
Fine line tattoos are hot on feeds right now, but they are not always the best move for every body or lifestyle. I keep seeing small, delicate work fade fast on wrists and hands while bold black pieces hold their shape for years. Read these 21 fresh designs with placement tips, what to ask your artist, and practical styling ideas so your next ink looks like it was made to last.
1. Linework Wolf on the Outer Forearm
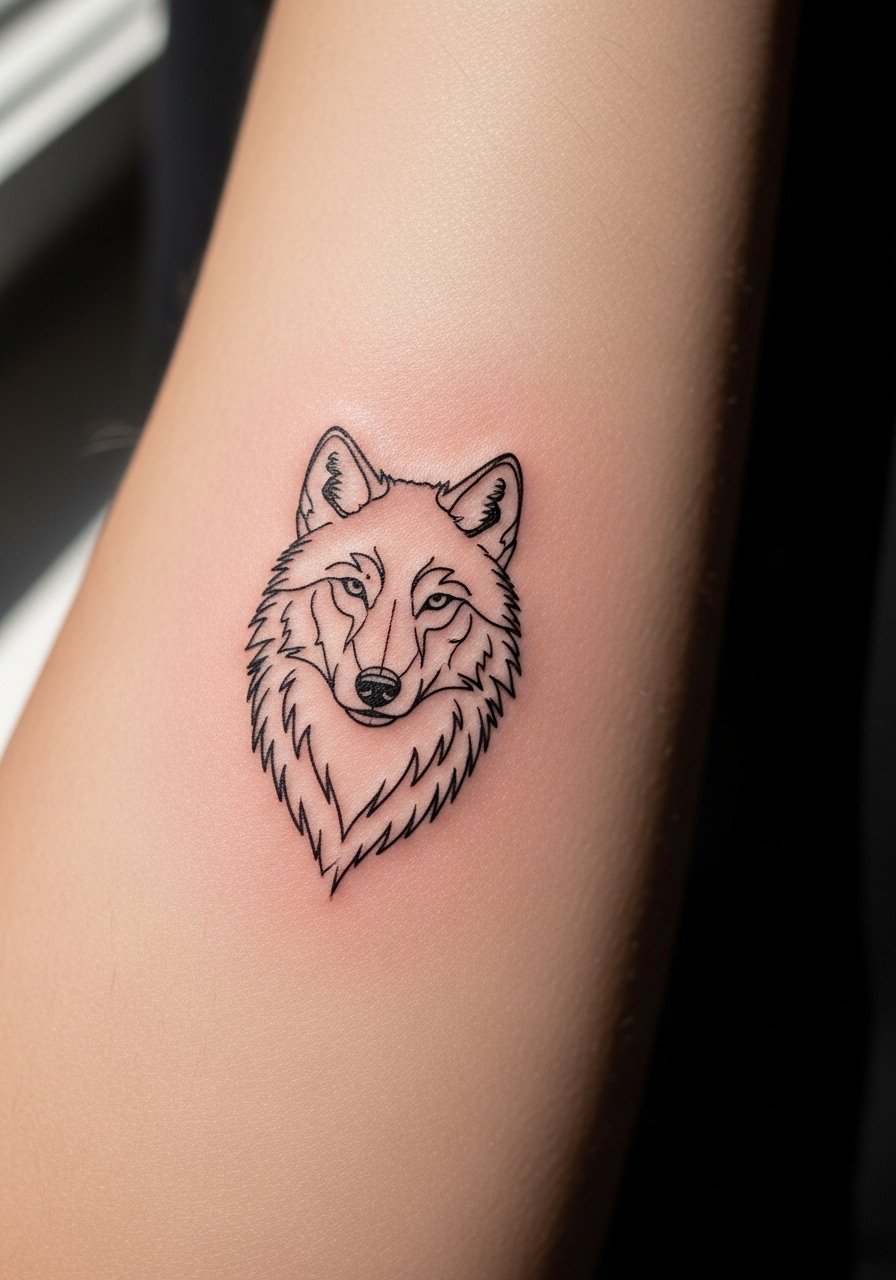
I recommend this when you want animal imagery that flexes with your muscle. Tell the artist you want bold enough linework to survive daily movement rather than hairline strokes that look great fresh but blur by year two. Fair warning, the outer forearm is visible and gets sun, so frame the design with slightly thicker outer contour and stipple shading inside. The session usually runs 1 to 2 hours and feels moderate on a typical pain scale. For showing it off, pair the piece with a fitted henley shirt with sleeves rolled to mid-forearm so the wolf sits in the sleeve break.
2. Neo-Traditional Lion Upper Chest Panel

This chest placement is great for anyone who wants a piece that moves with the torso and highlights a broad chest. Ask for bold black outlines with saturated fills and a little negative space around the mane so the colors do not muddy as they age. Chest sessions can bleed more because of movement when you breathe, and the skin there can be sensitive for people who sleep on their stomachs. Expect a two to three hour sitting for a 6 to 8 inch panel and a touch-up around year two if you sunbathe often. For evenings out, an open-collar deep crewneck tee frames the piece without covering it.
3. Geometric Tribal Armband to Accentuate the Bicep

Choose a geometric armband when you want pattern that follows muscle flow. During consult, show photos of your bicep at flex and at rest so the artist can plan breaks in the repeat pattern. A common mistake is making the band too thin for high-movement areas, which leads to early merging of parallel lines. This is a one to two hour piece that can look sharp for years if the line weight is confident. Wear a fitted short sleeve tee with the sleeve hem hitting just above the band for the best show-off look.
4. Micro-Realism Portrait Start on the Inner Bicep
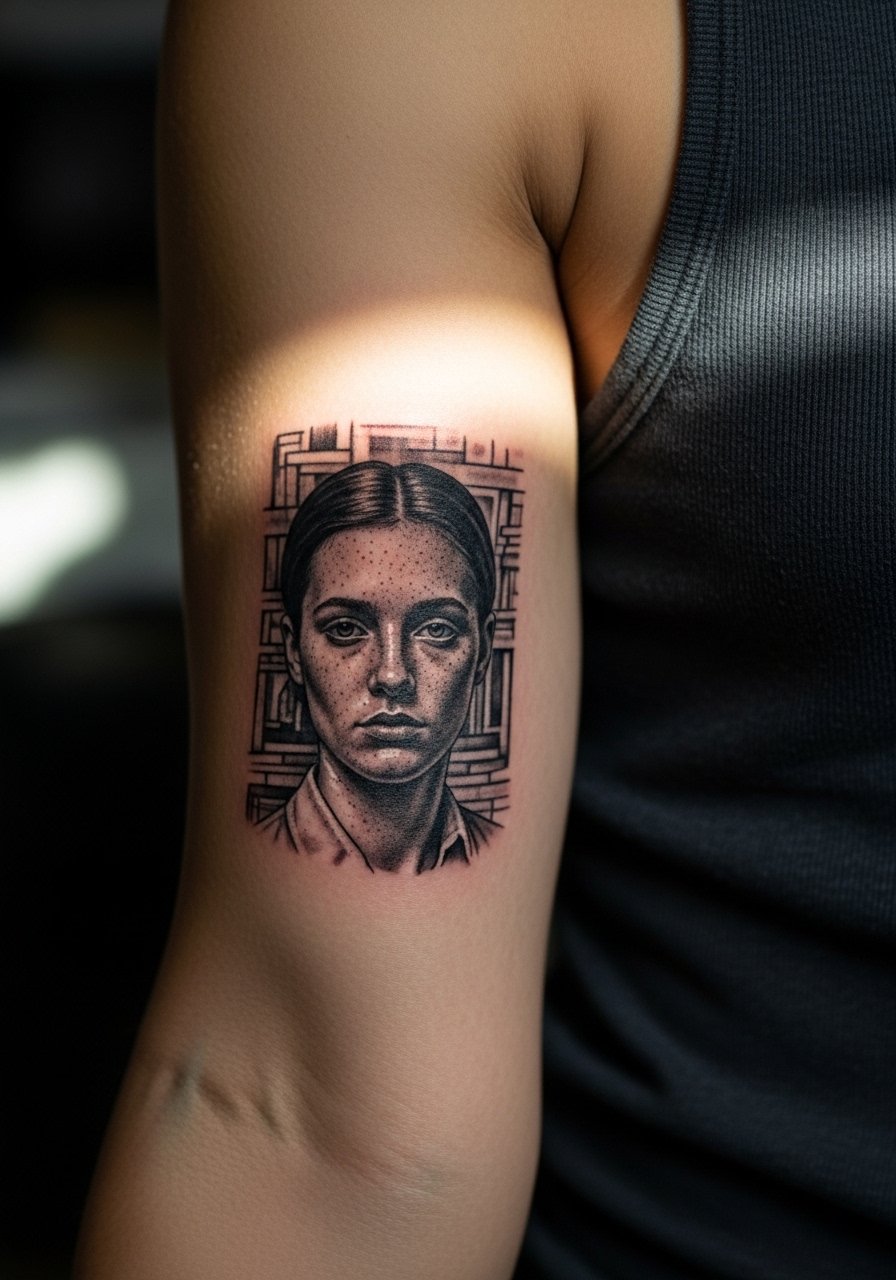
Micro-realism on the inner bicep reads intimate and detailed. Ask your artist to scale facial features slightly larger than the reference photo to avoid softening as the piece settles. Many portraits that look perfect fresh soften at 12 to 24 months if the needle work was too shallow. Sessions are long and require patience, often four to six hours split across days. The inner bicep is forgiving on blowout but can be tender. For the session, bring a loose button-up shirt you can easily pull aside so the artist has clean access.
5. Japanese Irezumi Dragon Back Panel

A dragon back panel is a storytelling piece meant to grow with the body. Be explicit about flow lines and how the dragon should curve with your scapula. One common mistake is crowding too many elements into the first session. Start with a clear outline and plan color saturation in later sittings to manage pain and budget. This area takes long sessions and multiple visits, and touch-ups are normal as color beds settle. For visibility, throw on a sleeveless muscle tank in earth tones so the dragon reads against the fabric.
6. Blackwork Skull with Roses on the Forearm
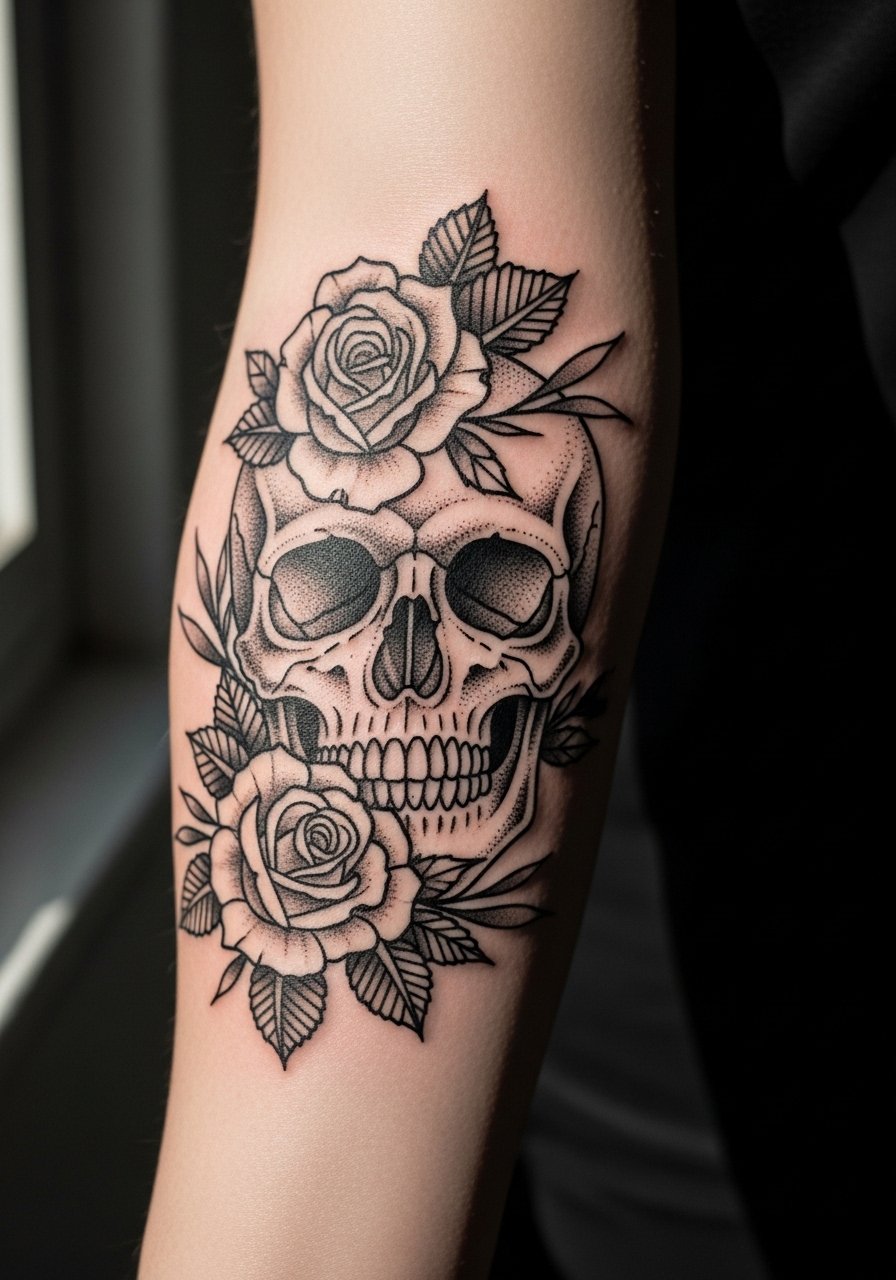
This foreground forearm piece ages well if the skull has strong contrast and the roses use clear negative space to separate petals. Tell the artist you want rich saturation rather than tiny shading strokes that vanish. Forearm skin stains with sunlight and friction, so plan for sunscreen after healing. Expect two sessions for shading and highlights with a realistic pain level. Pair this look with a leather cuff on the opposite wrist and a fitted henley rolled to mid-forearm so the tattoo sits in view without being crowded.
Studio Day Picks
The first six designs above include visible forearm and chest work and smaller wrist pieces. A few targeted products smooth the session and the first week of healing so those placements behave like they were meant to.
- Ink-Ichiban balm. A go-to for winter healing when skin cracks, this thinner balm helps with dry patches around detailed linework without the greasy film some people dislike.
- Australian tea tree ink fix spray. Light anti-itch properties make it useful for the first few days after forearm or chest sessions where sweating or friction can irritate.
- H2Ocean sterile spray. A no-touch spray option that keeps healing skin moist without heavy ointment, handy for people who find ointments clogging.
- Japanese aftercare rice paper patches. Breathable patch material that works in humid climates and reduces picking on high-motion spots.
- Hustle Butter jar. A favorite thinner alternative to petroleum for the first week when you want moisture without heavy residue.
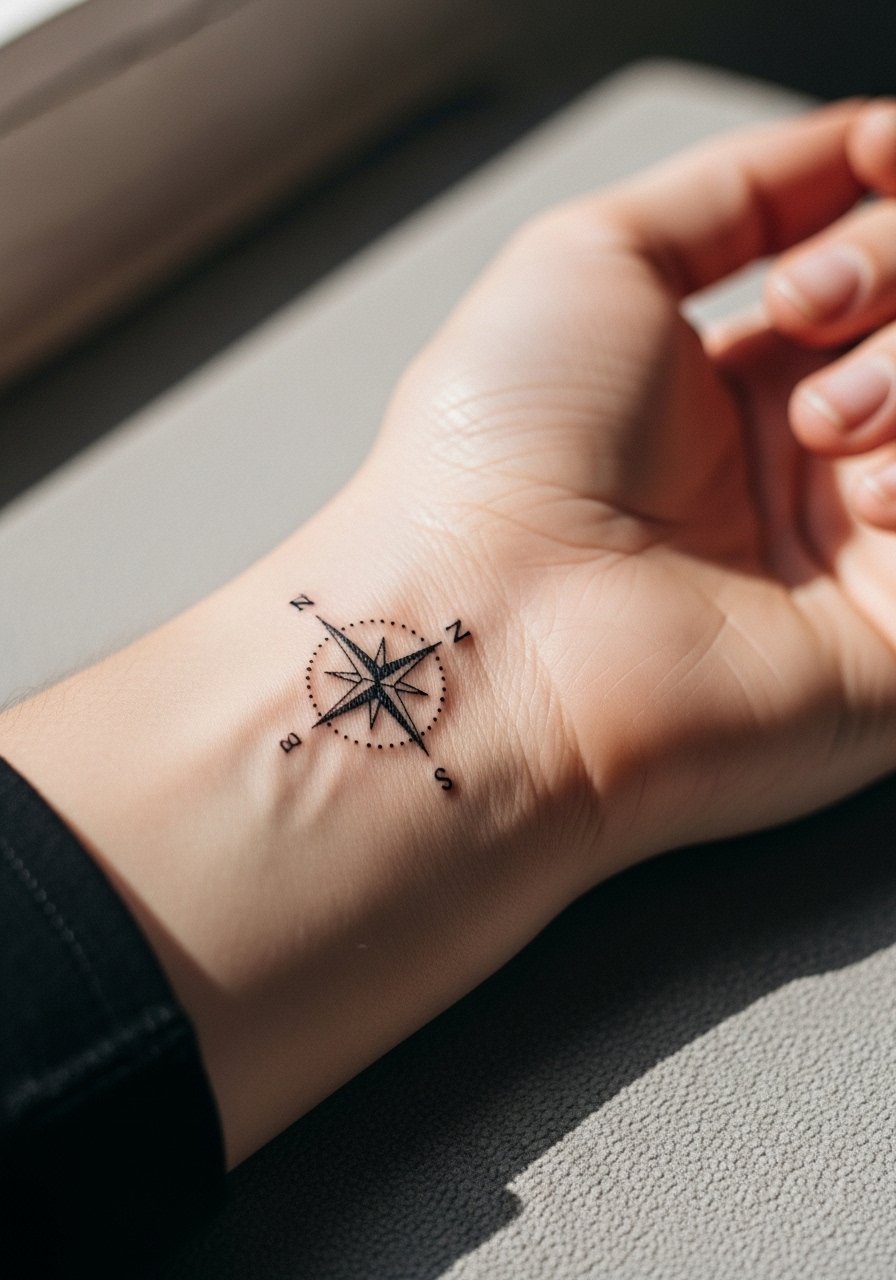
7. Minimalist Compass on the Inner Wrist

A compact wrist compass reads like a daily tuck-in piece but beware of fine-line fade here. The wrist takes a beating from washing and sun exposure so ask for slightly bolder linework than online references suggest. This one is short and usually done in a single session. Expect touch-ups earlier than forearm work, often around year one to three depending on activity. For showing it off, wear a slim leather watch on the opposite wrist to balance the look and avoid stacking bracelets that crowd the compass.
8. Biomechanical Snake Across the Outer Thigh
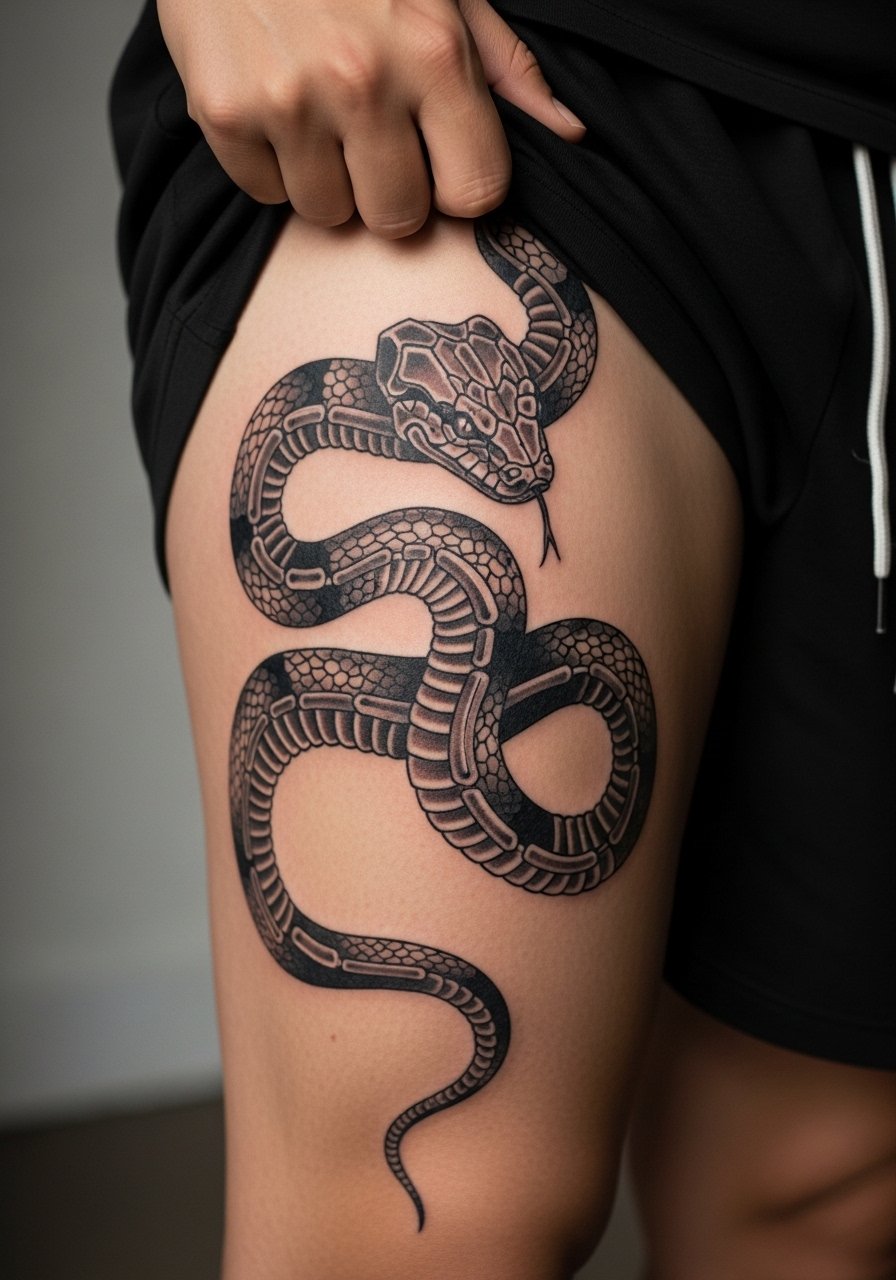
Biomech snakes thrive on larger canvases where anatomy can be part of the illusion. The outer thigh handles heavy blackwork and long sessions because there is more flesh to anchor saturation. Tell the artist you want the mechanical segments to follow muscle lines so movement enhances the effect. Sessions are medium to long and can feel tender if the needle rides over bone near the hip. For post-session comfort wear loose gym shorts so seams do not rub the fresh work.
9. Thor’s Hammer at the Collarbone

A collarbone hammer sits higher than the sternum and shows with many shirt styles. Ask for bold outlines and an anchor of negative space so color does not blend into shadows over time. Pain can spike near the clavicle because the bone is close to the surface. Sessions for a 5 to 7 inch piece are usually two short sittings. For a clean presentation wear an open-collar henley that frames the hammer without covering its edges.
10. Crescent Moon and Wolf on the Calf
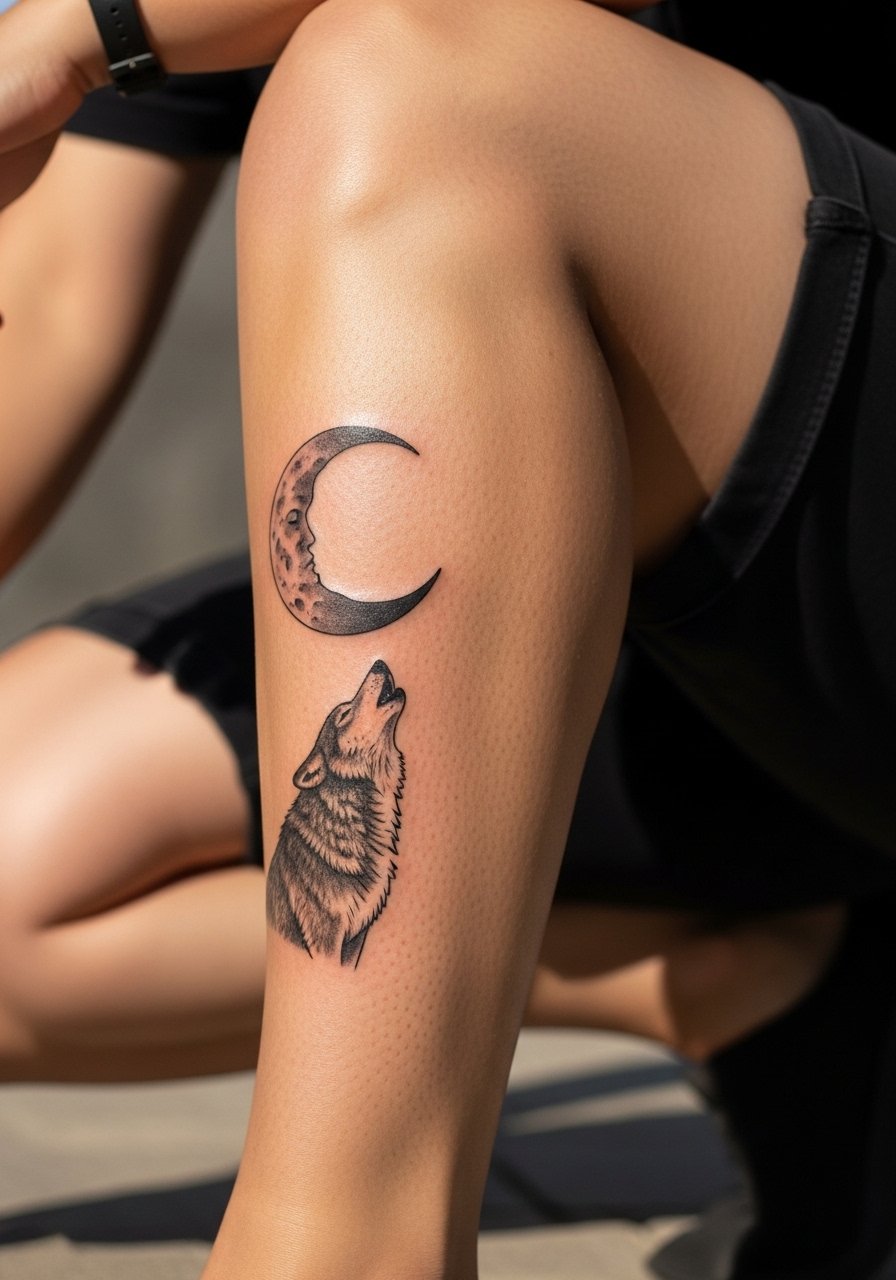
Calf pieces are seasonal show-offs and they survive abrasion from jeans better than ankle work. Ask for a clear contrast between the moon and the wolf silhouette so photos read crisp even after a few years. The calf is comfortable for longer sessions and typically needs one to two sittings. For summer visibility cuff your chinos or choose athletic shorts and low ankle socks so the crescent sits in the gap.
11. Angel Wings on the Shoulder Blade

Shoulder blade wings work for memorial pieces because they are visible in sleeveless tops yet remain private under shirts. During consult ask how the feather layers will age so they keep definition rather than becoming a gray mass at five years. This area can take three short sessions to build shading and depth. Show it off with a sleeveless muscle tank in earth tones to keep attention on the upper-back canvas.
12. Phoenix Rising Sleeve Outline on the Full Arm

A sleeve outline gives you the scaffolding to add color over time in a patchwork approach. Tell the artist you want clear anchor points for future color so the composition remains balanced as it develops. Many people phase a phoenix sleeve across multiple sessions to manage pain and budget. Expect four or more sessions before color fills. For session comfort pick a loose sleeveless tank so the artist has full shoulder access.
13. Mecha Body Morphing Thigh Panel
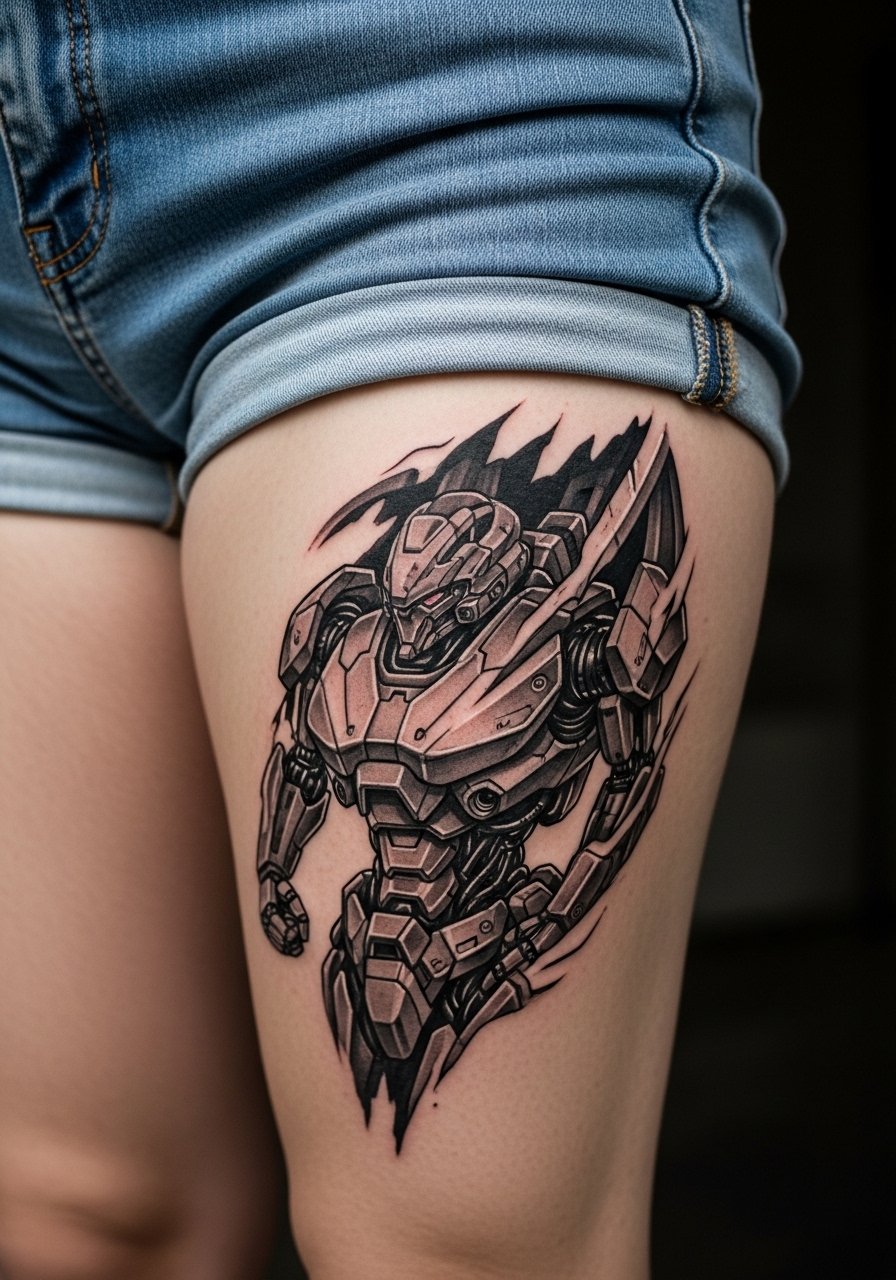
This sci-fi morphing design is under-covered but powerful on the thigh where scale and depth shine. During consultation bring multiple references that show both anatomical flow and mechanical parts so the artist can marry the two. The thigh allows heavy saturation without blowout if the artist spaces dark areas thoughtfully. Sessions are medium length and the piece hides under pants for recovery. To keep it visible when you want to show off, wear slim joggers rolled up or ripped jeans cuffed above the knee.
14. UV Blacklight Accents Hidden in a Sleeve

UV accents are party-ready and mostly invisible in daylight, which suits people who need discretion at work. Ask the artist to place UV lines inside existing blackwork or as highlights rather than the main outlines. Be aware that UV pigments behave differently on darker tones and some artists treat them as an additive layer during touch-ups. The session feels similar to color work and may require a separate pass. For low-key days wear a short-sleeve button shirt so the UV details remain a private flourish until night.
15. Hand-Poked Minimalist Compass on the Wrist
Hand-poked pieces have a softer texture and can feel more organic than machine work. Discuss needle depth carefully because hand-poked dots can sit higher and may need a touch-up if placed too shallow. This method is slower but often gentler and can hold up well when done by someone who specializes in hand poking. The wrist is high wear, so expect earlier touch-ups than forearm work. For the appointment wear a sleeveless tank so the artist has clear access and the hand-poked pattern is not disturbed.
16. Crescent Moon Calf Variant with Negative Space

A stripped-back moon using negative space reads modern and photographs well. Ask your artist to map the negative sections so they remain bright against your natural tone rather than relying on thin shading that fades. Calf placement keeps this design private on cold days and visible during summer. The session is quick and relatively low pain. Style it with cuffed chinos or athletic shorts and low ankle socks to let the moon hang above the shoe line.
17. Cultural Pattern-Inspired Geometric Back Patch
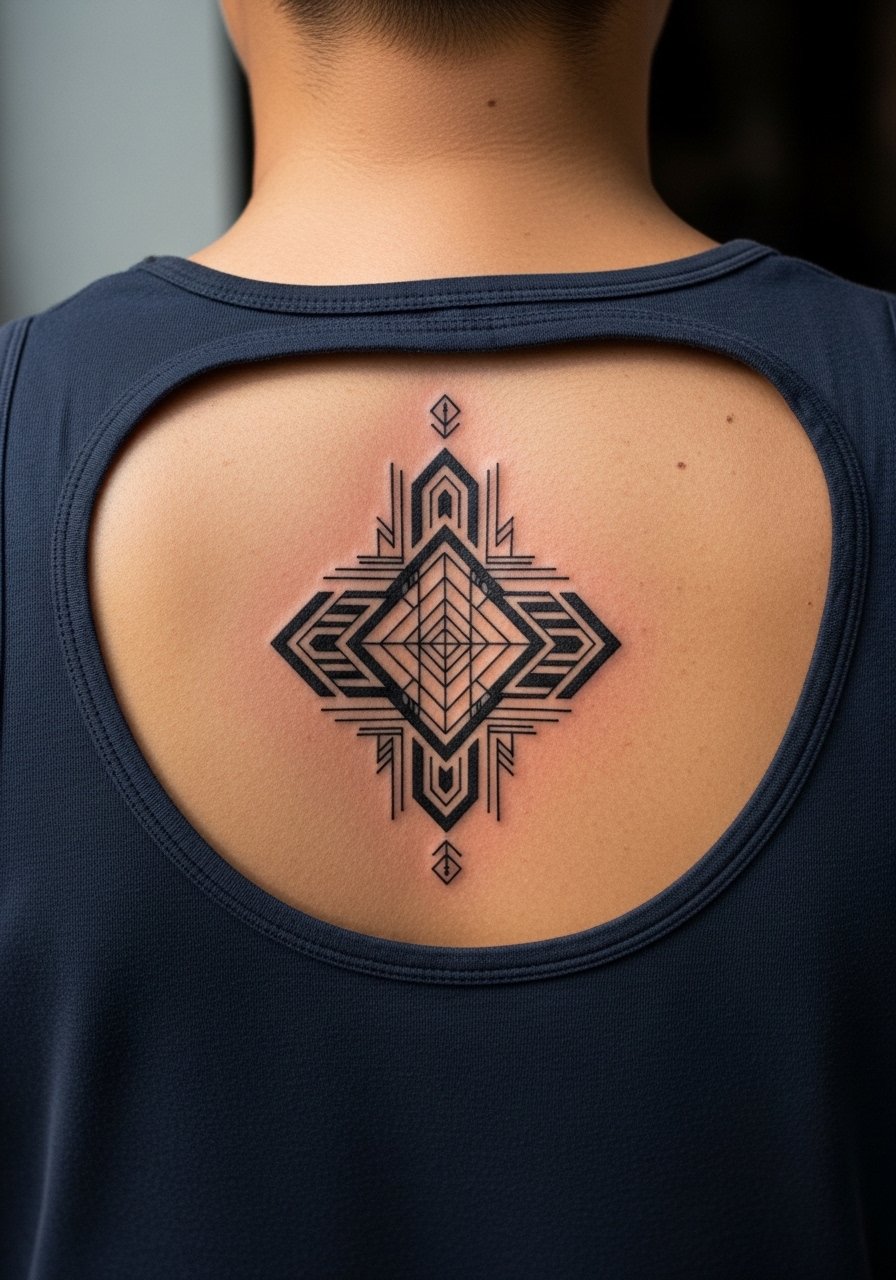
Patterns with cultural roots need respectful handling. When you bring indigenous motifs into a custom piece ask the artist how they will adapt elements and whether they have experience working with that lineage. One sentence of provenance in the consult prevents accidental appropriation and helps steer the design toward a personal, informed variation. Upper back panels handle heavy blackwork and can host a geometric patch that ages clearly if spacing is generous. For showing the piece wear a hoodie unzipped halfway or a cropped tank.
18. Small Script on the Sternum with a Bandeau

Sternum text can be intimate and painful near the center where the bone sits shallowly. If you want crisp script over time, ask for slightly heavier letterforms than the thinnest script you see online. There is a debate about fine line on the sternum. One camp says the movement and thin skin cause blurring within a couple of years. The other camp argues that careful depth and generous letter spacing hold up fine. Ask where your artist stands and get a healed portfolio shot before committing. For the session wear a fitted sports bra or bandeau so the area is accessible while still modest.
19. Shark-Tooth Tribal Sleeve Accent

Shark-tooth tribal motifs play well with arm curves and can be scaled into a sleeve without looking repetitive. During consult ask the artist to plan rhythm breaks so the pattern breathes and does not merge. This is a good pick for swimmers or ocean lovers because the theme maps to personal experience without copying a specific cultural marker. The arm tolerates the dense blackwork, but heavy patches may require extra sittings to let the skin recover. Pair with a rolled sleeve henley to frame the pattern.
20. Micro-Realism Animal Portrait on the Calf
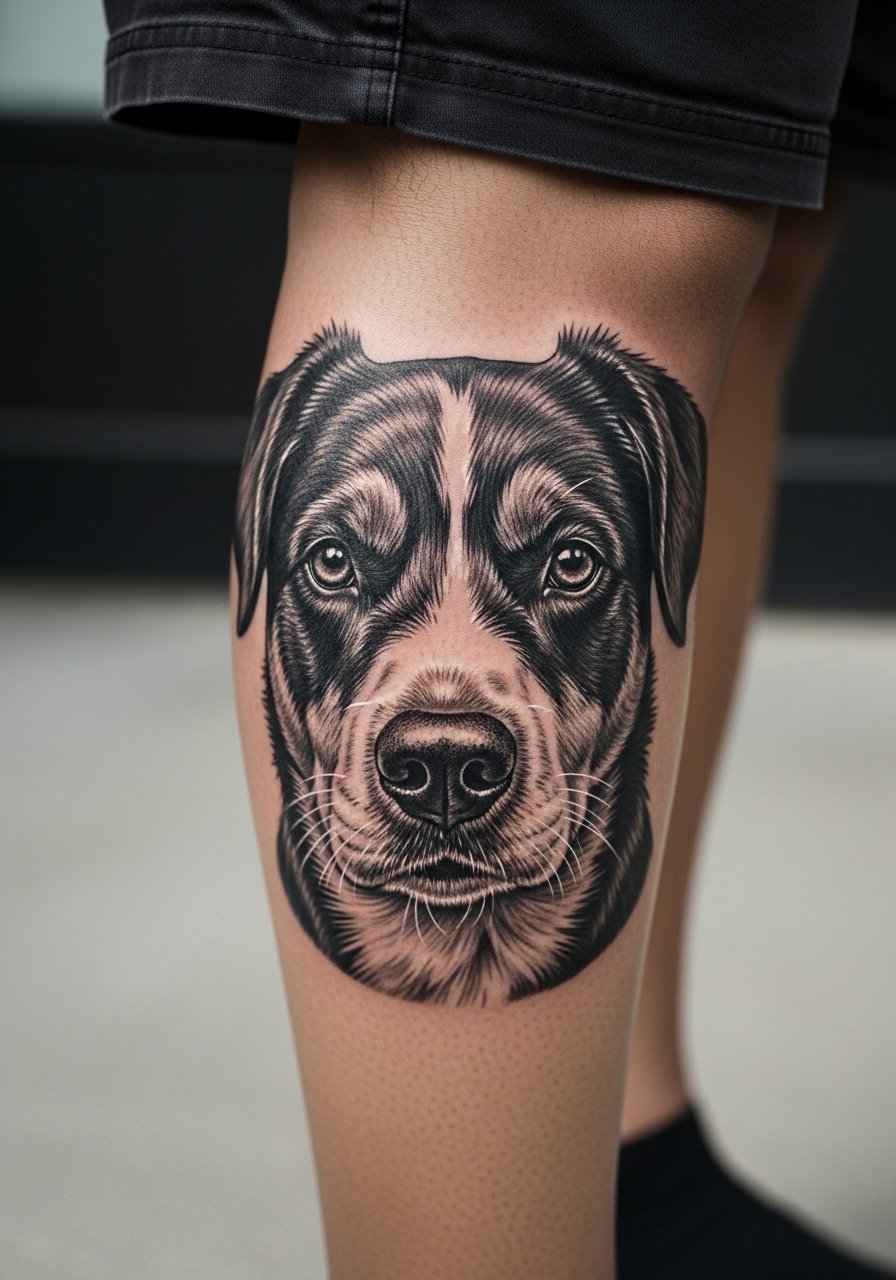
A calf micro-portrait ages well if you allow the artist to size features slightly larger than a photo. Small hyper-detailed portraits on thin skin often blur faster. For calf placement the extra flesh keeps tonal transitions crisp, and many people who have a calf portrait report two-year touch-ups rather than annual fixes. Expect a long session and plan recovery days where you sit lower and avoid tight denim. Style with cuffed joggers or shorts to keep the portrait visible on summer walks.
21. Constellation Ankle with Low Sock Styling

Ankle constellations are discreet and seasonally flexible, but the ankle is a high-friction zone from shoes and socks. Ask for slightly thicker connecting lines or micro-dot clusters instead of ultra-thin single lines so the pattern keeps legibility. The session is quick but plan for the first two weeks of careful footwear choices. Show it off with cuffed jeans or low-profile sandals and low ankle socks so the constellation sits just above your shoe line.
Frequently Asked Questions
Q: Will fine line tattoos like the wrist compass and sternum script blur faster than bold work?
A: From what I have seen fine line does tend to soften sooner on high-movement, high-friction areas like wrists and sternum. One group of artists says small, shallow lines blur within one to three years. The other group says careful depth and spacing can keep lines readable for longer. Ask to see healed photos on similar placements before booking.
Q: How should I prepare clothing-wise for a thigh or back session?
A: Wear loose bottoms for thigh work and a loose tank or robe for back sessions so you can shift fabric without rubbing the area after the session. Bring a zip hoodie you can unzip to sit comfortably during long sittings and to slip on afterward when temperature drops.
Q: Are UV blacklight accents safe and visible on darker skin tones?
A: UV pigments behave differently across skin tones and can require stronger dosing to show under blacklight on darker skin. Discuss placement and expectations with the artist and request healed photos on similar tones. UV lines work best as accents inside existing blackwork rather than as the main outline.
Q: How do I find an artist who handles blackwork well on melanated skin?
A: Search hashtags like #blackworktattoo with a city tag and filter for portfolios that show healed pieces on darker tones. Community threads on local Reddit or platform directories that allow portfolio filters are useful. Look for strong contrast in healed photos and ask about their approach to saturation on melanated skin.
Q: Can I phase a sleeve like the phoenix over time on a budget?
A: Yes. Many people start with a bold outline and then add color and shading in planned sessions, which helps spread cost and recovery. Mention a patchwork timeline at consult and confirm how the artist stages color so later additions integrate seamlessly.
