
Fine line koi are everywhere on mood boards right now, and the look is easy to fall for. The reality is that delicate koi need careful placement and honest line weight planning to age well. If you like small, graceful fish that read as jewelry instead of body art, these 27 ideas show how to do the aesthetic with options for touch-ups, wardrobe pairings, and the placements that hold up longest.
1. Fine Line Single Koi on Inner Forearm
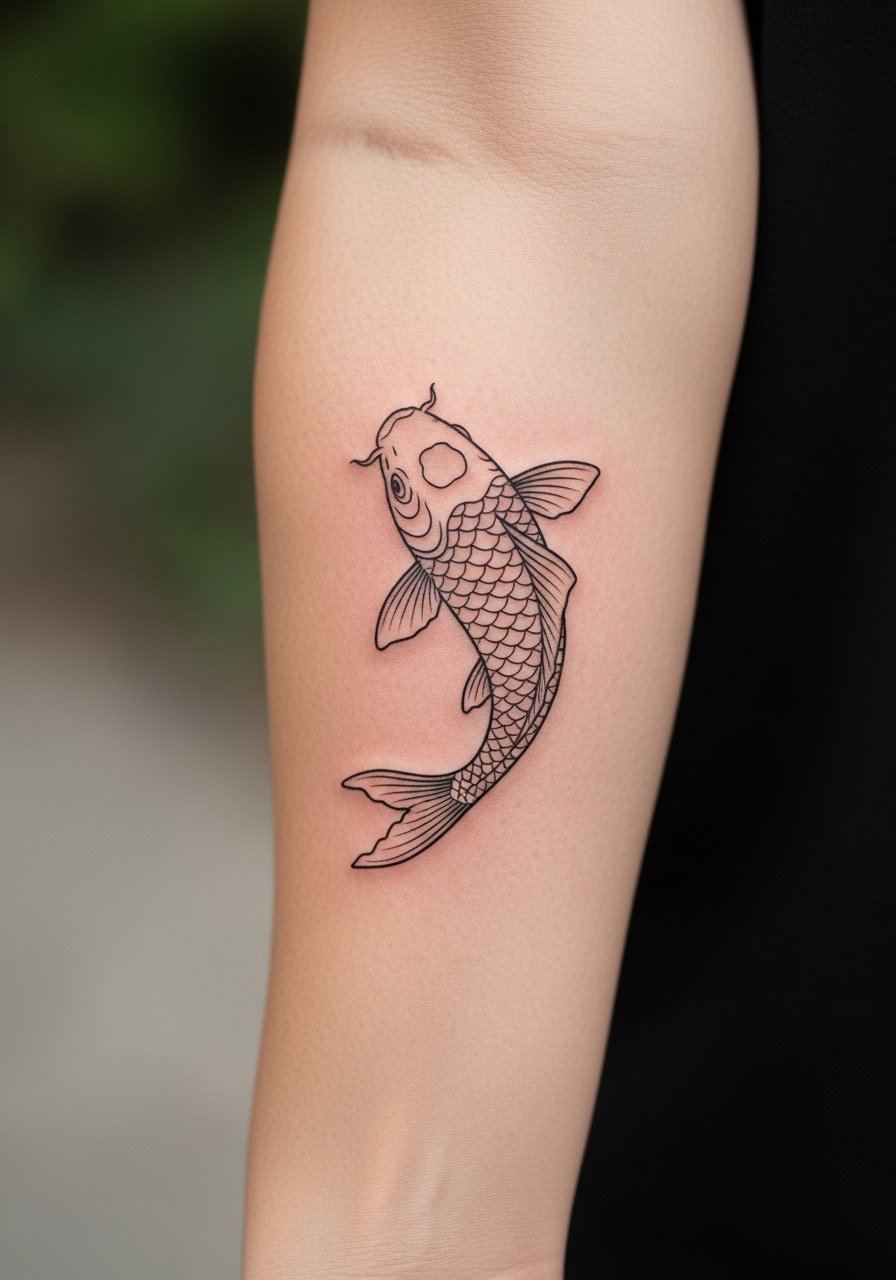
This is the classic delicate koi for first-timers, and I point people here when they want symbolism without a lot of color. Tell your artist you want single-needle linework with slightly increased spacing between scales so the lines do not blur. A common mistake is compressing too many tiny details into a two-inch wrist piece, which usually needs a touch-up sooner. Expect one short session and moderate pain. Over two years the single-needle lines will soften, so plan a touch-up at year two if you want the crisp look maintained. For showing it off, wear a linen button down shirt with sleeves rolled.
2. Watercolor Koi Pool on Shoulder Blade
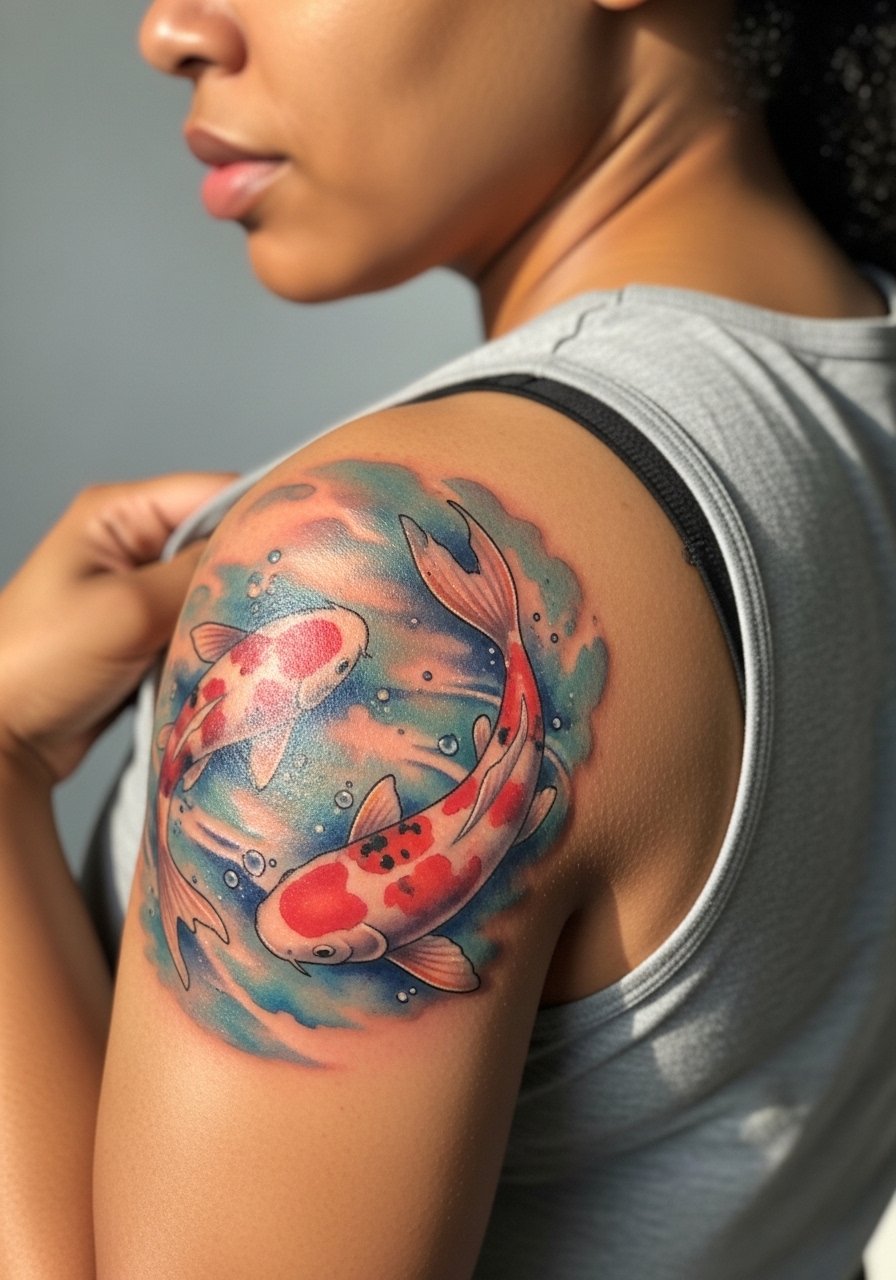
Watercolor gives koi a painterly feeling, and the shoulder handles the soft bleed better than wrists. Be clear in consults that you want diluted color washes and minimal black outlines so the tones float. The color camp and the blackwork camp argue about longevity on this look. One group says watercolor fades unevenly and looks muddy after a few years. The other points out that on upper arm and shoulder it can settle beautifully when saturated correctly. Sessions run longer and you may need a color follow-up at year two. For session comfort, bring a off shoulder sweater you can remove easily.
3. Traditional Koi with Cherry Blossoms on Outer Forearm
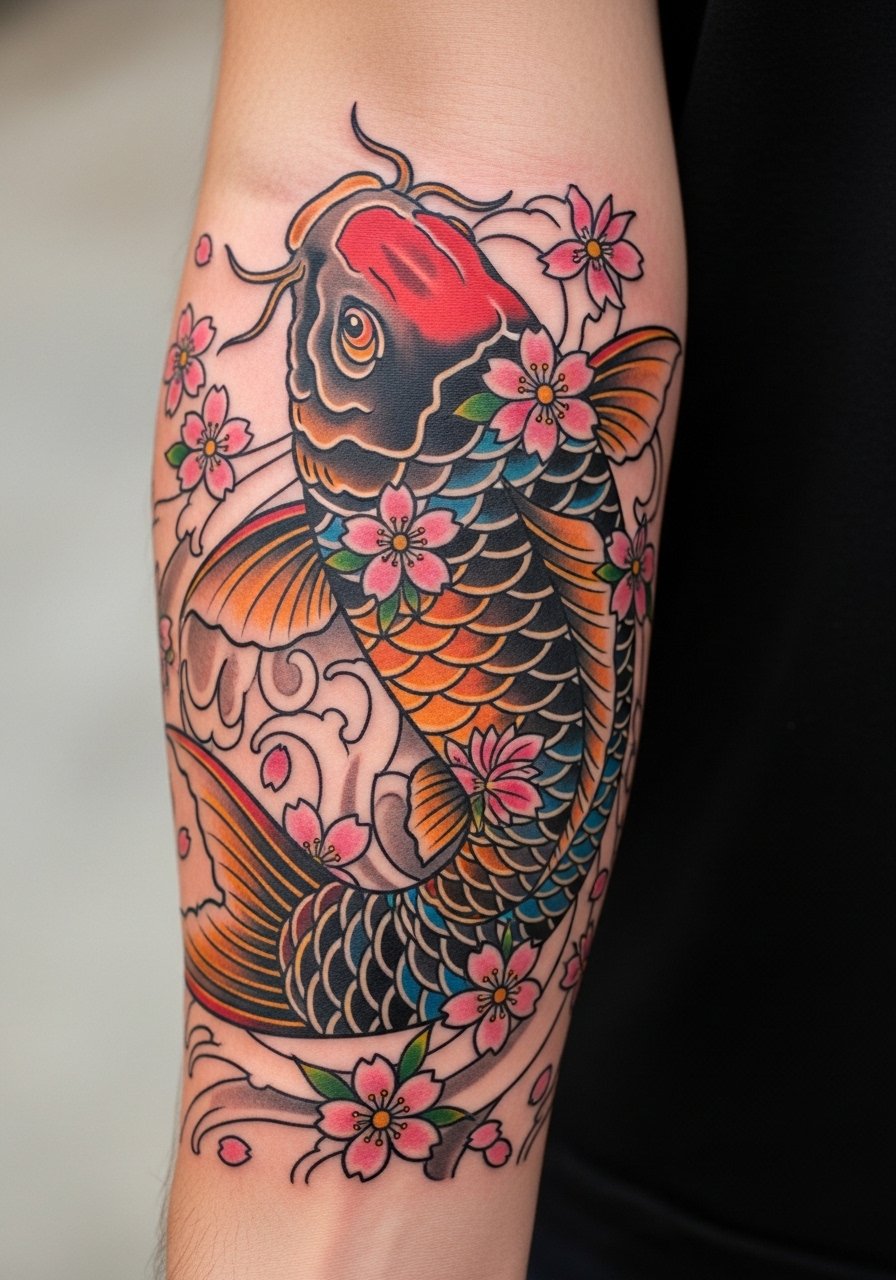
This version leans on bold linework and saturated fills so the design still reads years later. Tell the artist to prioritize clear black outlines around the blossoms and koi scales to protect the composition as the color fades. A common error is making the petals too dense near the fish, which crowds the linework and creates merging as it heals. Expect 2 to 3 sessions and moderate pain. The outer forearm shows well with fitted short sleeves, and it pairs nicely with a vintage fit t-shirt when you want to display the scene.
4. Black Karasu Koi Outline on Upper Bicep
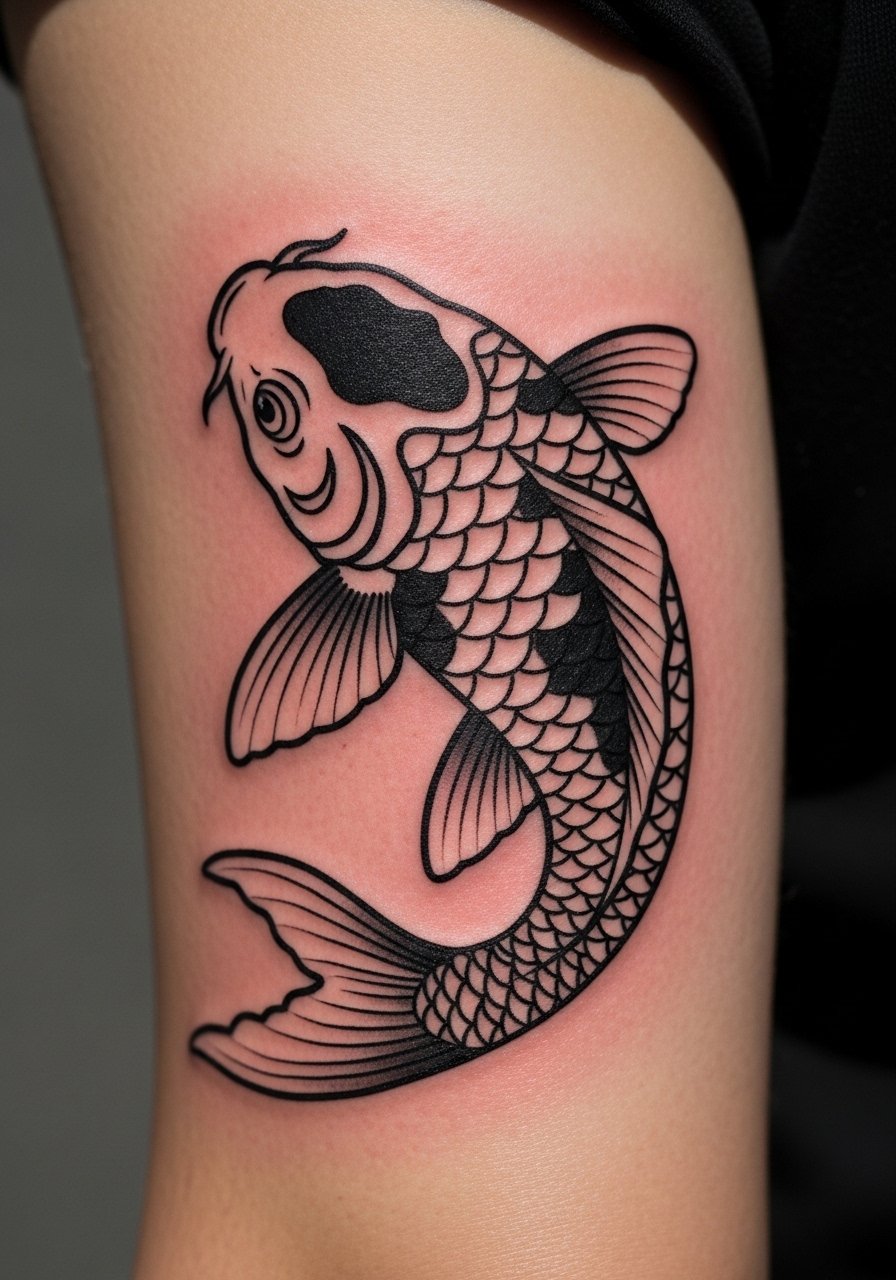
Black karasu koi make a bold yet minimal statement when you prefer contrast over color. Ask for solid black saturation with a slightly heavier outer line so it stays strong as it softens. The biggest mistake is keeping lines too fine for a three-inch piece on the bicep, which risks patchy saturation. Session time is usually short to moderate. If you work in an environment where color reads differently, this blackwork approach keeps the motif legible. Roll on a leather arm cuff opposite the tattoo to balance the look.
5. Kohaku White-Red Koi at the Collarbone
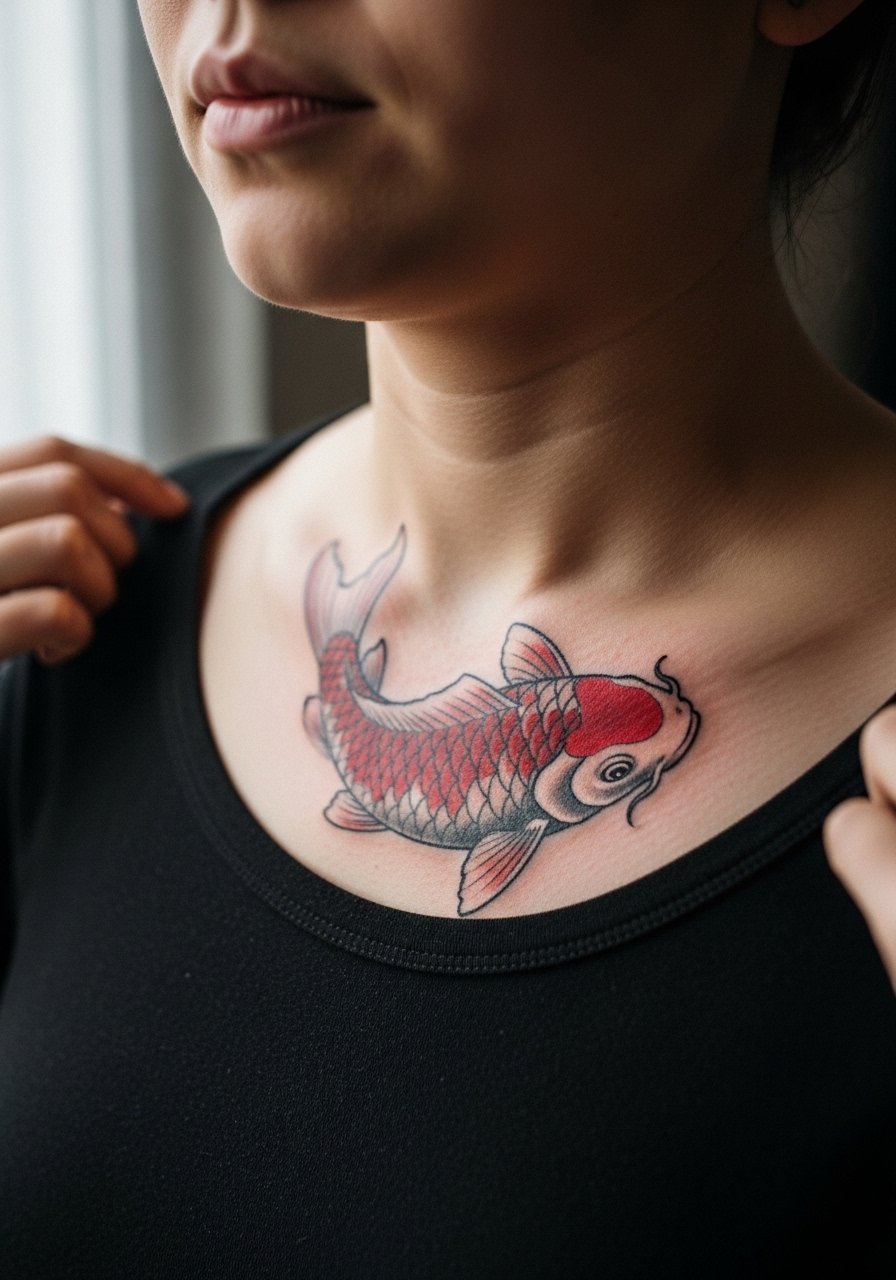
A collarbone placement gives Kohaku koi a striking placement without a full sleeve commitment. Tell your artist you want the white base preserved using negative space rather than white ink for longevity. Pain here is higher than the arm, so plan for shorter passes and a second session if needed. The common aging issue is red migrating into surrounding skin when saturated too aggressively. Pair this with a black tube top for evenings out and a dainty necklace that sits below the fish.
6. Red Koi with Flowing Scales on Inner Thigh
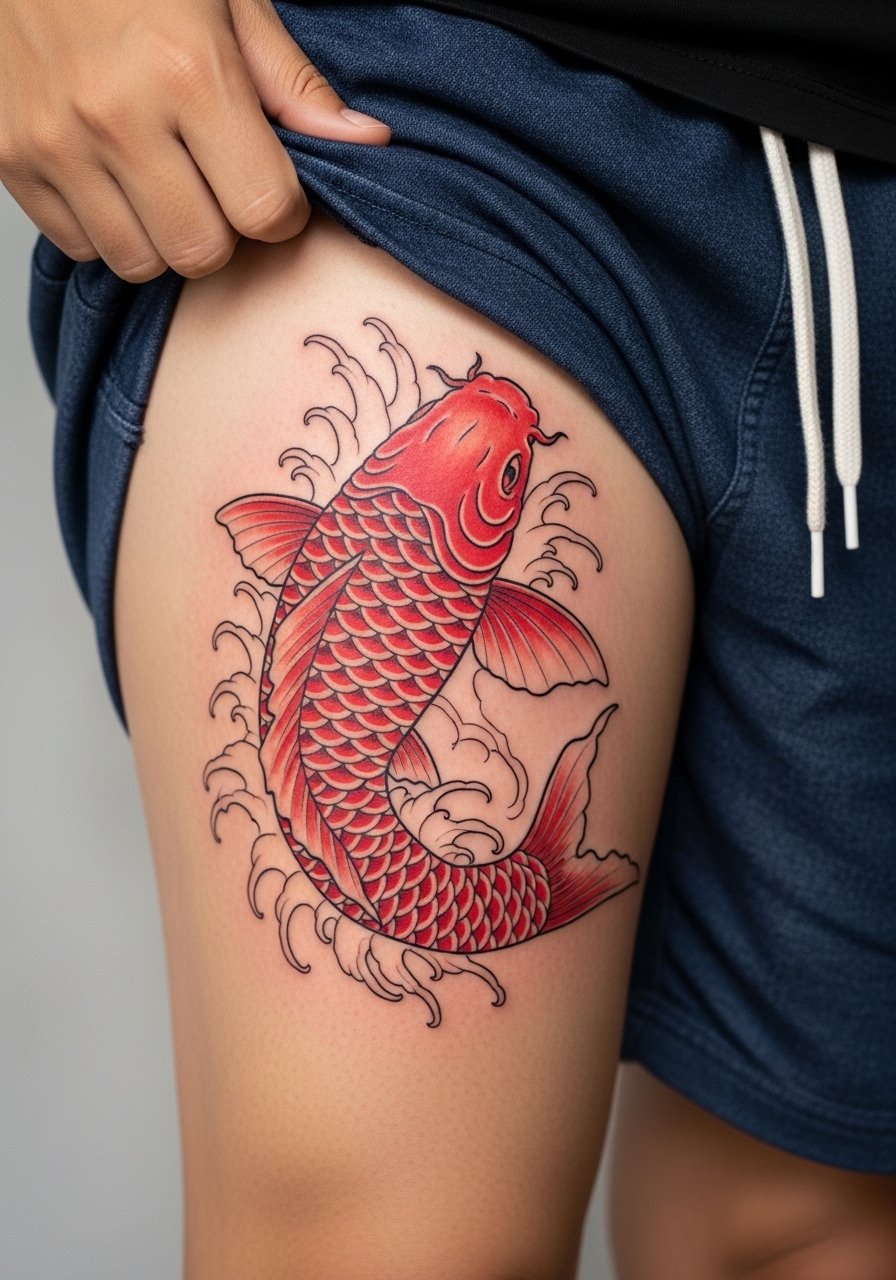
Inner thigh pieces can be both intimate and bold without being visible daily. Fair warning: the inner thigh is a softer canvas so saturation must be controlled to avoid patchy heals. For motherhood symbolism many choose red, but ask for scale spacing that mirrors muscle movement so the fish does not warp with body changes. Sessions are moderate and you will want loose shorts for the appointment. Show-off style pairs this with high cut shorts when you want it visible.
Studio Day Picks
The collarbone, upper arm, forearm, and inner thigh pieces above need different prep and first-week care, so a few targeted items smooth out the session and the early healing window.
- Stencil transfer paper kit. Helps you and the artist preview placement on the skin, especially useful for small forearm and collarbone pieces.
- Topical numbing cream. Applied before the session it eases sensitivity on the collarbone and inner thigh without altering the linework.
- Thin protective film roll. Keeps ankle and wrist tattoos from catching friction during the first few days.
- Fragrance free gentle body wash. Cleans healing skin without irritants that can dull delicate color blends.
- Aquaphor healing ointment. A thin layer the first few days locks in moisture while letting fine linework breathe.
7. Silver Ogon Metallic Shimmer on Upper Arm
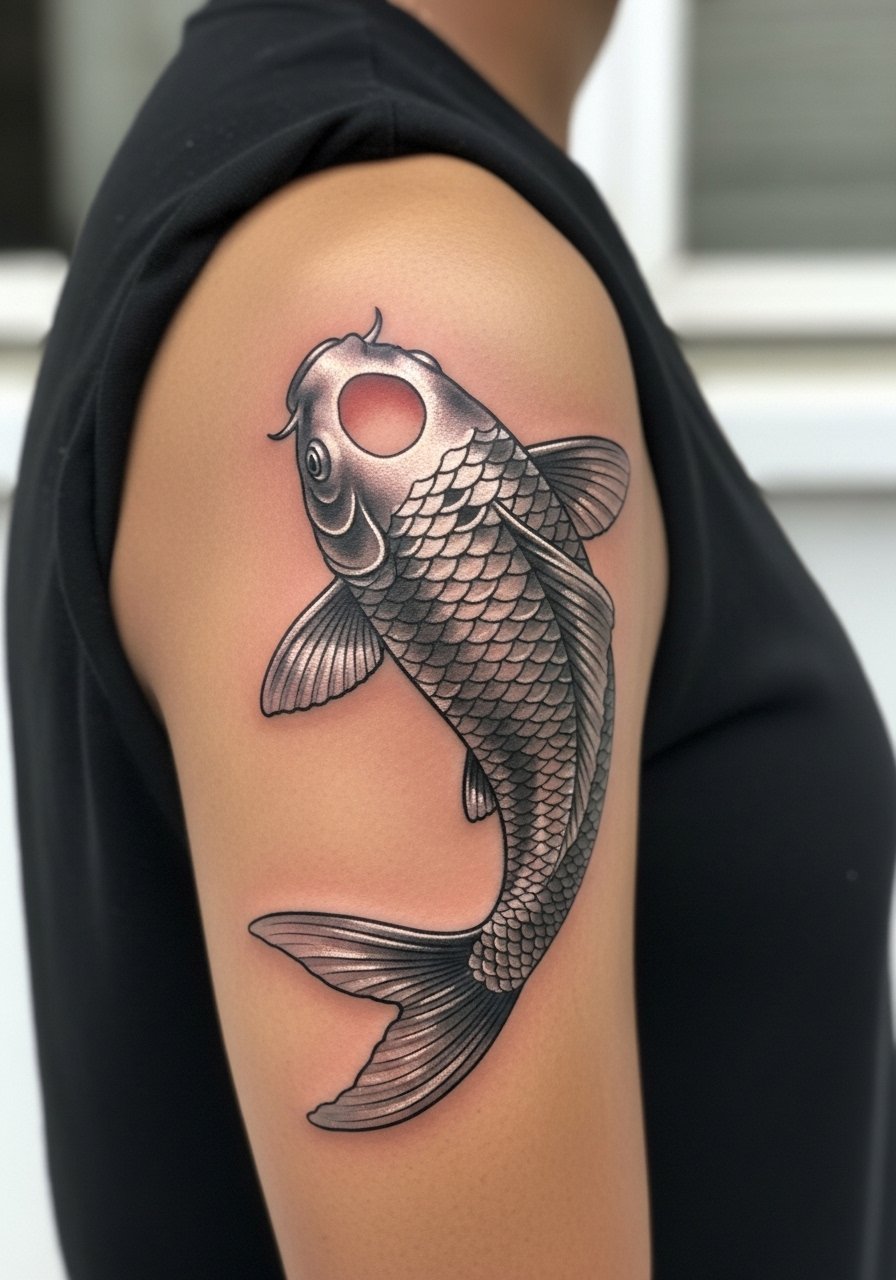
Metallic tones read as a sophisticated flash on the upper arm. Tell your artist you want micro-realism shading with reflective highlights rather than a heavy fill. The upper arm is friendly to metallic shades because it avoids high-friction areas. The usual mistake is overusing white ink for highlights, which often fades faster on darker tones. Expect multiple short sessions and a color follow-up window. For wardrobe, try a simple cream knit top to let the shine read in daylight.
8. Shusui Blue Shimmer on Inner Arm
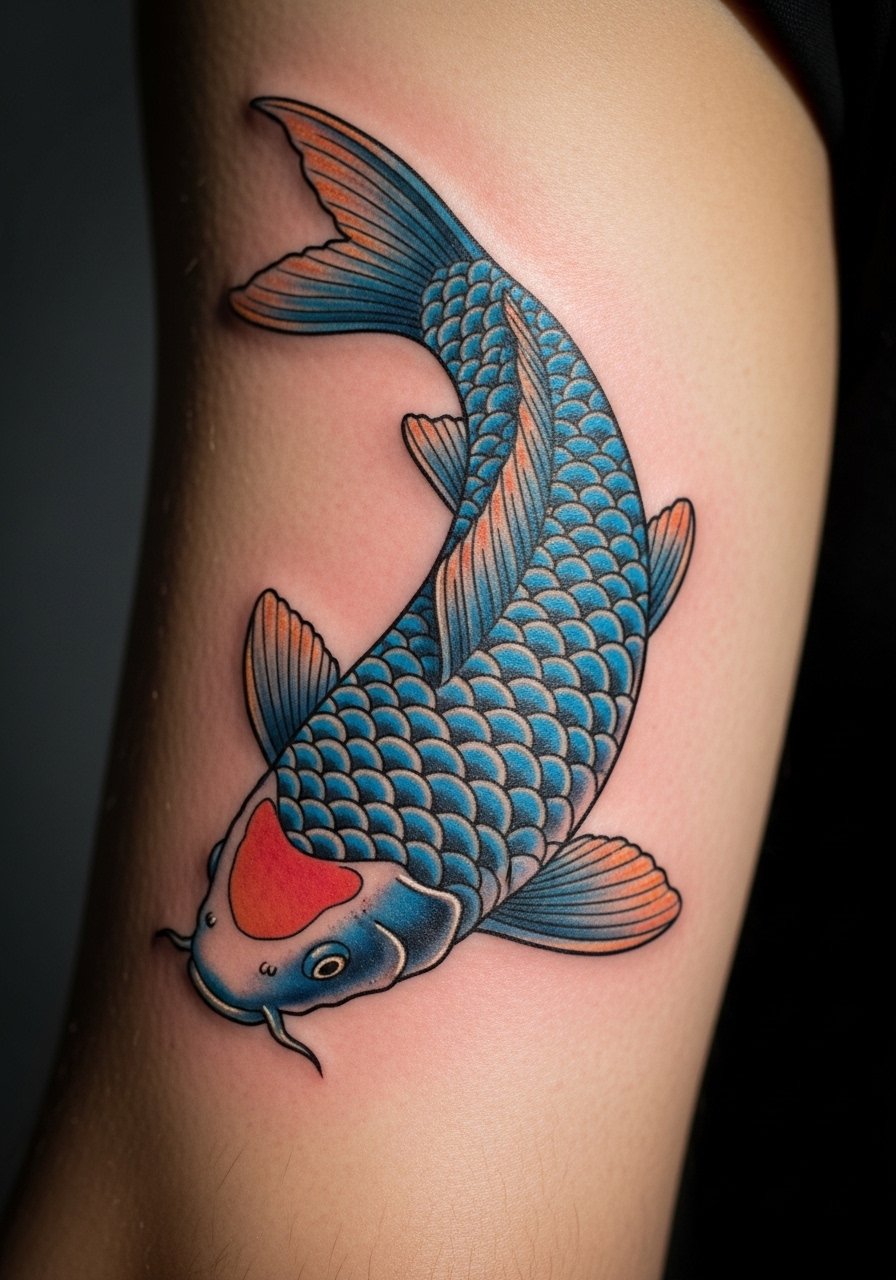
Shusui blue gives a cooler, calmer take on koi motifs and works well on inner arm placements. Ask for smooth gradient work and a soft black outline to prevent pigment spread. Fine line proponents and traditionalists differ on how light a line should be here. One side says keep lines thin for delicacy. The other says a slightly stronger outline protects the color over time. If you plan to show it, roll up a sleeve and wear an olive green tank to complement the blue tones.
9. Kumonryu White-Black Spotted Koi on Forearm
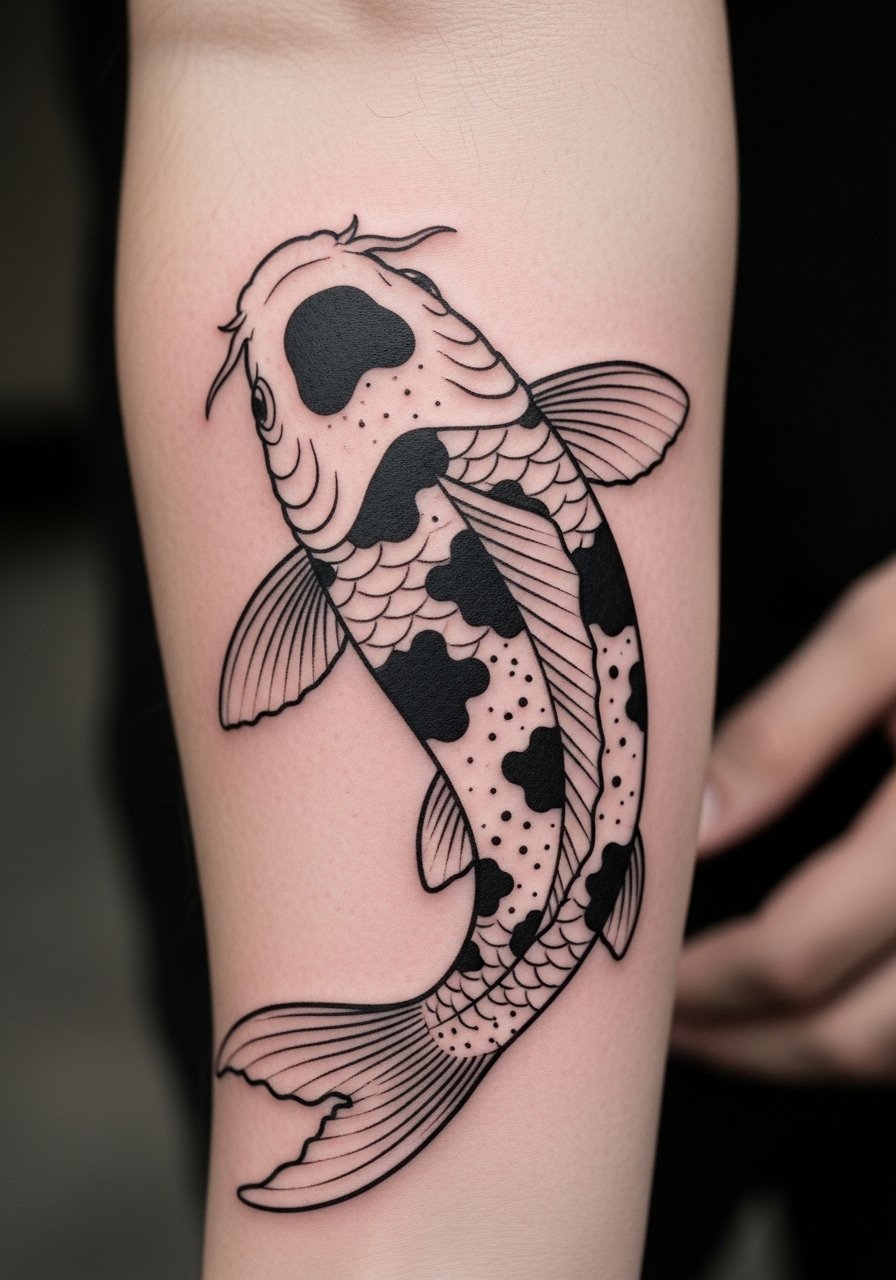
Kumonryu brings high contrast and a graphic look that ages predictably. Tell the artist you want distinct negative space between spots to avoid them merging as the tattoo softens. A common misstep is overlapping black areas too close together in a small design. The forearm placement best suits this bold contrast, and touch-ups are rarely needed before year three. For display pair it with a navy cotton tee and a watch on the opposite wrist.
10. Dragon Koi Hybrid Starting at the Shoulder
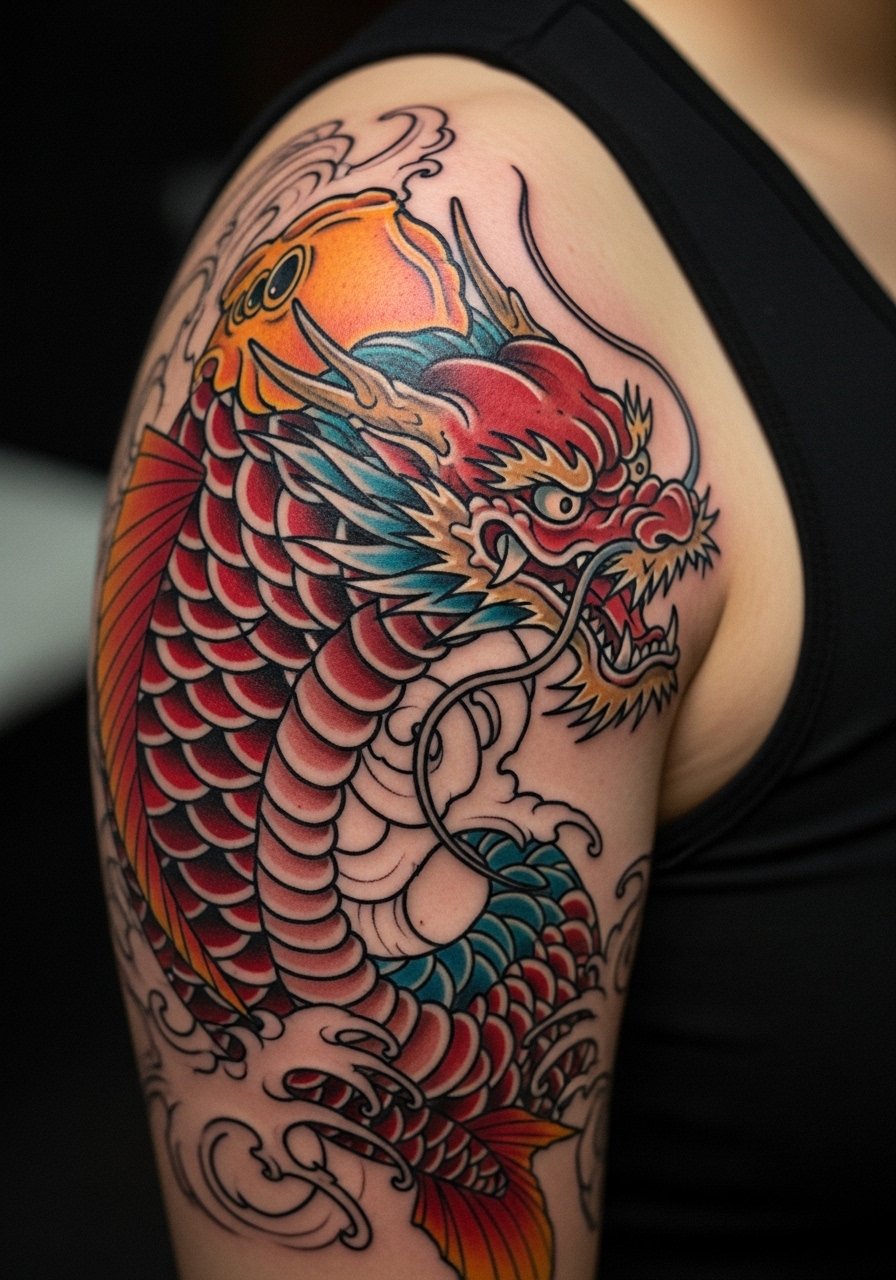
The dragon-koi hybrid reads as transformation and suits anyone wanting a statement that can grow into a sleeve. During consultation ask how the fish will morph into dragon features along the shoulder and down the arm so the composition stays balanced. This is a multi-session project with higher pain tolerance required. Artists disagree about how much detail to pack early on. One camp starts heavy and refines later. The other builds slowly. Map out sessions and budget. Off-shoulder sweaters in cream frame this work well, try an off shoulder sweater post-heal.
11. Serene Koi Pond Back Panel
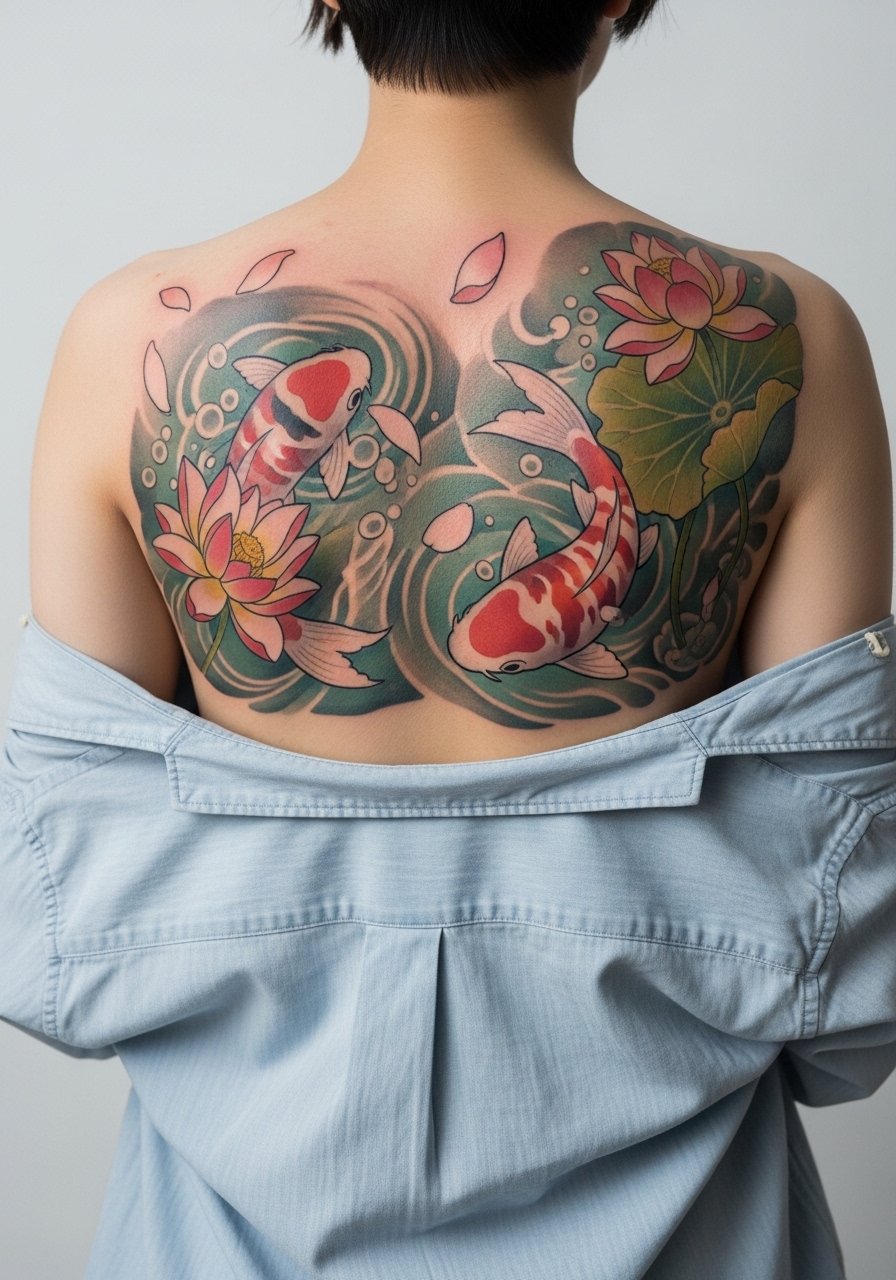
Back panels let koi and pond elements breathe, and they make room for lotus and petal accents. Ask your artist to plan negative space around the pond so the scene does not become visually heavy as it ages. A common error is crowding too many tiny petals into the center, which looks muddled after a few years. Sessions will be long and may need multiple days. For session wear bring a loose button-down shirt you can pull aside easily.
12. Minimalist Feather-Light Koi on the Wrist
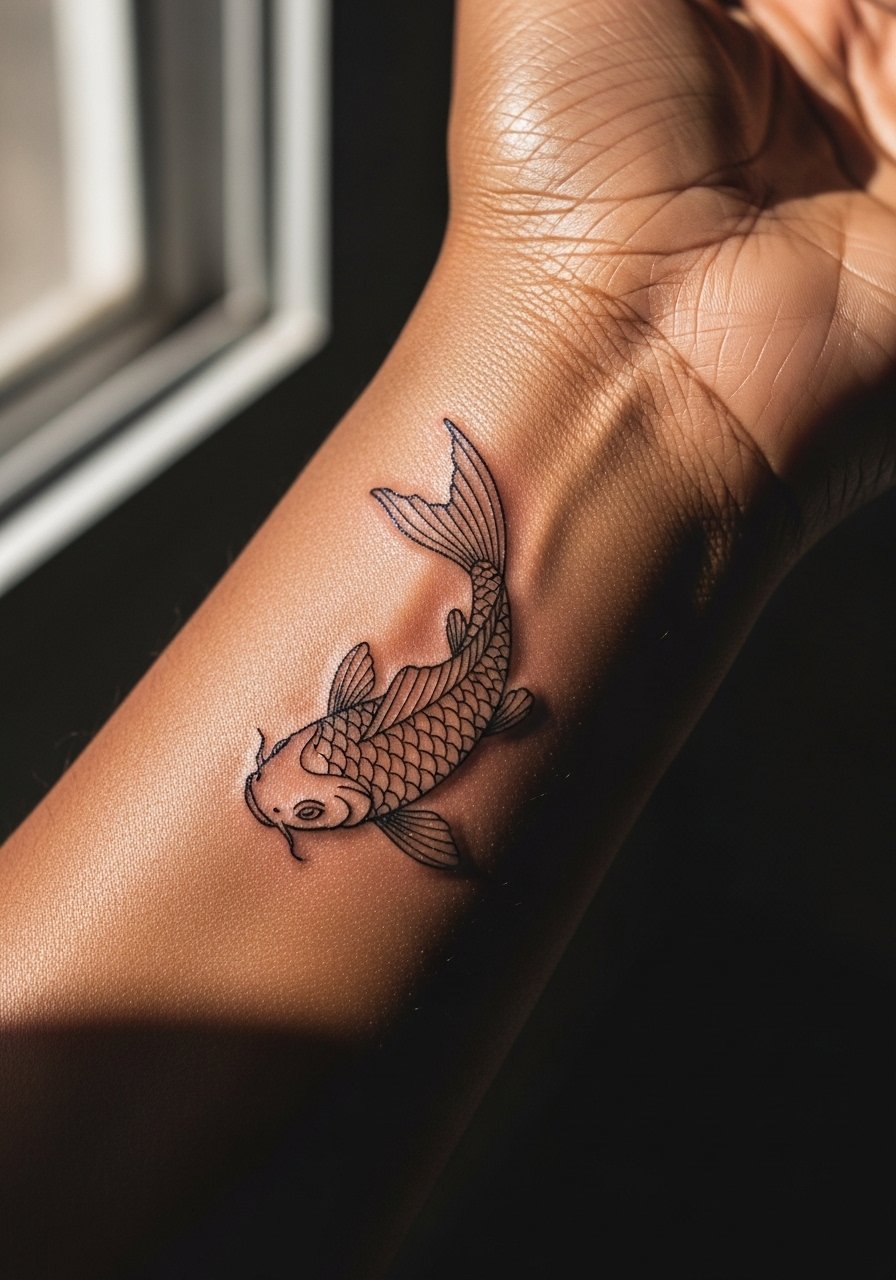
Wrist pieces are vulnerable to fading, so when people ask for feather-light koi I advise a slight compromise in line weight. Request slightly denser primary contour lines with feathered internal detail. The controversy about fine line longevity is loud here. One side says fine line fades quickly on wrists. The other believes careful placement and depth can keep it crisp longer. In practice plan for touch-ups at 12 to 18 months. For showing off try a thin gold chain bracelet on the opposite wrist.
13. Gold Yamabuki Koi at the Ankle
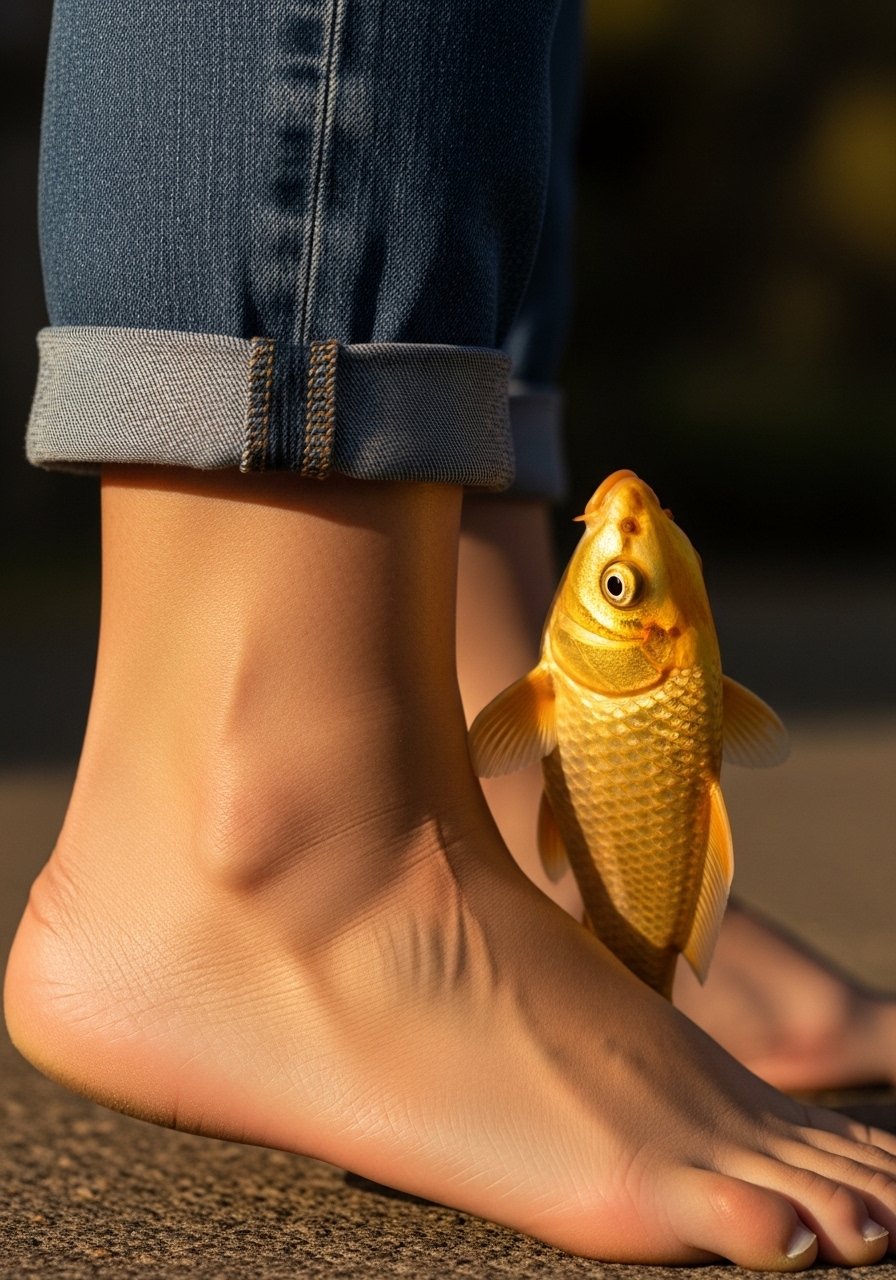
Ankle koi feel like summer jewelry and gold tones read as prosperity markers. Ask for gentle warming tones and avoid heavy white ink that can flake. The ankle sees a lot of friction from socks and shoes, so protective film in the first week helps. A common mistake is placing the koi too low on the foot where shoes rub. Wear high waist denim shorts to show it off seasonally.
14. Micro-Realism Upper Arm Koi Portrait
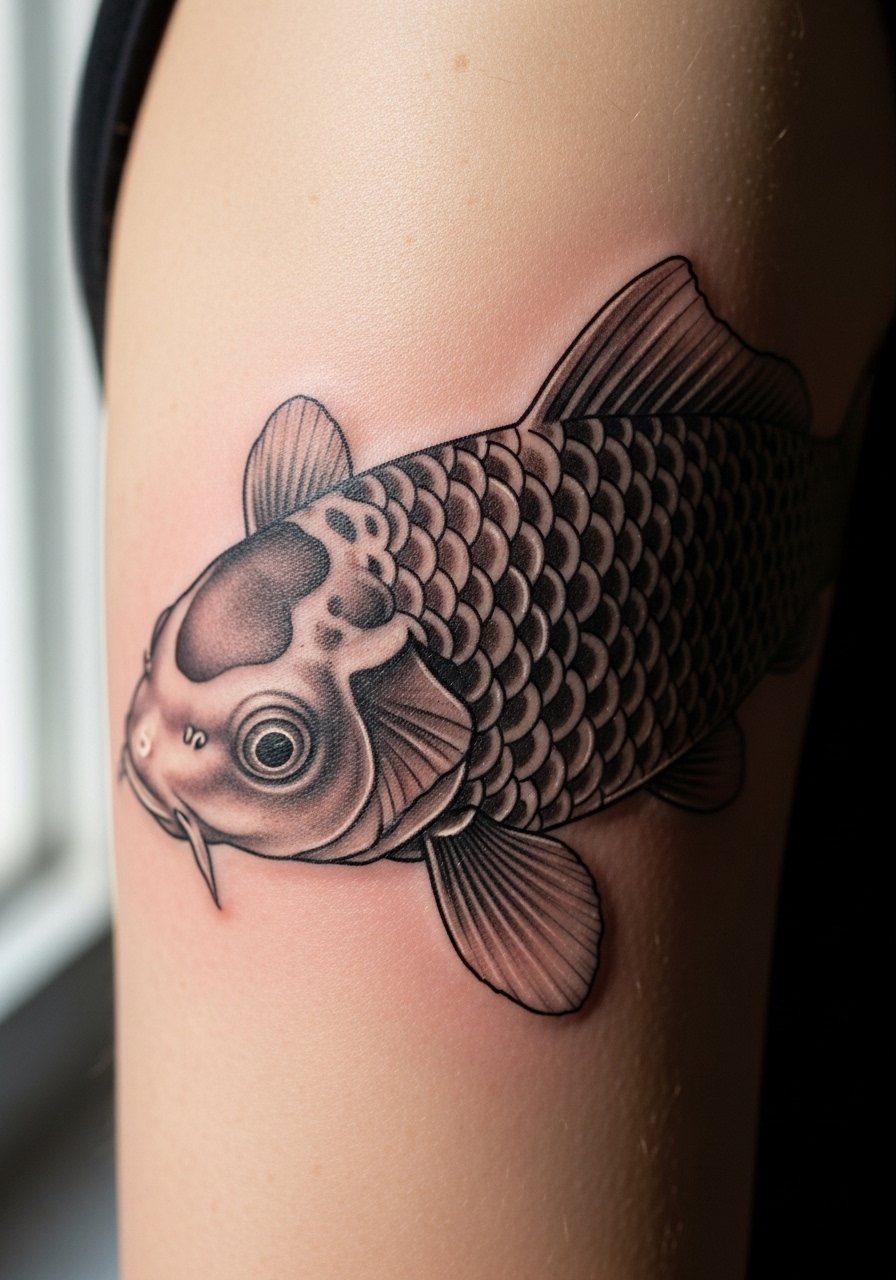
Micro-realism requires precise shading and patience. Tell your artist you want realistic eye highlights and scale texture with gradual stipple shading to avoid ink packing. The common fail is trying to squeeze too much realism into a tiny patch, which reads muddy as it heals. This placement is forgiving and keeps detail visible. Sessions are longer and you may prefer a brief break mid-session. Pair with a cream knit top when the weather allows.
15. Small Koi on the Collarbone Curve
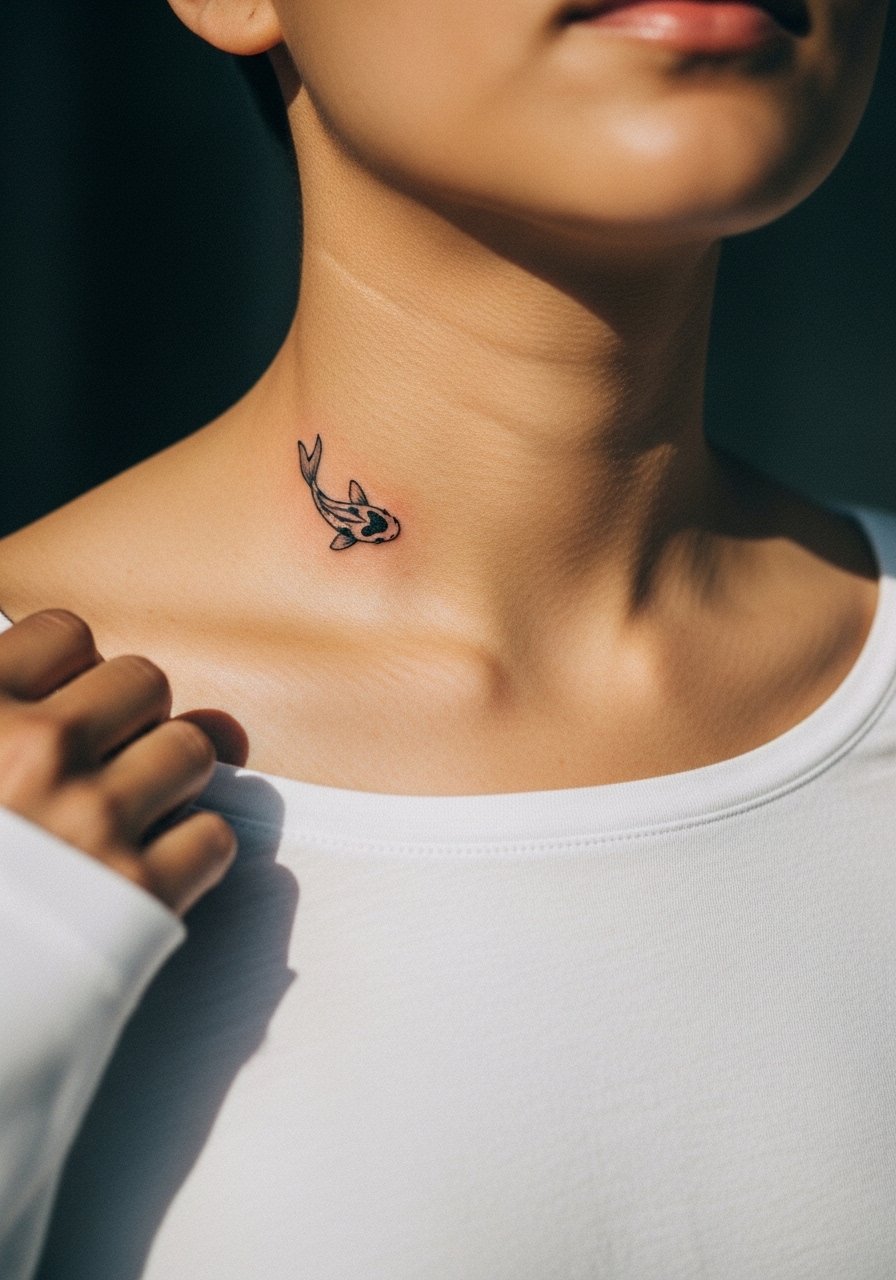
A collarbone alignment uses natural anatomy to make a small koi feel custom. When booking say you want the fish to follow the bone direction, not sit perpendicular. A mistake is centering a small koi awkwardly which makes it look off balance. Pain here is higher so two short sessions beat one long grind. For evening looks a dainty pendant necklace sits below the fish and keeps focus on the tattoo.
16. Flowing Scales Along the Calf
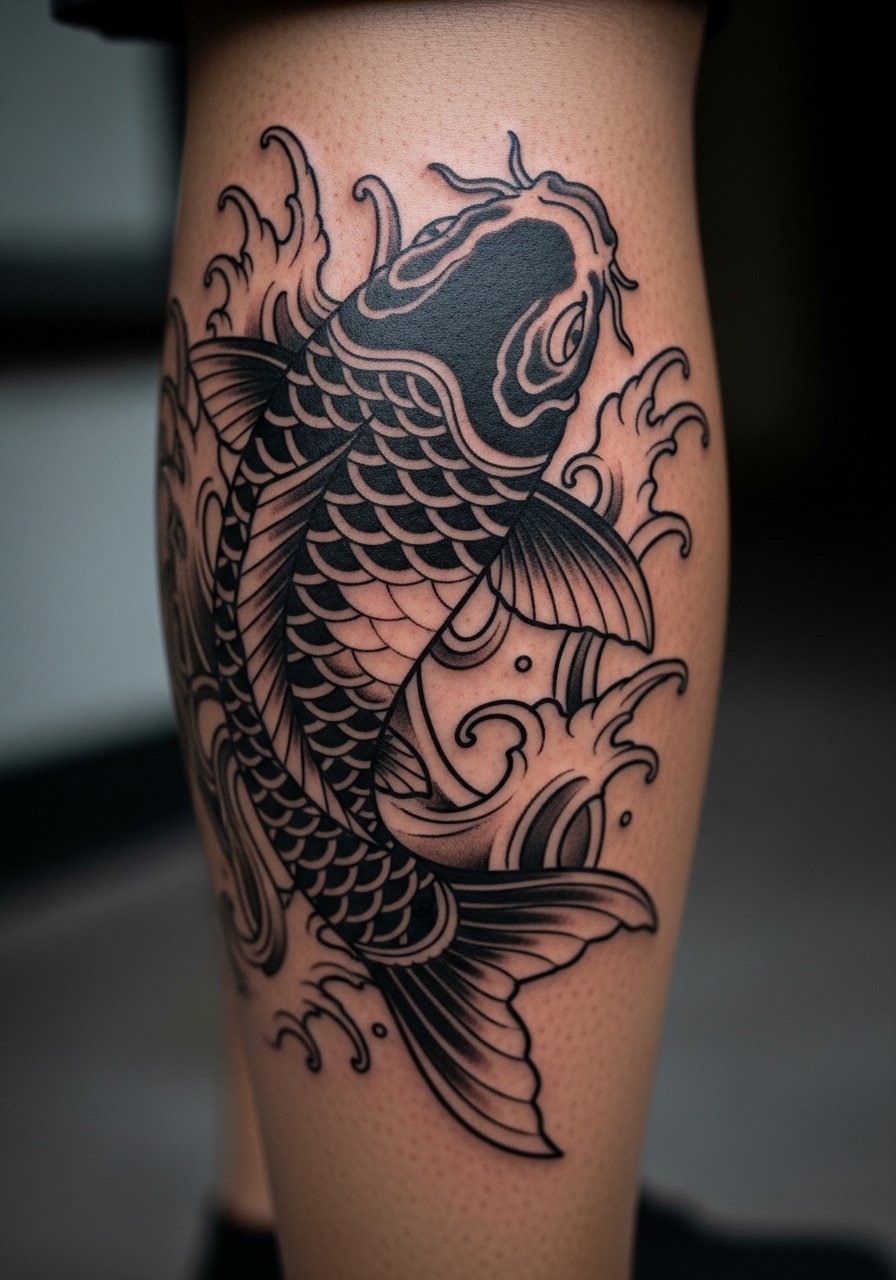
The calf handles vertical movement well, which suits a koi swimming down the leg. Ask for scale rhythm that follows muscle lines so the fish looks consistent while seated or walking. A common error is mixing too many scale sizes which creates visual noise. Sessions are comfortable compared to ribs. For summer visibility roll cuff bootcut jeans or pair with ankle boot flat when showing it off.
17. Tiny Finger Koi Accent
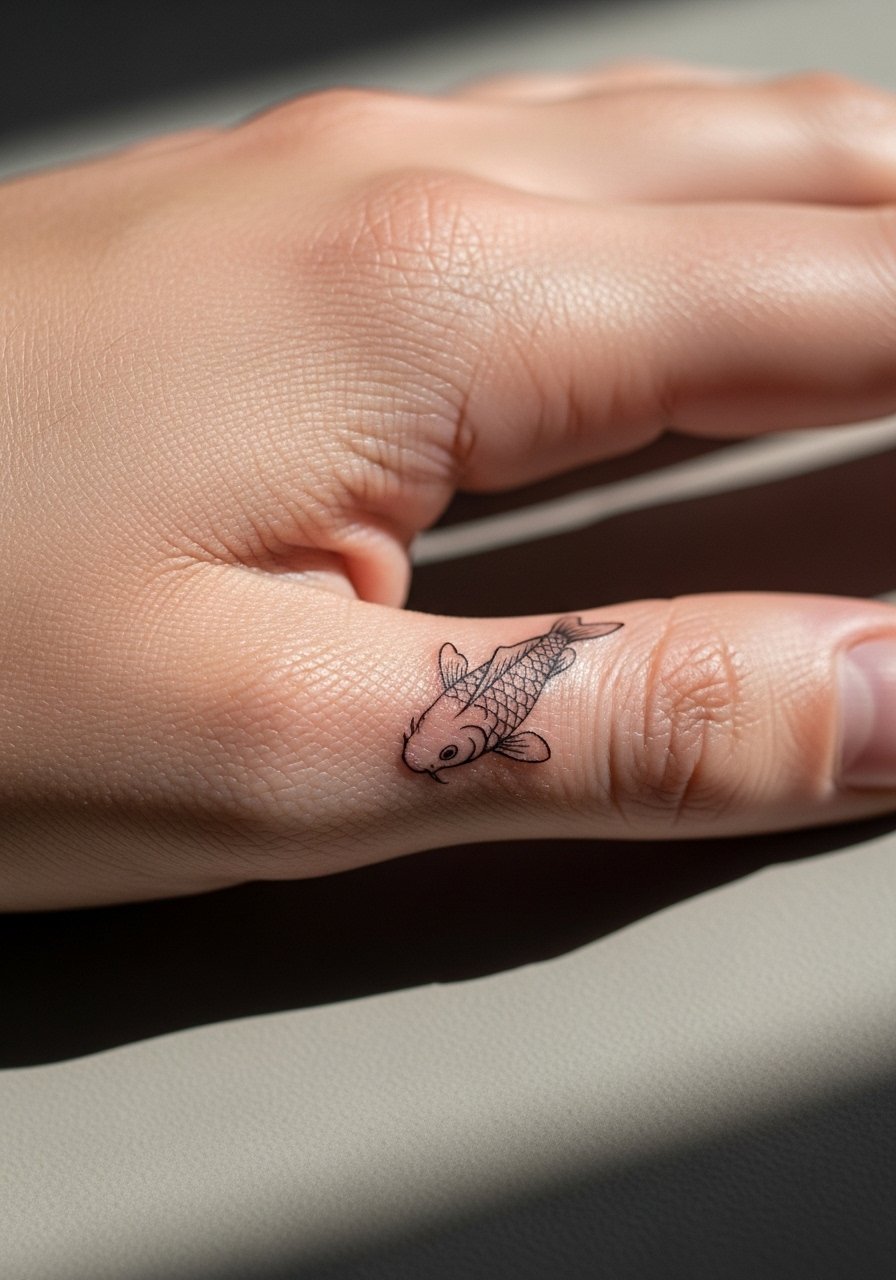
Finger tattoos age fast because of skin turnover and frequent washing. For a tiny koi on the finger opt for a slightly bolder contour and minimal interior detail so touch-ups will be simpler. The usual mistake is over-detailing from the start which leads to a blob in a year. Expect touch-ups at year one or two. For session wear keep jewelry off and let the artist work on a clean surface. A thin band or a minimalist wrist stack complements without crowding.
18. Ankle Constellation Pond Accent
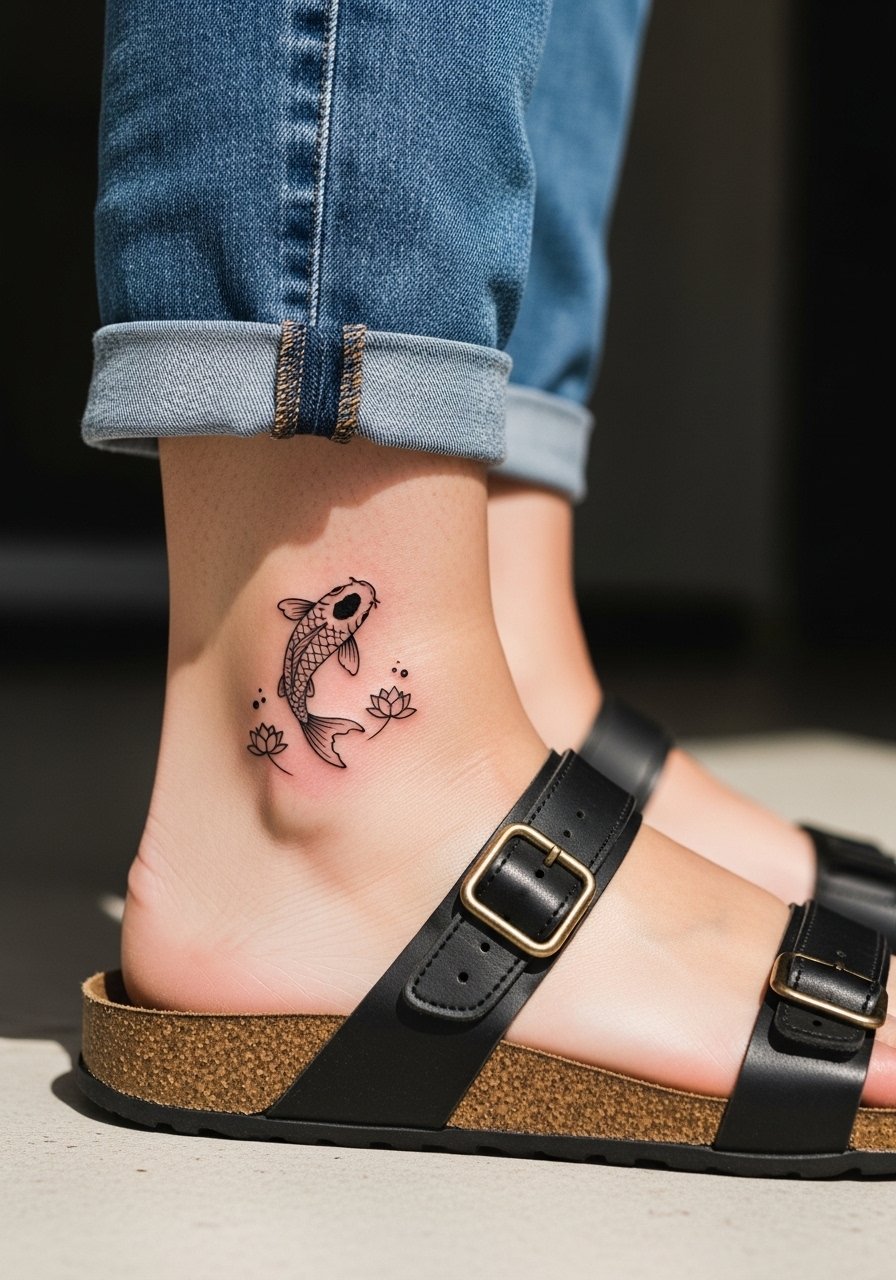
Ankle koi paired with small lotus spots create an architectural mini-scene that reads like jewelry. Ask for negative space between petals to prevent merging with the koi outline. Friction from shoes is the common issue so protective film helps the first week. This placement pairs well with thin anklets in the summer, for example a thin gold anklet.
19. Inner Bicep Micro-Realism Koi
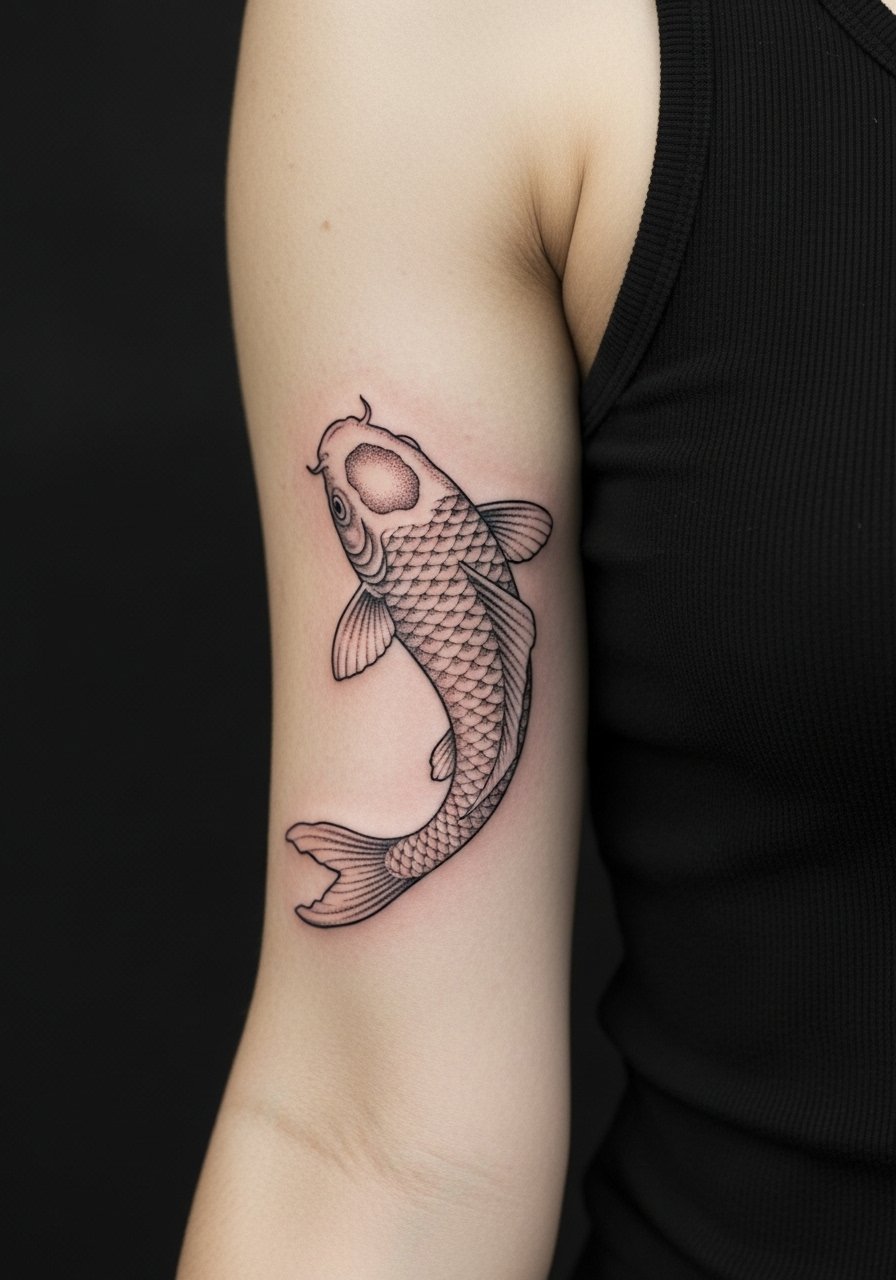
Inner bicep skin is softer and requires careful needle depth to avoid blowout. When you consult, ask the artist about slower passes and stipple shading rather than packed gradients. The mistake is expecting bold contrast in that spot without considering skin thickness. Pain is moderate and sessions may be timed shorter. For appointment day wear a loose tank top so the artist can position the arm easily.
20. Thigh Panel with Red Flowing Koi
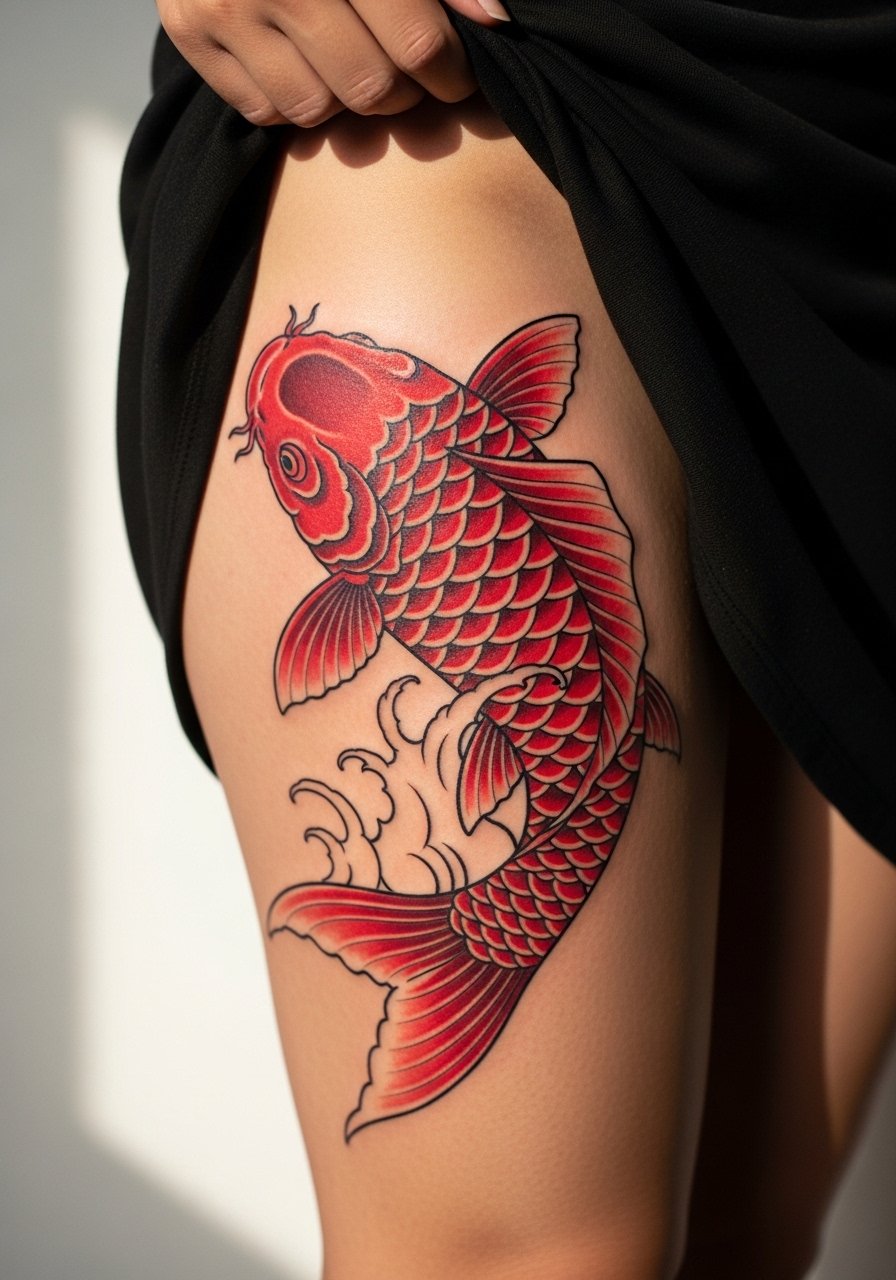
Thigh provides a generous canvas for large scale movement. For red koi request scale flow that wraps slightly to the back so it reads as a single motion. The common error is creating a design that fights with natural leg contours. Sessions may be longer and you will be more comfortable in loose shorts or a skirt. For showing off choose a midi skirt flowy that lets the panel breathe.
21. Neck Side Accent Kohaku Variant
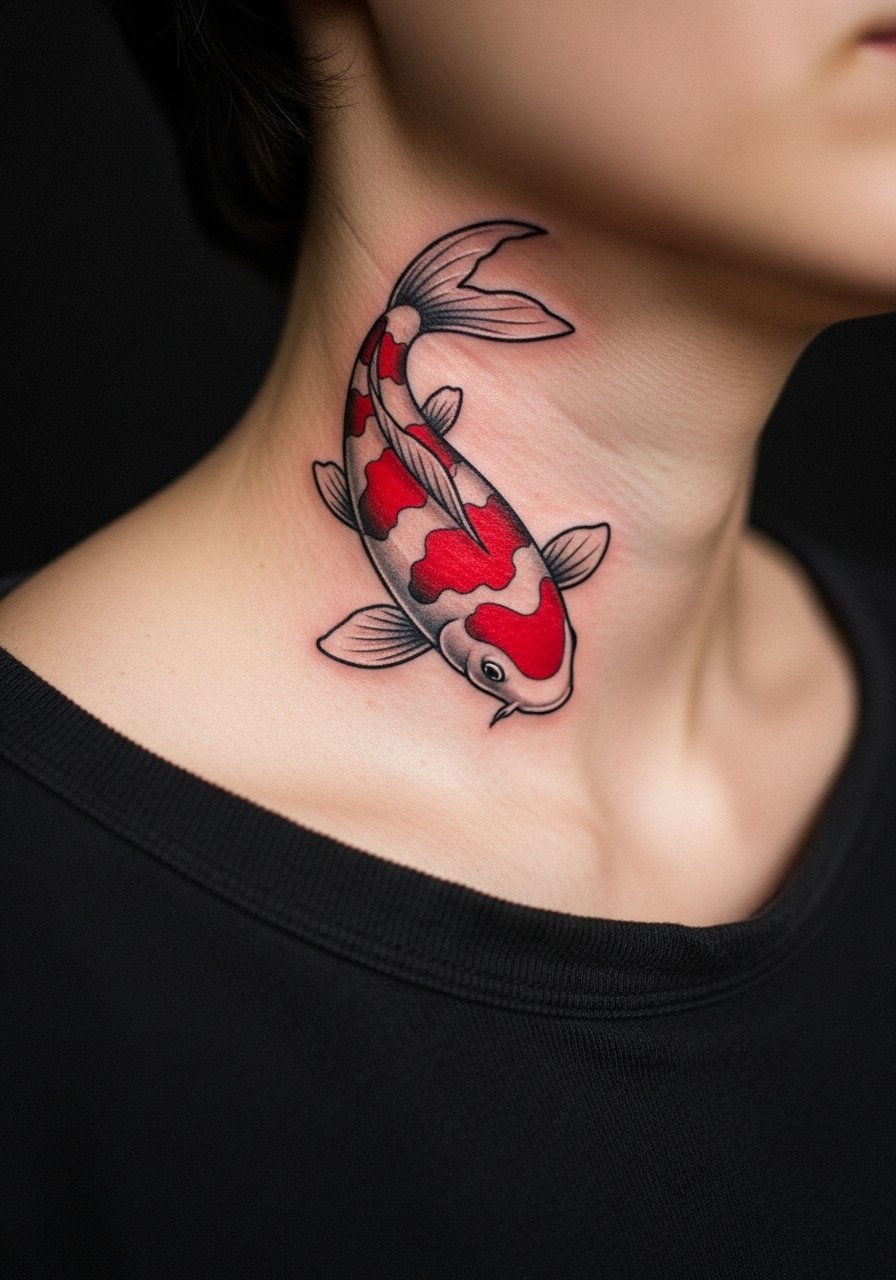
Neck pieces need an experienced hand for even saturation. Ask about long-term employment implications and about subtle placement just below the hairline. A common mistake is expecting fine detail to stay crisp on the neck. Pain is high and healing can be visible, so plan clothing to protect the area. Pair with a thin chain pendant necklace that sits near but not over the tattoo.
22. Sternum Feather Koi
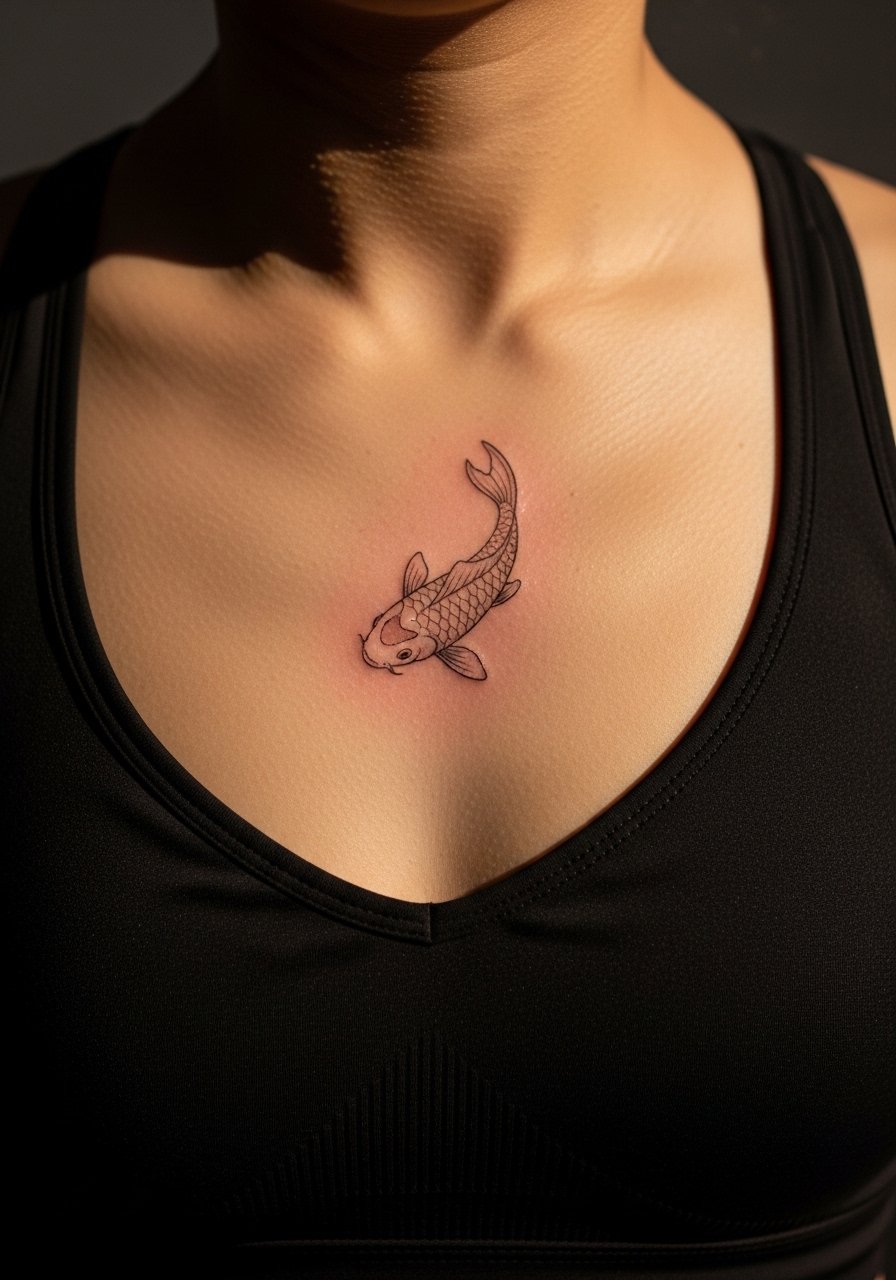
Sternum tattoos are intimate and can be painful. When booking tell the artist you prefer shorter passes and a breath-controlled session. A mistake is asking for ultra-fine compression across a wide sternum area which often needs a second pass. Because this is a sensitive placement some artists specialize in chest work, so ask where they focus. For session comfort wear a fitted sports bra you can remove or keep on depending on your comfort.
23. Small Pond Wrist Wrap
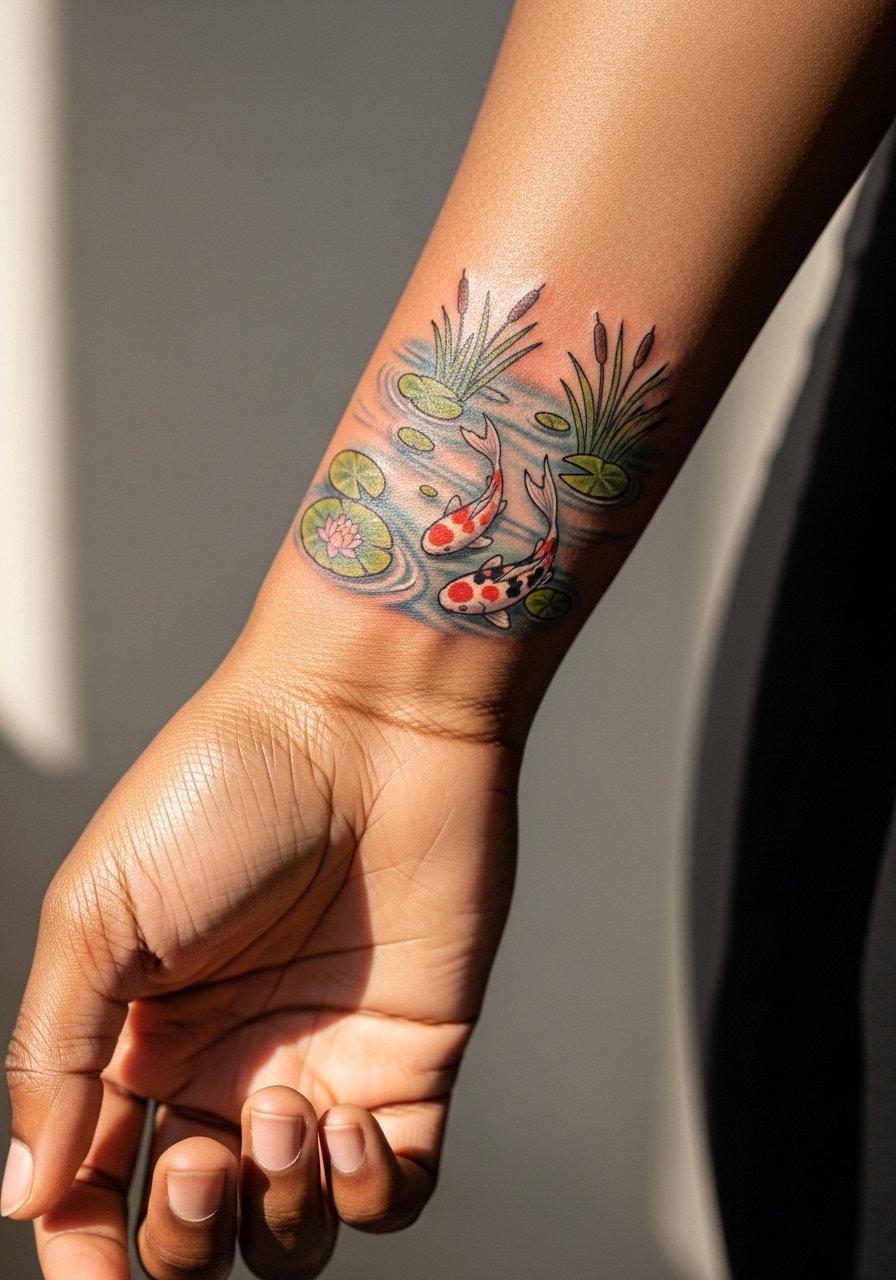
A wrist wrap pond can read like a bracelet when planned with negative space. Ask for simplified lotus shapes and a single koi to avoid overcrowding. The common issue is trying to include too many elements in a small circumference which causes blending after healing. Touch-ups are expected at 12 to 18 months. For showing off combine it with a thin chain bracelet on the opposite wrist for balance.
24. Hip Crescent Koi Accent
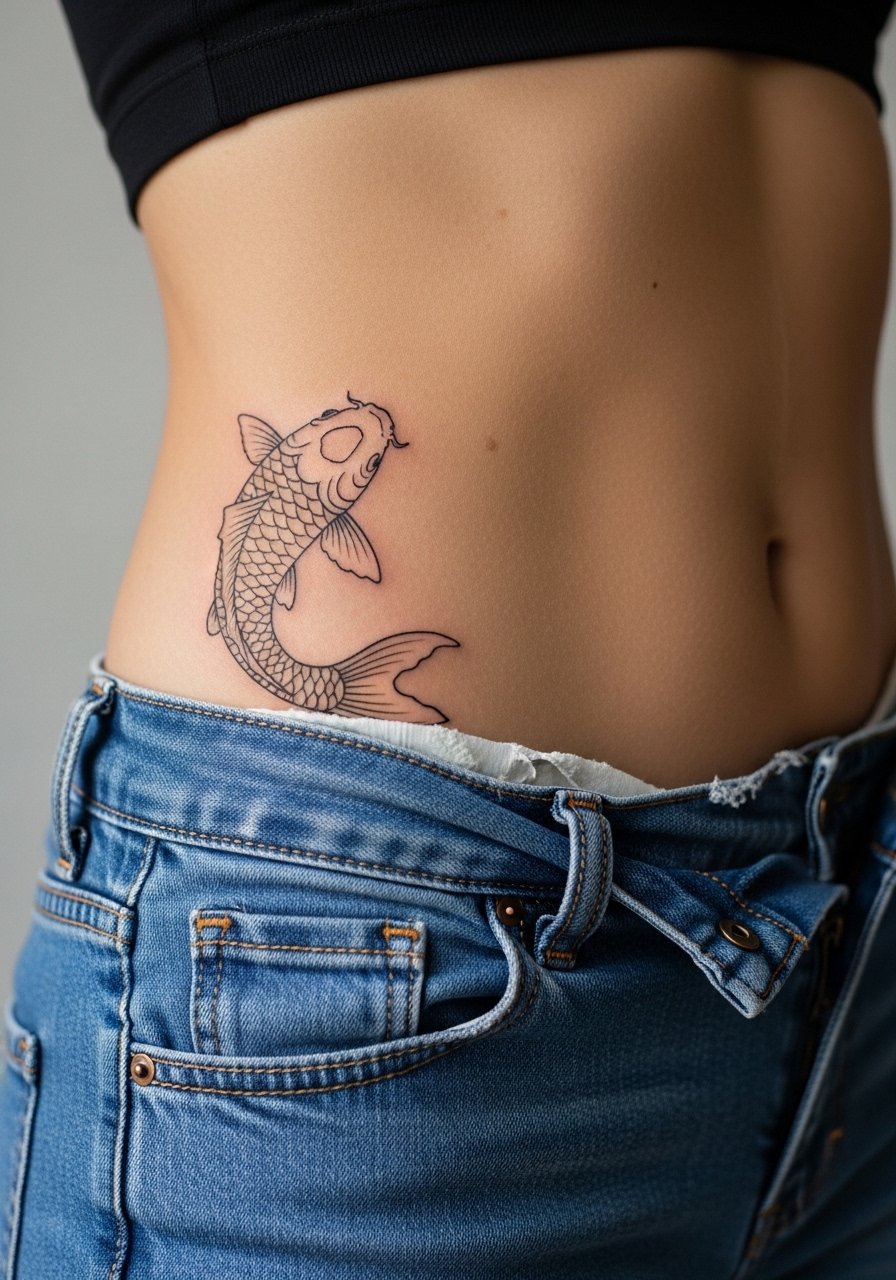
Hip placements are sensual and let the koi curve with the body. When consulting ask how movement will affect the fish when you sit or bend. The frequent mistake is centering the piece where clothing constantly rubs. For the appointment plan to wear high-waisted bottoms you can shift slightly. For show-off style try high waist denim shorts.
25. Back of Neck Mini Koi
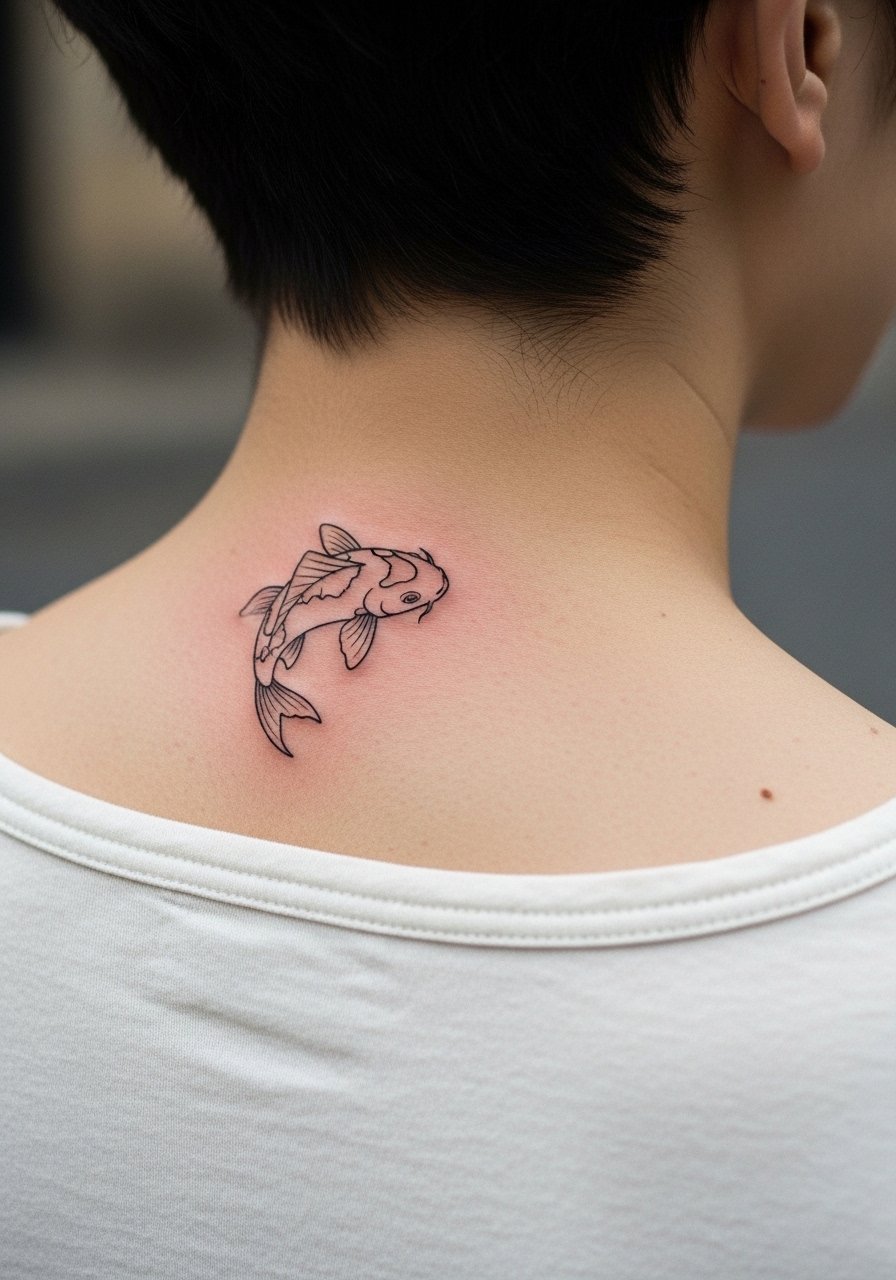
Back of neck work is discreet and shows up under hair or with short collars. Ask your artist about hairline placement to avoid awkward visibility. A common mistake is placing it too low where shirts sit. Pain is moderate and aftercare requires avoiding hair products on the area. For session wear a wide-neck shirt you can shift easily.
26. Ornamental Gold Accent Around Ankle
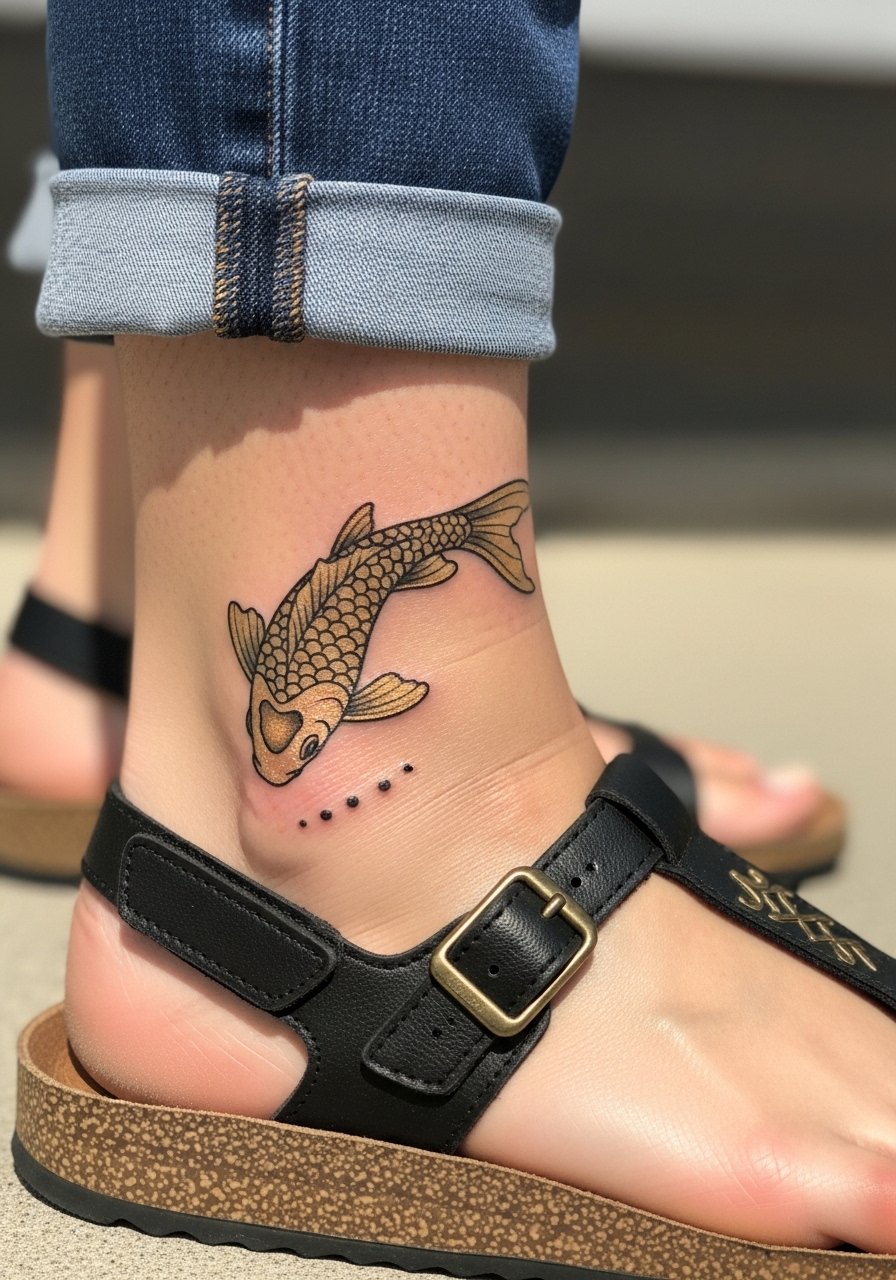
Ornamental koi with gold hints read like jewelry at the ankle. Request that metallic accents remain as tints rather than dense white ink so they fade gracefully. The ankle rubs against footwear so the first week is critical. A common error is heavy contrast too close to the edge of foot where shoes hit. For summer looks pair with cropped joggers or sandals.
27. Scaled Pond Sleeve Starter on Upper Arm
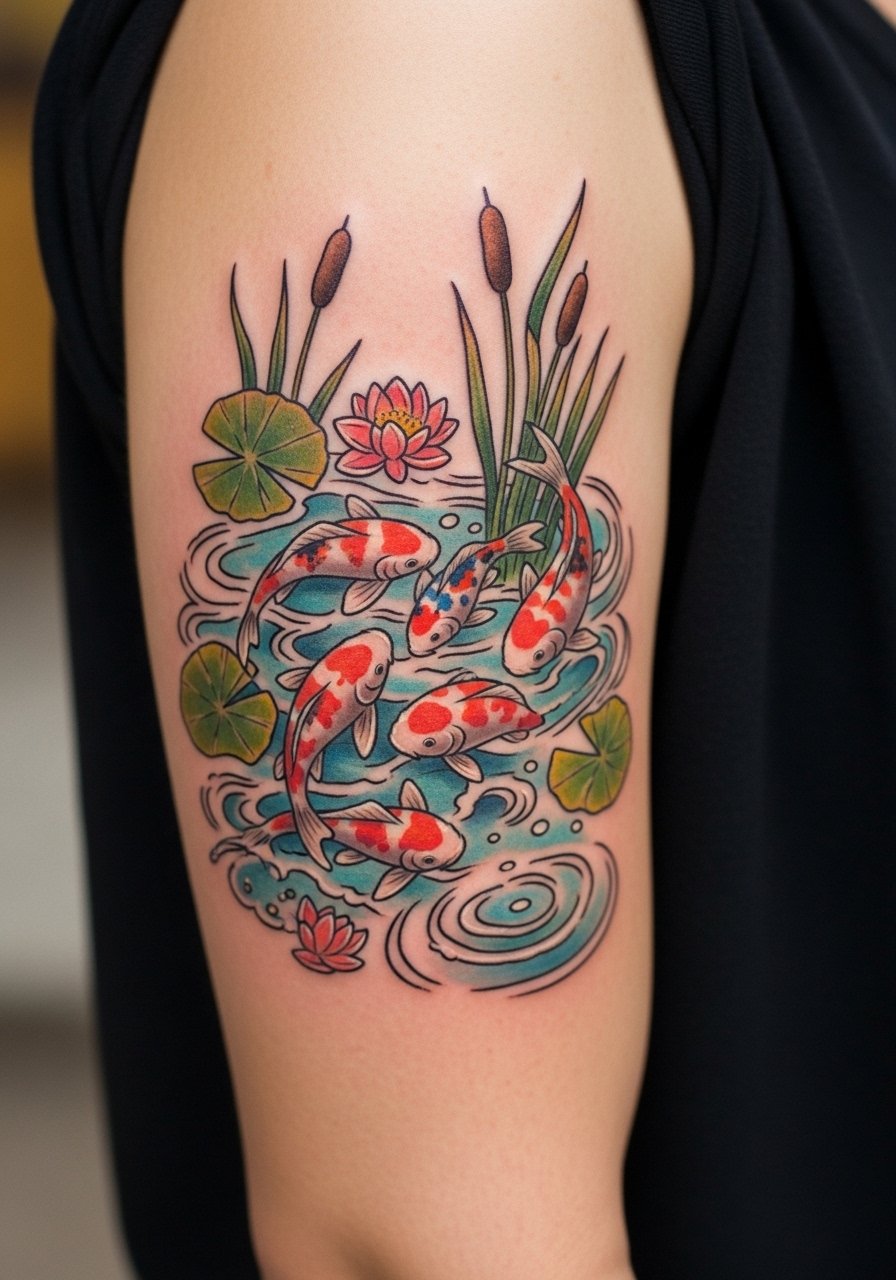
A sleeve starter lets you add koi motifs over time. In consultation clarify which pieces should read well alone and which will later connect. Avoid packing dense detail in early spots that will later be covered or reframed. The typical mistake is committing to a full sleeve layout too fast. Expect multiple sessions spaced over months. For session comfort bring a loose short sleeve shirt that gives easy access and can be pulled aside.
Frequently Asked Questions
Q: Will fine line koi on the wrist blur faster than a bold koi on the forearm?
A: In my experience fine line on wrists tends to soften sooner because of constant motion and exposure. Bold outlines on the forearm usually hold up longer. The trade-off is aesthetics. If you want a delicate look on the wrist ask for slightly stronger primary contours and plan for a touch-up around year one or two.
Q: Do watercolor-style koi need different aftercare than traditional color work?
A: Watercolor koi often use diluted pigments and lighter outlines, so they benefit from gentler cleansing and less friction during the first week. Avoid heavy scrubbing and protect the area from sun. That said the basic principle is the same, gentle wash and light moisturizing until the scabbing phase passes.
Q: How do I find an artist who can do small, delicate koi without charging sleeve prices?
A: Look for artists who post #FineLineKoi and check city location tags. Tattoo directories and forum threads on r/tattoos often list guest spots that specialize in small work. Be upfront about size and budget in your first message and ask for healed photos of similar small pieces.
Q: Are there color choices that show better on medium and dark skin tones?
A: From what I've seen, higher contrast and slightly deeper saturations read better on medium and dark tones. Blues and golds often hold character, while pale washes can disappear. Ask your artist to do color mockups on skin tone references and consider a small black and gray test patch if you are unsure.
Q: How often should I plan touch-ups for delicate koi designs?
A: Plan realistically. Fine line delicate koi often need a touch-up at year one to two. Watercolor pieces may need color refreshes at year two or three, depending on sun exposure and placement. Bold traditional fills can go longer before needing attention.
Q: What should I wear to a shoulder or back koi session?
A: Wear a loose tank or a button-down you can pull aside so the artist has clean access. For shoulder work an off shoulder sweater you can remove works well for travel to and from the shop.
