
Fine line fallen angels are everywhere on saved boards, but trending and durable are not the same thing. The fresh, feathered look that racks up likes can soften into a soft gray blur if placement, line weight, and aftercare are not planned. This list jumps straight to small ideas that balance what looks great now with what actually holds up, plus what to wear to the session and what to show off afterward.
1. Fine Line Fallen Angel with Broken Wings on the Wrist
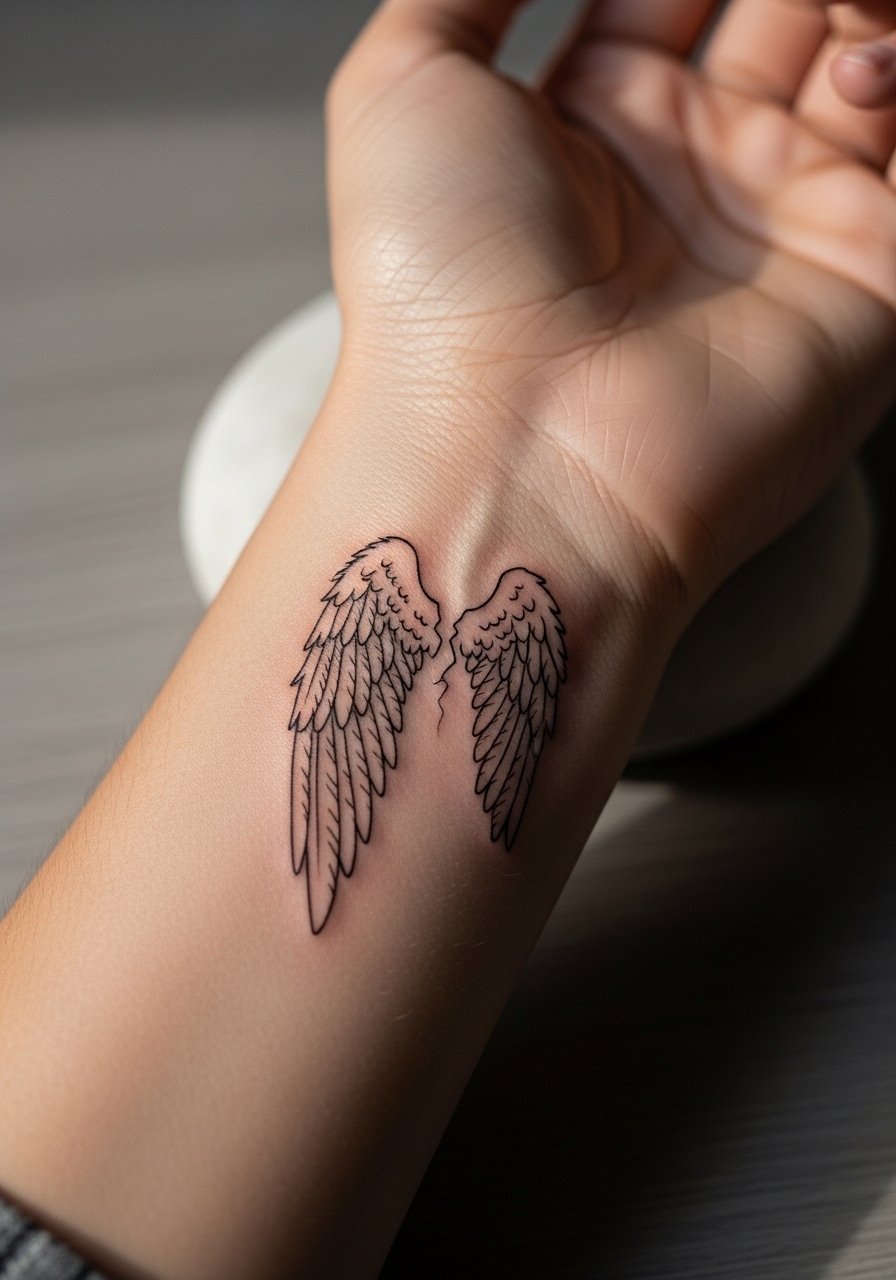
I recommend this when you want the angel to feel intimate but readable at arm's length. Fair warning, fine line on wrists divides people. One camp argues fine line fades much faster on high-friction spots and needs boldening. The other camp says with slightly deeper needle placement and planned touch-ups, it can stay delicate and legible. Tell your artist you want thin contour but with a slightly stronger anchor line around the wing base so the feather detail has room to breathe. Expect a 45 to 75 minute session and a likely touch-up at year 12 to 18 months. For showing it off, roll up a rolled cuff chambray shirt and stack a thin silver chain bracelet on the opposite wrist during photos.
2. Minimalist Fallen Angel Silhouette on the Inner Forearm
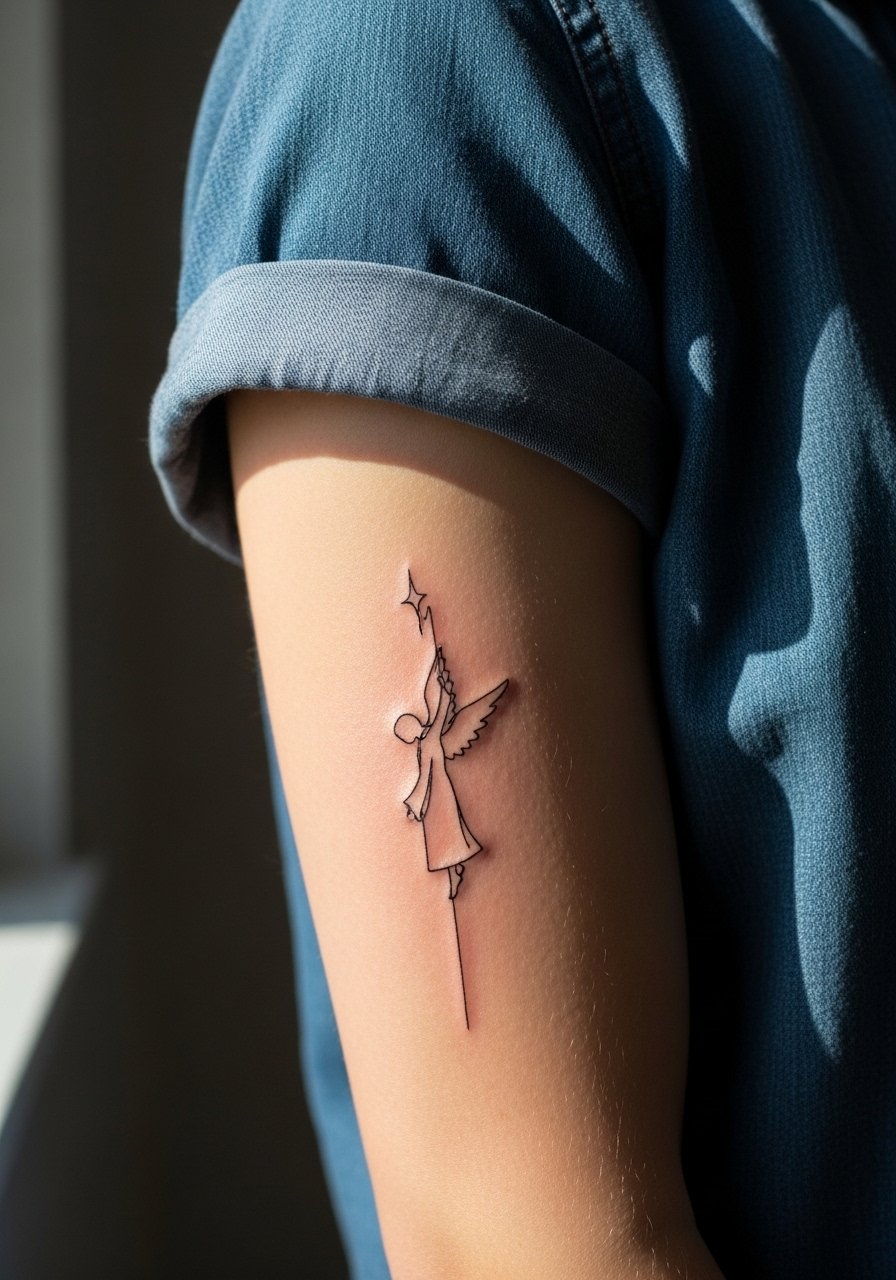
This is a safe first-tattoo choice that reads discreetly and ages by losing crisp micro-details first. During the consultation say you want the silhouette scaled to one inch with negative space inside the wings to avoid feather bleed. The biggest mistake is asking for feather detail in that size. The session feels calm because the inner forearm tolerates fine line work well, and it usually finishes in under an hour. For session comfort wear a short sleeve chambray so the artist can lay your arm flat without tugging, and consider a button-up you can unroll if you need arm mobility.
3. Blackwork Fallen Angel with Tattered Feathers on the Collarbone
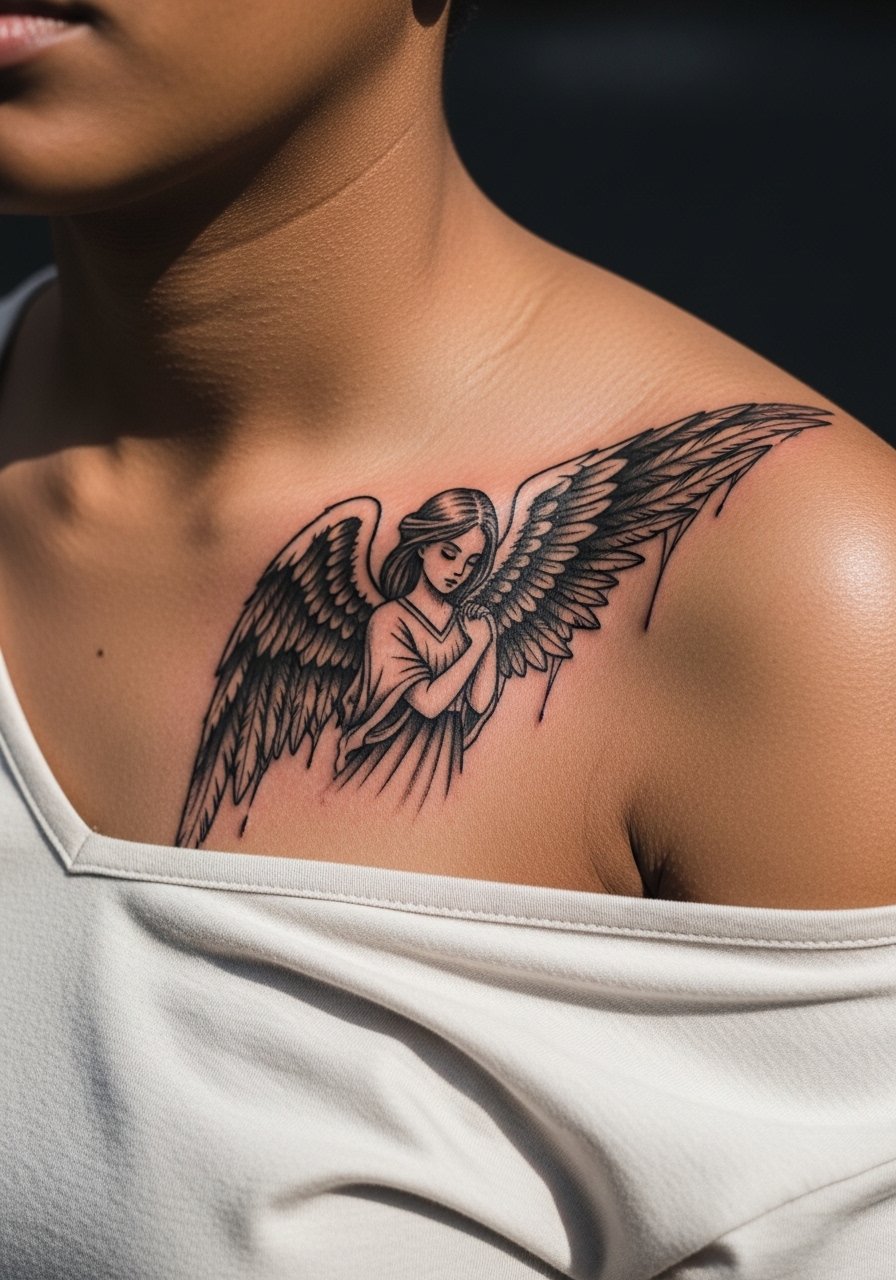
Blackwork is great here because saturation holds on darker tones and the collarbone frame makes the piece read like jewelry. Mention during booking that you want saturated fills and heavy contrast around the wing tips so it reads from across a room. Avoid asking for tiny shaded feathers in a two-inch scale. Pain sits around a 5 to 7 for most people because the bone is shallow. Expect a 60 to 90 minute session and possibly a second pass for saturation. For evenings out pair the piece with an off shoulder blouse and layer a thin gold necklace layer worn just below the design to frame the wings.
4. Micro-Realism Fallen Angel Face Behind the Ear
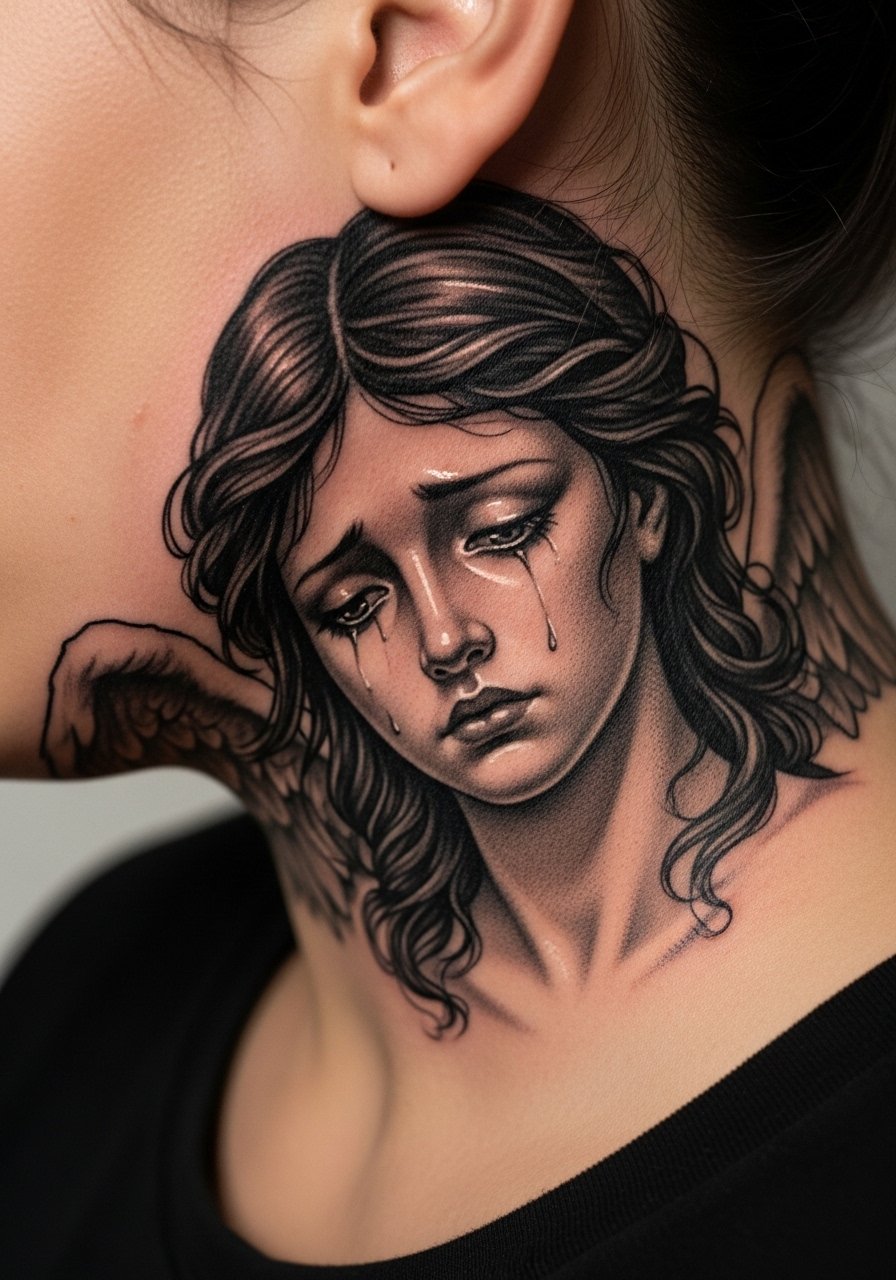
Behind the ear is tiny real estate that rewards restraint. Ask for a profile with soft shadow and one focal highlight rather than crowded texture. The common mistake is packing too much facial detail into one centimeter. Expect two short sessions if you want refined shading. Note that behind-the-ear healing can be fussy because of hair and pillow contact. If you plan to numb, know that some artists welcome topical numbing and others prefer minimal use. One side says numbing helps first-timers sit through delicate shading. The other side argues it can alter skin response during shading. Wear your hair up for the session and bring a clean shirt with a loose collar so the artist can access the area without pulling hair.
5. Neo-Traditional Fallen Angel with Halo Remnants on the Shoulder Blade
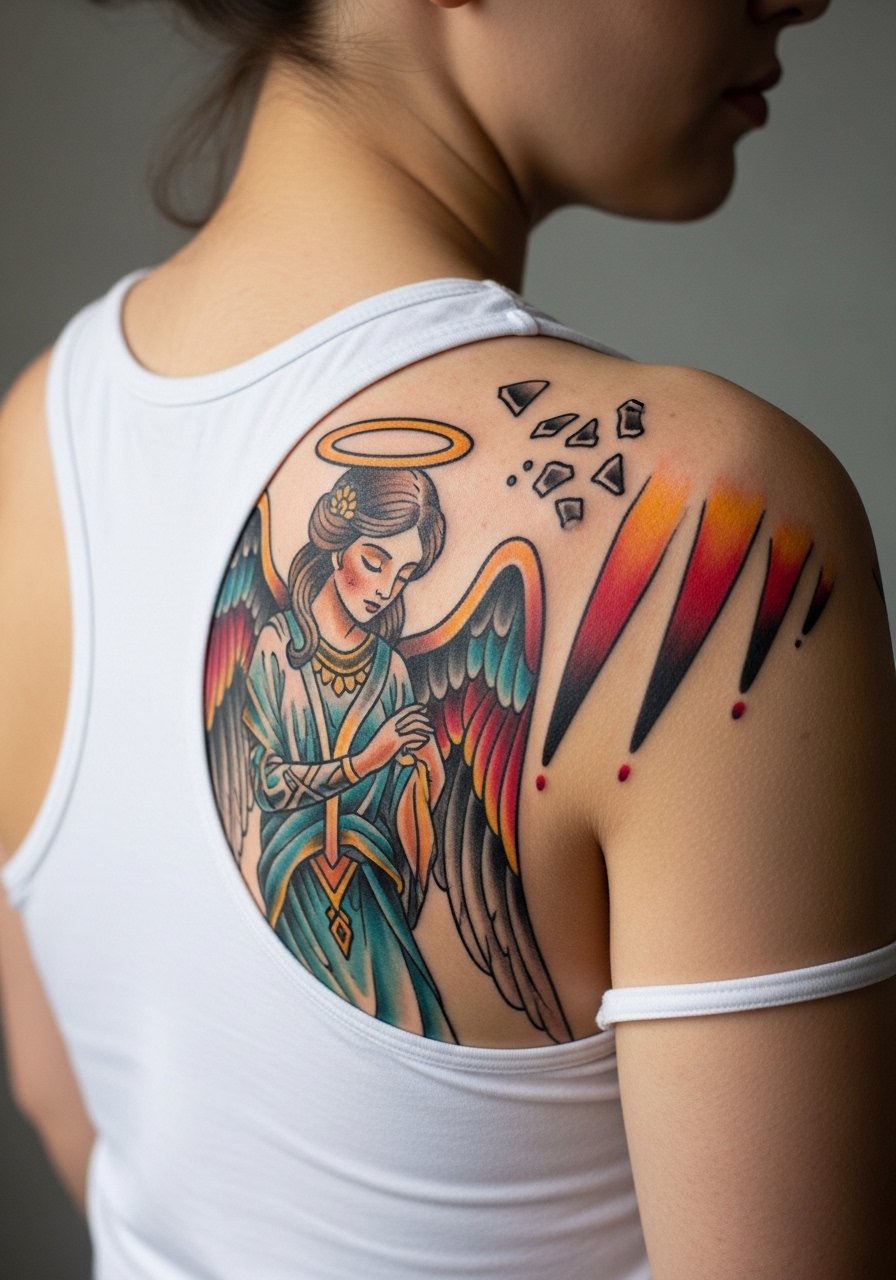
The shoulder blade gives enough canvas for neo-traditional storytelling while staying discreet under clothing. Ask for clear color blocking and a simple halo remnant rather than tiny illustrative ornamentation. The mistake is overcrowding the composition with small scrolls that age into muddiness when compressed. Pain is low to moderate because the area is fleshy, and a single two-hour session often does the job for a small three-inch piece. For showing it off, a racerback tank top or a sleeveless bodysuit keeps the back clean and readable. Bring a button-front shirt to the appointment so you can get in and out without contorting.
6. Watercolor Fallen Angel Descending on the Ribcage
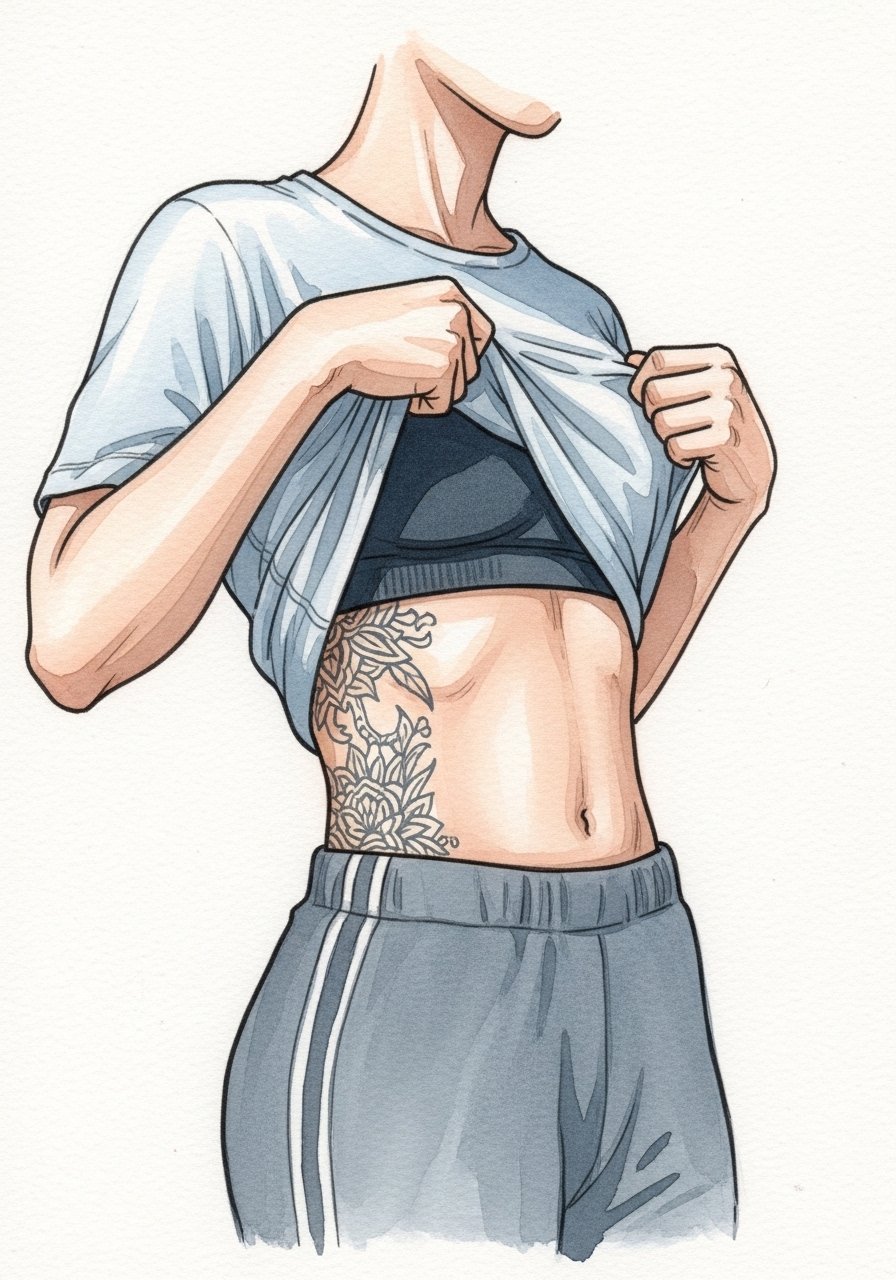
Fair warning, ribs are a high-pain spot for many, often rated eight out of ten. The watercolor blur suits the ribs because it follows body curves, but color saturation can soften faster in small scales. Artists split on whether to use numbing for ribs. One camp praises topical numbing to let clients sit through layering. The other camp worries it masks pain cues that help the artist pace the session. If you want this look, ask for slightly denser color cores with feathered watercolor edges so the center holds at year two. Wear a cropped top you can lift easily to expose only the area needed for the artist. Touch-ups at year two to three are common if you want to refresh color pop.
Studio Day Picks
The pieces above cover wrists, forearms, collarbones, ribs, and shoulder blades, and a few small things smooth out the session and the first week.
-
Hustle Butter Deluxe. A thinner balm many people prefer over heavier ointments for fine line work because it feels less likely to clog tiny channels in delicate wrist and inner forearm tattoos.
-
Green Sheep tattoo aftercare balm. A breathable balm artists sometimes recommend for small blackwork pieces that need moisture without a greasy film.
-
Australian tea tree salve. Handy for minor itching on ankle and thigh spots in humid conditions, used sparingly and only when the shop says it is safe.
-
Fragrance-free gentle body wash. Keeps healing lines clean during showers without stripping the delicate oils that help fine line pieces settle on wrists and neck areas.
-
Aquaphor healing ointment. A thin initial layer for the first couple of days that many people still reach for on fresh small pieces, especially when the artist recommends a short occlusive window.
7. Ornamental Fallen Angel with Geometric Wings on the Upper Thigh
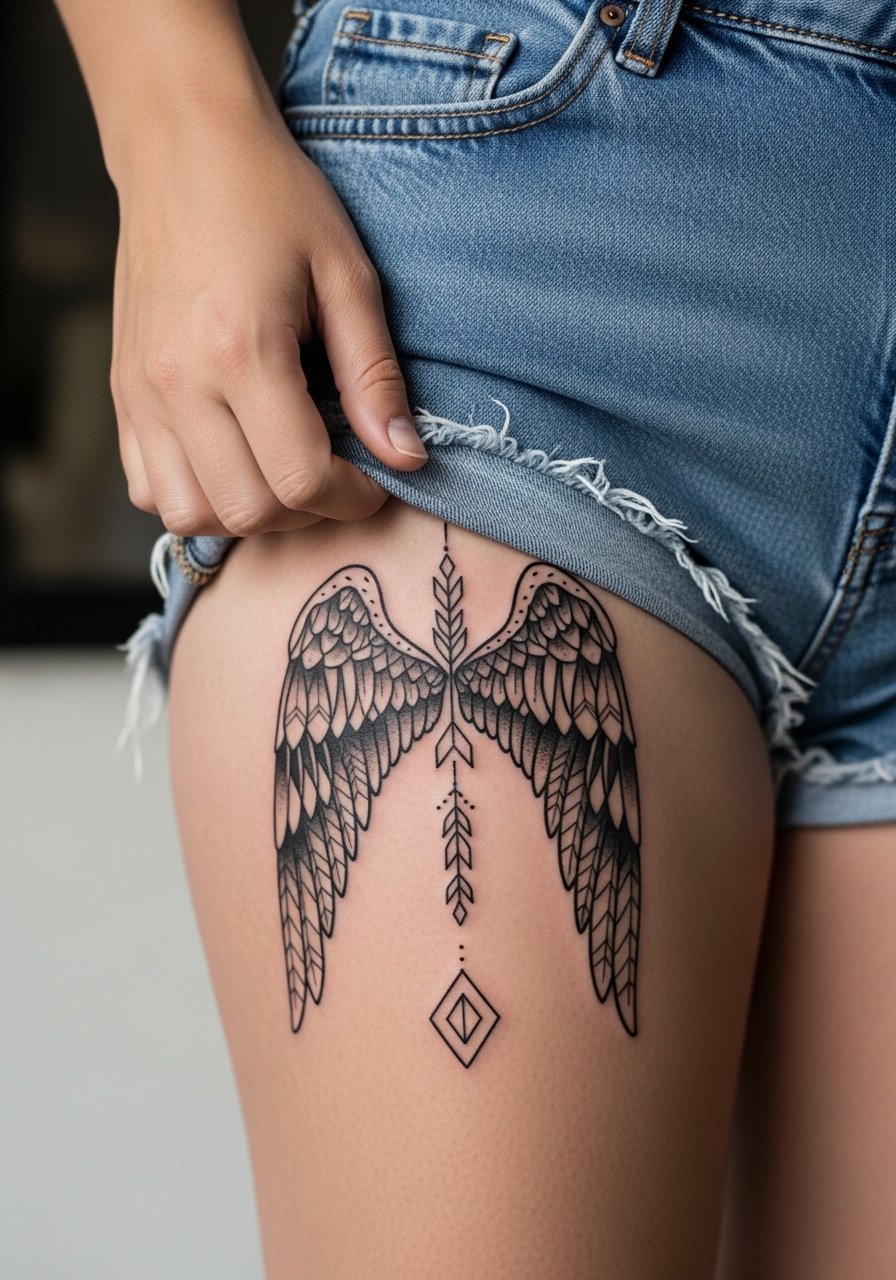
The thigh gives you space to combine symmetry and asymmetry without crowding. When asking for geometric wings, say you want open negative shapes between pattern lines so the work does not densify over a few years. The common mistake is forcing intricate dot grids too close together in a small area. Expect a one to two hour session depending on detail and a possible second pass for crispness. For summer show-offs consider high-waisted denim shorts and neutral thigh-high socks when you style photos. Session wear should be loose shorts so the artist can position your leg without pressure.
8. Ignorant Style Fallen Angel Scribble on the Calf
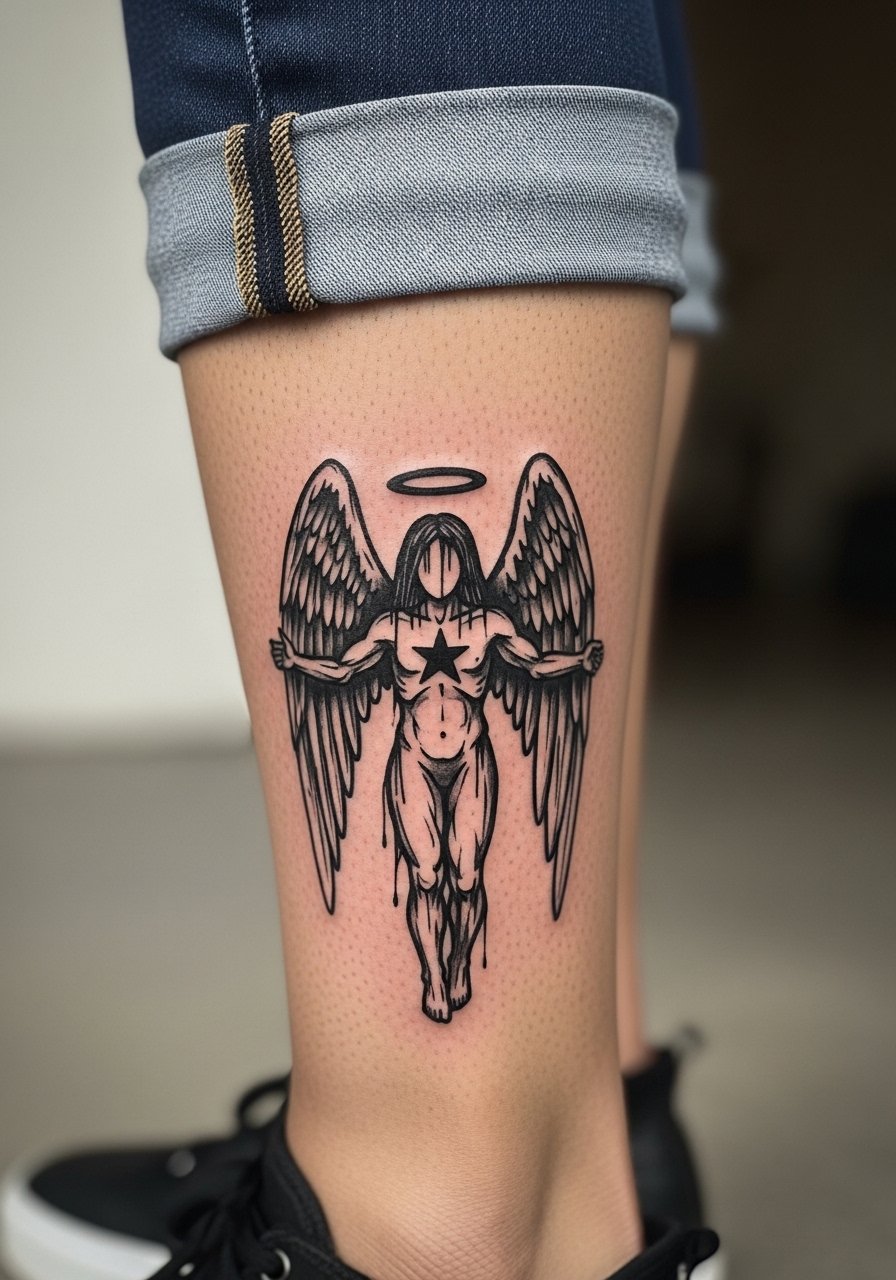
Ignorant style is raw and rebellious with energetic strokes that mask small healing shifts. This works well on the calf because the muscle lets heavy black hold. Ask for intentional asymmetry and ask the artist to leave irregular negative spaces so the scribble breathes. The session is quick, often under an hour, and the main mistake is asking for micro detail in a style that is defined by confident imperfection. Calf work tolerates heavy black without blowout risk in the same way as thinner wrist lines do, but still avoid asking for hairline feathering within dense fills.
9. Traditional Fallen Angel with Sword on the Outer Forearm
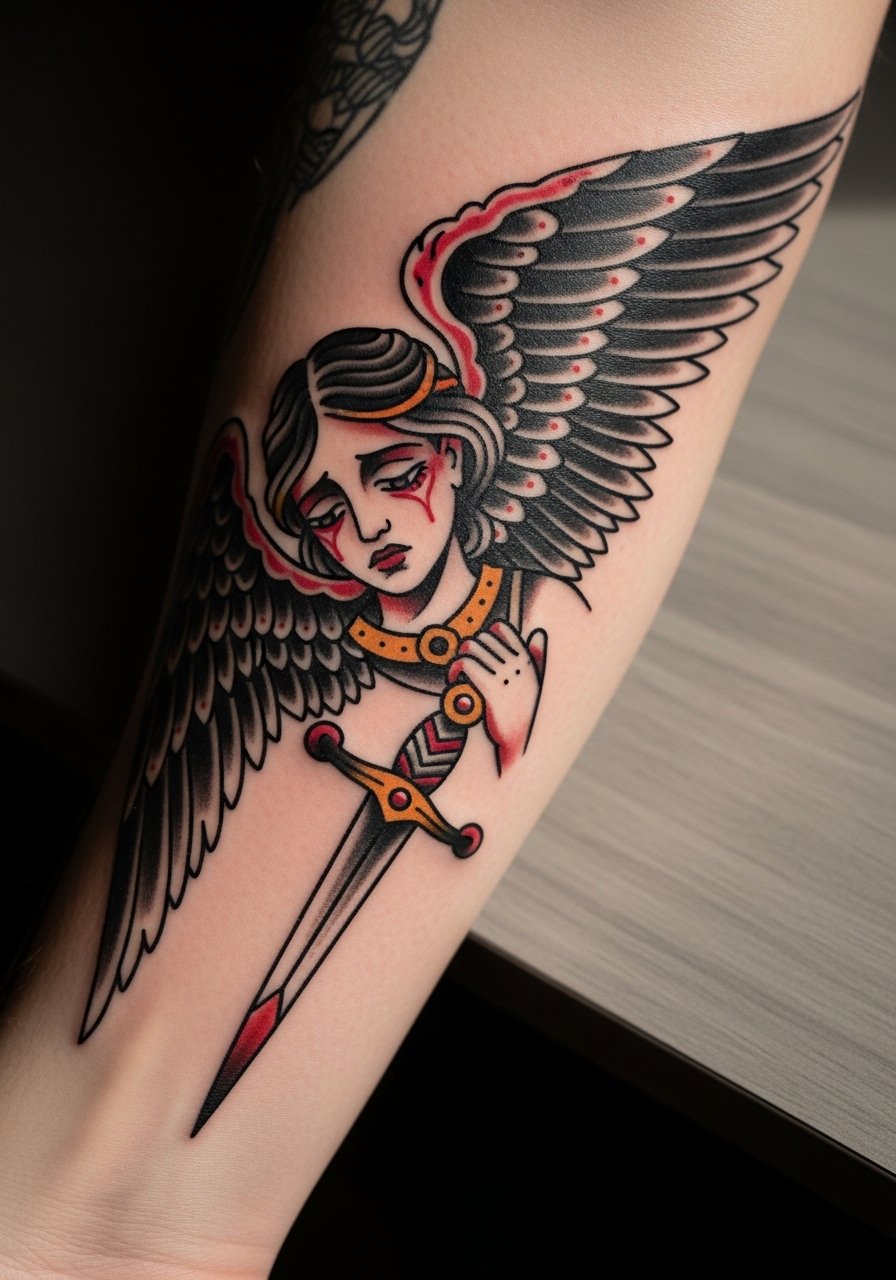
Traditional linework and saturation age predictably well in this placement. The outer forearm is visible daily so choose color accents deliberately. Tell your artist you want classic bold outlines and solid color blocks rather than micro-shading inside the torso. A single 60 to 90 minute session usually gets this small two-inch piece done and saturated. The common regret is asking for too many tiny color transitions. For casual outfits roll the sleeve of an oxford button down shirt to frame the design without covering it, and wear a loose short sleeve on the day so the artist can access the area easily.
10. Dotwork Fallen Angel Halo Breaking on the Side Neck
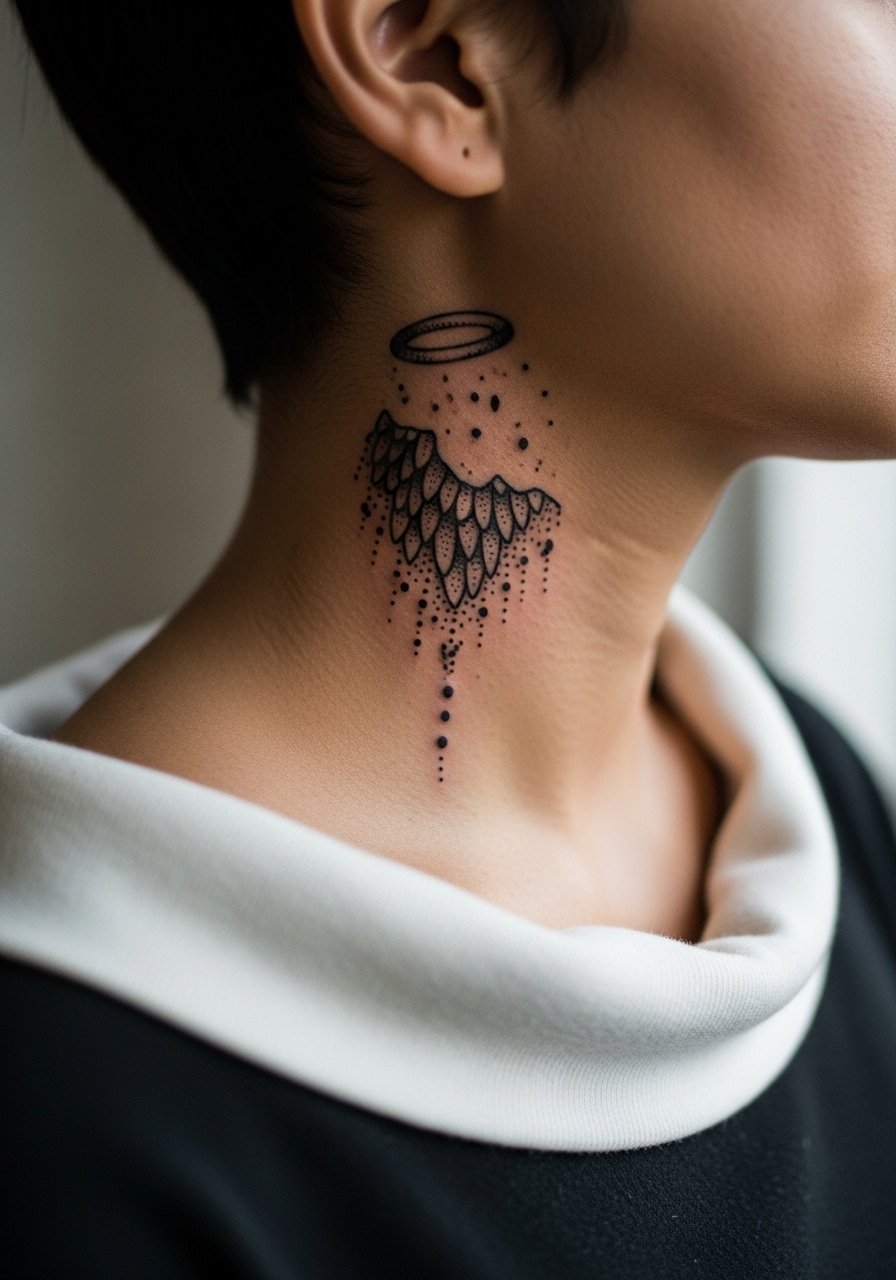
Neck-side dotwork reads delicate but needs space between dots to avoid merging later. When you consult, request wider dot spacing and a clear transition ring so the halo does not become a gray smudge. This spot is sensitive and heals with more movement from collars and hair. The session is short but may need a touch-up if dots compact. There is a debate about Saniderm versus dry healing for neck spots. Some people prefer Saniderm for less scabbing and fewer scabs rubbing against collars. Others favor dry healing to avoid trapped moisture and potential irritation. Ask your artist which method they trust for dotwork pieces in neck areas.
11. Fallen Angel with Fallen Leaves Hybrid on the Finger Webbing
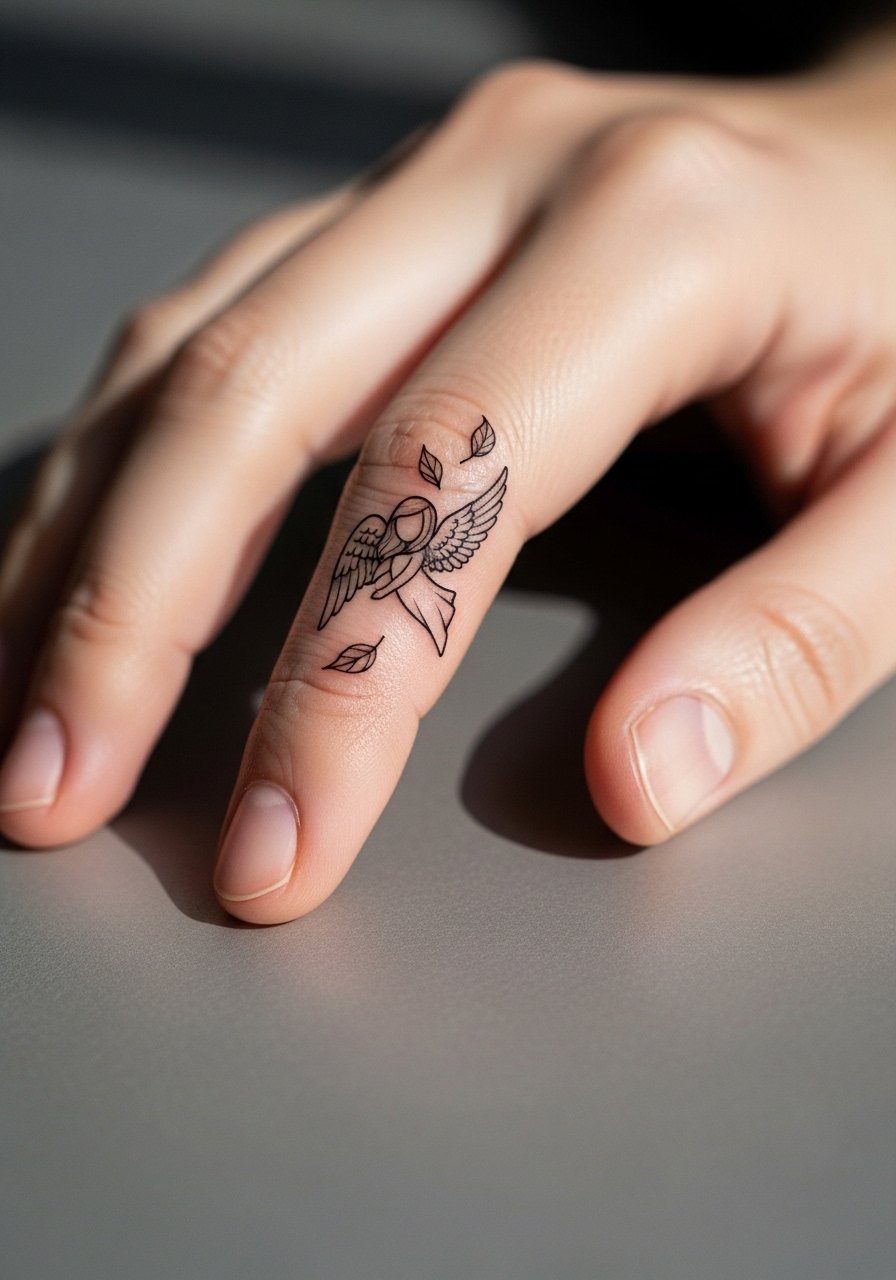
Finger webbing is ultra-discreet but the tissue moves and ages differently. This hybrid idea adds leaves to the wing edge so the silhouette reads even if fine feathers soften. The main mistake is expecting a finger webbing tattoo to last like forearm work. Plan for annual touch-ups and accept that the edges will soften. Sessions are quick and the pain is sharp but brief. Keep in mind daily friction and frequent washing speed fade. For bookings ask about the artist's experience with hand placements and whether they offer maintenance touch-ups for small living areas.
12. Micro-Realism Fallen Angel Miniature on the Behind-Ear Neck Edge
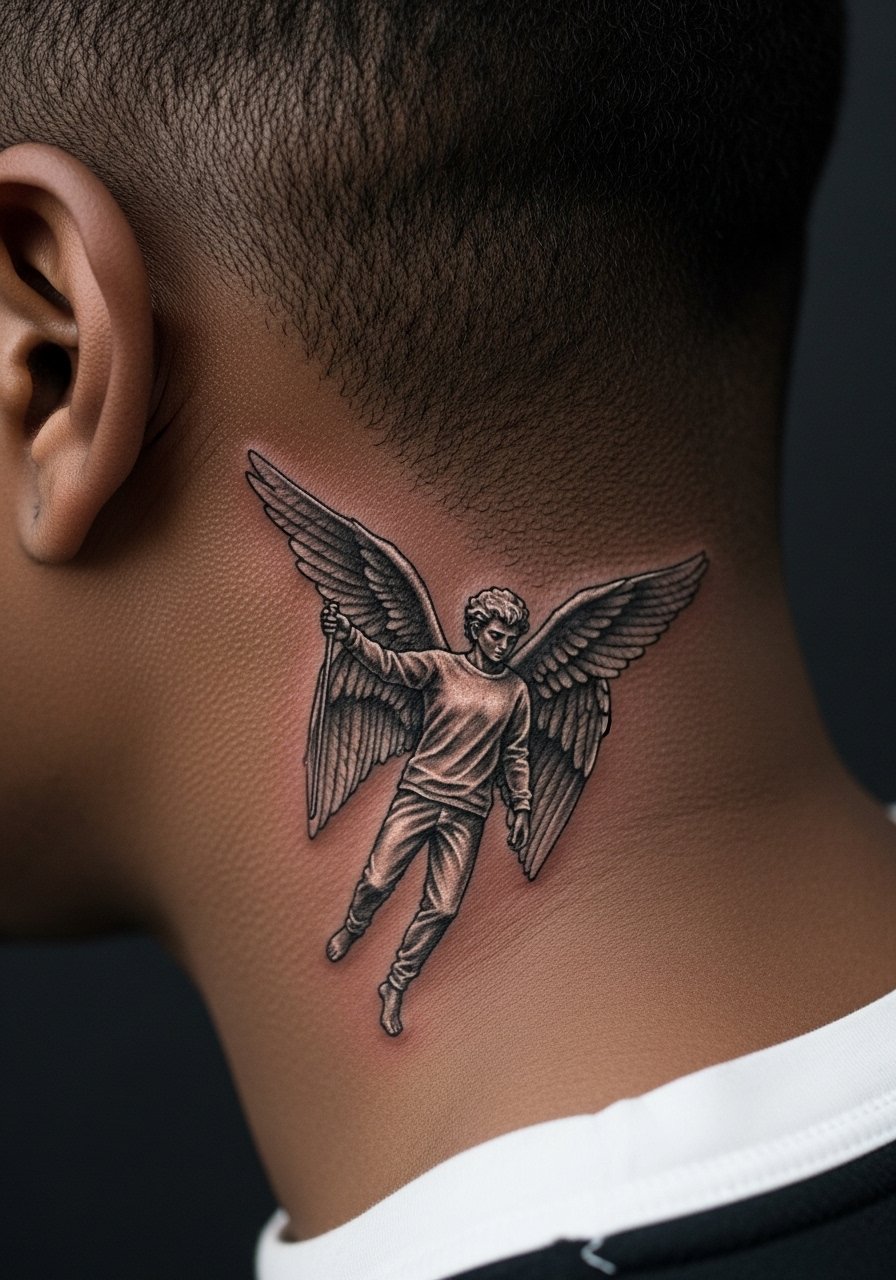
Tiny micro-realism works behind the ear when simplified. Tell your artist to prioritize a single directional light source and one clear contrast edge so the face reads at arm's length. Avoid asking for hair-strand-level detail at one inch. Healing here is sensitive because of hair oil and pillow contact. The session time is short but require careful aftercare. This placement often looks best in black and gray rather than color. If you travel for a guest spot, ask how the artist handles sanitation for behind-ear work and whether they recommend an occlusive for the first night.
13. Micro-Realism Fallen Angel on the Ankle
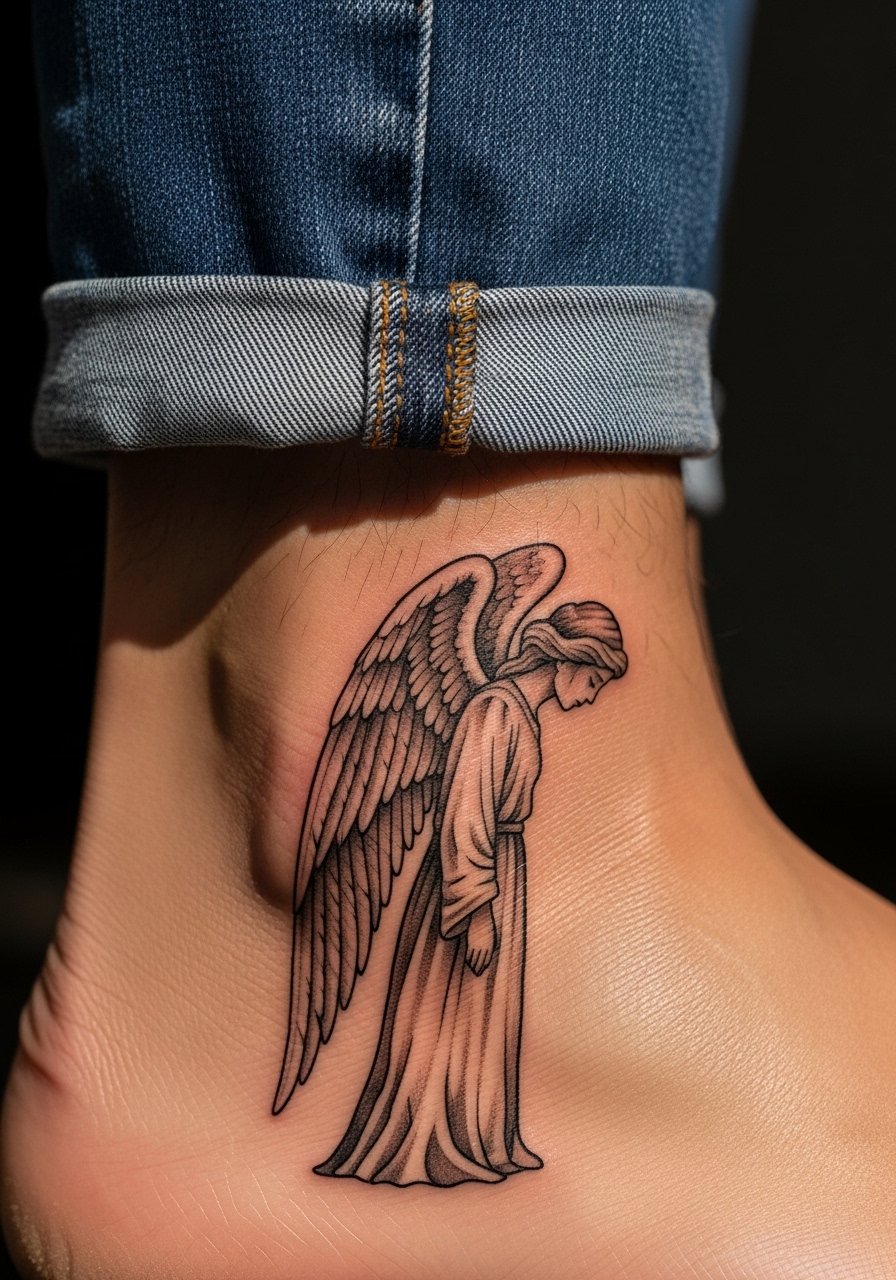
Ankle micro-realism reads intimate when scaled to the bone contours. The downside is seasonal irritation from socks and shoes. Ask for slightly bolder contour in the tiny profile so it survives shoes and straps. Typical session time is 45 to 75 minutes. For showing the piece this summer pair it with cuffed ankle jeans or a delicate ankle strap sandal. For the appointment wear loose joggers or shorts you can pull up without compressing the area.
14. Small Neo-Trad Fallen Angel Chest Accent Near the Sternum
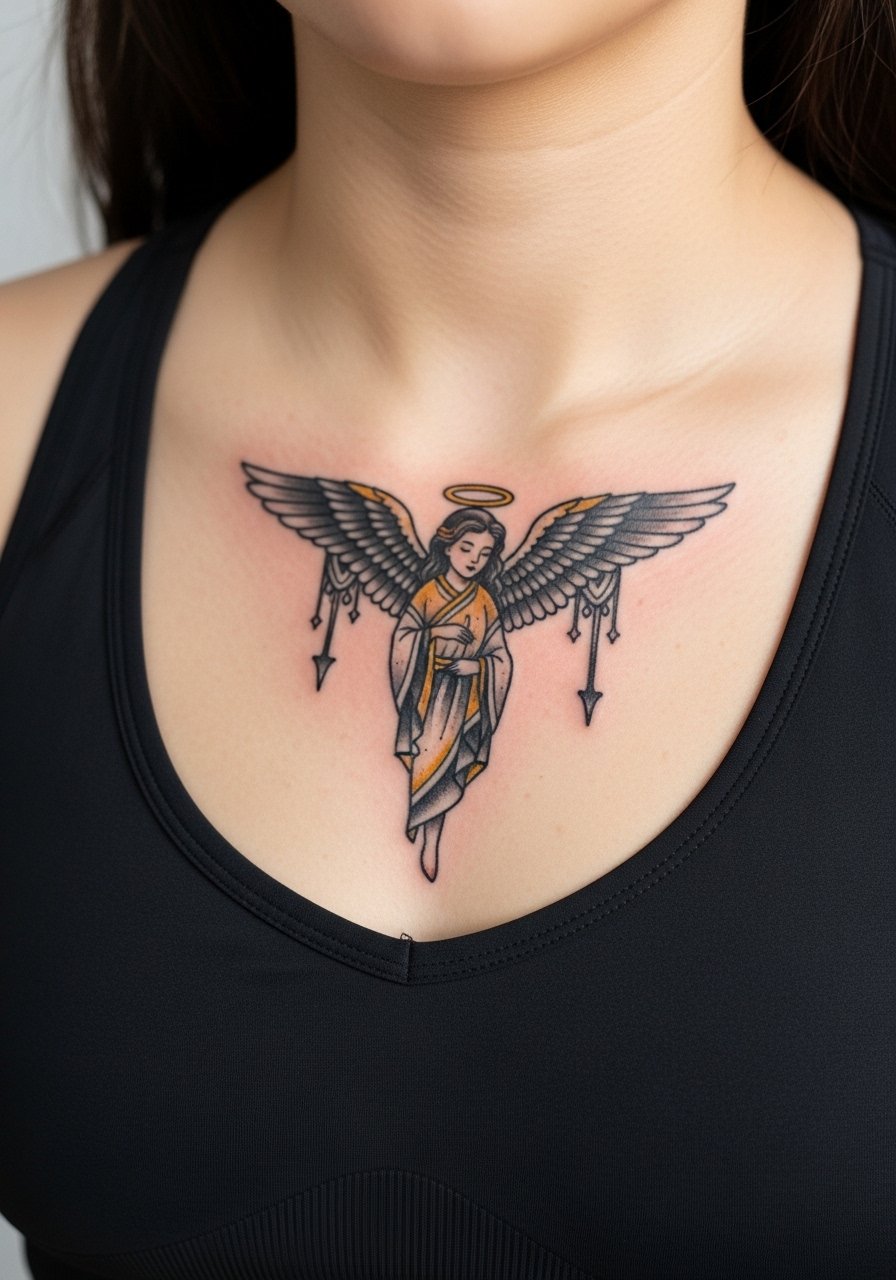
A tiny sternum accent can feel dramatic while remaining coverable. The sternum is tender so session pain can spike. Ask for a compact composition with strong anchor shapes under the wings so the piece reads when partially covered by clothing. The typical session is 45 to 90 minutes. The common mistake is extending the design too far laterally which makes clothing rub more during healing. Wear a fitted sports bra to the appointment so the artist can access the center line without excess pulling.
15. Watercolor Fallen Angel Accent on the Outer Thigh

Outer thigh gives room for soft watercolor without constant friction. Tell your artist you want diluted color pools and a stronger dark anchor to preserve shape. The biggest mistake is asking for intense saturation in a delicate watercolor piece that will age by fading the washes. Sessions run one to two hours depending on color layering. For styling, high-waisted denim shorts or an A line mini skirt frames the area in summer photos. During the appointment wear loose shorts so the artist can position your leg comfortably.
16. Tiny Fallen Angel Lower Back Accent
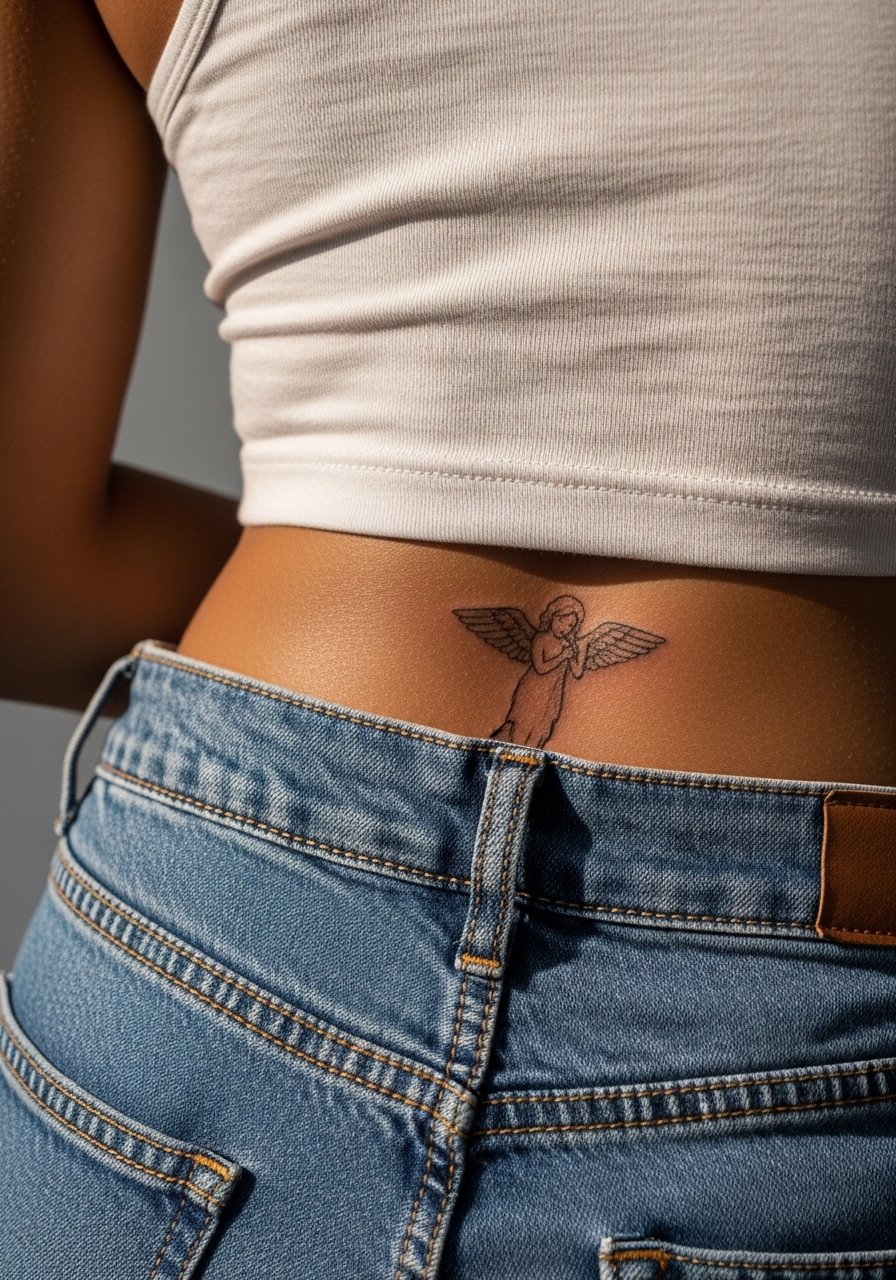
Lower back placement keeps the piece private and lets you scale up later if you want to expand. Request a balanced silhouette with open negative space along the spine so the design does not compress as skin shifts. The session is usually brief and lower back tends to heal cleanly when you avoid tight waistbands during the first two weeks. The common mistake is choosing a design that reaches into areas where clothing rubs nightly. Bring pants with a soft, low waistband for the ride home.
17. Delicate Fallen Angel on the Inner Bicep
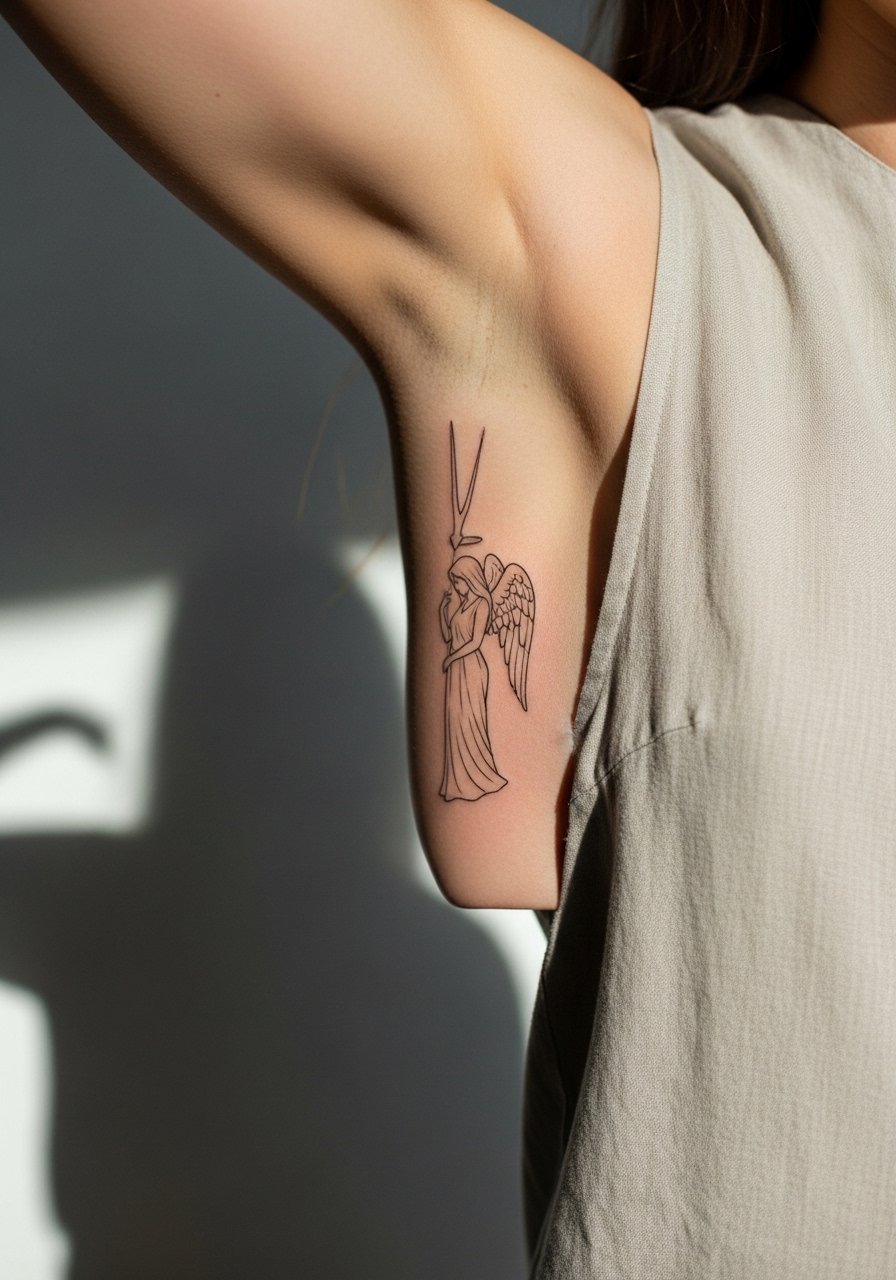
Inner bicep pieces sit nicely when you want a design that can be covered or shown with a raised arm. Ask for slightly stronger anchor lines around the torso so the small wings do not blur into skin texture over time. A common mistake is compressing filigree too close to the arm crease. The session is comfortable for most people with short breaks as needed. For the appointment wear a sleeveless linen tank so the artist can access the inner arm without tugging. Expect a touch-up in year one if you want the filigree to stay crisp.
Frequently Asked Questions
Q: Will a fine line fallen angel on my wrist blur faster than a blackwork collarbone piece?
A: It depends on wear patterns and initial line weight. Wrist tattoos see more friction and UV exposure which makes ultra-fine lines soften sooner. Blackwork on the collarbone sits in lower-friction space so saturation holds longer. Planning slightly thicker anchor lines for wrist pieces and scheduling a touch-up at 12 to 18 months keeps them readable.
Q: For a watercolor fallen angel on the ribs or thigh, should I expect different aftercare?
A: Ribs and thigh can use the same basic cleaning routine but watch friction. Ribs can scab more if clothing rubs, so a loose top or a cropped athletic top for the session helps. Thigh work heals well if you avoid tight waistbands and heavy sweating for the first two weeks. Follow the studio's specific advice rather than a one-size routine.
Q: I have darker skin. Which small fallen angel styles tend to photograph better over time?
A: Bold blackwork and clean silhouettes often maintain contrast on darker tones. Tiny micro-detail can soften into gray patches more quickly, so ask for stronger anchors and open negative space. Also photograph healed work in bright, indirect light for the best detail capture.
Q: Are hand and finger webbing placements worth it if I want longevity?
A: Hand and finger webbing fade faster due to washing and constant use, and they often need annual touch-ups. They are great if you accept maintenance and like the very discreet placement. If longevity without upkeep is a priority, consider inner forearm or collarbone instead.
Q: How do I find a reliable artist or a guest spot without risking cancellations?
A: Use booking platforms that show availability and cancellation policies, search local guest spot listings with the style tag you want, and cross-check recent healed photos in the artist's feed. Asking about their touch-up policy at booking time avoids surprises.
