
Fine line tattoos are everywhere on feeds but the ones that still look crisp after a year are usually the ones planned with placement and longevity in mind. Micro pieces read as wearable accents when the stencil sits flat and the line weight gets room to breathe. Below are 27 micro girl tattoo ideas with practical notes on how they age, what to ask for at consults, and how to dress them up for real life.
1. Fine Line Butterfly on the Wrist
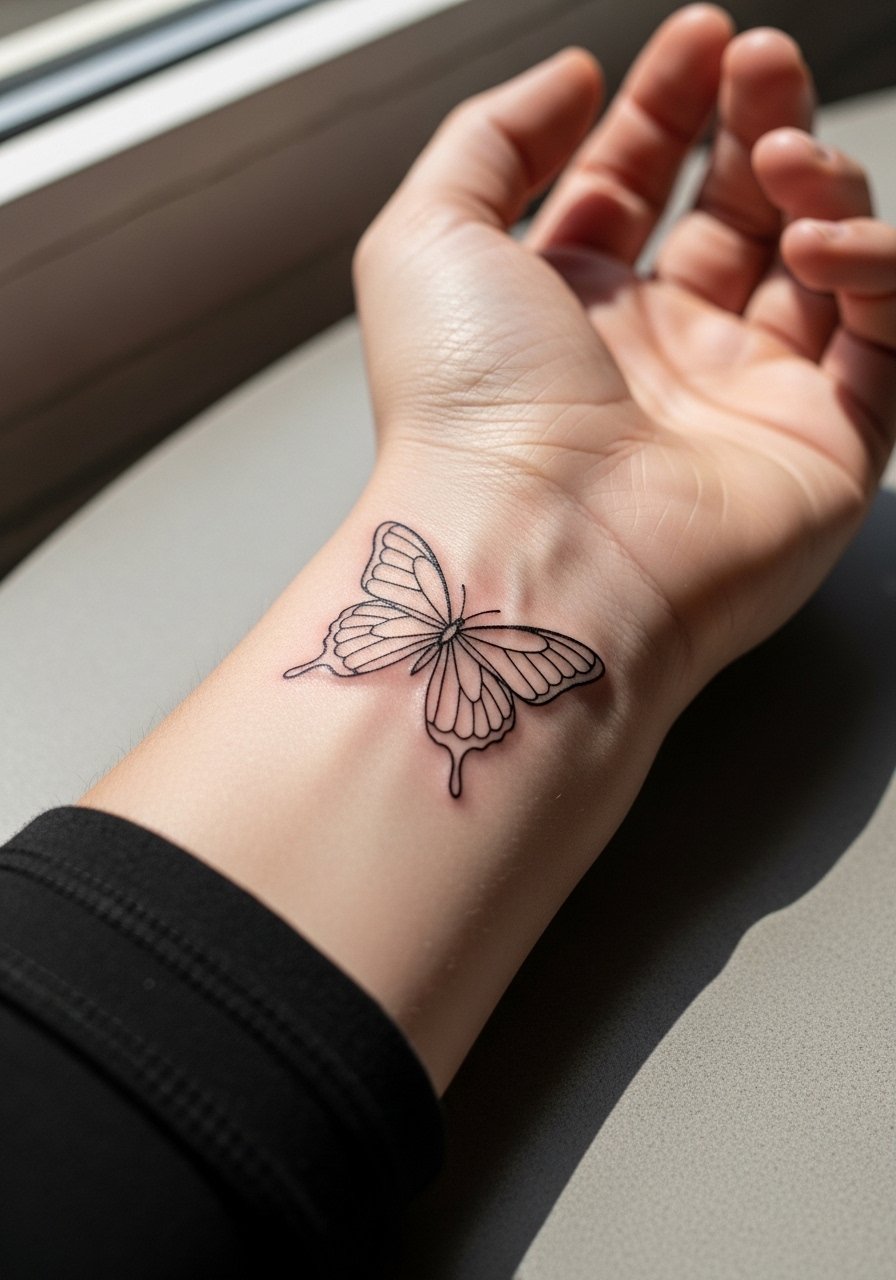
I see this design on wrists more than any other micro motif. The wrist is forgiving for quick sessions and the piece reads well when the artist uses a slightly firmer line rather than a whisper-thin needle. Tell the artist you want a single-needle feel but with slightly heavier outline so the wings keep shape at year two. Fair warning, wrists get constant washing and friction so expect a touch-up sooner than a forearm piece. For the session wear a sleeveless top or a loose tee and after you show it off stack a thin gold chain bracelet on the opposite wrist to balance the composition.
2. Minimalist Heart Outline Behind the Ear
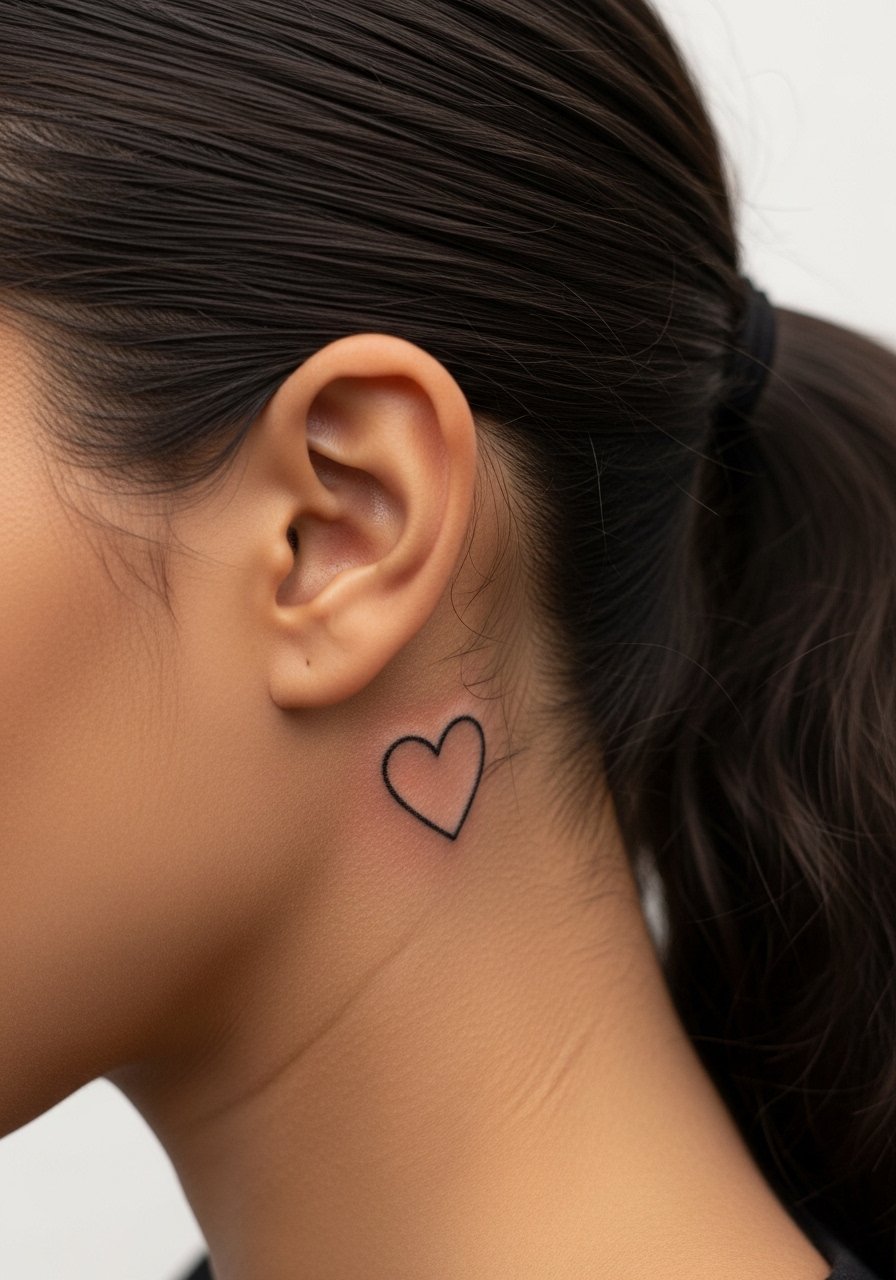
Behind-ear tattoos are a classic for subtlety. The area heals fast because it moves less, but the caveat is hair and headphones can rub the site during the first week. During consults specify a 1 cm outline with a single pass and ask for a slightly wider gap between line curves so the heart does not merge over time. Session prep means hair up and no earrings that could snag. For showing it off try a high ponytail and a pair of drop earrings that draw attention to the neck without covering the ink.
3. Micro Planet Above the Collarbone
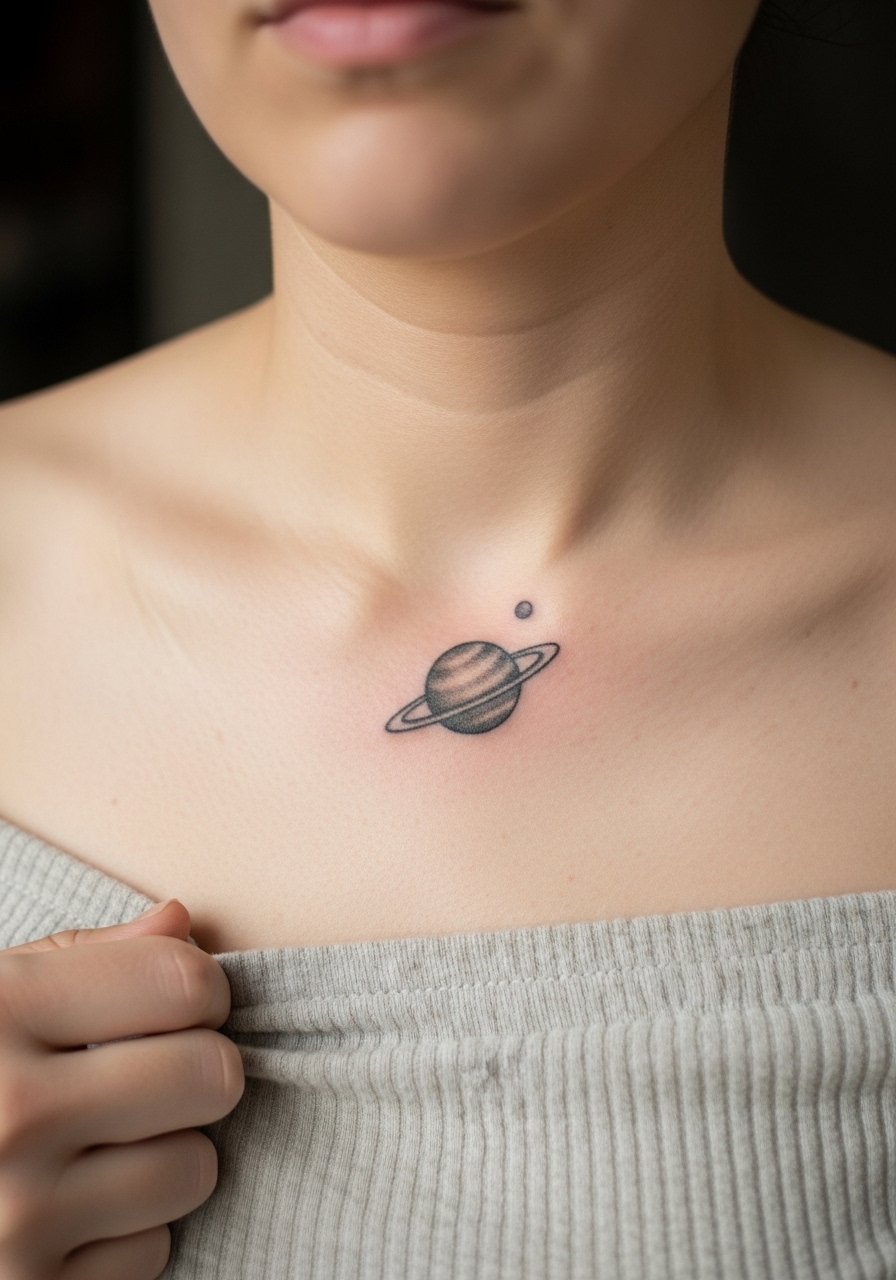
Collarbone placements read like jewelry when the design sits just above the bone. Micro-realism shading gives the planet depth but avoid heavy gray saturation that can age into a gray blob on oily skin. Ask the artist to keep shading stippled and low contrast so highlights remain over time. Session wear should be a strapless or off-shoulder top so the artist can access the area cleanly. Frame it at night with an off shoulder top or a long pendant that sits below the design.
4. Floral Sprig on the Ankle
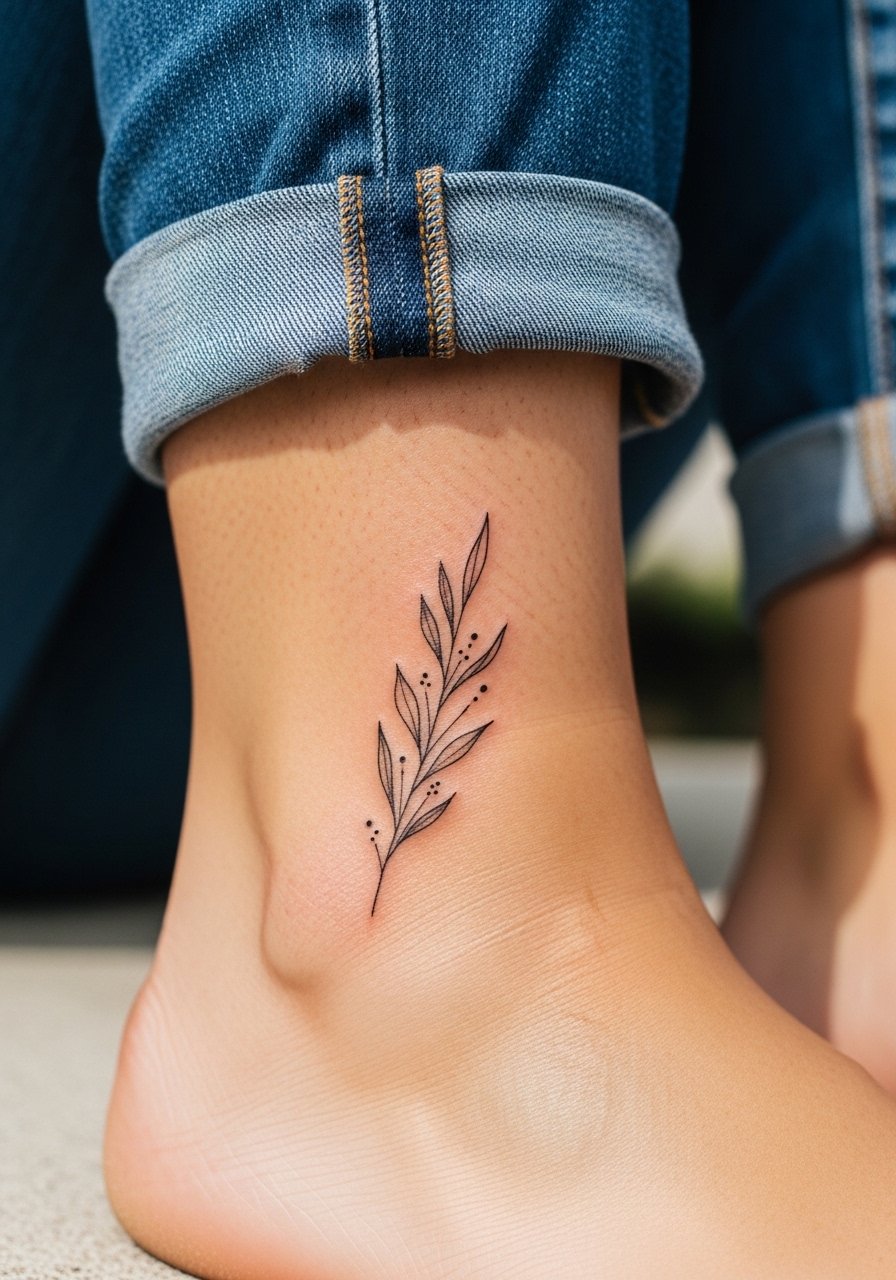
Ankle florals have a seasonal peak for sandal weather. The challenge is friction from shoes and socks while healing. Tell your artist you want a 2 cm sprig with open negative space in the leaves so the design has room to breathe and resists early blur. Keep session wear loose pants or a skirt so the area can be exposed without tugging. For showing it off, pair the tattoo with strappy sandals and a gold ankle chain for a summer editorial vibe.
5. Single Line Wave on the Finger
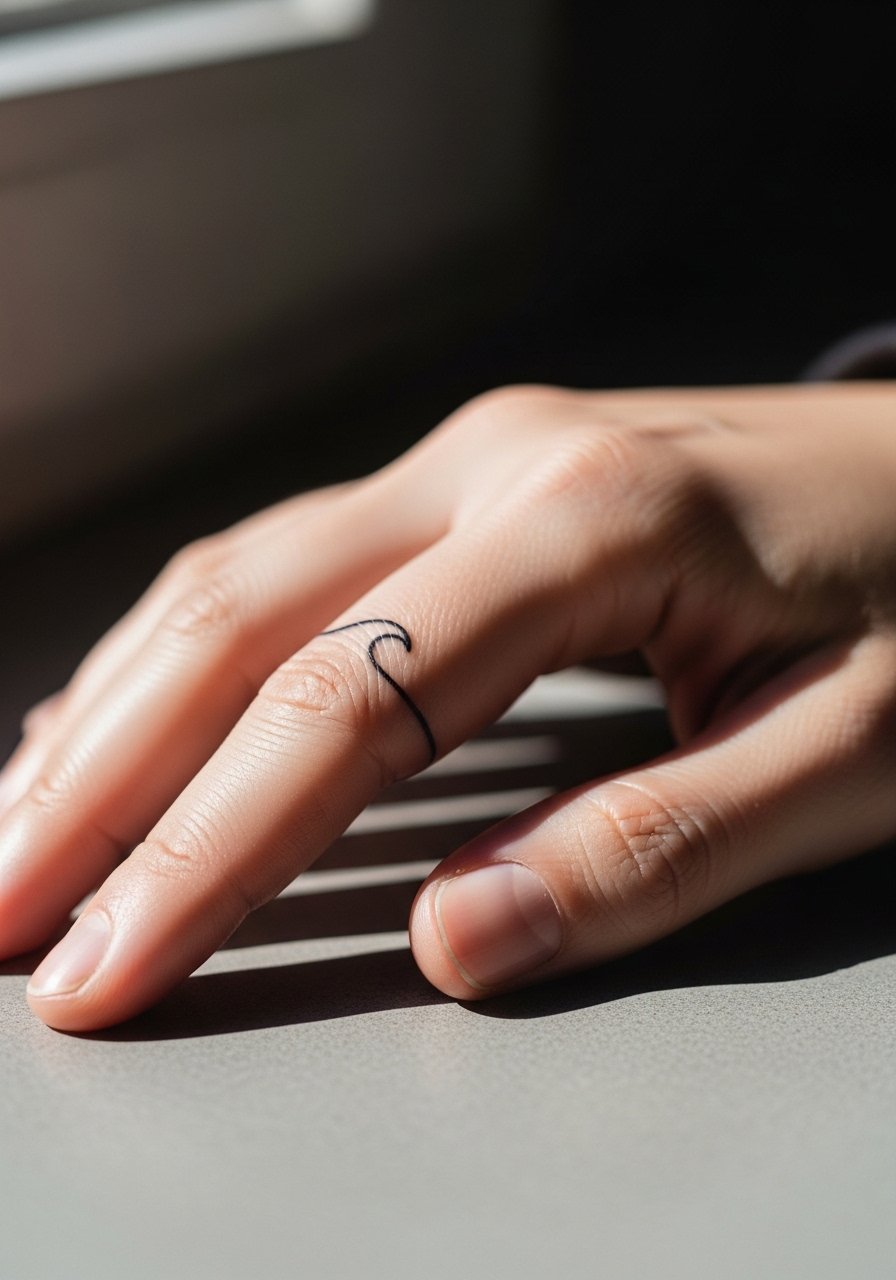
Finger placements are notorious for fading and touch-ups. Expect this one to need refreshes around the 12 to 18 month mark because hands get constant washing and exposure. Ask for a slightly bolder single-line wave and discuss touch-up policies in the consult. The session is short and the pain is sharp but quick. Keep the hand dry while it heals and consider pairing the piece with a minimalist ring set after full healing.
6. Tiny Star Cluster on the Inner Forearm
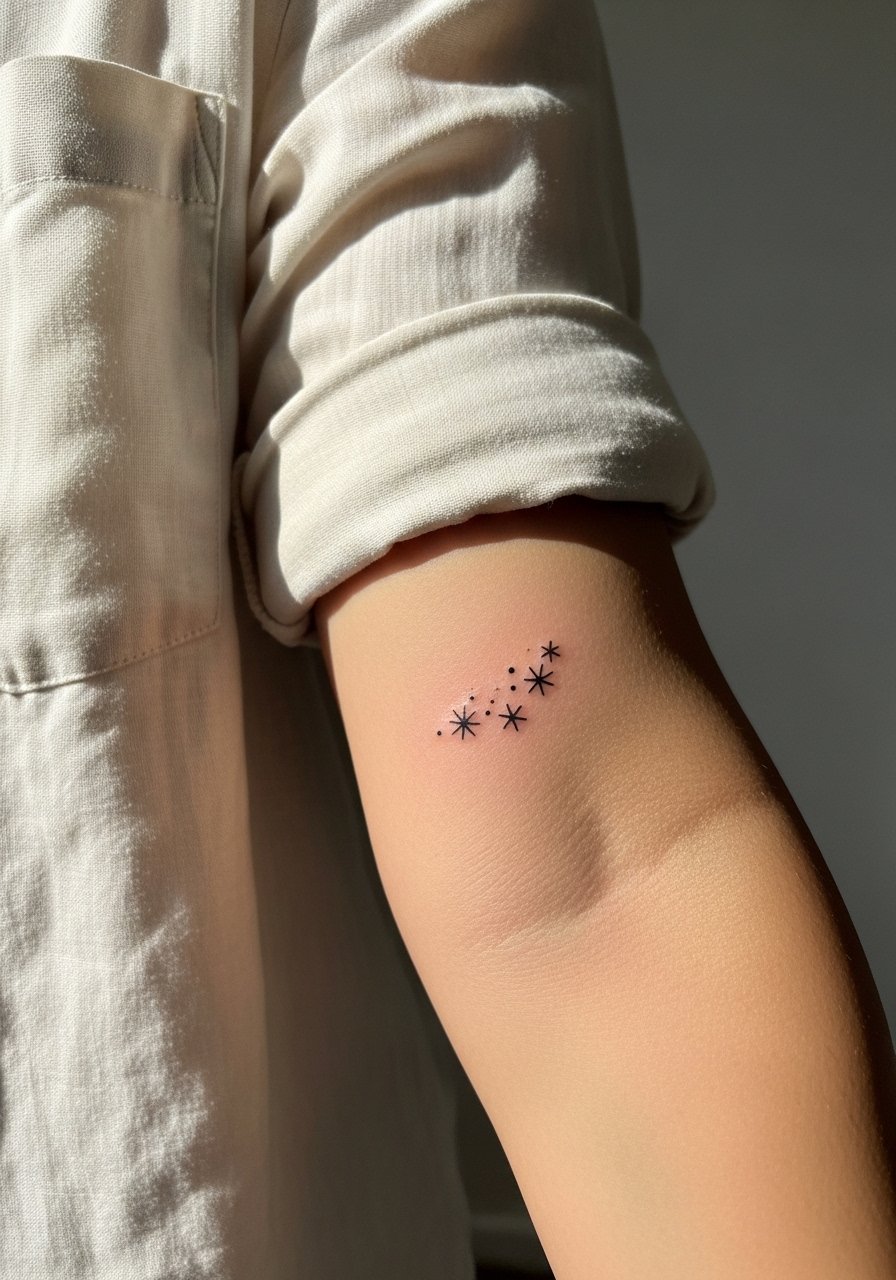
Inner forearm is one of the most forgiving spots for micro clusters. Stars that are spaced with small gaps age far better than densely packed dots. When you consult, ask for dot spacing that avoids dense stippling near one another and specify you want the option to build later into a sleeve if desired. Session time is short and pain is low. Pair this look with a cream linen button-down rolled at the sleeve so the cluster reads like a subtle constellation when you move.
Studio Day Picks
The wrist and finger pieces above heal differently from larger forearm work, so a few small things smooth the session and the first week.
-
Tea tree tattoo balm. A non-greasy balm some people use for finger and ankle tattoos to avoid the white residue that can mask fine lines while still keeping the skin comfortable.
-
Australian tattoo aftercare spray. A light spray works well for behind-ear and collarbone spots where rubbing from clothing is minimal and you want a non-sticky option.
-
Rice bran salve. Lighter than heavier ointments, people with fine line wrist work report it absorbs faster and feels less clogging as the skin settles.
-
Indie dotwork oil. Designed for dot work and tiny clusters, the oil absorbs quickly and can reduce visible residue on darker skin tones during the healing window.
-
Hustle Butter healing balm. A thinner alternative to petroleum based ointments that many collectors prefer for fine line areas because it moisturizes without excessive build up.
7. Outline Moon Phase on the Ribcage
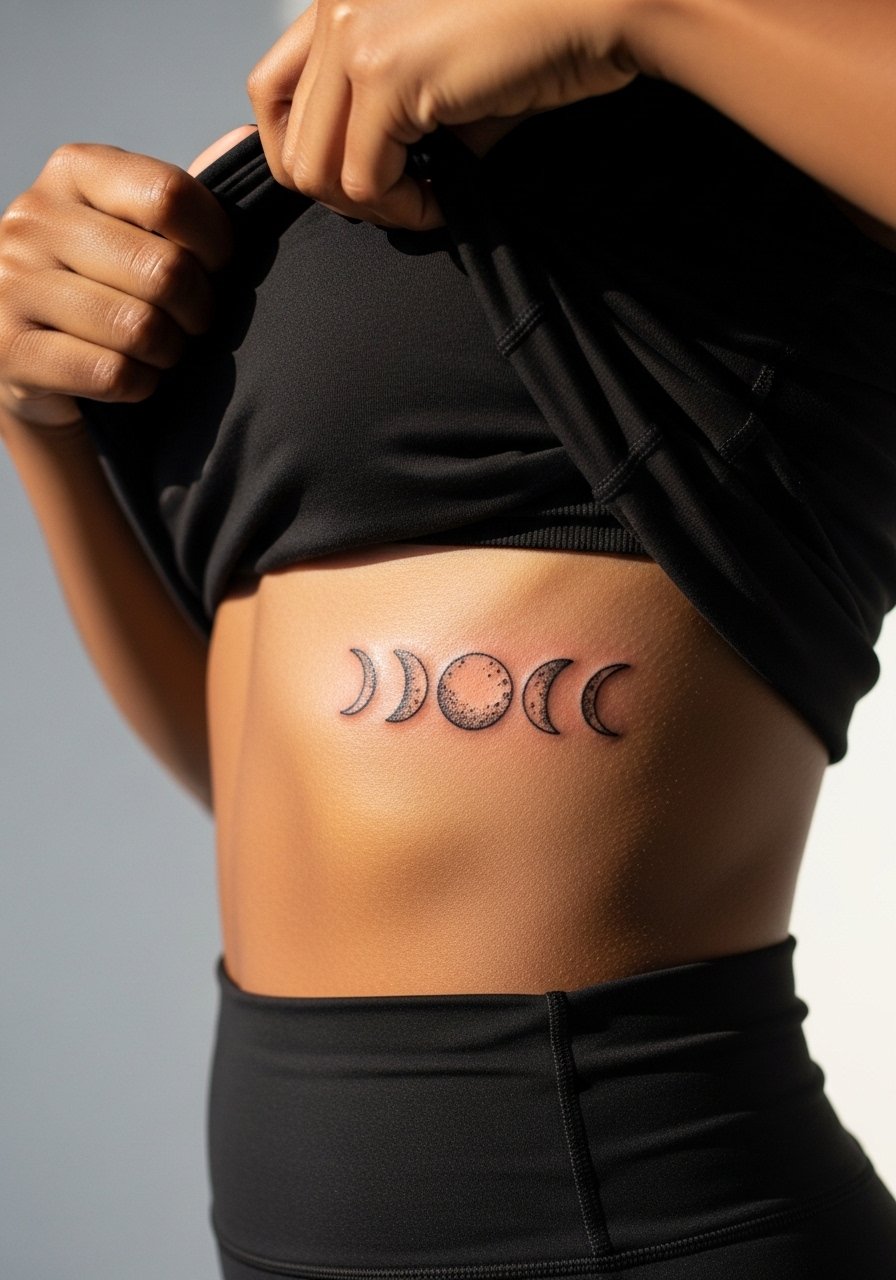
Fair warning, ribs are a high sensitivity area and sessions feel long for many people. Fine line moon phases look elegant there but skin stretch and breathing motion can make very thin lines merge over a few years. Artists are split on whether to use Saniderm type barriers or dry healing for ribs. One camp prefers protective film to limit sweat and friction, the other argues breathable dry methods avoid maceration. Ask where your chosen studio stands and request slightly more space between the crescents so the set keeps clarity at year three. Wear a cropped top for access and expect to book a touch-up if you want the lines to remain crisp.
8. Micro Cherry Blossom on the Shoulder
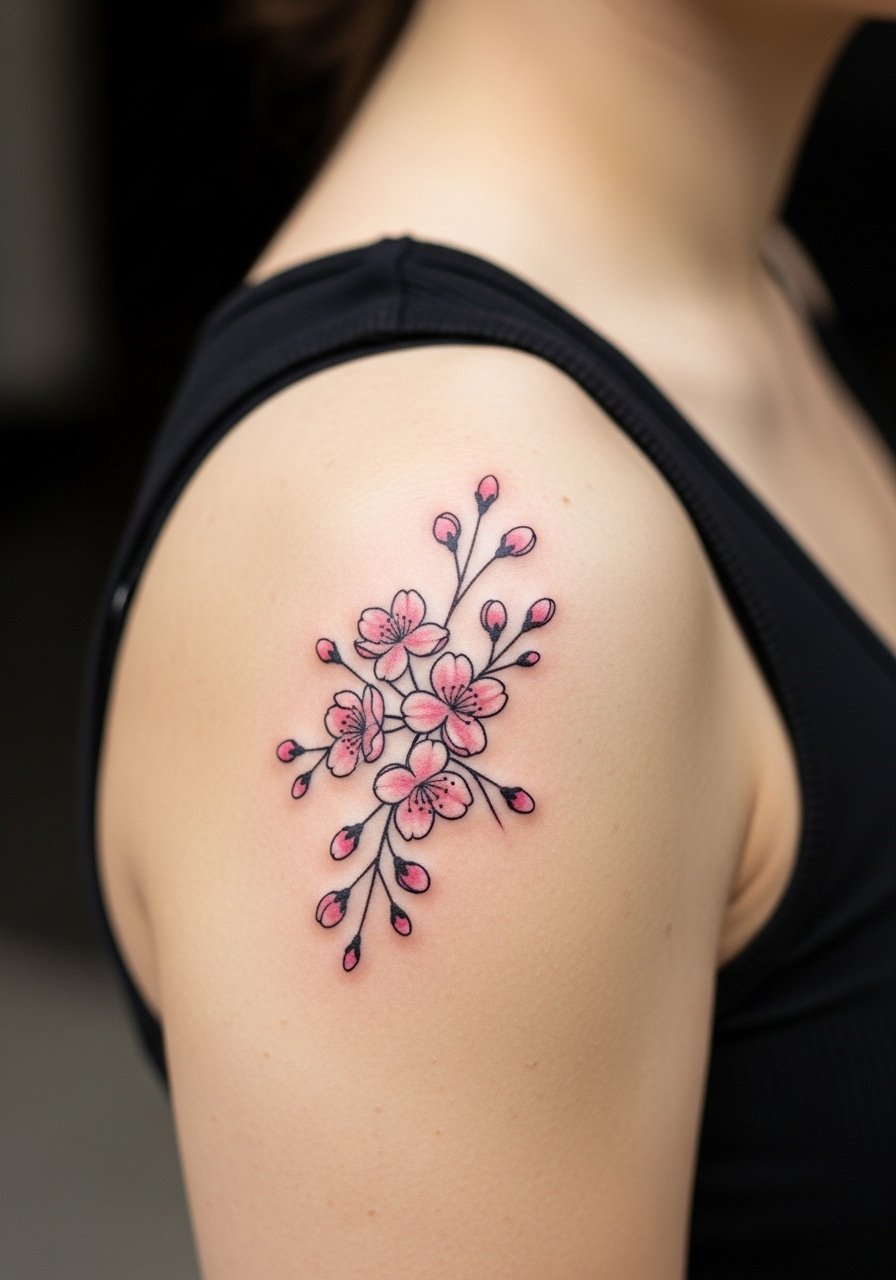
Shoulder skin moves but not like the ankle or hand, which makes it ideal for painterly botanicals in micro scale. Keep the petal edges open with small gaps so the blossoms do not fill in over time. During the consult ask for soft stipple shading rather than solid fill if you want subtle color. For the session wear a button-down or tank to give the artist access without tugging the area. Show it off with a sleeveless tank or wrap top in olive to avoid fabric rub while it heals.
9. Simple Arrow on the Calf
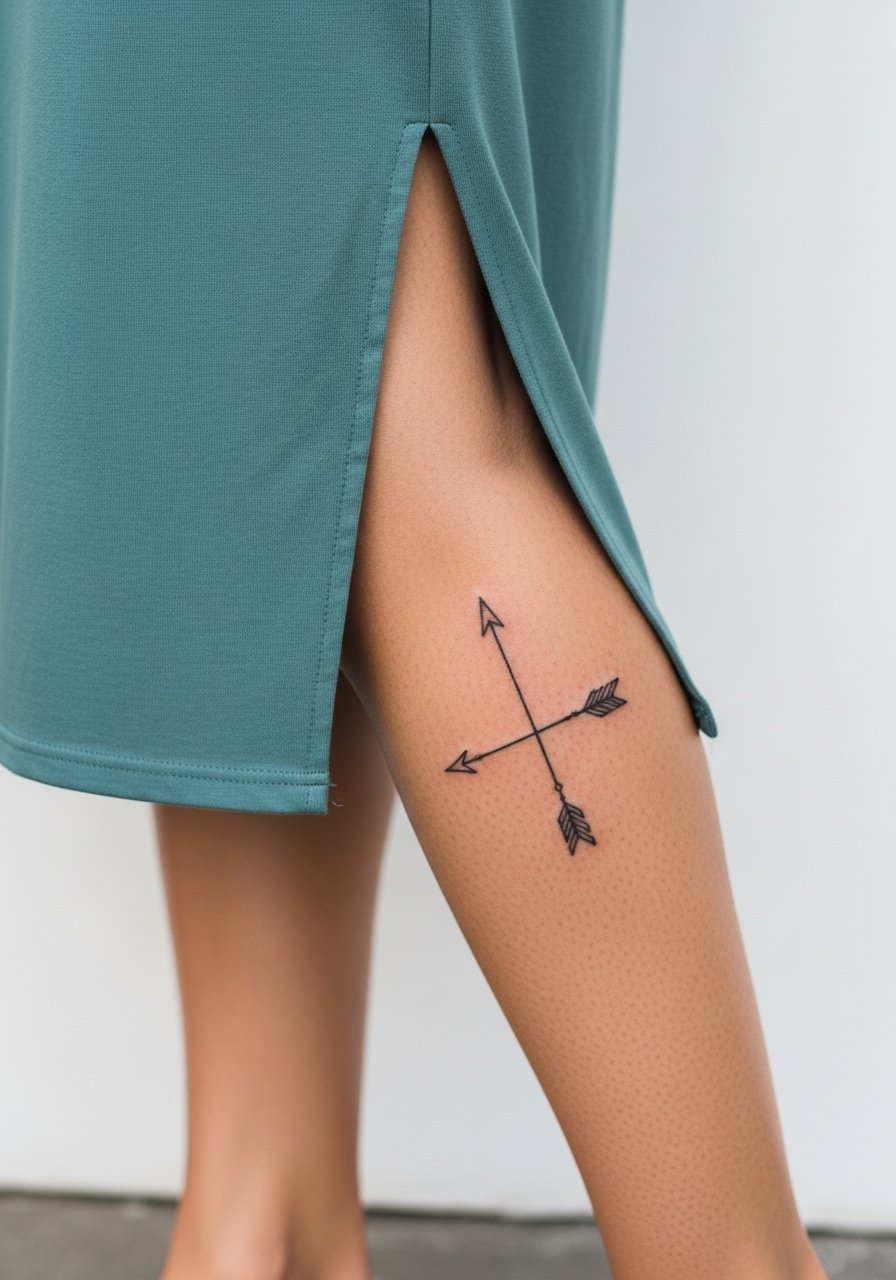
Calf tattoos sit flat and handle movement well which makes them resilient. A simple arrow done with clean linework stands up to occasional stretching from running better than overly intricate geometric fills. Ask the artist to keep line weight consistent and to avoid clustering thin cross-hatching around the shaft which can merge over time. Session wear should be shorts or a dress you can move in. For styling, roll boot cut jeans or choose a midi dress with a side slit to let the arrow peek out during warmer months.
10. Dotted Constellation on the Neck
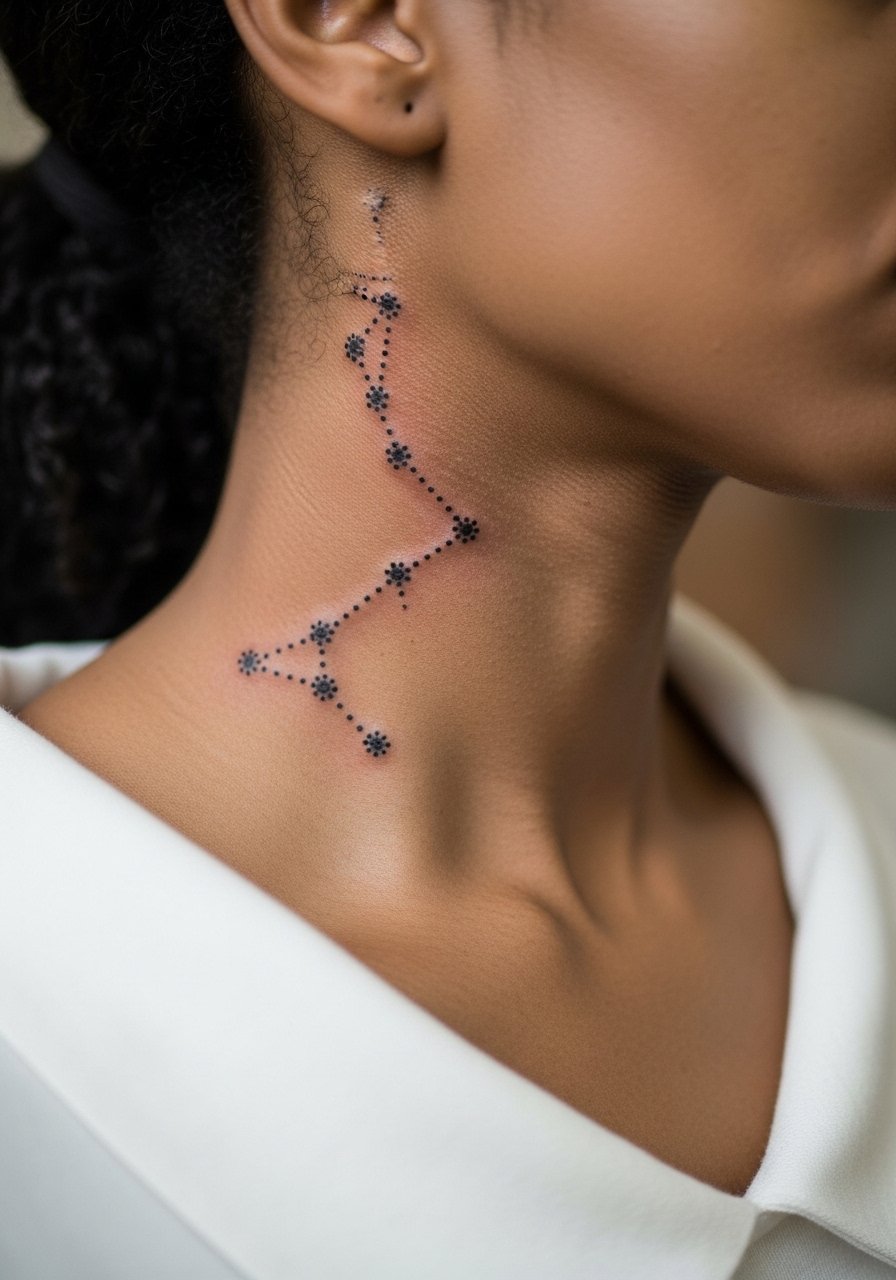
Neck dots look striking when hair is up, but they are more visible in professional settings. Dot work there needs careful spacing because the neck skin is thin and lines can spread. Discuss scaling during consult and insist on steady dot distances rather than clustered speckling. Wear a wide-neck top for the session so the artist has access and consider pairing it with an alternative choker like a velvet ribbon when you want the design framed.
11. Framed Heart on the Inner Thigh
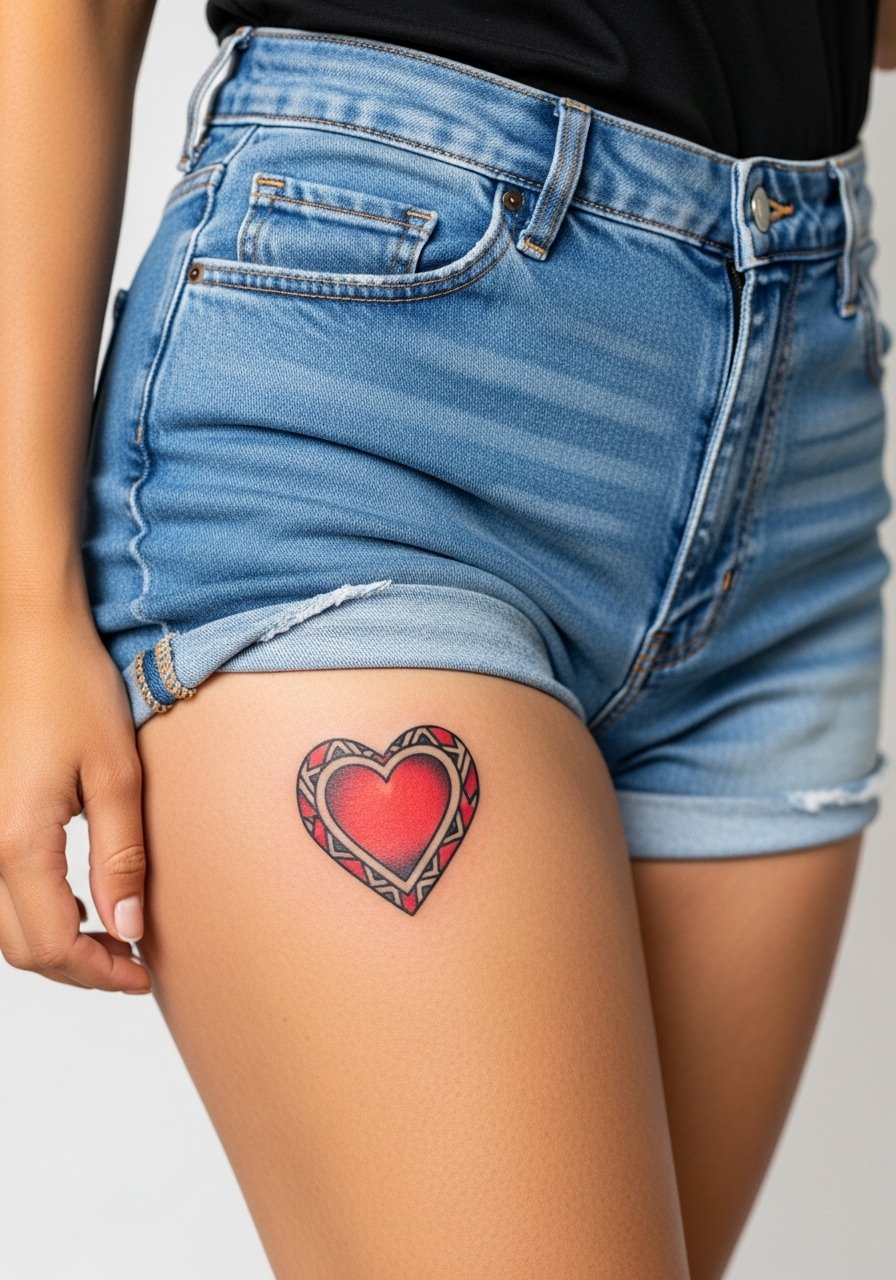
Inner thigh pieces are private show-offs and they heal differently because the area is prone to friction from walking and snug clothing. A framed heart with a clear border will hold shape better than tiny internal details. For the session, wear loose shorts and be ready to adjust underwear for access. If you want to show it, high-waisted shorts or skirts work best and they pair nicely with a flowy midi skirt that can shift to reveal the piece.
12. Tiny Bee on the Collarbone
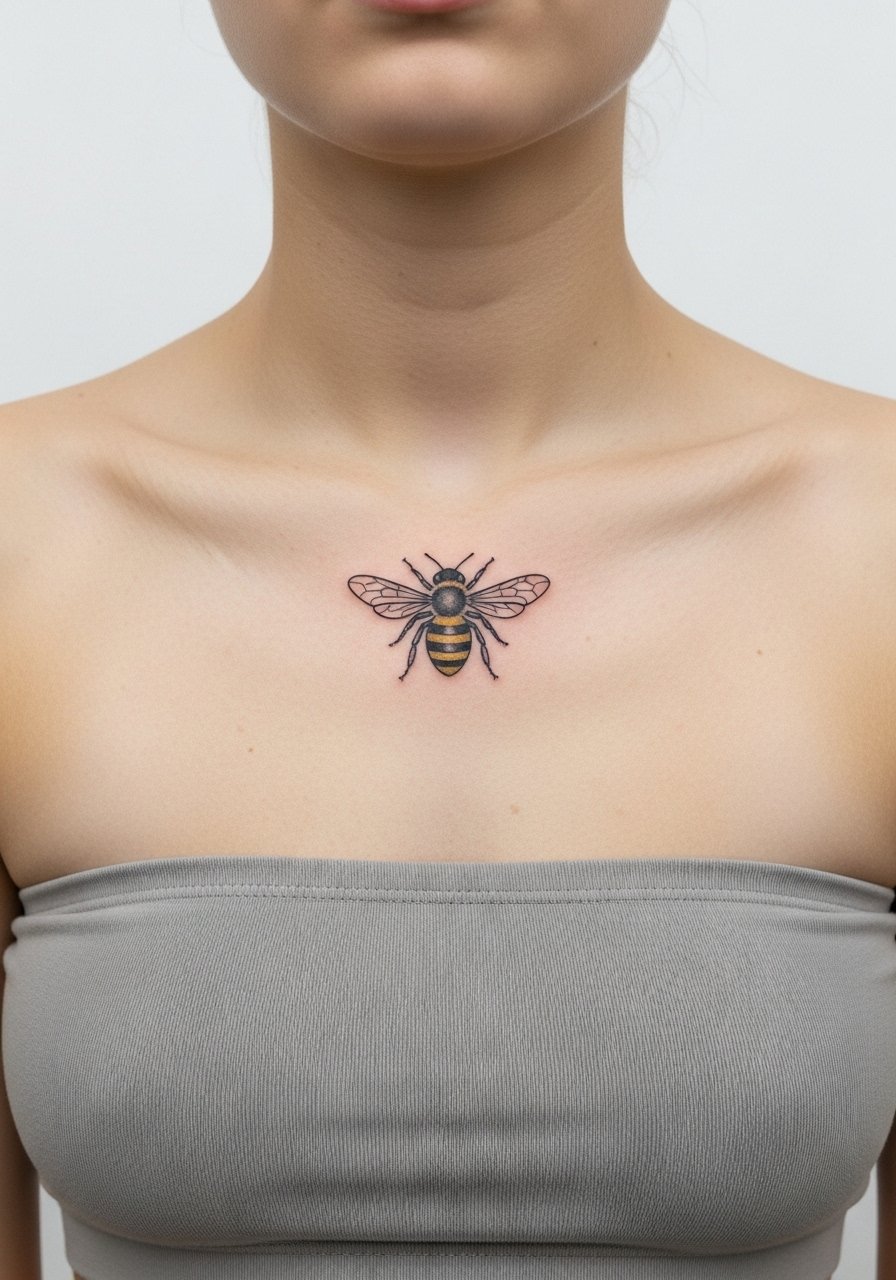
Bees are compact but full of character when placed on the clavicle. The skin there accepts small color accents but keep yellow subtle to avoid early desaturation. Ask for a fine line outline with low contrast fill and request the artist to avoid dense dot shading near the wing joints to prevent thickening. Session prep means a strapless or wide-neck top. A long pendant necklace can frame the bee without overlapping the ink.
13. Single Needle Lotus on the Wrist
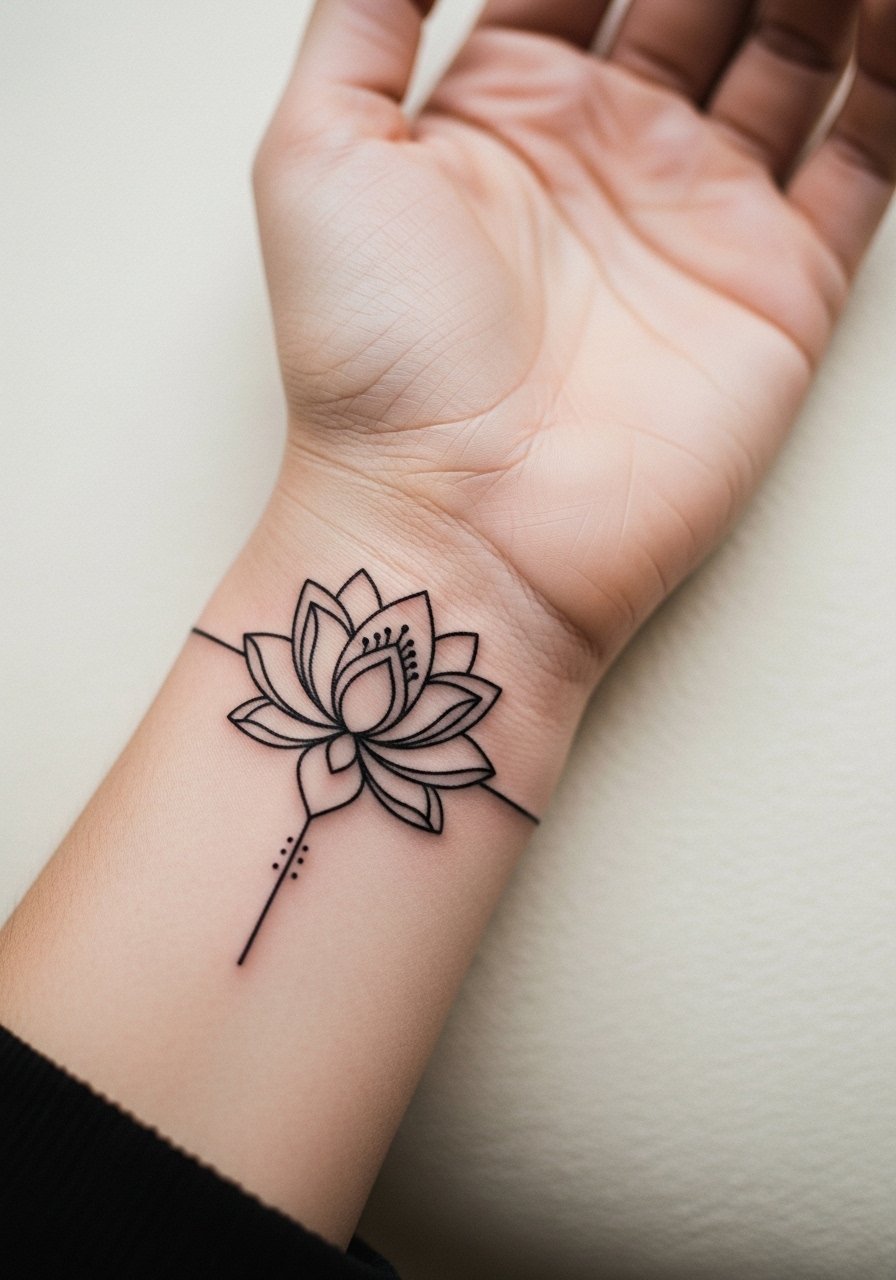
I've seen single-needle lotus pieces wear well when the lines are given breathing room. The biggest mistake is asking for lace-like filigree without spacing. For wrists, request a touch more line weight and slightly wider petal spacing so the lotus reads at year two. The session is short and the pain is manageable. Pair this with a thin chain pendant necklace and stacked bracelets opposite the wrist to create balance.
14. Script Word Near the Collarbone
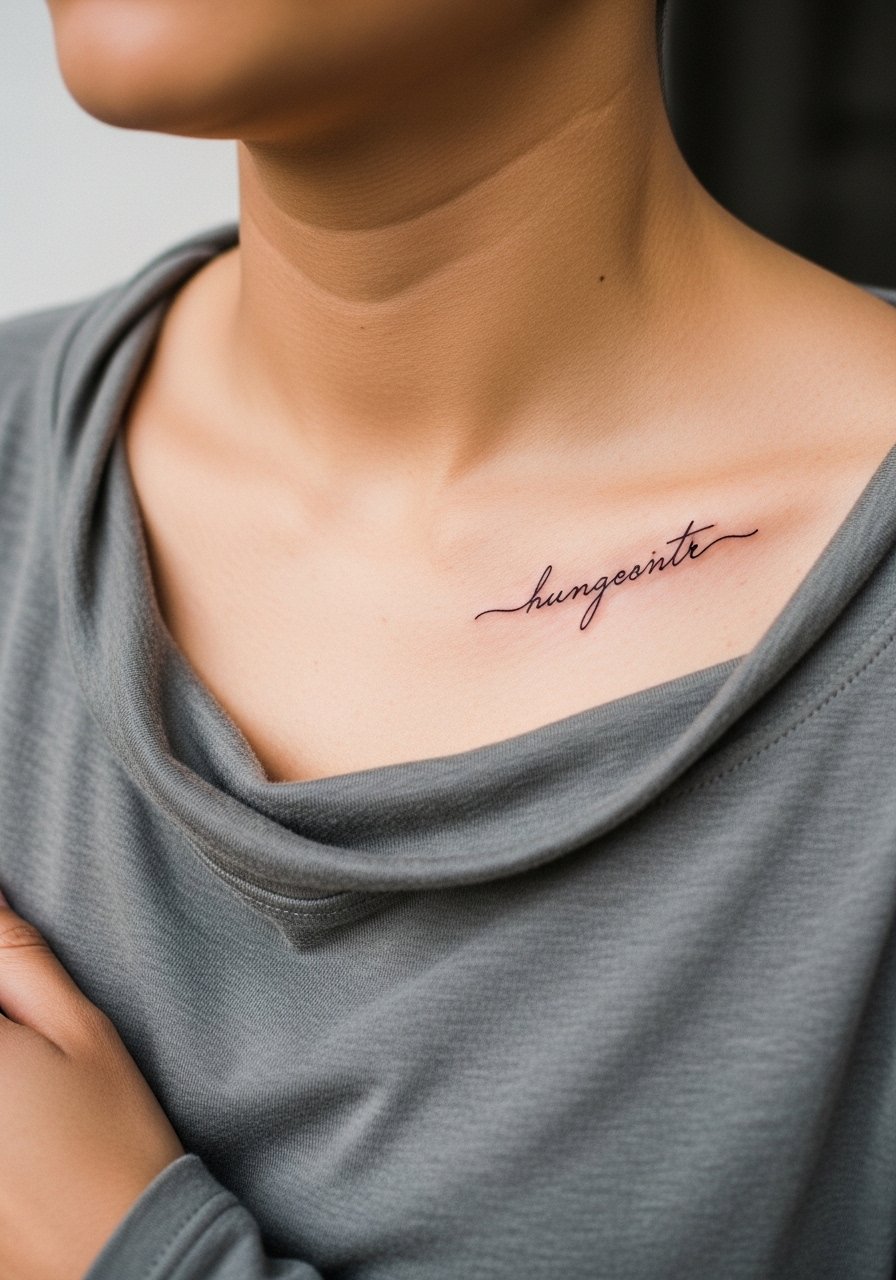
Lettering near the collarbone looks elegant but it ages depending on font density. Tiny cursive with ultra-thin strokes will soften quickly. Ask for slightly increased counterspace inside the letters and confirm exact placement with a stencil while upright so gravity does not skew how it sits. Session wear should be a wide-neck shirt or strapless bralette for straightforward access. Add a strappy bralette during the session for easy exposure and modest comfort.
15. Micro Realism Eye on the Upper Arm
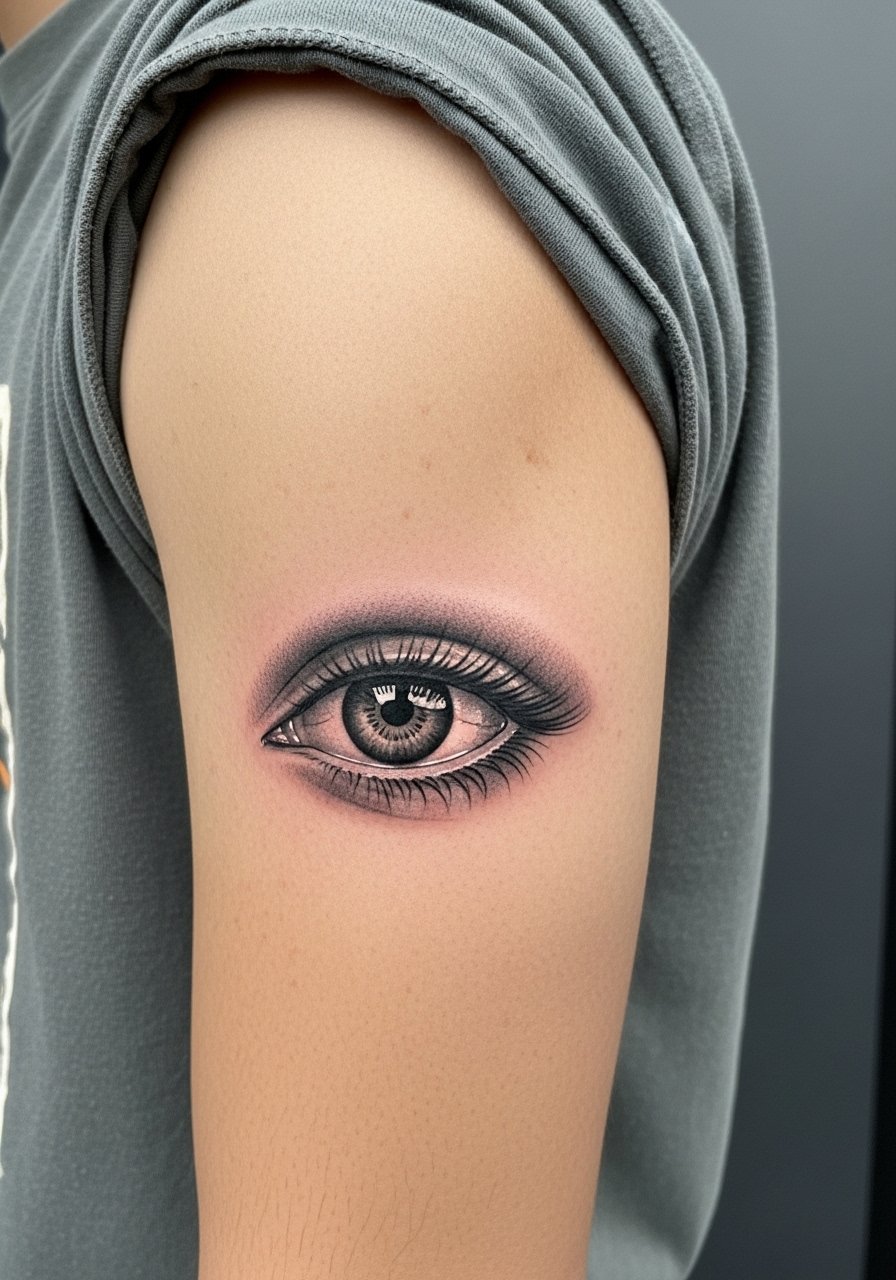
Upper arm skin is a reliable spot for micro-realism because it does not flex as much as ribs or hands. A micro eye reads well when the pupil has small highlights and the lashes avoid heavy saturation. Tell the artist you want subtle contrast rather than heavy black fill. Session wear is a short-sleeve loose shirt you can roll up. If you want to frame it for casual wear, try a linen button-down with sleeves rolled so the piece peeks out editorially.
16. Minimalist Crescent Behind the Knee
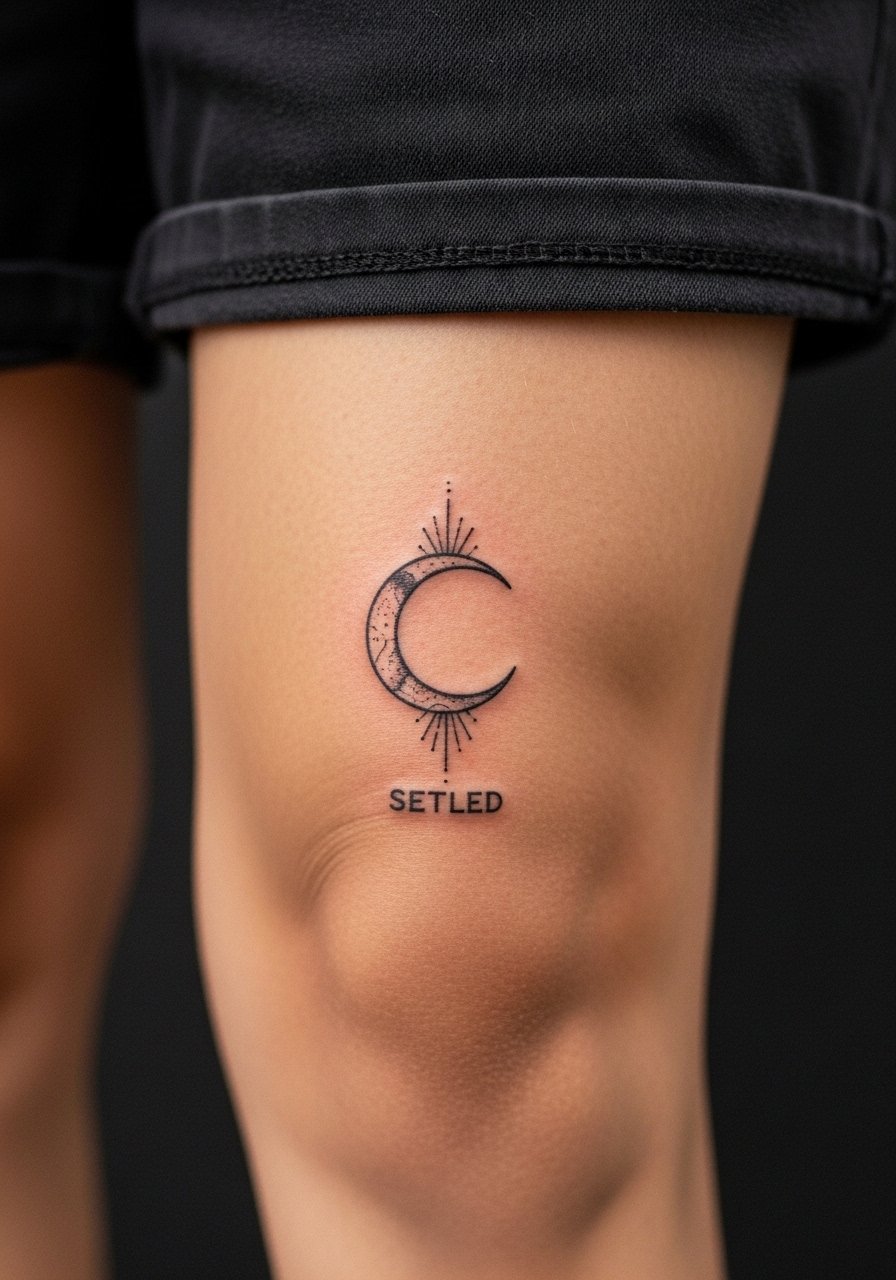
The back of the knee is a mobile spot and not the easiest to heal because bending affects scabbing. Minimalist crescents work if you accept potential touch-ups. In consults ask for a thicker outline than you might normally request so the curve keeps form after movement. Wear shorts or loose pants for the session so the area is accessible without tight fabric pressing on healing skin.
17. Micro Flower Cluster on the Shoulder Blade
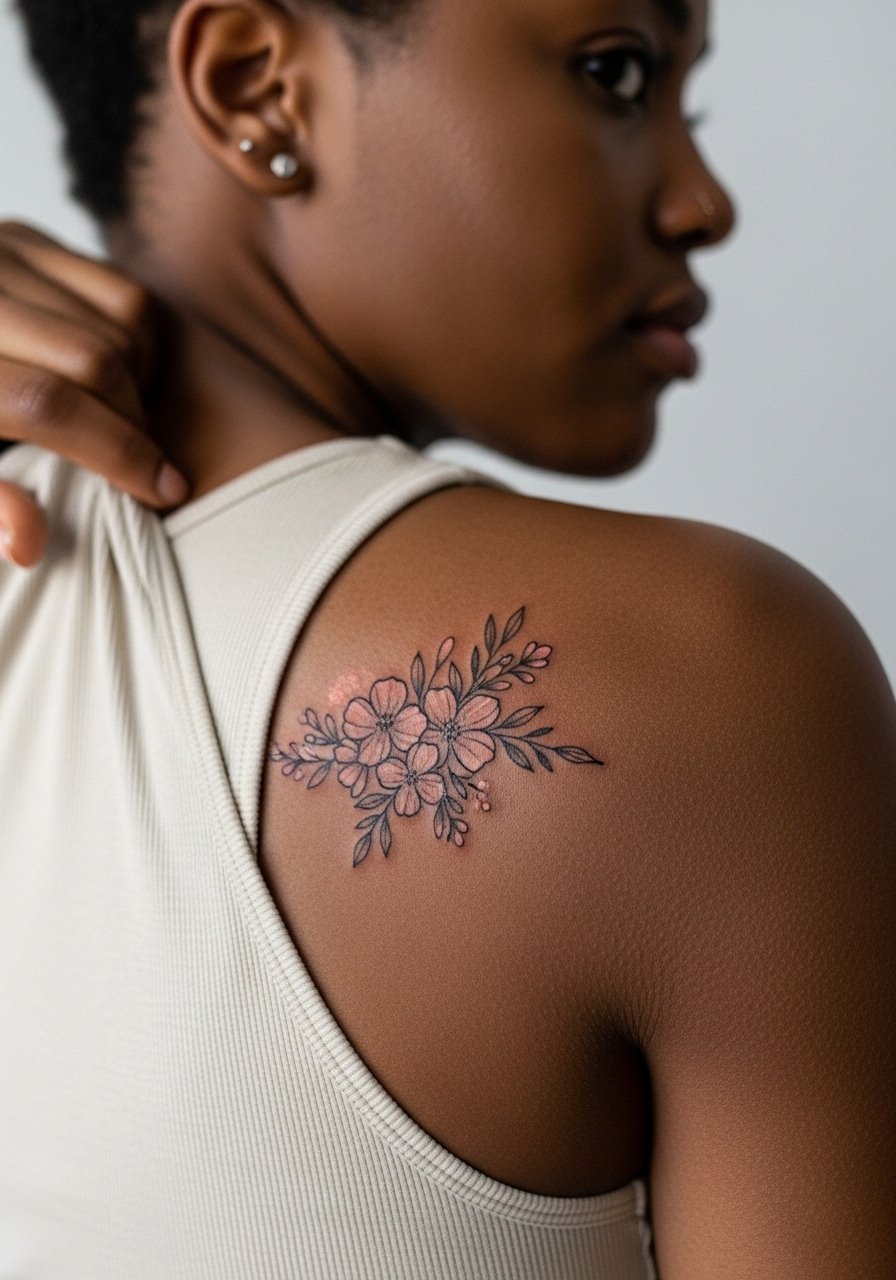
Shoulder blade placements are low pain and show well with dresses or back-baring tops. The risk with fine petals is that dense shading on dark skin can flatten. Request negative space between buds and a mix of stipple shading to keep texture. For the session wear a loose tank top you can pull aside. A wrap top will avoid rubbing while you heal and frames the area when you want to show it.
18. Micro Compass on the Side of the Thumb
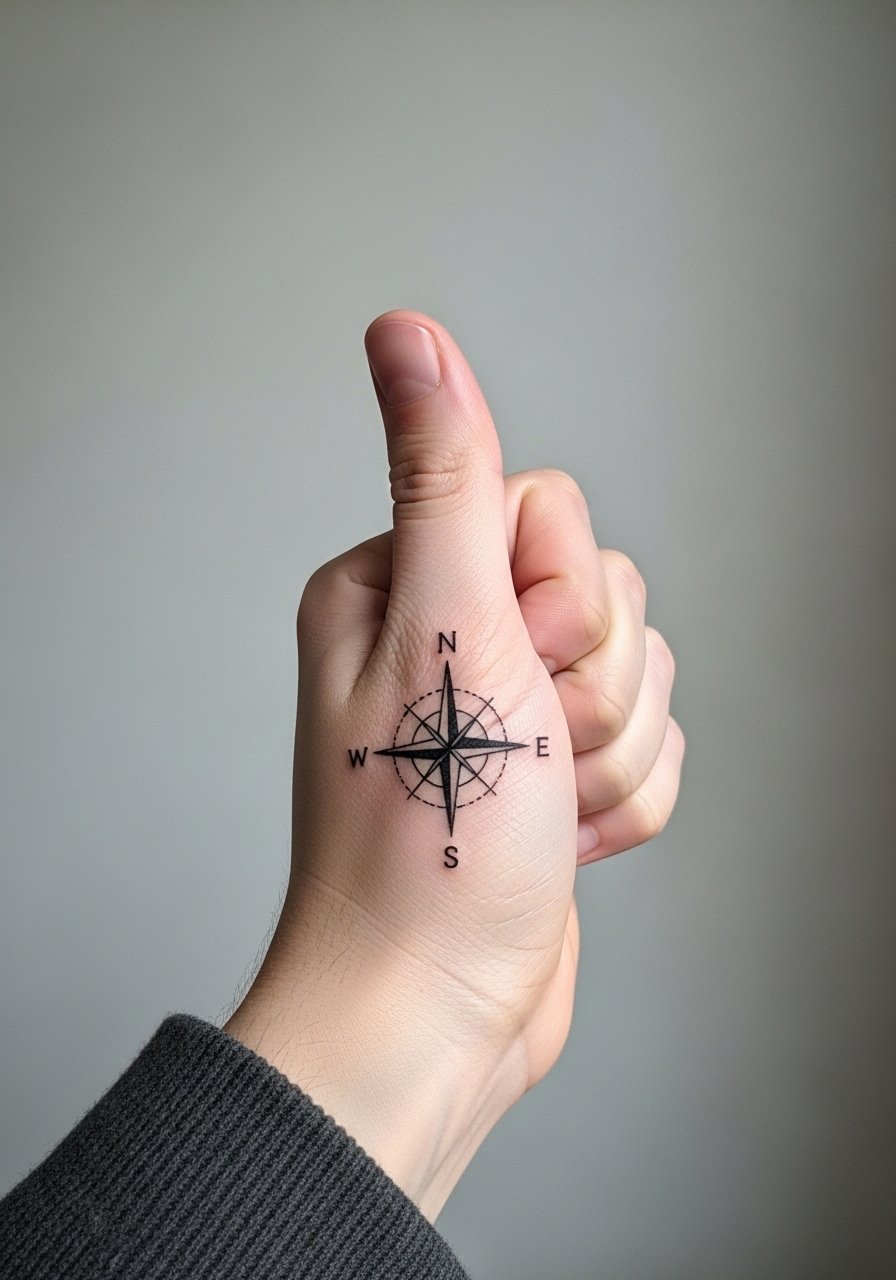
Thumb work is high exposure and high touch. A micro compass can read clearly if the lines are bolder and the central points are simple. Ask for consolidated detail rather than tiny spikes that will soften quickly. The session is short but expect annual touch-ups if you use your hands often. Keep the area dry while healing and be prepared for slower pigment retention.
19. Minimalist Triangle on the Outer Finger
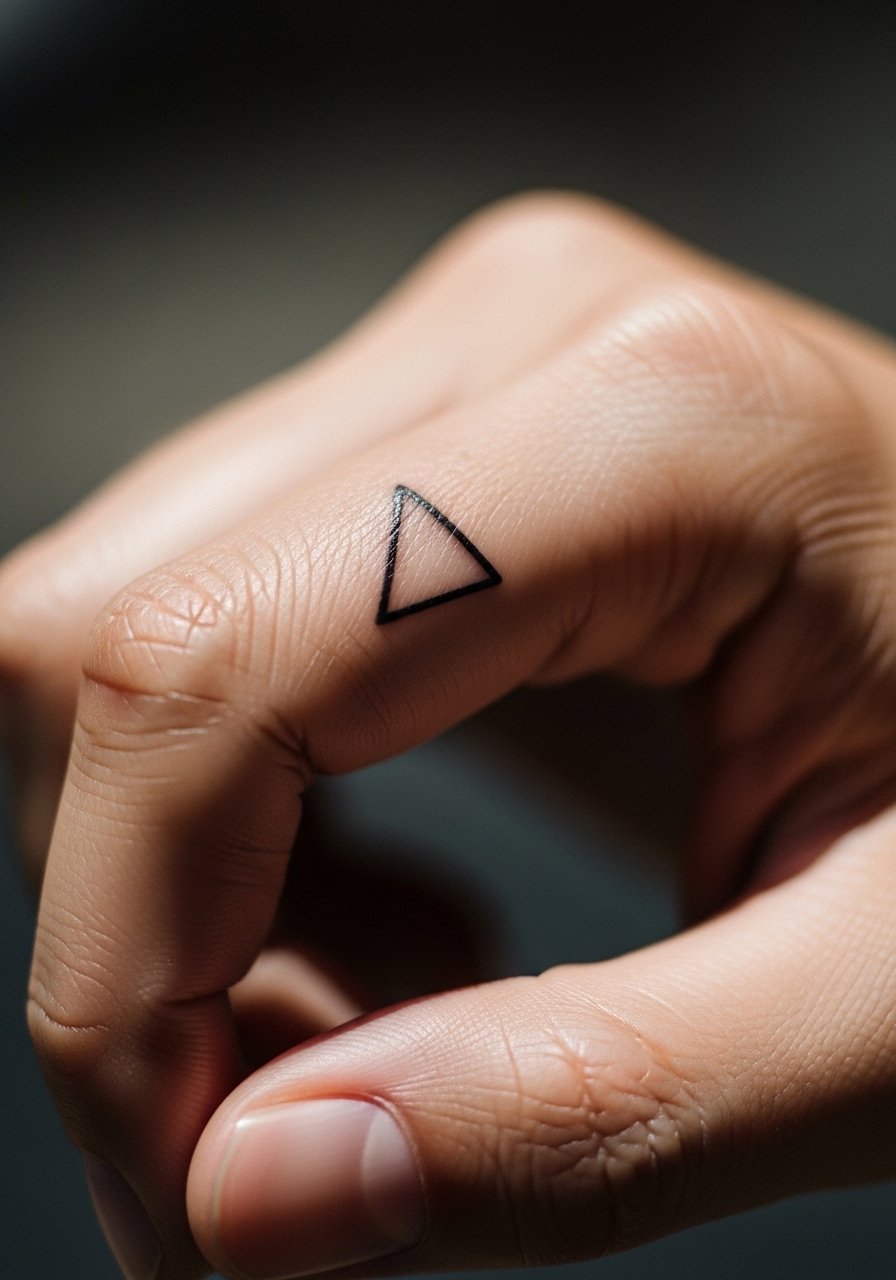
Finger fills are a commitment. Solid filled shapes tend to fade into patchiness if placed on high-motion sides. The safer approach is a micro-outline with a narrow edge and some negative space inside so it does not become a faded smudge. Ask about touch-up pricing in the consult and expect yearly refresh cycles if you want the triangle to stay saturated.
20. Whip-Shaded Wave on the Ankle Side
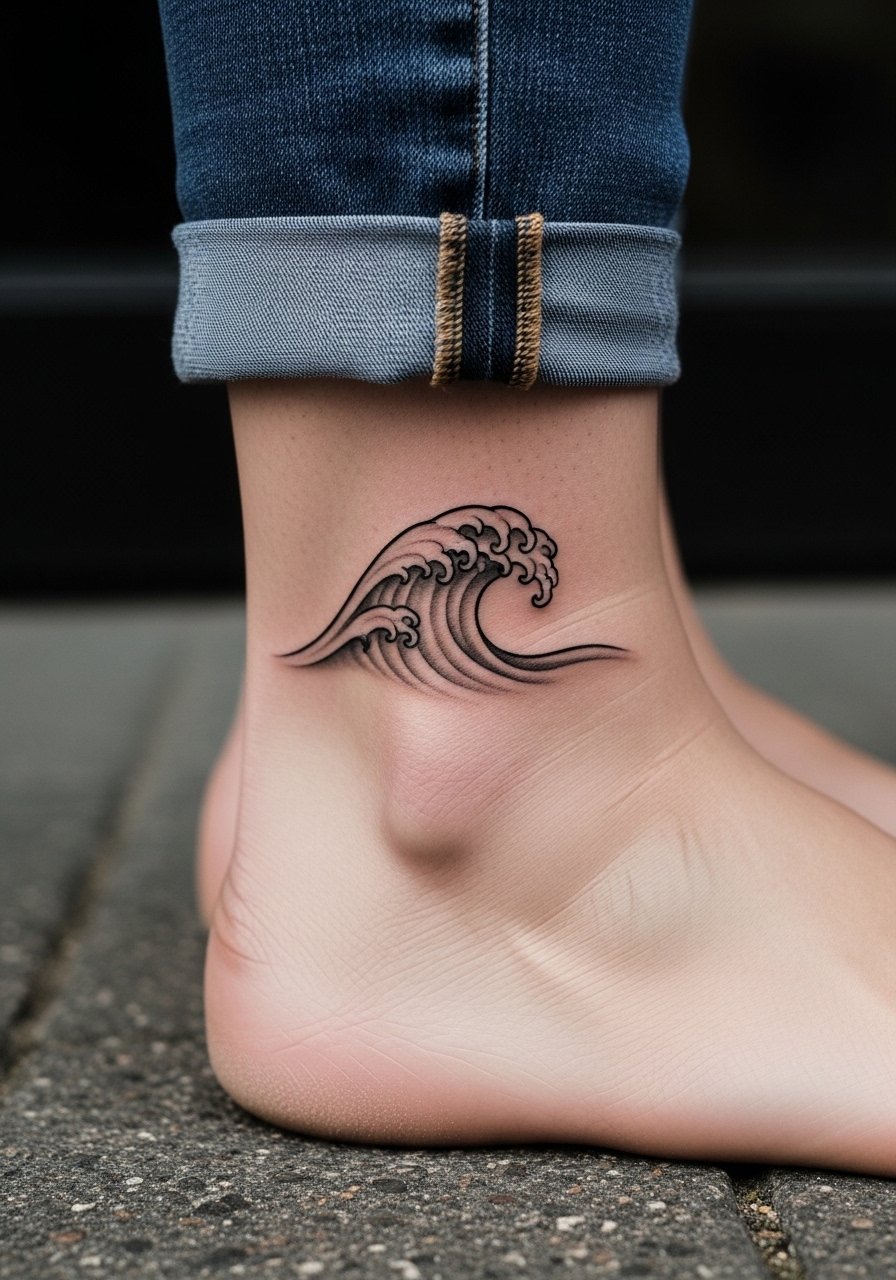
Whip shading translates well into movement when contrasted with a clean outline. On the ankle avoid tight, dense shading that will fill in with friction from shoes. Ask the artist for soft whip transitions and a small open edge so the wave remains readable. Session wear should be pants you can roll and a sandal ready for showing off when the scabs fall.
21. Dot Work Crescent Near the Ear Lobe
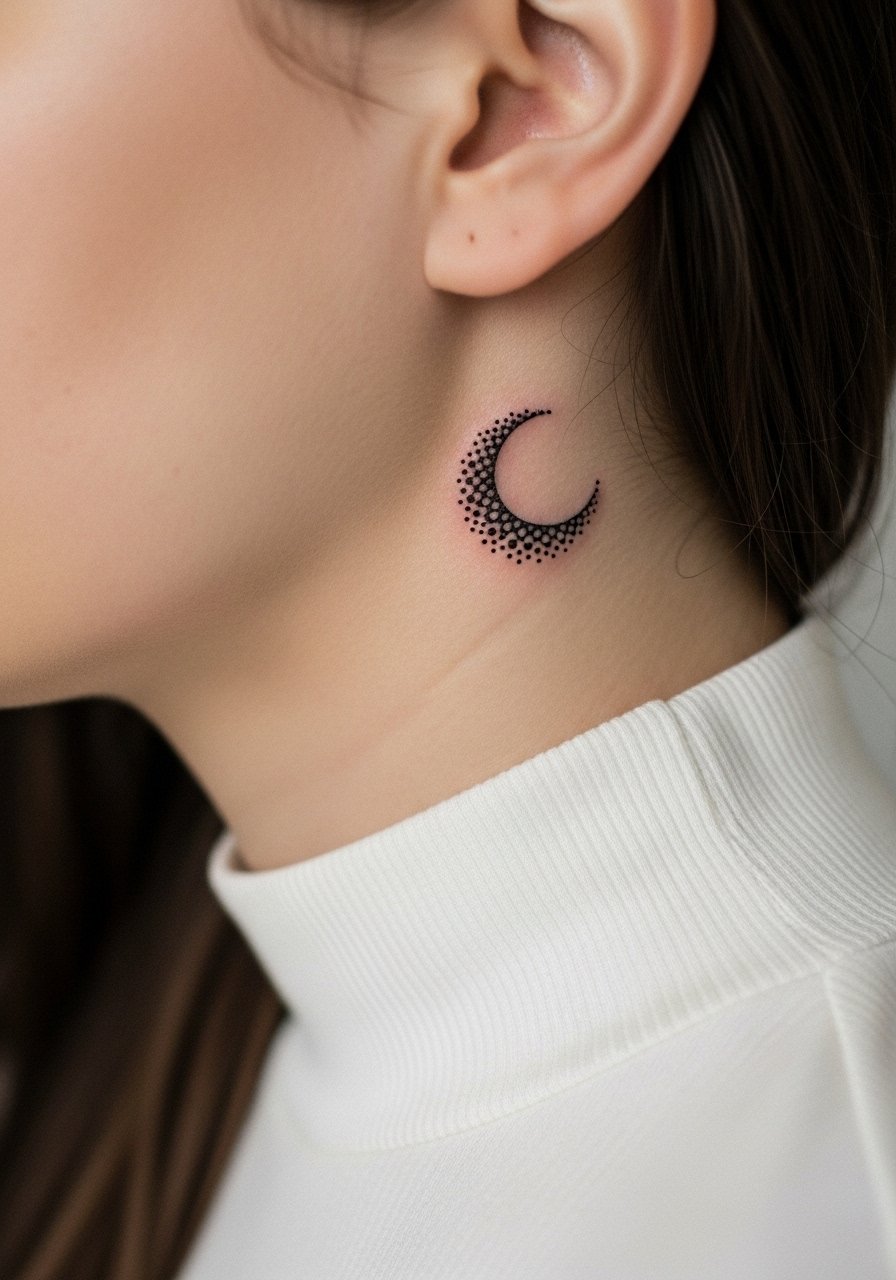
Dot work near the ear looks delicate without needing solid lines that might thicken. The key is dot spacing. If dots are too close they read as shade later. Discuss point spacing and request a healed mockup on similar skin tone. For sessions keep hair tied and wear a loose top.
22. Micro Geometric Sun on the Calf
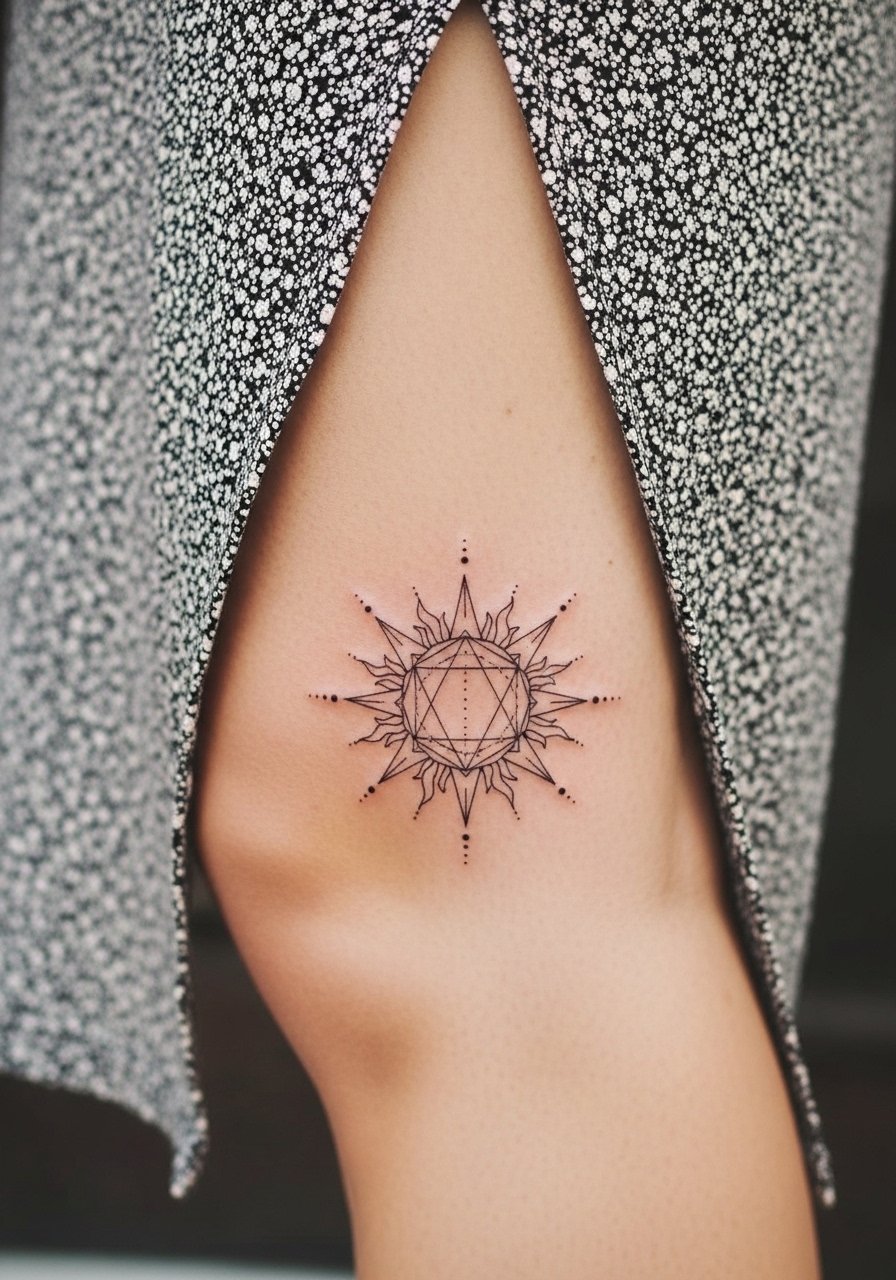
Geometric suns hold up well on the calf because of consistent skin tension. The common mistake is going too small with tight rays. Make sure the rays have room and that the central circle has a clear border to avoid merging. Wear shorts or a skirt for the session so the artist can work with the leg extended. For show-off, choose cropped denim or a boot cut jean rolled to reveal the calf.
23. Minimal Floral Ring Around the Wrist
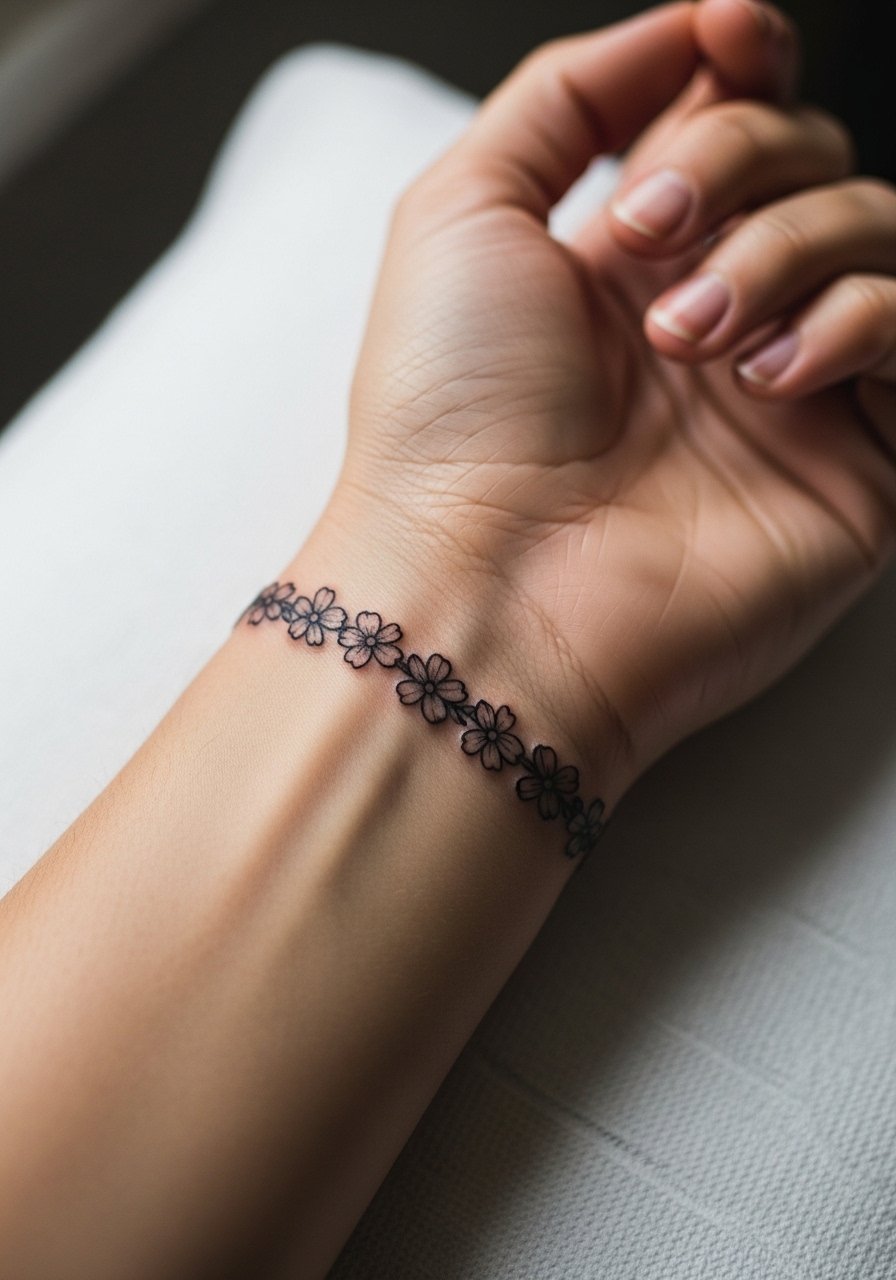
A floral wrist ring is charming but the wrist takes a beating daily. Rings that are spaced and avoid continuous dense shading keep their silhouette better. Ask the artist to leave a millimeter or two of skin between petals for longevity. Session wear should be a sleeveless top or loose tee. Complement the ring with a thin chain bracelet on the opposite wrist to maintain balance.
24. Stippled Moon on the Shoulder Cap
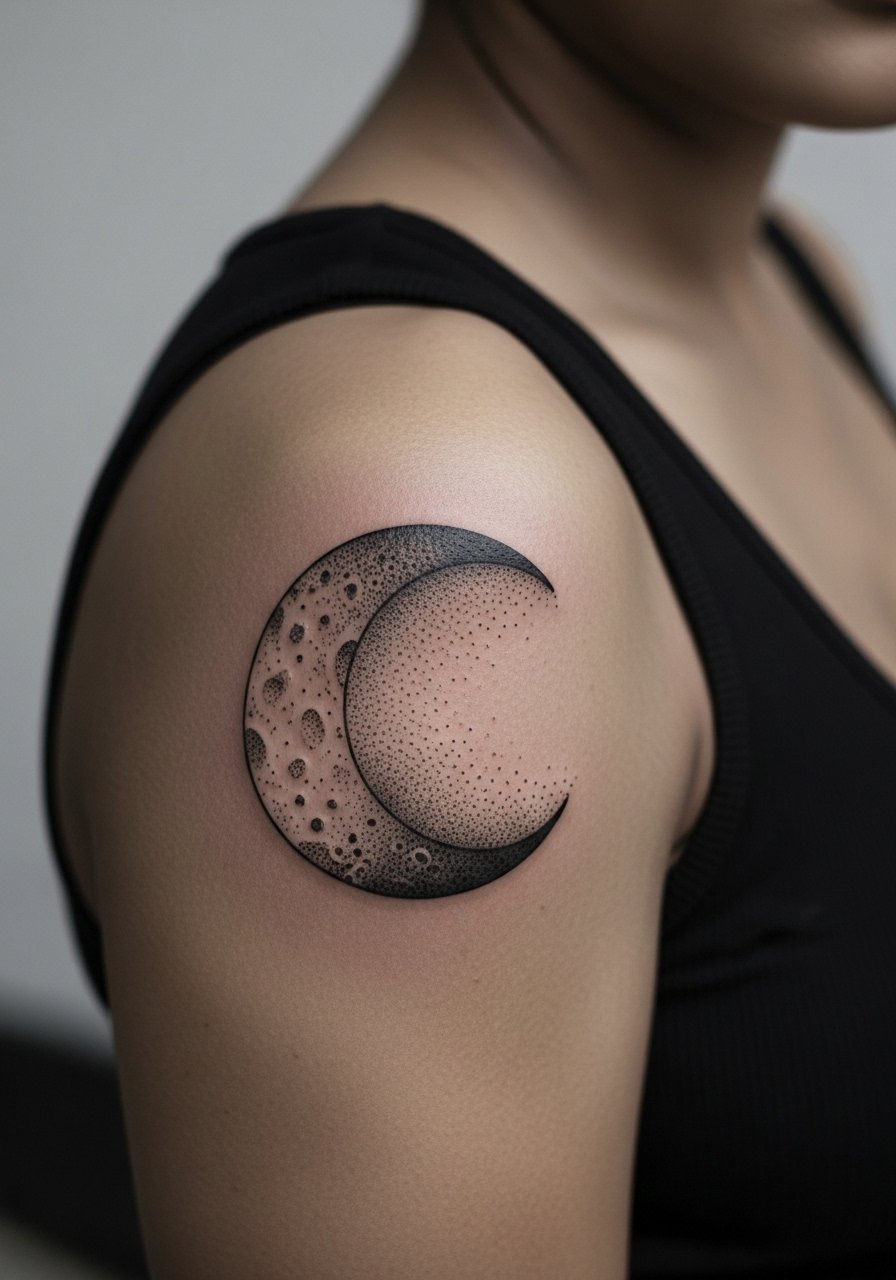
Stipple shading plays well on shoulders because the dot texture ages into a soft fade rather than solid blocks. The risk is over-dense stippling which can look muddy. Ask for larger dot gradation and a sparse outer edge so the moon keeps a luminous feel. Wear a tank top for the session and use a sleeveless tank after the healing window to reduce fabric rub.
25. Micro Floral Behind the Ear Lobe
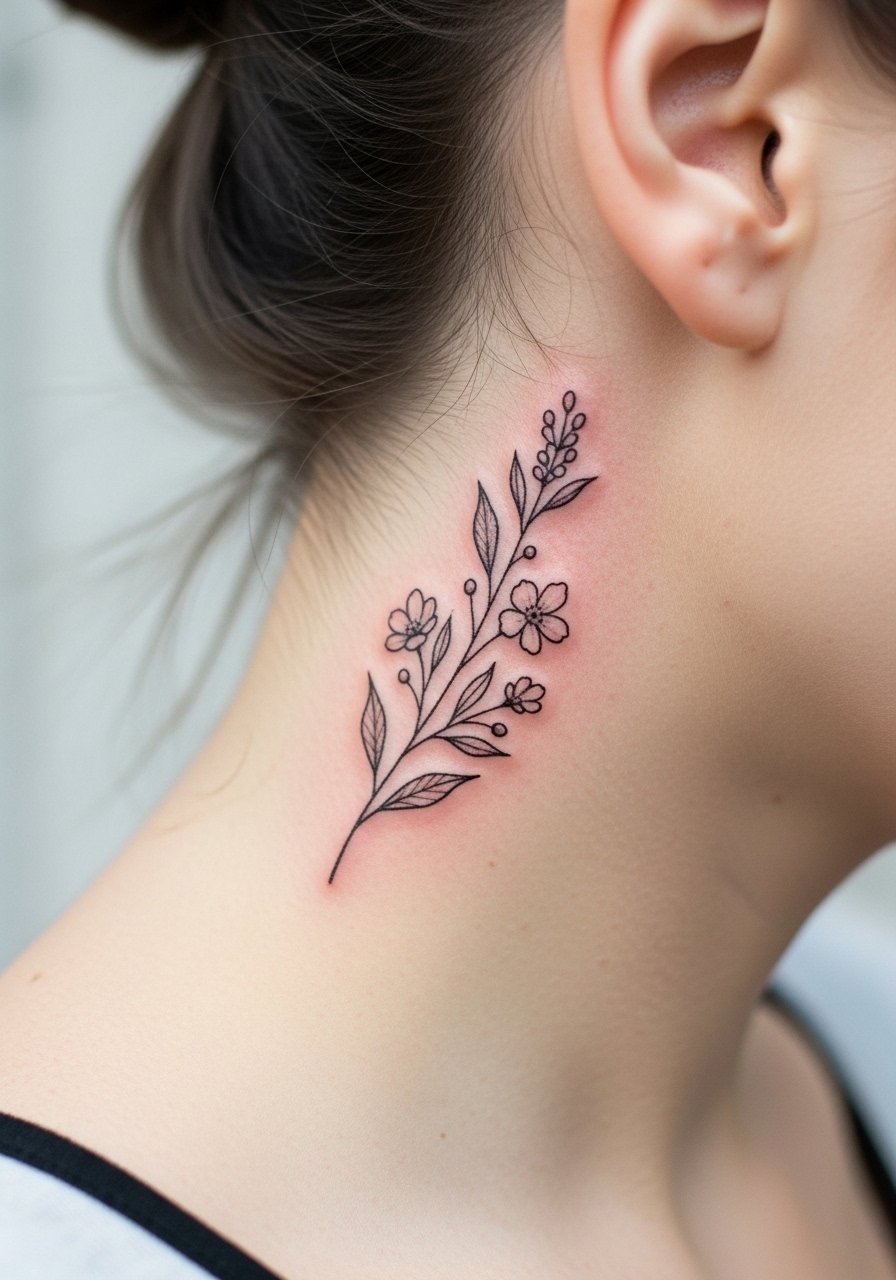
A second behind-ear option works great when you want symmetry with a tiny element on each side. The same rules apply as other behind-ear work. Keep the stems open and request the artist space petals to avoid merging. Session prep includes hair up and no heavy earrings that could press into the fresh pigment. Pair with delicate stud earrings and a high ponytail holder while showing the area.
26. Micro Planet Ring on the Inner Wrist
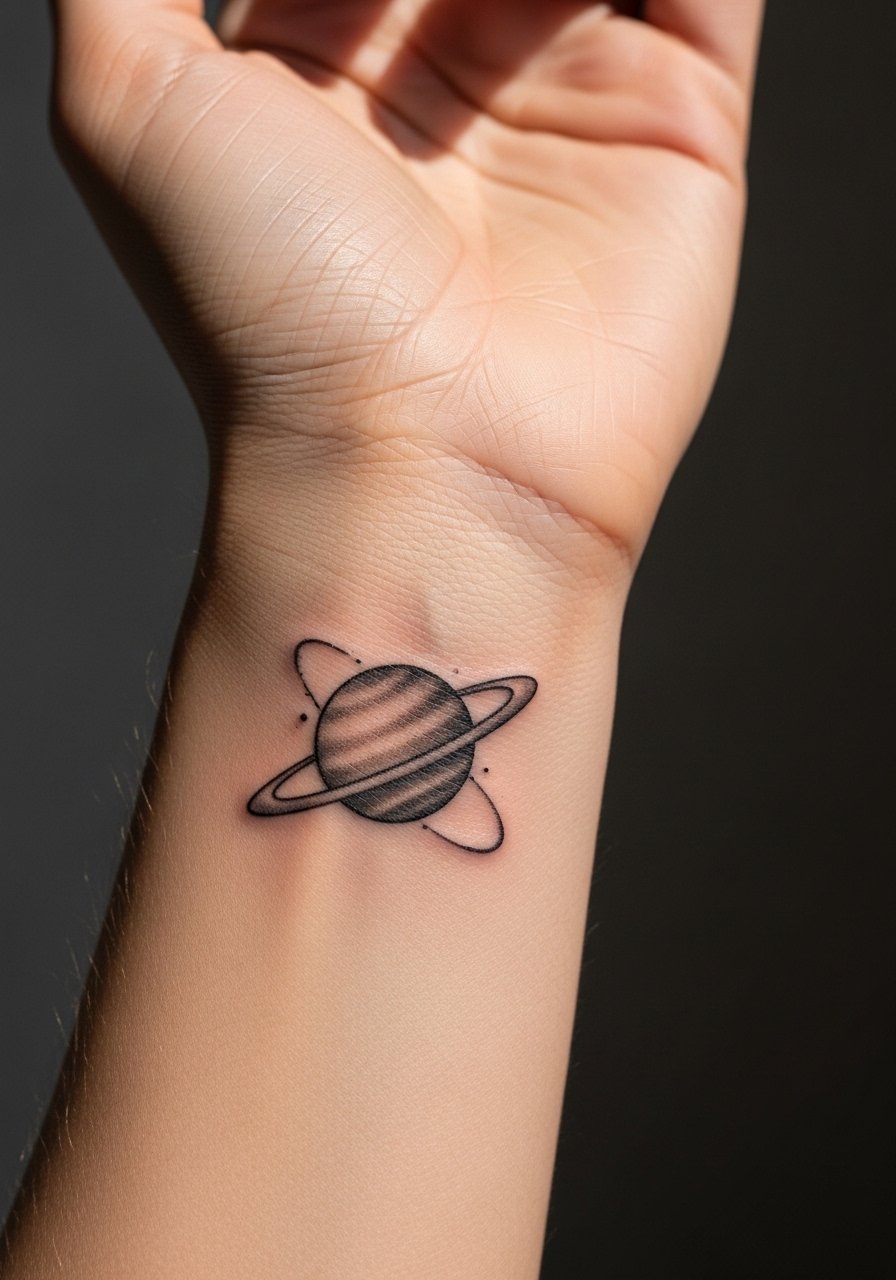
Inner wrist planets read like tiny ornaments and they photograph well. The common mistake is asking for dense full shading close to the edge which can flatten. Ask for a light gray wash for the planet and keep the orbit line slightly thicker than your imagined thin line so it stays readable at year two. Session wear should be sleeveless or have a loose tee. Style with a thin gold chain bracelet on the opposite wrist to frame the piece.
27. Micro Mandala Petal Near the Collarbone
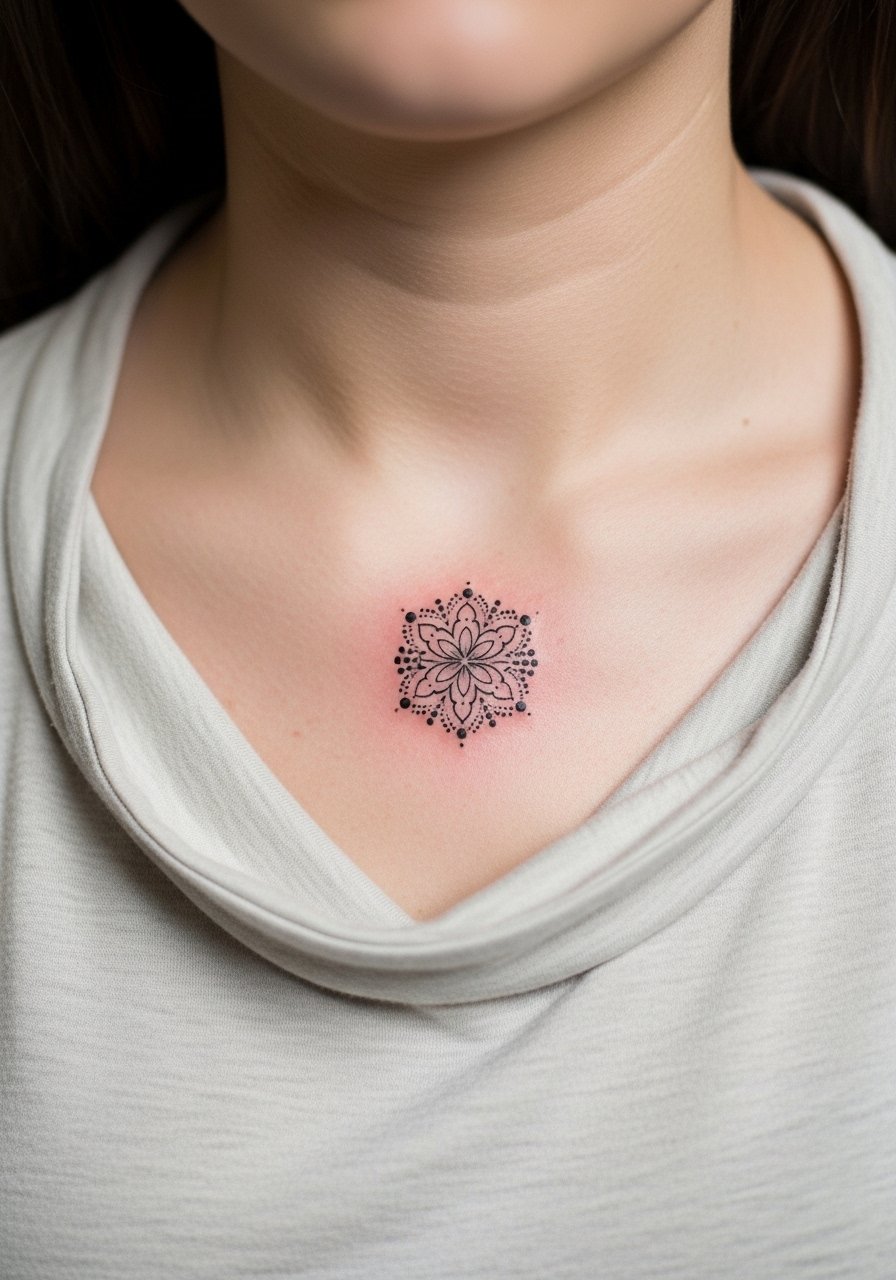
Small mandala elements are gorgeous but they demand spacing. When placed by the collarbone, dense mandala centers can merge as the skin moves against clothing. Ask for a single petal or segment rather than a full circle if you want to keep longevity. Session wear is a wide-neck top or strapless piece. Consider a long pendant that sits below the design to complement the geometry.
Frequently Asked Questions
Q: Do fine line wrist and finger tattoos really need touch-ups more often than forearm pieces?
A: From what I have seen, yes. Wrists and fingers get far more friction and washing which wears pigment faster. Expect touch-ups sooner and talk timing with your artist during the consult so you are not surprised.
Q: How should I decide between Saniderm and dry healing for a rib or collarbone tattoo?
A: Artists split into two camps. One group likes protective film for ribs to reduce sweat and friction. The other group prefers breathable dry healing to avoid maceration. Ask your studio which method they recommend for that placement and why, and follow the plan they provide.
Q: Will fine line designs show up on darker skin tones the same way they do on lighter tones?
A: Outcomes vary. I have noticed artists who work on melanin-rich skin often adjust line weight and use negative space tricks so the pattern holds. Before booking, request healed photos of similar placements on similar skin tones.
Q: Are inner thigh tattoos safe if I want to hide them for work and also show them occasionally?
A: Yes, inner thigh is discreet for most office settings and easy to reveal for social situations. Healing needs loose clothing and patience since friction can slow scab formation. Wear loose shorts or skirts for the session and avoid tight waistbands until fully healed.
Q: How do I make sure a micro-realism piece ages well on the shoulder or upper arm?
A: Ask for slightly less contrast in tiny shaded areas and more spacing between fine elements. On shoulders and upper arms gentle stipple shading tends to age more gracefully than dense fill. Confirm touch-up options and time estimates during booking.
