
Fine line tattoos are everywhere online, but the pieces that still read crisp after a few years are not always the ones that looked best the day they were done. Placement, line weight, and skin type decide longevity more than flash. Below are 17 inner forearm designs that look clean in the months after healing and into year two, with what to ask for in consultation and how to dress the part on session day.
1. Fine Line Arrow on Inner Forearm
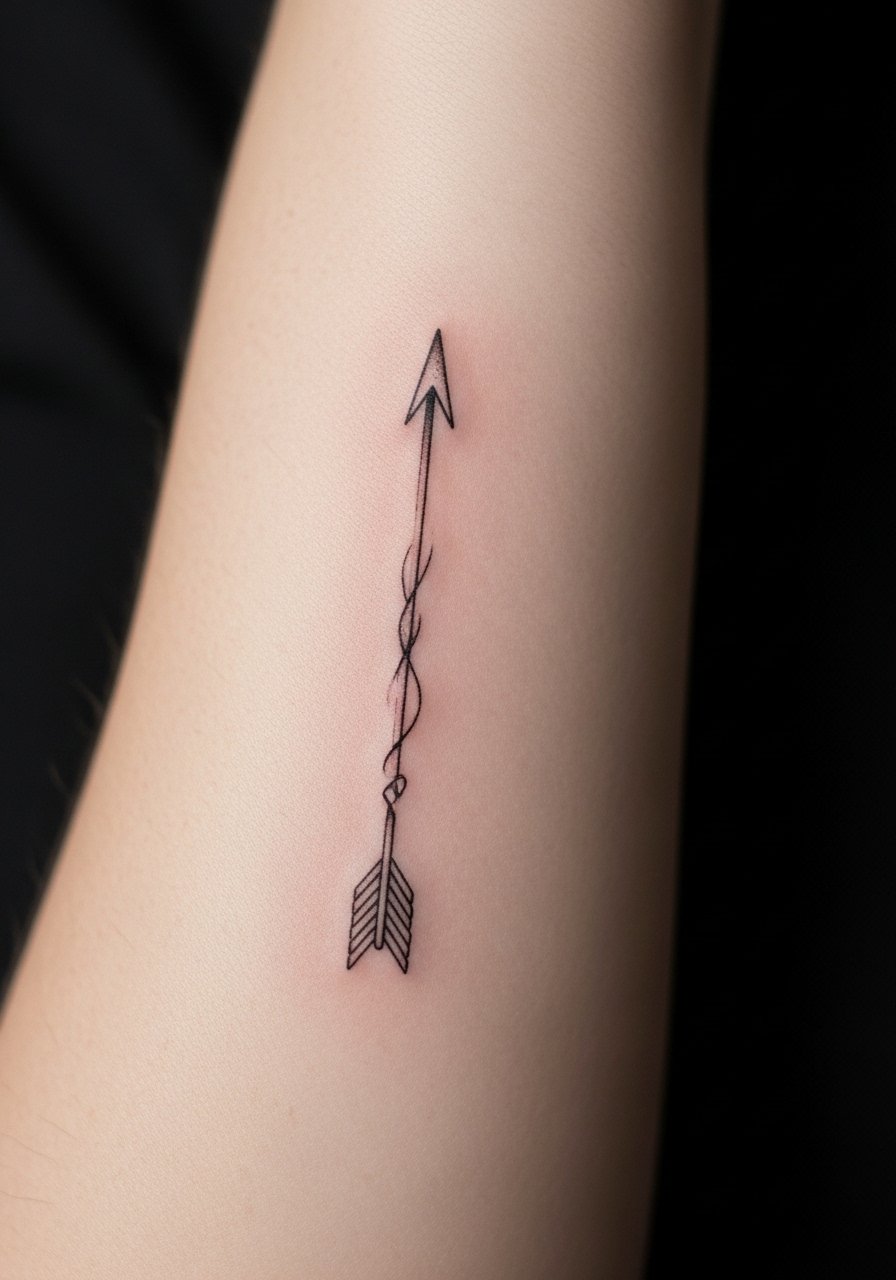
When you want something minimalist that still reads from a few feet away, go for a slightly thicker fine line arrow rather than a whisper-thin one. Ask your artist for one to two extra needle passes for consistent saturation and a clear spine through the shaft. The common mistake is requesting the thinnest possible line; it looks delicate fresh and then softens into a faint hairline. Expect a low pain level and a single quick session. For showing it off, rolled-cuff shirts frame a vertical forearm piece well, try a rolled cuff chambray shirt and a slim gold chain on the other arm.
2. Minimalist Geometric Pattern Centered on Inner Forearm
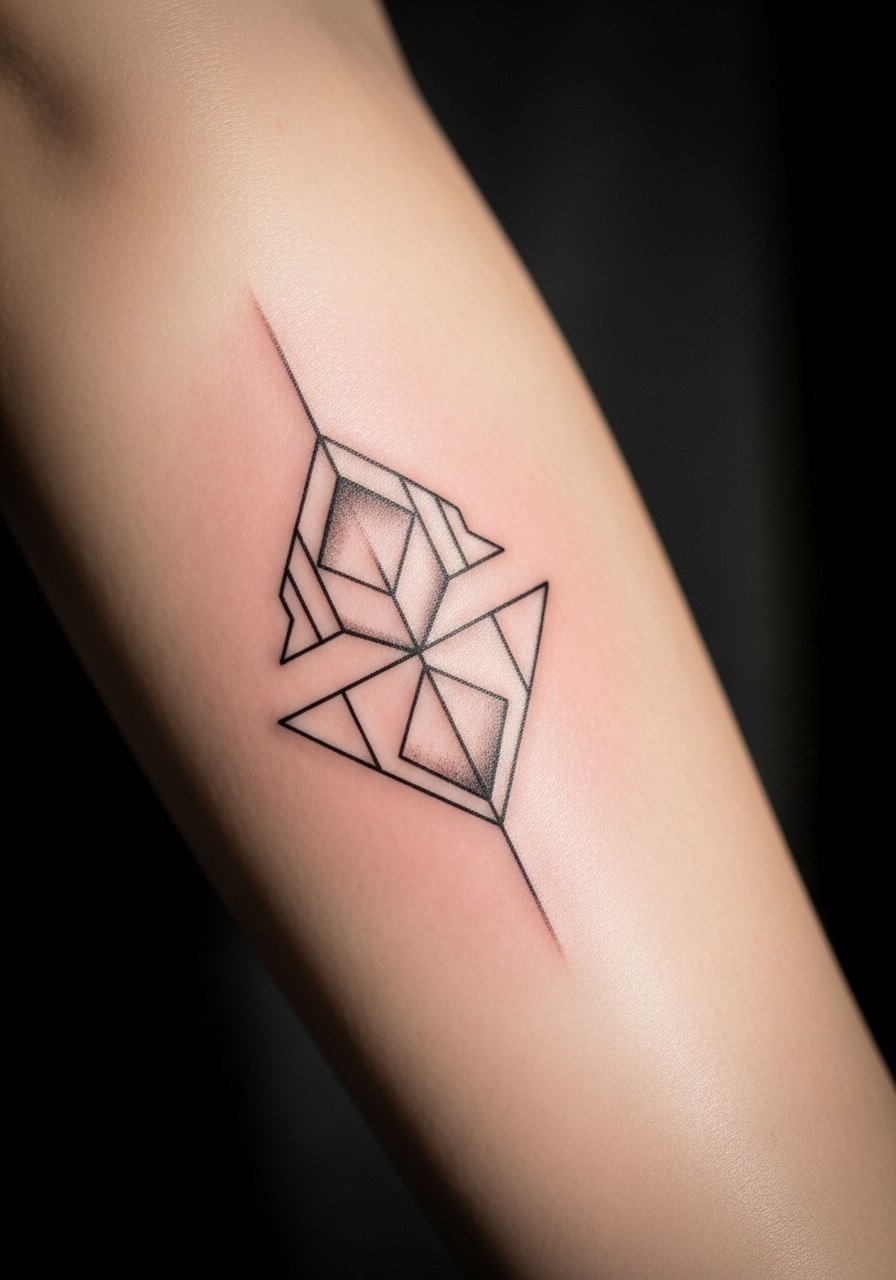
Most people choose geometric for clean longevity, but the trap is scaling the shapes too small. The aging issue starts when dense intersections sit too close together and blur after a couple of years. In consultation, request increased spacing between lines and stipple shading rather than packed shading in the center. This design works for phased sleeve builds because it can be a focal anchor later. It is low pain and usually a single session under an hour. For a polished look, wear a rolled cuff chambray shirt on show days and choose neutral tones so the geometry pops.
3. Nature-Inspired Leaf Outline, Vertical
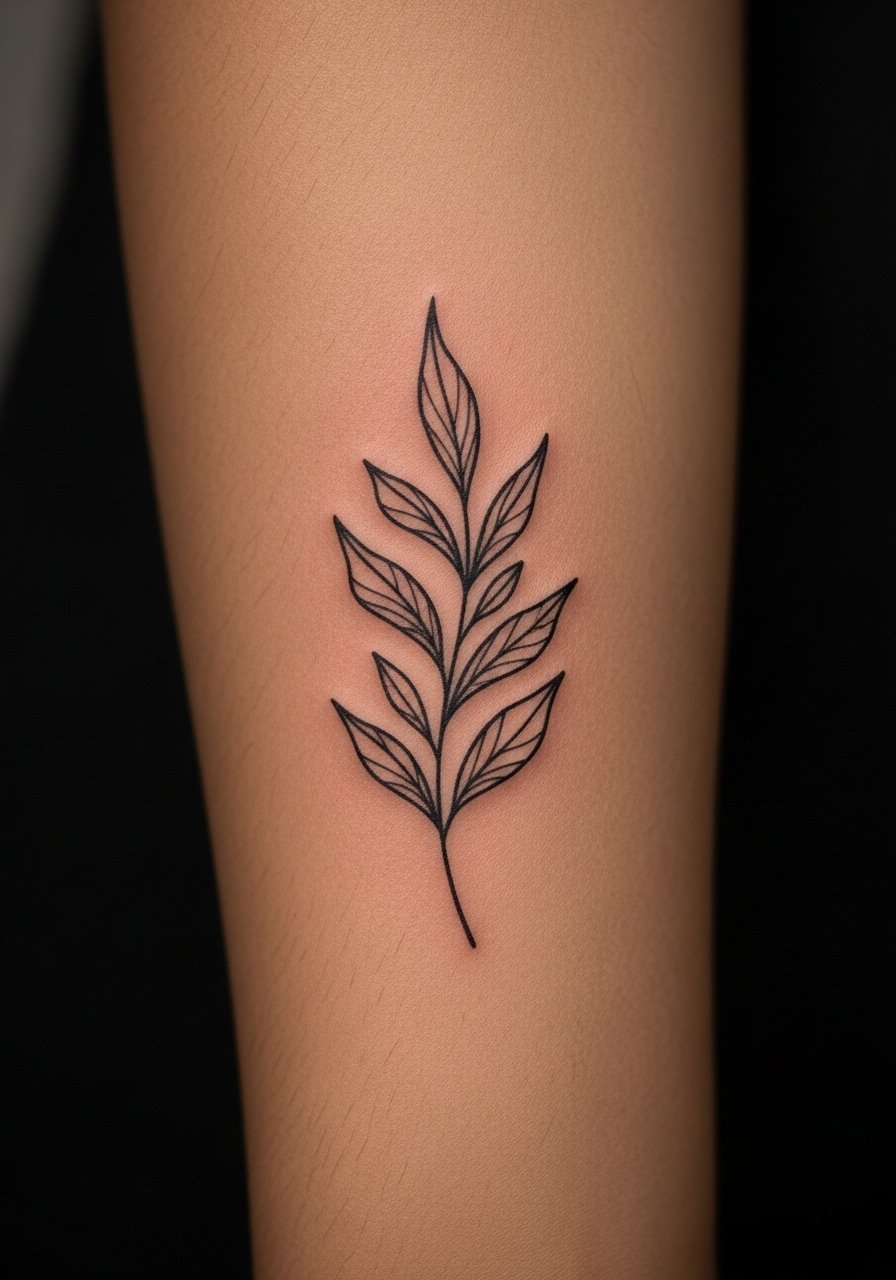
Botanical outlines ride the forearm naturally with arm movement, but the common error is too-many thin offshoots. Tell your artist you want a simplified vein structure and a slightly bolder outer contour so the shape remains readable on darker or hairier arms. On hairy forearms shave or clip the area right before the appointment for better stencil adhesion. Expect mild pain and a one-session job. Over time the outer contour keeps the silhouette while inner veins may need a touch-up. Paired with outdoorsy outfits, this looks sharp with a slim fit polo rolled to the elbow. Try this look with a slim fit polo shirt when you want it framed.
4. Blackwork Wolf Silhouette Mid-Placement

If longevity is the priority, blackwork silhouettes are a smart pick because saturation resists fade. When booking, ask for solid fills with clean edgework and avoid intricate internal detail that will soften. This sits in the middle of the forearm and reads masculine without needing color. Pain is low to moderate and sessions are usually quick. For gym days and casual wear, a fitted henley shirt with sleeves pushed up highlights the silhouette. On dark skin, a heavier saturation pass at the end can prevent early loss of contrast.
5. Thin Script Quote, Horizontal Across Inner Forearm
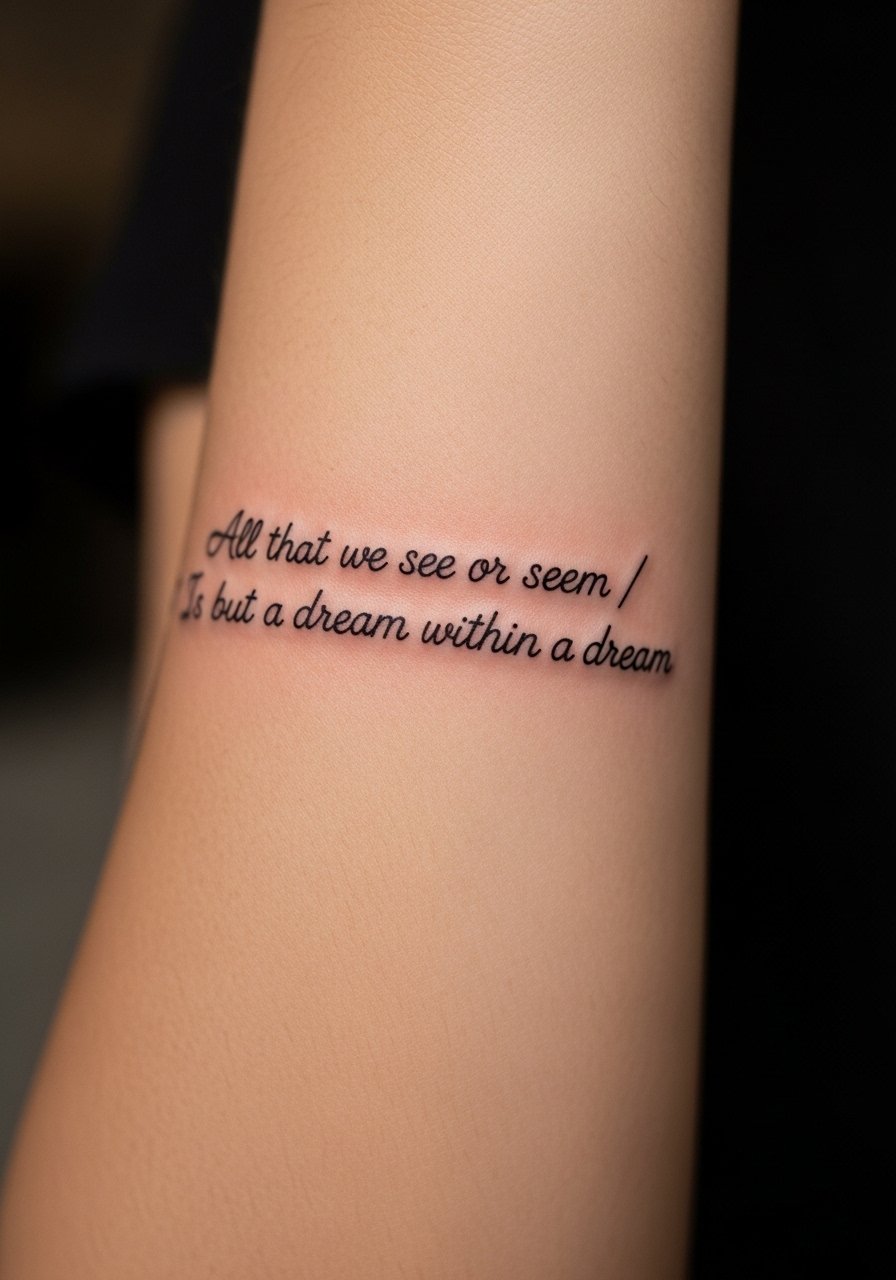
Script is the classic forearm pick, but thin lettering often blurs. Test fonts scaled to your skin and ask the artist to show a stencil on your arm to confirm letter thickness. A common regret is picking a tiny, ornate script that reads beautifully on an iPad and then becomes unreadable after healing. Horizontal placement makes it easy to read when your arm is down, and it tends to age okay with one touch-up at year one. For sessions wear a linen shirt you can roll or pull aside easily. If you have darker skin, discuss slightly bolder stroke weight for clarity.
6. Mandala Half-Sleeve Start on Inner Forearm
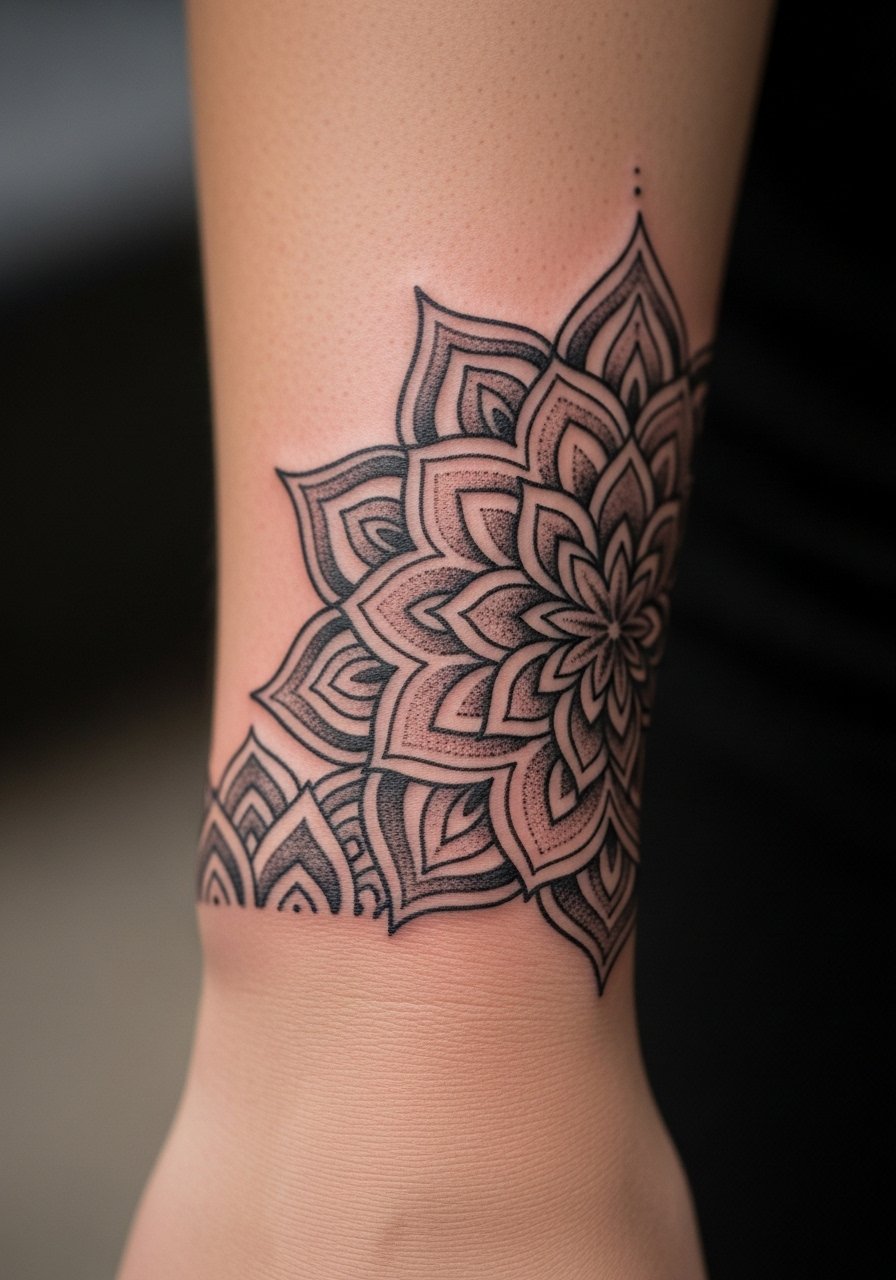
Mandalas make water-tight starters for an eventual half-sleeve, but the rookie error is packing too many concentric rings in a small area. Ask for clean spacing and stipple shading to keep density manageable as it ages. Plan for multiple sessions if you expand toward the elbow. Expect moderate session time and some tenderness when working near the wrist. For that meditative symmetry, a vintage band tee with sleeves cut or rolled complements the motif. Wear a vintage band tee when you want the mandala visible.
Studio Day Picks
The first six designs above include delicate linework and dense ornament. A few packing and healing items make the session and first week easier.
- Tattoo Goo balm. A non-greasy alternative some people prefer for winter months, useful for the thin script and leaf outline that are prone to dry cracking.
- Unko Giko balm. Ultra-thin finish recommended by some artists for fine line work so the healed lines keep contrast without shine.
- CeraVe Healing Ointment. Fragrance-free barrier balm good for sensitive forearm skin and for folks who react to heavier petroleum products.
- Revive lotion. Light lotion that absorbs quickly during the post-Saniderm phase for larger mandala areas.
- Hustle Butter Deluxe. A widely used mainstream balm that many find less greasy than classic ointments during the first week.
7. Compass Rose Near Wrist
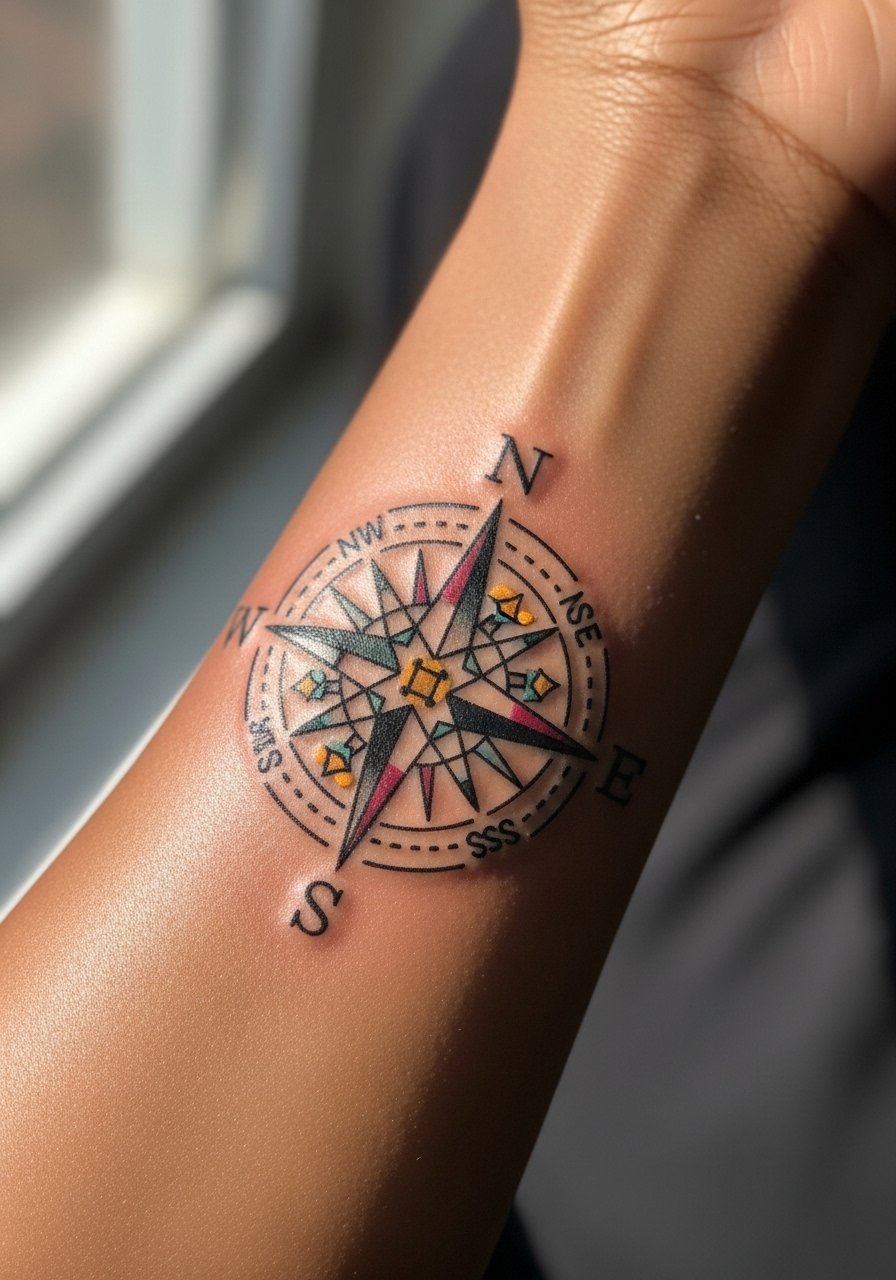
A compass near the wrist reads as an intentional travel motif and frames well with watches and bracelets. Tell your artist you want a slightly larger diameter than a coin so the points keep separation as the piece ages. Color accents are optional; solid black outlines help durability. Expect two short sessions if you include color. A crisp white oxford half-rolled looks sharp with a compass near the wrist. For show days try a white oxford shirt men to frame the placement.
8. Skull with Floral Accents, Centered
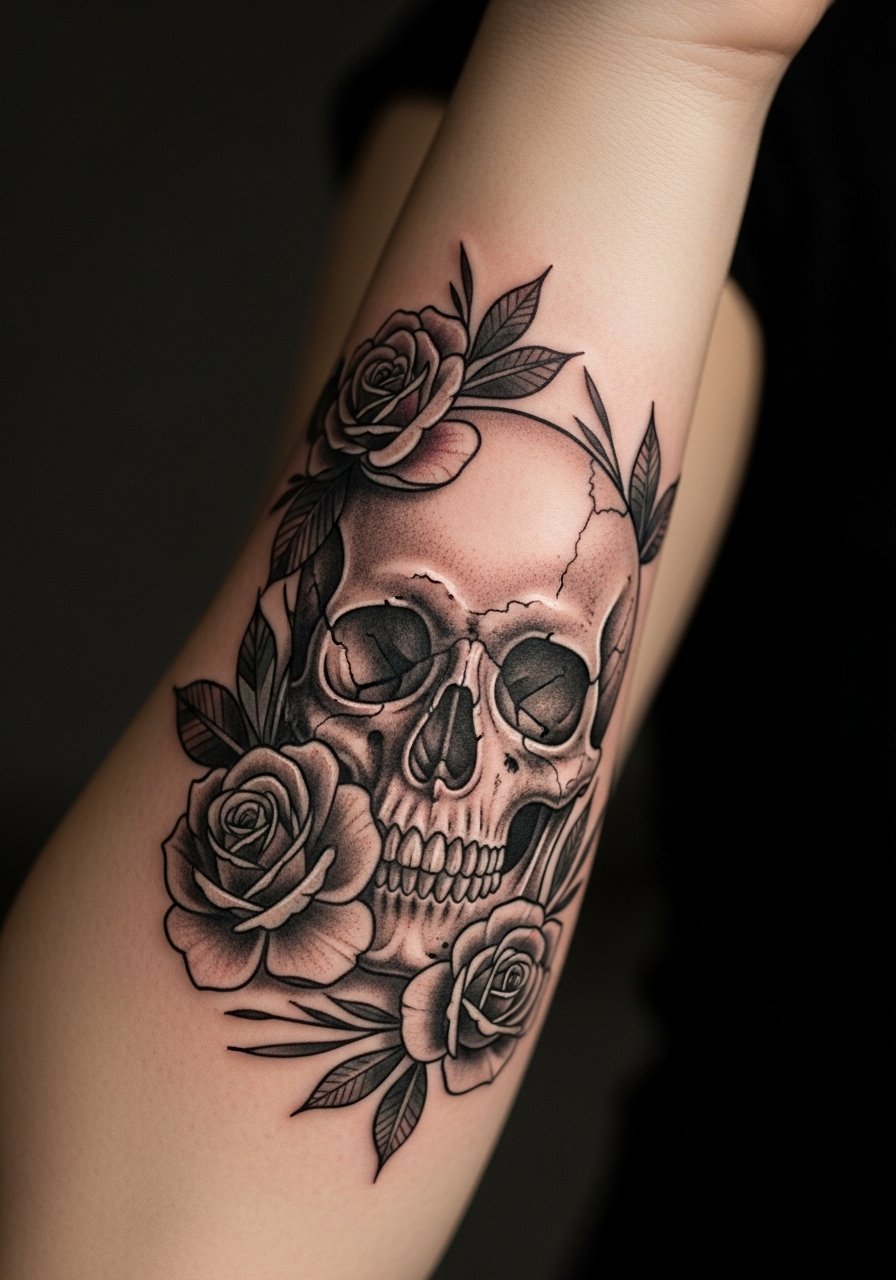
Balancing edge and refinement, a skull with flowers uses negative space to keep the design readable as it softens. During consultation ask for clear separation between skull edges and petals and avoid tiny petal veins that fill in. This style takes two to three sessions depending on size. It pairs well with vintage or band tees and stacked leather bracelets on the opposite wrist. A stacked leather bracelet complements the rugged yet refined look when you show it off.
9. Hourglass Minimalist Lower Inner Forearm
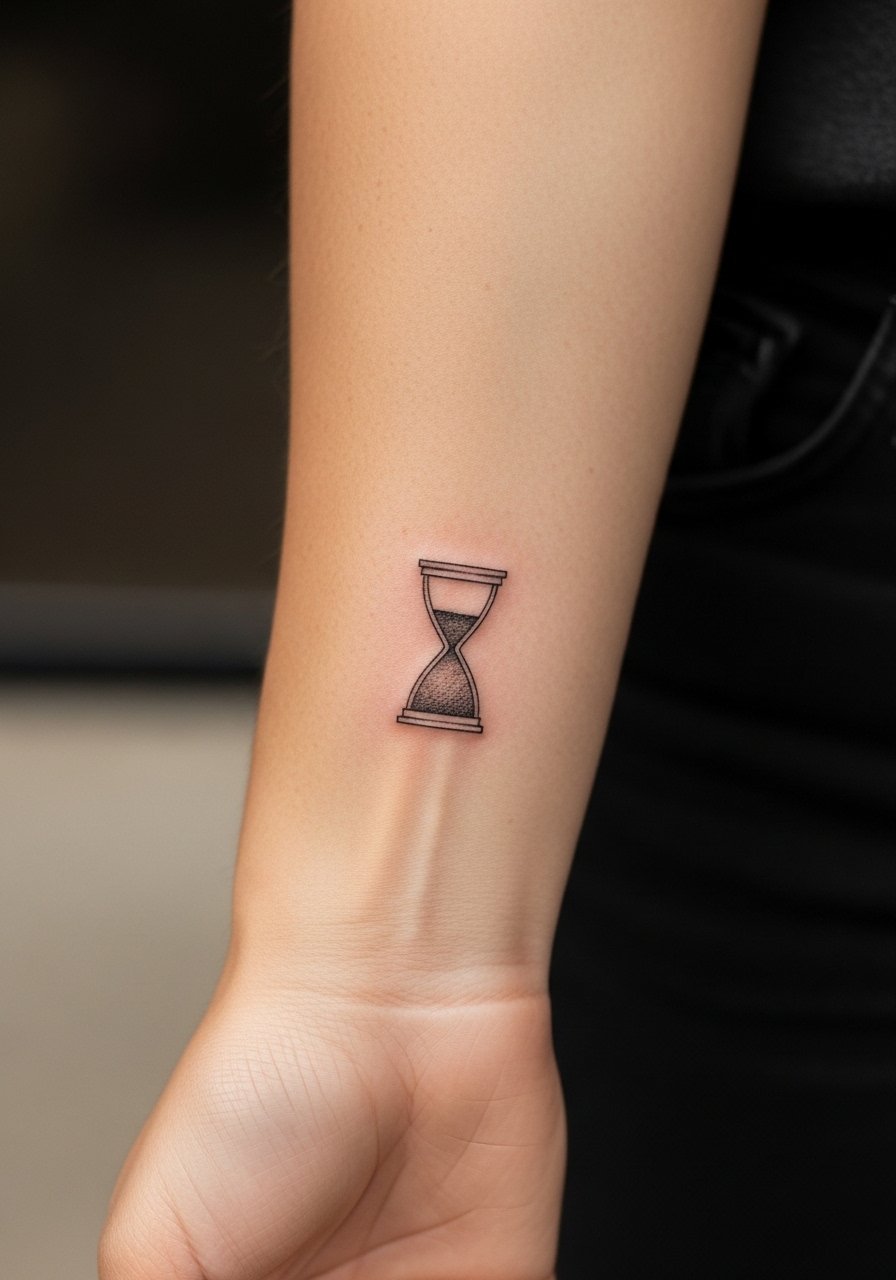
An hourglass reads philosophical without excessive detail, but if the silhouette is too narrow it fades into a faint mark. Ask for a slightly bolder frame and a faint stipple fill rather than empty negative space. This placement is low pain and fits nicely under shirts when needed. For session day wear a short sleeve button down so the artist can expose the lower forearm without tugging at fabric. Plan a touch-up at year one for thin internal lines.
10. Dragon Outline Vertical Wrap
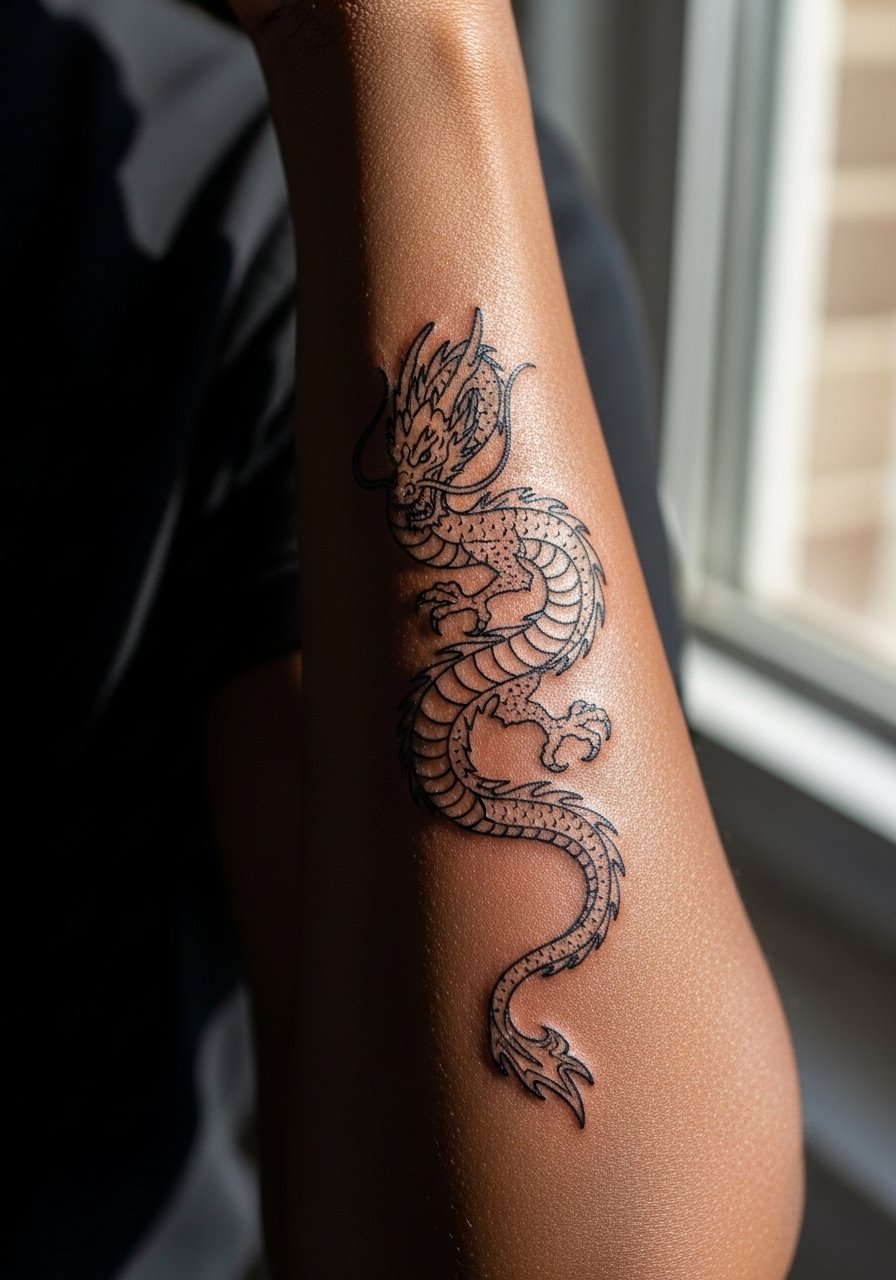
A vertical dragon outline uses the forearm's length to good effect, but the mistake is asking for too much internal scale detail. Ask the artist to keep the body as a rhythmic ribbon with spaced scales rather than micro detail. For heritage or mythical vibes, this usually takes one to two sessions. On show days a fitted henley rolled up draws attention to the wrap. Touch-ups might be necessary along curves where the skin moves more.
11. Wave Pattern Blackwork Full Length
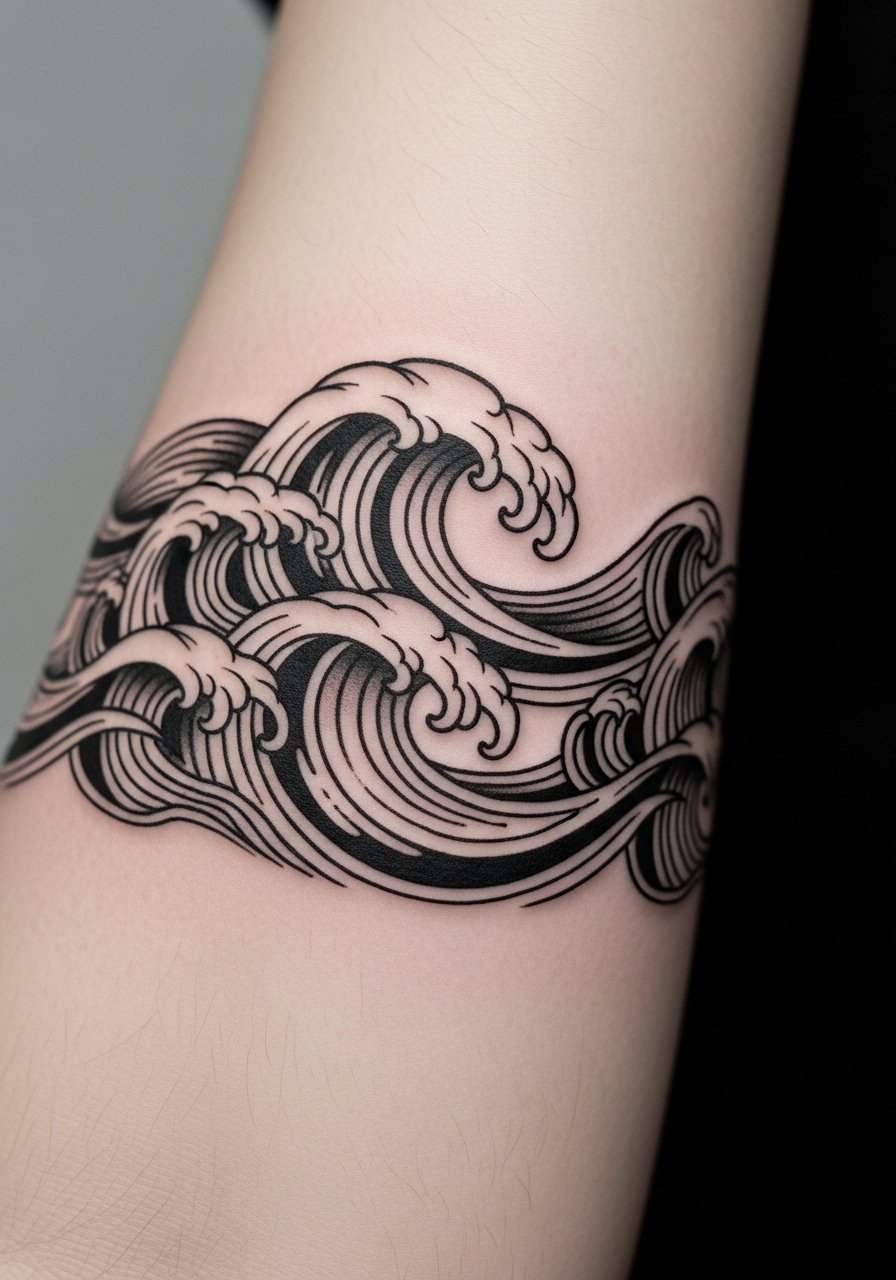
Wave motifs are ideal for those who want a calming, kinetic look that resists fading because of heavy black saturation. The common error is putting too many thin crests; ask for larger, rhythmically spaced waves with consistent edgework. This is a single-session piece for a skilled blackwork artist and it stands up well to sweat and frequent hand washing. It pairs with fitted tees or tank tops. Because of heavy saturation, expect a slightly longer initial session and a settled healed appearance that stays bold.
12. Eagle Micro-Realism Portrait Upper Inner Forearm
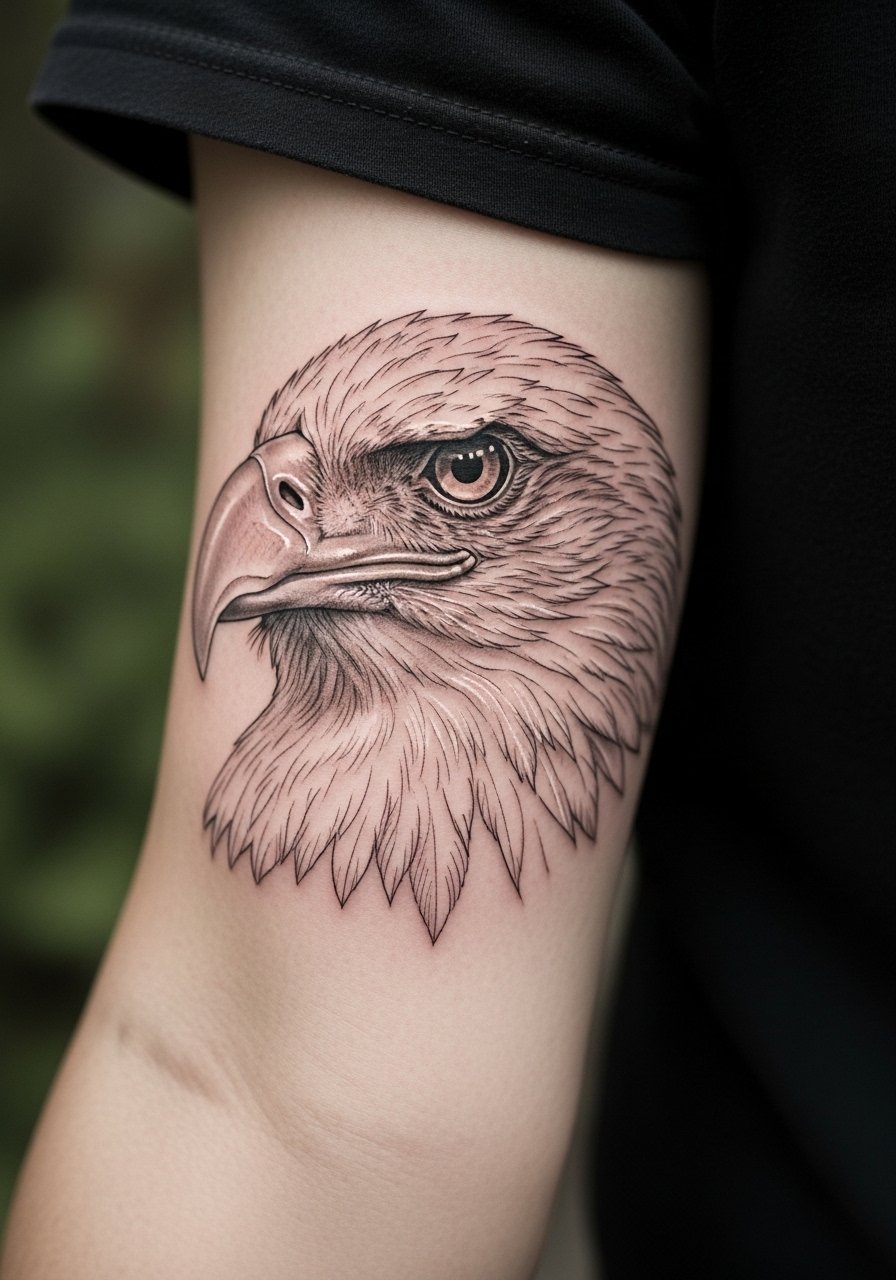
Micro-realism requires precise shading for feathers and eye detail, and the inner forearm handles small portraits surprisingly well. Tell your artist you want emphasis on contrast rather than overworking tiny lines that will blur. This is a multi-session piece with moderate discomfort near the elbow crease. For framing the portrait in casual outfits try pairing with a minimalist leather watch on the opposite wrist to create symmetry. Plan for a shading touch-up at year one for fine feather detail.
13. Rune Symbols Cluster, Scattered
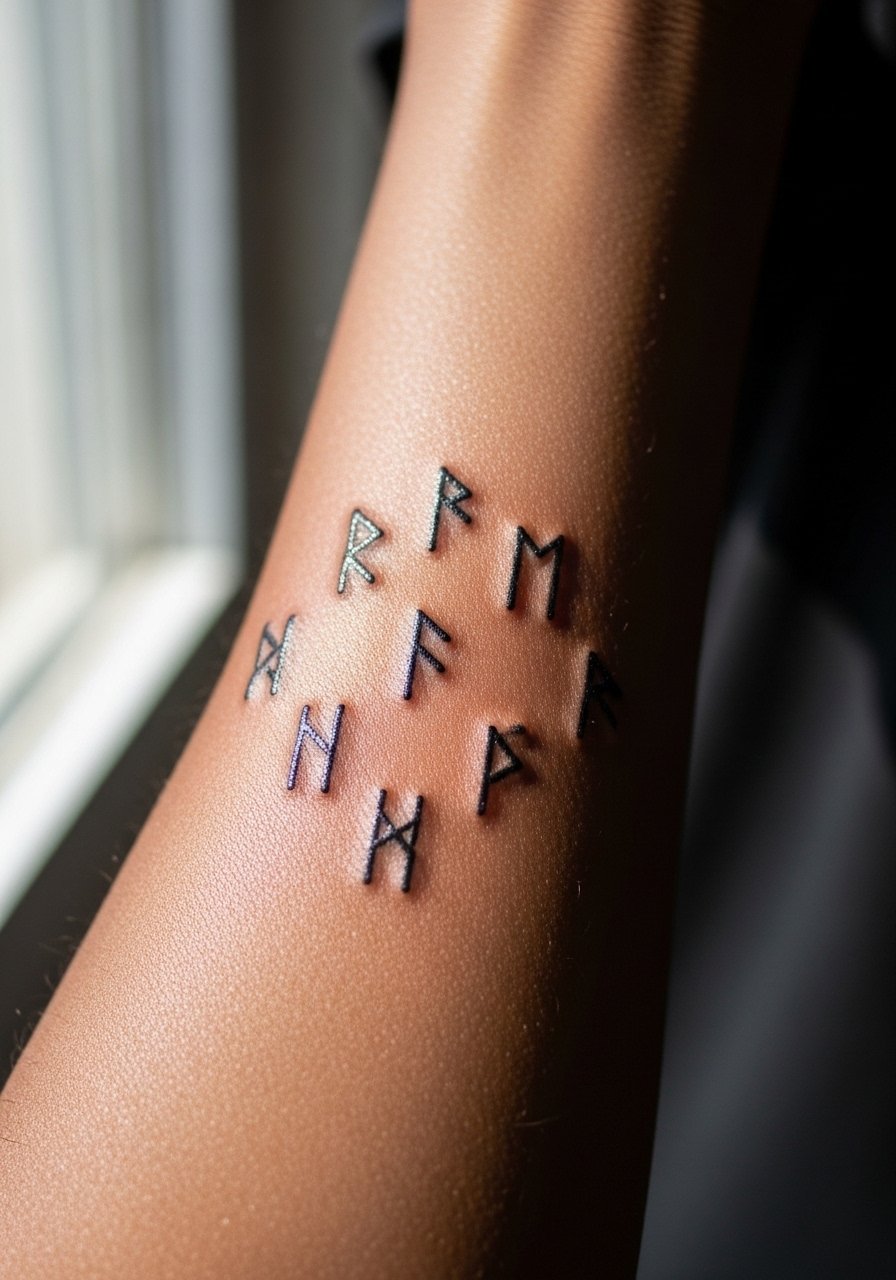
Clusters of small symbols work when you use spacing as the design language. The common mistake is cramming too many icons close together. Ask for a layout mockup on your arm so you can see how movement affects spacing. This placement is low pain and usually one session. For career-conscious folks who need occasional concealment, keep the cluster toward the lower inner forearm so shirt cuffs can hide it when needed. If you want subtle accessory pairing, a thin beaded bracelet on the opposite wrist keeps balance.
14. Geometric Mandala Slice for Patchwork Sleeve
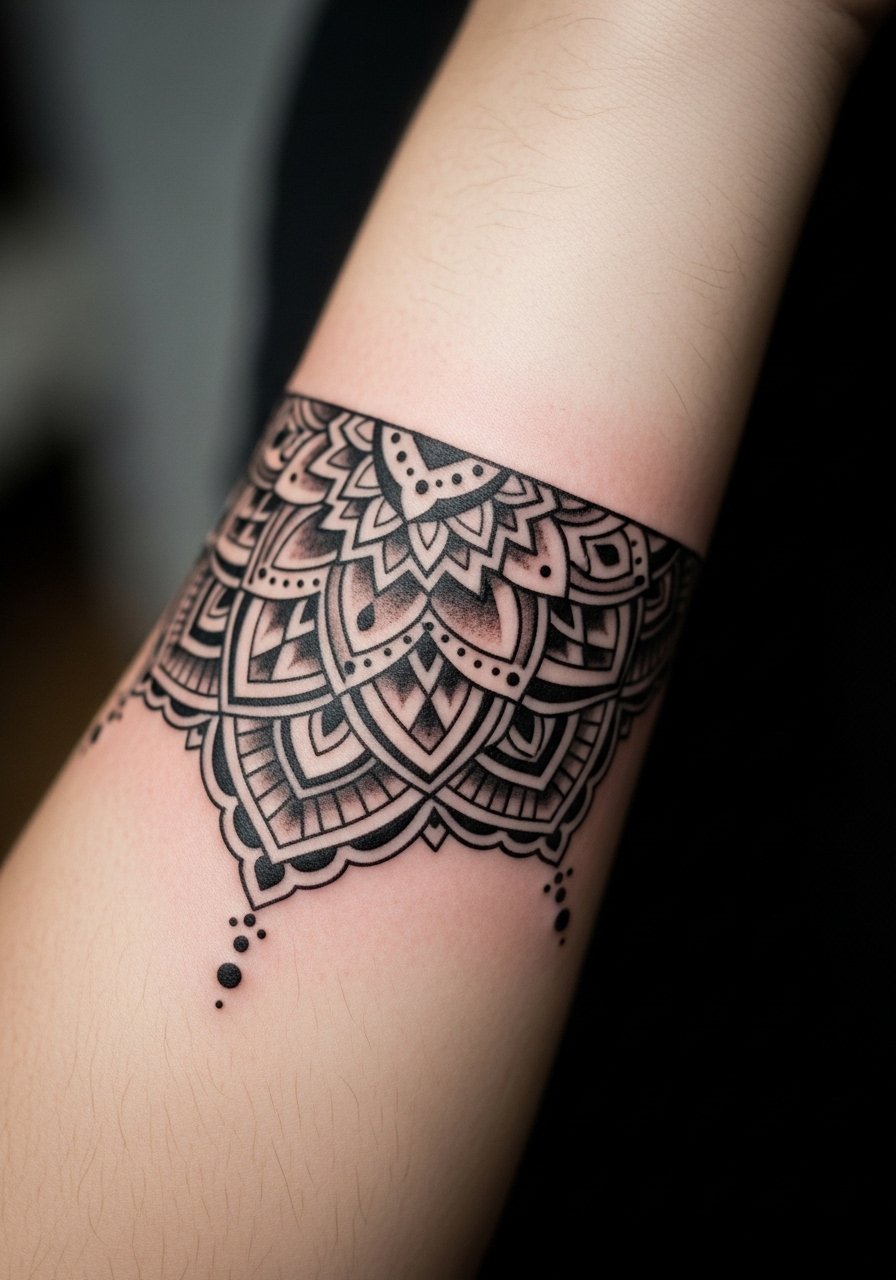
A mandala slice is a smart start for a patchwork sleeve because it gives a clear anchor with room to build out. The error to avoid is making the slice too small to connect later. Ask for a generous outer ring and clear negative space for future elements. Sessions depend on size but expect a multi-hour start. For sessions wear a long sleeve you can roll up without rubbing the fresh ink. When showing it off, a long sleeve raglan rolled neatly frames the piece.
15. Minimalist Constellation Line Along Inner Forearm
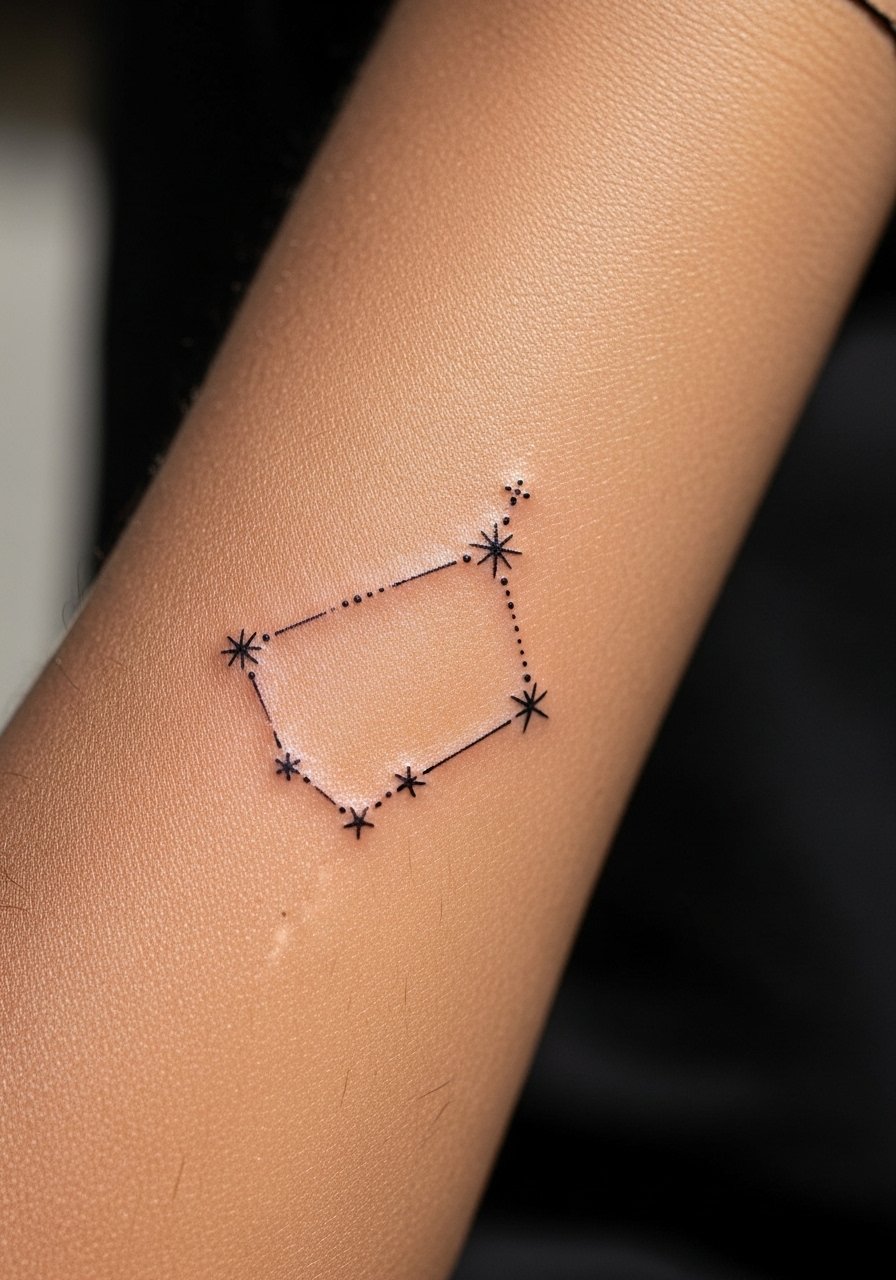
Constellation lines are elegant but dot work can fade if the dots are too faint. To keep stars visible, request slightly larger dots with occasional stipple clusters for contrast. This design is low pain and quick. For session day choose clothes that keep the forearm clear such as a loose tank or short sleeve. In the long run expect a small touch-up on the dots around year two depending on exposure. A thin chain or subtle bracelet on the opposite wrist helps frame the constellation without crowding the forearm.
16. Blackwork Wave Band Near Elbow Bend
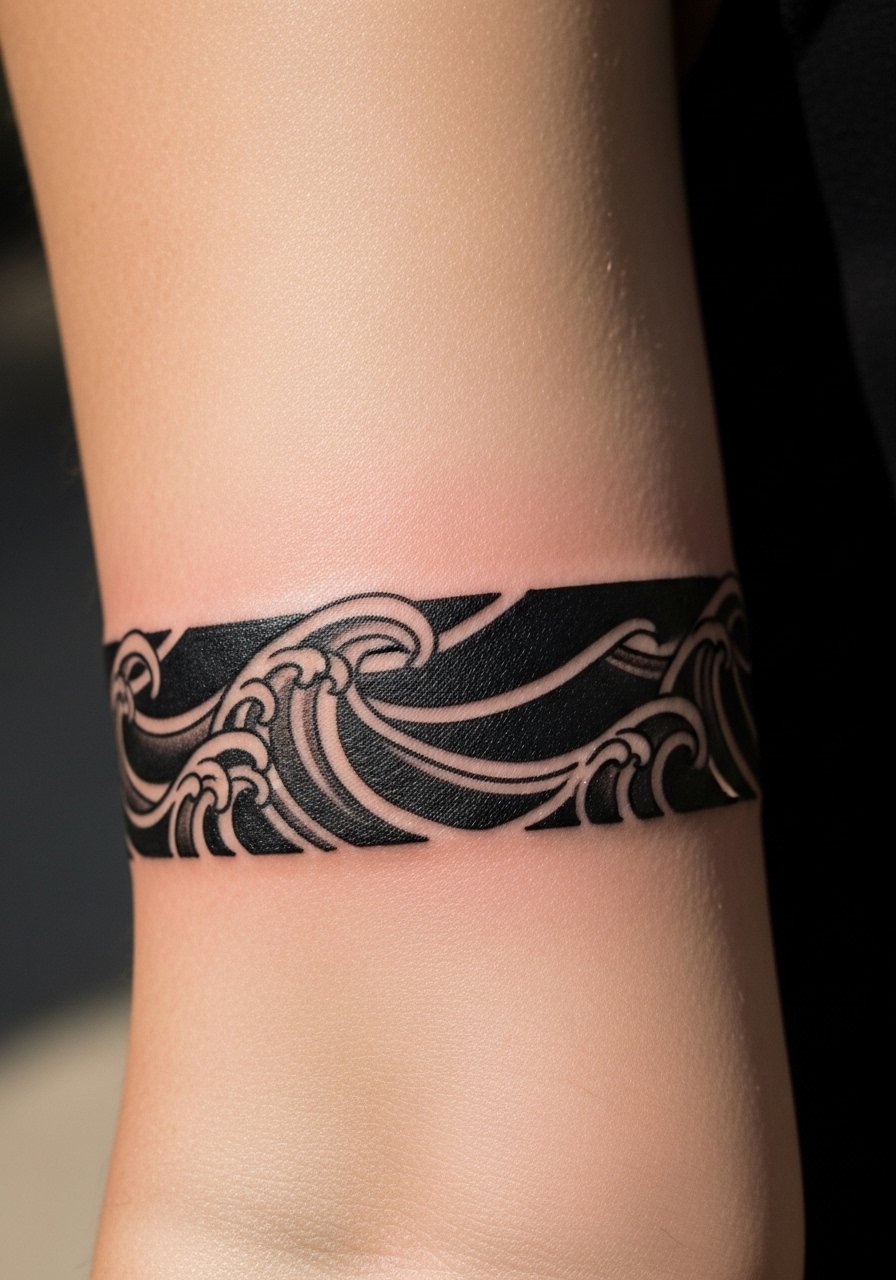
A bold band at the elbow crease uses high saturation where the skin moves, which reduces visible blur. Ask for a clean margin between the band and surrounding skin to prevent feathering. It will need slightly longer initial saturation time and may feel more tender because of the joint area. For show-off outfits, half-rolled sleeves or a vintage tee with stacked leather bands opposite the tattoo creates a balanced look. This placement wears well across active lifestyles and holds up better than ultra-fine linework in the same zone.
17. Vertical Fine Line Mountain Range That Ages Well
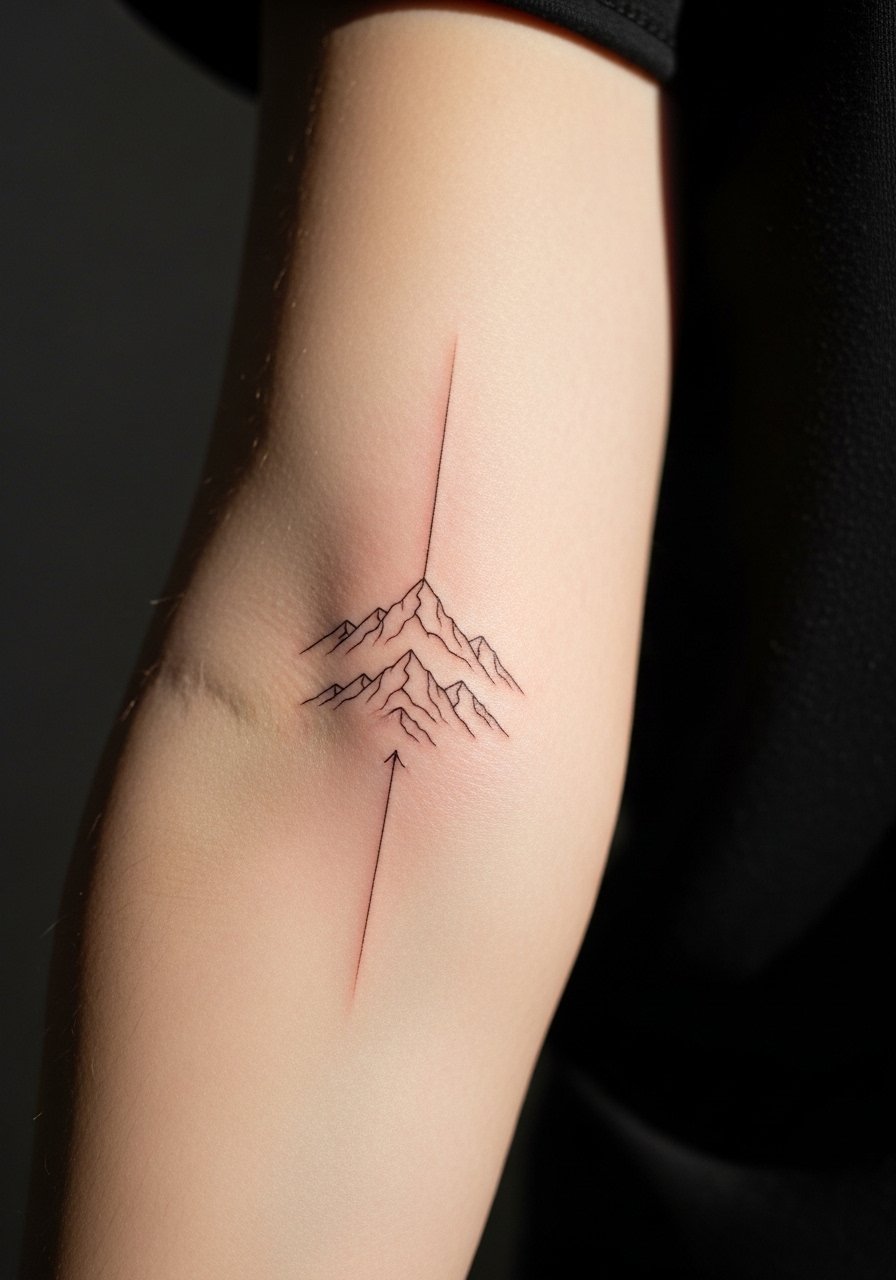
Mountains are a favorite for forearms because the vertical shape follows the arm. The veteran mistake is asking for too many micro-peaks and tiny shading, which blur over time. Request simplified ridgelines and occasional negative space so the silhouette stays legible at one year and beyond. This is a low pain one-session piece. For session wear, pull on a short sleeve button down so the artist can access the forearm easily. If you want to start a patchwork sleeve later, leave the upper and lower margins open.
Frequently Asked Questions
Q: Will fine line inner forearm tattoos blur faster than blackwork?
A: From what I've seen, fine line pieces tend to lose crispness sooner than saturated blackwork, especially on high-movement areas or on hairier arms. One camp argues fine line can last if spaced and shaded carefully. The other camp prefers bolder lines for longevity. Ask your artist which approach they use and plan a touch-up at six to twelve months if you go fine line.
Q: How should I prepare a hairy forearm for a fine line design?
A: Trim or shave the area right before your session so the stencil sticks and the needle hits clean skin. Some people consider a laser hair reduction plan for long-term visibility, but that is a separate process to discuss with a dermatologist.
Q: Which healing method is better for inner forearm tattoos, Saniderm or dry healing?
A: Artists and forums split on this. One camp favors Saniderm because it reduces scabbing and keeps the area protected. The other camp prefers dry healing, saying it lets the skin breathe and some heals see less trapped moisture. It depends on your skin type and the artist's aftercare routine. Ask the studio which method they recommend for fine line or saturated work.
Q: I work in a conservative office; which inner forearm placements are easiest to conceal?
A: Keep art lower toward the wrist and closer to the sleeve cuff so you can hide it by rolling sleeves down or choosing slightly longer sleeves. Horizontal scripts and small clusters near the lower forearm are easier to tuck compared with a full vertical piece from wrist to elbow.
Q: How often do inner forearm touch-ups happen for script and dot work?
A: In my experience, scripts and dot work often need touch-ups between one and three years, depending on exposure and skin type. Plan for at least one touch-up appointment if you choose ultra-fine lettering or small dot clusters.
Q: Do darker skin tones require different approaches for fine line pieces?
A: Yes. On darker skin, slightly bolder strokes and the option of a blackwork base under delicate lines can preserve contrast. Discuss saturation testing in your consult. Many artists will show healed portfolio examples on similar skin tones so you know what to expect.
Q: What should I wear to the appointment for an inner forearm session?
A: Wear something loose on the arm like a short sleeve or a button-down you can pull aside without tugging the fresh stencil. A simple short sleeve button down is a practical choice so the artist has clear access and you stay comfortable during the session.
