
Fine line Donnie Darko references are everywhere online right now, and the trend-versus-reality split is loud. What looks delicate and perfect on a saved board can lose definition fast on certain skin tones or placements. This guide walks through 21 concrete tattoo directions that fans actually live with, with note on how each choice heals, what to tell your artist, and the wardrobe tips that show the work off without compromising it.
1. Frank Bunny Mask Outline on Inner Forearm
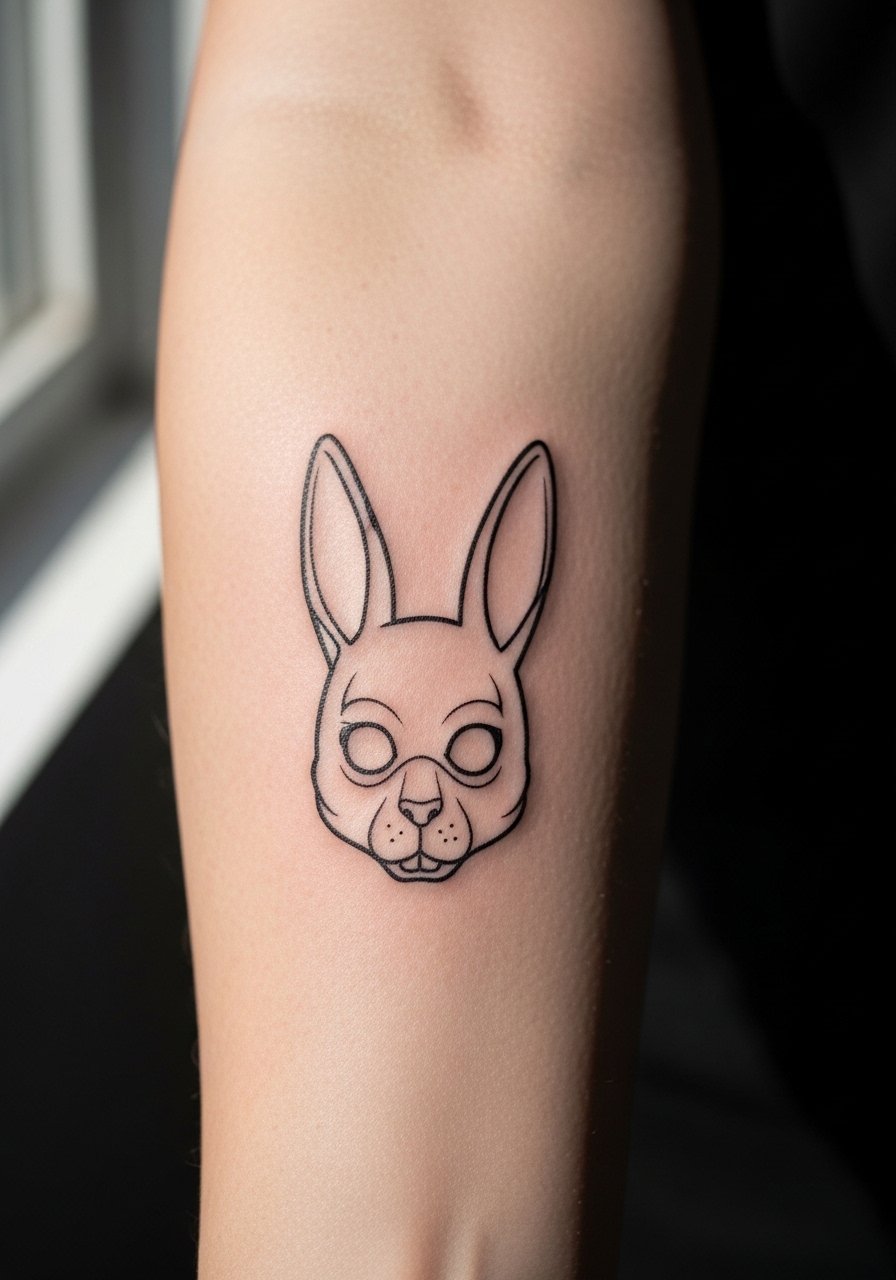
Ive seen simple bunny outlines age really differently depending on line weight and spacing. Opt for slightly heavier contour lines and 2 mm of breathing room inside the mask so the ears and eyes do not blur together as the piece heals. Tell your artist you want single-pass outlines with a backup bold contour, not a fragile single-needle job. Pain on the inner forearm is mild to moderate and a single short session usually does it. For showing the ink, pair it with a rolled cuff chambray shirt on casual days and remove jewelry during the session.
2. Fine Line Jet Engine Falling from Sky on Outer Forearm
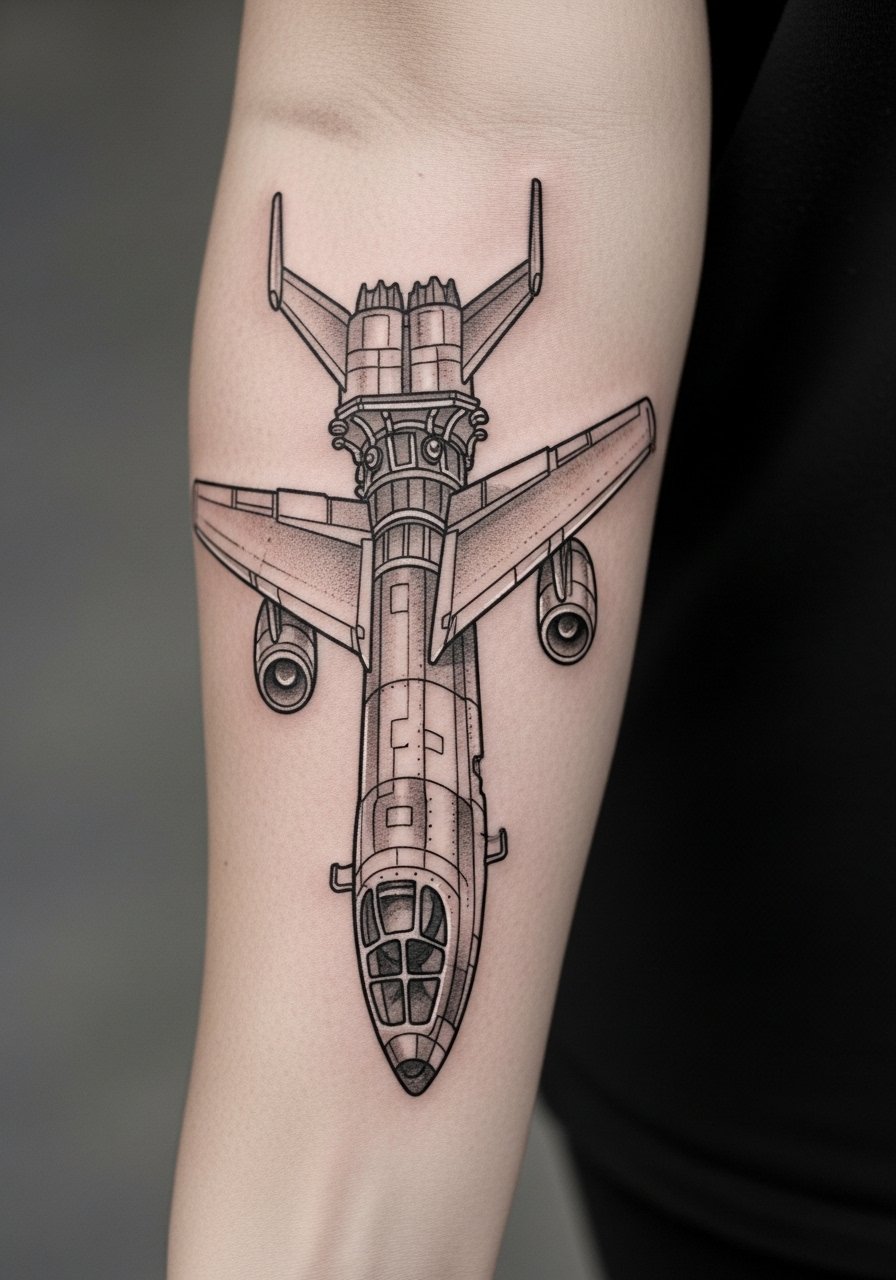
Fair warning, fine line engines look stunning fresh but can soften on darker skin or high-friction zones. Ask your artist for slightly increased contrast in the shading and a small halo of negative space around the central silhouette so the engine reads at distance. The outer forearm is forgiving for touch-ups, and most people book two shorter sessions rather than one marathon. During the consult, show examples of healed work so the artist can match depth. For outfits, roll sleeves up and let a slim leather cuff on the opposite arm balance the look, like with a slim leather cuff bracelet.
3. Surreal Frank Bunny Portrait on Upper Arm
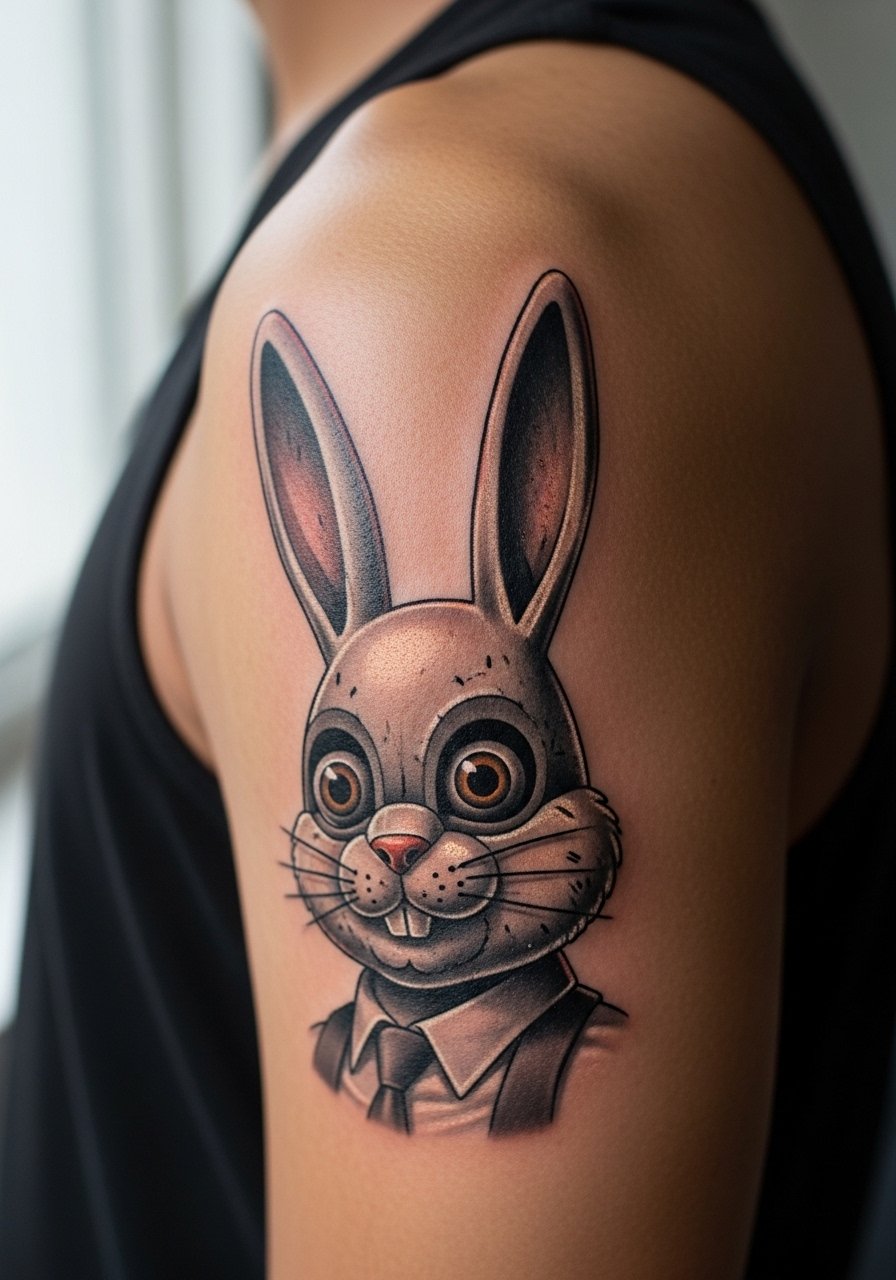
If you want the dead-eyed stare but need it to last, choose micro-realism with moderate saturation rather than ultra-fine stippling. Upper arm portraits heal well because the skin is stable, but heavy detail needs 2 to 3 sessions and careful layering of graywash. Tell the artist to map out where highlights will sit so they avoid overworking shadowed zones. A common mistake is compressing too many tiny textures into a single sitting. For showing it off, fitted tank tops work best and a fitted tank top men style keeps the shoulder silhouette clear while you break in the piece.
4. Time Portal Vortex with Bunny Silhouette on Shoulder Blade
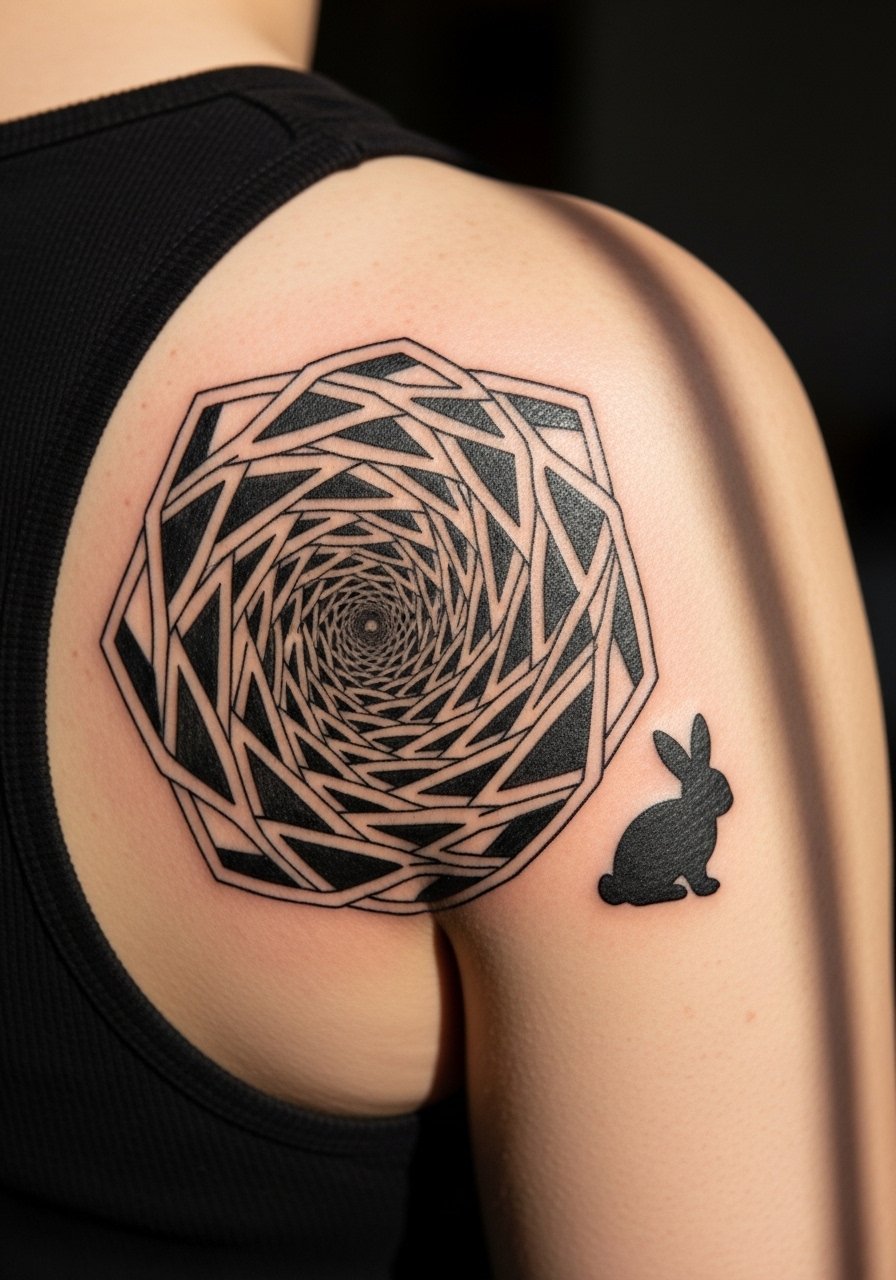
Large portal geometry needs room to breathe. On the shoulder blade, bold black fills and clean spacing mean the vortex holds its motion for years. In consultation, ask for a compositional mockup that shows how the vortex flows with muscle curves. The shoulder blade takes well to multiple sessions and sits low on the blowout risk scale if the artist keeps needle depth consistent. For session access, wear a loose button down shirt you can pull aside. For nights out, strappy tanks frame the work without obscuring the edges.
5. Donnie in Pathological Hoodie Scene on Chest
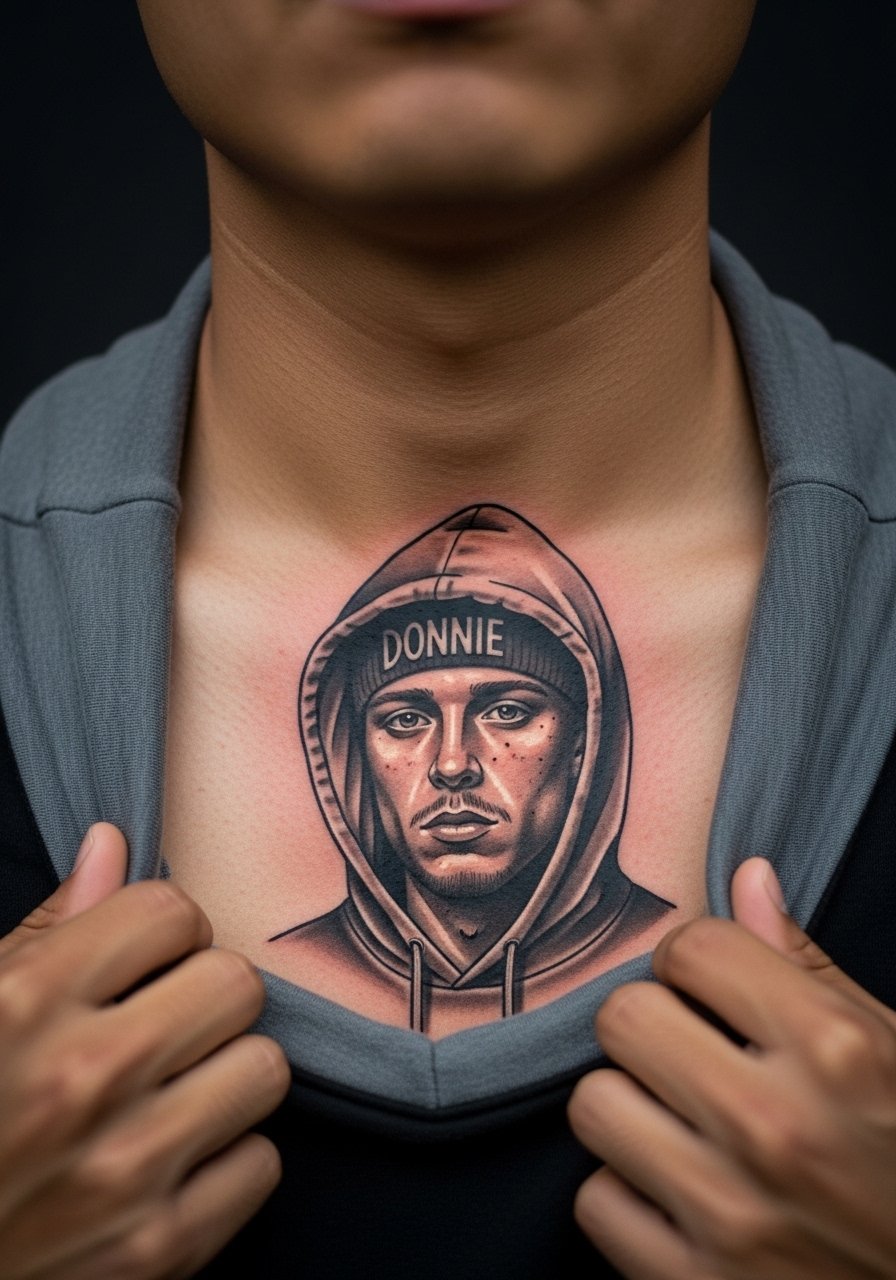
Chest pieces read intimate and they hurt more than arms. The sternum and upper chest move a lot when breathing, so expect longer sessions and strategic layering of color. Ask your artist to place the focal point just above the fabric line so the design reads when you wear V-necks. A common misstep is compressing the portrait too low on the chest where distortion is worst after weight change. For session day wear, bring a v neck t shirt or wide-neck top so the artist can access the area without you being uncomfortable.
6. Minimalist Eye in Triangle at the Wrist
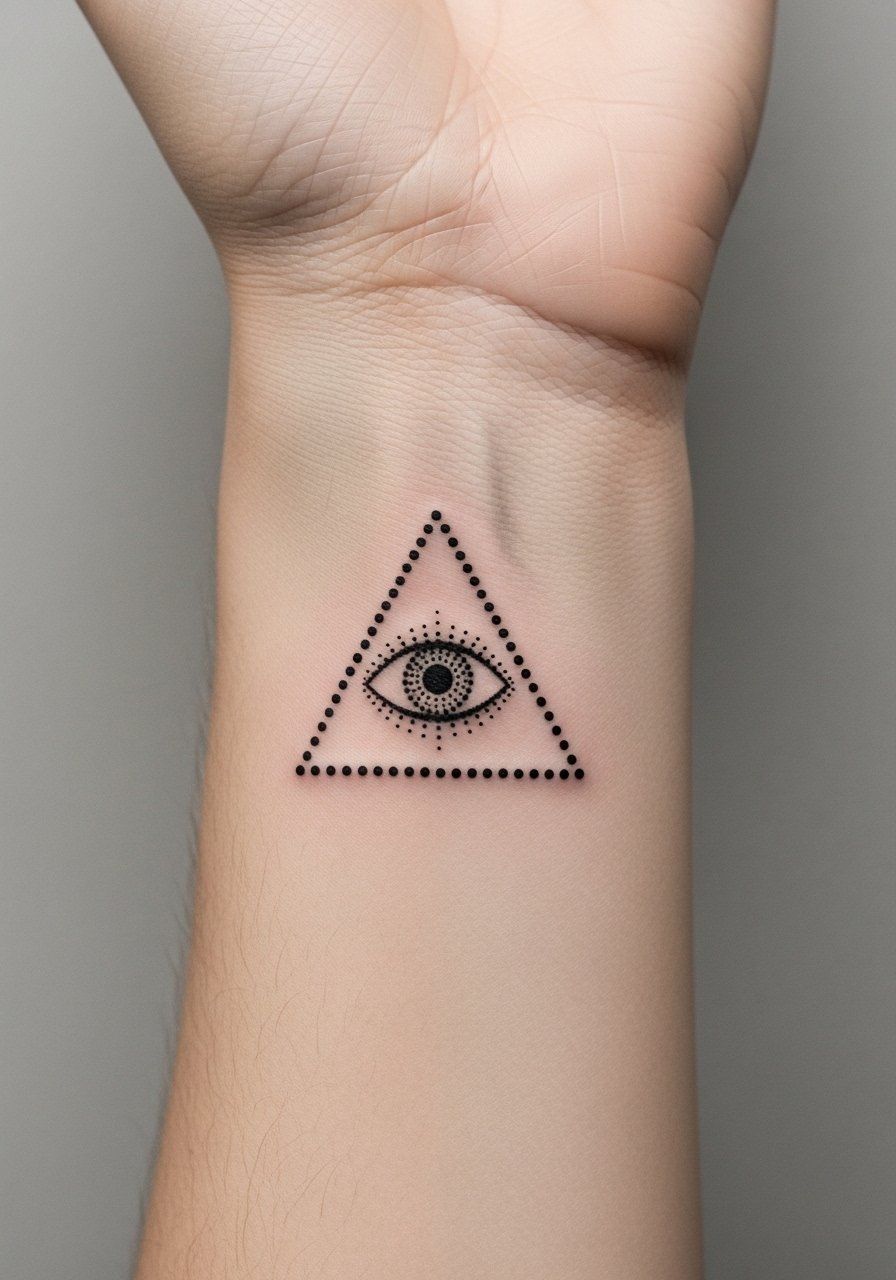
Wrist placements are discreet and visible, but the skin there is thin so fine dots can blur if spaced too tightly. For wrists, insist on dotwork spacing that gives each pinprick room to settle. Expect a one-session job but plan a touch-up at the one-year mark if lines soften. The fine triangle reads best with a thin chain opposite wrist for contrast. Pair this with a thin silver chain bracelet when you want the peekaboo effect, and remove all jewelry for the appointment itself so stencils lay clean.
7. Haunting Sky with Jet Engine Shadow on Outer Thigh
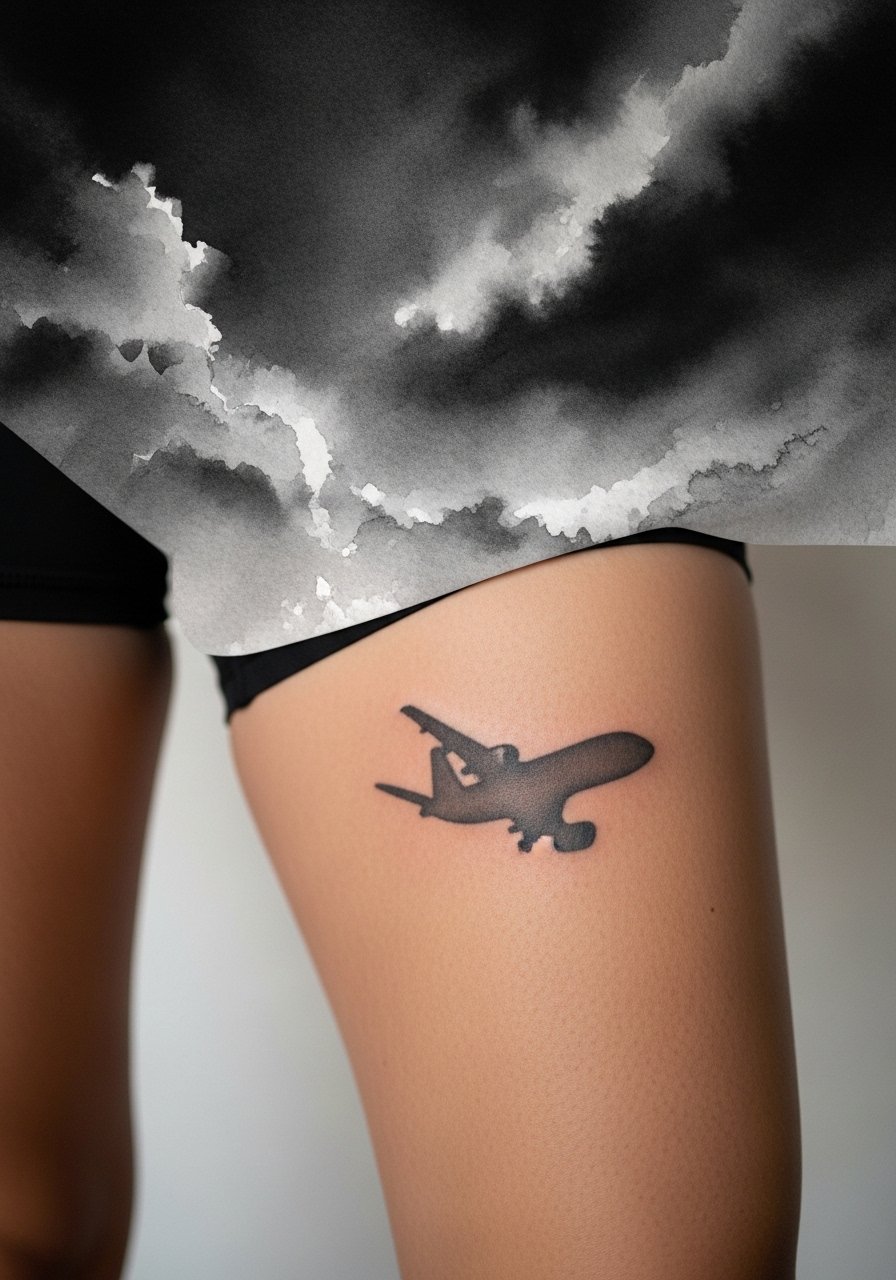
Thigh pieces heal under friction if you are active, but they offer a canvas for atmospheric shading that shoulders or wrists cannot match. For this watercolor approach, ask for durable washes and anchoring black shapes so the engine silhouette remains readable as pigment settles. The outer thigh can handle two-session builds and will soften more slowly than ankle work because skin is thicker. For session comfort, wear loose shorts and consider a high cut athletic shorts you can adjust without sacrificing modesty.
8. Frank Bunny with Clock Gears on Calf
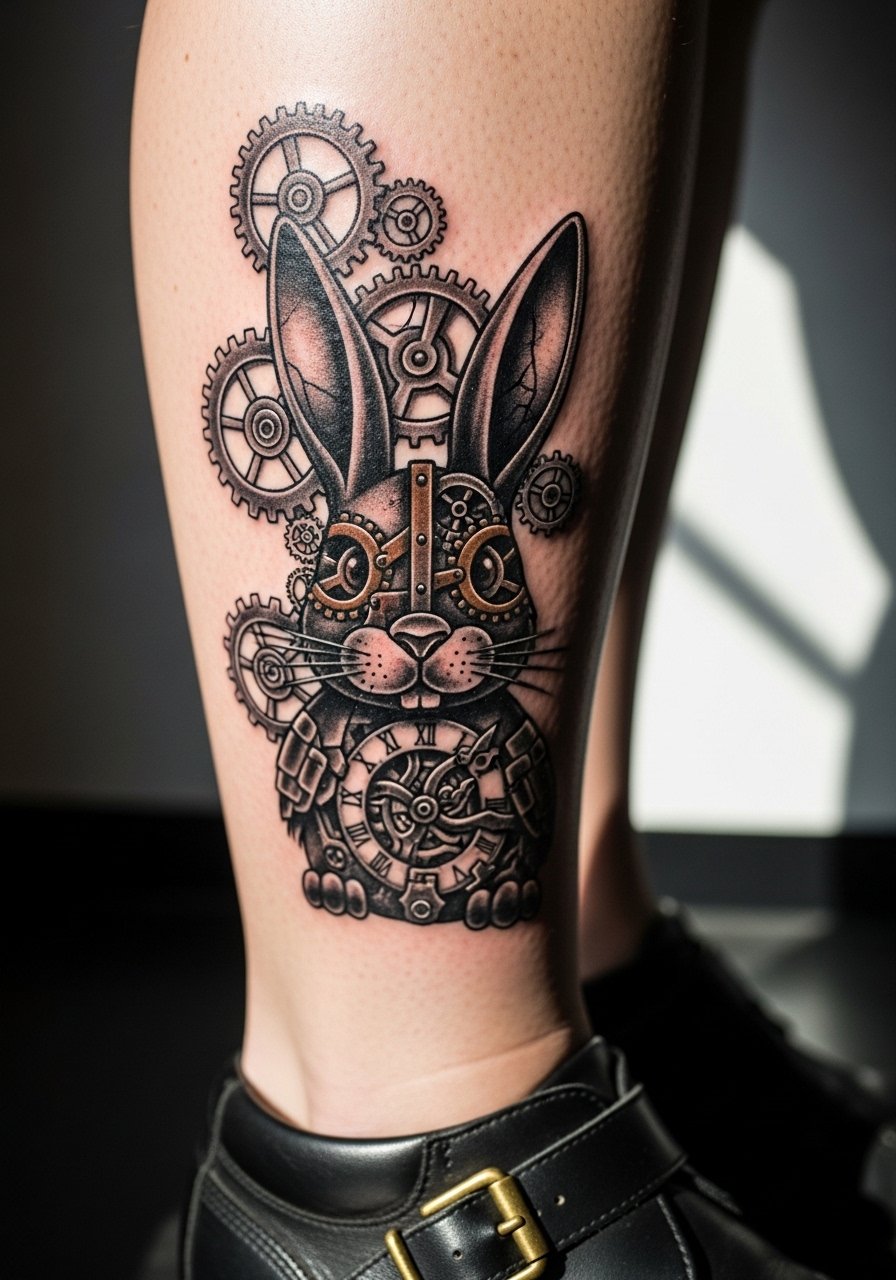
Calf placements are great for pieces that need vertical flow and mechanical detail. Ask your artist to anchor the gears to calf anatomy so the design moves with your gait. Most calf work is medium pain and usually done in two sessions if you want layered gray tones. A common error is crowding gears too tightly which blurs into an indistinct mass over time. Show it off in cropped joggers or with ankle sneakers. A cropped jogger pants silhouette frames the calf and keeps the piece visible without making it a statement all the time.
9. Donnie Darko Quote Across the Ribs
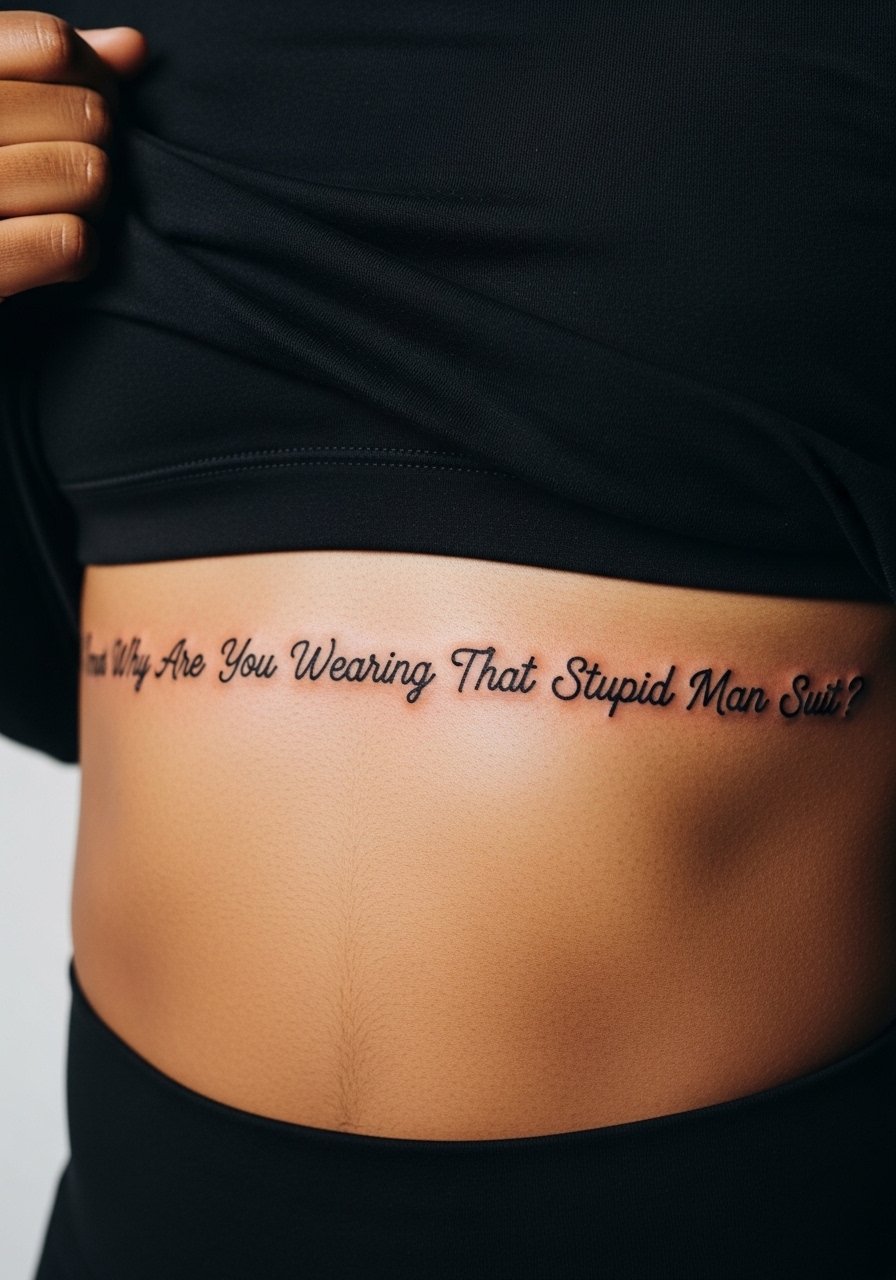
Rib tattoos are high on the pain chart and high on readability risk when done too small. Script across ribs needs slightly larger letterforms and generous spacing so the phrase does not compress as skin stretches. Expect a single long session for a 6 inch horizontal script and prepare for soreness for a few days. Artists are split on fine line here. One group says ribs stretch and blur lines quickly. The other group says careful depth control and spacing make ribs work. Ask your artist where they land on that debate before booking. For the session, wear a cropped top you can lift, and bring a playlist to stay calm.
10. Bunny Mask with Tangled Timeline Paths on Shoulder Blade
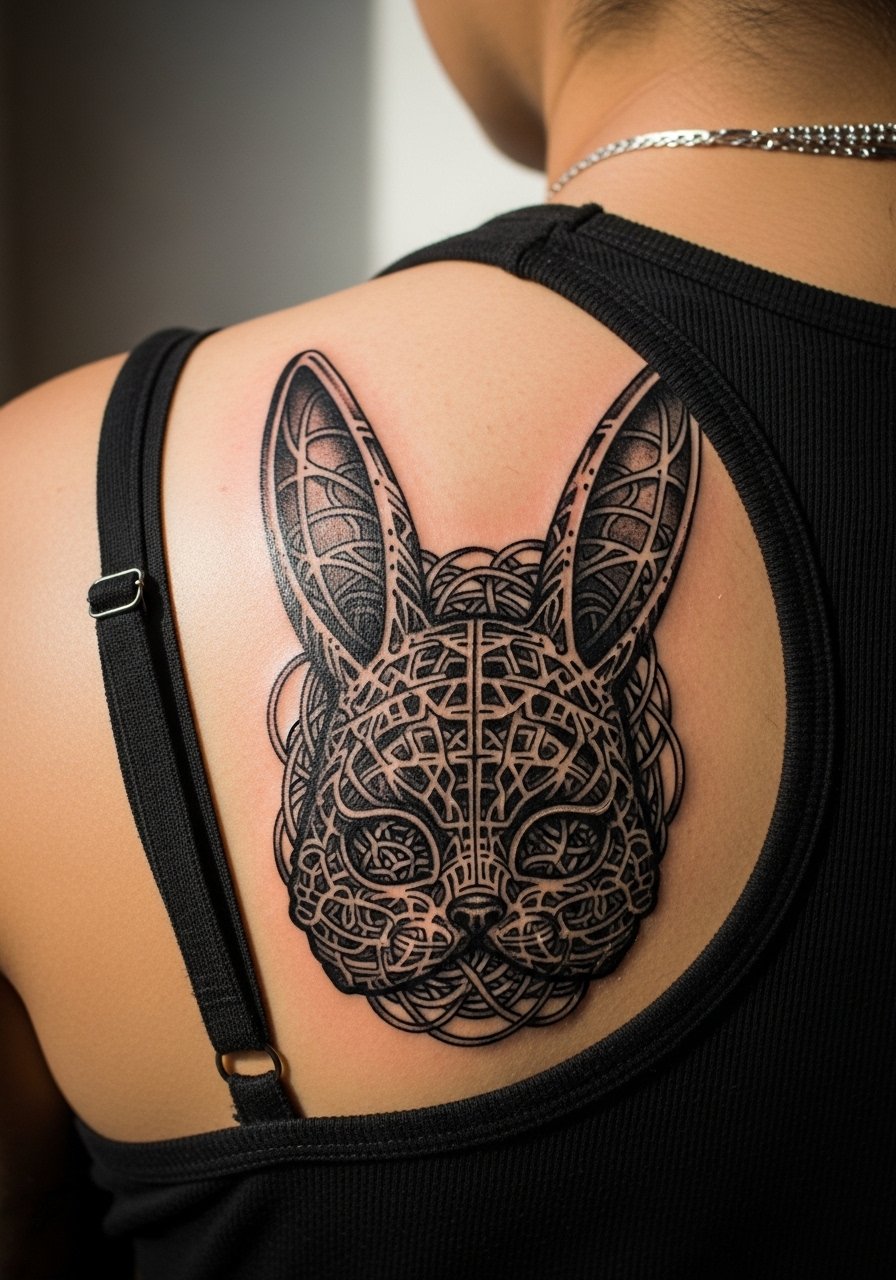
Collectors like this for its narrative depth but it demands scale. Tangled path motifs need negative space corridors to maintain legibility. On the shoulder blade, design the paths to flow toward the spine or scapula so the piece reads from multiple angles. A frequent mistake is compressing timelines into a circle too small for the detail. This one benefits from a three-session plan. For showing it off, strappy tanks and high-waisted bottoms frame the shoulder blade. Consider a strappy tank top that keeps the area visible without overstretching the skin.
11. Primary Universe vs Tangent Universe Split Design on Inner Bicep
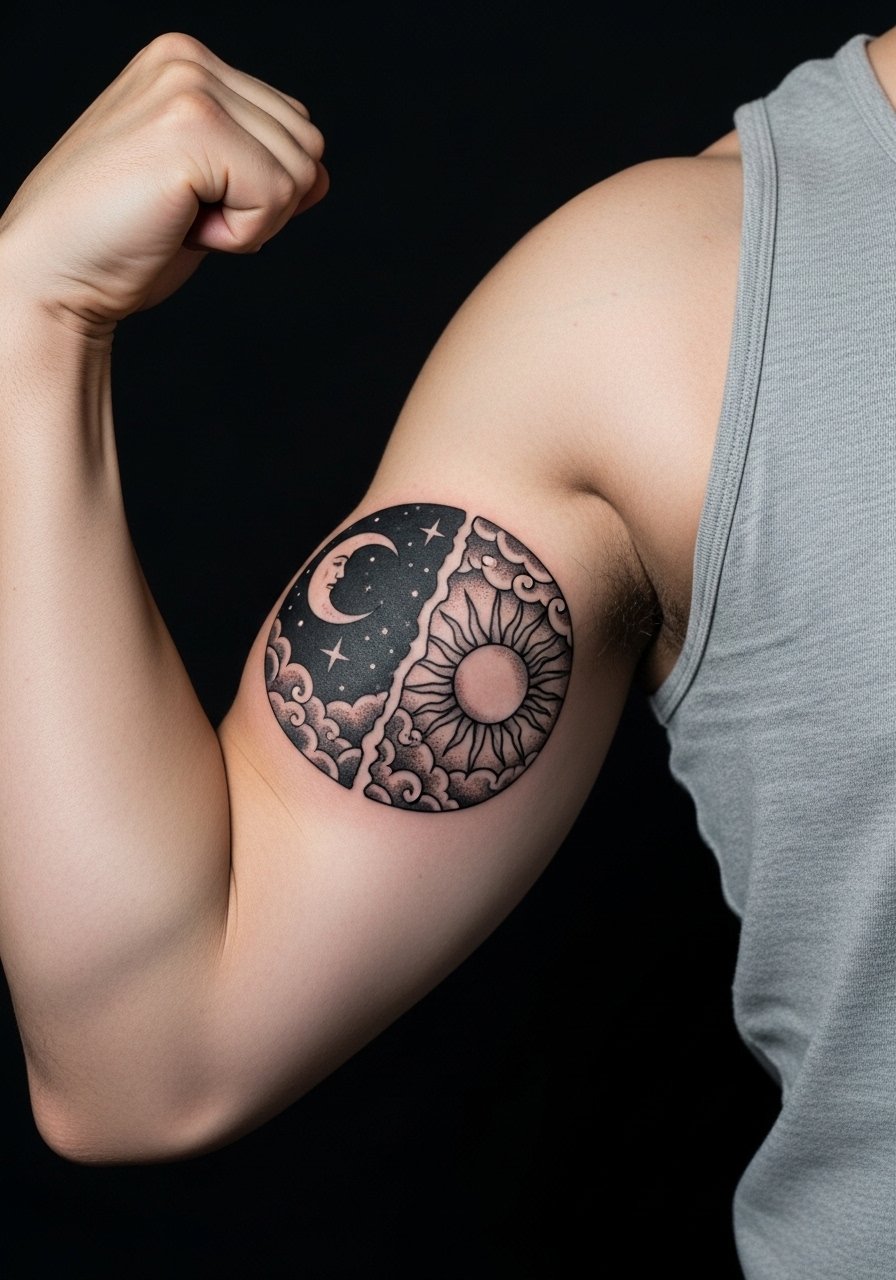
Inner bicep pieces require careful siting because the surface curves when you relax the arm. For this split concept, map the dividing line to where the forearm meets the bicep so the mirror effect reads when you move. The inner bicep can be tender, and many artists prefer multiple short sessions to maintain saturation. Avoid excessive micro-line detail in the fold. For session wear, a loose button down shirt you can slip off one arm works well so the artist has clean access without a full undress.
12. Ethereal Bunny in Misty Forest at the Collarbone
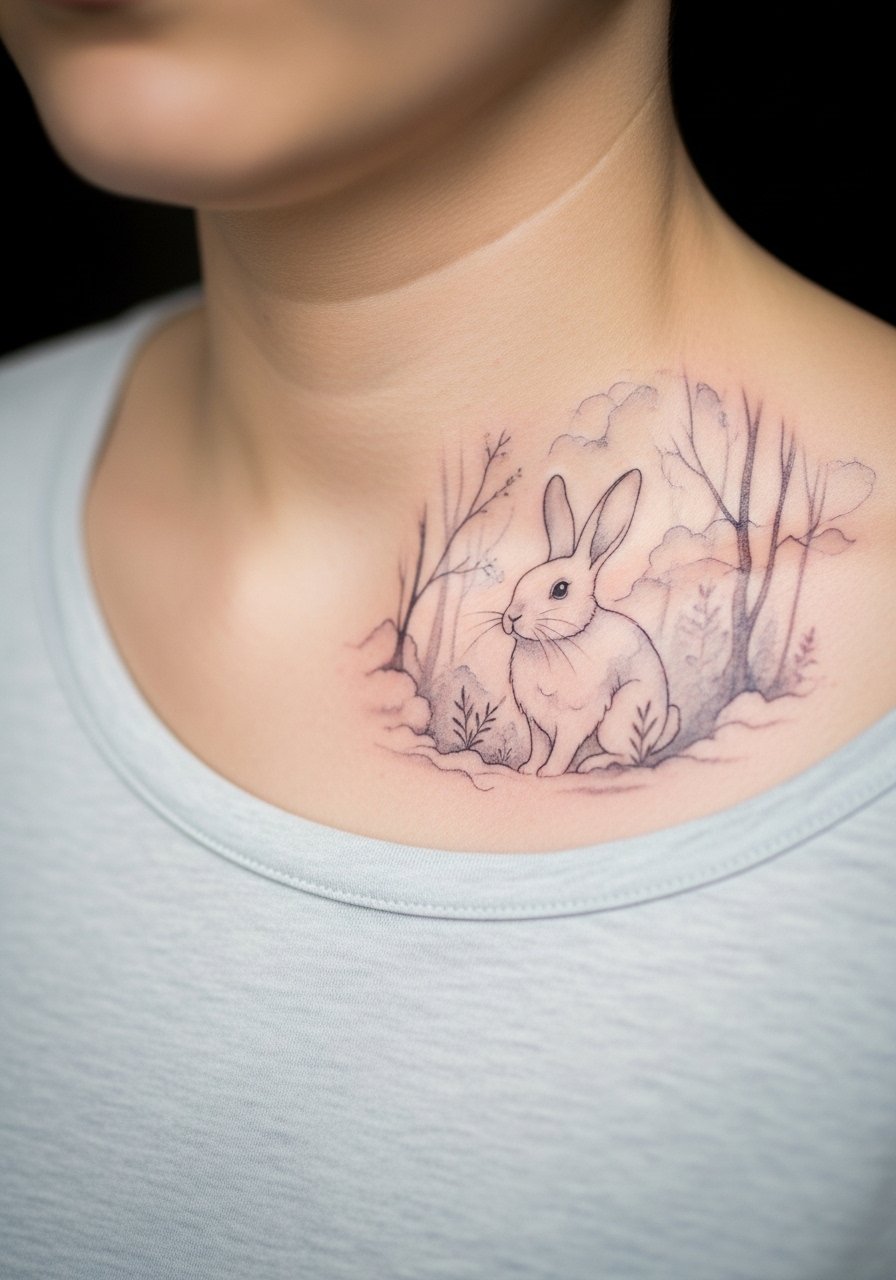
Collarbone tattoos read very close to the face and require careful scale. For ethereal, low-saturation watercolor, ask for soft edges and anchored dark points so the bunny silhouette survives time. Expect moderate pain and most artists to prefer two sessions for layered washes. A common error is placing too much detail toward the sternum where it warps with movement. For showing off, V-neck tops highlight the collarbone. Try pairing with a v neck t shirt when you want the piece visible for evenings out.
13. Skeletal Frank with Jet Engine Core on Outer Forearm
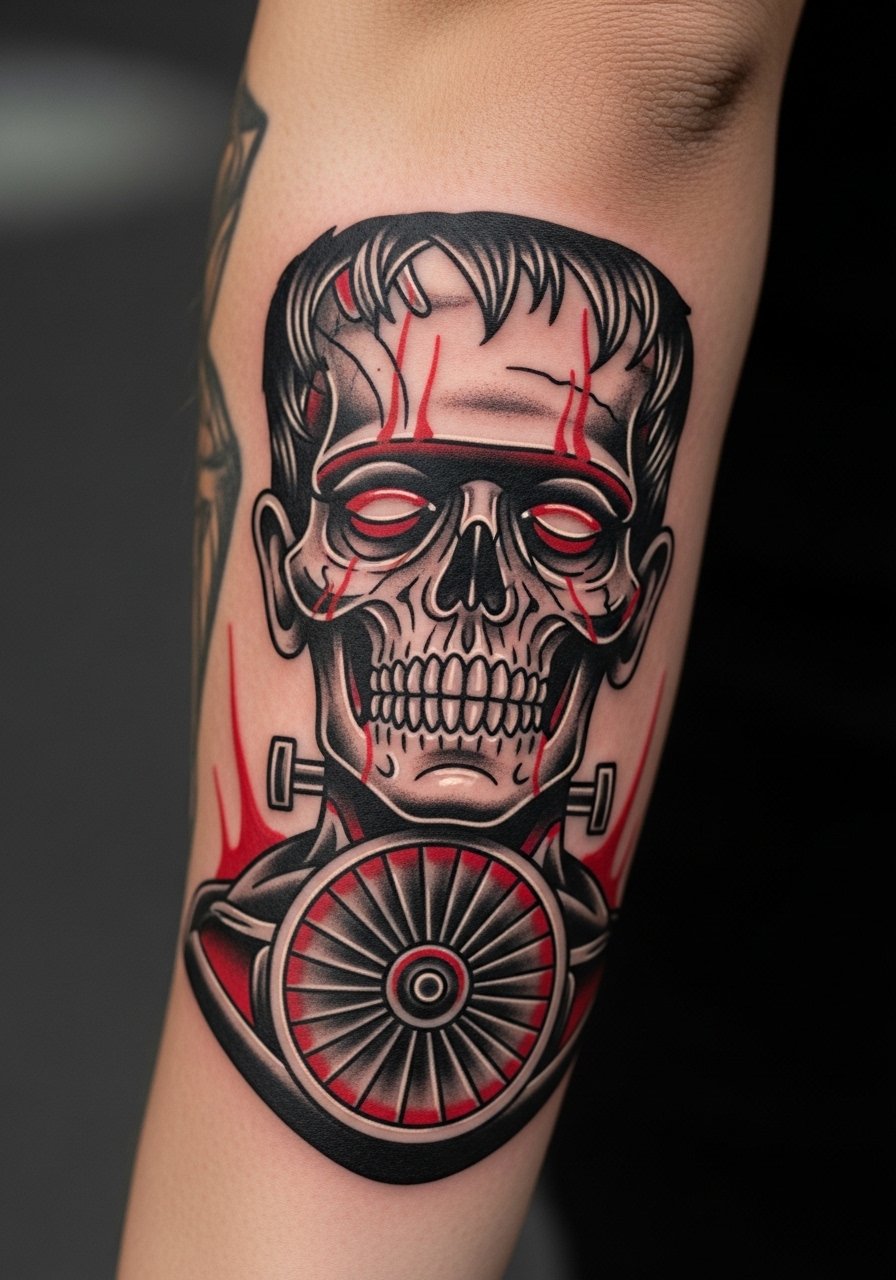
Outer forearm is one of the most reliable areas for detailed traditional horror pieces because the skin is relatively stable. For a skeletal Frank with red core accents, ask for saturated black fills and small bursts of color rather than full washes so the red remains punchy. Blowout risk is low here when the linework is bold. Expect two to three short sessions for a five inch composition. For casual showing, rolled sleeves and a simple sleeve cuff are enough, and a rolled cuff chambray shirt complements the ink without stealing the mood.
14. Knuckle Bunny Eyes
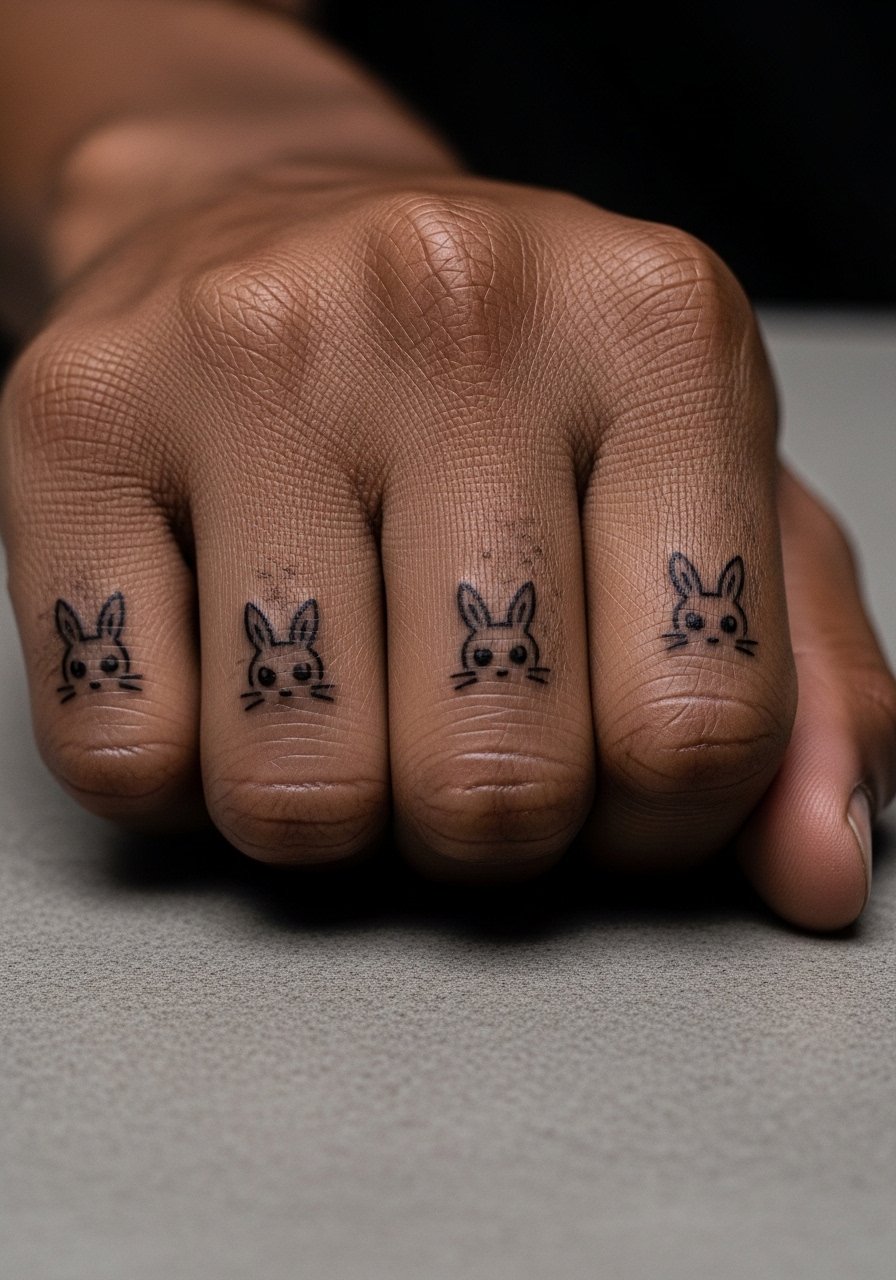
Knuckle tattoos are a statement with heavy daily wear. The skin on the knuckles sheds faster and needs touch-ups more often. For tiny eyes across knuckles, keep the glyphs bold and avoid narrow strokes that disappear with repeated washing and impact. Sessions are quick but often need top-ups at 6 to 12 months. A real mistake is asking for micro-script on knuckles; text does not survive there well. Keep expectations about longevity realistic and plan for maintenance if you want them to stay crisp.
15. UV-Reactive Falling Engine on Upper Back (Glow Under Blacklight)
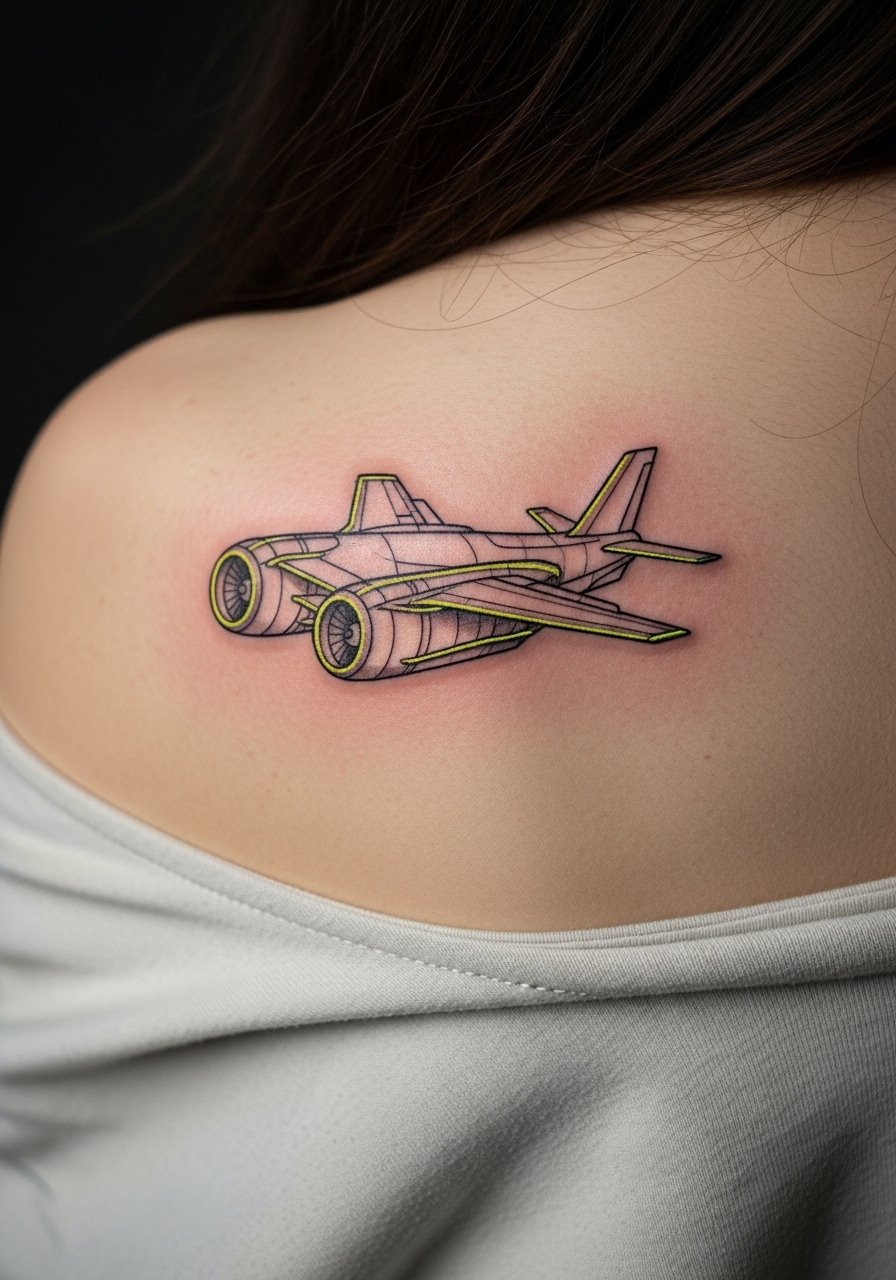
UV-reactive ink adds a party-time element but it comes with trade-offs. UV pigments can be less durable in normal light and require experienced hands to blend safely with blackwork. If you opt for a glow-under-blacklight engine, request the UV as accent highlights only rather than the main fill. Upper back gives the artist room to test placement across sessions and limits UV exposure wear from sunlight. Be explicit about the effect during consults and ask to see healed UV examples. For show-off moments, backless or wide-neck tops reveal the glow under party lights.
16. Quote Woven into Time Vortex Script
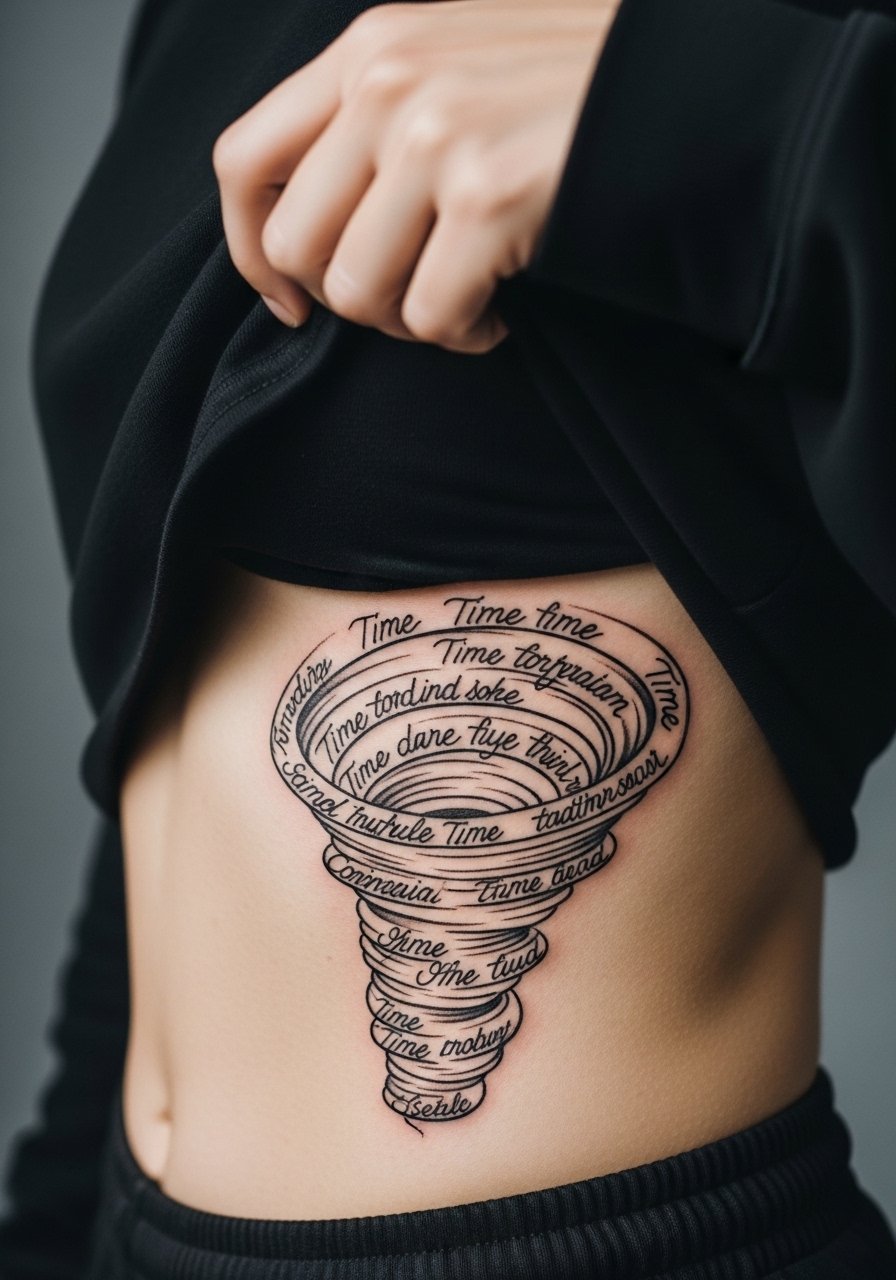
Integrating text into a vortex looks clever but the script must follow the design flow and avoid thin loops that close up when healed. When asking for this, show the exact wording and preferred typeface. Artists need to plan negative space around letters so the phrase remains legible at distance and after settling. Side torso work can stretch with weight change, so place the script along lines of low stretch when possible. For the session, bring a top you can lift slightly to expose only the area being tattooed.
17. Dark Skin Optimized Blackwork Portal on Back
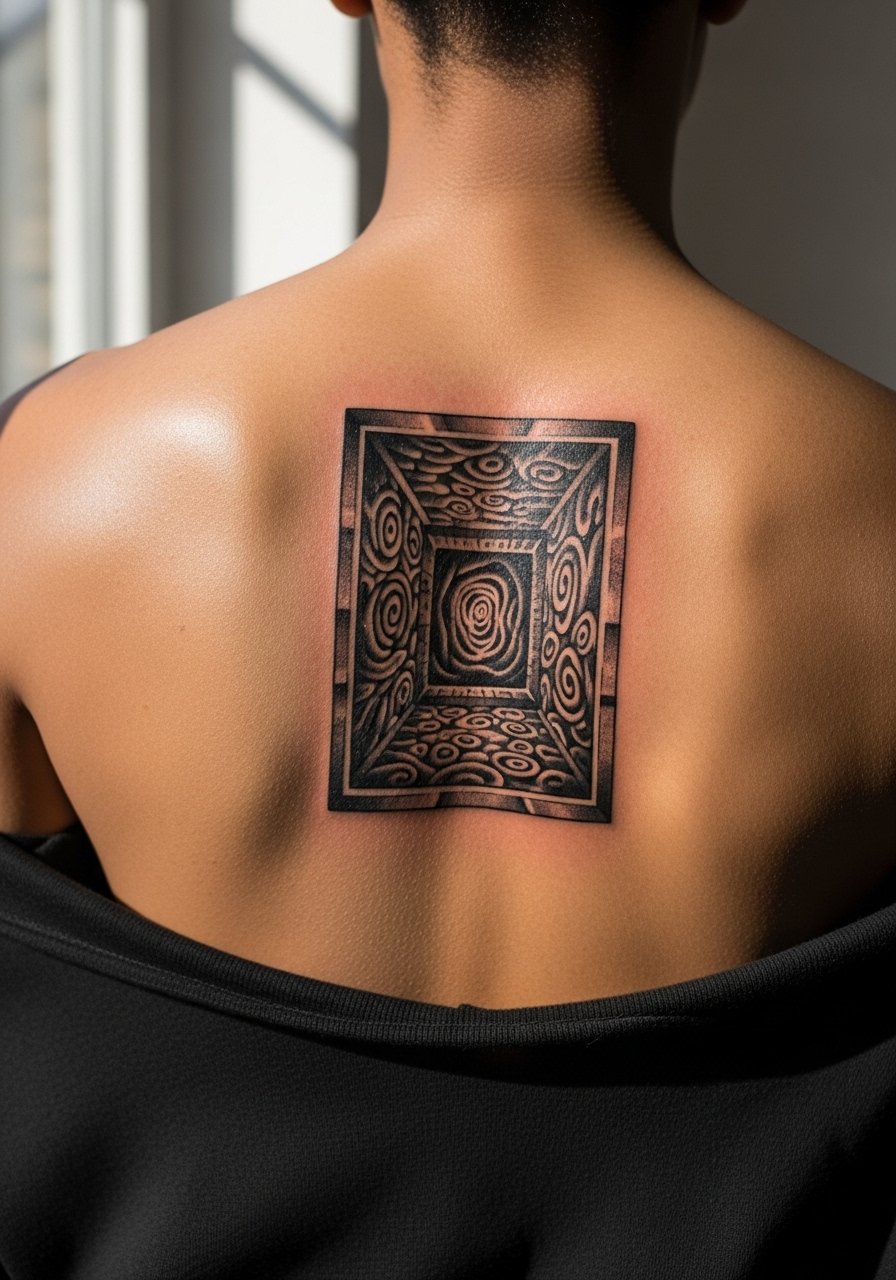
Designers often forget that contrast choices differ across tones. For darker skin, ask an artist who leans into saturated black fills and crisp negative shapes instead of fine gray shading. The result reads better in photos and in person. A portal built this way may use fewer mid-tones and more decisive edges to keep motion legible over time. Back placements give the scale needed for that approach and usually do well across healing stages. When booking, mention you want healed examples on darker skin so you and the artist share expectations.
18. Frank Mask in Ornamental Frame on Calf
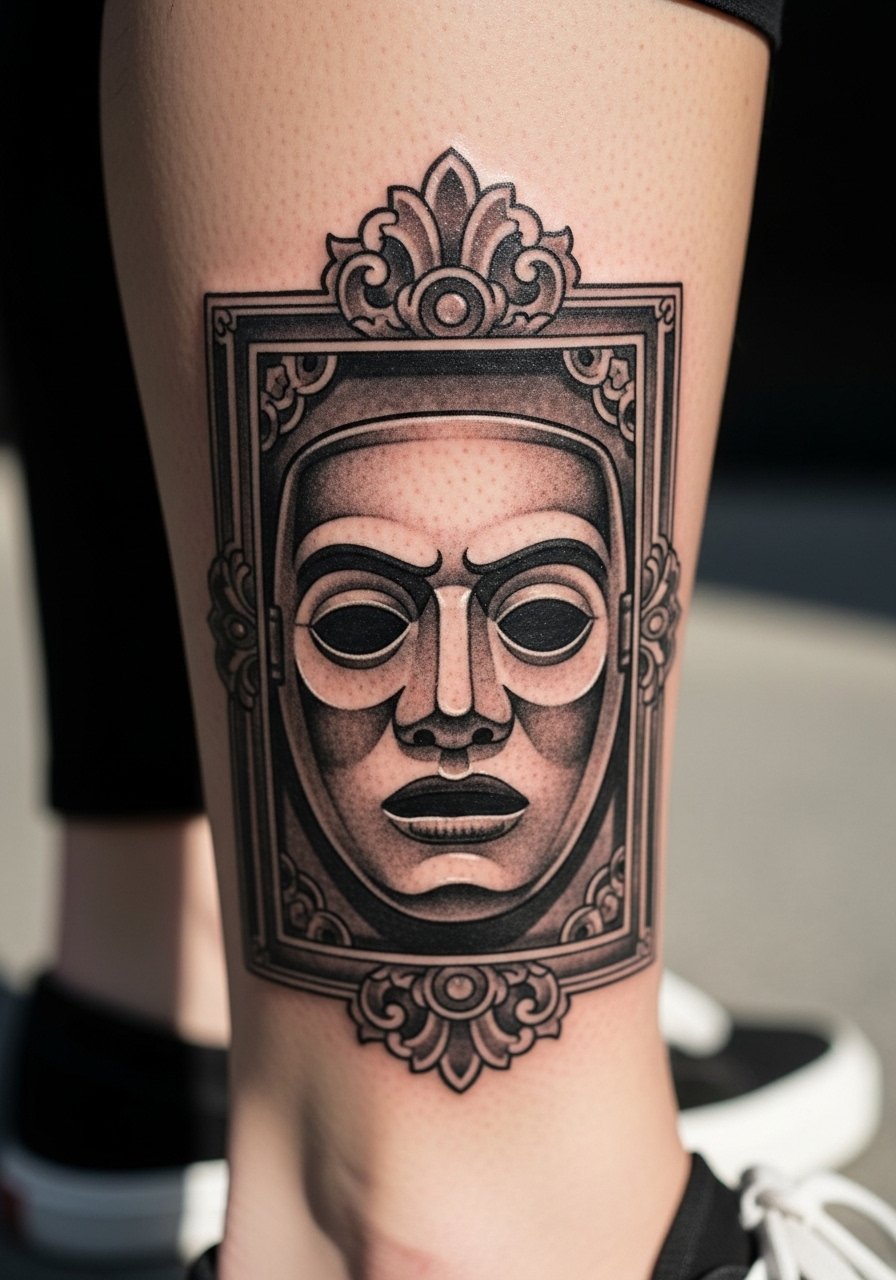
Ornamental frames can keep a central motif readable by giving the eye a defined border to rest on. On the calf, frames follow the vertical plane well and help the mask sit like a medallion. Tell your artist to keep the frame open in places to avoid dense black that becomes a blob when pixels settle under skin. Calf is less prone to blowout, but heavy fills still need careful shading. Show it off with cropped bottoms or summer sneakers and use a cropped jogger pants look to make the piece casual.
19. Micro-Realism Frank on the Chest Center
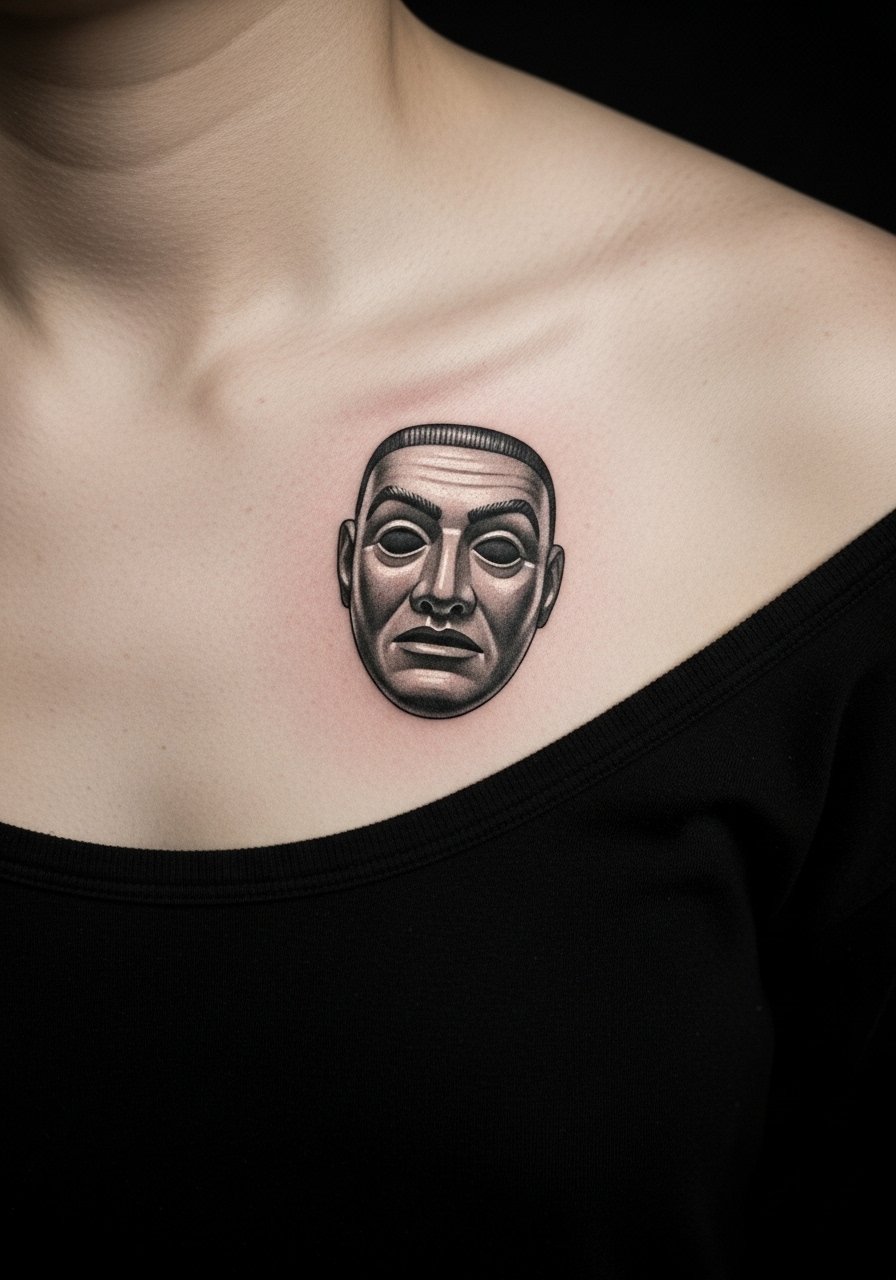
Micro-realism demands patience. On the chest center, small portraits keep intimacy but require careful contrast planning so the eyes and mouth do not wash out. Tell the artist you prefer slightly high-contrast highlights and a matte mid-tone rather than glossy saturation. Expect two sessions and a realistic touch-up timeline at the one-year mark. The chest shifts with body changes, so avoid packing too much detail into a tiny space. For sessions, a front-open layer helps the artist keep you comfortable without full undress.
20. Backplate Sleeve: Donnie Scene Montage
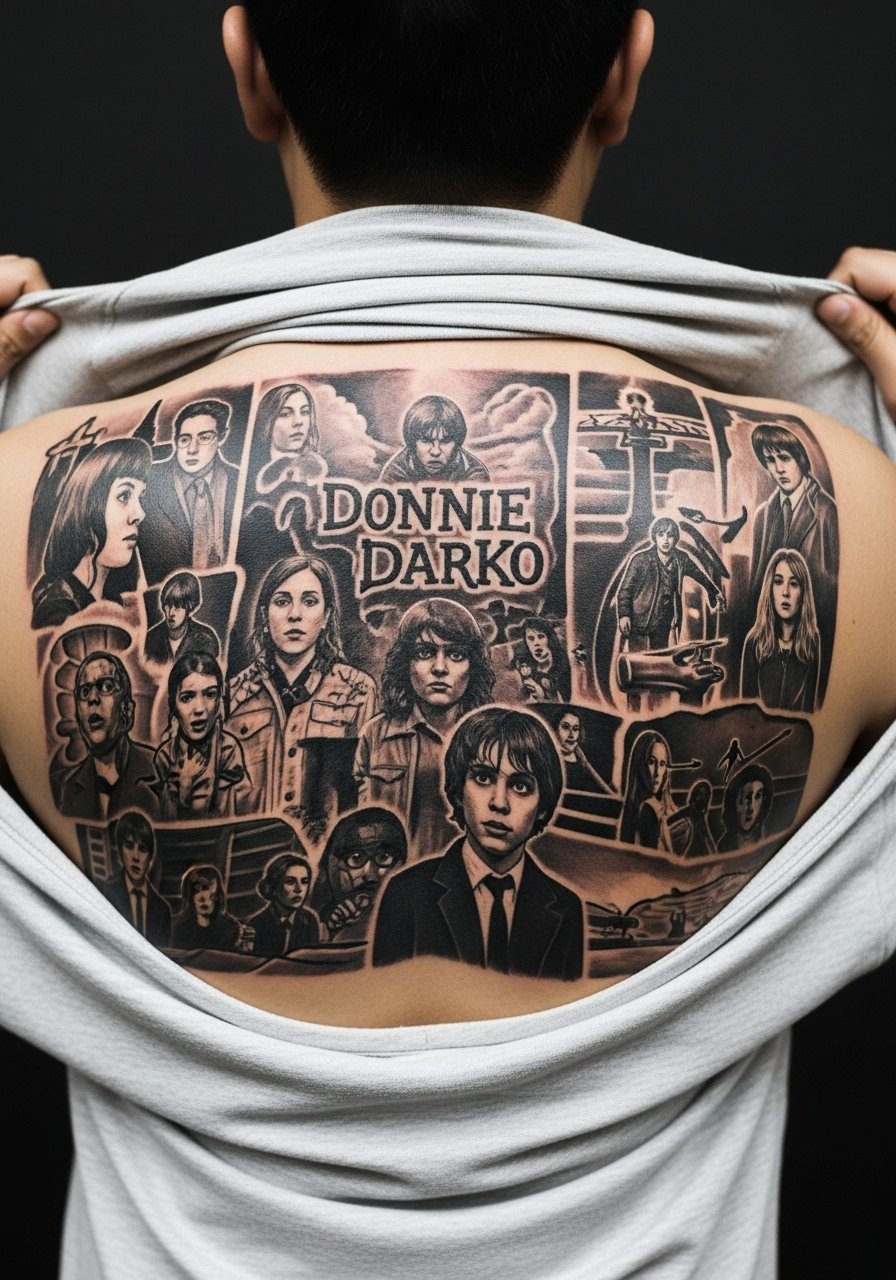
Big backpieces let you sequence moments and motifs so smaller elements do not fight each other. A montage needs a compositional roadmap from the artist that spaces scenes with breathing corridors. Plan multiple sessions across months and expect the design to shift visually as patches are added. A common mistake is trying to cram a sleeve onto the back without accounting for narrative flow. For booking, ask about a long-term schedule and how touch-ups will be coordinated across the whole plate.
21. Minimalist Time Portal Dot Wrist Band
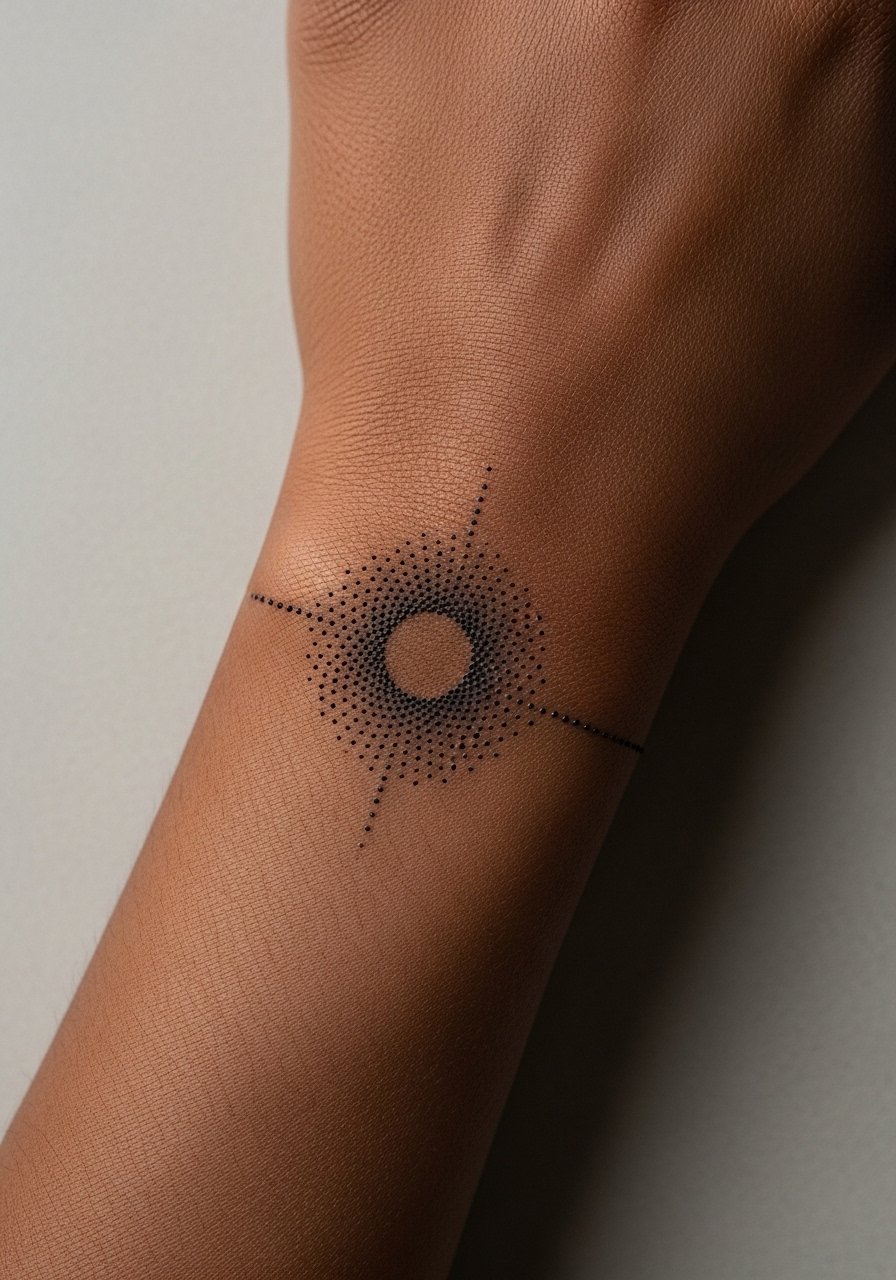
Wrist bands made from dot gradients are a subtle way to reference the film without a motif. For durability, the dot spacing must be deliberate so groups of dots do not merge. This is a low-pain, one-session piece but expect a light touch-up at 12 to 18 months on high-movement wrists. A styling trick is to wear oversized button-down cuffs that partially hide the band for a peekaboo reveal. Consider a oversized button down shirt when you want the wrist to be part cover, part showcase.
Pre-Session Essentials
The first six ideas above include wrists, forearms, chest, and shoulder blade work, so a few targeted items smooth the session and the first week of healing.
-
Tea tree tattoo balm. A thin balm some people prefer over heavy ointments during early blackwork healing because it absorbs without leaving a thick film.
-
Indie second skin tattoo patches. Breathable single-use film is handy for wrist and knuckle pieces that get friction from sleeves and hand washing.
-
Lanolin-free sensitive moisturizer. Good for people who react to traditional balms and for keeping fine lines from looking shiny while they heal.
-
Washi paper tattoo wraps. Lightweight dry-healing wraps are an alternative for environments where heavy plastic film feels suffocating.
-
Small-batch hemp salve. A gentle anti-itch option during the later scab-softening window for those who prefer plant-based balms.
Frequently Asked Questions
Q: Will a fine line Frank bunny on my forearm blur within a year on medium to dark skin?
A: It depends on line weight and aftercare. For medium and dark skin tones, higher contrast and a slightly heavier contour help the bunny remain readable. Plan a small touch-up at 12 to 18 months if it softens, and ask the artist to show healed examples on similar skin.
Q: Are ribcage scripts worth it given the pain and stretch risks?
A: Ribs are painful and they change with weight and posture. If you want a quote, increase letter size and spacing and expect a longer session. Some artists avoid ultra-fine lines on ribs. Ask where your artist stands on that specific placement before committing.
Q: How should I prep clothing-wise for a shoulder blade portal session?
A: Wear a loose button-down or a tank you can remove easily, and avoid tight straps that pinch the area afterward. A strappy tank top you can slip off keeps the shoulder blade accessible while maintaining modesty.
Q: Can UV-reactive ink be mixed into a larger blackwork design without ruining the durability?
A: It can, but UV pigments behave differently. Use UV as small accents rather than main fills and confirm the artist has healed UV examples. Expect different touch-up needs for the UV sections compared with standard blackwork.
Q: How do I find artists who actually understand Darko motifs without naming them?
A: Search the hashtag #DonnieDarkoTattoo and filter by location. Use apps that list guest spots and look for portfolios with high-contrast blackwork or micro-realism depending on your direction. Ask for healed photos in consults, not just fresh work.
Q: Should I be worried about aftercare debates like Saniderm versus dry healing?
A: Both camps exist. Some artists and clients prefer breathable second skin products for the first days, while forum users favor dry healing to monitor scabs. Ask your artist what they recommend for your chosen style and follow that plan closely.
