
Fine line butterflies dominate feeds right now, but what looks fragile on a screen does not always hold up on the body. I've seen crisp mini wings lose their edge at year two when placed on high-movement spots, while slightly bolder linework keeps the design readable for years. Below are 27 neck-focused butterfly ideas with real wear-and-care notes and wardrobe tips to help you pick one that lasts.
1. Fine-Line Black Butterfly, Center Front Neck
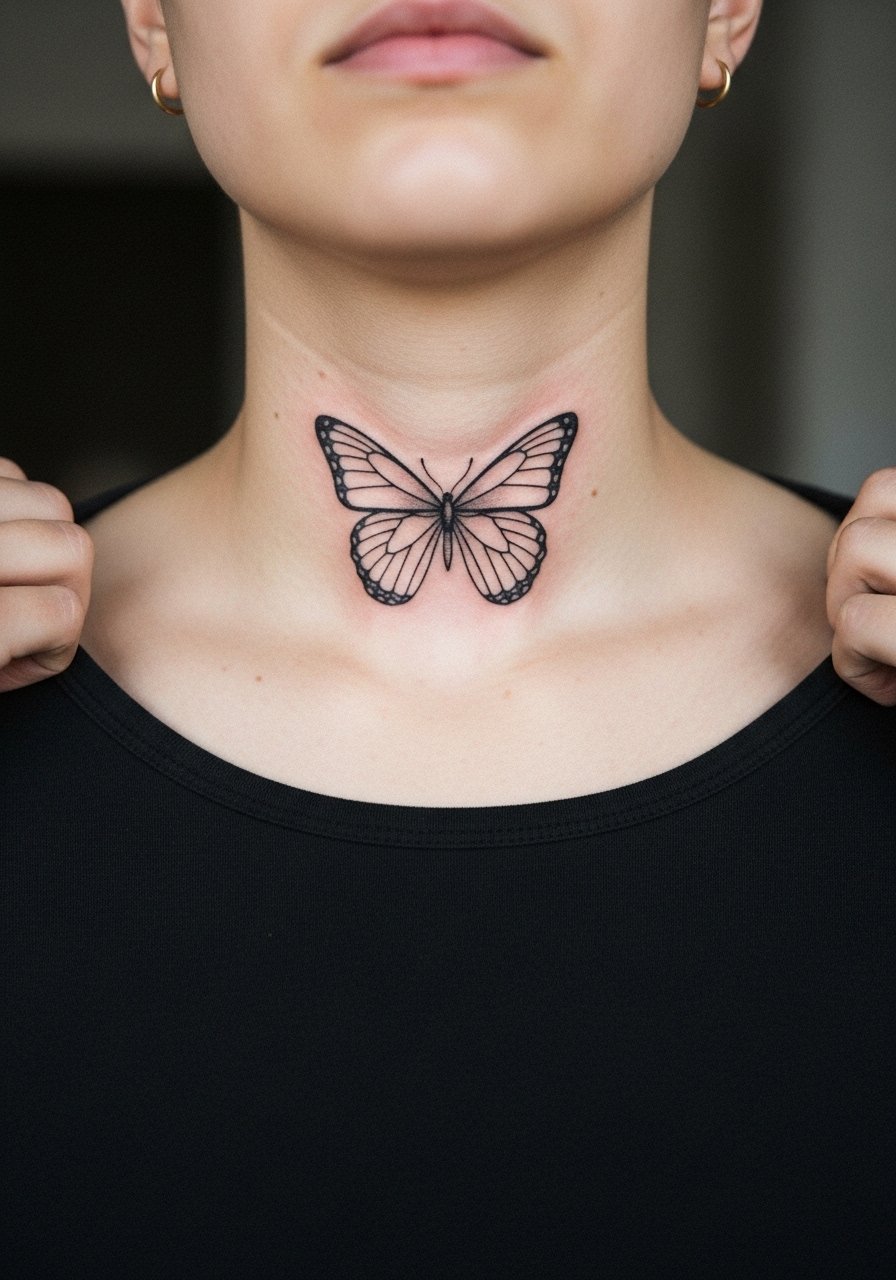
A small fine-line butterfly centered at the throat reads minimal and intentional. Recommend a slightly heavier outer line than the demo photo so the linework retains definition as it softens over two to five years. Tell your artist you want hairline inner details but a fractionally stronger contour, and ask where they place the stencil so it follows your collarbone lines. Expect a 60 to 90 minute session with moderate sensitivity. Common mistake is insisting on ultra-fine lines that later blur into a gray patch. For show-off wear, pull a wide-neck shirt aside for evening looks, and wear a loose button-down to the appointment so the artist has clear access.
Note on professional context: neck tattoos remain visible in client-facing roles, so weigh career implications before committing.
2. Red Outline Minimalist Butterfly, Side Neck
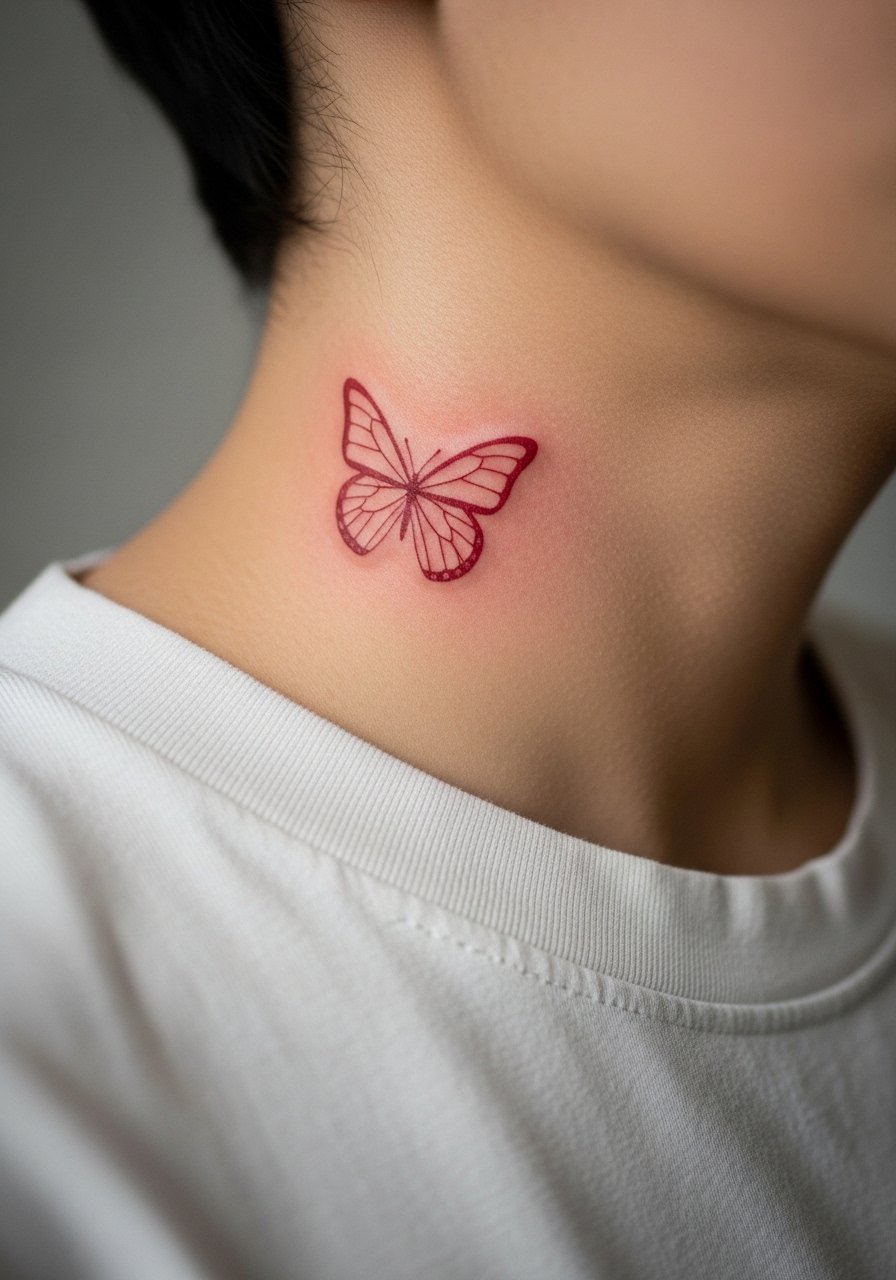
A single-color red outline gives a graphic pop without a full-color commitment. Tell the artist you want a pigment-rich single-pass outline and avoid internal shading so the red reads clean longer. This one tends to sting more than center-neck pieces because the skin is thin along the side, but sessions are short, usually under an hour. Aging note: red can fade faster than black, so expect a touch-up by year two or three for saturation maintenance. Common error is asking for extra filigree inside tiny wings which blurs over time. For styling, an open collar button shirt frames the wing and keeps attention upward.
Note on hiring concerns: some employers scrutinize lateral neck work more than a front throat piece, so consider placement carefully.
3. Black and Gray Realistic Butterfly, Side Neck Sweep
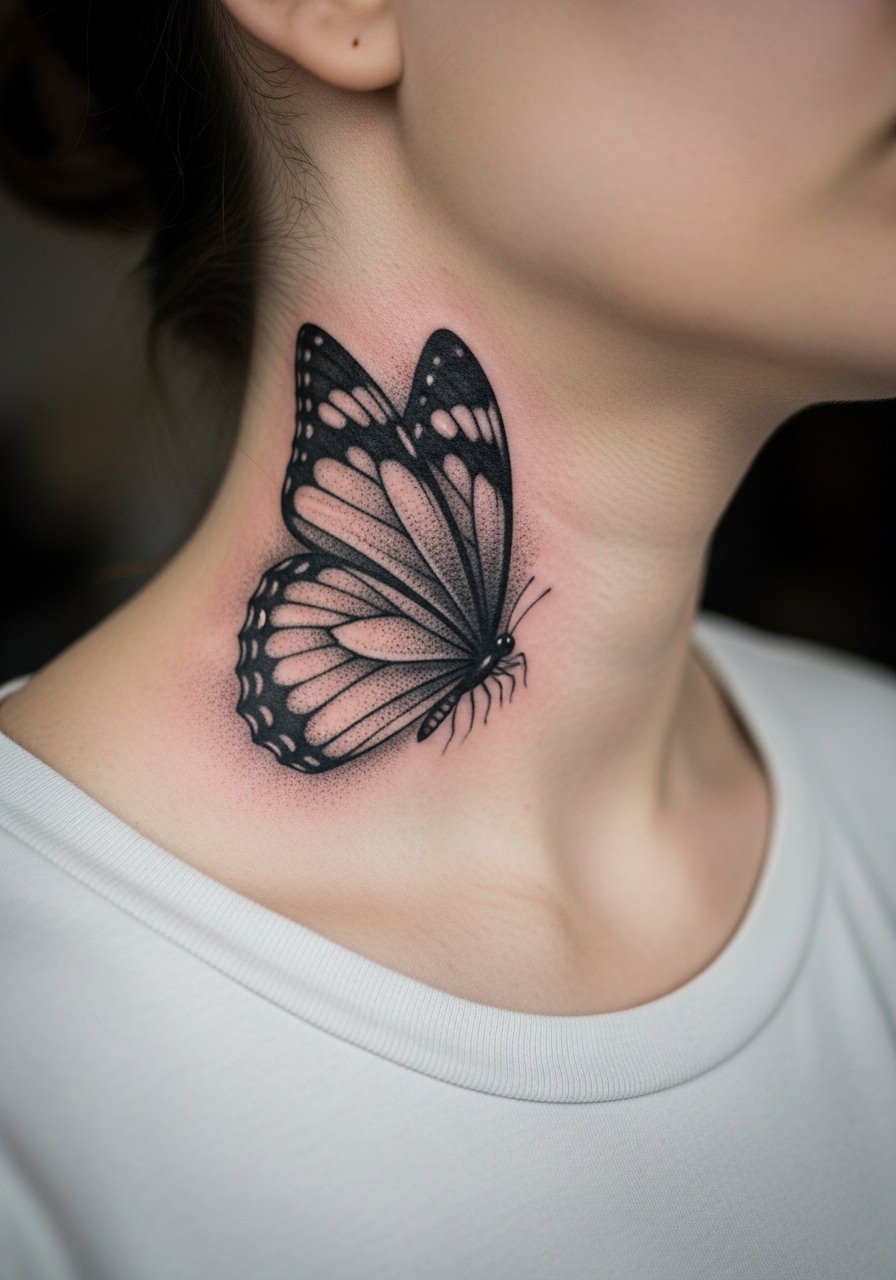
A realistic black and gray butterfly with stipple shading adds depth while staying tonal. Ask for subtle stippling rather than dense gray wash so the texture survives touch-ups and blends naturally with aging skin. This style is best for someone who wants more presence than a tiny outline but prefers monochrome work. Session time ranges from 90 minutes to two hours depending on detail. Blowout risk increases when artists push too shallow on the neck, so discuss needle depth in consultation. For showing it off, pair with a crew neck graphic tee or a wide-neck blouse that keeps the area visible.
Note on expectations: artists split on whether heavy realism holds up best on the neck. One camp favors denser shading, the other prefers simplified contrast. Ask your artist where they stand.
4. Micro-Realism Monarch, Side Neck Color
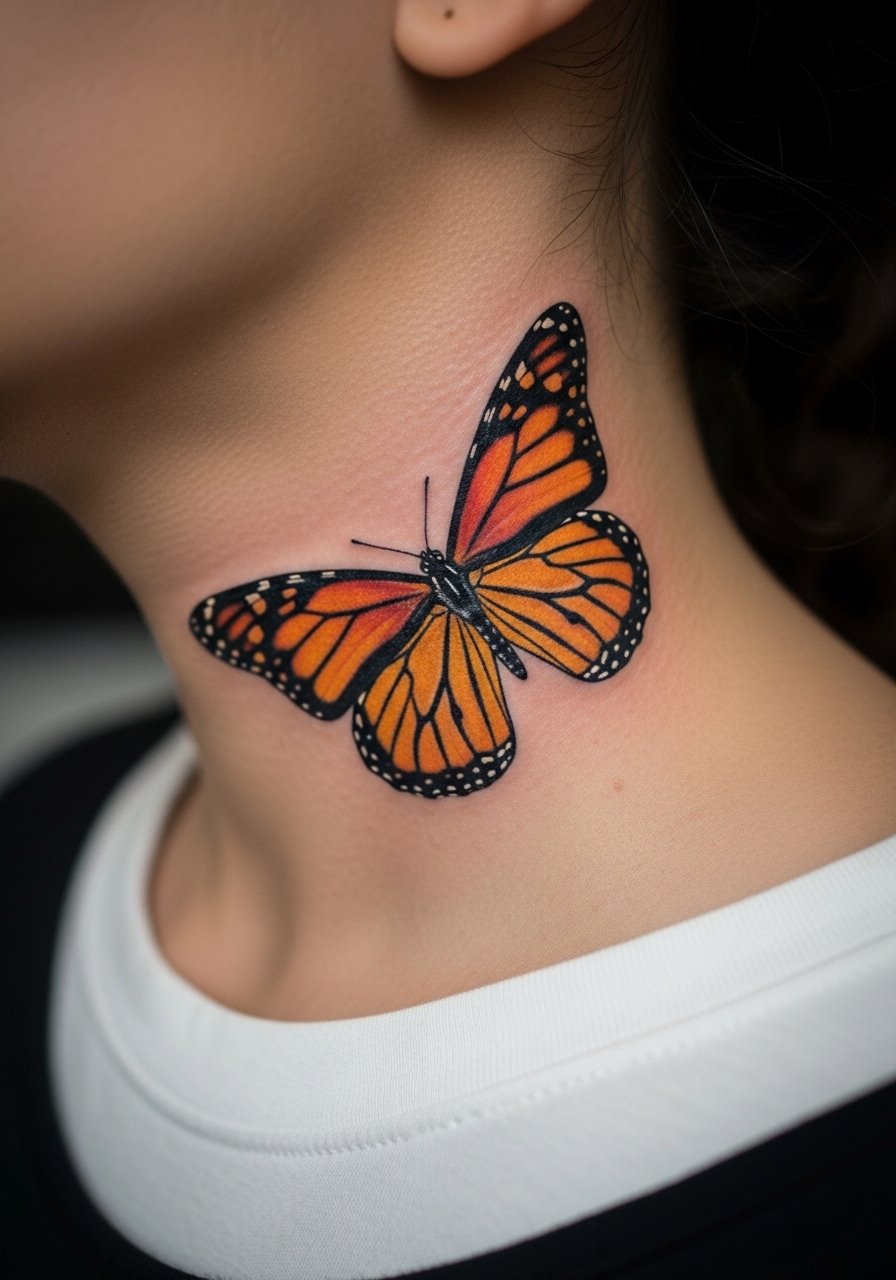
A micro-realism monarch transfers bold insect color to a compact neck scale. Tell the artist you want a color layer that respects natural wing veins rather than over-saturated blocks. Expect more session time than a line-only piece because color layering needs patience and periodic rest for saturation checks. Common mistake is compressing too much detail into a small area which makes the wings muddy after healing. For wardrobe, an open-back midi dress or a wide-neck top keeps the bright orange visible for evenings out.
Note on technique: color on the neck can need a touch-up sooner than arm saturation due to UV exposure and high movement from collars.
5. Tiny Dot-Work Butterfly, Nape
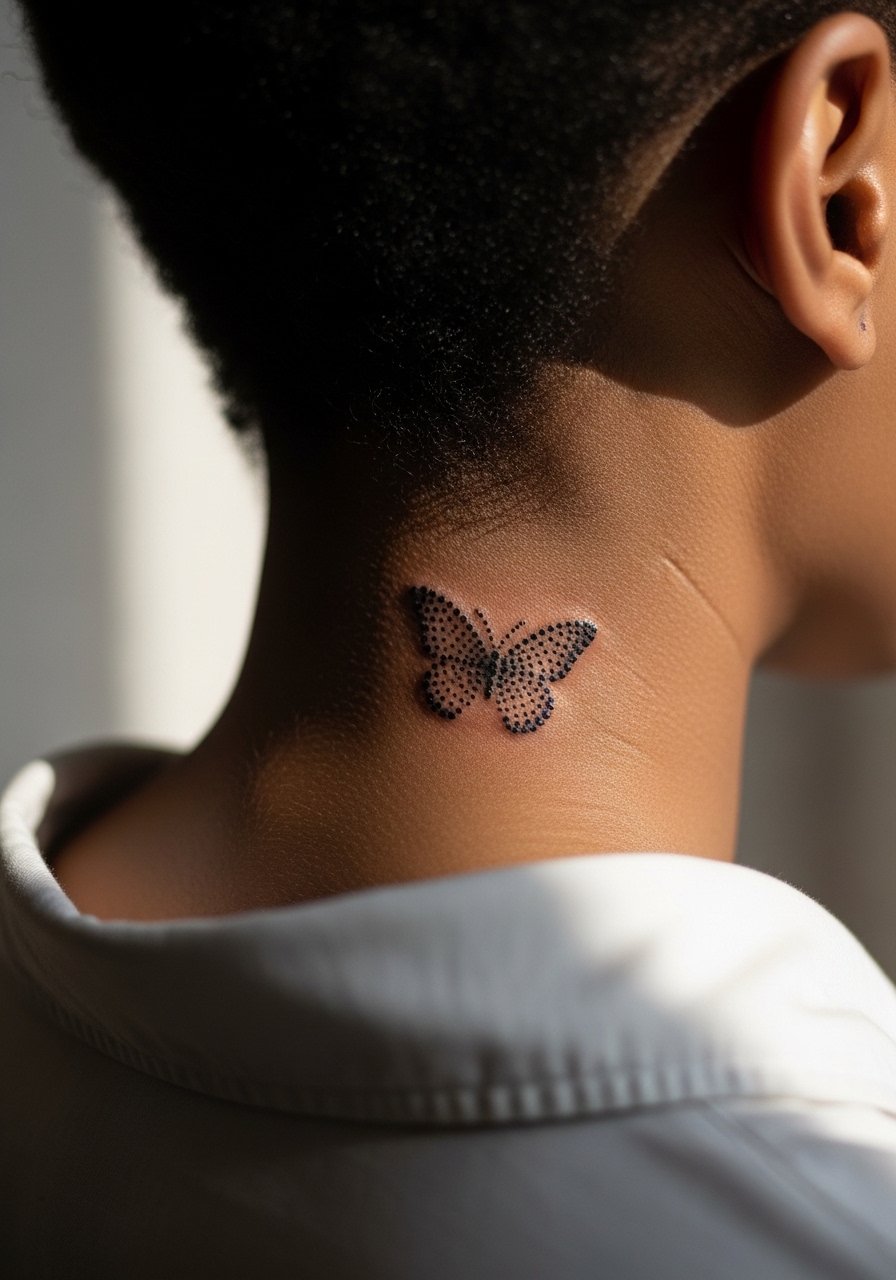
A delicate dot-work butterfly at the nape reads like a private detail when hair is down and becomes a small reveal when hair is up. Tell your artist you want spaced dot work rather than continuous shading to avoid dense patches as the piece heals. Sessions are quick, often under 45 minutes, but the nape can feel tender because of thin skin and nearby bone. Mistakes include squeezing too many dots into a small field which causes the stippling to bleed together. For the session, wear a loose button-down shirt so you can pull the collar aside without tugging the area.
Note on visibility: nape pieces are easily hidden with hair, which helps if you are concerned about workplace optics.
6. Split-Wing Design, Side Neck Into Collarbone
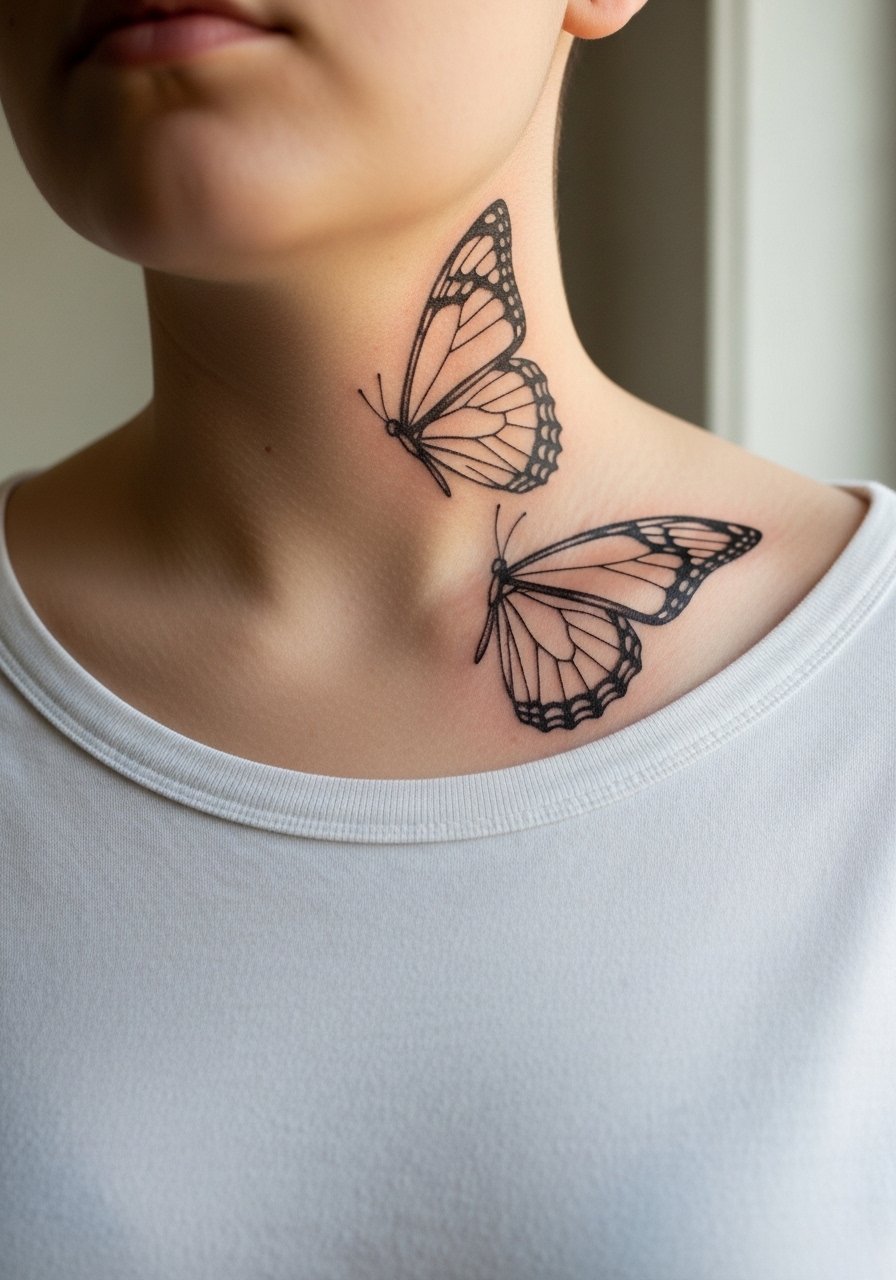
A split-wing layout uses the neck and collarbone to create movement across anatomy. In consultation ask for clear stenciling that maps onto your collarbone so the wings flow with the body rather than against it. Sessions can run 90 to 150 minutes when the artist balances linework and soft shading. Aging tip: the collarbone side gets more friction from clothing, so opt for slightly bolder lines there to avoid early thinning. A common mistake is ignoring how necklaces will sit over the design. For show-and-tell wear, an off-shoulder blouse highlights the collarbone wing while keeping the neck exposed.
Note on professional perception: split placements draw the eye. One camp says that makes them artistic and wearable, the other says it increases visibility in formal settings. Name both views to your artist if that matters.
Studio Day Picks
The varied neck placements above need small items that make the session and first week easier, especially when fine line detail is involved.
-
Stencil transfer paper kit. Lets you preview precise placement on the neck so the wings sit exactly where you want them relative to collarbones.
-
Topical numbing cream. Applied per instructions about 45 minutes before the appointment to soften sensitivity around thin neck skin without affecting linework.
-
Thin protective film roll. Covers the neck area cleanly during the first days when clothing rub can irritate fresh lines.
-
Fragrance-free body wash. Gentle cleansing removes oils without stripping the tiny channels that hold fine ink.
-
Aquaphor healing ointment. Thin layers in the first 48 hours help lock in moisture for fine-line neck work while letting the skin breathe.
7. Symmetrical Mini Cluster, Front Neck Band
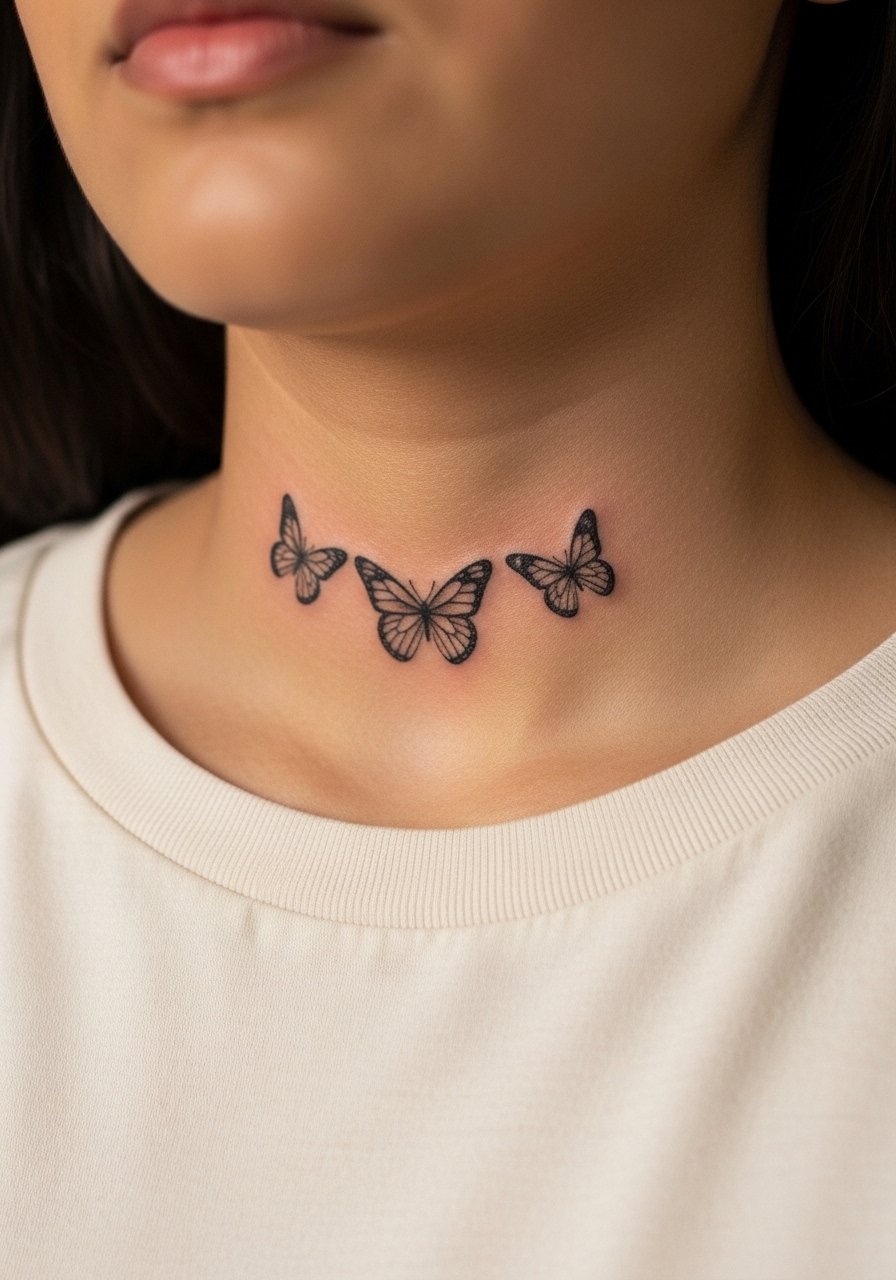
A three-butterfly band across the throat reads like an ornamental choker when healed. Ask for consistent spacing and matched wing scale so the band sits balanced on your anatomy. This design ages best with slightly thicker connectors between motifs to avoid early loss of definition. Session usually under two hours. A common error is compressing too many motifs into a narrow band which makes the pattern fuzz in two to three years. For outfits, a thin chain pendant necklace can sit above without competing for attention.
Note on visibility: front throat pieces are immediately visible and hard to cover, so consider workplace rules.
8. Geometric Wing Overlay, Side Neck
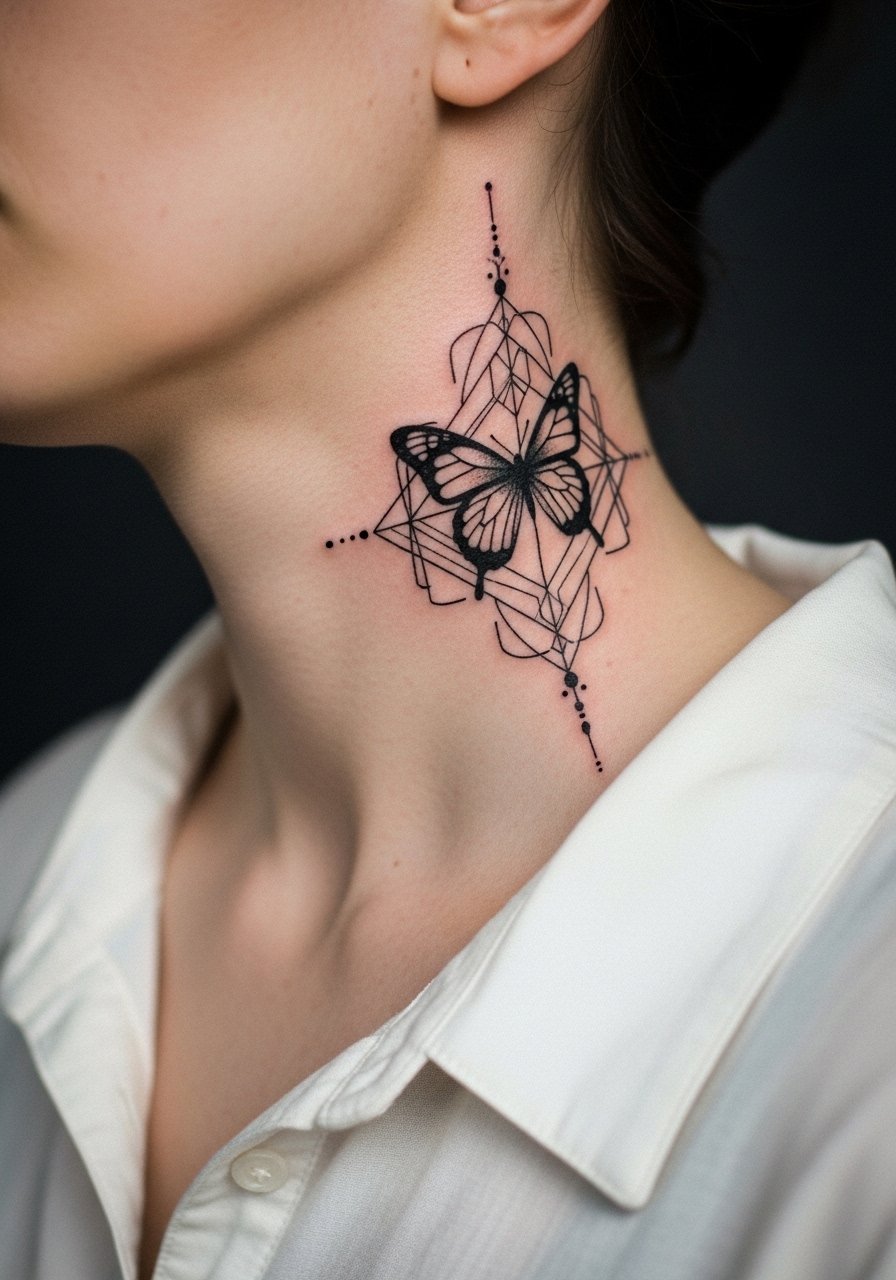
Combining geometric linework with a butterfly silhouette creates modern contrast. In consultation, specify that geometry stays slightly bolder than the interior linework so shapes remain crisp as lines age. This combo can take longer to stencil but typically finishes in one to two sessions depending on complexity. Common mistake is making the geometric elements too dense which leads to a muddy healed look. For casual wear, a crew neck tee with the collar cut low frames the geometry without blocking it.
9. Tiny Single-Wing Accent, Lower Side Neck
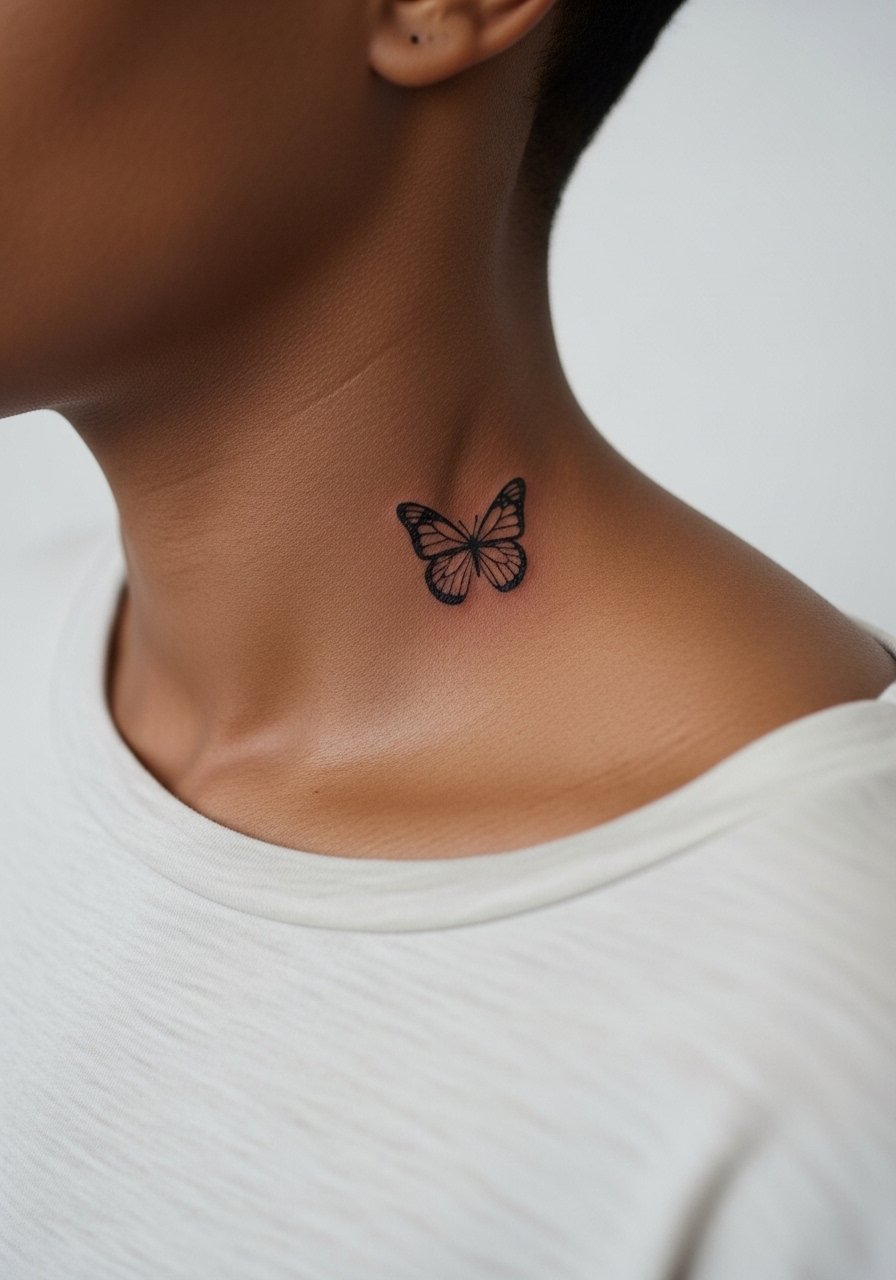
A single-wing accent reads subtle and asymmetric. Tell the artist you want the wing to follow the curve of the clavicle rather than sit parallel to it. Sessions are brief, under 45 minutes, but the thin skin can make lines feel sharp during the tattoo. Aging note: because this is an edge detail, expect a touch-up at year two when lines start to soften. A frequent mistake is requesting ultra-fine filigree inside the wing which disappears in healing. For session comfort, wear a loose button-down shirt so you can adjust the collar without stretching the area.
10. Watercolor Wash with Fine Line Outline, Side Neck
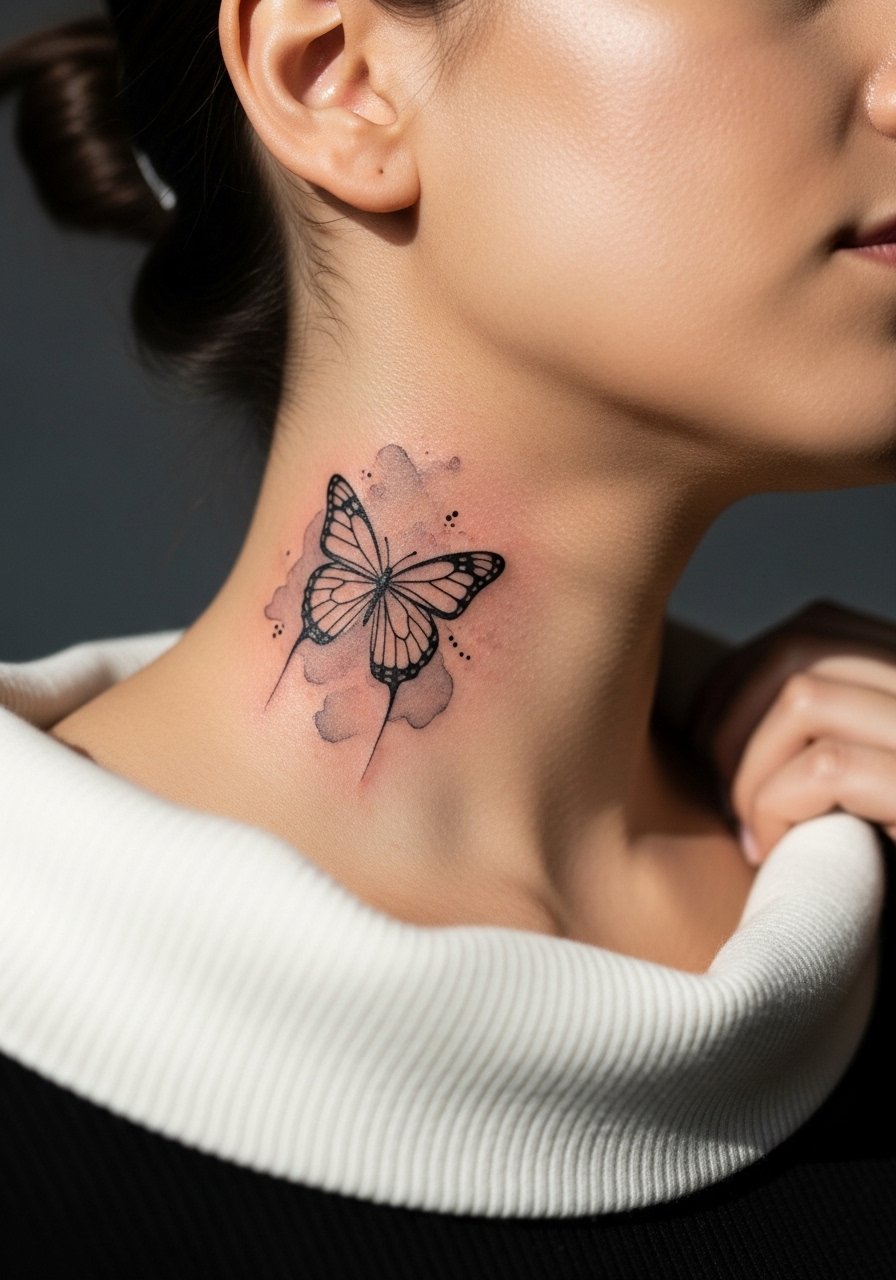
A fine-line outline paired with a soft watercolor wash keeps structure while adding painterly color. Tell the artist you want the wash to sit behind the linework so touch-ups can target the outline without repainting the background. Watercolor elements tend to fade faster, so plan a color top-up at year two to maintain vibrancy. Mistakes include asking for large, saturated watercolor blobs too close to the neck crease, which invites early fading. For showings, an off-shoulder blouse reveals the wash without competing patterns.
11. Script-Backed Butterfly, Back of Neck
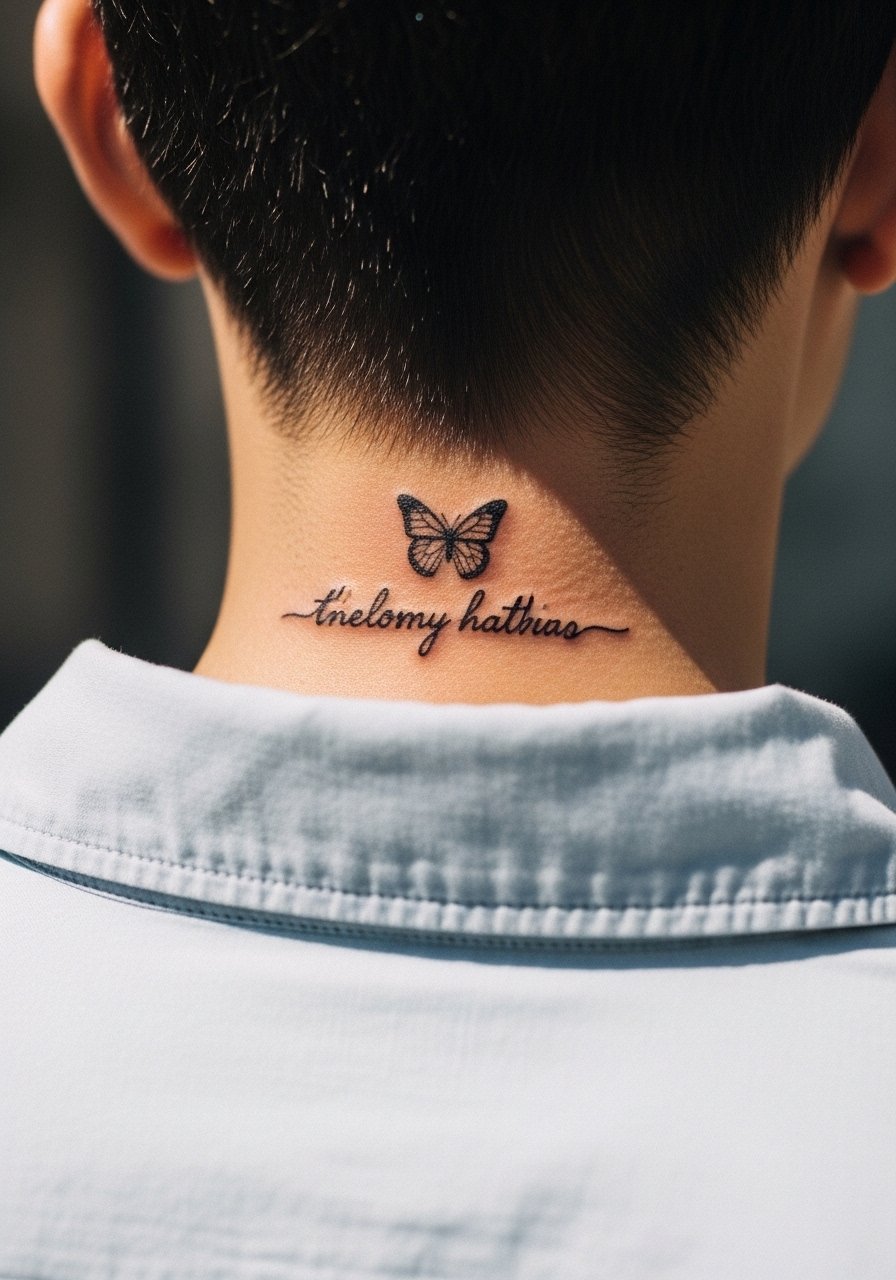
A tiny butterfly perched above a short script creates a layered narrative. When specifying text, give the exact word or date so the stencil reads correctly and the artist can choose appropriate letter spacing for longevity. Script near the neck needs slightly heavier letterforms to avoid merging over time. Session is often split into two short passes for alignment and comfort. Common mistake is picking tiny script that heals into blur. For appointment ease, wear a button-down shirt you can remove without pulling over the head.
Note on text visuals: always confirm the exact lettering with the artist before any needles touch the skin.
12. Neo-Traditional Bold Butterfly, Side Neck
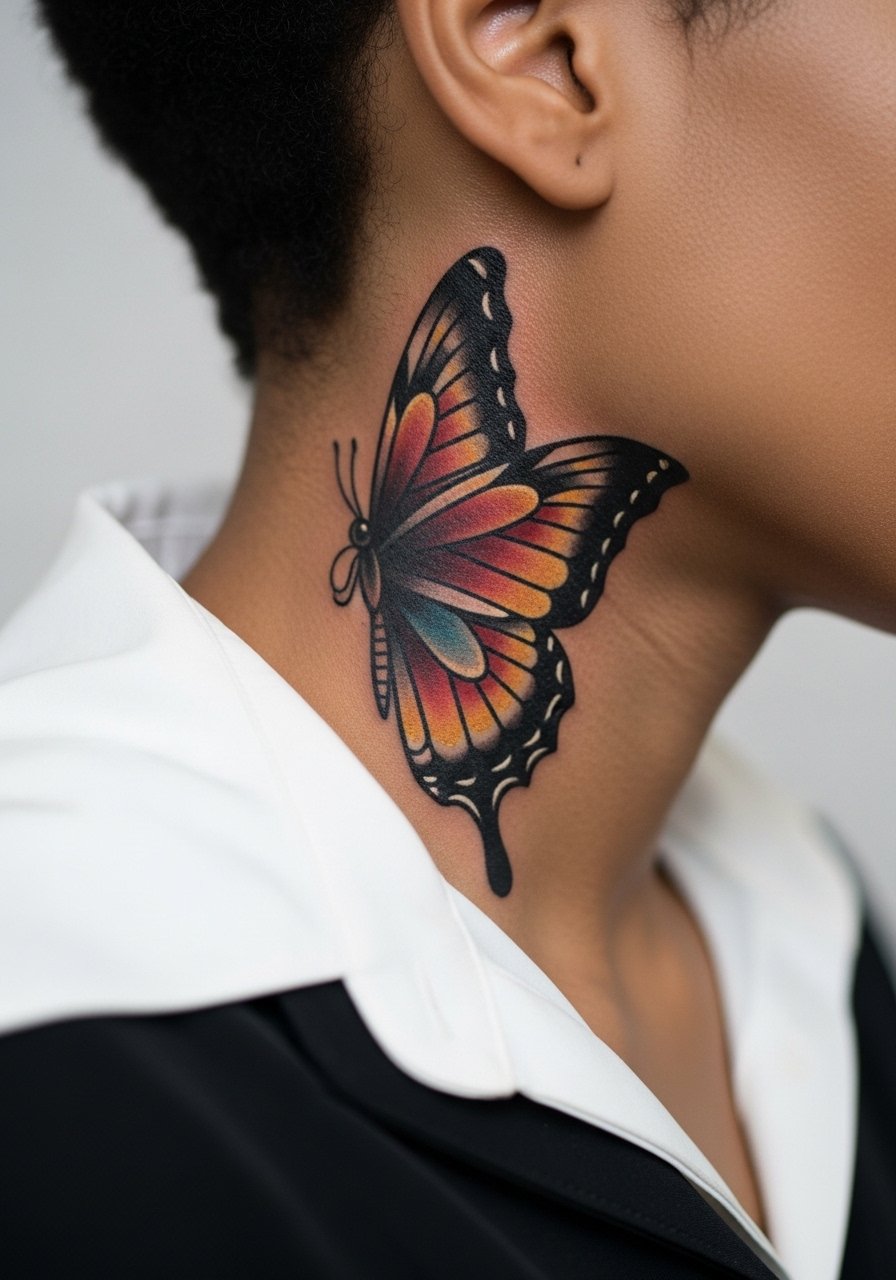
Neo-traditional styling brings thicker outlines and controlled saturation that age predictably. Ask for clear black borders and saturated fills that are not overworked into the skin. This approach tends to weather well on the neck because the contrast retains definition. Sessions range from one to two hours. A common error is asking for micro-detail inside bold outlines which creates clutter. For daily wear, a racerback tank or wide-neck tee keeps the neck space open and the design visible.
13. Tiny Monarch Row, Across Lower Neck
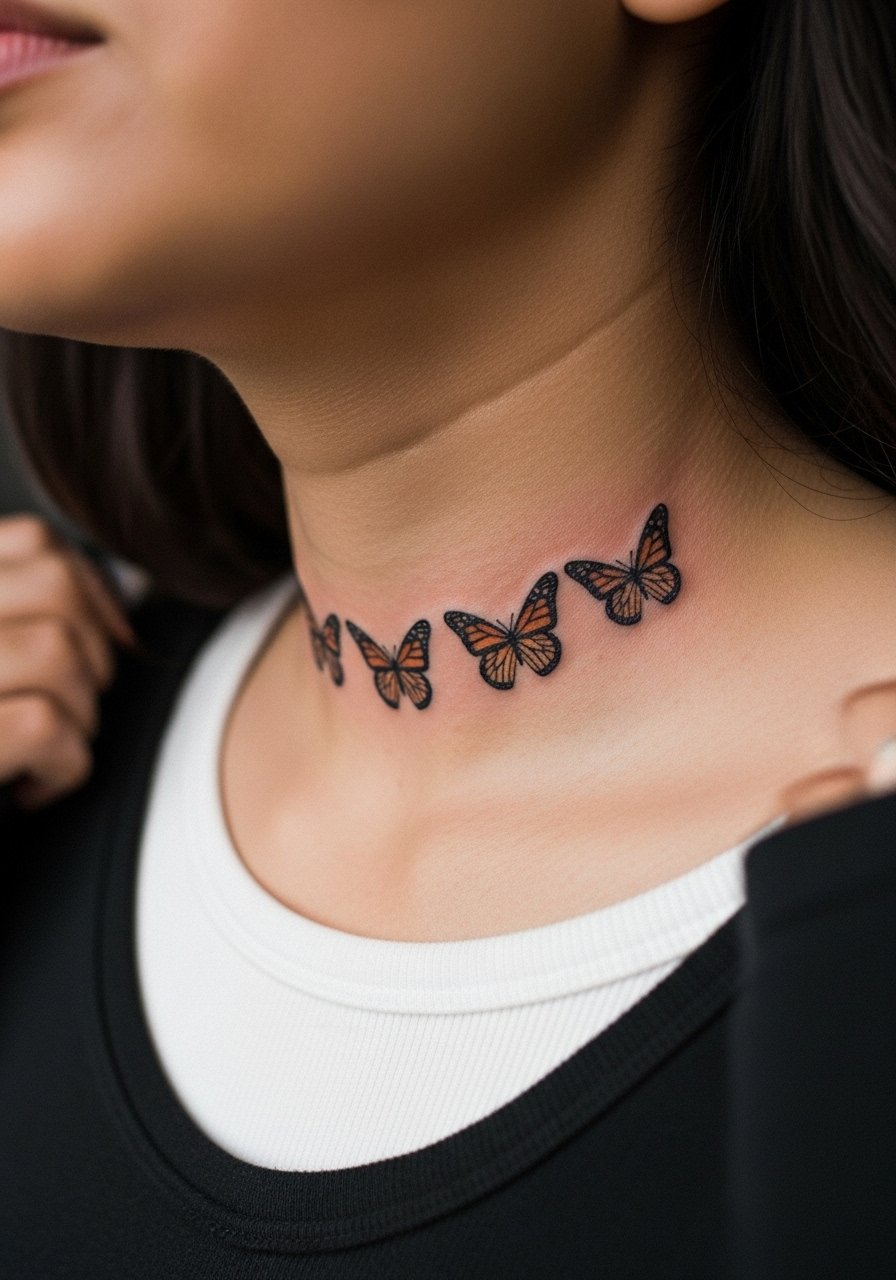
A row of tiny monarchs mimics a delicate chain and sits low on the neck where it meets the collarbone. Tell your artist you want uniform spacing and matched scale so the row reads cohesive rather than scattered. These run quick as single-pass sessions under an hour. Aging note: small colored motifs may need touch-ups as UV exposure fades orange pigments faster. A common mistake is uneven wing scales across the row which becomes noticeable over time. For evening wear, a low scoop top shows the line without neck coverage.
14. Negative Space Butterfly, Side Neck
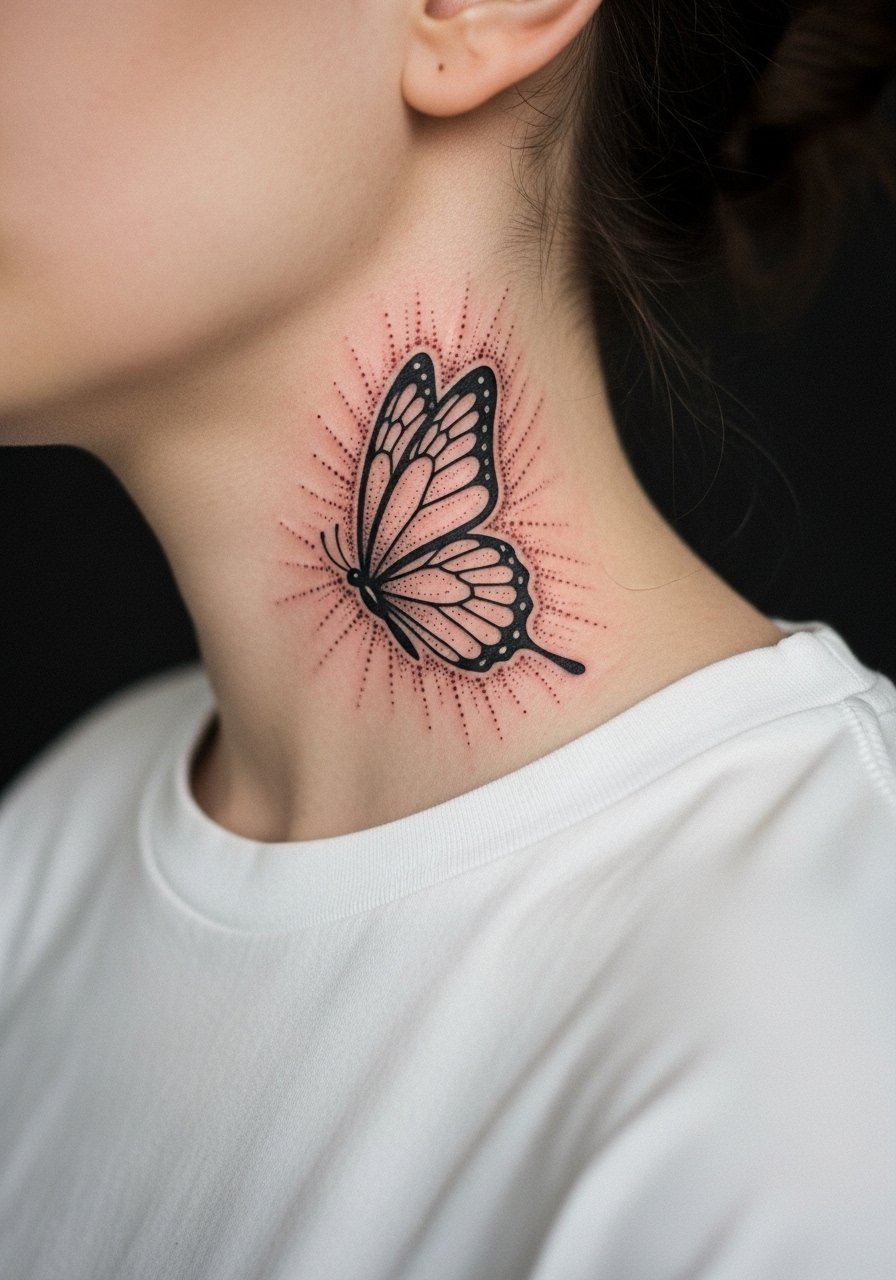
Using negative space keeps the butterfly pure while relying on surrounding stipple to define form. In the consult specify how much skin you want left untouched for the silhouette to remain obvious as the stippling softens. This approach ages decently if the surrounding shading stays open rather than packed. Sessions can be longer because of detailed stipple work. People often over-fill dots which later compact; ask for spacing in the stippling plan. Pair with a crew neck graphic tee to keep focus on the negative silhouette.
15. Ornamental Filigree Wing, Lower Side Neck
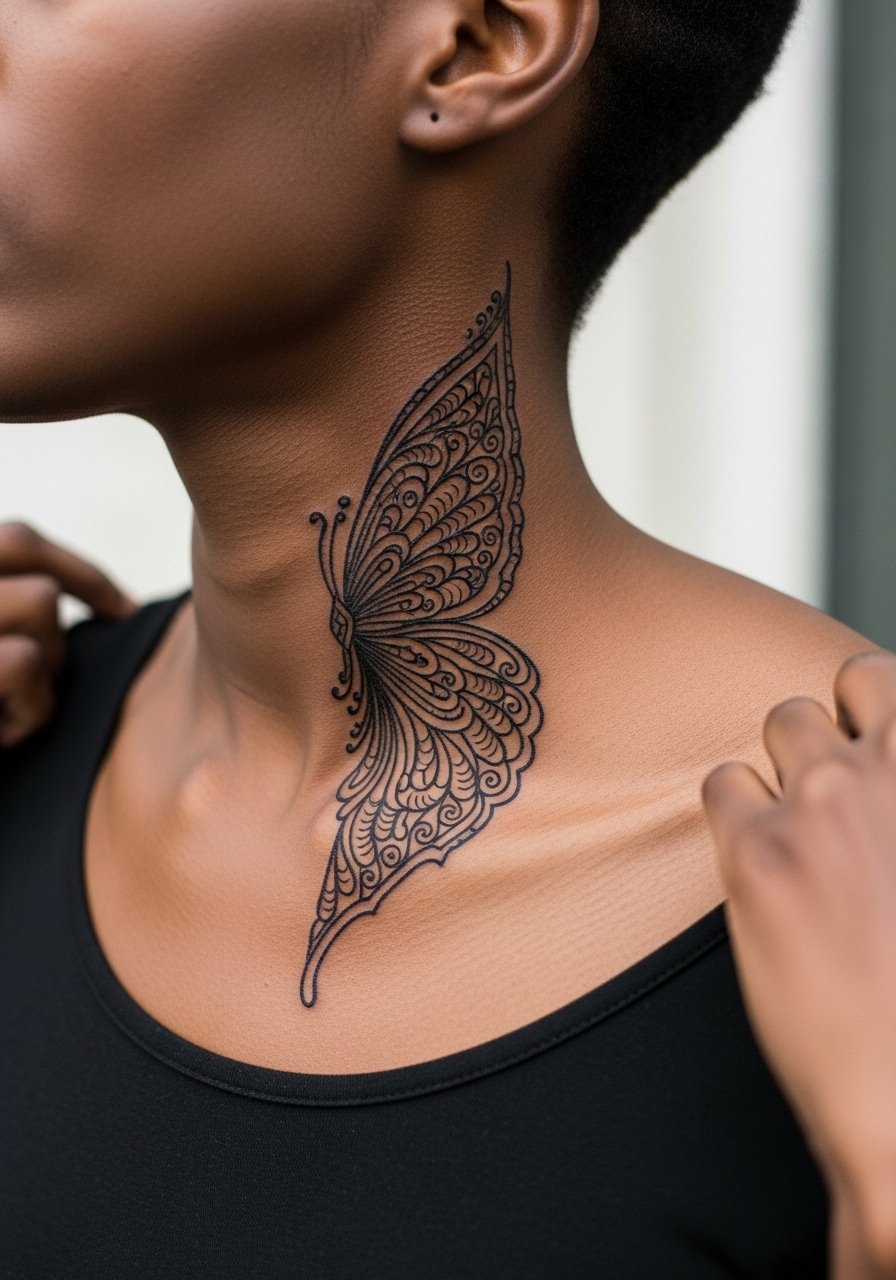
Filigree wings feel jewelry-like when elongated toward the collarbone. Ask for simplified filigree rather than micro-hooks that risk blurring. This design benefits from slightly bolder anchor lines and airy inner detail. Sessions usually 90 minutes. Typical mistake is requesting too many micro-curlicues in tight space which fills in with time. For styling, a thin chain pendant necklace sits above the filigree without crowding.
16. Single Bold Silhouette, Side Neck
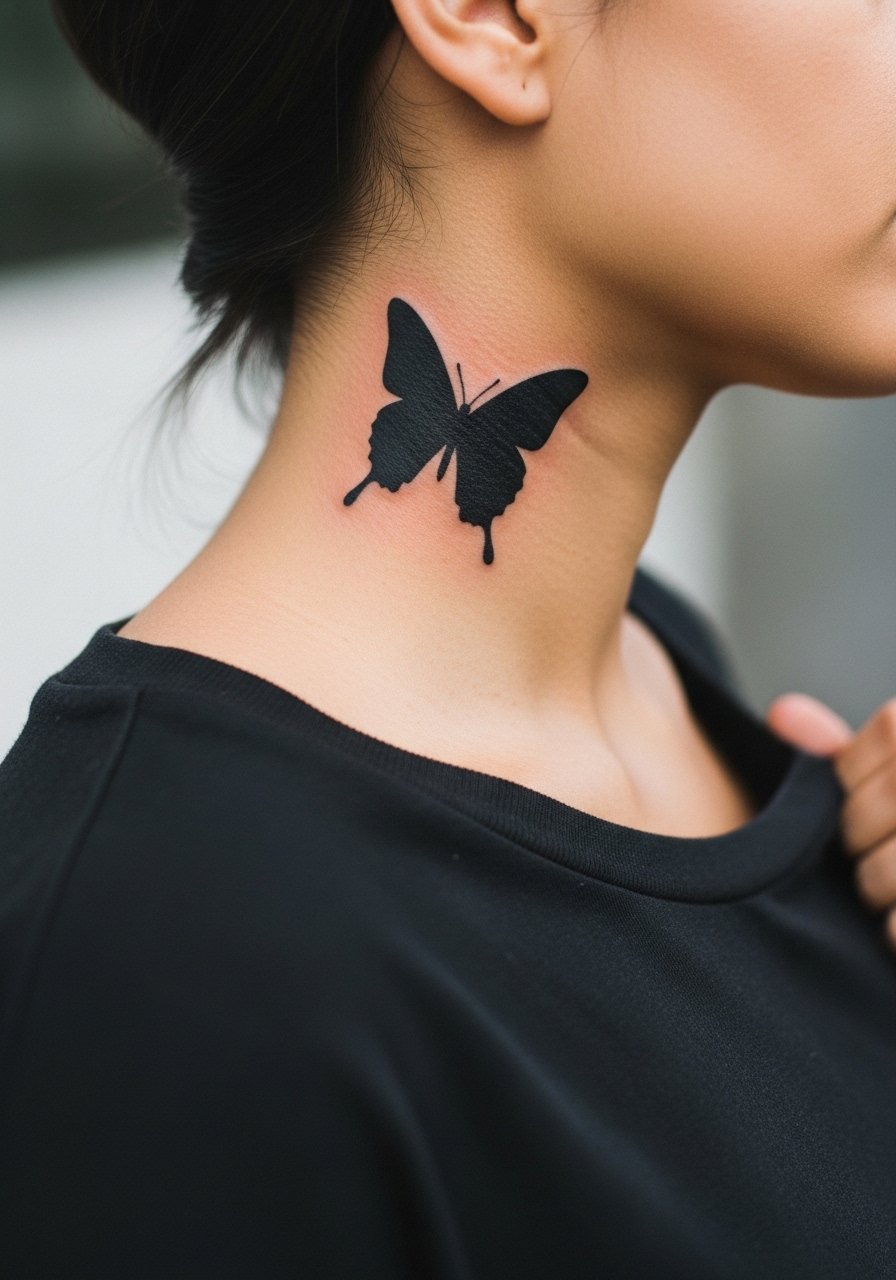
A solid silhouette drops the detail in favor of shape, which often reads better as lines soften. Tell the artist you want full saturation in the first pass and inspect coverage before leaving. This style resists blowout visually because it does not rely on micro-line separation. Sessions are shorter but the artist may go over the fill twice for even saturation. A common error is making the silhouette too small which reduces visual impact. For outfits, a wide-neck blouse or off-shoulder top keeps the bold shape on display.
17. Double-Stacked Mini Butterflies, Central Neck
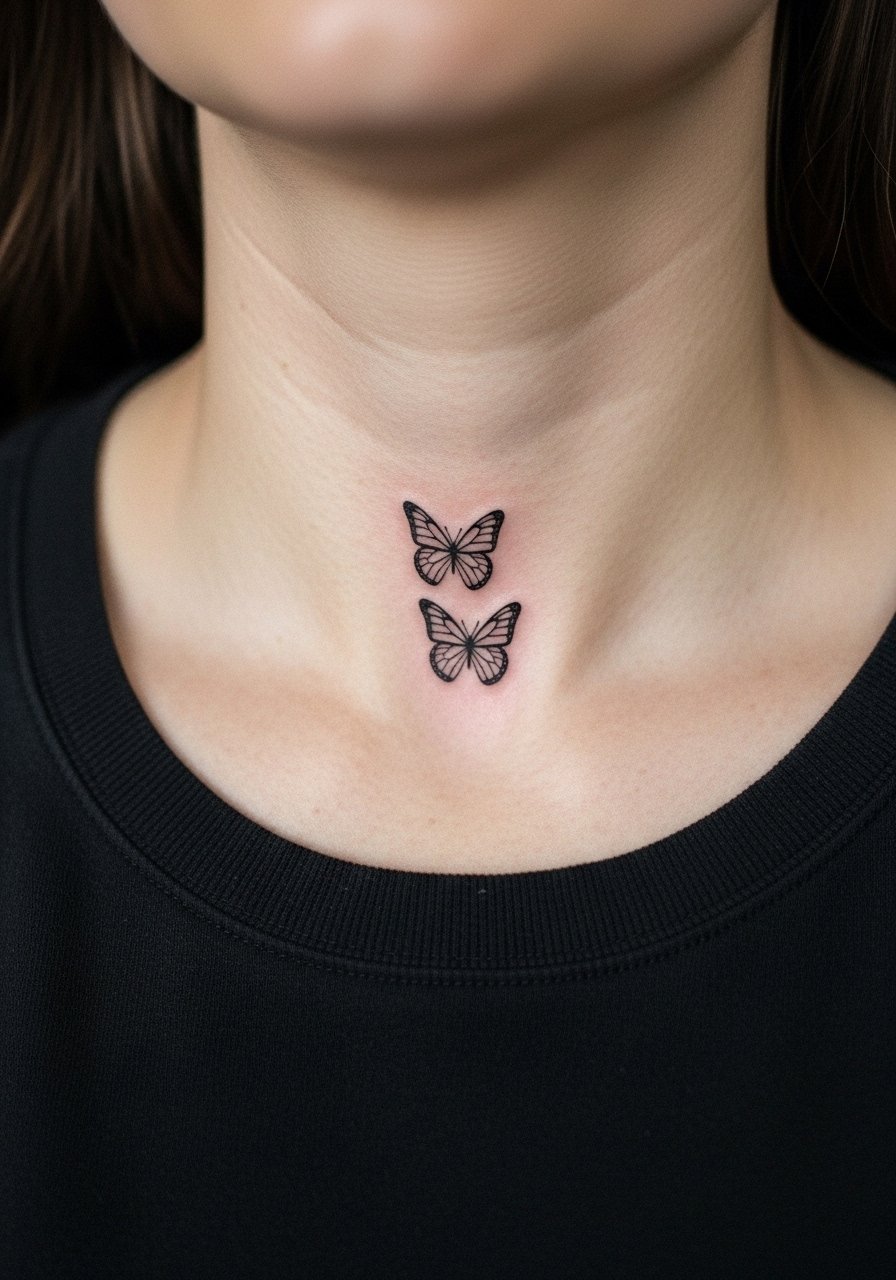
Stacking tiny butterflies vertically uses the neck’s vertical space elegantly. Request matched wing angles so the stack feels intentional rather than random. Sessions are brief but require steady hand placement. Touch-up expectations are similar to other fine-line front pieces, often a small refresh by year three. Mistake to avoid is uneven spacing that makes the stack look lopsided. For showing them off, a wide-neck shirt lets them peek through without full exposure.
18. Floral Wing Fusion, Side Neck
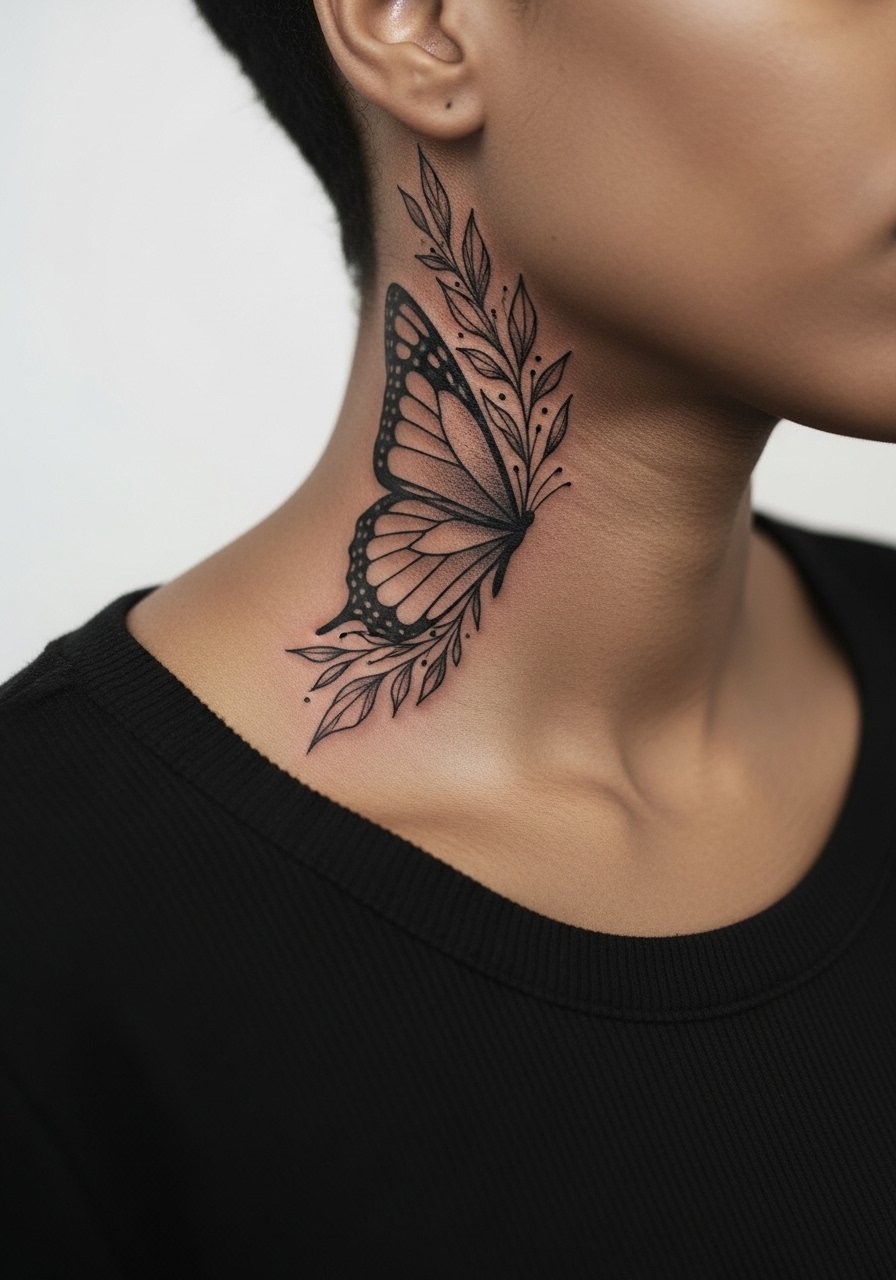
Merging botany into a wing gives the piece organic flow with natural negative spaces. Specify which botanical elements you prefer so the artist can balance density and breathing room. Sessions vary depending on leaf detail but often finish in one long visit. Aging tip: leaves with heavy shading can soften into blocks, so ask for light hand in shaded areas. For wardrobe, a racerback tank or open collar top frames the flowing line.
19. Chain-Link Butterfly, Lower Neck
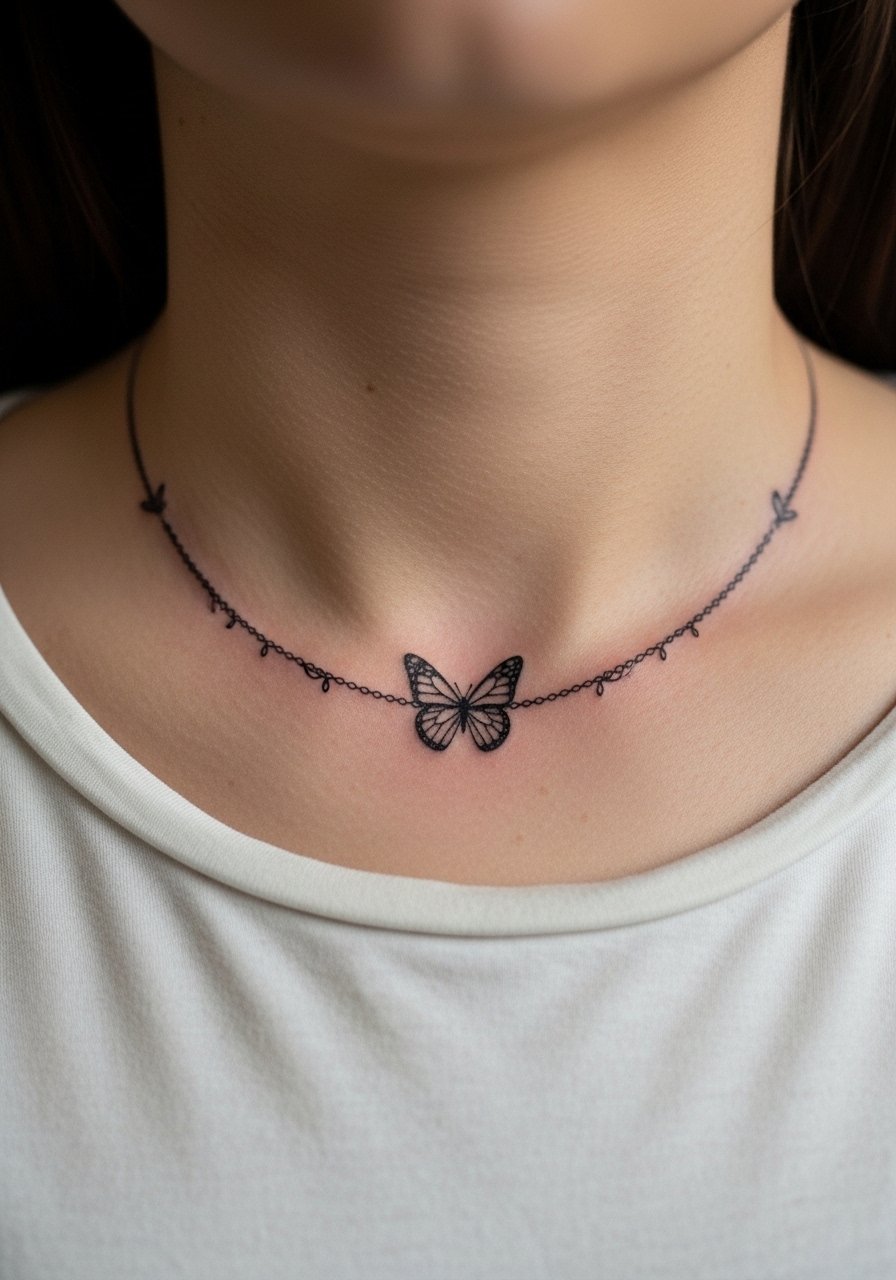
A chain-link motif uses repeated small elements to guide the eye across the lower neck. Ask for consistent links rather than varied sizes so the chain reads intentionally. This style needs careful spacing to avoid merging into a single block after healing. Sessions are straightforward, usually under an hour. Avoid asking for too many tiny links in a tight band which leads to blurring. Pair the design with a thin chain pendant necklace that echoes the motif.
20. Winged Script Accent, Side Neck
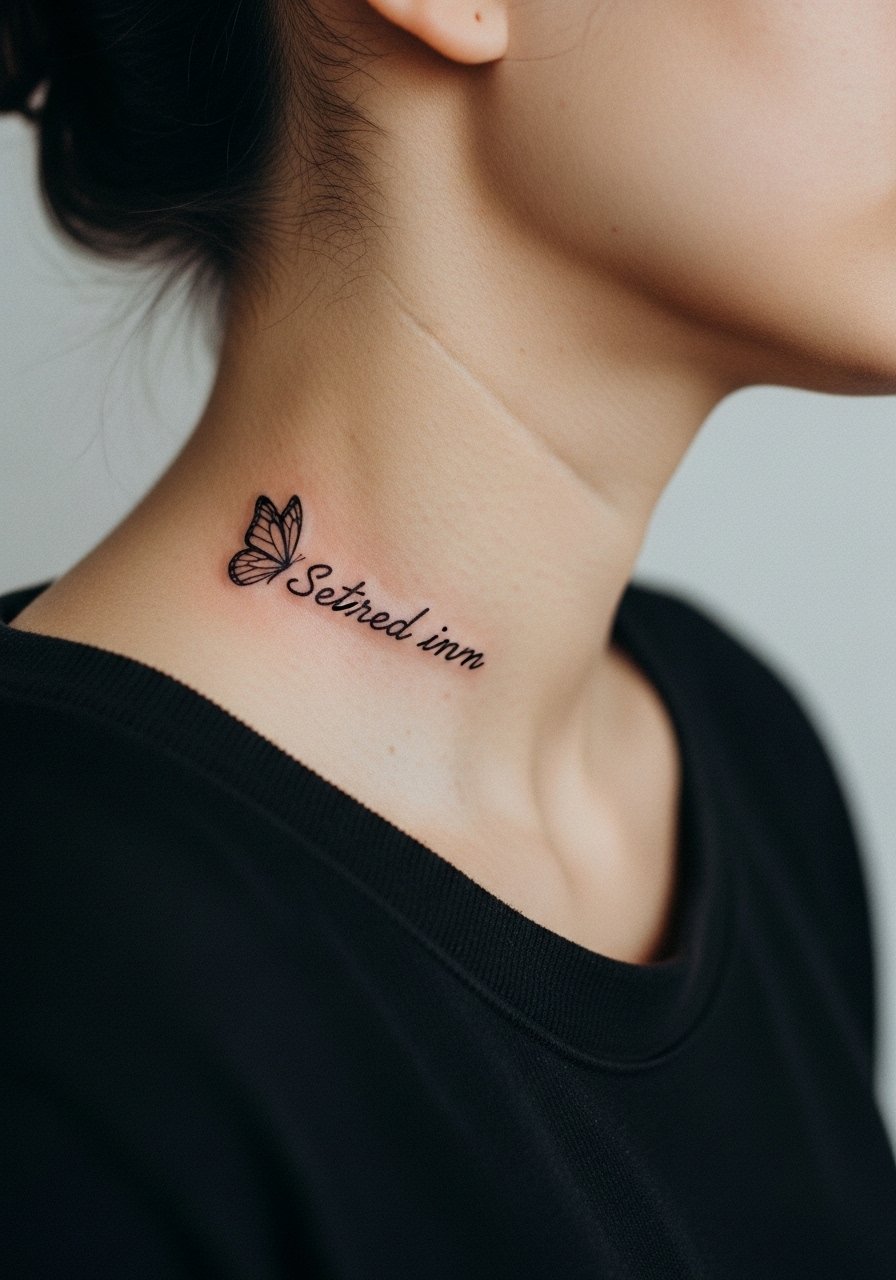
A wing beside a short word creates a concise statement. Provide the exact text for the stencil and say whether the wing should point toward or away from the script. Sessions are short but placement precision matters for legibility. Common mistake is crowding the script and wing too closely which causes the two elements to compete. For session comfort, wear a loose button-down shirt so the artist can adjust the collar without tugging the area.
21. Minimalist Outline Row, Side Neck Curve
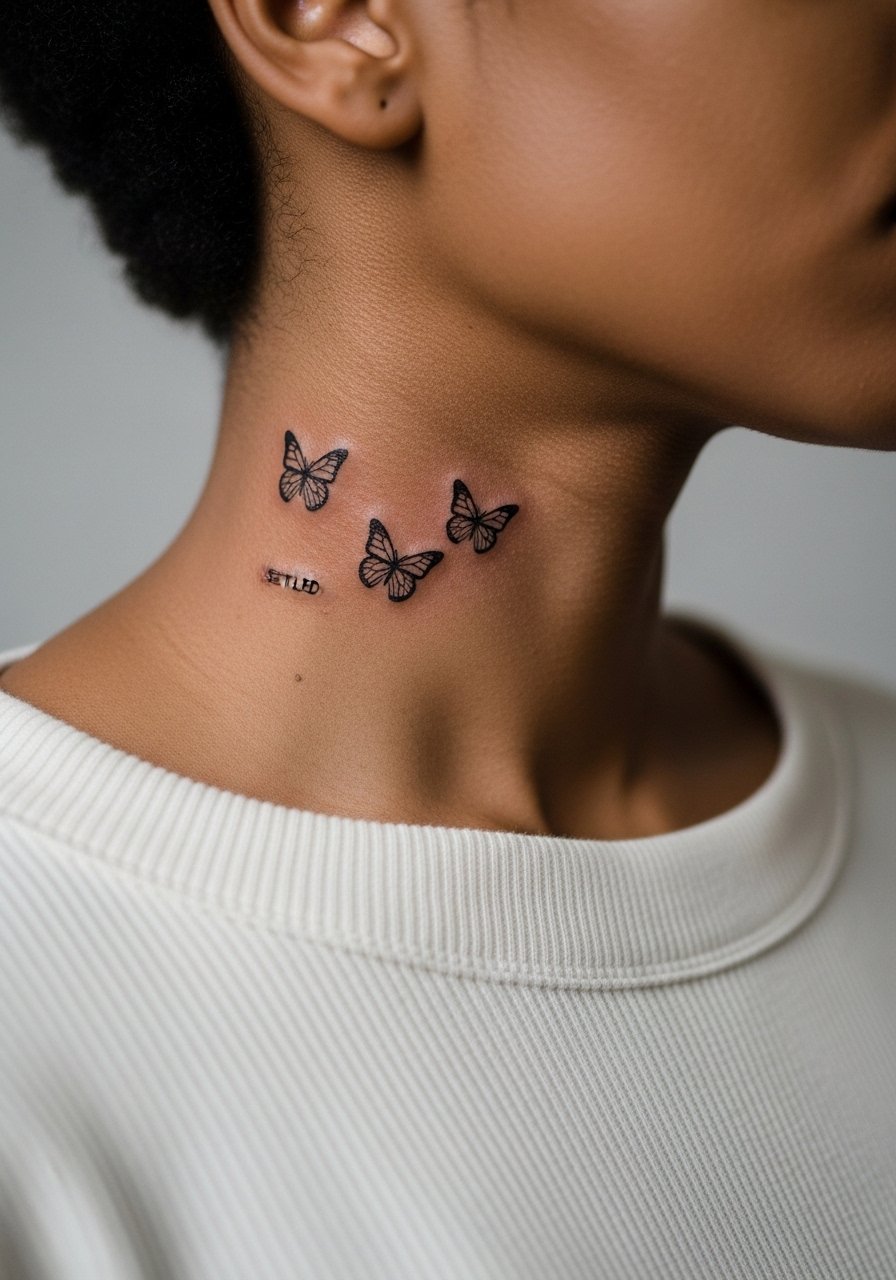
A minimalist outline row that follows the neck curve reads delicate and intentional. During consult ask that the stencil be applied while you move your neck so the curve sits right when you look forward. Sessions are quick but require precision in placement and angle. Aging note: outlines that are too thin merge faster, so request a hairline interior and a slightly stronger outer contour. For daytime wear, a crew neck tee keeps the row visible without constant exposure.
22. Micro-Color Accent, Behind the Ear Into Neck
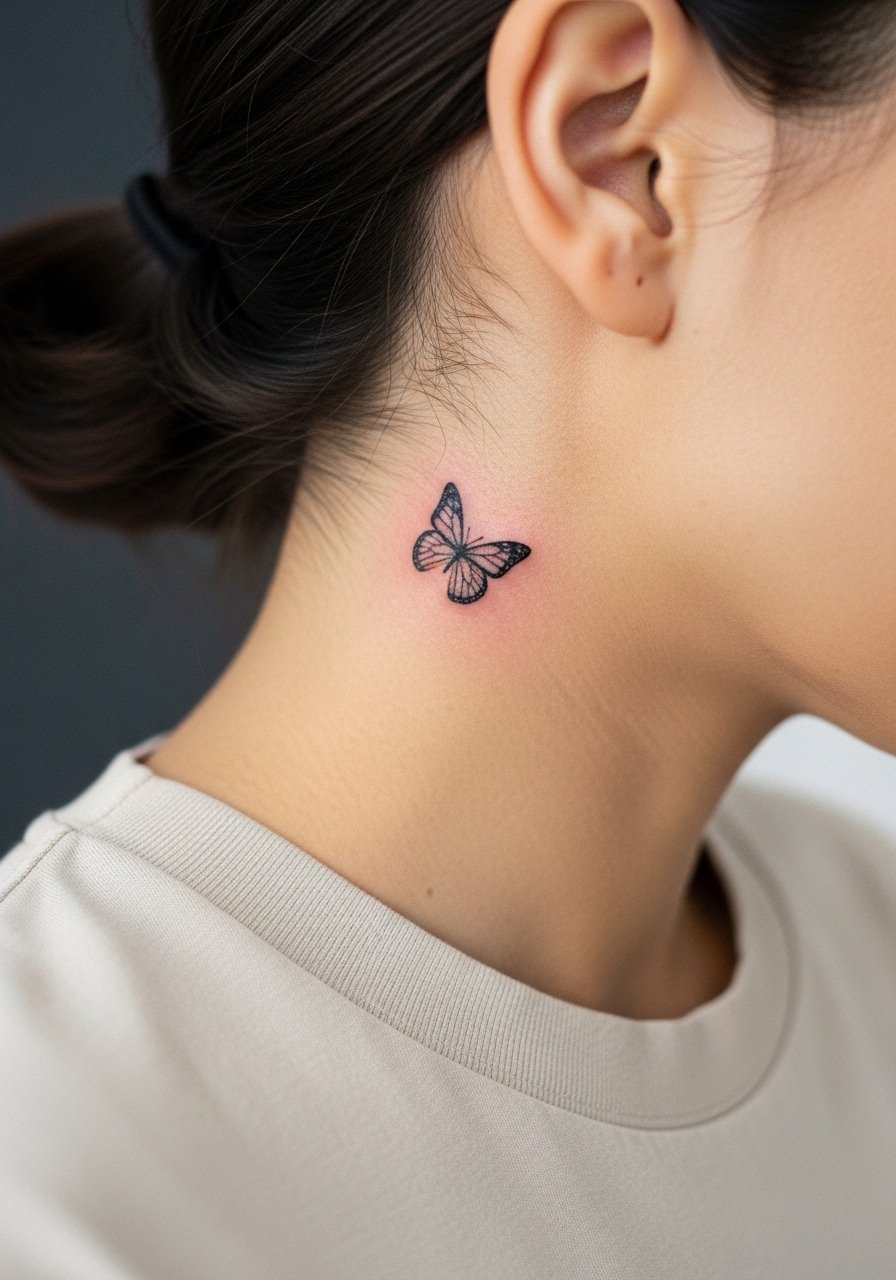
A micro-color accent that spans the area just behind the ear and into the neck reads like a secret pop when hair is swept back. Specify exact color points so the artist can plan pigment choices for your skin tone. Sessions are short but the area is sensitive. Common mistake is asking for too much saturation behind the ear which can be hard to maintain. For showing the piece, wear hair up and a wide-neck shirt so the tiny color becomes a neat reveal.
Note on placement language: describe this area as skin just behind the ear and below the hairline when discussing with the artist.
23. Whip-Shaded Wing, Side Neck
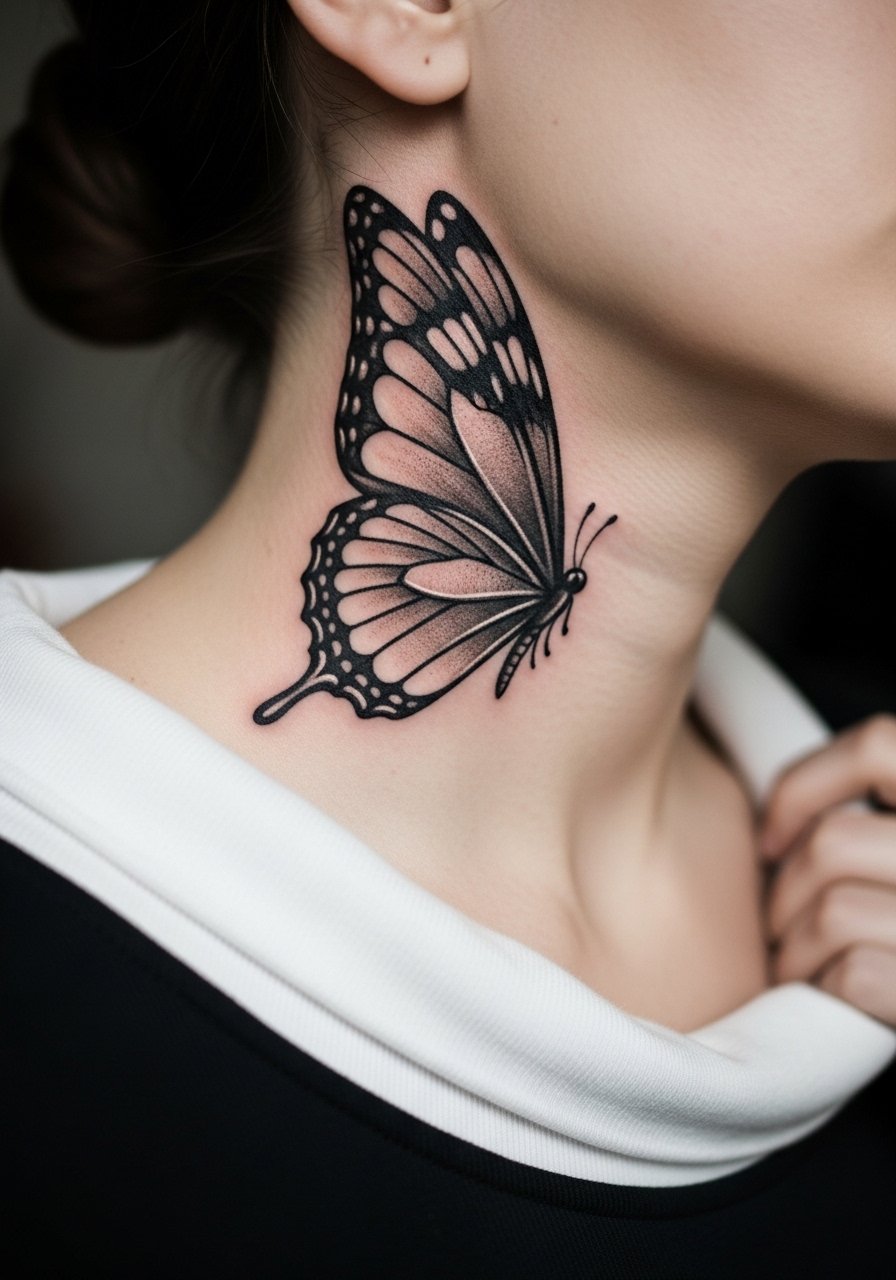
Whip shading creates soft gradients that read airy on neck skin. Ask for whip shading rather than heavy packing to preserve texture and avoid dense healed blocks. Sessions may take longer because shading needs careful hand speed. A common error is overpacking pigment which loses the whip-swipe effect and ages into flat mass. For styling, pair with a racerback tank or an open collar blouse that keeps the shaded wing visible.
24. Geometric Negative-Space Butterfly, Front Neck
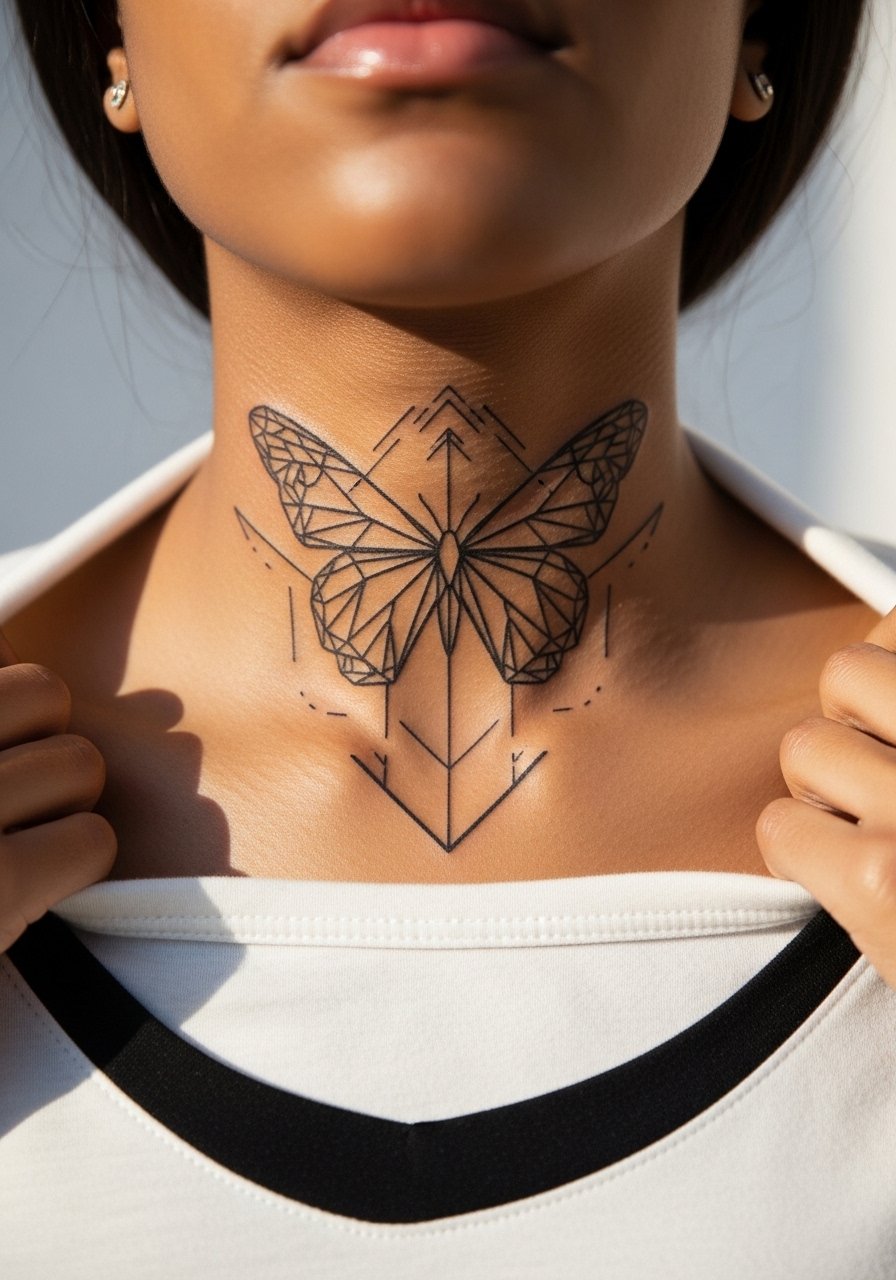
Combining geometry and negative space on the front throat makes a modern focal point. Discuss harmony between the negative shapes and surrounding anatomy so the piece does not look lopsided as you move. This design benefits from slightly stronger border lines that read through aging. Sessions can run one to two hours. Mistake to avoid is making triangles and voids too small which leads to merging. For outfits, a wide-neck blouse keeps the geometry visible and balanced.
25. Mirrored Tiny Wings, Lower Nape
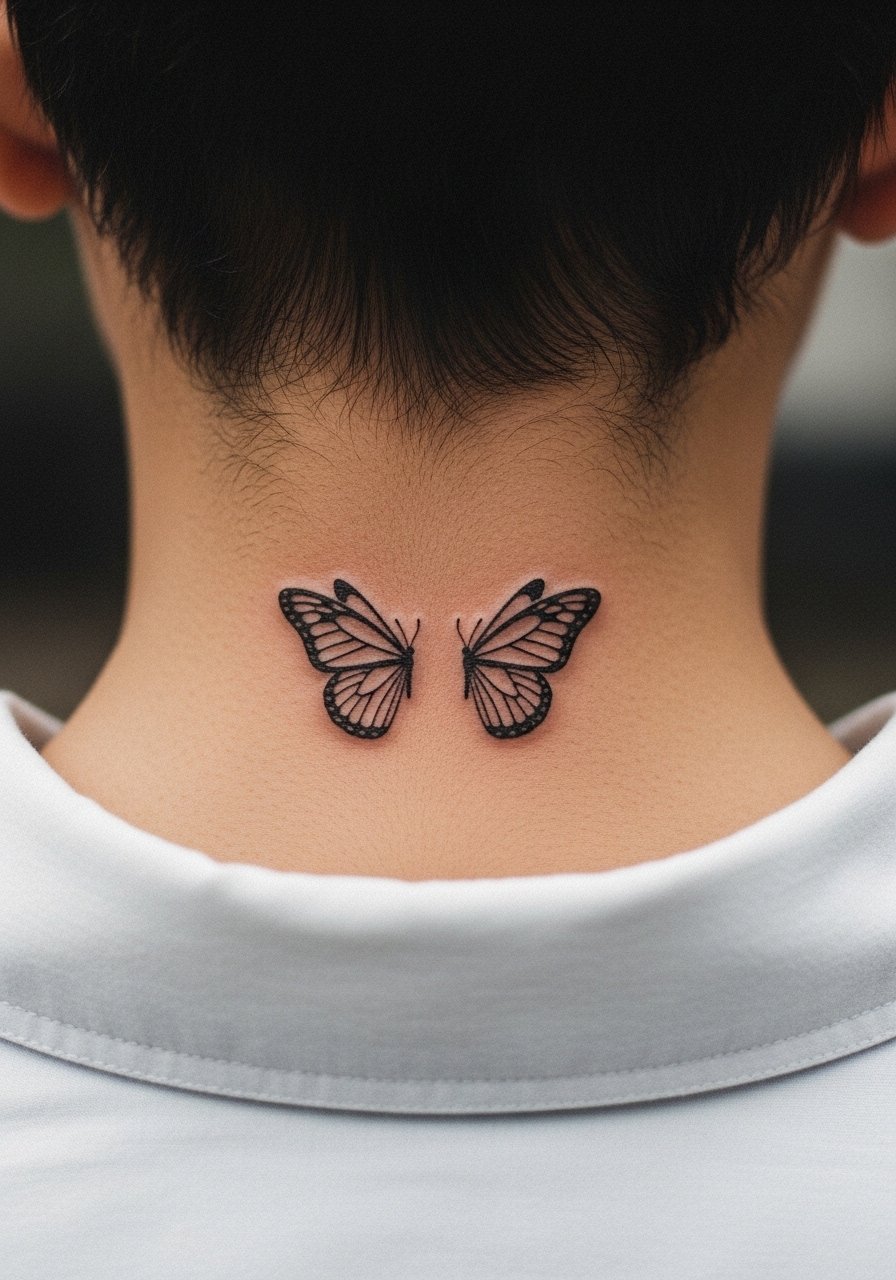
Mirrored wings at the nape have an architectural symmetry that pairs well with short hair or updos. Ask your artist to preview the mirror effect with the stencil while you move your head so they remain balanced. Sessions are short and usually low in pain, but precision is key. A common mistake is misaligned mirrors that become obvious when hair is tied back. For easy reveals, wear a loose button-down shirt the day of your session to avoid tugging.
26. Tiny Stipple Wing Cluster, Side Neck
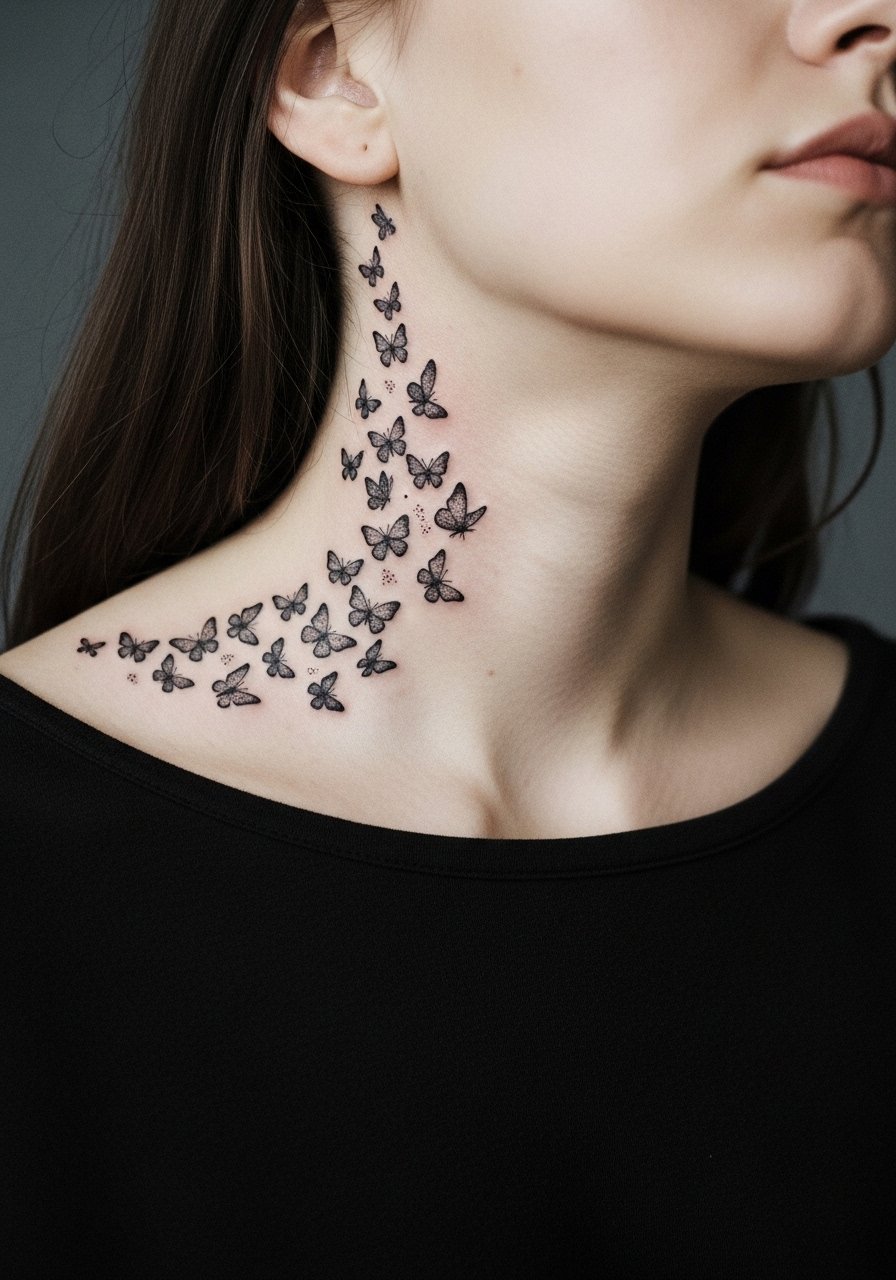
A stipple cluster relies on dot density to suggest form and movement across the neck. In consult request intentional spacing in the stippling so dots do not pack into a blob as the skin heals. Sessions vary but are often longer for dense stippling. A typical mistake is asking for high dot density which compacts and loses detail. For outfits, a wide-neck shirt keeps the cluster visible with minimal competition.
27. Single Color Accent with Metallic Feel, Side Neck
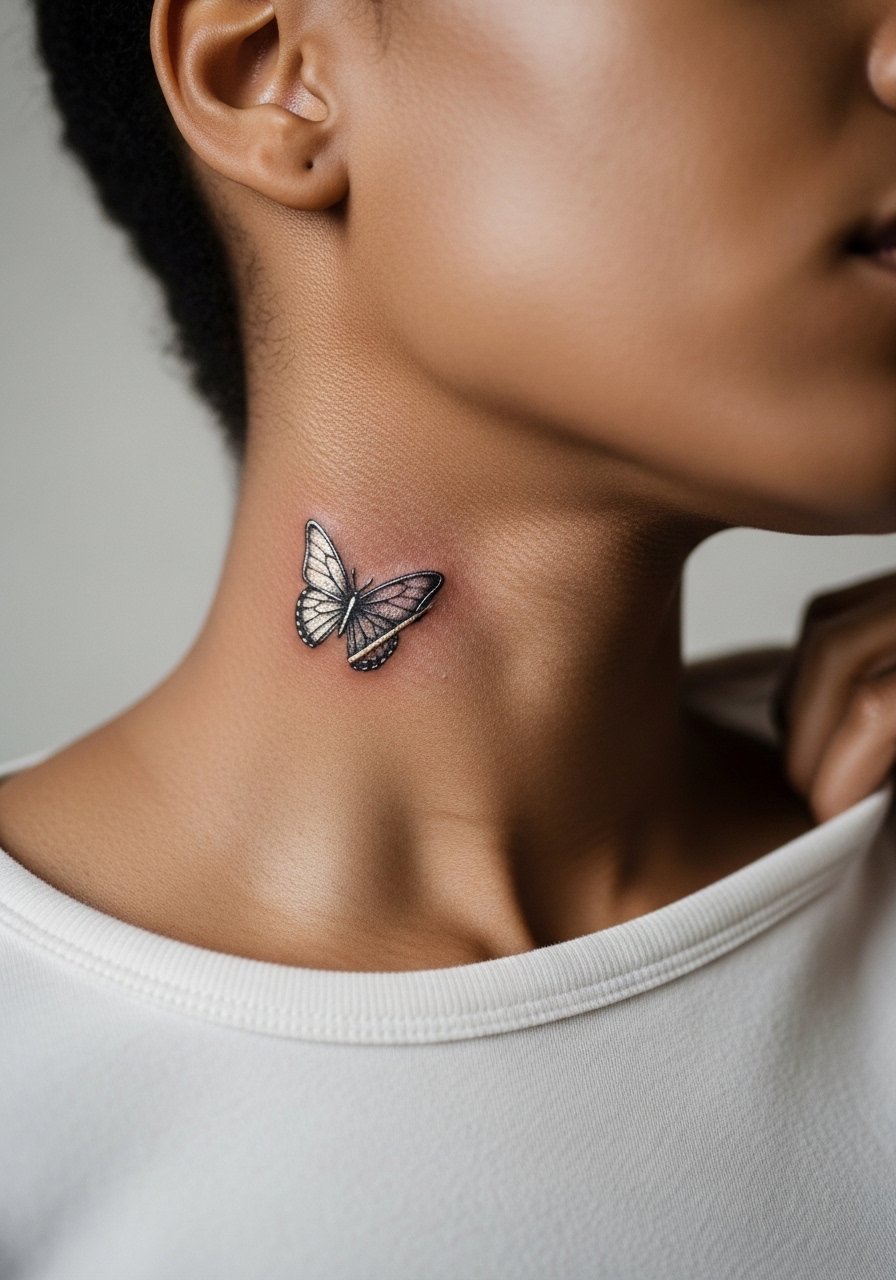
A restrained single-color accent that imitates metallic sheen offers sophistication without full saturation. Ask the artist to layer pigment subtly and to test a small patch for how the tone settles on your skin. Sessions are medium length when the artist builds the sheen gradually. Common mistake is over-applying metallic tones which can look patchy after healing. For evening wear, an open-back midi dress or wide-neck top puts the subtle sheen on display.
Frequently Asked Questions
Q: Will fine line neck butterflies need touch-ups more often than bold silhouettes?
A: Yes, fine line work typically demands more touch-ups because thin lines soften faster on moving skin. Bold silhouettes or slightly reinforced outer contours tend to read longer between refreshes. Expect a small touch-up opportunity around year two to keep hairline details crisp.
Q: How should I prepare clothing-wise for a side neck tattoo session?
A: Wear a loose button-down shirt or wide-neck top you can pull aside without stretching the area. That keeps the artist’s access clear and prevents fabric from rubbing the fresh lines during the first 24 hours.
Q: Do certain colors perform better on darker skin tones for neck work?
A: High-contrast pigments like deep black and heavily saturated tones hold up more predictably across darker tones. Lighter pastels may vanish faster, so discuss palette choices with your artist who can recommend pigments with proven saturation for your skin tone.
Q: Is there a higher blowout risk for small butterfly details on the neck?
A: There is some added blowout risk because neck skin can be thin and mobile. Minimize that risk by asking the artist about needle depth and line weight choices. Slightly bolder anchors and airy interior details lower the chance of visible blowout over time.
Q: How visible are healed neck tattoos in formal settings and should I hide them for interviews?
A: Neck tattoos are highly visible by design. Some industries are more accepting than others. If you have concerns, opt for placements that sit lower toward the collarbone or choose designs small enough to be partially covered by a collared shirt when needed.
