
Fine line Medusa work is everywhere on feeds right now, and the reality is that the daintiest pieces demand as much planning as a larger custom. Small lineweight reads delicate fresh and can go soft fast if spacing and placement are off. These 27 compact takes lean into what holds up, what to ask your artist for at the stencil stage, and how to style each spot so the design reads the way you expect after year two.
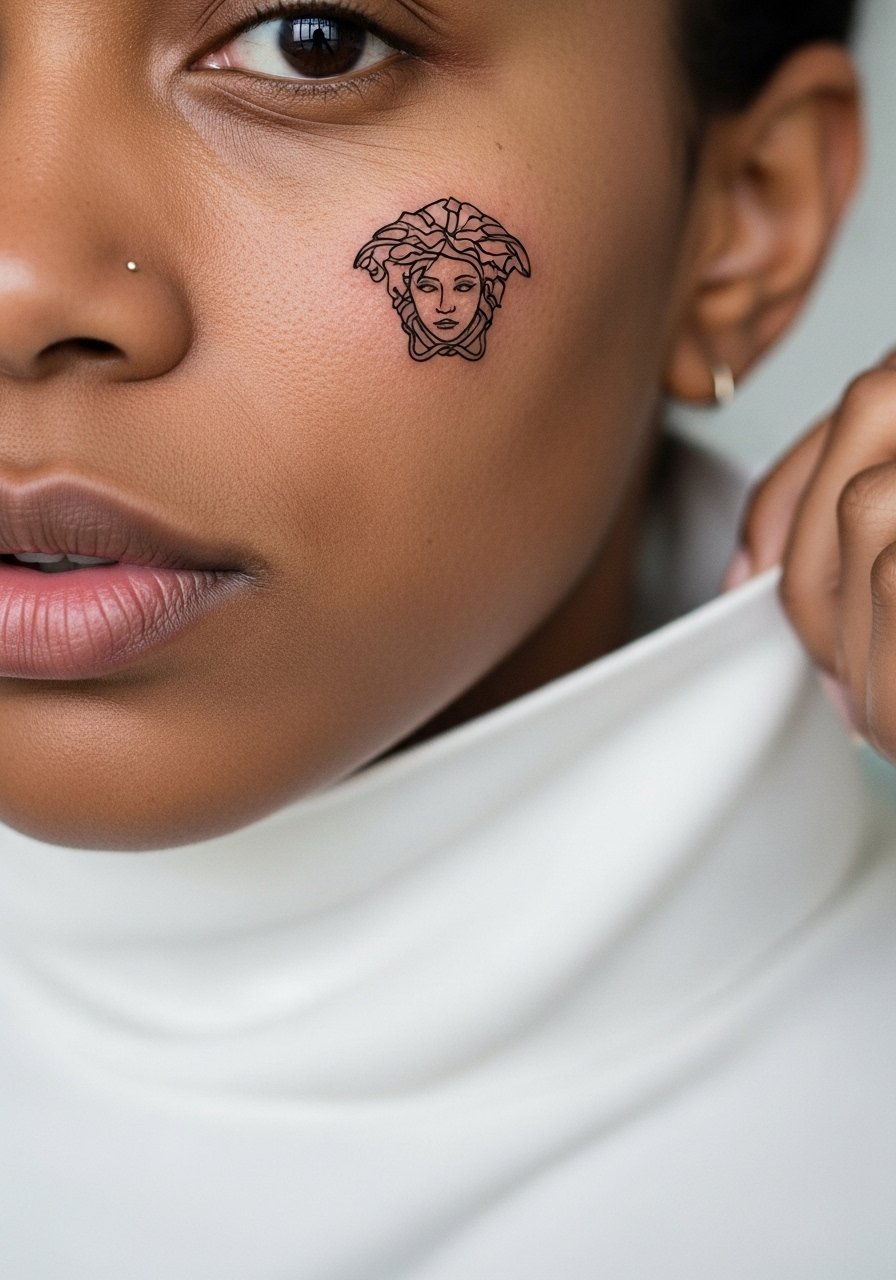
1. Fine Line Medusa Head Silhouette on Inner Forearm
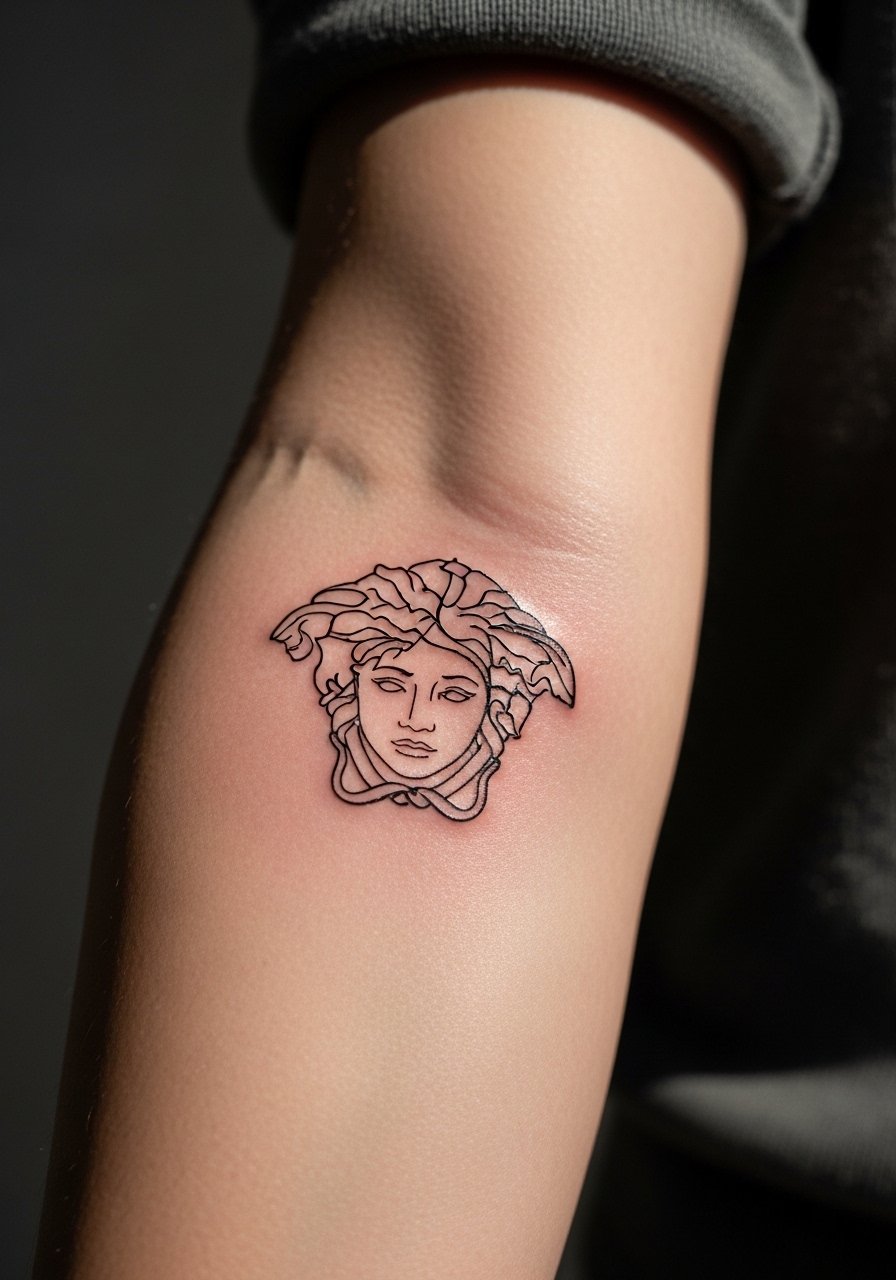
I recommend this when you want the Medusa reference without a lot of detail. Tell your artist to keep the snakes simplified and the negative space clear so the silhouette reads at a glance. Common mistake is packing too many tiny snake curls into a 1.5-inch piece, which blurs by year two. Expect a one-hour session and light pain. For showing it off, pair with a thin gold chain bracelet on the opposite wrist or a dainty bracelet stack that keeps attention on the silhouette. Plan touch-ups around year two if you use single-needle linework.
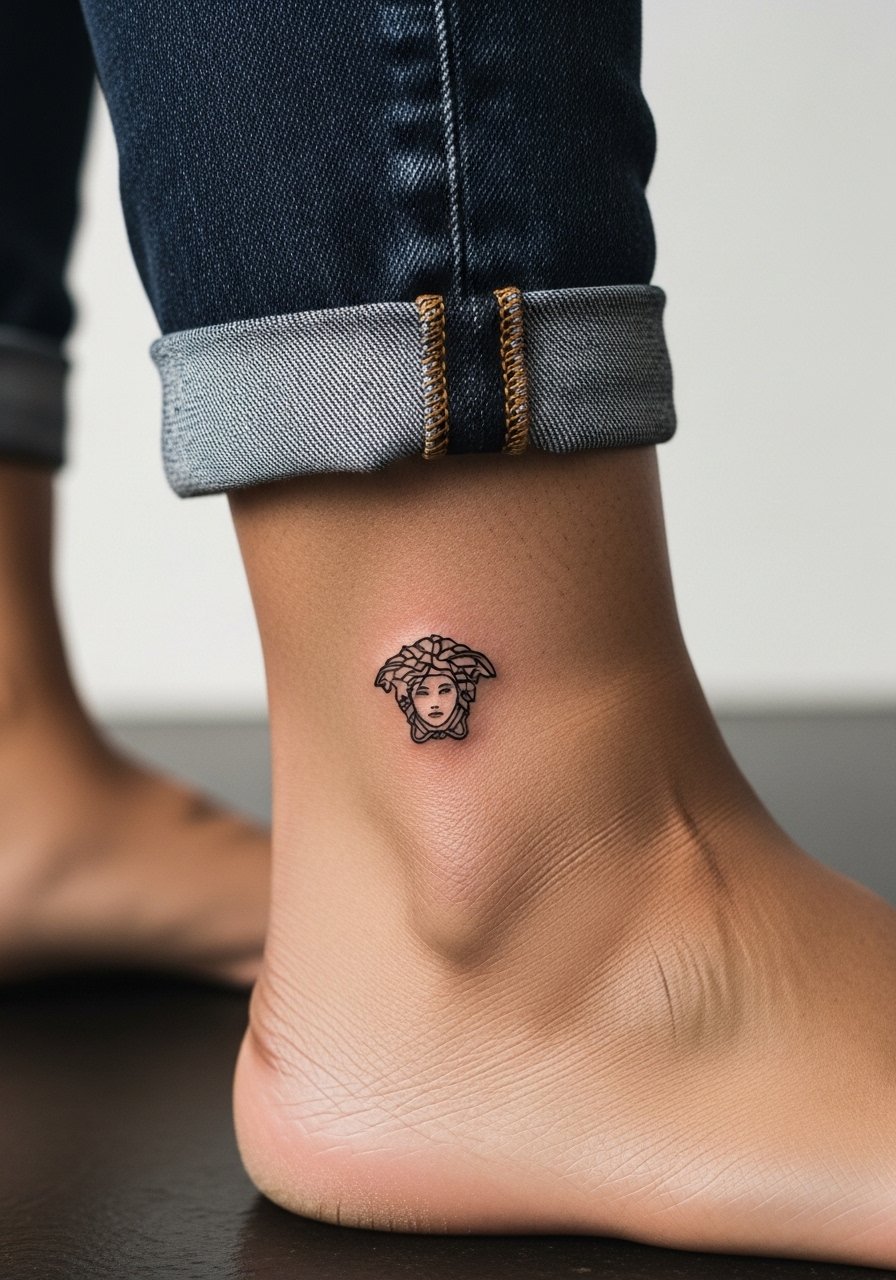
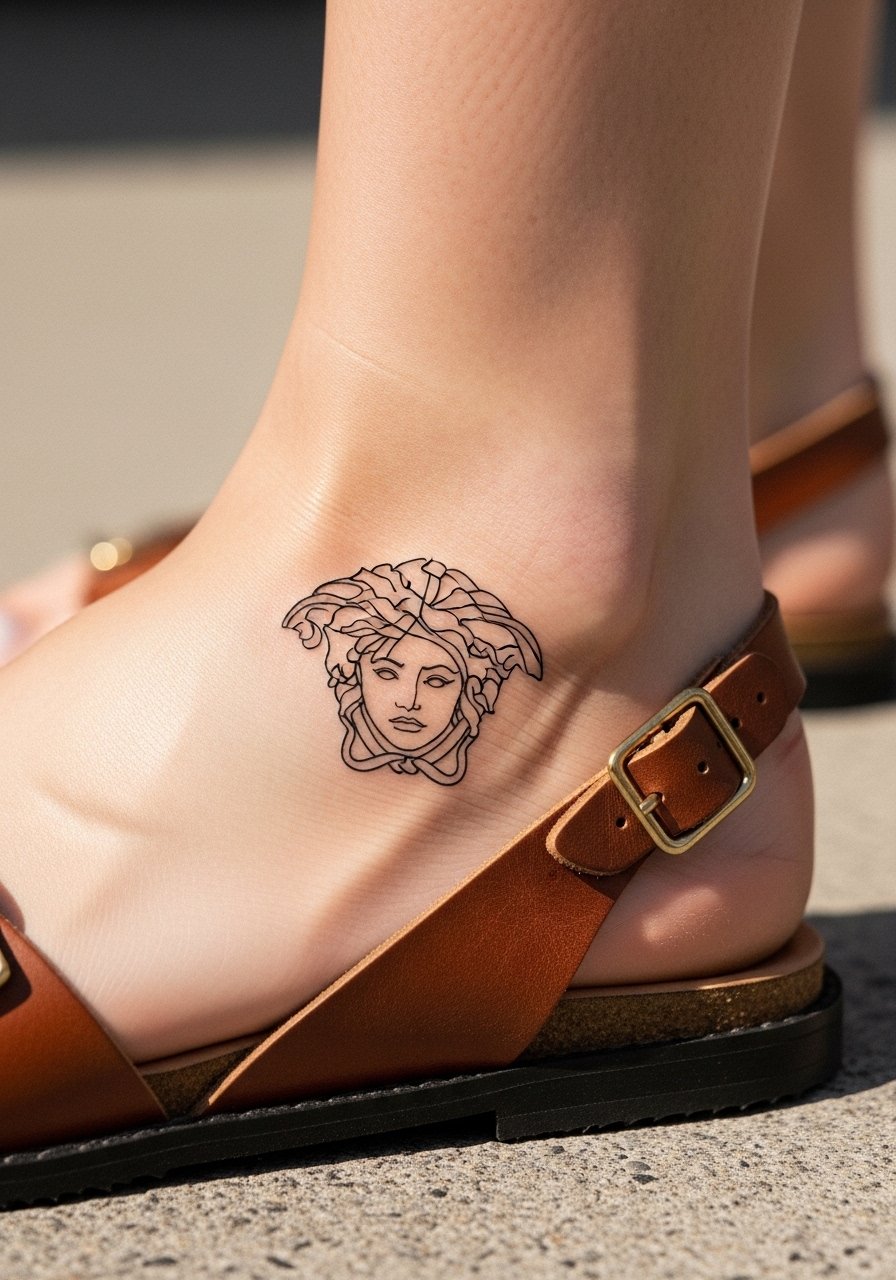
2. Minimalist Medusa Outline with Snakes at the Ankle

An ankle micro suits people who want a private talisman that shows in summer. The biggest error is sizing it too small under one inch with delicate curves. Ask for slightly heavier anchoring lines around the jaw and snakes so the outline survives friction from shoes. Expect the session to be 30 to 45 minutes and the ankle to be more tender than the forearm. Style with strappy flat sandals or cropped ankle pants to highlight the placement when you want to show it off.
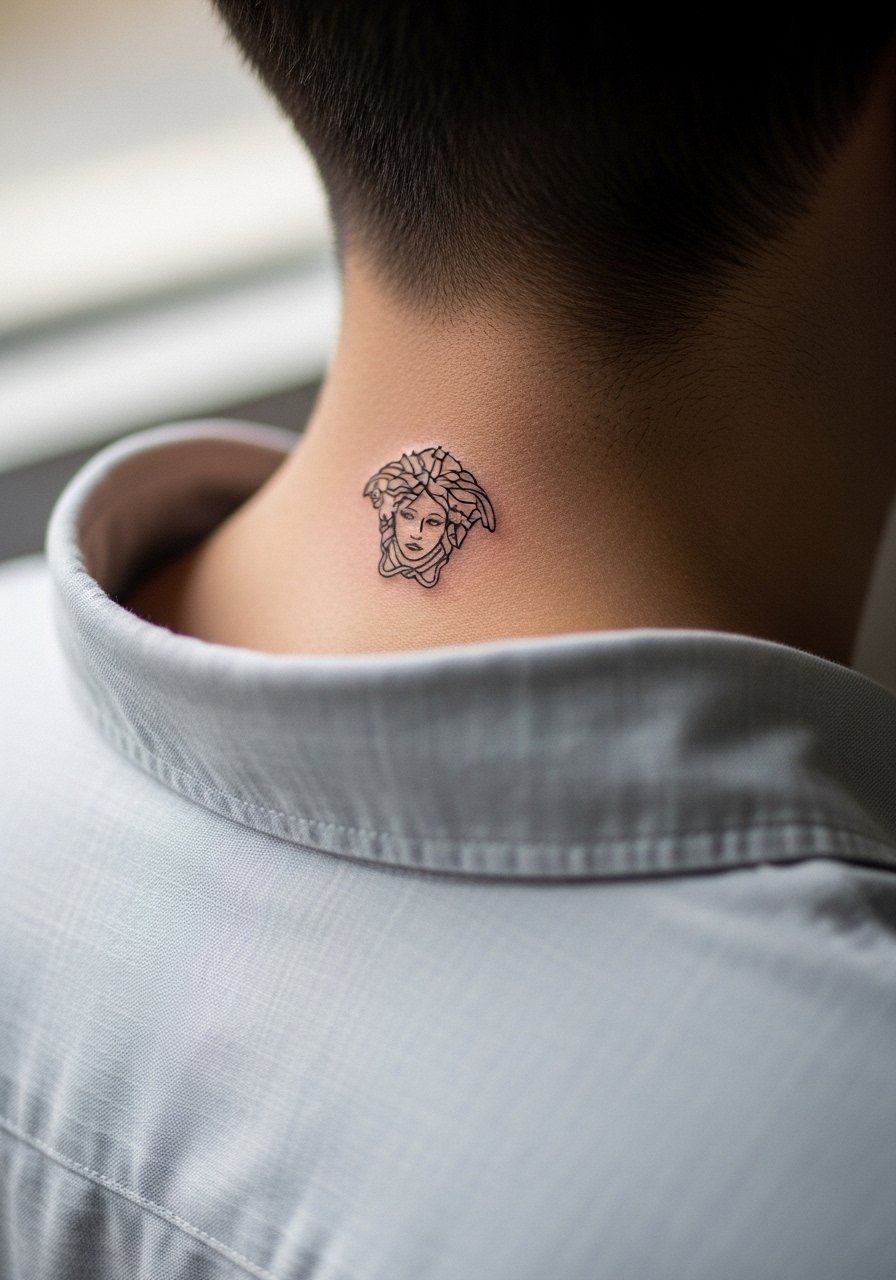
3. Subtle Fine Line Medusa Profile Behind the Ear
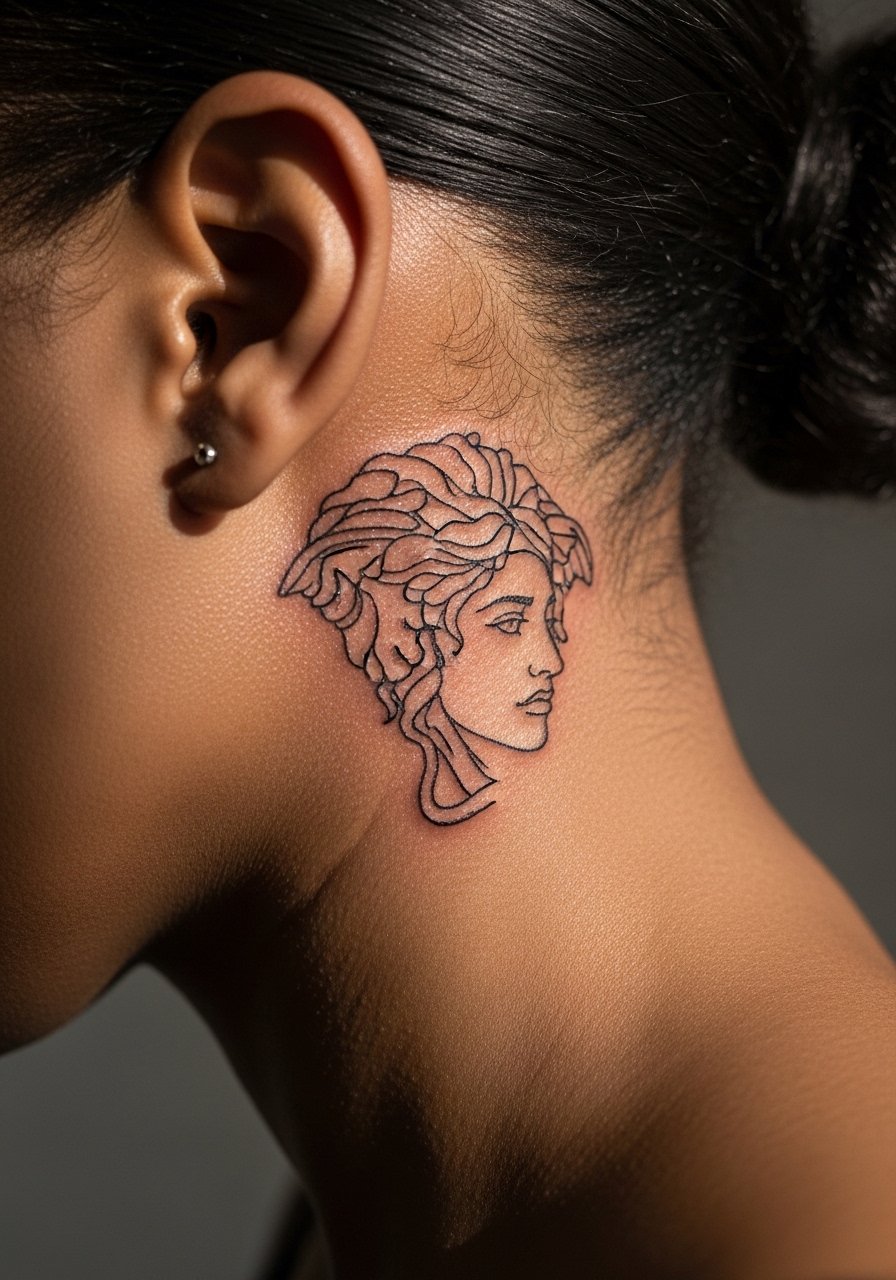
Behind-the-ear profiles read whisper-quiet and work for people who need discretion. Be explicit at consultation that you want the profile on the skin just below the hairline, not on the cartilage. The common aging issue is blurring from low line density. Ask the artist to balance light linework with a few slightly bolder contour strokes. Session time runs short but sensitivity is higher. For session wear, bring a shirt that lets the artist tuck hair back easily. Search #DaintyMedusa on Instagram to find artists who post similar placements.
4. Black and Gray Shaded Medusa Face on Outer Forearm
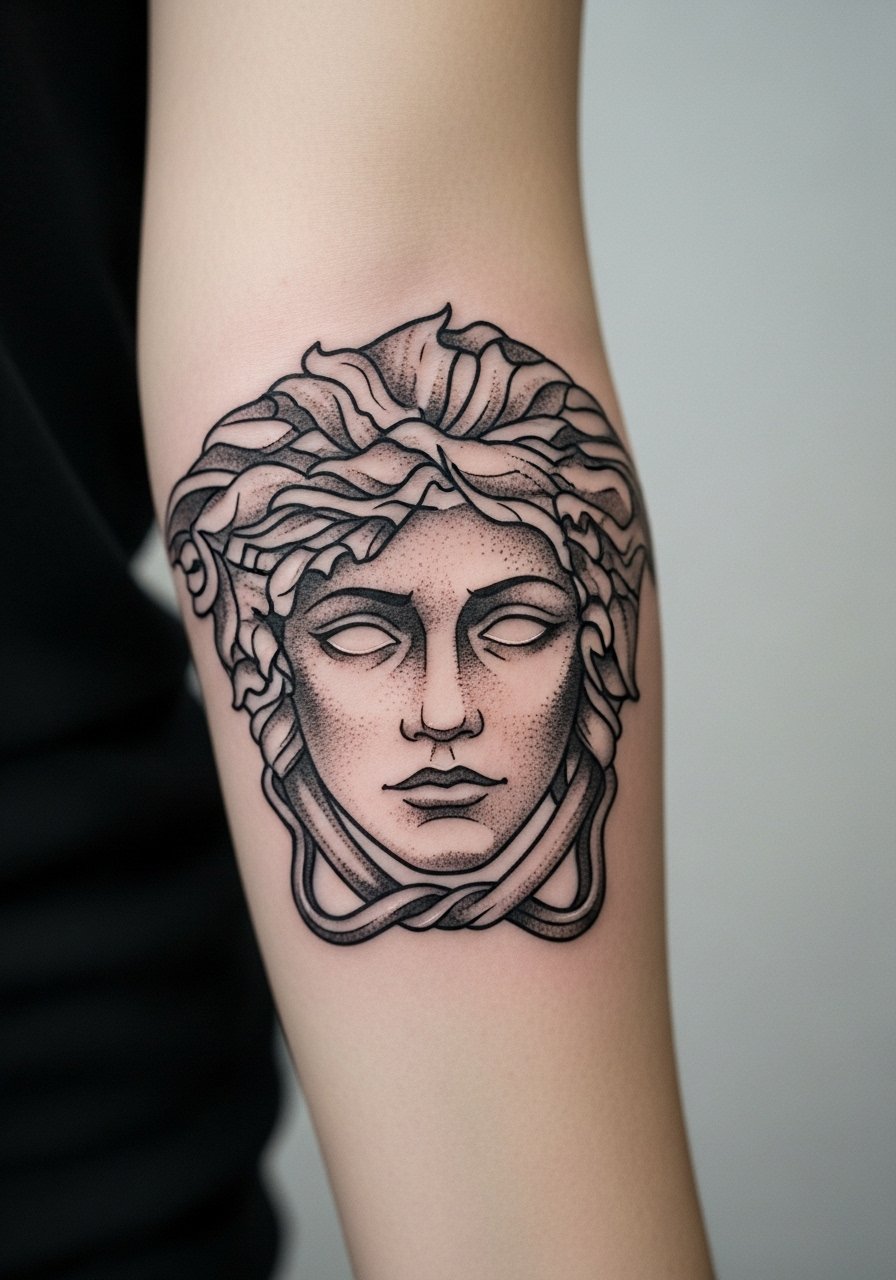
If you want intensity that still reads small, choose gray wash rather than tiny color fills. This style balances realism and dainty scale by using stipple shading around the cheek and soft gray for snake shadows. It takes longer, expect two sessions for a clean mid-sized version. A common mistake is over-detailing the face in a 2-inch space which turns into muddy shading after a few years. For visibility, roll sleeves and wear a fitted black tee during the session so the artist has full arm access.
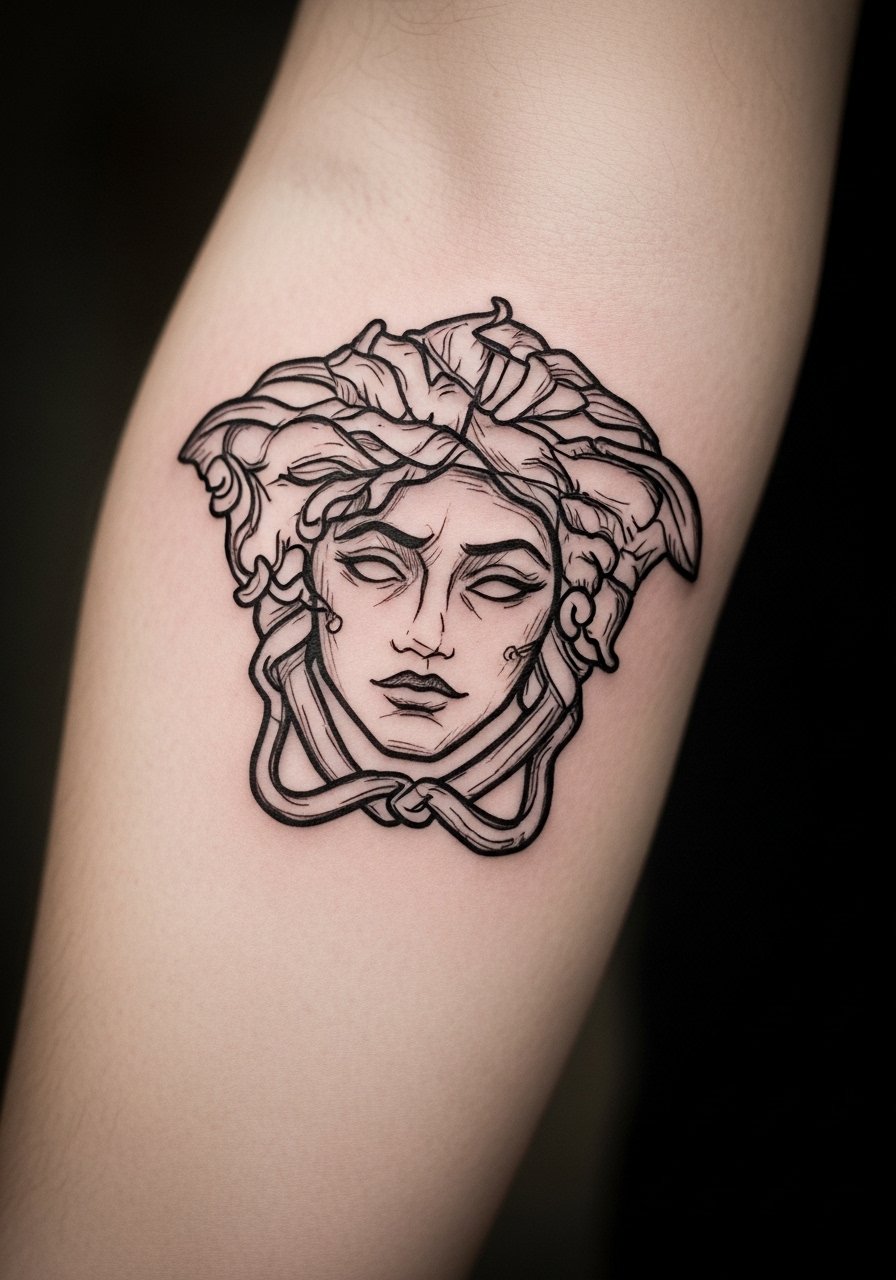
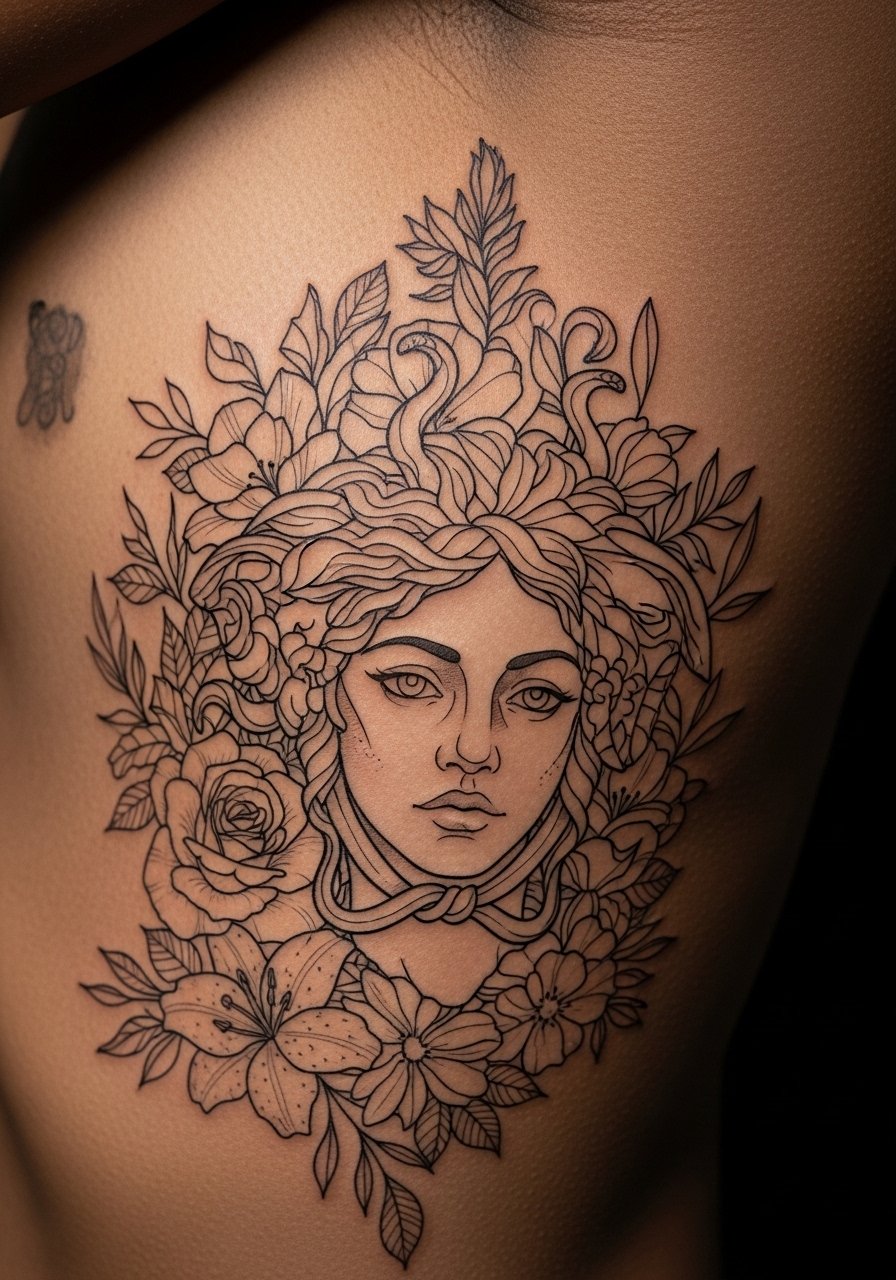
5. Dainty Medusa with Flowing Snake Hair on Inner Bicep
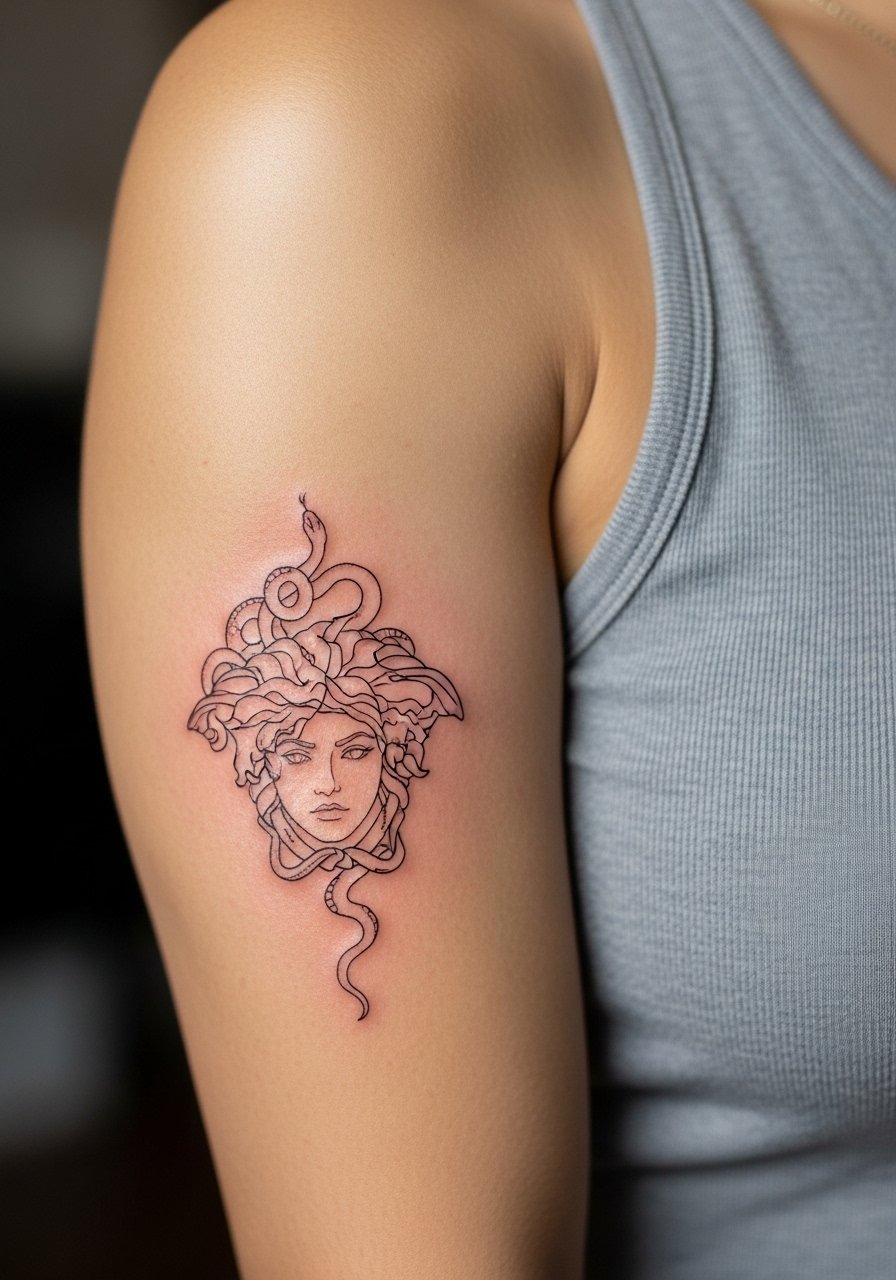
Fair warning the inner bicep is sensitive but looks intimate and hidden until you lift your arm. Ask for flowing snake hair that follows muscle lines so the piece stretches more gracefully with movement. A common mistake is placing the snakes perpendicular to the arm axis which distorts with flex. Planning note: inner bicep pieces can sit for longer sessions but expect flicker pain when the needle hits thinner skin. For the session, wear a linen tank top to keep the area accessible. Touch-ups may be needed at 18 months if you sleep on the side often.
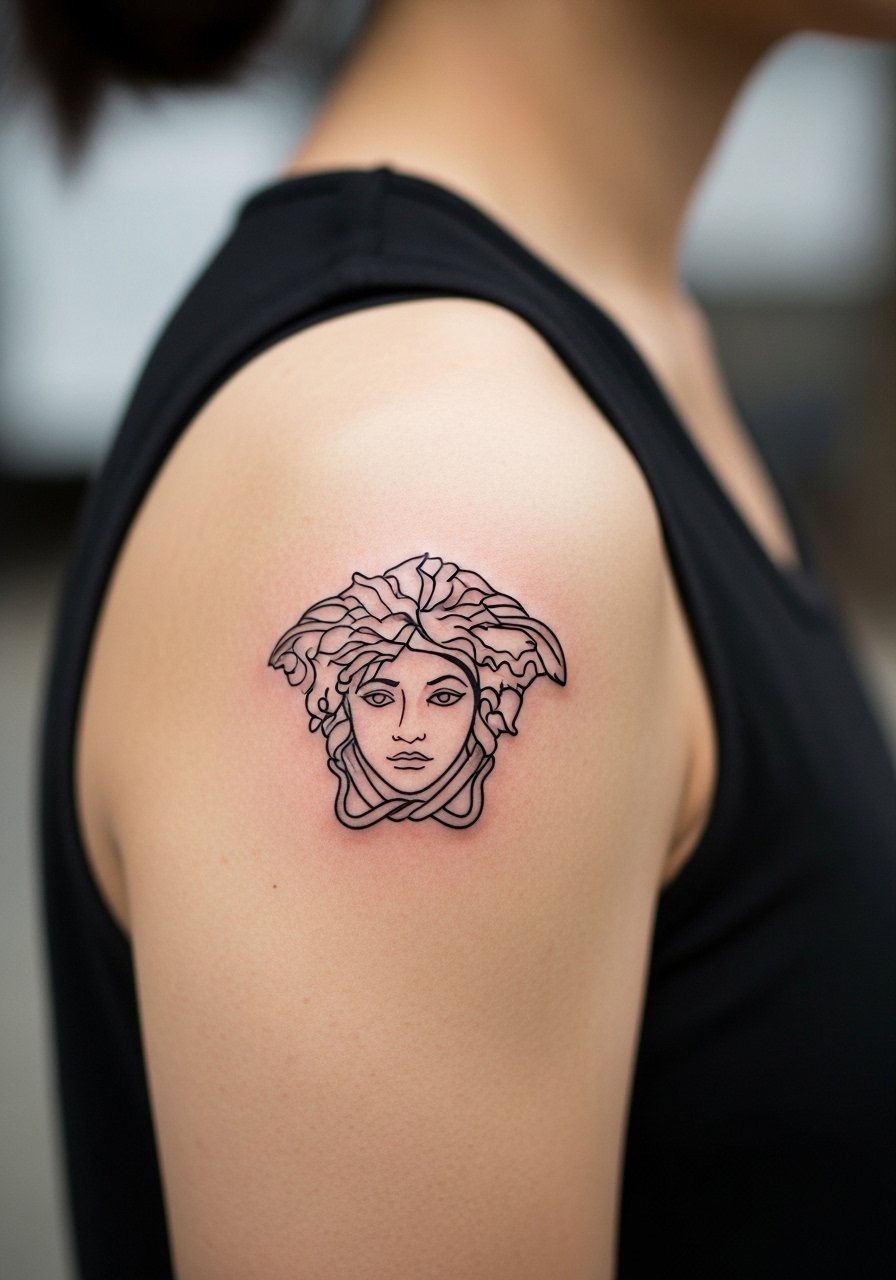
6. Neo-Traditional Medusa with Vibrant Snakes on Upper Arm

This one glows with color but keeps a compact footprint. Ask for bolder outlines around the face so the color stays readable as saturation softens. Controversy exists here because fine line fans prefer subtler palettes while neo-traditional advocates push heavy saturation for longevity. Name both camps when you consult the artist so you get the approach you want. Sessions usually span two to three hours and may split over visits. Pair with a sleeveless muscle shirt during session for easy access.
Studio Day Picks
The wrist, ankle, collarbone and inner forearm pieces above each have different prep needs, so these items smooth the session and the first week.
-
stencil transfer paper kit. Lets you preview exact placement on tricky spots like the collarbone and ankle before the needle touches skin.
-
topical numbing cream. Applied per instructions it helps with sensitive zones like the inner bicep and behind the ear without altering linework when used properly.
-
thin protective film roll. Useful for low-friction placements like the wrist and ankle to reduce rubbing in the first 48 hours.
-
fragrance free gentle body wash. Cleanses healing areas without stripping oils from fine line work shown above.
-
Aquaphor healing ointment. A thin layer can protect small single-needle tattoos in the initial days while skin seals.
7. Micro Medusa Silhouette on Back of Hand
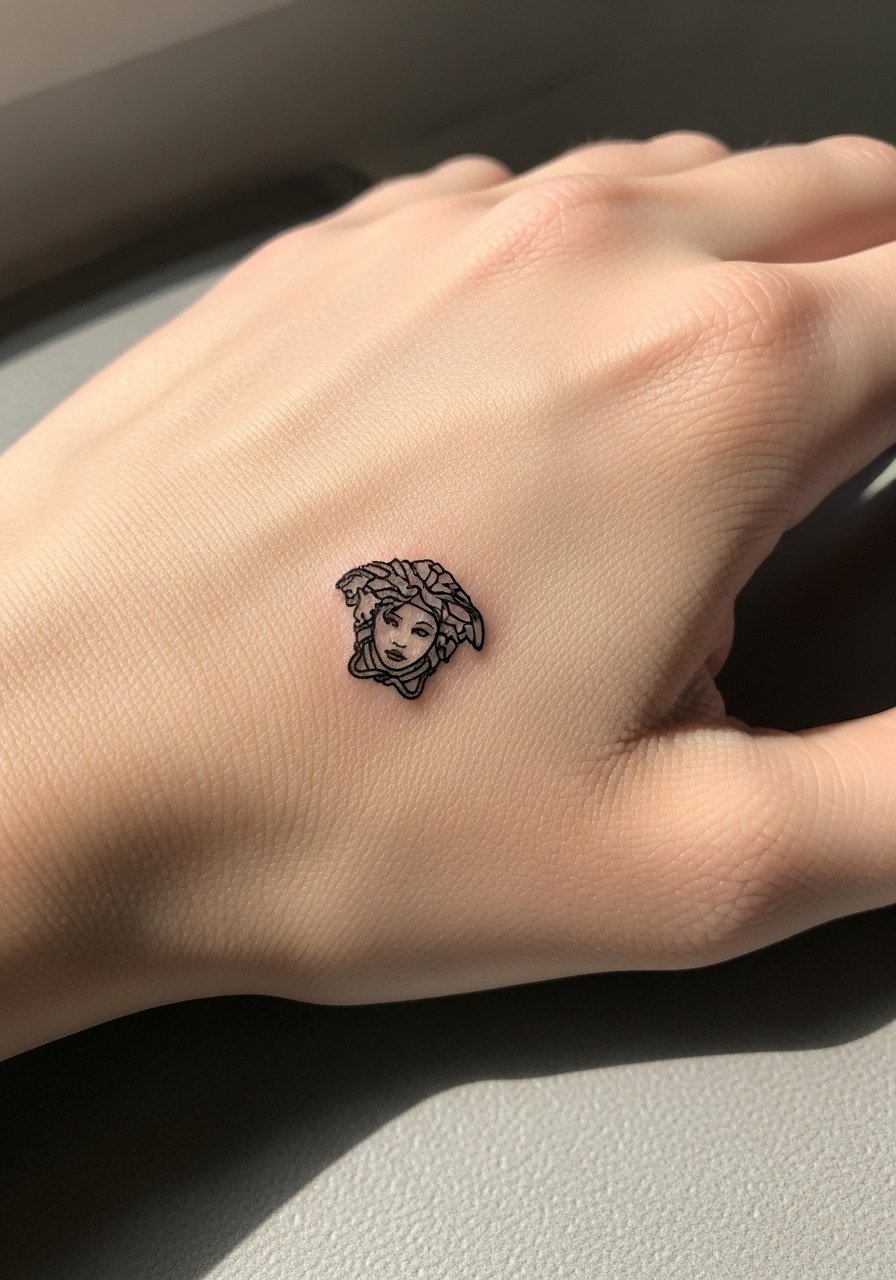
Hand tattoos age fast because of constant washing and friction. If you want a hand Medusa, request a slightly bolder silhouette than you would for the forearm so the shape lasts. The common regret is going too fine and then needing annual touch-ups. Session time is short but painful, especially near knuckles. Style with stacked rings to frame the back-of-hand piece, like a dainty finger ring set. Be realistic about workplace visibility before booking.
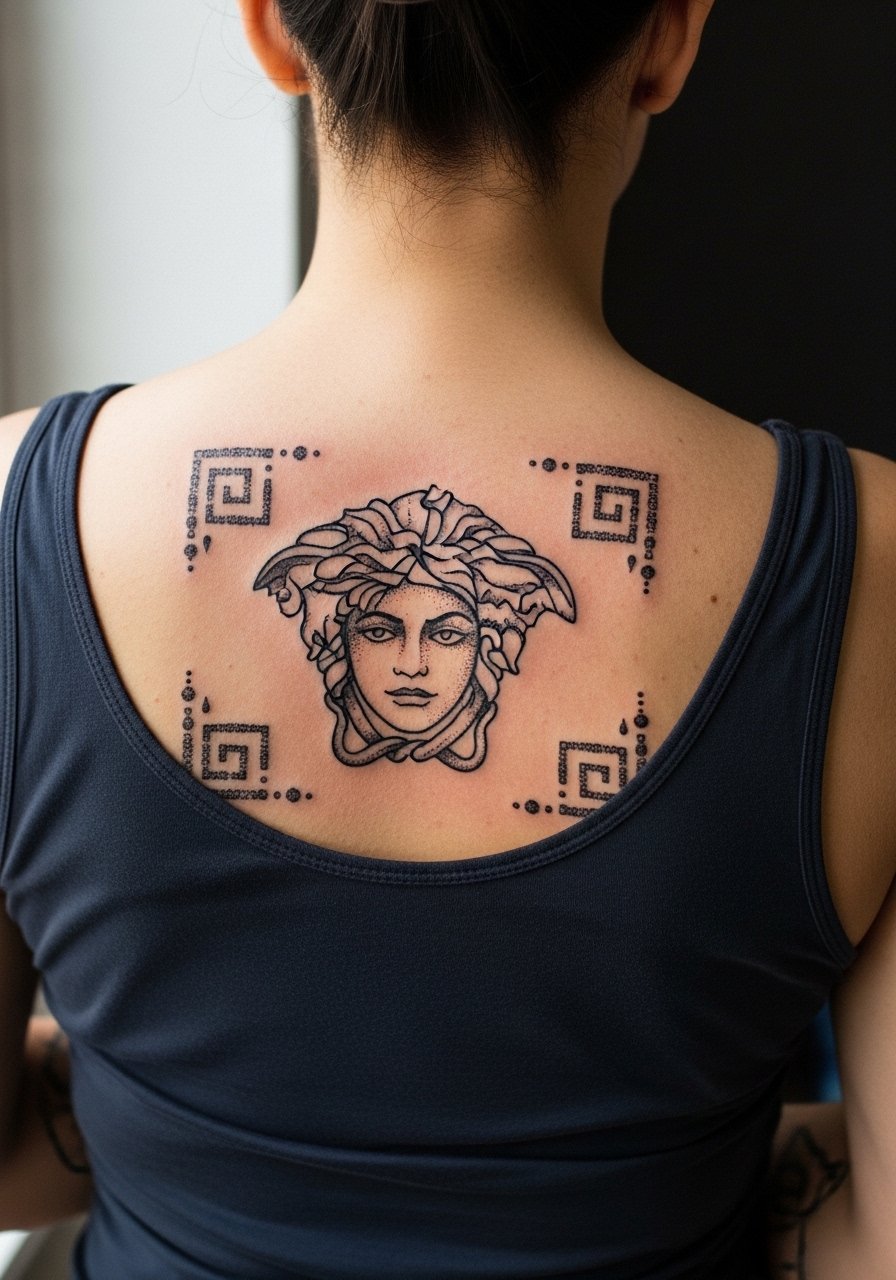
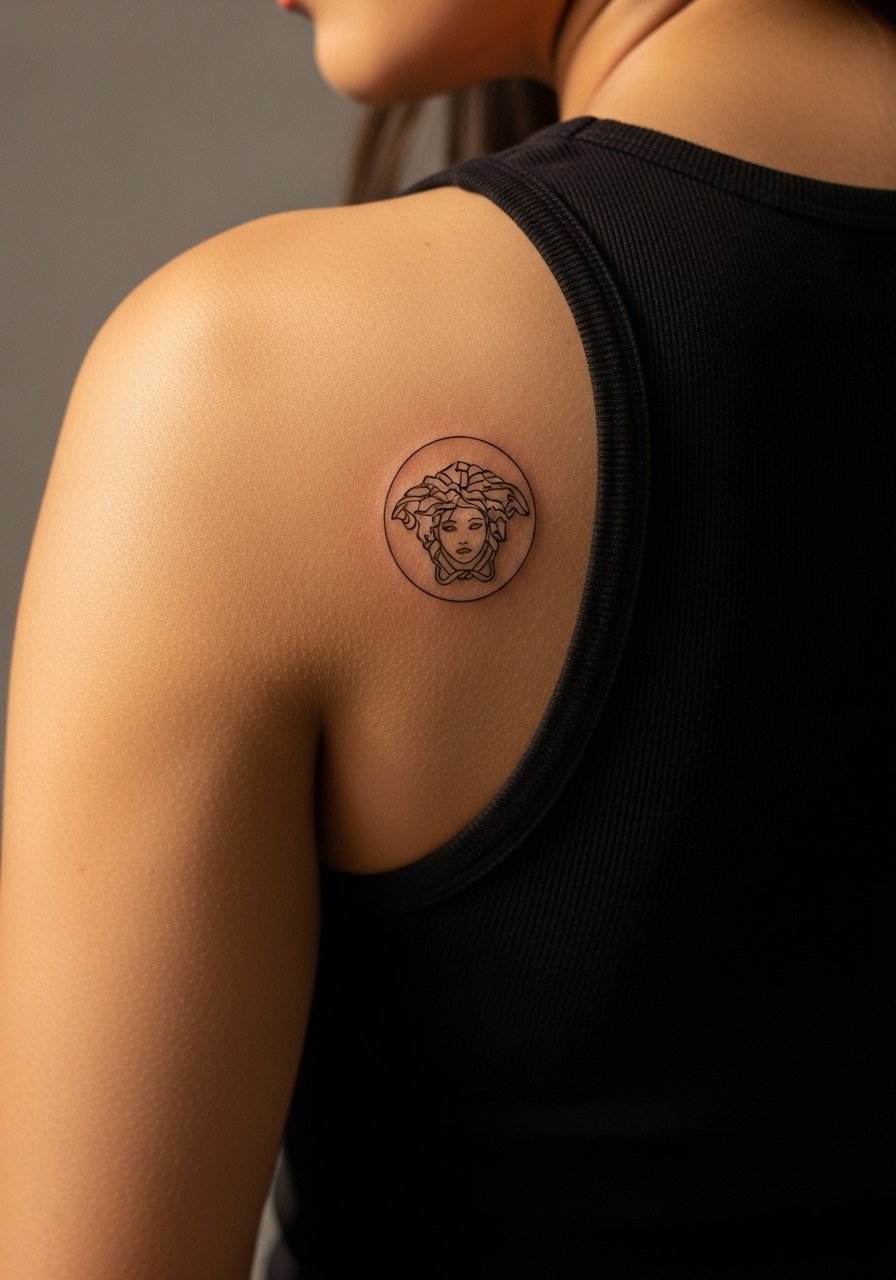
8. Ornamental Medusa Frame on Shoulder Blade
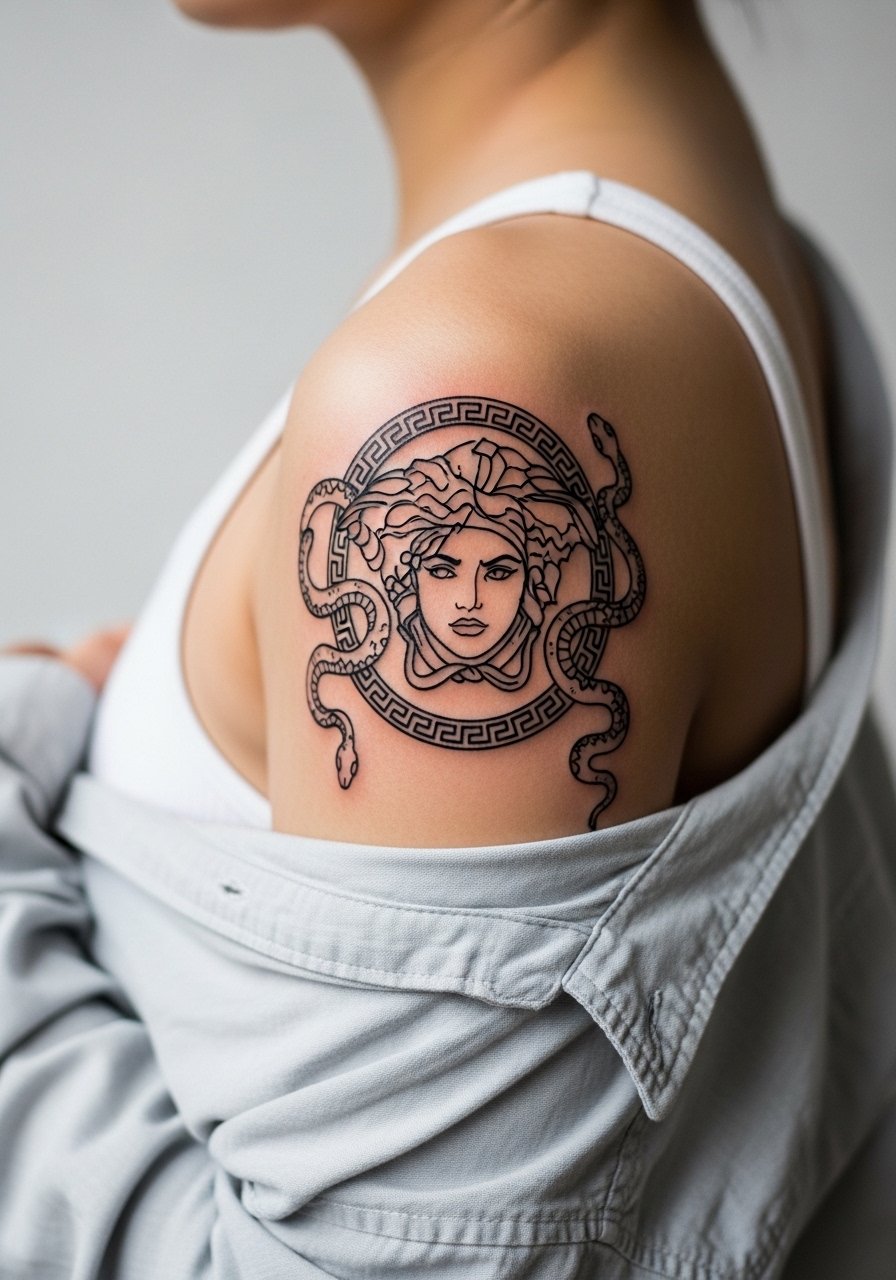
Shoulder blade work sits flat and heals predictably. For an ornamental frame, ask for spacing between border elements and the face so the filigree does not merge over time. A common mistake is overfilling the frame with tiny dots and curls which can look like texture later. Session is typically one visit. For showing it off, pull a loose button-down shirt to reveal just the area or wear off-shoulder tops for evenings.
9. Watercolor Medusa with Soft Snake Edges on Thigh
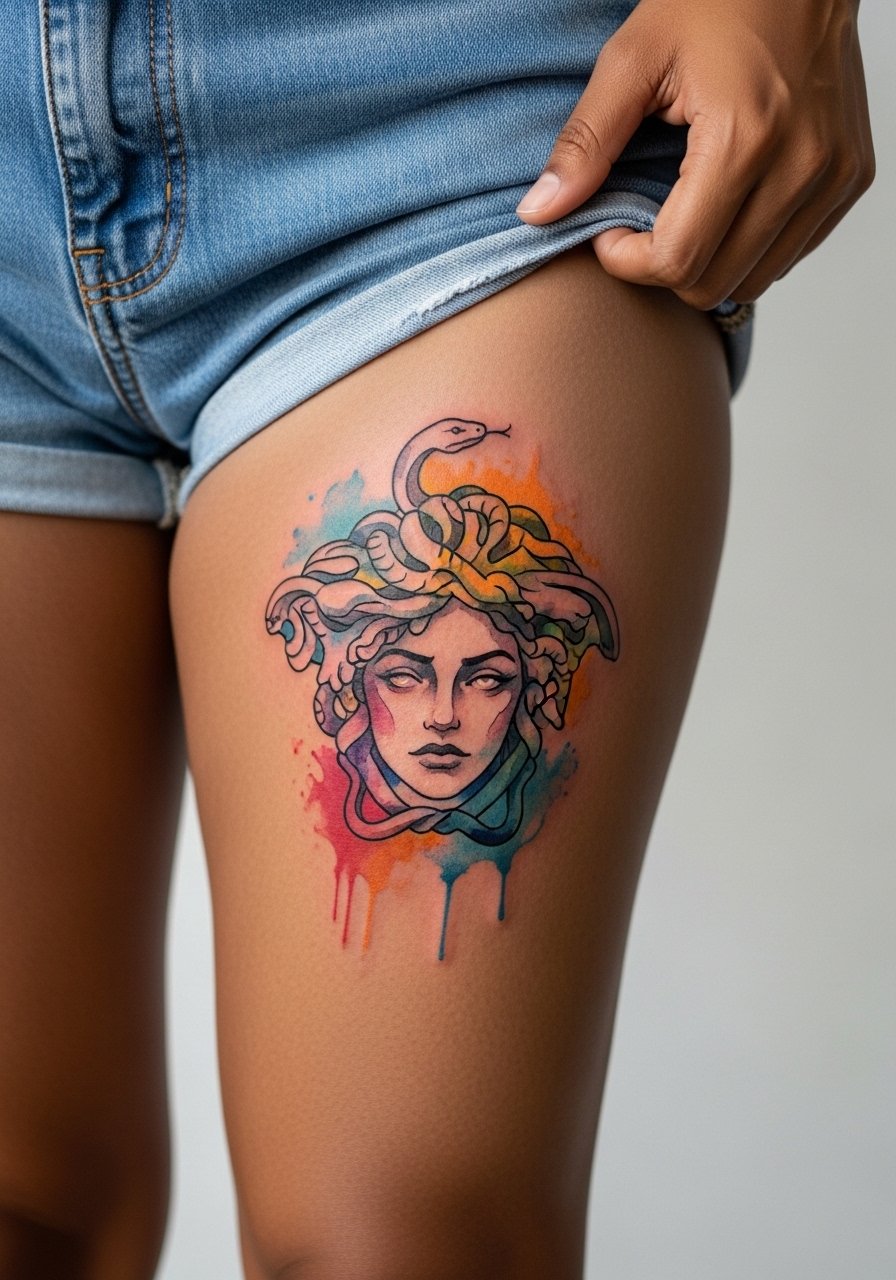
Watercolor effects read beautiful on the thigh but they can bleed on small scales. If you want color, ask your artist to keep pigment patches larger and avoid tiny color dots. Expect two sessions for blending. Weight fluctuation can affect thigh pieces so pick a spot that sits on flatter flesh for better aging. Session wear should be high-waisted shorts so the artist can roll fabric without pressure on the area.
10. Ignorant Style Madussa Sketch on Forearm
Ignorant style embraces imperfect lines that feel immediate. The risk is the aesthetic ages into generic smudge if the anchor strokes are too shallow. Tell your artist you want visible confident marks that read as deliberate, not underworked. This piece suits someone who likes visible, easy-to-maintain ink. Session is quick and typically one visit. Pair with a rolled-sleeve linen shirt like a linen short sleeve shirt to show the sketchy look without distraction.
11. Tiny Medusa Script with Integrated Birthstone Coordinates on Collarbone
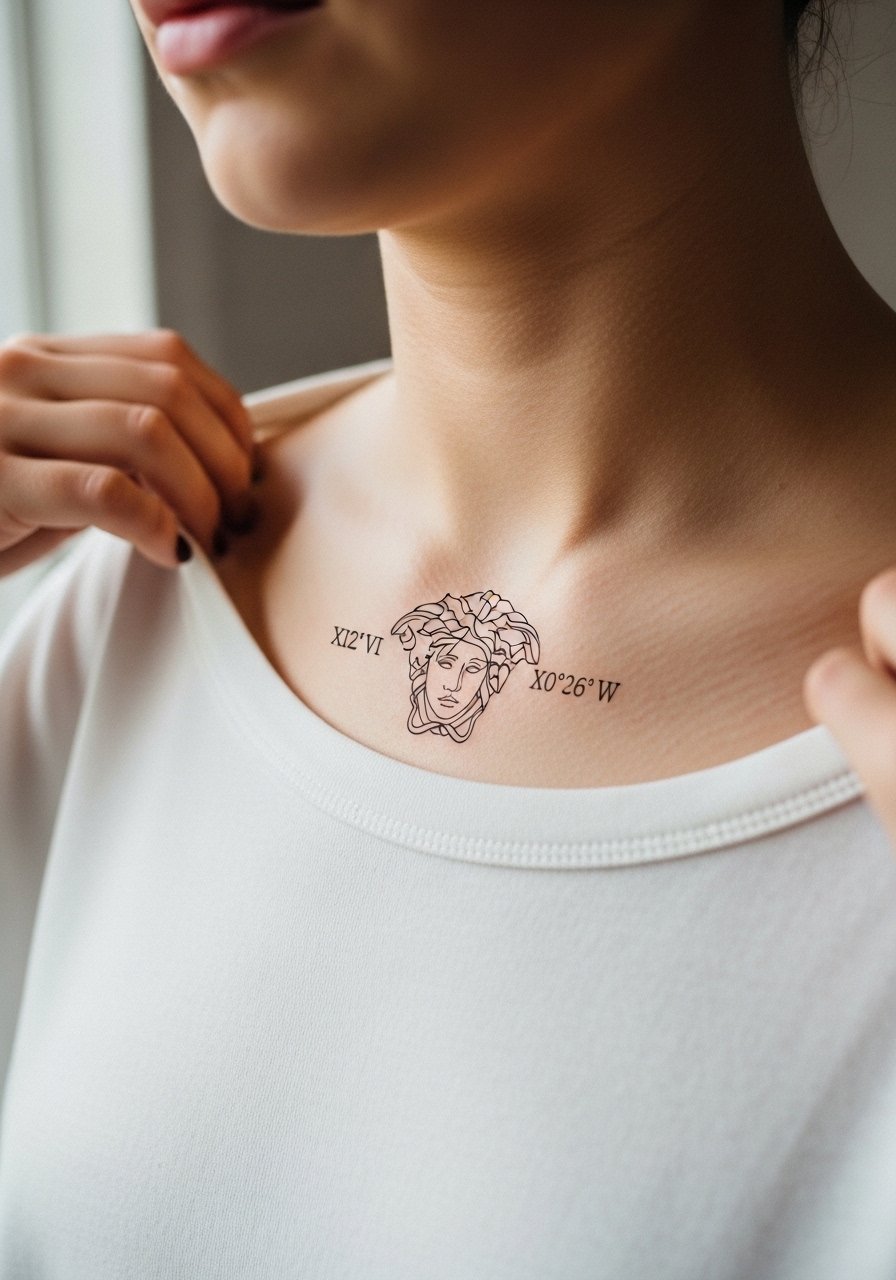
Integrating personal elements like coordinates or a birthstone glyph gives a hidden meaning without cliché phrasing. For collarbone work ask the artist to keep vertical spacing because the skin there curves. Many people underestimate the visual size once placed which is why a printed stencil on the skin is essential. Session time is short but the collarbone can be ticklish. Show it off with an off shoulder blouse or a thin chain pendant necklace that sits above the piece.
12. Ornamental Micro Frame on Shoulder Cap
Shoulder cap placements let micro ornamental frames read like jewelry. Tell your artist you want negative space inside the frame to prevent dot shading from filling in. A frequent mistake is over-detailing within a 2-inch frame which looks heavy in two years. Sessions are short and tolerable pain-wise. For the session wear a loose tank top so the area is easy to access.
13. Micro Realism Medusa Eye on Finger
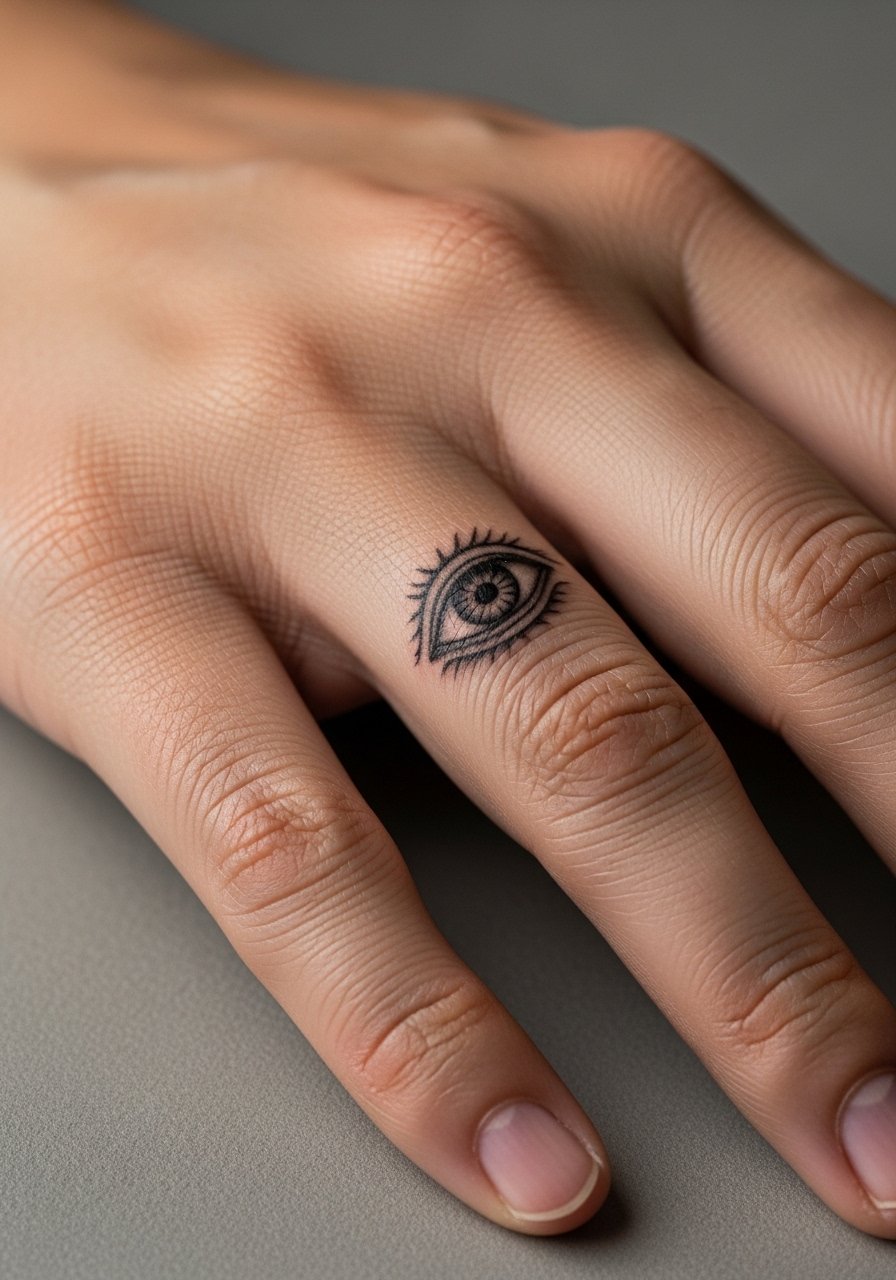
Finger micro realism risks rapid fade because of constant use and hand washing. If you want detail, have your artist use bolder micro-anchors and accept yearly touch-ups. The common mistake is expecting fine stipple to last like forearm dot work. Sessions are short but painful on the finger. Style with thin stackable rings to draw attention without crowding the image.
14. Miniature Medusa Bust on Calf
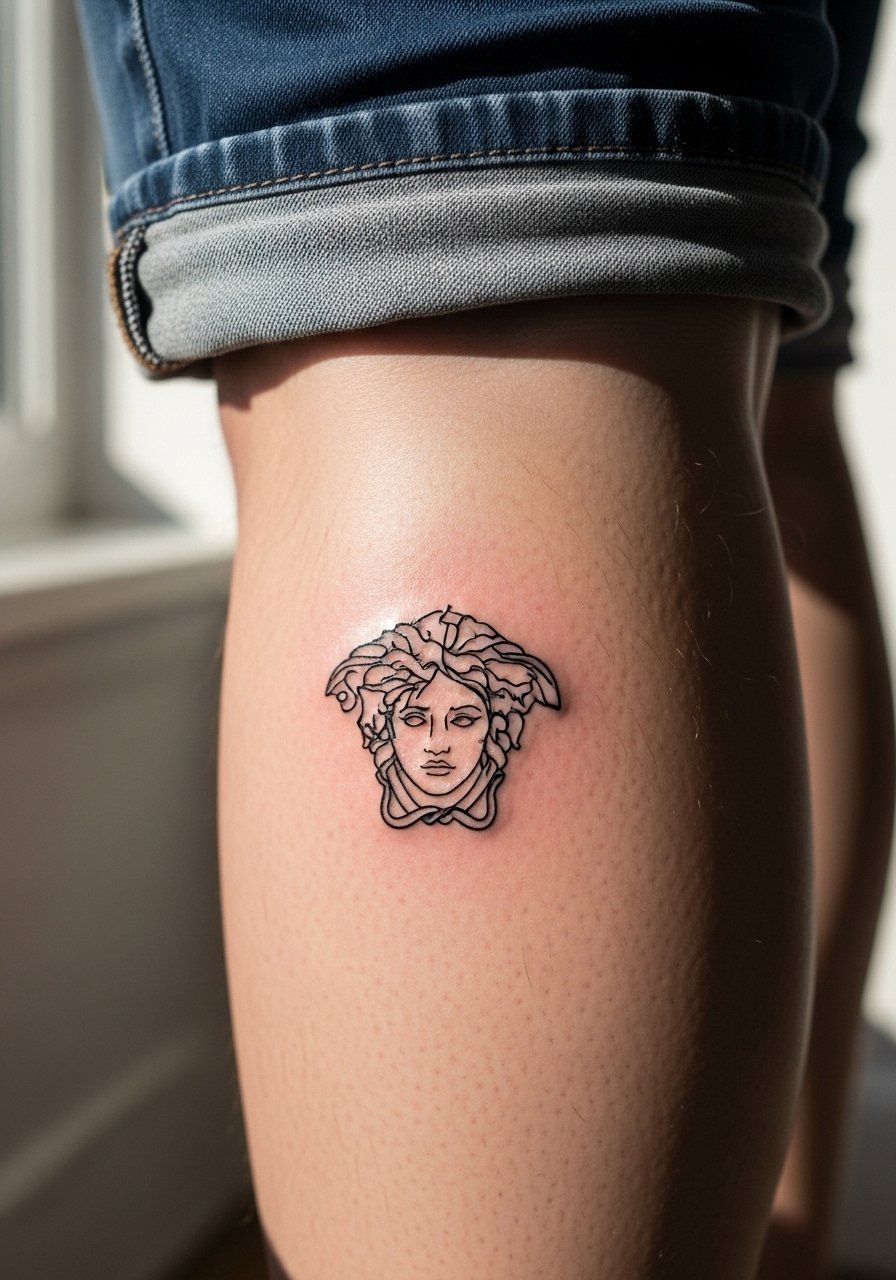
Calf pieces are low friction and tend to age more predictably than hands. For a miniature bust, ask for slightly stronger entrance lines around the jaw to prevent gradual softening. A mistake is placing complex facial detail into a piece under two inches. Expect a comfortable session and solid longevity. For outings pair with midi slit dresses or high socks to frame the artwork.
15. Blackwork Medusa Nose Ring Accent on Nostril Area
Facial-adjacent micro work requires specialized skill and nerves. Many artists advise against tiny facial pieces for first-timers. If you pursue it, request a test stencil over several expressions to see how smiling and frowning affects placement. The debate exists between those who say small facial work blends beautifully and those who worry about longevity and career implications. Name both stances with your artist and make a decision. Sessions are quick but sensitive. Consider a low-profile accessory instead if you need discretion.
16. Ornamental Medusa with Dot Work Frame on Back
Upper back pieces let dot work breathe without crowding. Ask for stipple gradients that respect distance between dots so shading does not close up over time. A common mistake is compressing dots too tightly in the name of realism. Sessions can run longer for stipple shading. For the session wear a loose button-down shirt you can pull aside easily.
17. Minimalist Medusa Keyhole on Sternum
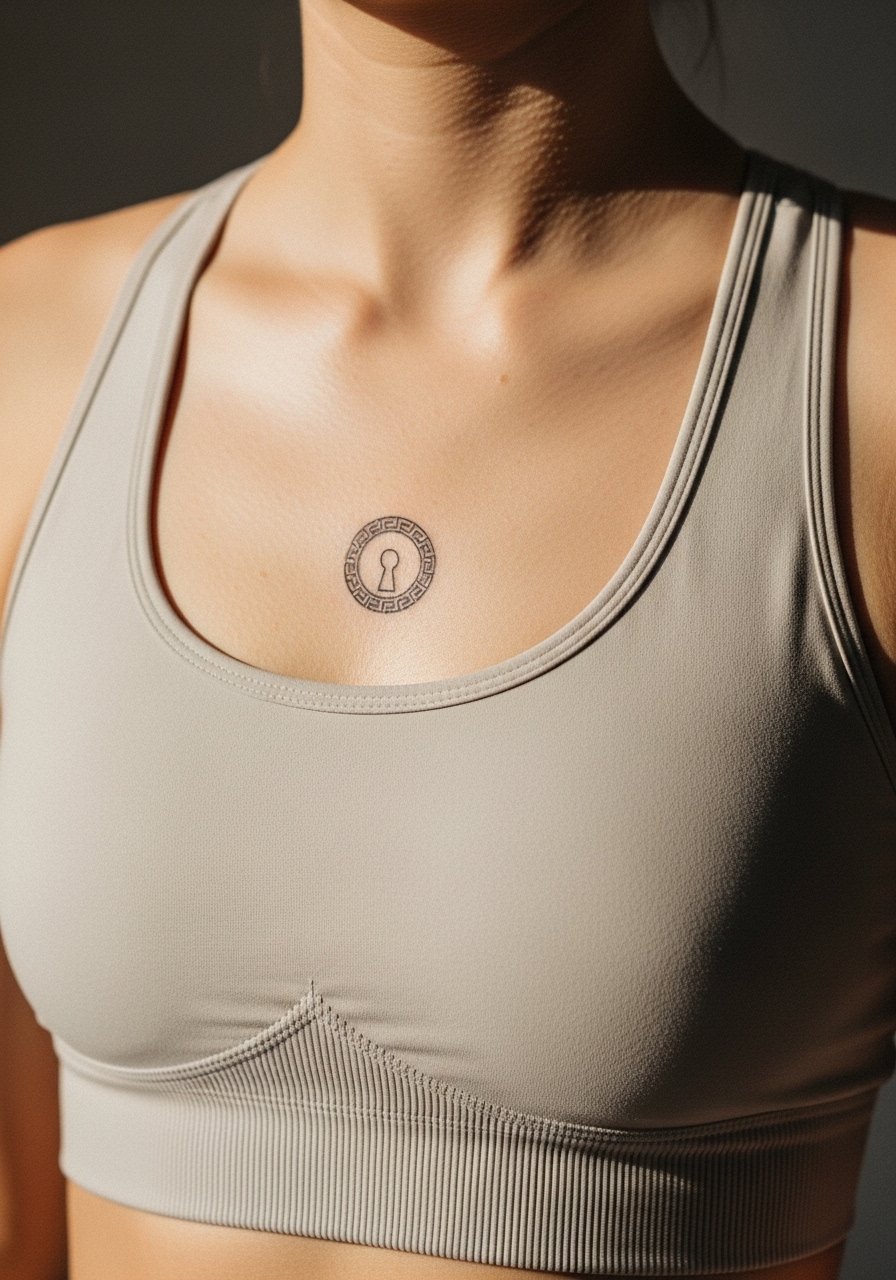
Sternum placements are intimate and the skin there moves a lot. If you want a keyhole or central motif, ask for slightly thicker outer strokes to maintain contrast as the skin shifts. The sternum can be one of the more painful spots, expect longer healing and careful session pacing. Wear a fitted sports bra for the appointment so the artist can work without fabric interference. Consider future expansion into chest panels if you like larger work later.
18. Medusa with Floral Elements on Ribcage
Fair warning: ribs are a high-pain zone but they offer stunning placement for pieces you mostly keep private. Artists split into two camps when it comes to fine line on ribs. One camp argues the skin stretch blurs thin lines within two years. The other camp believes proper needle depth and spacing keeps fine line readable. Ask the artist where they stand and show movement with the stencil before starting. Wear loose shorts or a crop top so the area is easy to access.
19. Tiny Medusa on the Nape of Neck
Nape tattoos are easy to hide with hair and are low-friction if kept covered. Ask for a compact lay-in so the snakes read at a glance and do not become a hairline smudge. The common mistake is choosing ultra-fine lines that vanish under hair regrowth and winter scarves. Session is brief. For the appointment wear a top with a collar you can shift aside.
20. Medusa in a Geometric Frame on Upper Arm
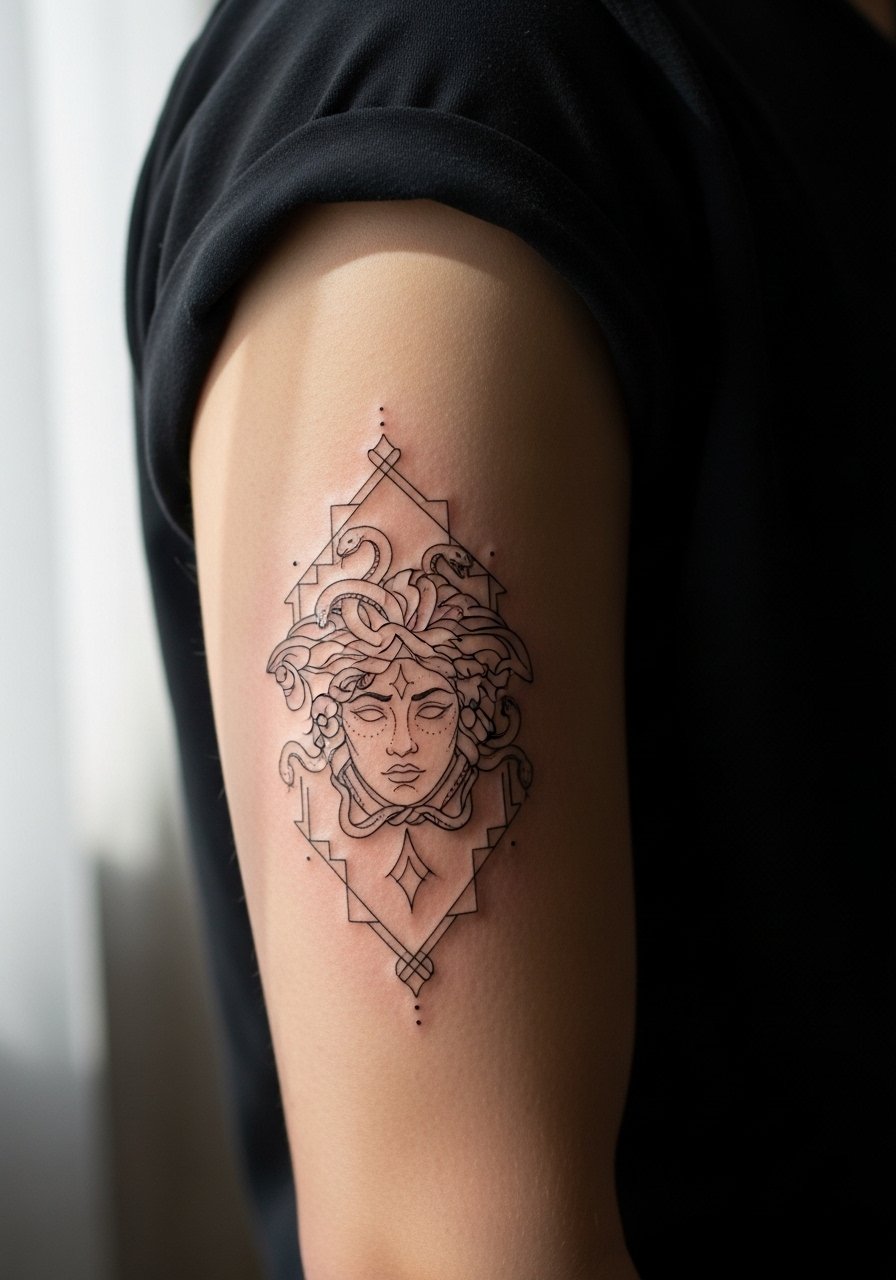
Geometric frames force decisions about spacing early in the design. Tell your artist you want breathing room between geometry and face so intersections do not blur with time. The frequent mistake is tight geometry that looks crisp fresh and crowded later. This placement is relatively low pain and shows well with rolled sleeves. Pair with an olive tank top for casual shows.
21. Micro Medusa Silhouette on Ankle Inner Side
Inner ankle pieces rub against socks and shoes, so line choices matter. Ask for slightly reinforced anchor lines and avoid pure single-needle loops. The common grief is fading within the first year for folks who keep leather boots on. Session time is short but aftercare should minimize tight socks for two weeks. For show-off looks wear strappy flat sandals.
22. Tiny Medusa with Halo on Behind Shoulder
This spot balances concealment and display well. Ask for a halo ring with negative space so the piece keeps its airy feel as the ink settles. A mistake is adding too many micro dots that close into a solid band after a few years. Sessions are gentle and quick. For sessions wear a loose tank top you can pull aside.
23. Micro Medusa on the Side of Foot
Foot tattoos face a lot of friction and can lighten quickly. Ask for bolder outlines and accept that yearly refreshes are common. The usual mistake is choosing a too-intricate face for the narrow canvas. Sessions are quick but healing requires low shoe pressure. For showing it off choose sandals that avoid straps over the piece.
24. Tiny Medusa on the Inner Wrist Script Accent
Inner wrist work is visible and holds attention. For longevity request slightly heavier contour strokes and minimal internal detail. A common mistake is crowding the wrist with script and tiny snakes that blur together. Sessions are brief but the wrist is sensitive. For the session wear a sleeveless top so the artist can access the area comfortably. Pair with a thin chain bracelet if you want jewelry that sits above the design.
25. Medusa with Subtle Color Accents on Calf Inner Side
If you like color but want restraint, pick muted washes in the snake hair and keep the face black and gray. The risk is color that fades into blotches on small areas. Ask for pigment in larger shapes rather than speckled touches. Sessions may split into two for color saturation. For outings pair with high-waisted shorts or mid-length skirts to show the calf.
26. Tiny Medusa with Ornamental Neck Ring on Side Neck
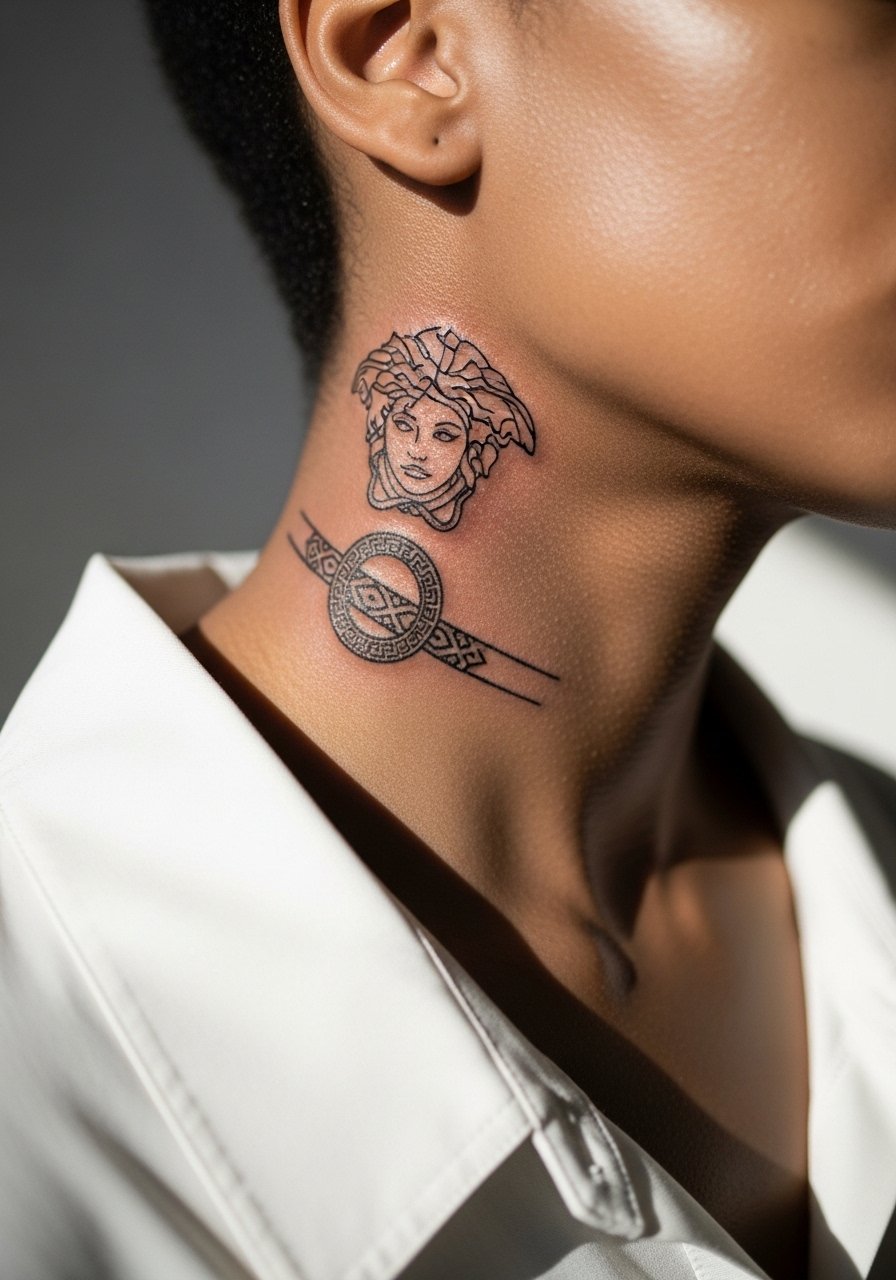
Side-neck placements need careful consultation about movement and visibility. Ask the artist to preview stencils with you turning the head so the ring does not hit folds. Some artists advise against tiny neck pieces for first-timers, noting both career and longevity implications. If you proceed, expect a quick but sensitive session. Show it off with wide-neck shirts that reveal the area selectively.
27. Micro Medusa on Inner Thigh with Hidden Details

Inner thigh work is private and ages well when placed on stable flesh. The common mistake is wearing tight clothing during early healing which rubs the piece. Tell your artist to keep strokes flowing with the thigh grain so the snakes do not kink with movement. Sessions can be longer because of sensitivity and awkward positions. For the session wear loose shorts you can shift without pressure.
Frequently Asked Questions
Q: Will fine line Medusa tattoos fade faster than neo-traditional versions on wrists and hands?
A: From what I have seen, fine line pieces on high-friction spots like the wrist and hand do tend to soften sooner than bold neo-traditional work. The trade-off is subtlety versus longevity. Ask your artist about slightly heavier anchor lines if you want the fine look to last longer.
Q: How should I choose between watercolor accents and black and gray for a thigh Medusa?
A: Watercolor looks painterly on thighs but can require larger color blocks to avoid patchy fade. Black and gray gives consistent contrast and easier touch-up timelines. If you love color, plan for a two-session saturation pass and a touch-up at year two.
Q: What should I say in a consultation to avoid common placement mistakes for a ribcage Medusa?
A: Show the artist how you move and ask for the stencil to be applied while you change positions. Mention you do not want dense micro detail where the skin folds. Ask the artist which fine line spacing they recommend for that exact rib site.
Q: Can I wear jewelry to show off a wrist or hand Medusa immediately after it heals?
A: Yes. Lightweight pieces like a thin chain bracelet or thin stackable rings complement small Medusa pieces without crowding the image once fully healed. Avoid heavy bracelets while the tattoo is still settling.
Q: Are hand and finger Medusas worth the upkeep if I want daily visibility?
A: Many people find visible hand work worth annual touch-ups. Expect more maintenance than forearm pieces. If low upkeep matters, choose slightly bolder lines or move to the outer wrist.
Q: How do I find an artist who specializes in dainty Medusa work without naming specific names?
A: Search hashtags like #FineLineMedusa and #DaintyMedusa on Instagram and TikTok plus your city name. Use portfolio filters on Tattoodo and check r/tattoos threads for recent healed photos. Book a consult and ask for healed, not just fresh, images.
Q: Is there a healing method artists agree on for fine line work — Saniderm or dry healing?
A: Artists are split. One group favors barrier film for reduced scabbing. The other worries about occlusion on very delicate single-needle lines. Ask your artist which method they use and why, and follow their protocol for that specific piece.
