
Fine line styles are flooding feeds, and the reality is the version you love on day one is not always the one that reads well years later. I have seen tiny wrist spiders blow out faster than anyone expects, booking windows for sought-after guest artists close without warning, and photos that flatten dark skin tones. Read the first idea and you will see a practical fix to start with at your consultation.
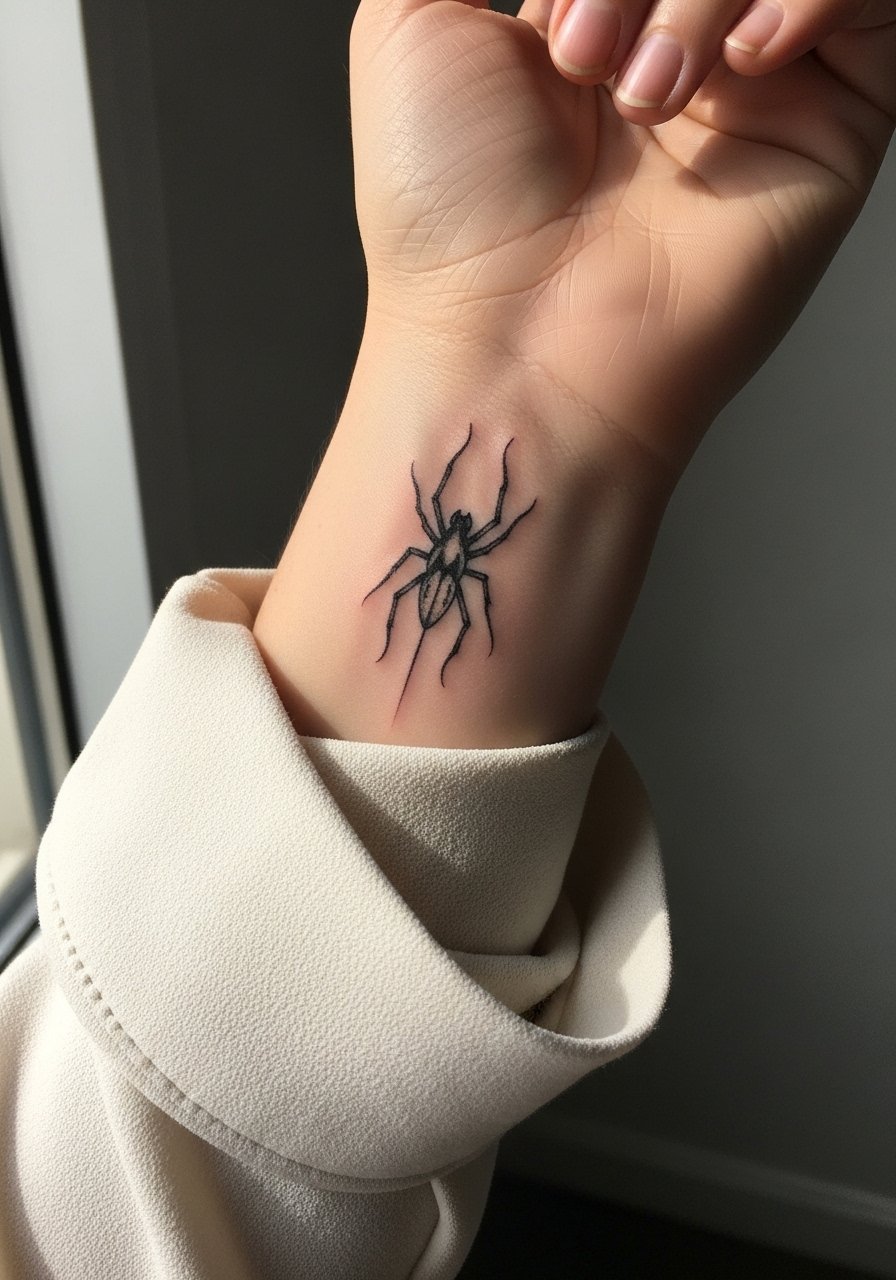
1. Fine Line Black Widow on Inner Wrist
I've seen the inner wrist host some of the sweetest small spider pieces and also the ones that need touch-ups first. Tell your artist you want 1.5mm minimum line thickness for anything that sits near the hand so the linework has room to age. Expect a short single session and a wrist that is gentle pain wise but prone to friction. The common mistake is pushing the legs too thin or too many intersecting web lines which merge by year two. For the session wear something with a loose cuff so the artist can access the area easily. Pair the finished piece with a rolled cuff blouse and thin bracelets to show the tattoo without crowding the skin.
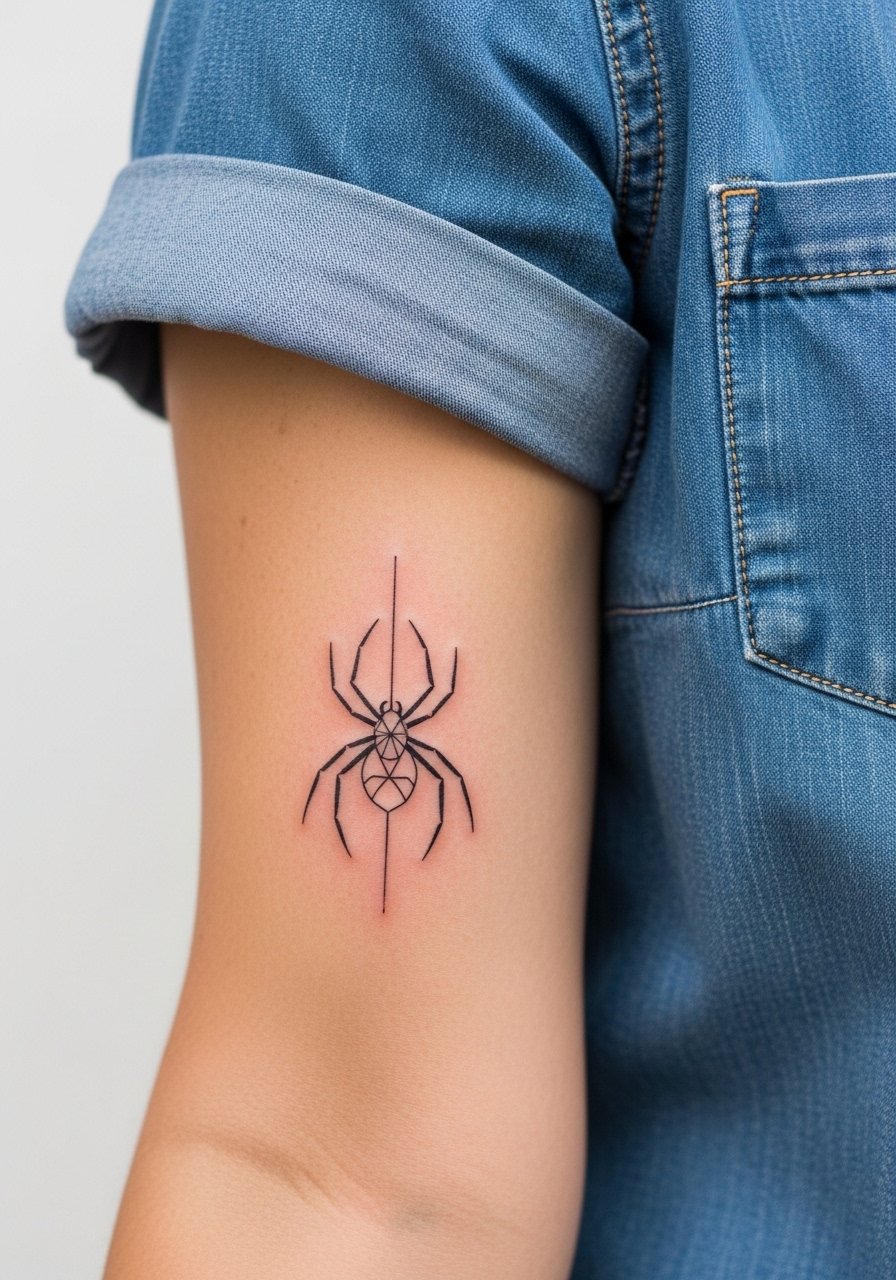
2. Minimalist Geometric Spider on Inner Forearm
Fair warning, the inner forearm rewards clean spacing and punishes designs that are too dense. Ask for a 2 to 3 inch arrangement with negative space around the body for longevity. The session feels straightforward, mostly steady buzzing and light pressure, and you can usually finish in one sitting. A frequent error is requesting ultra-fine cluster lines that merge when the arm moves. This placement hides well under sleeves for work. For an effortless everyday frame try a chambray button up shirt half-rolled to reveal the work without overexposing it.
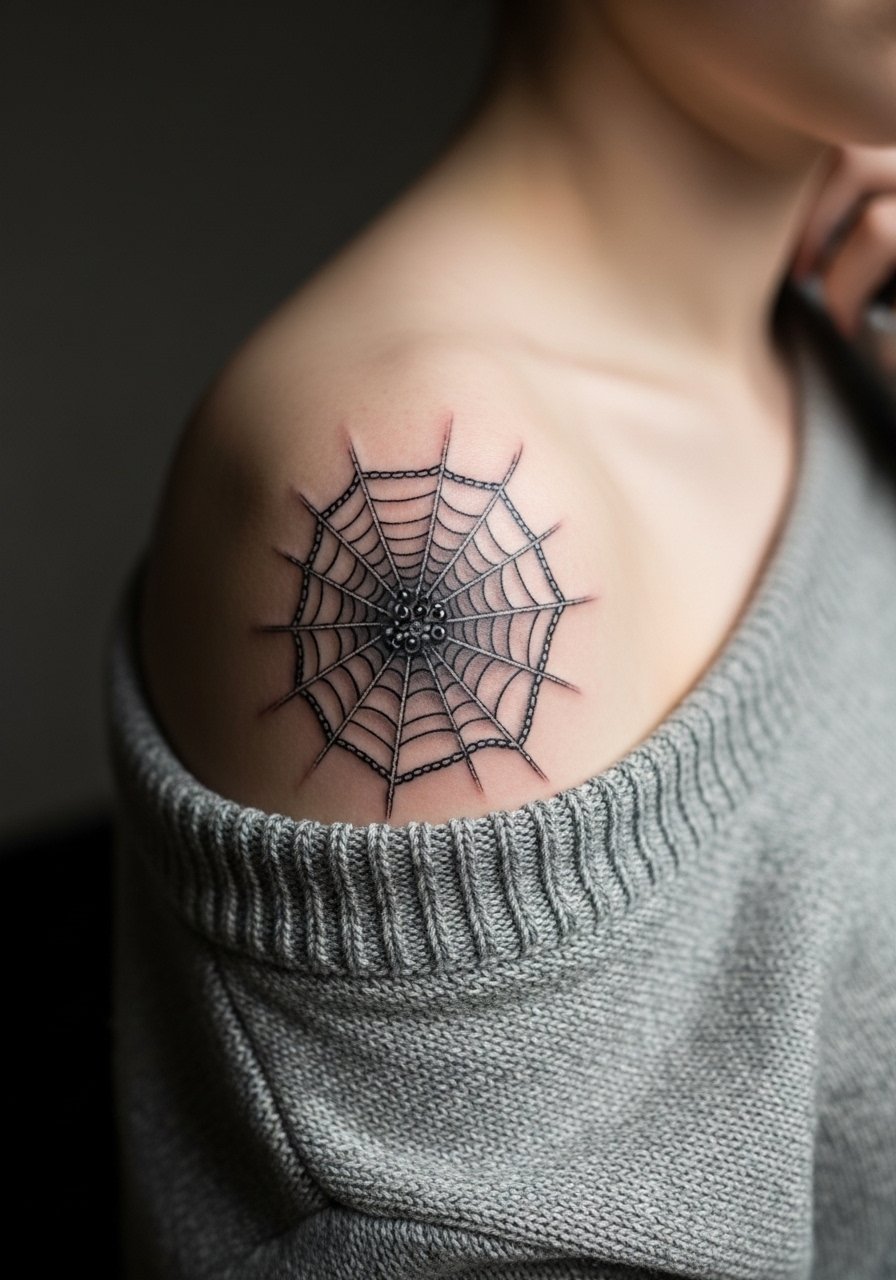
3. Micro-Realism Orb Weaver on Shoulder
Most shoulder pieces heal predictably and hide well under straps which makes them ideal for first timers who want something private but peekable. Request micro-realism with soft black and gray shading and subtle leg articulation so the spider reads like a tiny portrait not an icon. Expect one to two sessions and a session comfort level that is easy compared with ribs. The aging path is kind; the shading softens but stays readable if saturation is consistent. A common mistake is loading too much tiny detail into a two inch space. For showing it off, slip into an off shoulder sweater that reveals the top of the shoulder when you want to flash the piece.
4. Blackwork Abstract Spider on Ankle
The ankle is seasonal and thrives on bold black shapes that resist sweat and sun. If you want protection or rebirth vibes without the look of a taxidermy spider, request a compact abstract silhouette with solid fills instead of fragile legs. Expect one session and a brief sharpness when the needle runs over bone. Blowout risk is lower here than on hands, but small lines near joints can stretch. For summer show-off pair the tattoo with strappy heeled sandals or cropped jeans so the ink gets the moment it deserves.

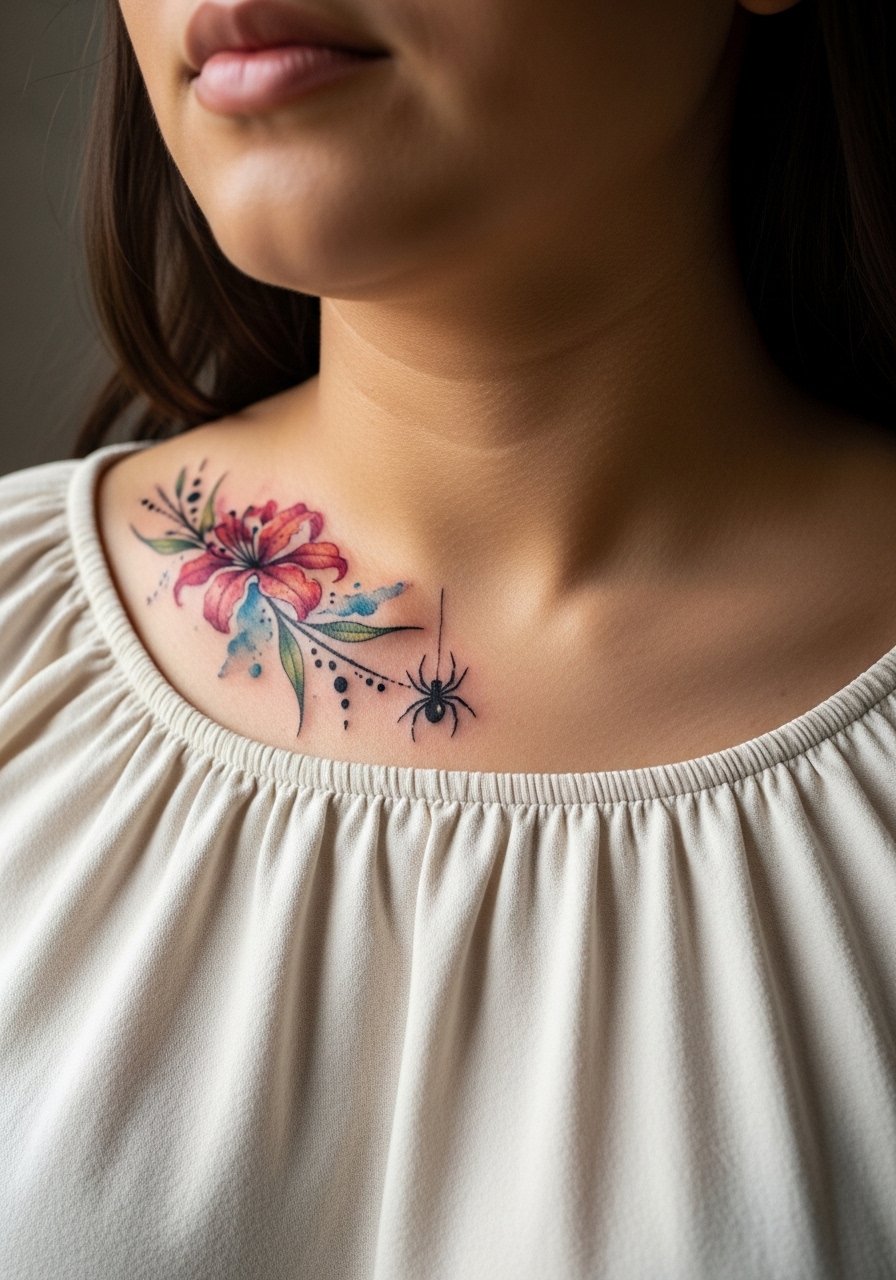
5. Watercolor Spider Lily with Spider on Collarbone
Watercolor needs careful placement to avoid bleeding from sweat, but collarbone is flattering for soft palettes that peek from blouses. Ask your artist to anchor watercolor washes with thin black accents so the design keeps its structure as it ages. Expect two sessions and areas that will require careful sun avoidance while healing. The common regret is going too saturated on skin that sees a lot of movement and friction from straps. When you want to show it off, a low V works; try a v neck silk blouse that lets the lily rest in soft fabric.
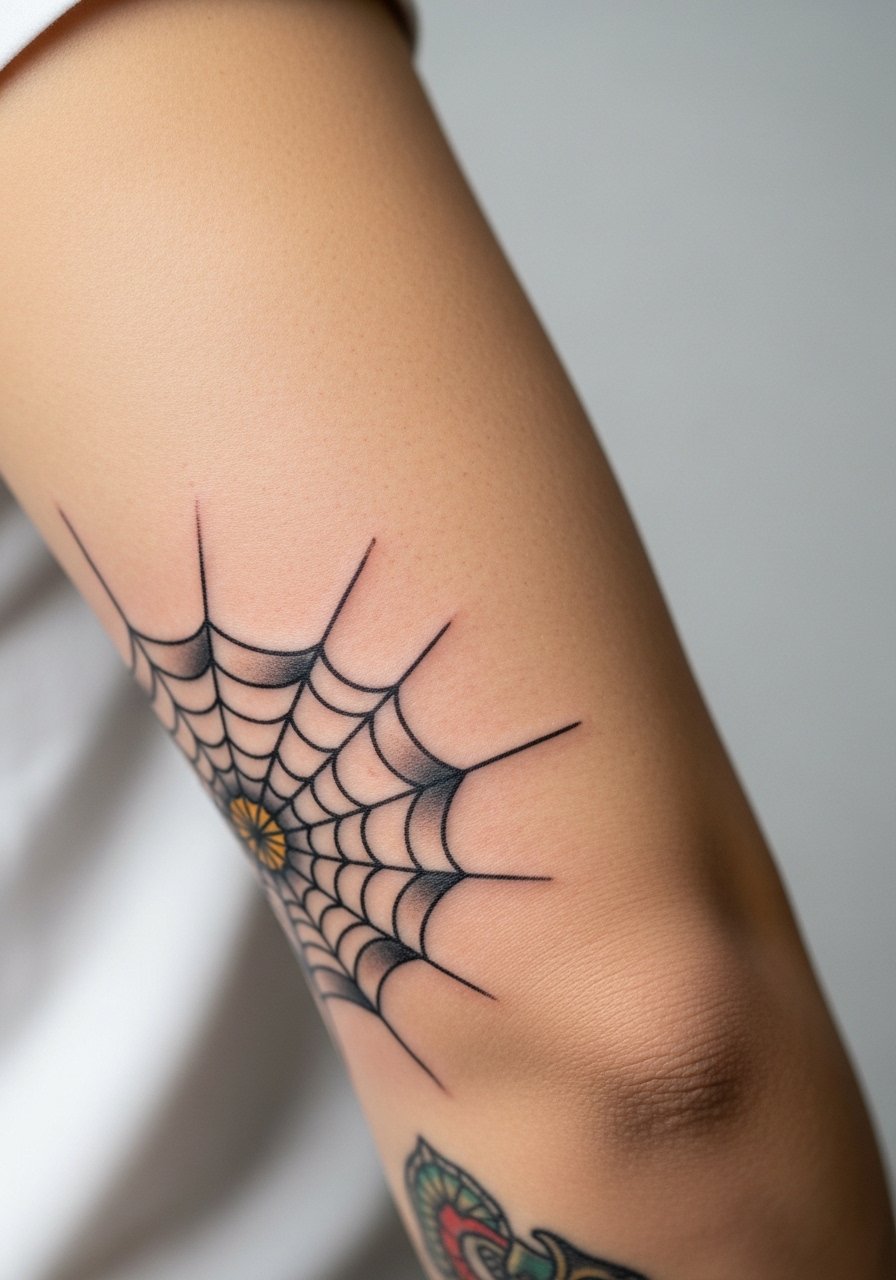
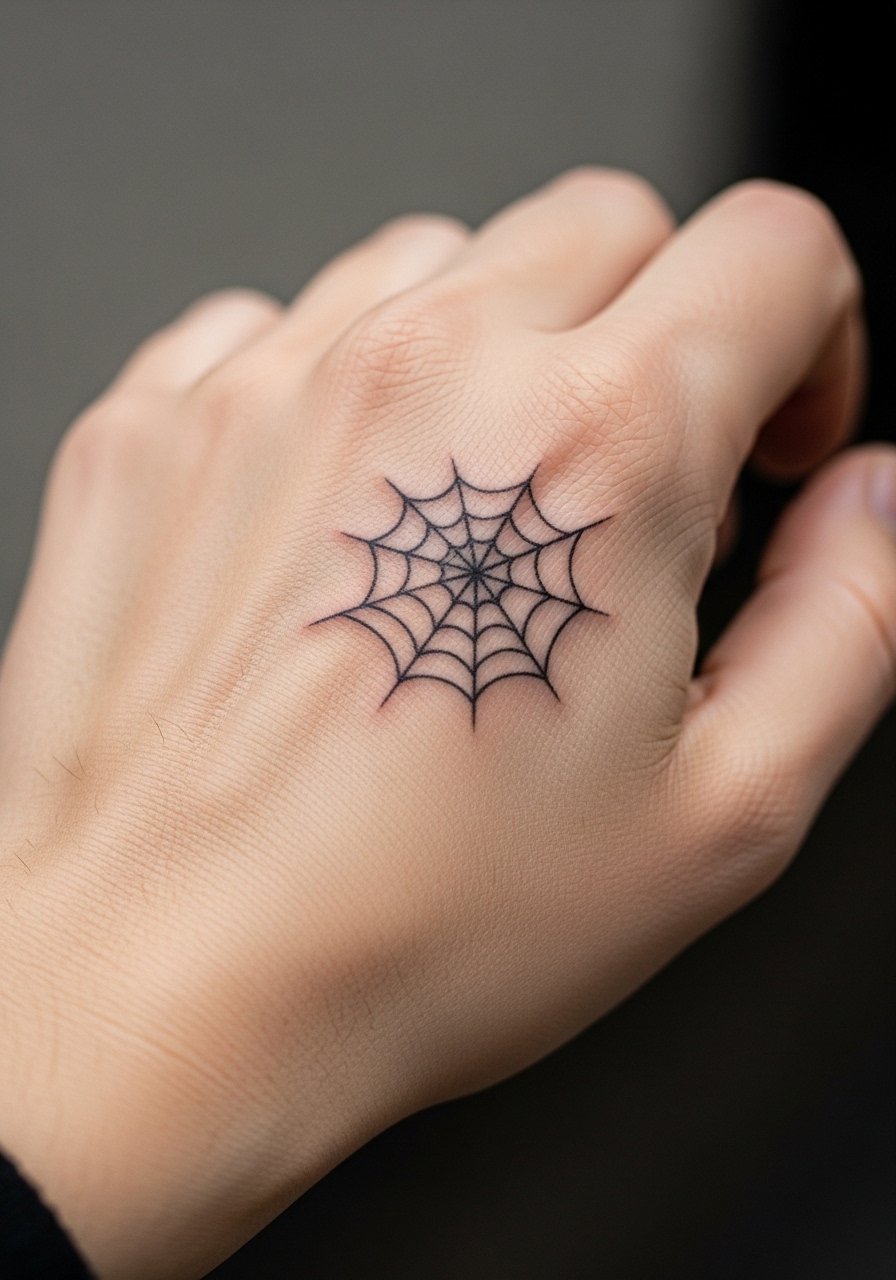
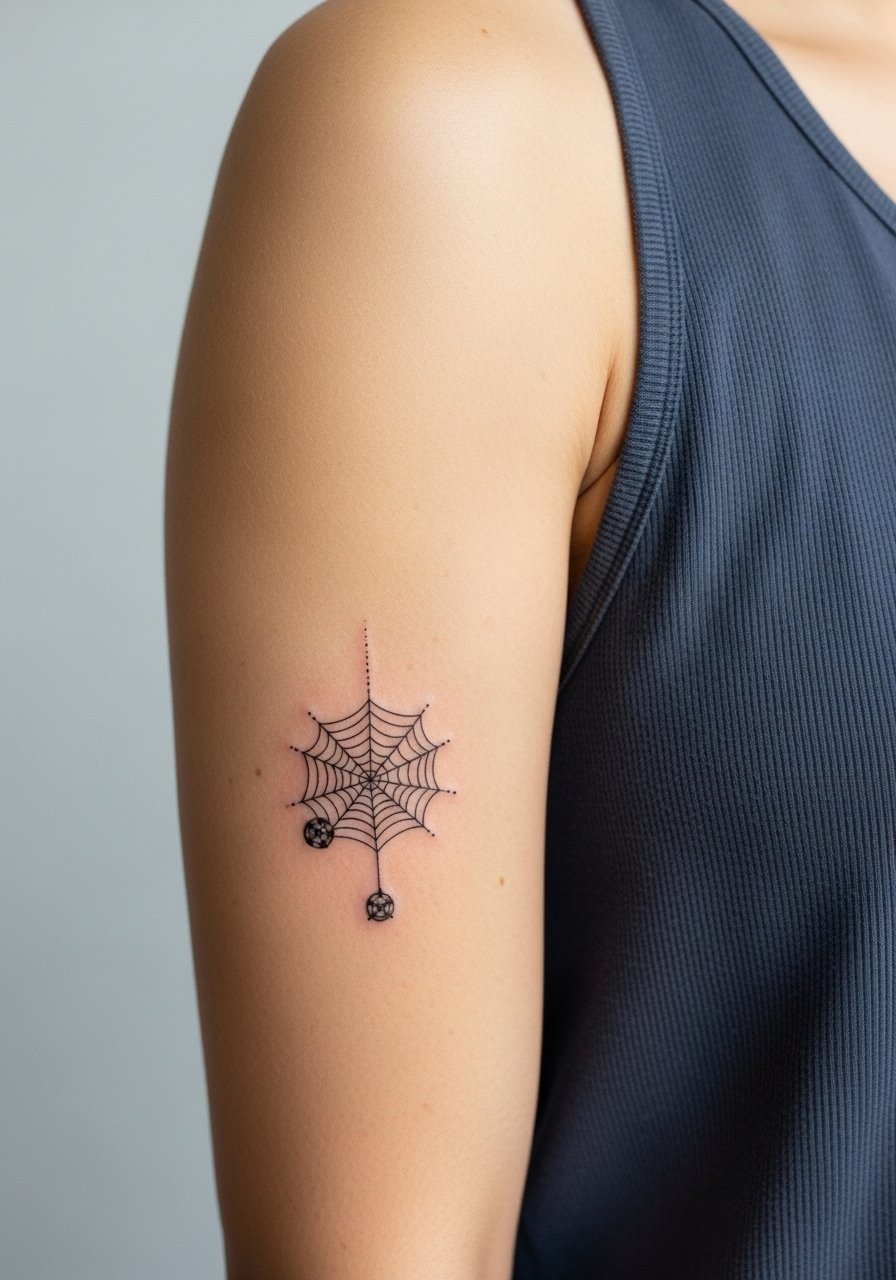
6. Neo-Traditional Spider Web with Tiny Spider on Elbow
Elbow tattoos are kinetic and dynamic but they demand a style that accounts for motion. Neo-traditional webs with slightly bolder outlines and deliberate spacing ride the point where traditional saturation meets modern softness. Expect two to three sessions and sharp stinging when the needle crosses the joint. Artists are split on wet bandaging for elbows. One camp prefers protective film because it keeps the area moist and reduces hard scabs. The other camp favors dry healing for better airflow. Name both options during consultation so the studio can share how they handle elbow movement and aftercare.
Studio Day Picks
The first six designs above include high-movement areas and small fine line work, so a few targeted items make the session and the first week much easier.
-
Heal Fast tattoo balm. A thinner balm that users say helps fine line sections avoid heavy greasing when summer sweat is a concern.
-
Ink Guard tattoo spray. A light spray option that people use instead of full adhesive films on elbows and ribs where breathability matters.
-
Tatt2Away oil. Handy for reducing residue from stencils and for gentle cleaning if the studio uses it during a longer session.
-
Second skin tattoo patches. Small protective film pieces used on wrists and fingers to cut down on friction in the first 48 hours.
-
Aquaphor healing ointment. A thin layer for the earliest window that locks in moisture for fine line work without heavy clogging when used sparingly.
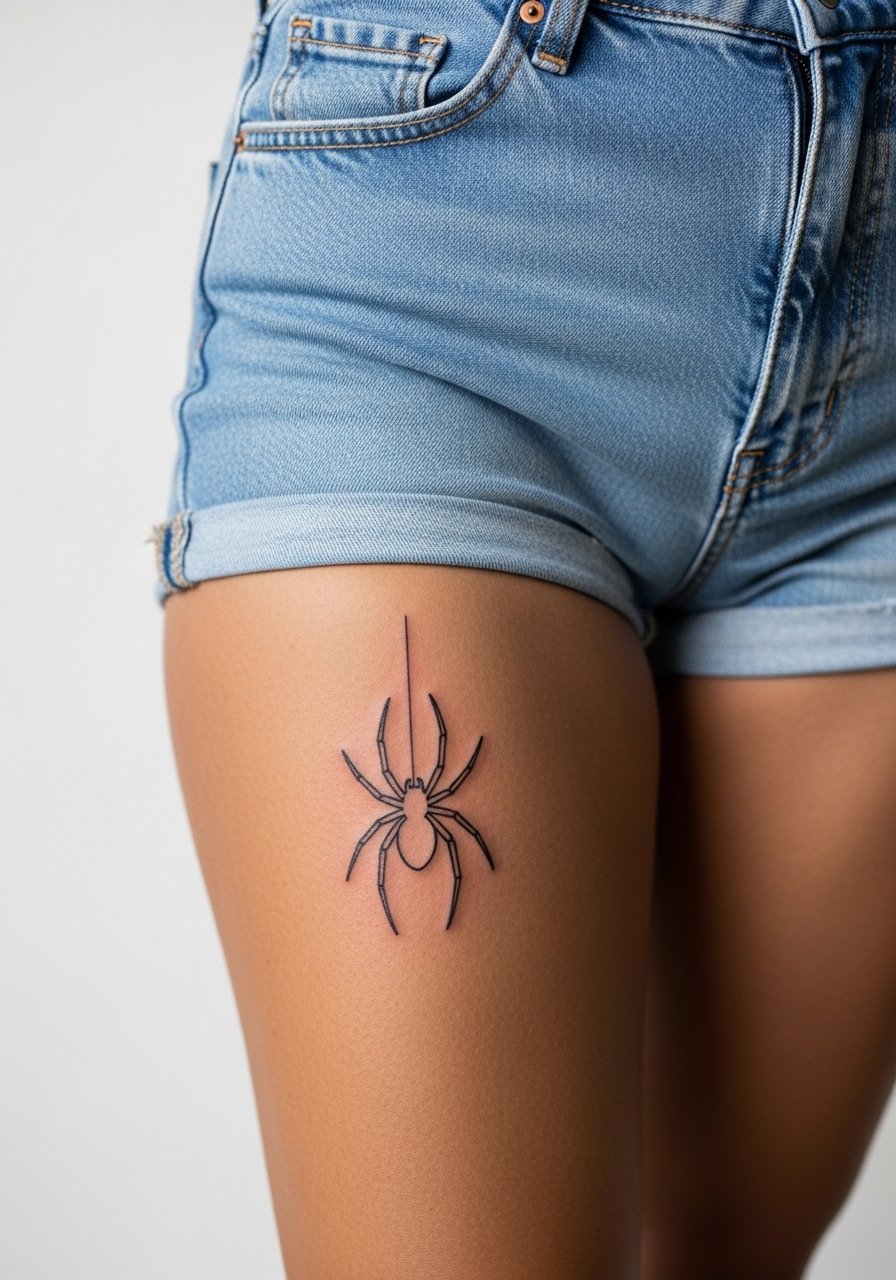
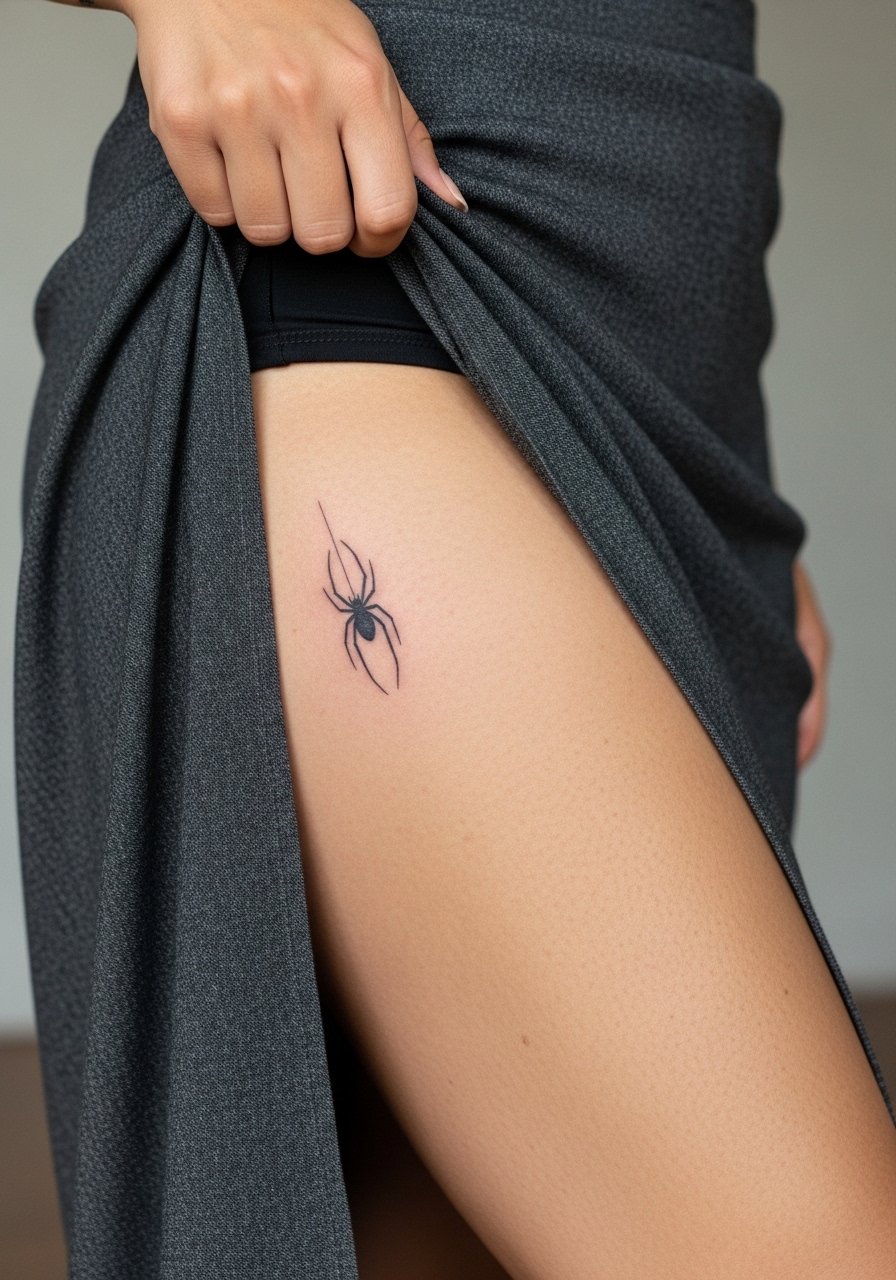
7. Ignorant Style Single-Line Spider on Thigh
Thigh placements reward privacy and bold decisions, and the inner thigh is a quiet zone that ages gracefully for single-line work. This ignorant style thrives on imperfect continuous line that reads charming in motion. Expect a single session and a medium level of discomfort that is manageable while seated and relaxed. A mistake is compressing too much line detail into one curved area which can distort with body changes. For seasonal flashes pair the piece with high waisted denim shorts or a slit skirt so the tattoo peeks exactly where you want it to.
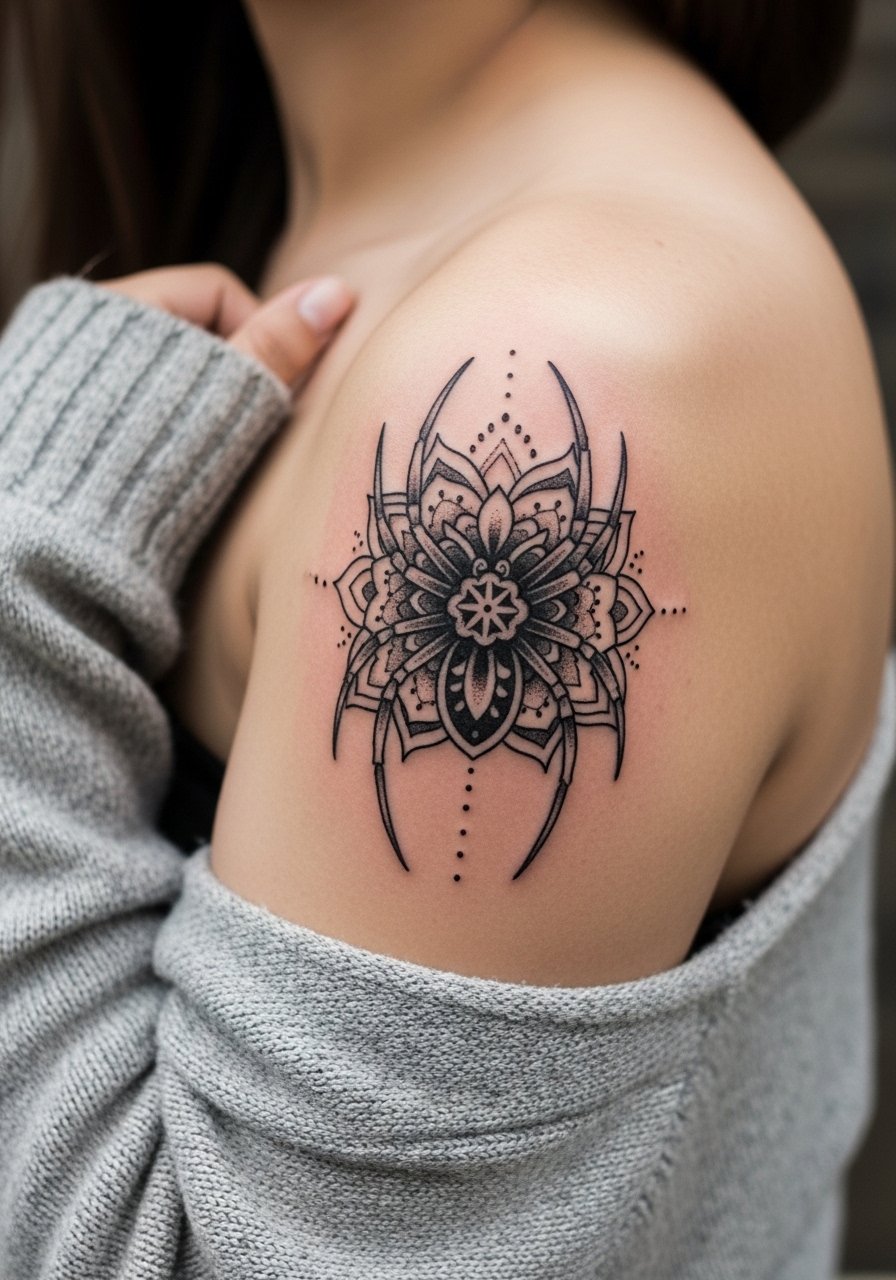
8. Ornamental Spider Mandala on Upper Arm
The outer upper arm is a forgiving canvas for mandala patterns that incorporate a tiny spider at the center. Ask for symmetry but leave breathing room between dot work and spokes so stipple shading does not compress over time. Sessions run two to three sittings for a four inch piece and pain is mild. People often over-detail the inner spokes and watch them blur by year five. For a quiet show-off, the top of an off-shoulder sweater works and a small hoop frames the shoulder without competing.
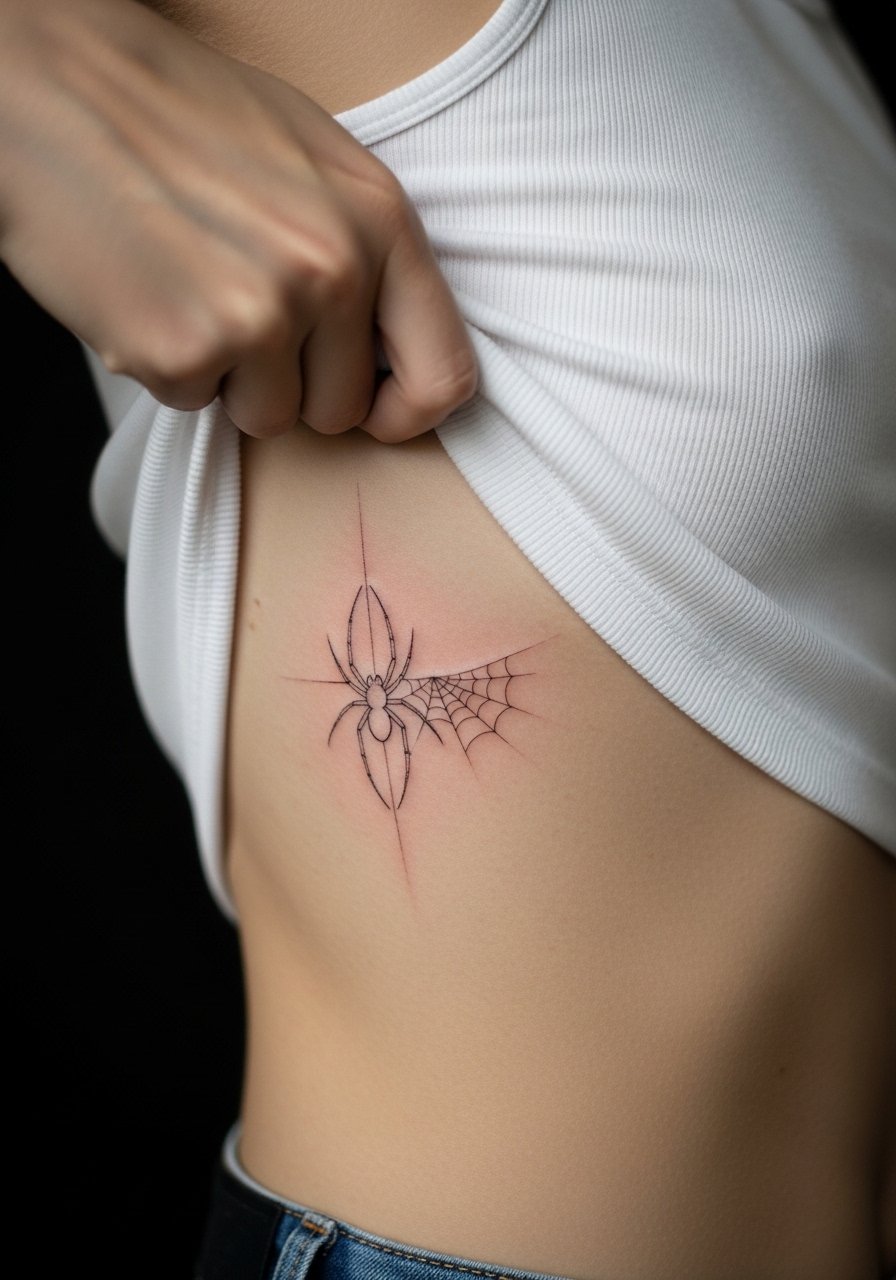
9. Fine Line Spider with Web Accent on Ribcage
Fair warning, ribs are among the more painful zones but they give a private, intimate placement where a fine line spider can live unseen. Artists split on whether fine line on ribs holds up. One camp says the skin stretch and movement blur lines within a few years. The other camp says properly spaced lines and controlled needle depth settle fine. If you choose ribs, build touch-ups into the plan and bring reference photos that show the exact line weight you want. For the session wear a sports bra or a crop top you can lift to expose only the tattoo zone.
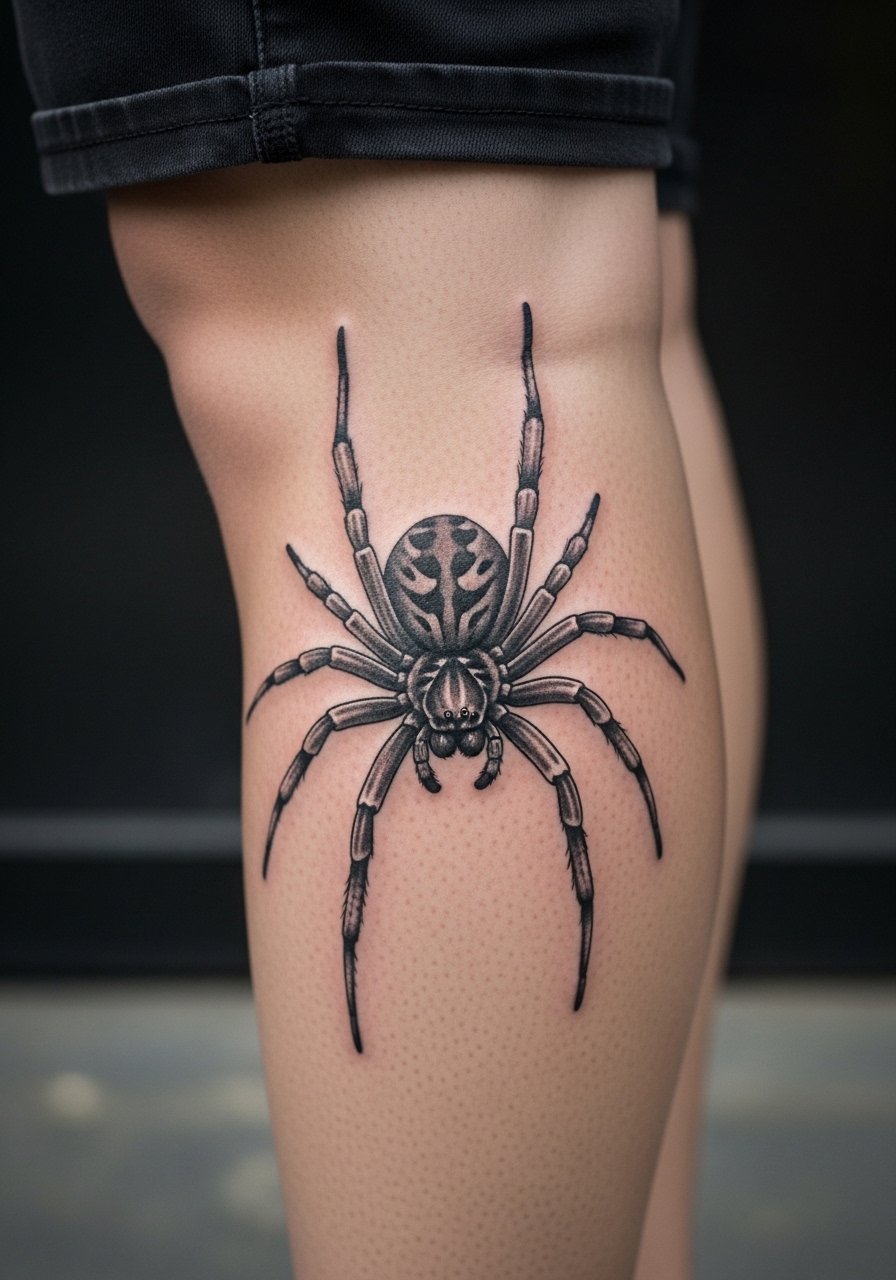
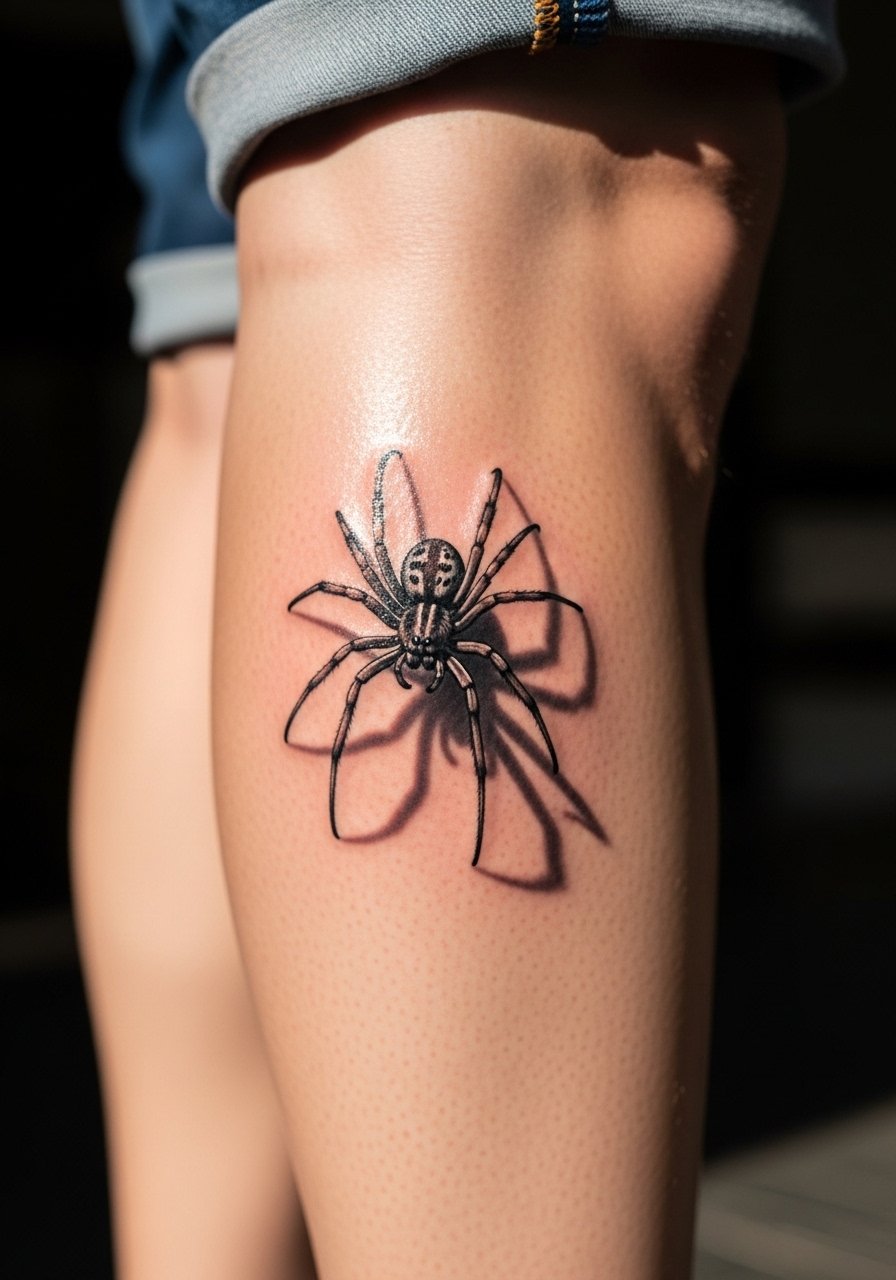
10. Black and Gray Realistic Spider on Calf
The calf is a great place for micro-realism that can read from across a room when placed on the outer leg. Ask for clear leg separation and strong contrast in the shadow areas so the fangs and joints keep identity as the years pass. Expect two sessions for a three to four inch realistic piece and a discomfort that is more like pressure than sharp pain. A common misstep is requesting overly fine hair details that disappear when the skin texture changes. Show your artist photos of healed realistic legs you like to set expectations.
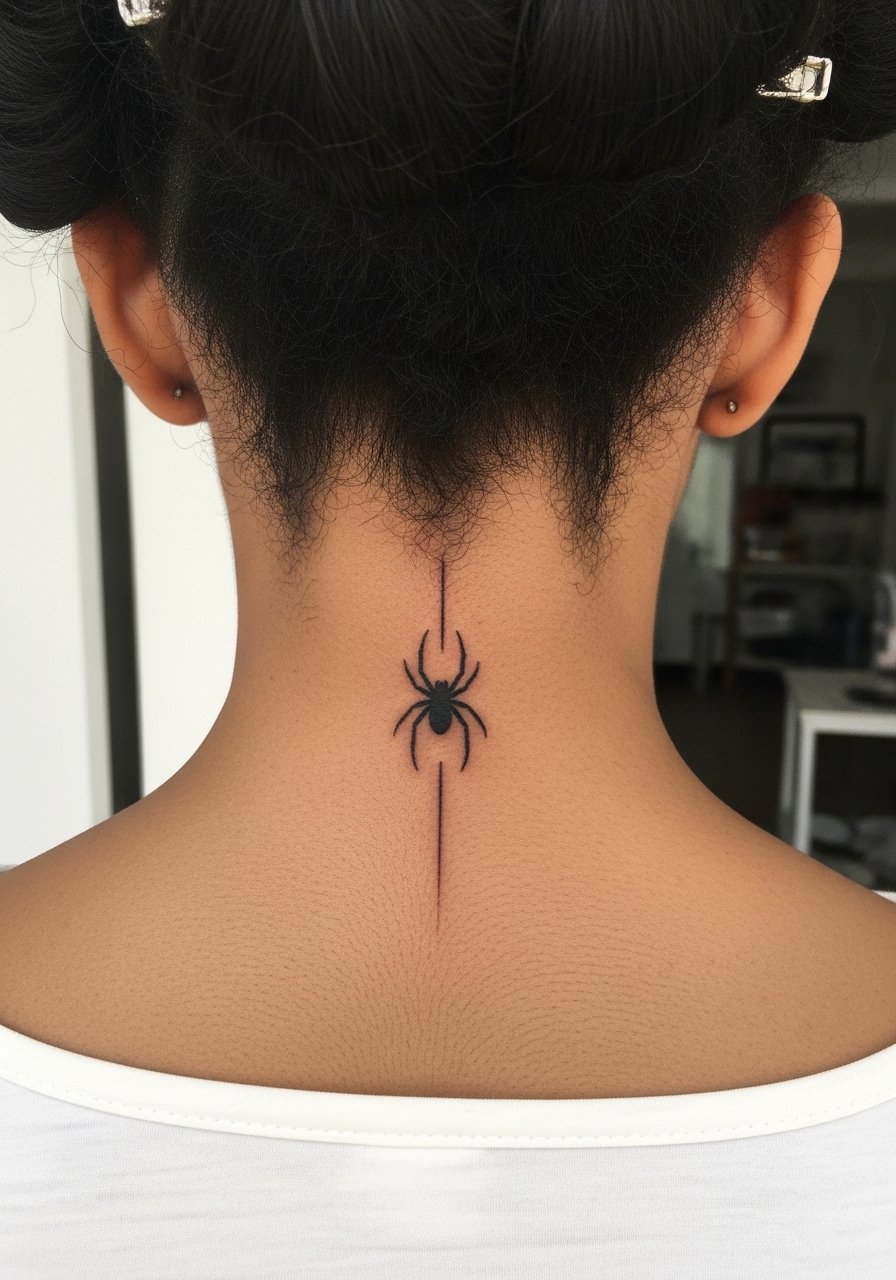
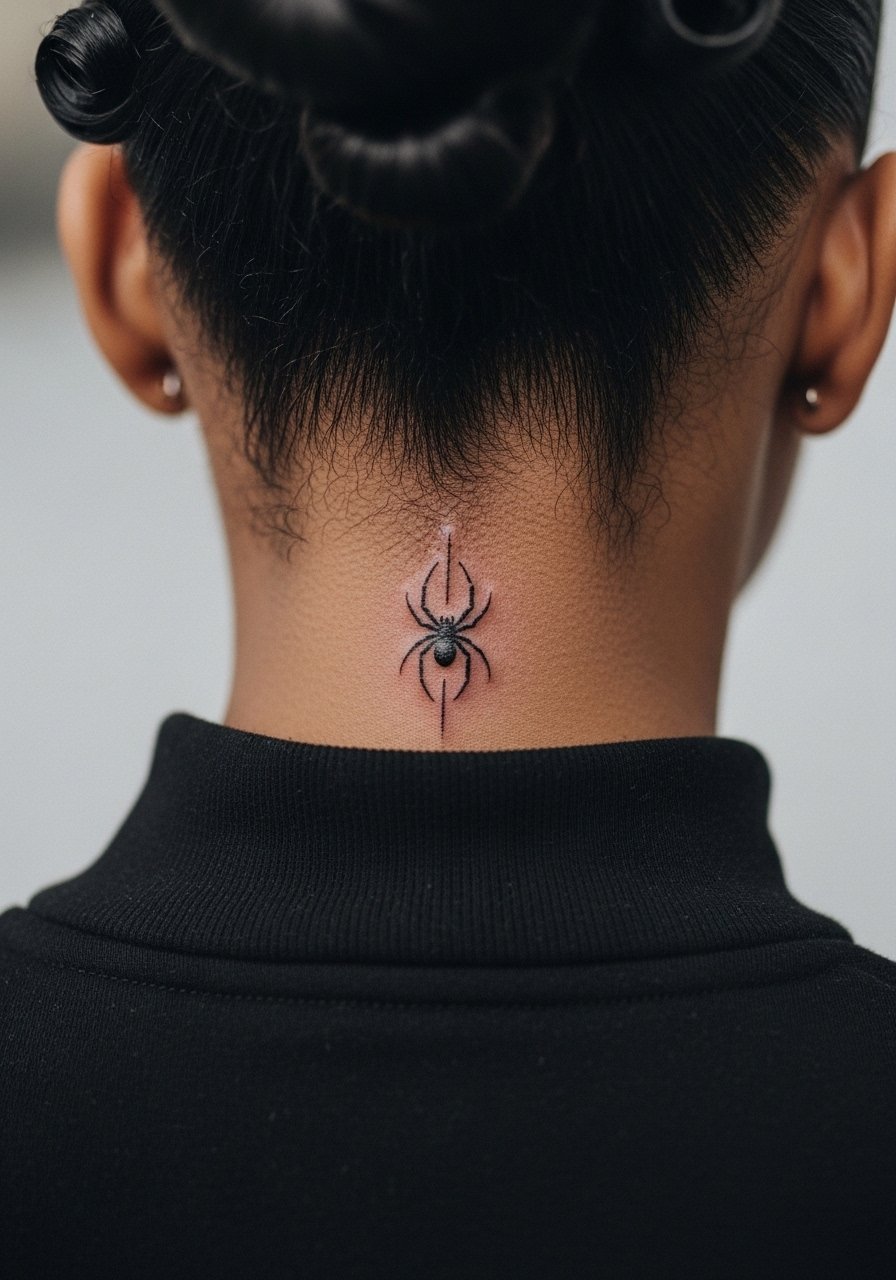
11. Minimalist Spider Silhouette on the Nape
The nape is a small, bold spot that hides under hair or peeks out when you wear your hair up. Expect a sharp sting on the bone near the neck but a quick single session for a one inch silhouette. The error I see is requesting too much detail in one tiny silhouette which then reads muddy in photos. For show-off or concealment use a thin choker or a thin choker necklace and plan hair-up styles for reveal moments.
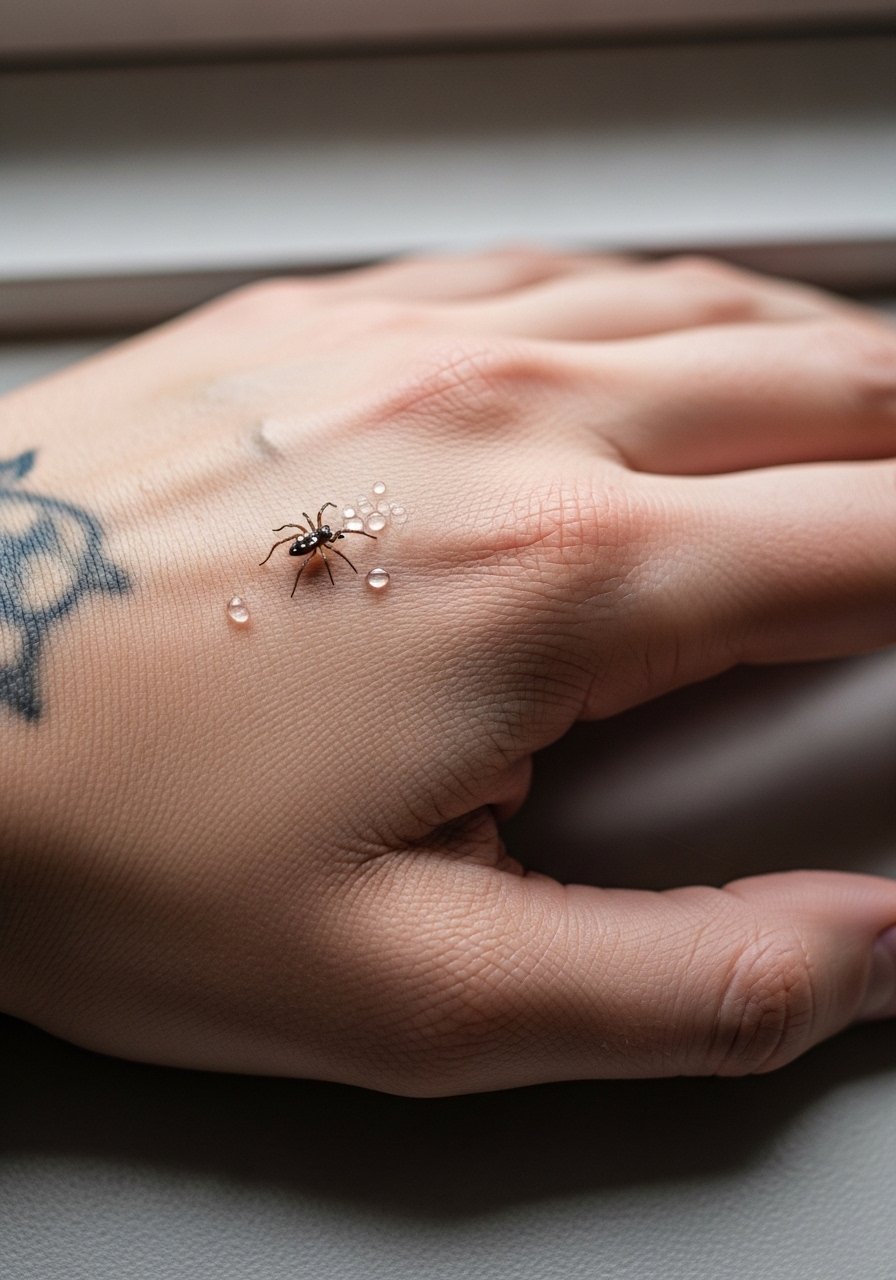
12. Micro Spider with Dew Drops on the Back of Hand
Hand tattoos are visible and fragile. The back of hand offers instant visibility but the trade off is a higher fade rate and more frequent touch-ups. If you want a micro spider with dew drops, ask for slightly bolder dots and minimal legwork to resist washout. Expect a sharp session and a longer path to settled color because hands see constant washing and sunlight. Also consider career implications since hands remain a visible zone for many professions.
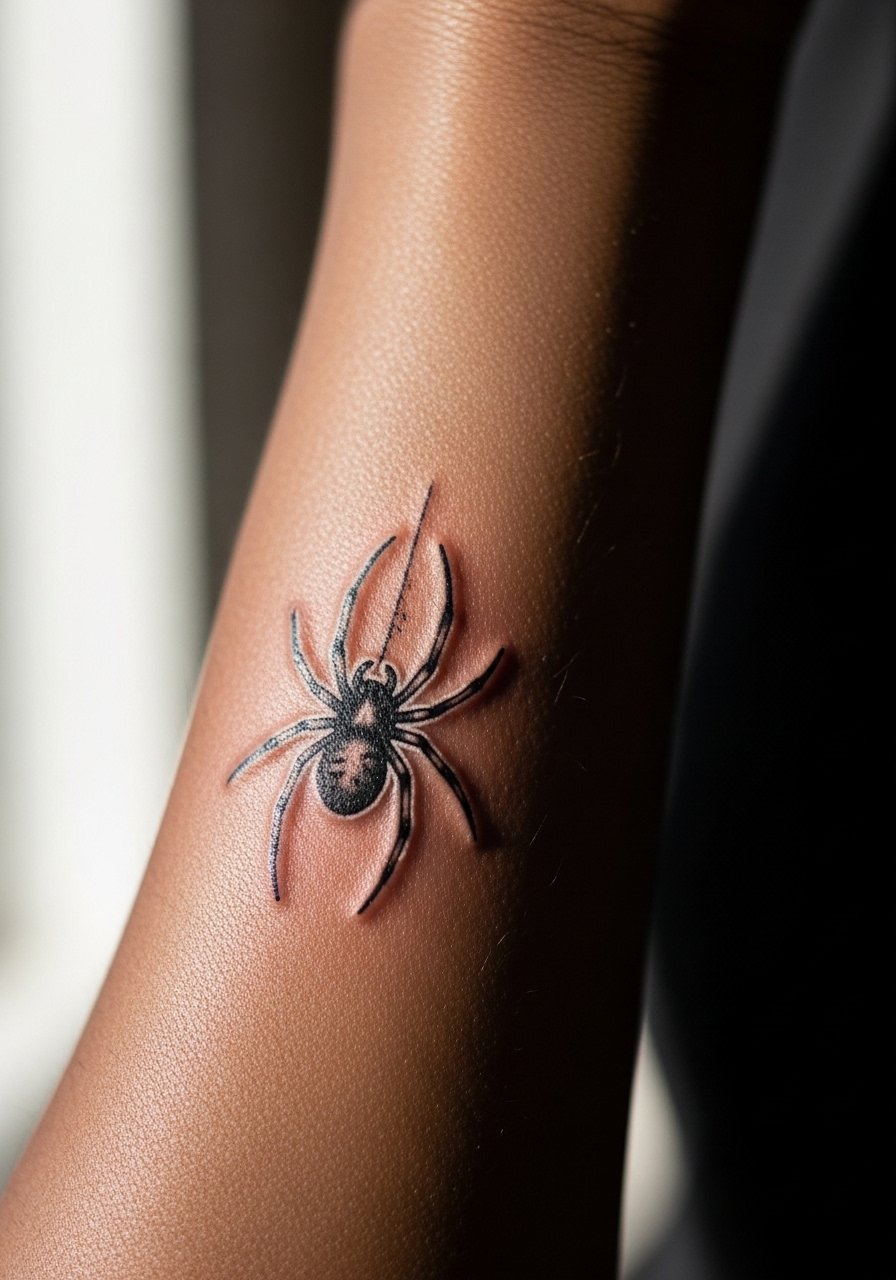
13. Tiny White-Highlight Spider for Darker Skin Tones
Dark skin can make blackwork read differently in photos, and a small white ink highlight used sparingly helps the spider pop without heavy saturation. The key is contrast planning with your artist and testing a small highlight area first. Expect a single session and a visual effect that sometimes needs a touch-up at year two to maintain the white. Many artists lack experience with negative space on melanated skin so ask where they have examples. For gentle daytime photos, try indirect light and avoid flash which can wash out subtleties.
14. Hand-Web Illusion That Moves When You Flex
Designs that hug the hand and mimic a web use the natural motion of fingers to animate the image. This is visually clever but the hand is unforgiving for fine line and needs intentional spacing. Tell the artist you want thicker anchor lines and minimal cross-hatching so the pattern survives heavy use. Sessions are quick and painful over tendons and knuckles but the movement payoff is pleasing. Expect touch-ups sooner than with arm pieces, and plan the design so it does not interfere with daily typing or hand washing.
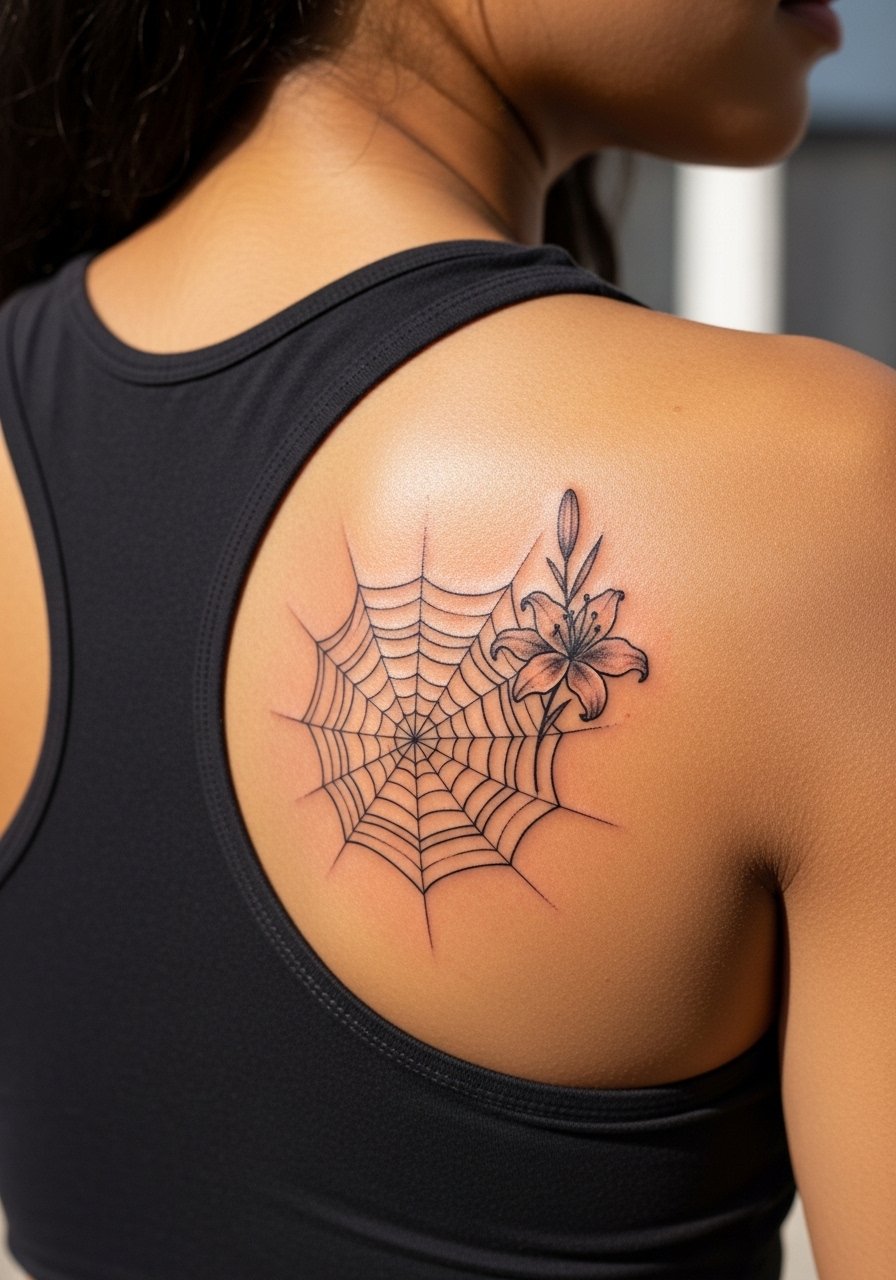
15. Orb Weaver Paired with a Spider Lily on Shoulder Blade
Pairing an orb weaver with a spider lily gives a creative destiny vibe without looking aggressive. The shoulder blade allows a horizontal composition that peeks under straps when you want it to. Ask for separation between the flower and the spider so each element reads at six months and at five years. Sessions are comfortable and often completed across two sittings. A common mistake is crowding small petals into the spider zone which can lead to muddiness later. For casual reveals a racerback or off-shoulder top frames the work cleanly.
16. Micro-Realism Calf Variation That Reads in Movement
When a realistic spider sits on the lower leg it picks up movement from walking and posture which can enhance the three dimensional feel. Ask for a clear cast shadow and slightly separated legs so the image keeps depth as the skin stretches. Expect two sessions and milder discomfort than ribs. A mistake is packing too much highlight into the legs which disappears in a year. This location photographs well in daylight and holds up better than many forearm placements because of less frequent sun exposure.
17. Ignorant Edge Peek on Upper Thigh
A thigh edge placement that slips under skirts or shorts makes for a flirty reveal. The ignorant single-line look here reads playful and private. Expect moderate discomfort that is manageable while seated and one session for a small layout. The mistake is letting the line run too close to stretch marks or seams which can distort with movement. For showing a hint of the piece try a slit maxi skirt or high waisted shorts that let the design peek when you sit.
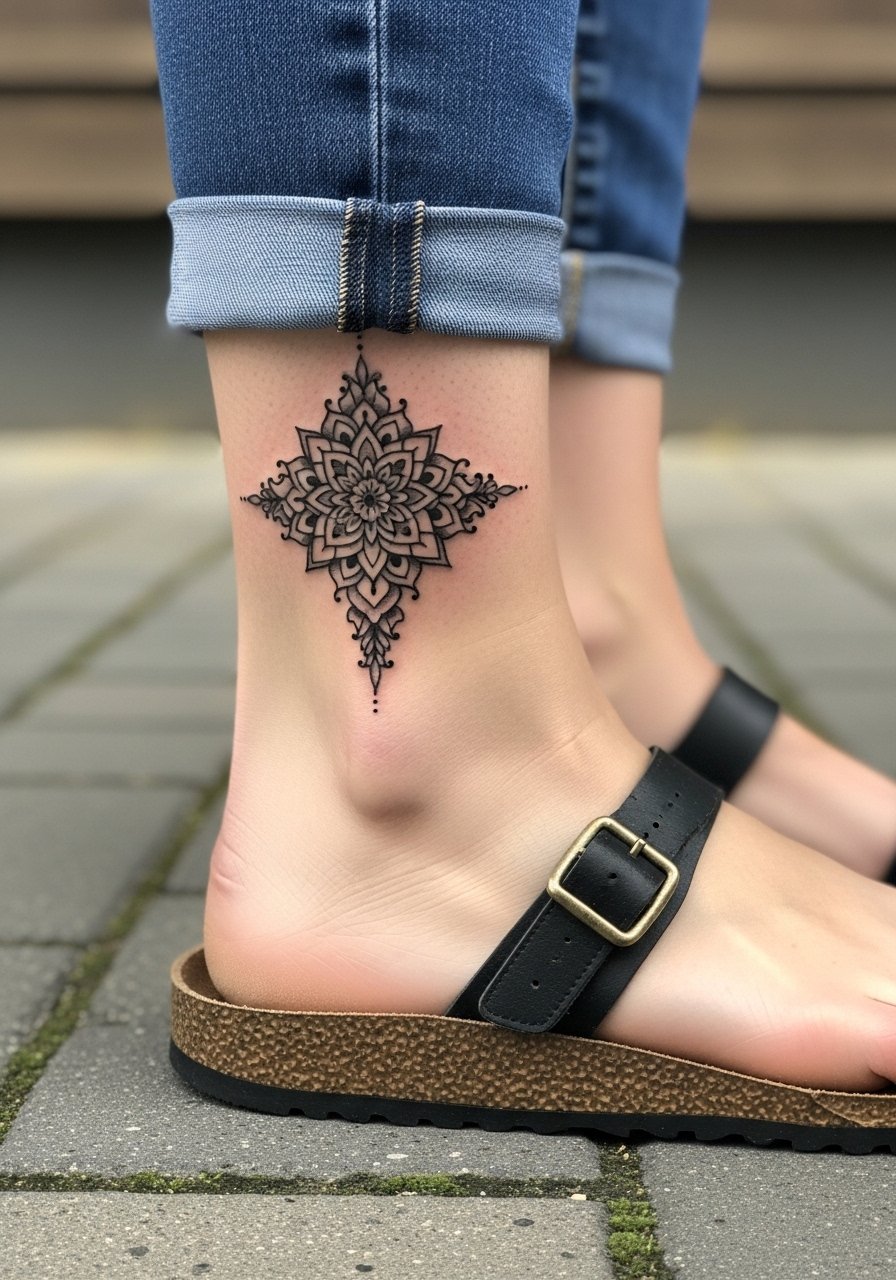
18. Ankle-Wrapped Ornamental Mini Mandala
A tiny ornamental mandala that wraps the ankle reads like a jewelry piece and holds up especially well in blackwork. Keep spacing between petals generous and use dot work for texture rather than tiny hairlines. Expect a single session and a quick sharpness over bone. Common errors include over-detailing which fades into a blob after heavy wear in sandals. For an instant frame pair it with a delicate gold anklet chain that complements the mandala without hiding the shape.
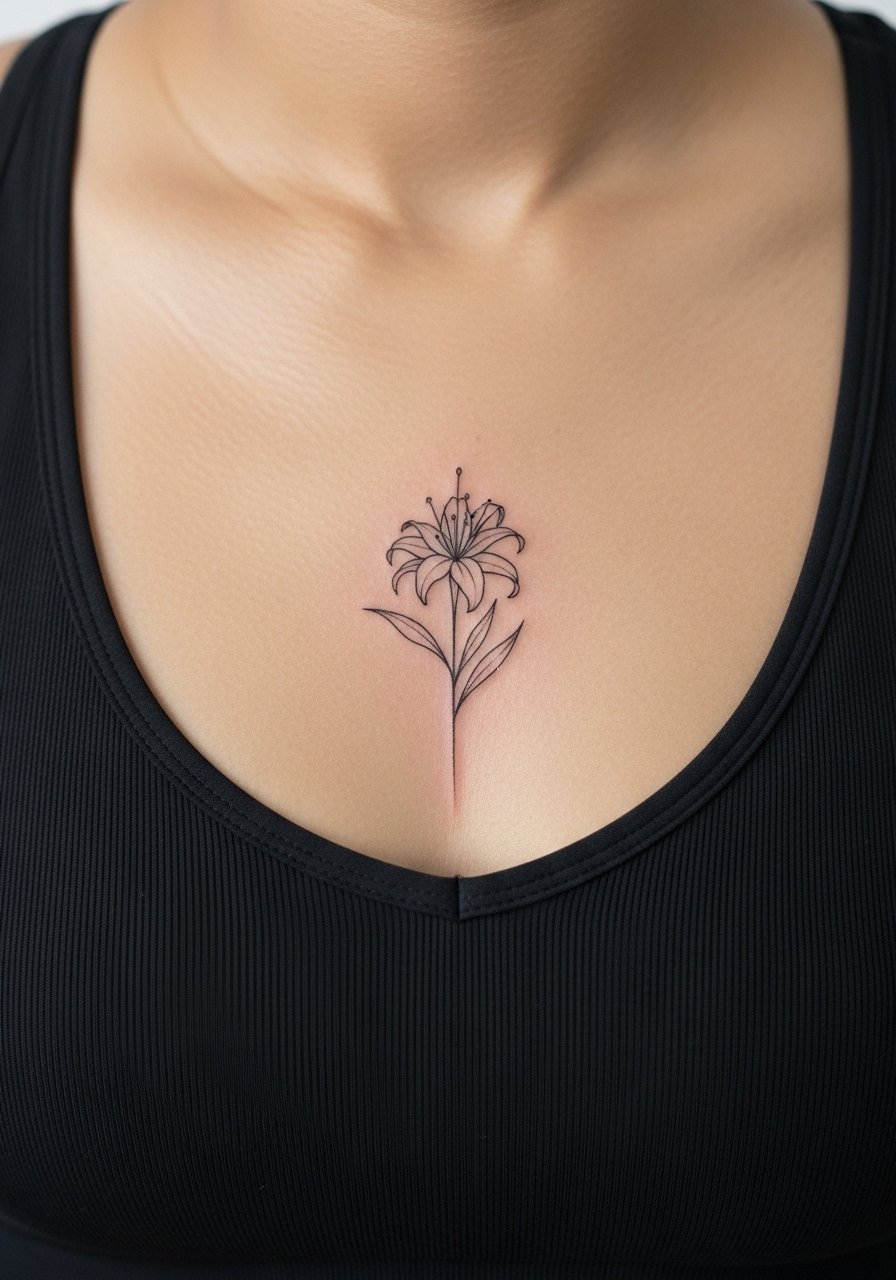
19. Sternum Spider Lily Hidden Under a Band
Sternum placements are intimate and require careful wardrobe and artist choices. Ask for a fitted sports bra or bandeau during the session so the artist can see precise placement. Fine line here can look wonderfully fragile but it is sensitive and often needs a stronger anchor line near the sternum to keep form. Sessions can be painful and require patience. If cultural iconography is involved, note the origin and consider slight variations rather than exact replicas.
20. Inner Bicep Mini Orb Spider
The inner bicep is a private canvas that opens when you want to show it. Expect a tender session as the skin there is thinner and more sensitive. For micro-realism ask that the artist avoid overly tight stipple in the smallest areas so clarity lasts beyond year one. The common mistake is cramming too much detail into a pocket that experiences frequent arm movement. For the appointment wear a loose tank top that allows the arm to be raised without constriction.
21. Minimal Micro Spider at the Nape of the Neck
A micro spider tucked under the hairline at the nape gives you a reveal that reads like a deliberate secret. The area is small so keep the silhouette simple and avoid tiny cross hatching that will merge as it settles. The session is quick but can sting on bone. If you want it hidden most days keep your hair down and wear high collars occasionally to protect fresh ink. For styling, plan hair-up moments with hair up accessories so the reveal feels intentional.
Frequently Asked Questions
Q: How do fine line spiders on wrists hold up over time and will I need touch-ups?
A: Fine line wrist work is charming at first and often softens faster than bolder blackwork. Expect a touch-up window around year two to three for most fine line wrist pieces, especially if the area sees lots of friction. Plan a touch-up as part of the timeline and ask your artist about minimum line thickness during the consultation.
Q: I have darker skin. How can I make sure a blackwork spider shows up well in photos?
A: On melanated skin a mix of strong black saturations and selective negative space helps maintain clarity. Some artists use tiny white highlights carefully to add pop. Request healed examples on skin tones similar to yours and test a small highlight first so you can see how it photographs in natural light.
Q: Should I wrap an elbow or use Saniderm for an elbow web piece?
A: Artists split on this. One camp uses protective film to keep elbows moist and reduce scabbing. The other camp recommends dry healing for better airflow on joints. Discuss both paths with the studio and pick the approach that fits the artist’s experience with elbow movement and your own healing habits.
Q: What should I wear to a thigh or ribcage session to make the artist’s job easier?
A: Wear loose shorts or a skirt for upper thigh work and a sports bra or cropped tank for ribs so the artist can access the area cleanly. For showing the healed result try a high waisted denim short or a crop top depending on the placement and how much you want to reveal.
Q: How can I find artists who do subtle spider designs without naming specific people?
A: Search hashtags like #finelinespider and #microspidertattoo on Instagram and TikTok, filter by location, and use apps such as Tattoodo or Booksy to view portfolios and shop calendars. Posting on community forums asking for recommendations in your city also surfaces artists who take subtle custom work.
Q: Will weight changes distort a wrist or thigh spider more, and which placements age better with body fluctuation?
A: Areas over joints and soft tissue like the wrist and inner thigh can show more distortion with large weight change. Collarbone, shoulder, and outer calf tend to age more predictably because the skin there moves less dramatically with weight shifts. If you anticipate significant fluctuation choose a placement with stable skin or plan for future touch-ups.
