
Bold blackwork keeps its edge longer than trendy fine line pieces, and the gap between what looks great fresh and what still reads clean years later is wider than most expect. I've seen intricate designs that begged for touch-ups at year two and saturated black pieces that only improved with time. Below are 21 bold blackwork ideas that favor longevity, placement sense, and wardrobe pairing so you leave the chair confident.
1. Born To Die Skull with Roses
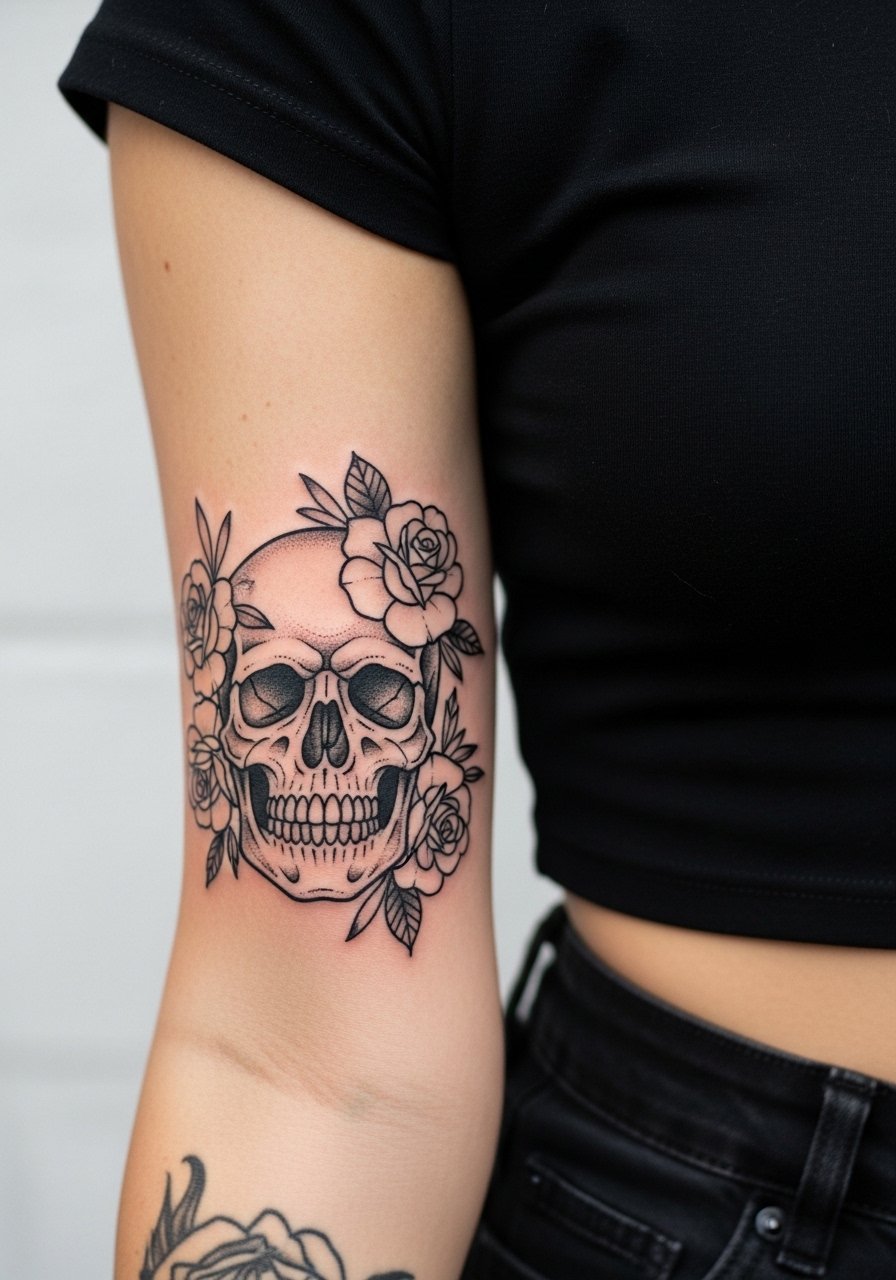
I've seen this design on forearms for years and the contrast holds when artists use heavy contour linework and large black fills. Ask your artist for bold outlines around the eye sockets and negative-space petals so the roses keep shape as the piece settles. Common mistake is asking for tiny petal detail that vanishes into saturation by year three. Forearm flex means size up about 20 percent from the reference image to avoid distortion with muscle change. Session time is usually two sittings for a 4–6 inch piece and expect a touch-up around year two. For showing it off pair it with a fitted black t-shirt and roll the sleeve during warmer months.
2. Death’s Head Moth Born To Die
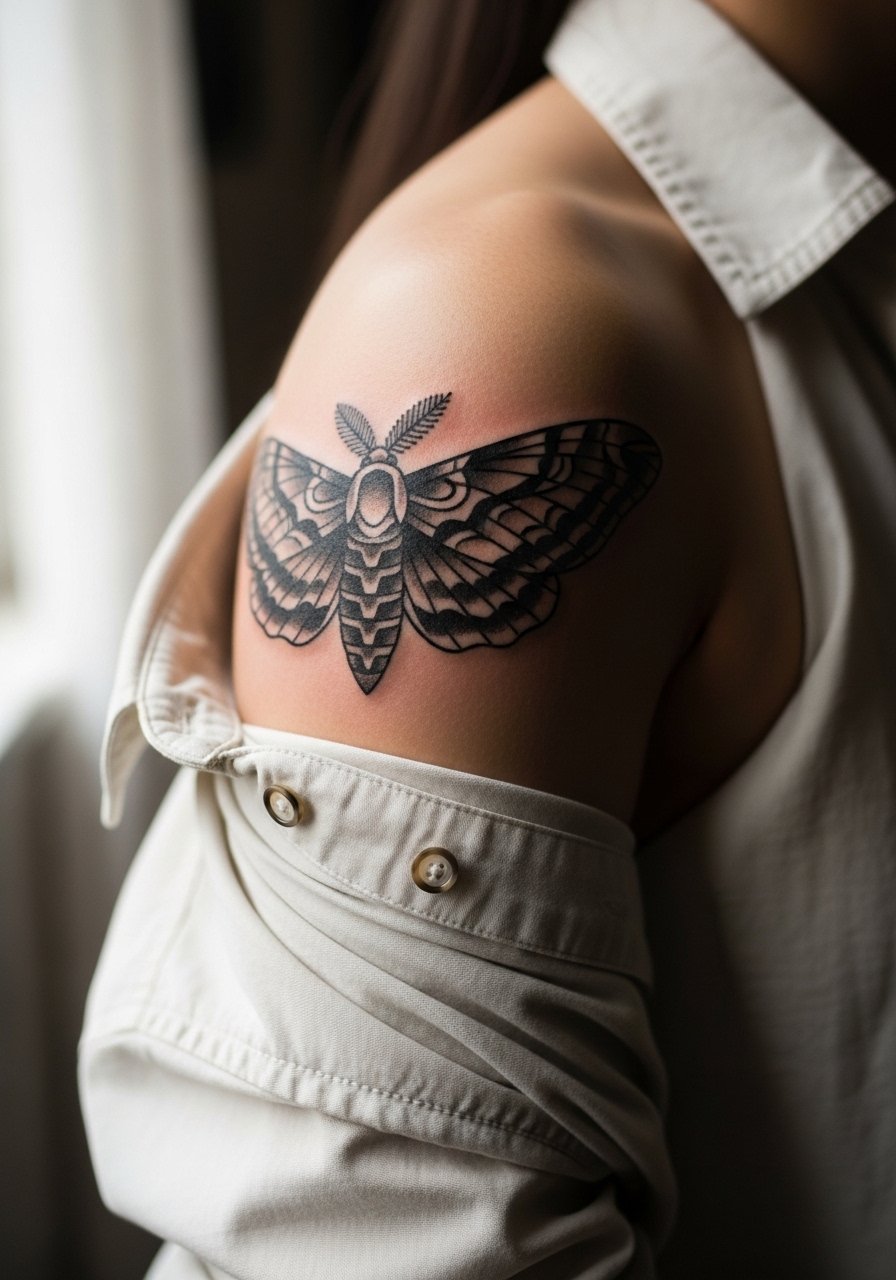
Shoulder placement is forgiving for size and shading and this moth reads strongly when the thorax and wing veins use dense blackwork and stipple shading in the wings. Tell your artist you want wing veins separated by clear negative space to prevent merging over time. Pain is moderate and most people wear a button-down they can pull aside for the session. A one- to two-hour session usually covers a 3–5 inch moth. One caveat is fine line wing details on shoulders can soften by year three if placed too small. For nights out, an off-shoulder top or muscle tee fitted frames the moth without competing.
3. Born To Die Script Banner with Dagger
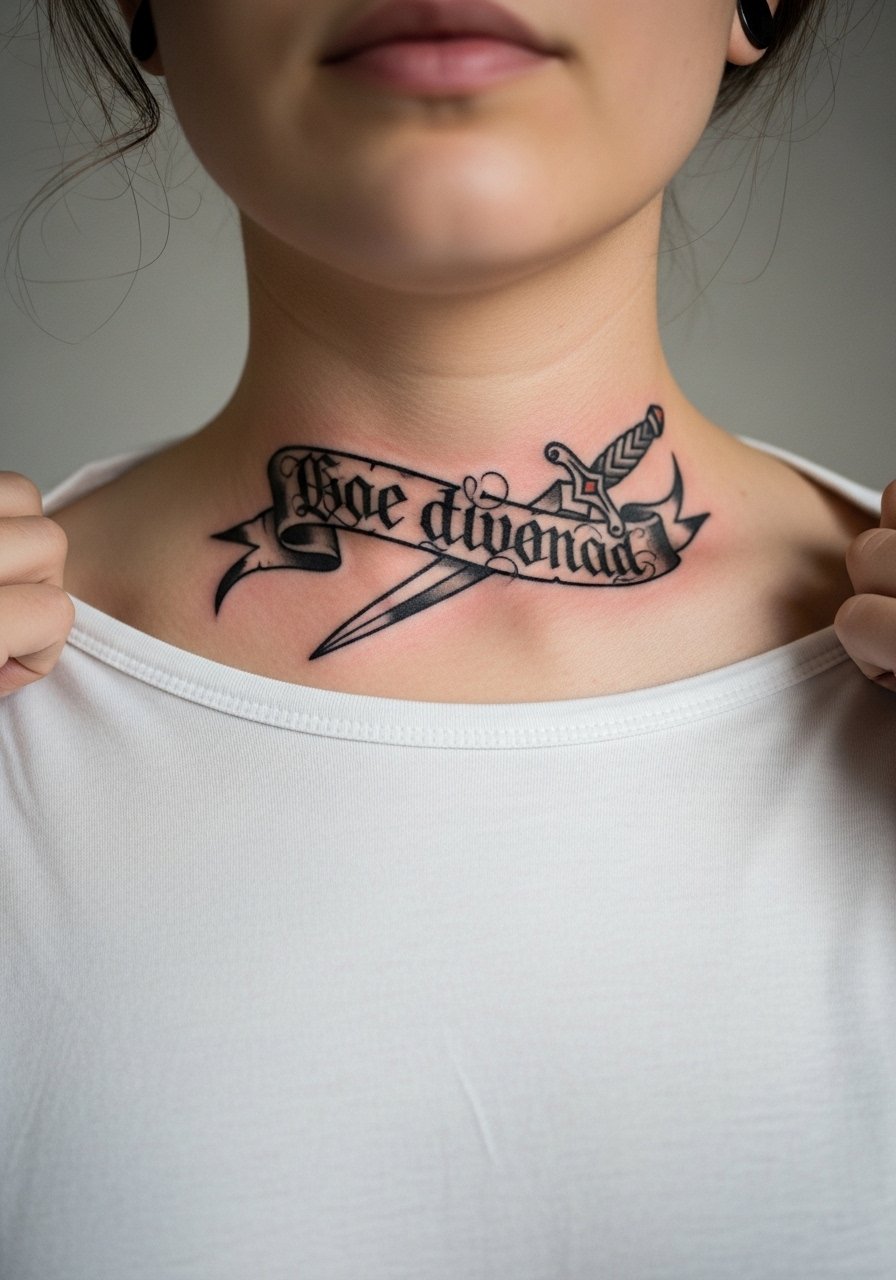
Wrist and collarbone script differ a lot in how they age. Collarbone holds text if the lettering sits larger and uses thick, even stroke weight. Ask the artist to show the exact font at life size on skin before committing. The common error is requesting micro script that fades into a smudge after heavy sun exposure. Collarbone pieces heal easier when you wear a wide-neck shirt the day of, so bring one you can pull aside with minimal friction. For showing off pair the collarbone piece with a v neck tank to keep attention on the lettering.
4. Floral Skull Sleeve Start
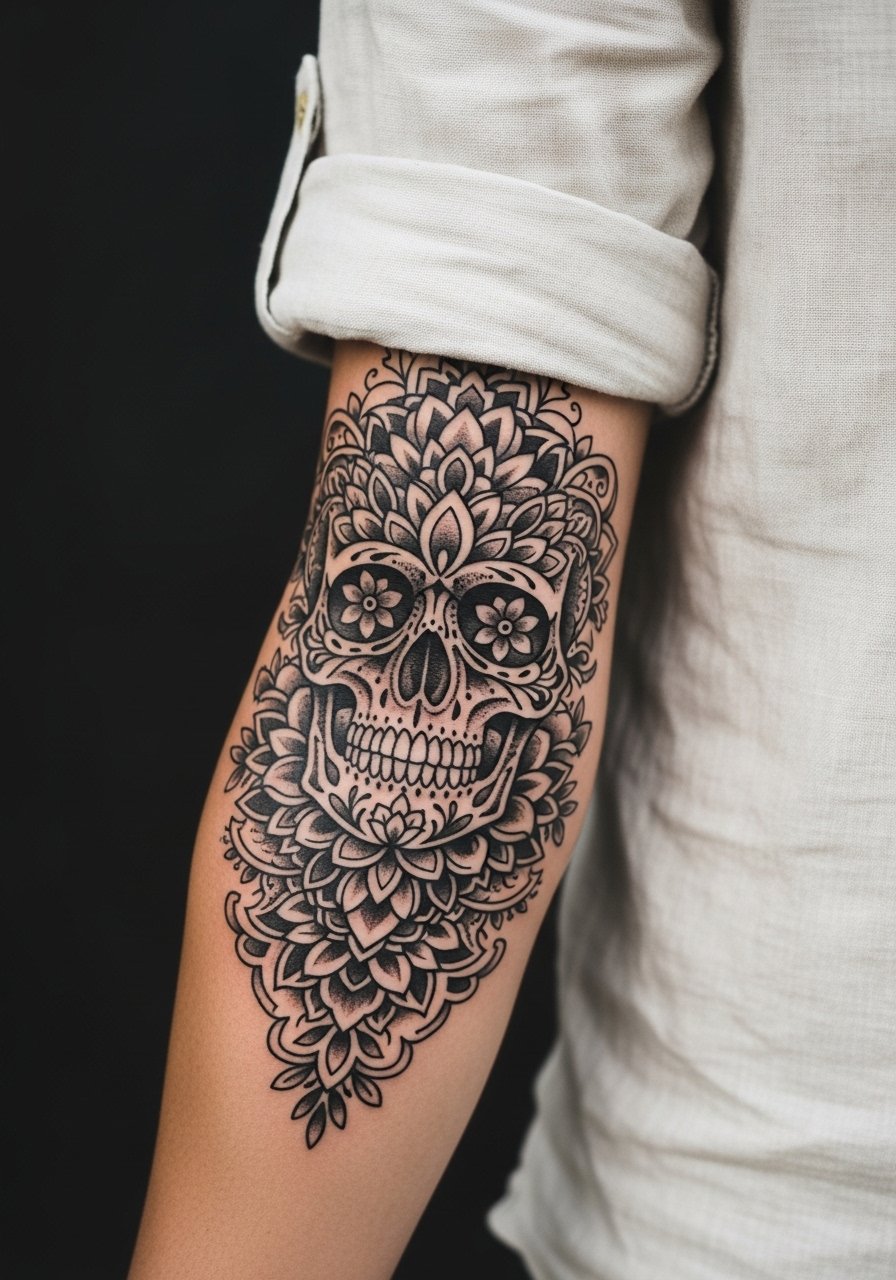
Sleeve starters demand planning. I recommend using a skull motif as an anchor with large floral elements and geometric voids to give negative space breathing room. In consultation, ask the artist to map how the skull will read from a few distances and to reserve bold black fields so the sleeve does not become a single dark mass as it heals. A common mistake is packing too much fine detail into the first session. Expect four sessions spread across months for an 8–10 inch start, with touch-ups at year one. For session comfort, wear a loose tank or button-down you can easily pull back and show off later in a leather jacket or rolled sleeve henley.
5. Minimal Born To Die Hourglass
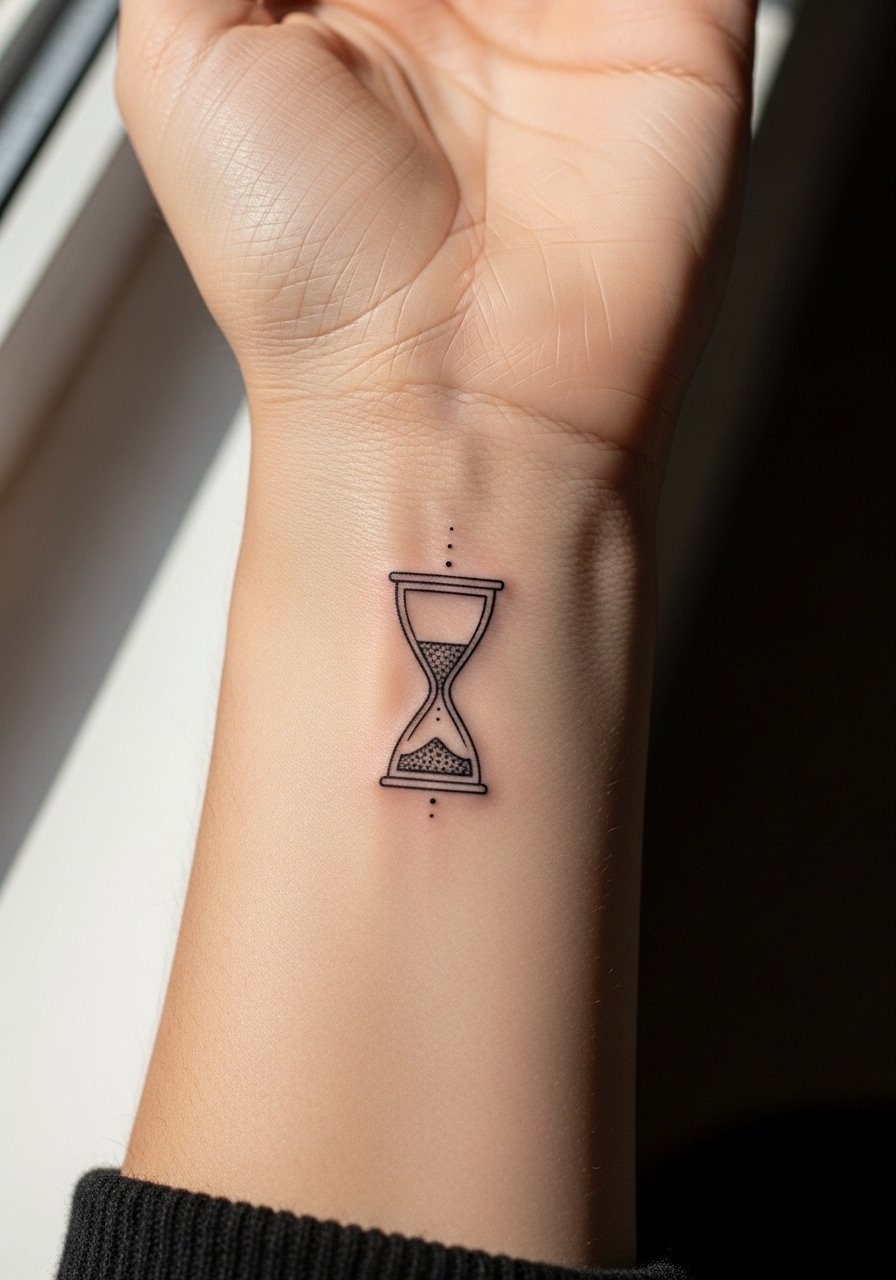
Fine-line hourglasses are ideal for first-timers who want the concept without a large commitment. Fair warning though, fine line on wrists trends toward faster fade than bold work. Name your tolerance for touch-ups in the consultation and size the hourglass up slightly so the sand details do not blur together. Pain on the inner wrist is mild to moderate and the session is usually under an hour. For the appointment wear a sleeveless shirt and no jewelry. Style-wise a chunky leather cuff bracelet placed on the opposite wrist complements the script or symbol without crowding it.
6. Blackwork Rose and Cross
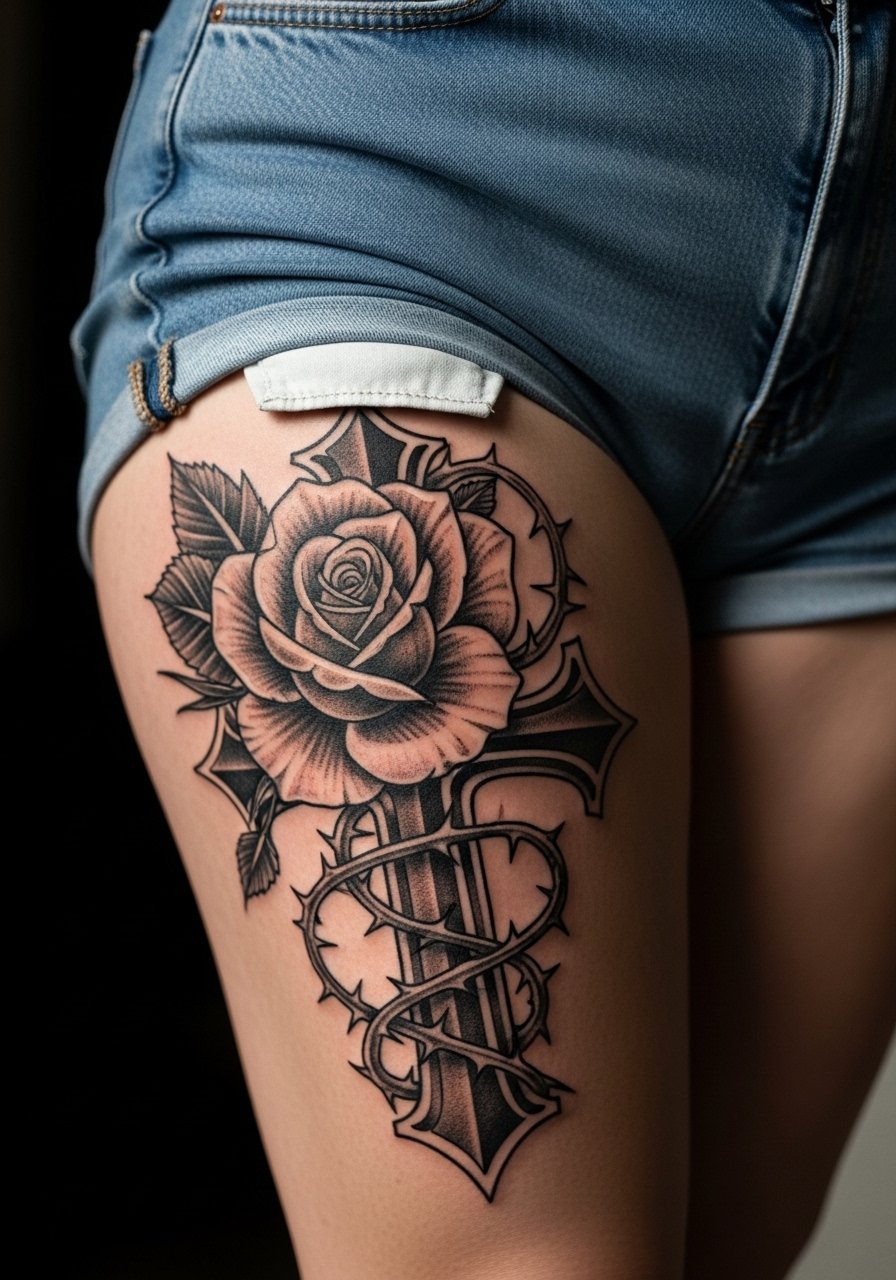
Thigh pieces tolerate large black fills and heavy saturation well, so a rose-and-cross composition benefits from dense black shadows that keep the cross silhouette crisp. Be explicit that you want solid black saturation rather than delicate gray washes, because shaded gray fades faster on this surface. The thigh is lower on pain charts and a single two- to three-hour session often handles a 5–7 inch layout. A common mistake is compressing too many small roses into a tight space. For showing it off, choose high waist denim shorts or thigh-high socks that give a peek without constant rubbing.
Studio Day Picks
The outer forearm and wrist pieces above need different prep than thigh and shoulder work, so these five items smooth studio days and the first week of healing.
-
Stencil transfer paper kit. Lets you preview the line placement on skin so you can spot sizing or angle issues for forearm and collarbone pieces before ink hits skin.
-
Topical numbing cream. Applied as the artist recommends, it can reduce edge pain on wrist and rib sessions without affecting line clarity.
-
Thin protective film roll. Useful for finger and wrist tattoos that face friction from washing and typing during the first 48 hours.
-
Fragrance-free gentle body wash. Cleans healing blackwork without irritating the skin, which helps keep dense black fills intact.
-
Aquaphor healing ointment. Thin application for the first few days can lock in moisture for saturated work while you follow your artist's aftercare schedule.
7. Born To Die Mandala with Skulls
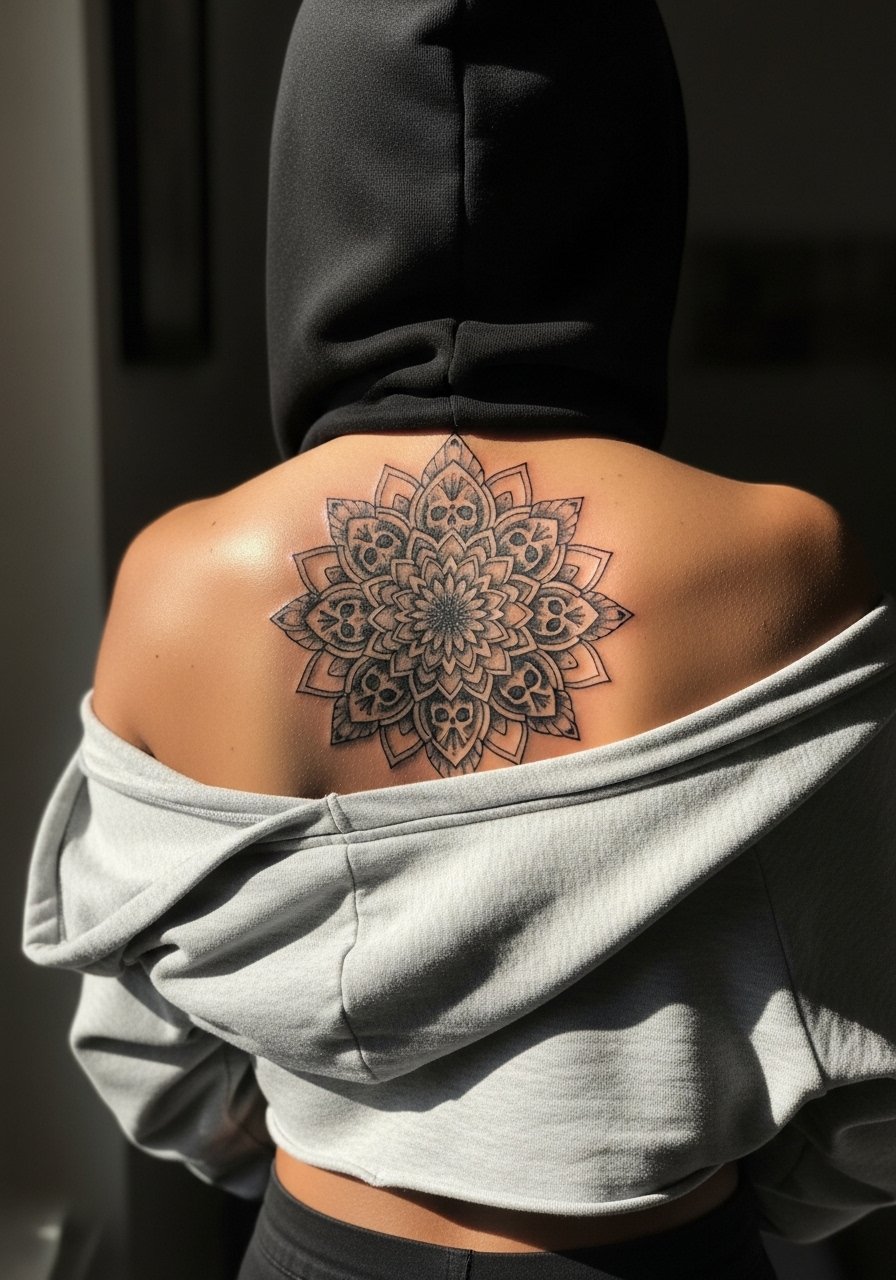
Mandalas need symmetry and breathing room. Add small skull motifs in the negative space rather than crowding the central geometry. On the shoulder blade this design benefits from sharp contrast and defined radials so each petal reads clearly at six months and still at five years. A common mistake is over-detailing the center too tightly, which becomes a grey pool over time. Expect two sessions and a potential touch-up at year two. Pair a mandala on the shoulder blade with a crop hoodie or backless top to let the symmetry show.
8. Realistic Born To Die Portrait Frame
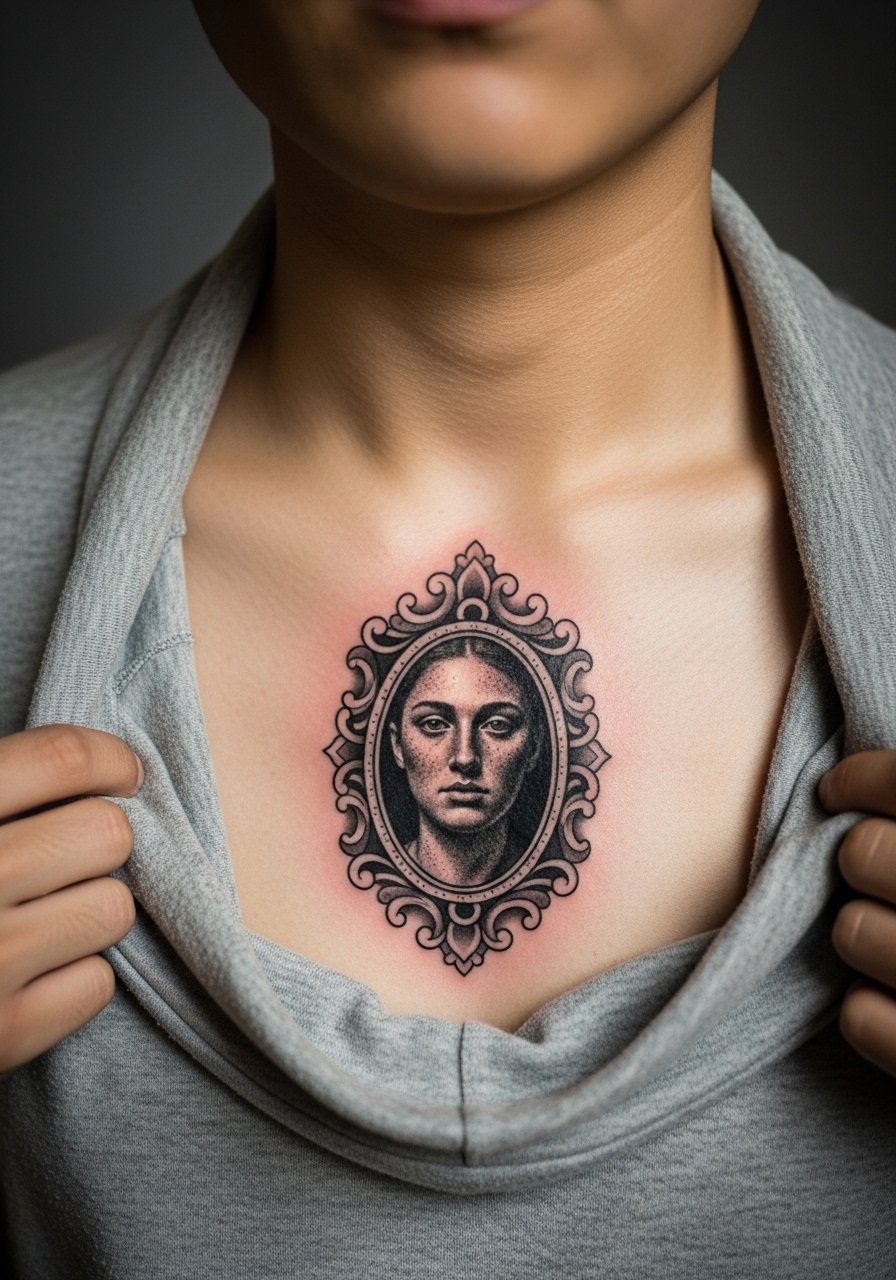
Portrait work in blackwork micro-realism asks for an experienced hand and realism that translates into black and gray gradients. Artists debate fine-line portrait details on chest areas. One camp says chest motion and texture blur fine lines quickly. The other camp argues that proper needle depth and strong contrast allow portraits to hold. Ask the artist which approach they use and to show healed portfolio examples at similar sizes. Sessions often run multiple hours across three to four sittings. For the appointment, wear a wide-neck shirt you can pull aside and keep it loose afterwards to reduce rubbing.
9. Born To Die Dagger through Rose
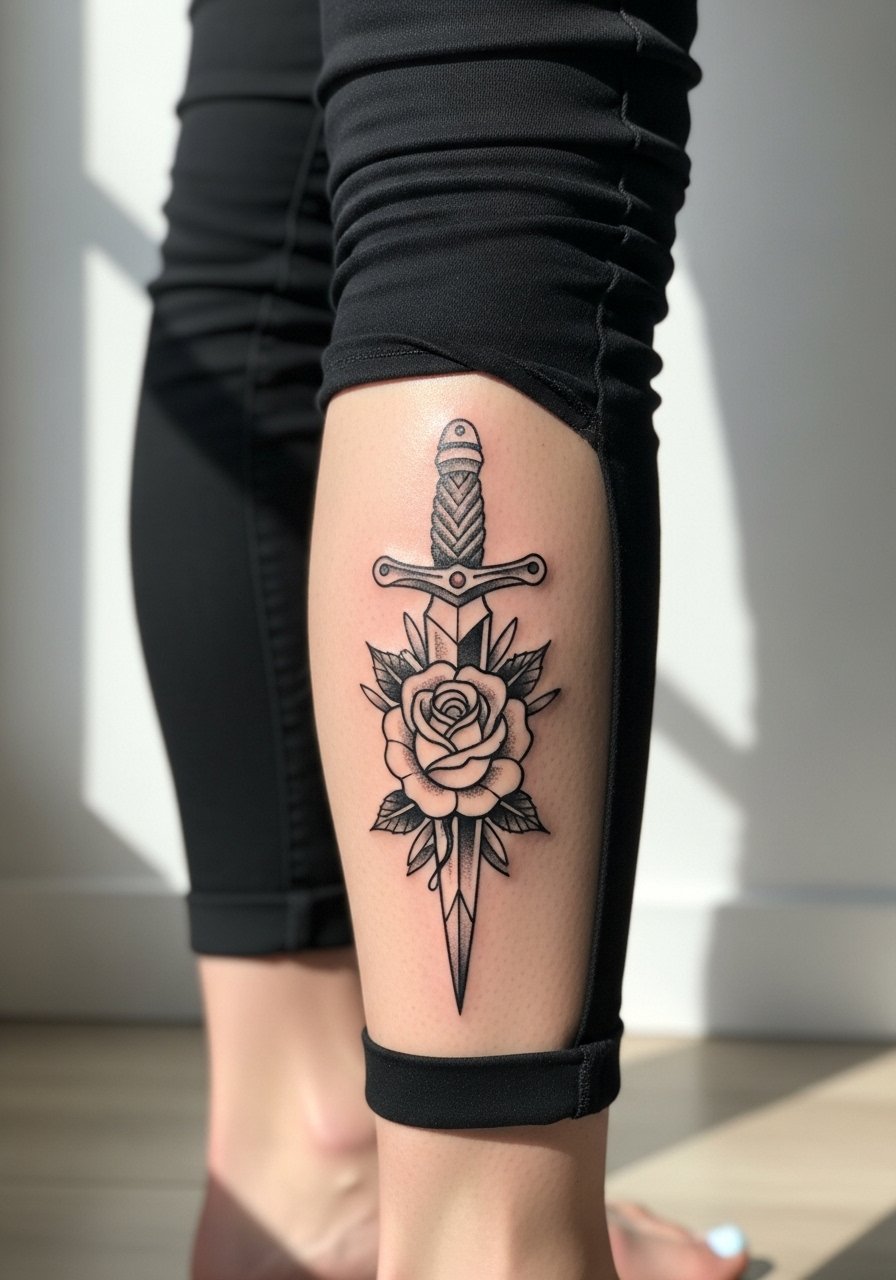
Calf pieces are great for bold outlines and thick black fills, which makes this dagger-and-rose combo read well at a distance. Tell your artist you want heavy black outlines around the dagger and a negative-space halo around the rose so the shape survives muscle movement. A single session usually covers a 4-inch composition. Mistakes happen when clients ask for too much fine texture on the blade; those details soften over time. For showing it off, slim black jeans rolled at the ankle or ankle boots frame the piece, so consider a pair like slim black jeans men for daily wear.
10. Blackwork Butterfly Wings
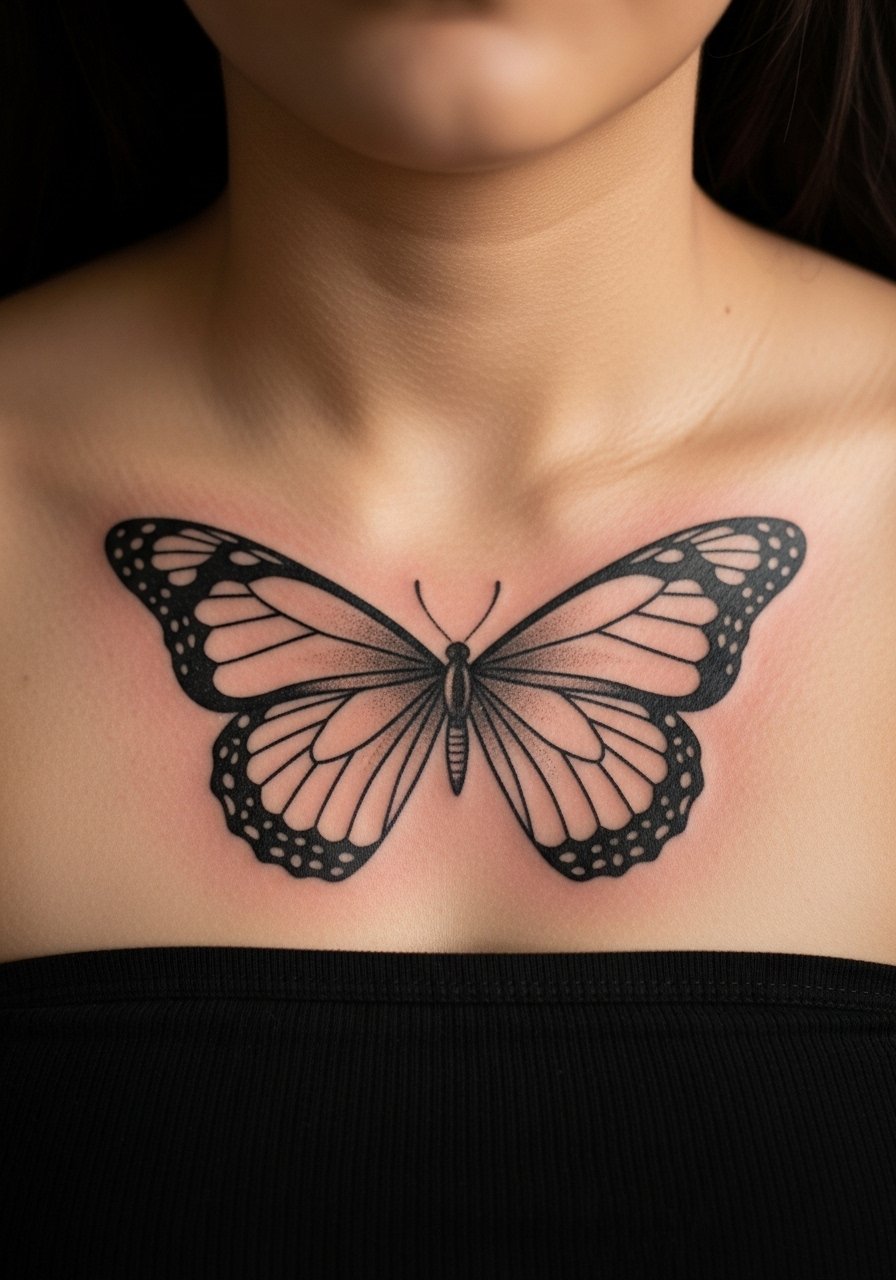
Collarbone placement gives winged designs prominent visibility and a natural curve to emphasize symmetry. For longevity request bold wing outlines and negative-space veining rather than micro filigree. Fine internal dot work can hold for a while but expect touch-ups sooner than bold silhouettes. A common mistake is placing the wings too low on the chest where clothing friction accelerates fading. For showing it off try a strapless top or strapless bralette that keeps fabric from rubbing the ink.
11. Hourglass Born To Die with Flames
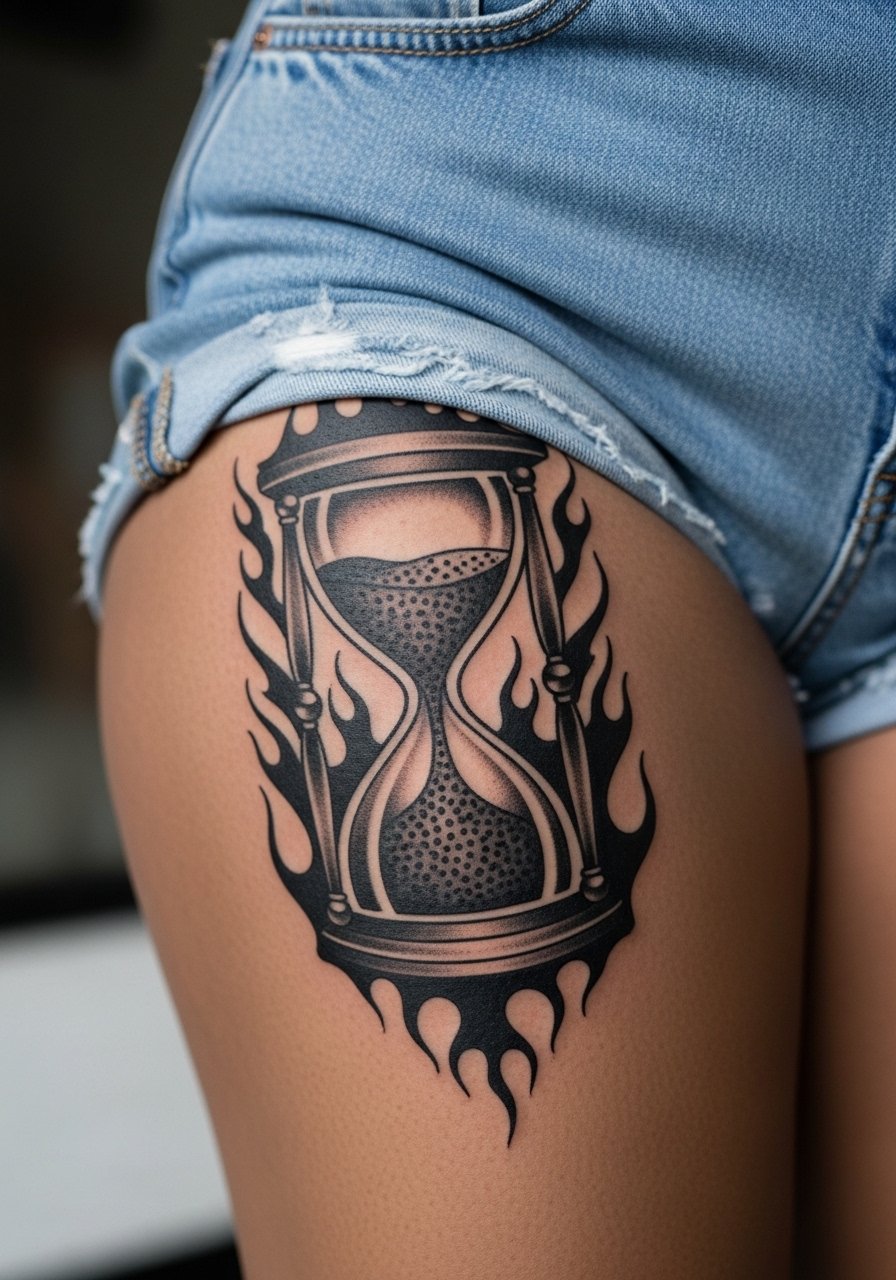
Outer thigh holds saturated black exceptionally well, so an hourglass with bold flame fills will keep its silhouette without frequent touch-ups. Ask the artist to use solid black fills for the flame negative spaces and to leave small uninked channels around the hourglass edge for crisp contrast. Pain is low to moderate and session time is commonly two hours for a 5-inch piece. Avoid tiny flame filigree that will blur. For showing it off choose high-waisted shorts or thigh high socks black to reveal or hide the design as needed.
12. Born To Die Gothic Archway Skull
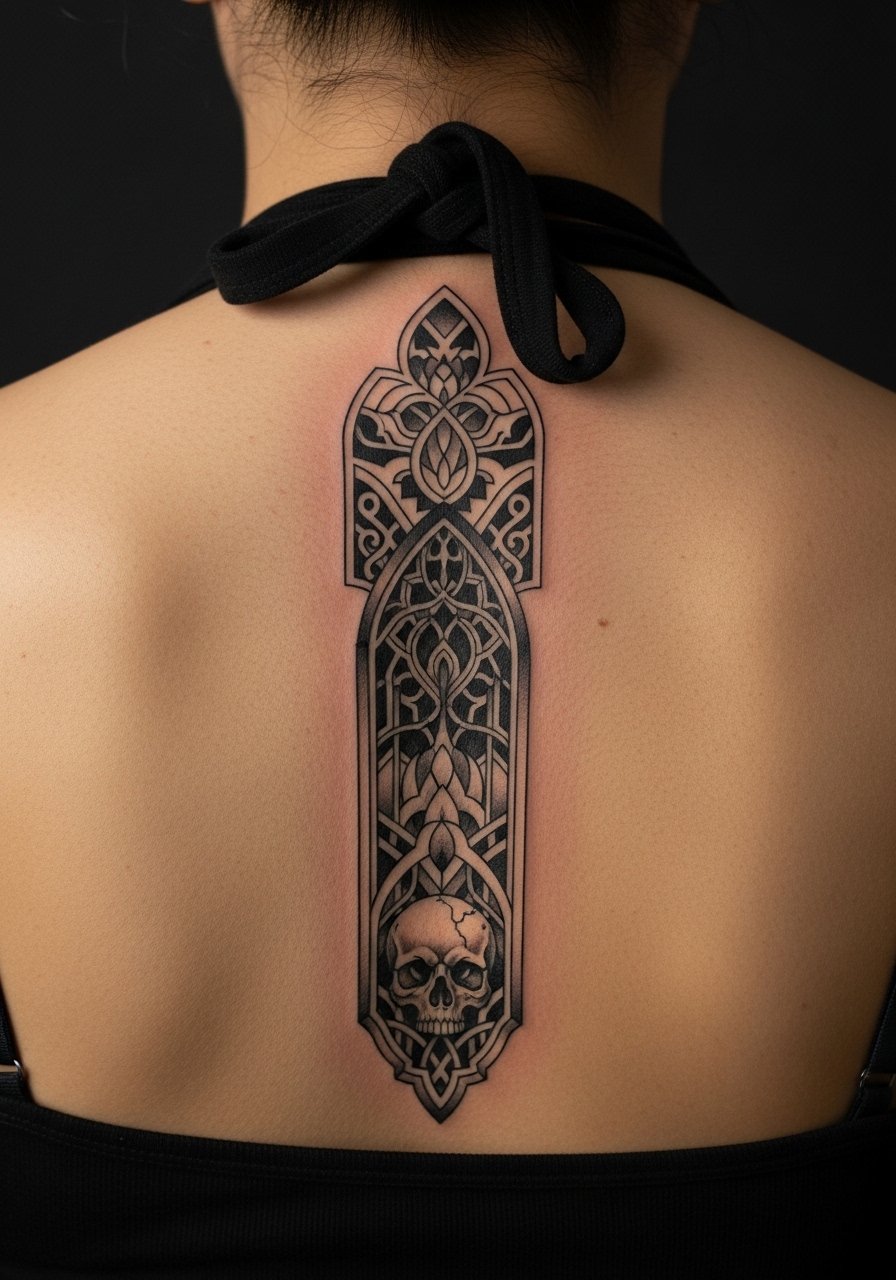
Spinal verticals need strong contours and repeating geometric patterns to avoid becoming a blur. When you discuss placement, emphasize that the archway should read as separate modules with narrow bands of negative space between them. The spine area is sensitive and sessions can be painful enough to need breaks. Expect three sessions for a 6–8 inch vertical piece. A design that crams tiny skulls into narrow arches tends to lose clarity. For evenings pair the piece with backless top black or a crop hoodie to let the vertical composition show.
13. Minimalist Born To Die Crown
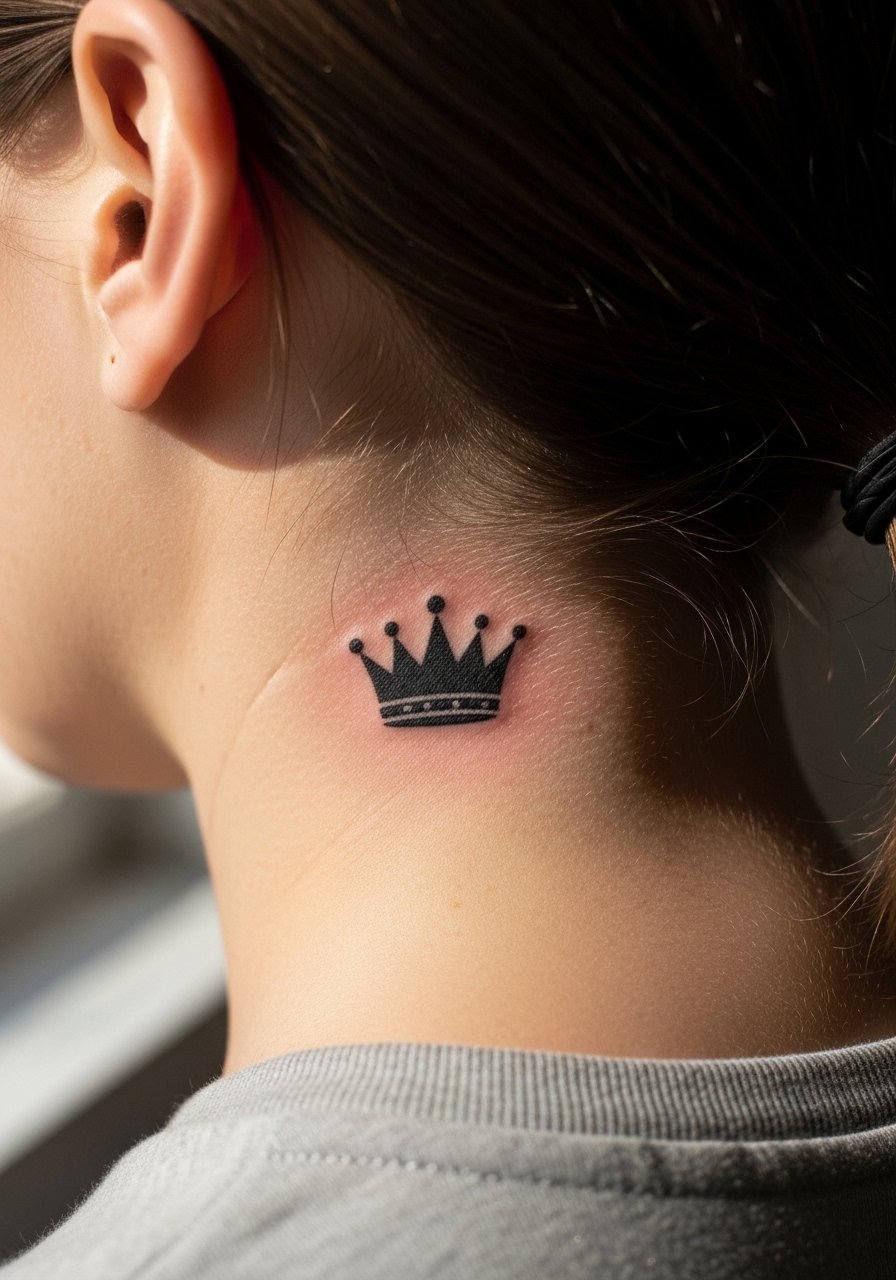
Tiny solid black crowns work behind the ear when the lineweight is unapologetically bold. Avoid the temptation for micro-dot shading there because the area is prone to blur and the hairline movement can soften thin strokes. This placement is low on visible pain but tricky for careers that restrict facial-area ink, so consider that factor. Session time is short and usually one sitting. For the appointment style hair back and wear a wide-neck shirt. A simple choker or thin chain pendant necklace can frame the area without drawing attention away.
14. Knuckle Born To Die Letters
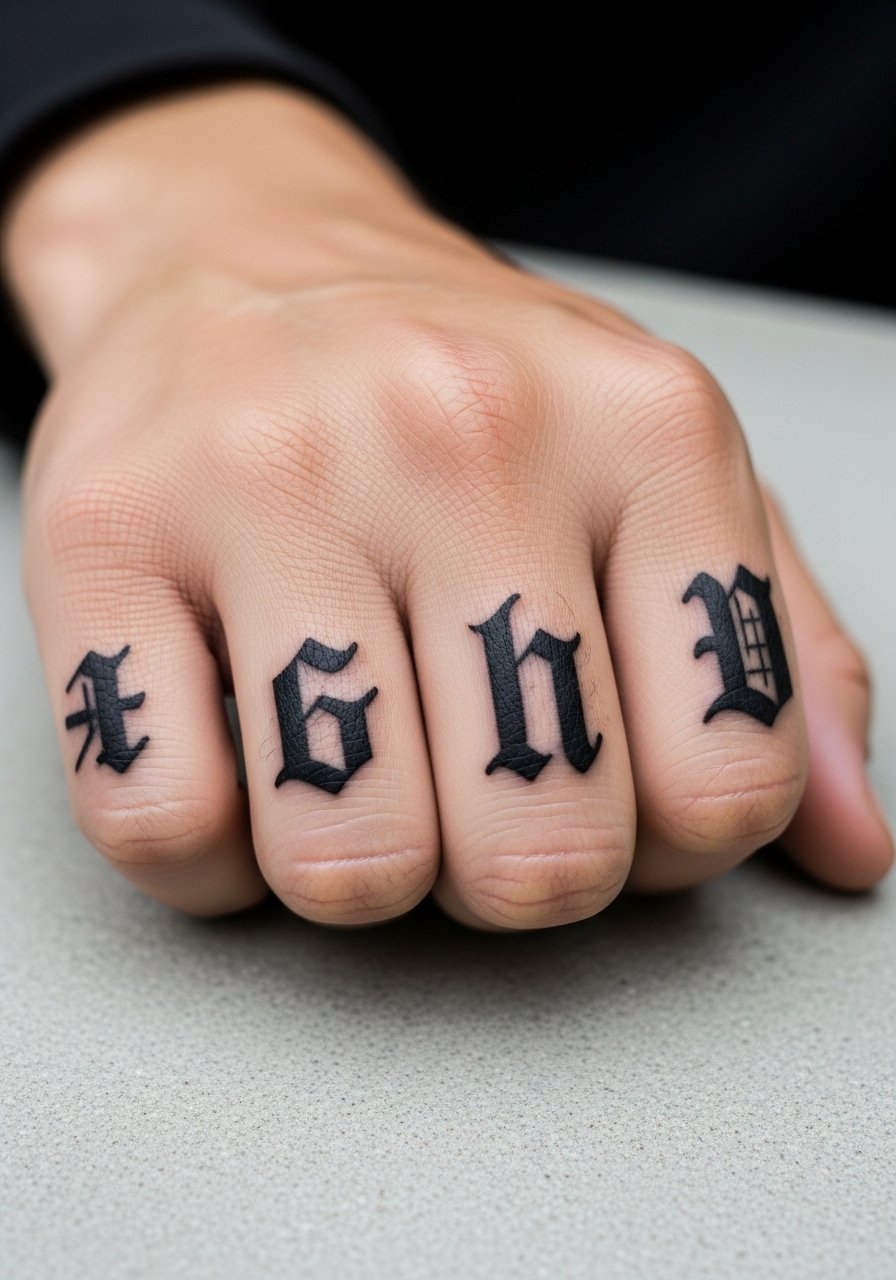
Knuckle work is daily visible and faces heavy friction from soaps and gloves, so keep letters chunky and avoid fine serifs. One overlooked issue is grip wear; repeated motion and washing can thin strokes quickly. Use protective film for the first 48 hours and expect more frequent touch-ups than limb pieces. Sessions are short but can sting; numbing cream is sometimes used for comfort. For showing it off, leather cuffs on the opposite wrist or short rolled sleeves create balance. Consider a leather cuff bracelet during casual wear.
15. Geometric Void Connector for Calf
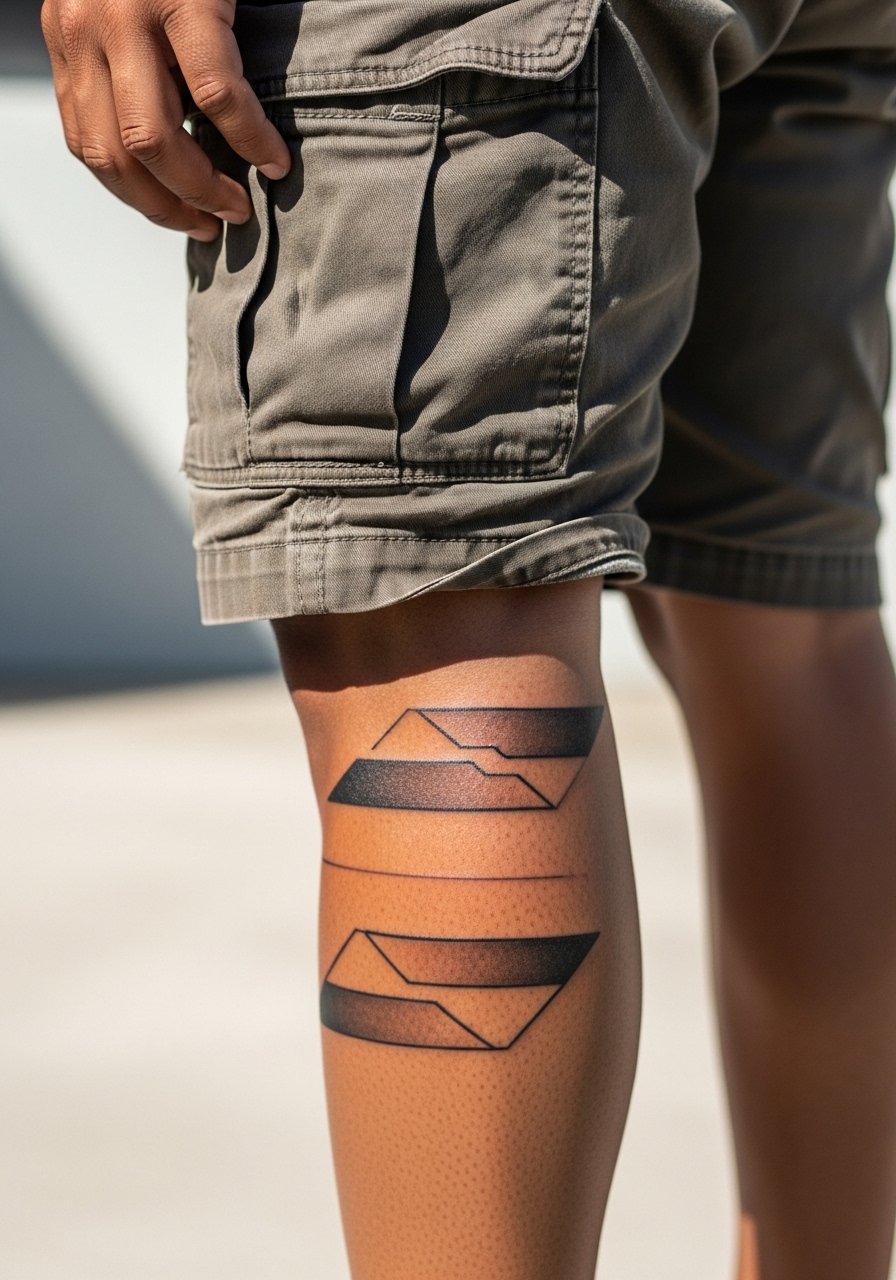
This idea uses negative space to create optical shifts on curved anatomy like the calf. Tell your artist to plan voids that follow muscle lines rather than cutting across them, so the illusion stays consistent while you move. The calf tolerates thick black areas, but thin crossing lines risk blowout where the skin thins. Expect a one- to two-hour session for 4–6 inch wraps and perhaps a touch-up at year two. For summer show-off, pair with cargo shorts knee length or boots for a stronger aesthetic.
16. Patchwork Born To Die Connector
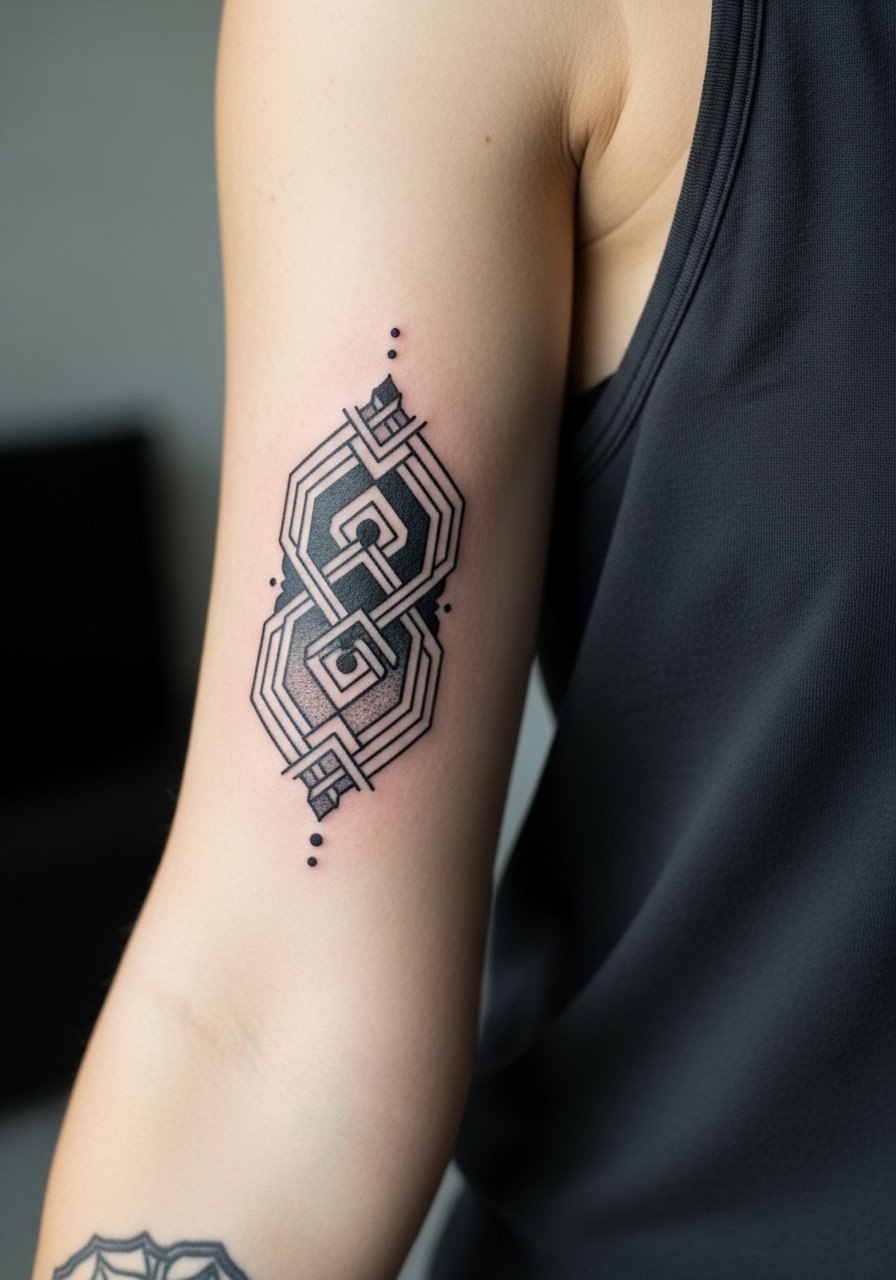
Connectors are practical if you want to unify disparate pieces into a cohesive sleeve starter. Use large black anchors and negative-space bridges instead of tiny filler to avoid a muddy result after the ink settles. In consultation, bring photos of all pieces and ask the artist to map the connections on skin. Sessions vary based on coverage and can be spread out for comfort. The biggest mistake is small, intricate filler between old pieces; it often becomes indistinct. For the session wear a loose tank so the artist has clear access and consider a loose button-down shirt for afterwards.
17. White-Edge Boost for Dark Skin
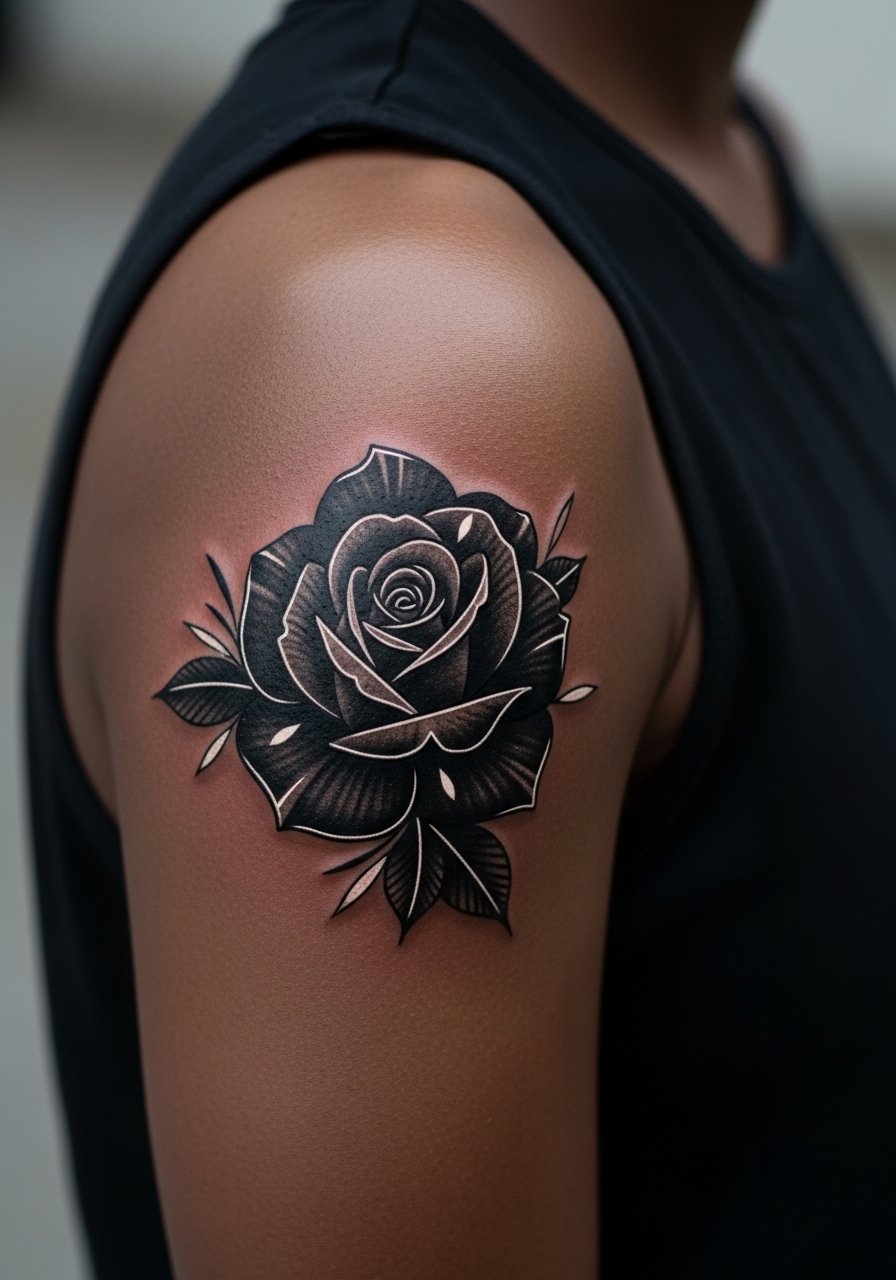
On deeper skin tones, small amounts of white ink along edges can create contrast and help shapes read after healing. This technique requires an artist experienced with white ink on darker skin, because white can shift and needs careful placement. Artists debate this approach. One camp warns white fades faster and can scar if overused. The other camp uses micro-pearling to enhance contrast without heavy white fields. Ask to see healed examples on similar skin before committing. Session time depends on size and often includes a touch-up to refine the white edge once initial healing finishes.
18. Calf Moth Wraparound
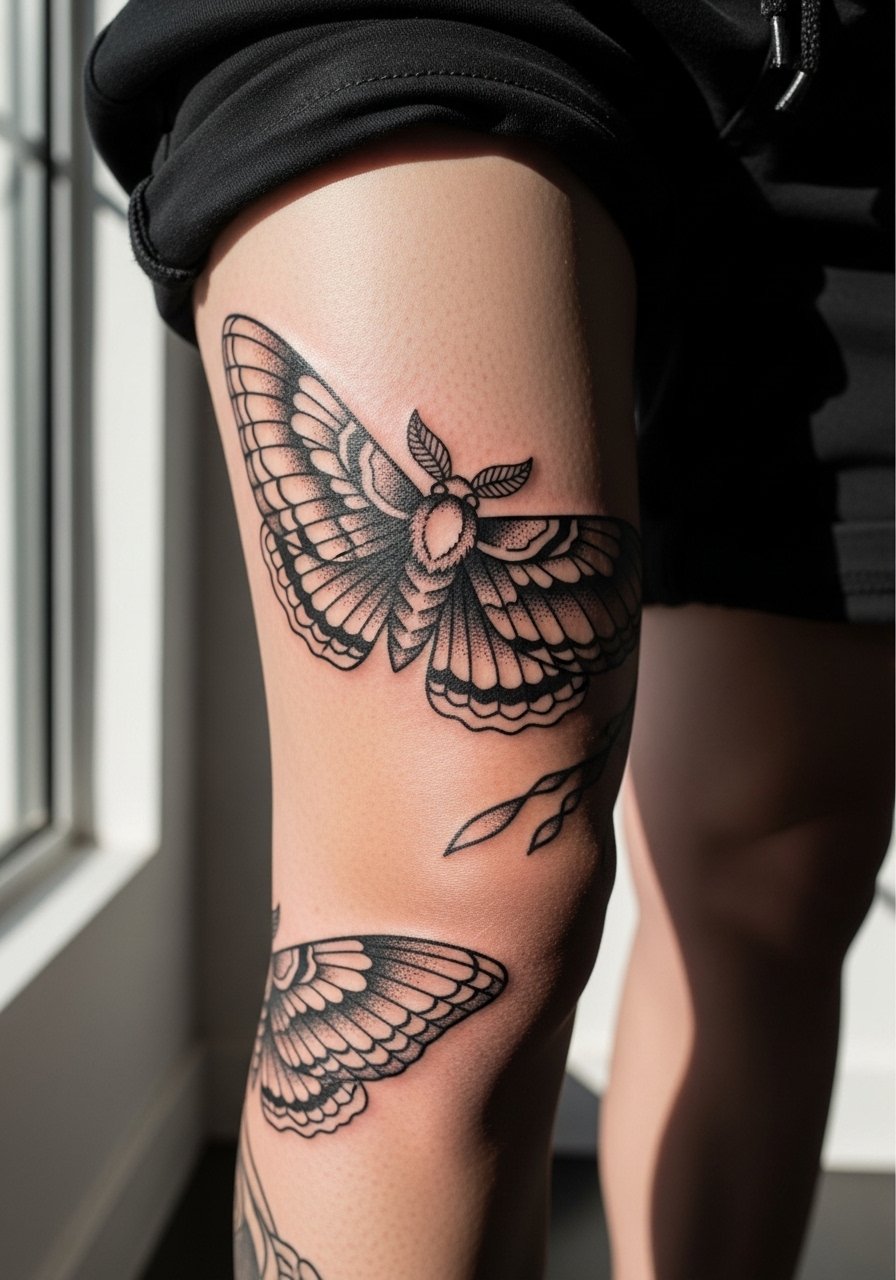
Wraparound compositions use the calf curve to dramatic effect. Make sure the wings meet at a seam that avoids the bend of the knee so the design reads from most angles. A common mistake is placing the central axis over a muscle insertion, which distorts the moth when the leg flexes. Sessions are typically one to two hours for a 4–6 inch wrap. For showing it off roll slim jeans or choose ankle boot black leather to spotlight the wrap.
19. Ribcage Born To Die Rose and Lettering
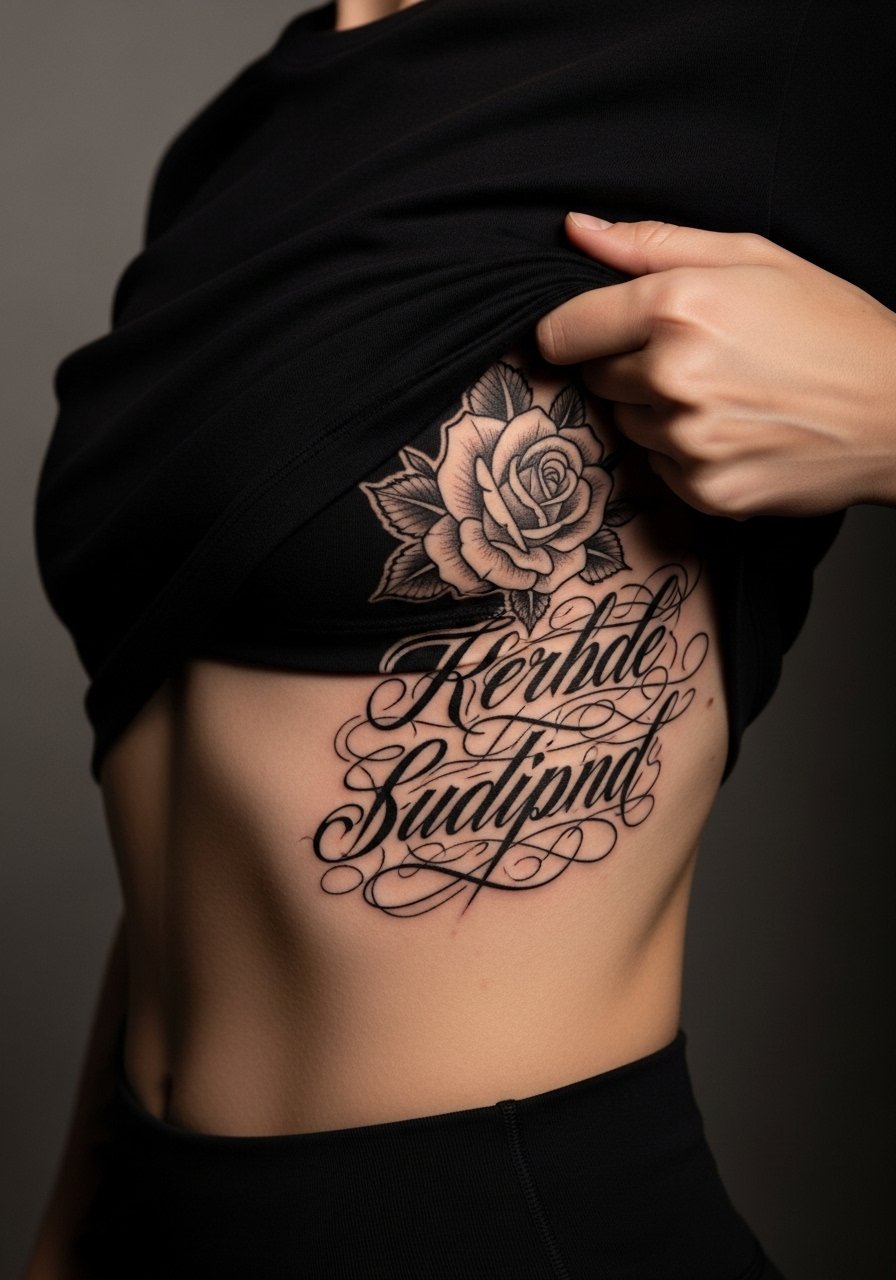
Fair warning, ribs are sensitive and the skin there moves with breathing, which affects how lettering and fine details settle. Artists split on fine-line ribwork. One camp thinks fine lines blur quickly. The other contends that proper spacing and needle depth preserves thin work. If you want script on the ribs, increase line weight and spacing slightly. Expect a painful session and plan for breaks. For the appointment wear a cropped top you can lift easily and choose aftercare that avoids friction from tight clothing.
20. Thigh Ornamental Mandala with Skulls
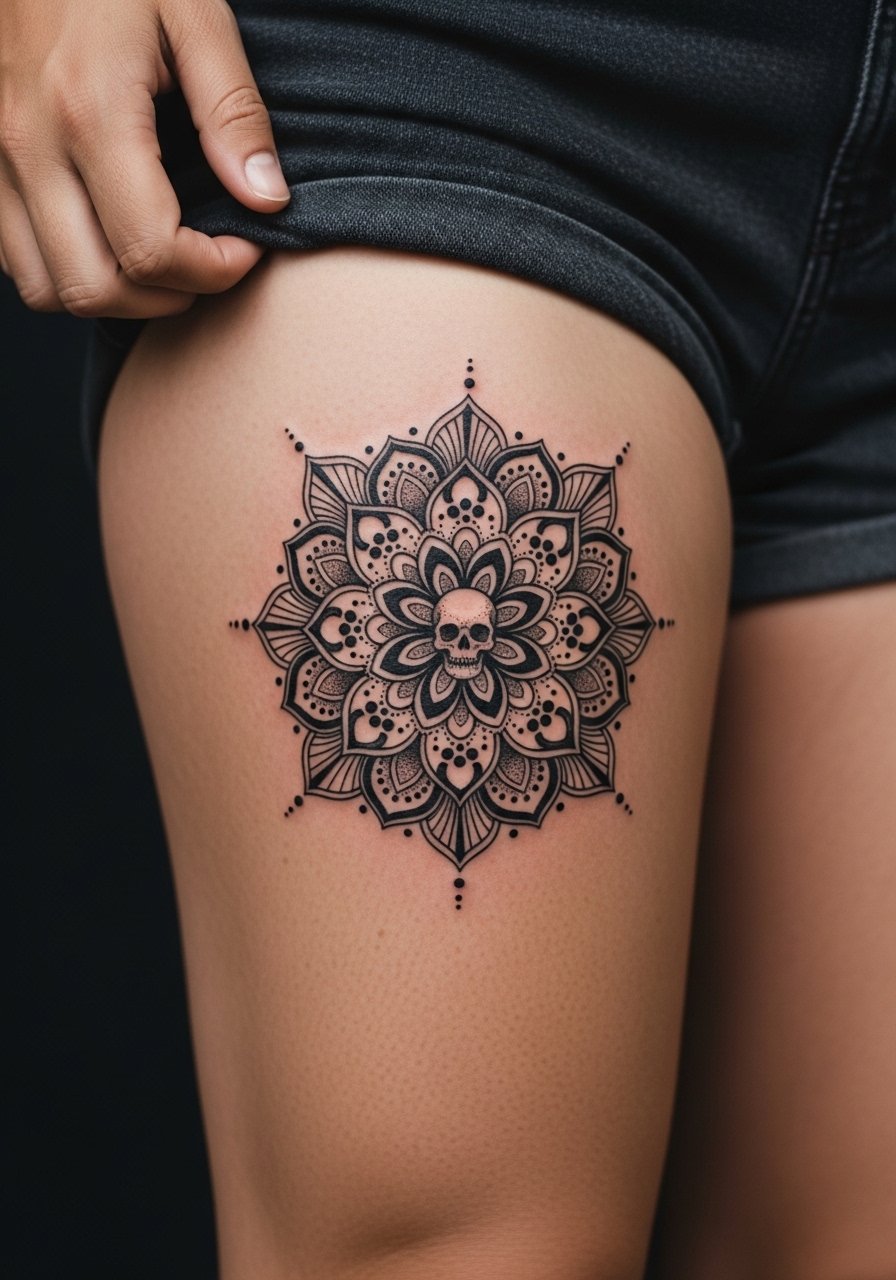
Thighs are forgiving and make excellent canvases for large ornamental mandalas. Use strong radiating lines and reserve black fields to preserve mandala petals over time. Mistake to avoid is packing the center with tight stippling that later softens into an indistinct spot. Sessions will be longer but less painful than ribs. When planning, ask how the artist spaces each ring for five-year visibility. For showing it off pick high waist denim shorts or a skirt that reveals the piece without constant rubbing.
21. Collarbone Micro Dot Hourglass
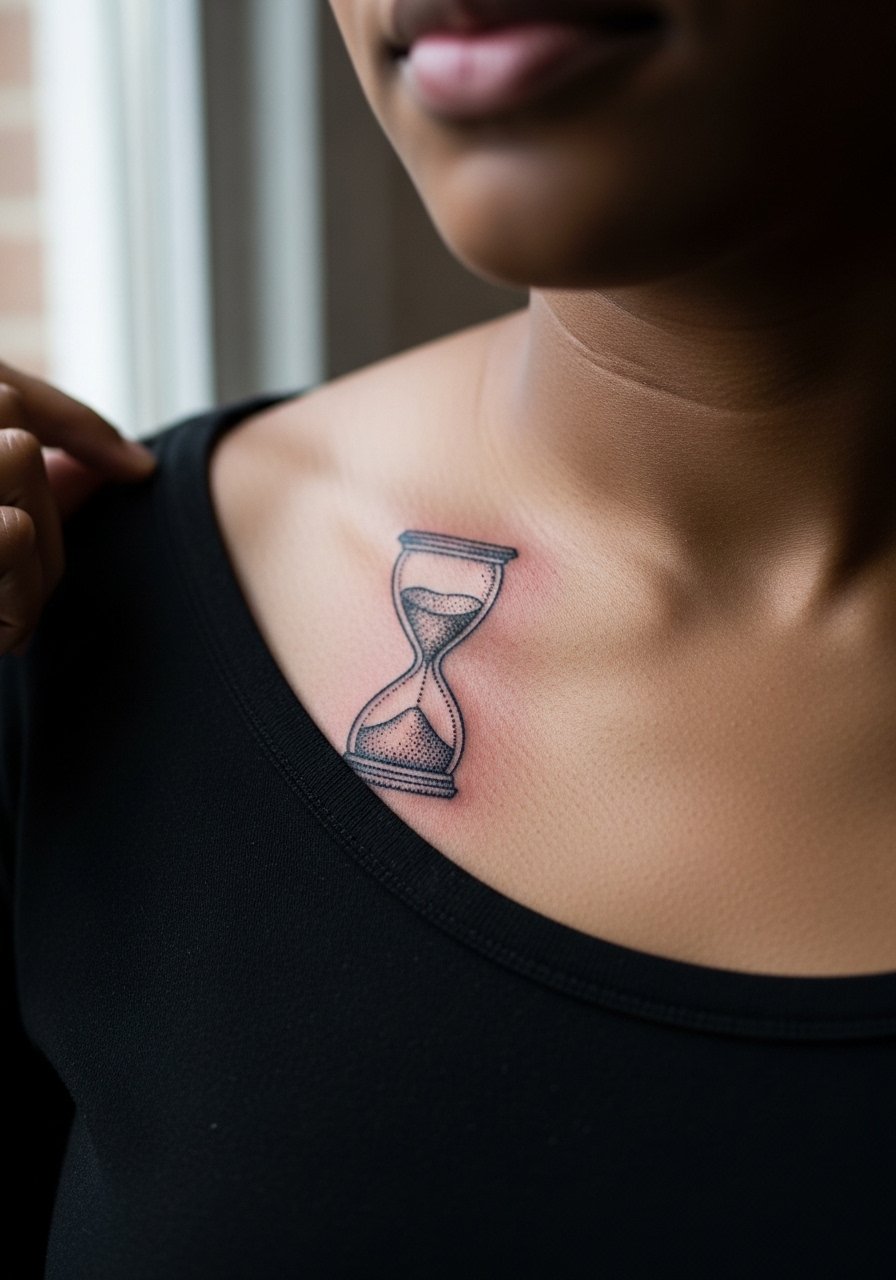
Micro-dot stipple looks delicate on the collarbone but it needs room to avoid merging. If you prefer this approach, ask the artist to space dots wider and to increase overall size compared with the reference image. Collarbone motion and thin skin make very fine dots vulnerable to fade. Sessions are short but may require touch-ups at year two. For the session wear a wide-neck shirt and for showing it off consider a choker necklace velvet to frame without obscuring the piece.
Frequently Asked Questions
Q: Will fine line Born To Die pieces on the wrist blur faster than bold blackwork?
A: From what I've seen, fine line pieces on high-friction spots like wrists tend to soften sooner than saturated blackwork. If you prefer thin lines, size up and ask for slightly heavier stroke weight, or expect a touch-up around year two to three.
Q: How should I pick placement if I plan to lose or gain weight?
A: Avoid major soft-tissue zones like the stomach if you expect big changes. Stable options include collarbone, outer forearm, and calves. Size and positioning adjustments during consultation can minimize distortion.
Q: Saniderm or dry healing for dense blackwork, which is better?
A: Artists split into two camps. One favors Saniderm for fewer messes and lower risk of infection. The other favors dry healing for better ink saturation, especially on heavy black fills. Ask your artist which method they use for large saturated pieces and follow their exact timeline.
Q: How soon can I wear jewelry or tight clothing near a new collarbone or wrist piece?
A: Wait until initial scabbing softens and the artist gives the all-clear, usually about five to seven days for collars and wrists. Tight jewelry and straps can rub the area and lift scabs, so choose looser options in the first two weeks.
Q: Are white ink accents safe on darker skin tones?
A: White accents can boost contrast on deeper tones but they require an artist experienced with subtle micro-application. Results vary and you may need small touch-ups once initial settling is complete.
Q: What should I ask about touch-up timelines during my consultation?
A: Ask your artist what they expect at year one and year three for the specific piece. Good questions include whether they charge for initial touch-ups and what they typically adjust on saturated versus fine-line work.
Q: What should I wear to a thigh or calf session to stay comfortable?
A: For leg sessions wear loose shorts or a skirt you can shift, so the artist has clear access without fabric rubbing the fresh ink. A simple option is a pair like loose linen drawstring pants you can roll up easily.
