
Fine line angel wings look effortless in photos, but their real test is how they age on skin that moves, scars, and sees sun. Trends push wafer-thin detail right now, and the trajectory from fresh to faded often surprises people. Choose placement and line weight with longevity in mind and you cut the need for early touch-ups, which is exactly what the first set of ideas below helps you plan for.
1. Fine Line Inner Forearm Wings
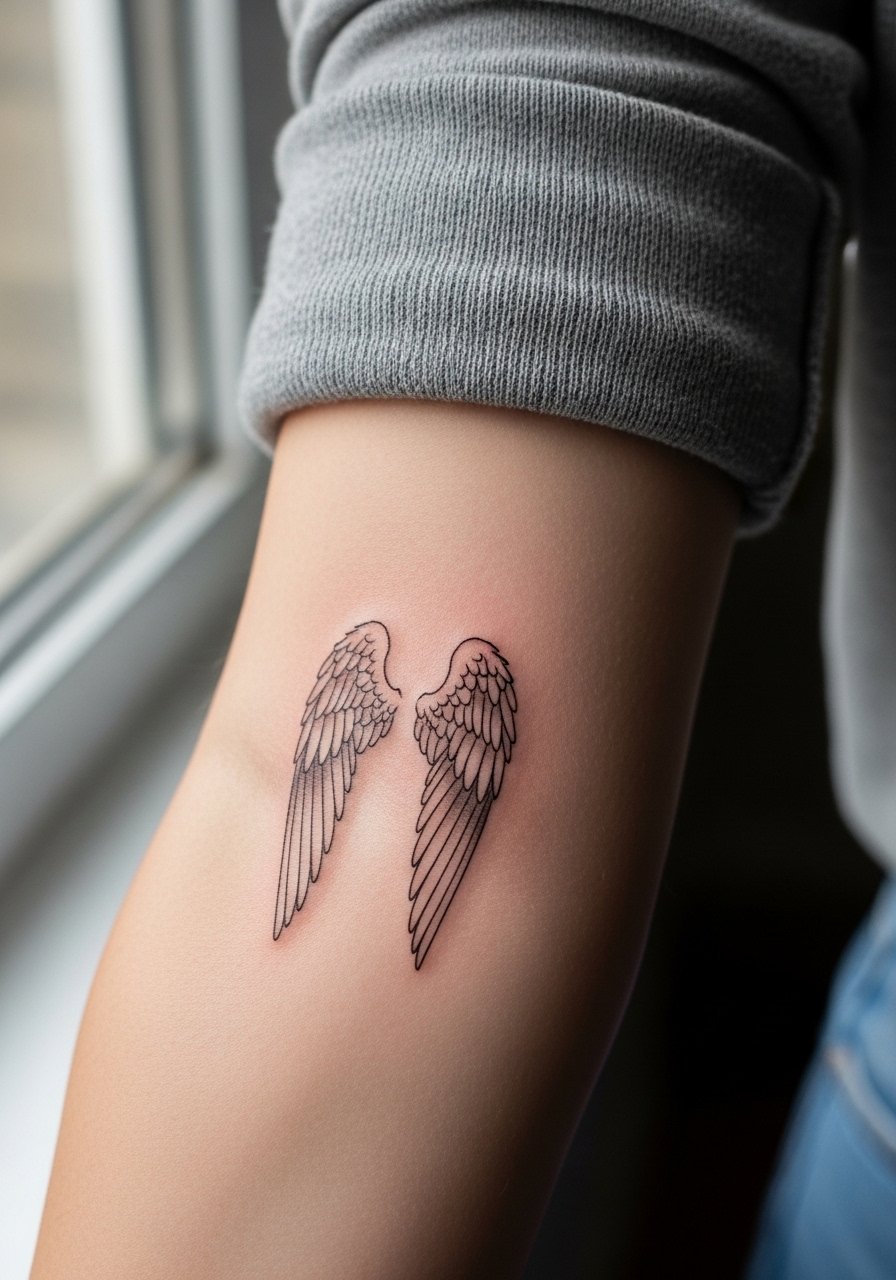
Fine line wings on the inner forearm read like handwriting. I recommend slightly bolder contour lines than you might save for the day of the session. Tell your artist you want clean single-needle linework with a slightly heavier outline so the central feathers keep shape at year two. Common mistakes include asking for hairline details that merge with wrist motion and daily sun exposure. Expect a session that is low to moderate on pain and can finish in 60 to 90 minutes. Pair with a rolled-sleeve linen shirt for show-off outfits and wear it on appointment day so the artist has clear access.
2. Stipple-Shaded Shoulder Cap Wings
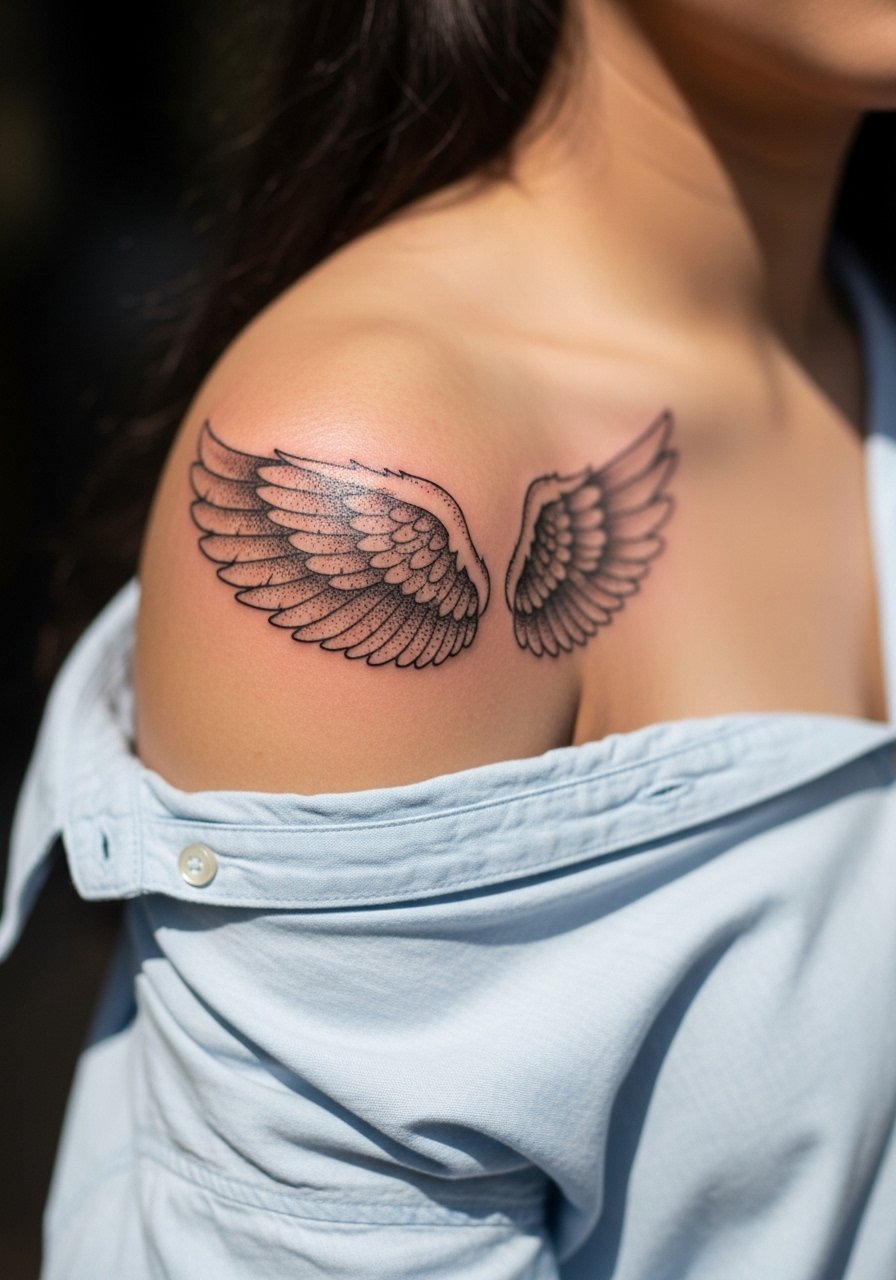
Stipple shading gives wings a soft texture that holds better than dense micro-shading on rounded shoulder skin. Ask for stipple gradients that follow the shoulder curve and avoid dense solid fills near the arm joint. The biggest aging issue is saturation placed too close together, which can merge where the deltoid moves. Sessions run 90 to 150 minutes depending on scale. Styling-wise, a loose button-down shirt that you pull to one side frames the shoulder without covering the art. For discovery, search artist portfolios on hashtag directories and gallery listings when you shop for someone who does dot work.
3. Blackwork Back Wings, Full Span
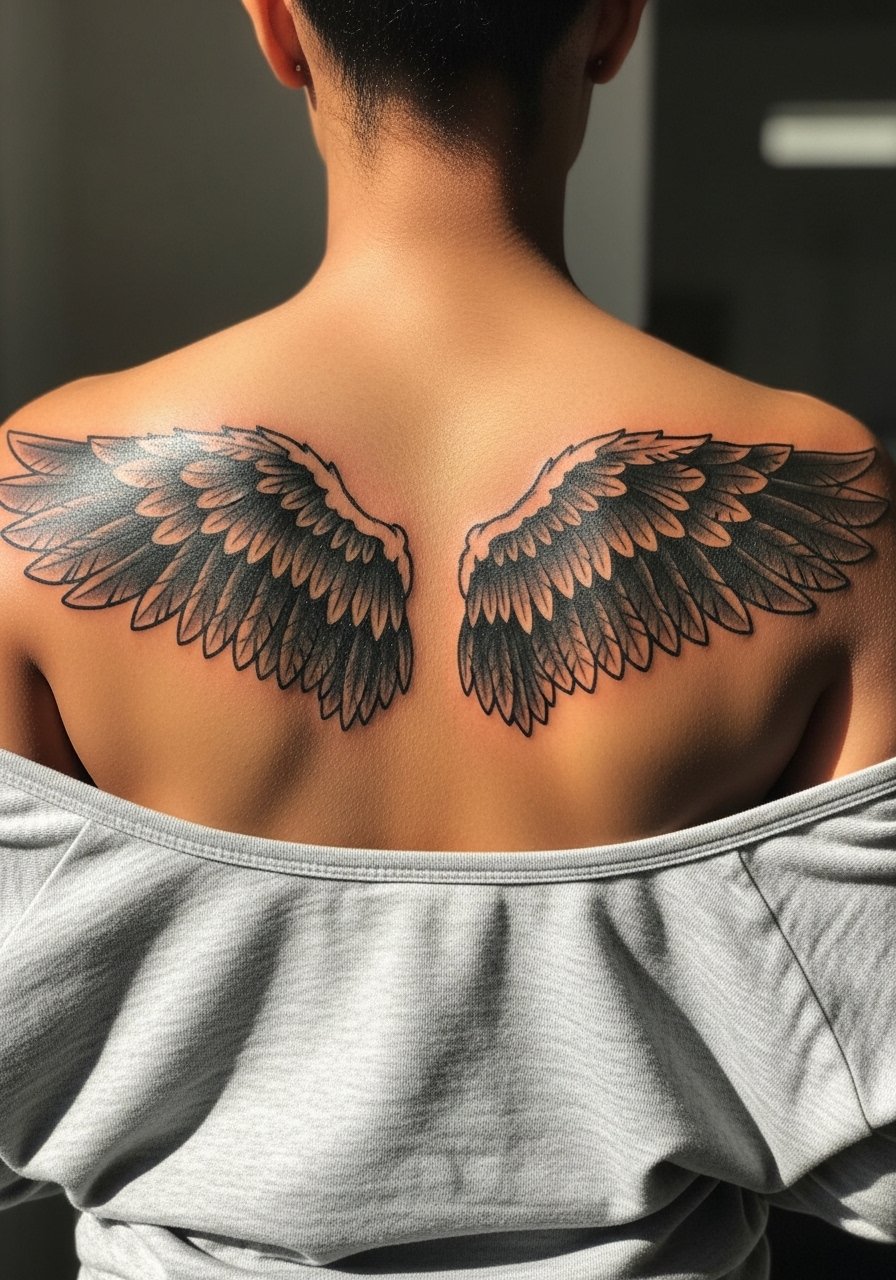
A full-span blackwork pair is about presence more than detail. I suggest asking for bold outlines and room between feathers to avoid early softening. Artists split on tight black fills near the spine. One camp says heavy saturation ages well and reads clearly at distance. The other camp favors staged negative space to prevent the piece from looking like a block of ink after five years. For sessions expect multiple hours and possibly two visits for full saturation. Wear a button-up you can pull off or a loose tank so the artist can work across the full back without awkward twisting.
4. Micro-Realism Ribcage Wings
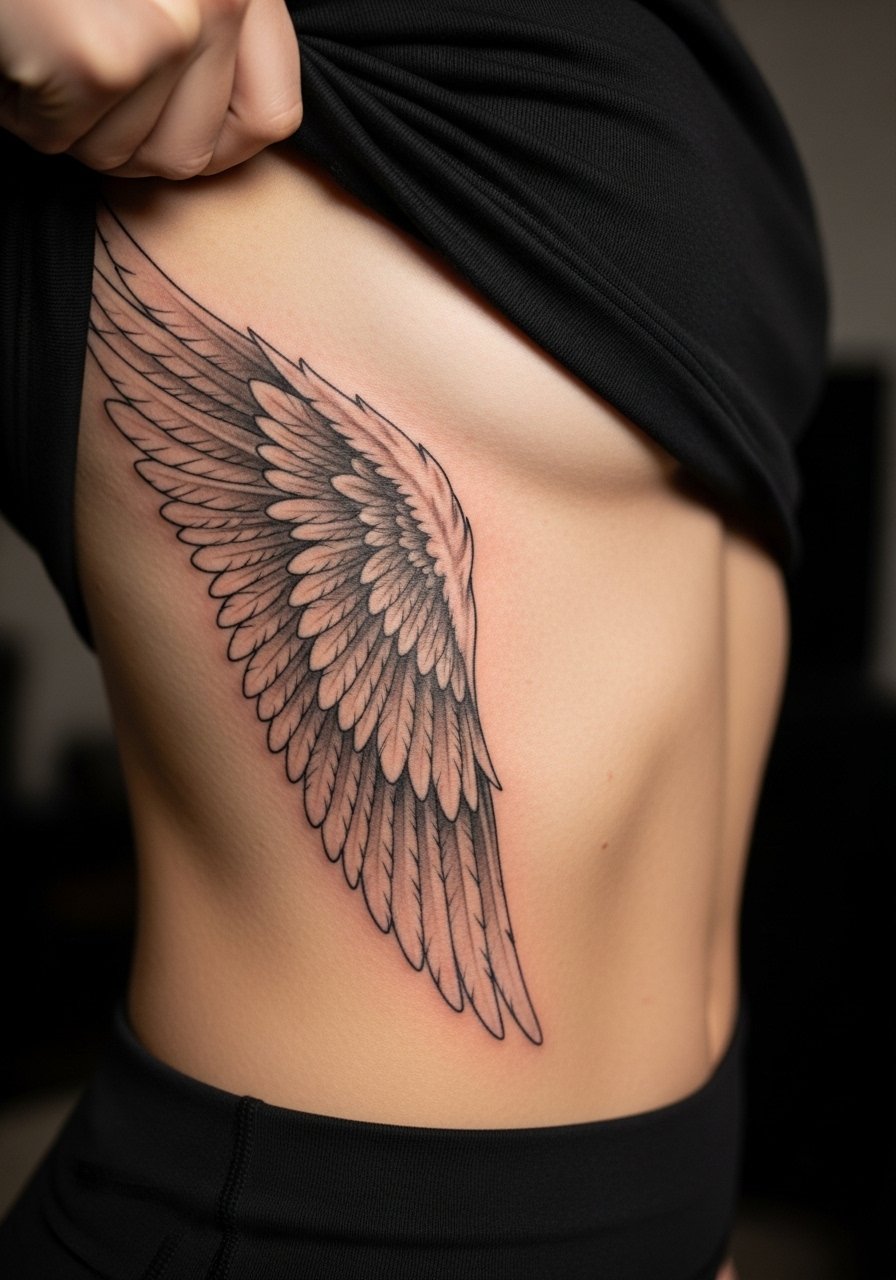
Ribcage wings read delicate but the area moves a lot. Fine detail here risks blurring as the skin stretches. When you consult, be clear you want spaced linework and minimal tiny cross-hatching that ages into muddiness. Pain is higher on the ribs and sessions are usually broken into shorter passes to keep lines crisp. Expect touch-up conversations early, and budget for a follow-up around year two. This is a classic controversy placement. One group of artists avoids micro-detail on ribs entirely because of stretch and breathing motion. The other group does it, insisting on conservative spacing and the right needle depth. Ask your artist where they stand.
5. Collarbone Script with Mini Wings
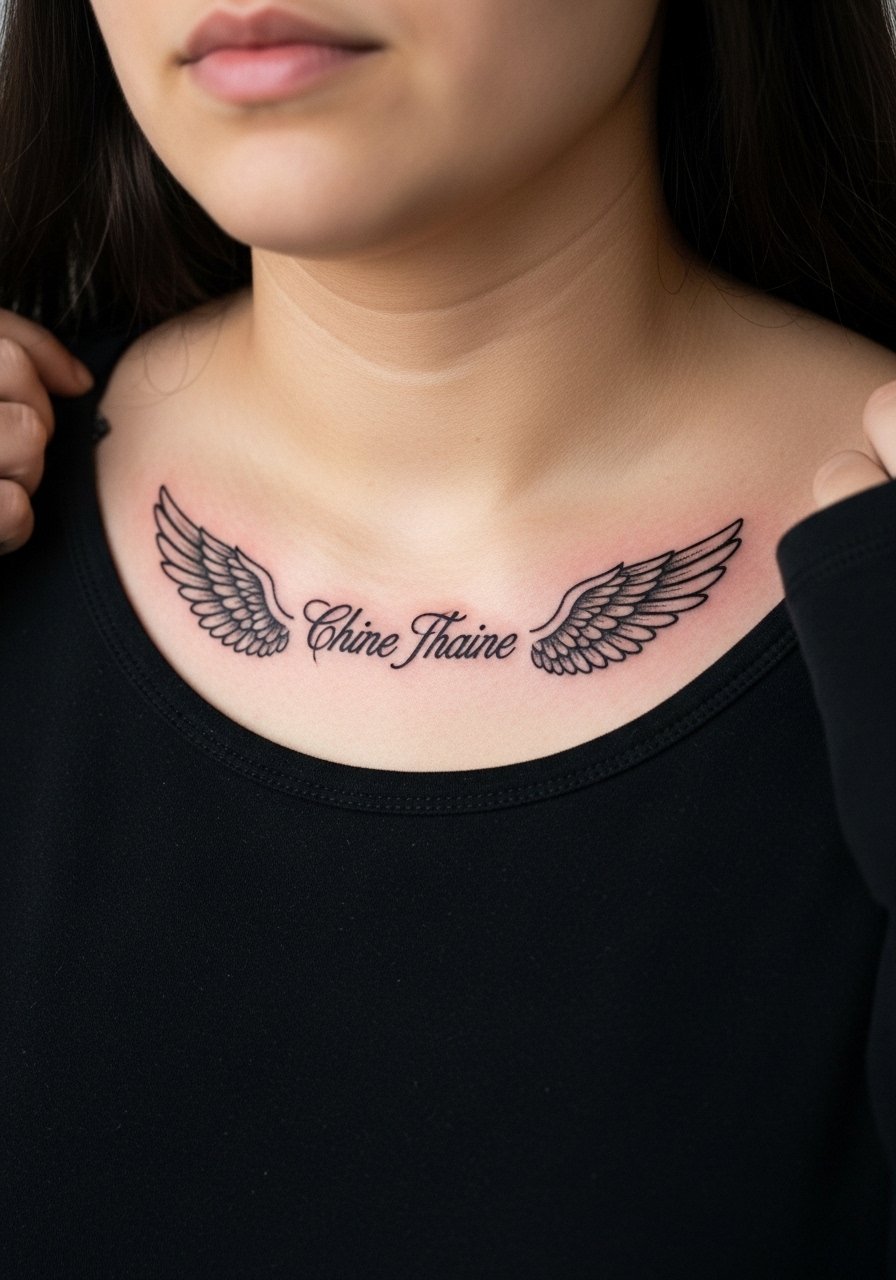
Tiny wings paired with script over the collarbone are visible and age differently than flat chest pieces. The risk is placing letters too close to the feather tips. Tell your artist you want the lettering offset so the wings have breathing room. Sessions are short but the collarbone sits on thin skin so expect sharper initial soreness. Show-off styling pairs this with thin chain pendant necklaces that rest above the script without competing. For career-conscious readers, collarbone pieces peek through many necklines, so consider placement relative to work environments.
6. Minimalist Wrist Wings, Tiny and Upright
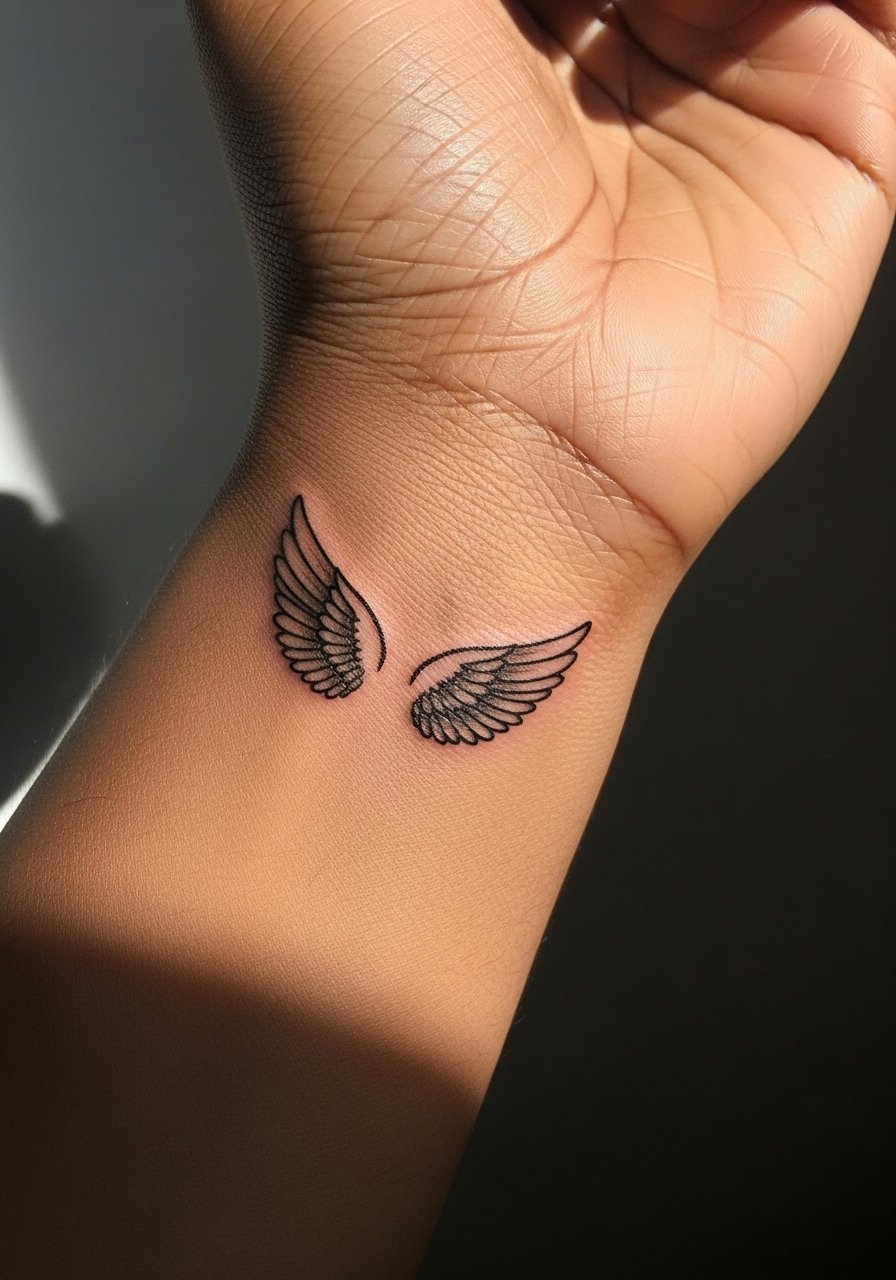
Wrist wings read intimate and need restraint. The common mistake is making the feathers too dense for a small canvas. Request slightly increased line weight versus pure single-needle to keep the shape through regular washing and friction. Sessions are brief, often under 45 minutes, but expect quicker fade in high-friction spots. For showing it off, pair with a minimalist watch or stack dainty bracelets that sit beside the wing without covering the tattoo. Hands and wrists can affect job prospects in some places, so weigh visibility.
Studio Day Picks
The upper chest, collarbone, and wrist pieces above each need different prep, and these five items smooth the session and first-week healing for those placements.
- Stencil transfer paper kit. Lets you test placement on the skin before the needle touches, which is invaluable for precise collarbone and wrist placements.
- Topical numbing cream. Applied as directed it reduces edge pain for rib and sternum sessions without disturbing linework when used correctly.
- Thin protective film roll. Helpful for wrist and finger tattoos that face constant washing and friction during the first days.
- Fragrance-free gentle body wash. Cleans the healing area without stripping moisture from delicate fine line work.
- Aquaphor healing ointment. A thin layer in the first couple of days locks moisture and keeps thin linework from flaking aggressively.
7. Neo-Traditional Winged Shoulder Blade
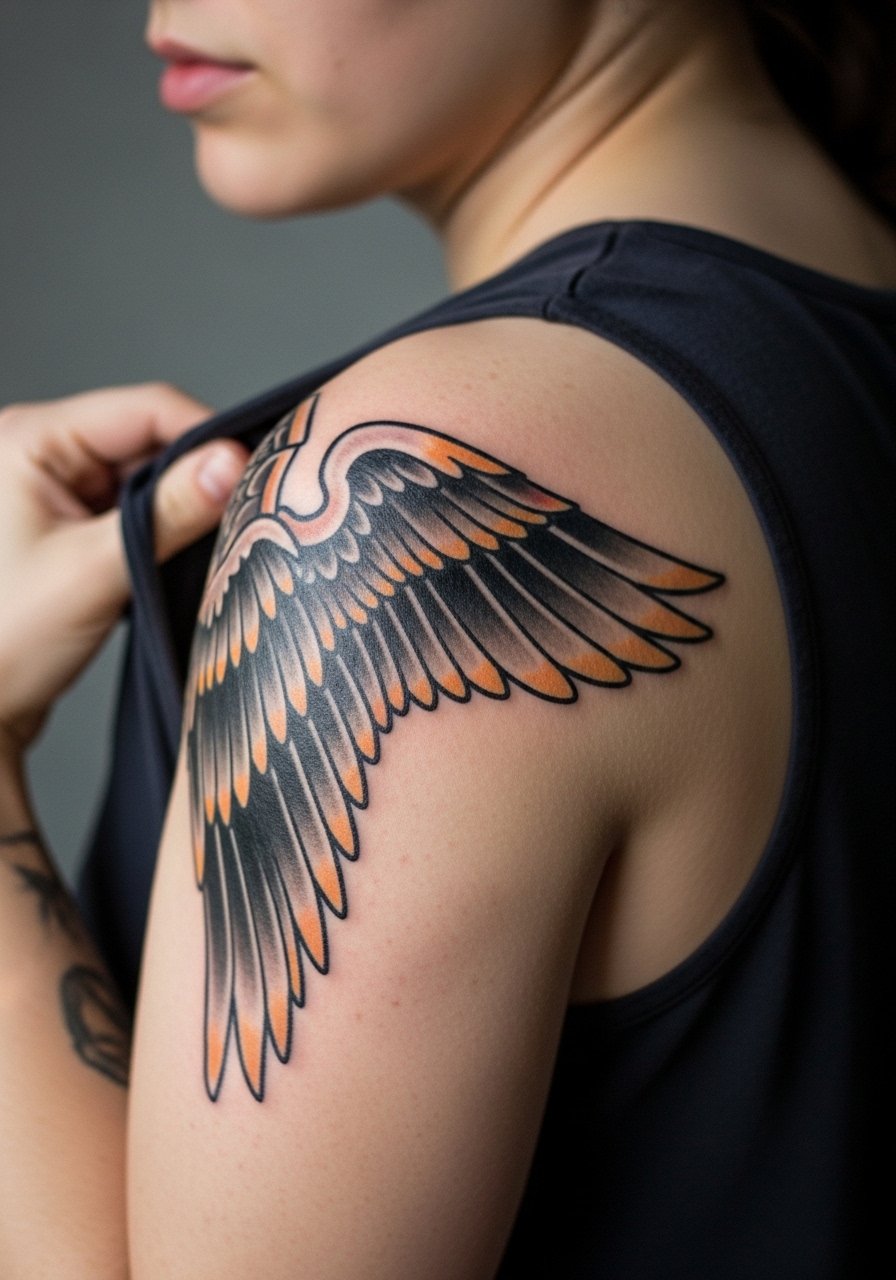
Neo-traditional wings let you mix solid fills with illustrative feather detail. I advise larger feathers and clear separations between color planes to prevent early bleeding. This style tolerates heavier saturation which often ages into a strong silhouette. Sessions can be longer for color packing and may require a second pass for saturation. For outfits, an open-back midi dress showcases the shoulder blade while leaving the art visible on nights out. When booking, search portfolios for artists who show healed color photos rather than just fresh work.
8. Contour Line Small Sternum Wings
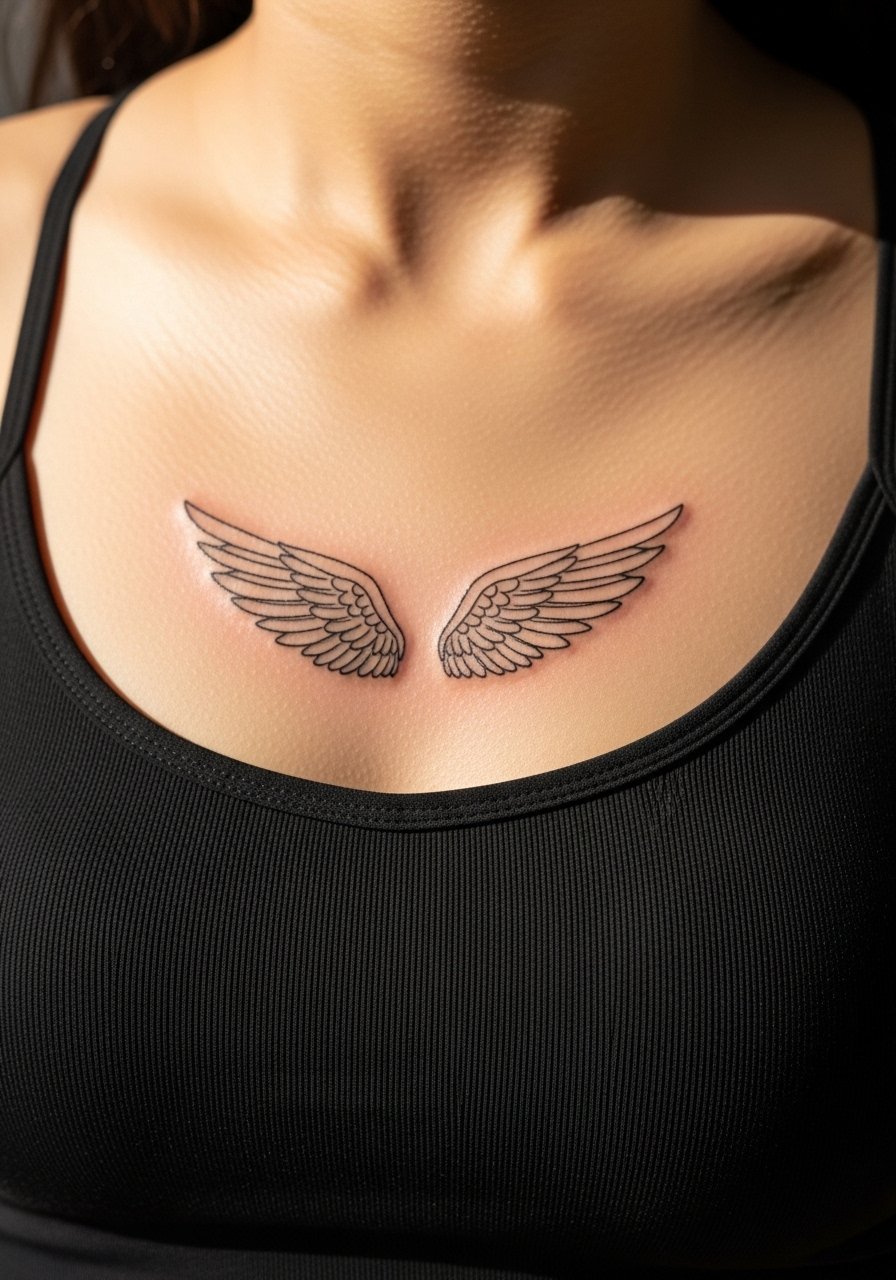
Sternum wings need referral to someone experienced with chest placement. The skin near the sternum moves with breathing and sits over bone, which affects needle depth. Request moderate spacing and avoid tiny feather textures that compress into one another. Sessions hurt more near bone and are shorter if you break them into passes. Coverage and touch-up timing vary, expect to discuss a follow-up at the consultation. For appointment day wear something like a zip-front hoodie that you can unzip and rezip easily so the artist has access without you changing completely.
9. Illustrative Calf Wings with Flowing Feathers
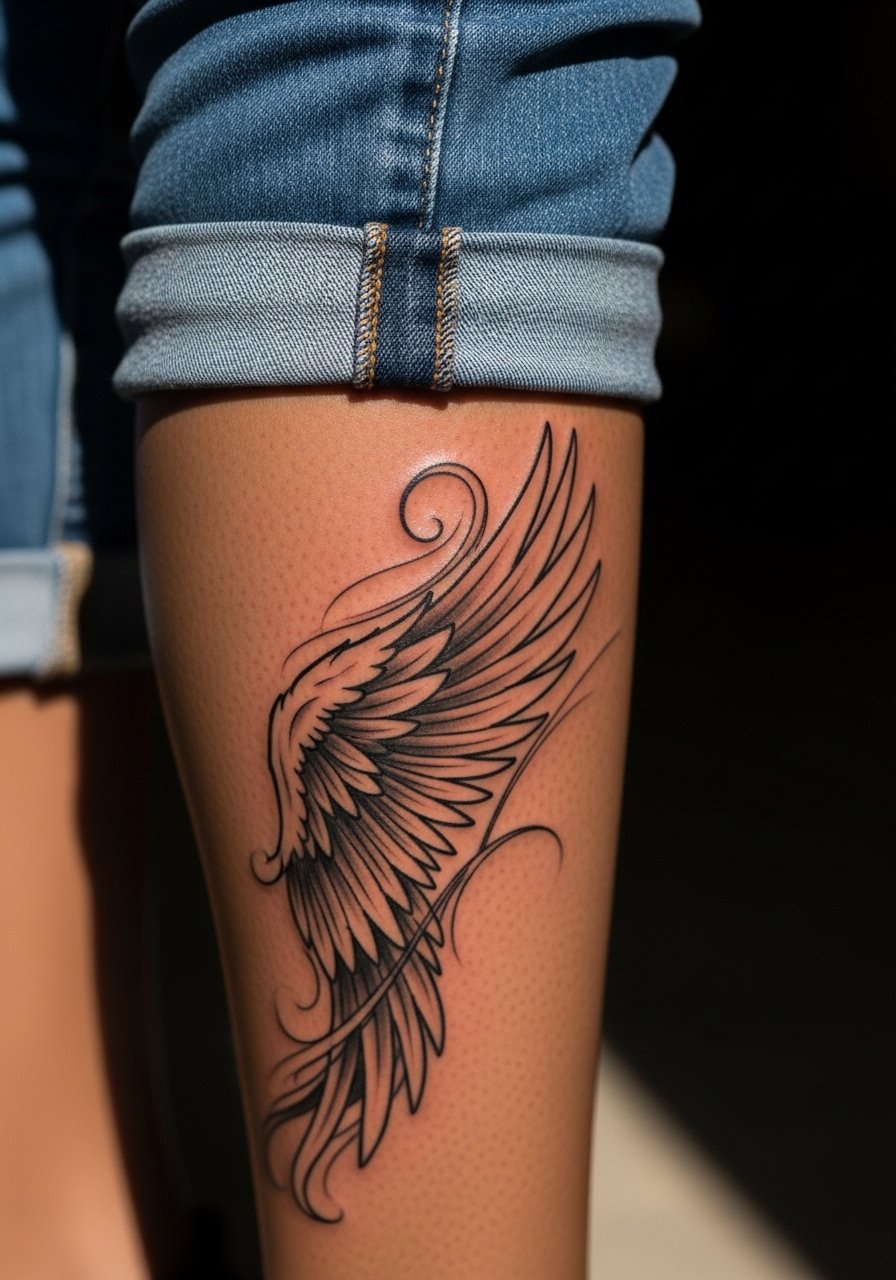
Calf wings work well with motion. Ask for feather direction that follows calf muscles to keep the composition natural when you walk. Mistakes occur when artists place dense feather detail that blurs with skin movement. Expect moderate pain and sessions around 90 minutes. For showing it off in warm months try a loose drawstring linen pant you can roll up without stressing the area. Also consider how boots and socks rub the lower calf during early healing.
10. Geometric Angel Wings on the Inner Bicep
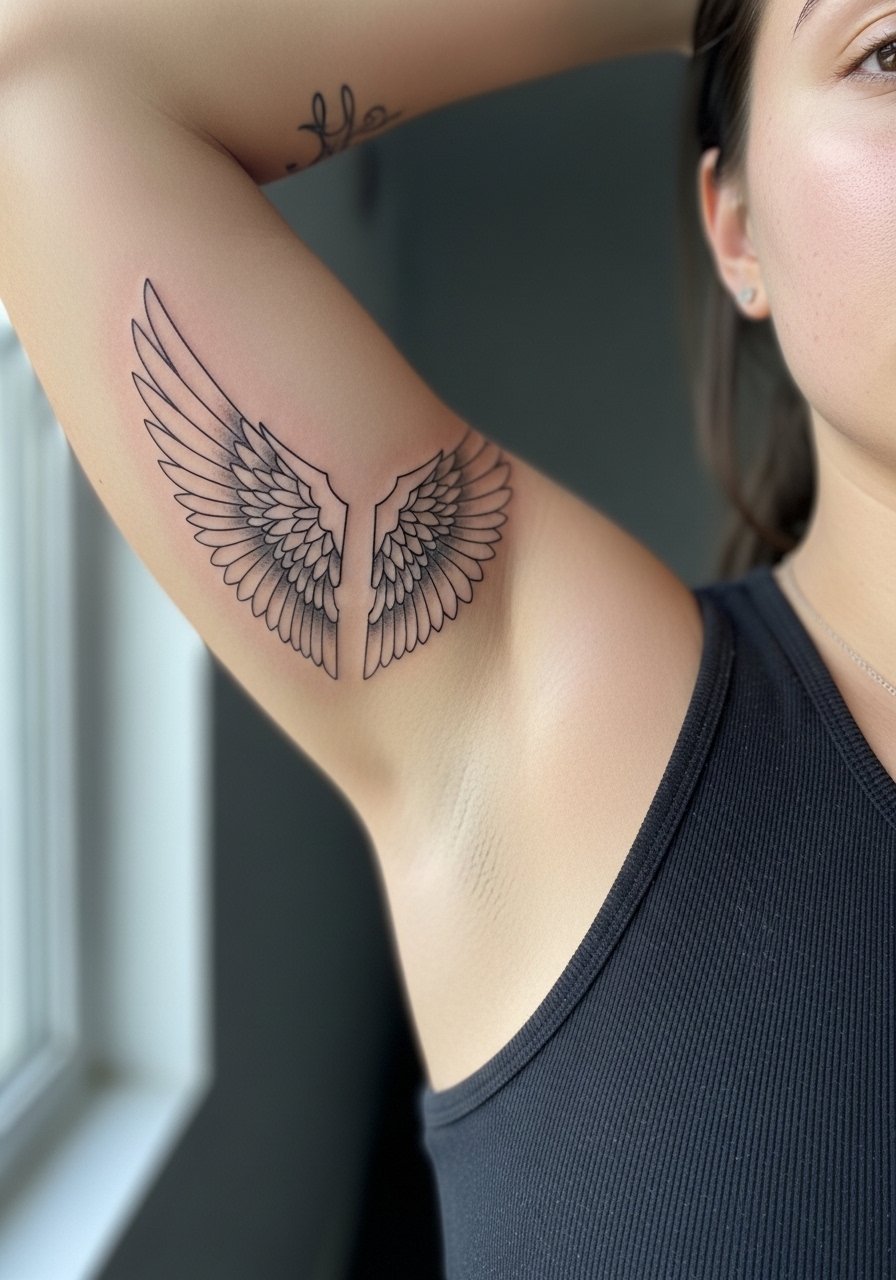
Inner bicep placements hide well and surprise with glimpses when you move. The skin there is softer and can make ultra-fine work spread. Tell your artist you want geometric spacing and avoid tiny parallel lines that can become a single band over time. The session is moderate and often done in shorter stretches to reduce swelling. For the appointment wear a racerback tank so the artist can expose the inner arm without removing clothing. Note that inner arm touch-ups are common within three years for intricate geometry.
11. Finger Base Mini Wing Pair
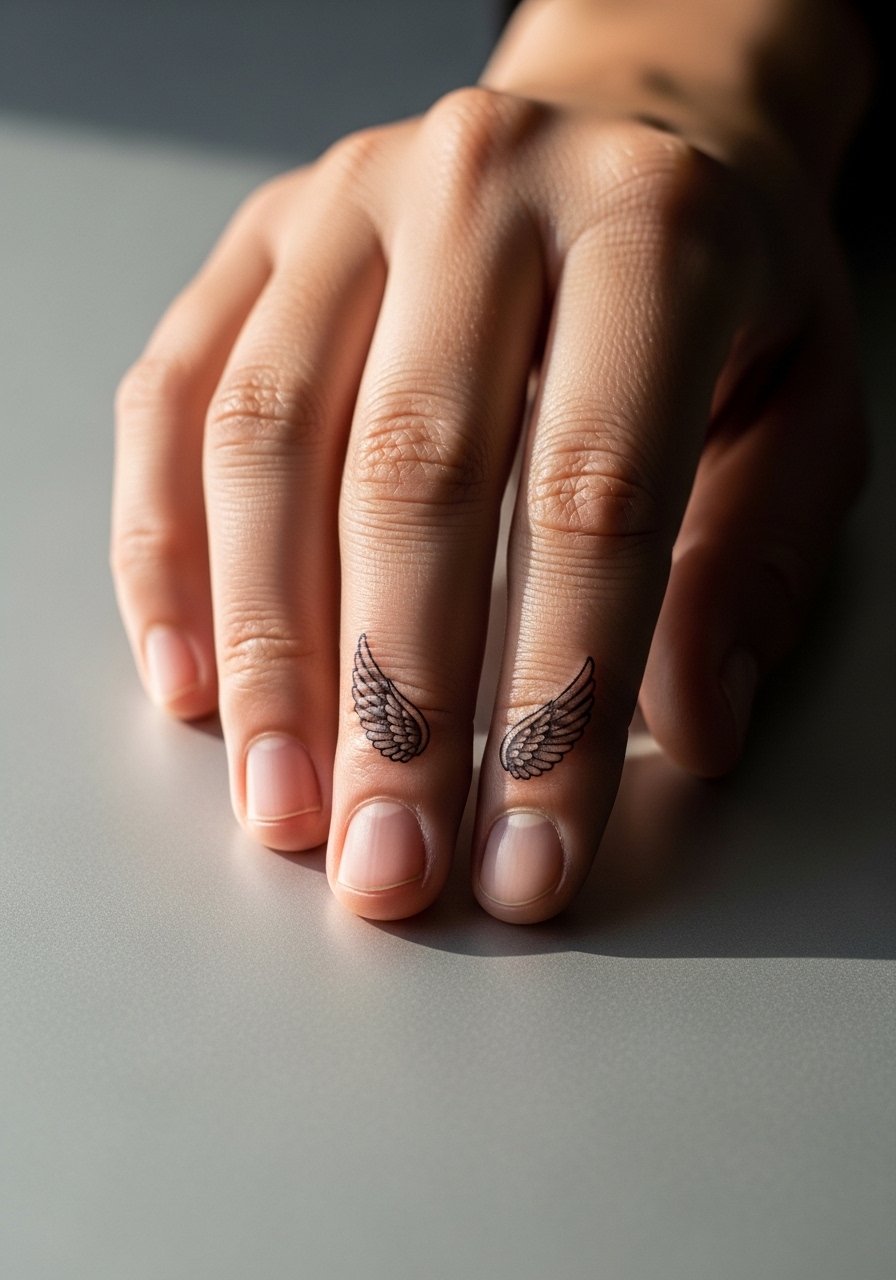
Finger-base wings are charming but notoriously high-maintenance. The skin on fingers renews and spreads ink faster than most spots. If you choose this, ask for simplified shapes and accept a higher chance of touch-ups within one to two years. Sessions are very short yet sometimes require multiple tiny passes. For showing this off, minimalist stacked rings can complement the wings without covering them. Use discovery pathways like local studio walk-in lists to find artists who tattoo hands regularly.
12. Watercolor-Accented Angel Wings on the Thigh
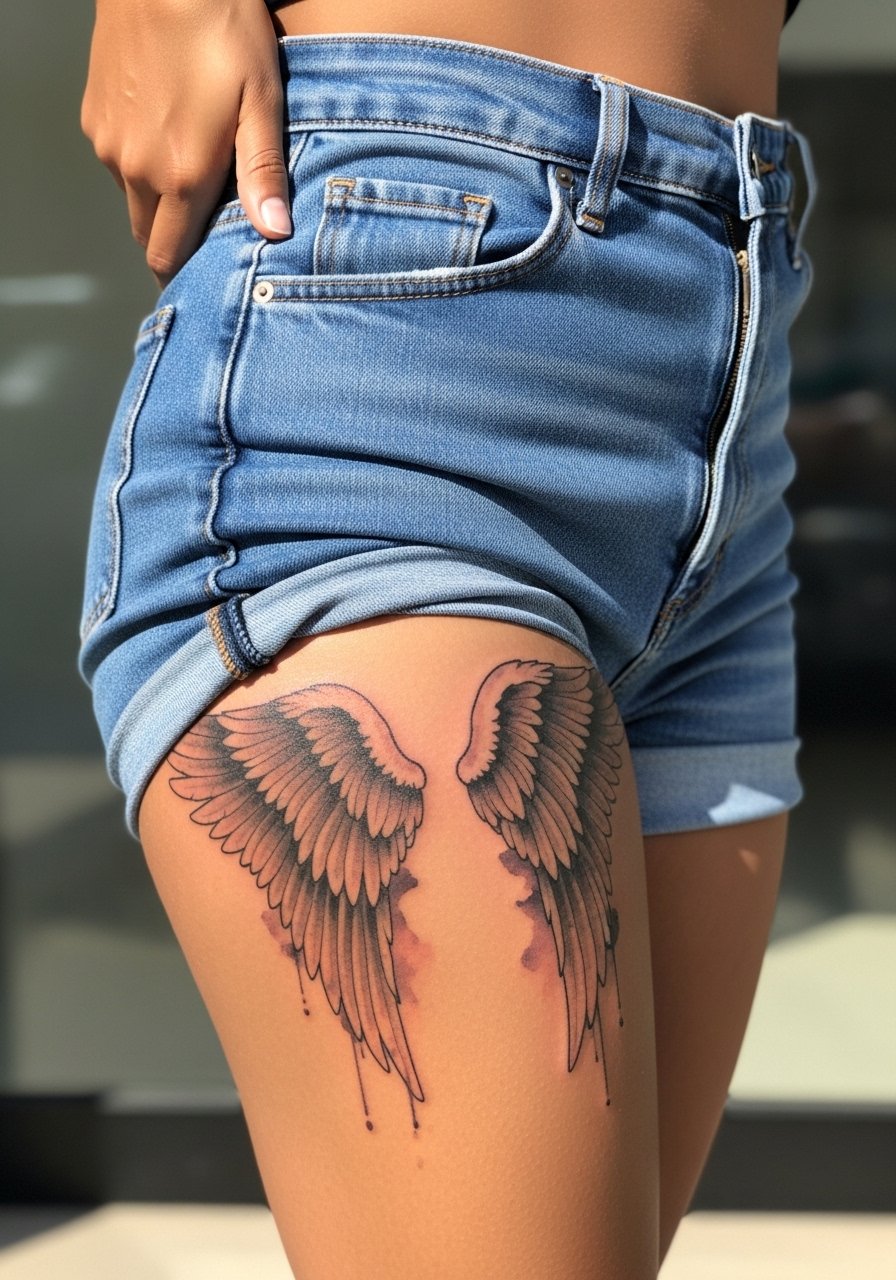
Watercolor accents add color mood without heavy saturation. The thigh is forgiving for softer bleeding edges but sunlight and friction from jeans can fade subtleties. Ask for anchors of linework that keep the piece readable as the watercolor softens. Sessions can be long because of scale and color layering. For the session wear loose shorts or a wrap skirt so the artist can access the area easily. If you want longevity, plan a color-refresh touch-up around year three.
13. Single Feather Behind the Ear, Wing Fragment
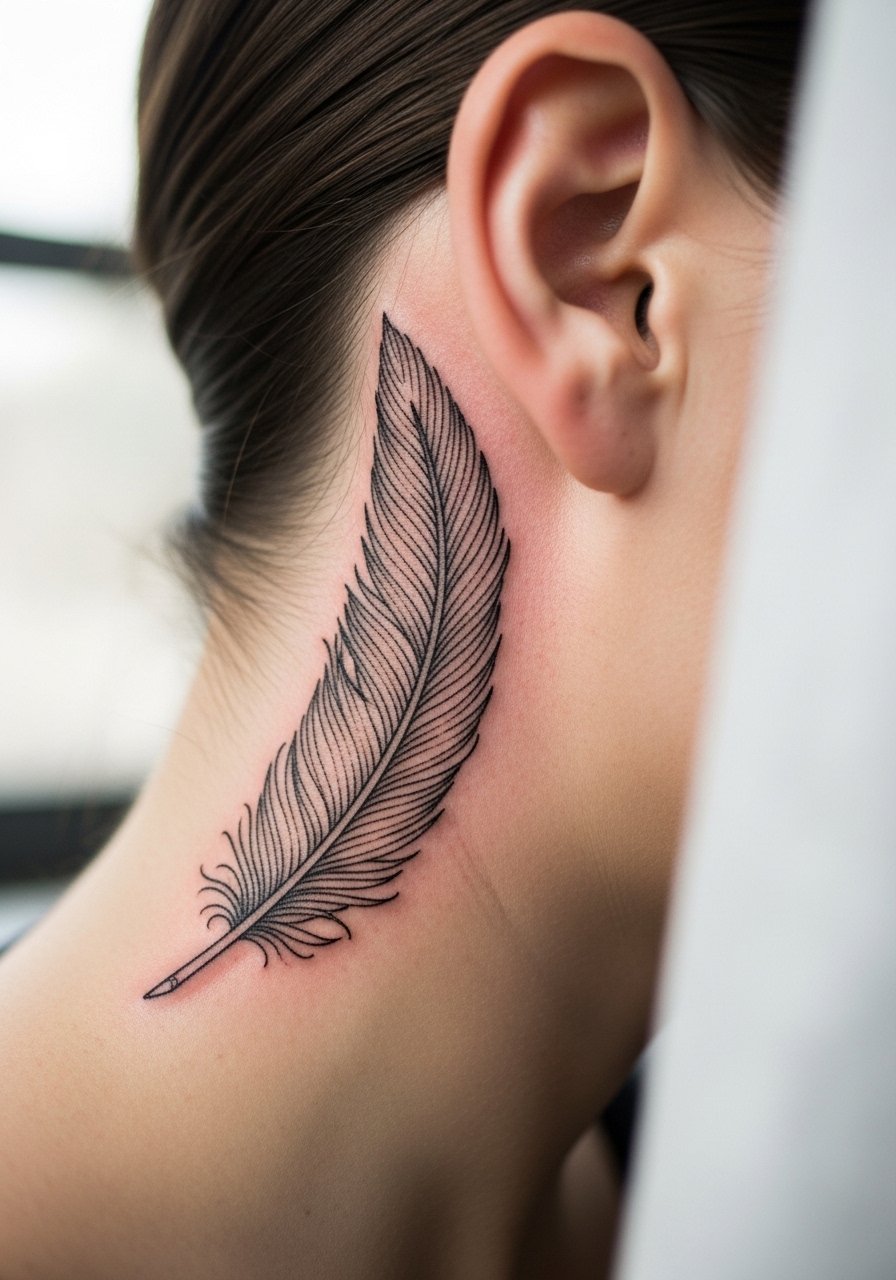
A fragment wing behind the ear reads intimate and subtle. This spot needs a careful artist who tattooed around hairlines before. Ask for a single-line feather with a defined anchor point and avoid dense cross-hatching. Sessions are quick but the area can be tricky because of tiny movements and hair growth. Keep in mind hair will sometimes cover the area unless you pull it back. For bookings search portfolios and local walk-in listings that show healed behind-the-ear work rather than only fresh photos.
14. Split-Sternum Wings with Script Band
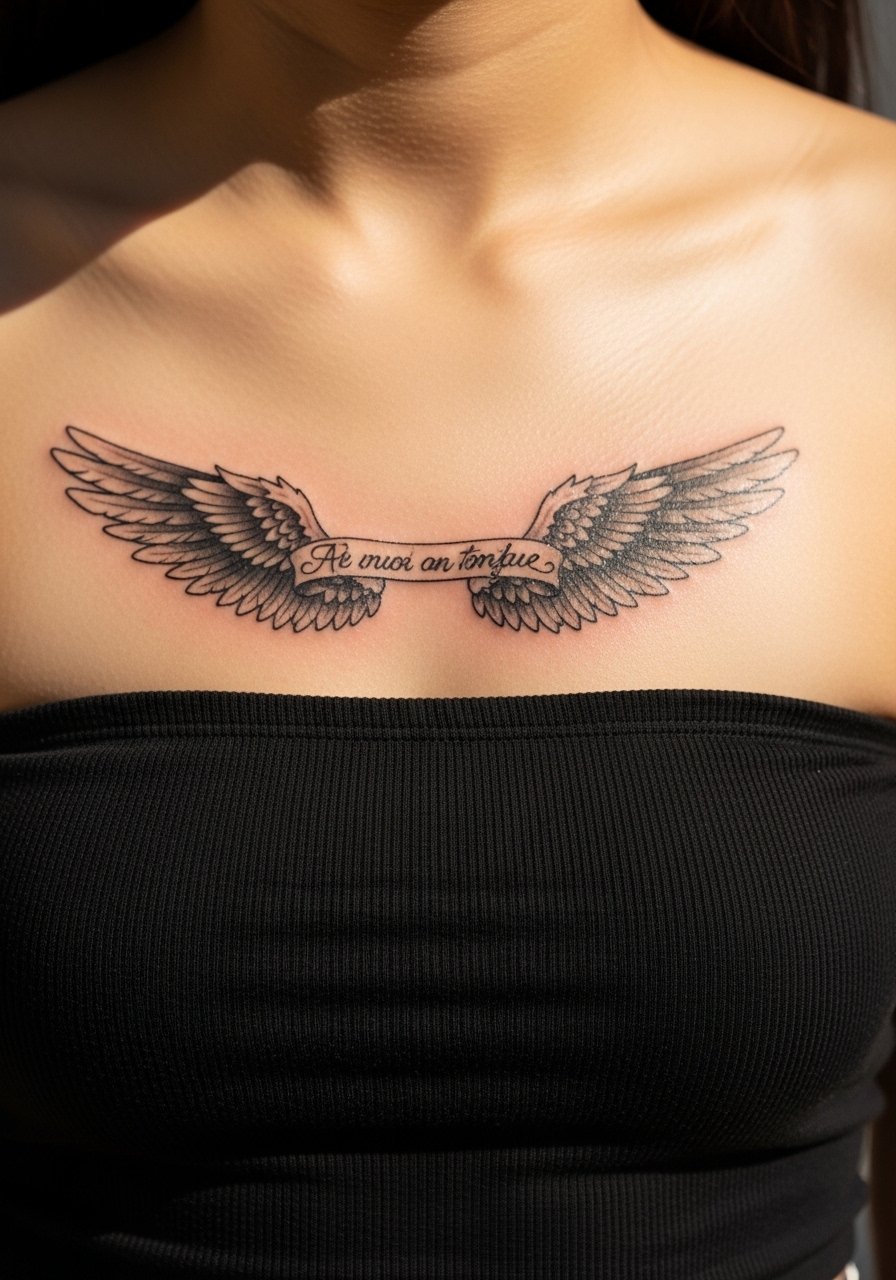
Split-sternum designs create symmetry but demand precise placement. The danger is misaligned script or wings that do not mirror due to body asymmetry. During consultation, bring a stencil preview and ask the artist to adjust while you stand and breathe. Sessions are sensitive and often split into two shorter appointments. Styling-wise, a bandeau or fitted sports bra shows the symmetry without exposing more than necessary. If the script involves cultural or religious text, consider respectful variations rather than direct replication.
15. Low Back Winglets for the Small of the Back
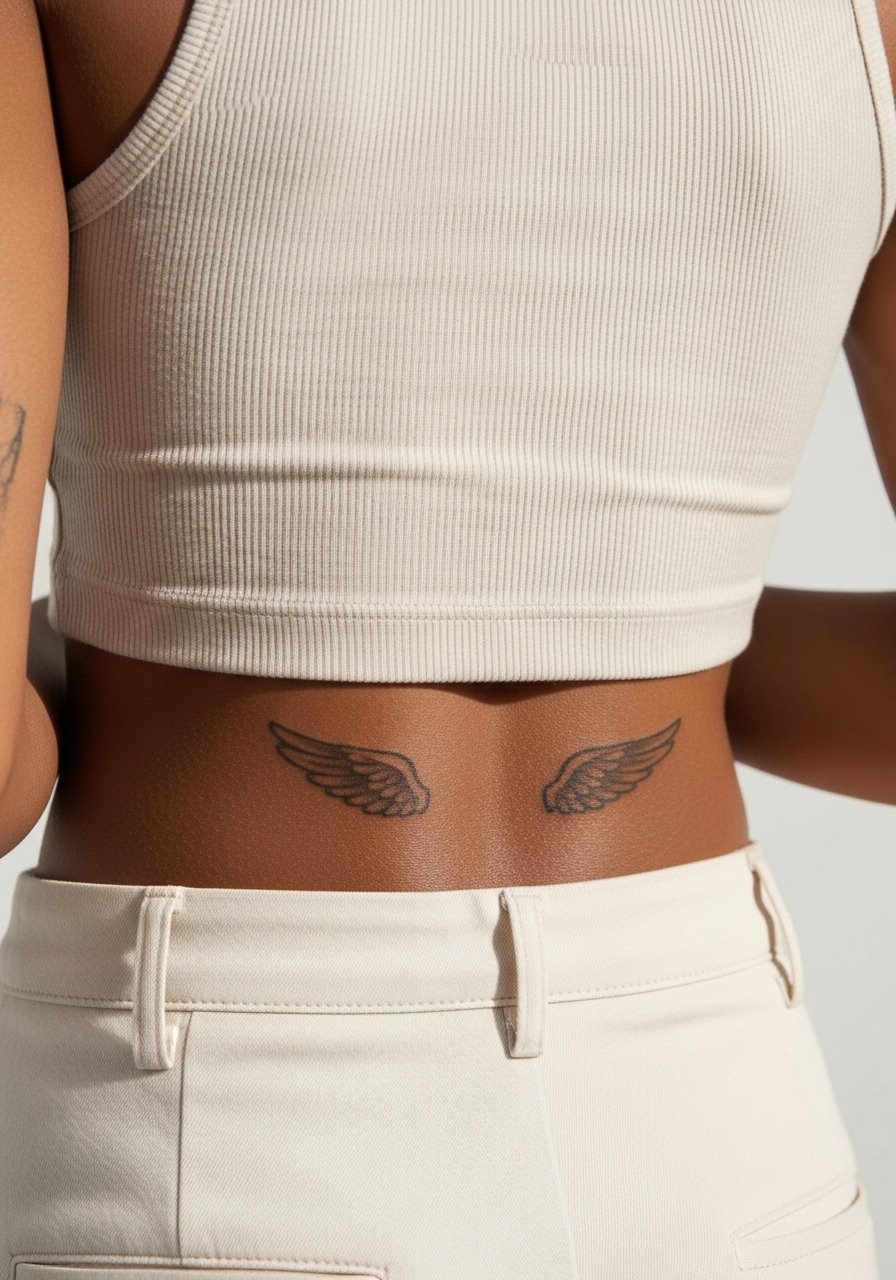
Low-back winglets can be playful and discreet. They sit over skin that bends frequently so heavy detail can blur. Ask for modest scale and clear separation between feather strokes. Sessions are short and usually low in intensity. Clothing during the session should be a tank top you can hike up slightly to reveal only the tattoo zone. Keep in mind some workplaces and situations still note low-back visibility when choosing swimwear or low-rise garments.
16. Forearm Sleeve of Layered Illustrative Wings
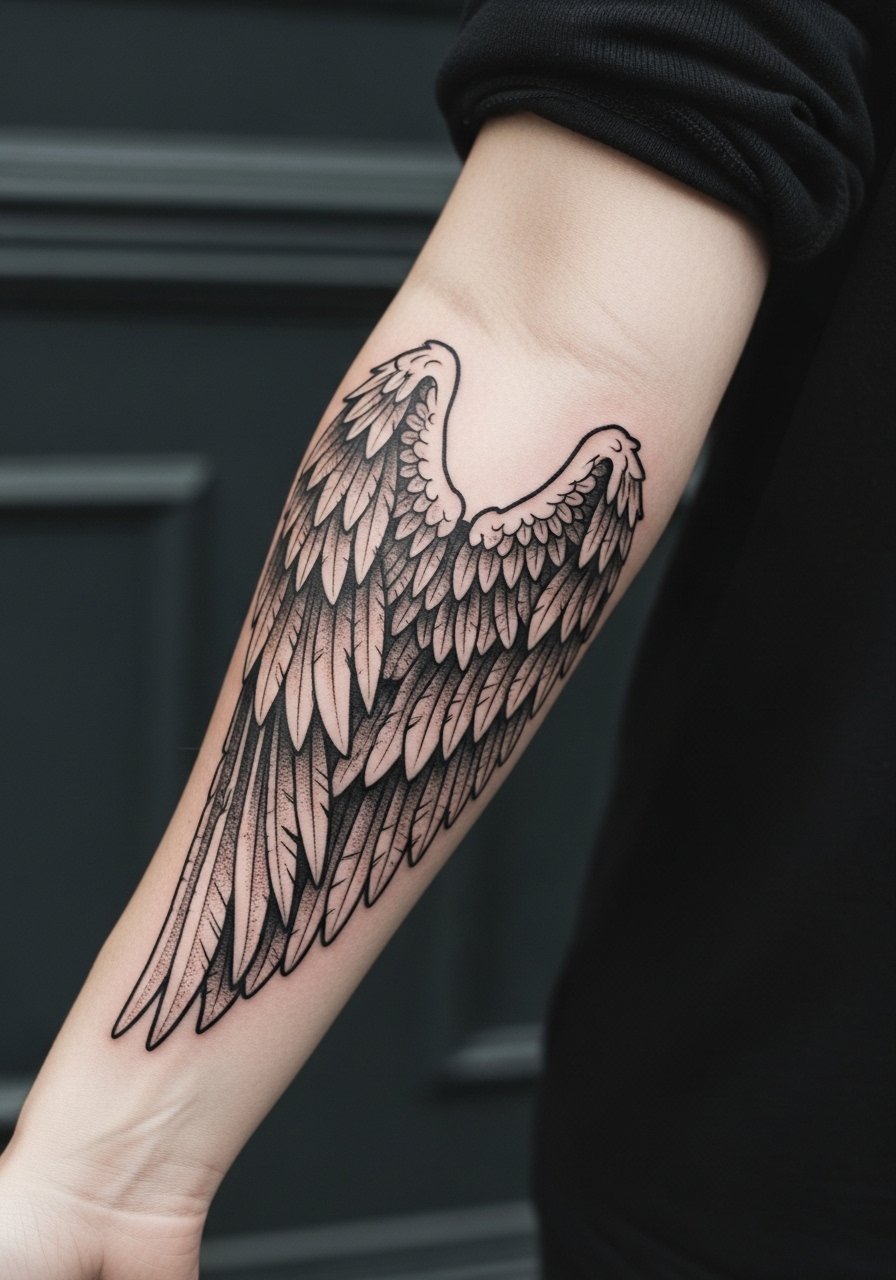
A forearm sleeve allows you to scale wings into a narrative. Plan for distinct layer depths and varied line weights so inner wings do not disappear under outer ones over time. The primary mistake is packing too much tiny detail into narrow spaces. Sessions are long and will likely be broken across two or three visits. For showing off, roll sleeves and wear a casual linen shirt to frame the sleeve when you want it visible. Expect a touch-up timeline of two to four years for fine details.
17. Collarbone-to-Shoulder Single Wing Accent
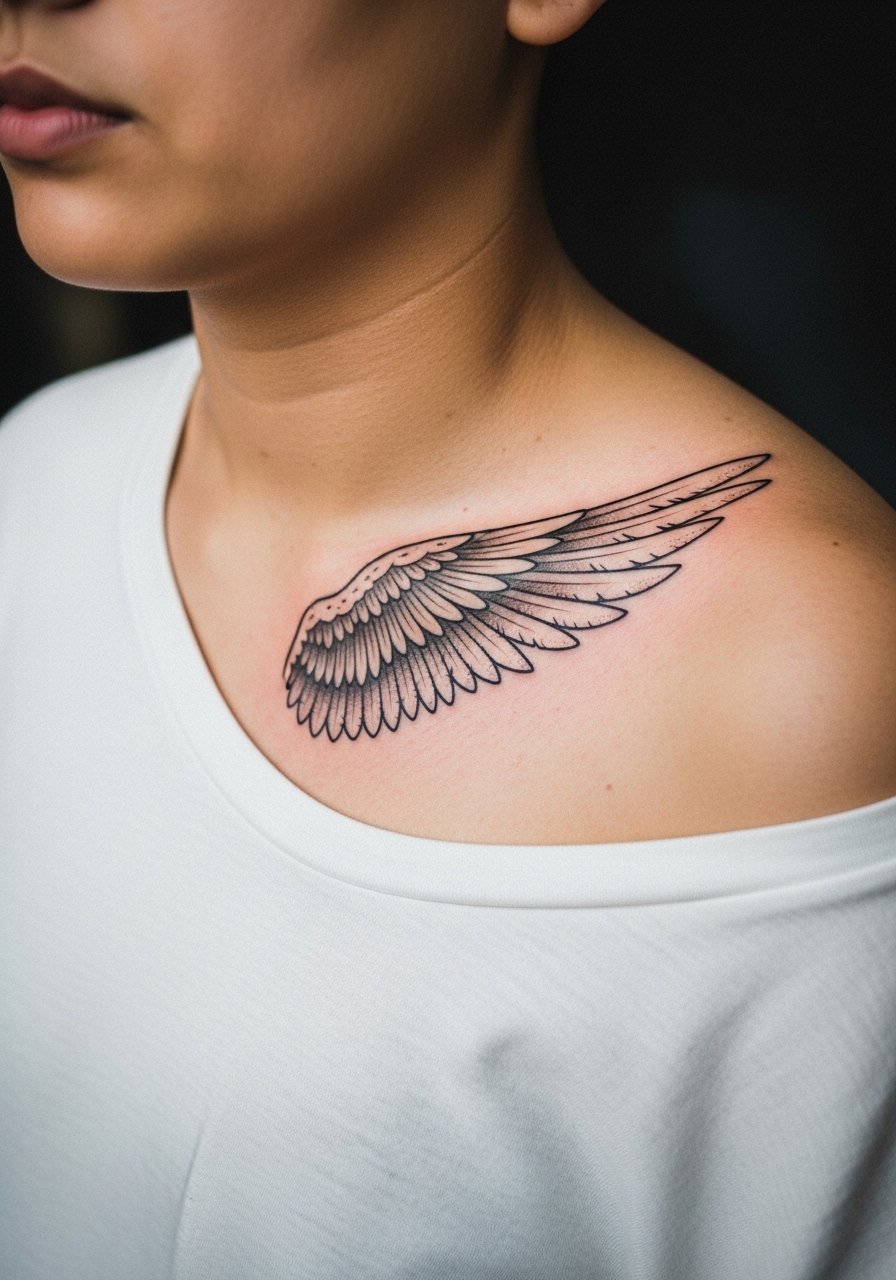
A single asymmetrical wing works as a statement without full-symmetry commitments. Ask your artist to prioritize flow from bone to muscle so the wing reads naturally when you move. Common errors include stopping the wing abruptly at the shoulder joint which makes it look unfinished. Sessions are moderate and often fit into one to two hours. Pair the look with an open-shoulder top to balance exposure. If the piece uses sacred iconography, consider small stylistic changes to avoid direct replication.
Frequently Asked Questions
Q: Will fine line angel wings blur faster than bold blackwork?
A: Fine line tends to blur sooner because the lines are narrower and the skin shifts. Bold blackwork reads clearly from a distance longer because saturation holds up better. That said, placement and sun protection matter more than style alone, so spacing and occasional touch-ups keep fine line designs readable.
Q: How should I prepare clothing-wise for a sternum or ribcage wings session?
A: Wear a fitted sports bra or a cropped top you can lift slightly for sternum and ribs. That keeps the area accessible without full disrobing and helps the artist maintain hygiene. A zip hoodie or button-front layering piece is helpful for layered recovery travel.
Q: Are behind-the-ear or collarbone wings risky for professional settings?
A: Behind-the-ear is easy to conceal with hair, while collarbone pieces peek through many necklines. If you work in conservative environments think about placement visibility and wardrobe choices. Many people choose smaller fragments or coverable positions to balance expression and career.
Q: How often will I need touch-ups for a forearm sleeve made of layered wings?
A: A forearm sleeve holds up well but expect to discuss touch-ups at year two to four for fine details, depending on sun exposure and how much friction the area sees. Keeping the sleeve shaded in sunlight and scheduling a refresh when lines soften preserves the composition.
Q: What are good discovery pathways to find artists who specialize in illustrative angel wings?
A: Look through local studio portfolios, check convention listings, and search niche hashtags that combine style and city. Directory sites and community threads help you filter for artists who show healed photos rather than only fresh pieces.
