
Fine line dotwork on the bicep is everywhere in saved boards right now, and the gap between what trends and what lasts shows up fast. Small stippled mandalas can look crisp for a year and then soften if they were packed too tightly. Pain, placement, and long-term touch-ups matter more than the initial photo. Read the first idea next to see a bicep layout that gives the dotwork room to breathe and keeps detail readable beyond year one.
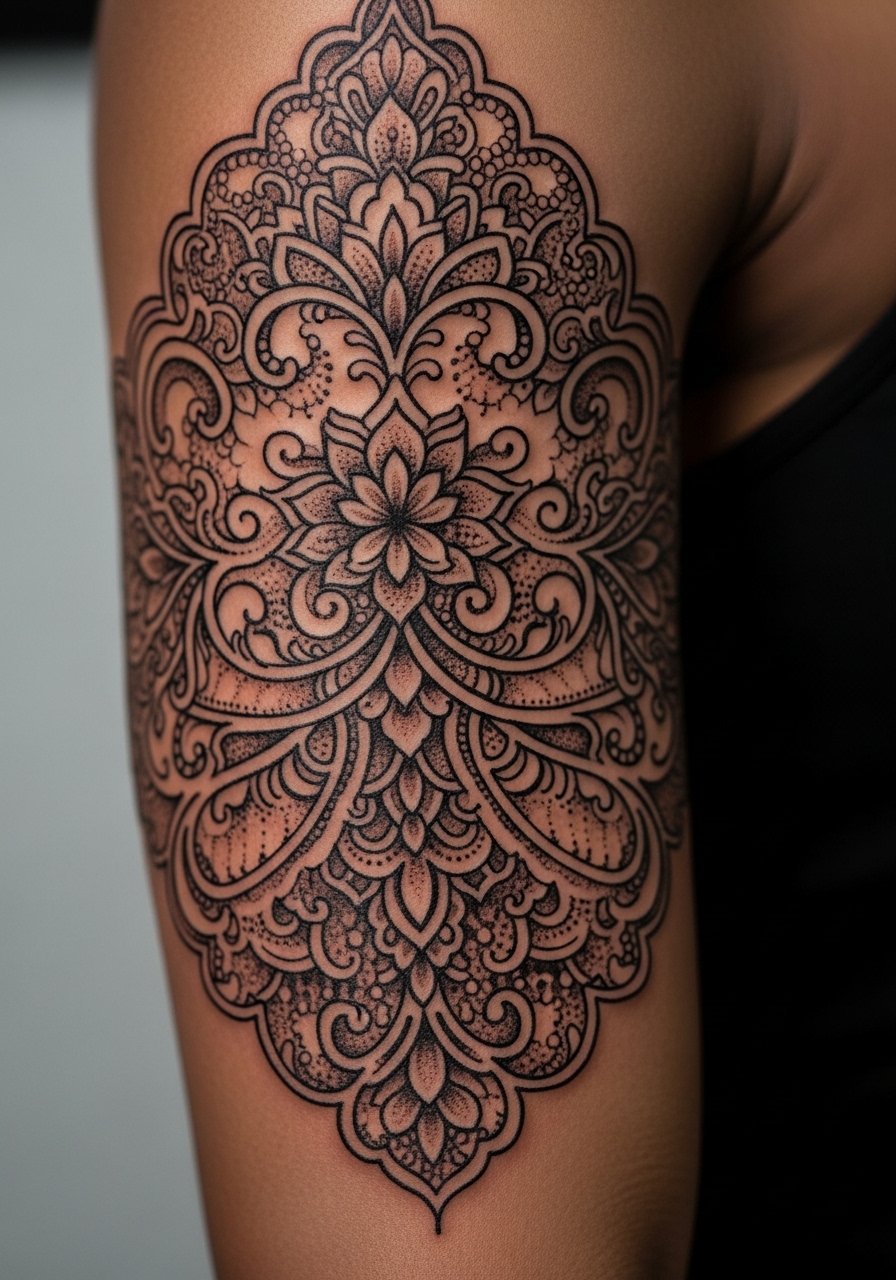
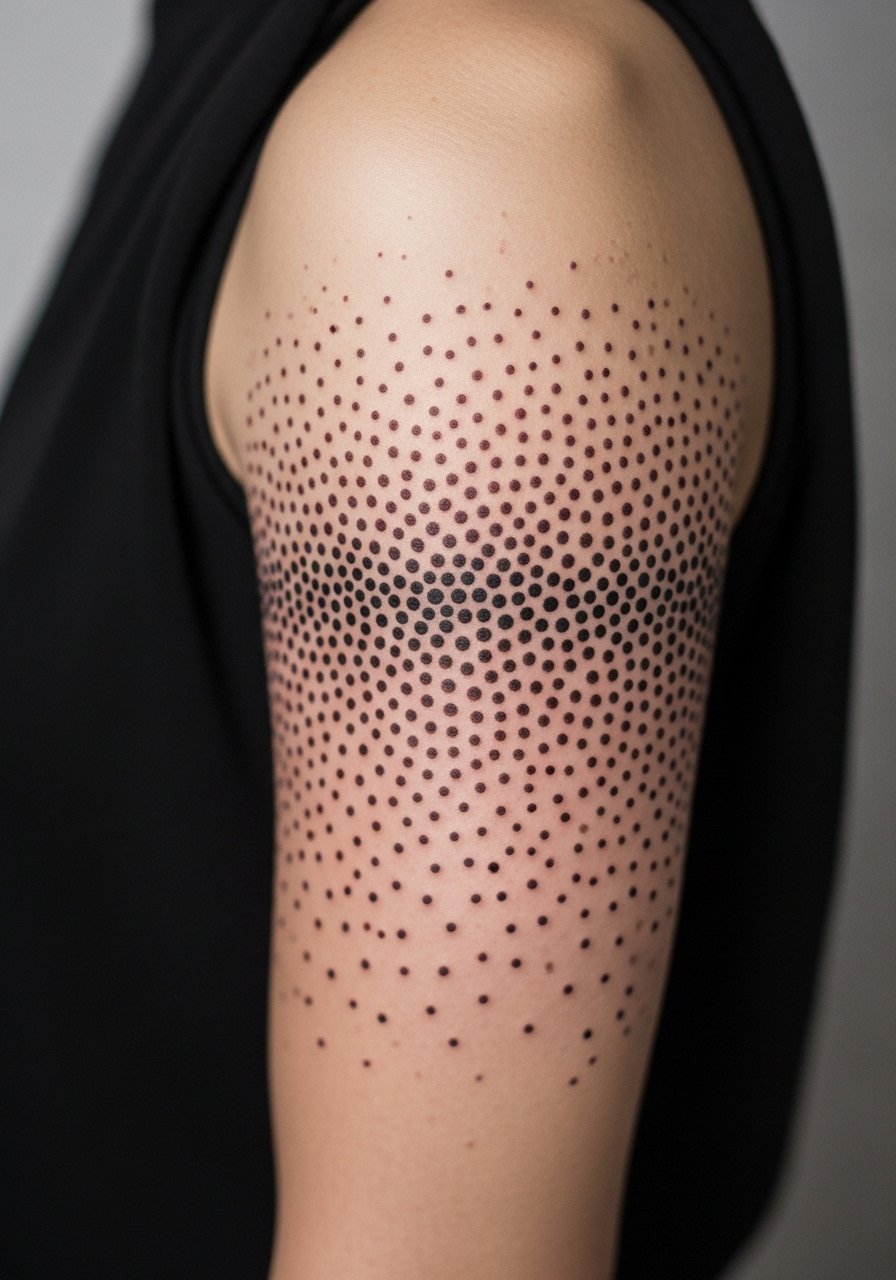
1. Inner Bicep Mini Mandala in Dotwork
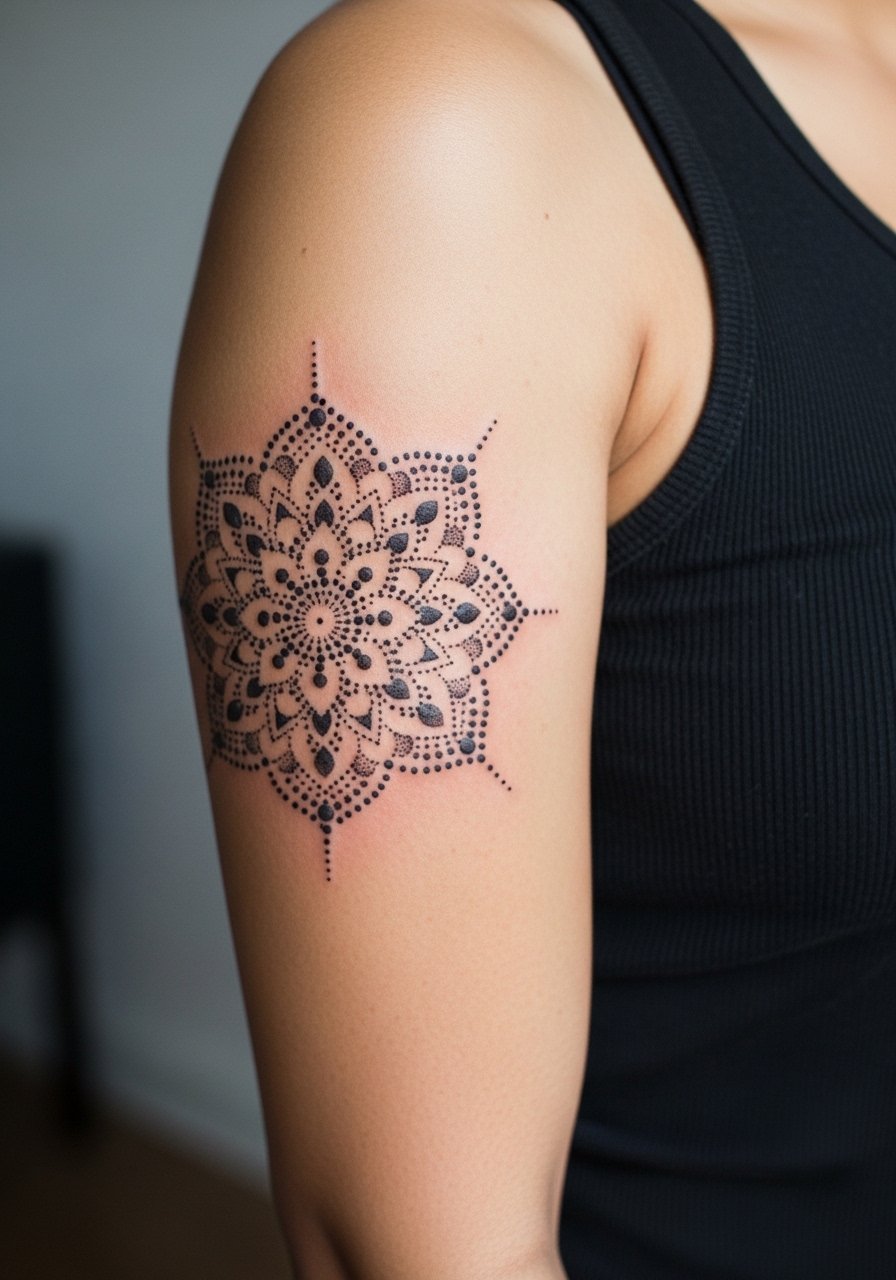
I recommend an inner bicep mandala when you want detail that reads in close, not across a room. Tell your artist you want open spacing between concentric rings and lighter stipple build-up near the center to prevent dense areas from merging as the piece ages. Expect the session to feel more tender than outer bicep work because the skin is thinner and pressure is more noticeable. Blowout risk is moderate here if the artist packs dots too deep. Plan for a touch-up around year two for high-contrast restoration. For the appointment, wear a loose tank top you can lift slightly without rubbing the healed area.
2. Outer Bicep Geometric Band with Stipple Shading
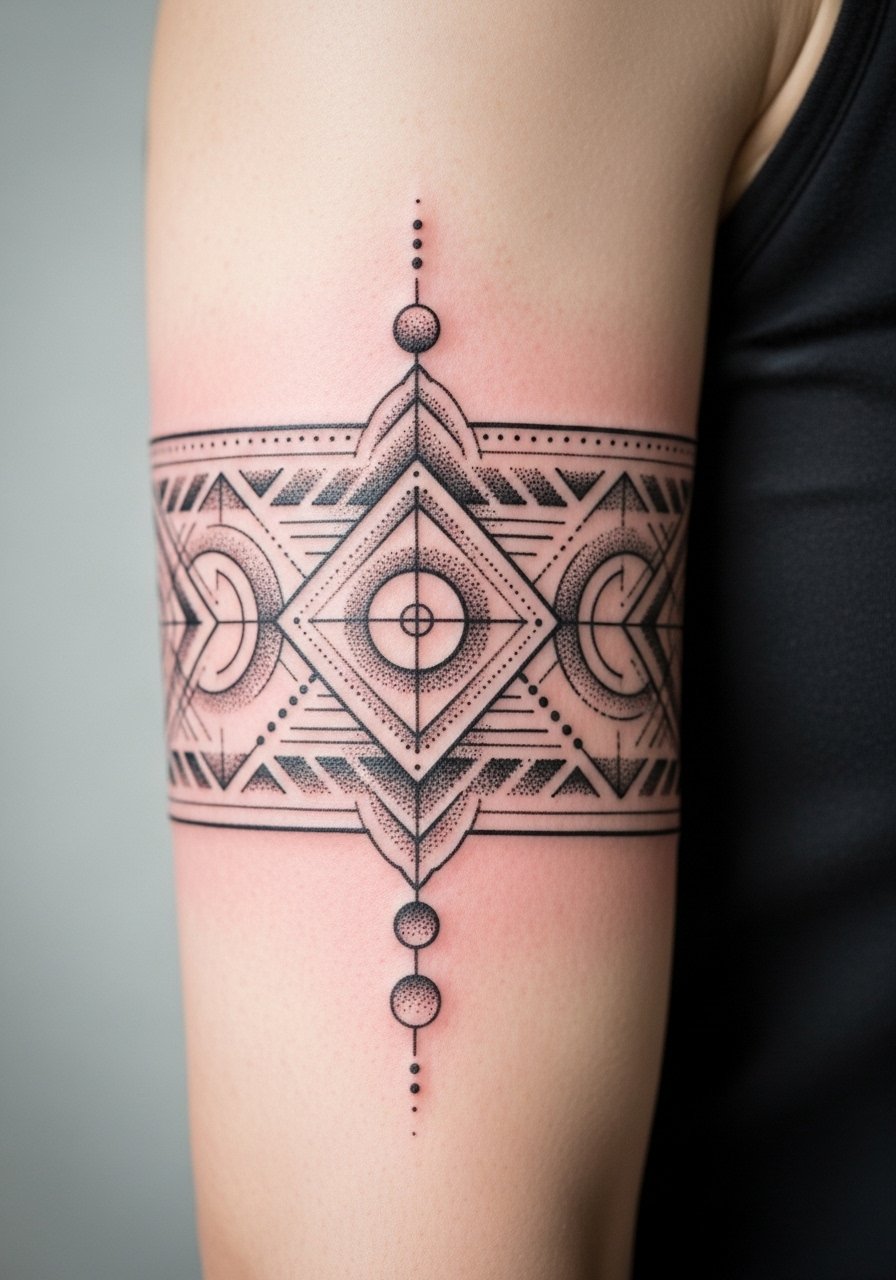
This bicep band works when you want something visible with clean linework and dot shading that holds from a distance. During consultation say you want clear negative space between motifs so the band ages with definition instead of blending into a single gray area. Outer bicep pain is lower than inner bicep, and most sessions finish within one visit unless you want dense saturation. A common mistake is shrinking the geometry too small which causes merge in tight curves after a few years. Expect touch-up at year three for most skin types. It pairs well with rolled sleeves and cropped tees that frame the band.
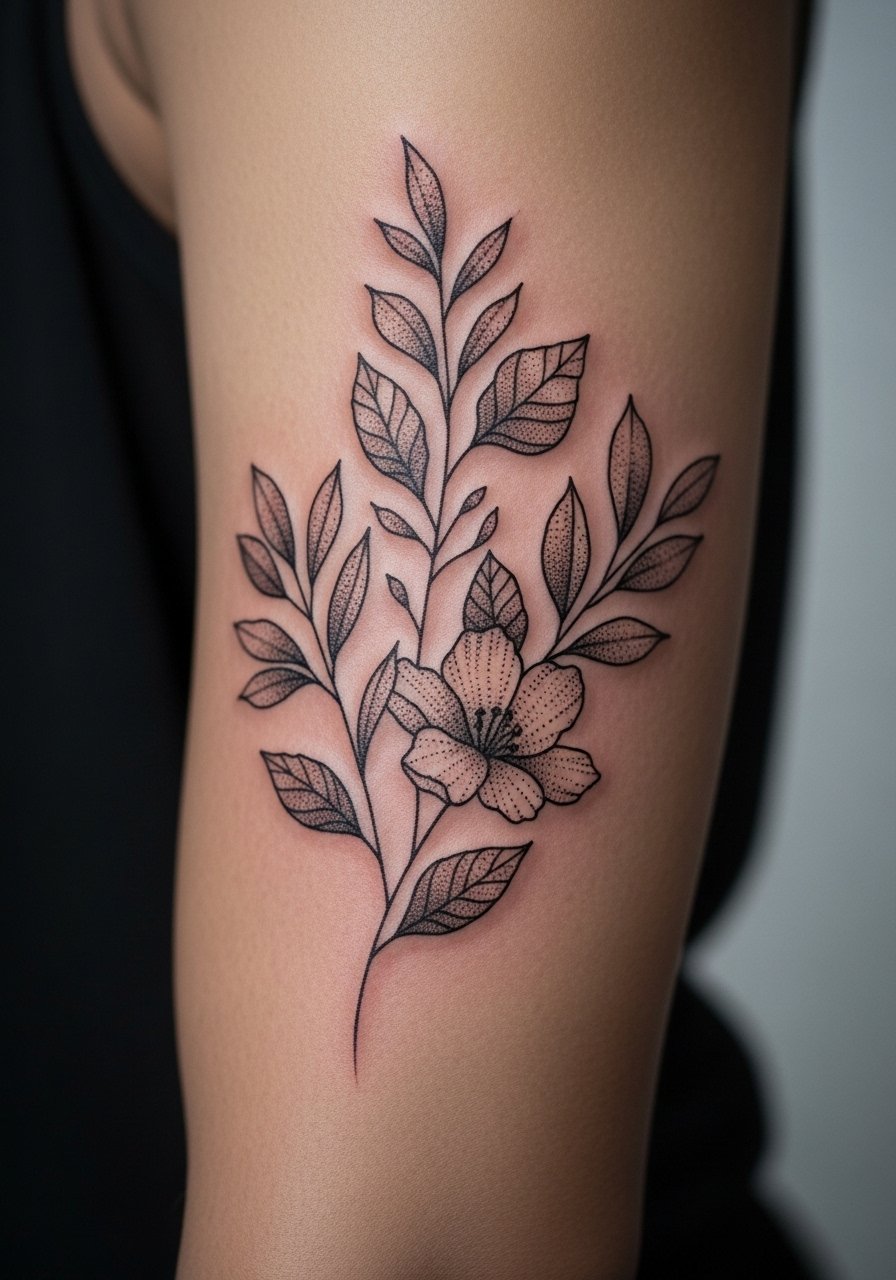
3. Stipple Floral Cluster that Follows Muscle Lines
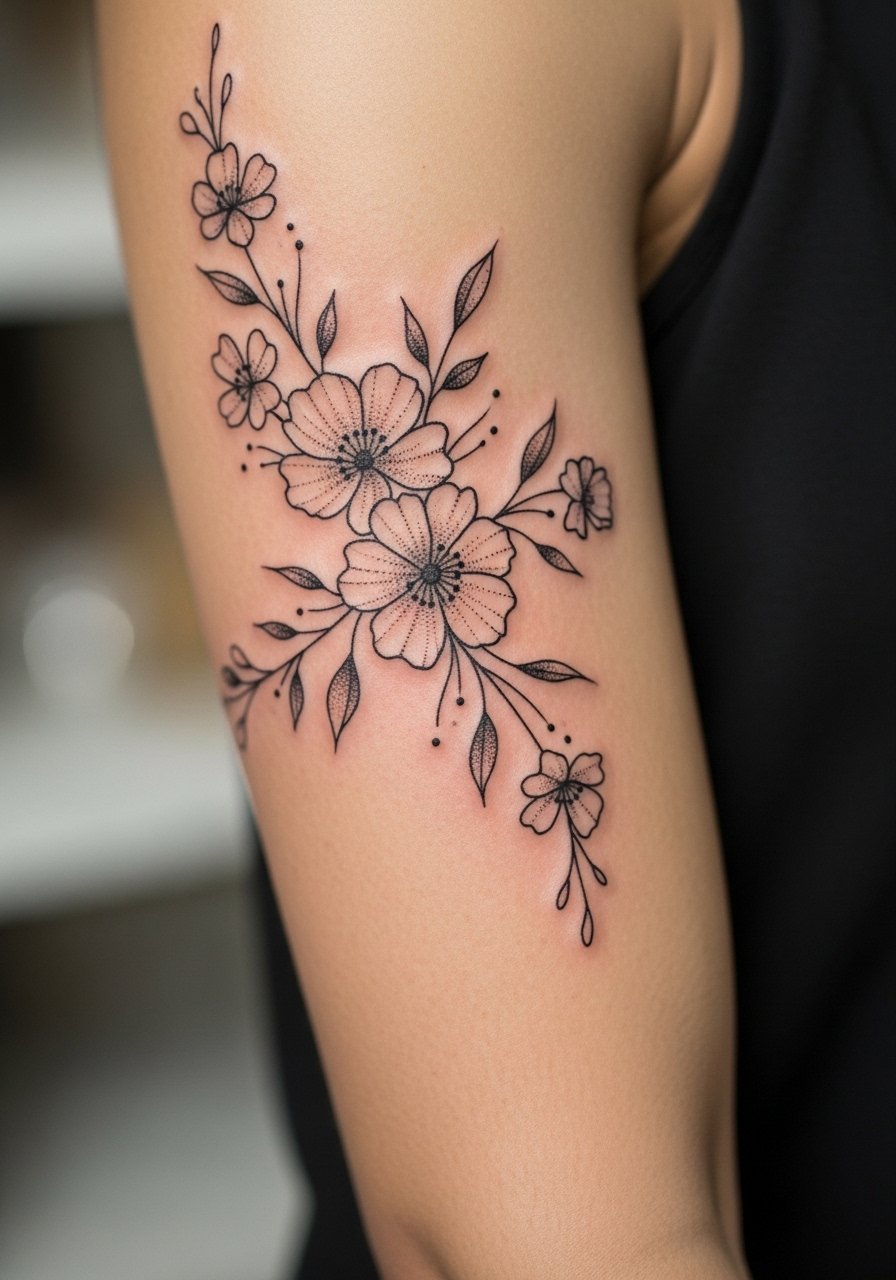
Place florals along the muscle grain so the design moves with the arm rather than against it. In consultation, ask the artist to map petals to your natural muscle arc so the dotwork highlights the bicep shape when you flex. The session feels like medium discomfort as the needle crosses raised muscle. The aging story is straightforward: stipple fades into softer gray but keeps form if spacing is generous. A mistake I see is forcing heavy central saturation in a floral cluster which turns muddy over time. When you want to show it off, a sleeveless blouse keeps attention on the curve without competing with bold prints.
4. Negative-Space Crescent with Micro Dot Accents
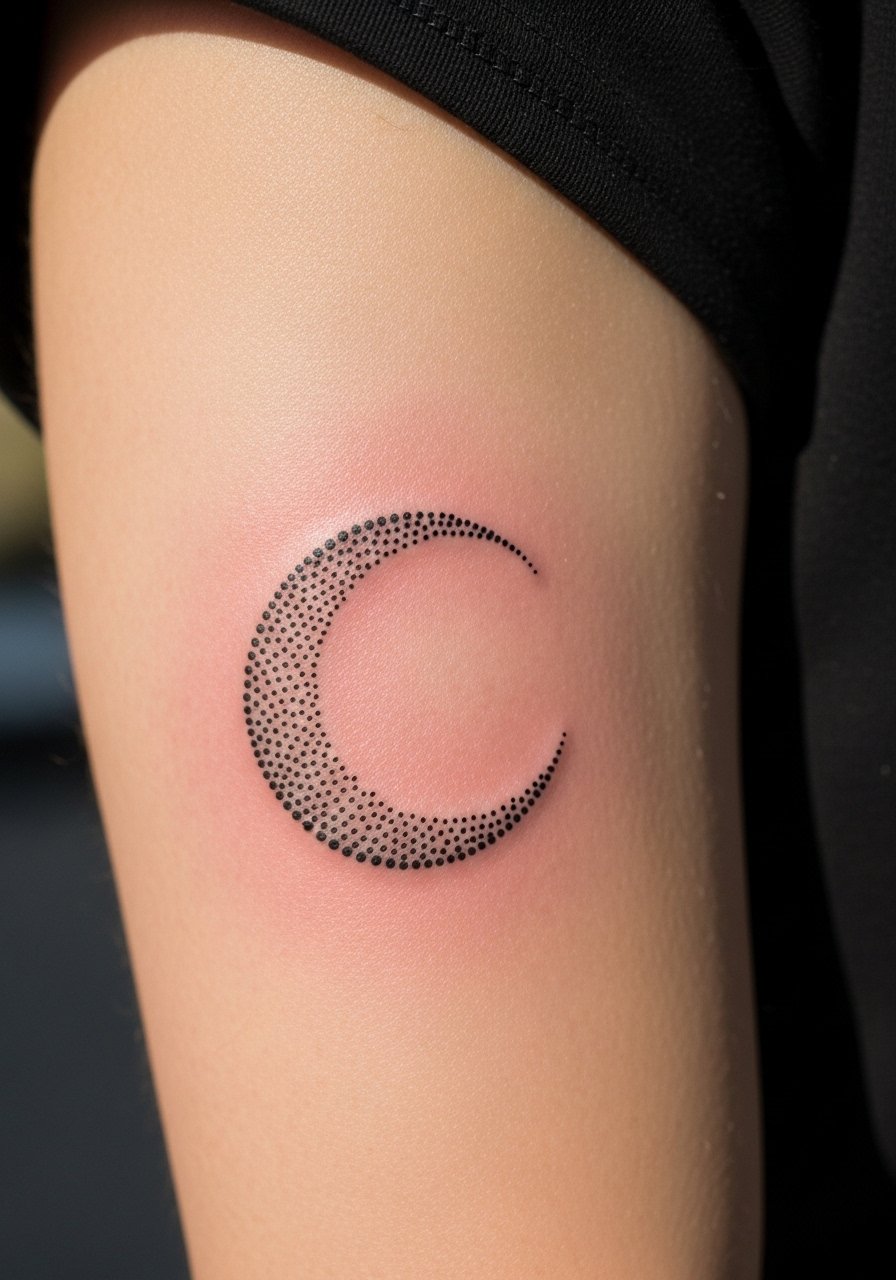
A negative-space crescent reads clean when the artist uses stipple to create a gradient that stops short of the edge. Ask for clear margins and slower dot buildup at the outer ring to avoid a hard gray edge that can look patchy later. This placement feels moderate in pain and usually wraps in a single session. The controversy around negative-space work centers on whether tiny dots near the edge are worth the risk. One camp says leave wide margins so the skin has room to settle. The other argues careful depth control lets you keep fine detail. Both sides matter, so get clear examples of healed work from your artist. Pair with short-sleeve shirts and a thin chain bracelet to balance the upper-arm negative area.
5. Portrait-Adjacent Linework with Dot Shading
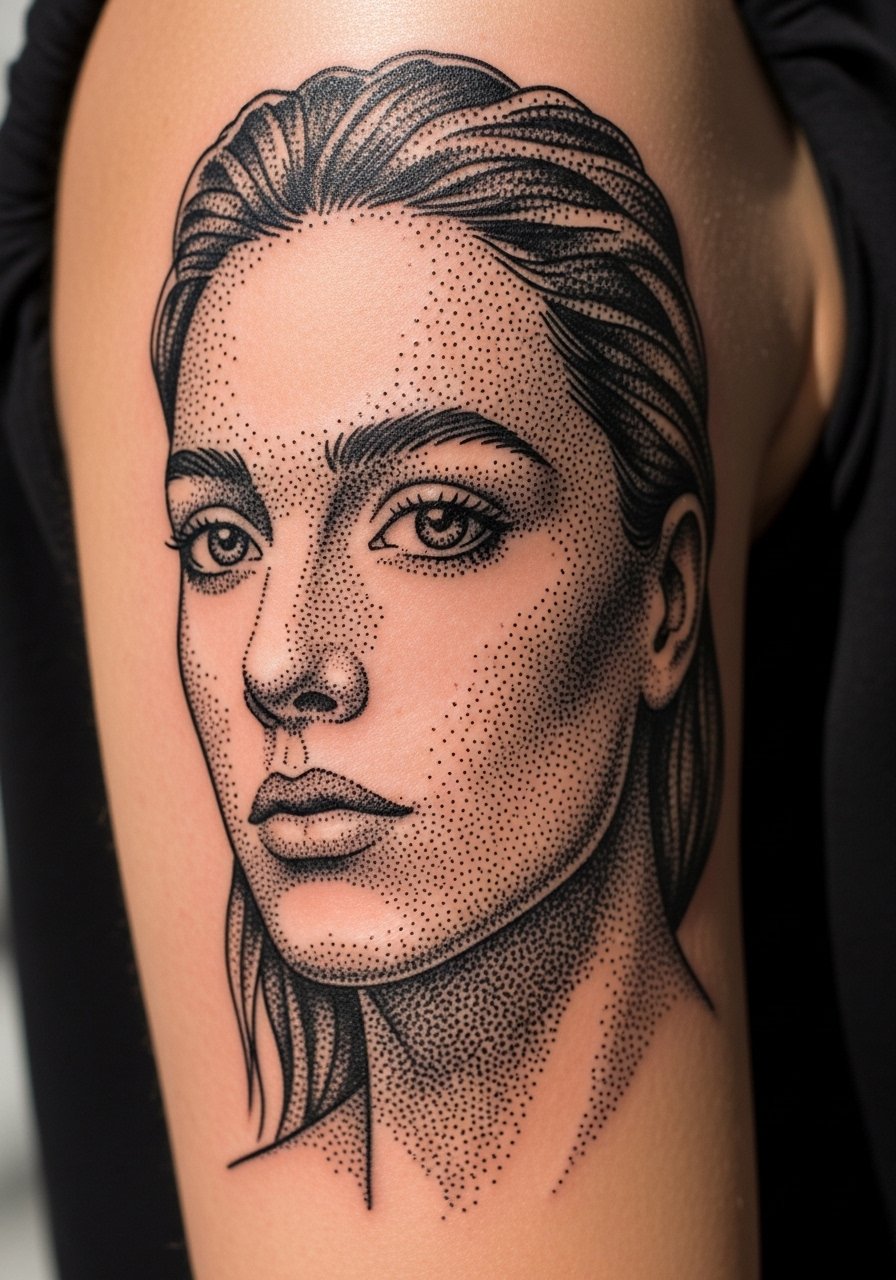
Dot shading around a face or figure gives dimension without heavy blackfill. During consultation bring reference photos that show lighting direction so stipple shadows match the original. This style is less about tight photorealism and more about impression through dot density. Sessions are longer and can be split. A frequent mistake is asking for too much tiny facial detail at small scale, which blurs over time. Expect the softer halftone look to mellow at six months and need a defined touch-up by year three. For session comfort, wear a button-down shirt you can pull aside so the artist has clean access.
6. Bicep-Wrap Mandala That Connects to Shoulder
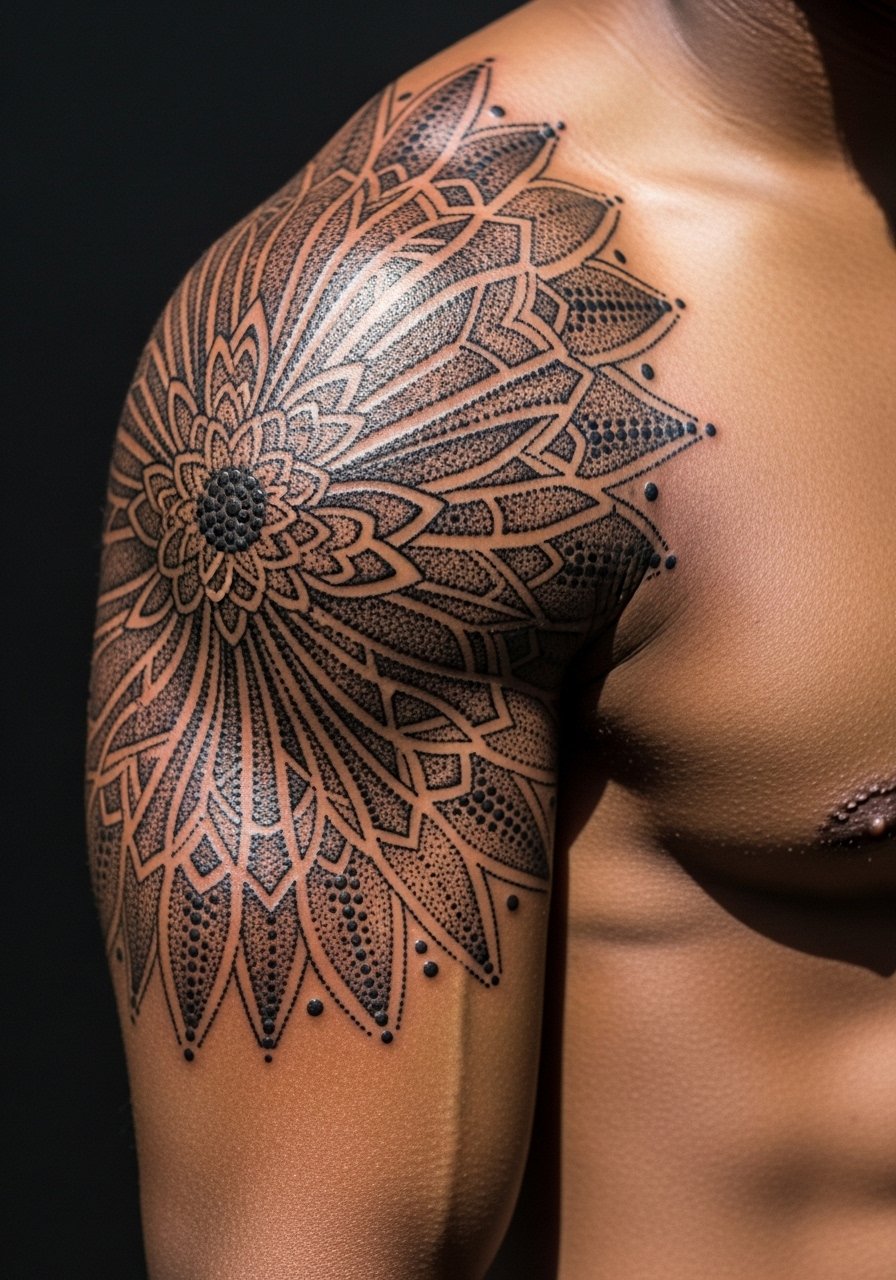
A wrap mandala that flows onto the shoulder reads like armor when spaced right. Tell your artist you want the densest stipple at the center and increasingly lighter dots as the piece moves outward to keep the edges airy. Sessions will likely require two passes when bridging the shoulder because curved areas take longer. A mistake is crowding motifs so the wrap becomes a single dark mass after a few years. The touch-up timeline is typically one to three years depending on exposure. For showing it off, an open-back tank or scoop shoulder tee frames the shoulder without hiding the wrap.
Studio Day Picks
The upper and inner bicep pieces above ask for different prep than forearm work, and a few targeted items smooth the session and the first week.
-
Stencil transfer paper kit. Lets you preview exact placement on skin before the needles start, helpful for symmetrical mandalas and wrap designs in ideas above.
-
Topical numbing cream. Applied as directed 30 to 45 minutes before reduces the sting on tender inner bicep spots without altering linework.
-
Thin protective film roll. Useful for covering the lower bicep area which gets friction from sleeves during the first few days of healing.
-
Fragrance-free gentle body wash. Cleans the area during showers without stripping delicate dotwork or causing early flaking on fine stipple.
-
Aquaphor healing ointment. Thin layers in the first 48 hours help retain moisture in fine line and dot shading while you sleep.
7. Script Ribbon with Stipple Highlighting
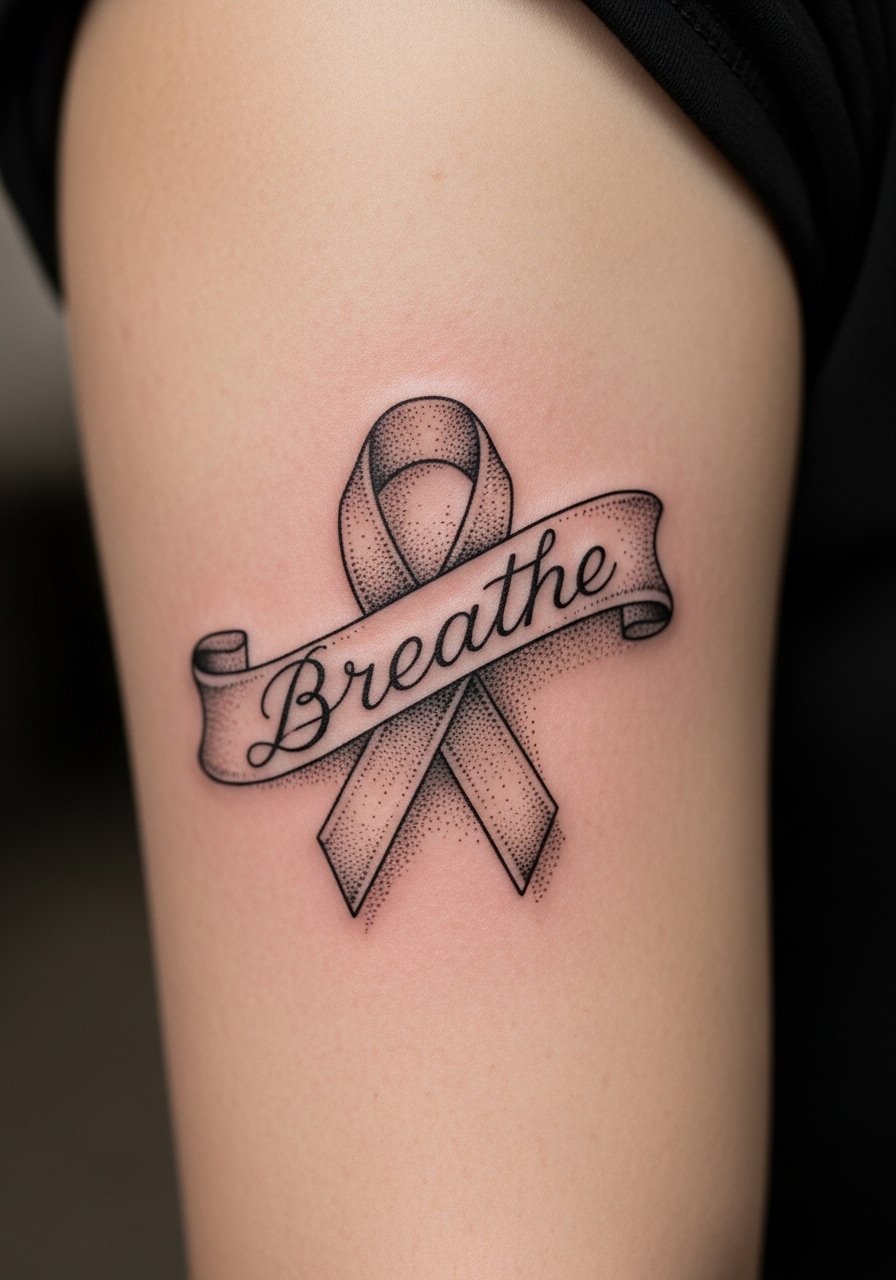
Script that follows a curved ribbon reads elegantly when the stipple is used as a soft shadow beneath lettering. Bring a clean, scaled reference and specify letter size so the artist knows the minimum line weight to maintain legibility over time. The bicep is forgiving but tight script will soften in two to three years. A common error is requesting ultra-thin strokes that vanish on darker skin tones. Expect a short session for small script and a longer one for ornate ribbons. Pair with layered short sleeves or a delicate pendant that sits above the bicep when you want a minimal jewelry accent.
8. Celestial Cluster with Dot Constellation Trails
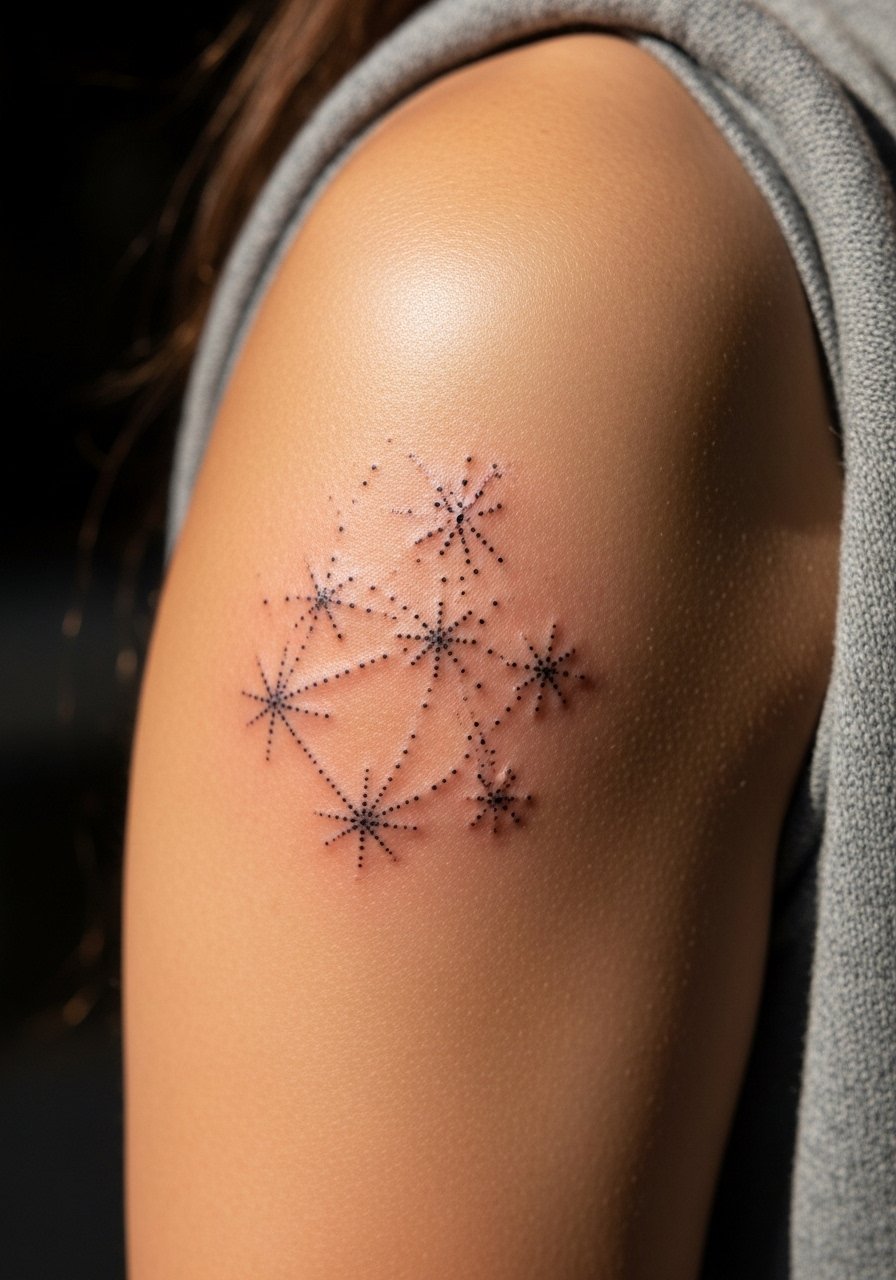
Small stars and dotted trails perform best when spacing is deliberate so points do not merge. Tell your artist you want dots separated by at least three millimeters in tighter areas to prevent small stars from joining into indistinct smudges. The session is quick for minimal clusters, but adding stipple halos increases time. This design ages well if kept airy. A mistake is overpacking glow effects which dull into gray patches. Touch-ups are usually cosmetic and occur around year three. This piece looks great with rolled-up sleeves or a short-sleeve linen shirt.
9. Botanical Line Cluster with Stipple Veins
Botanical line work benefits from stipple used sparingly to suggest shadow instead of filling entire leaves. In consultation, ask for lighter vein stippling and preserve negative space inside each leaf to keep shapes distinct as the piece heals. The bicep tolerates longer sessions but expect some soreness for a day or two. A common mistake is heavy leaf fill that ages into flat gray. If you plan to show the art often, wear a rolled-sleeve button shirt to frame the cluster while keeping the piece visible.
10. Micro Dot Animal Silhouette on Inner Bicep
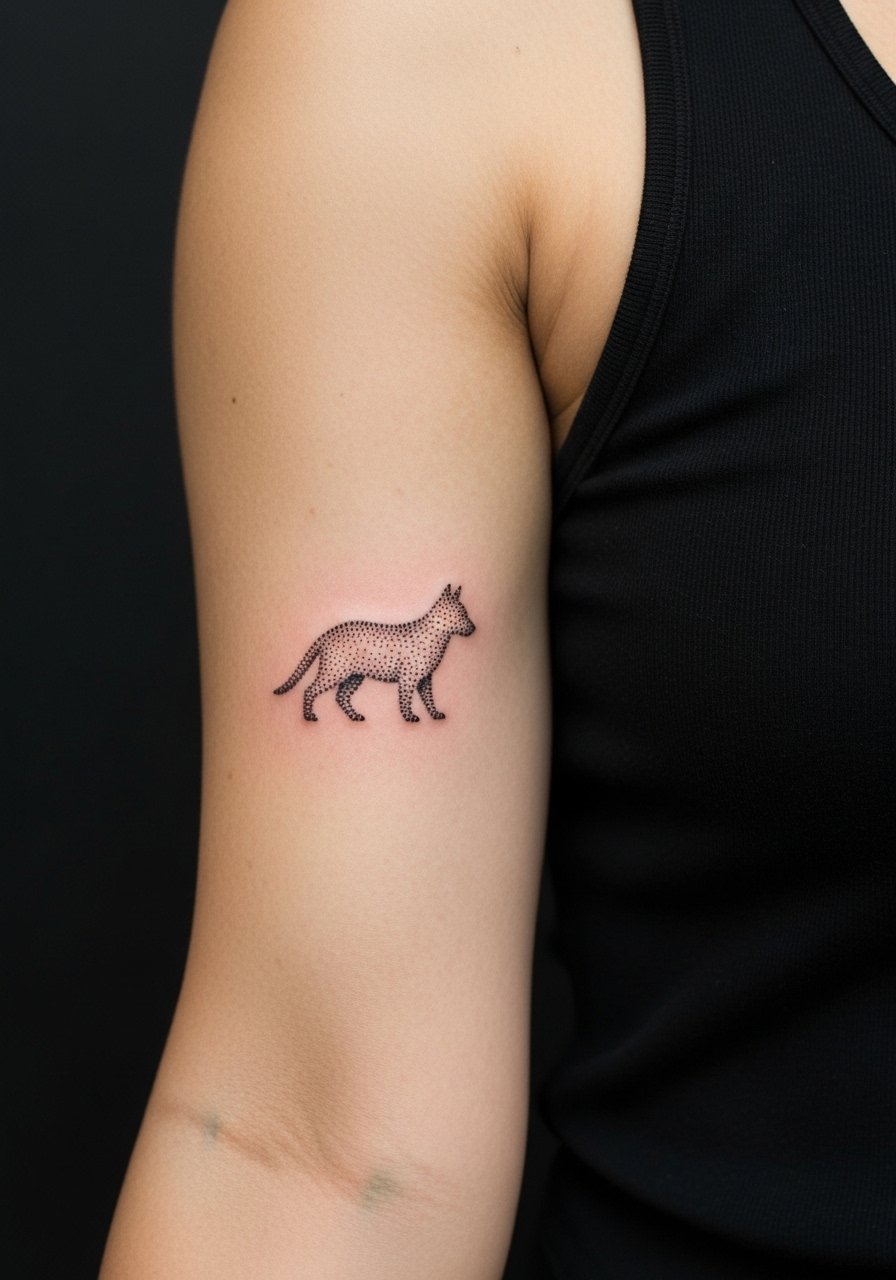
A tiny animal silhouette done with dots reads best when scaled to be appreciated up close. Tell the artist you want heavier outline contrast with internal stipple sparingly placed for depth. The inner bicep makes this more intimate and more sensitive during the session. The main error is shrinking the silhouette too small which causes the shape to lose definition in a year. Expect a touch-up timeline similar to other fine pieces, often around year two. Professional considerations apply for visible inner bicep pieces if you work in conservative settings.
11. Lace-Inspired Dotwork Band Near Elbow

Lace bands near the elbow need break points so the pattern does not collapse with joint movement. Ask for slightly larger motifs where the bicep curves toward the elbow to avoid compression artifact as you bend your arm. Pain increases near the joint but sessions are usually short. A frequent mistake is uniform tiny dots across the band which can blur into a gray stripe. Plan a touch-up around year two for crisp motif edges. For outfits, a three-quarter sleeve top keeps the lace visible without tugging on the lower bicep.
12. Hourglass Negative Space with Stipple Motion

An hourglass negative space reads as movement if stipple is oriented to follow the implied flow. During the consult, request directional stippling rather than random dots to get that motion effect. The bicep placement makes this a medium-pain session and usually finishes in one appointment. Mistakes involve inconsistent stipple direction which reads messy after healing. Timelines for touch-ups depend on how much sun exposure the area receives. Pair the piece with short sleeves or a cap-sleeve top to let the negative space show without competing patterns.
13. Ornamental Filigree with Fine Dot Embellishments
Filigree needs rhythm and alternating weight to avoid looking like a textured block later. Tell the artist to alternate thin linework with open stipple fields and reserve dense dots for small accents only. The session feels comfortable overall but intricate fills add time. A common error is pushing too much density into the center, which disappears into gray. Expect touch-ups at year three for restored contrast. If you want a polished evening look, pair with a cap-slee cocktail dress that hits above the bicep.
14. Interlocking Knotwork with Micro Dots
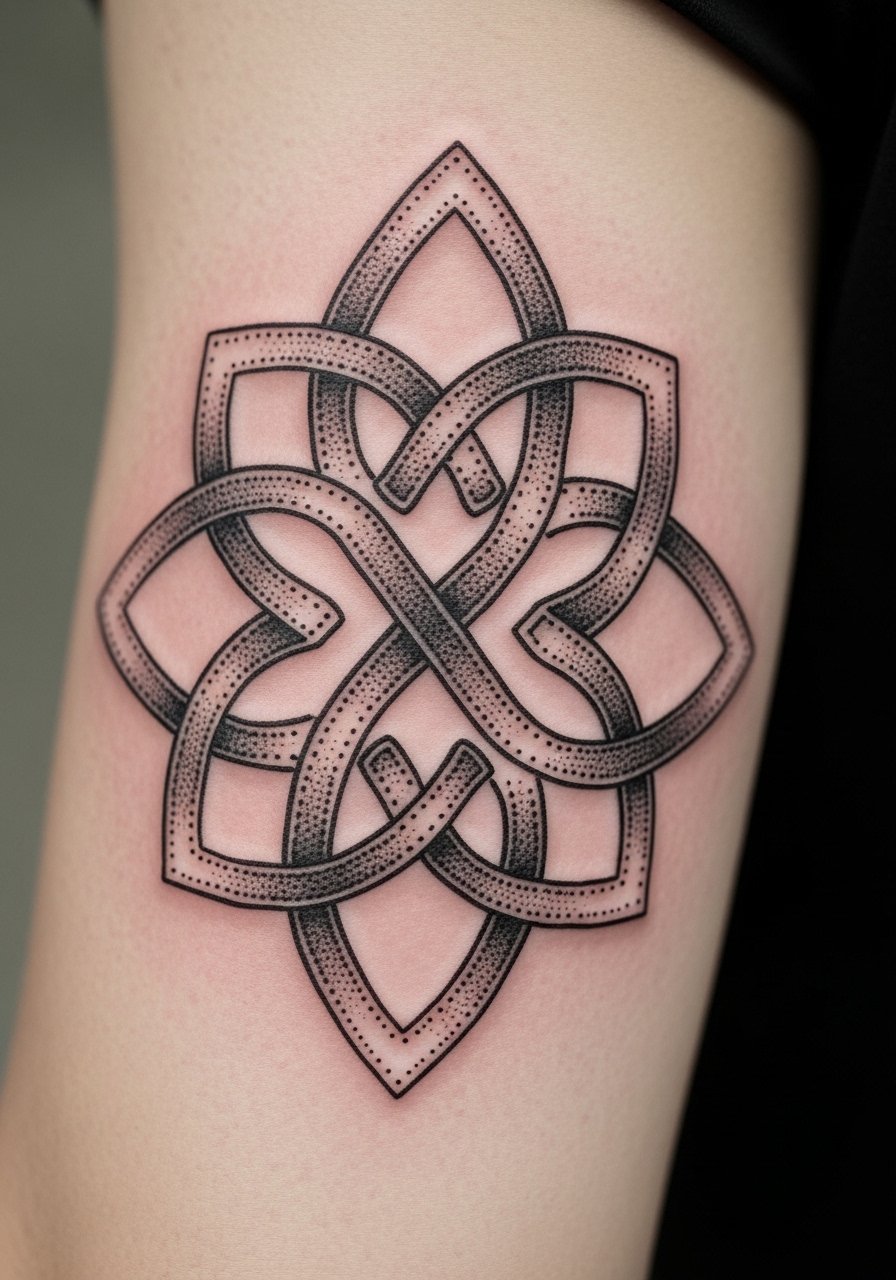
Knotwork benefits from clear over-under line distinction and tiny dots at the junctions to suggest depth. In consultation ask for slightly heavier contrast where strands cross so the pattern keeps clarity as it softens. Sessions take longer for continuous knot bands. The biggest mistake is keeping all lines the same tiny weight which makes crossings indistinguishable later. Touch-ups are commonly needed after two to three years. This design is a classic if you want subtle complexity with a low visibility commitment.
15. Half-Sleeve Dotwork Gradient That Stops at Mid-Bicep
A half-sleeve gradient uses stipple density to move from heavy saturation near the shoulder to open dots approaching the mid-bicep. Specify the fade plan in the consult so the artist knows the ring widths for dot spacing. This is a multi-hour session in one or two visits depending on coverage. One controversy here is how much saturation equals longevity. One camp says heavier early saturation preserves contrast longer. The other camp warns that over-saturation builds scar tissue that blurs detail. Choose the approach that matches the artist's healed portfolio. For the session, wear a button-down shirt you can slide off without pulling on the fresh ink.
16. Geometric Rose with Stipple Petal Shadows
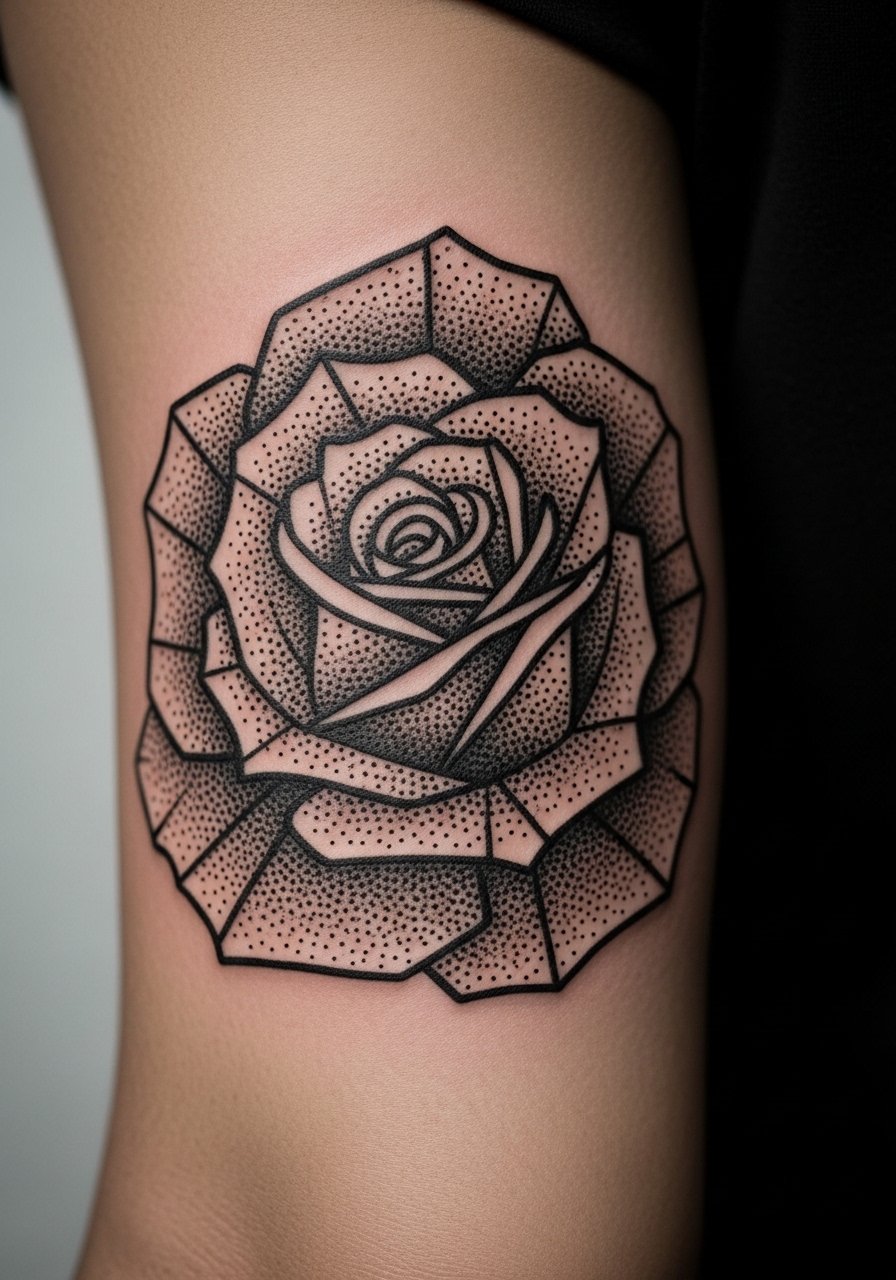
Combining geometry and botanical elements calls for clear hierarchy between the rose outline and the geometric frame. Tell your artist to keep the rose outline slightly stronger and use stipple only inside petals as shadow. The bicep handles the detail well but avoid tiny inner petal dots that will merge. The session is medium length and most people report soreness for two days after. A common mistake is blending the geometric frame too tightly to the petals which reduces legibility. Wear a loose linen tee to the appointment so fabric does not rub the fresh area during travel.
17. Minimalist Dot-Chain Cascading Toward the Elbow
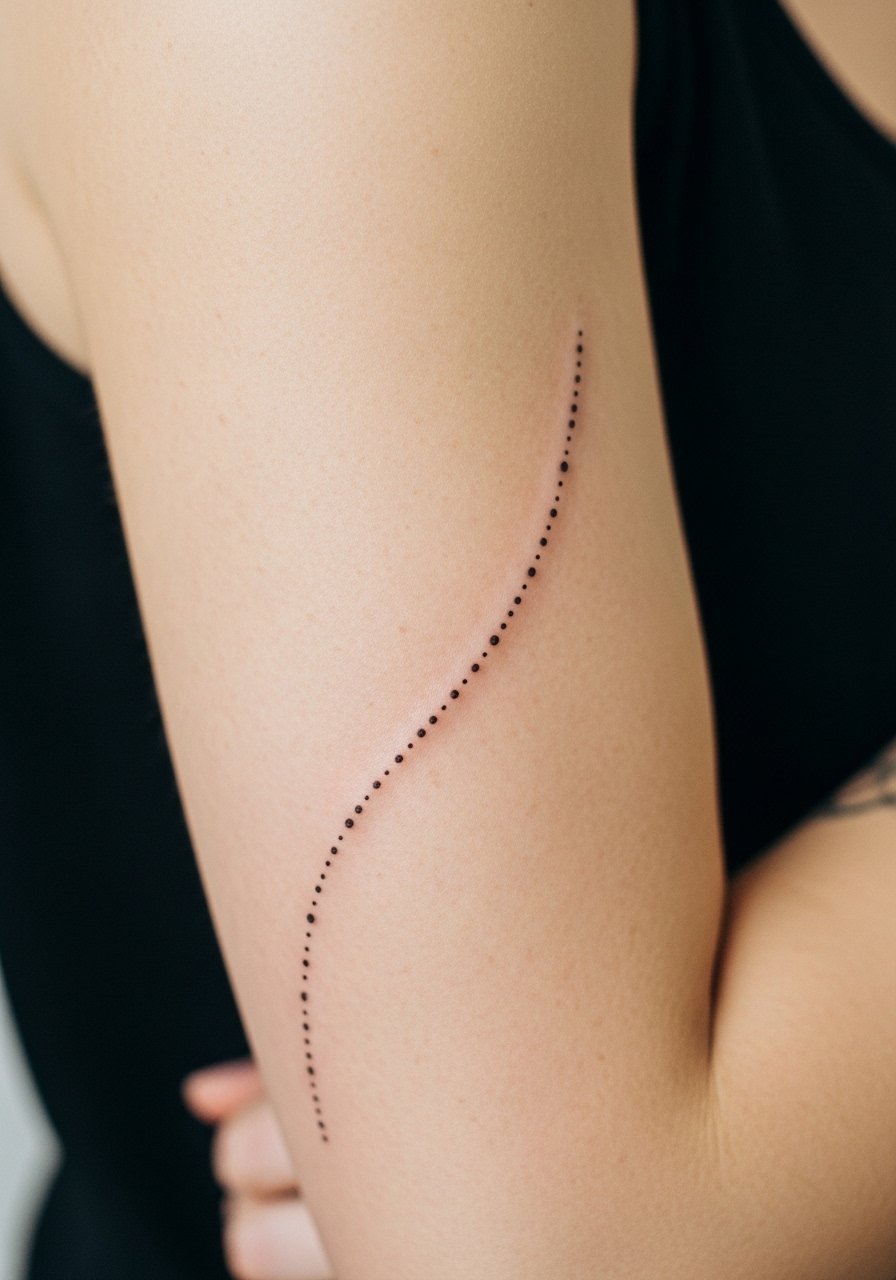
A minimalist dot-chain works when you want subtle movement that reads in person. Ask for consistent dot spacing and slightly larger terminal dots so the chain keeps rhythm as it softens. The lower bicep toward the elbow is more sensitive, so session discomfort can spike near the fold. People often regret requesting uneven spacing which shows quickly as dots shift with skin elasticity. Expect small touch-ups around year two if you want crisp points preserved. For showing it off casually, a short-sleeve tee keeps the chain visible without fuss.
Frequently Asked Questions
Q: How does dotwork on the inner versus outer bicep compare for longevity and touch-ups?
A: Inner bicep skin is thinner and experiences more movement, so dense stipple tends to soften faster there. From what I have seen, outer bicep pieces usually keep contrast longer. Expect touch-ups sooner on the inner side, often around year two to three depending on exposure and placement.
Q: Will densely packed dotwork always blur into a gray block over time?
A: Not always. If the artist spaces dots and varies density strategically the form can remain readable for years. The common problem is overpacking without negative space. Ask to see healed examples of similar scale and density from the artist so you know their healed results.
Q: Are there styling choices that help dotwork bicep tattoos read better in everyday outfits?
A: Yes. Sleeveless tops and rolled sleeves frame the bicep and let stipple and linework show without distraction. For session comfort and access, a loose tank top makes removal and dressing easier without rubbing the fresh area.
Q: Should I expect more pain for a large wrap mandala compared with a small dot-chain?
A: Larger wrap pieces take longer and cover curved skin, so they usually feel more taxing overall. Short pieces like a dot-chain concentrate discomfort into less time. Break long sessions into parts if you are worried about pain or swelling.
Q: How do I find an artist who actually understands dotwork on biceps without relying on social handles?
A: Use discovery paths such as local shop directories, convention portfolios, and forum threads where people post healed photos. Search hashtags that show healed work and check multiple healed images rather than just fresh shots. Ask studios for healed portfolios and inquire about their touch-up policy before booking.
