
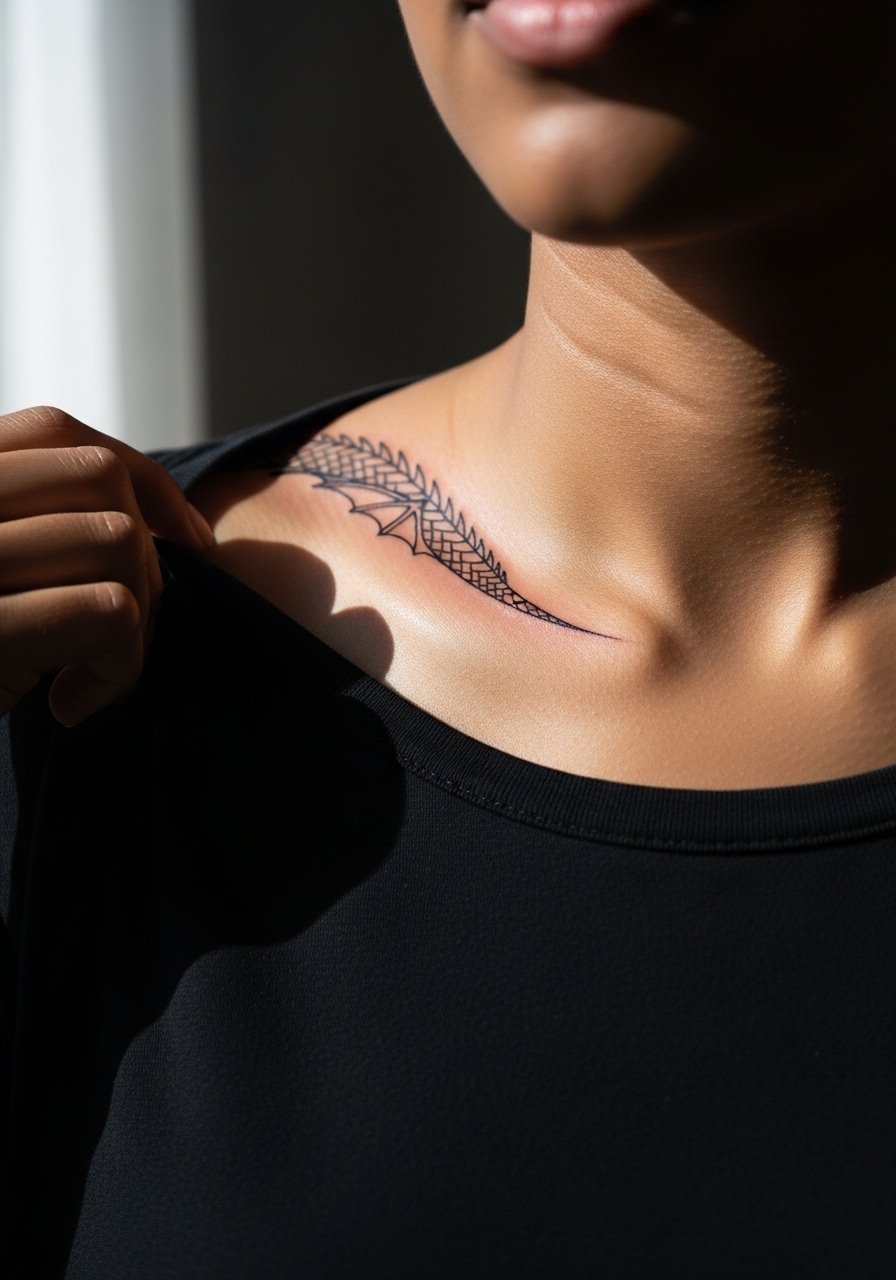
Fine line collarbone dragons are everywhere online, but what looks delicate on a phone often loses its shape against bone, sun, and necklaces. The collarbone sits close to movement and clothing, so choices about scale, line weight, and negative space matter as much as the artwork itself. Below are 27 Japanese dragon collarbone designs with practical notes on aging, consultation talking points, session feel, and how to show them off.
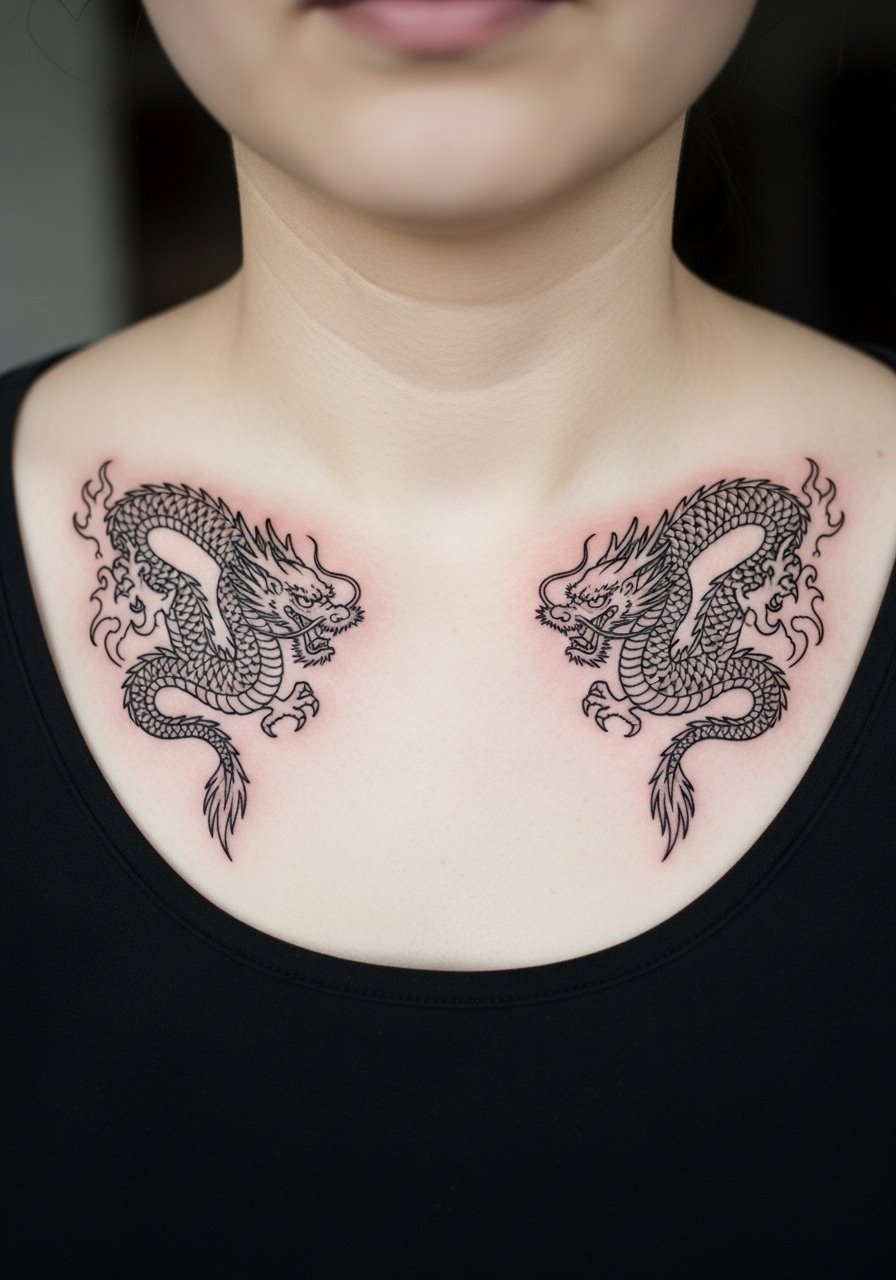
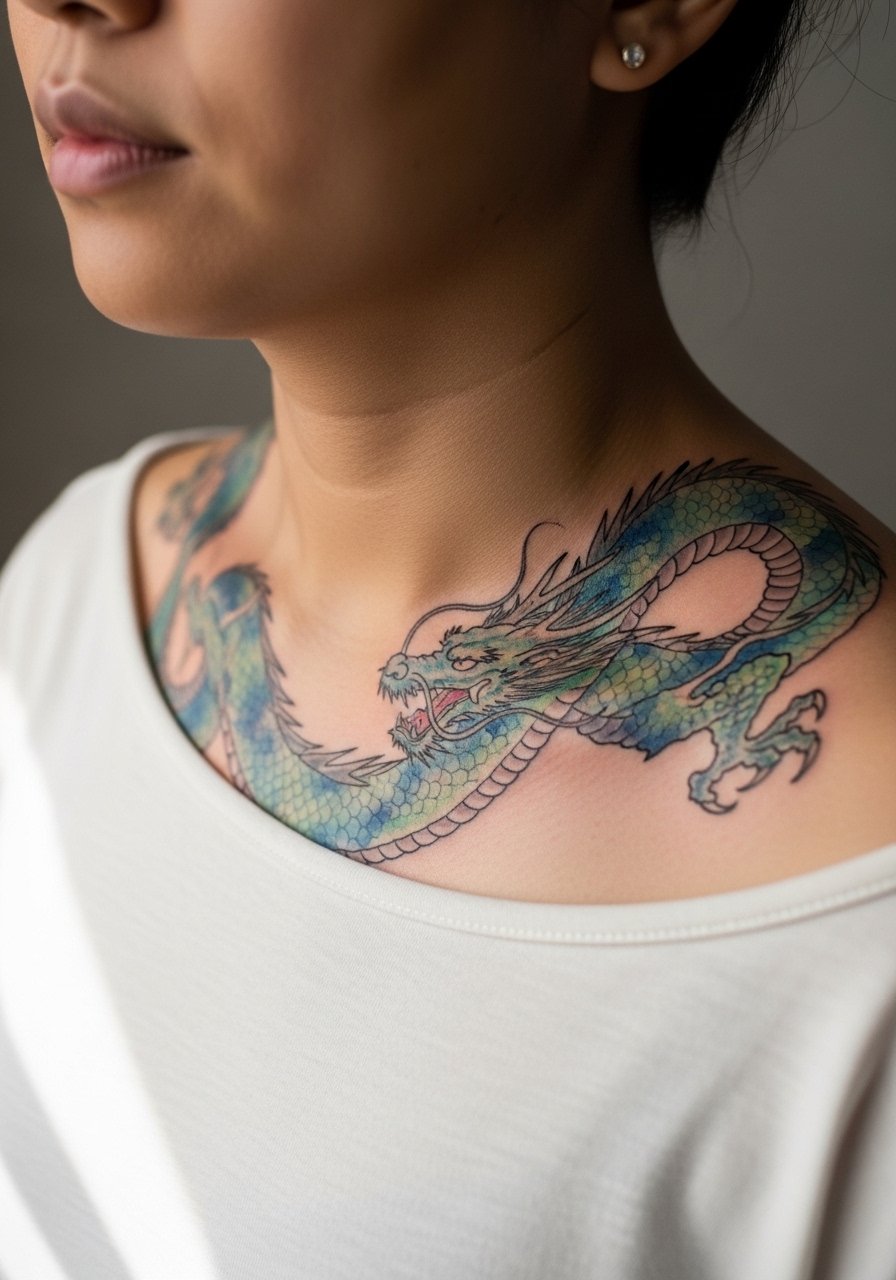
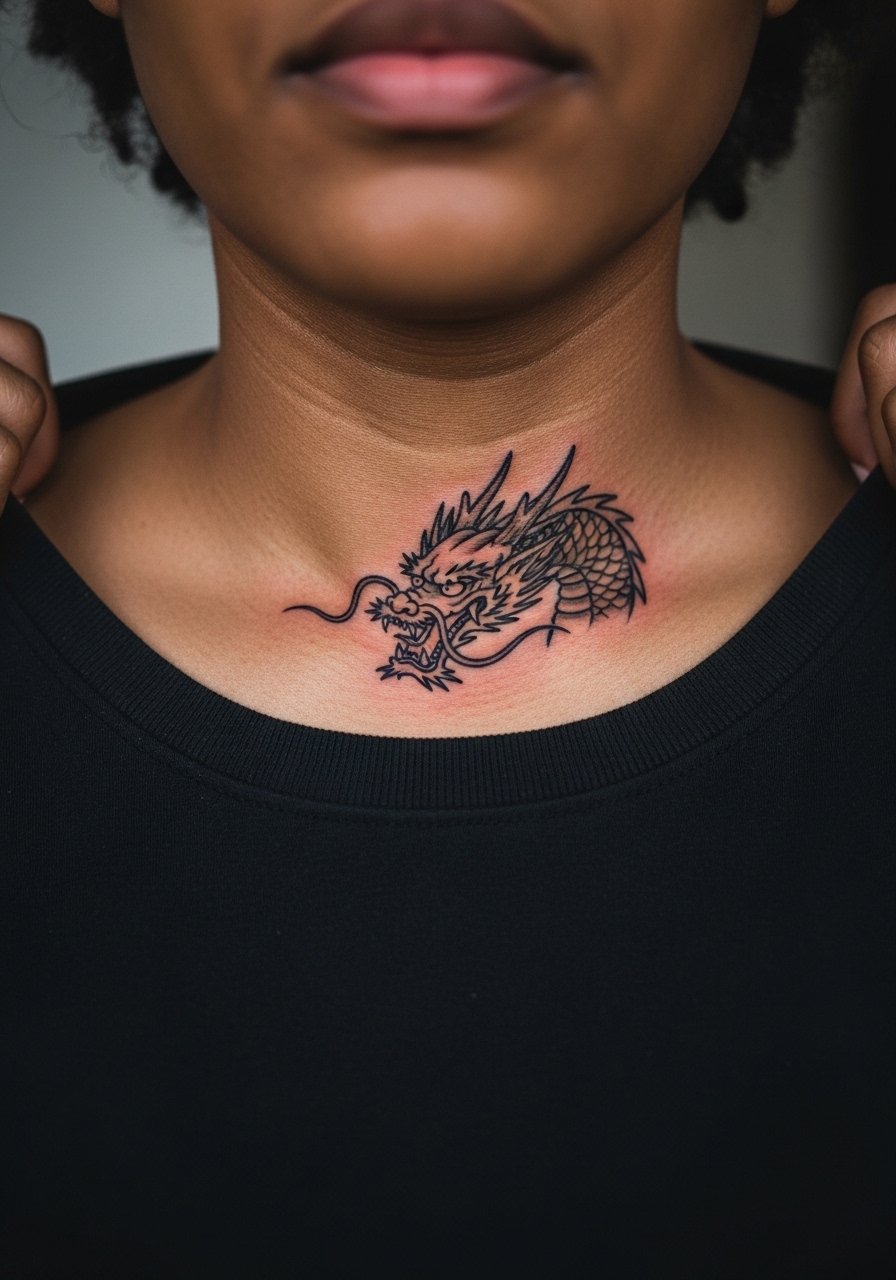
1. Traditional Irezumi Dragon Curling Along the Collarbone
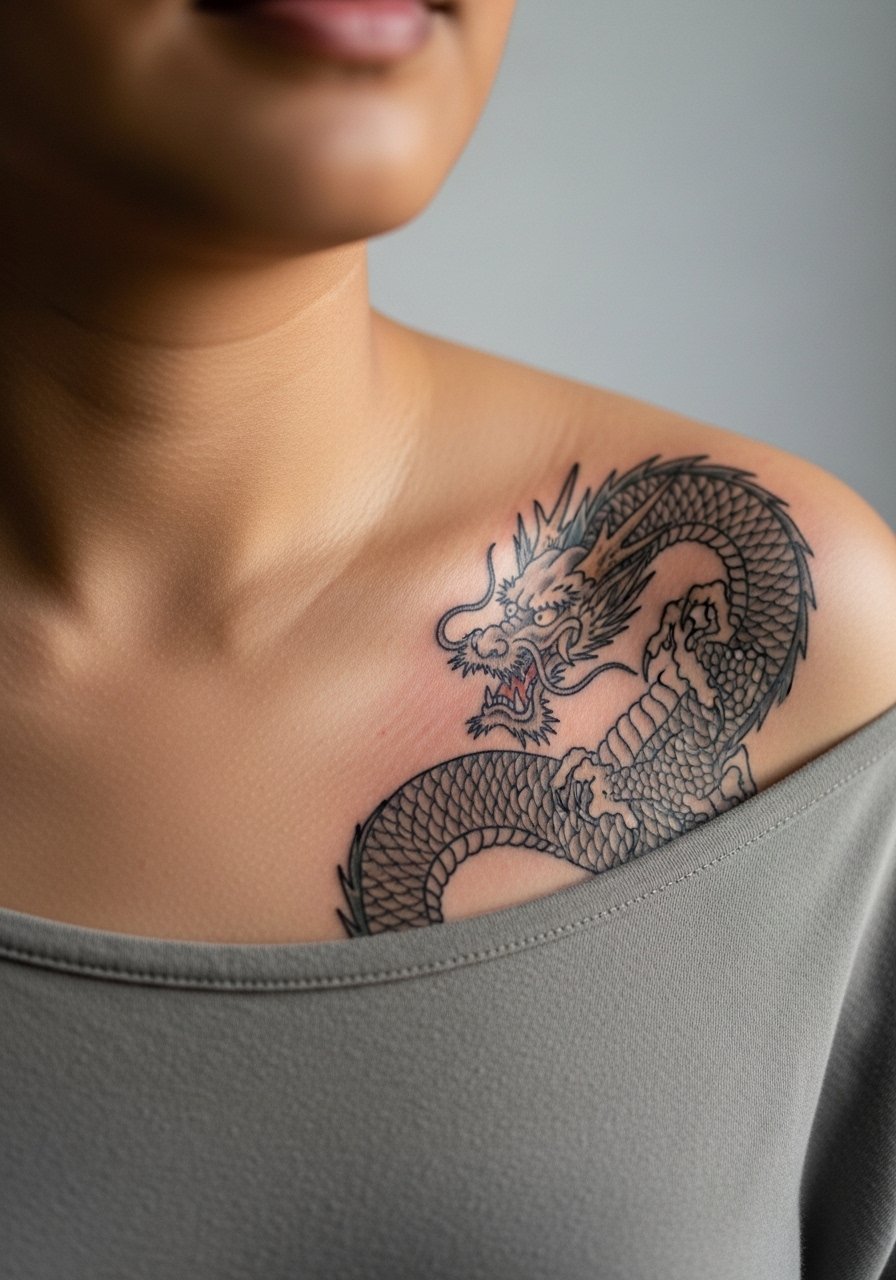
I've seen full Irezumi pieces adapted to the collarbone when clients want that mythic scale in a compact form. Ask your artist for simplified cloud and scale patterns so the dragon reads from a distance and does not rely on ultra-fine detail that blurs against bone. Expect a stiffer session when the needle runs right over the clavicle, with bursts of sharp sensitivity followed by duller scraping as the artist moves away. Over two to five years the saturated outlines hold better than micro detail. Pair this with an open-collar blouse when showing it off.
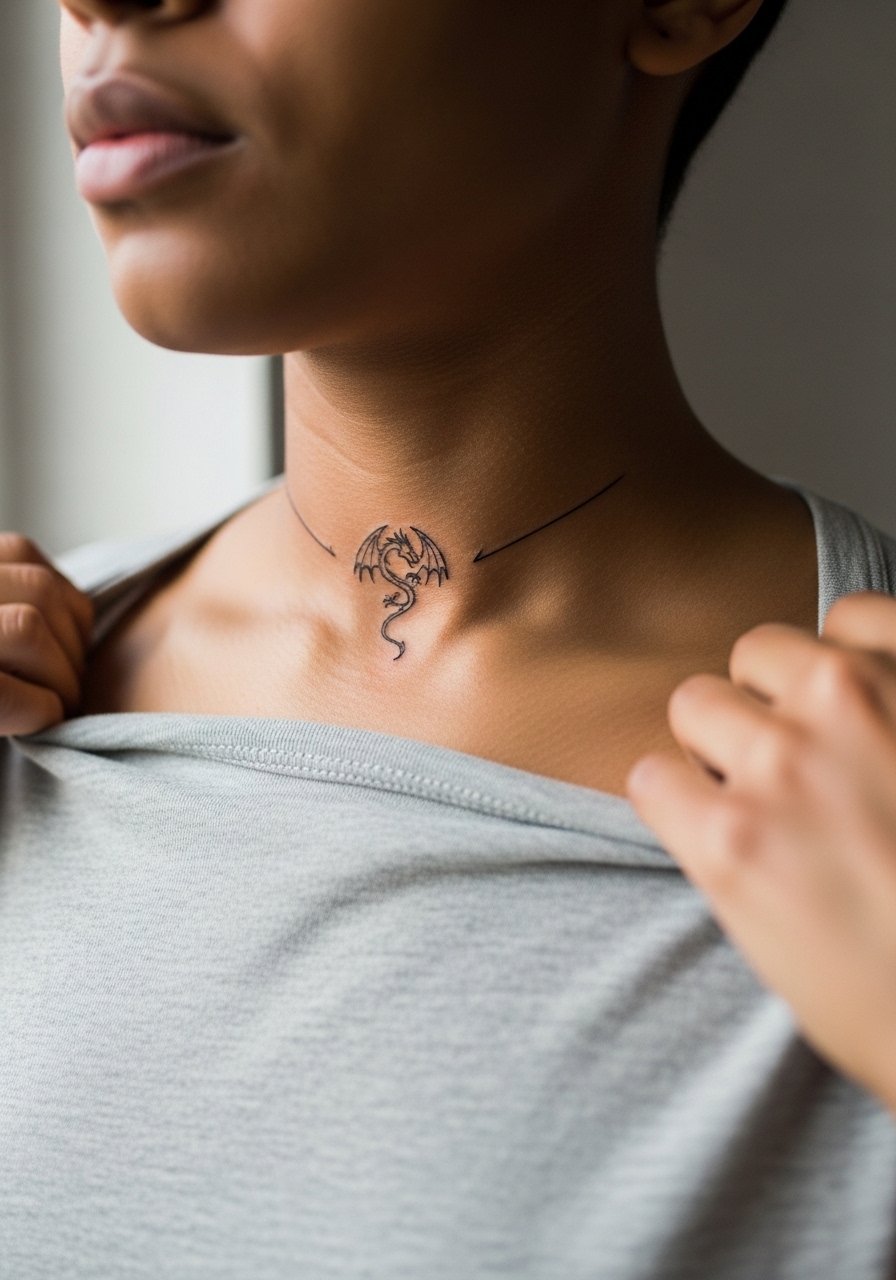
2. Single-Scale Minimal Dragon Accent
Fair warning: tiny minimalist elements on the collarbone need room to breathe or they will merge. I recommend a single, slightly enlarged scale motif rather than a micro-scale chain, because the skin over the bone moves and rubs. Tell your artist you want negative space around the scale and slightly heavier linework than a pure micro piece. A common mistake is asking for ultra-fine lines that vanish at year two. Expect a 45 to 90 minute session and a likely touch-up at year three. For showing it off, try a delicate chain pendant necklace that sits above the ink.
3. Dragon Head Peeking from Under the Collar
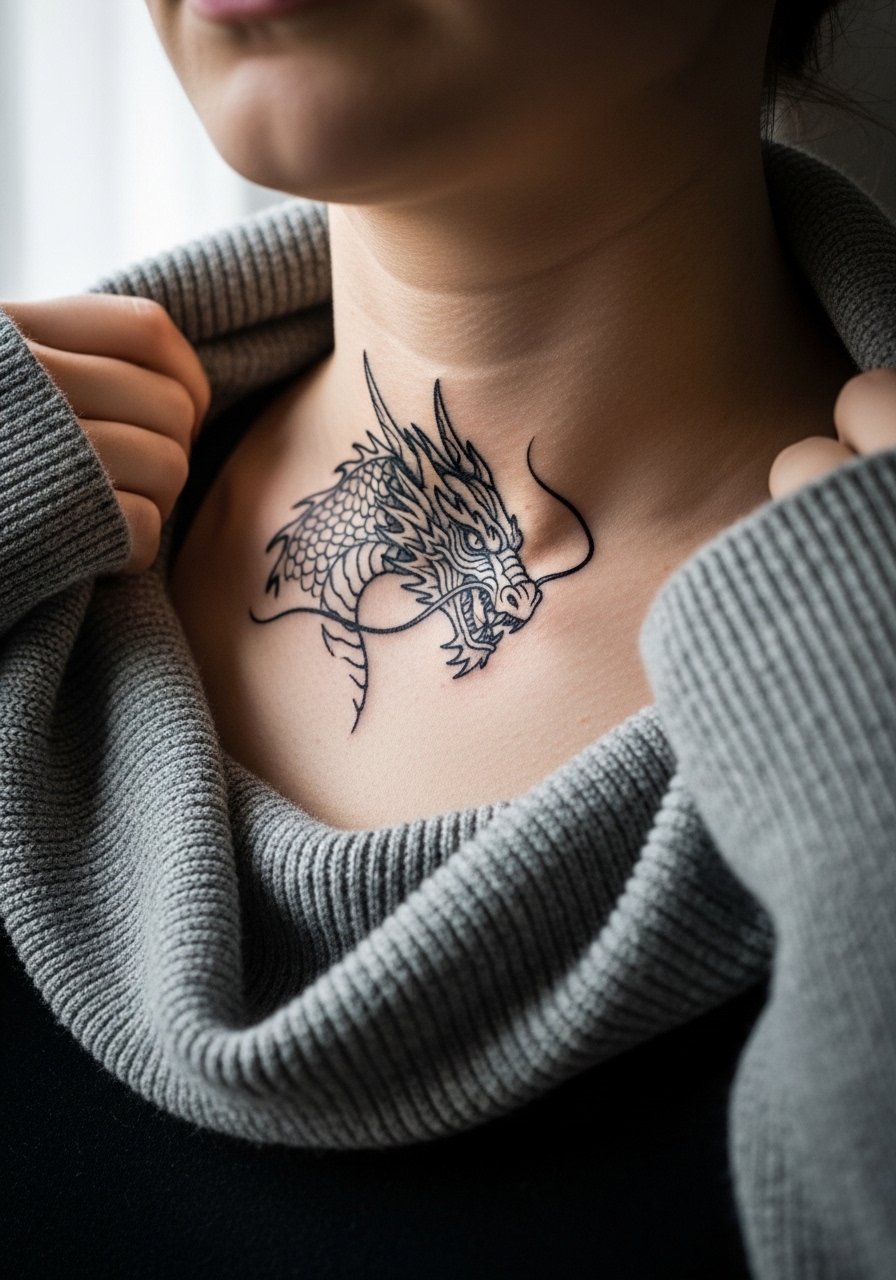
When the dragon is cropped to a head that peeks from clothing, the visual impact is strong without needing full-body scales. In consultation, bring clear reference photos of the head angle you like so the artist composes the snout and eye to follow the bone. The collarbone area has a higher blowout risk if the needle is too shallow, so ask how they handle depth near bone. At six months the finish looks crisp; by year four fine teeth and whiskers soften unless you keep moderate line weight. A wide-neck sweater worn low frames the peek without covering the work.
4. Red-and-Gold Saturated Collarbone Dragon Accent

There are two camps on bright color near the collarbone. One group says saturated pigments handle sun exposure better if packed aggressively. The other group warns that color spots over bone can fade oddly without heavy layering. Both are right depending on pigment choice and aftercare. If you want color, ask for moderate saturation and clear skin-tone tests in consultation. Sessions feel pricklier over the bone, and color work usually needs a second pass for full saturation. Pair this with a strappy camisole to show off the hues without rubbing from collars.
5. Flowing Dragon Tail That Wraps Toward the Shoulder
The advantage of a tail-focused composition is movement without heavy detail on the bone. When you prefer motion over micro-features, ask for longer, cleaner linework and stipple shading away from the bone. A typical mistake is compressing too many scales into the short collarbone run, which reads as texture blur later. Session time is often under two hours, and touch-ups for tail designs are usually about color or line crispness at year two. For an evening look, an off-shoulder top lets the tail breathe and remain visible.
6. Symmetrical Twin Dragons Meeting at the Center
This symmetrical layout looks intentional and decorative, but symmetry demands precise placement. In consultation, ask for mirrored stencils that the artist places while you sit up and relax so posture does not skew the composition. The controversy here is aesthetic. One camp prefers near-identical copies for clean symmetry. The other likes slight asymmetry to make the piece look more organic and wearable. Both approaches work. Expect a two hour session and a high chance of small touch-ups to maintain symmetry over time. Wear a scoop-neck shirt when showing both sides.
Studio Day Picks
The collarbone designs above can be sensitive to sun, friction from tops, and necklace wear, so these items smooth the chair-day experience and the first week of healing.
-
Stencil transfer paper kit. Lets you preview exact placement on the collarbone curving toward the shoulder before the needle hits skin.
-
Topical numbing cream. Applied per instructions about 45 minutes ahead it reduces sharp jolts over the bone while leaving the artist clear to work.
-
Thin protective film roll. A close-fitting film helps collarbone pieces avoid necklace friction during the first few days of healing.
-
Fragrance-free gentle body wash. Cleanses the area without stripping pigment, especially useful when shirts brush the collarbone.
-
Aquaphor healing ointment. A thin application in the first 48 hours keeps tiny lines from drying into tight flakes and supports even epidermal healing.
7. Micro-Realism Dragon Eye Accent
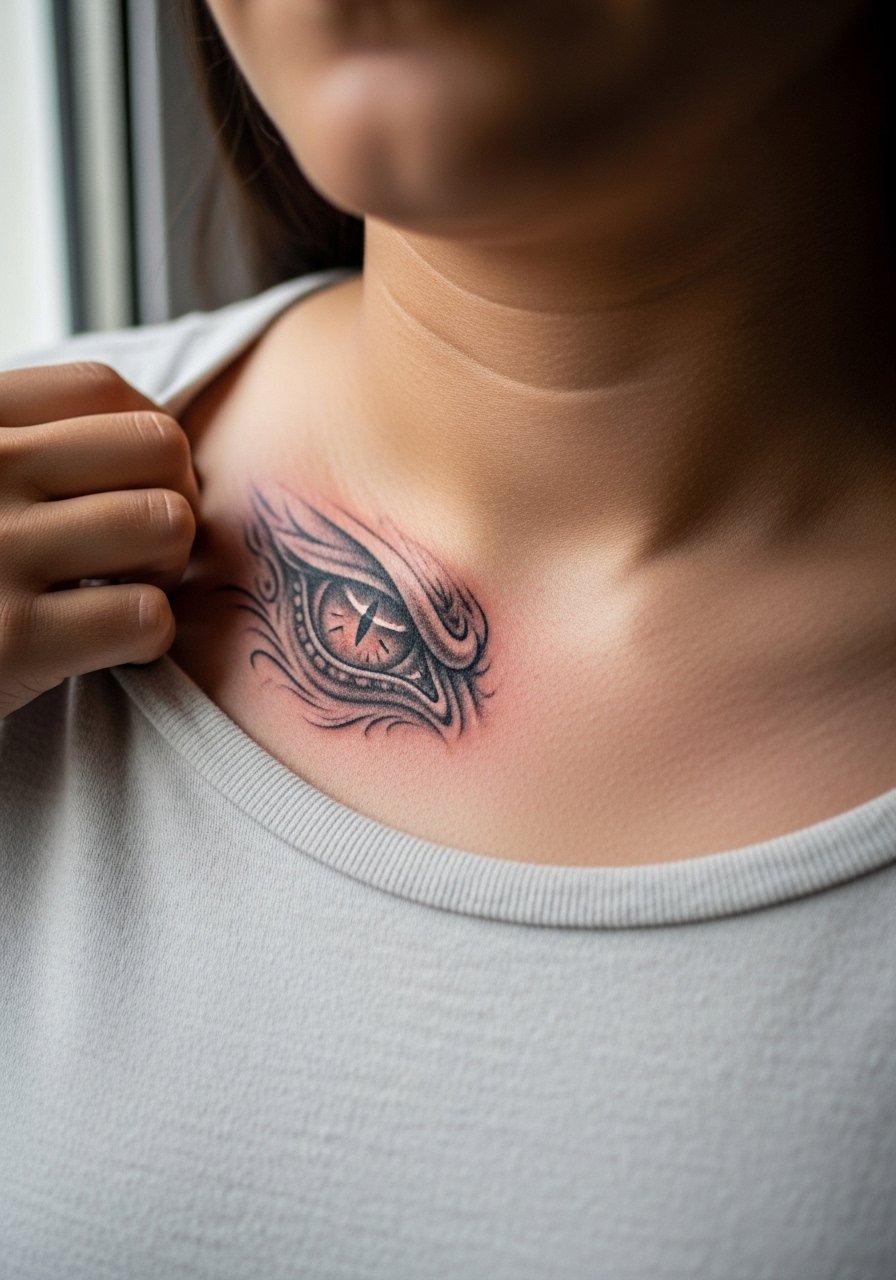
Visual impact lead: there is something about a single, hyper-detailed eye that reads as presence without needing full-body work. For micro-realism on bone, demand subtle depth rather than super-fine scratch lines, because too-light strokes fade unevenly. The session is focused and precise, usually under two hours. At six months the contrast is strong; by three years expect softening in lashes and small highlights unless you plan a touch-up. For evenings, a thin chain pendant can sit above the eye without covering it.
8. Negative-Space Dragon Silhouette Along the Clavicle
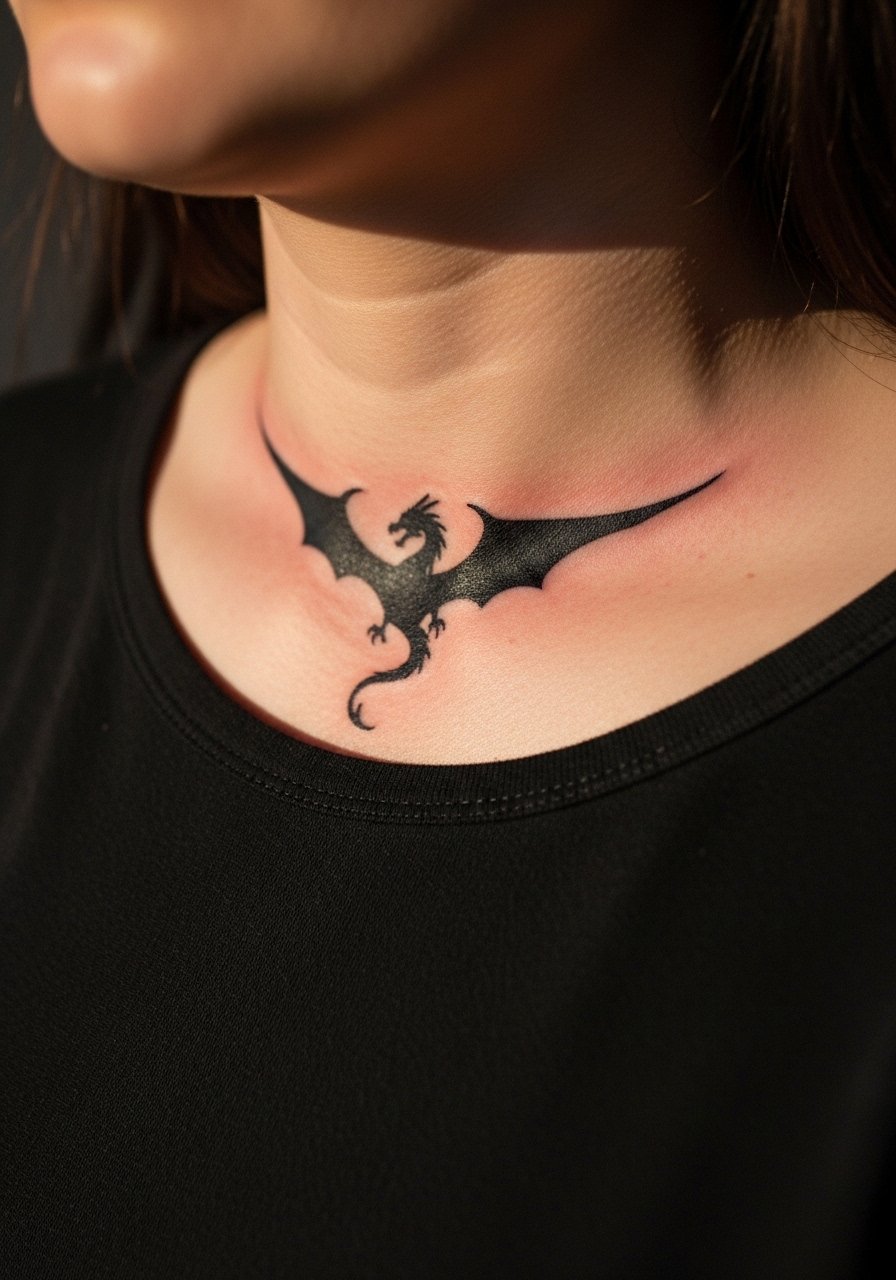
Mistake lead: the worst version of negative-space dragon silhouettes is when the artist over-relies on tiny negative cutouts that fail as the ink settles. Instead, ask for bold black shapes that use negative space sparingly so the silhouette holds up. Sessions are less painful than heavy shading because needle passes are fewer, but the black saturation must be even to avoid patchiness. Over time the silhouette ages like any blackwork and may need a repaint at year five. This pairs well with a crew neck tee pulled aside to control how much of the silhouette shows.
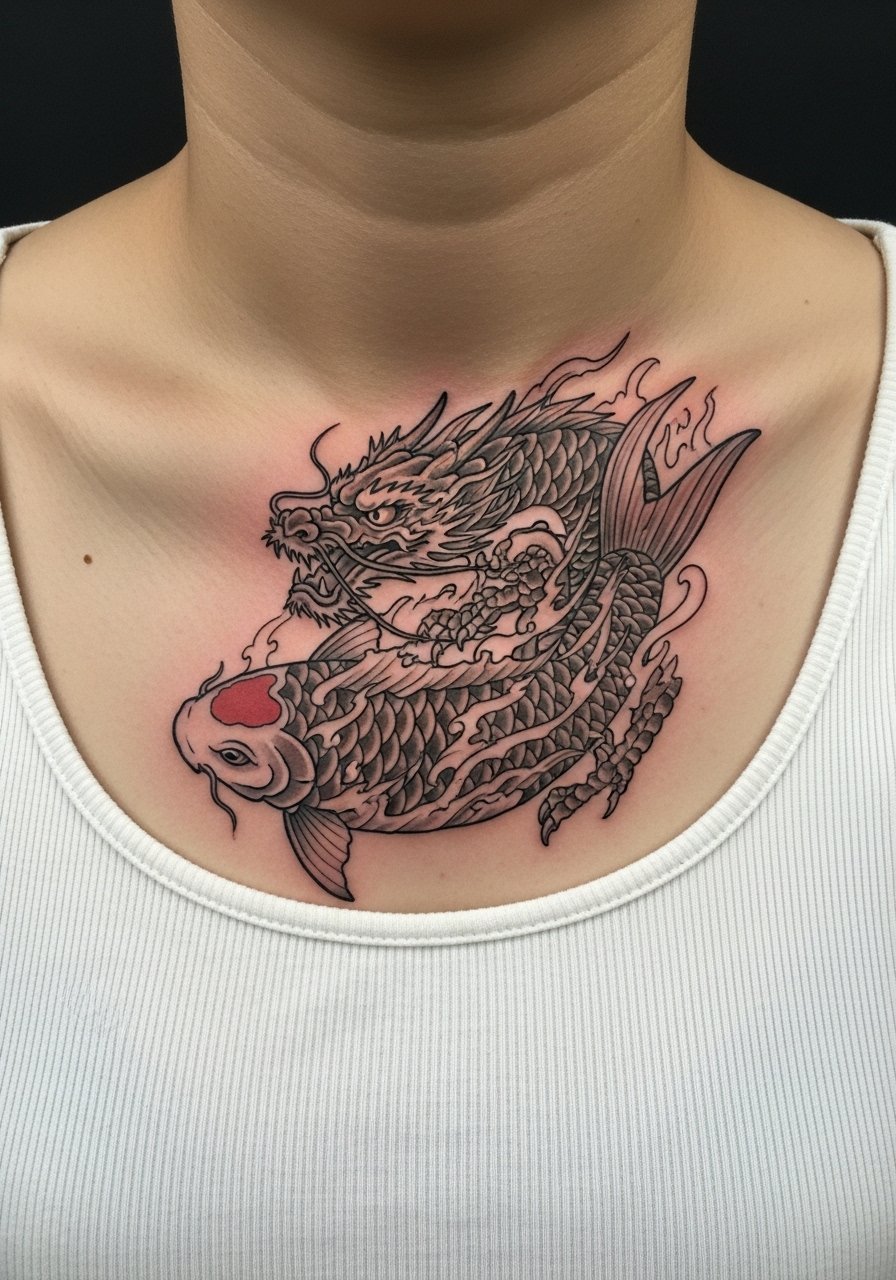
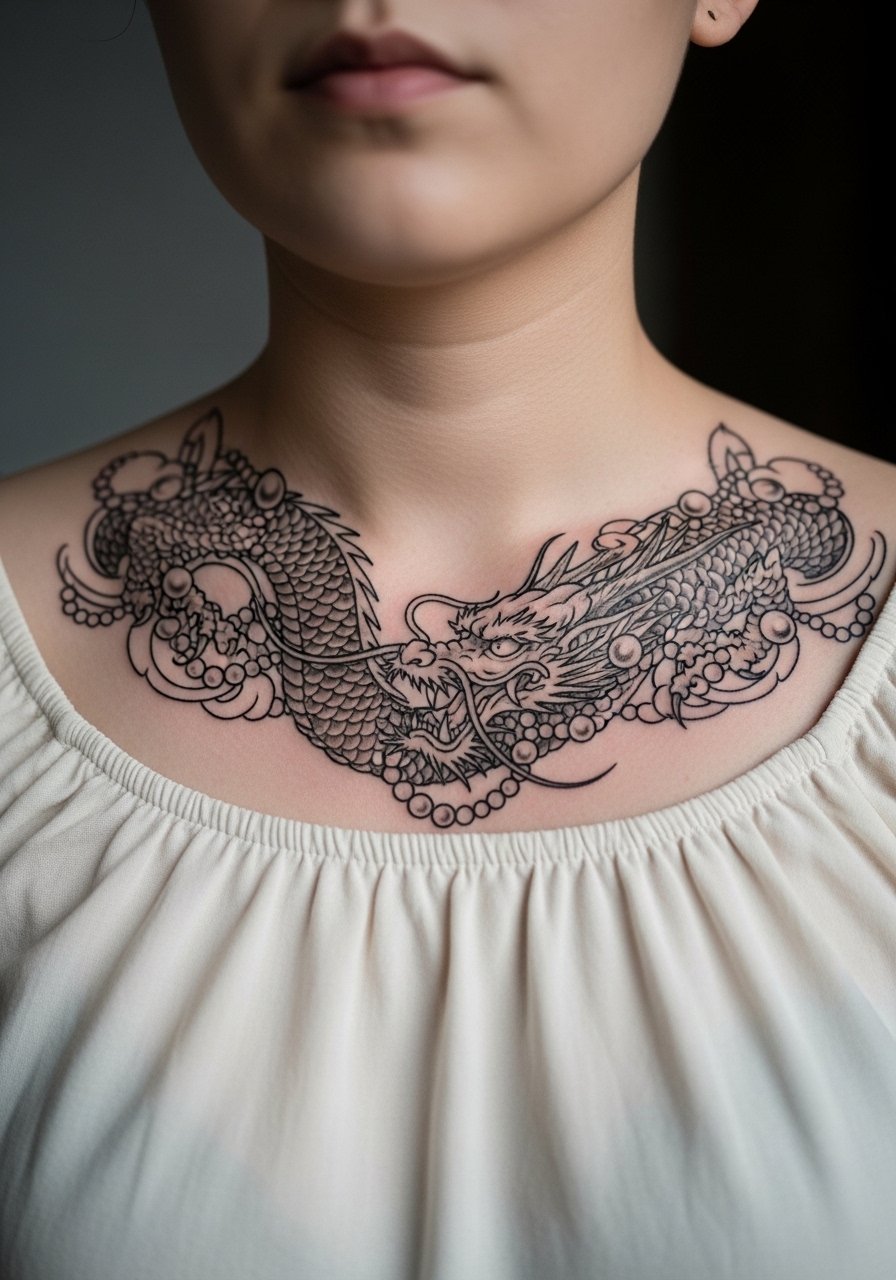
9. Ornamental Dragon with Koi and Wave Elements

Consultation lead: when combining dragon motifs with koi and waves, be clear about hierarchy. Tell your artist which element you want to read first so the composition does not look crowded over the short collarbone run. A common mistake is squeezing three motifs into a tiny space. Session time often approaches three hours when multiple elements are present. Expect color and line touch-ups down the line, especially where waves contact skin that rubs under straps. For daytime showing, an open-collar shirt frames the artwork while minimizing friction.
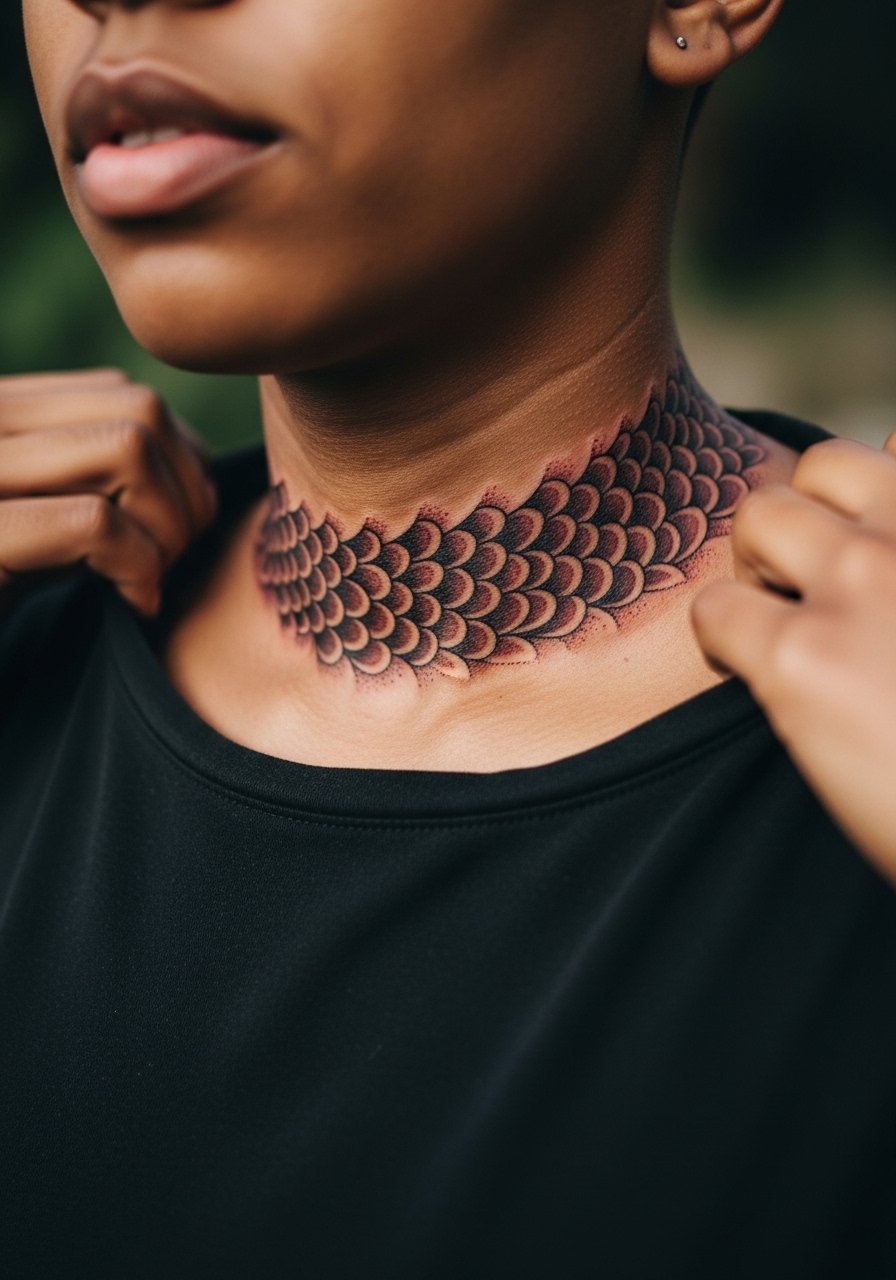
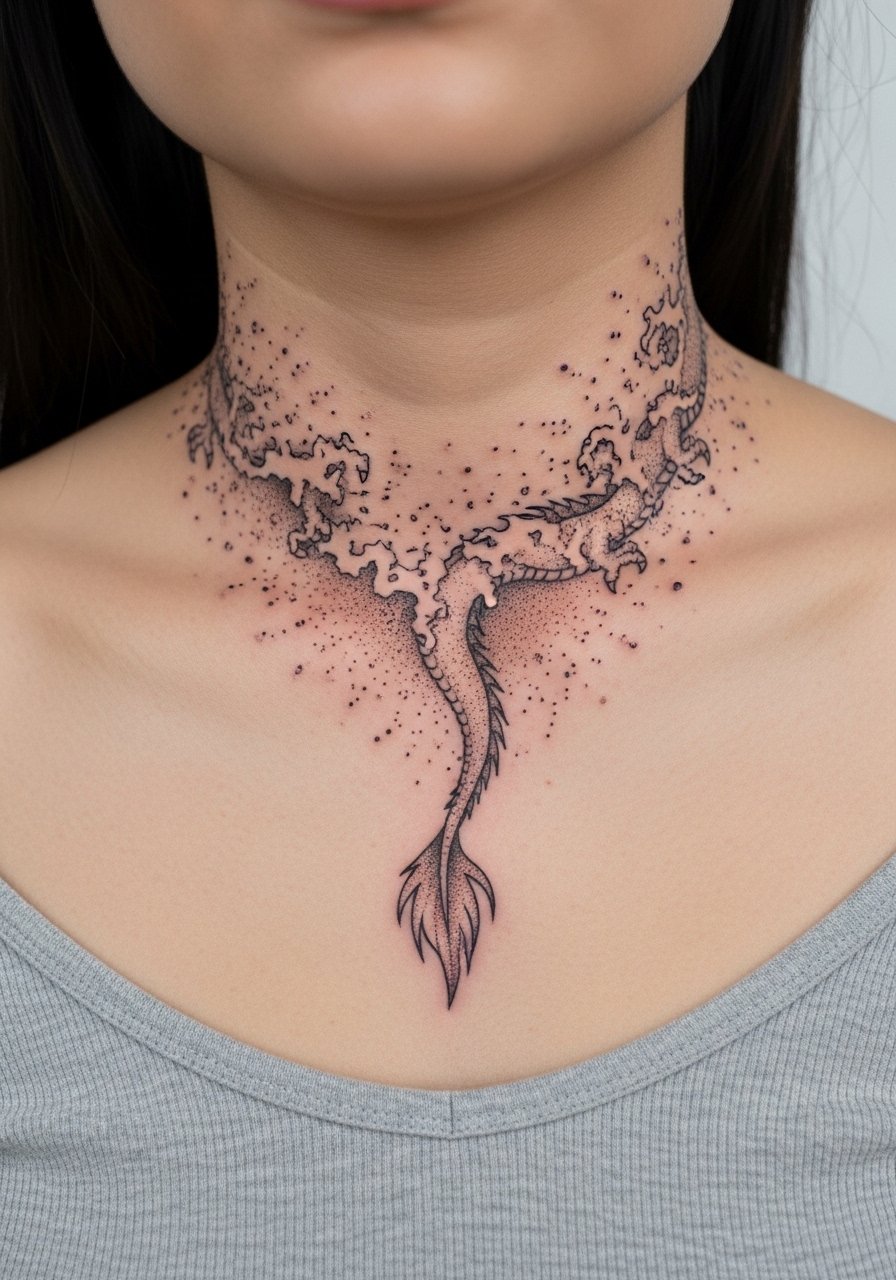
10. Stipple-Shaded Dragon Scales Accent
Aging lead: stipple shading can age gracefully if the dots are spaced correctly. Too-dense stipple on the clavicle risks merging with time. Tell your artist you want visible dot spacing and a few heavier anchor dots along the form. The session feels like a steady, rhythmic tapping. At six months the texture looks intentional; by five years very fine dots may blur slightly and benefit from a targeted touch-up. For low-profile showing, a minimalist choker can sit above the shading without crowding the visual.
11. Dragon Wrapped with Sakura Blossoms
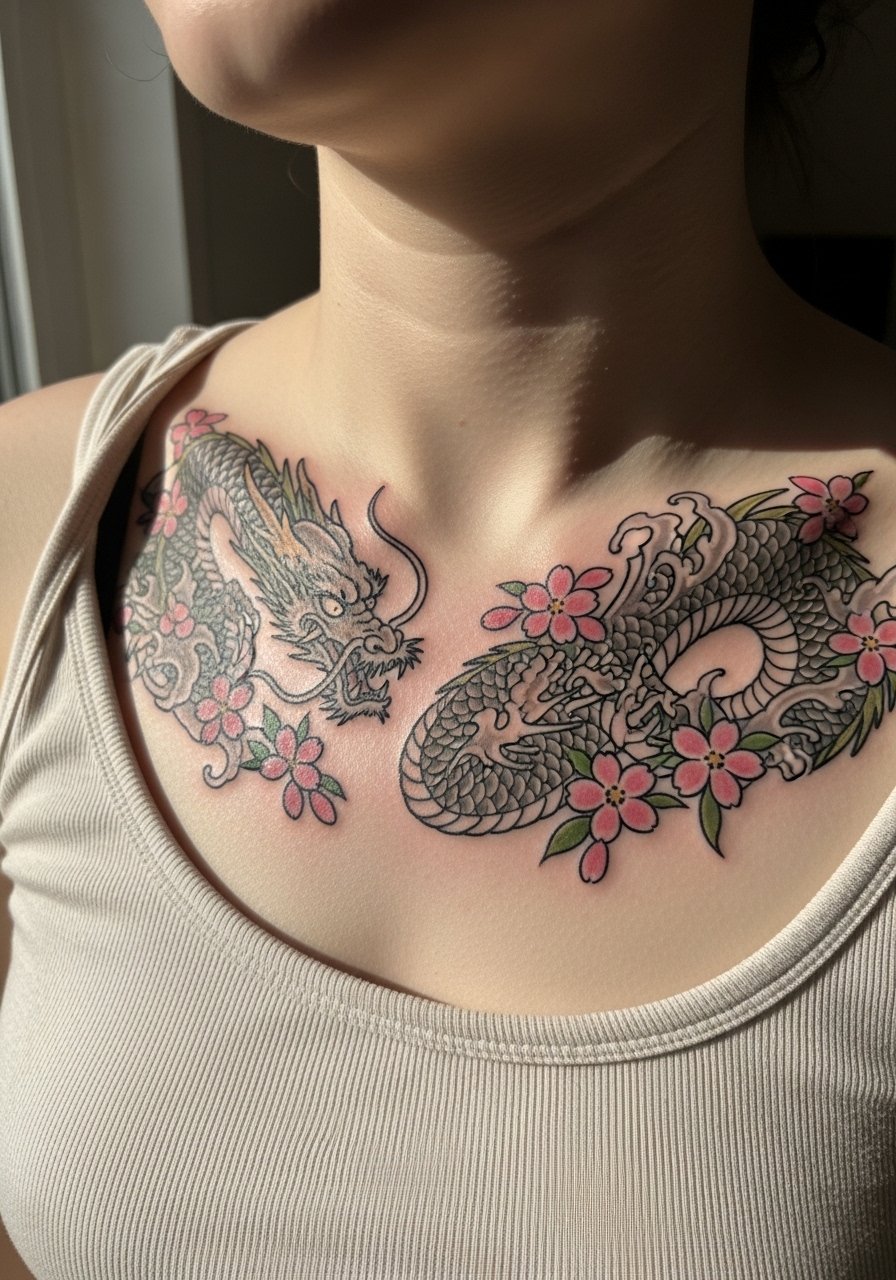
Personal observation lead: floral pairings soften the mythic edge and make collarbone dragons feel wearable. When you want both motifs, ask for blossoms with slightly less saturation than the dragon so the scales remain focal. A frequent mistake is over-coloring the petals which then steal contrast from darker linework. Sessions are moderately long because flowers require color layering. Over time petals fade faster than black linework, so plan for a color refresh at year three. For show-off pairings, a strappy tank top keeps the blossoms visible.
12. Geometric Dragon Form in Fine Line
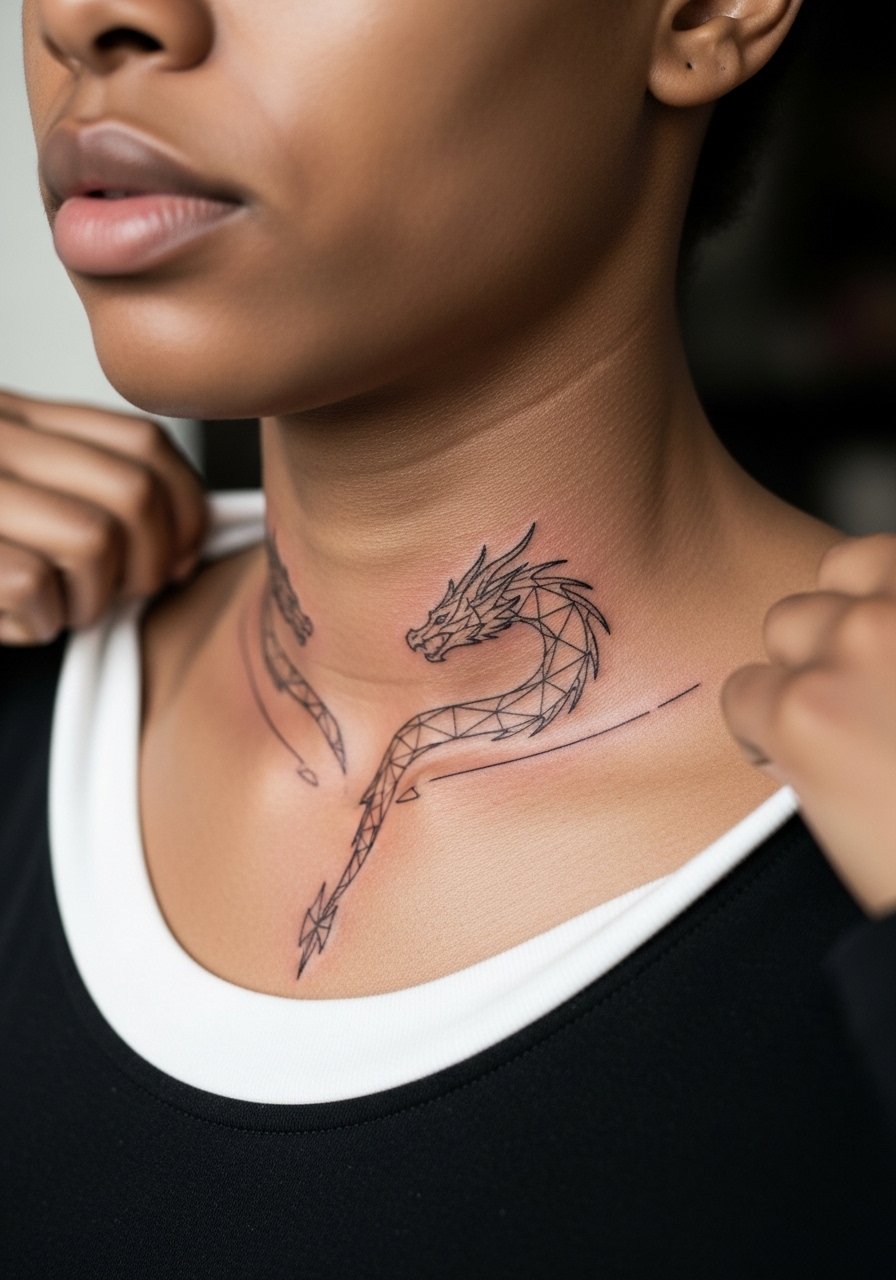
Mistake lead: the biggest pitfall with geometric fine line is scale. Tightly packed geometry collapses as the lines blur. If you love geometry, ask for slightly thicker anchor lines and more spacing between shapes. This placement has higher touch-up needs because the collarbone moves with breathing and shoulder motion. Expect an initial crisp finish and a likely touch-up at year two for the finer intersecting lines. For styling, a minimalist pendant works without competing.
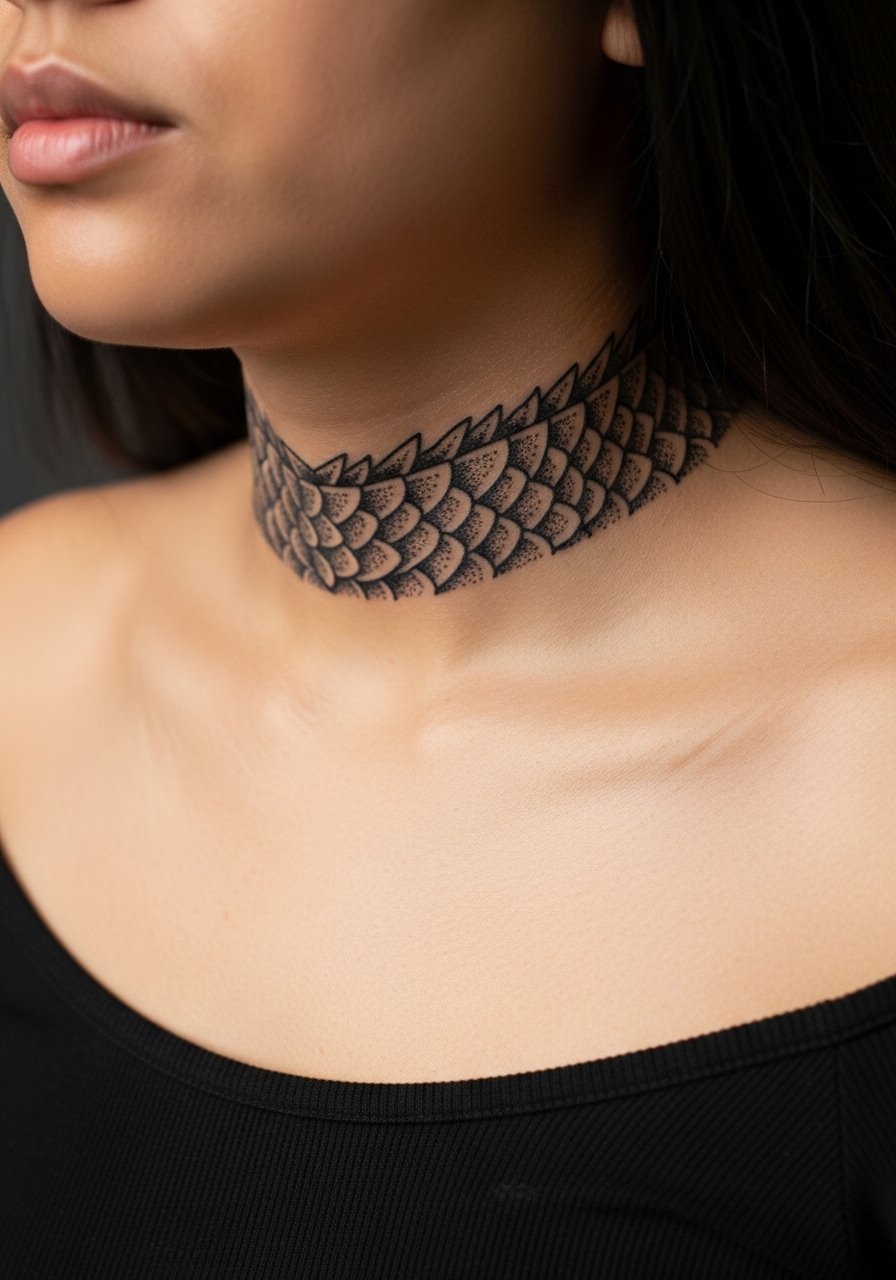
13. Blackwork Dragon Band Along the Clavicle
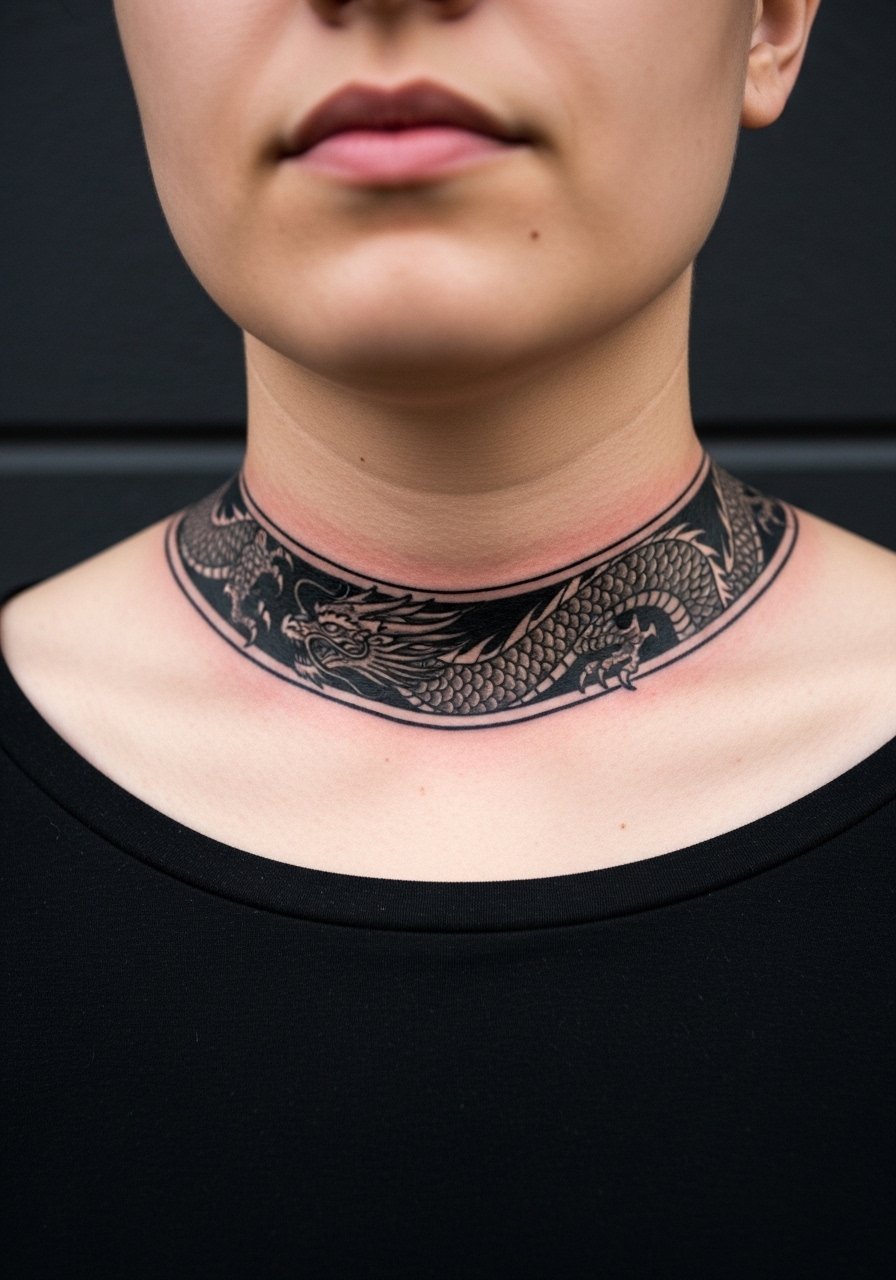
Visual impact lead: bold black bands with dragon motifs age predictably and read strong even with sun exposure. Tell your artist you want consistent saturation and clean edges to avoid patchy healing. The session can be tappy but shorter than fully detailed color jobs. Over the years the black remains legible with occasional repainting around year five. For smart layering, pair this with an open neckline blouse that showcases the band without rubbing.
14. Watercolor Wash Dragon Accent
Aging lead: watercolor-style tattoos are divisive. One camp accepts that the paint-like edges will soften and blur over time. The other expects crisp longevity and therefore dislikes watercolor. If you want watercolor, ask your artist how they anchor the design with minimal linework so color edges age intentionally. Sessions vary by layering needs and you should budget for color refreshes at year two to four. A bandeau top shows off the wash without collar friction.
15. Dragon with Kanji Accent Above the Collar
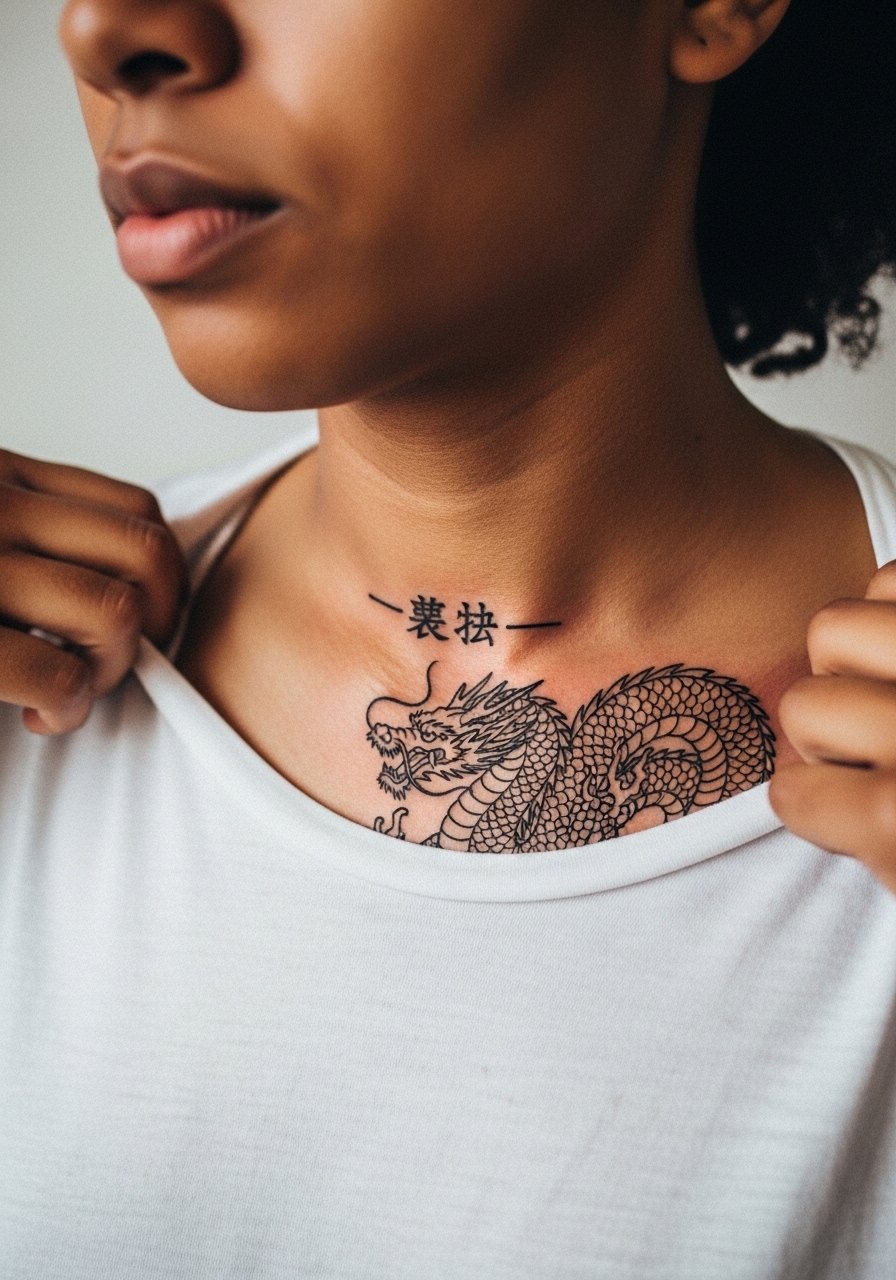
Consultation lead: when text is involved, specify exact wording and font. The image prompt here shows the exact kanji text. The common mistake is choosing fonts too intricate for the collarbone. Ask for slightly thicker strokes on the kanji and for the artist to stencil the text while you check posture. Expect a short session, but remember script on bone can soften and need touch-up. A simple thin chain necklace can sit just above the script without smudging.
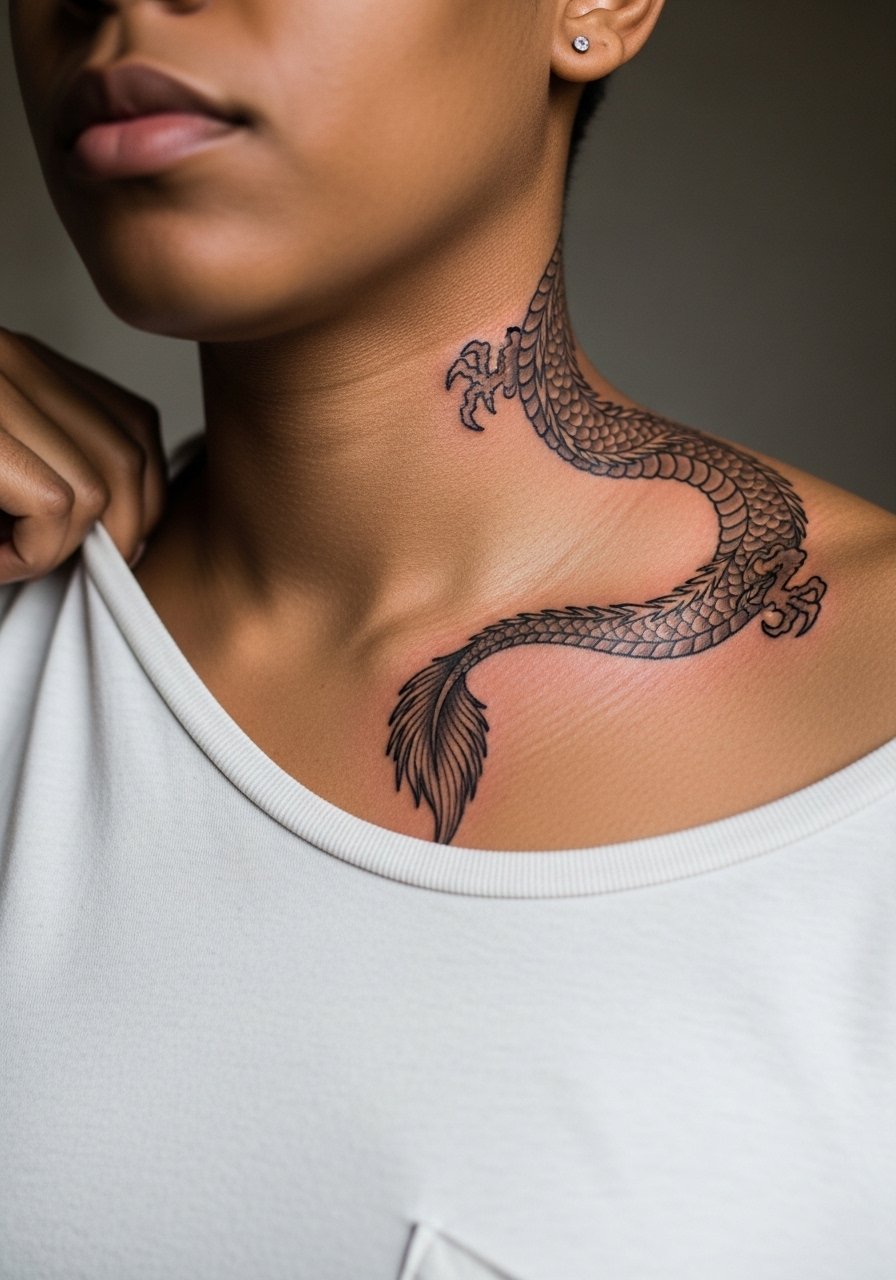
16. Half-Shoulder Dragon Curling Toward the Collarbone
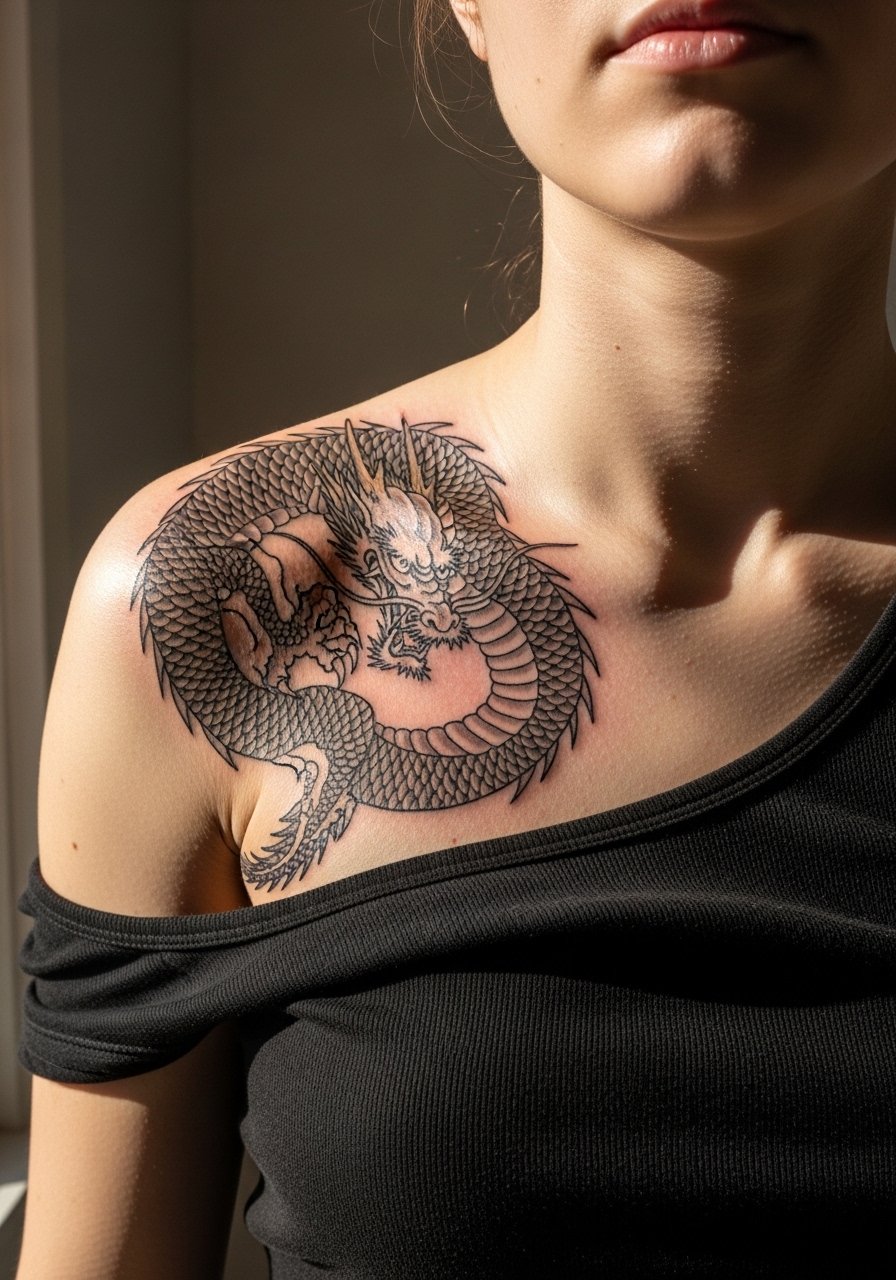
Pain warning lead: the shoulder-collarbone junction shifts placement when you move your arm, so plan to sit with your arm relaxed. Tell your artist where you want the curl to stop so it does not disappear under a strap. A common mistake is letting the dragon arm onto the shoulder too much and losing its collarbone presence. Sessions that cross into the shoulder tend to be longer and may need a touch-up at year three along the junction point. For showing off, an asymmetrical tank reveals the curl without pressing on it.
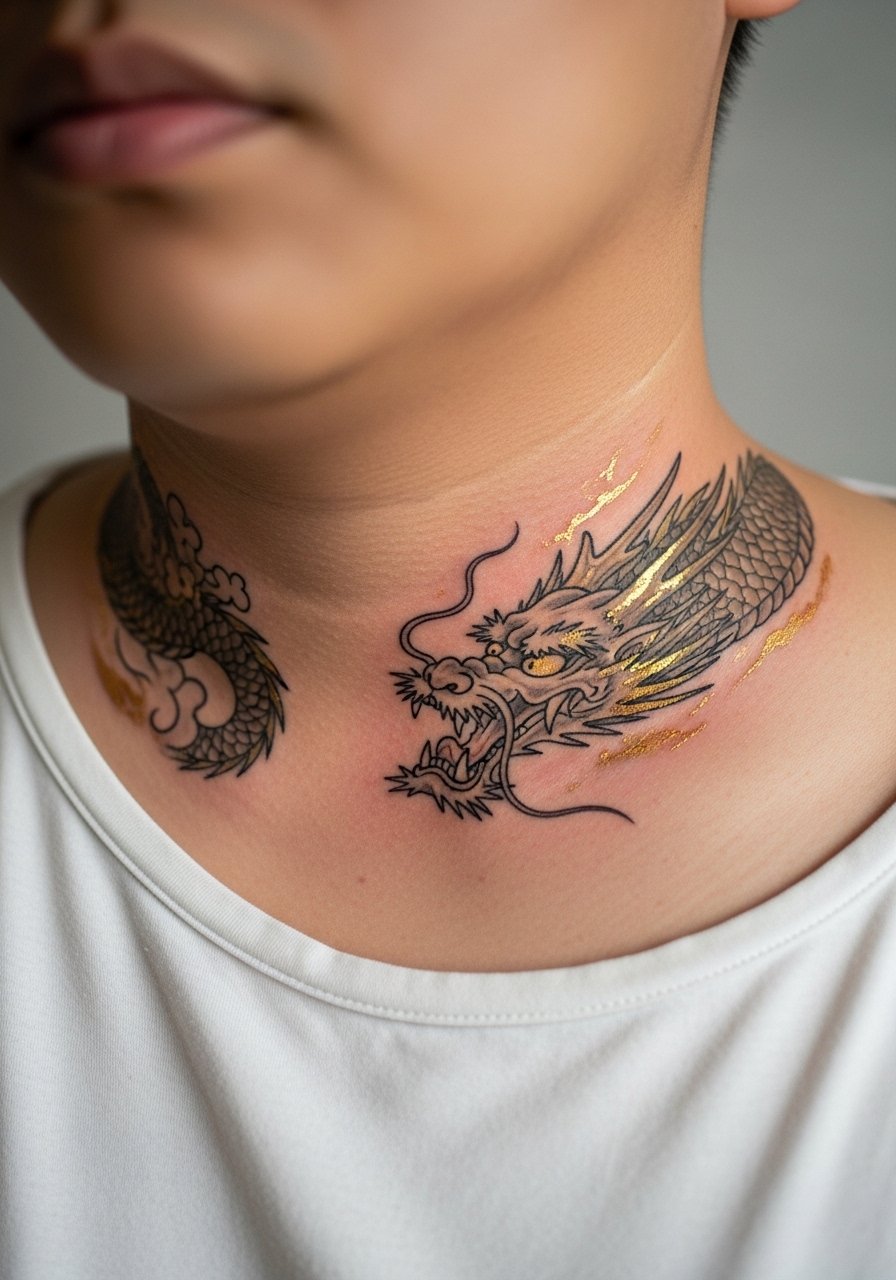
17. Neo-Traditional Collarbone Dragon with Bold Outlines

Controversy lead: neo-traditional adaptations of Japanese dragons spark debate. One camp favors faithful, cultural detail and motifs. The other accepts fusion and stylistic reinterpretation. If cultural respect matters to you, explain that to the artist and ask for references that nod to origin without copying sacred panels wholesale. Bold outlines in neo-traditional work hold up well on the clavicle and need fewer touch-ups than frailer lines. For date nights, a wrap-neck top frames the silhouette nicely.
18. Scaled Gradient Using Dot Work Near the Collarbone
Aging lead: dot gradients create a textured illusion without heavy lines. The trick is balancing dot density so the gradation does not become a muddy patch later. In consultation ask for visible dot spacing and anchor points where density can be refreshed in a touch-up. Sessions are slower because dot work takes time. Expect better longevity if the densest areas sit off the bone slightly. Pair with a lightweight scarf for cooler days that still reveal the gradient.
19. Dragon Head Framed by Wind Bars and Clouds
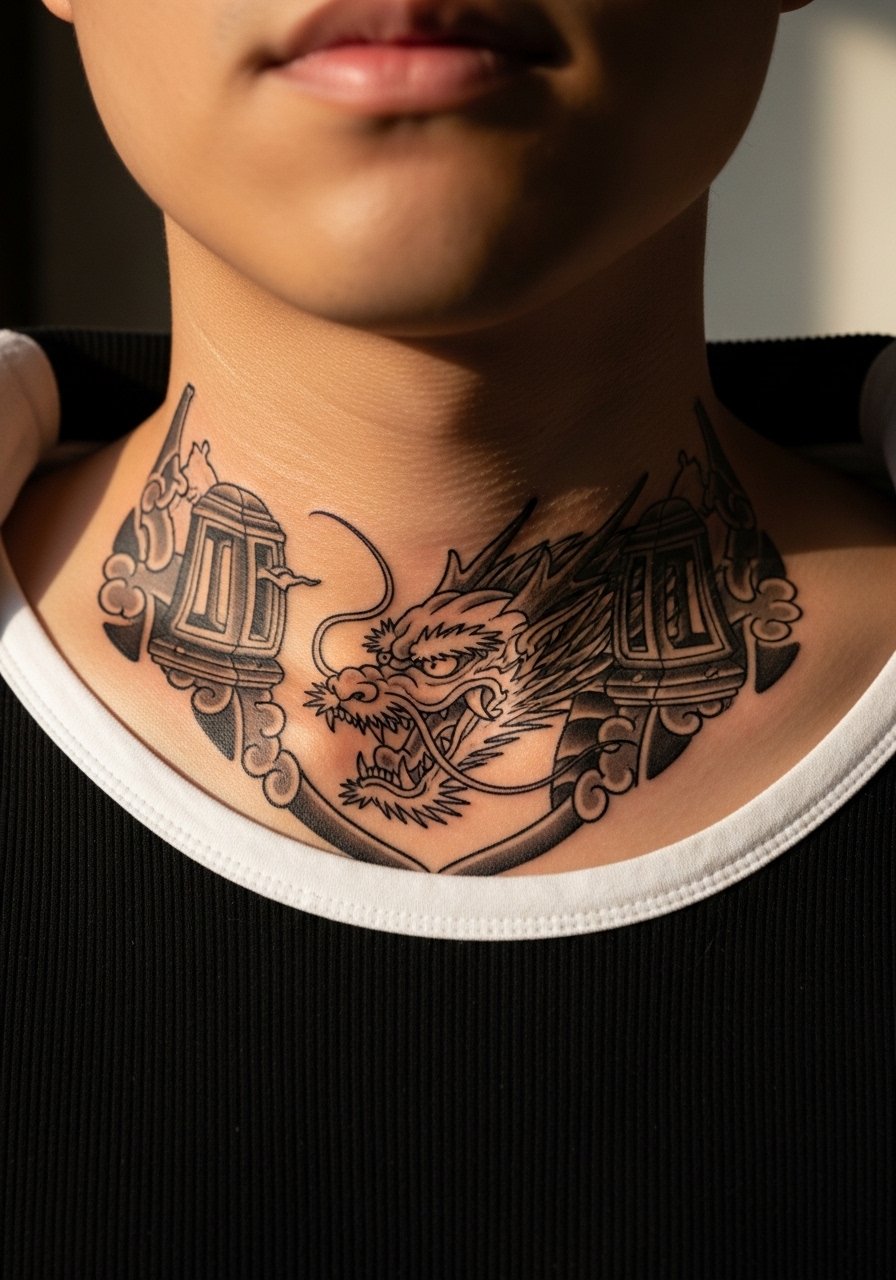
Personal observation lead: adding wind bars and clouds gives context and keeps the dragon readable at small scale. Tell your artist which classic elements you want and ask them to reserve negative space so the motifs do not compete. The collarbone placement makes the wind bars especially useful because they can follow the bone curve. Sessions of this sort tend to run two to three hours and may ask for a second pass on light shading. For styling, an open-neck blouse looks traditional and complementary.
20. Koi-to-Dragon Hybrid Accent Near the Collarbone
Visual impact lead: hybrids are narrative and compact well on the clavicle when the transition is clear. A common mistake is forcing a full koi body into the small run. Instead, focus on the head and the immediate transformation scales. Sessions are longer because of blending work between forms, and color refreshes are common where two pigments meet. When you want to highlight the story, a low scoop tank keeps the transition visible and comfortable.
21. Tiny Dragon Footprints Along the Clavicle
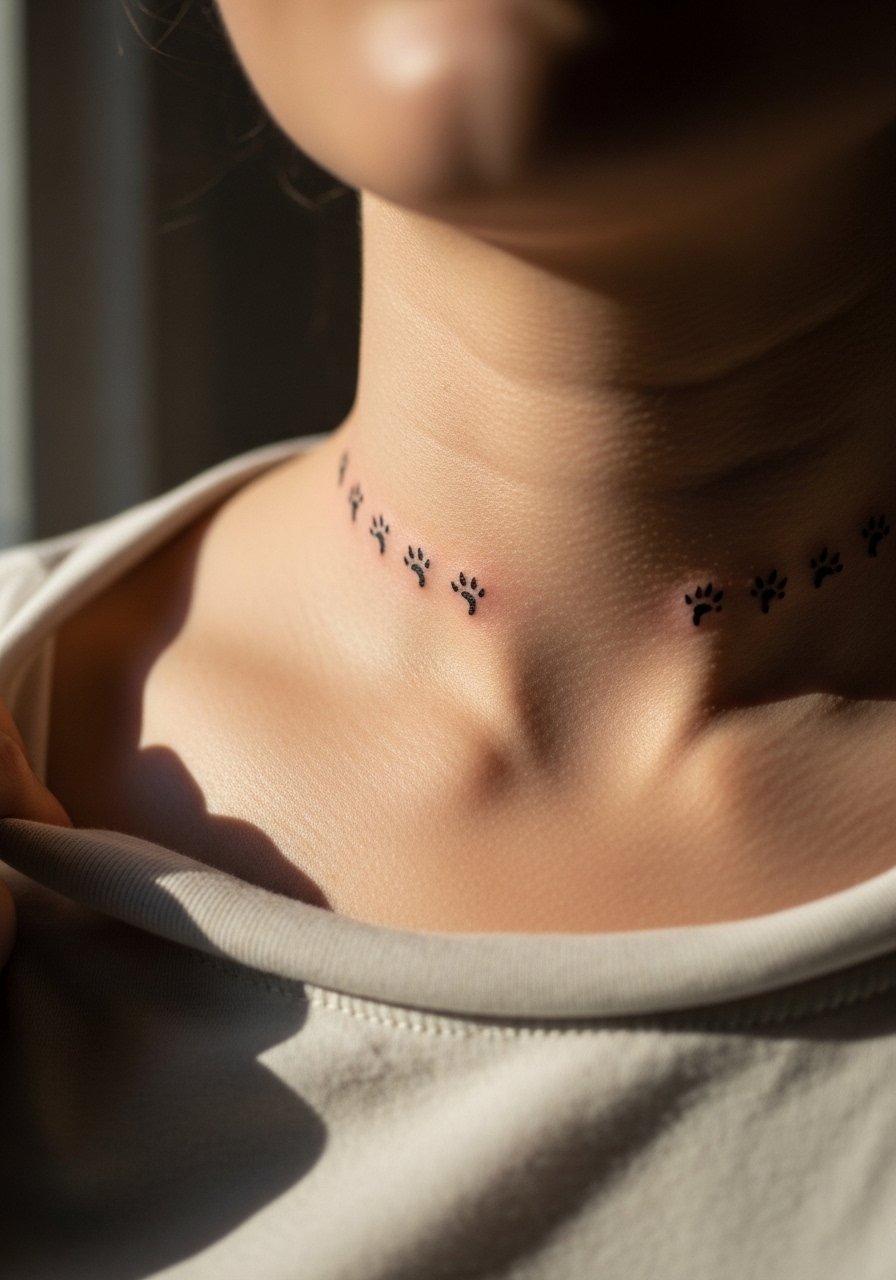
Mistake lead: tiny isolated marks on the collarbone can blur unless spaced. Ask for footprint sizes slightly larger than you think and for deliberate spacing. The session is quick but sensitive because each dot is over bone. At two years expect the smallest dots to soften, so plan for a modest touch-up if you want the crisp dotted path to remain. For casual showing, a scoop-neck tee reveals the trail without snagging.
22. Collarbone Dragon with Subtle Metallic Ink Accents
Consultation lead: metallic inks can add shimmer but they do not wear like traditional pigments. Some artists avoid them because they can fade or change tones in different lights. If you want metallic accents, ask about longevity and test patches. The session may include layering that feels similar to color work. Over time metallic flecks often need reapplication sooner than base colors. For nights out, a low-cut silk blouse shows the shine without abrasive collars.
23. Miniature Dragon Crest Centered Over the Collarbone
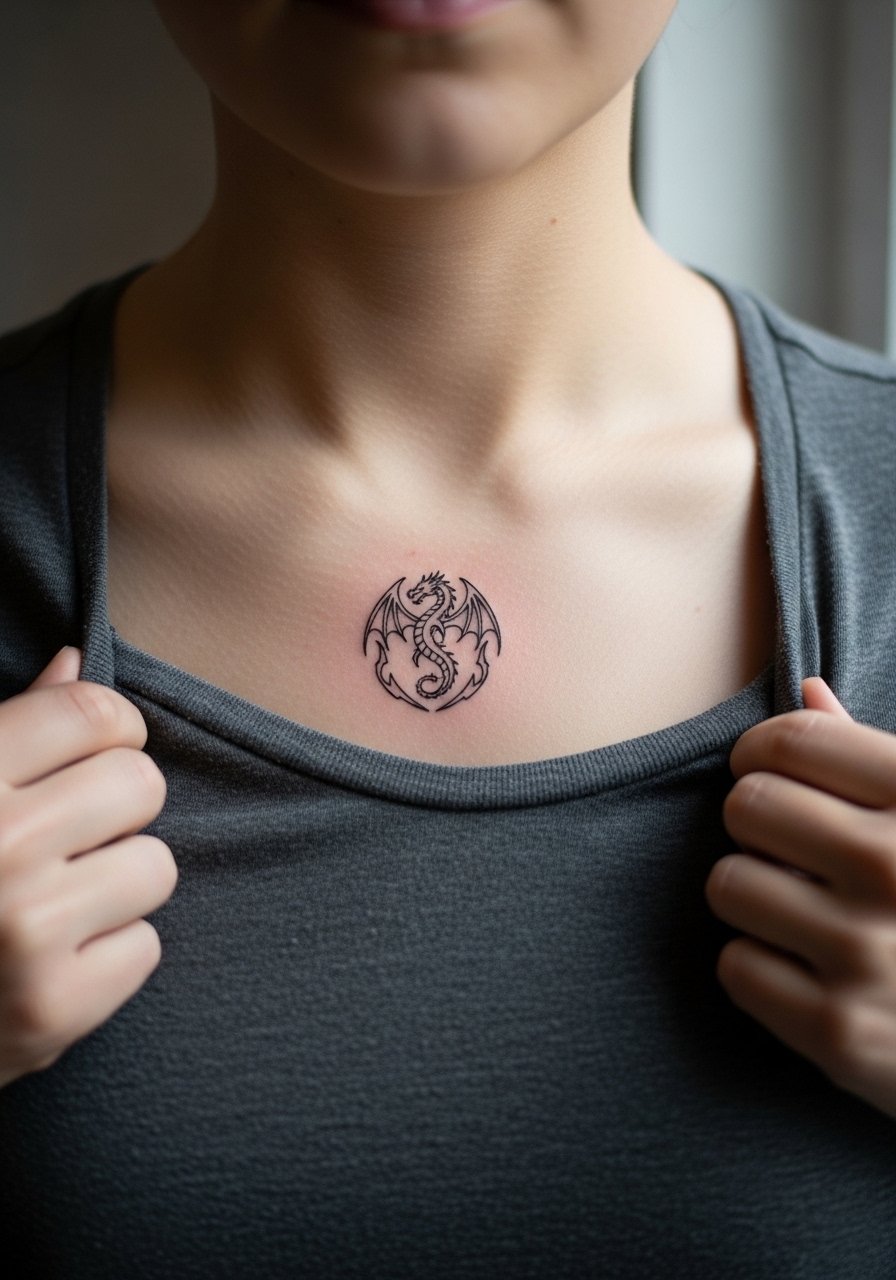
Personal observation lead: centered crests read well on people who favor symmetry in jewelry and wardrobe. When booking, verify the stencil sits exactly centered when you are standing and relaxed. A common mistake is placing a centered crest relative to the spine instead of the collarbone curve. Sessions are short and focused and may need tiny touch-ups as the skin moves. A thin bar necklace sits below the crest and completes the composition.
24. Matchbook-Sized Dragon with Heavy Linework
Pain warning lead: compact pieces over bone concentrate needle passes in a small zone which increases sensitivity. Ask for heavy outline rather than excessive internal detail; that choice preserves the silhouette longer. This is often a 45 to 90 minute session with predictable aging if lines are bold. Expect a touch-up in two to four years mainly for line refresh. For daily show-off, a v-neck tee works without rubbing.
25. Dragon Tail Finely Dot-Shaded into Negative Space
Styling lead: tails that fade into negative space look elegant with minimal tops. Tell the artist to leave a deliberate buffer of clear skin so the negative fade reads as design rather than thinning pigment. Sessions focus on consistent dot spacing and take time. Over several years the gradient softens and may need reworking if you want crisp separation. For evenings, a simple cami reveals the fade cleanly.
26. Dragon with Pearl and Bead Motifs Along the Collar
Styling lead: bead and pearl elements pair naturally with necklaces, but plan placement to avoid friction. In consultation specify where you wear jewelry so the artist can keep beads off those exact contact points. A common mistake is putting heavy beading where a necklace will constantly rub and speed fading. Sessions may be longer due to small ornamental work. For accessorizing, a delicate choker can sit above without stressing the ink.
27. Minimal Line Dragon Crest That Ages Cleanly
Aging reality lead: minimal single-line tattoos are trending, but minimal often requires slightly bolder placement around bone to last. Ask the artist for a single-pass with consistent depth and slightly heavier endpoint anchors. The session is quick and less painful than layered color work, though the collarbone still yields sharp sensations. Expect potential softening of the thinnest strokes at year two, with a simple touch-up restoring clarity. Pair with a scoop-neck tee to show the crest cleanly.
Frequently Asked Questions
Q: How visible will a Japanese dragon on the collarbone be in professional settings?
A: Collarbone tattoos can be easy to conceal with collared shirts or higher necklines and visible with scoop or wide-neck tops. If workplace visibility is a concern, plan placement slightly under the collar line or choose clothing options that cover the area during interviews.
Q: Will fine line detail hold up on the collarbone or should I pick bolder work?
A: It depends on your priorities. Fine line can look incredible at first but tends to soften faster on bone. If longevity matters, request slightly heavier anchor lines and deliberate negative space. Expect touch-ups earlier for ultra-fine styles.
Q: Is it cultural appropriation to get a Japanese dragon design if I am not Japanese?
A: Opinions differ. One camp advises cultural avoidance unless you have a direct connection or deep understanding of the motif. The other supports respectful adaptation that acknowledges origin and avoids sacred symbols. If this matters to you, discuss respectful elements with your artist and consider subtle variations rather than direct replicas.
Q: How should I dress for my collarbone session to give the artist access and stay comfortable?
A: Wear a wide-neck shirt, a tank top, or a button-down you can pull aside so only the collarbone area is exposed. This prevents unnecessary fabric rubbing and makes it easy to keep the rest of your torso covered. A loose top also helps with movement during longer sessions.
Q: Do I need to worry about necklaces rubbing or causing fading during healing?
A: Yes. Avoid necklaces that rest directly on fresh ink for the first two weeks. After healing, thin chains are usually fine, but heavy or textured necklaces can increase friction and wear down delicate lines over time. A lightweight pendant is a safer daily choice; a search for delicate pendant necklace shows options that sit above the collarbone.
