
Fine line roses look delicate in photos and bold in person, and the trick is deciding which version actually holds up. I've spent time in five shops across Brooklyn and listened to artists argue over placement, spacing, and color recipes. This list collects colorful small rose directions that work on different skin types and body zones, with notes on aging, consult talk points, and what to wear the day of the session so the final piece reads as intended.
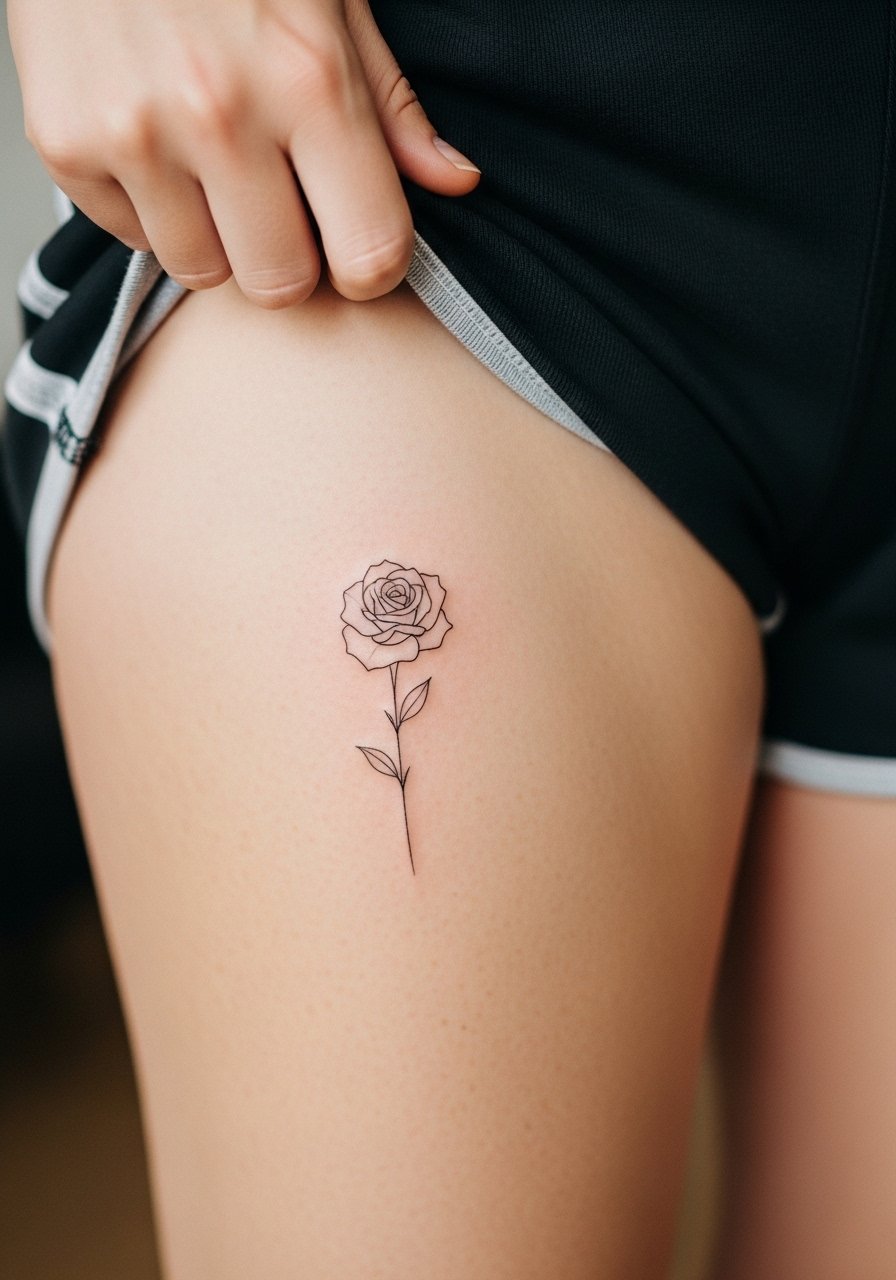
1. Fine Line Small Rose on the Inner Forearm

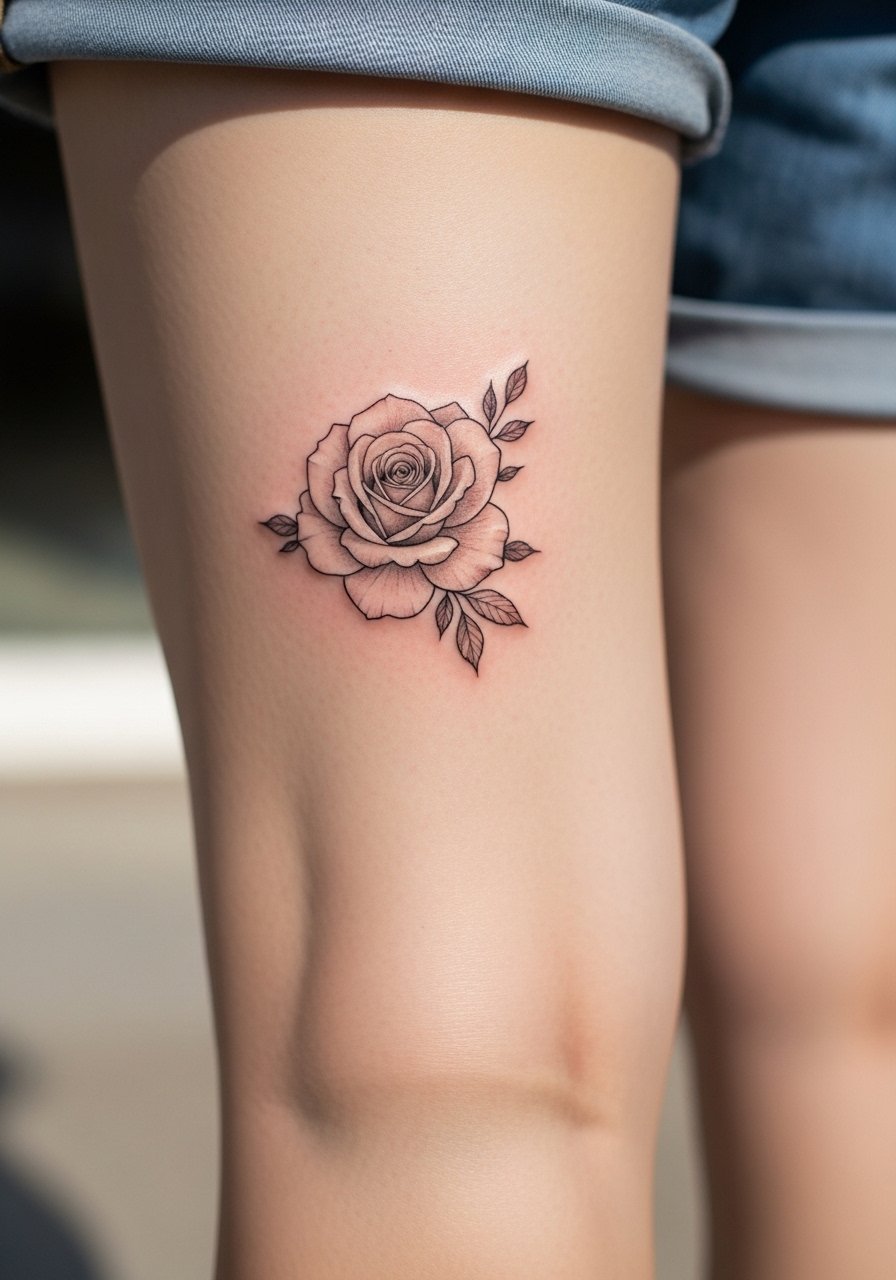
I recommend the inner forearm for this fine line rose when you want clarity without heavy saturation. Fair warning, the forearm sees sun and friction, so ask your artist for slightly stronger line weight than a single hairline so the stem and petals keep separation year two and beyond. In consultation, show a reference that matches the line weight you want and say "a touch more depth than ultra-fine." Expect a two-hour session and mild to moderate pain. Avoid asking for overly dense watercolor fills here because small washes tend to blur faster on thinner forearm skin. For showing it off, roll up sleeves and pair the piece with a rolled cuff linen shirt that frames the tattoo without competing.
2. Tiny Saturated Rose Behind the Ear, Below Hairline
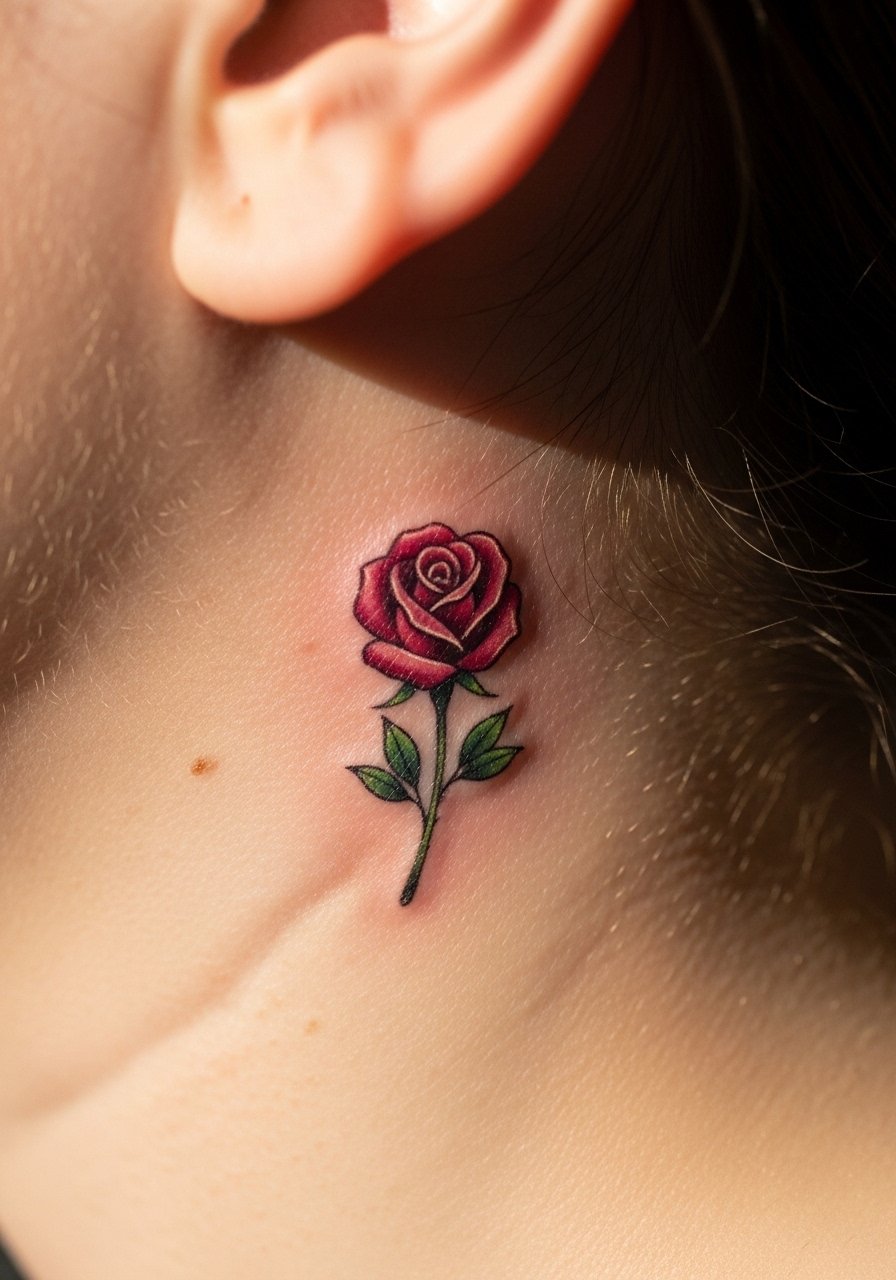
This placement reads like a private accent that peeks out with short hair or an updo. The skin here is thin so artists split into two camps. One camp says saturated color holds better long term and prevents the design from softening into a gray blur. The other camp warns heavy saturation risks migration given the delicate tissue. Ask your artist where they land and whether a small outline with a soft color fill is their go-to. Session time is short, about 30 to 45 minutes, but expect higher touch-up odds at year two. For the appointment wear a shirt that you can easily lift at the collar, like a wide-neck tee.
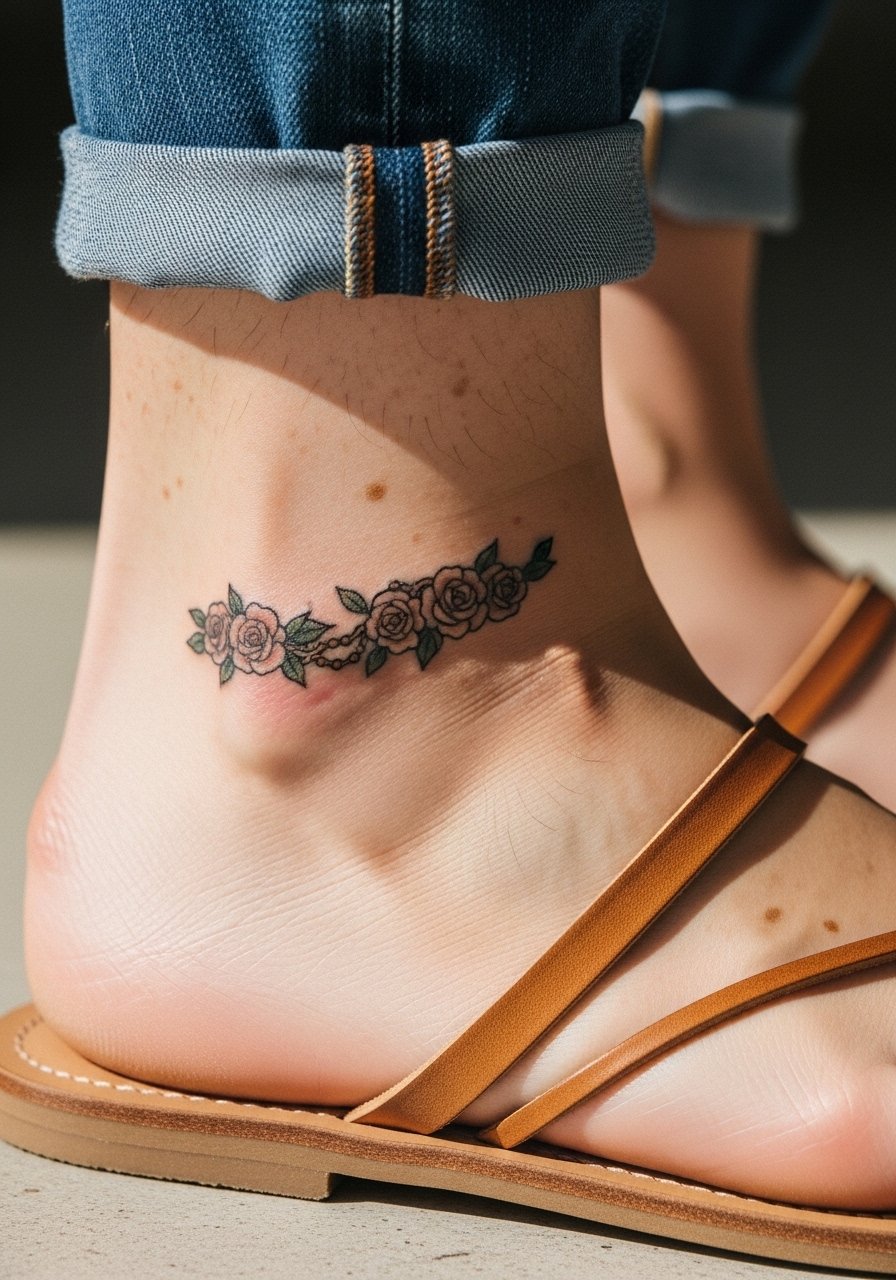
3. Watercolor Mini Rose on the Ankle
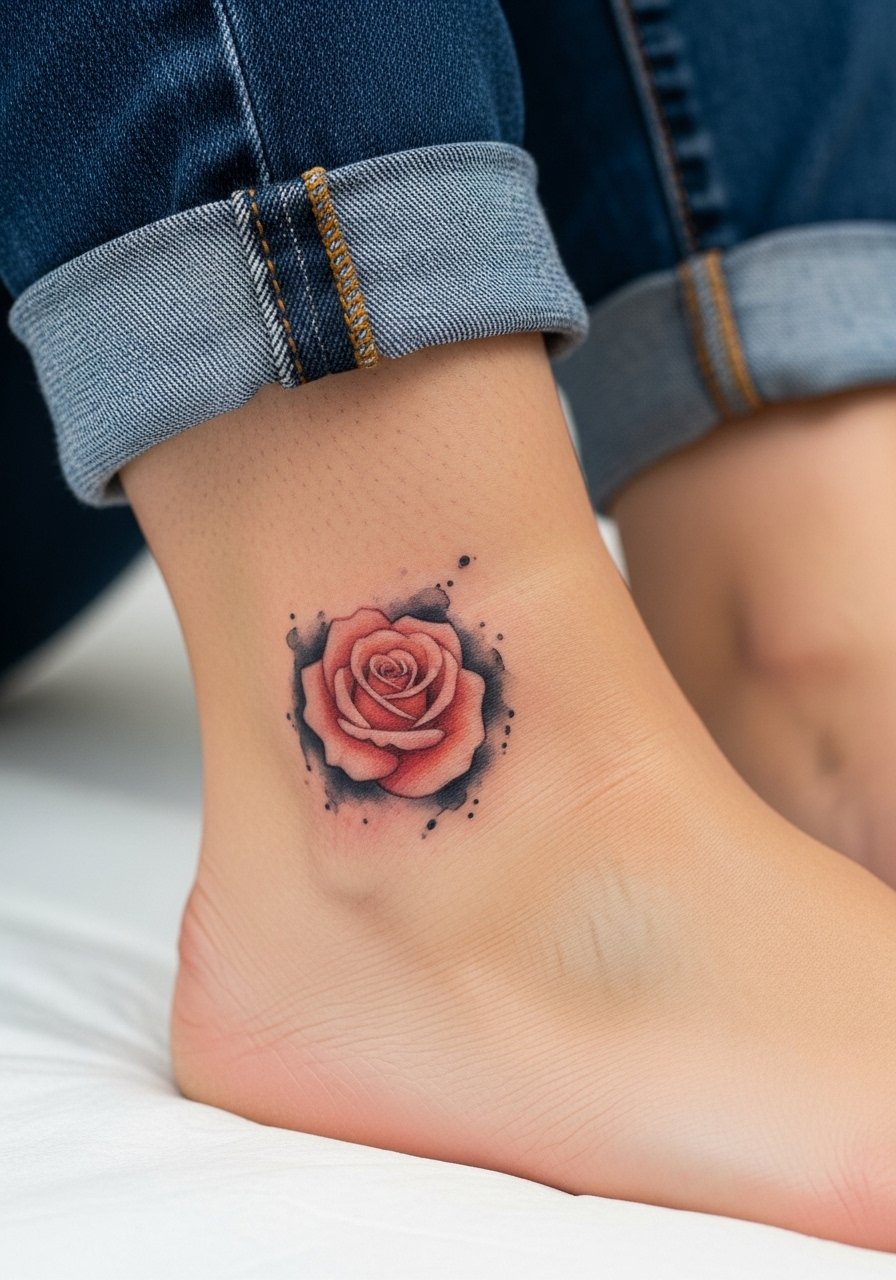
Ankle pieces look effortless but face constant rubbing from socks and shoes. Watercolor shading can be beautiful here when kept minimal and anchored by a thin outline. My observation is that heavy painterly fills on the ankle often fade into patchy color after a year. Tell your artist you want "delicate wash, anchored outlines" and expect a single-session appointment under an hour with moderate pain. For showing it off, wear sandals or roll up jeans and pair the tattoo with a minimalist ankle bracelet to draw attention without covering the work.
4. Micro-Realism Rose on the Side of the Ribcage
Ribcage work is notorious for being painful and for how it ages. Artists split into two camps on fine detail here. One group says the constant expansion and contraction makes ultra-fine lines blur quickly. The other group argues that proper needle depth and spacing let micro-realism sit well. If you pick this spot, plan for a longer session and expect a stronger pain level. Bring a loose cropped top so the artist can access the area easily. During consult, request slight spacing inside petals rather than extreme tight detail to avoid density that can merge when healed. Touch-ups at year two to three are common for high-detail rib work.
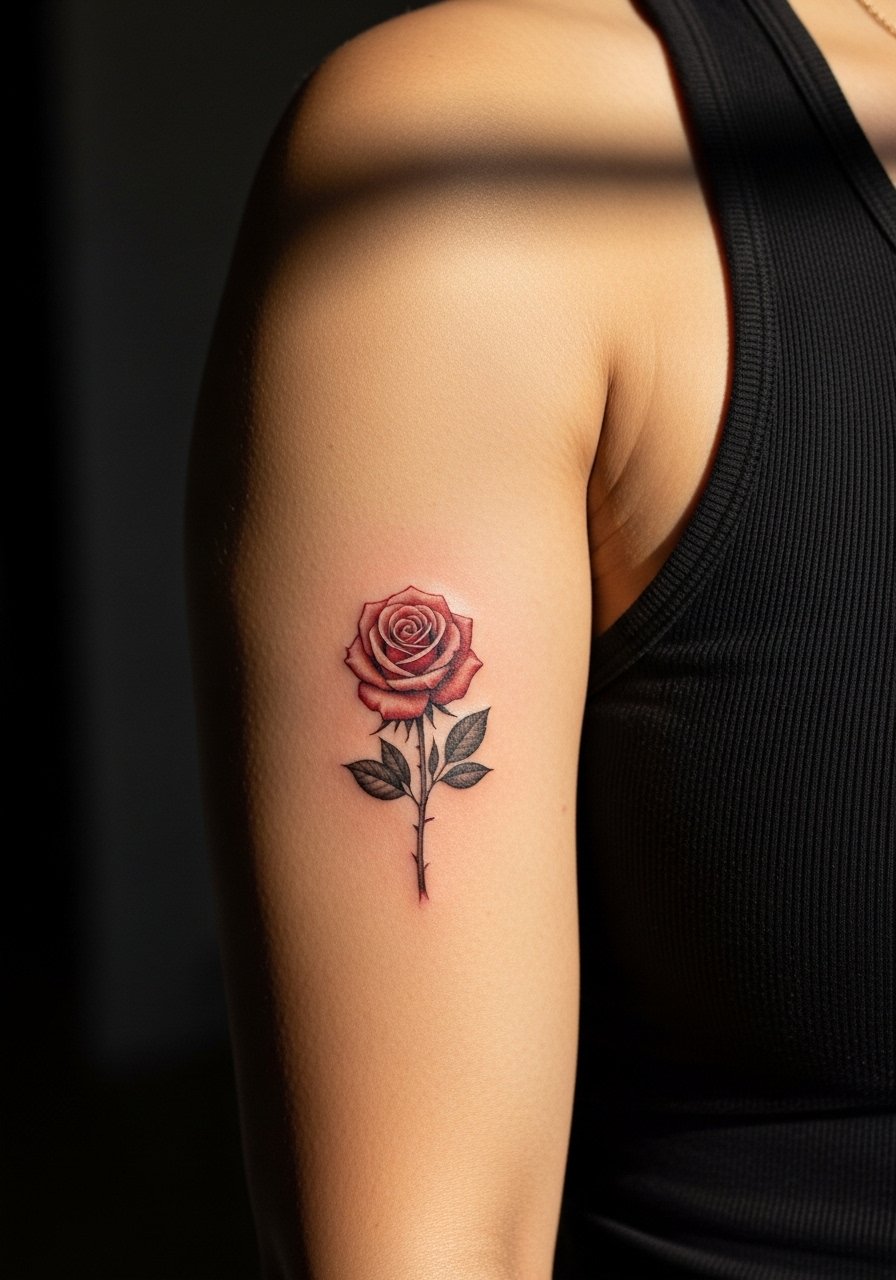
5. Traditional Bold Rose on the Outer Shoulder
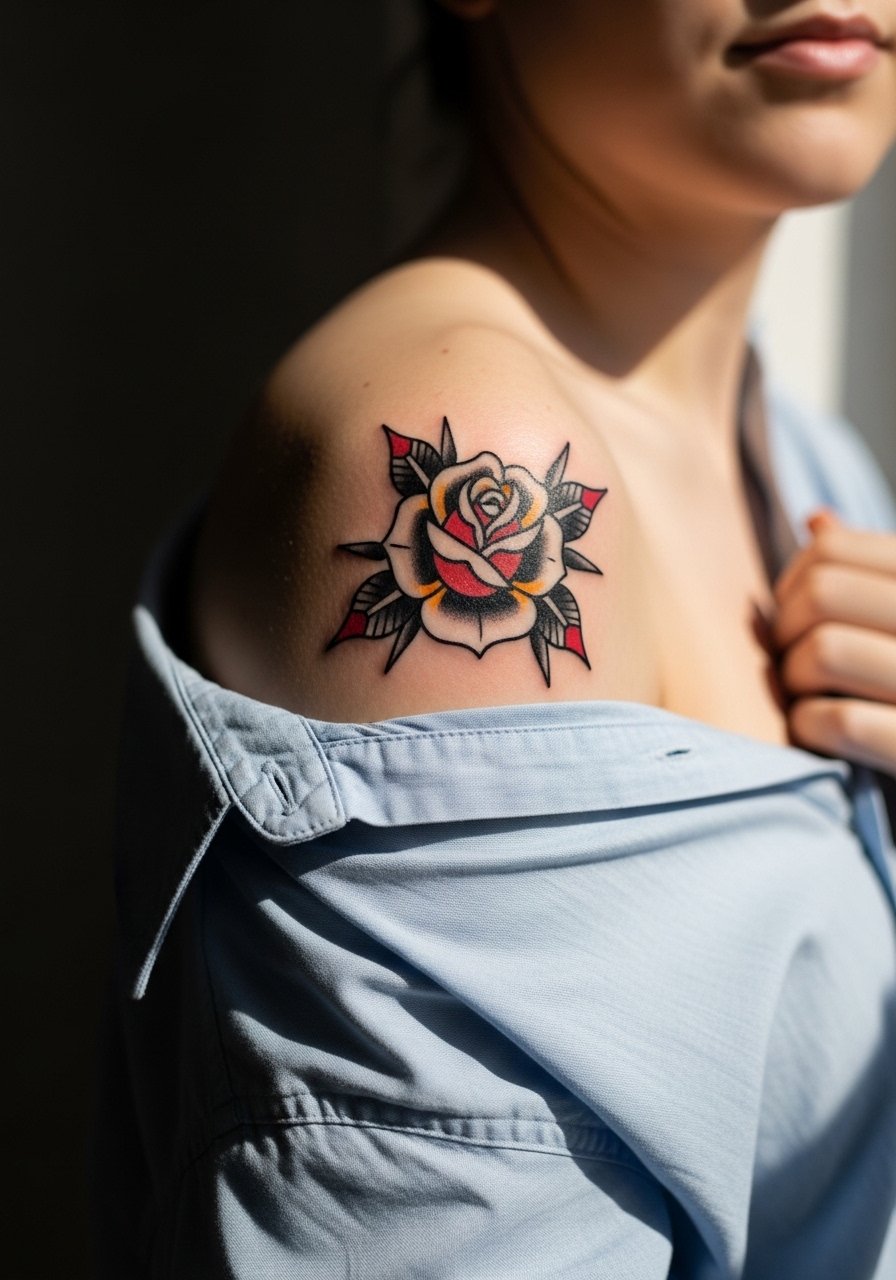
Bold traditional roses age predictably, which is why many people choose them for shoulders. Saturation and solid outlines soften into a pleasing patina while maintaining the shape for years. This placement is lower on pain, often a single 45-minute session. Tell the artist you want blocked color rather than tiny gradients, and avoid tiny script around the blossom because fine lettering and shoulder movement can blur. For the session, wear a loose button-down shirt you can pull aside; for evening wear, sleeveless tops frame the design well.
6. Mini Rose Cluster on the Wrist
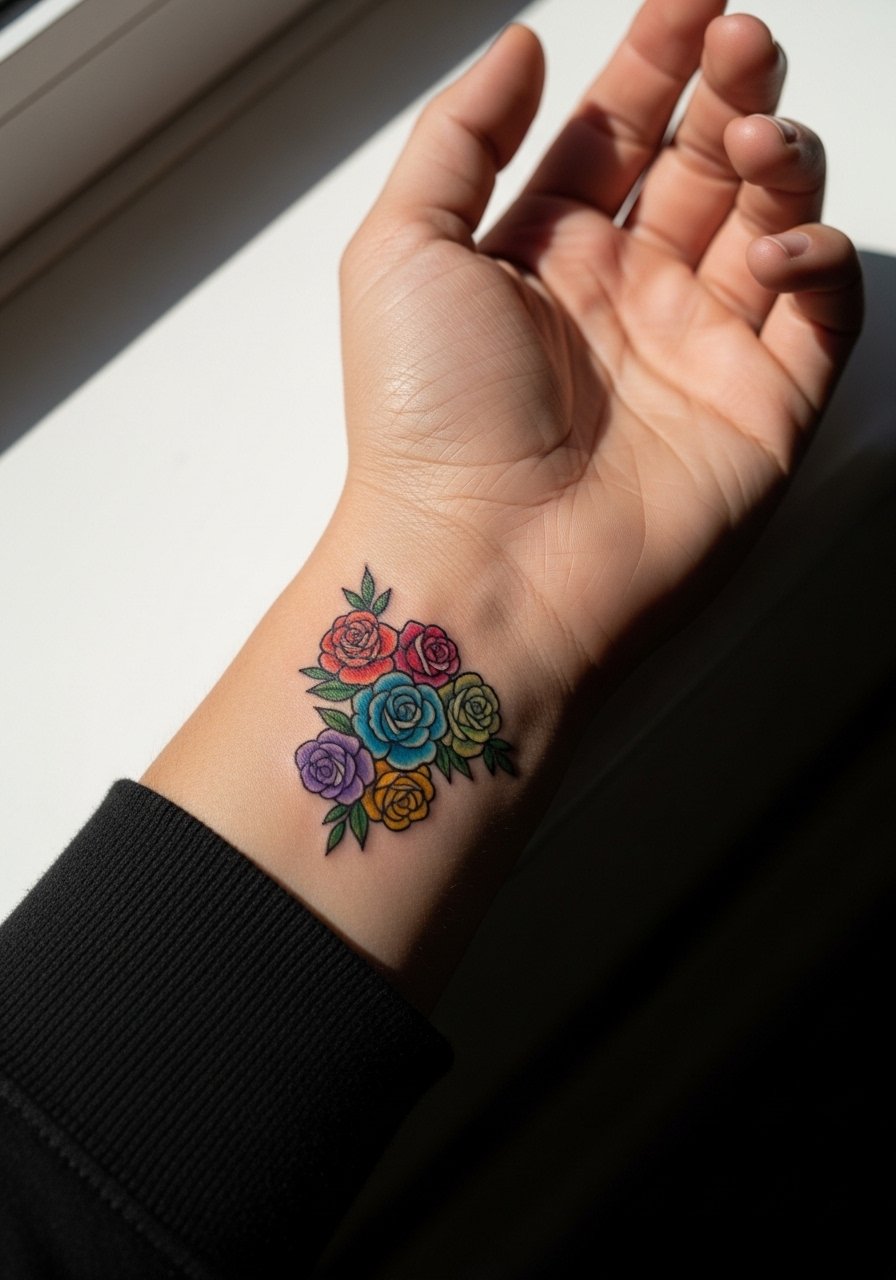
Wrist pieces are visible and fast to heal but they live in a high-friction zone. A cluster of tiny roses reads charming at first and then depends heavily on line spacing and saturation. I usually recommend slightly bolder outlines than ultra-fine work so the petals stay distinct after frequent washing. The session is short and relatively low pain. A common mistake is packing too many small elements into the wrist space. Instead, simplify the cluster into three focal blooms. For the appointment, wear a racerback tank with sleeves that roll easily so the artist can access the area and you can keep the tattoo dry while it heals.
Studio Day Picks
These picks help with the small placements in ideas 1 through 6, where access, friction, and delicate linework matter most.
- Stencil transfer paper kit. Lets you preview linework placement on the arm and wrist before committing, which is useful for inner forearm and wrist roses.
- Topical numbing cream. Applied as directed 30 to 45 minutes before reduces the sting on rib and shoulder sessions without affecting color.
- Thin protective film roll. Keeps ankle and wrist tattoos clean in the first few days when rubbing from footwear or bracelets is most likely.
- Fragrance-free gentle wash. Cleans the area without stripping pigment from small, colorful roses while they heal.
- Aquaphor healing ointment. A thin layer helps lock in moisture during the first 48 hours for small linework that needs to stay supple.
7. Minimal Stem Rose on the Side of the Finger
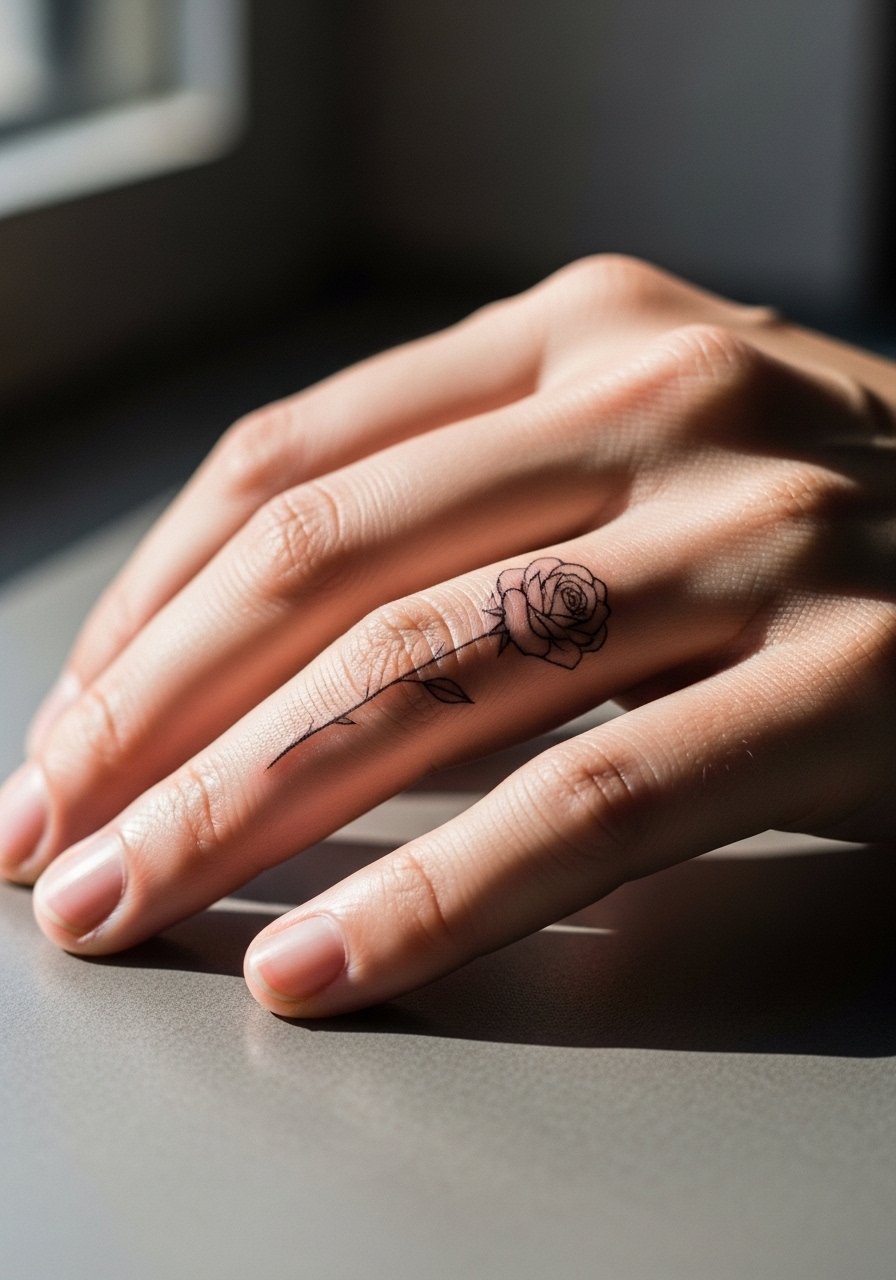
Finger tattoos are a commitment. The skin here is thin and constantly washed which makes fading and touch-ups the rule rather than the exception. A minimal stem rose works best when the design has intentional negative space and a bit of thicker linework around the petals. Expect a short but sharp session and plan on touch-ups at year one or two. A common mistake is asking for ultra-delicate detail that disappears quickly. If you want to dress the piece up, stack thin dainty rings or pair it with a minimalist midi ring set so the finger feels thoughtfully styled without covering the tattoo.
8. Tiny Bloom on the Back of the Neck

The back of the neck sits between visibility and privacy, so it can be a strategic spot. Pain is moderate and the area tolerates fine linework when the design is small. A mistake people make is overcomplicating the piece. Keep the silhouette clear and avoid dense color here. In consultation, ask how the piece will look with hair down versus pulled up. Also consider workplace norms since some employers still notice neck tattoos. Expect a 30 to 45 minute session and low maintenance other than standard sunscreen when exposed.
9. Chest-Center Tiny Rose Above the Sternum
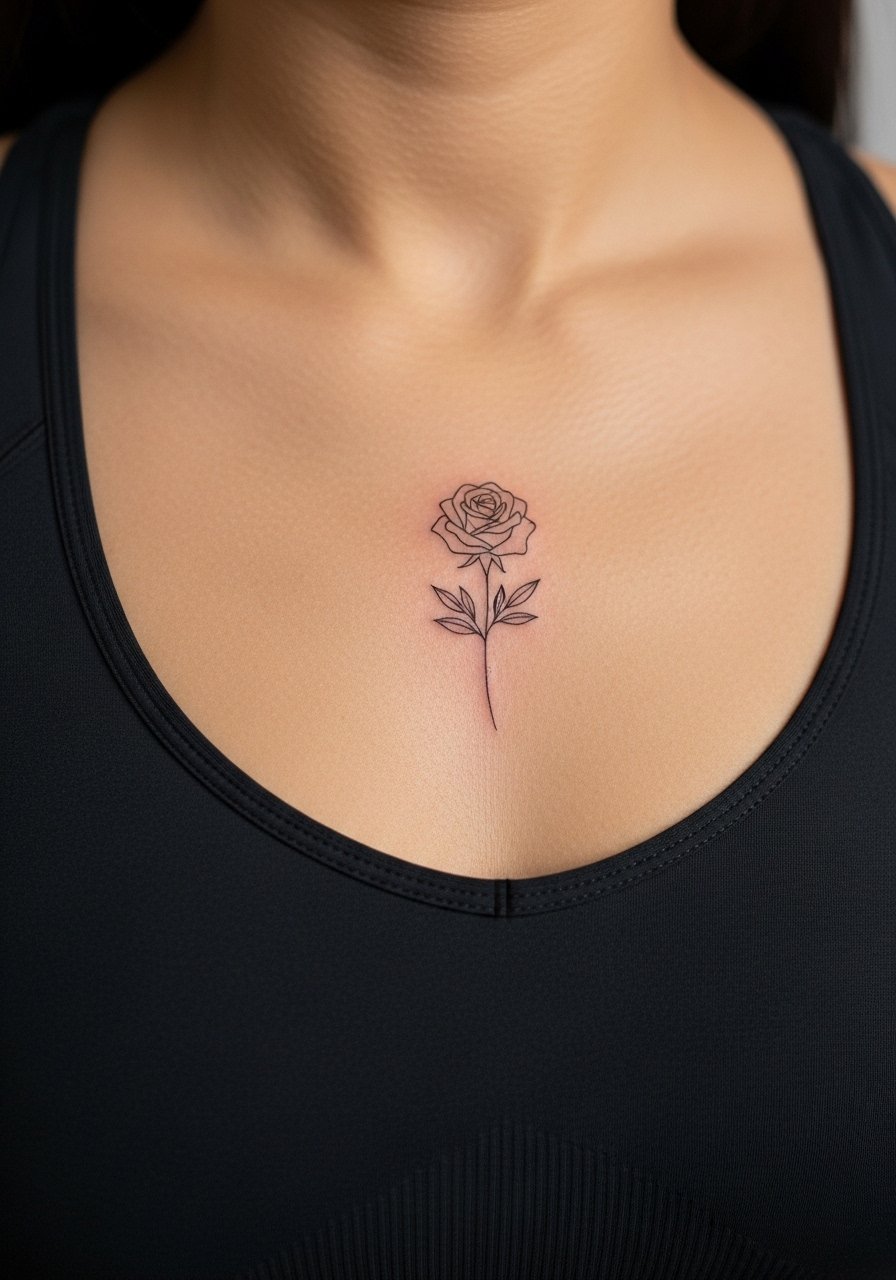
This petite chest placement has a strong visual payoff when paired with open necklines. Pain is higher on the sternum compared with the shoulder, and dense detail can feel crunchy to get through. I recommend simple petal shapes and a modest color wash so healing goes smoothly. During the consult, request that the artist keep shading light and avoid packed dots across the sternum. For showing off the piece, a thin chain pendant necklace sits just above the rose without competing visually.
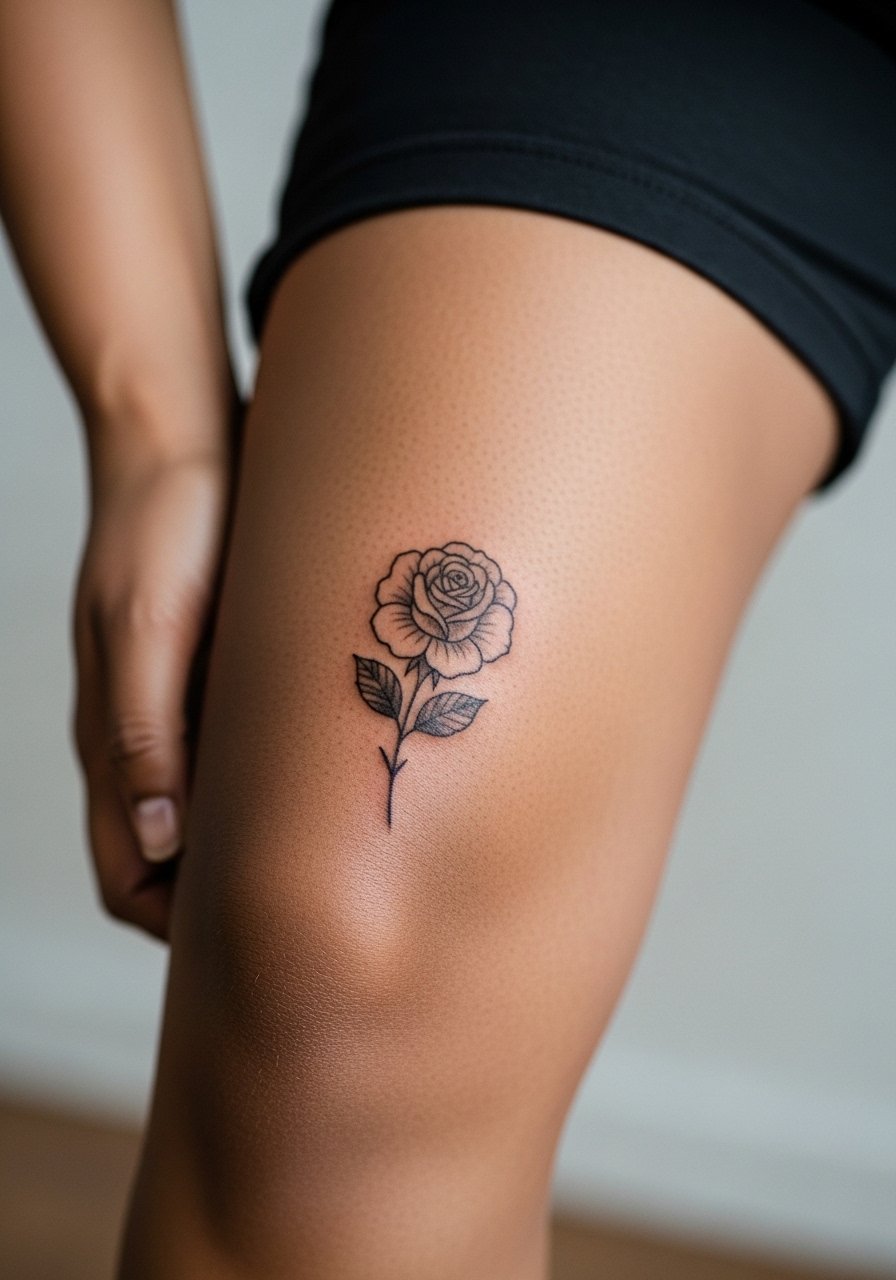
10. Subtle Rose on the Inner Bicep
The inner bicep is one of those spots where shading ages differently because the skin moves with muscle. Fine details can remain crisp if spaced correctly, but dense dot work in tight clusters may merge. The session feels tender but short. Ask your artist for slightly wider petal separations and to avoid heavy stipple shading in a small area. A real mistake is crowding text or other motifs close to the bloom; let the rose breathe. Wear a loose tank top that the artist can adjust so the area is accessible without stretching the skin.
11. Ankle Wrap Rose Chain
A wraparound on the ankle reads jewelry-like when done with clean spacing. It does see lots of movement and shoe friction, so keep colors focused and outlines clear. The main mistake is packing too many tiny roses into a narrow band. Ask for three to five slightly larger blooms rather than a dozen micro-buds. Session time is generally under an hour, but expect touch-ups sooner than on less mobile zones. For showing it off, sandals and cropped pants pair well and a thin ankle chain highlights the placement without hiding it.
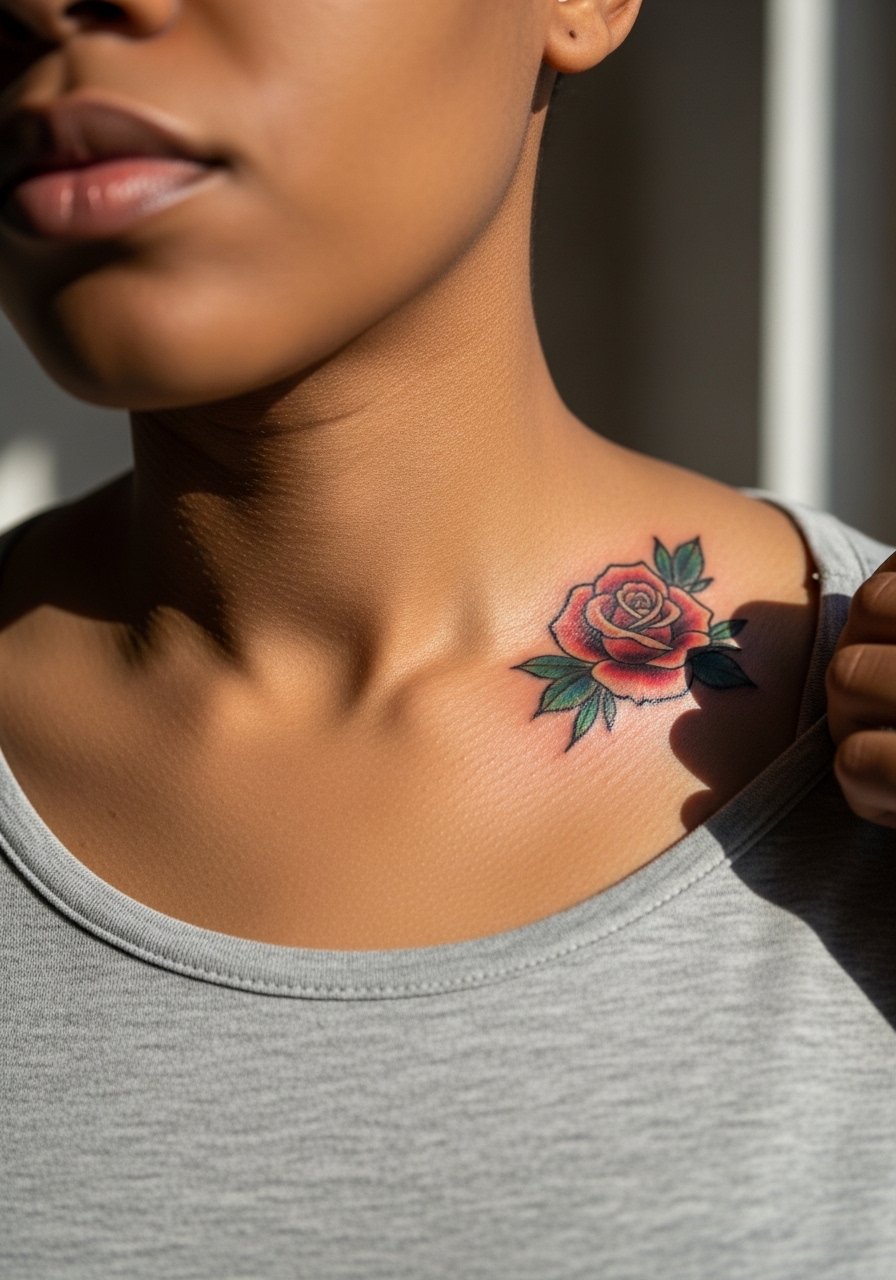
12. Tiny Red Rose on the Collarbone
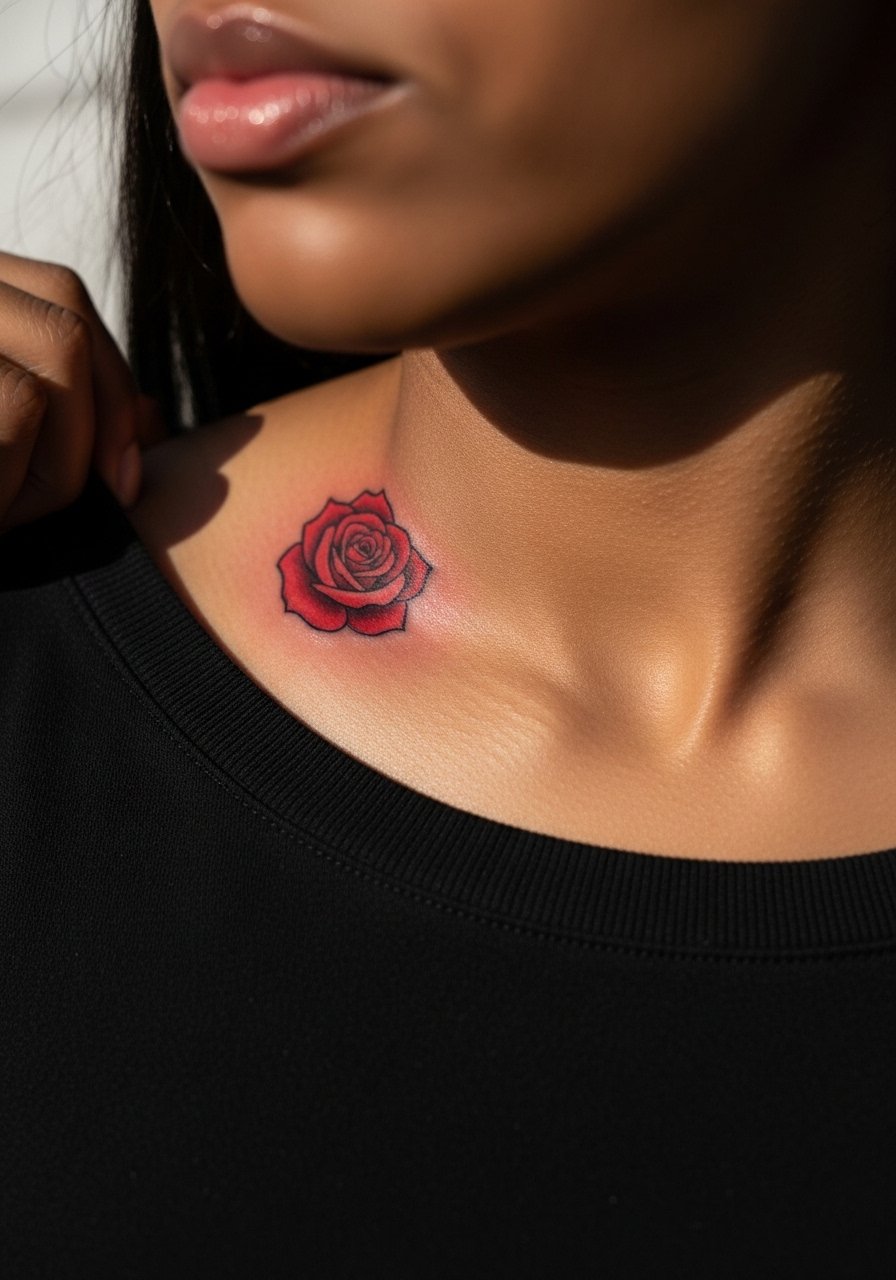
Collarbones are flattering but unforgiving of cramped composition. The skin is bony and color can sit unevenly if applied too heavily. I prefer a modest outline and a clean color fill that follows the bone contour. Session length is short and pain is moderate. Avoid asking for super intricate internal shading that reads poorly on the contours. When you pick outfits, an open-neck blouse or a slip dress shows the piece nicely for evenings out.
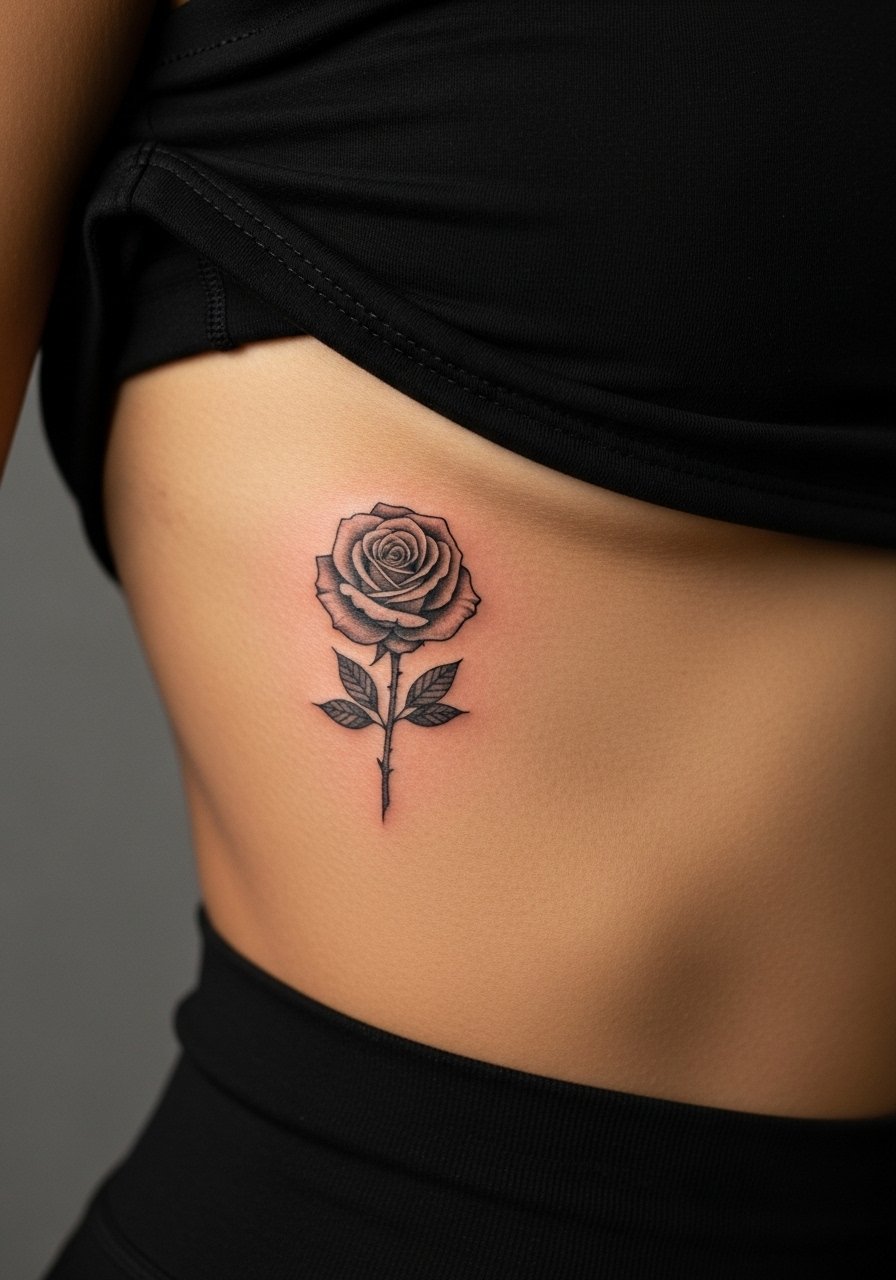
13. Tiny Blackwork Rose on the Lower Back
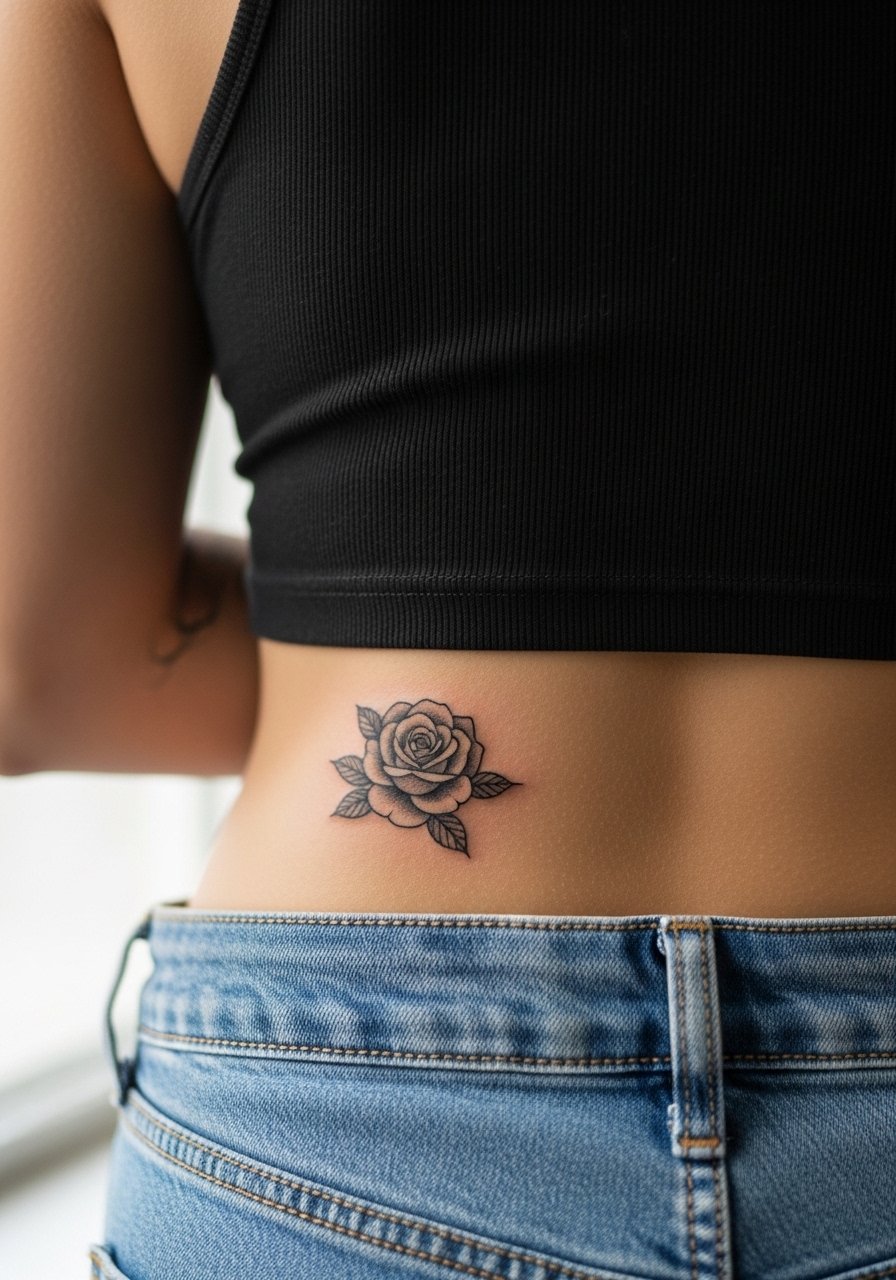
Lower back roses are discreet and hold up well when the design is bold and simple. Blended gradients in a tiny lower back piece can soften unevenly over time. For a small blackwork rose, ask for solid saturation and confident outlines to resist blur. Sessions are low to moderate in pain and often quick. Consider clothing fit after healing since tight waistbands can rub the area during early weeks. A common mistake is choosing extremely fine shading that vanishes into the skin texture over time.
14. Micro-Realism Rose on the Calf
Calf placements tolerate more detail and heavier saturation because the skin is thicker than at joints. Micro-realism roses here can keep crisp transitions for longer. The session can run longer if the artist layers color. Pain is moderate and healing is straightforward. A mistake is putting the flower too low on the ankle side where rubbing occurs. During consult, indicate final positioning while standing since calf curves change with posture. For the appointment, wear loose drawstring shorts so the artist can access the area easily.
15. Small Bloom on the Side Hip

Hip roses are intimate and often chosen for a private touch that shows with swimwear or low-rise jeans. The skin moves and stretches here, so keep linework slightly bolder than you might ask for on the forearm. Pain is variable and some describe it as sharp when the needle crosses bony areas. A common mistake is asking for tiny, intricate shading that blurs after skin shifts. For the session wear high-waisted bottoms you can lower a little, like high-waisted denim, to expose only the tattoo zone without discomfort.
16. Tiny Cluster at the Base of the Thumb

The thumb base sees constant use and hand washing which accelerates fading. Small clusters here benefit from compact shapes with confident outlines rather than delicate filigree. Sessions are quick and painful in short bursts. Expect touch-ups sooner than on the arm. A mistake is placing long stems that wrap the joint, which can feel and age awkwardly. For styling, short sleeves or bracelets that leave the wrist open help the hand tattoo read clearly; a minimal wrist cuff complements without crowding the thumb base.
17. Tiny Rose on the Inner Thigh
Inner thigh roses are private and smooth, which means detail can read nicely when spaced properly. This spot has more forgiving skin but demands specialized experience from the artist because of sensitivity and stretch. The session often involves more position changes and medium pain. I advise telling the artist if you bruise easily so they can adjust technique. A common mistake is tiny stipple fills that can look like bruising while healing. For the appointment pick loose shorts so the artist can access the area without causing pressure on the fresh work.
18. Small Rose Near the Clavicle Edge
Clavicle roses sit nicely with necklines but can show uneven healing if the design crosses bone prominence. Ask your artist to keep petals lifted away from the highest point of the bone and to favor softer washes rather than packed dots. The pain level is moderate. A common mistake is lining too close to the bone where touch-ups can be uncomfortable. For showing it off, pair with open-neck tops and a delicate camisole so the area reads intentional.
19. Single Rose at the Nape of the Neck

Nape tattoos peek out from hair and can be very flattering when kept simple. The skin here tolerates small designs well but detail can soften if the piece sits under long hair that rubs constantly. Keep the silhouette clean. The session is quick and pain is low to moderate. A practical mistake is choosing heavy shading that catches on hair during early healing. If you plan to show it often, a cropped or wide-neck top works; for discreet wear, let hair down.
20. Small Rose on the Back of the Hand
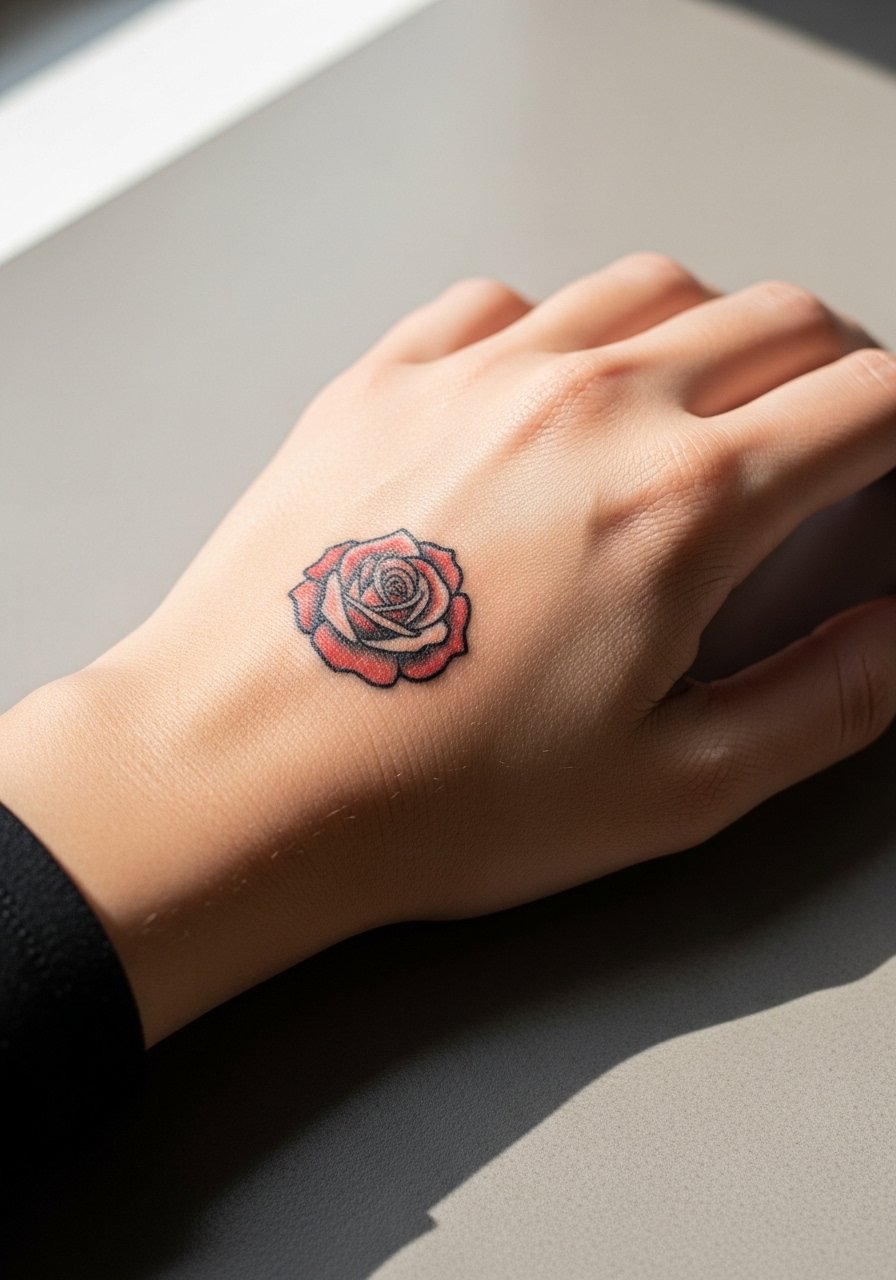
Hand tattoos age faster and remain controversial. One camp says hands are fair game and style statements that fit modern workplaces. The other camp cautions that hands are high-traffic and may affect job prospects in some fields. If you choose this spot, plan for heavier saturation and realistic expectations about touch-ups. Sessions are short and painful. Avoid tiny internal shading that vanishes into skin texture. A practical styling tip is to keep jewelry minimal around the wrist so the hand piece reads clearly; a skinny stackable bracelet can complement without covering.
21. Tiny Rose Behind the Knee
Behind-the-knee pieces are quiet and surprising when visible. The area flexes a lot which can blur dense detail over time. I recommend a small, simplified rose with clean outlines and light color. The session can be awkward since legs may need to be angled, and the pain could spike when the needle crosses the joint fold. One mistake is packing in heavy dot shading that migrates with motion. For the appointment, wear loose shorts you can shift so the artist accesses the area without stretching the skin.
Frequently Asked Questions
Q: Will a watercolor small rose fade faster than a traditional colored rose?
A: In my experience watercolor fills often fade into a softer wash quicker than saturated traditional fills. Watercolor looks beautiful fresh but relies on lighter pigment, so plan for touch-ups earlier and protect the area from sun exposure.
Q: How do hand and finger roses affect job prospects long term?
A: Views vary by industry and region. One camp treats visible hand tattoos as acceptable, while the other advises caution for client-facing or conservative workplaces. Consider your career trajectory and whether you are comfortable touching up or covering the piece if needed.
Q: Should I pick a darker outline for roses on darker skin tones?
A: Yes, slightly stronger linework and thoughtful contrast help a small rose read clearly on darker skin tones. Ask your artist to adapt the palette so color choices complement your tone while keeping petal separation clear.
Q: How many sessions should I expect for a micro-realism ribcage rose?
A: Most small micro-realism rib pieces fit into one session but expect that the artist may pause to assess how the pigment sits and schedule a touch-up. Pain and movement on the ribs can lengthen the time needed.
Q: What should I wear to a sternum rose appointment to make access easy?
A: Wear a fitted sports bra or a zip-up hoodie you can move aside so the artist only exposes the sternum strip. A zip-up hoodie is practical for comfort during healing and precise access.
