
Fine line work is everywhere online, but the truth is that not every upper shoulder piece will age the same. Pain, sweat under straps, and blowout risk all change how a black and grey shoulder tattoo looks after a year. Pick a direction now that balances longevity and visual weight, and the first idea below shows a reliable start for anyone who wants bold but wearable shoulder ink.
1. Bold Compass Nestled on the Shoulder Cap
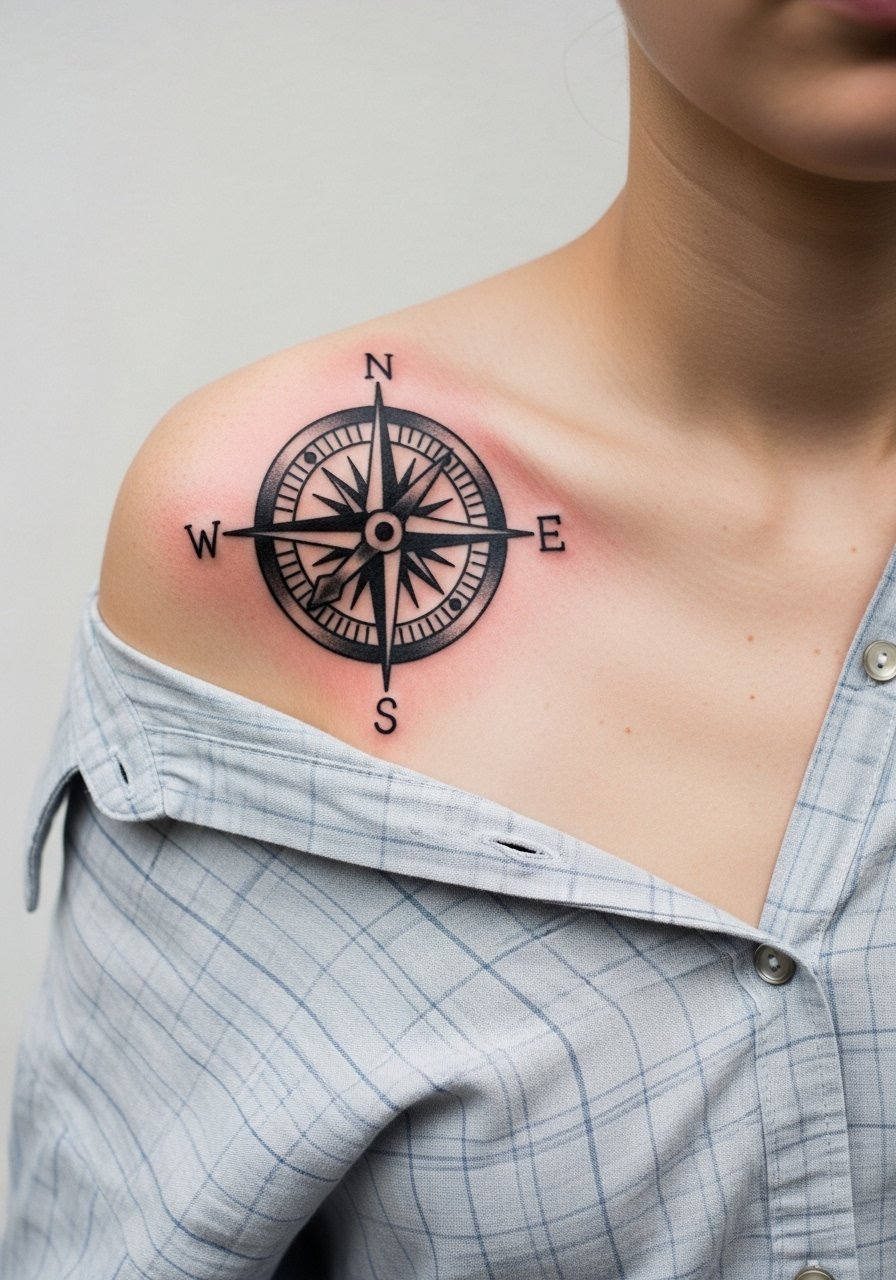
A compass reads strong on the shoulder because the round plane gives it a natural frame. For this, ask your artist for bold linework with saturated black fills in shadowed quadrants rather than tiny hatch shading. The common mistake is shrinking the design so it reads like a speck from across a room. Expect a three-hour session with moderate pain from the deltoid, and plan a touch-up around year two for the dark fills. For the session wear, pull on a loose button-down shirt you can slip off or shift so the artist has full access.
2. Stippled Mandala That Wraps Toward the Collarbone

This version uses stipple shading to keep heavy contrast without solid black blocks that trap heat under straps. Tell your artist you want spacing between dot clusters so the pattern keeps its geometry as it settles. The long session means more movement in the shoulder, so expect intermittent sting and short breaks. A common aging issue is lost negative space when dots are too dense. Pair this with open-neck shirts for evenings. Try an open-neck linen shirt to show the wrap without rubbing against the ink.
3. Anchor and Rope, Low-Profile and Saturated
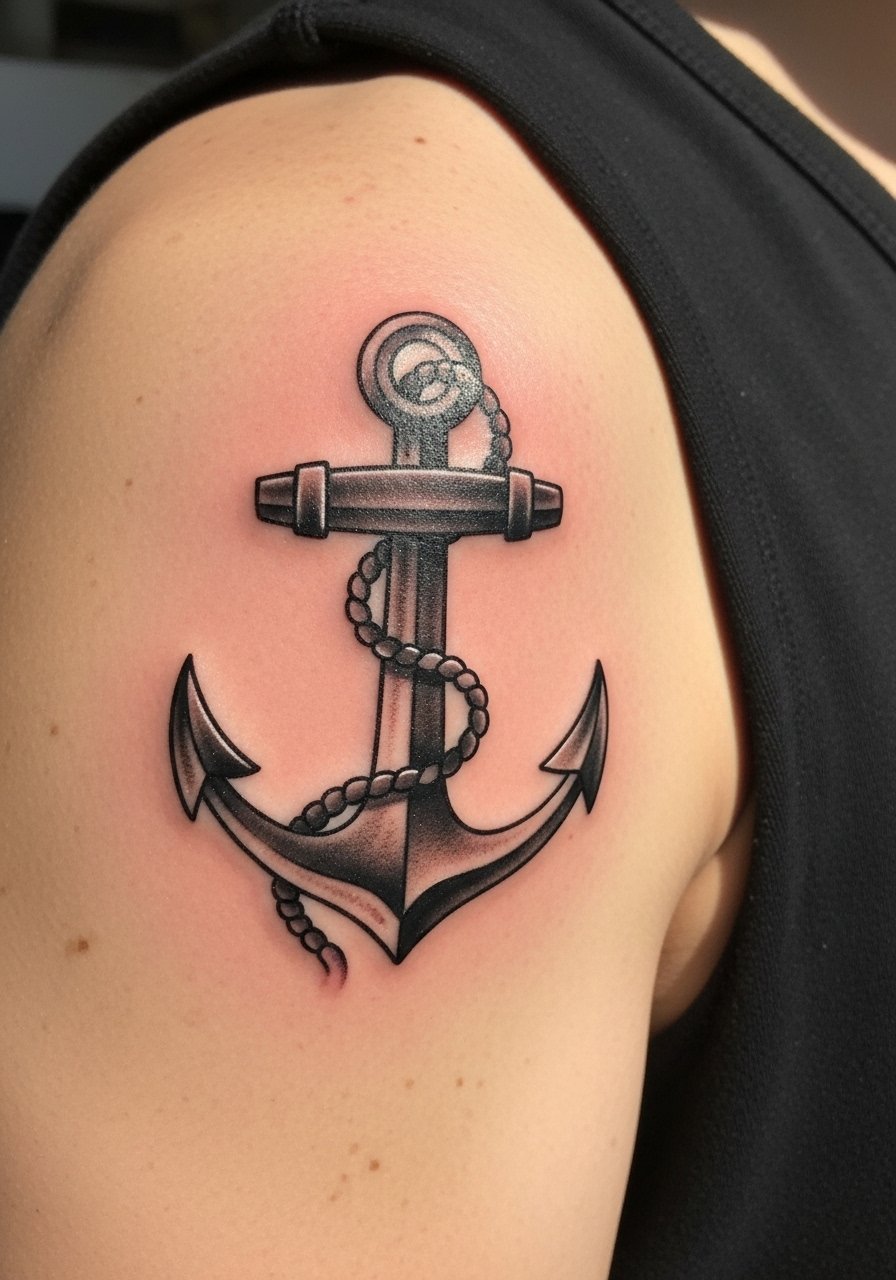
An anchor with thick linework holds up because saturation survives sun better than micro detail. Ask for denser black in the rope shadows and softer whip shading for midtones. The mistake is over-detailing the rope with tiny crosshatches. Pain is moderate on the shoulder cap and sessions usually run two to three hours. Expect touch-up needs around year three if you wear shoulder straps often. This style looks sharper with rolled sleeves or tank tops for casual wear.
4. Geometric Plate That Follows Muscle Flow

A geometric plate reads bold when the linework respects the deltoid curve. Tell your artist to map the design on while you flex so the lines align with muscle. The wrong move is forcing a perfect circle across an oval shoulder. Expect a session with precise linework that can feel prickly in places where the skin stretches. If you plan to show it often, pair this with short-sleeve linen shirts that frame the shoulder without competing.
5. Photorealistic Skull Accent, Subtle Fade-Out
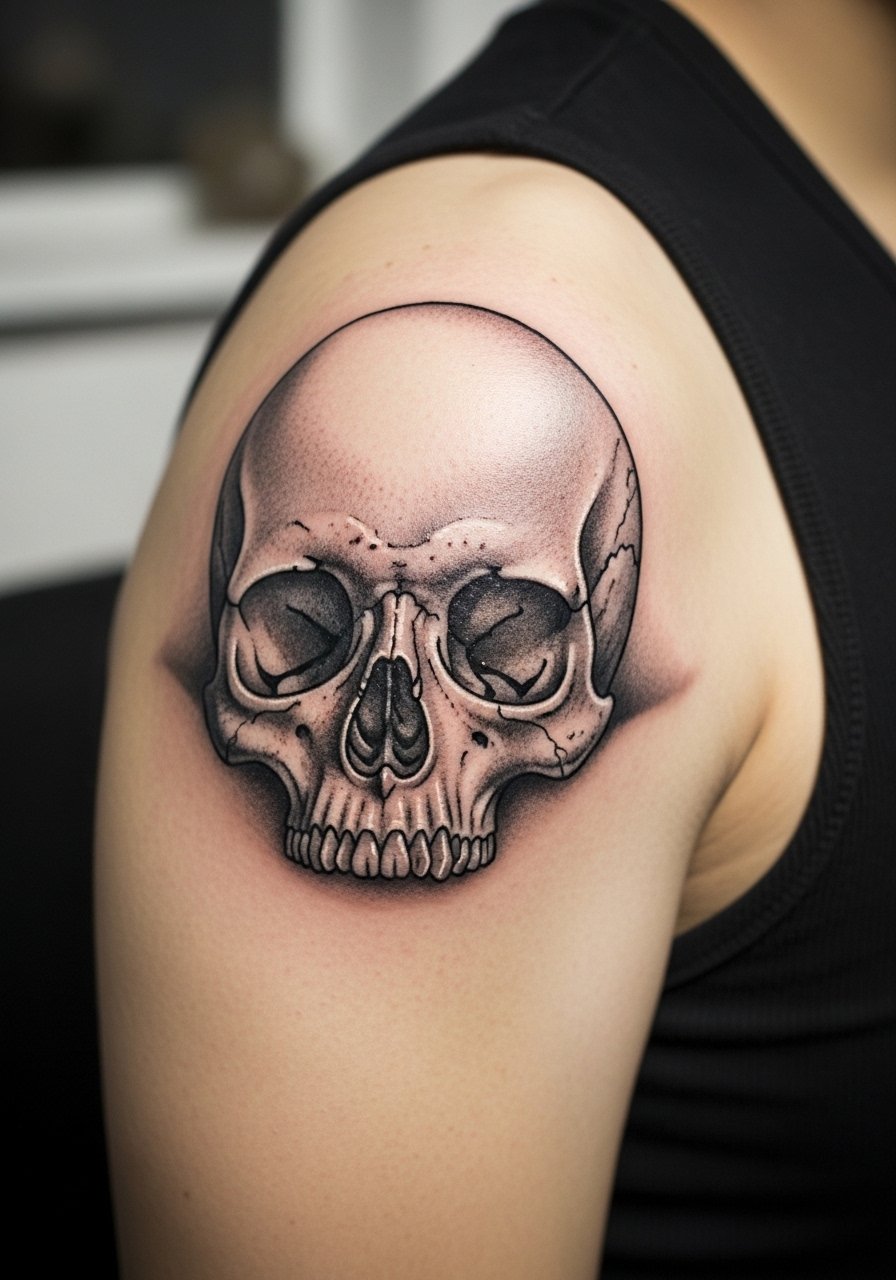
Micro-realism can look dramatic but it needs scale on the shoulder. Tell the artist to keep the high-contrast focal area about the size of a palm and let the rest fade with soft grey washes. A common problem is compressing too much detail into a small patch which blurs after healing. Sessions can be longer and the skin movement makes sharp edges feel scratchy during the appointment. For showing it off, button a loose henley with the top buttons open so the piece reads without a collar crowding it.
6. Minimalist Script Along the Shoulder Edge
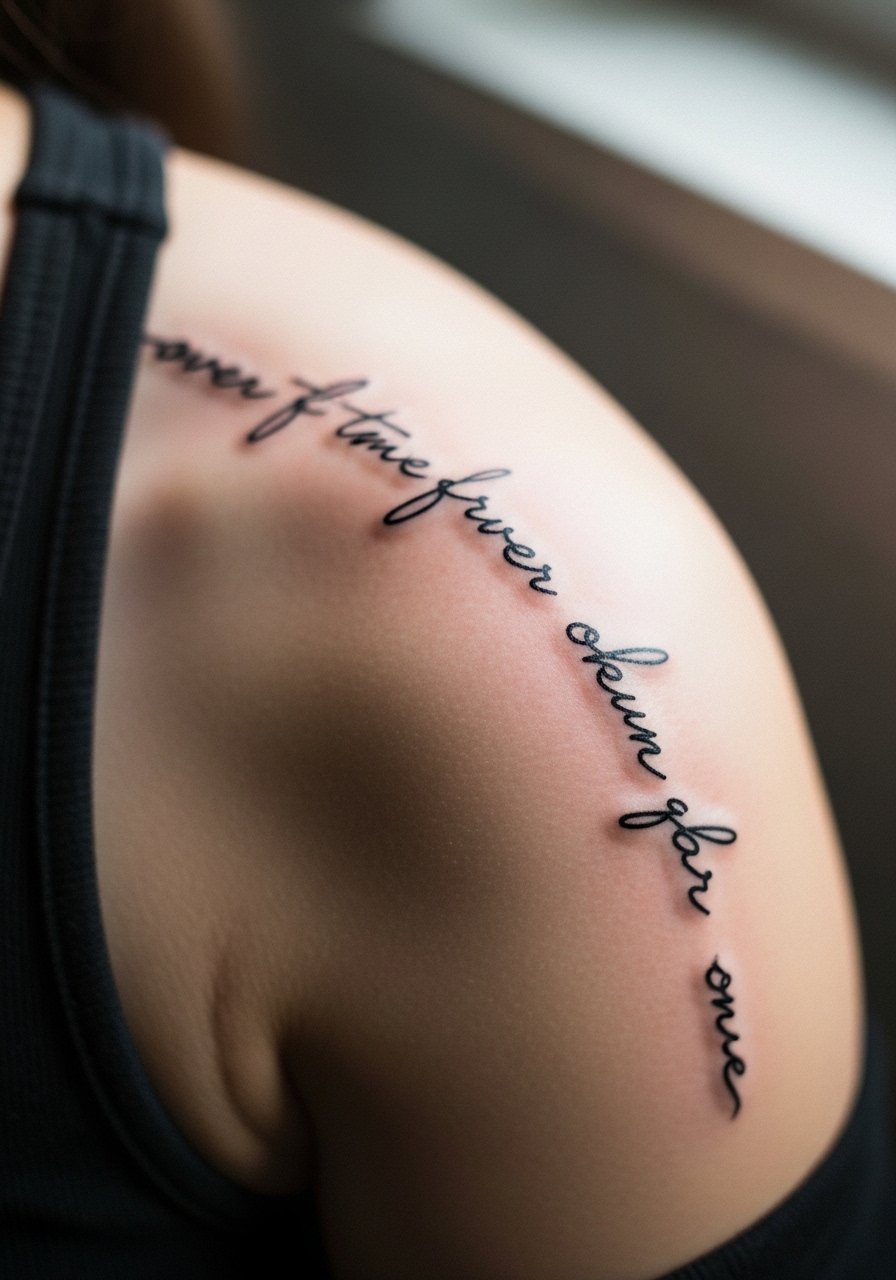
Thin script has two main failure paths on this placement. One camp insists tiny lettering will blur within a couple years because the skin stretches. The other camp says proper needle depth and spacing keeps script legible for longer. Ask your artist which approach they take and prefer slightly larger letterforms to guard against blowout. The session is quick but the placement can feel sharp near the bone. Wear a loose tank top to your appointment so the artist has clear access without you getting overheated.
Studio Day Picks
The six upper shoulder pieces above trade off between dense black saturation and delicate linework, and the right prep helps manage swelling, strap friction, and stencil accuracy during the session.
-
Stencil transfer paper kit. Lets you and the artist preview placement on the curved shoulder before the needle hits skin which matters for wraparound designs.
-
Cooling gel pack wrap. Helps control early swelling after a long shoulder session and eases the first evening of soreness for dense blackwork.
-
Thin protective film roll. Useful if your shirt strap will brush the new ink in the first 48 hours, especially for compass and anchor pieces.
-
Fragrance-free gentle body wash. Keeps the area clean during showers without stripping ink or irritating tender linework.
-
Aquaphor healing ointment. A thin layer in the first days helps prevent tight crusting on heavily saturated shoulder fills without suffocating the tattoo.
7. Japanese-Inspired Koi Flowing onto the Deltoid

This silhouette leans on bold black areas and controlled grey washes so the image survives sun exposure. Note on origin: this style draws from Japanese traditions so many pick altered motifs rather than direct copies. In consultation, ask for scale that lets the fish breathe across the shoulder curve. The session may be multiple sittings if you want deep saturation. Avoid crowding the design with tiny scales which can morph into tonal muddiness over time. For showing it off, pair with a short-sleeve cotton shirt so the body of the piece sits cleanly on the arm without straps obscuring the flow.
8. Roman Numeral Band Around the Shoulder Cap

Bands can look elegant but they need consistent linework around a curved surface. Tell the artist to lay the stencil with you standing so the numerals sit level when you move. Small numerals are the usual mistake because tight characters blur as the shoulder moves. Expect a short session and minimal swelling, but watch for blowout along the band edge if the needle goes too deep. This piece pairs well with rolled sleeves. Try a relaxed tee that keeps attention on the band when you lift your arm.
9. Gothic Lettering with Soft Grey Fills
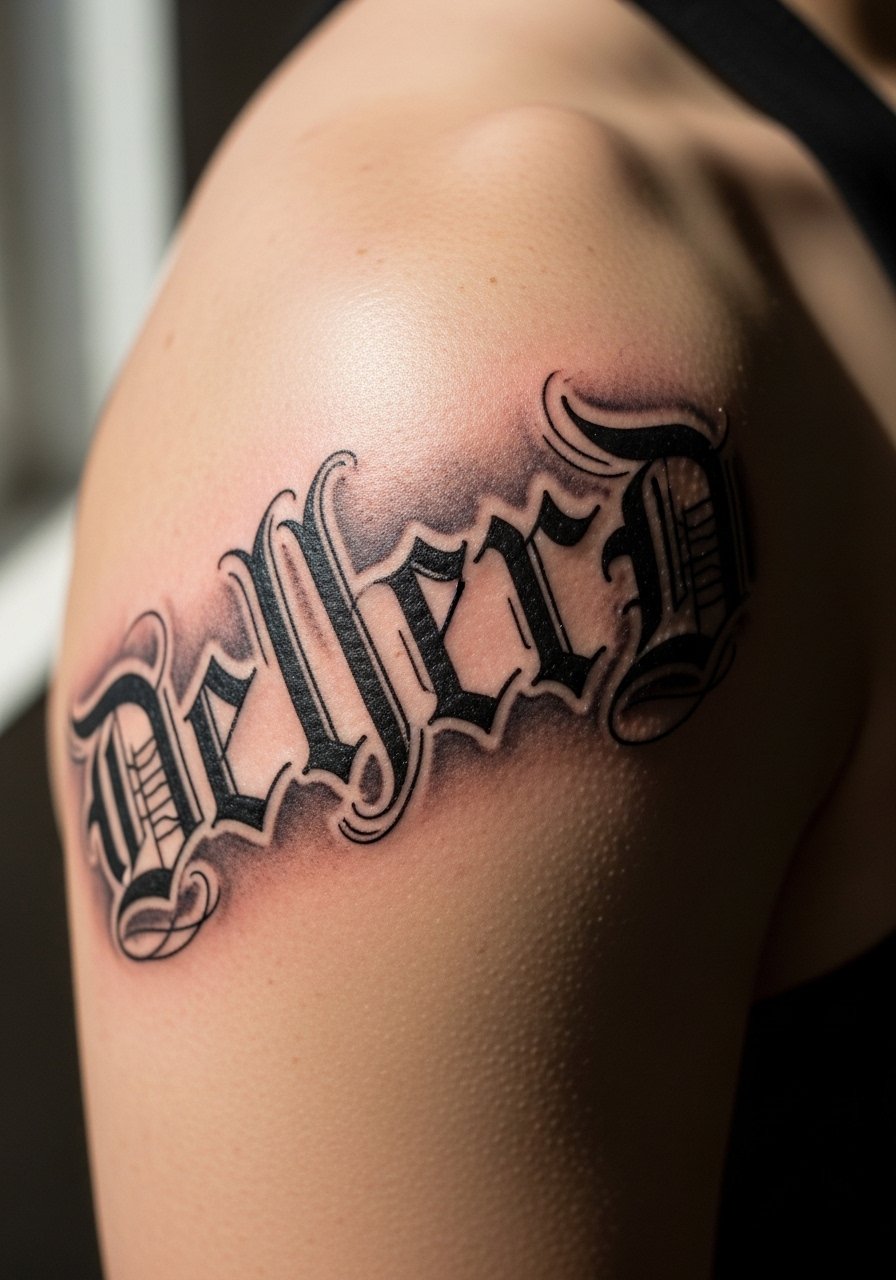
Heavy black lettering survives better than fragile thin scripts. Ask for slightly thicker strokes and gentle grey shading behind letters to prevent the black from looking flat. The common mistake is demanding tiny ornate letters that look sharp fresh and merge after a year. This placement feels prickly near the top of the shoulder during the needle work, but sessions are usually brief. If you want to show it casually, button a short-sleeve polo with the top button open so the lettering reads.
10. Blackwork Wave Panel That Curves with Muscle

Blackwork panels age well when the negative space is planned. Tell your artist you want crisp borders and gradual grey transitions into skin so the panel does not look like a flat blot in a year. A mistake is solid filling without contour lines which makes the area trap heat and fade unevenly. Expect a heavier buzzing feel during saturation and a follow-up touch-up after a year if you wear backpacks often. Pair this with sleeveless shirts for hot days to keep the panel visible without shoulder straps rubbing the fresh ink.
11. Ornamental Band with Dot Work Edge
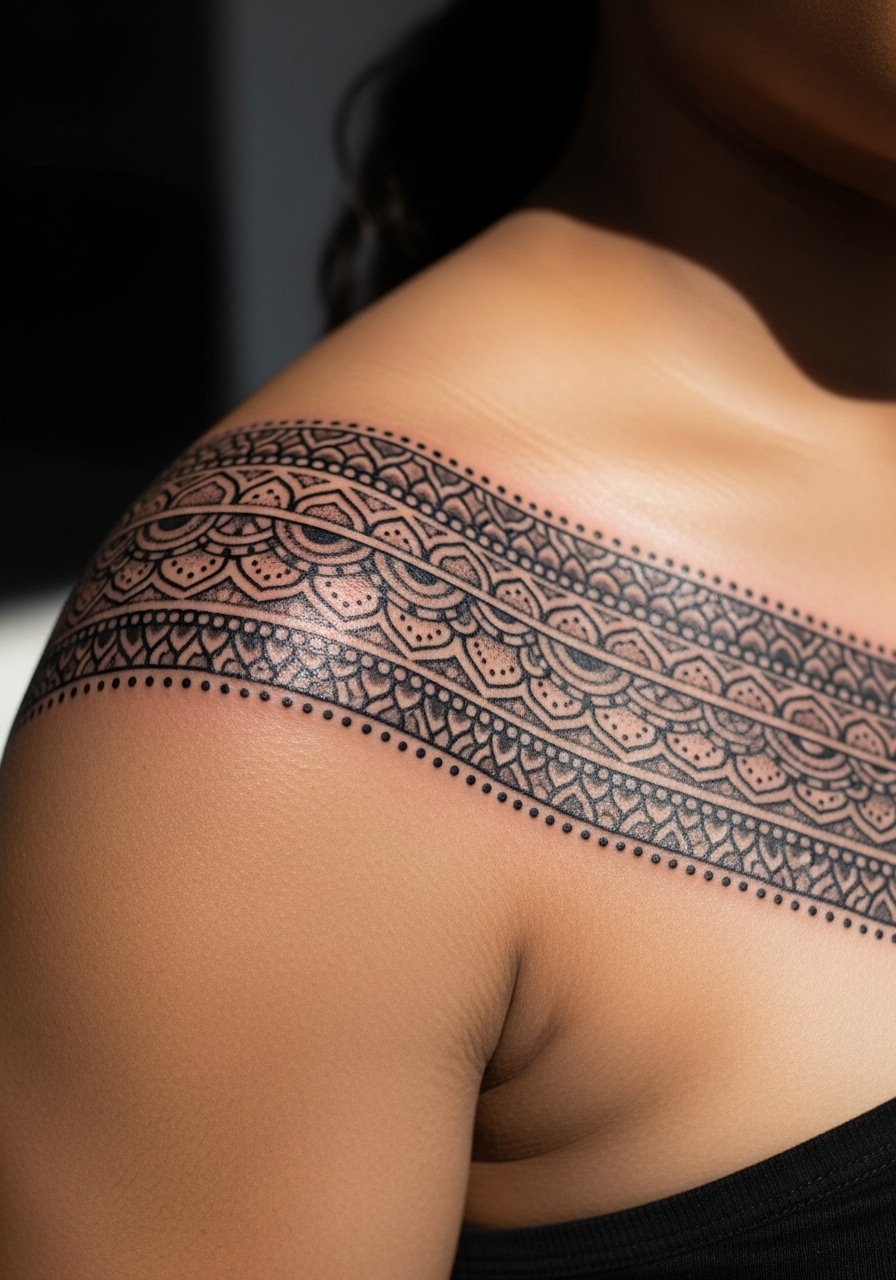
An ornamental band benefits from a clear focal width. Ask for a slightly wider band so the dot work has negative space to settle into. The error is compressing ornament into a thin line where dots close in and lose shape. Sessions are steady but not overly long. Dot work can soften at year three depending on sun exposure. To display it without friction, choose a sleeveless cotton tank for warm-weather wear.
12. Realistic Animal Portrait, High-Contrast Greywash
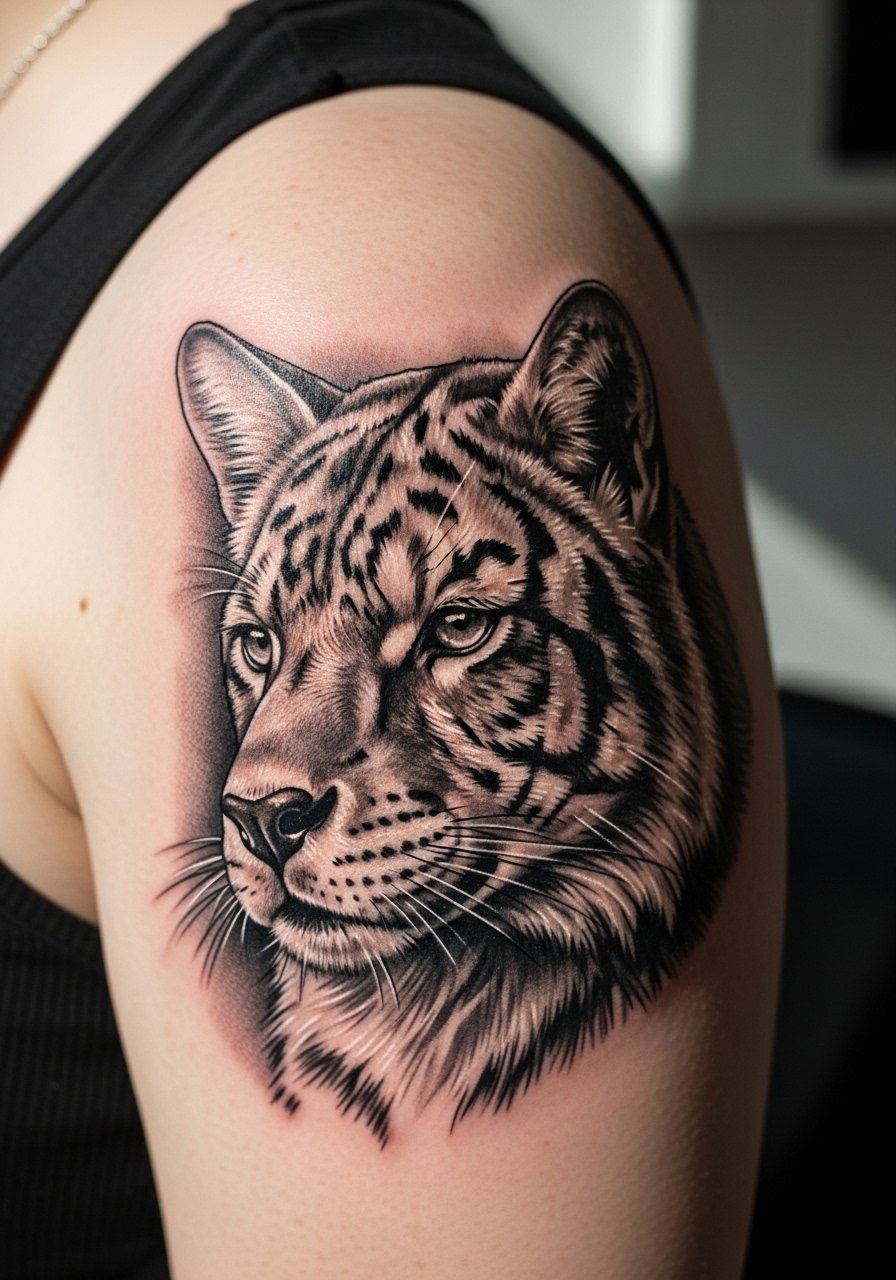
Portraits demand scale here, so ask for a reference size and insist on a rehearsal stencil to check expression and angle. Too-small portraits lose facial clarity as the shading settles. Expect a longer, detail-focused session and realistic portraits usually need touch-ups at two to three years for high-frequency use of greys. If you plan to show it socially, an open-collar shirt frames the shoulder with minimal interference.
13. Norse Knotwork That Flows Over the Deltoid

Knotwork needs breathing room between strands so the pattern reads after healing. Tell your artist to prioritize clear line spacing and avoid tiny crossing points. The common mistake is overcomplicating interlocks which blur. Sessions demand attention to layout and feel like repeated precise pinpricks. For display, a rolled-up flannel or a tank keeps the knotwork visible without rubbing from straps.
14. Minimal Geometric Triangle Cluster, High Contrast

Minimal geometry needs a slightly larger scale on shoulders to avoid blowout. Ask for bolder outer lines and measured spacing in clusters. Tiny triangles are the usual misstep. Sessions are short and the pain is moderate. This piece looks clean under a short-sleeve tee that offers casual framing.
15. Heraldic Shield with Layered Shading
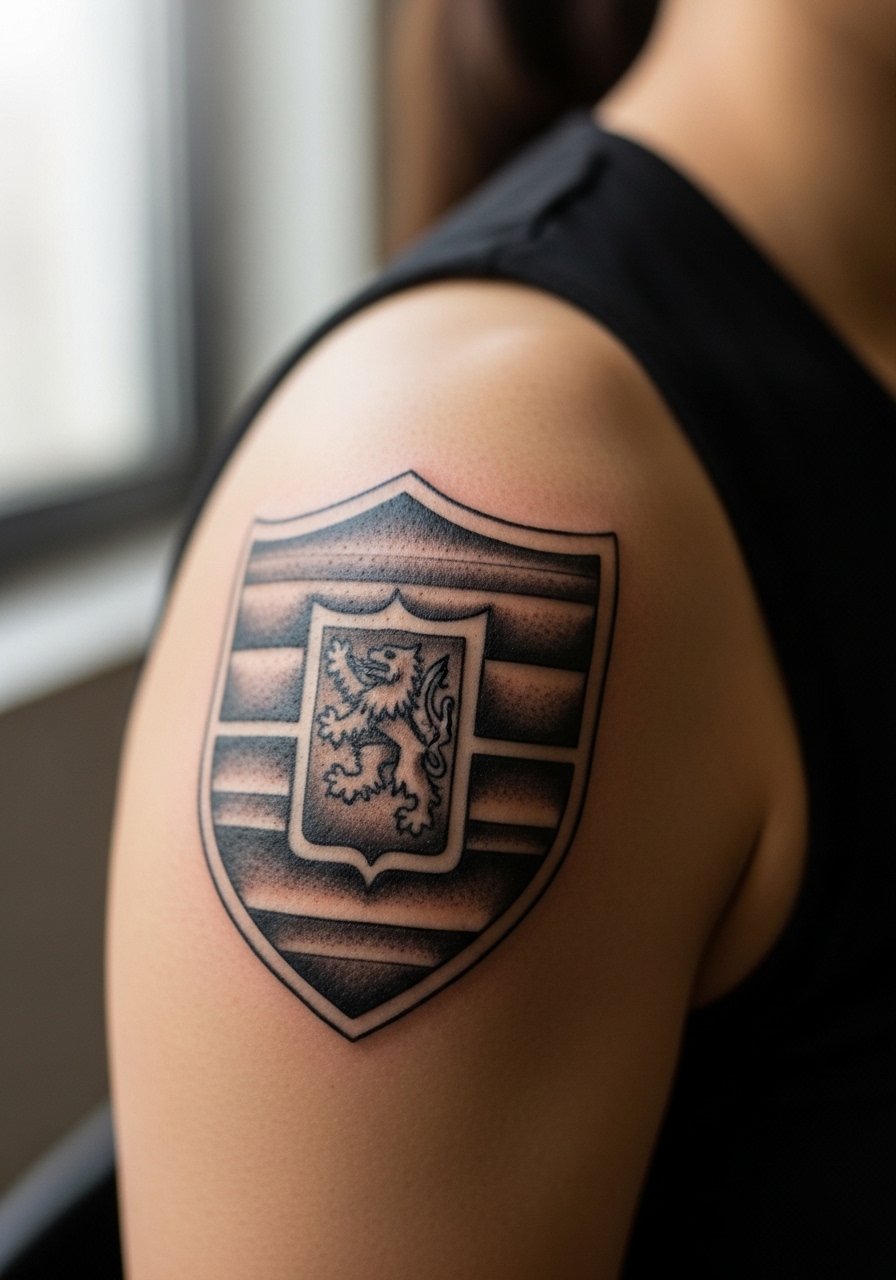
A shield reads architectural when the black is used to separate planes. Tell the artist you want a clear hierarchy between deep blacks and mid grey layers to maintain depth. Over-detailing the crest can wash out the silhouette later. Sessions may feel dull and steady as larger needles pack saturation. This style pairs well with a crewneck sweatshirt that reveals the top edge when you move.
16. Scripted Quote Arcing Toward the Back

Arcing script benefits from a mock-up that follows your natural shoulder line. Ask for slightly increased letter spacing to avoid letters merging. The disagreement among artists is whether ultra-thin lettering can stay crisp on moving shoulder skin. Name the camp your artist prefers during consultation. The session is quick but the area near the scapula can be twitchy. Wear a wide-neck shirt so the artist can check curvature as they work.
17. Single-Needle Portrait Accent Near the Clavicle
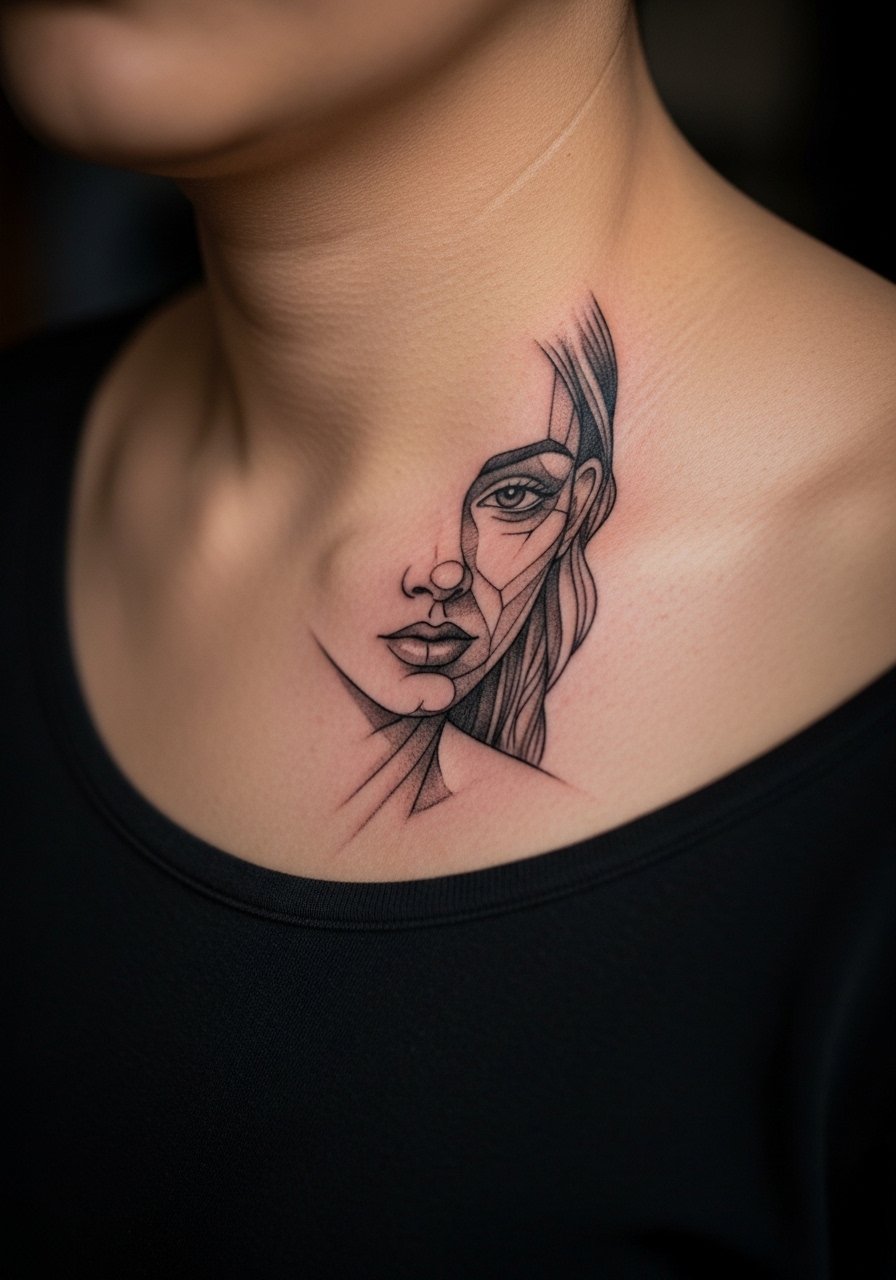
Single-needle work looks delicate but risks losing contrast on the shoulder. One camp argues single-needle should be avoided on mobile spots like the shoulder. The other camp says careful depth and spacing can preserve it. Ask your artist where they stand and consider slightly beefier line weights for longevity. Sessions feel like steady fine pin pricks and may require a touch-up by year two. For showing it off without pressure, unbutton a lightweight overshirt.
18. Crescent Moon in Negative Space Against Saturated Grey

Negative-space pieces depend on crisp surrounding saturation. Tell the artist to protect the edges of the crescent with a clean border of black and soft greys beyond it. A common error is feathering the border so the crescent loses shape once healed. Sessions are moderate and the shading can feel warm. If you like to show moonwork, a sleeveless hoodie keeps the area visible while limiting strap friction.
19. Mechanical Plate, Industrial Greywash
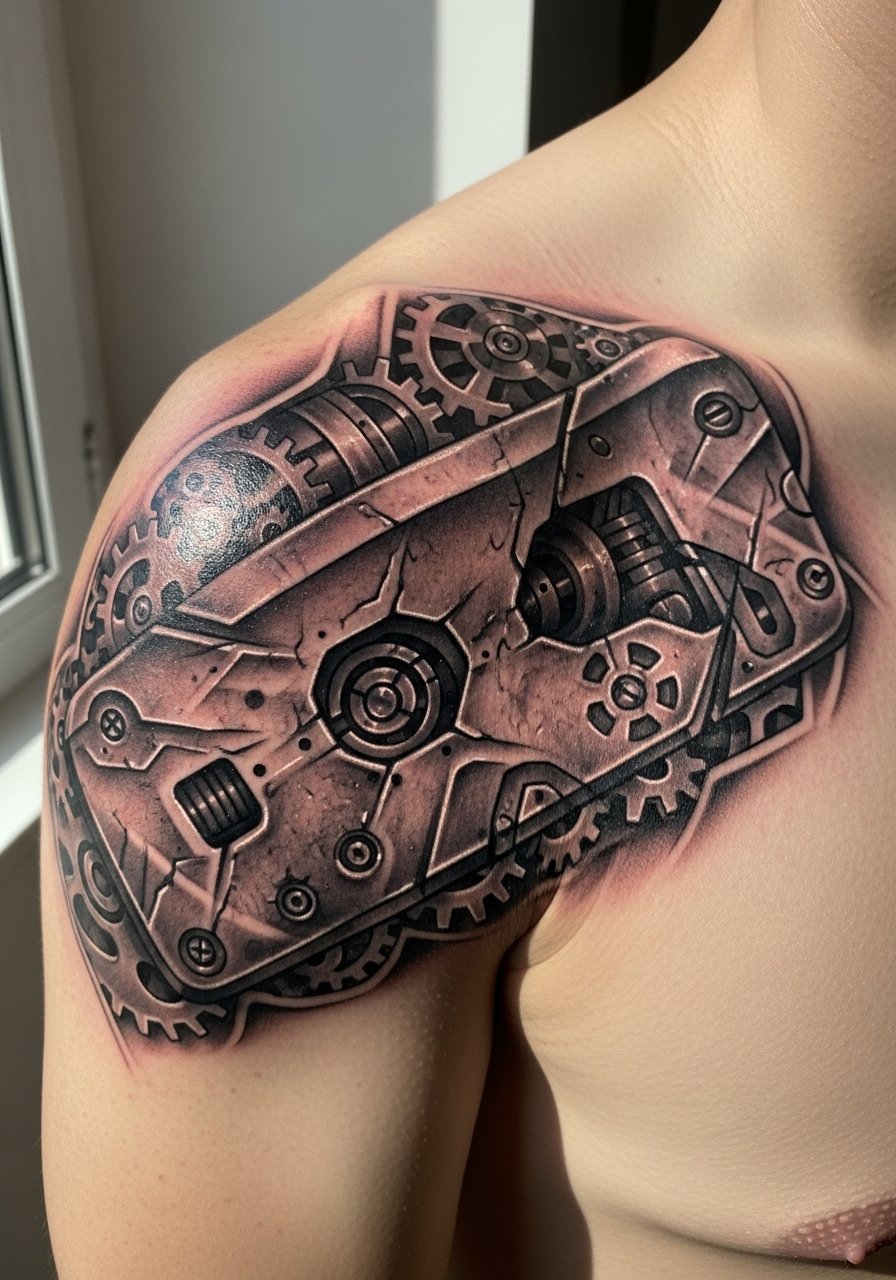
Mechanical motifs benefit from clear contrast and anchored black areas to stop grey from washing out as it heals. Ask for crisp borders between gears and softer grey inside cavities. The mistake is packing too many tiny bolts which can blur. Sessions may be longer because of dense shading. For a casual reveal, roll up a short-sleeve work shirt that frames the plate.
20. Lion Head in Graphite-Style Greywash
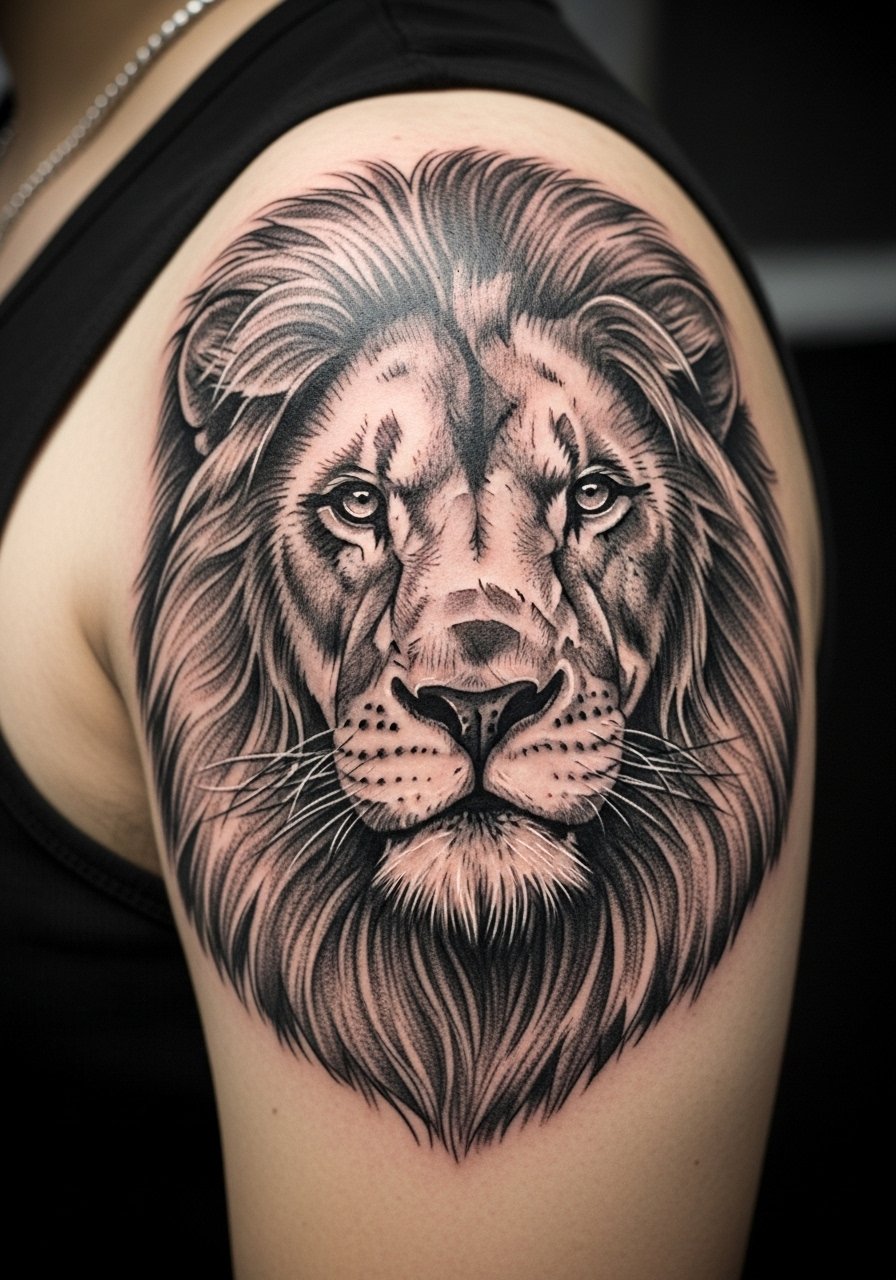
Animal heads need a clear focal point such as the eye and mane contrast. Ask your artist to keep the darkest blacks focused in the eye area and let the mane use layered greys. Tiny hair strokes without contrast will vanish with time. Sessions are detail-oriented and can be tiring for both client and artist. For dressing, a button-up shirt with the top button undone frames the neckline while keeping the shoulder visible.
21. Anchor Chain Wrapping Over the Shoulder Blade

Wraps that cross bone structures need clear thickness to avoid blowout along curves. Ask for chain links sized for the shoulder curve and for the artist to preview the path while you move. The error is tiny link detail that blends into a grey blur. Expect medium pain and a standard touch-up timeline of around two years. For session comfort, wear a tank top so the artist can access the area without you overheating.
22. Heraldic Raven with Motion Lines
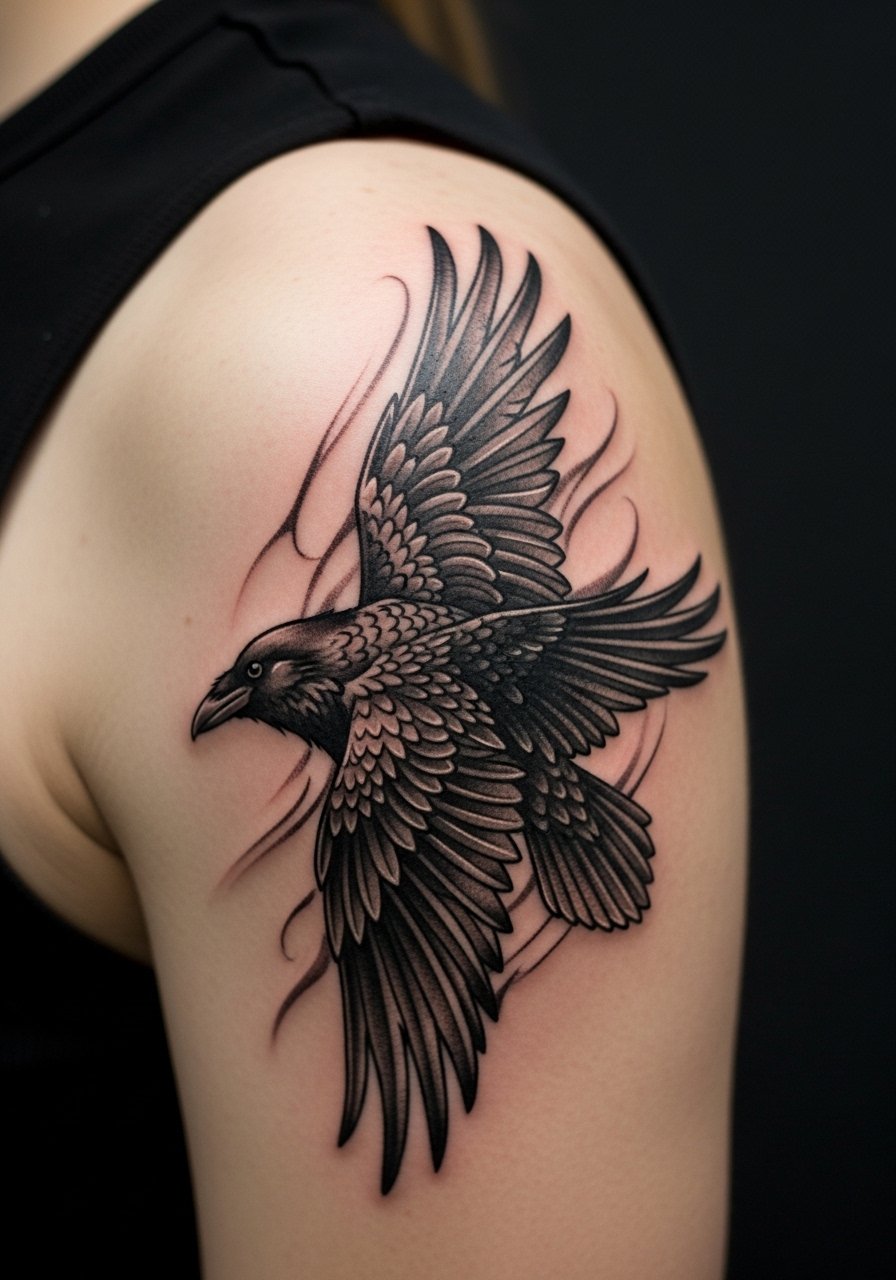
Motion lines help a bird composition read as movement rather than a static patch. Tell your artist to use negative space around the wings to maintain clarity. Over-inked motion strokes can merge into a dark blob at year two. Sessions can be brisk if you limit fine feather detail. To wear casually, choose a v-neck tee that lets the wings breathe at the sleeve line.
23. Baroque Filigree Panel for a Statement Piece
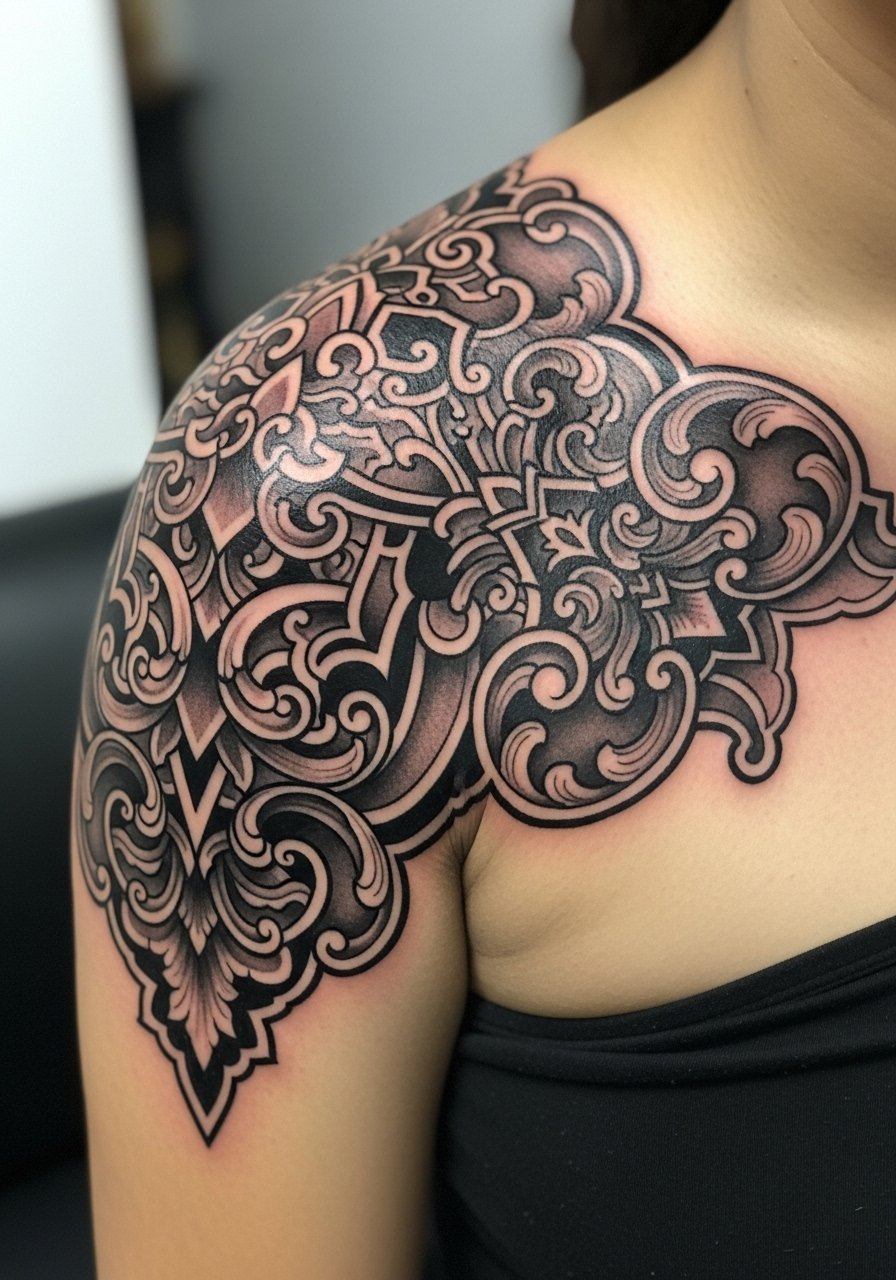
Filigree needs planned negative space. Request a strong silhouette and ask the artist to mark areas that should remain clear for future contrast. The common mistake is filling every curve which flattens the piece. Sessions may require multiple passes for smooth greys. When you want to show the detail, roll up a long-sleeve linen shirt to keep the shoulder exposed without irritation.
24. Compass Rose with Subtle Topographic Lines
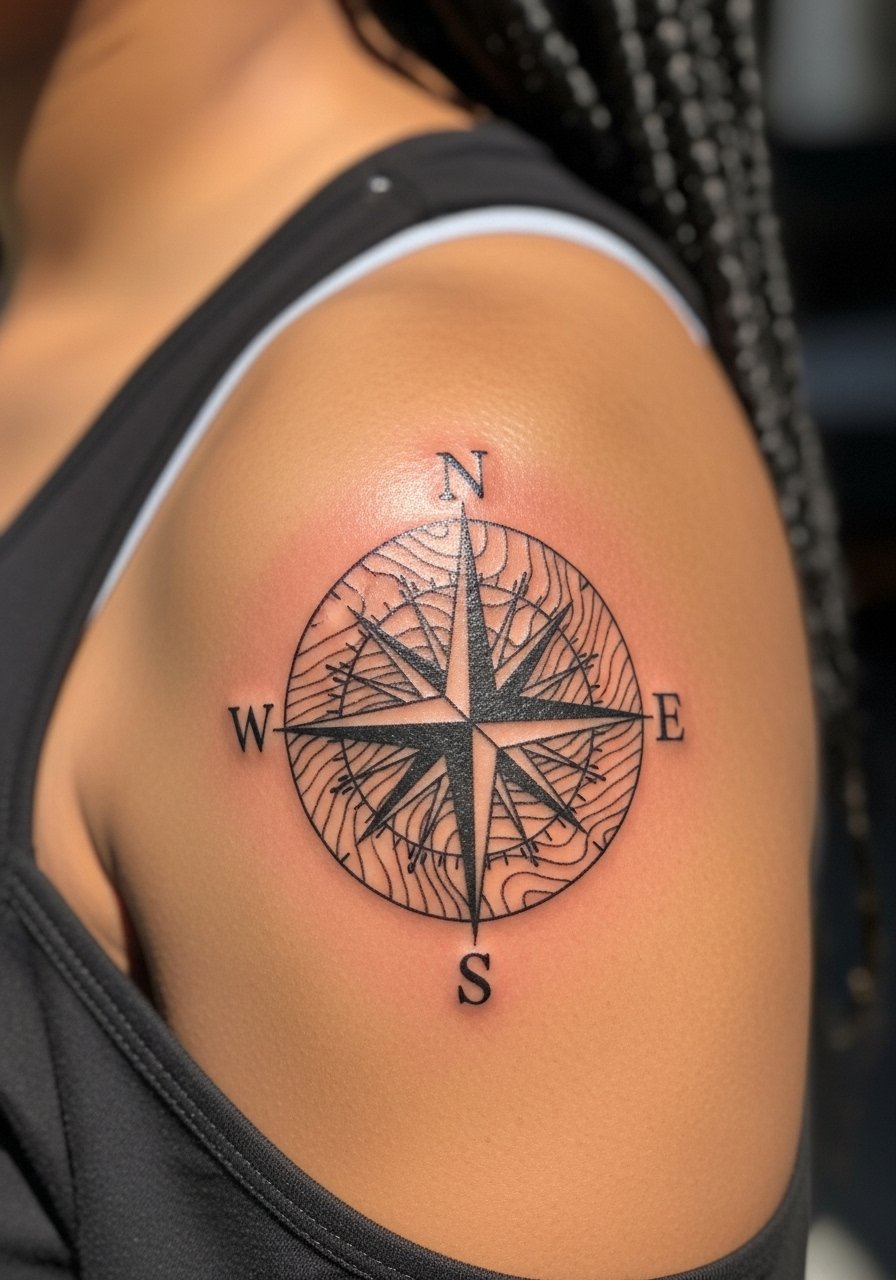
Combining bold compass forms with faint topographic lines adds dimension but needs spacing. Ask your artist for topographic lines that sit a step lighter than the compass so they age as background texture. A mistake is layering topographic density close to the compass edge. Sessions are focused and the area can be tender near the clavicle. For showing it, a short-sleeve button shirt gives structure around the compass.
25. Single-Needle Constellation Arcing Over the Deltoid
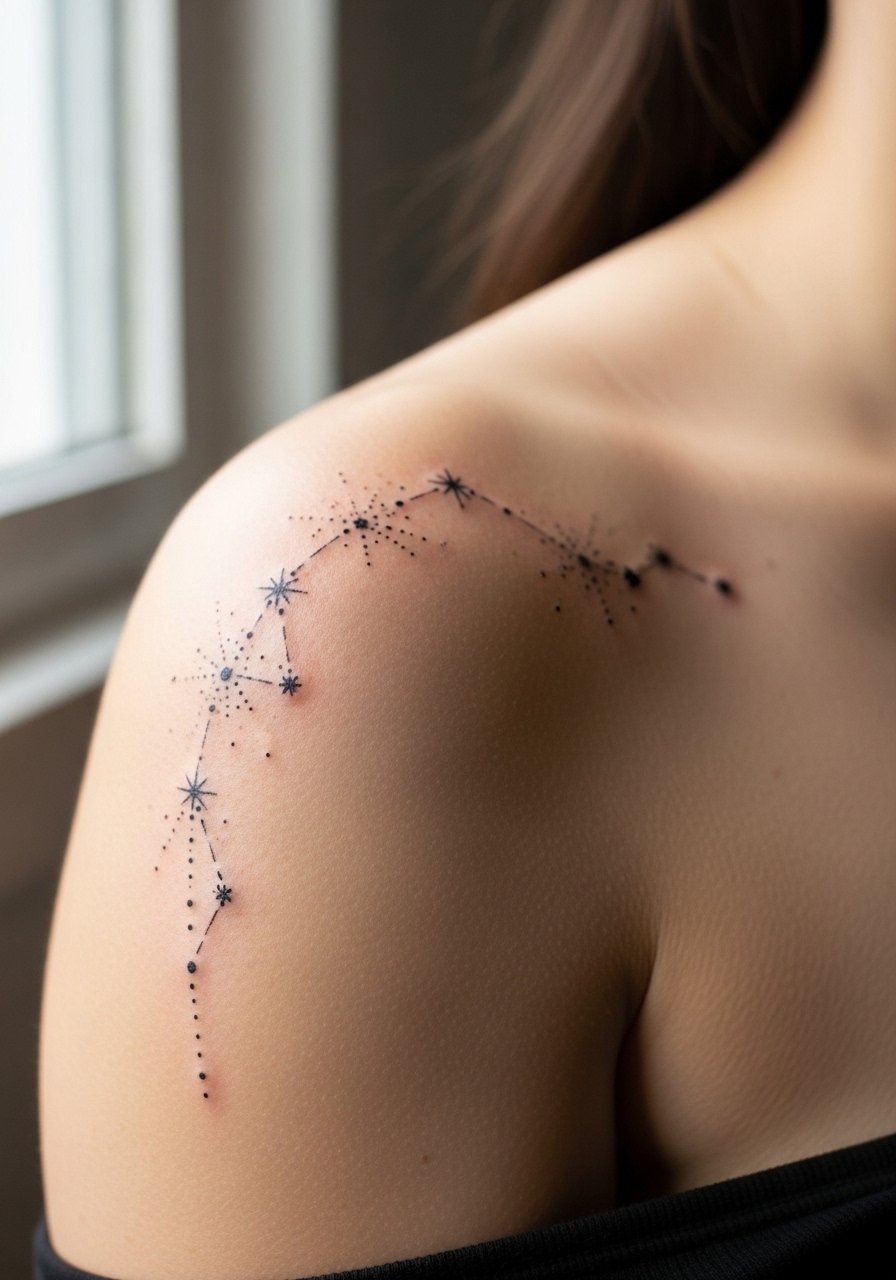
Single-needle constellations look delicate but the upper shoulder is a mobile surface. One group of artists avoids single-needle here citing loss of crispness. The other group uses slightly bolder needle choices and extra spacing to keep stars distinct. Ask which method your artist prefers. Expect minimal session time but accept the possibility of touch-ups at year two. For showing this subtle work, a rolled sleeve tee keeps attention on the arc without harsh collars.
26. Shielded Cross with Weathered Grey Texture

Weathered textures read well when balanced with crisp outlines. Ask for the outline to be slightly stronger than other texture strokes so the cross retains its form as greys soften. Over-texturing is the usual mistake because small scratches merge into grey fog. Sessions are stable and the area is easy to access. When you want the cross visible without looking staged, slip on a lightweight tee that shows the top edge.
27. Old School Swallow Landing on the Shoulder Tip

Classic swallow pieces survive years because of strong linework and clear black anchors. Tell the artist to keep the wings slightly larger than reference flash so feather detail does not compress. The mistake is shrinking flash scale which undermines longevity. Sessions are short and straightforward. This one pairs naturally with rolled sleeves and a short-sleeve shirt that frames the wing without rubbing from bag straps.
Frequently Asked Questions
Q: Will fine line work hold up on the upper shoulder or should I pick bold blackwork?
A: It depends on the exact placement and your daily habits. Fine line can last if the artist spaces strokes and avoids too-small lettering, but heavy sun exposure and constant friction from straps accelerate fading. If you wear backpacks or tight shirts often, denser blackwork is the lower-risk choice.
Q: How does shoulder movement affect healing and the risk of blowout for detailed greywash pieces?
A: The shoulder moves a lot, and that can blur very fine detail during the first healing weeks. Plan for slightly larger elements and ask for conservative needle depth to limit blowout risk. Expect a touch-up around year two to refresh any soft grey transitions.
Q: Are there wardrobe choices that help protect a fresh upper shoulder tattoo during the first week?
A: Yes. A loose button-down or a tank top that does not press into the ink keeps friction low while still letting the area breathe. I often recommend a lightweight button-down you can shift aside during the session like a loose button-down shirt for easy access without rubbing.
Q: For wraparound designs that touch the chest or back, what should I ask in consultation?
A: Ask the artist to map the full path while you stand and move. Have them show the stencil in sitting and standing positions so they can adjust for muscle flex and posture. This prevents awkward breaks where a design crosses the collarbone or shoulder blade.
Q: How long is a realistic touch-up timeline for black and grey shoulder tattoos?
A: Realistic timing is usually between one and three years depending on saturation, sun exposure, and placement. Dense black fills typically hold longer. Fine line and single-needle elements are the ones most likely to need earlier refreshes.
Q: Do certain techniques increase blowout risk on the shoulder and should I avoid them?
A: Extremely tight single-needle runs and ultra-dense tiny dot work are higher risk because the shoulder skin moves and stretches. If you want delicate detail, plan for slightly larger scale and talk with your artist about needle selection and depth control so the piece can heal cleanly.
