
Fine line and saturated color both look alive on fresh skin, but they age very differently, especially when the design tries to capture movement. Bright pigment holds best where there is less friction. Smaller, highly detailed runs need more spacing and heavier saturation to stay readable. Read on for 17 ways to show a wild-horse motif that actually feels like motion at six months, two years, and beyond.
1. Watercolor Gallop on the Ribcage
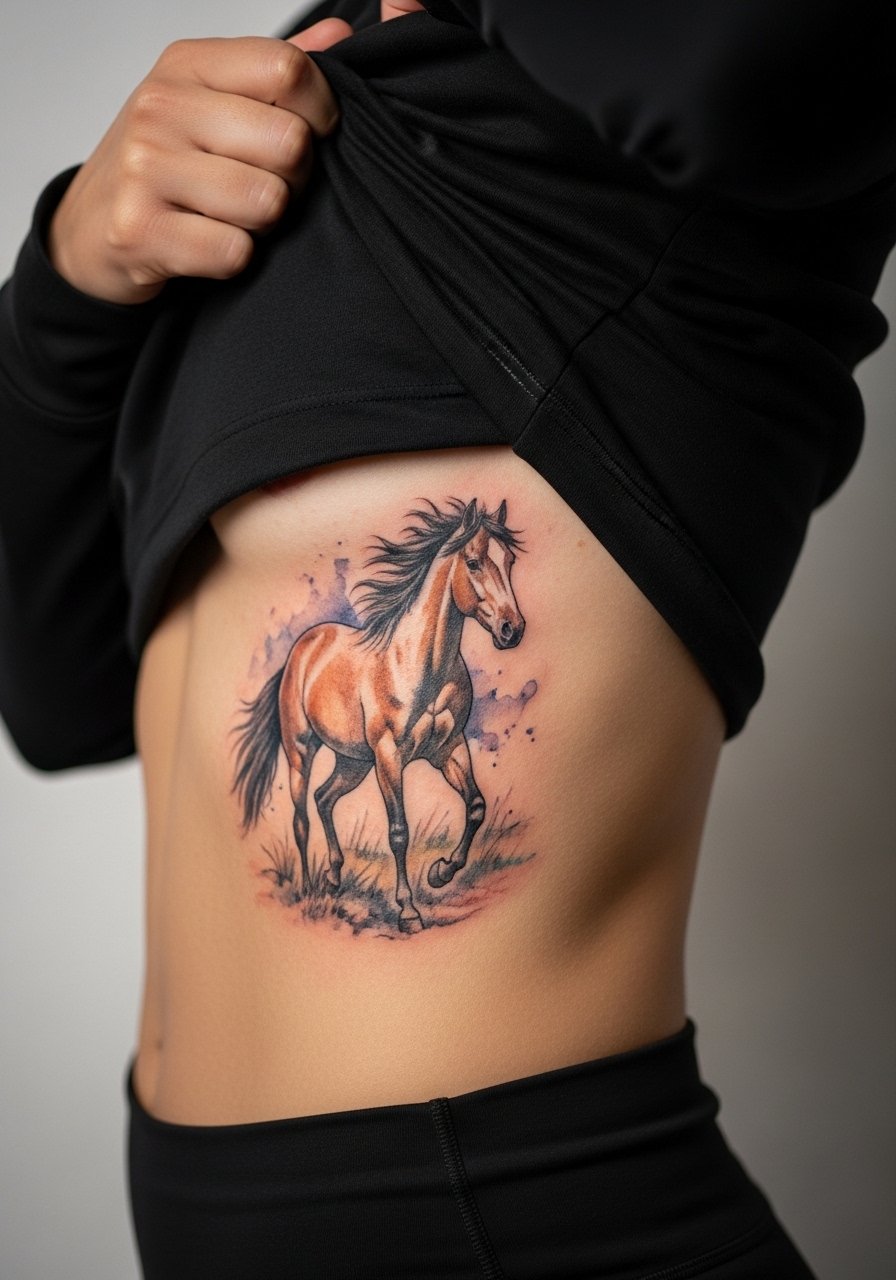
Fine watercolor splashes read like motion when they follow muscle contours on the ribcage. Fair warning: the ribcage is a high-pain spot and a place where ink sits differently as skin moves. Ask your artist for slightly bolder line anchors around the mane and hooves so the color fields can breathe without merging. A common mistake is packing tiny watercolor dots into the curve of the ribs. Those spots blur fast from stretching. Expect a longer session split into two appointments, and plan for a touch-up at year two if you want the color to stay vivid.
2. Painterly Mare on Outer Forearm
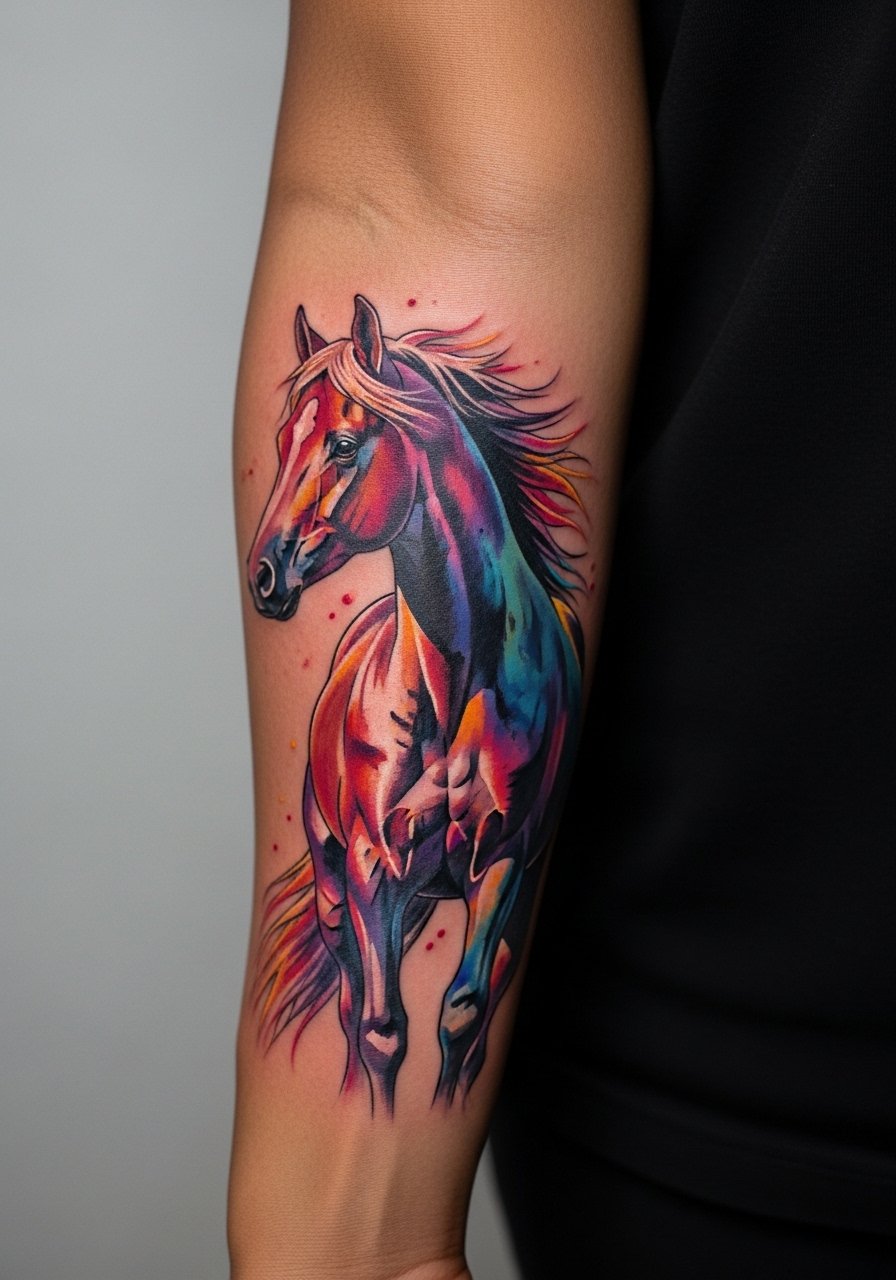
When you want a piece that reads in motion across the forearm, bring references that show the horse at three-quarter gallop. Tell your artist to keep the mane lines slightly thicker than the micro details so the silhouette stays clear with time. The forearm is forgiving for color saturation but it sees sun and sleeves, so expect touch-ups at year three if you expose it often. Session pain is low to moderate and most clients leave after one two-hour sit. Pair this with a rolled linen shirt when showing it off, the textured fabric frames the brushstroke colors without competing.
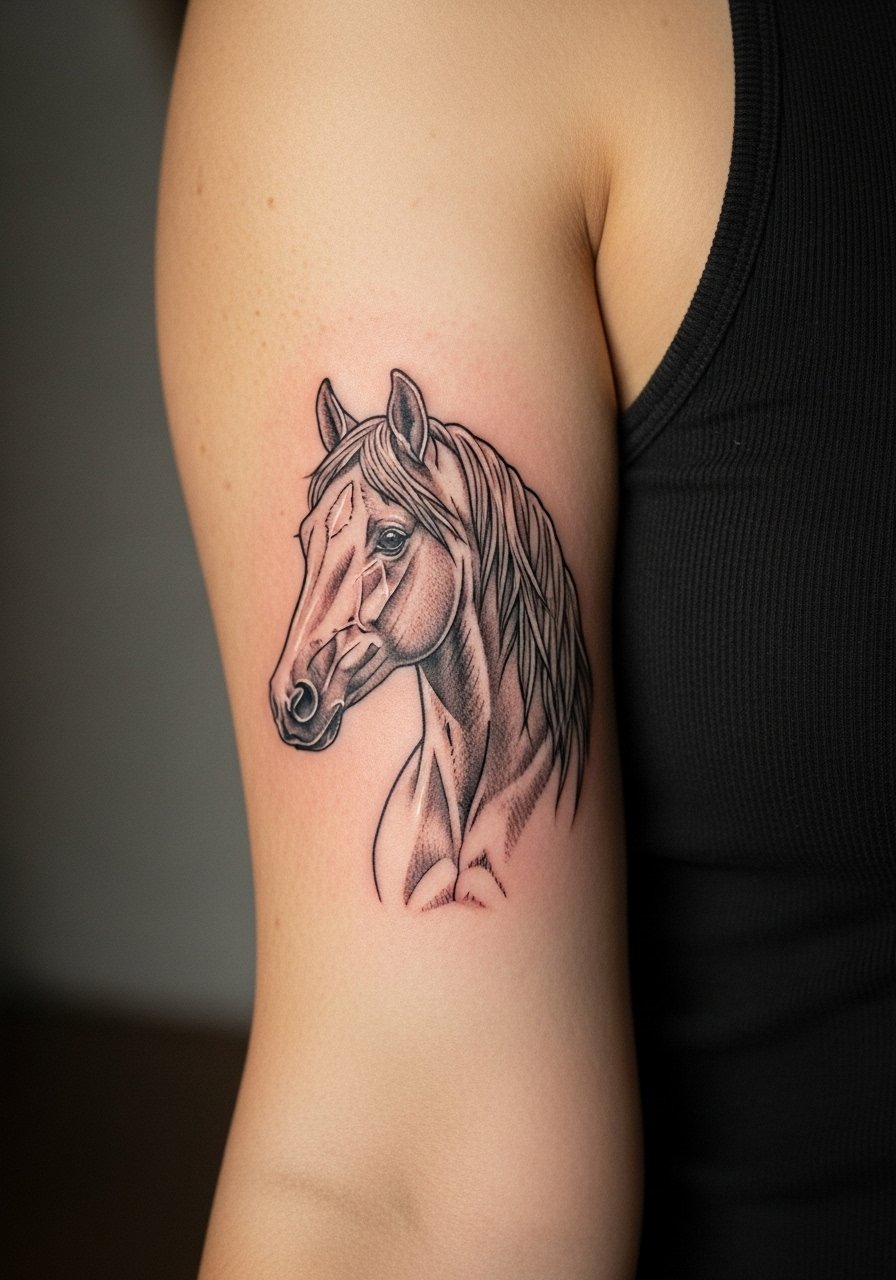
3. Neo-Traditional Stallion Head on Upper Arm

Bold outlines and rich saturation give a neo-traditional horse a long visual life. I have seen versions on upper arms hold color well for five years when the artist saturates properly and leaves breathing room between dark fills. The usual mistake is over-detailing the mane inside a tight area. That blurs into a blotch over time. The session feels steady and rhythmic, like a medium to long sit depending on size. This placement is excellent if you want something visible but still coverable with short sleeves. Expect low blowout risk with solid linework and a one-year touch-up check.
4. Running Herd Across the Shoulder Blade

A herd layout reads as movement when sized to the shoulder blade's canvas. The biggest consultation detail is scale. Small silhouettes crammed together lose their individual shapes after a year. Ask for negative space between figures and modest color gradients rather than tiny stipple fills. Shoulder blade sessions are moderate on pain and easy to access with a loose tank top for the appointment. For showing it off, open-back tops reveal just enough without overexposing the upper back. Expect the design to soften at five years but keep its motion if spaced well.
5. Tiny Silhouette Behind the Ear
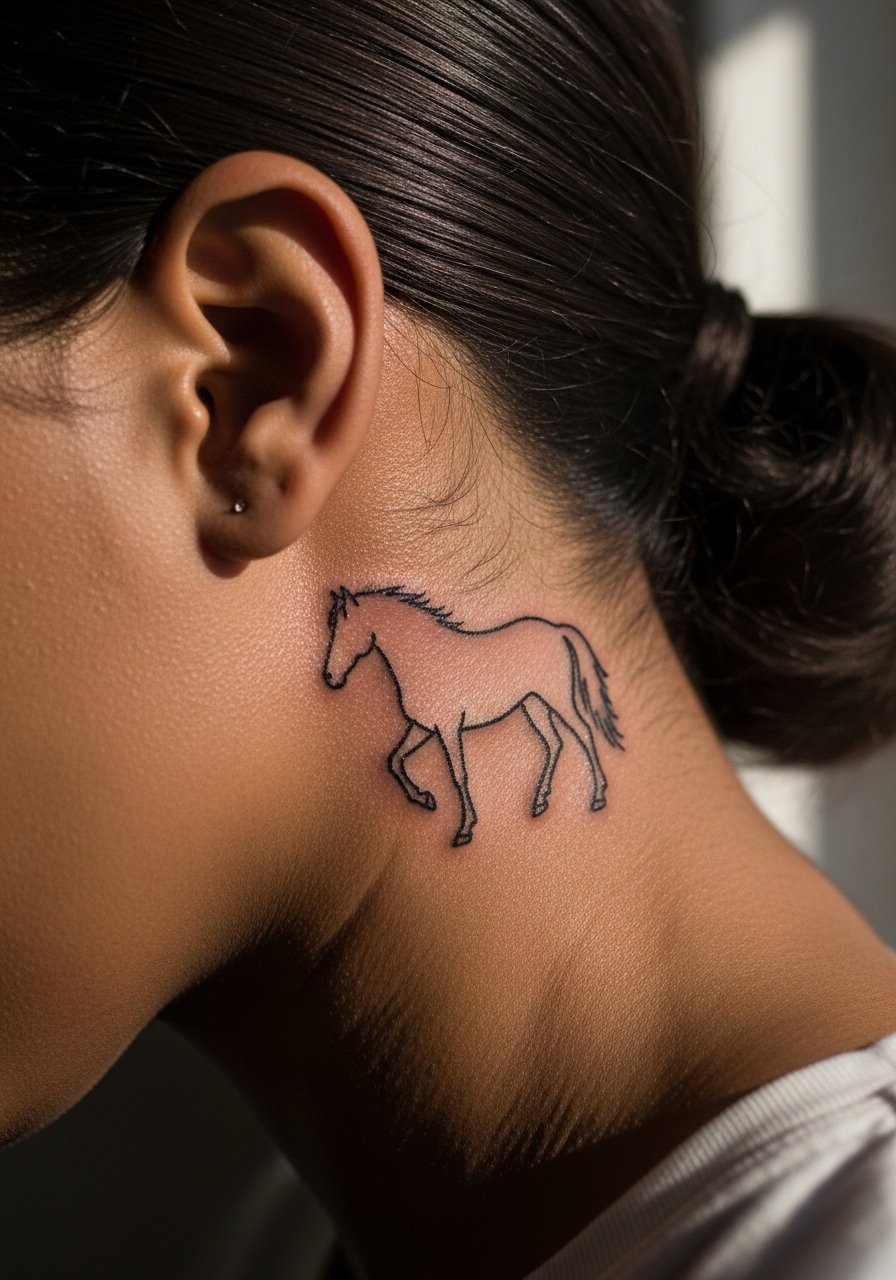
Behind-the-ear pieces are delicate and very small, which makes needle depth and placement critical. Artists split on tiny script and micro motifs in that zone. One camp says the constant hair contact and thin skin blurs fine detail quickly. The other camp argues that strategic needle depth and an airy composition keep it legible for years. When you ask for this, insist on slightly larger proportions than you think you need. Sessions are quick but sensitive, and you will want to avoid tight hats or headphones while healing. Consider this if you want a hint of motion rather than a full scene.
6. Calf Run in Saturated Color
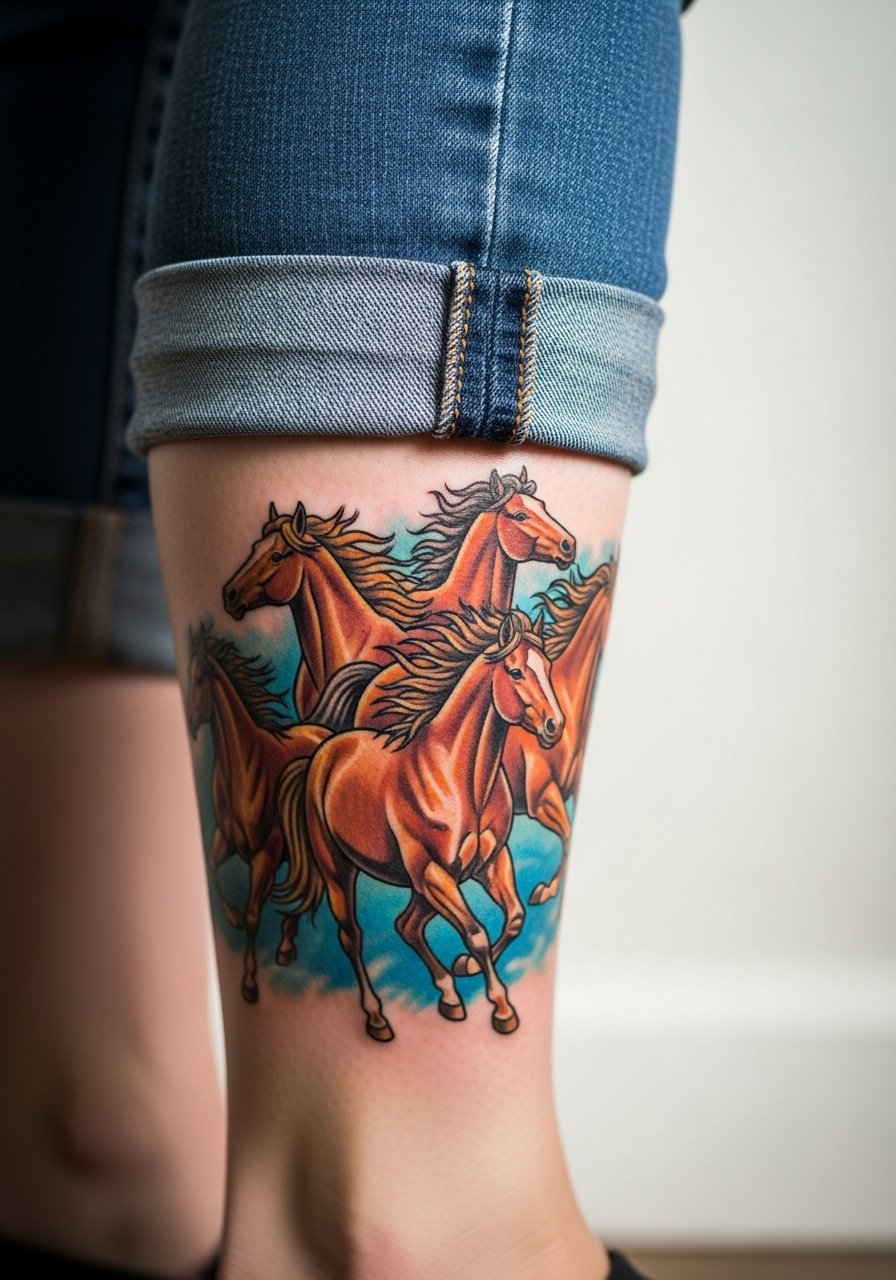
Calf pieces let color breathe and show motion with long muscle stretches. Wear a pair of mid-calf boots or skirts to frame the work when you want to show it off. For the appointment, shorts are easiest so the artist has clear access. A common mistake is packing too many tiny color shifts into the calf where muscle movement will soften them. Tell your artist you want distinct color panels and clear line anchors for hooves and eye highlights. Pain is usually low to moderate and touch-ups at year three keep the saturation punch.
Studio Day Picks
The ribcage, behind-the-ear, and forearm pieces above need different session prep and healing tools than a calf or upper-arm piece, so a small kit tailored to the placement smooths the process.
-
Stencil transfer paper kit. Lets you preview exact placement on the skin before the needle touches, which is critical for the ribcage and shoulder blade layouts.
-
Topical numbing cream. Applied 30 to 60 minutes before the session can take the edge off sensitive zones like ribs and behind the ear without masking the artist's feedback.
-
Thin protective film roll. Useful for finger and wrist-adjacent work where friction from clothing threatens early healing.
-
Fragrance-free gentle body wash. Keeps healing color clean without irritating delicate edges on fine line forearm pieces.
-
Aquaphor healing ointment. Thin layers in the first few days lock in moisture and protect fine line anchors while skin re-forms.
7. Full-Thigh Gallop with Layered Color
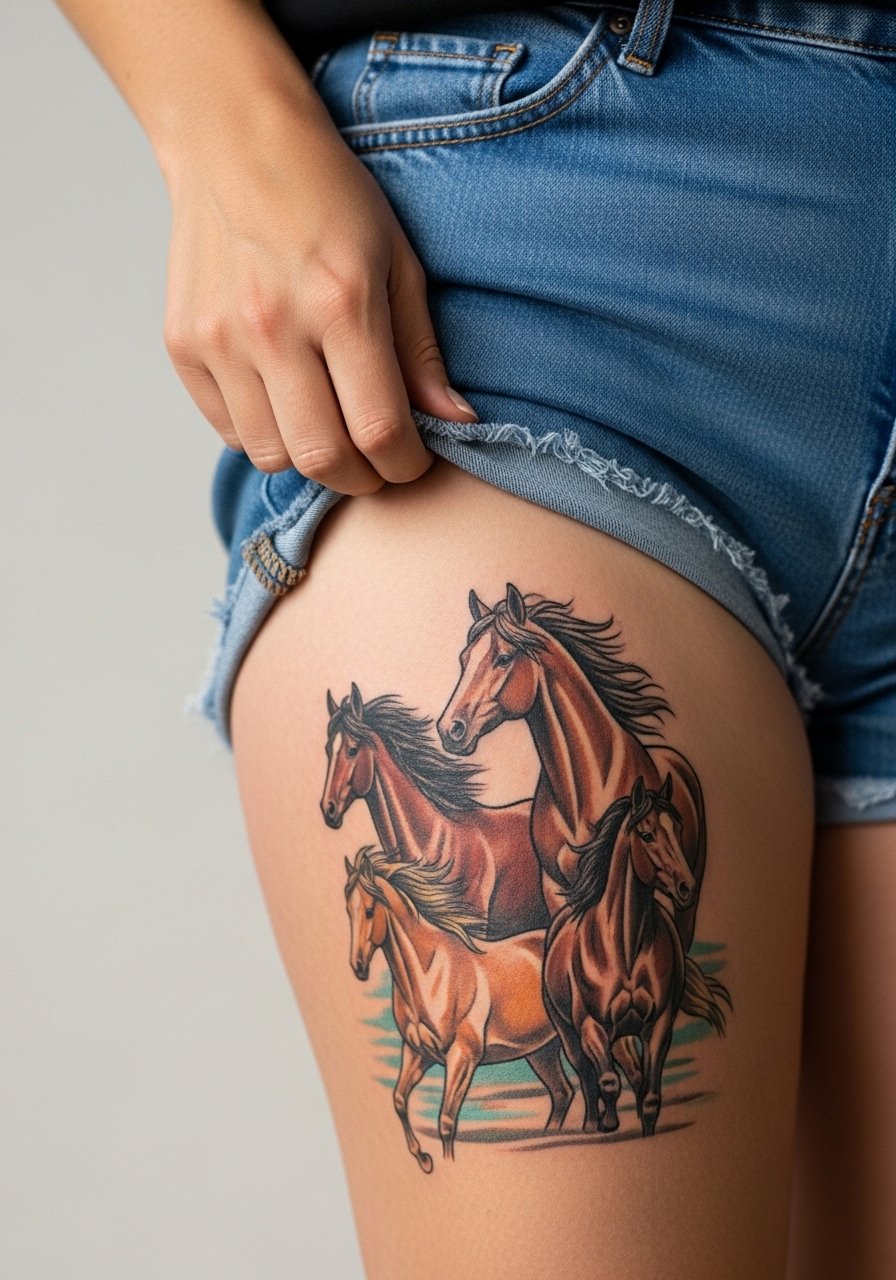
Upper-thigh canvases let artists create depth with overlapping colors without risking blowout. For session wear, a pair of loose high-waisted shorts makes access simple and comfortable. The thigh is a mid-pain zone and often requires a longer sit. One mistake is requesting too many tiny gradients in a compact area. Spread the color planes so the horse forms remain legible as tissue shifts. Many people report better longevity when they avoid tight pants that rub during the first two weeks.
8. Linework Mare Along the Collarbone
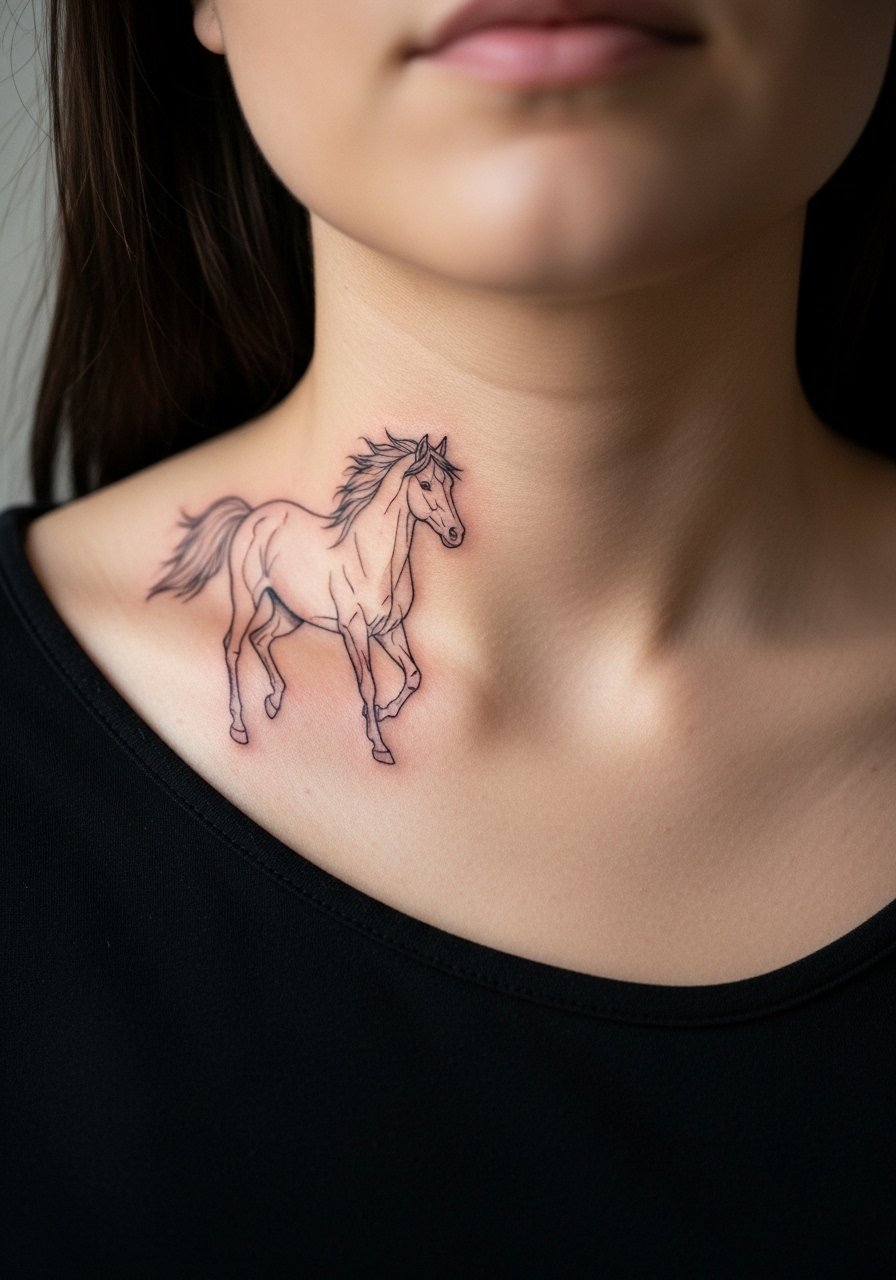
Collarbone pieces sit on thin skin and need confident linework. The usual error is going ultra-fine on a high-movement area. Ask for slightly stronger line anchors at joints in the mane so the image keeps its edge as the skin moves. Pain can spike when the needle crosses the actual bone ridge, but the sit is often short. This placement pairs well with open-neck shirts or a thin chain pendant necklace that sits above the work when you want to balance an outfit.
9. Minimalist Hoof Print Ankle Band
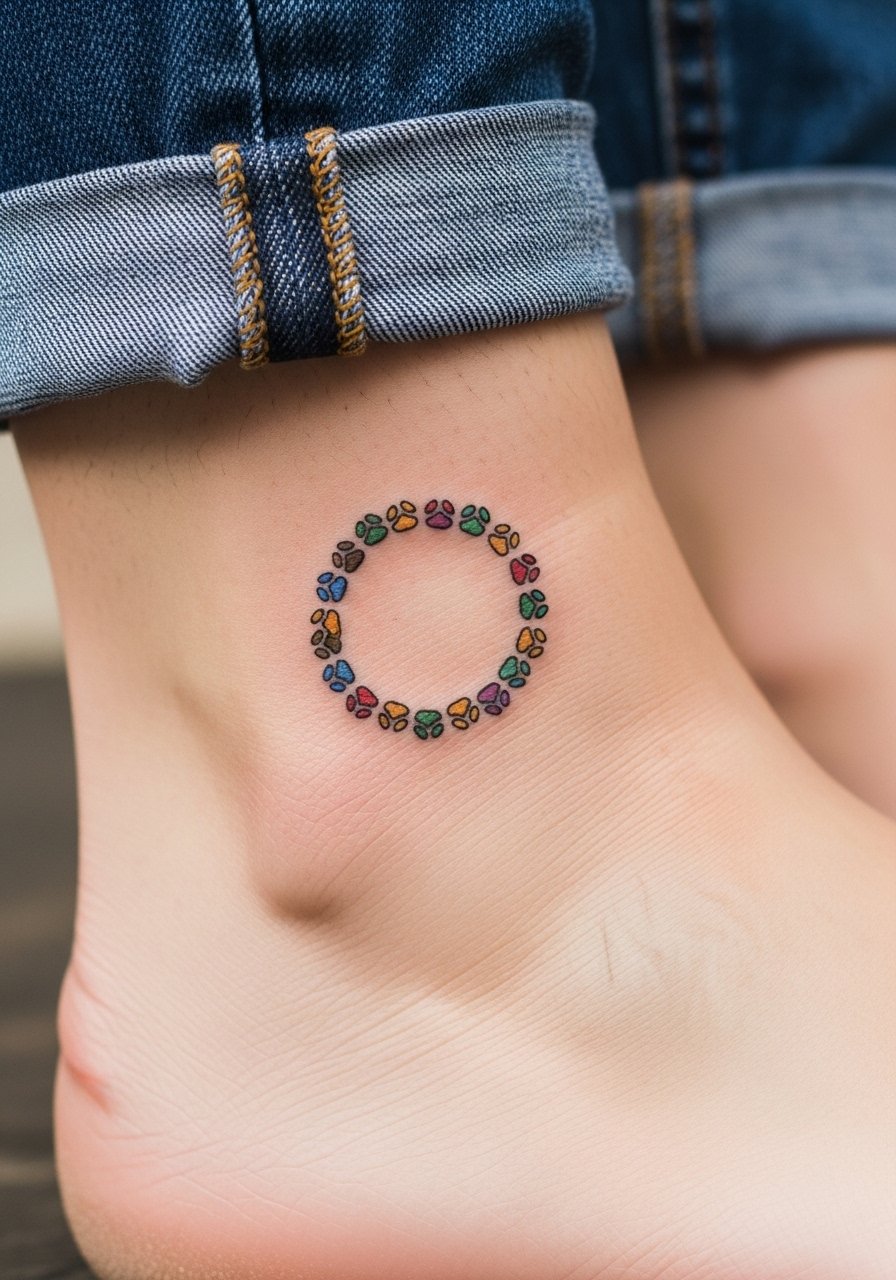
Ankle bands are great for repeating motion motifs, but they live in a high-friction zone. The common mistake is choosing thick fills in a small band. Ask for thinner color panels and slightly more negative space so washing and shoes do not prematurely blur the pattern. Ankle sessions are low to moderate pain and quick. For show-off outfits, cropped jeans or sandals frame the band. Consider a pair of jeans to roll during the healing weeks so you avoid constant rubbing.
10. Scripted Name with a Running Foal on the Wrist
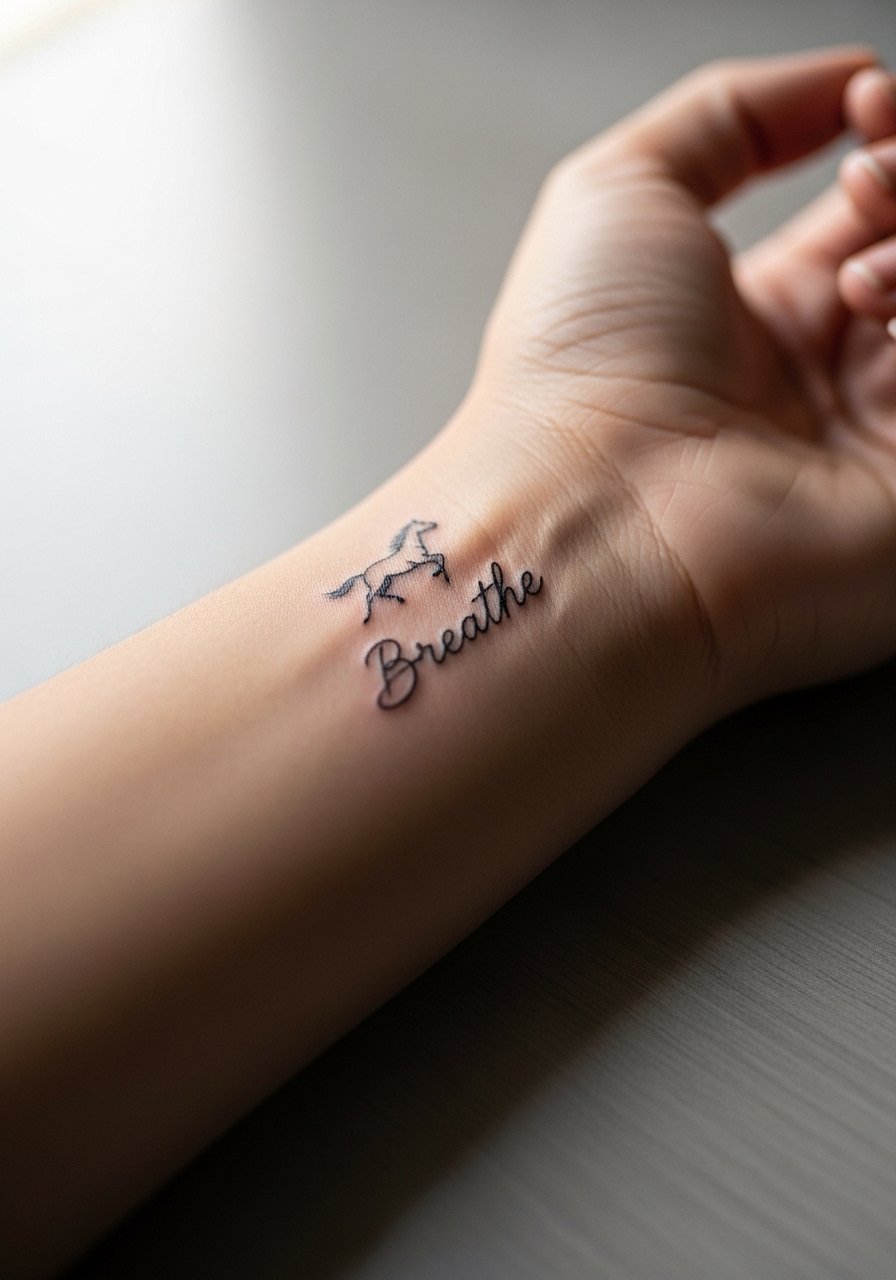
Wrist tattoos age fast because of constant movement and washing. If you want lettering plus a tiny foal, increase the script size and keep the glyphs simple. The typical mistake is tiny cursive paired with micro imagery. That combo loses clarity in two to three years. Sessions on the wrist are quick but uncomfortable for some. Expect yearly touch-ups if you wear bracelets or watches that rub the area. For the session, a loose button-down shirt you can slide up makes access painless.
11. Geometric Horse in Dot Work on the Back of the Neck
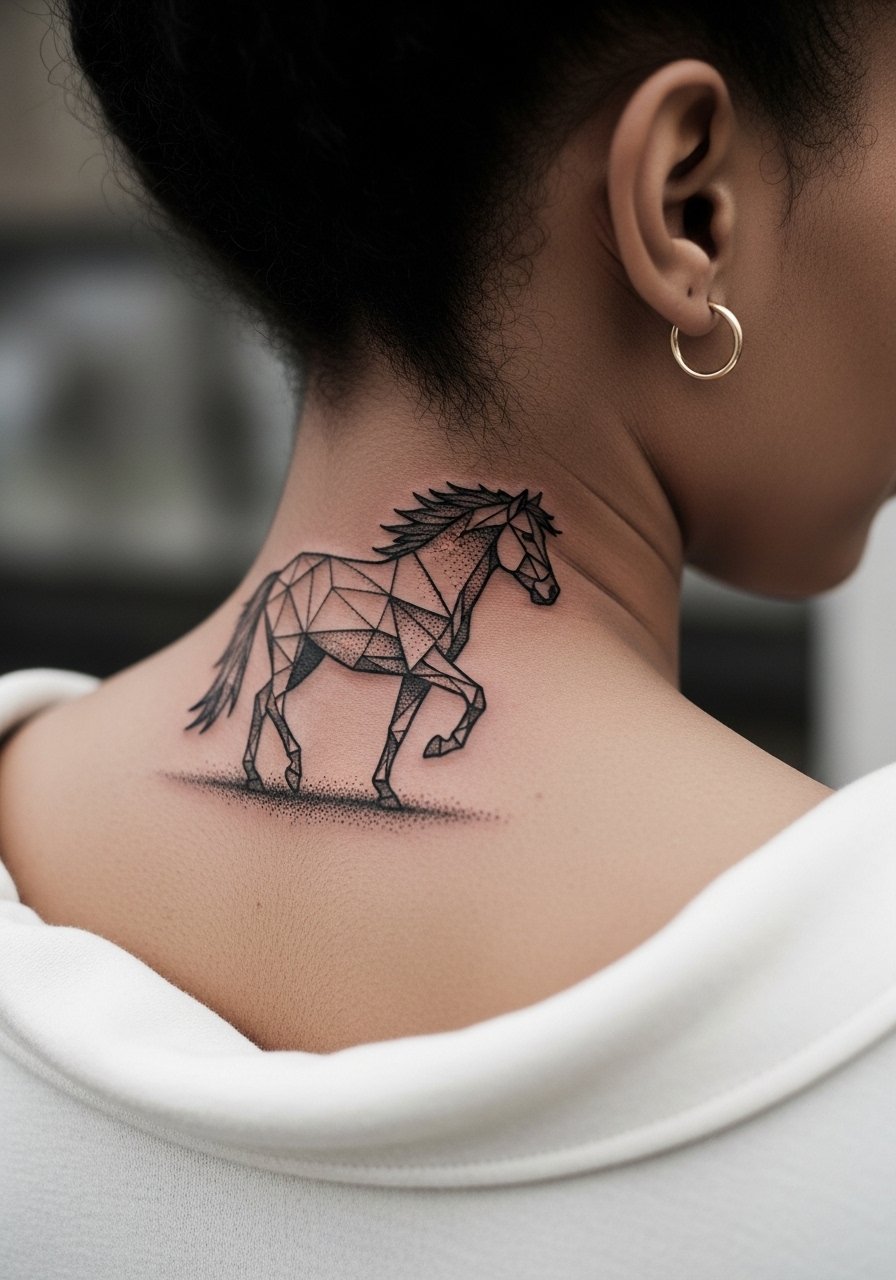
Neck pieces demand a balance between detail and longevity. Dot work can create texture, but packing dots too tightly leads to mudding as the skin regenerates. Artists split on how dense stipple should be on the neck. One camp prefers airy stipple with strong outer linework. The other favors denser dot gradients for immediate visual impact. Ask your artist which approach they use and why. Sessions here are brief but sensitive, with potential workplace visibility consequences to consider. For showing off, wide-neck shirts frame a neck piece without exposing the chest.
12. Chestpiece Mare Near the Sternum

Sternum work sits at a convergence of skin tension and movement, so spacing matters. The common problem is trying to cram elaborate detail into that narrow zone. Ask for a central focal horse with simplified flanks to keep the image readable as the chest moves. Pain tends to spike across the bone and through inhalation, so plan for a few shorter passes rather than a single marathon sit. Expect touch-ups at two to three years, especially if the pigment sits shallow on the first pass.
13. Watercolor Mane Flowing Down the Side Rib
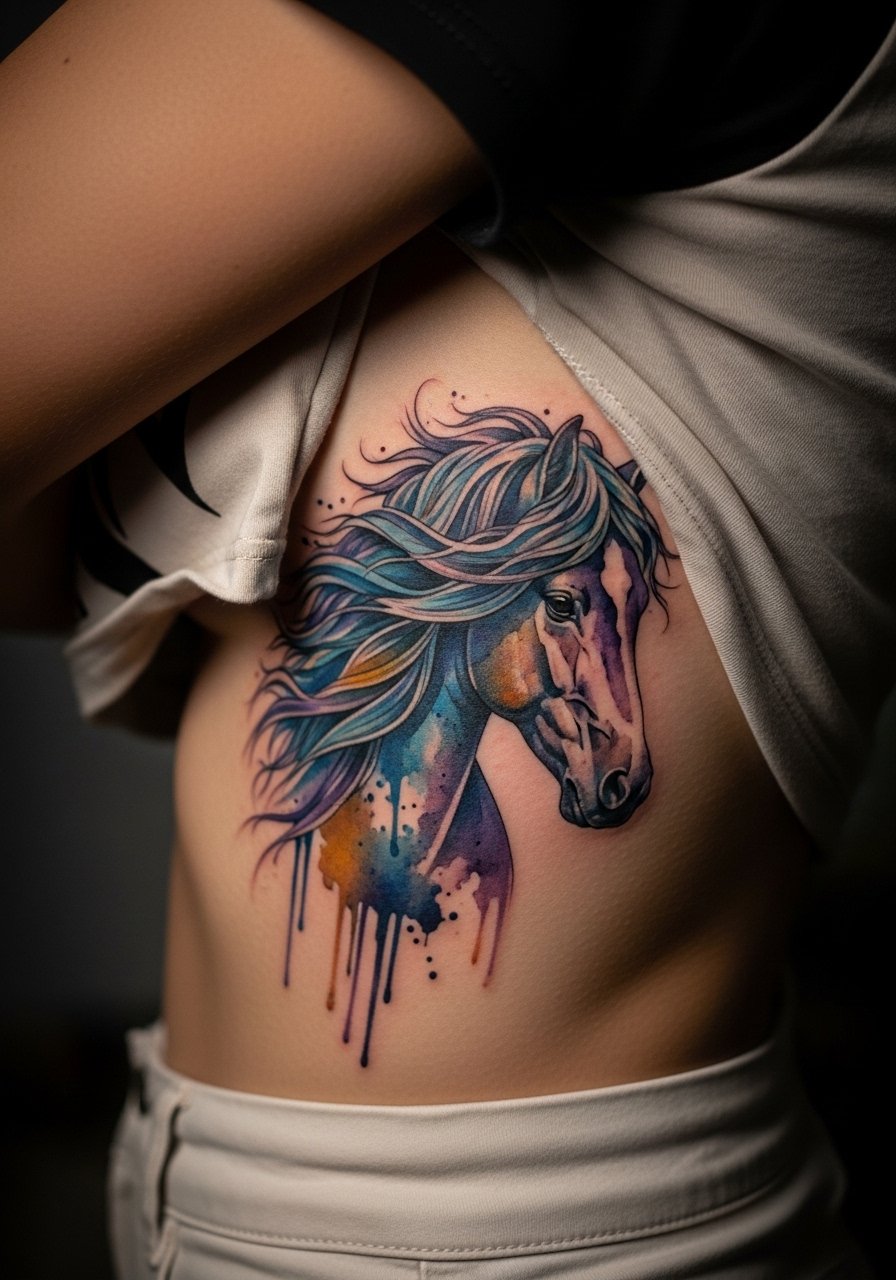
Side-rib watercolor requires artists who know how to pack color without overworking thin skin. A mistake I see is too many wet-blend strokes in a small area. That causes early feathering as the ink settles. Ask for layered washes with anchor lines to preserve motion. Pain is high to very high, so split sessions help. Avoid tight waistbands while healing, and choose loose bottoms that do not press into the color. Expect a touch-up in year two to restore brightness if you want the mane to remain luminous.
14. Finger-Edge Tiny Grazing Mare
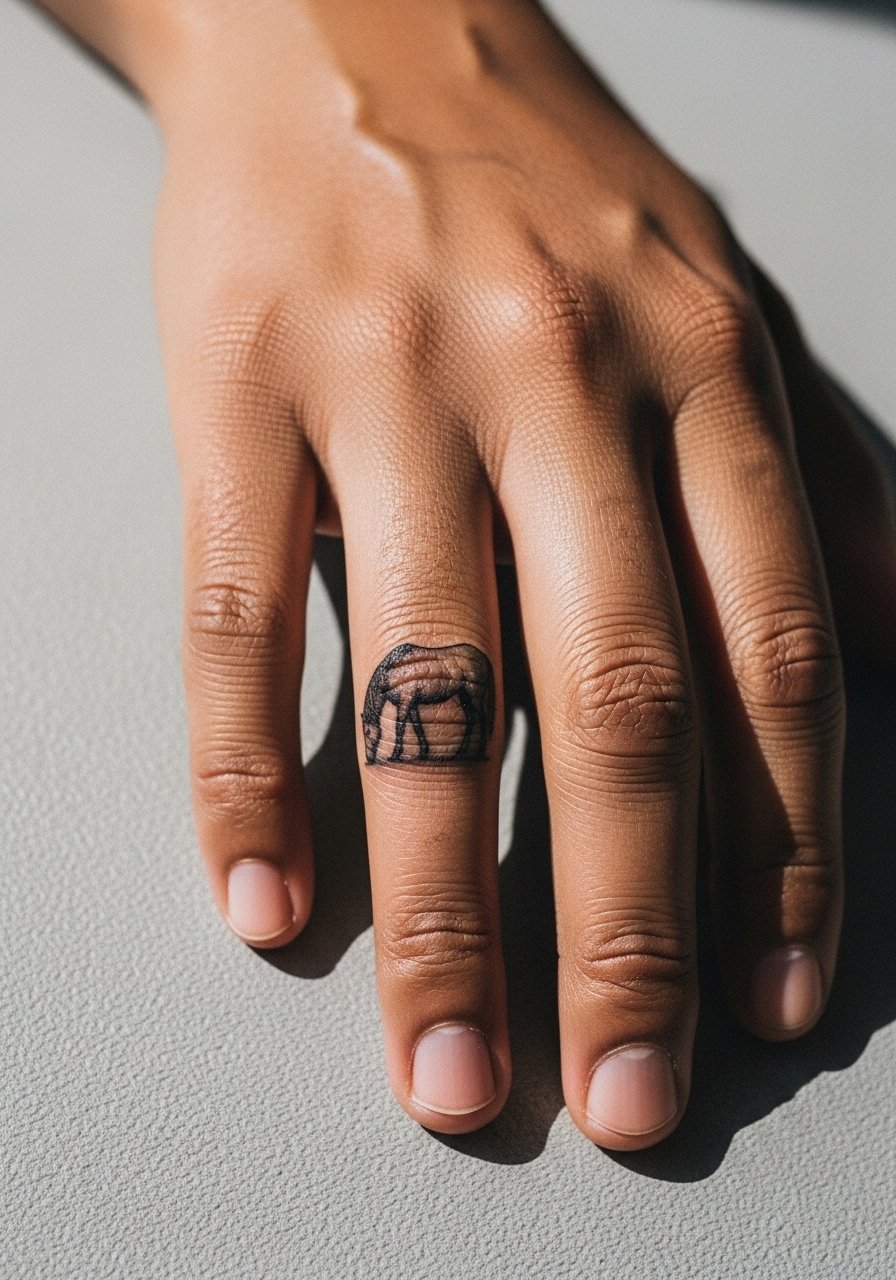
Finger tattoos are exposed to constant washing and friction, so longevity is limited. The most frequent error is insisting on solid-filled color on a fingertip band. That fades fast and requires frequent touch-ups. For a grazing mare, keep linework confident and minimal. Sessions are short but the healing period is fussy. If your job involves heavy hand use, consider the placement carefully. A thin band of negative space around the figure helps the small image hold its form longer.
15. Full Back Motion Scene in Mixed Styles
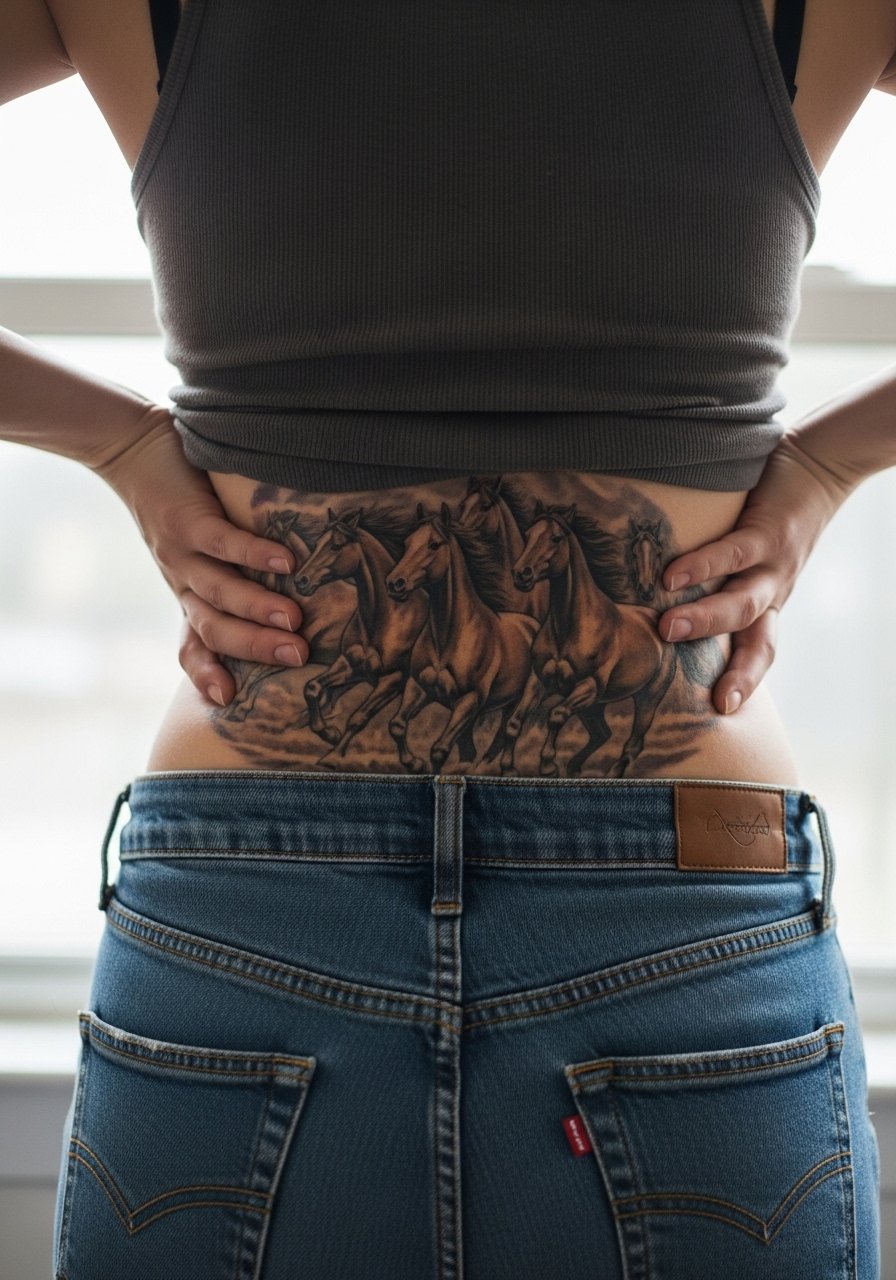
A full back scene is a commitment that rewards careful planning. Break the design into readable chapters across the back so each horse has breathing room. The biggest mistake is treating the back like a single flat surface. Talk to your artist about muscle flows and movement so the composition reads when you bend or twist. These sessions are long and usually split across multiple days. For showing it, open-back dresses frame the story, but for daily life, high-waisted pieces keep the lower edges protected. Bring several reference poses to your consultation.
16. Inner Bicep Running Study
Inner bicep work can be surprisingly resilient if the composition allows skin to rest between strokes. The usual error is heavy dense shading in a zone that flexes with every arm motion. Ask for lighter fills and confident contours around the chest and belly of the horse. This area is moderately painful because of the thin soft tissue, and sessions often require breaks. For the appointment wear a tank top so the artist can access the area without shifting fabric constantly. Expect a touch-up at year two if you want the micro details to last.
17. High-Contrast Black Outline with Neon Fill on the Shoulder Cap
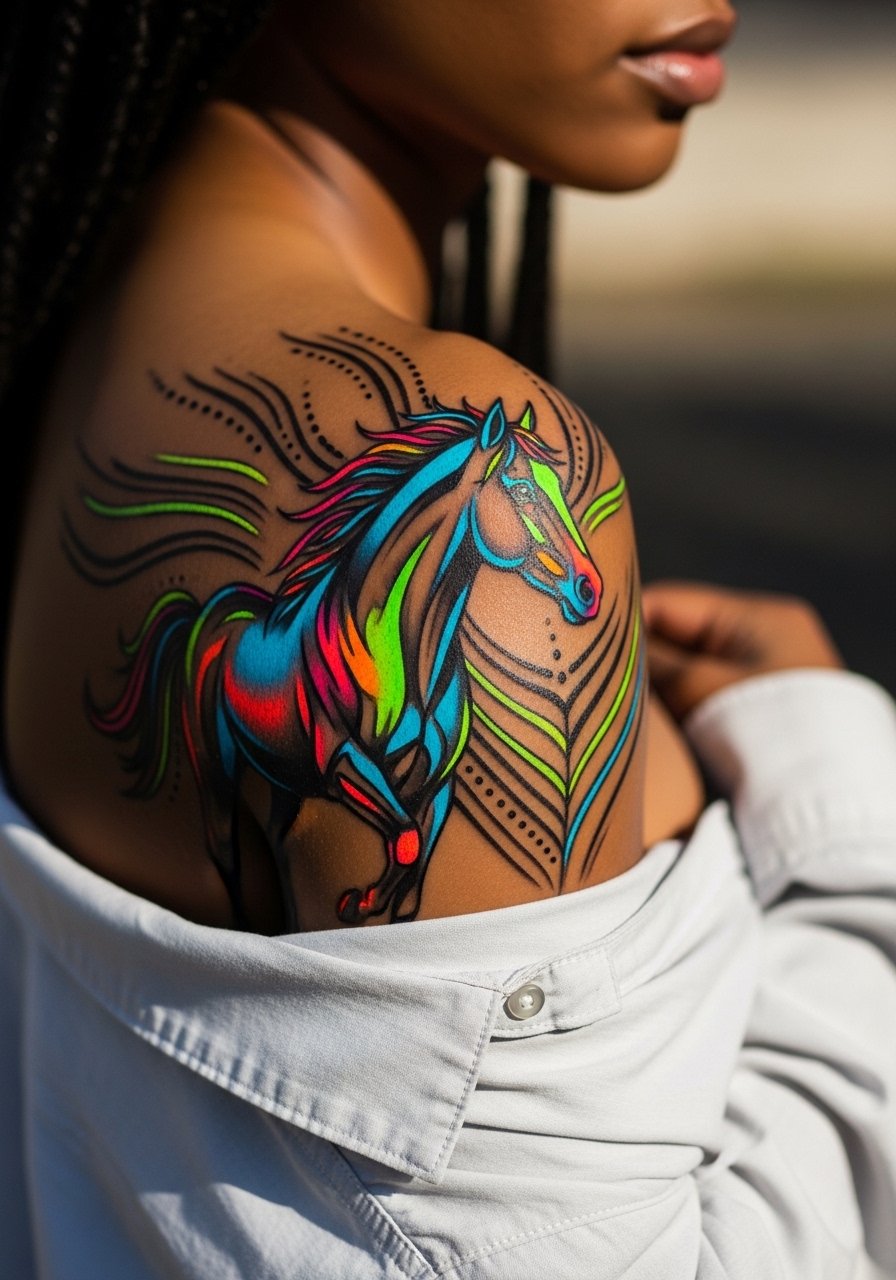
Combining heavy black outlines with neon fills gives immediate pop and helps color hold longer against fading. There is debate in the community about neon pigments. One group worries that neon fades unevenly and turns muddy. The other group points out that when paired with solid black anchors, the neon reads longer and can be refreshed more predictably. Ask your artist how they layer neon over black and what brands they trust. Shoulder-cap placements are moderate pain and show well with rolled sleeves and a loose button-down shirt for framing.
Frequently Asked Questions
Q: Will watercolor-style wild horse tattoos fade faster than neo-traditional pieces on the ribs and side torso?
A: Watercolor can soften faster because it relies on subtle washes rather than bold anchors. On ribs and side torso those washes also face stretching. If longevity matters, ask your artist for stronger anchors around key shapes and plan a touch-up at year two to re-saturate the washes.
Q: Are fine line horse silhouettes behind the ear worth it, given the visibility and healing?
A: They are worth it if you accept the trade-off: very small, subtle impact up front and a higher chance of softening sooner. Make it slightly larger than you think and have a plan for touch-ups. Discuss noise from headphones and styling that keeps hair off the spot during healing.
Q: How should I dress for a calf or thigh session to make the artist's life easier?
A: Wear loose shorts or a wrap skirt for thigh sessions and jeans you can roll for calf work. A pair of high-waisted shorts is a simple choice that gives the artist full access and keeps you comfortable during longer sits.
Q: Do finger and ankle horse bands usually need annual touch-ups?
A: Yes, those zones face constant abrasion and water exposure. Many people plan for touch-ups every one to two years if they want crisp edges. Consider simpler linework and negative space to reduce how often you need refreshes.
Q: Should I worry about workplace policies with neck, hand, or sternum pieces?
A: Consider visibility and your current career path. Neck and hand pieces are more likely to attract attention in conservative environments. Sternum and shoulder work tend to be easier to conceal with standard clothing. Think about future roles when choosing placement.
Q: How do I ask my artist about the neon pigment controversy without sounding uninformed?
A: Ask them which neon pigments they use, how they layer them over black anchors, and what kind of touch-up schedule they recommend. Most artists will explain technique and expected longevity in plain terms. Trust your artist if they can show healed photos over time.
