
Fine line dotwork that honors Anubis can look incredibly intentional and age with character if you choose spacing and placement with care. Trends push tiny, dense stipple that reads amazing fresh and then softens faster than people expect. Pick placements that give dotwork room to breathe, ask for slightly heavier anchors in shadowed areas, and expect a realistic touch-up timeline. The first idea below starts with a bold upper-arm Anubis that balances detail with longevity.
1. Dotwork Anubis Head on Upper Arm
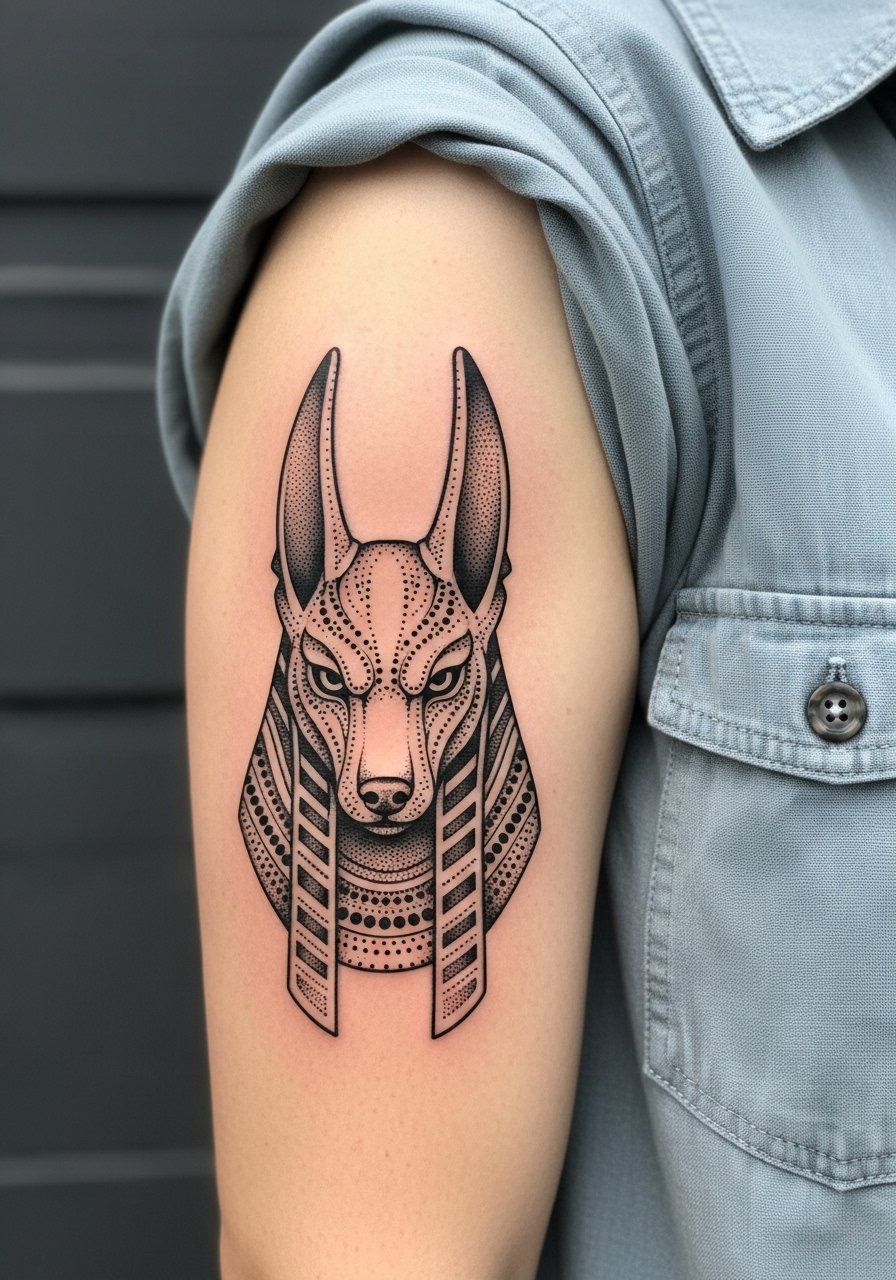
I've seen this placement hold detail the longest because the outer upper arm gets less friction and sun exposure. Ask your artist for broader negative space around the snout and ears so the stipple does not compress as skin ages. Pain is moderate and sessions usually run one to two hours, depending on how dense you want the dotwork. A common mistake is packing tiny dots into a narrow area to force contrast. That reads great the first month and then softens into a muddy block. For the appointment, wear a loose button-down shirt you can roll to the shoulder so the artist has clear access.
2. Miniature Dotwork Anubis on the Wrist
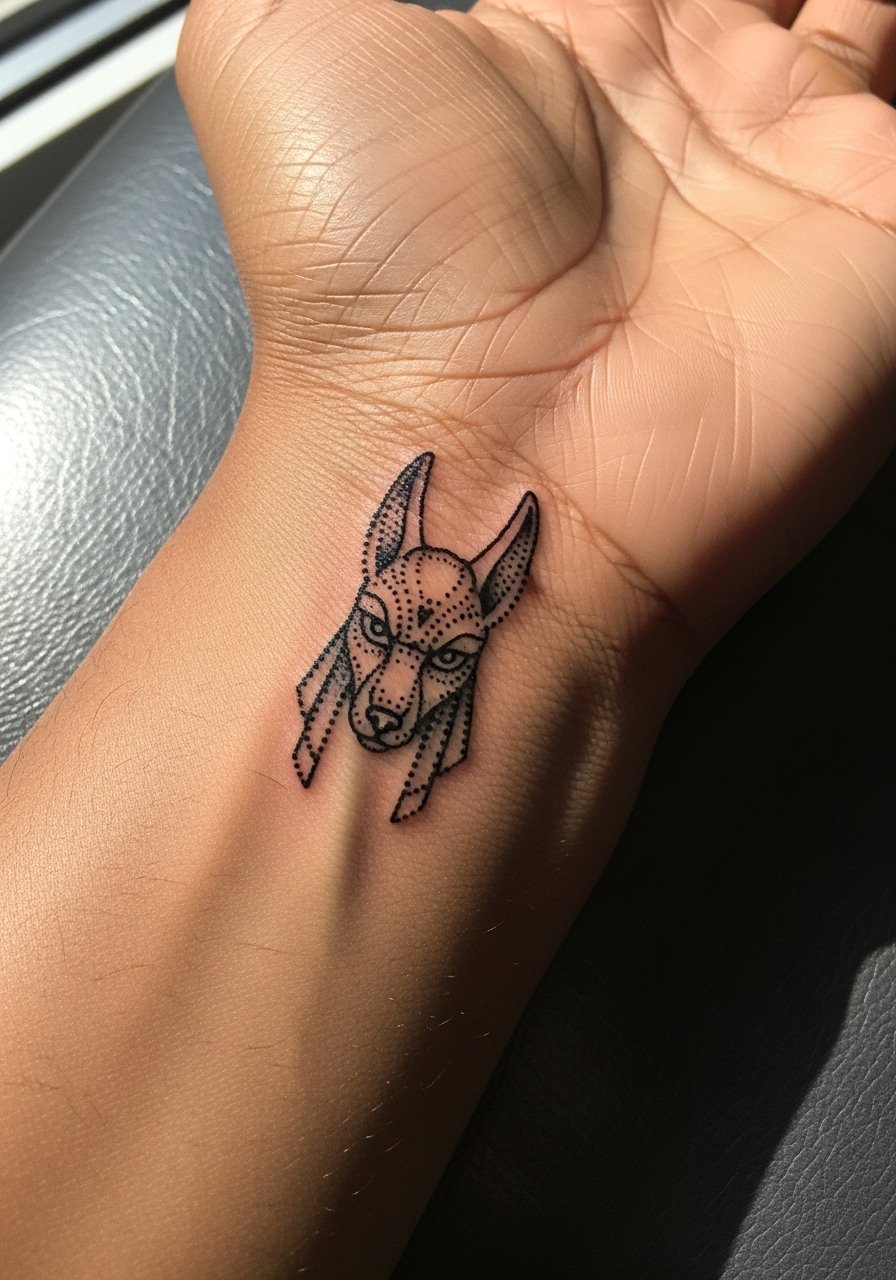
Fair warning: the wrist ages fast from washing and friction so microdot faces need extra spacing. I recommend a slightly larger miniature than you think so the stippling holds defined contrast at six months and beyond. The session is short but the touch-up timeline is sooner than for thicker placements. A common mistake is asking for an ultra-tiny face with dense dots. That compresses and blends with daily use. Expect light discomfort as the tendon sits close to skin. For showing it off, pair with a thin chain bracelet to frame the wrist without covering the detail.
3. Geometric Dotwork Anubis Collarbone Accent

Most collarbone placements look sharp when the design uses negative space to avoid overpacking. The sternum and collarbone both move with breathing and clothing, so the artist must plan dot spacing across the curve. Pain jumps when ink crosses the bone. Sessions are typically split into shorter passes so skin doesn’t swell. One mistake is insisting on continuous dense stippling across the collarbone. That area benefits from airy dots and clean linework to keep contrast over time. For the session, wear a wide-neck shirt you can pull aside so the artist has clear access.
4. Anubis Silhouette Down the Spine
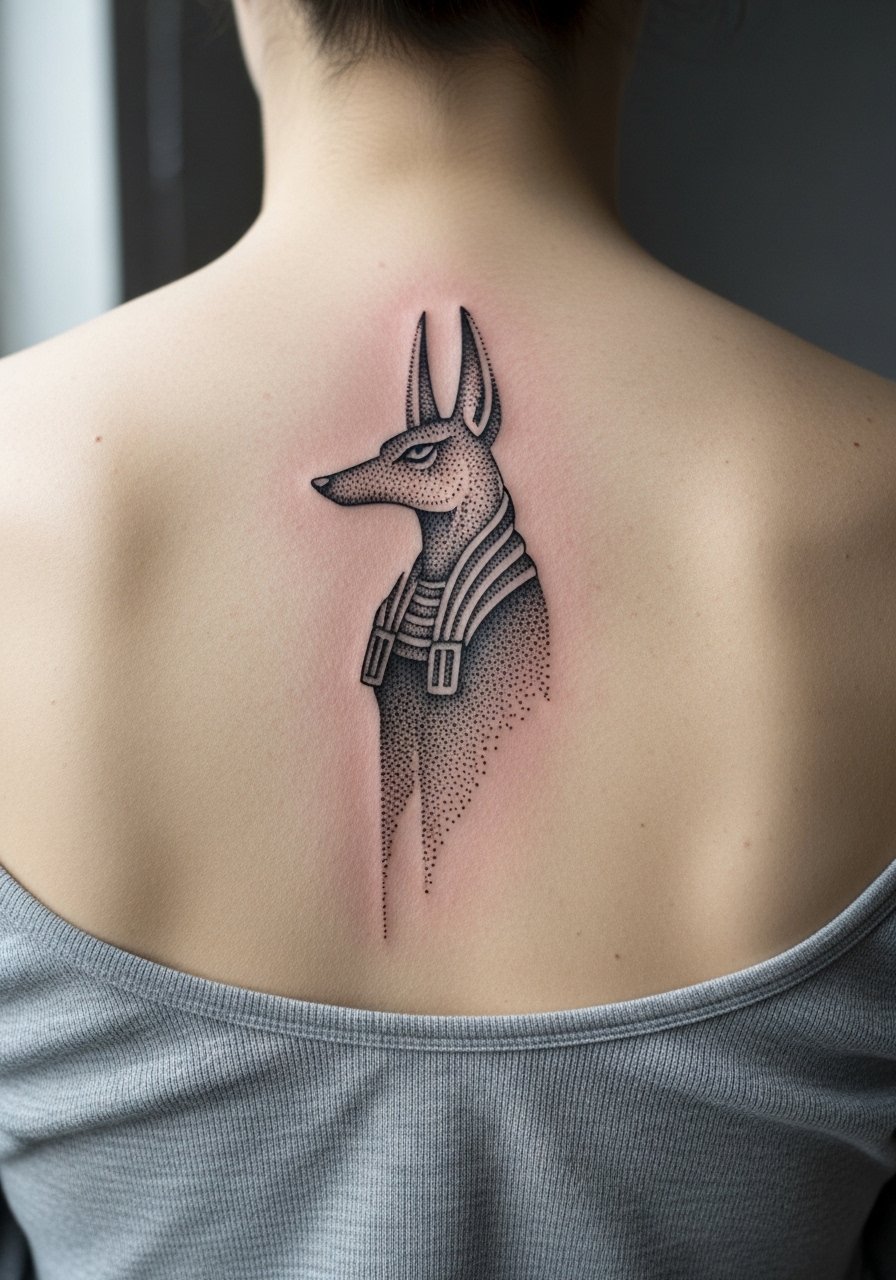
There's something about spine work that reads cinematic, but it also tests session endurance. The spine placement feels sharper on the bone and softer in the muscle pockets. Sessions often last two to three hours with breaks. The most common error is compressing fine stipple into long, uninterrupted bands. Over time that volume can merge. If you want contrast to last, ask for slightly bolder anchor lines where the silhouette meets shadow. Also consider how open-back pieces pair with evening wear. A simple open-back dress shows off vertical pieces with minimal fuss.
5. Half-Sleeve Dotwork Anubis with Floral Frame
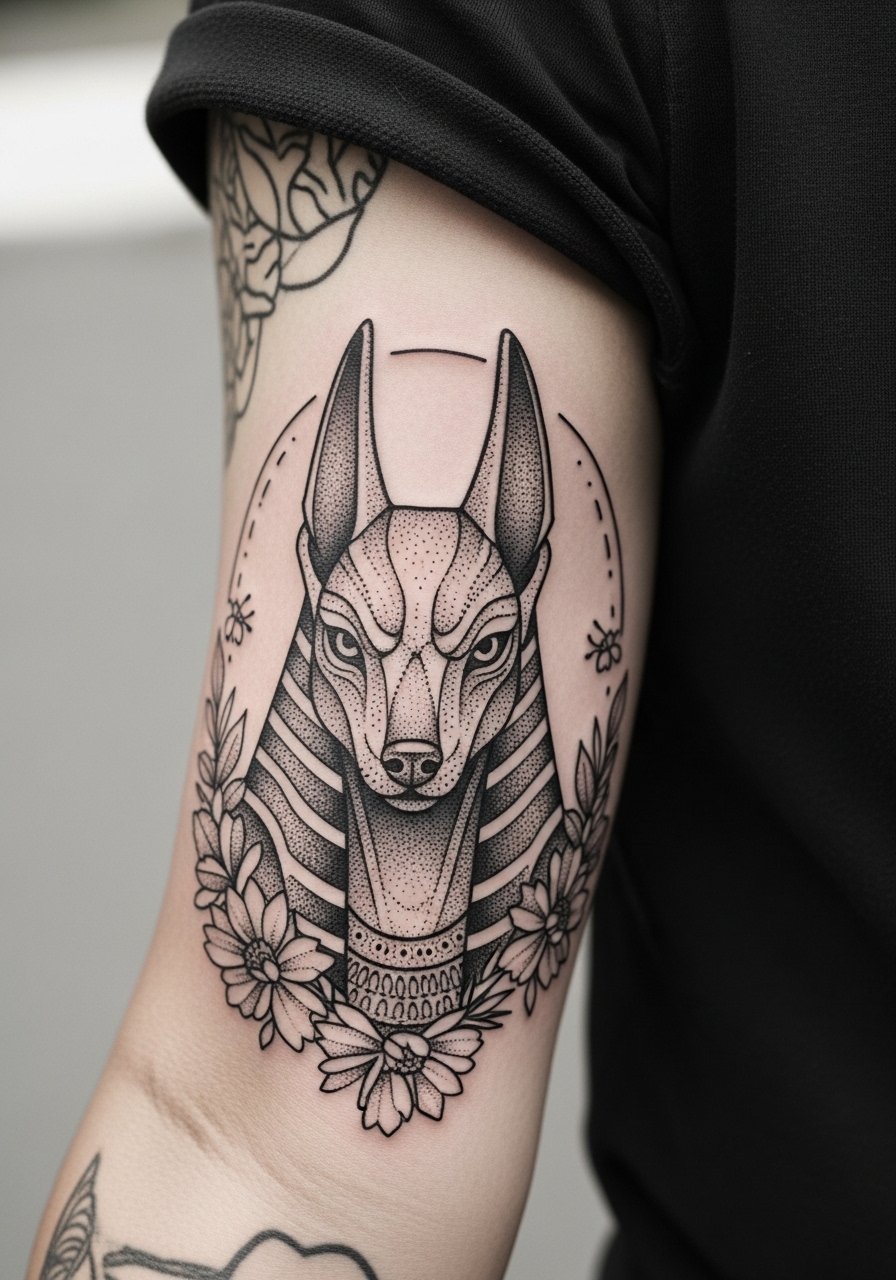
When you want the Anubis motif to read like a narrative, wrap it in botanical stippling to soften transitions. I've noticed half-sleeves that balance bold anchors with fine stipple age best. Session time tends to be multiple appointments totaling six to ten hours. A frequent mistake is trying to cram too many tiny motifs into a single session. Space the work, let old areas settle, and plan a touch-up to rebalance saturation after healing. For outfit pairings, a rolled linen sleeve or short-sleeve shirt keeps the piece visible. I like a loose linen shirt for casual show-off days.
6. Dotwork Anubis Chest Panel
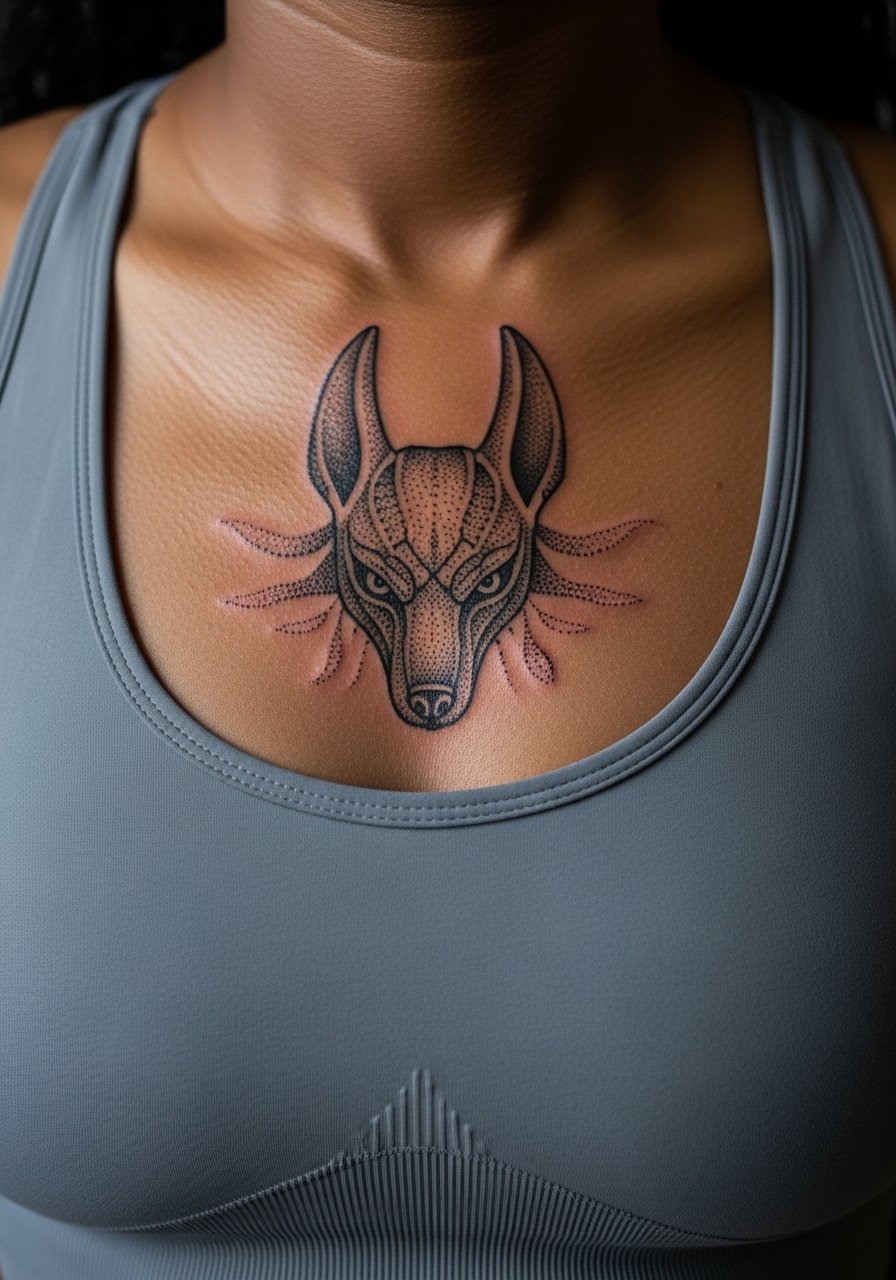
Artists split on chest panels using heavy dotwork. One camp warns that chest movement and sun exposure dilute tiny dots into soft shadows within a few years. The other camp says well-spaced stipple with stronger anchors can hold up fine. Ask before booking which camp your artist sits in. Chest work is pricier in time because breathing and curve require careful passes. A common mistake is a dense, uniform stipple across the chest. That tends to gray out. For session clothes, wear a fitted sports bra or a wide-neck top you can pull aside for access.
Studio Day Picks
Those upper-arm, chest, and wrist Anubis pieces above benefit from different prep items. These picks smooth the session and protect delicate dotwork during the first week.
-
Stencil transfer paper kit. Lets you confirm placement and linework before the needle starts, especially useful for the symmetry required in chest panels.
-
Topical numbing cream. Applied as your artist recommends it eases shoulder and chest sessions so you can sit through longer stipple passes.
-
Thin protective film roll. Keeps wrist and hand pieces cleaner during the first days of showering and daily use.
-
Fragrance-free gentle body wash. Cleans the healing area without stripping oils the skin needs to set dotwork.
-
Aquaphor healing ointment. Thin application for the first few days helps protect fine stipple without suffocating the skin.
7. Anubis Half-Portait on the Thigh
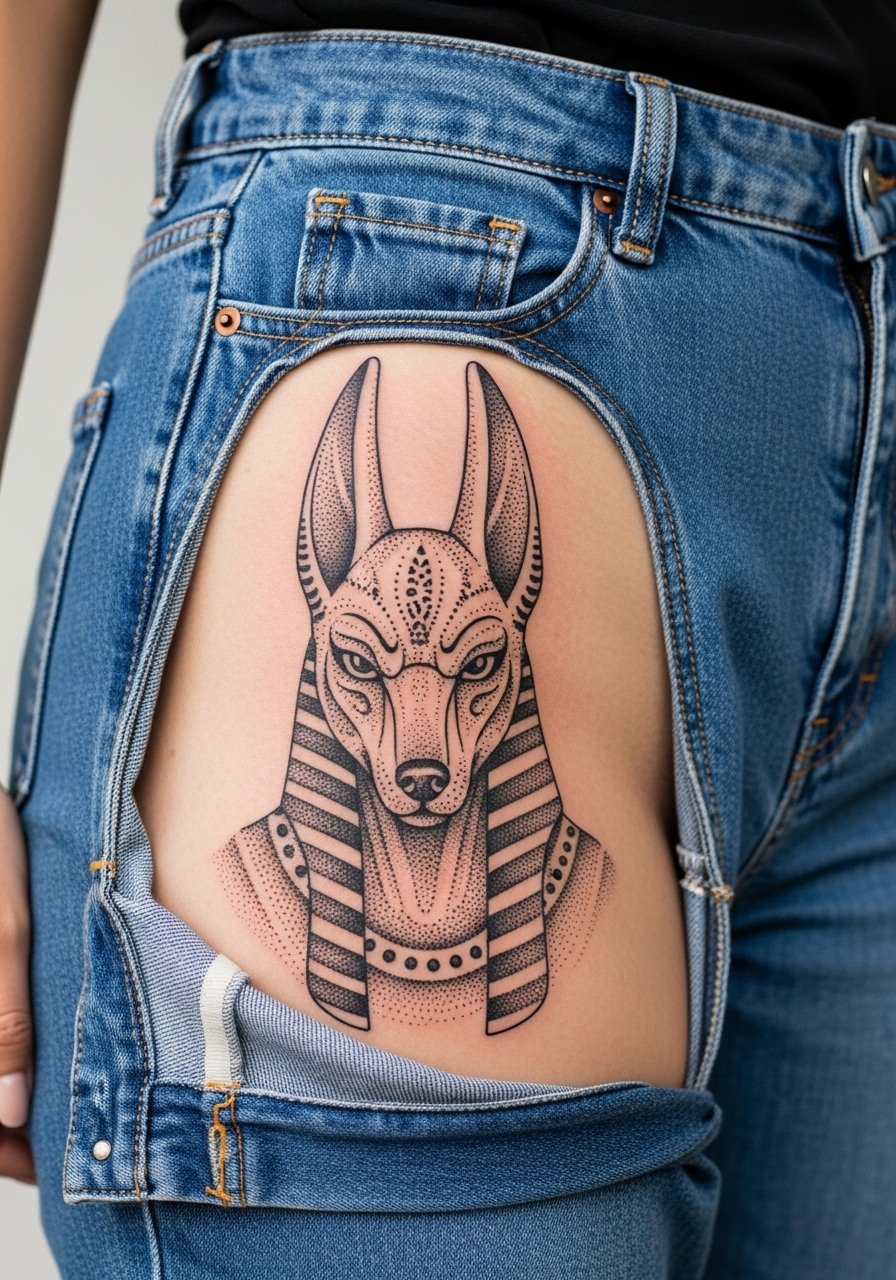
When a design needs room for detail, the thigh is forgiving. The muscle and fat cushion make long stipple passes less painful. Sessions are comfortable to moderate and can be longer, so bring layered clothing. The mistake I see is requesting ultrafine dot density without allowance for natural tissue movement. Spacing dots out and building contrast with negative space keeps the portrait readable at year three. For the studio, wear high-waisted denim or shorts so the artist can easily expose the upper thigh. A high-waisted denim works well for that access and for showing the piece later.
8. Tiny Anubis Finger Accent
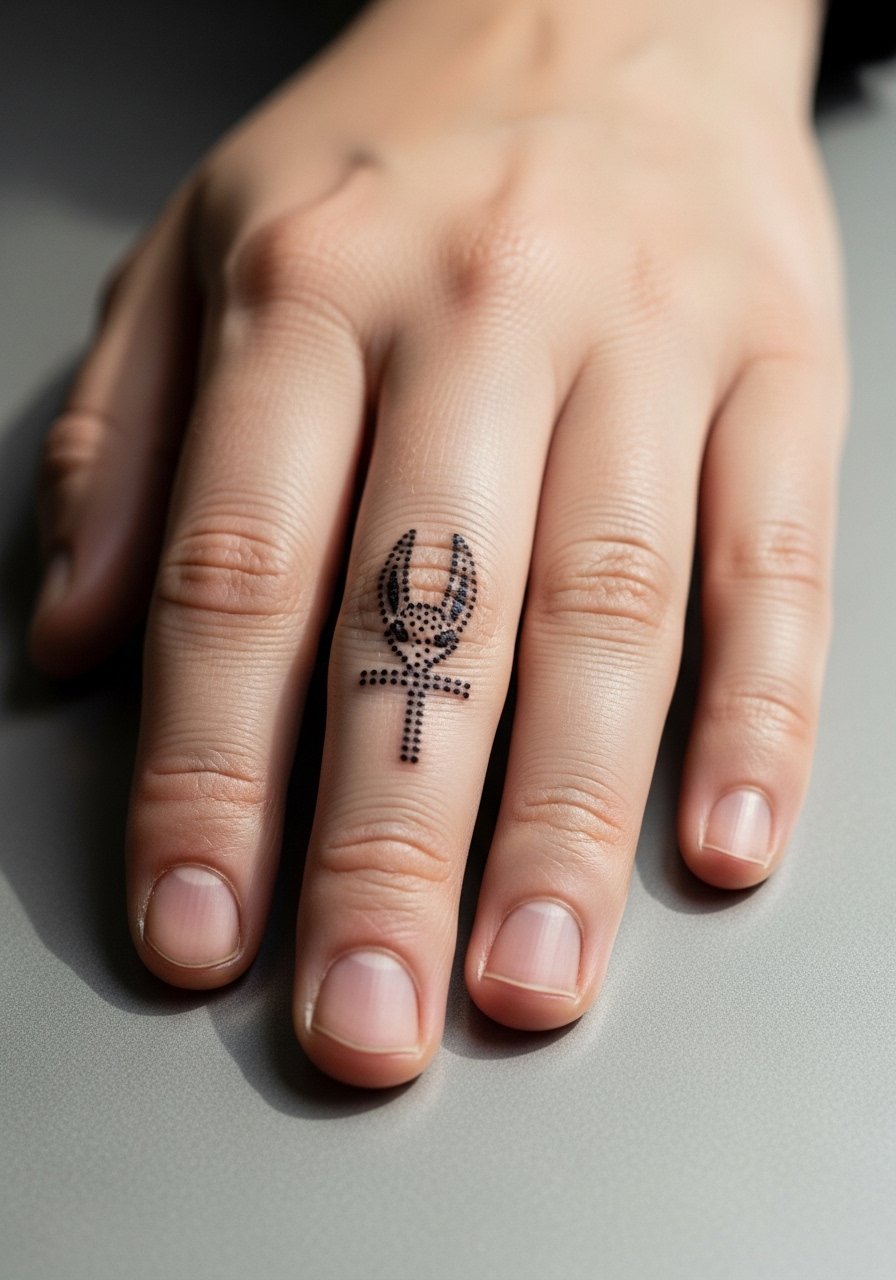
Finger tattoos live in a harsh environment. Constant hand washing, movement, and thin skin mean dotwork there needs bolder anchors and acceptance that touch-ups are likely. Sessions are short but expect fading faster than other placements. A common error is asking for an ultra-fine glyph with no bold elements. That disappears. If you want fingers, plan on a refresh at year one to two. Also consider how visible it is for work or formal settings. For everyday wear, a minimalist ring can frame the finger tattoo instead of covering it.
9. Anubis Back Shoulder Plate
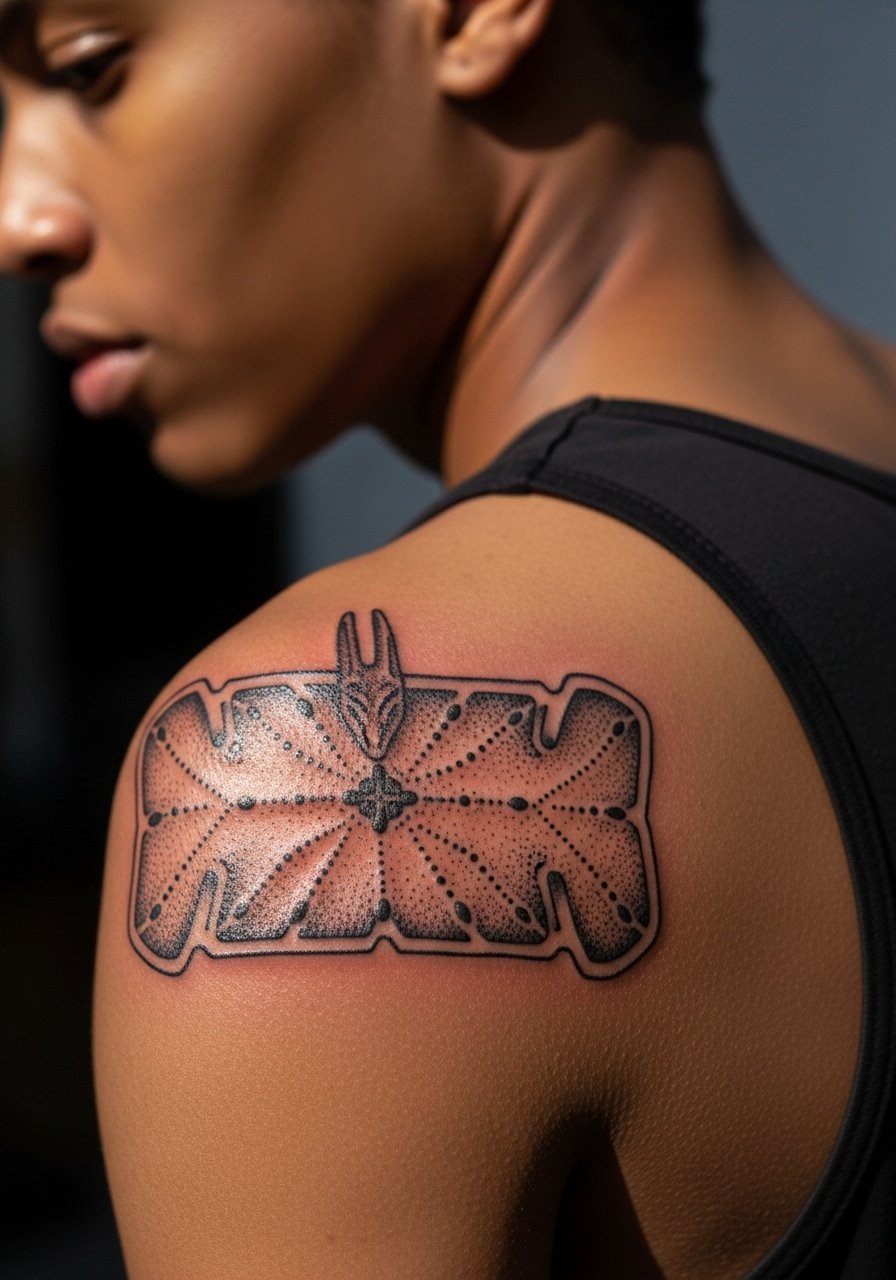
There's a lot of room on the shoulder blade to play with texture and negative space. I've noticed shoulder plates survive sun exposure better when artists leave deliberate gaps in stippling. Sessions can be broken into two appointments to let the skin relax. The typical mistake is over-detailing tight areas without thinking about shirt seams or backpack straps. For showing the piece, wear a tank top or a wide-strap dress that reveals the shoulder line without rubbing the art during the first weeks.
10. Anubis on the Calf with Dot Mandala
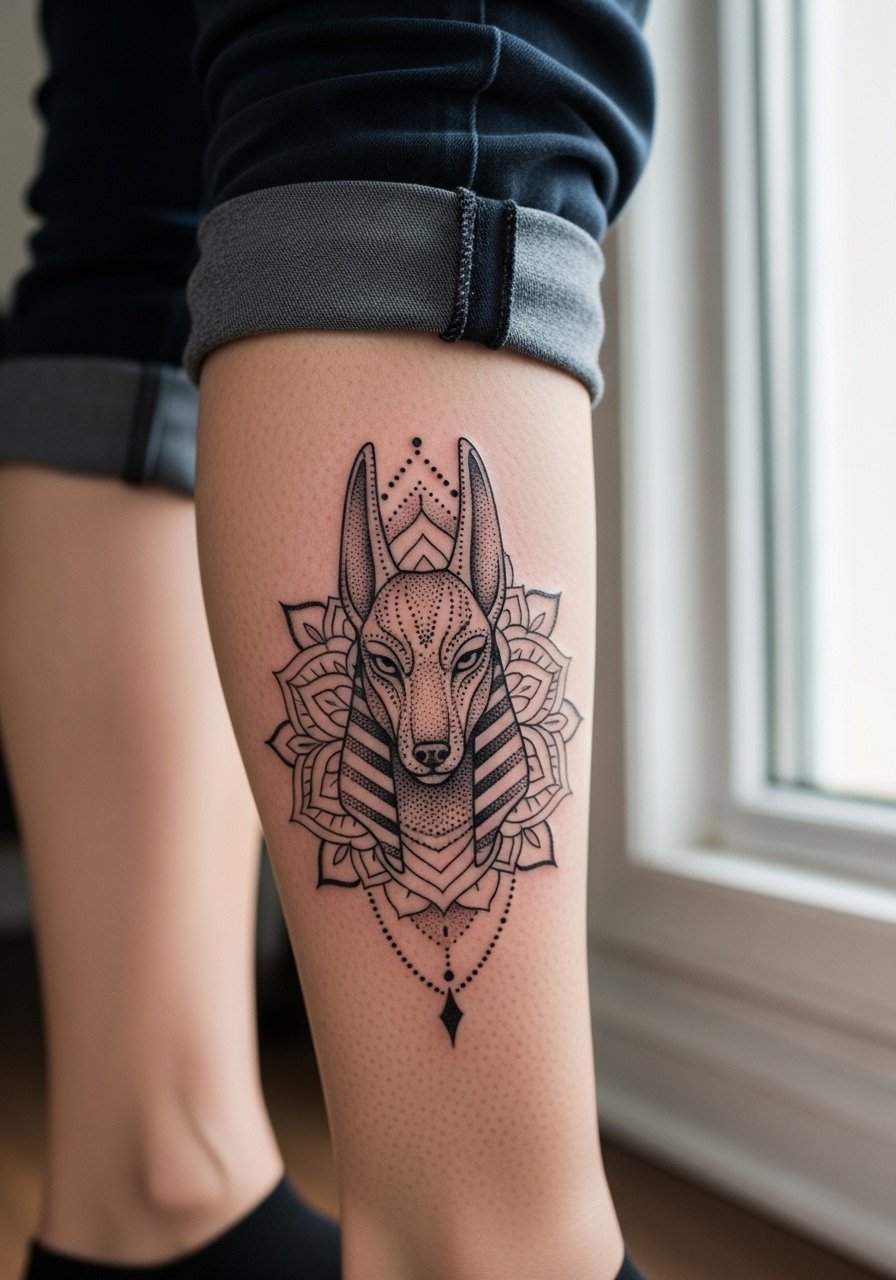
Calf placements handle dense dotwork well because the area endures less daily abrasion and sun compared with lower legs. Expect mild discomfort and sessions that can stretch to a few hours. A common error is pushing too much small detail into the mandala's center. Give mandalas breathing room near the focal Anubis face to keep central dots from merging. For session comfort, wear loose drawstring pants so you can roll them without pinching. A loose drawstring pant makes pre- and post-session movement easy.
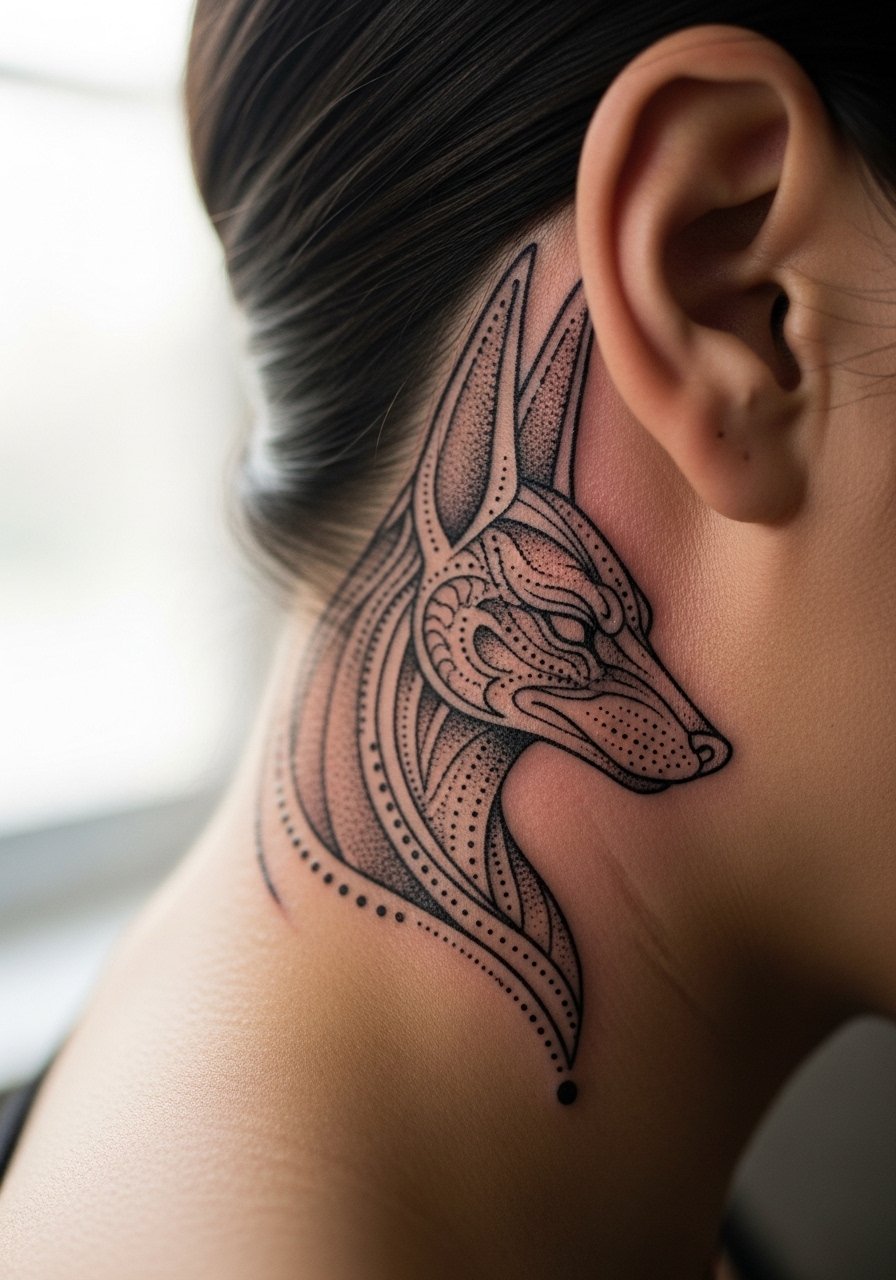
11. Anubis Neck Side Accent
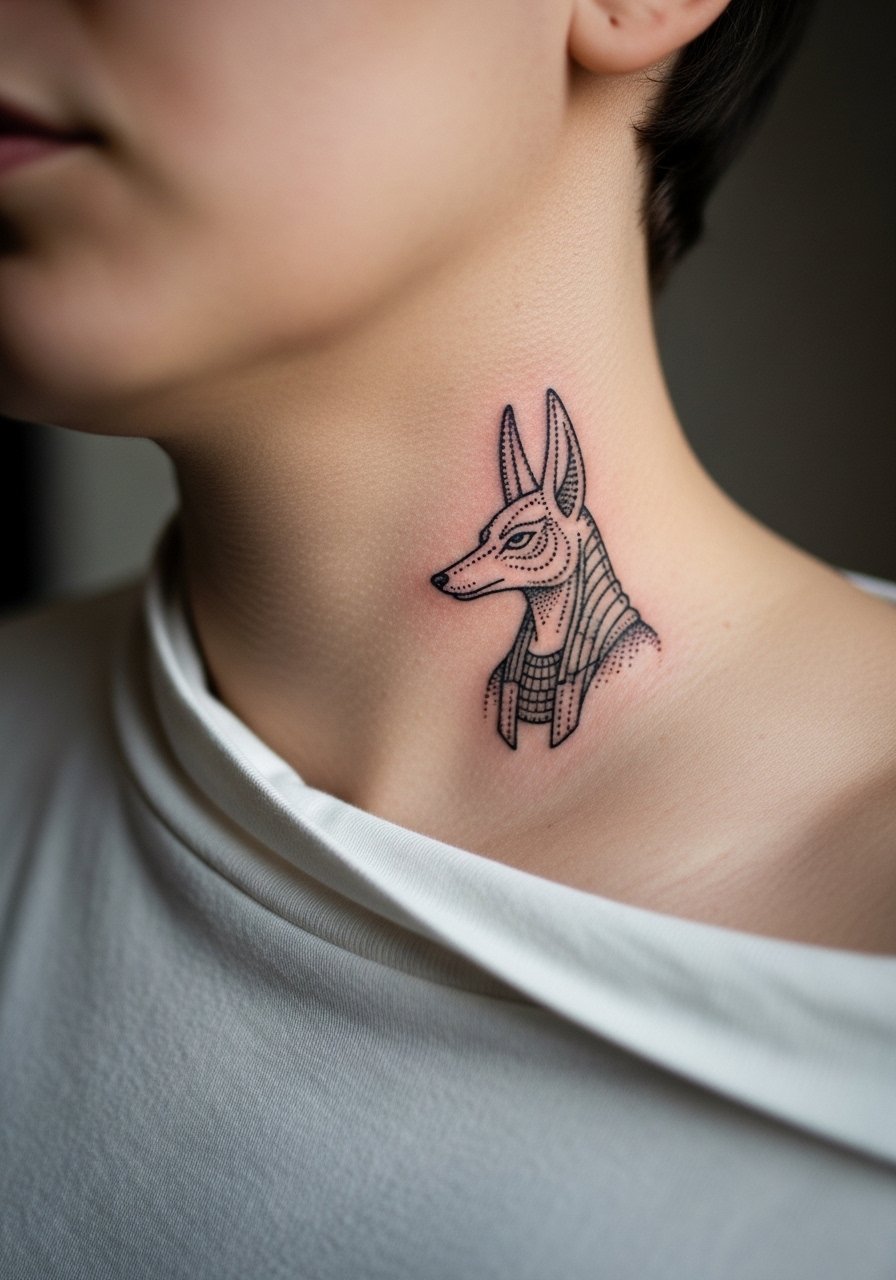
Artists are split on neck placements because of visibility and aging. One camp says neck skin shifts and blurs fine detail quickly. The other camp argues careful depth and dot spacing can make small accents last. If visibility matters, think about career effects before committing. Pain is sharp but brief. The usual mistake is treating the neck like a flat canvas and asking for microdot density. Ask for slightly heavier anchor dots and clearer negative space. For sessions, wear a wide-neck shirt you can shift for access.
12. Sleeve Accent: Anubis Paw with Dot Rays
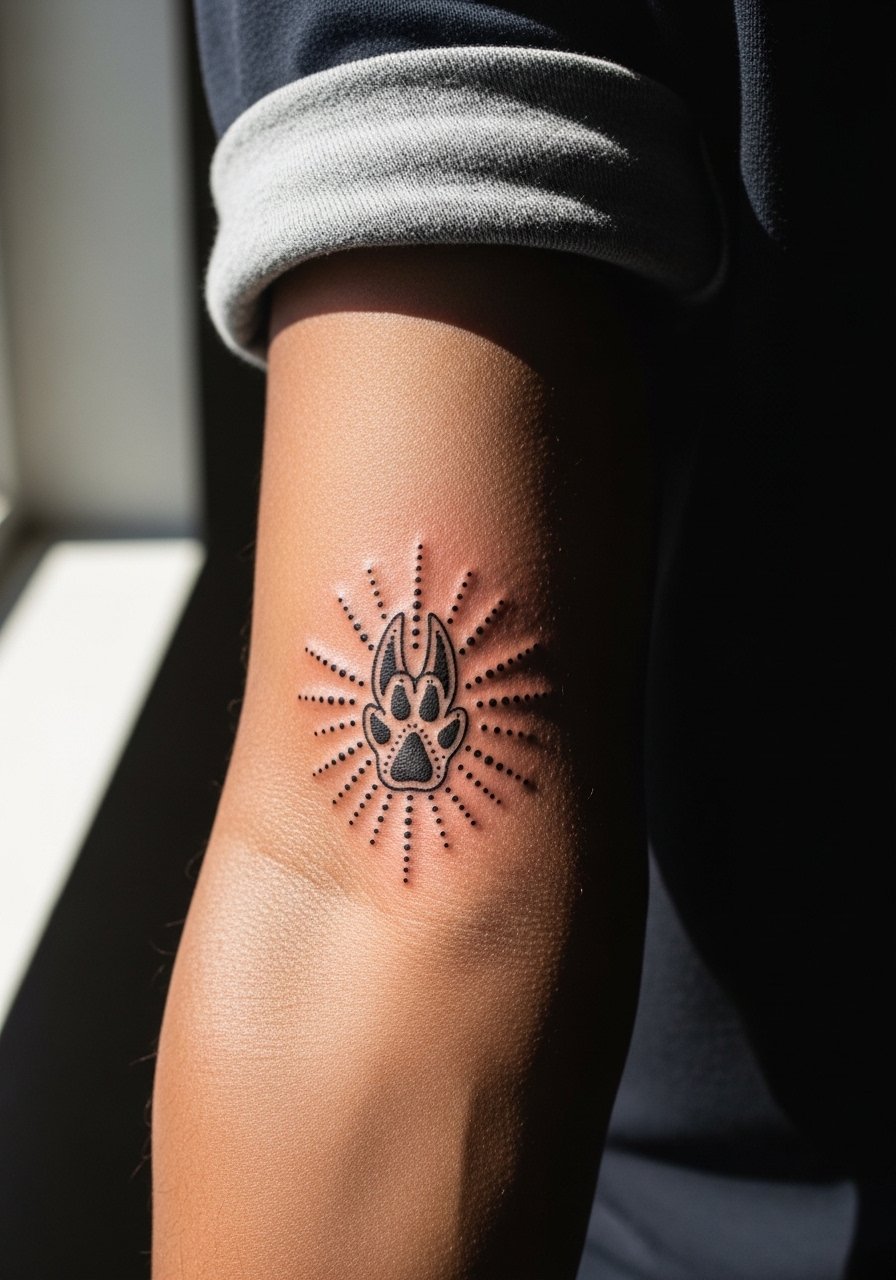
I've seen inner-forearm accents age well when artists avoid excessive contour dots near tendons. The inner forearm is forgiving but hair and frequent sun exposure still affect saturation. Sessions are comfortable and short. A mistake is piling tight stipple close to thin skin; that tends to soften in two years. For a sleeve, think about how the paw integrates with larger motifs and leave negative bands between dense areas. For showing off, rolled sleeves and short-sleeve shirts frame inner-forearm accents nicely. Try a rolled sleeve shirt.
13. Anubis Sternum Mini-Panel
Sternum work demands a specialized hand because of curvature and sensitive skin. The usual controversy is between those who think the area can show fine detail and those who say it blurs quickly. I encourage a consultation to see the artist's healed sternum photos. Sessions are painful and often split. A common error is pushing ultra-dense dot fields across the sternum. That tends to gray out. For the session, wear a fitted sports bra or bandeau so the artist can access the area without constant readjustment. A bandeau top makes this easy.
14. Anubis Line-and-Dot Forearm Band
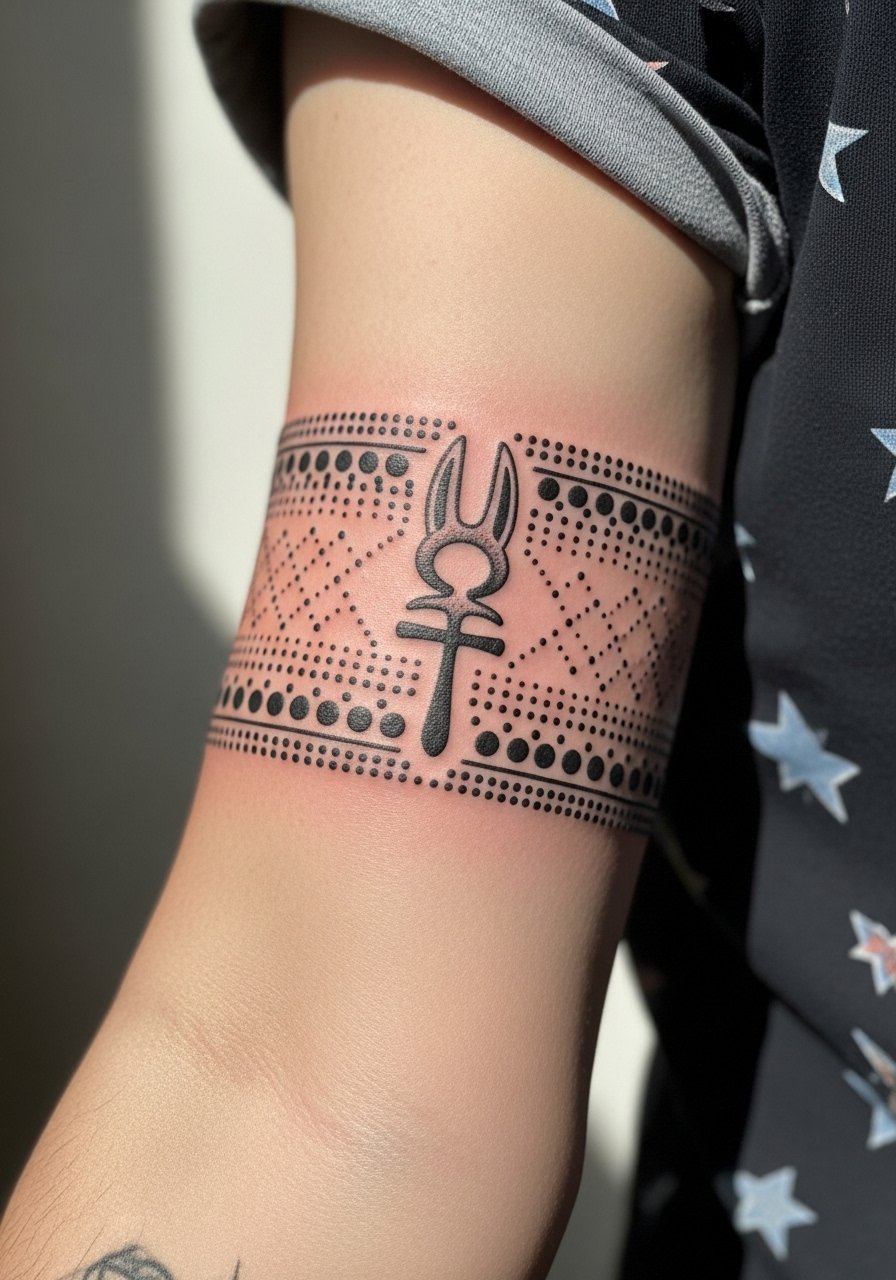
A forearm band can read both subtle and graphic. The mistake I see is making the band too tight around the arm with dense stippling, which can merge as the skin moves. Ask for slightly wider gaps between dot clusters and defined anchor lines to preserve shape over years. Forearm sessions are manageable and often completed in one appointment. For show-off days, short sleeves or rolled cuffs keep attention on the band. A short-sleeve shirt is a simple choice to reveal the design.
15. Anubis Hand Backplate
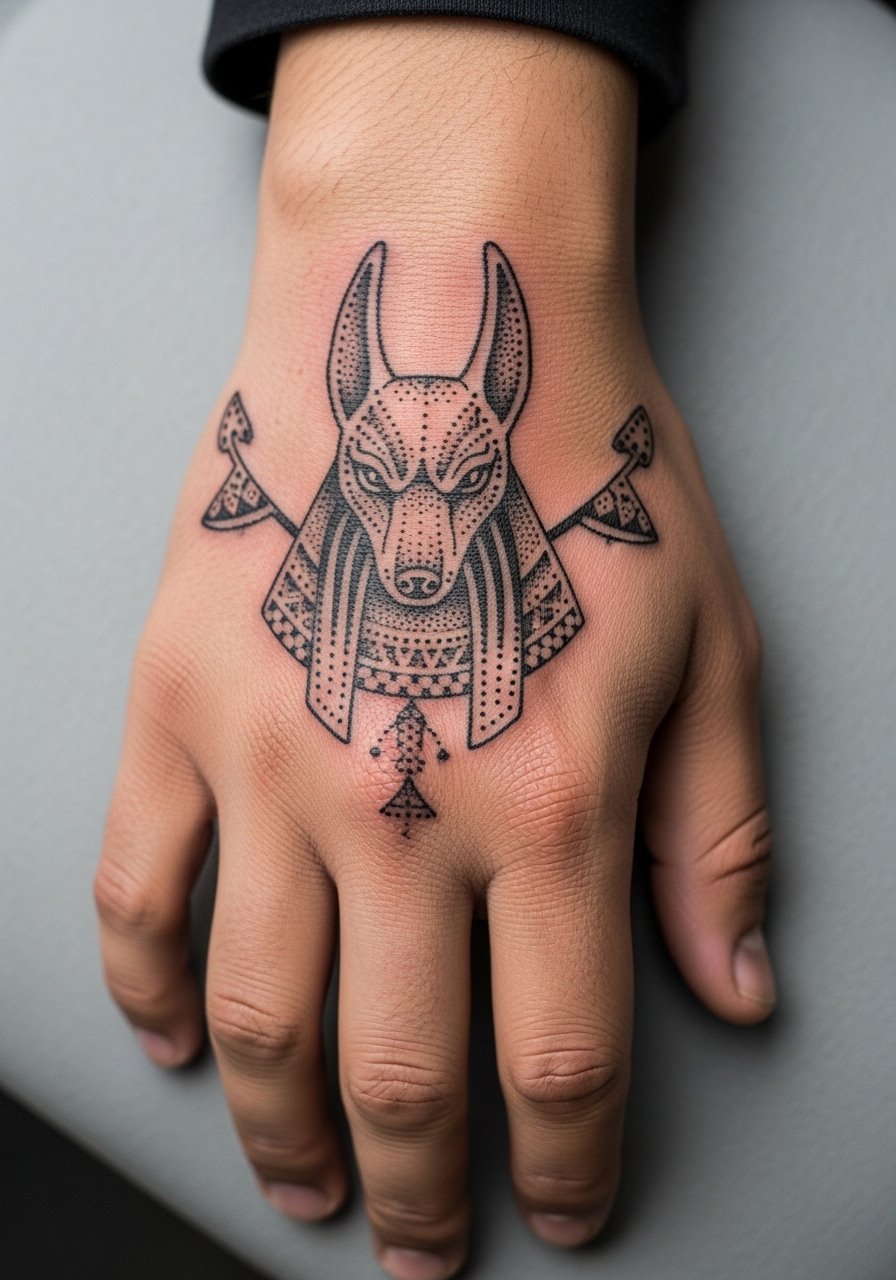
Hand tattoos have a higher blowout risk and fade faster due to constant use. If you want an Anubis backplate, plan for touch-ups and accept a shorter saturation window. The usual mistake is expecting palm-level longevity. Back-of-hand work fares better when dots are larger and anchors are bold. Sessions are brief but the healing period requires guarding against water and abrasion. Consider how your job views hand tattoos before committing. For styling, dainty rings can complement the piece but avoid anything that rubs the tattoo during healing.
16. Dotwork Anubis Throat Script Pairing
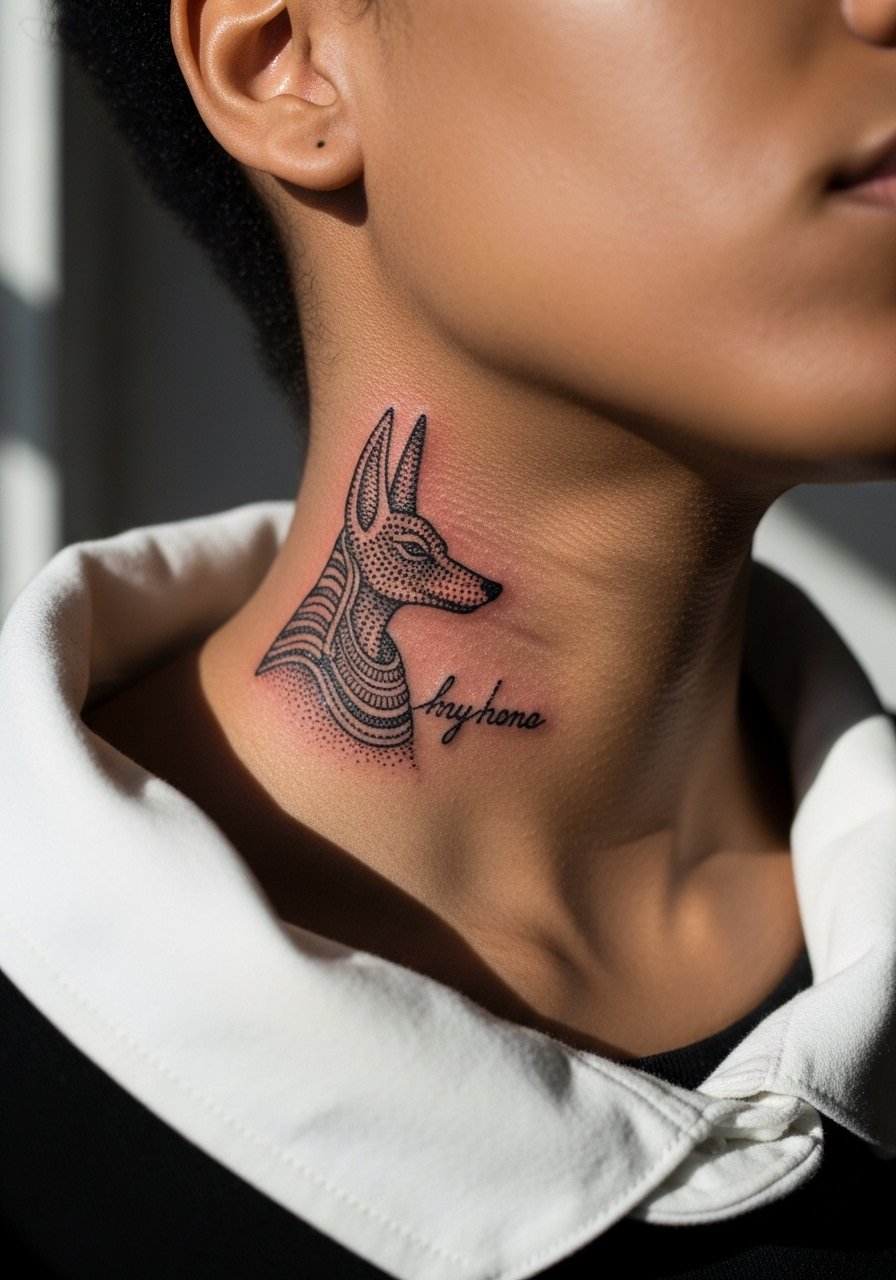
When text accompanies an Anubis glyph, be precise about font size and spacing. Lettering on the neck can blur if too small. The common error is choosing a delicate typeface without testing it at the actual size on skin. Sessions are short but accuracy matters. Ask your artist to stencil text at final size and photograph it for you to review. For visibility and pairing, a thin chain pendant sits above the piece without competing. A thin chain pendant necklace can finish the look.
17. Anubis Full Back Panel in Dotwork
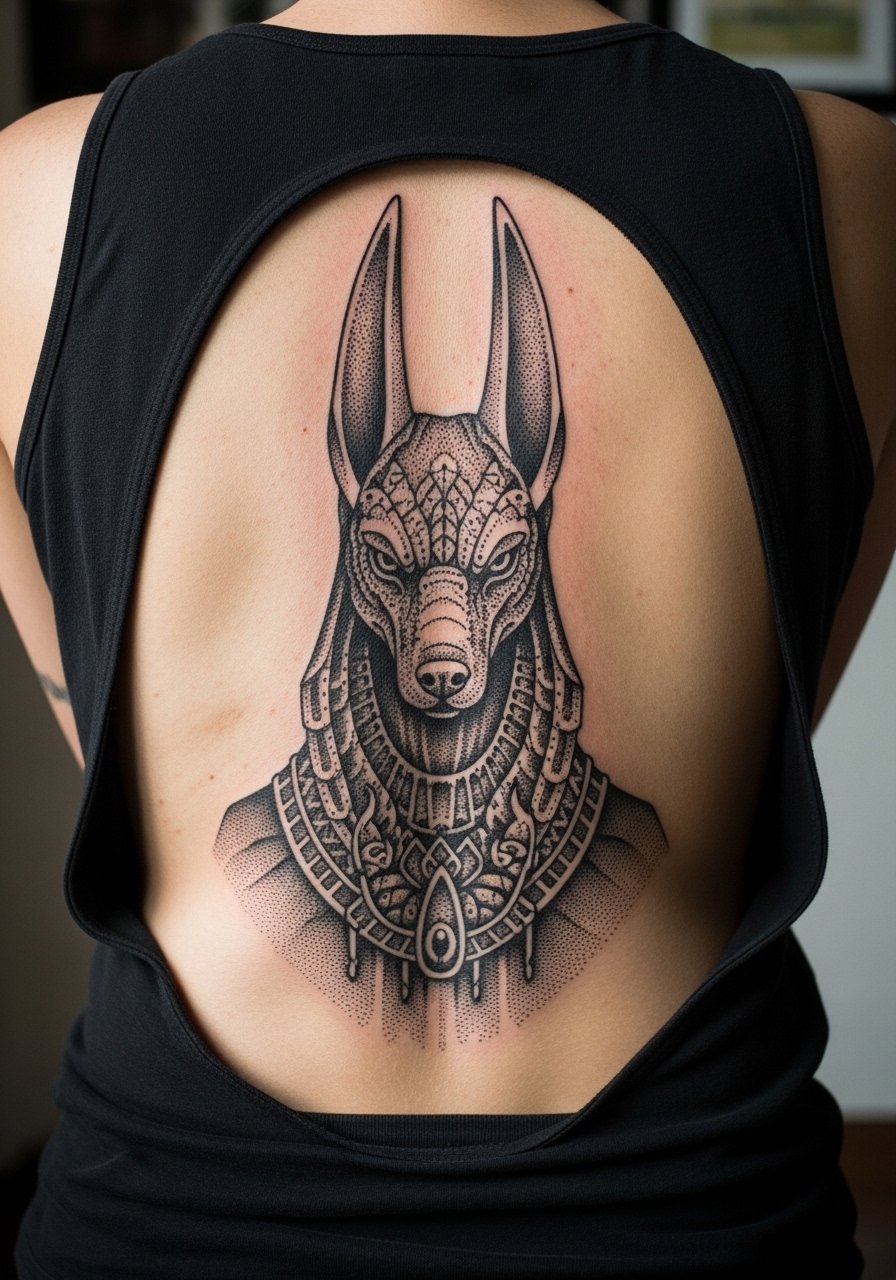
Large back panels are forgiving for detailed dotwork because the skin there moves less and sees less sun. Expect multi-session work stretching across several months. The common mistake is wanting the entire panel in one marathon session; that stresses skin and can affect healing. Build in recovery, let the artist rebalance shading in follow-ups, and plan for a touch-up after full healing. For dresses and evening wear, open-back styles make the work shine. An open-back top pairs well for reveal moments.
18. Anubis Ear-Behind Accent
Behind-the-ear placements are tiny and delicate. They need an artist comfortable working on tight curves. The mistake is asking for heavy stipple behind the ear; that spot benefits from sparse dots and crisp linework. Sessions are quick and healing is usually easy. Consider hairline changes and how you wear your hair. If you prefer to show it off, a short haircut or a tucked-behind-ear style reveals the piece. For appointment setup, avoid oil-based hair products that could interfere with the stencil.
19. Anubis Anklet Dotwork
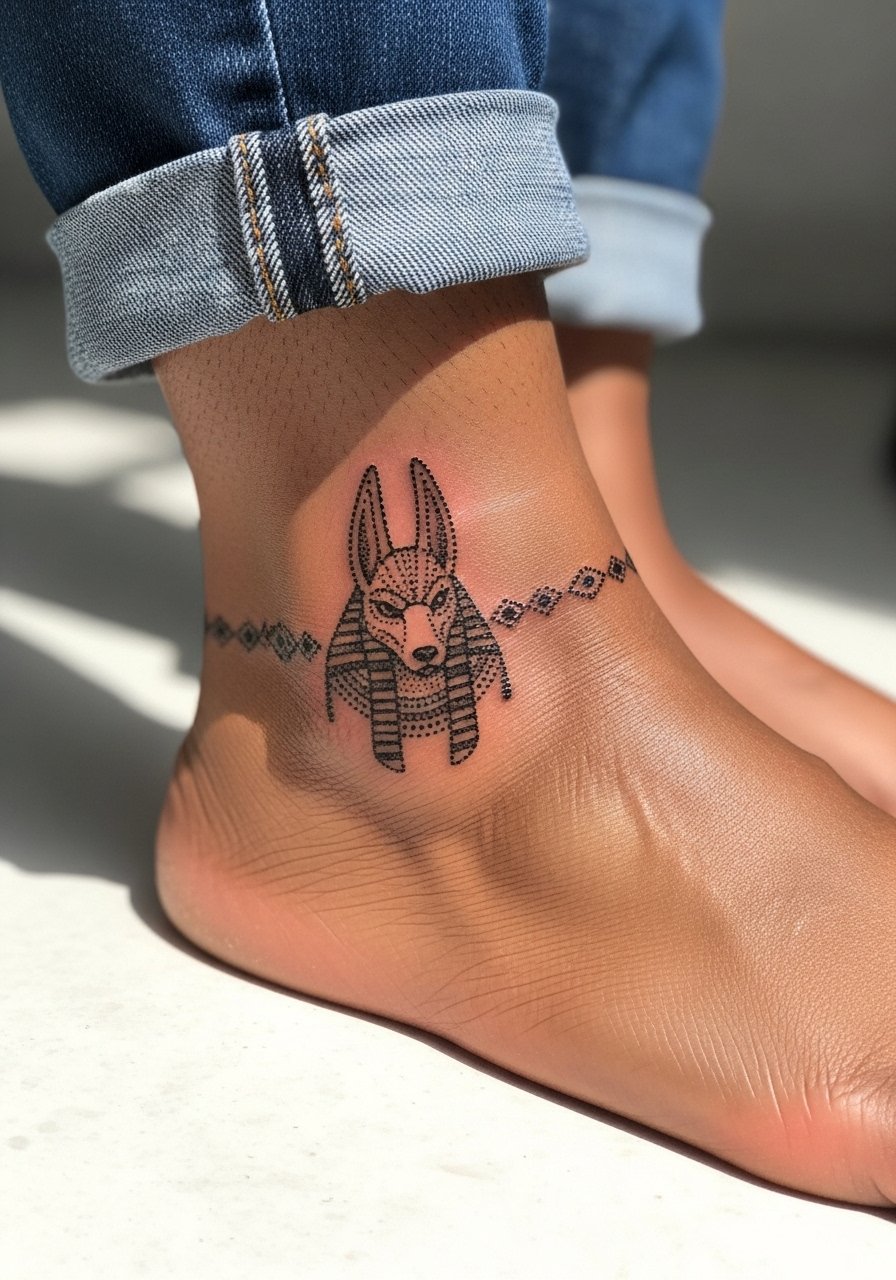
Ankle tattoos rub against socks and shoes, so dots need protection early in healing. The frequent error is underestimating friction. Sessions are short but demand careful aftercare. Expect touch-ups sooner than on less mobile areas. For show-off days, sandals and rolled jeans display anklet work well. A pair of sandals that avoid straps over the tattooed zone keeps the art visible without irritation.
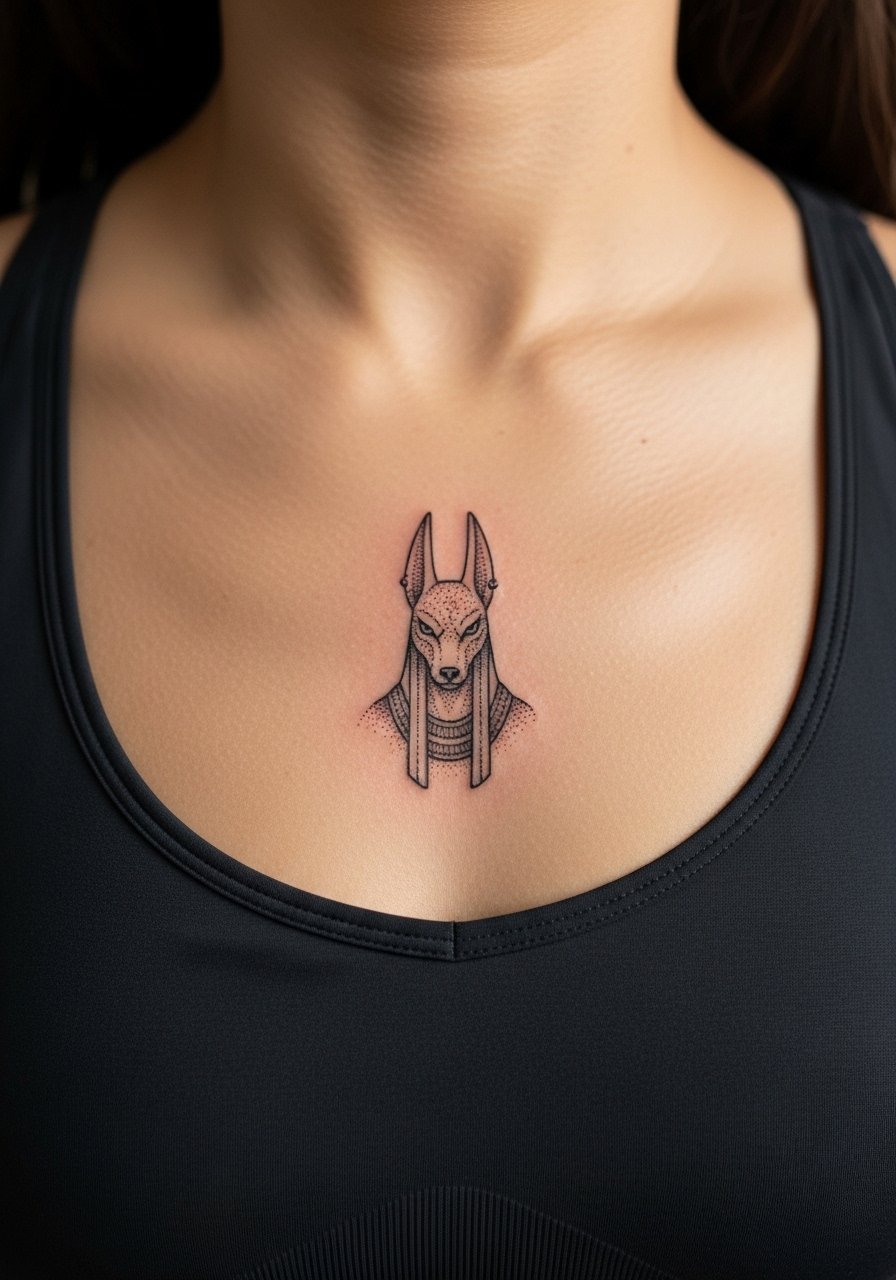
20. Anubis Geometric Chest Mandala

Geometric mandalas require symmetry and patient dot layering. On the chest, breathing and movement make even spacing crucial. A common mistake is forcing intricate symmetry in one session. Break it up and check stencils at each phase. Pain ranges from moderate to high depending on proximity to bone. For evening wear, open-neck or wide-neck tops frame chest mandalas elegantly. Consider a wide-neck blouse for a clean reveal.
21. Tiny Anubis Behind the Wrist
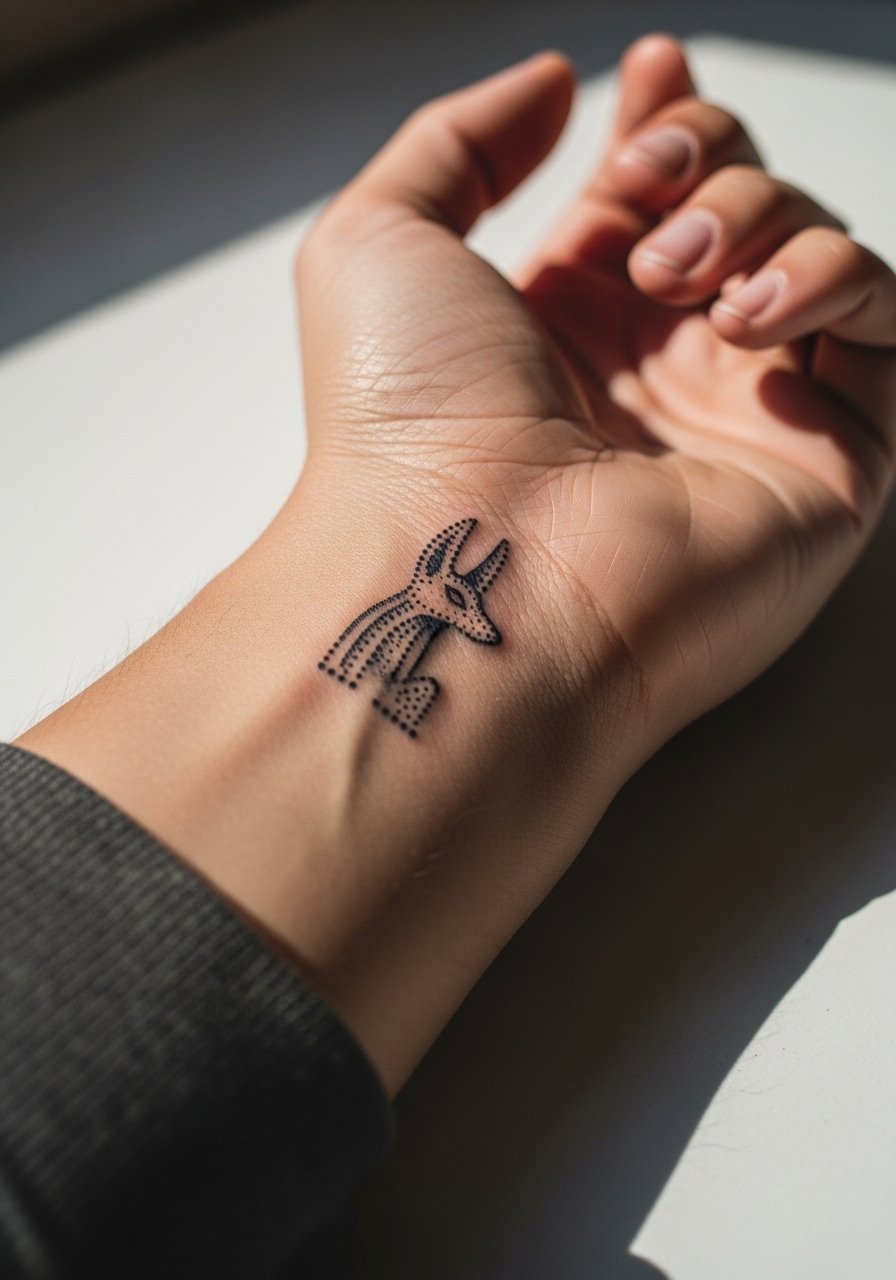
Behind-the-wrist pieces get constant exposure to water and motion. If you want a clear dot glyph, ask for slightly larger dots and a bold silhouette. The usual mistake is relying on microdots that merge under daily use. Sessions are quick but expect earlier touch-ups. For showing the piece, bracelets that sit above the wrist avoid rubbing. A minimal cuff bracelet can keep attention on the tattoo without interfering.
22. Anubis Ribcage Portrait
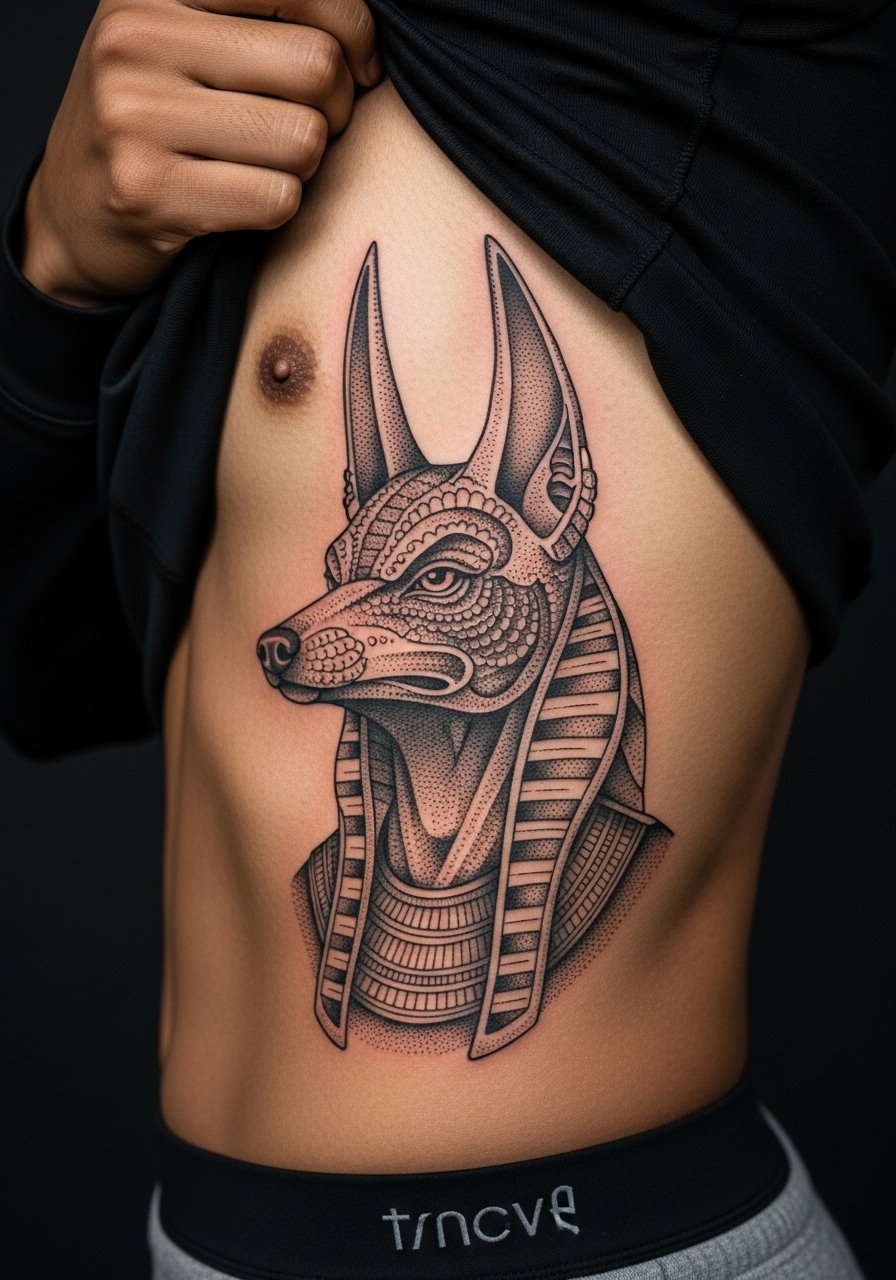
Ribcage work is painful and demands patience. Artists disagree openly about fine dotwork there. One group argues the stretch and movement blur subtle dots in two years. The other group says careful depth and spacing can make it last. Ask your artist where they stand and see healed ribs in their portfolio. Sessions are often split and healing can be slow. A common mistake is choosing extreme microstipple across ribs. Spacing and negative space will help the portrait hold.
23. Anubis Thigh Band with Dot Shading
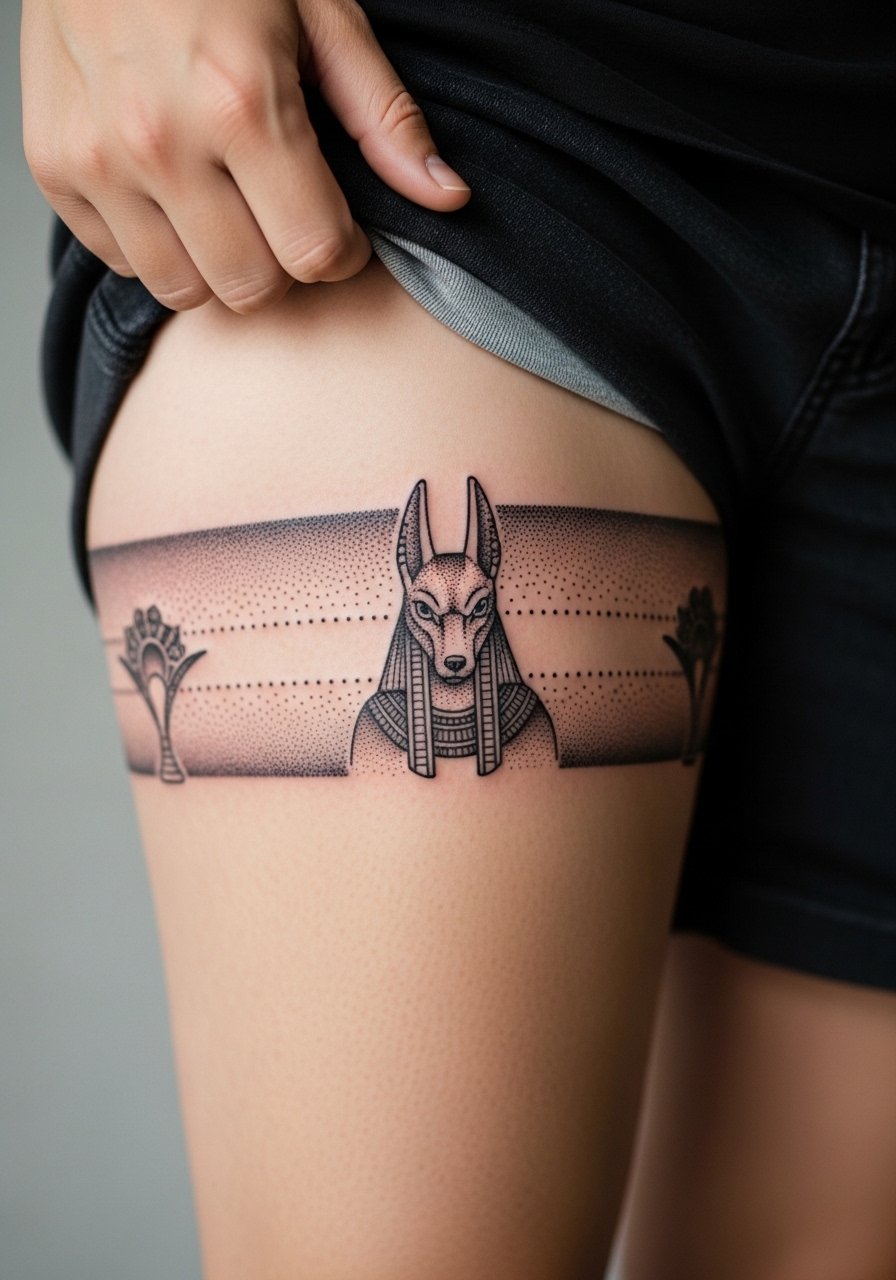
Upper-thigh bands are comfortable to sit through and excellent for dense dotwork. The mistake is not considering leg movement or outerwear seams. When the band crosses tight clothing lines, you need gap planning to prevent constant abrasion. Sessions are comparatively easier on pain and can be longer. For showing off, high-cut shorts or skirts frame the thigh band without rubbing. A high-cut short makes display effortless.
24. Anubis Micro-Realism on the Ear Cartilage

Ear placements demand an artist comfortable with contour work on thin cartilage. Micro-realism woven with dotwork requires bold anchors or it will look like noise in months. The typical error is requesting realism sized too small for the canvas. Sessions are brief but precise. Consider hair styles that show or hide the piece. A tucked-behind-ear look reveals it on demand. For appointment prep, avoid heavy hair products that could smear the stencil.
25. Anubis Calf Sleeve Connector

Connector work between calf elements should respect existing negative spaces. Rushing to fill gaps with tiny dots leads to blurring later. I recommend staged sessions and photographic checks between passes. Pain is moderate and the area tolerates density. The usual mistake is assuming identical dot density across different calf panels. Vary the treatment to suit muscle curves and exposure. For casual display, rolled pants or cropped trousers show the connector without rubbing. Try cropped trousers for easy reveals.
26. Anubis Wrist Wrap with Stipple Halo

Wrist wraps can be elegant but must account for constant movement and washing. The typical error is overcomplicating the halo with tiny clustered dots that wash out. Ask for a mix of dot sizes so the halo keeps depth after healing. Sessions are short and the area heals quickly if you protect it from abrasion. For jewelry pairing, stack delicate bracelets above the wrap rather than across it. A stackable bracelet set frames the wrist without smudging the art.
27. Anubis Throat Pendant Line
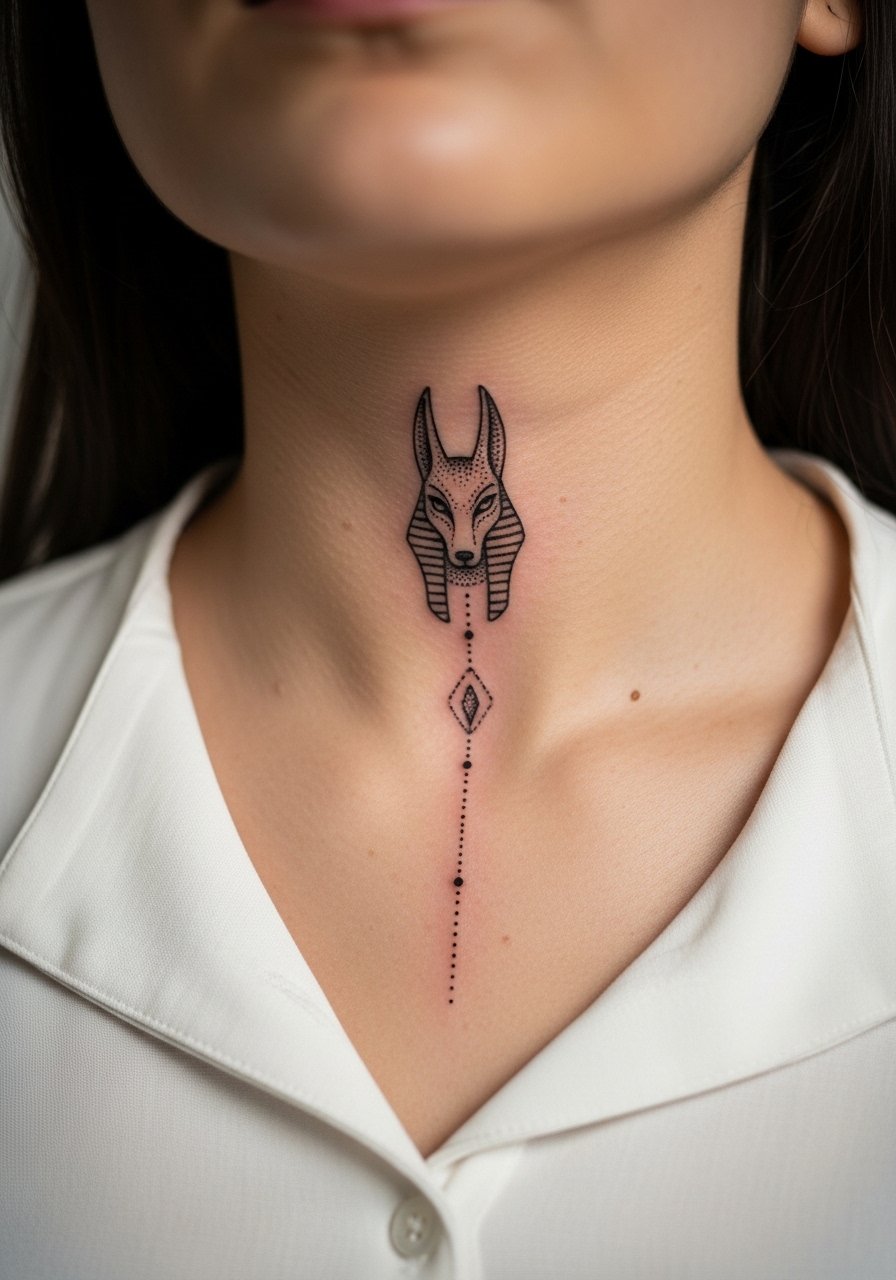
A central throat pendant is highly visible and ages with facial movement and sun exposure. The mistake is choosing an ultra-delicate dot chain expecting it to remain crisp. If you want longevity, request stronger anchors and slightly enlarged dots in the pendant line. Sessions are sharp and short. Be mindful of career and visibility considerations. For accessories, a simple pendant that sits above the throat piece can complement without crowding it. A minimal pendant necklace keeps the focus on the tattoo.
Frequently Asked Questions
Q: How does dotwork Anubis compare in longevity across forearm, chest, and ribs?
A: From my experience, forearm pieces age best because they see less constant friction and can be sheltered from sun. Chest panels can hold well if you leave negative space and avoid overly tight stipple. Ribs are the trickiest. Artists disagree about fine detail there and touch-ups are common. Expect a potential refresh at year two to three for dense rib dotwork.
Q: If I want cultural respect built into my Anubis design, what should I ask the artist?
A: Ask how they approach historical motifs and request slight adaptations rather than photocopying sacred imagery. Two camps exist on this topic. One camp argues direct replication can feel appropriative. The other sees respectful homage as acceptable. Saying you want a design inspired by Egyptian iconography and asking to see previous respectful pieces will guide the conversation.
Q: Will tiny dotwork details on fingers or hands require special aftercare from the product block?
A: Yes. Fingers and hands need protection from water and friction during the first week. Use the protective film and fragrance-free wash suggested in the Studio Day Picks for those locations. Plan for earlier touch-ups than for larger body work.
Q: How often should I expect touch-ups for heavy dotwork Anubis pieces?
A: It depends on placement and sun exposure. For hands and fingers it is common at year one to two. Forearms and thighs often keep detail for three to five years with minimal touch-ups. Large back or calf panels can go longer before needing correction.
Q: What should I wear to a session for sternum or ribcage dotwork?
A: Wear clothing that gives clear access without being removed. A fitted sports bra, bandeau, or a cropped athletic top that you can lift slightly works well. That keeps the rest of you covered and lets the artist reach the area cleanly.
Q: Is dotwork Anubis suitable for someone with darker skin tones?
A: Absolutely, but the approach changes. On darker skin tones, artists often use slightly bolder anchors and varied dot sizes to maintain contrast. Ask to see healed photos on similar skin and discuss spacing so the stipple reads well after healing.
