
Fine line elbow work looks incredible fresh, but the joint changes everything. Pain near the bone, ink that sits oddly as the arm bends, and a higher chance of touch-ups are all part of the deal. If you want something that still reads sharp after two years, placement, needle spacing, and wardrobe choices matter more than the flash photo. Start with what follows and you will know what to ask in the consultation.
1. Minimalist Crescent and Dot on the Outer Elbow
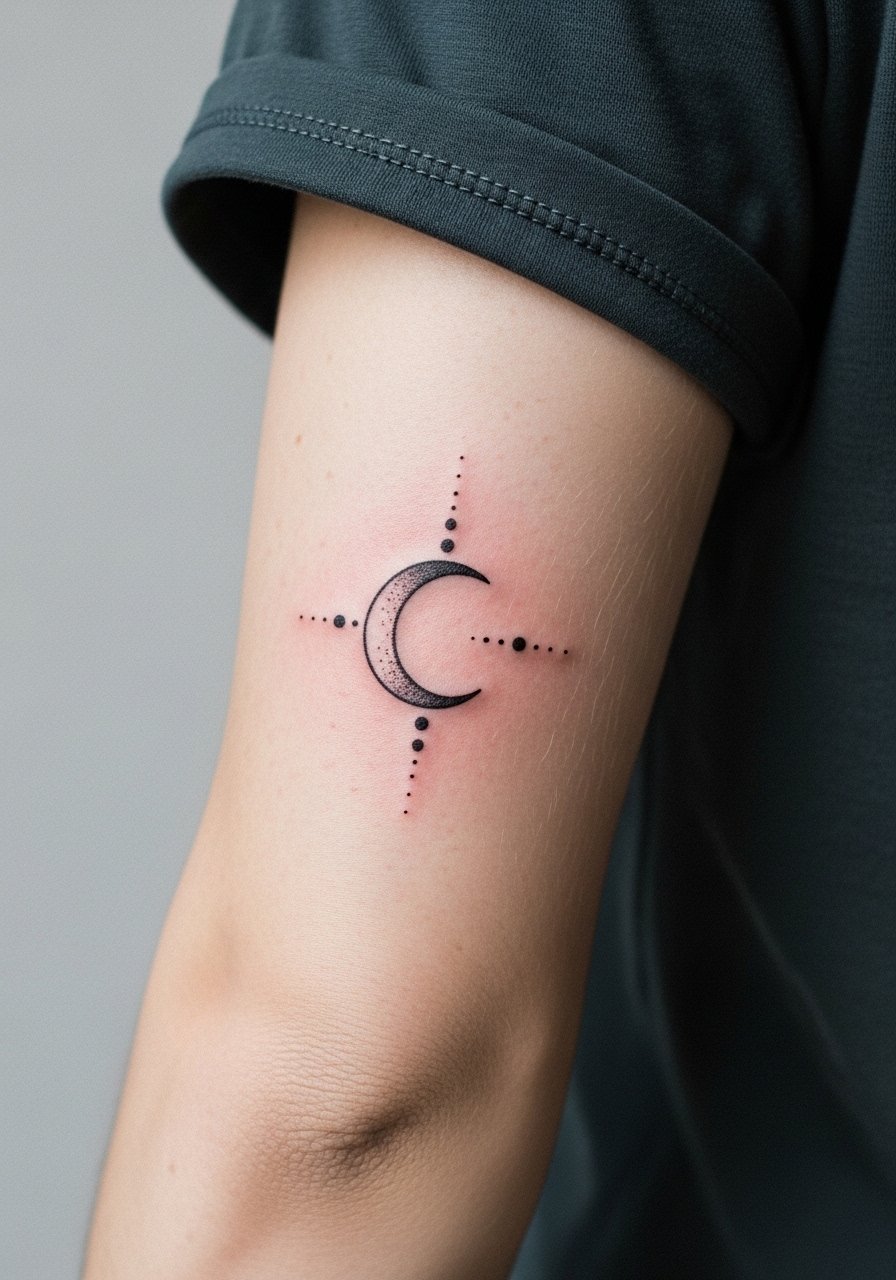
A tiny crescent with a single dot reads crisp on the outer elbow when the linework is given room. Personal observation: too many people ask for hairline lines on the joint and those become fuzzy after a year. Ask your artist to space the elements and use slightly bolder linework where the skin folds, which reduces blowout risk and improves longevity. Pain is moderate because the outer elbow has more padding than the tip of the elbow. Session time is short, often under 30 minutes, but expect a touch-up at year two for tight line clarity. For showing it off, roll sleeves or pair with a short sleeve henley to frame the small design.
2. Stipple Shaded Skull Cap Around the Elbow
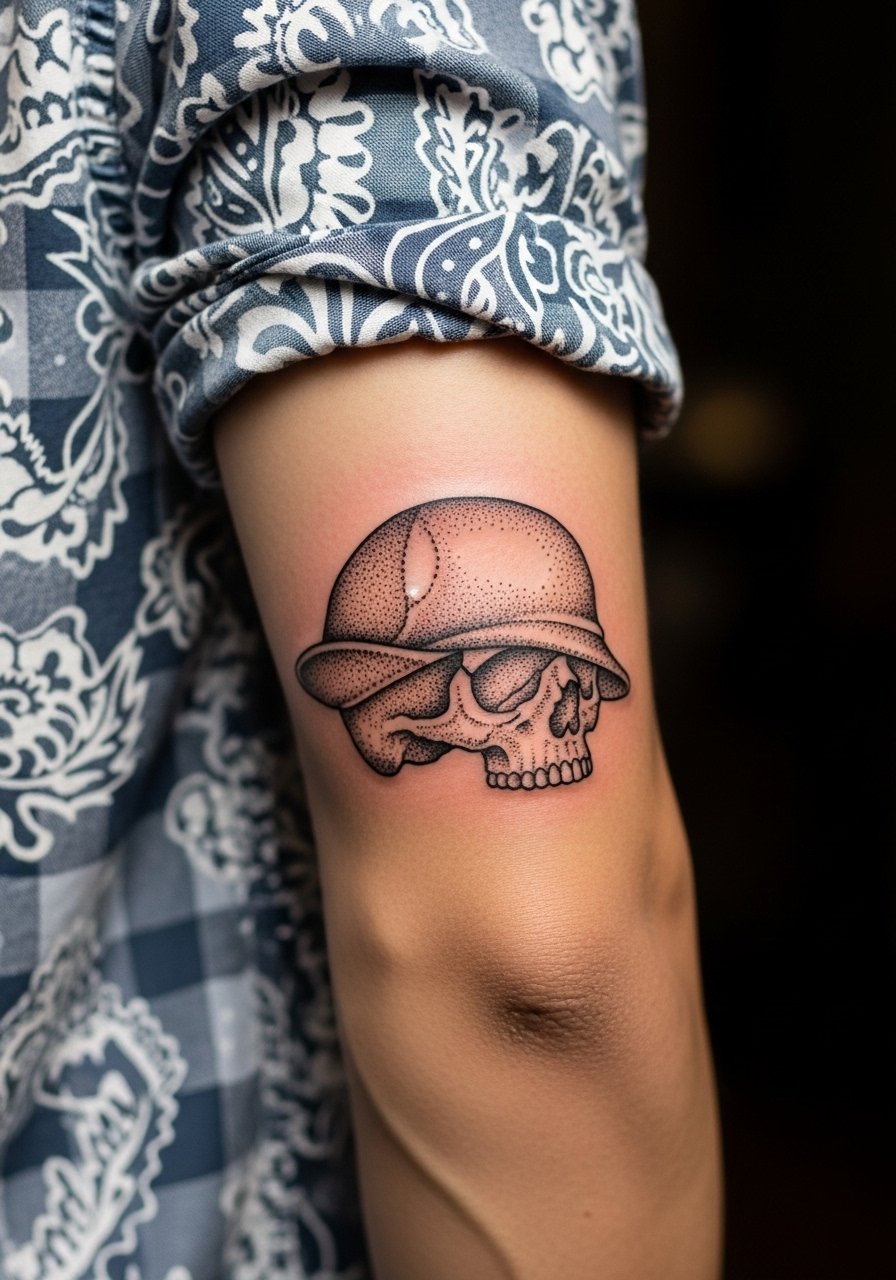
When you want something edgy but textural, stipple shading gives depth without heavy saturation that might blow out in the joint. Consultation tip: ask for dot work instead of dense black fills in the crease to avoid pigment migration. Expect the session to feel scratchy around the olecranon, so bring loose clothing you can pull aside easily. Aging looks best if the dot spacing is generous, because tight dots in creases tend to merge. A common mistake is asking for a full black cap that sits too close to the fold. For an outfit that keeps attention there, a short sleeve button-down frames the elbow without covering it.
3. Geometric Partition That Bridges the Elbow Joint

There is a real visual impact when geometry crosses the joint and the shapes remain legible as the arm moves. Visual impact lead: bold outlines with negative space hold up better than tiny intersecting lines that vanish. Tell your artist to prioritize thicker outer lines and to plan negative space across the crease. Pain spikes near the tip of the elbow but the session usually fits into a single hour for small partitions. Over time the inner lines nearest the fold may soften, so plan touch-ups at year two to three for crisp edges. Pair the look with a rolled sleeve tee when you want the shapes visible.
4. Micro-Realism Eye Centered on the Elbow Cap
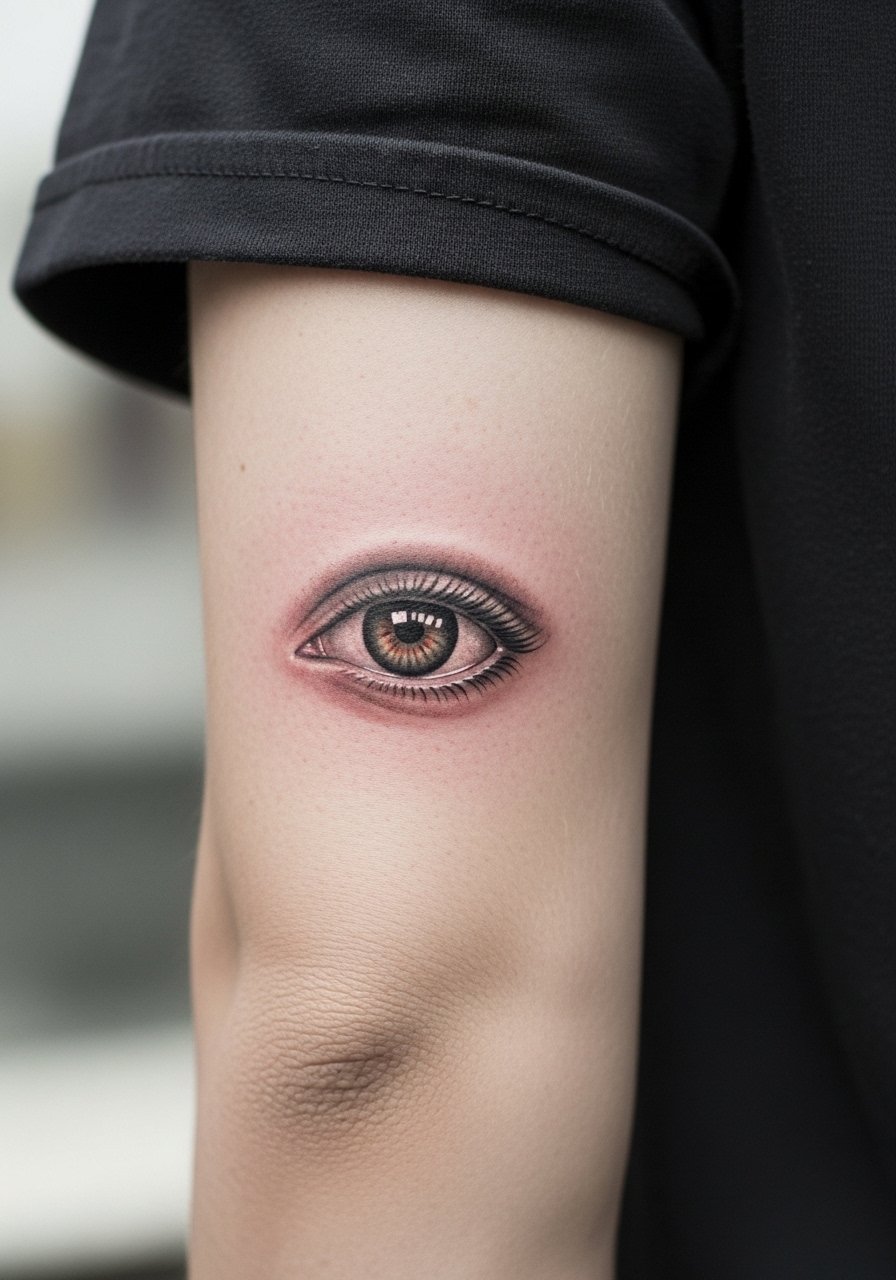
A micro-realism eye uses fine shading and tiny contrasts, but the elbow challenges realism because of movement. Mistake lead: the most common error is asking for ultra-fine pupils and lashes that the joint cannot hold. During consultation, ask for slightly more saturation in the darkest points and for macro shapes rather than hyperdetail. Expect a stinging, bumpy sensation as the needle crosses the bony cap, and plan for a brief touch-up once healed. To show this piece without crowding it, wear a sleeve-pushed-up crew neck that keeps the elbow visible while staying casual.
5. Blackwork Thorn Band that Wraps the Elbow
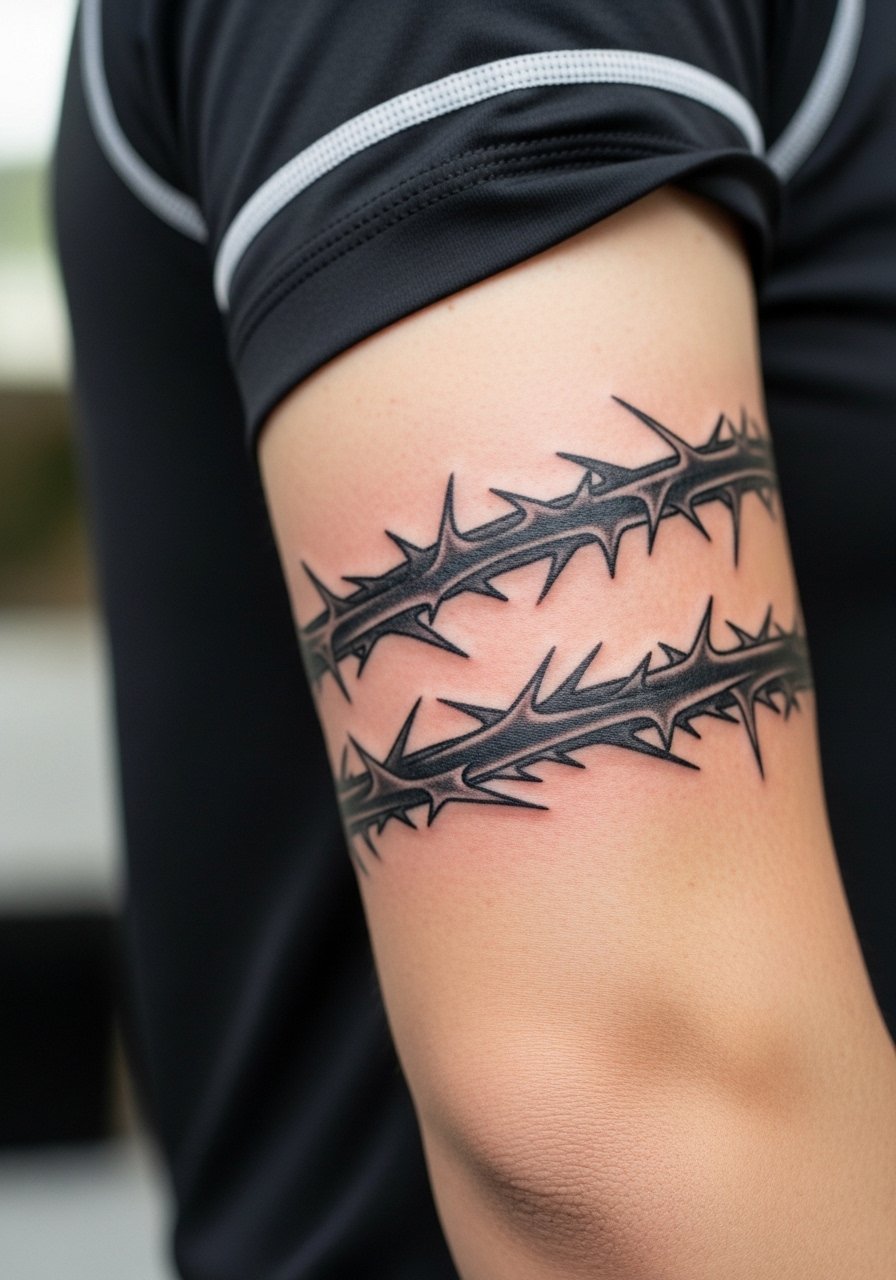
Bold black bands read strongly on joints because saturation resists blurring when done correctly. Consultation lead: ask for multiple smaller passes instead of one heavy pass so the skin accepts ink evenly around the creased area. Pain is higher when the artist hits the bony ridge, and sessions tend to take 45 to 90 minutes depending on wrap detail. The controversy here is color versus blackwork for wraps. One camp says bright color breathes life into bands, the other argues color fades weirdly at the joint. If you want color, plan on touch-ups at year two. For styling, a short sleeve athletic top keeps the band visible and sporty.
6. Mandala Slice Nesting Over the Elbow Crease
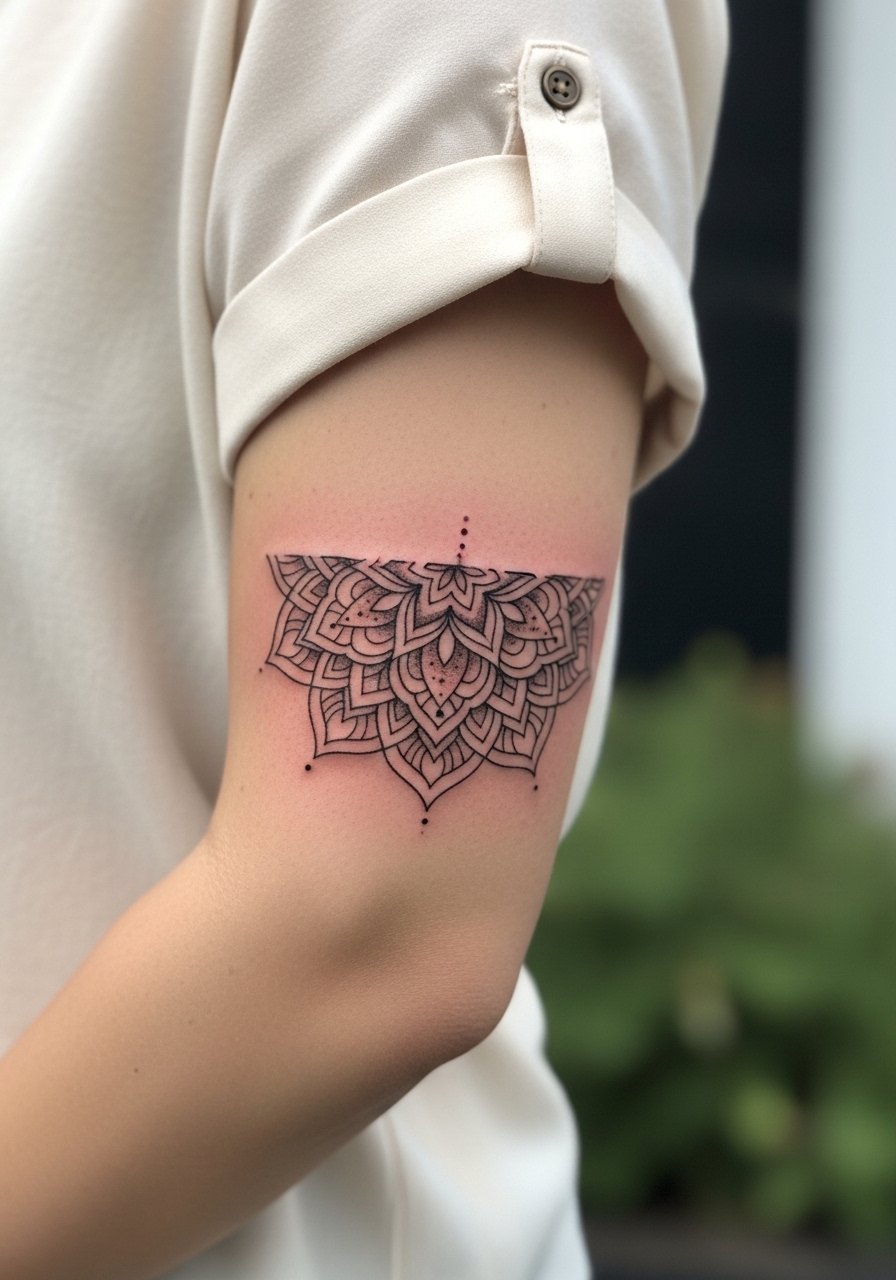
Mandala fragments are popular because they let symmetry meet movement, but scale is crucial. Consultation lead: tell your artist you want the densest details sitting off the crease and only the resilient linework crossing the fold. The biggest mistake is centering dense geometry directly in the bend because tight mandala work in the joint softens quickly. Expect a medium pain level, and plan for a one-hour session for a small slice. For evenings out, the tattoo pairs well with a short sleeve blouse that keeps attention on the patterned slice.
Studio Day Picks
The elbow pieces above test both mobility and friction during the first week, so a few select items smooth the session and the first healing phase.
-
Stencil transfer paper kit. Lets you preview how a mandala slice or geometric partition sits on the bend before the needle hits skin, which avoids in-chair surprises.
-
Topical numbing cream. Applied about 45 minutes before eases the sting over the bony elbow cap without affecting linework when used correctly.
-
Thin protective film roll. Helps keep wraps and thorn bands clean through the first week of movement and contact with clothing.
-
Fragrance-free gentle body wash. Cleanses healing elbow tattoos without stripping pigment or irritating new linework.
-
Aquaphor healing ointment. A thin layer for the initial days keeps moisture balanced on tight line work and small dot work without excessive clogging.
7. Neo-Traditional Rose Cap with Bold Outlines
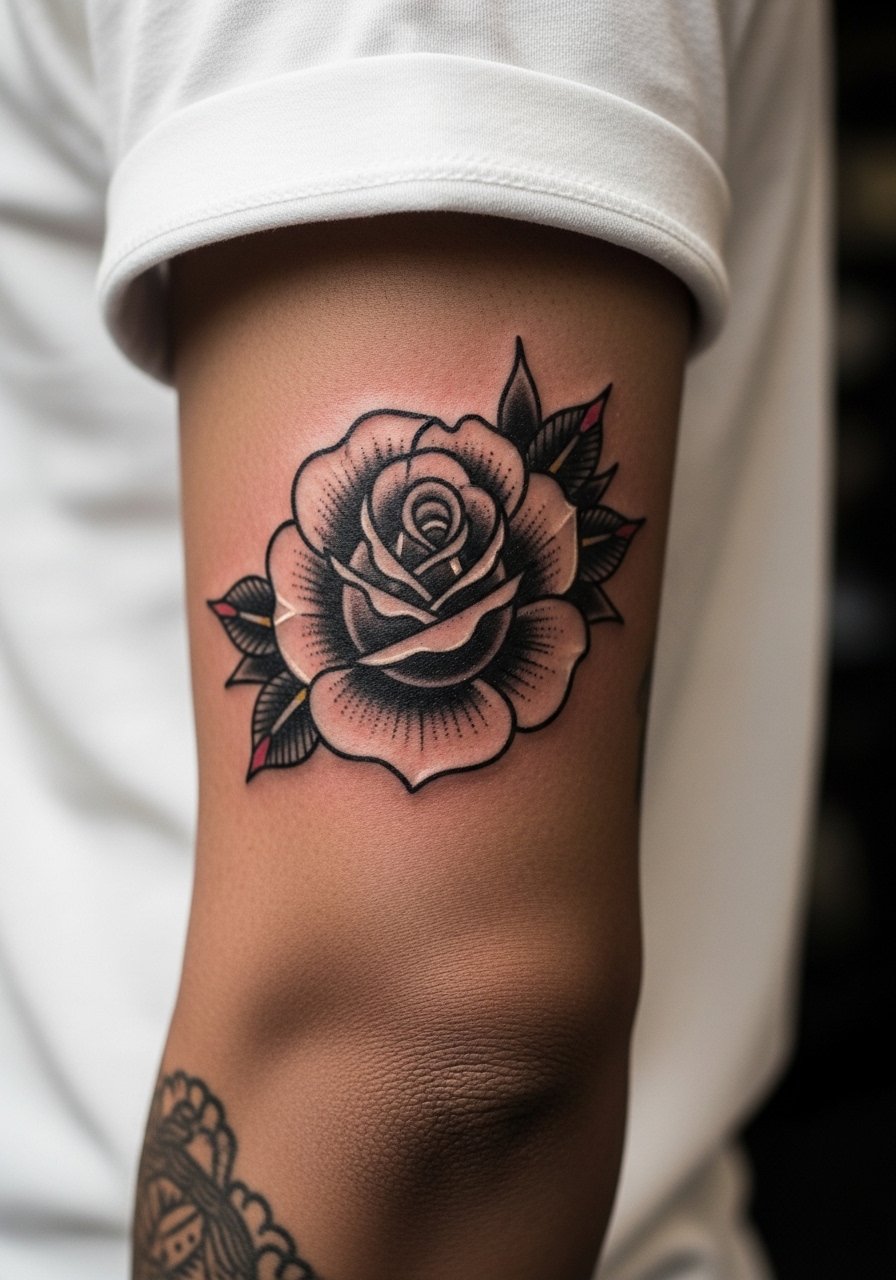
There is something about solid outlines and saturated fills that reads reliably over time on joints. Visual impact lead: neo-traditional pieces use stronger linework to hold edge as the skin moves. Tell your artist you want the petals slightly enlarged where the crease meets the bloom so the core shapes stay legible. Expect a stiffer sensation on the bony sections and plan a 60 to 120 minute session depending on color. The common aging pattern is color softening near the crease, so a touch-up at year three is realistic. To show it off, pair the piece with a rolled sleeve cotton shirt.
8. Negative Space Lightning Bolt That Aligns with the Joint
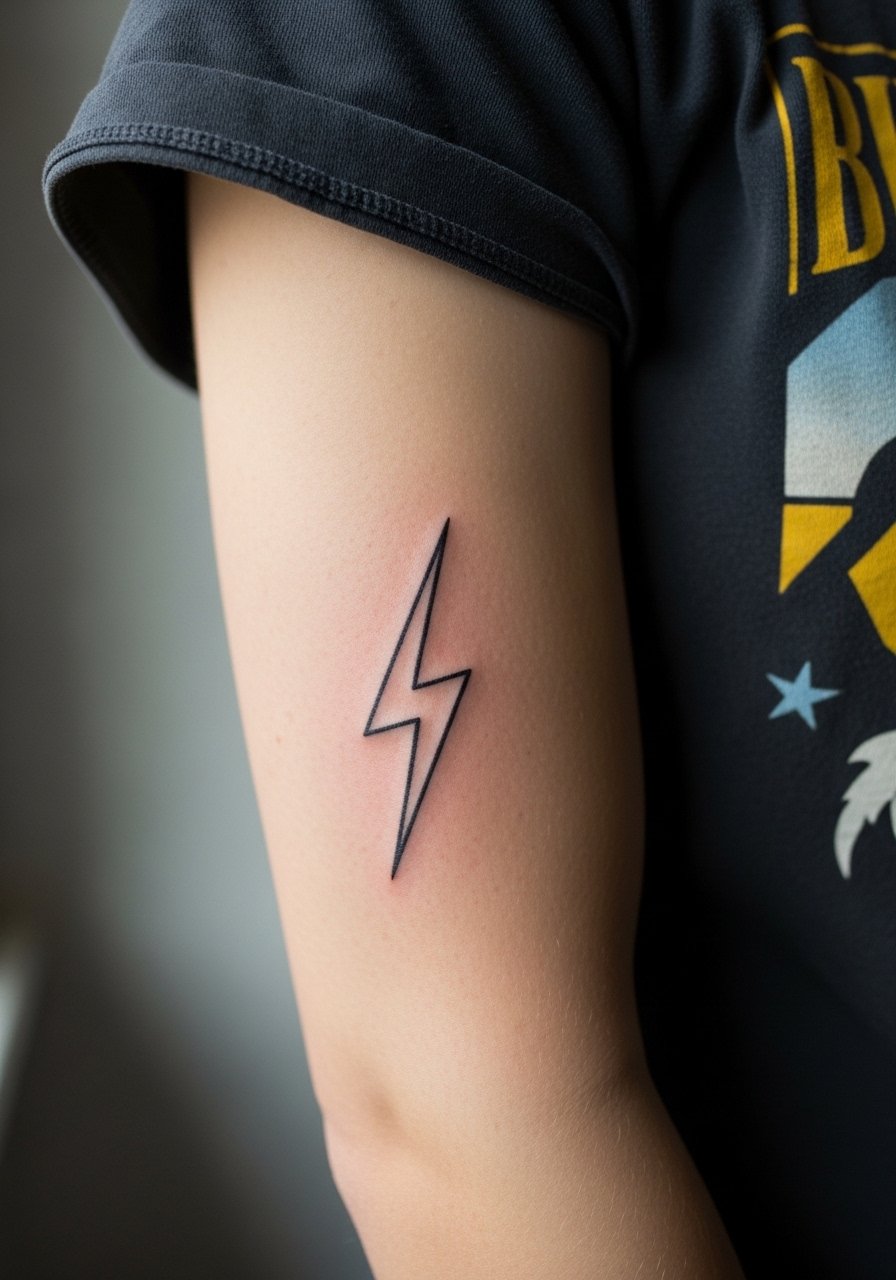
Negative space designs work because they rely on untouched skin to form the image, but joints complicate that balance. Consultation lead: request that your artist maps negative areas with slightly thicker surrounding lines to preserve the shape as the skin settles. Pain is moderate and session time can be brief, often under 45 minutes. A real mistake is making the bolt too thin where the crease bites into the negative area. Over time the negative space may pick up slight pigment from surrounding saturation, so expect touch-ups if you want high contrast. Wear a short sleeve vintage tee when you want the bolt visible.
9. Tiny Script Curve Following Elbow Contour
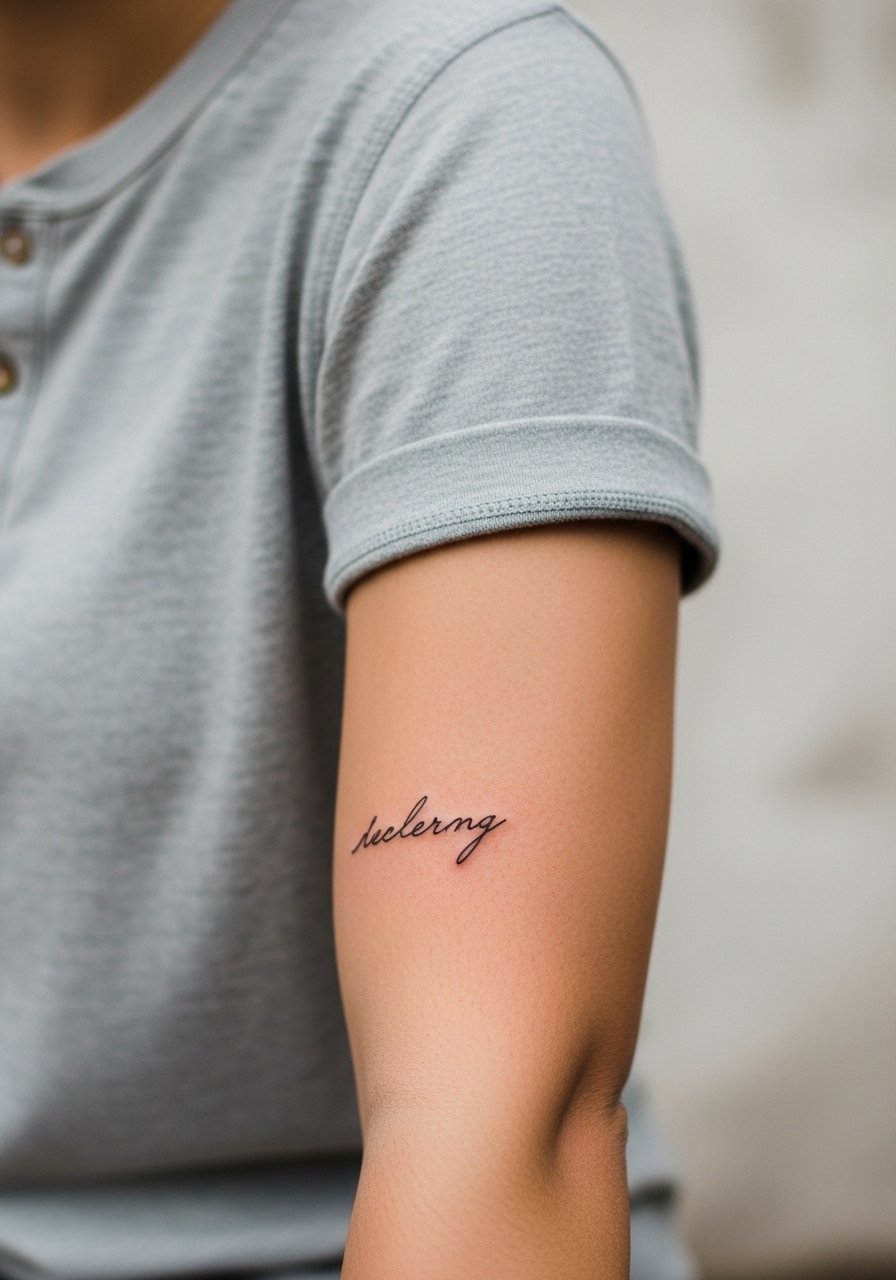
Script on the elbow is attractive but risky because tiny script often blurs into a line over time. Consultation lead: request slightly increased letter spacing and ask the artist to bold strokes that cross the crease. Pain spikes near the bone and the session is usually short, under 45 minutes. Artists split on micro script across joints. One camp warns that the movement causes blurring within a couple of years. The other camp says with correct depth and spacing it can last. Name both views and ask where the artist stands before booking. For casual reveals, a short sleeve henley frames the script without covering it.
10. Chain-Link Band with Metal Effect Shading
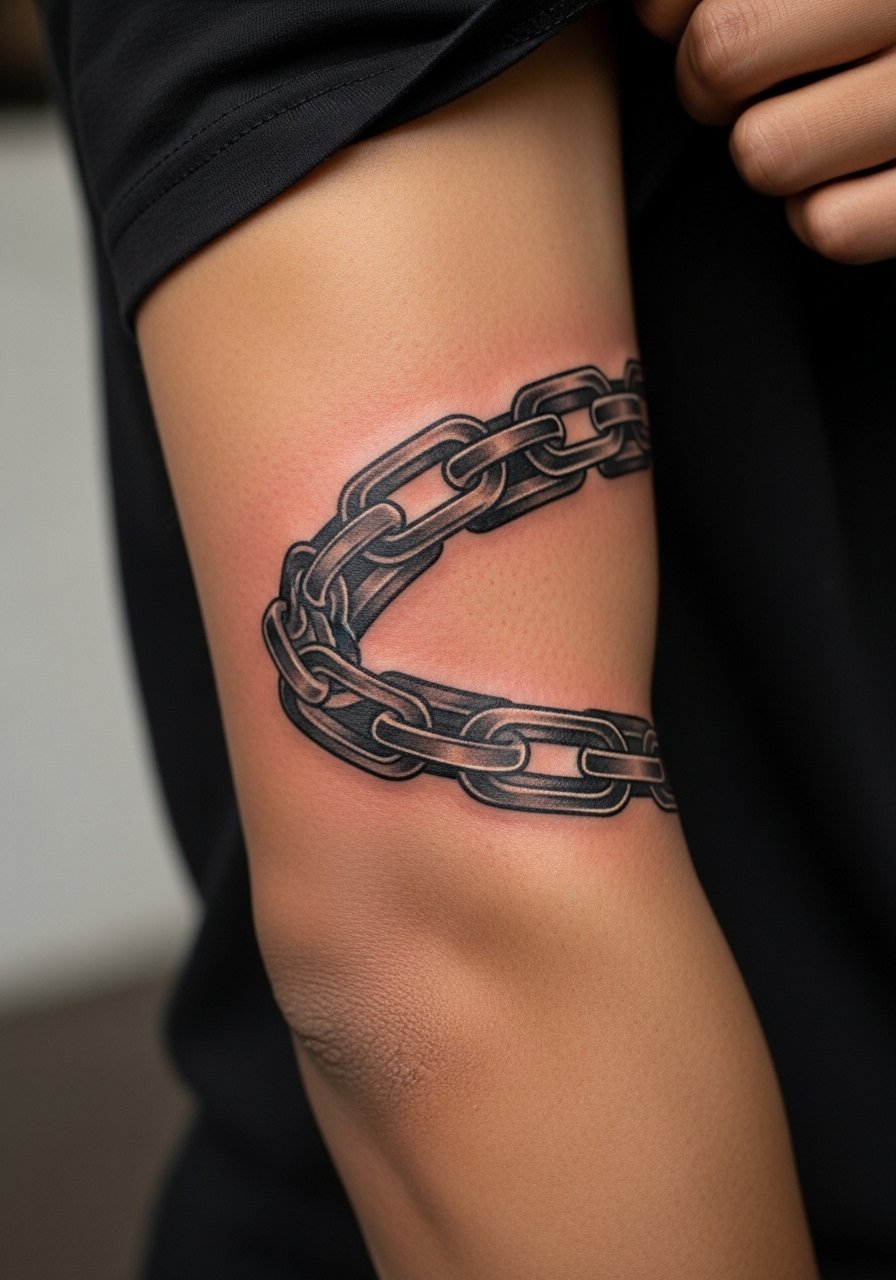
A chain-link band plays with continuity around the joint, but the metal effect relies on precise contrast. Mistake lead: too much tiny highlight in the crease will disappear. Tell your artist to place highlights on the outer curves and reserve darker contrast for the inner links. Expect higher discomfort over the bony cap and a one-hour session for a small wrap. Over time, midtones may soften and require touch-ups at about year three. For a utilitarian look, cuff sleeves or a short sleeve shirt pulled up keeps the chain visible.
11. Dot-Work Sunburst Radiating From the Elbow
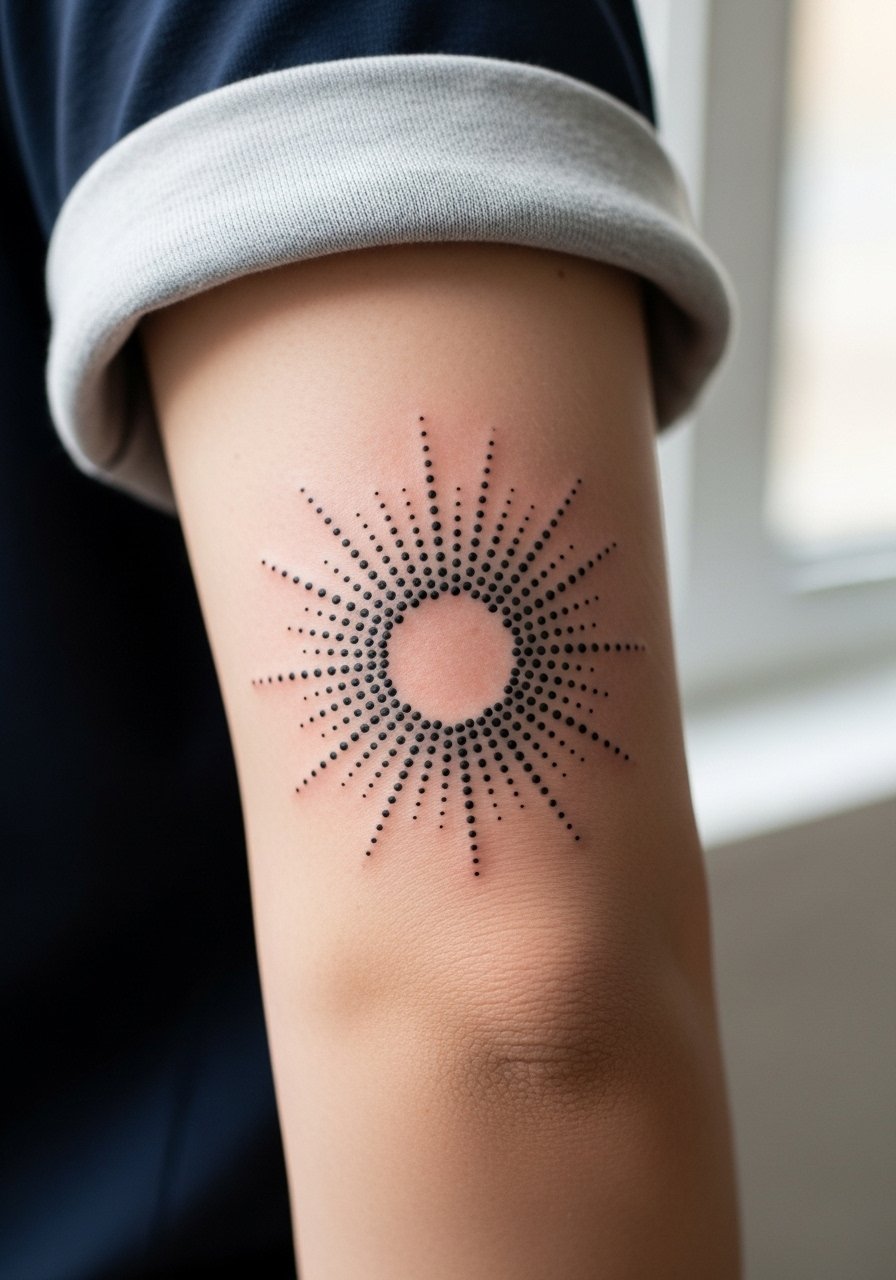
Dot-work is forgiving if the dots are spaced to account for skin movement. Personal observation: spacing and scale decide whether a sunburst holds or softens into gray. When you consult, ask for larger dot clusters near the crease and finer dots farther away. The sensation is a steady prickle rather than sharp pain, and sessions vary from 30 to 90 minutes depending on diameter. A frequent mistake is crowding dots too tightly in the fold. Pair this with a lightweight short sleeve top to display the burst without distraction.
12. Abstract Brush Stroke That Flows With the Joint
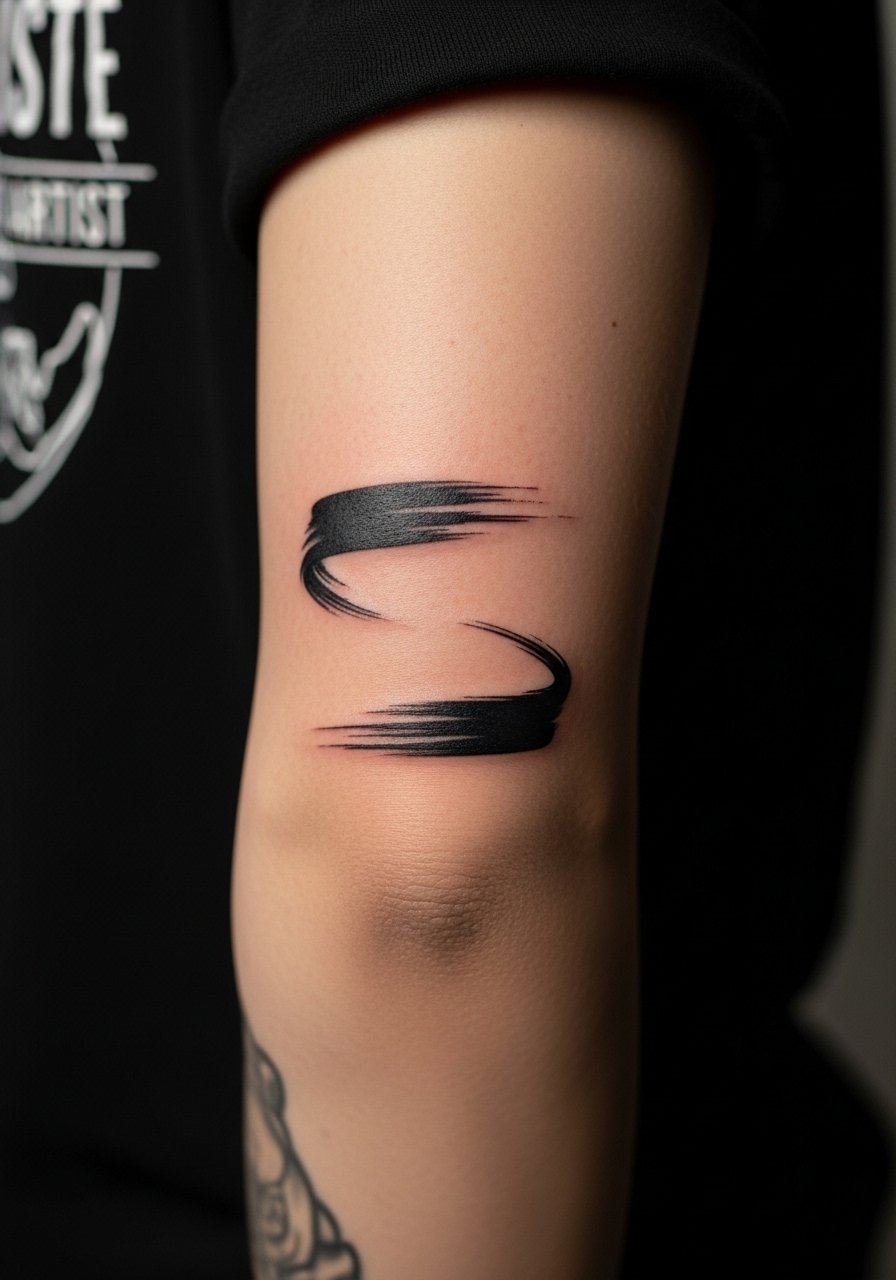
Abstract work lets you emphasize motion instead of rigid shapes, which suits the elbow well. Aging and healing lead: strokes that mimic muscle movement tend to read naturally as skin shifts, but thin wisps will fill in. Tell your artist you prefer broader, painterly marks rather than hairline streaks to avoid early blurring. The session feels uneven as the needle crosses both soft and bony areas, and this piece often finishes in under an hour. Avoid asking for very faint strokes directly in the crease. For a casually artistic look, push sleeves up or choose a short sleeve artist tee.
13. Compass Rose Anchoring the Elbow Outer Edge
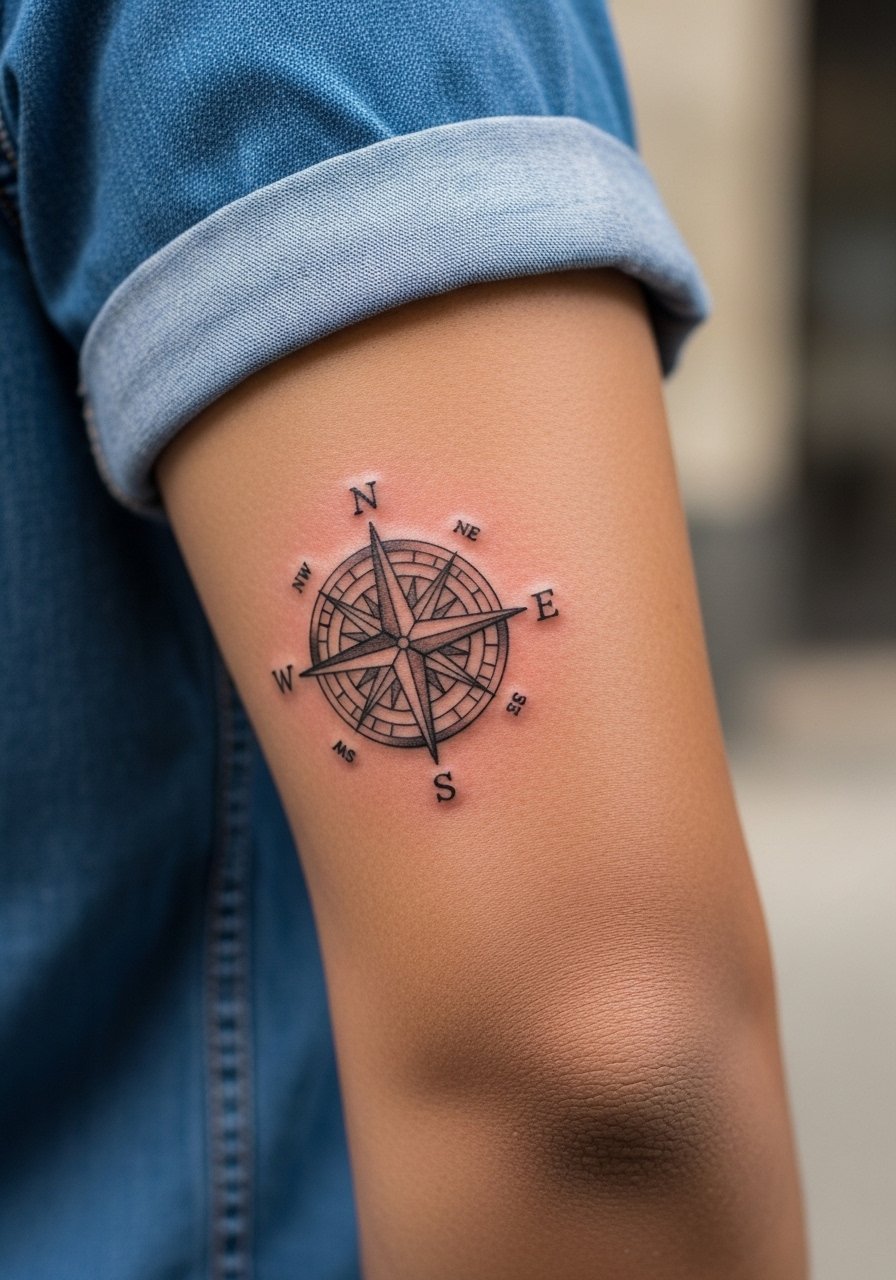
A compass rose maps well around the elbow edge because it can avoid the deepest fold. Controversy lead: some artists caution against compass detail directly on moving joints because tiny needlework can merge. The other view is that with bold cardinal points and open negative space the design remains legible. Ask which approach your artist prefers and why. Pain is moderate and a two-pass approach often gives even saturation. Expect to book a touch-up if you want crisp cardinal lines at year two. Style it with a short sleeve chambray when you want a rugged vibe.
14. Scripted Date in Thin Roman Numerals Across the Fold
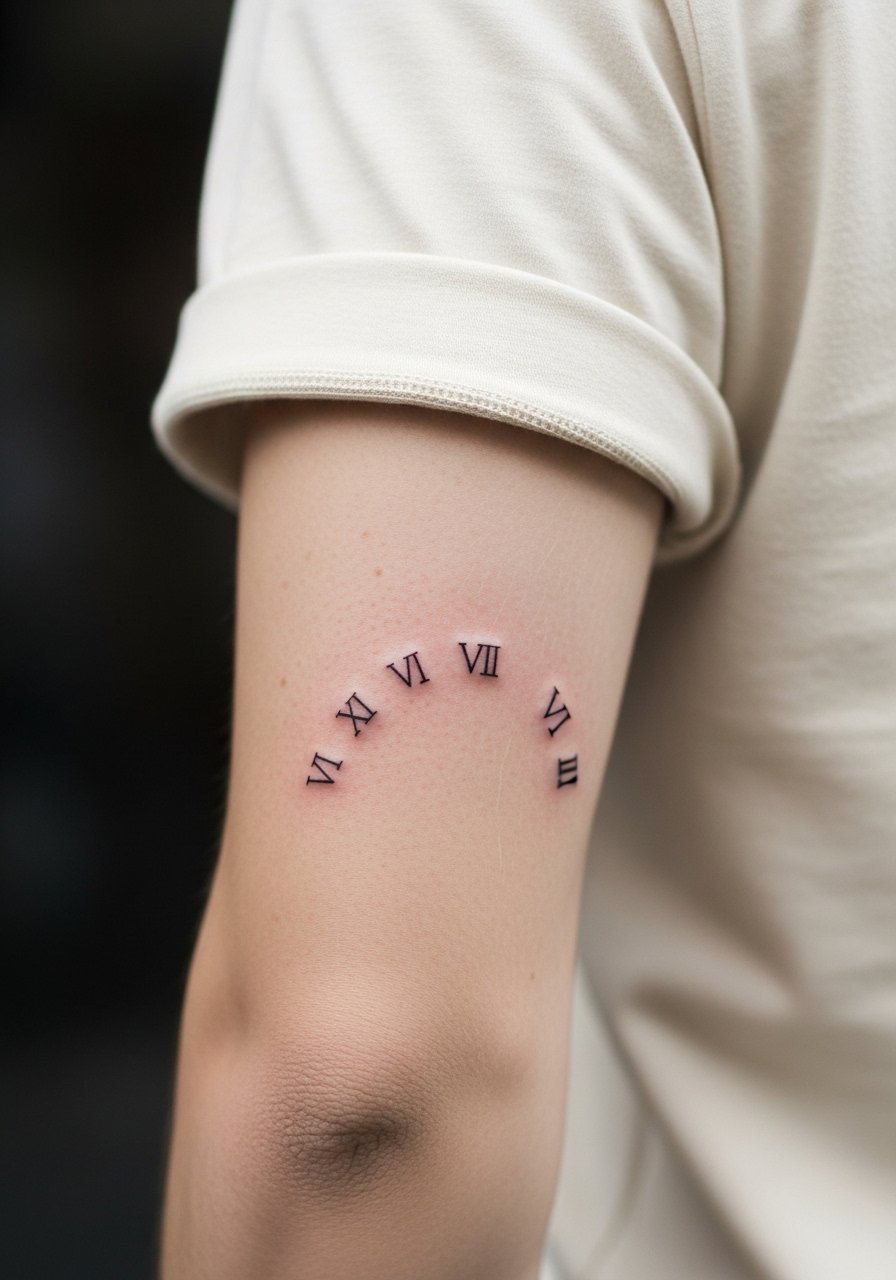
Dates are popular but thin Roman numerals need spacing to breathe on a joint. Mistake lead: compressing numerals to fit a curve makes them look like a single bar after healing. Tell the artist to increase line weight slightly and to keep numerals broken by micro-negative gaps. Pain spikes when the needle hits the tip of the elbow, and sessions are brief. Over time, expect softening near the fold and a potential touch-up at year three for fine numerals. For subtle presentation, roll up sleeves or wear a short sleeve cotton tee.
15. Tiny Anchor Tucked at the Elbow Pit
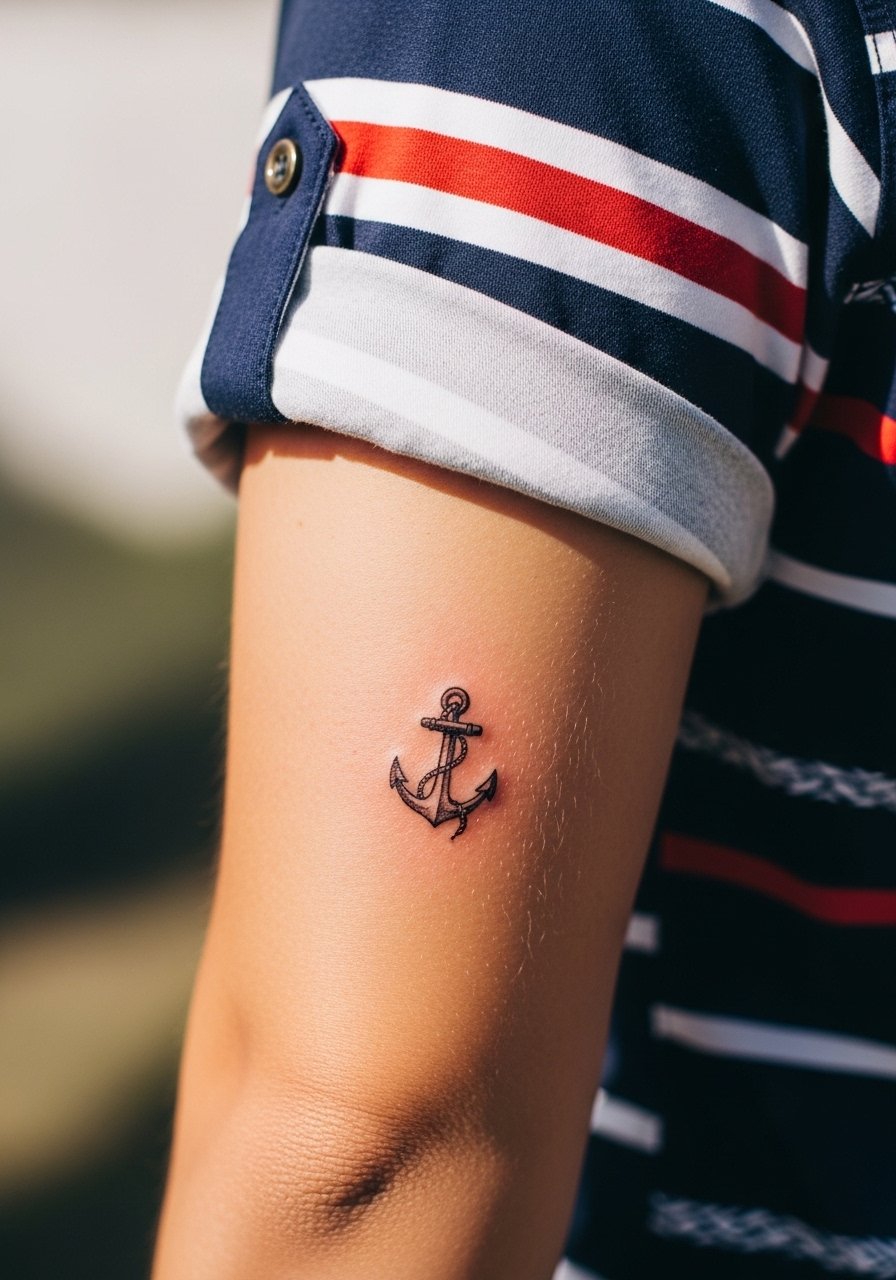
Small motifs tucked in the elbow pit feel private but are visible when you want them to be. Consultation lead: place the anchor slightly off-center so the core elements avoid the deepest crease. The sensation during the session is sharp around the thin skin of the pit, and expect a quick appointment. Common error: demanding very fine anchor detail in the fold. Those lines blur faster than you think. For a nautical hint on display, a nautical short sleeve shirt complements the placement.
16. Small Pin-Up Flash Styled Face Above the Elbow
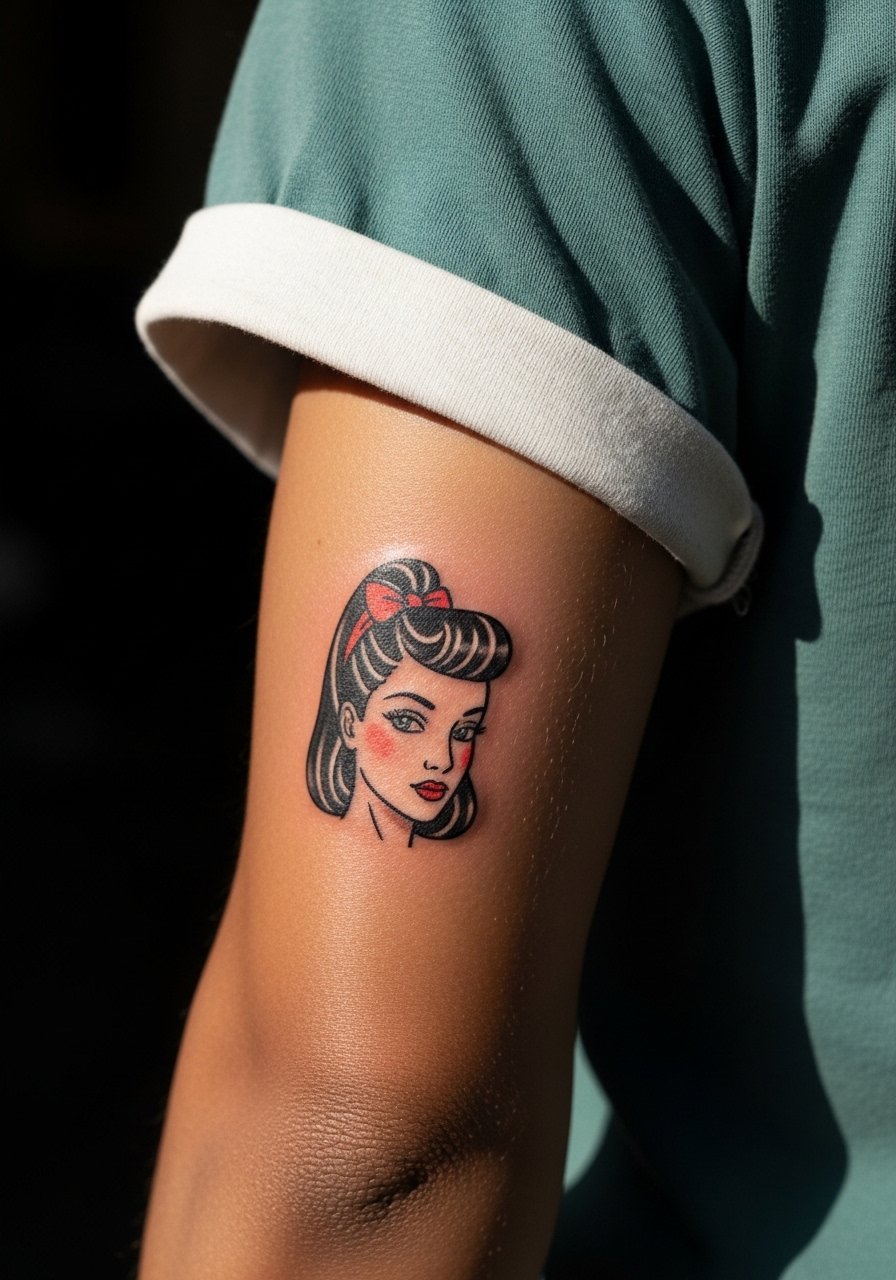
Neo-vintage faces can work if the features are simplified for the joint. Aging lead: tiny facial details like lashes and tiny pupils are the first to fade on moving skin. Ask for simplified facial shapes and slightly heavier linework to keep expression readable. The session has sharper moments at the bony cap and finishes in about an hour for small flash sizes. If you want color, accept that it will likely need maintenance, especially near the crease. Pair with a short sleeve vintage tee to highlight the retro vibe.
17. Interlocking Triangles Using Whip Shading
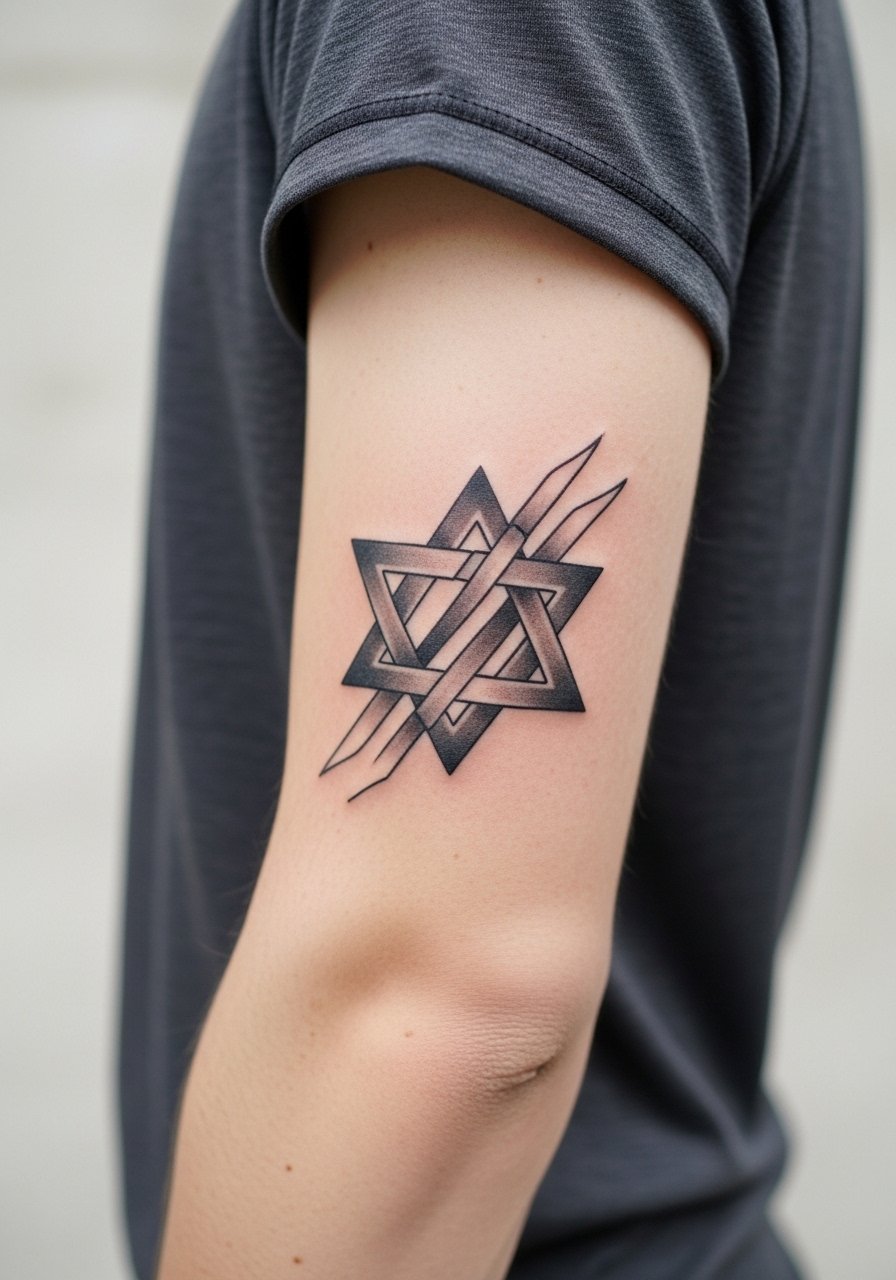
Whip shading gives smooth gradients without dense packing that's risky at joints. Consultation lead: request that the artist uses whip shading outward from the crease so the densest pigment sits away from the fold. Pain is a stinging drag when shading passes cross the bone, and sessions may run 45 to 90 minutes. The mistake is compacting gradients into the fold where they will smudge. Over time the lighter gradients hold better than heavy fills in this placement. For a technical look, a short sleeve tech tee keeps the geometry visible.
18. Minimal Anchor Chain Linking Inner and Outer Elbow
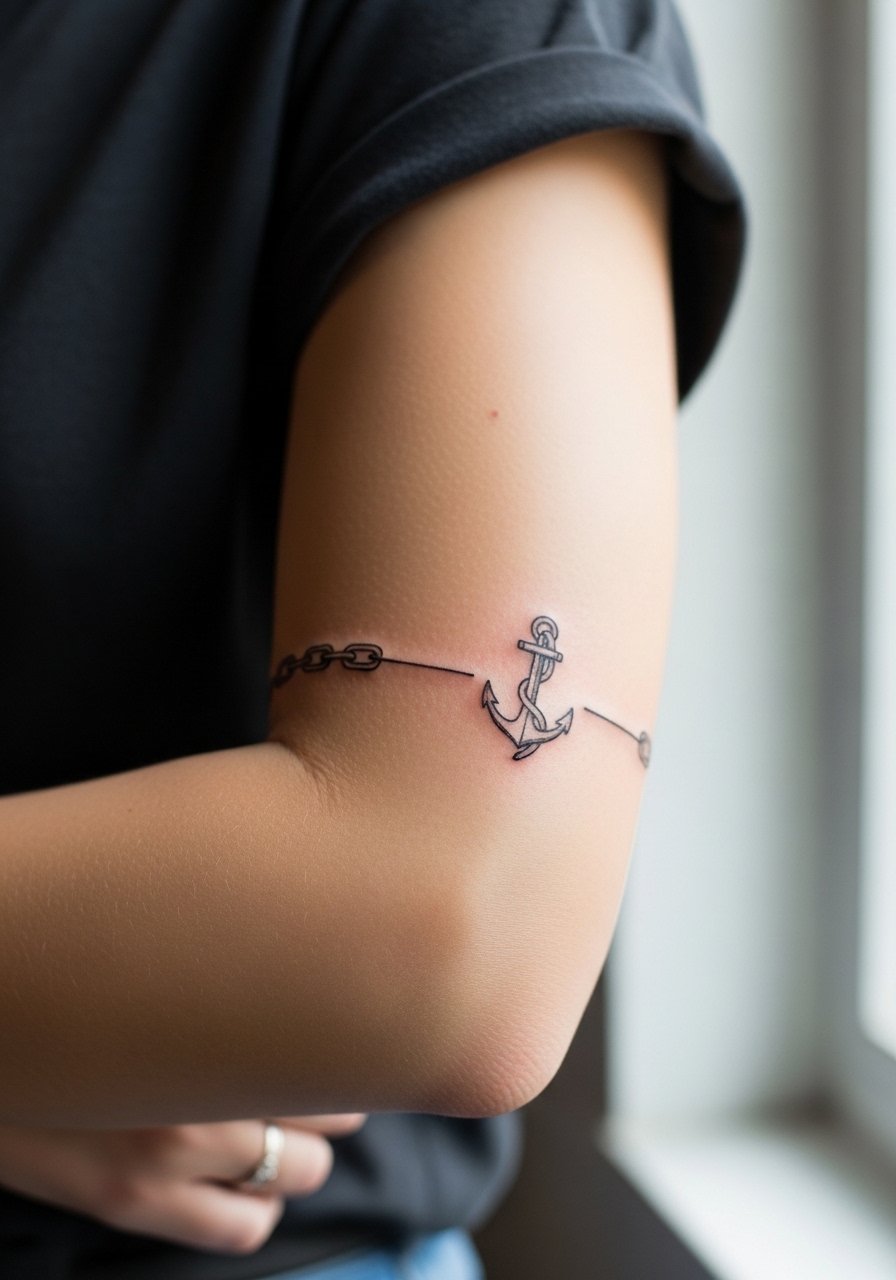
A linking chain uses continuous flow to play with the elbow shape. Consultation lead: ask the artist to break the chain with micro-negative spaces at the fold so links do not merge when the arm bends. The inner elbow carries more stretch and feels softer during the session. Expect a 45-minute session for a modest chain. A frequent error is requesting continuous hairline links that become an indistinct band after healing. Keep it visible with a short sleeve casual top.
19. Optical Illusion Linework That Warps With Movement
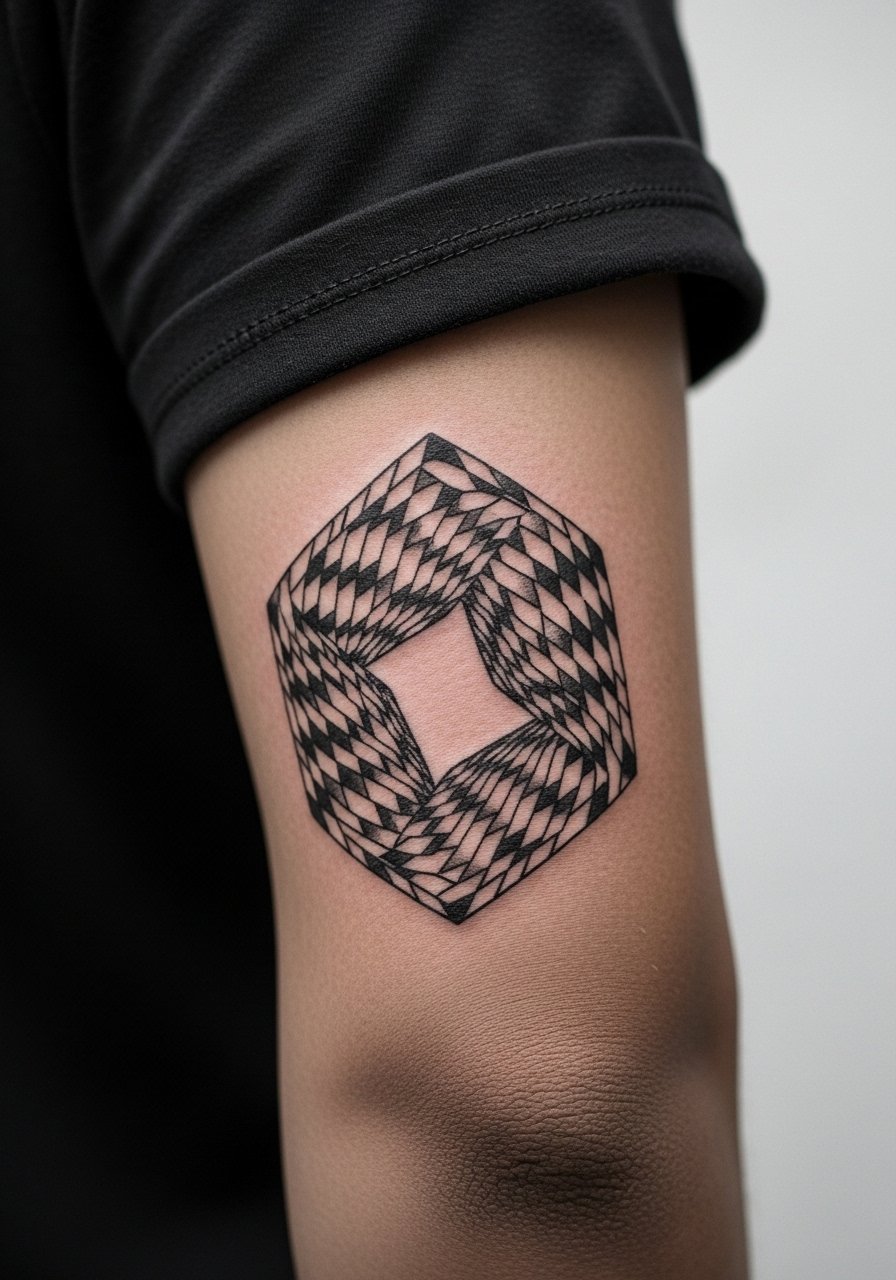
Optical tattoos rely on precise negative and positive patterns, which makes placement across a joint ambitious. Consultation lead: ask for bolder anchor lines and wider spacings so the illusion survives skin shifting. The session is detail-heavy and can be tiring for both client and artist, often requiring multiple short passes. The common mistake is insisting on razor-thin repetition across the fold. Over time, expect some softening and plan touch-ups to preserve the illusion. For a minimalist display, roll sleeves or wear a short sleeve monochrome tee.
20. Floral Vine That Trails Around the Elbow
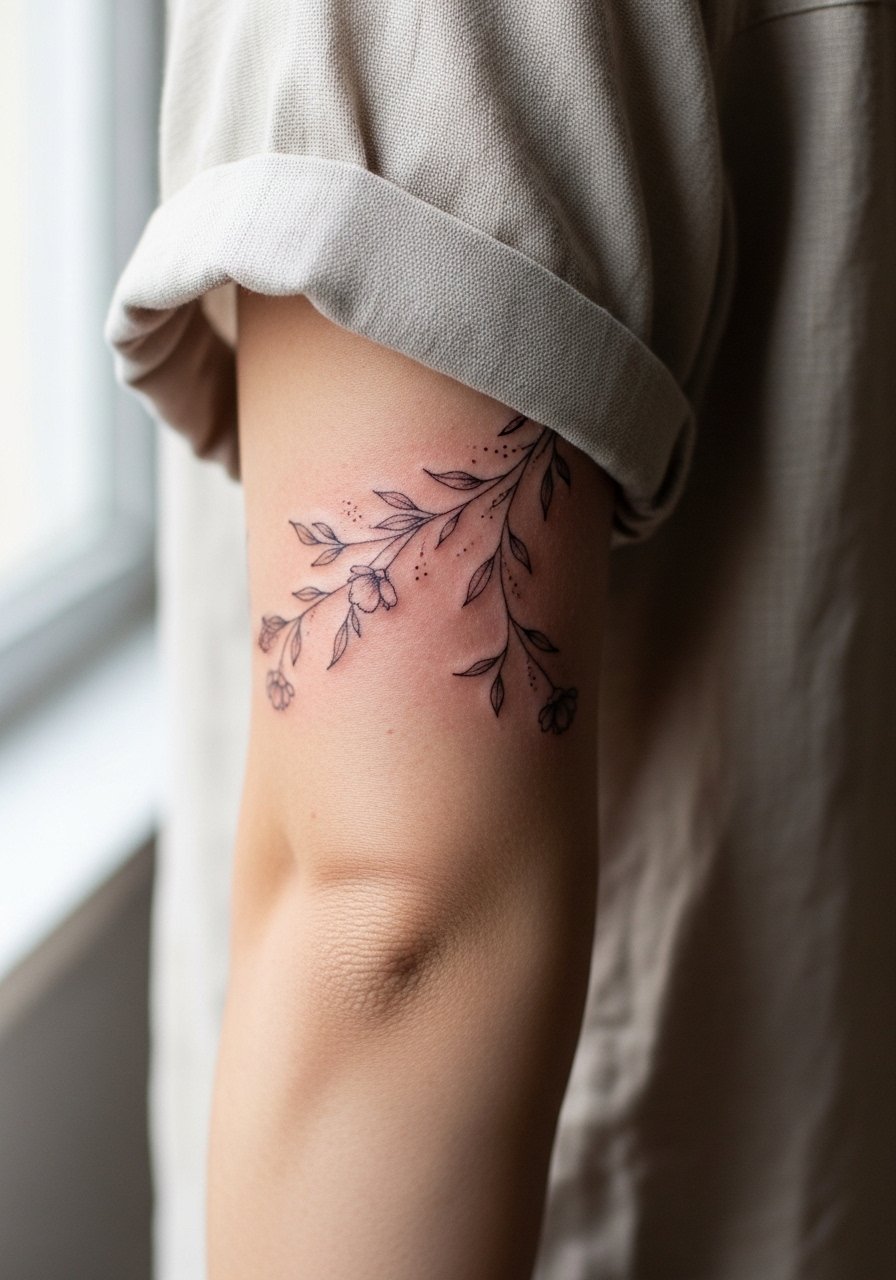
Floral vines can accent muscle flow if the spacing accounts for the crease. Styling lead: this placement looks particularly good with rolled sleeves or linen tops that create a natural frame. During consultation, ask the artist to keep dense petals away from the deepest fold and to use stipple shading instead of solid fills near the bend. Pain is moderate and sessions depend on length, often 60 minutes for a medium wrap. A common mistake is over-detailing tiny leaves right in the crease. For evening looks, pair with a short sleeve linen shirt.
21. Single Bold Glyph Centered on the Elbow Cap
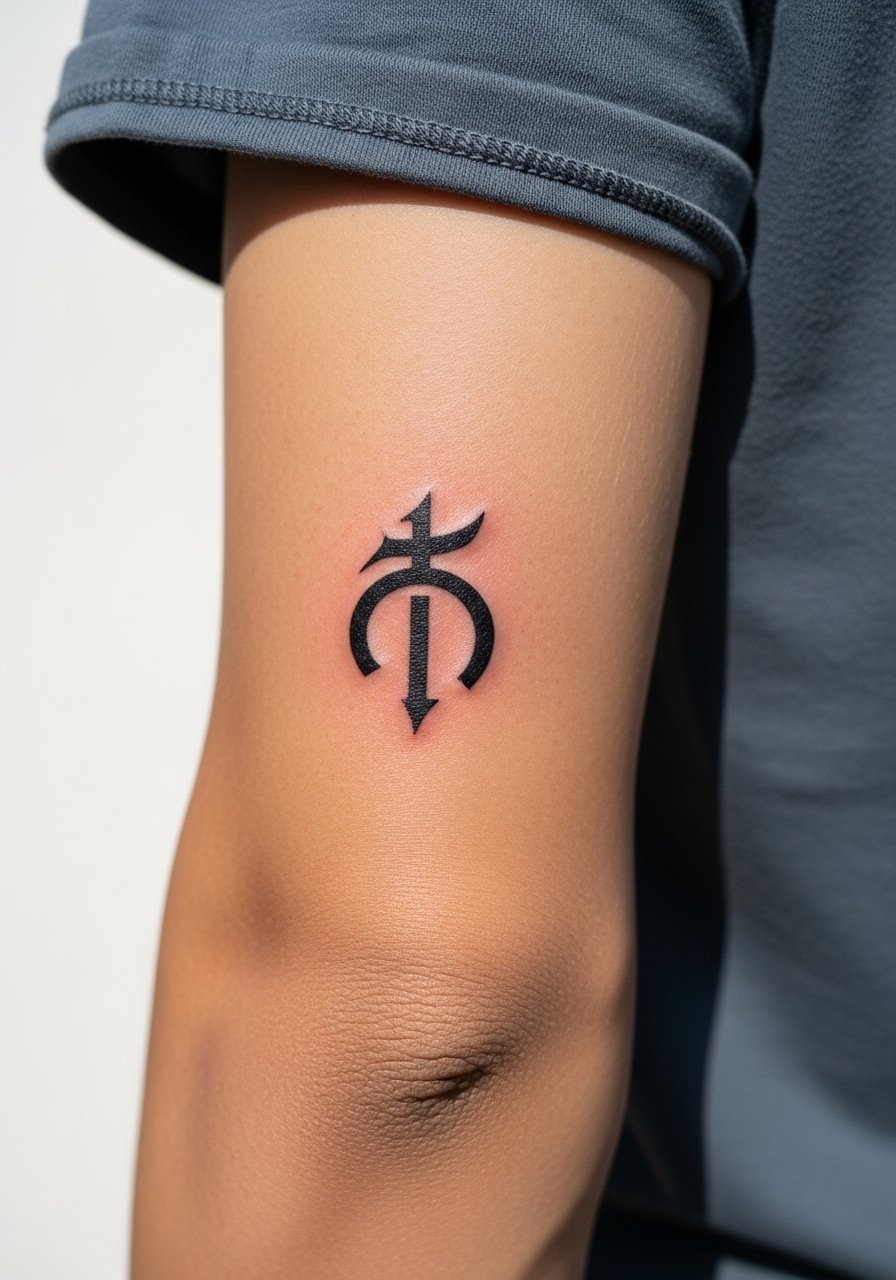
A single glyph or symbol can stand up to the elbow when scaled properly. Consultation lead: choose one clear shape and ask the artist to bolden the outer strokes while keeping inner detail minimal. Pain will hit when the needle navigates the tip of the elbow, and sessions are usually short. The usual mistake is cramming fine ornament into a small glyph. Over time, a bold glyph tends to age more predictably than delicate iconography, but expect a touch-up if you want consistently crisp edges after several years.
Frequently Asked Questions
Q: Will a fine line elbow tattoo blur faster than a bold blackwork piece?
A: Fine line tattoos around joints often soften sooner because the skin moves and pigment spreads. Bold blackwork and slightly heavier linework tend to hold edge better at the elbow, so ask your artist about increasing line weight subtly if longevity matters.
Q: How painful is getting tattooed on the elbow cap versus the outer elbow?
A: The tip of the elbow is one of the sharper sensations because the needle hits closer to bone, while the outer elbow has more padding and feels less intense. Expect stinging at the cap and more tolerable prickle on the surrounding area.
Q: Should I plan touch-ups for elbow designs, and how often?
A: Plan for at least one touch-up between year one and year three for most elbow work, especially for fine detail or color near the crease. How often depends on sun exposure, garment friction, and the initial line weight the artist used.
Q: What should I wear to the appointment for an elbow tattoo?
A: Bring a loose short-sleeve shirt or a button-down you can pull aside so the artist has unobstructed access to the elbow. A short sleeve henley or a lightweight tee works well and keeps you comfortable during the session.
Q: Are there elbow designs I should avoid if I want low maintenance?
A: Very fine script and hyper-detailed realism centered directly on the crease are higher maintenance. If you want low upkeep, favor bold shapes, negative space designs with clear separations, or patterns that sit slightly off the fold.
