
The pieces that still look crisp after five years are often the ones that started with practical decisions. Expect upper back pieces to shift with shoulder changes, know that spine-adjacent work can feel far sharper than the artist's estimate, and plan for summer healing to itch under tight straps. Start by thinking about scale, symmetry, and how you will show or hide the design, and the first idea below will make that conversation easier.
1. Ornamental Mandala Between the Shoulder Blades
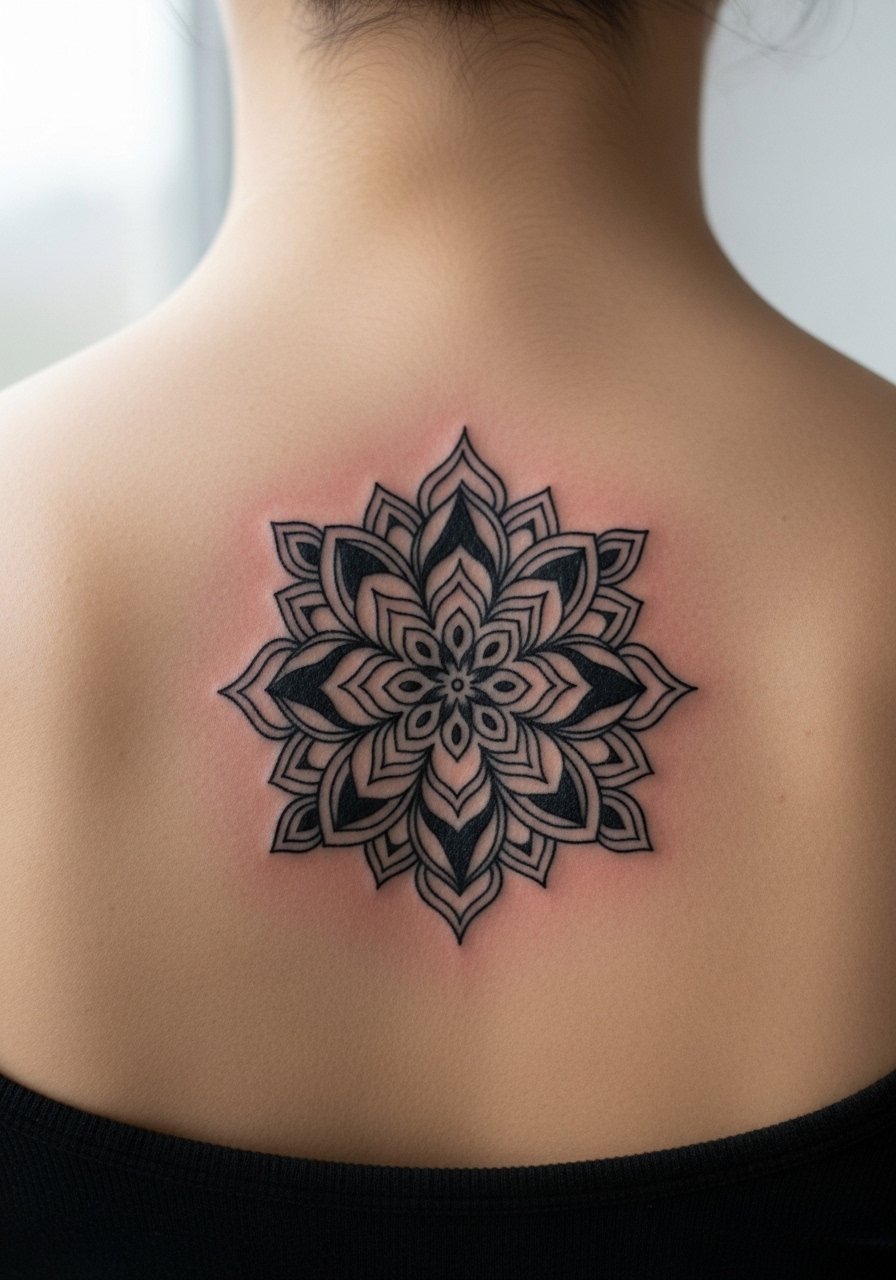
If you want symmetry that reads from across a room, a mandala between the blades is the go-to. I recommend asking your artist to leave slightly more negative space in tight pattern areas so the dots and stipple shading do not merge as it heals. Common mistake is shrinking the diameter to fit under a bra strap, which makes detail too dense and increases blowout risk. Expect a multi-session build if you want deep saturation, and plan for a touch-up at year two if you swim or spend a lot of time outdoors. For evenings out, pair it with a strapless midi dress that frames the center symmetry. During the appointment wear a loose tank so the artist has clean access without bra straps getting in the way.
2. Fine Line Floral Collarbone Extension
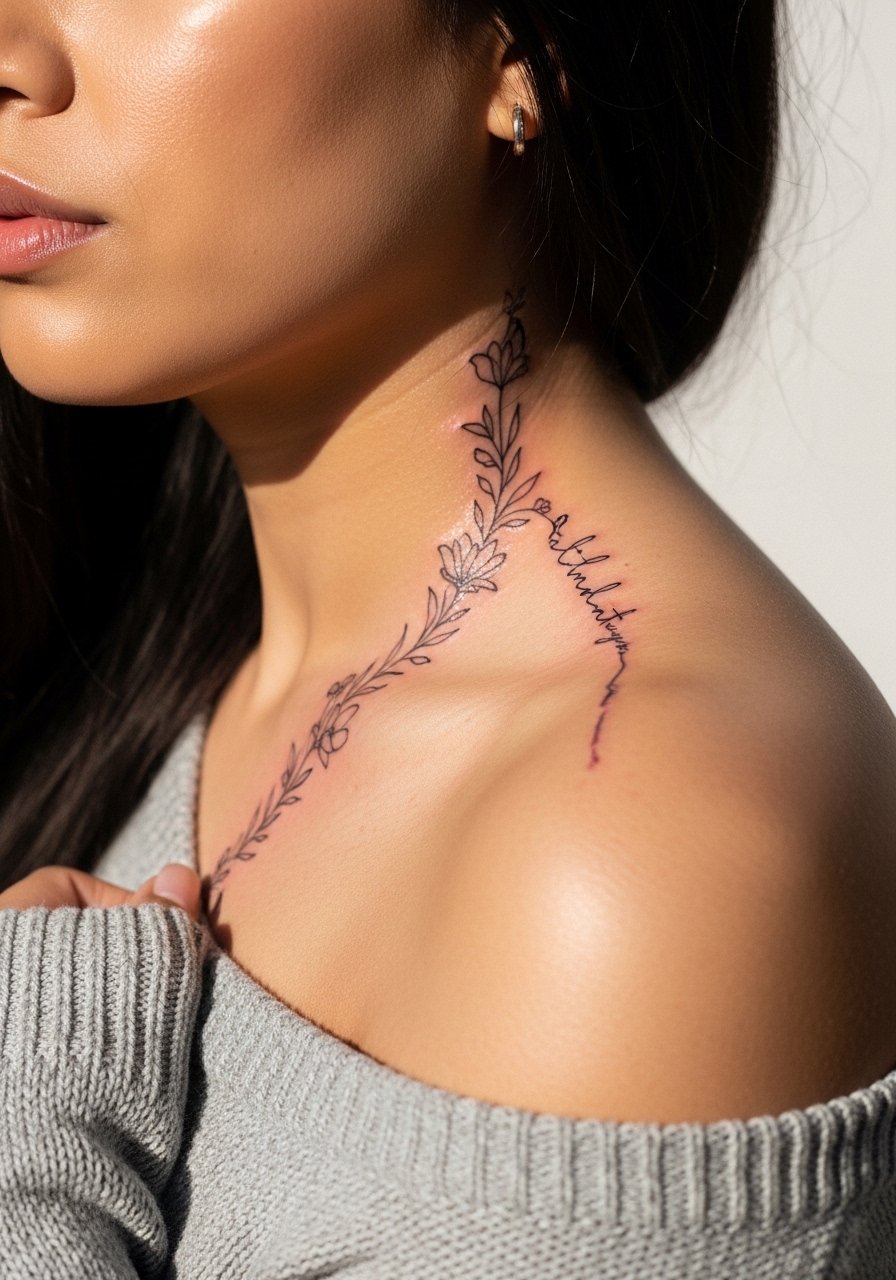
Fine line florals read delicately across the upper back into the collarbone, and they age differently depending on how close to the bone the ink sits. In consultation, ask for slightly bolder stem lines near the shoulder to anchor the composition, and request color washes only as accents rather than full fills. One camp of artists warns fine line fades fast on moving skin, and another camp says with measured needle depth it settles just fine. Call that out in the booking so you know where your artist stands. For showing it off, an off-shoulder sweater or layered pearl drop earrings work well.
3. American Traditional Eagle Spanning the Shoulder Caps
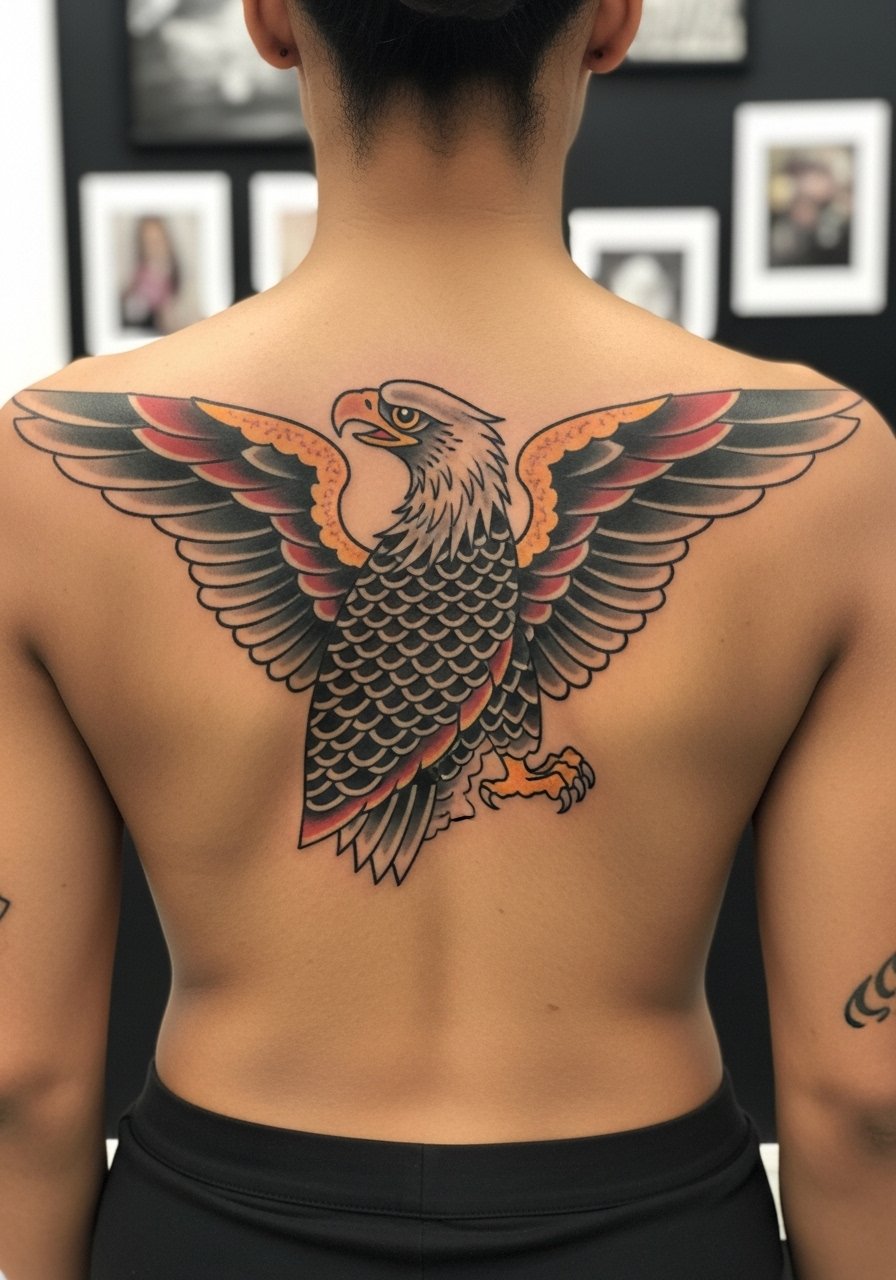
Traditional eagles use bold outlines and saturated fills because that approach ages predictably. If you want a piece that keeps contrast, ask your artist for slightly thicker outlines and solid color fields rather than tiny gradients. The session feels buzzy across the shoulder caps but not brutal, and most of the discomfort is in holding positions while shading larger fields. A common mistake is crowding the wing tips too close to the spine, which reads cramped in photos. Plan on two to three sessions for a full shoulder-span eagle and a potential touch-up after color settling in about a year.
4. Minimalist Geometric Wings Between the Shoulders
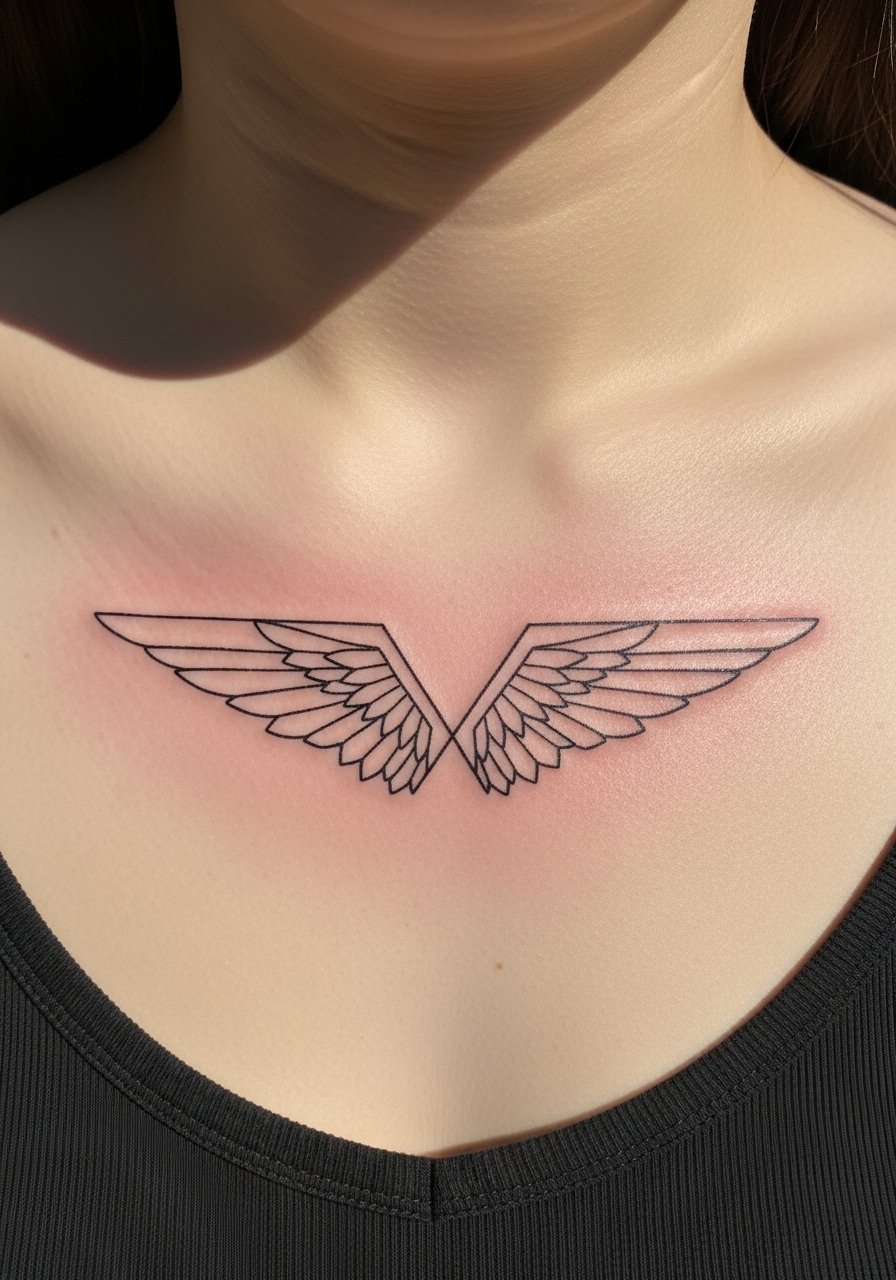
Geometric wings solve the concealment puzzle because they can be scaled to disappear under work shirts yet peek out in tanks. The biggest mistake is going too small in dense geometry, which causes lines to merge as the skin moves. Ask your artist to show the stencil on the skin and to stretch the area while you stand so you can see how it sits when you move. This placement is low on the pain chart, but the spine-adjacent bits can sting more than the outer blades. Pair with a backless halter top when you want it to show.
5. Neo-Traditional Lion Head on the Shoulder Caps
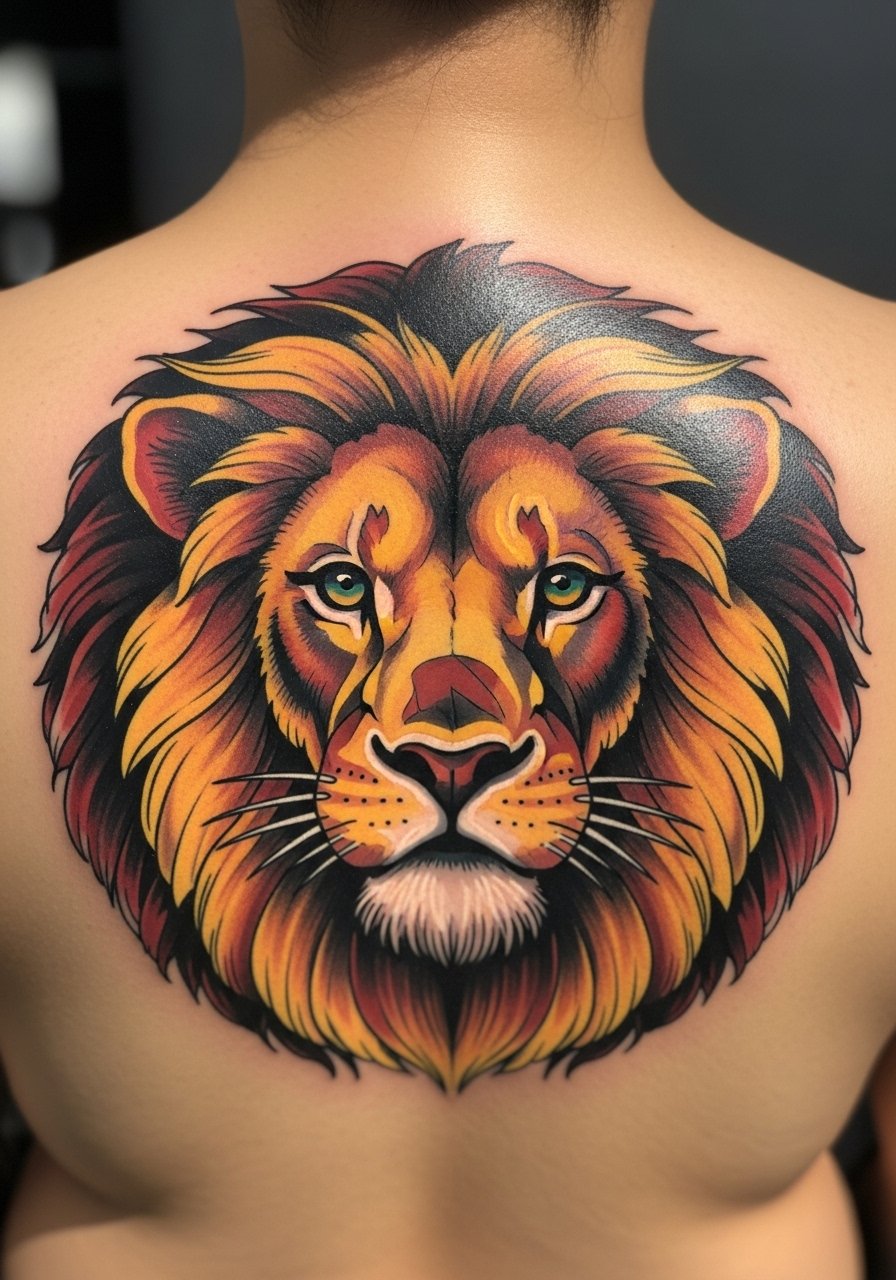
A lion on the caps reads strong under tank tops because the muscles give the design natural curvature. When booking, say you want the mane to wrap slightly onto the upper back so the piece breathes with movement. Artists often warn that very heavy saturation near the shoulder joint can feel tender longer during healing, so expect some extra aftercare attention. A common error is shrinking facial details too much, which turns expression into blur after a year. Two sessions is typical and plan a touch-up after color settling if you spend lots of time in sun.
6. Micro-Realism Phoenix Rising Across the Upper Back
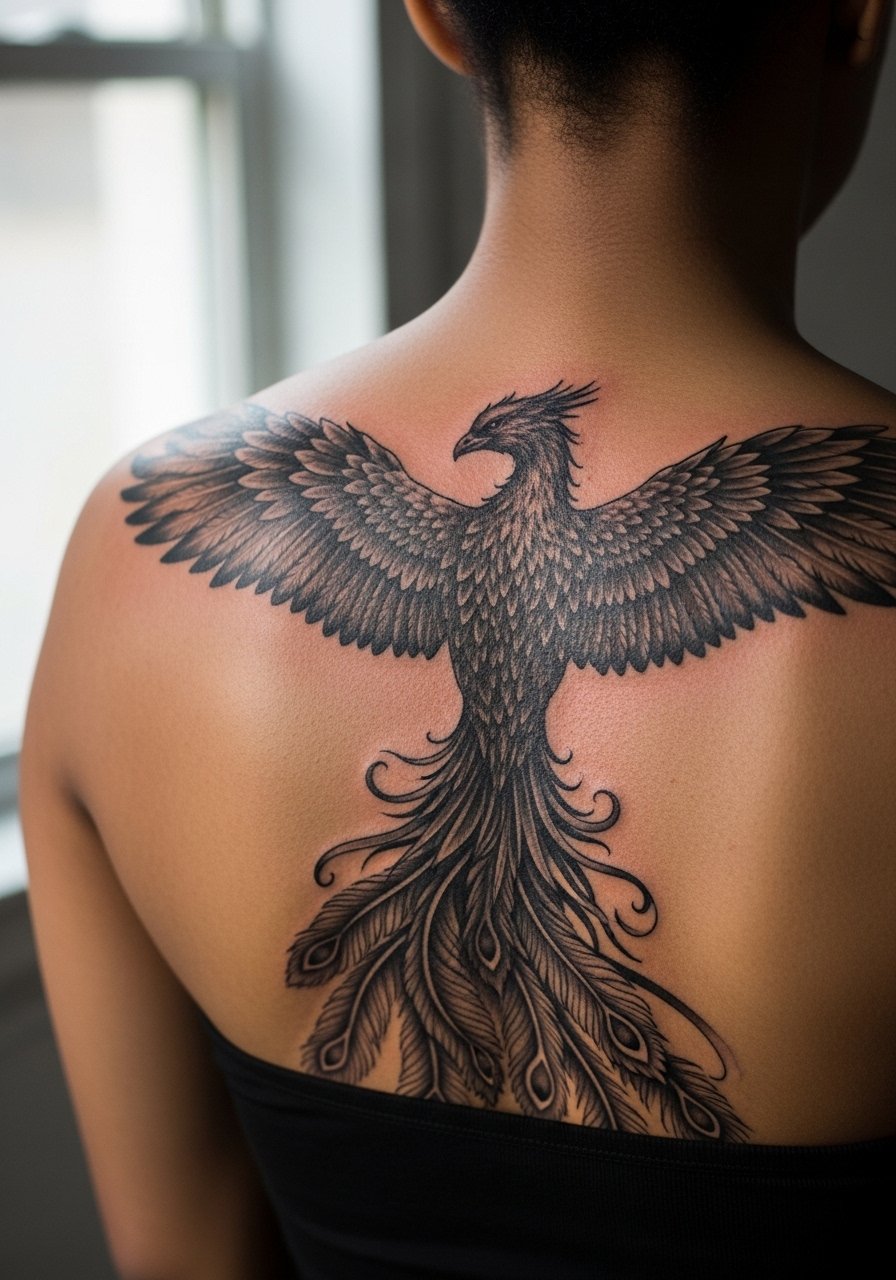
If you want the rebirth story without committing to a full back piece later, a carefully scaled phoenix on the upper back gives vertical impact while limiting session hours. Realistic detail asks for longer sessions and higher pain tolerance near the spine, so plan smaller chunks and take breaks. The usual mistake is packing tiny feather detail into a single sitting, which can result in line loss. Expect four to six sessions for deep realism and a possible year-one touch-up to re-saturate tiny shaded areas. For nights out, a sheer blouse layered over a bralette highlights the vertical line.
Pre-Session Essentials
A few practical items smooth the chair day for the mandala, collarbone florals, eagle, minimalist wings, lion caps, and phoenix pieces above.
-
Stencil transfer paper kit. Lets you preview scale and symmetry on the skin before the needle starts, which matters for centered mandalas and spine-adjacent designs.
-
Topical numbing cream. Helpful for longer spine or shoulder-cap sessions when you expect repeated shading passes.
-
Thin protective film roll. Useful for covering fresh upper back work that might rub against straps or backpacks during the first week.
-
Fragrance free gentle body wash. Cleanses healing back pieces without irritating tender linework or color fields.
-
Aquaphor healing ointment. Thin layers in the first 48 hours help lock in moisture for fine work without suffocating the needle channels.
7. Botanical Vine Draping the Shoulders
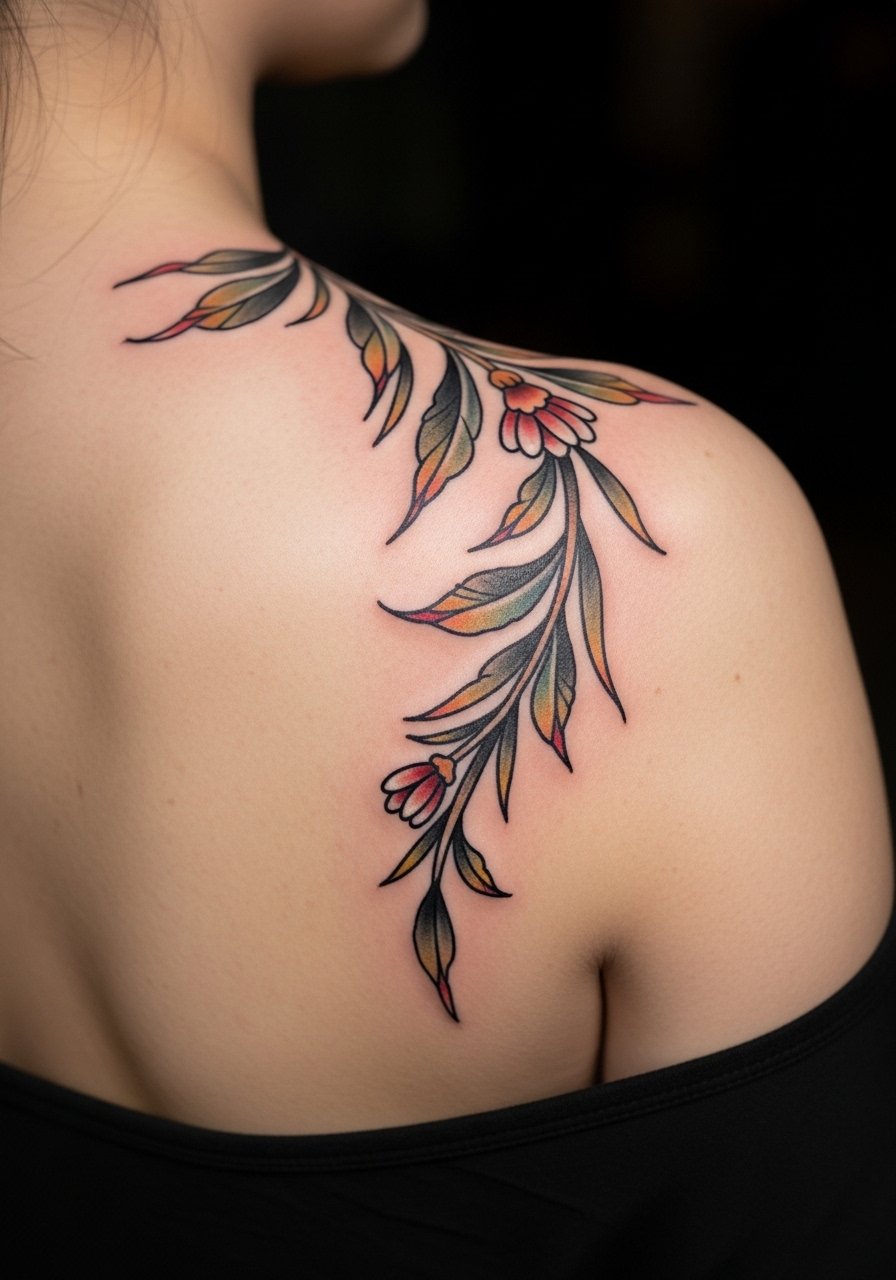
Botanical vines work with the body's contours, so the flow should move with the shoulder bridge rather than sit across it. Tell your artist you want the main vine to follow the muscle line so the piece keeps its motion when you lift your arm. A frequent mistake is mirroring a flat reference that ignores the three-dimensional shoulder, which makes the vine look awkward when you move. Two sessions usually do the job, and color washes may need a year-one revisit depending on sun exposure. For easy session access, slip into a racerback tank you can remove quickly.
8. Blackout Ornamental Mandala Centerpiece
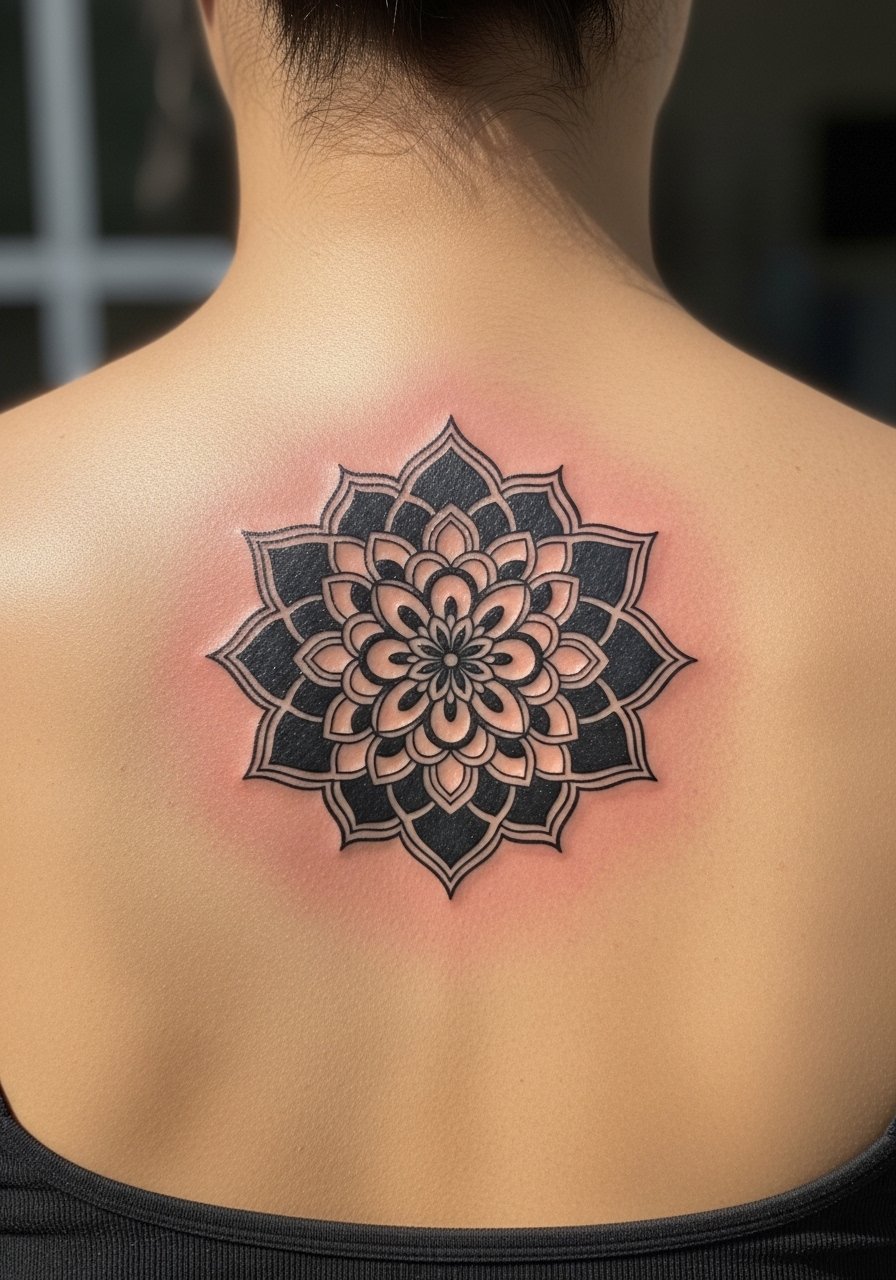
Blackout mandalas solve indecision by committing to strong contrast and negative space. They demand multiple sessions and can feel like long blocks on the skin, especially where the blade meets the spine. The main error is underestimating how much time solid black takes to saturate evenly, which leads to uneven sheen later. If you prefer a less intense route, consider a patterned blackwork with breaks of untouched skin. Expect three sessions at minimum and plan your wardrobe so straps do not rub the fresh work.
9. Traditional Swallow Flock Scattered Across the Upper Back
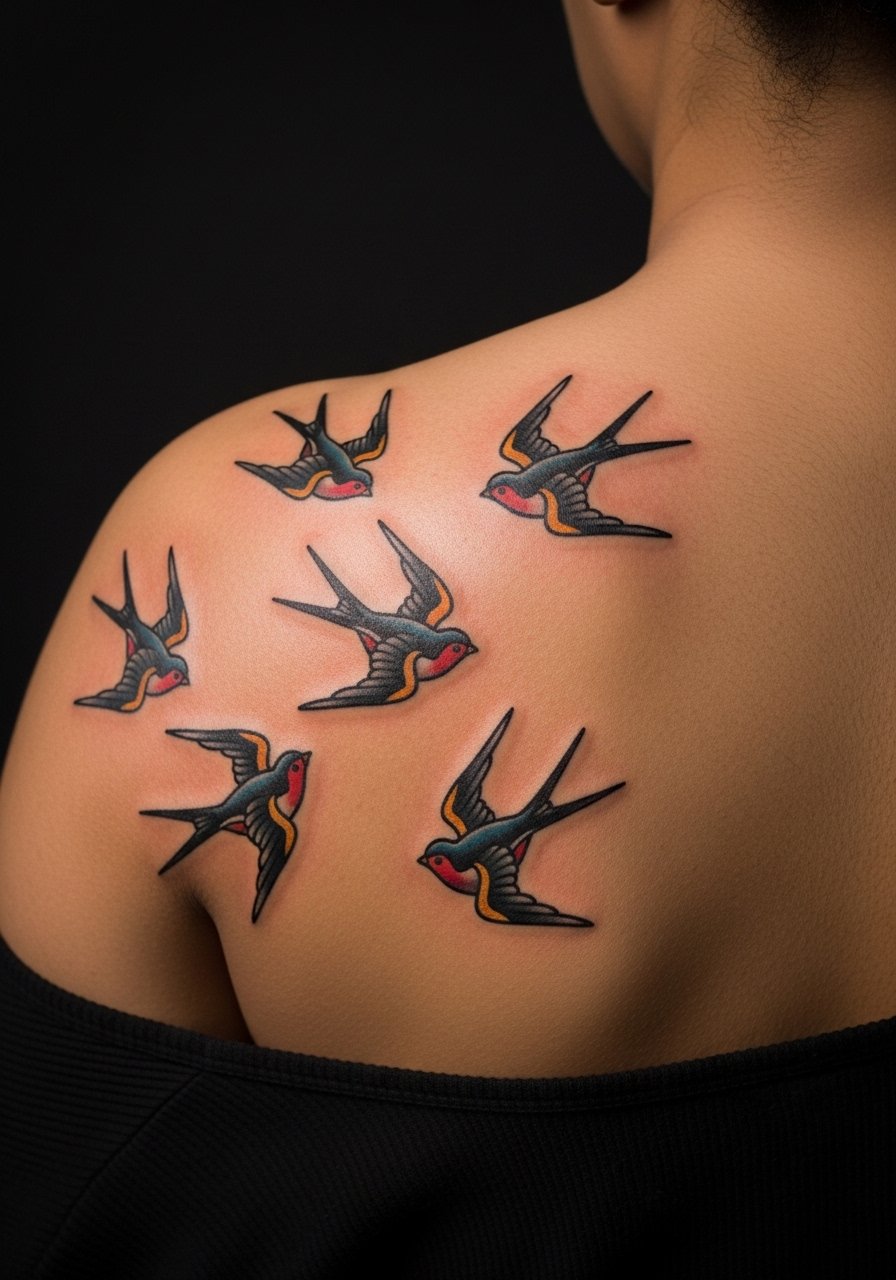
Small traditional swallows let you tell a story in modular pieces across the upper back without committing to one big piece. The biggest user error is clustering too many small birds close together, which reads cluttered as the tattoos age. Ask for consistent lineweight across each bird so the flock looks cohesive in photos. One session can handle several small swallows, but spacing and placement benefit from a second visit to balance composition. Crop tops or open-back denim vests make the scattered composition sing when you want to show it.
10. Fine Line Mountain Range Horizon
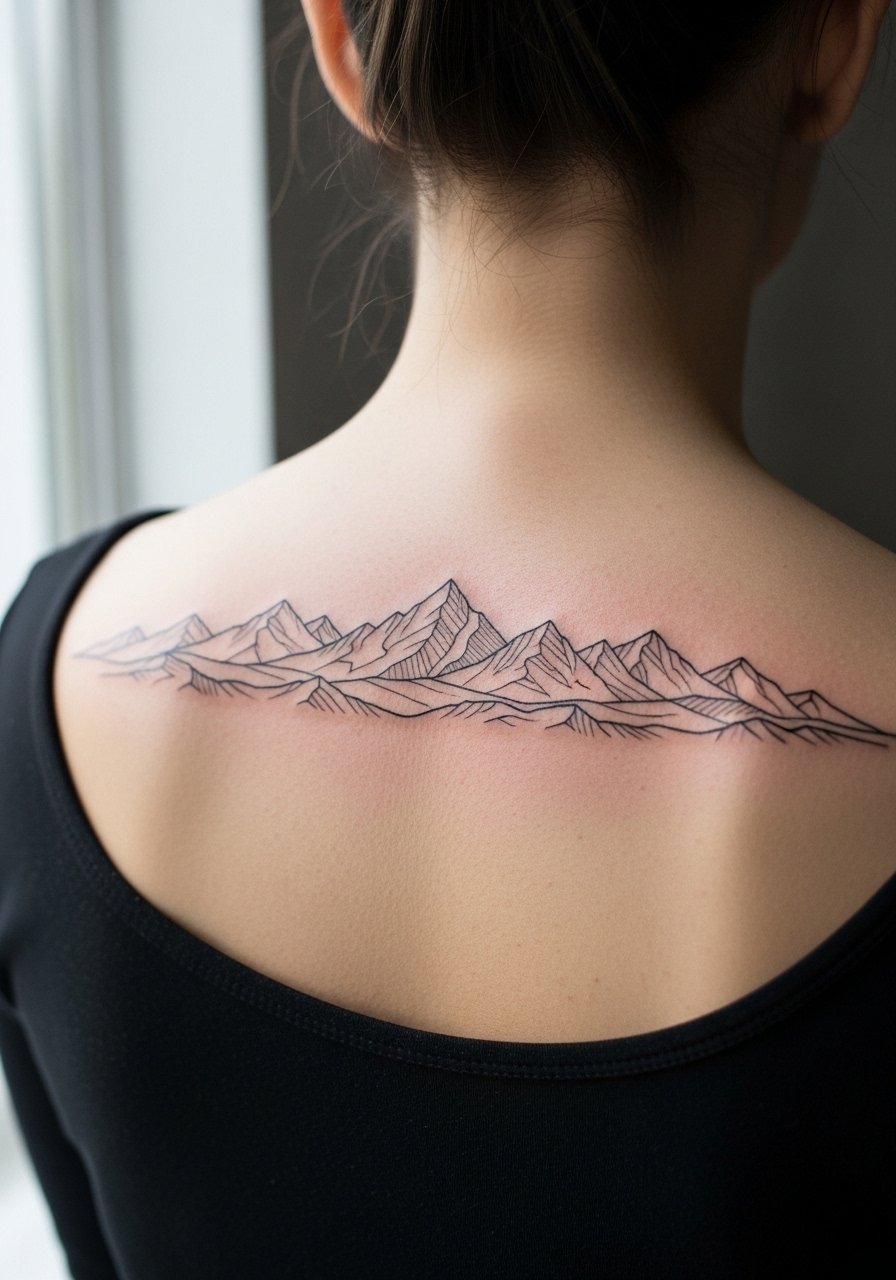
A horizon-style mountain strip is low-profile and travels well under most shirts. The usual mistake is over-detailing peaks too closely together, which causes early softening. Ask your artist to prioritize a few crisp ridgelines and to use varied spacing so the negative space preserves definition. This style is forgiving with a single touch-up after a year if you prefer strong contrast regardless of UV exposure. Session time is typically a single two-hour block and pain is mild on the flat of the upper back.
11. Ignorant Style Abstract Waves Along the Shoulders
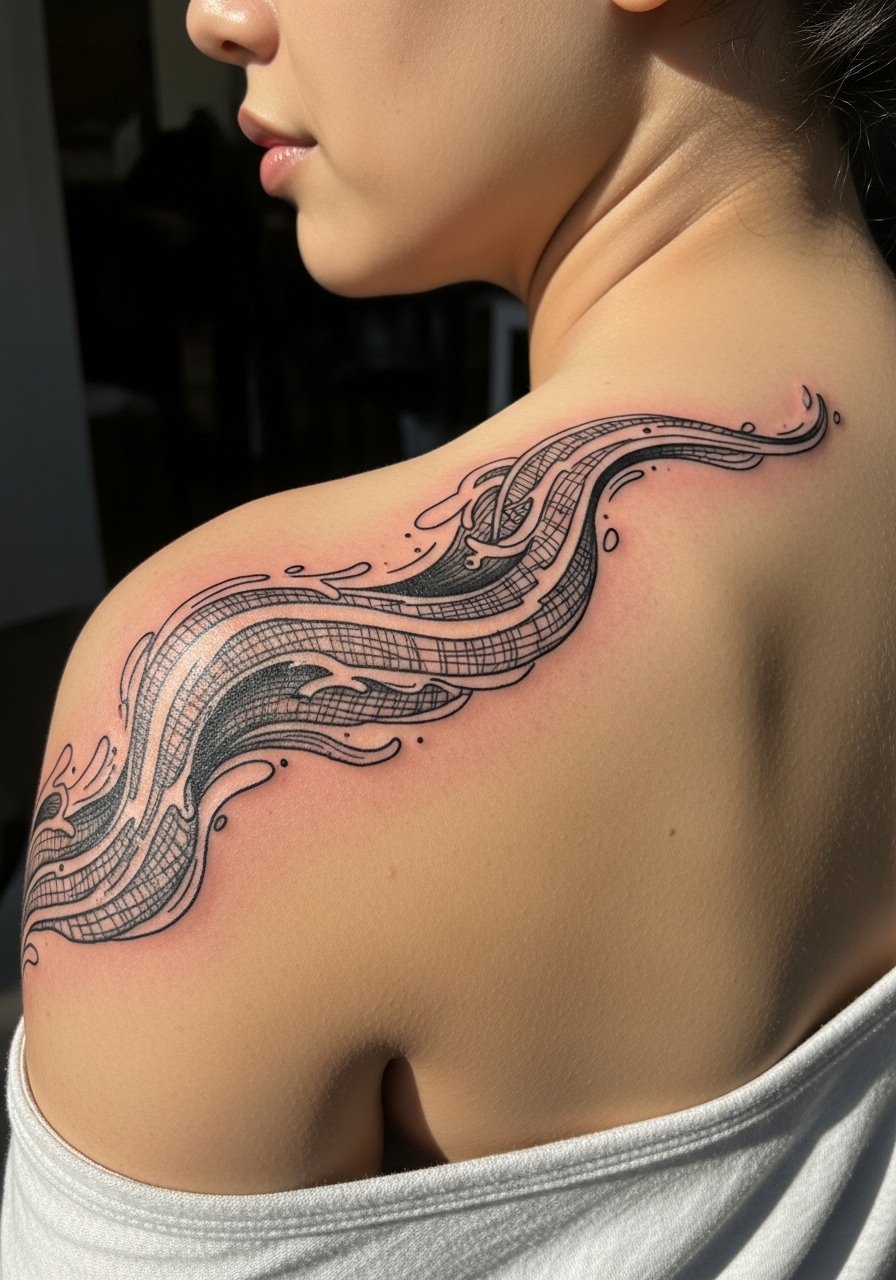
If you like a hand-sketched, raw aesthetic, ignorant style waves give that urban edge without needing perfect symmetry. In consultation, say you want intentional irregularity rather than accidental wobble, because artists who nail this do so with controlled strokes. A typical error is asking for micro-detail that contradicts the freehand look, which ends up looking overworked. Three sessions may be needed for wrap and shading, and expect some touch-up where the skin creases near the shoulder joint.
12. Watercolor Dreamcatcher Centerpiece
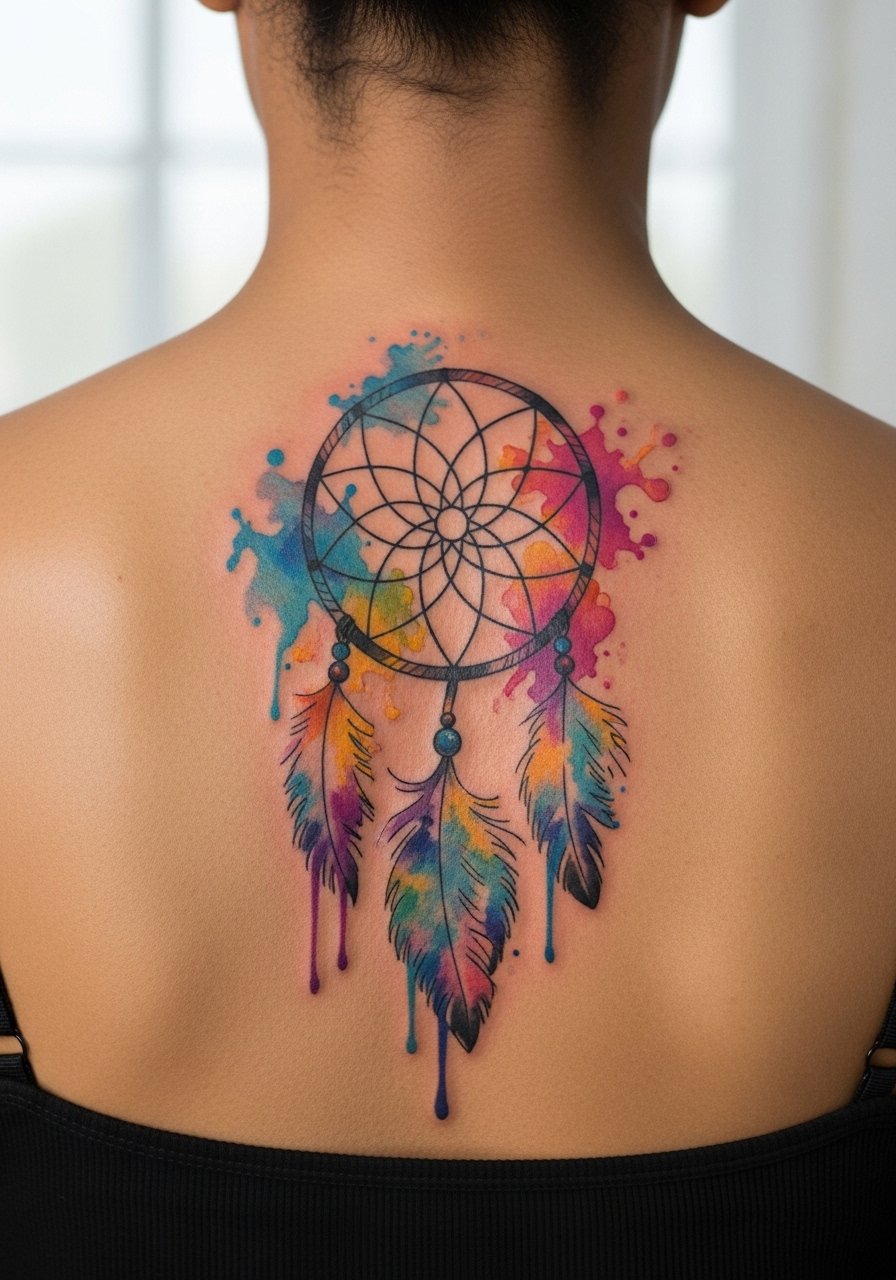
Watercolor in the upper back can be striking, but the style trades longevity for painterly blends. Most artists will caution that bright diluted colors need careful placement away from constant friction zones and heavy sun exposure. A frequent mistake is packing too many watercolor blobs close to dense linework, which causes the washes to lose separation within a couple of years. Two to three sessions usually create the layered washes, and plan for refreshes sooner than you would with traditional saturated color.
13. Patchwork Dragon for a Buildable Upper Back
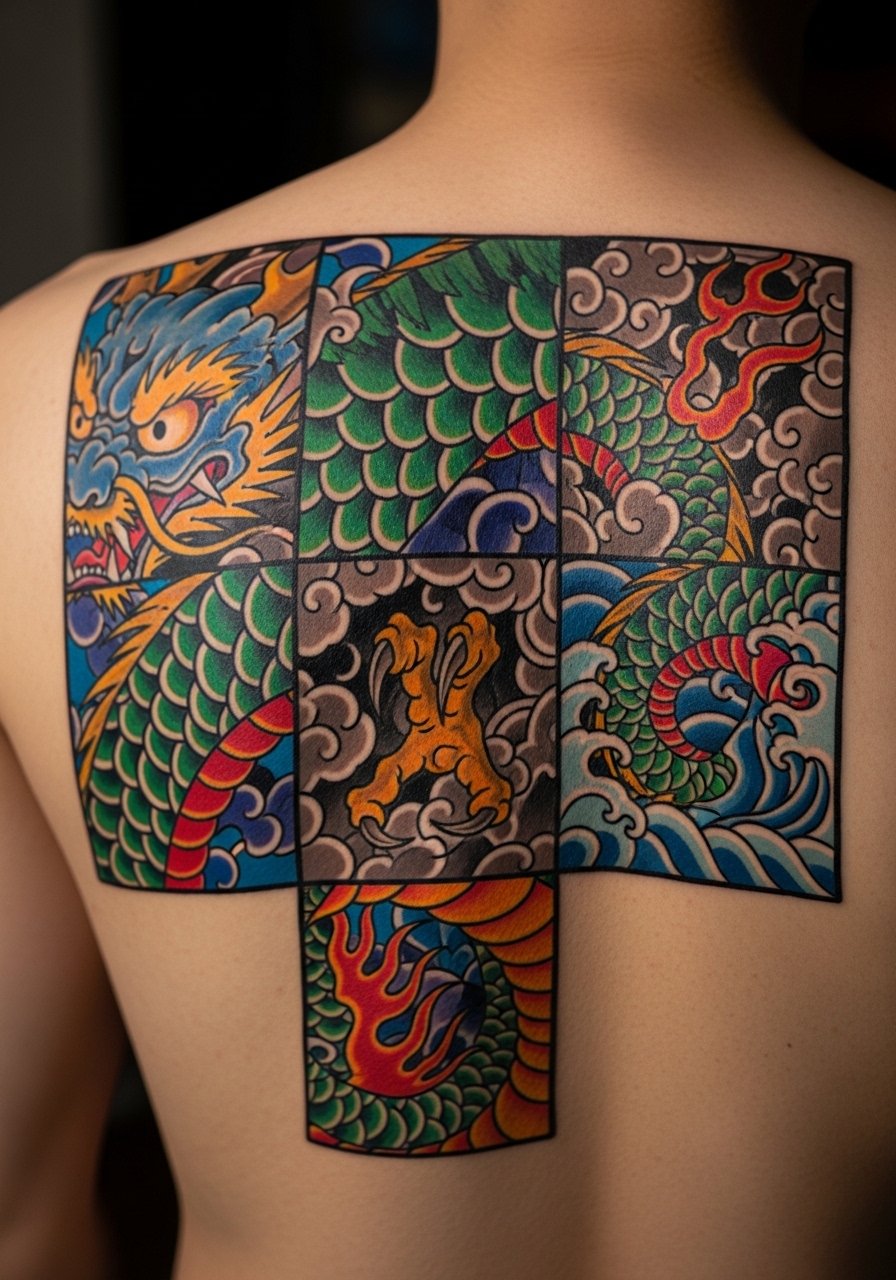
Patchwork dragons are made to grow, so think modular from the start and prioritize negative space between modules to keep future parts readable. Tell your artist you plan to add onto it so they can leave anchor points and consistent line weight for later matches. The common error is treating each session as a standalone tattoo, which leads to awkward seams. Expect multiple sessions over months or years, and build in a planning meeting to map future additions. For showing progress across seasons, a half-open leather jacket or racerback top keeps new arcs visible.
14. Shoulder Cap Wrapping for 3D Muscle Illusion
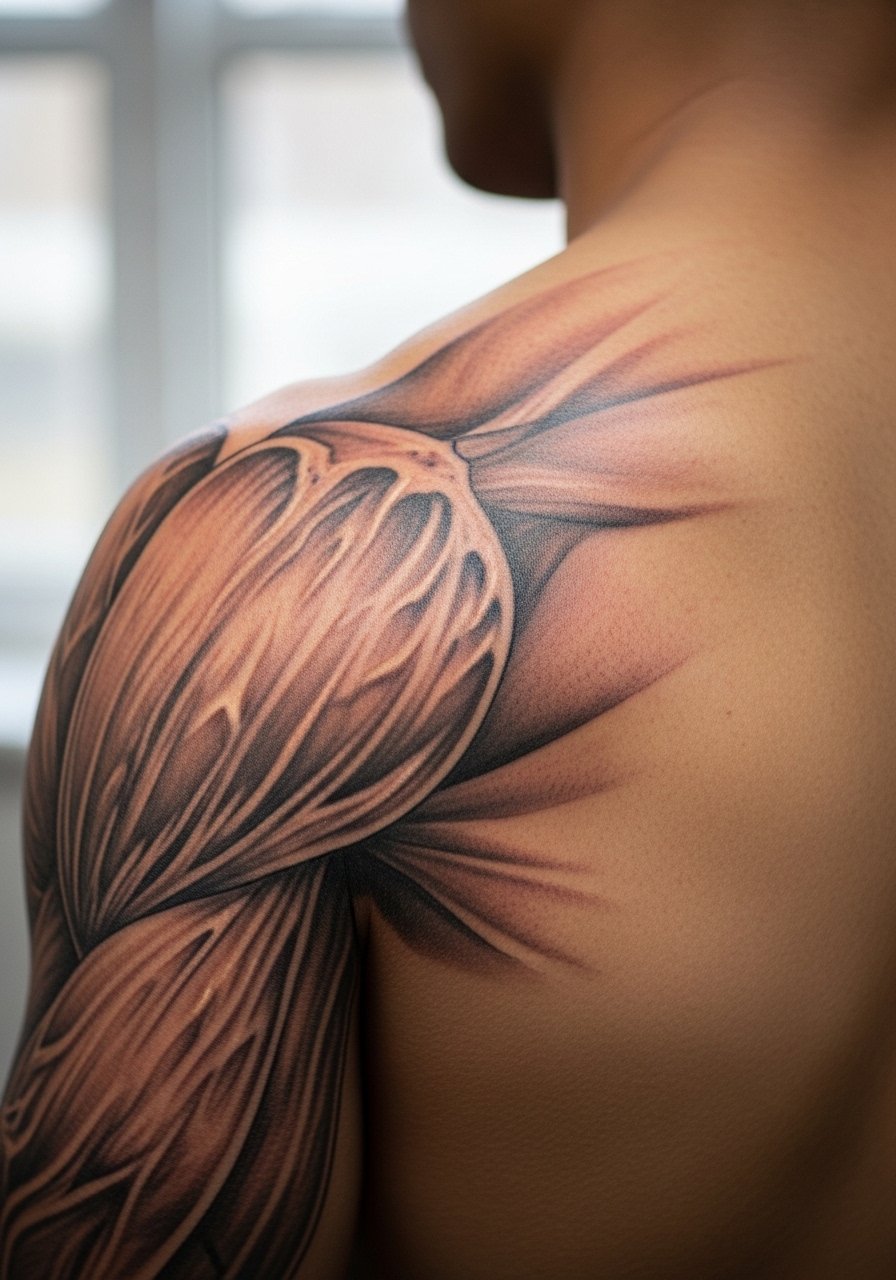
When you want the tattoo to emphasize the body's form, wrapping work across the shoulder cap creates an optical 3D effect. The consultation detail to give is where the highlight should fall so the illusion matches your posture and habitual movements. A mistake I see often is applying mirror-image designs without testing them during flex, which ruins the wrap when muscles move. Sessions can be moderately long, and the spine-adjacent edging can be more painful than outer shoulder passes.
15. Spine-Adjacent Micro-Realism Accent Line
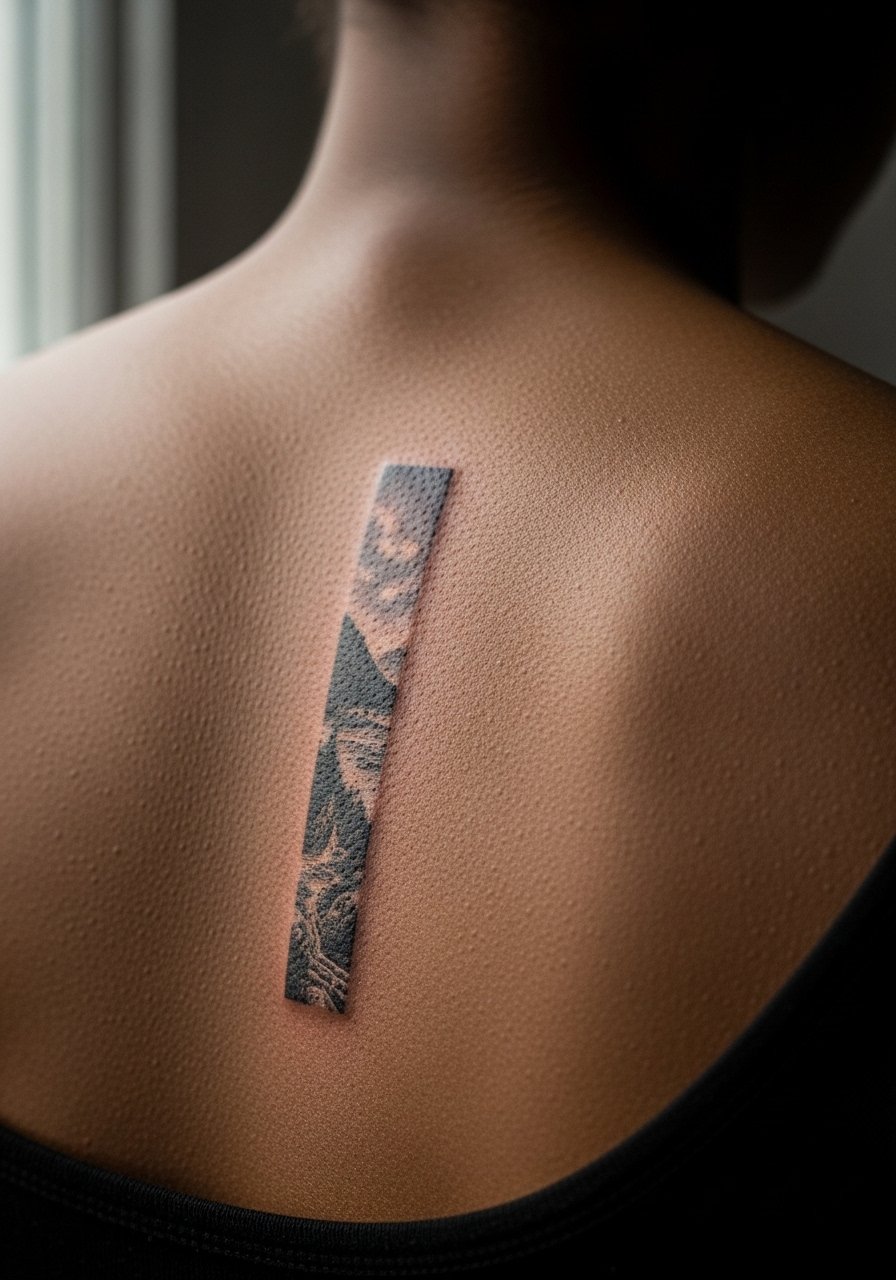
Spine-adjacent accents are compelling because they create a vertical focal point that reads under sheer tops. They also tend to feel sharper during the session. Expect higher pain near the spine and plan for shorter sittings to manage discomfort. The controversy about fine line holding on moving skin matters here, because one camp says lines blur after two years and the other camp says careful depth keeps them intact. Ask your artist which side they fall on before booking. For styling, a sheer blouse over a bralette will highlight the vertical line.
16. Botanical Shoulder Sweep with Color Washes
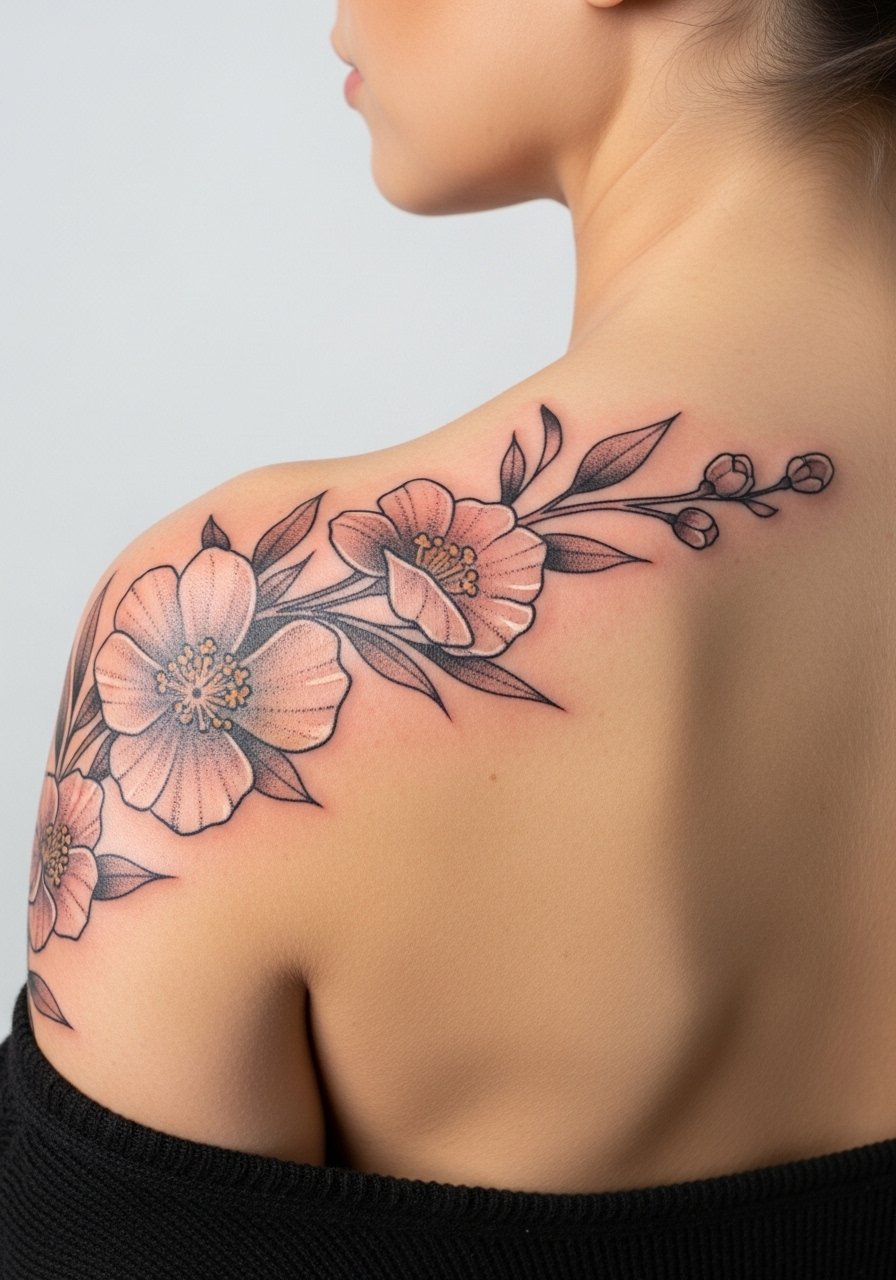
A sweeping botanical that follows the shoulder blade is forgiving and feminine without being fussy. Tell your artist you want the darkest pigment in shadowed hollows and lighter washes on the top planes to create movement. People often overload these with tiny buds that age into indistinct blobs, so favor larger, clearer floral elements. Two sessions typically cover linework and color. For session wear, pick a loose button-down you can pull aside so the artist has full access without rubbing the fresh ink.
17. Minimalist Horizontal Script Just Above the Shoulder Blades
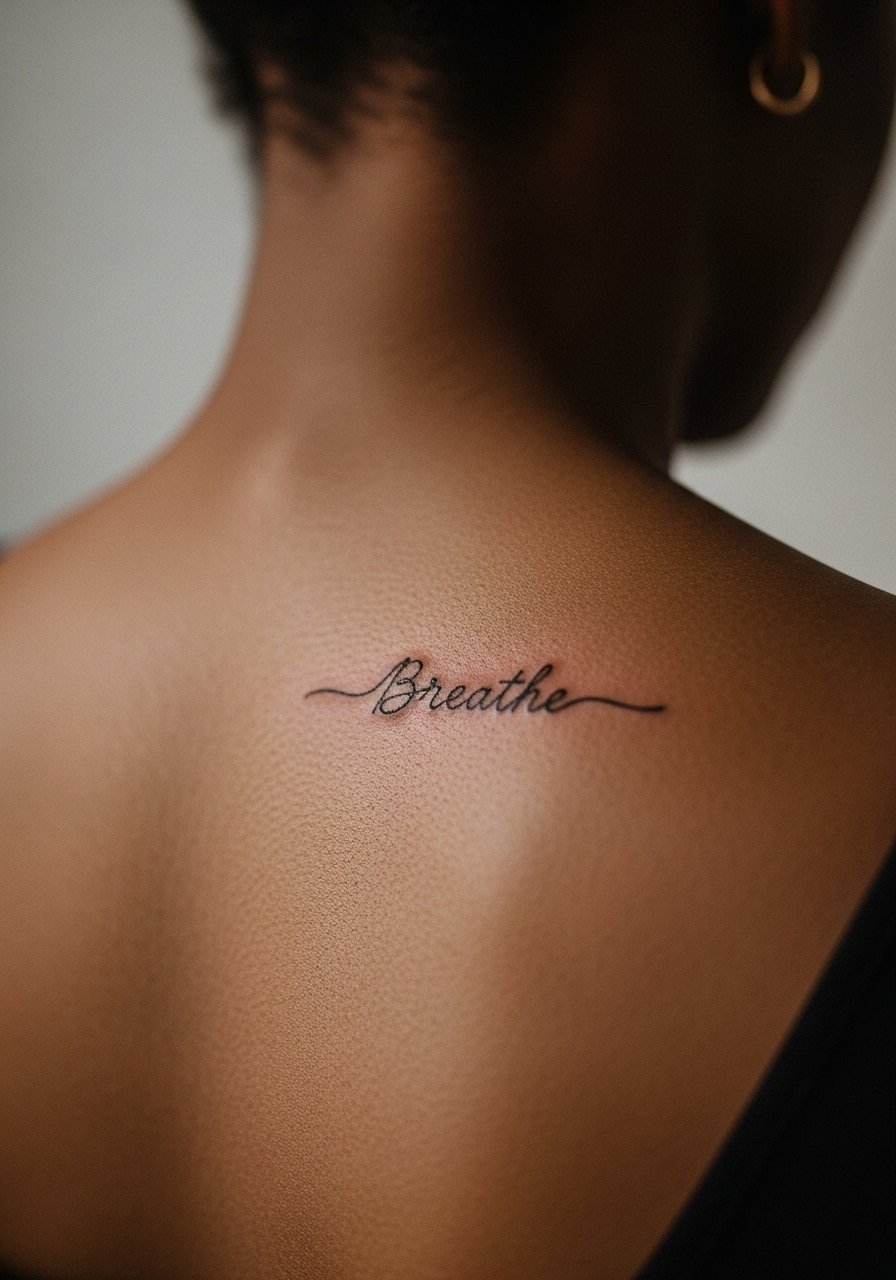
Small script gives strong personal meaning without heavy commitment, but tiny lettering needs spacing to remain legible as it heals. A common error is asking for extremely thin fonts in small formats, which can close up within a year. Ask for slightly heavier single-needle strokes and test the exact phrase in a stencil at full scale. Pain is low and session time short. Consider how the line sits under straps and pick clothing that avoids constant rubbing during the first month.
Frequently Asked Questions
Q: Will fine line upper back tattoos fade faster than traditional work?
A: Fine line pieces can soften sooner than bold traditional work, especially where skin creases or moves a lot. Some artists believe spacing and correct needle depth prevent early blur. Ask your artist how they handle depth and spacing for fine line in the upper back during the consultation.
Q: How much does gaining or losing weight affect an upper back tattoo?
A: Changes around the shoulders and upper torso can stretch or compress designs, making dense detail lose clarity. Designs with flexible linework and planned negative space adapt better. If you expect body changes, choose looser patterns and discuss placement over muscles rather than directly across them.
Q: Is the spine area really that much more painful than the outer shoulder?
A: Yes, spine-adjacent and near-bone work generally feels sharper for most people, while outer shoulder areas register milder on the pain chart. Break long sessions into shorter blocks, bring positioning pillows, and plan breaks. Topical numbing can help but discuss it with your artist first.
Q: Which healing method is better, transparent film dressing or dry healing?
A: Artists split into two camps. One prefers protective film or modern dressings because they reduce mess and lower infection risk. The other favors dry healing so you can inspect scabs and watch how the tattoo settles. Each approach works when done properly, so ask your artist what they recommend for your skin type and the piece you are getting.
Q: Should I worry about blackwork looking muddy on darker skin tones?
A: High-contrast blackwork designed with open patterns and varied negative space reads well across tones. If you are darker skinned, request test stencils and lighting mockups so you can see how saturation and spacing translate in photos and in natural light.
Q: What should I wear to the appointment for an upper back session so the artist has easy access?
A: A loose button-down or a racerback tank you can remove quickly is ideal for most upper back placements. Pick something you can put back on without rubbing the fresh area.
