
Fine line looks amazing on saved boards, and that is exactly the problem. What photographs best fresh often softens faster than people expect once the arm moves and the sun sees it. I have noticed that the half sleeves that read clean at year five were planned with spacing, contrast, and wardrobe in mind before the first session. Below are 27 half sleeve drawings that account for aging, sessions, and how to actually wear them while they heal.
1. Neo-Traditional Lion with Floral Accents on Outer Upper Arm
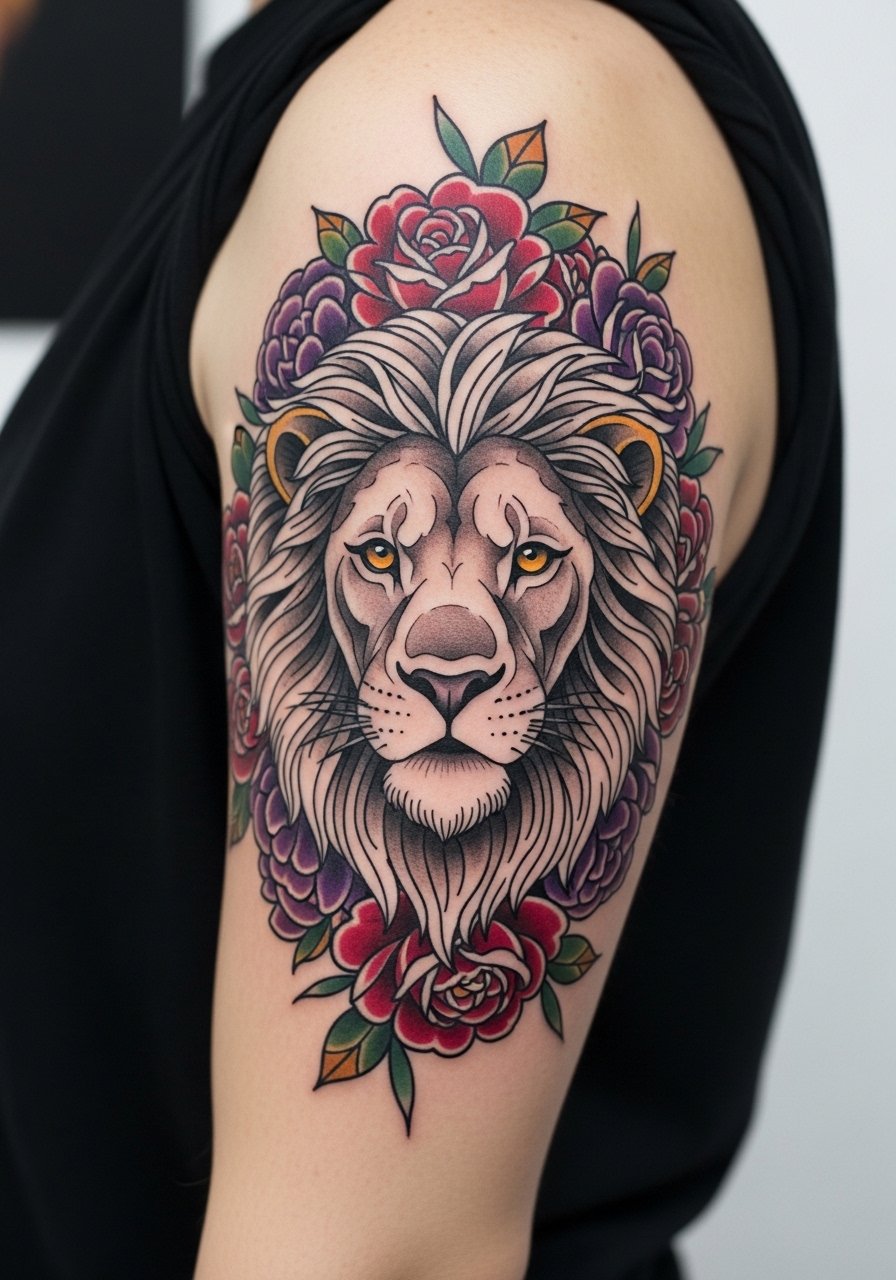
When a client wants something that reads from across a room, I point them to neo-traditional lion work, especially on the outer upper arm. For a half sleeve, ask the artist for thicker outline anchors around the face and softer shading in the mane so the focal point keeps its shape as color fades. Common mistakes include packing too many tiny background details that blur into noise by year three. Pain sits in the low-to-medium range on the outer arm and a single session often lasts three to four hours. For showing it off, pair the piece with a fitted tank top in solid black that frames saturation without clashing.
2. Black and Grey Realism Portrait Sleeve, Outer Forearm to Shoulder
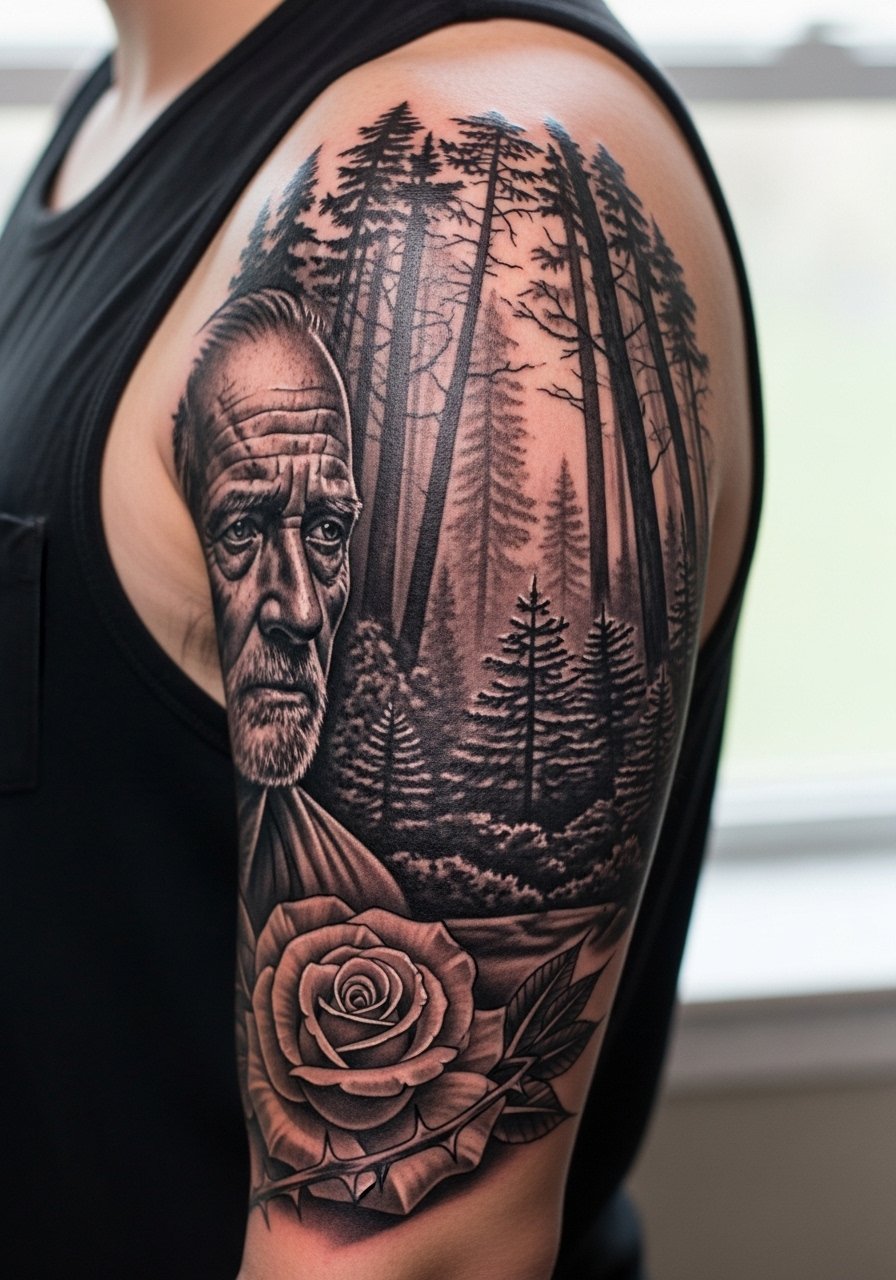
Personal observation: a portrait done too small loses the facial planes within months. For a half sleeve, plan 8 to 12 inches of canvas so stipple and whip shading get space to breathe. Tell your artist you want contrast between the focal portrait and the negative space so the subject does not dissolve into tonal grey. Expect four to six-hour sessions and touch-ups at year two for deeper mid-tones. The typical mistake is demanding ultra-fine detail at tiny scale. During sessions wear a short sleeve button down you can roll up for full access without fret.
3. Watercolor Floral Explosion on Inner Upper Arm
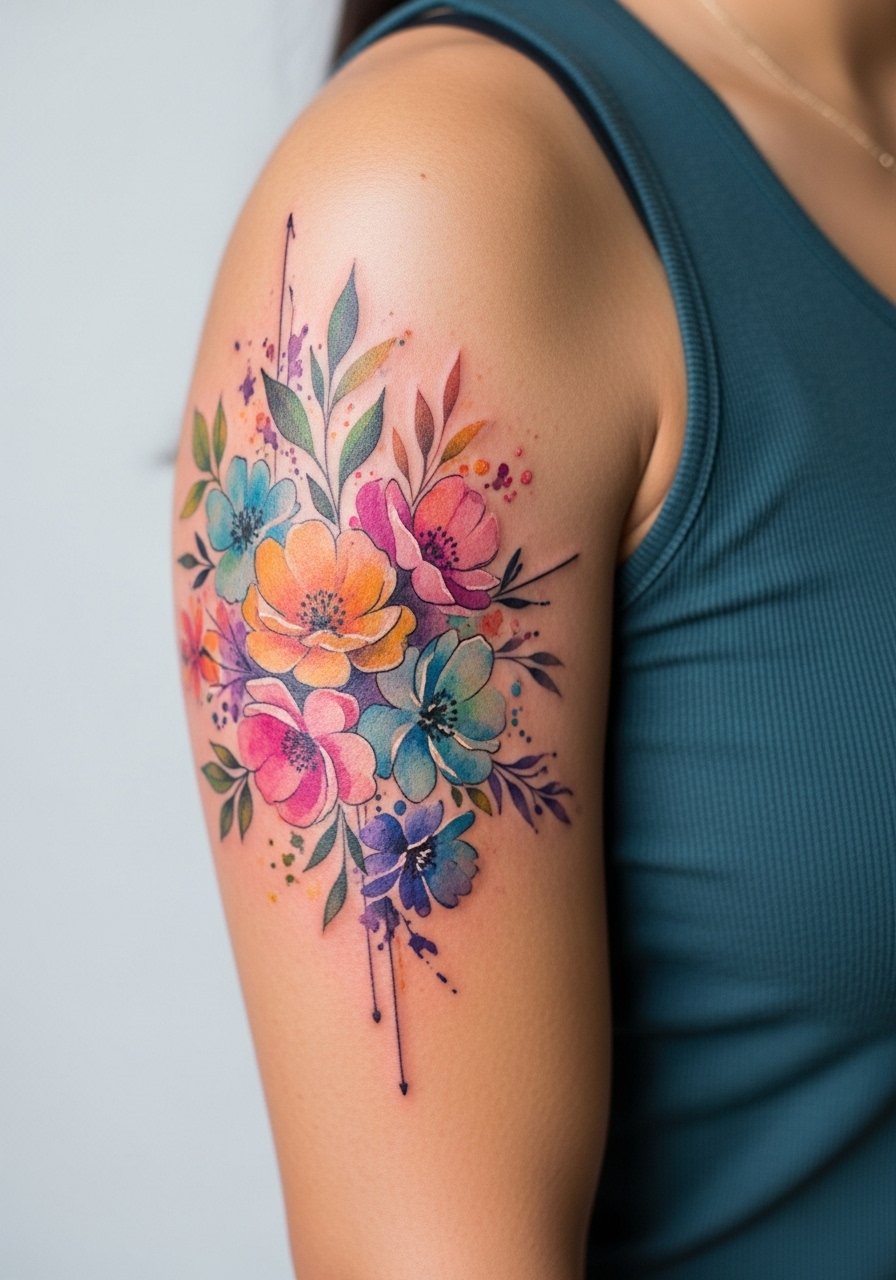
Fair warning: the inner upper arm is softer skin and color shifts differently there. The watercolor approach should use faint line anchors beneath the washes so the design keeps its shape as pigment settles. In consultation, request diluted edges and deliberate voids where the skin shows through. A two to three hour session handles a compact half sleeve, and you should expect touch-ups at year three when soft edges tend to fade. For the appointment wear a sleeveless tank top so the artist has clear access and there is minimal fabric pressure on the fresh work.
4. Geometric Mandala Wrapping the Upper Arm
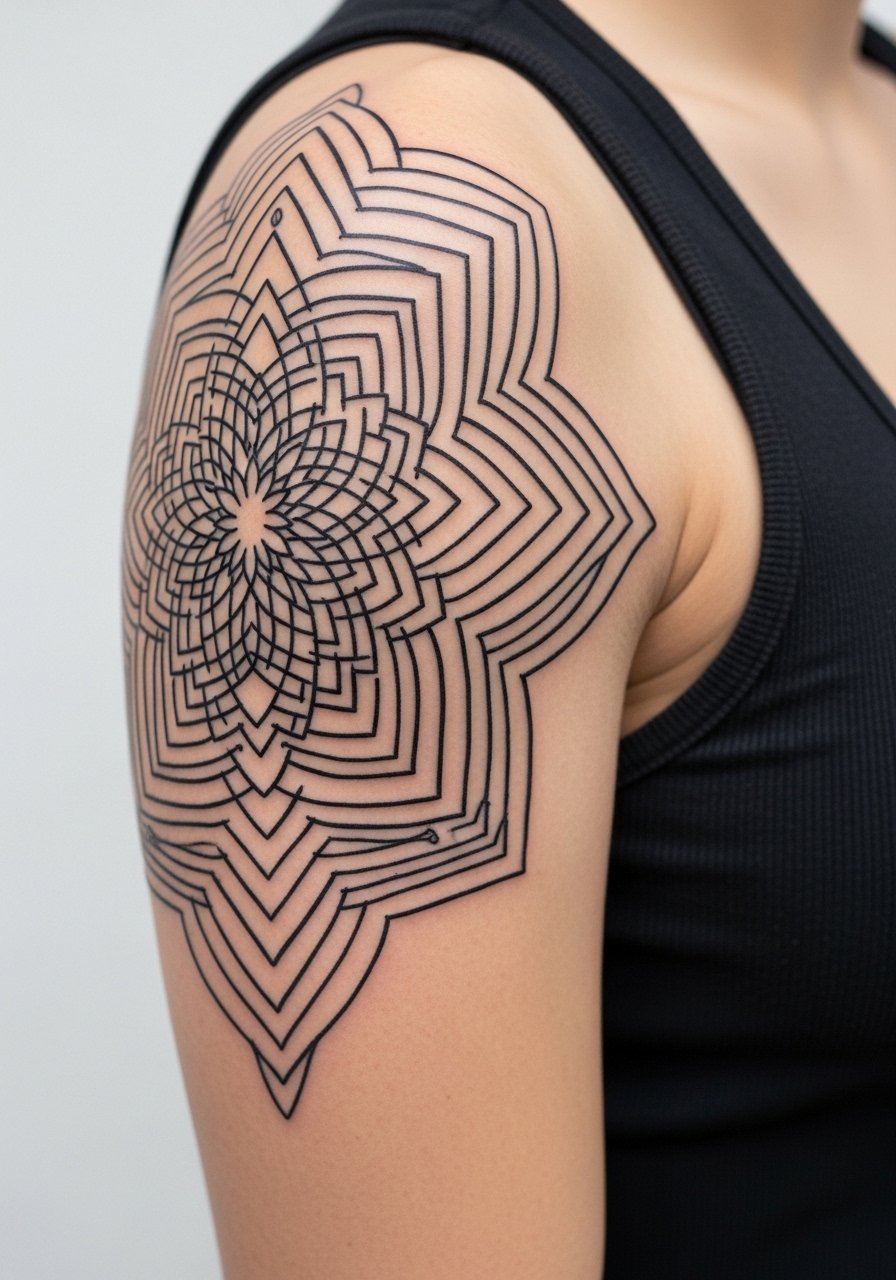
The biggest mistake with mandalas is scaling them too small. Dense linework needs space or the concentric rings start merging as the skin ages. When you bring references, highlight the exact outer diameter you want and ask the artist to space pattern elements slightly wider than the photo. Expect three sessions for a half sleeve wrap and plan for a touch-up around year two if the inner rings soften. Some artists argue fine mandala work holds up fine on the upper arm, while others avoid extremely tight patterns. Ask where your chosen artist stands before booking. For evenings out pair this with a strapless tube top to show the symmetry.
5. Dotwork Sacred Geometry on the Forearm
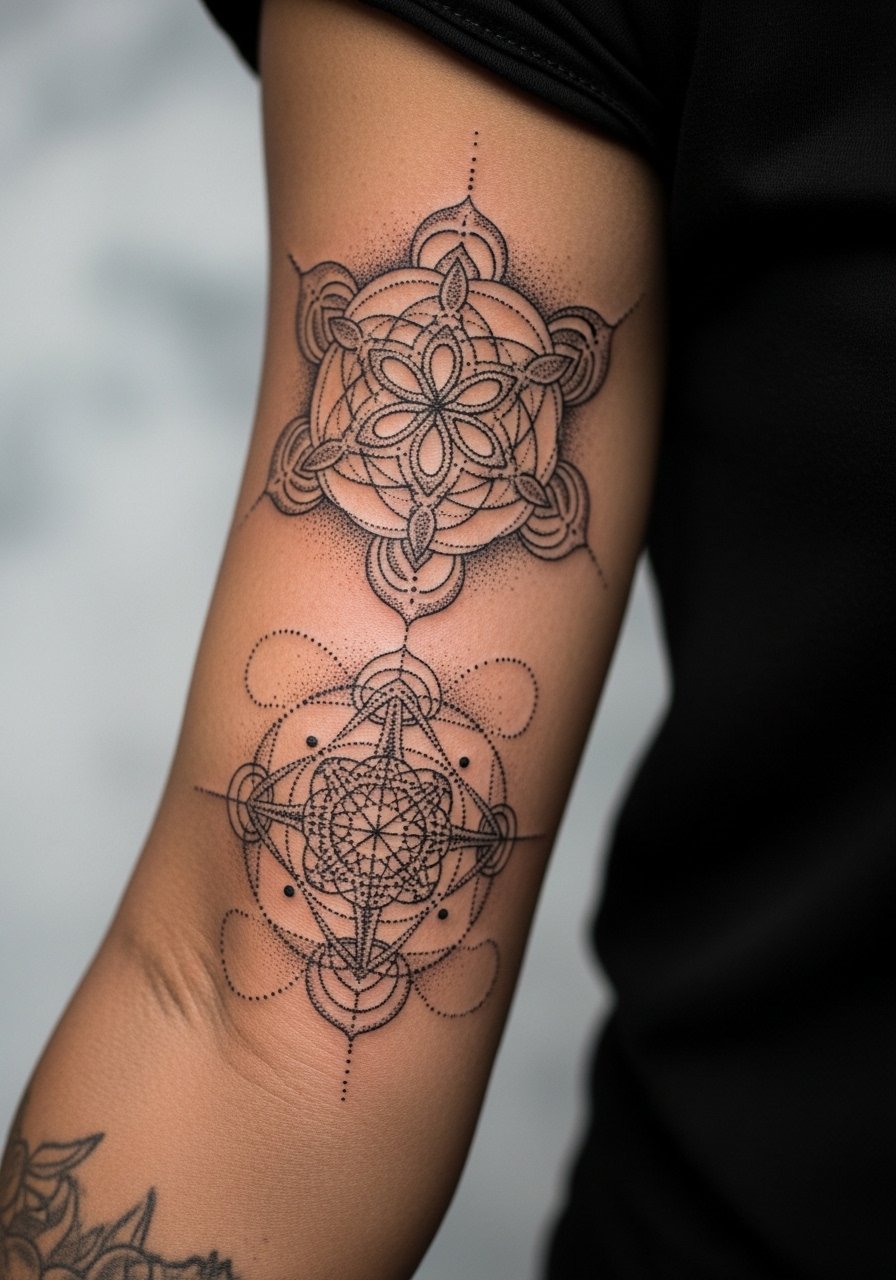
There is something hypnotic about stippling that grows in depth with more dots. For forearm wrap work tell your artist you want density variation rather than uniform packing so the piece reads with dimensionality over time. A two to four session build gives the stipple time to settle between sittings. A common error is asking for identical dot density across large fields, which flattens as skin texture changes. Pain on the forearm is manageable but expect longer needle time. Styling tip for showing this off: roll your sleeves or choose a rolled sleeve flannel shirt that frames the work without covering the pattern.
6. Fine Linework Botanical Vines on Inner Arm
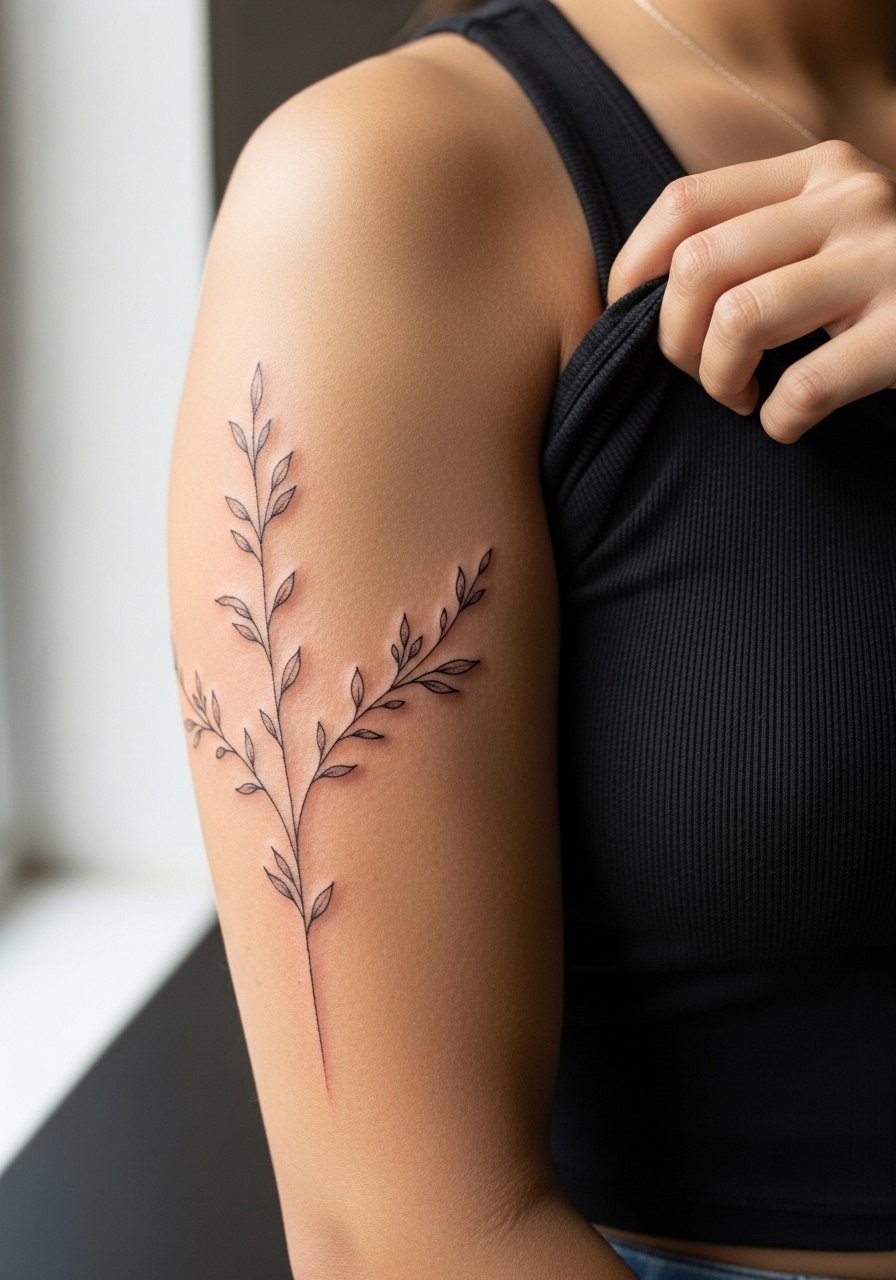
When I see fine-line botanic work that still reads five years in, it was drawn with spacing and slightly heavier nodes on stems. The common error is running everything at the same micro-weight. Tell your artist you want intermittent slightly thicker nodes and occasional stipple shading for longevity. This placement can sting more than the outer arm because of soft tissue and nerve endings, so shorter sessions may be better. For the appointment wear a loose long sleeve shirt you can push up without tight cuffs that rub the fresh ink.
Pre-Session Essentials
The first six ideas cover inner arms, forearms, and upper arm wraps, which ask for different prep than chest or ribs. Small changes make the session easier and the first week of healing smoother.
-
Stencil transfer paper kit. Lets you preview the line placement on skin before a long session, which is helpful for the botanical and mandala layouts above.
-
Topical numbing cream. Applied per instructions 40 to 60 minutes before can reduce wrist and inner-arm sensitivity for clients who need it.
-
Thin protective film roll. Useful for forearm and wrist pieces that face frequent washing and friction during the first few days.
-
Fragrance-free gentle body wash. Cleanses healing skin without stripping oils, which helps fine line and watercolor work maintain tone.
-
Aquaphor healing ointment. Thin layers in the first 48 hours help lock in moisture for delicate linework without clogging channels.
7. Japanese Koi Fish Climbing Waves on Outer Upper Arm
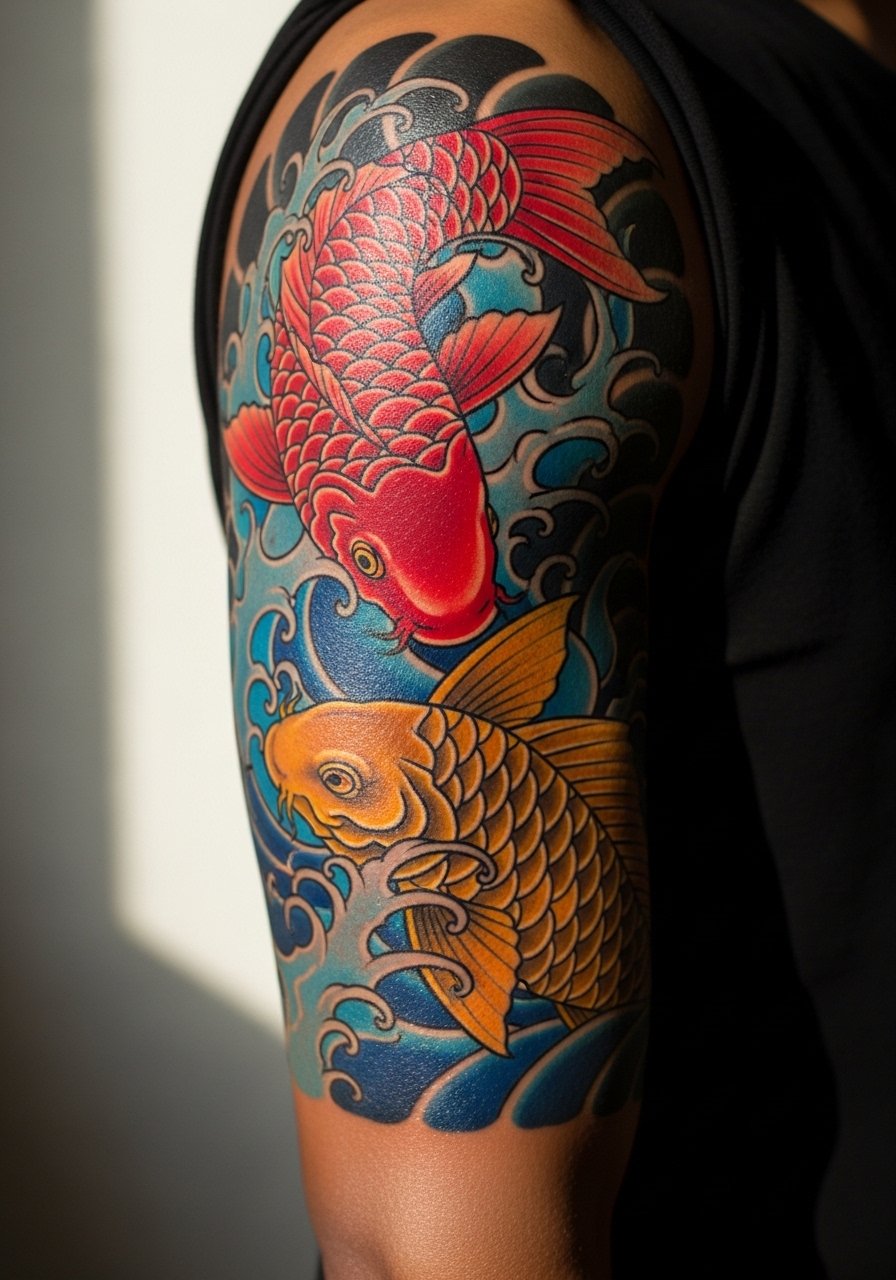
Visual impact lead: bold koi against black waves still reads strong after years when outlined and saturated properly. Make sure the koi scales get variable saturation rather than a flat fill so highlights remain visible as color softens. A three to five session plan is typical for the level of background work this design needs. A common mistake is not planning how the tail and waves will terminate at the edge of a half sleeve if you later want a full sleeve. Respect the cultural origin by using motifs rather than copying specific religious iconography. For session wear, a loose short-sleeve button-up shirt makes access easy and keeps the area comfortable.
8. Biomechanical Cybernetic Arm Wrap
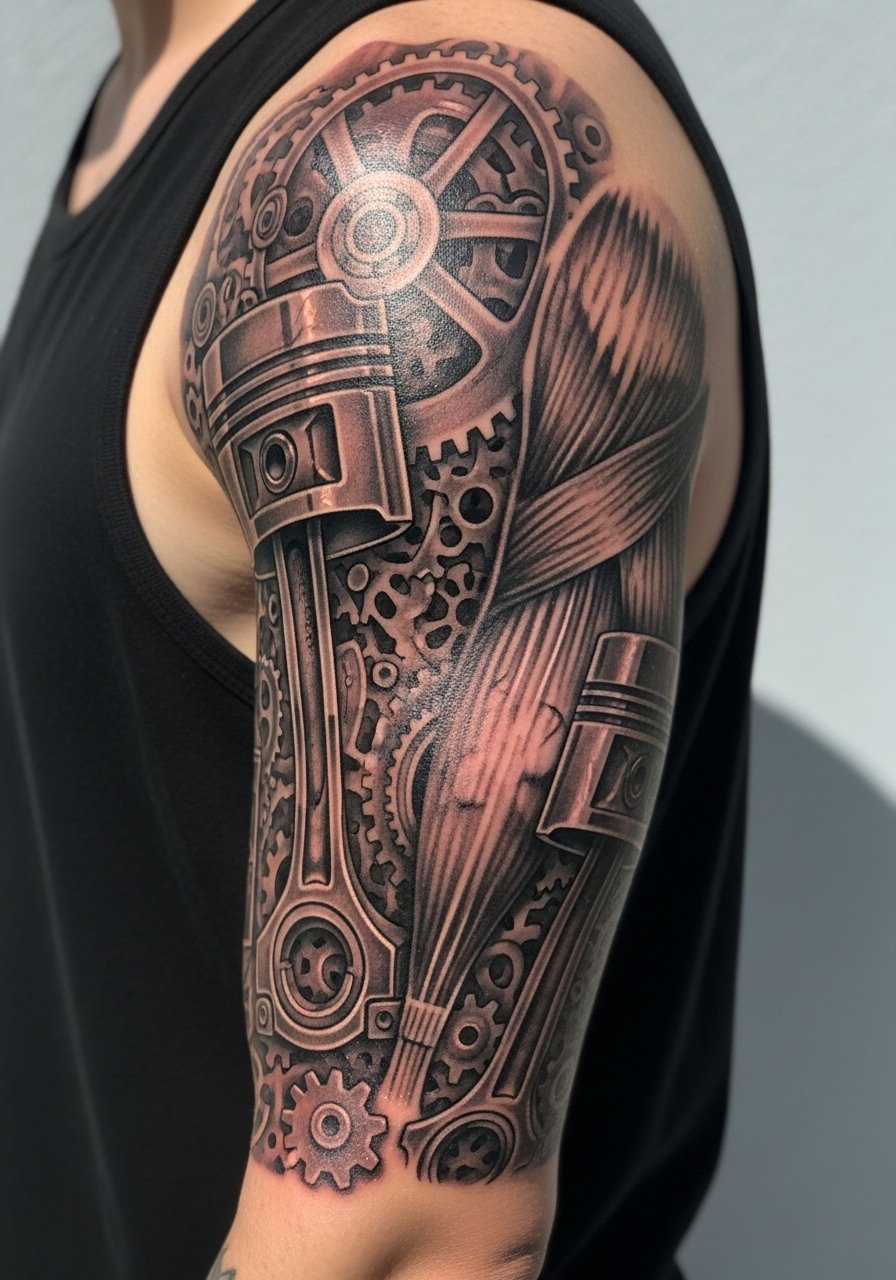
Consultation lead: tell the artist you want clear boundaries between mechanical plates and skin folds so the illusion keeps depth as the piece ages. The session feels long because of dense shading. Expect multiple sittings of three to four hours. Popular mistakes include overcomplicating negative gaps which later fill in visually with age. This is best for people who want a heavy black and grey presence that reads from a distance. For wardrobe during sessions wear a loose tank top or a button-down you can slide off cleanly.
9. Nature Landscape Scene on Upper Arm
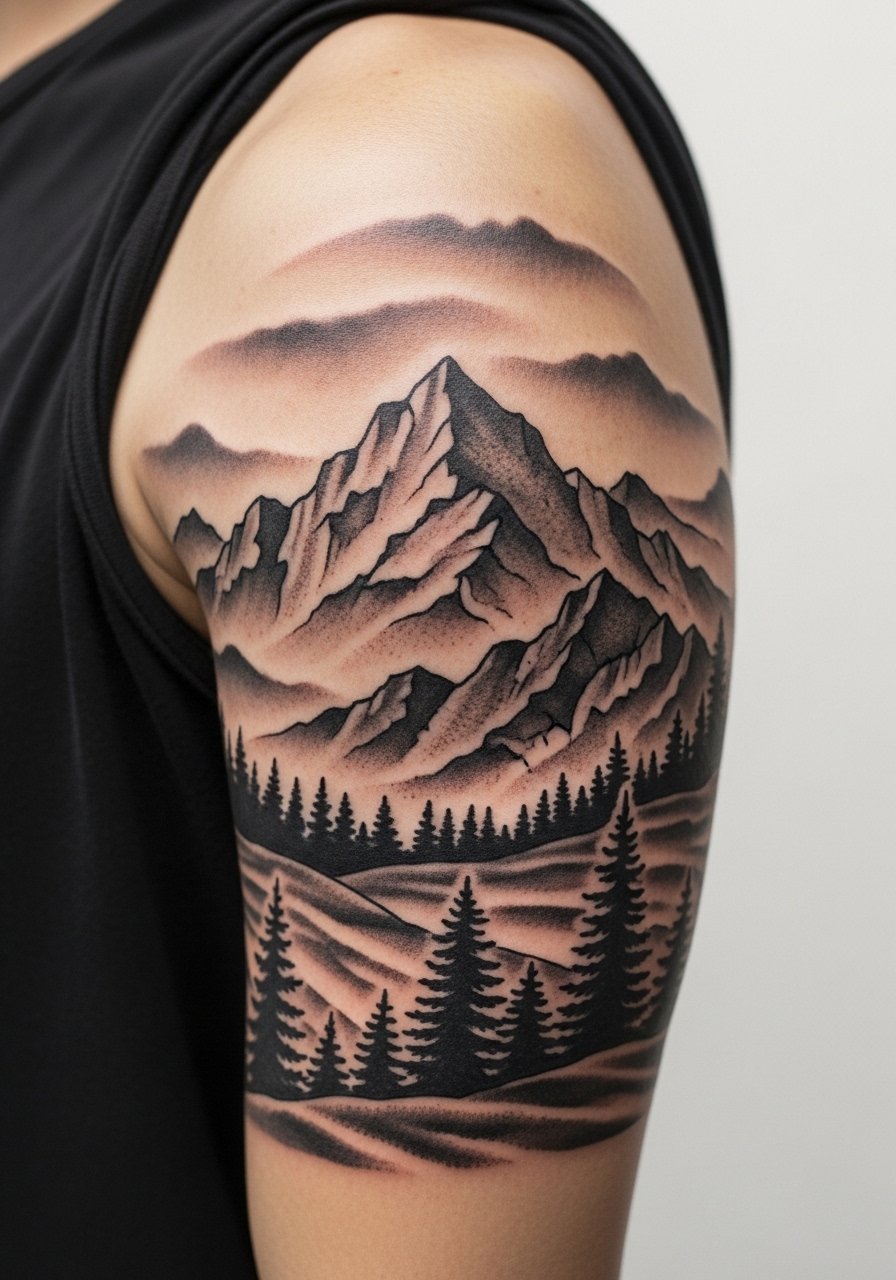
Aging and healing lead: landscapes lose their crisp mid-ground if everything is shaded at a similar tone. Ask for layered foreground contrast and pockets of negative space. For a convincing scene the artist should separate layers with different stipple or whip shading techniques. Three sessions spaced for healing time usually do the job. People often request full photoreal landscapes at very small scale which flattens quickly. This placement pairs well with casual daytime looks like a rolled sleeve flannel shirt for a subtle reveal.
10. Script Quote Integrated with Motifs Around the Arm
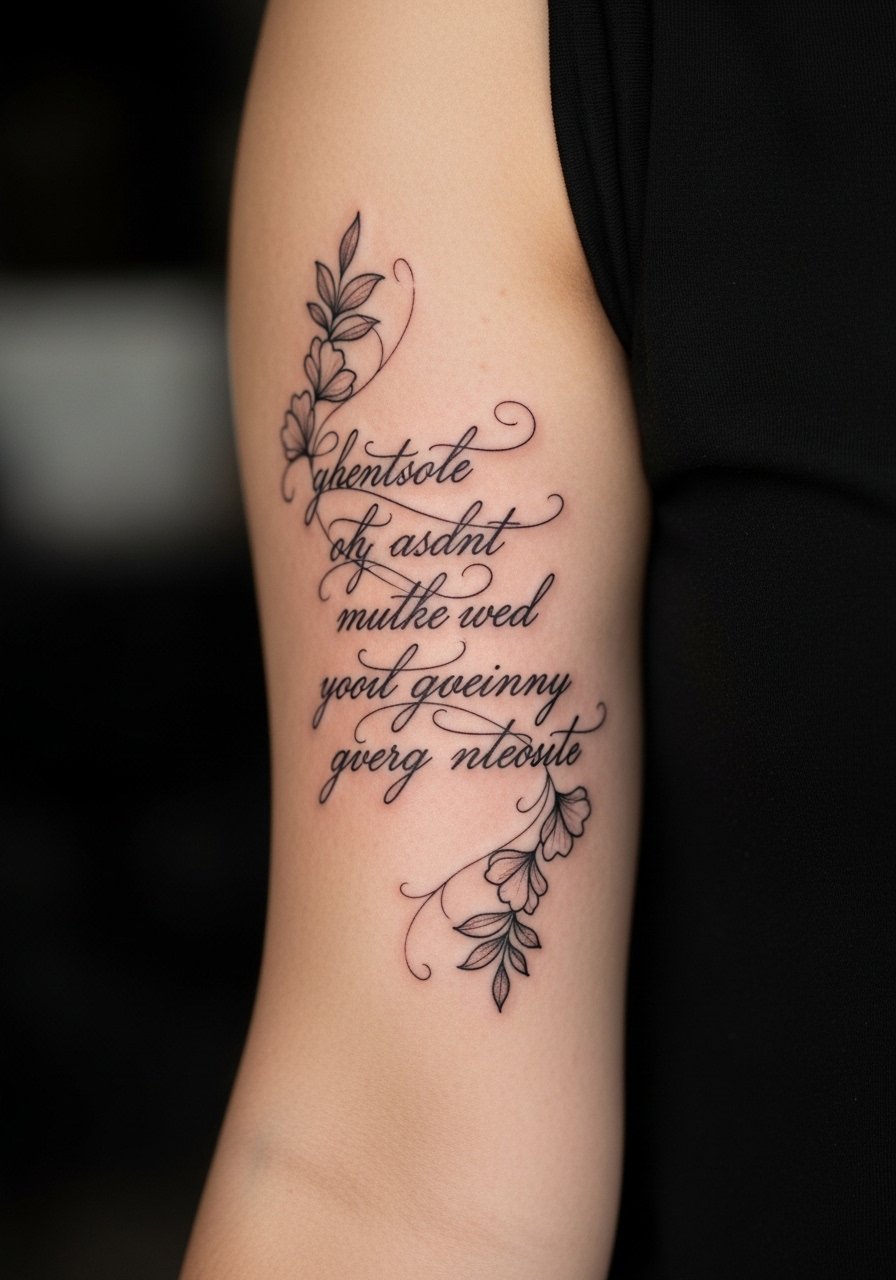
Mistake lead: the most common error for script is not matching line weight to skin movement, which makes letters blur in high-motion zones. For a half sleeve, curve the script to follow natural muscle lines and choose a slightly heavier hand for key letters. One to two sessions usually suffice for short quotes. If you want it to age well, choose spacing over flourish and ask for expanded kerning in tight curves. Pair the visible script with a thin chain pendant necklace to balance neckline attention when wearing low collars.
11. Animal Wolf Pack Silhouette from Shoulder to Elbow
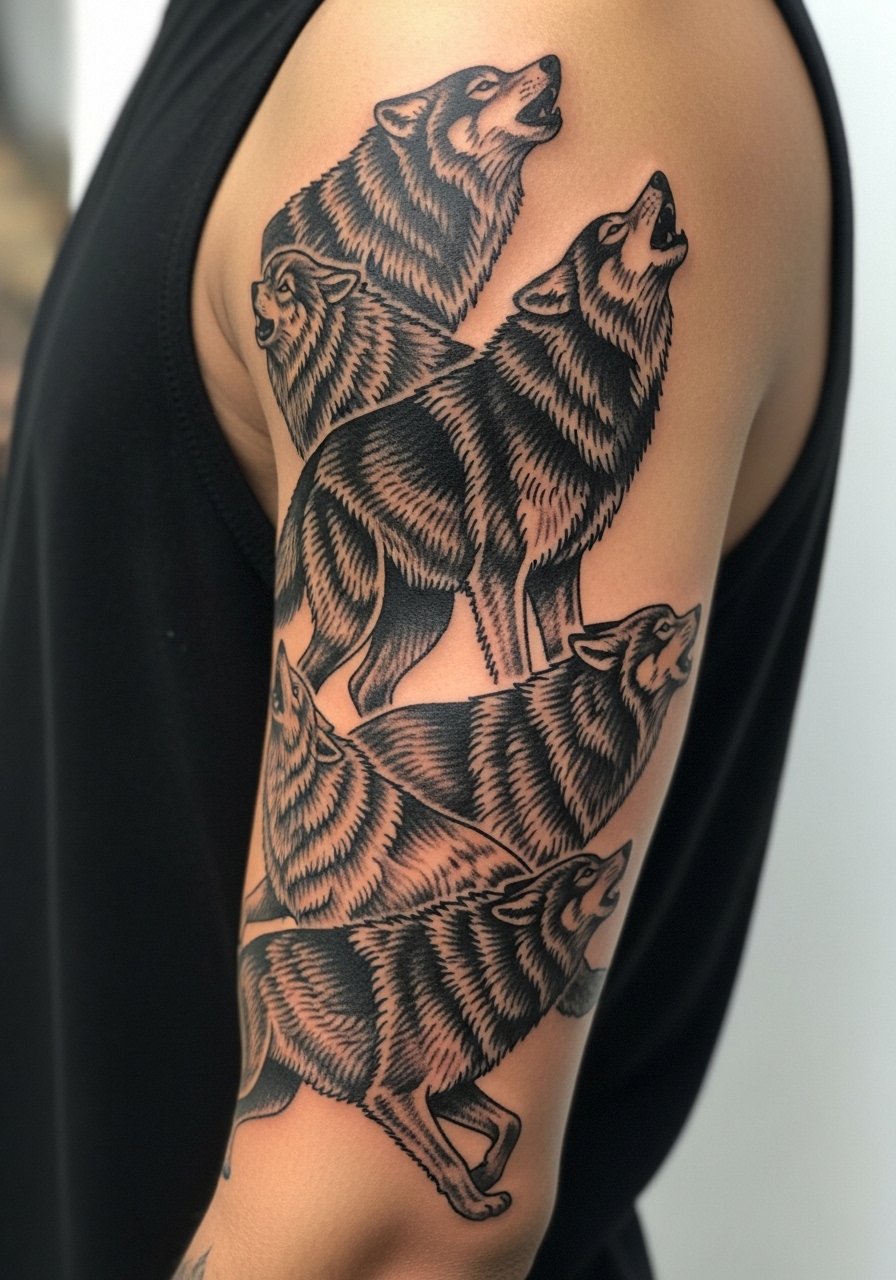
Personal observation: silhouette work ages best when artists plan solid negative breaks between animals so the shapes remain distinct as edges soften. Solid black fills are forgiving but need crisp edges to prevent feathering into the skin. Two to four sessions cover composition and fill. A frequent mistake is stacking silhouettes without adequate spacing, which makes the pack read as one blob later. For a casual reveal wear a fitted tank top or a short-sleeve tee rolled slightly.
12. Floral Rose Garden Cascade on Inner Forearm
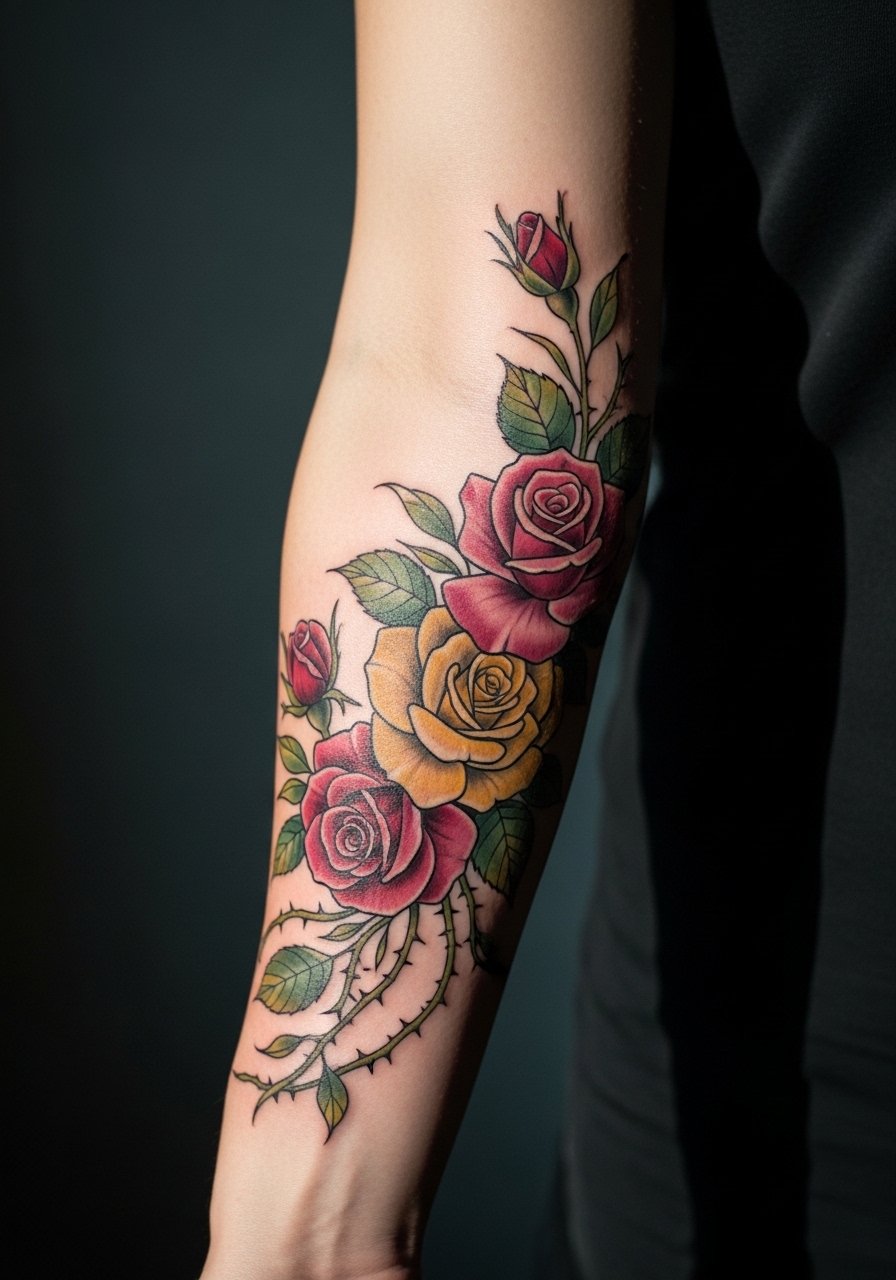
Aging lead: petals can lose edge definition over years when artists over-detail tiny veins. For longevity ask for strengthened petal edges and selective color saturation, so mid-tones can soften without losing form. One to two sessions may finish a compact cascade. The inner forearm heals differently than the outer forearm and sees more friction from clothing, so expect touch-ups sooner for delicate highlights. Showing this off works well with a thumb hole henley or rolled sleeves.
13. Dragon Mythical Coil Wrapping Upper Arm
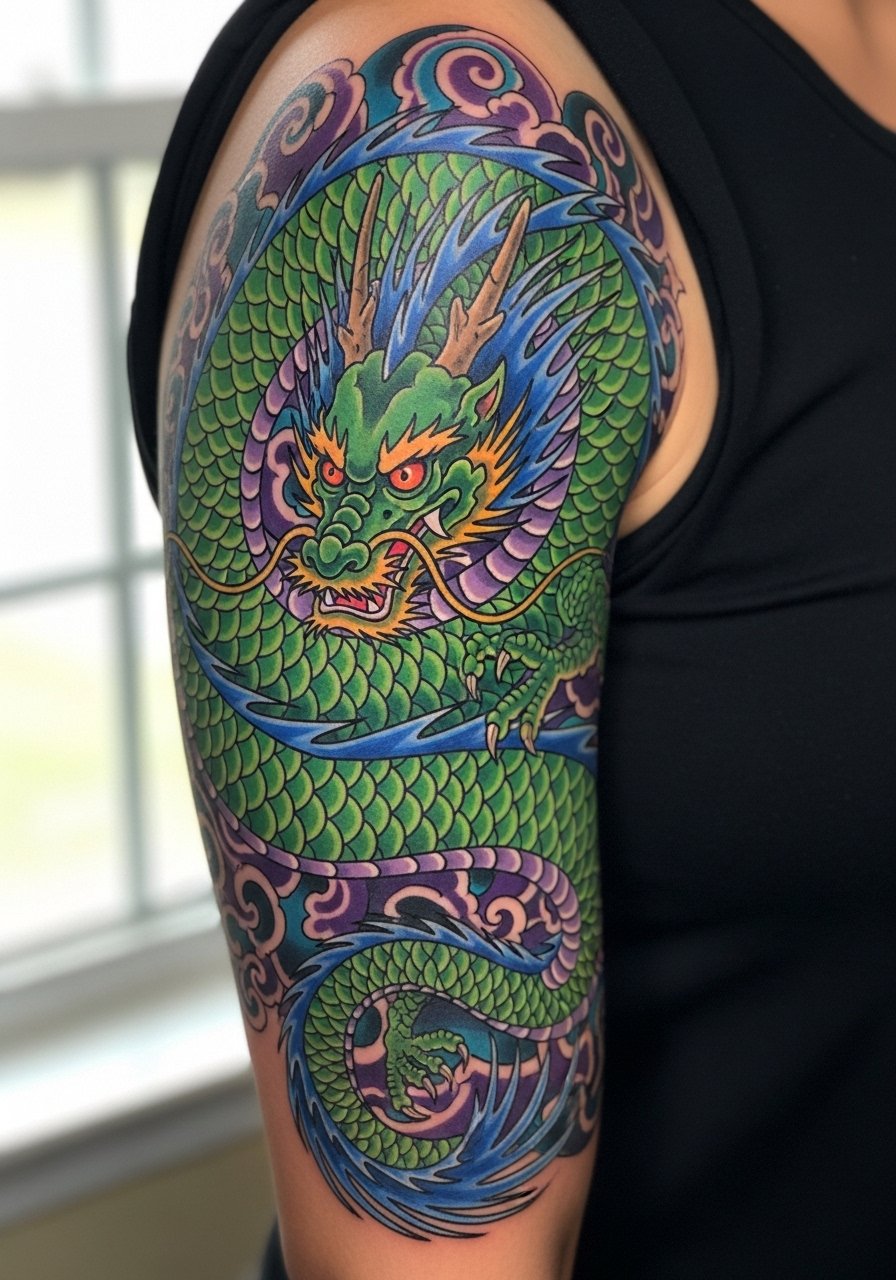
Visual impact lead: dragons demand contrast between scales and background winds so details survive stretching from movement. Use varying scale size along the coil to guide the eye and avoid repetitive patterning. Expect three to five sessions for full color and background. Common error: making every scale identical which flattens as skin shifts. This style can be extended to a full sleeve later if edges are planned as transition zones. For the session pick a loose short-sleeve button-up that gives clear access.
14. Micro-Realism Botanical on Inner Bicep
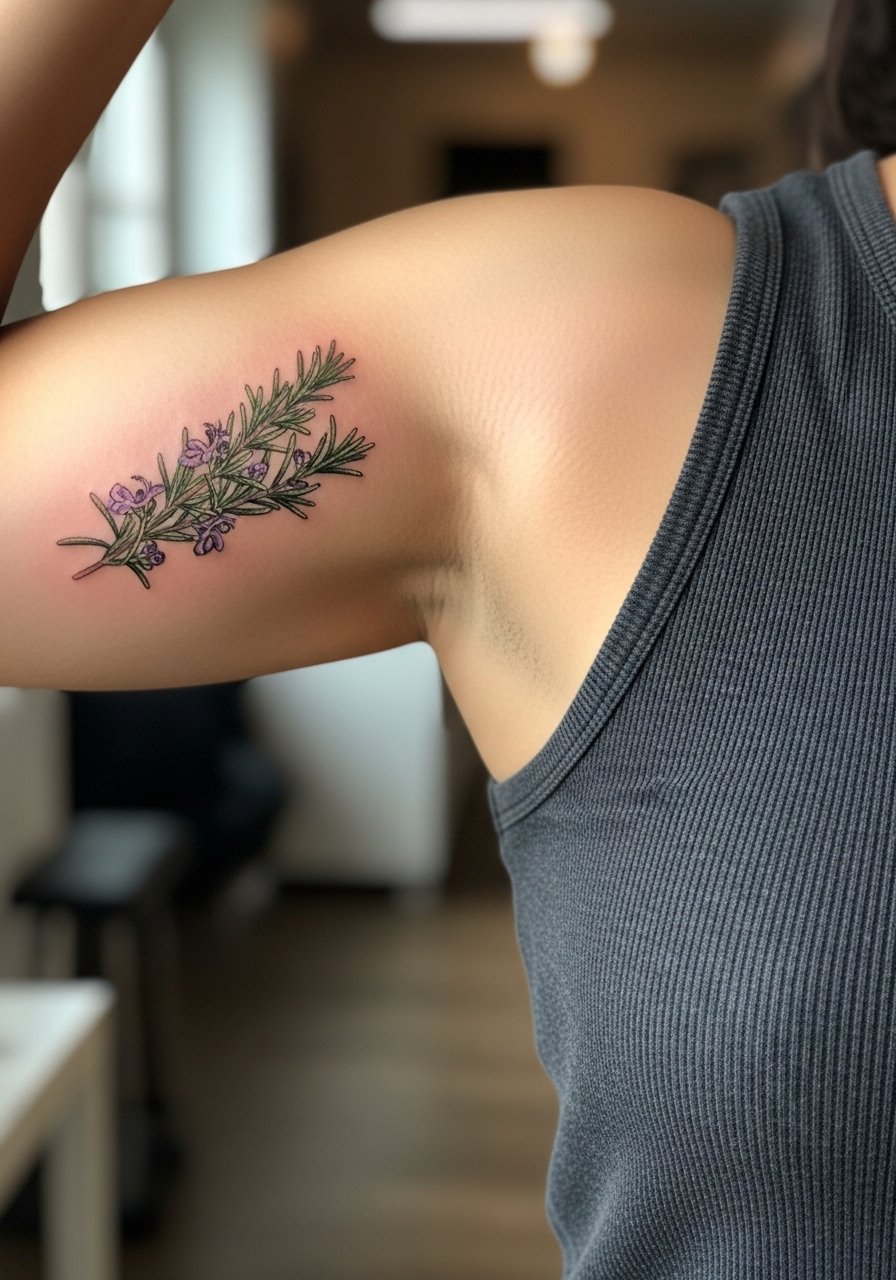
Pain warning lead: inner bicep work can be sensitive, and very fine micro-realism is at higher risk of blowout if the needle goes too deep. Ask for a conservative depth and talk about spacing in the initial consult. One to two hour sessions spaced a few weeks apart help the artist refine fine details without overworking the skin. The mistake here is requesting hyper-detail at a scale that cannot hold over time. For the appointment wear a tank top with arm raised slightly to give tight access without full exposure.
15. Geometric Optical Illusion Band on Shoulder Cap
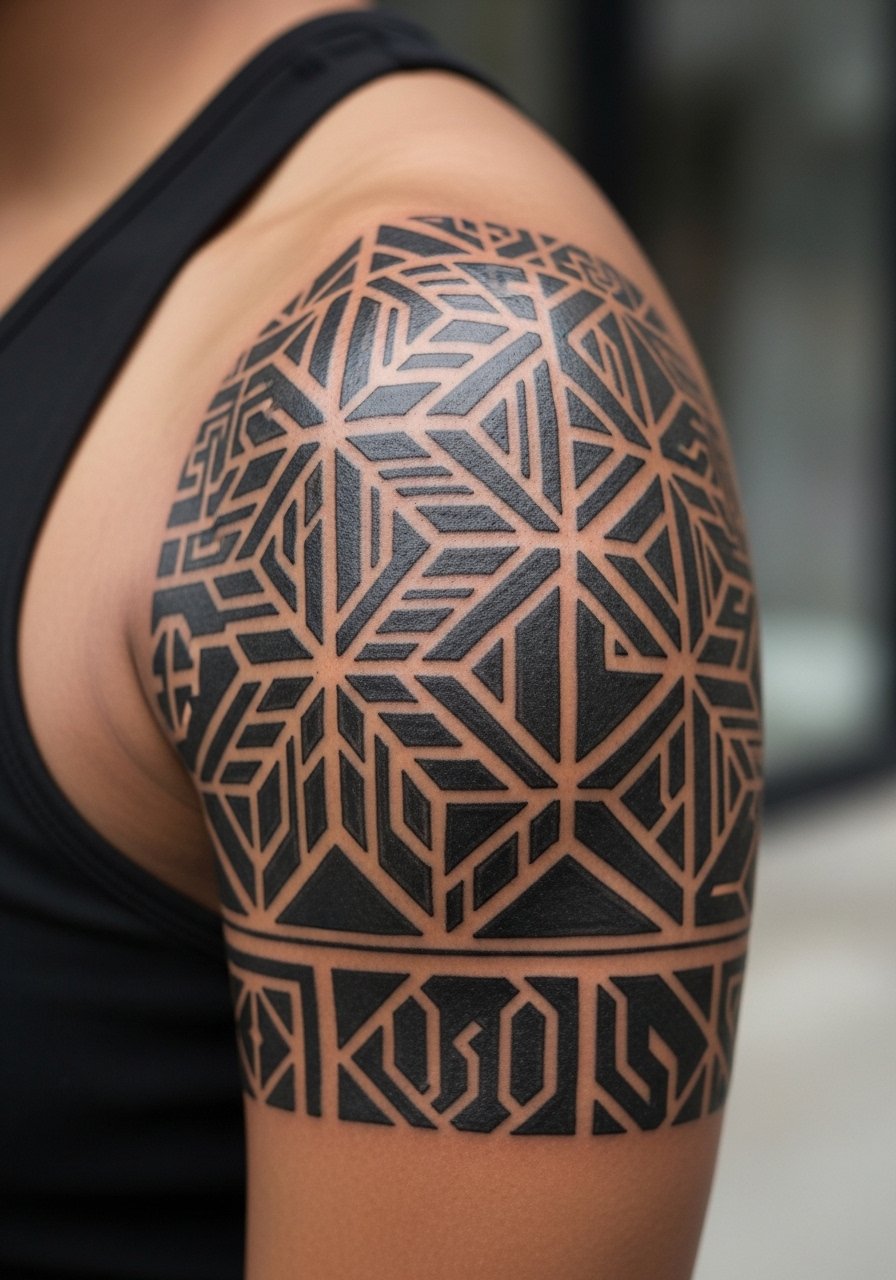
Mistake lead: optical patterns need breathing room. When elements are too dense they become a muddled grey as skin ages. Ask your artist to plan negative corridors through the pattern to preserve contrast. Two to three sessions allow for precision linework. Some artists argue tight optical on a curved shoulder distorts the intended effect. Try a small mockup before committing to the full wrap. For showing this off, a strapless tube top highlights symmetry and keeps the shoulder clean.
16. Dotwork Arm Band and Mandala Fusion
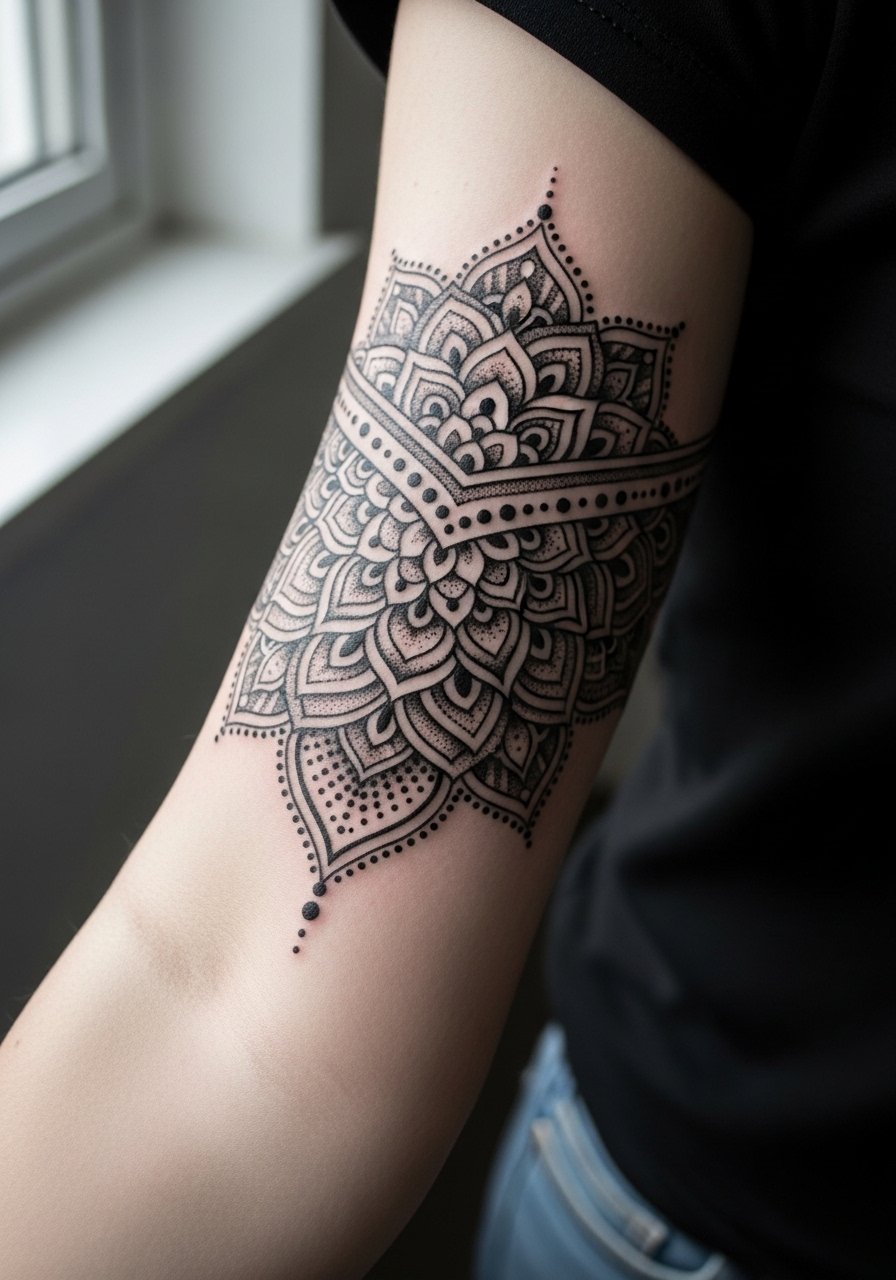
Consultation lead: fusion pieces need clear transition areas so the viewer sees the band separate from the mandala field. Ask for variable dot sizes as you move from band to center to create depth. Two sessions with breaks help the artist build density evenly. A common mistake is not testing how the band sits with muscle flex, which can warp symmetry. Wear a loose tank top that allows the mid-bicep to be accessible without rolling into the design.
17. Phoenix Rising Partial Sleeve with Flame Background
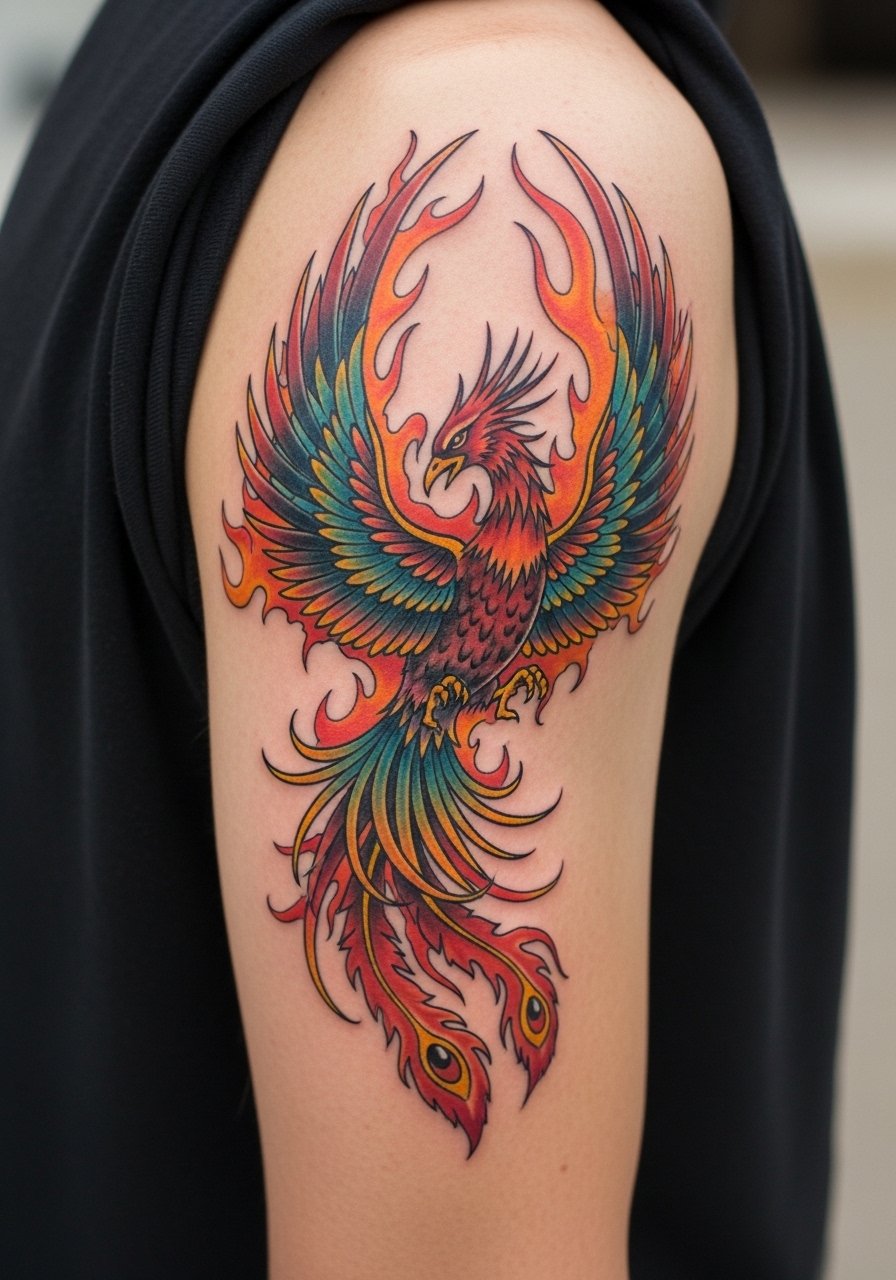
Visual impact lead: phoenix imagery survives time when artists use layered highlights and areas of negative space to imply feather groups rather than drawing every barb. Plan a clear focal point for the bird and lighter, looser background flames. Expect three to four sessions for color and background. The error people make is asking for full-scale texture across every feather which ages into muddle. For wardrobe, an open-collar shirt or wide-neck shirt pairs well for casual reveals.
18. Nautical Traditional Half Sleeve with Compass and Swallows
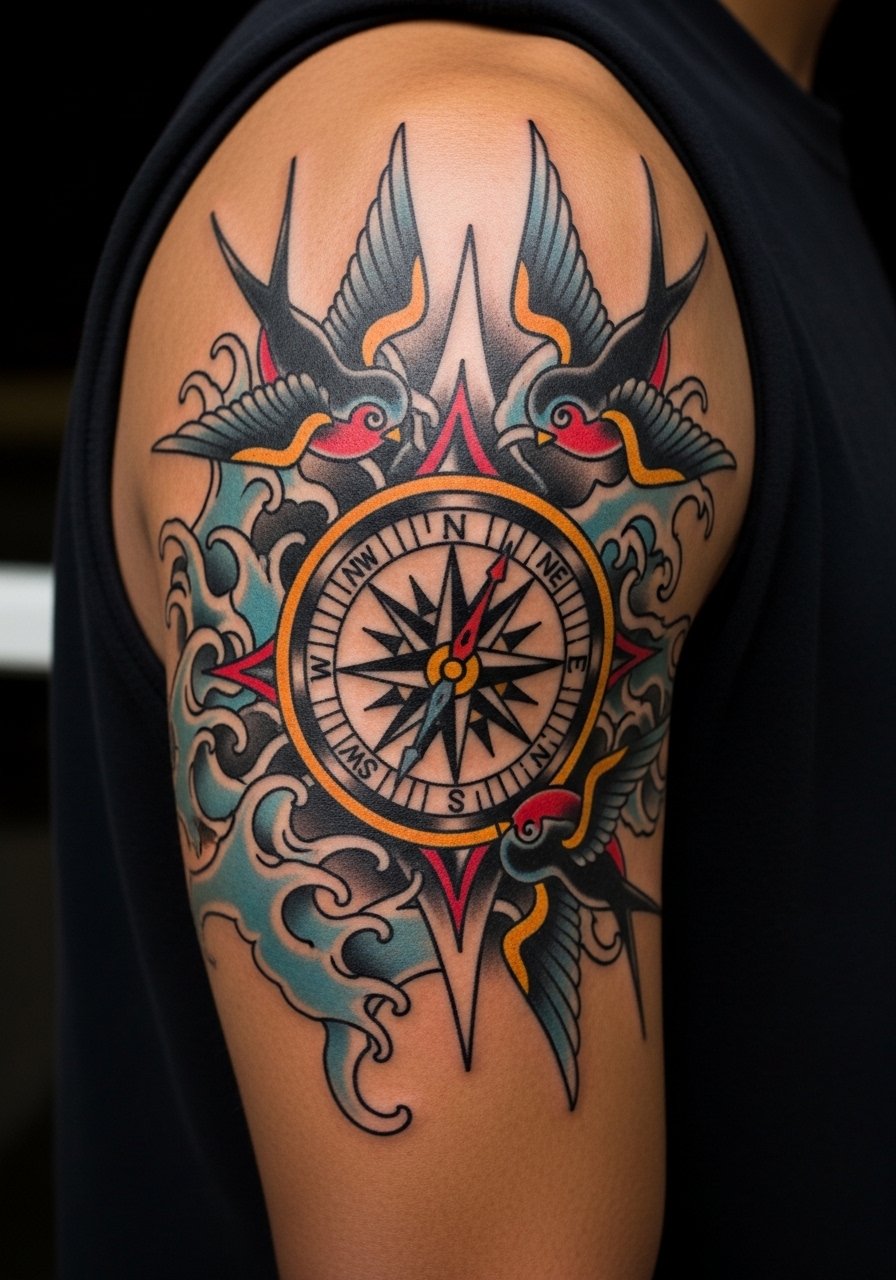
Personal observation: traditional motifs age predictably when artists use saturated fills and heavy outlines. That means less maintenance for classic sailors and map lovers. One to two sessions can cover the main motifs, with a short touch-up down the line for color saturation. Frequent mistakes include tiny script or small anchors that lose definition. For session comfort wear a button down shirt you can shift easily.
19. Minimalist Mountain Range with Negative Sky
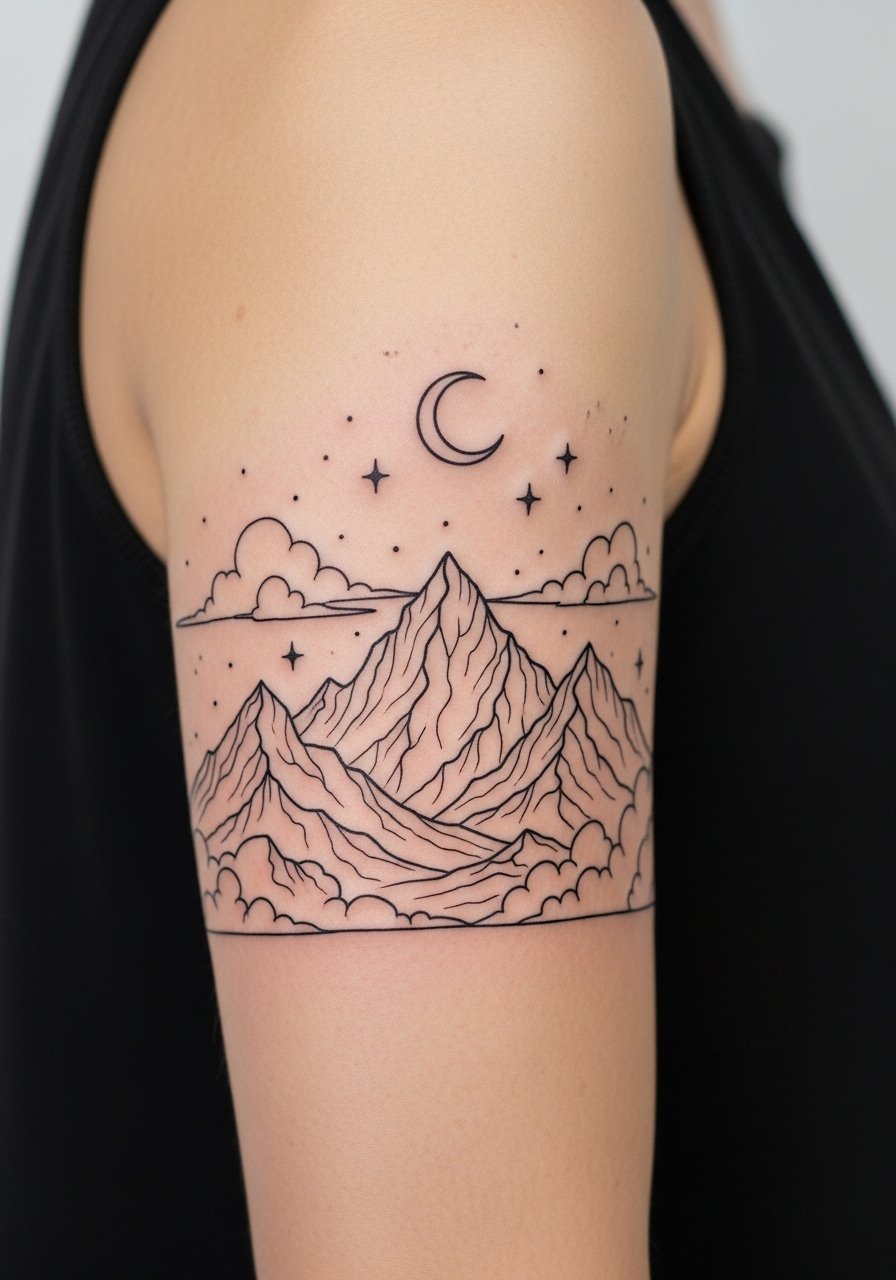
Visual impact lead: minimalist mountain ranges rely on crisp linework and generous negative sky. The mistake is cramming peaks into a narrow band. Ask the artist to emphasize the negative space above or between peaks so the composition reads for years. Pain is low on the outer arm and a single two-hour session often suffices. Pair the finished piece with neutral linen shirts to keep attention on the linework. Try a rolled sleeve flannel shirt for daytime styling.
20. Celtic Knotwork Half Sleeve Across Upper Arm
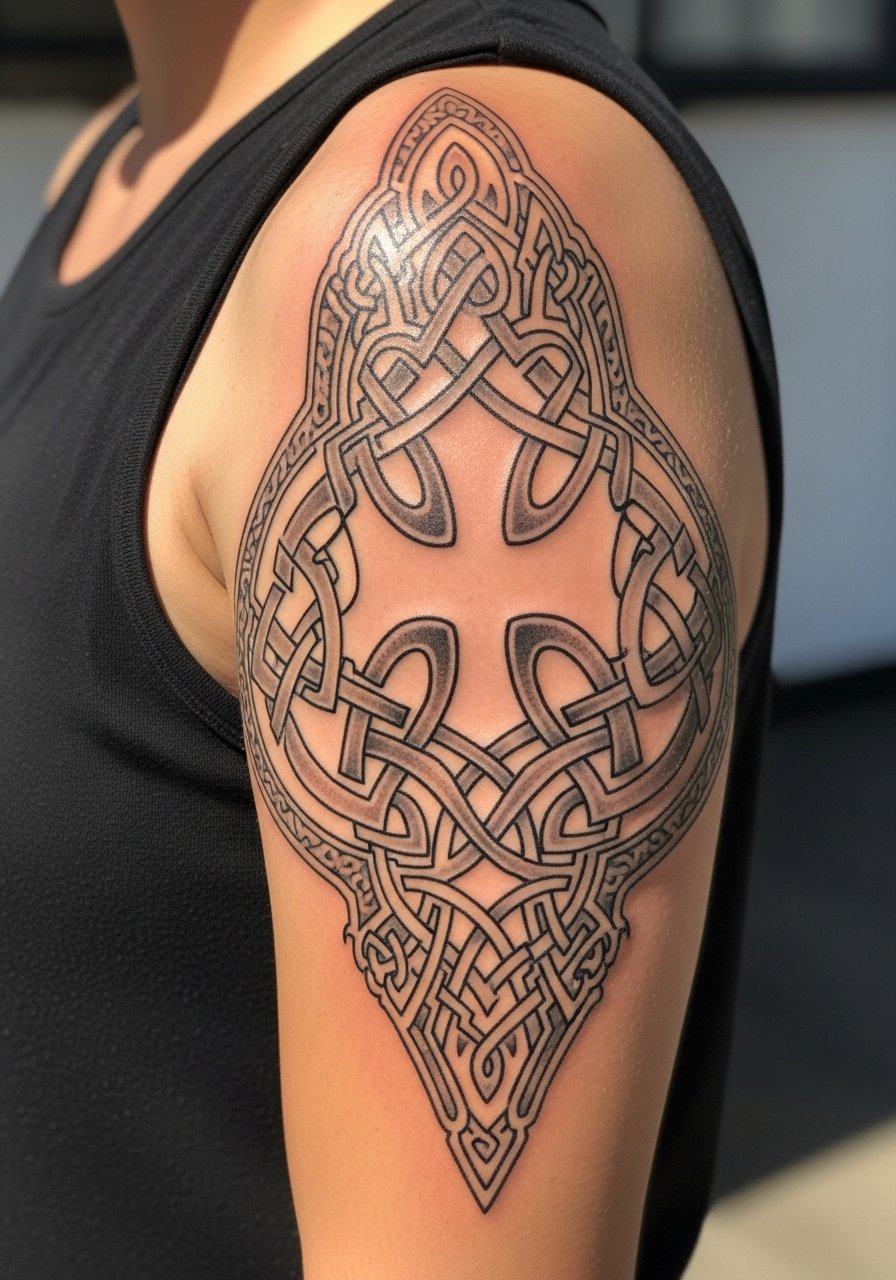
Mistake lead: knotwork needs consistent over-under rhythm and breathing room. If knots are too tight they become a dark mass as lines blur. When booking, ask the artist for a black-line mockup that you can view on the arm to check rhythm. Two to three sessions with steady spacing are ideal. For showing it off, a short sleeve button down keeps edges visible without overwhelming the pattern.
21. Skull with Roses and Negative Background
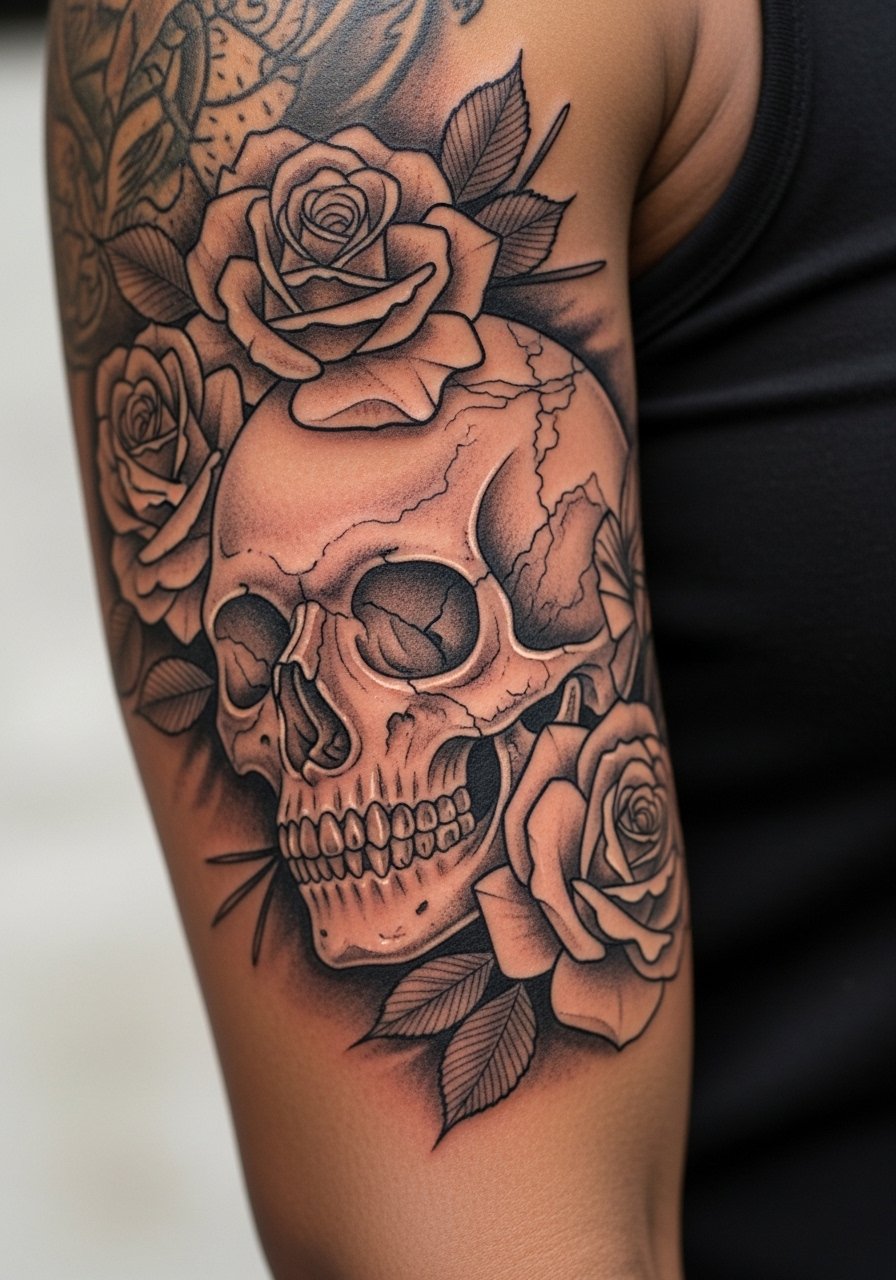
Aging lead: skulls and roses remain readable when artists separate the elements with negative space and use varied shading textures. A common mistake is blending the roses into the skull shading which reduces separation over time. Expect two to three sessions for balanced texture. For the session wear a loose tank top that is easy to move without rubbing the fresh lines.
22. Celestial Cluster Sleeve with Moon Phases
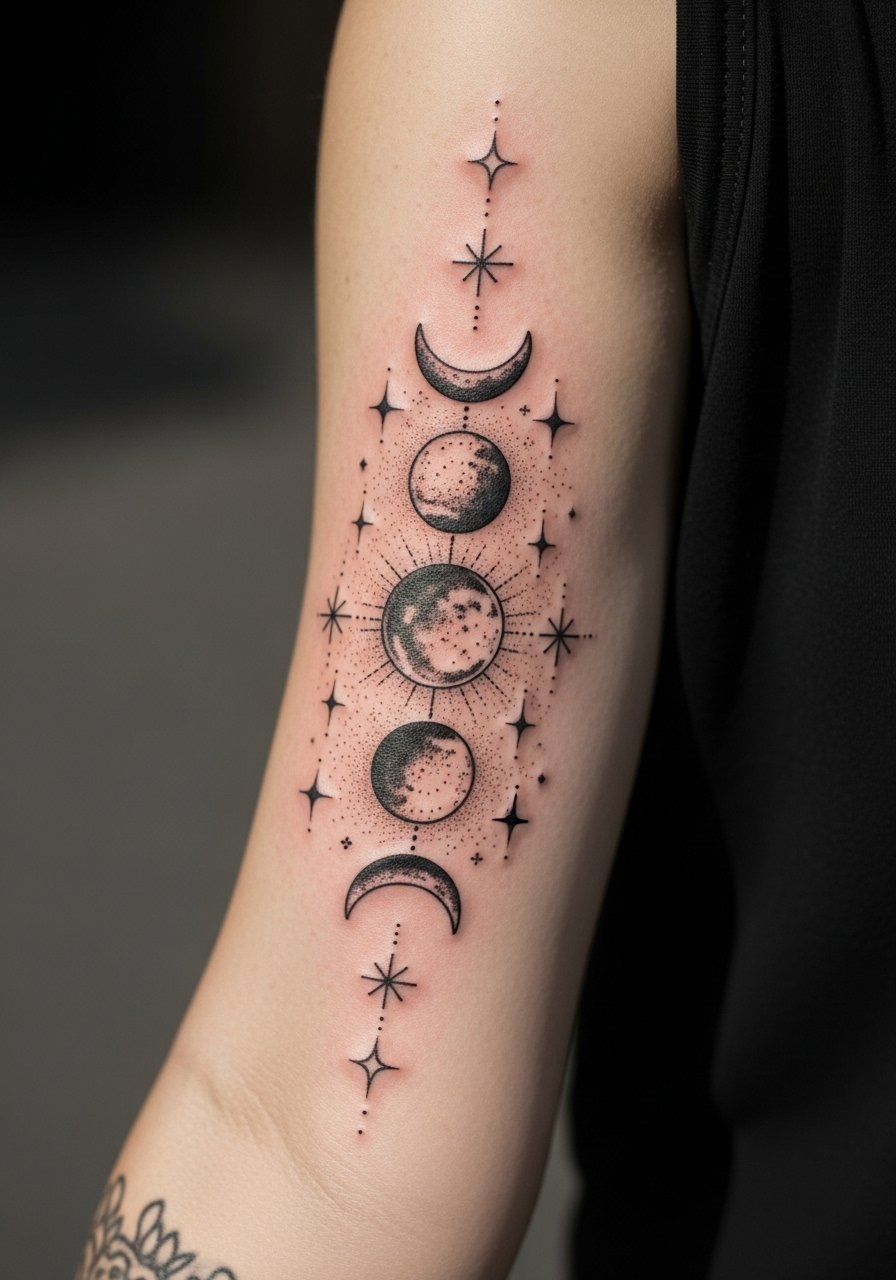
Consultation lead: moon phase sequences should follow arm curvature and muscle flow so phases stay aligned when the arm moves. Ask the artist to plan anchor points and to scale stars with varied dot sizes for depth. Two sessions usually cover layout and detail. The typical error is placing too many tiny stars, which blur into grey fields. A minimalist leather watch worn opposite the design balances wrist attention.
23. Map and Compass Half Sleeve with Vintage Ink Wash
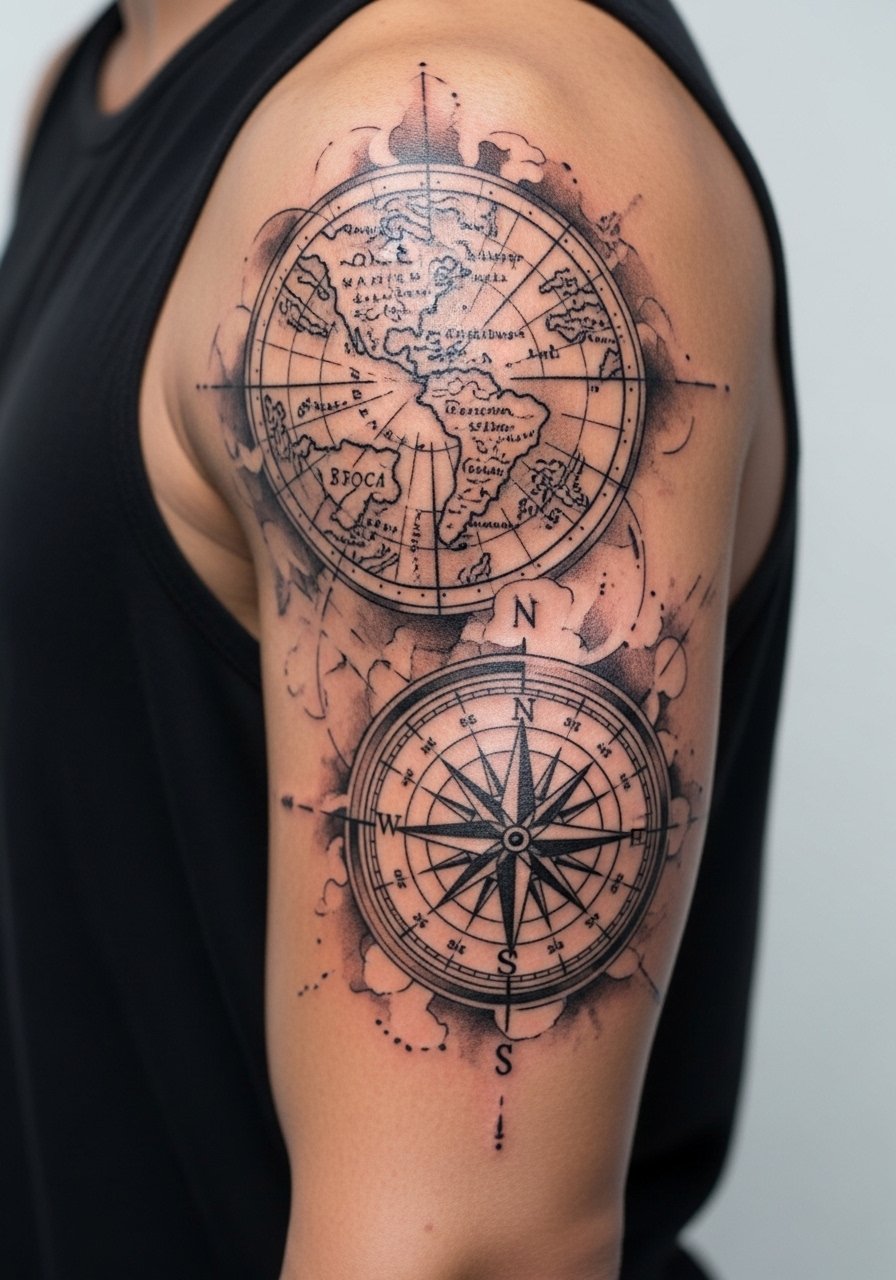
Personal observation: map motifs read like illustrations when artists treat the wash background lightly and reserve darker lines for symbols. The common mistake is saturating the wash which flattens small map details. Two sessions let the wash settle and allow for refinement. For showing off, open collars or a thin chain pendant necklace work well to balance neckline attention.
24. Art Nouveau Portrait with Floral Frame
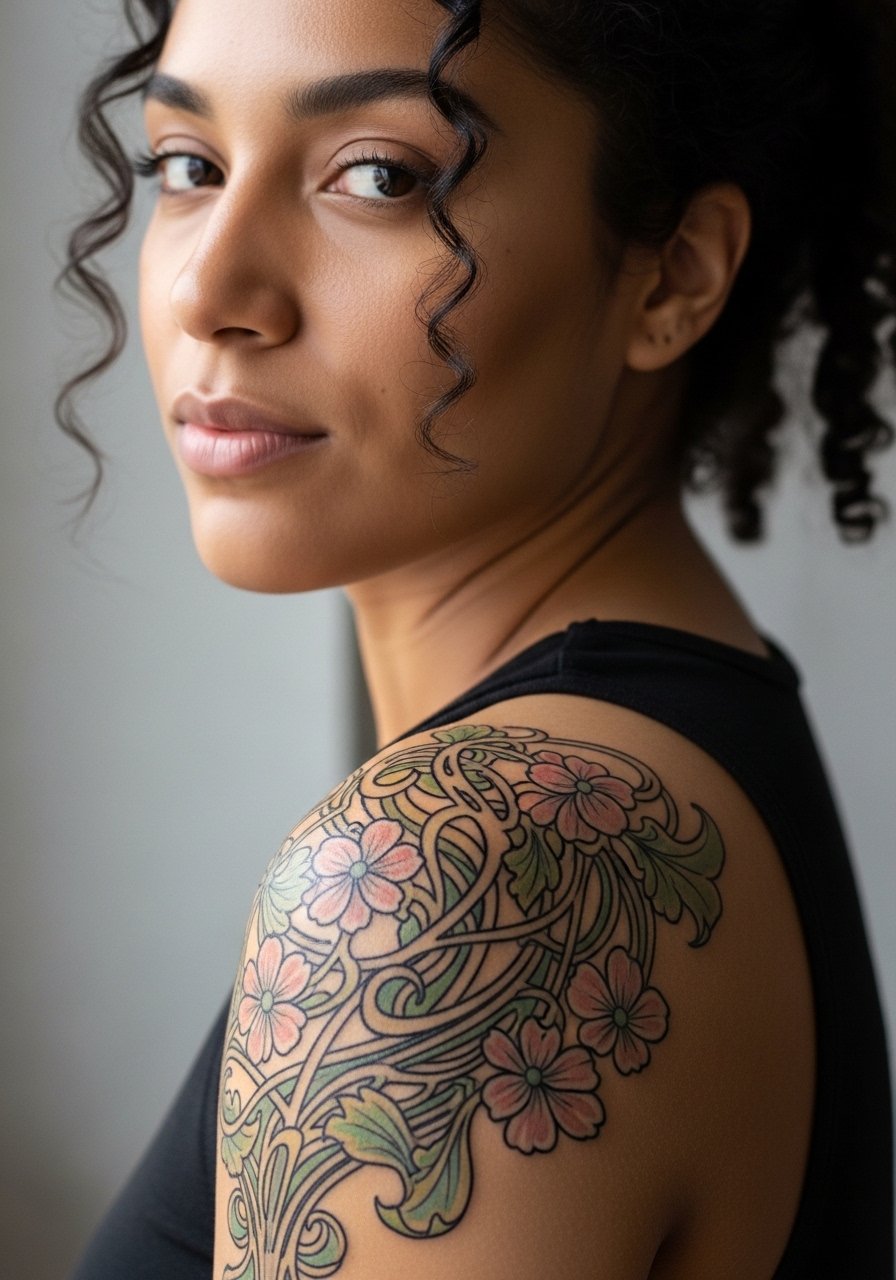
Visual impact lead: the flowing lines of Art Nouveau age better when the floral frame is spaced to avoid overcrowding the portrait. Ask for selective line weight variation in hair and petals so the piece keeps its hierarchy as it ages. Expect three sessions for color and fine detail. A common error is wanting every curl rendered, which makes the image busy at smaller scales. A fitted tank top shows the piece for special occasions.
25. Stippled Portrait with High Contrast Shadows
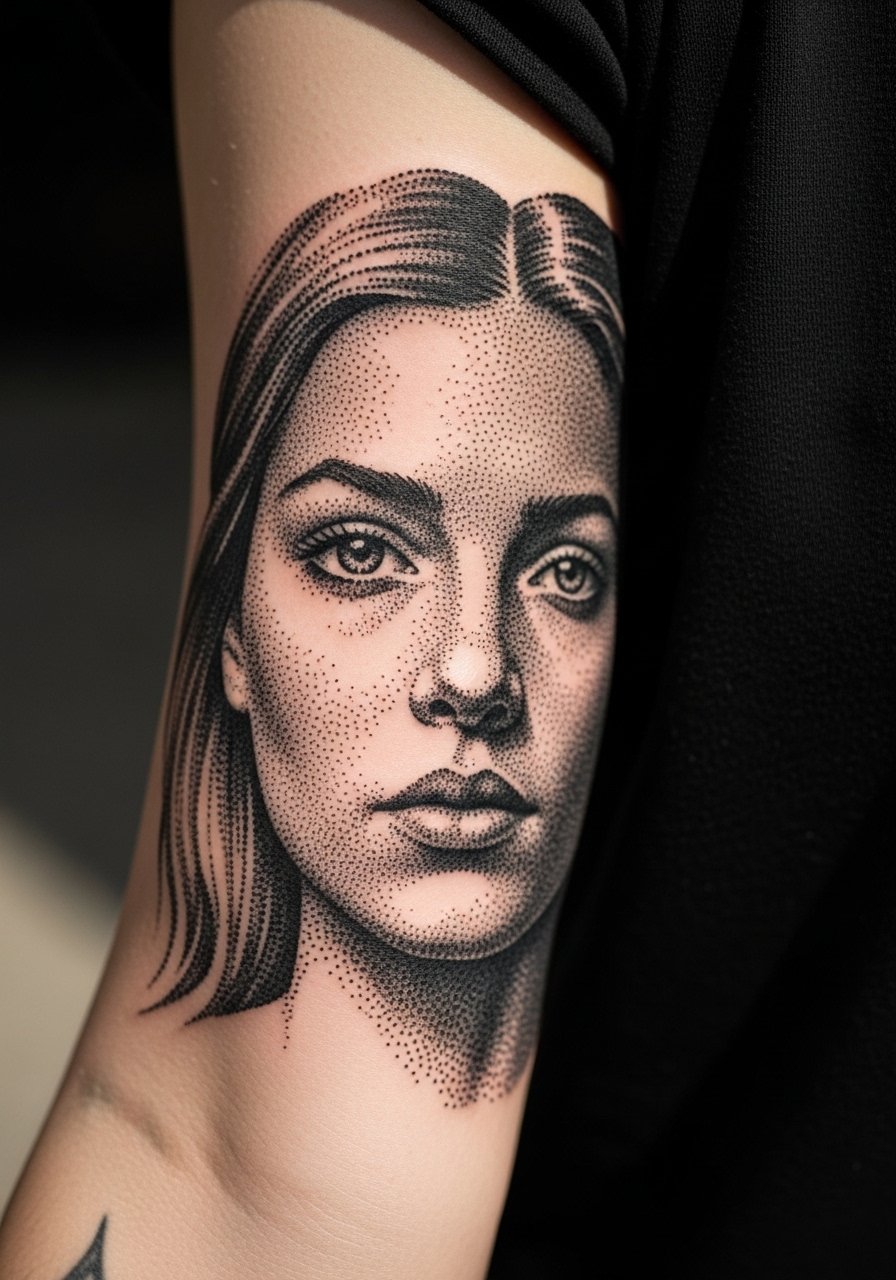
Consultation lead: stippled portraits need agreement on the tonal range before the needle touches skin. Too many mid-tones make features muddy as the dots merge. Expect several short sessions to build density gradually and allow the skin to recover. The mistake is pushing for an immediate heavy fill in one sitting. For session wear something easy like a short sleeve button down so the artist can access the entire wrap.
26. Compass Rose and Nautical Map Band
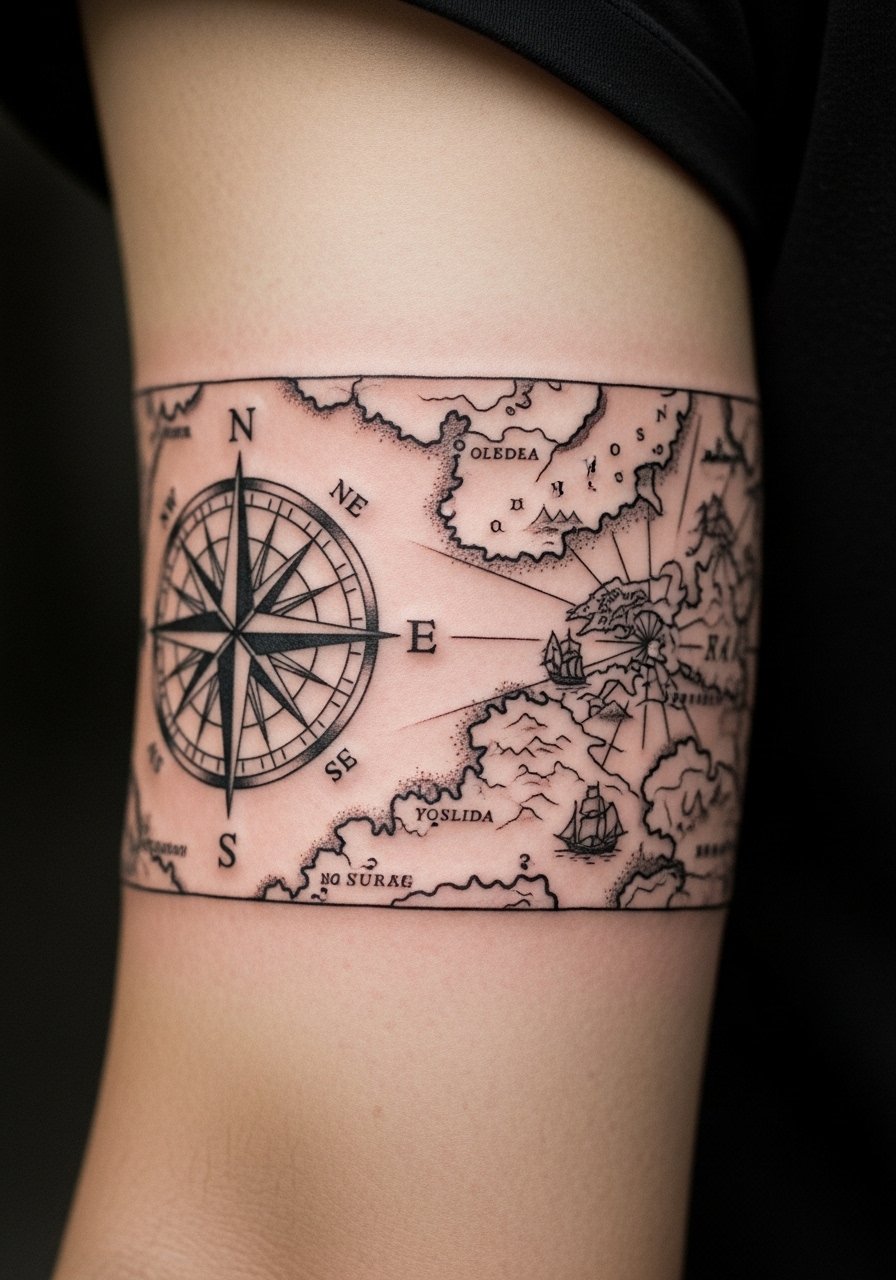
Mistake lead: bands around the arm need careful alignment so the compass does not look skewed when muscles flex. Ask for a small mockup taped around the arm so you can check placement. One to two sessions will do if the design is tight. People sometimes pick overly intricate map lines which blur with time. For showing it off, a rolled sleeve flannel shirt gives casual visibility.
27. Mythic Siren and Wave Composition for Upper Arm
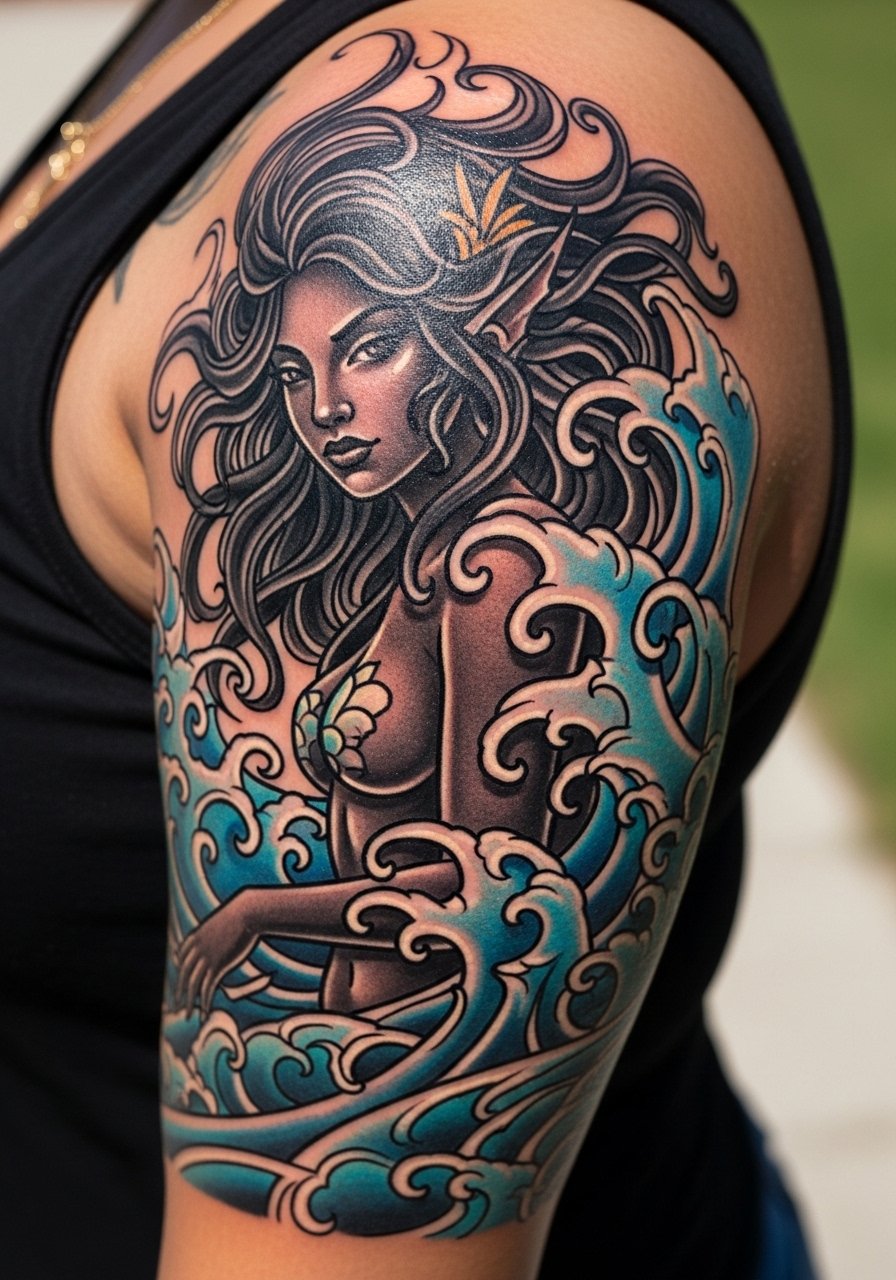
Personal observation: figurative mythic pieces work best when the figure gets a clear focal frame and the background waves support rather than compete. A three-session layout helps refine facial focal points and hair movement. The common error is crowding hair with background texture which steals attention. Consider how you will show this piece with necklines and sleeves. Pair it for evenings with an off shoulder blouse that echoes the flowing lines.
Frequently Asked Questions
Q: Will fine line vines on the inner arm need touch-ups more often than bold traditional work?
A: Yes, fine line on softer skin tends to lose crisp edges sooner than heavy traditional saturation. It depends on placement and sun exposure. Plan for a potential touch-up around year two to three, and ask your artist about slightly stronger anchor nodes so the lines have more resilience.
Q: Do watercolor-style half sleeves require different session planning than neo-traditional color work?
A: They do. Watercolor effects often need shorter, more deliberate passes and space between sessions so washes settle naturally. Neo-traditional color tends to be layered with saturation that can handle longer fills. Tell your artist you prefer staged sessions for watercolor to judge how washes settle.
Q: Why do geometric mandalas sometimes blur on ribcage placements more than on forearms?
A: Ribcage skin shifts a lot with breathing and weight changes, which stresses tight linework. One camp of artists avoids extremely dense mandalas on ribs. The other camp says that with proper spacing and needle depth, mandalas can hold up. Check the artist's ribcage portfolio and ask how they space concentric rings.
Q: How should I plan a half sleeve if I might extend to a full sleeve later?
A: Design the edges as transition zones, not hard stops. Ask your artist to leave negative corridors or soft fades where new elements can anchor. That planning saves future composition headaches and keeps future sessions flexible.
Q: What should I wear to a shoulder-cap mandala session to make the appointment easier?
A: Wear a button-down or zip-up hoodie you can pull aside easily. For showing the healed work, a strapless tube top highlights the shoulder symmetry without distracting fabric lines.
