
Fine line portraits and boldly shaded neo-traditional pieces keep stealing the feed, but what lasts is less about trend and more about spacing, placement, and how the design handles motion. If you want a Tony Montana-inspired piece that still reads sharp after a few years, pick a scale and placement that give the linework room to breathe. The ideas below show options that photograph well fresh and calm down into tidy healed pieces.
1. Micro-Realism Tony Portrait on Inner Forearm
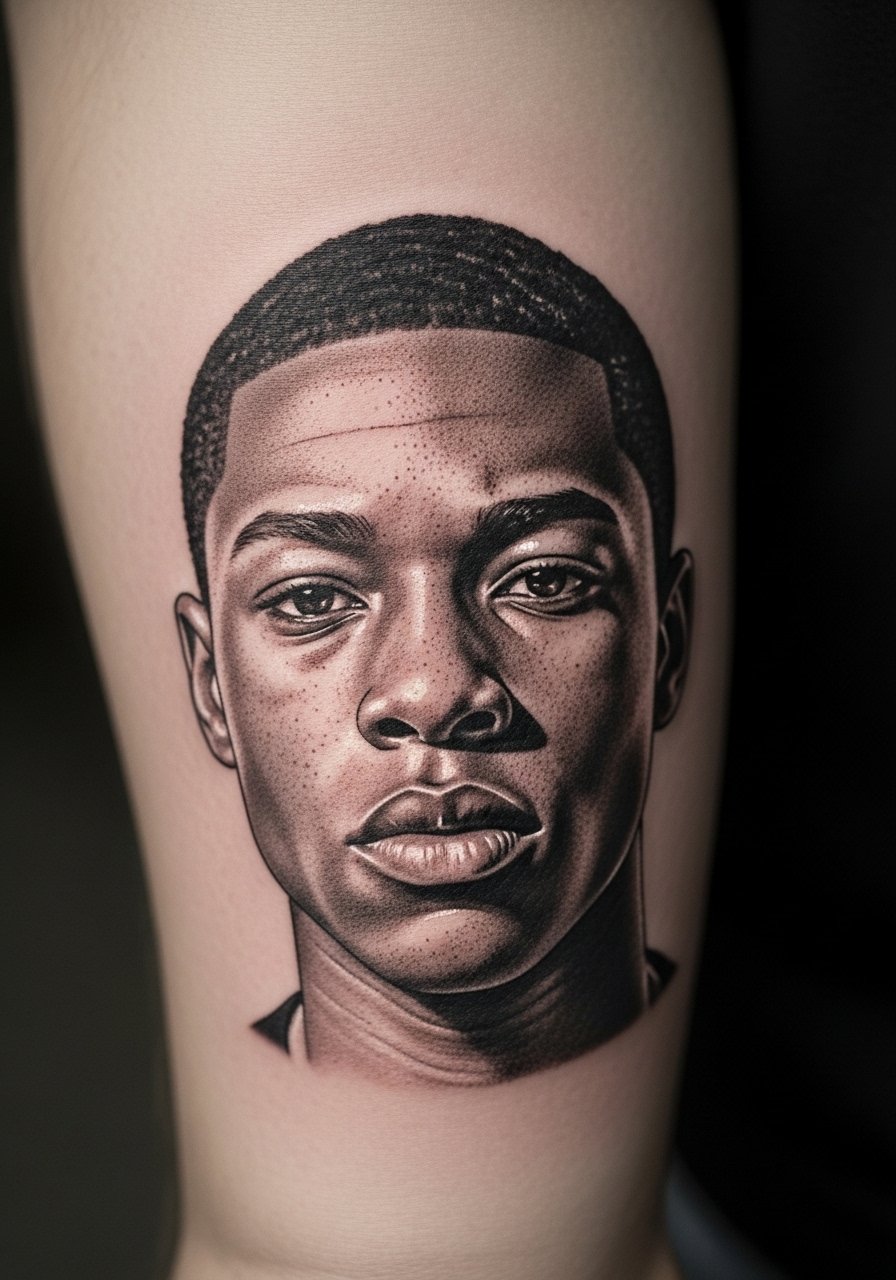
I recommend micro-realism on the inner forearm when you want a readable portrait without a full sleeve. Tell your artist you want slightly larger pupils and softer stipple shading around the jaw so the face keeps contrast as it heals. A common mistake is asking for the tiniest possible portrait, which blurs into an indistinct patch by year three. Expect a medium session time and a moderate pain level. For showing it off, roll up a linen short-sleeve shirt to keep the forearm visible without looking overdone.
2. Scripted Quote Under the Collarbone
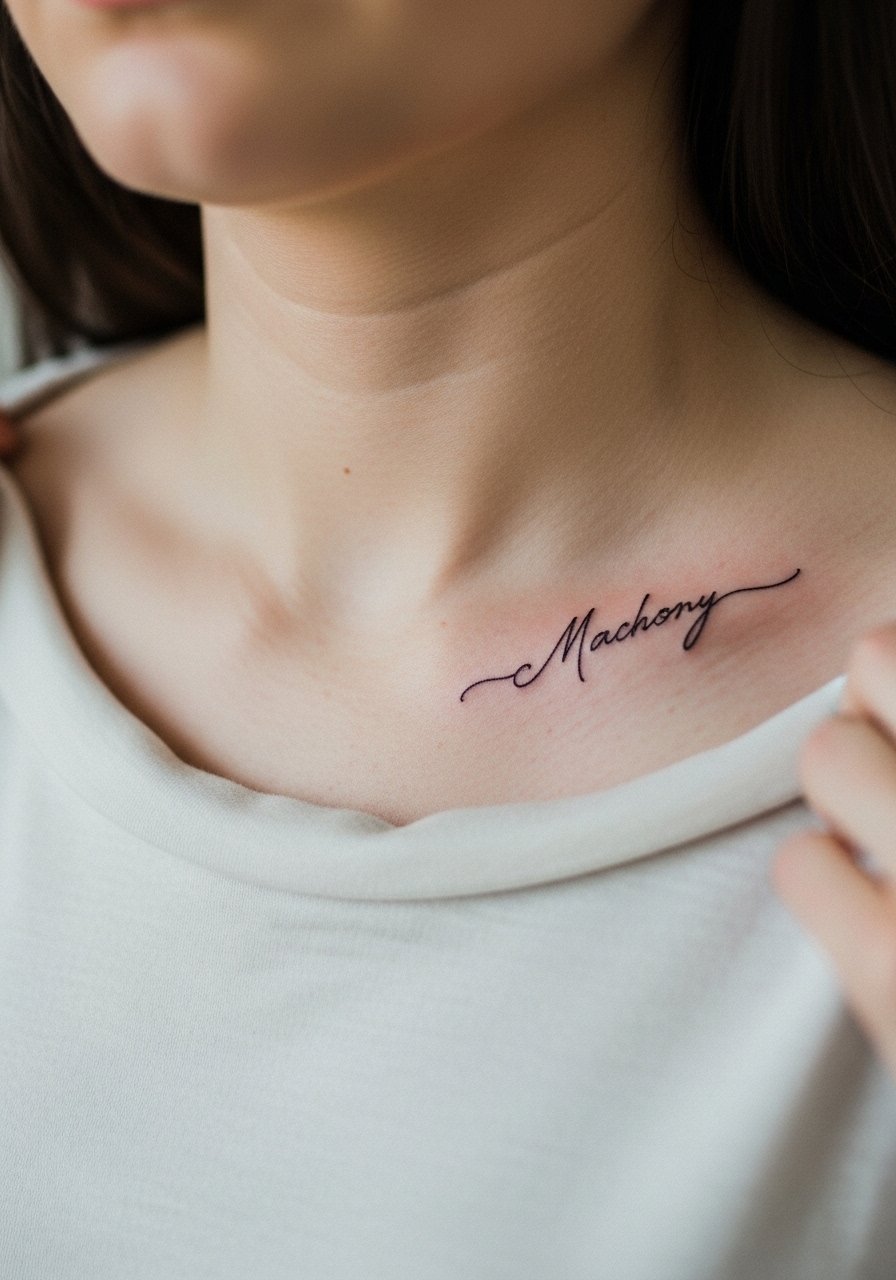
A tight, elegant script below the collarbone pairs well with a smaller portrait or a cigar motif above. Ask for a slightly bolder entrance stroke on letters that sit near the sternum so the script does not thin out with time. The collarbone area can feel like a 6 out of 10 on pain because of bone proximity, but sessions are short. Common mistakes include asking for ultra-fine hairlines sitting over moving skin, which wash out. For nights out, a thin chain pendant necklace frames the script without crowding it.
3. Neo-Traditional Cigar and Smoke on Outer Bicep
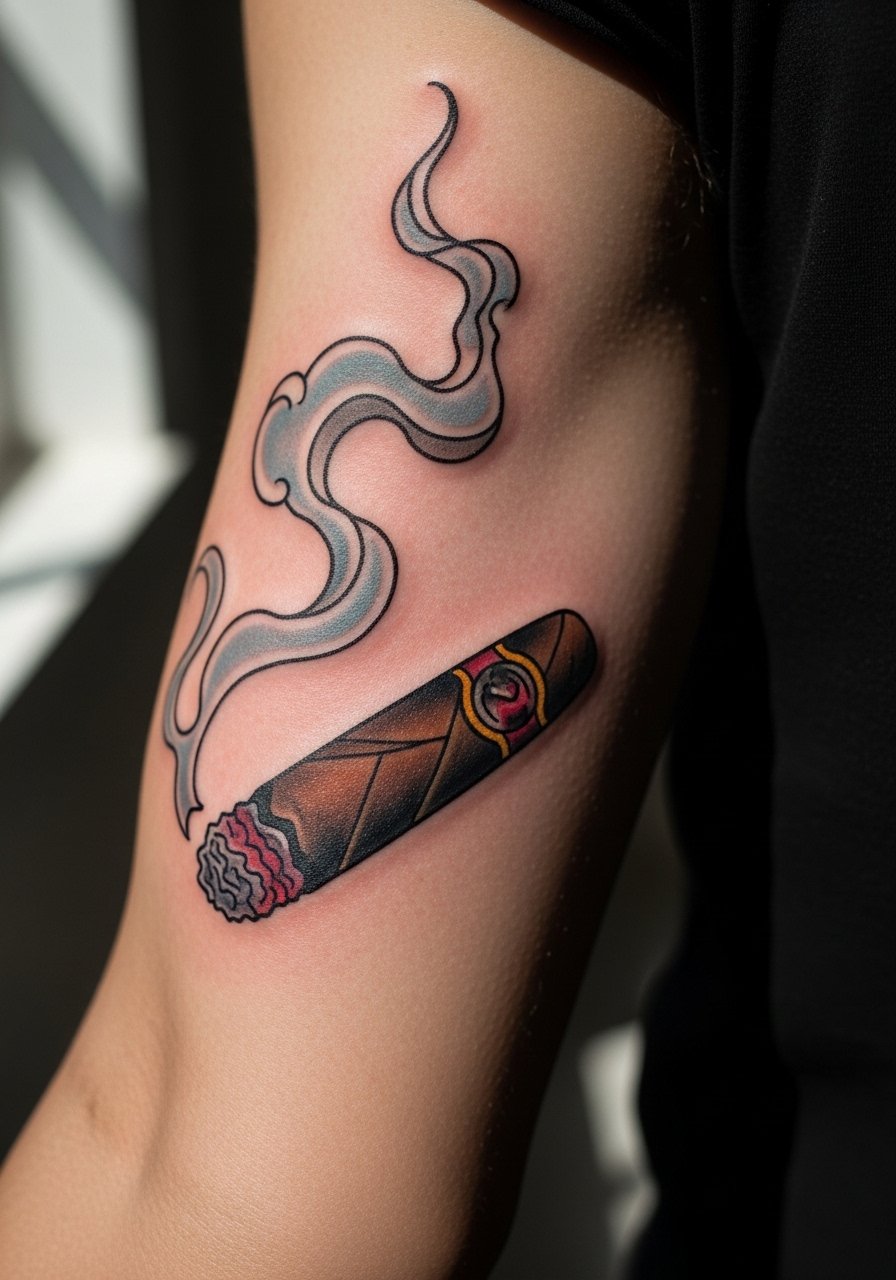
Bold outlines and saturated color play to neo-traditional strengths and age into a confident silhouette. Ask for heavier outlines around the cigar and lighter stipple shading for the smoke so the negative space reads at arm distance. Outer bicep sessions feel easier than inner bicep work and usually book in under two hours. A mistake is packing too much tiny detail into the smoke, which merges over time. Wear a loose tank top to the session so the artist has full access while you stay comfortable.
4. Small Chest Portrait with Subtle Shading
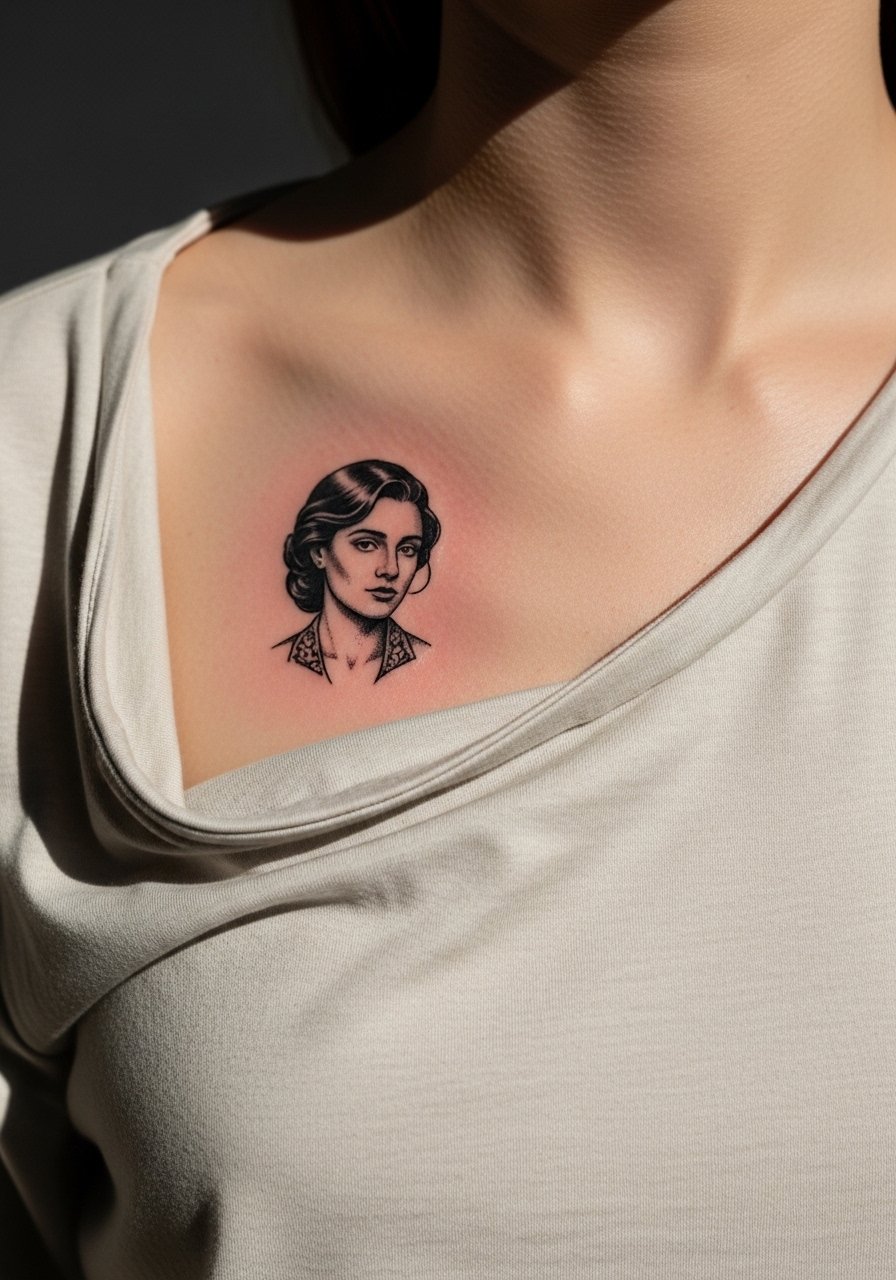
A compact chest portrait reads intimate and personal when placed just above the heart. For longevity, space the facial features slightly larger than you think you need and request soft whip shading for midtones. Chest skin moves with breathing, so one camp of artists warns that fine detail can blur there. The other camp says correct needle depth and spacing keep it stable. Ask your artist which approach they prefer. Session pain ranges from moderate to high, and plan for a short touch-up window around year two.
5. Ribcage Full-Figure Tony Silhouette
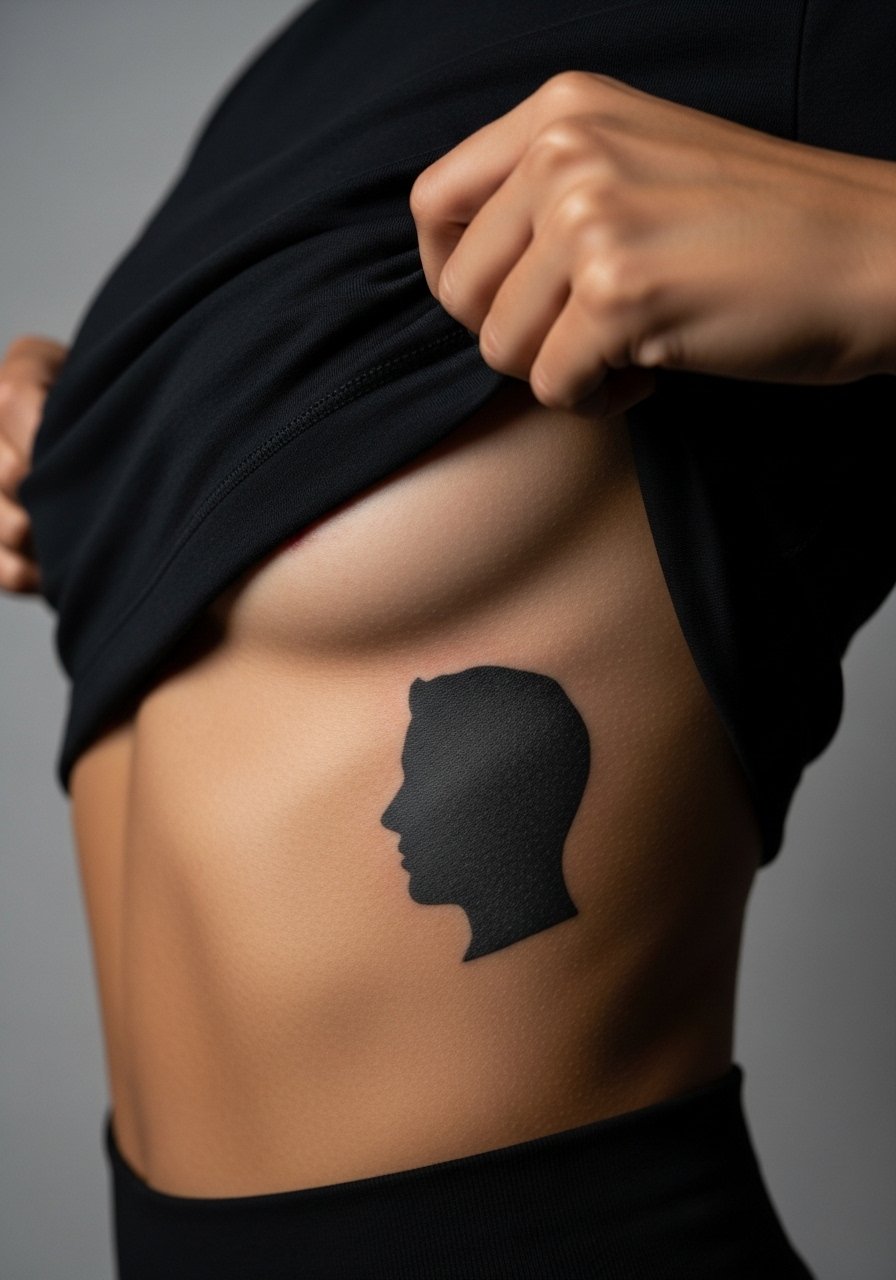
Ribcage pieces make a statement but demand planning. For a Tony silhouette, go for bold contrast rather than excessive detail. Most people underestimate how the canvas breathes and stretches there. One artist camp says fine line on ribs blurs within two years. The other camp argues that with proper depth and more spacing, fine line settles fine on ribs. Given the split, pick definite spacing over hairline details. Pain is high, session length depends on size, and plan touch-ups at year two if you want crisp edges.
6. Cuban Coat of Arms Chest Panel
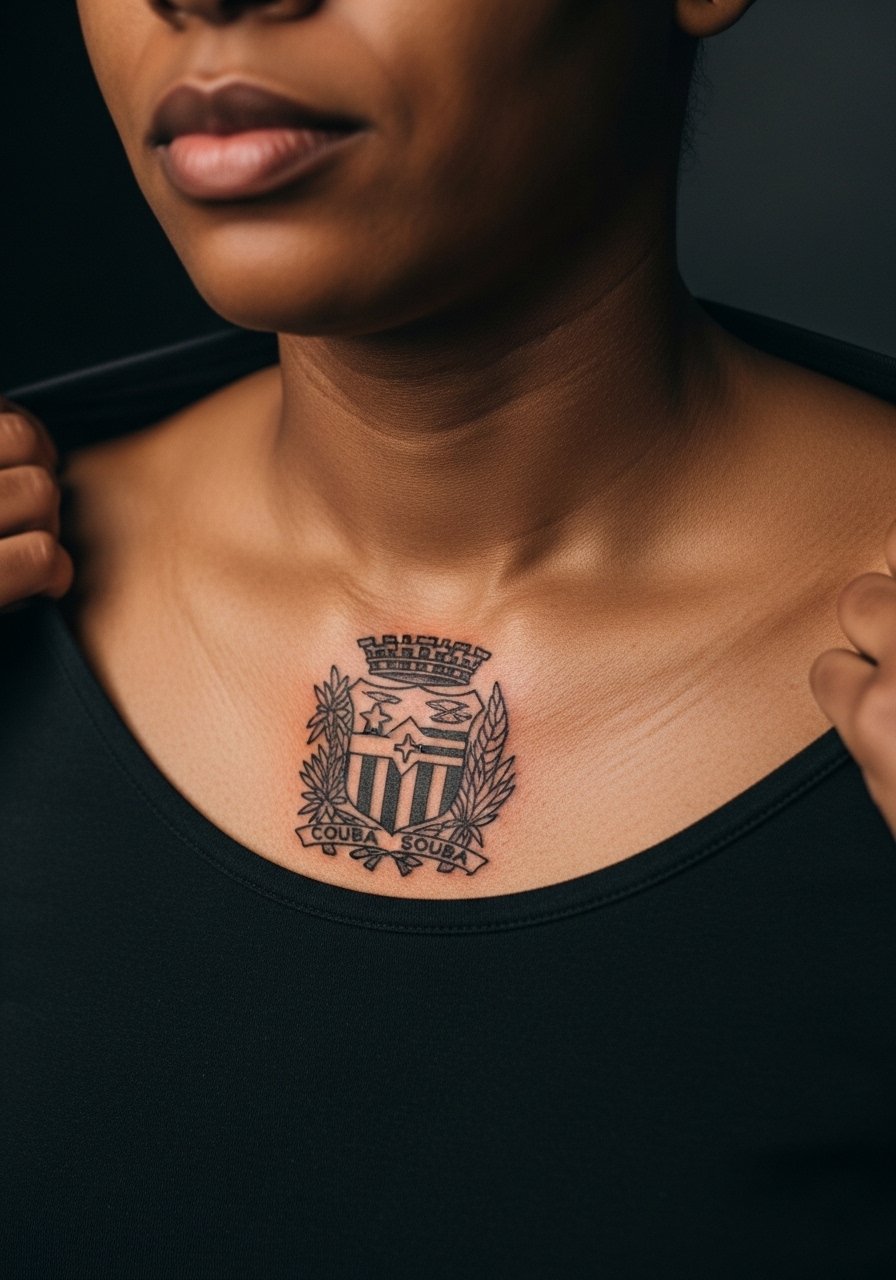
A coat of arms panel nods to heritage and adds context to a Tony Montana homage without recreating a portrait. Ask for solid black anchors and subtle dot work inside shields to preserve detail as saturation softens. Chest panels show well under open collars and age predictably if the black saturation is consistent. Because the chest can be sensitive, wear a button-down shirt you can pull aside to the session for easy access and modesty.
Studio Day Picks
The inner forearm portrait, collarbone script, and ribcage silhouette above ask for different prep and first-week protection, so these picks smooth the session and the initial healing window.
-
Stencil transfer paper kit. Lets you preview the placement on skin and adjust scale before ink goes down, which is helpful for the forearm and chest pieces above.
-
Topical numbing cream. Applied per instructions before a ribcage session takes edge off intense sensitivity without impeding linework.
-
Thin protective film roll. Keeps small wrist or finger-adjacent pieces clean during the first week when friction is highest.
-
Fragrance-free gentle body wash. Cleanses the area without stripping oils that support initial healing for chest and rib work.
-
Aquaphor healing ointment. Thin layers in the first days lock in moisture for tight linework and reduce scabbing that can obscure micro-realism details.
7. Forearm Half-Sleeve: Movie Scene Montage
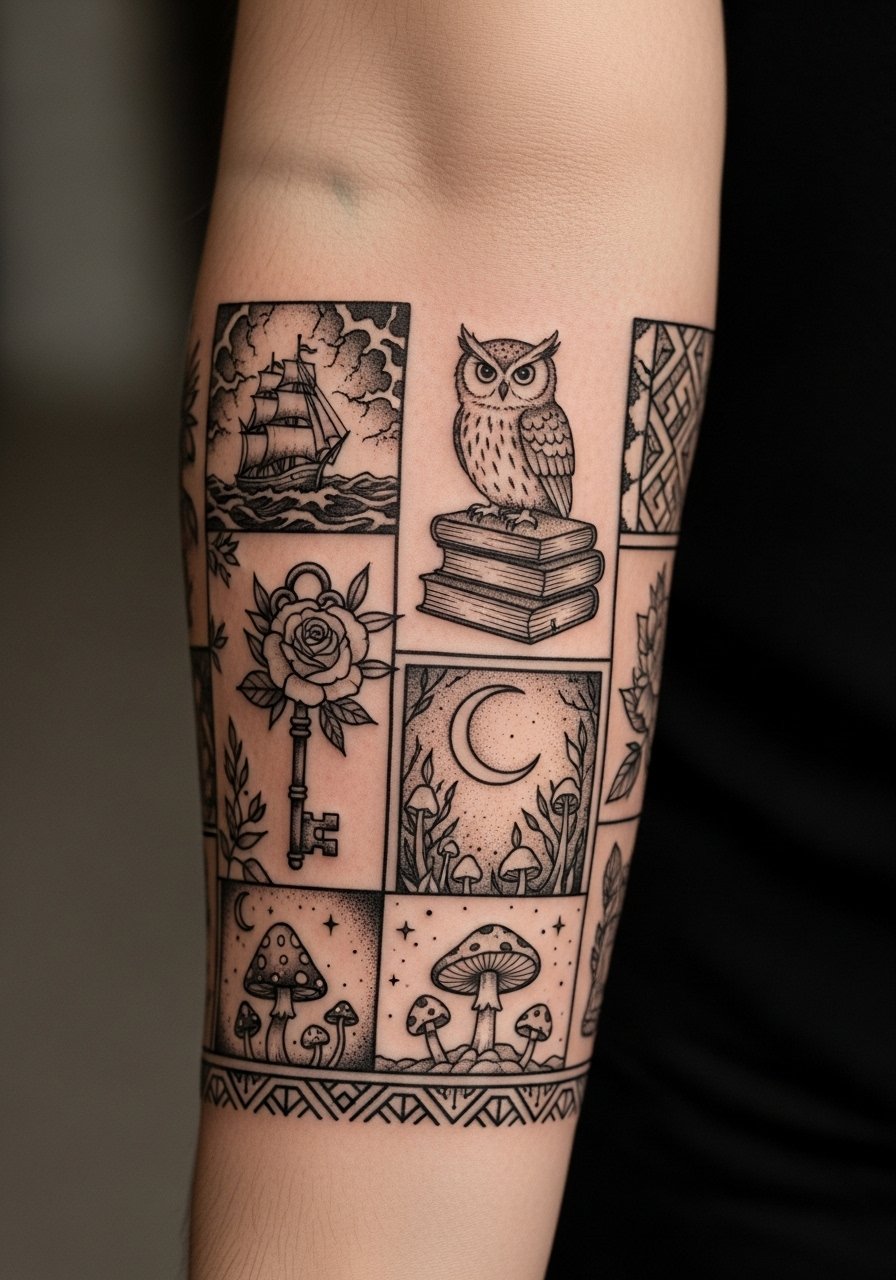
A montage across the forearm lets you mix portrait elements with objects and phrases. When planning, map negative space so each scene reads on its own. Tell your artist to treat each object as a single block of contrast so it keeps identity when viewed from a distance. People often cram too many tiny icons into a narrow forearm which leads to visual muddle. Sessions are multiple shorter sittings. For display, roll sleeves and wear a linen short-sleeve shirt to keep the piece visible without covering the elbow.
8. Minimalist Cigar Band on the Wrist
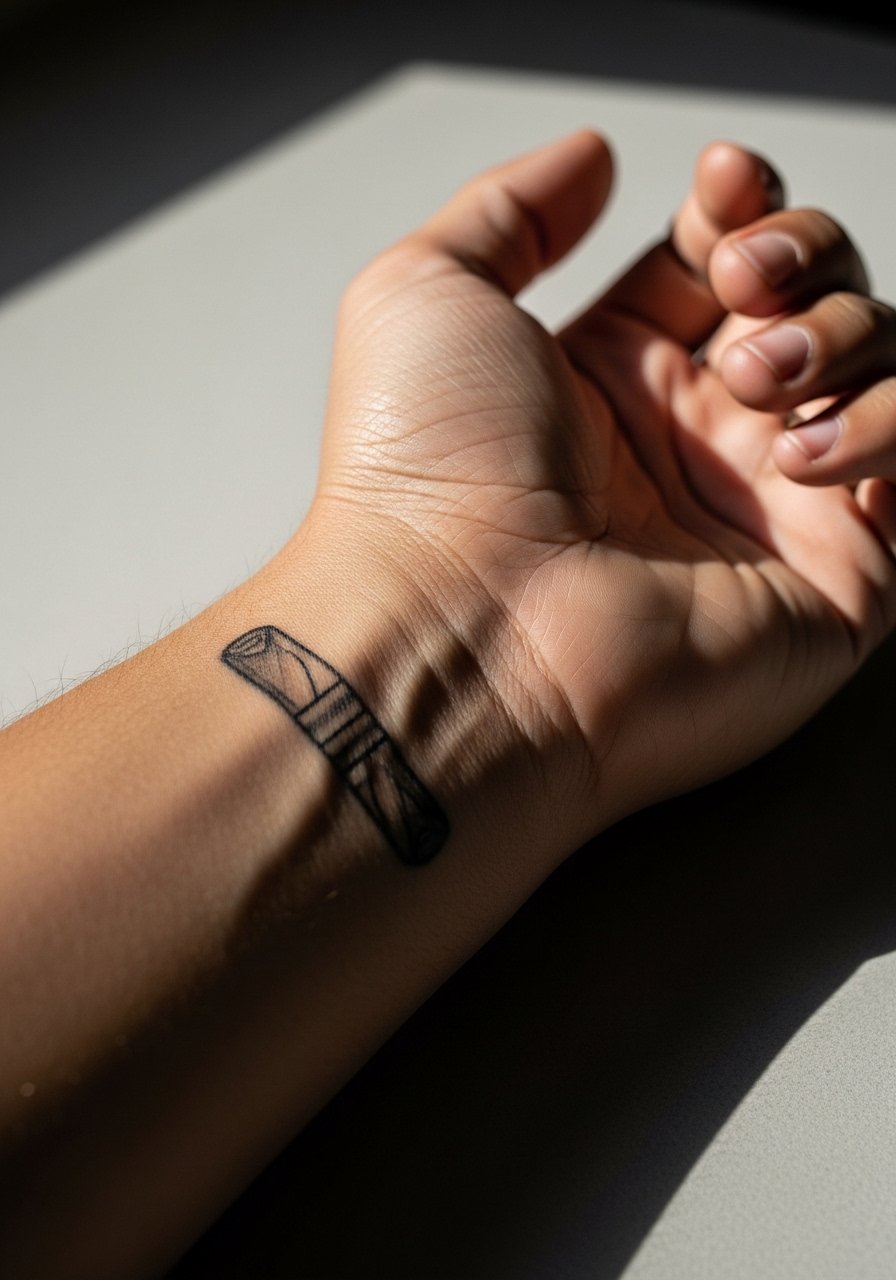
A thin band that mimics a cigar wrapper reads subtle and symbolic. Be honest about wanting a bold entrance stroke so the band does not micro-blur in constant wash cycles. The wrist has high blowout risk if the line is too small. The session is quick but the healing window needs care because of repeated washing. Avoid asking for ultra-fine lines that circle the wrist. During the session, wear a loose button-down shirt you can pull up so the wrist is unobstructed.
9. Back Piece: Full Portrait with Script Banner
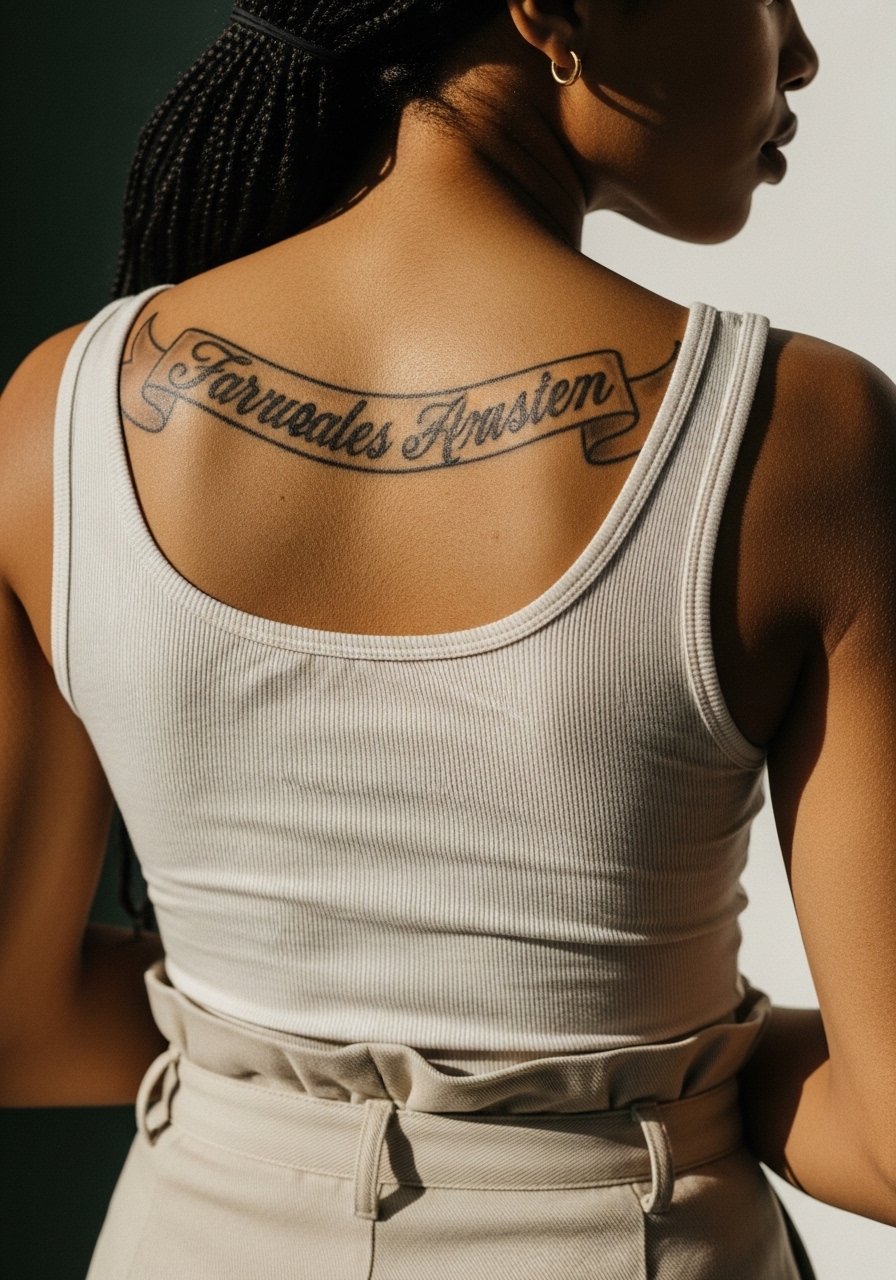
A back portrait gives scale and lets the artist play with composition. For a Tony Montana homage, consider a banner with a short phrase and strong negative space behind the head to avoid wash. A common error is packing the back with too many small elements. Back pieces demand multiple sessions and sit in the medium to high pain range depending on spine proximity. For session comfort, bring a loose tank top you can remove or shift without exposing more than needed.
10. Ankle Constellation with Tiny Portrait Accent
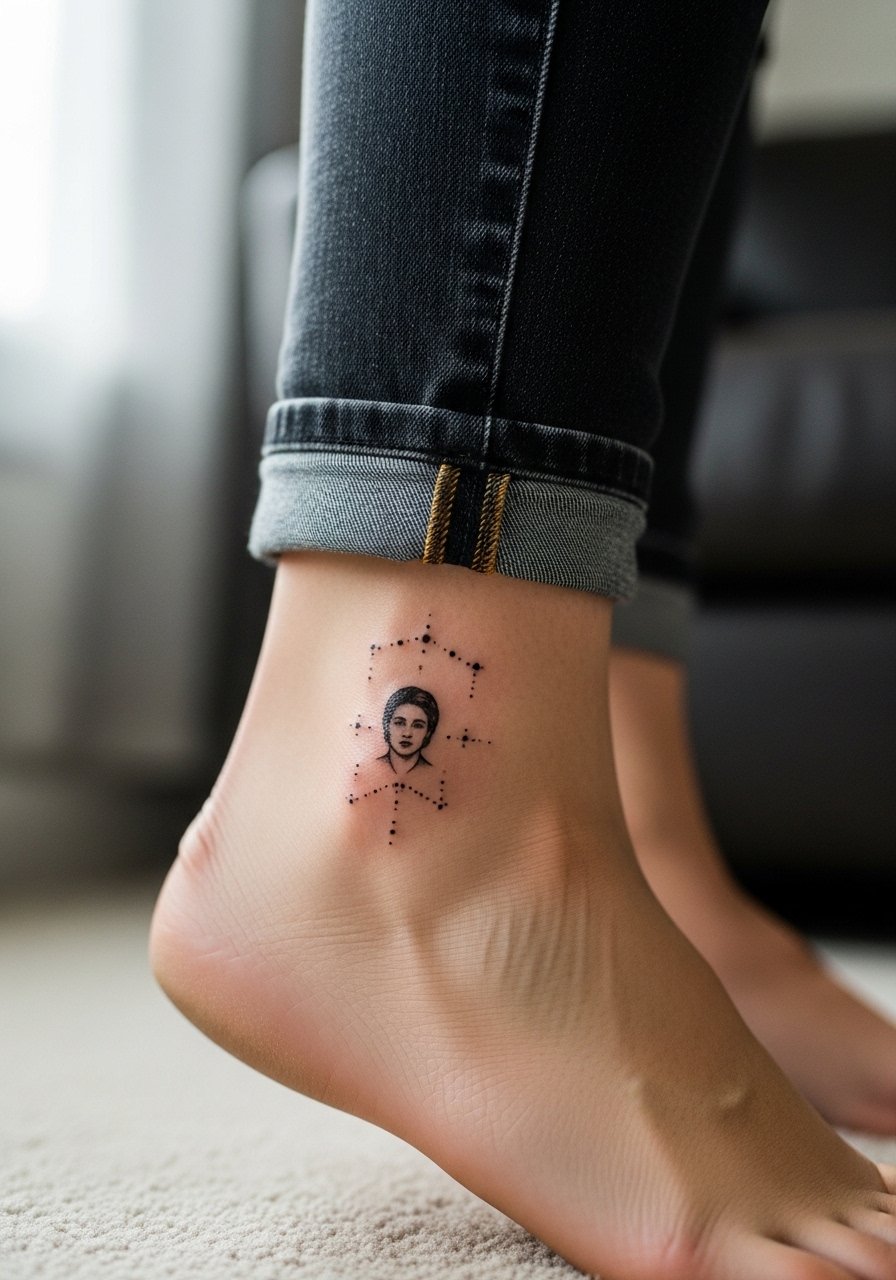
Tiny portrait accents work on ankles if kept simple and paired with graphic elements like constellations. The mistake is trying to cram facial detail into a space that is too narrow. Ankle placement is low on the pain scale for some and higher for others because of bone. Expect a short session and potential fade sooner due to friction from shoes. For showing it off, roll jeans or wear sandals and consider a pair of simple leather sandals so the ankle art gets noticed.
11. Finger Tattoo: Single Letter with Tiny Crown
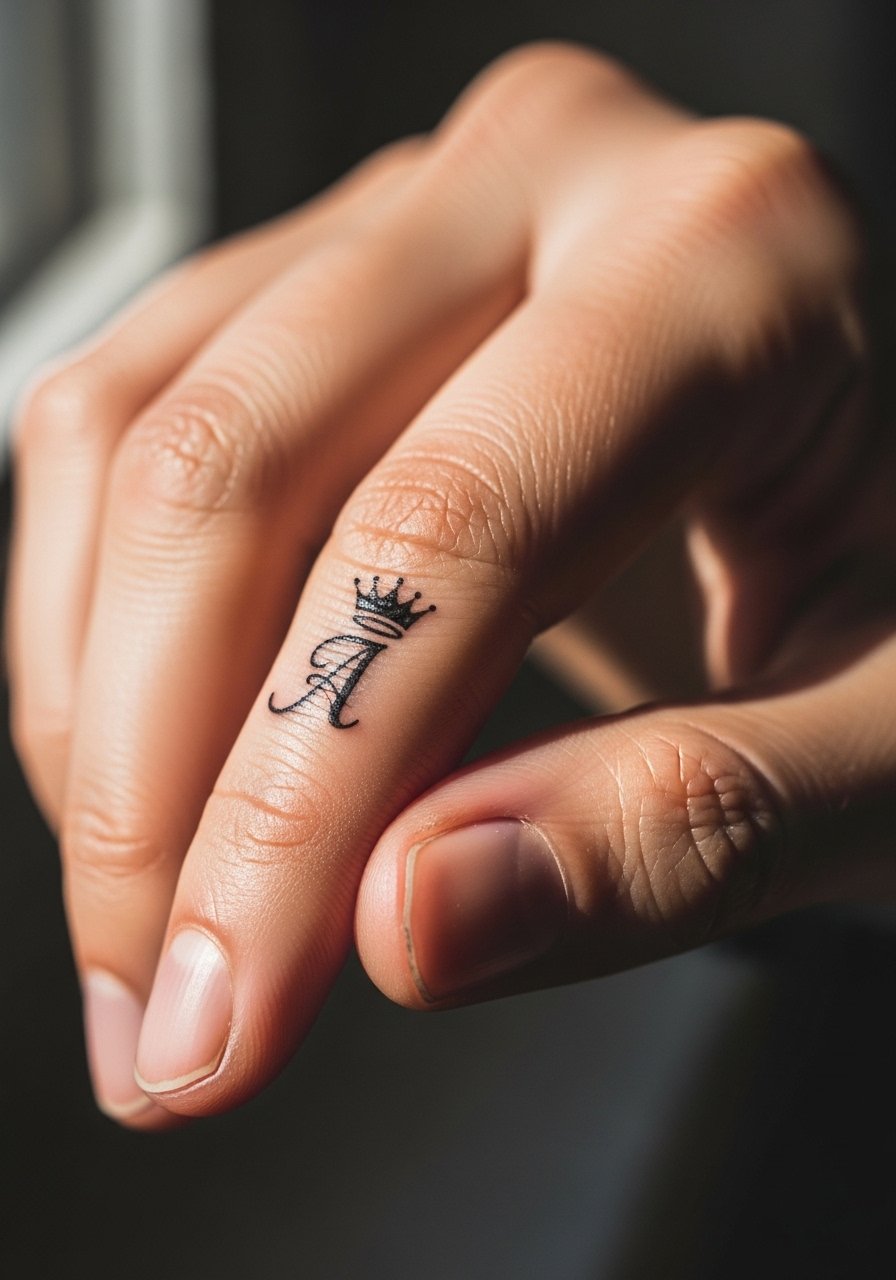
Finger tattoos are intimate and high-maintenance. Ask for slightly thicker strokes than you want initially because skin there sheds and the thinest lines vanish. The common mistake is requesting micro script that becomes dotted blur. Expect touch-ups often and a faster fade due to daily hand use. Sessions are quick but painful and healing is sensitive. For the appointment wear a long-sleeve shirt with removable cuff so the artist can work and you stay warm.
12. Calf Comic-Style Panel
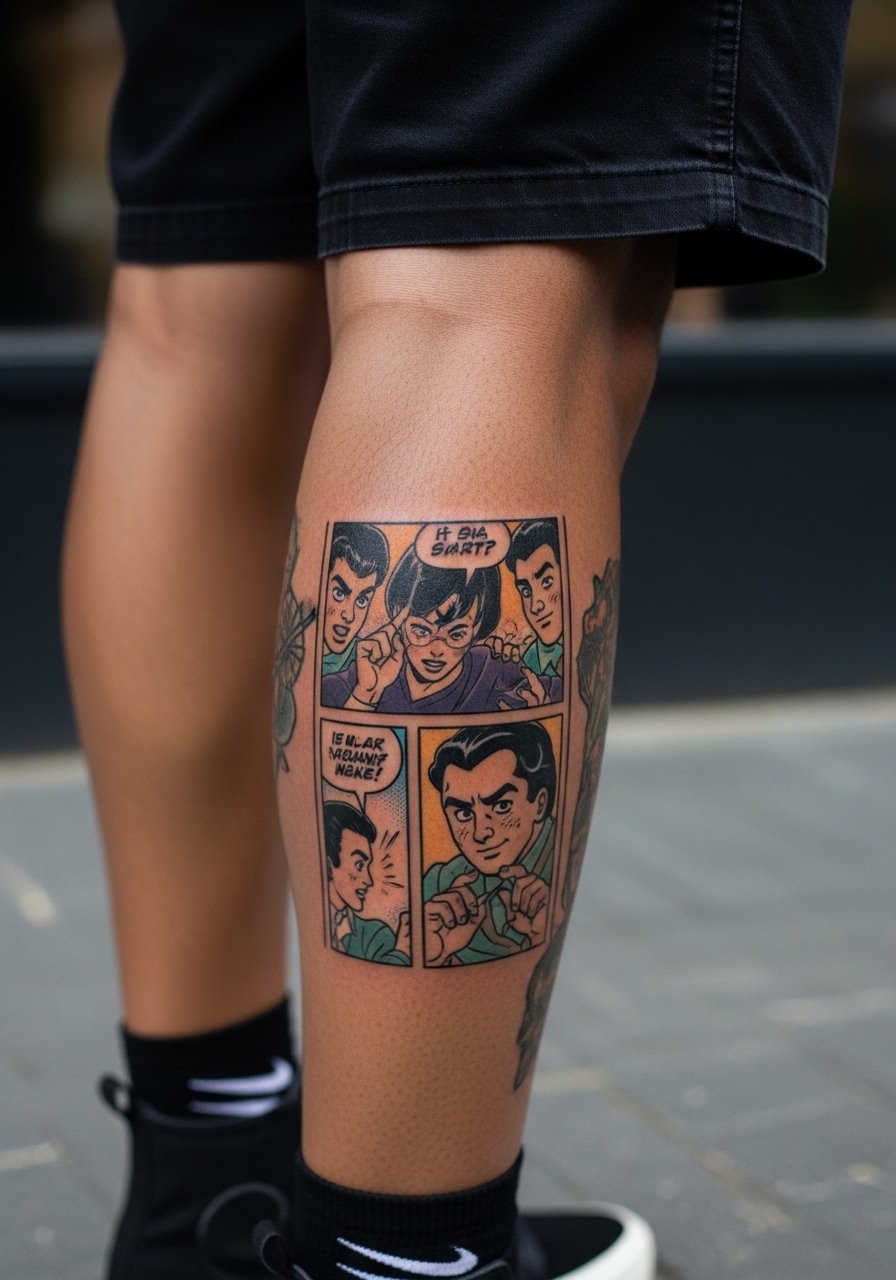
The calf gives room for bold comic panels and dynamic text boxes. For a Tony-inspired comic panel, aim for heavier inks in outlines and flat blocks of color to age into a readable silhouette. Avoid tiny lettering that needs to be deciphered close up. Calf sessions are generally low to moderate pain and fit well into a single two to three hour block depending on size. For the session wear loose drawstring shorts you can roll up comfortably.
13. Sternum Script with Dot Work Frame
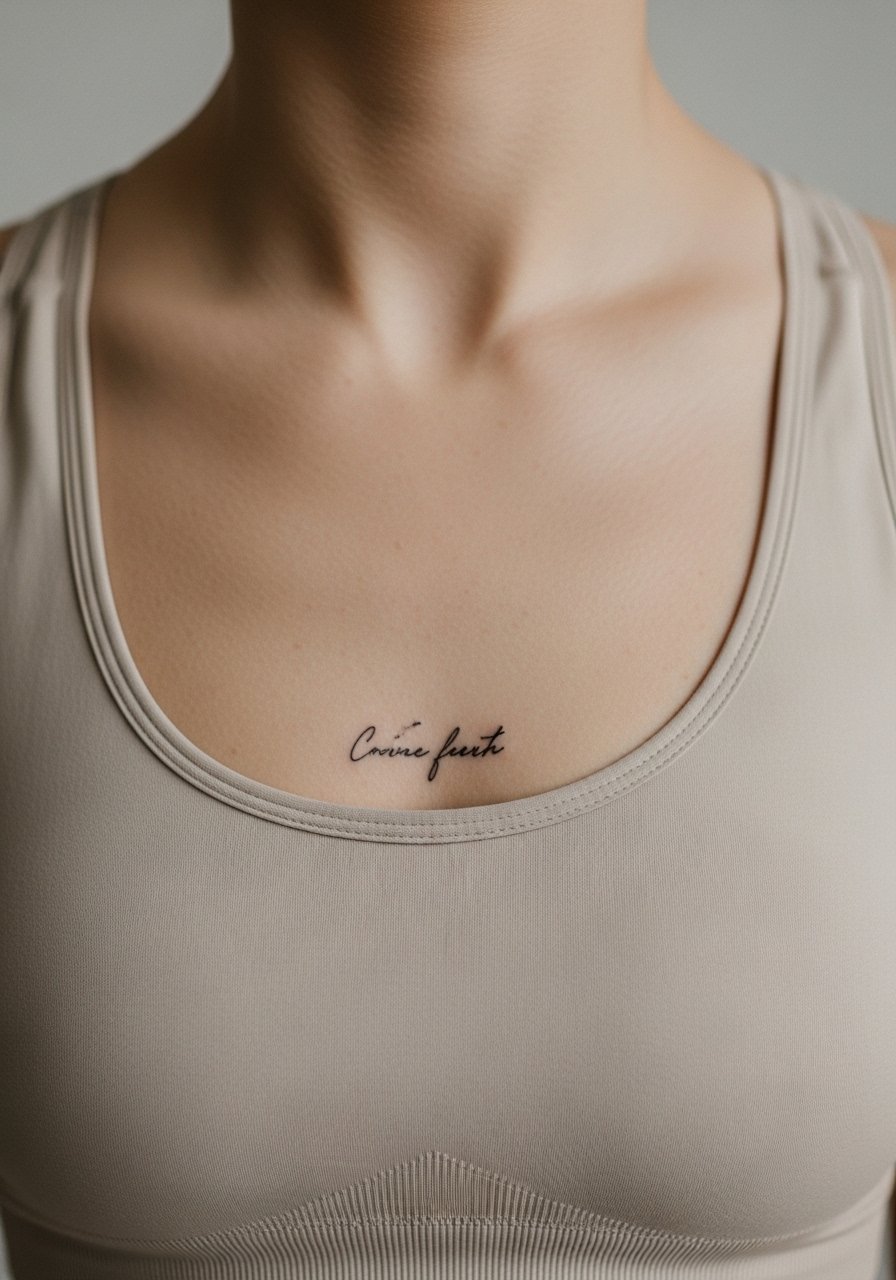
Sternum placements can be striking when the script follows the body curve and is framed with dot work. Use a slightly bolder main stroke and stipple shading for background texture to keep the text legible as the skin shifts. This area can be sensitive so expect a higher pain rating and a carefully planned session. A mistake is asking for ultra-fine tiny letters that distort when the body moves. For the appointment wear a fitted sports bra that allows access while keeping you covered.
14. Inner Bicep Mini Portrait
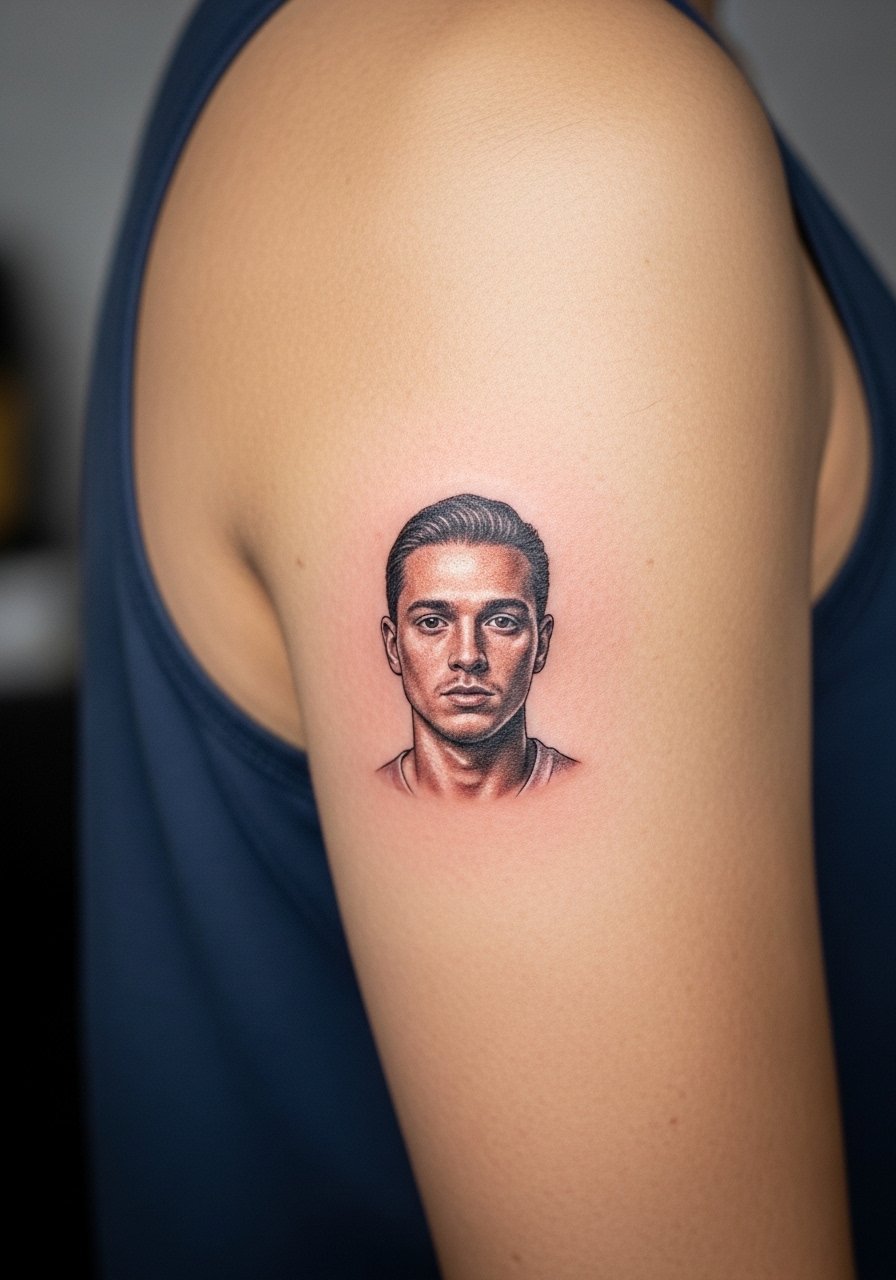
Inner bicep pieces feel intimate and photograph well under shirts. The skin there is softer and prone to blowout with overworked shading. Tell your artist to use light whip shading and to avoid dense packing that causes saturation to spread. Many clients ask for extreme detail that does not hold in this area. Pain is moderate because of the soft tissue. Bring a sleeveless tank to the session so the artist has clear access without you getting cold.
15. Collarbone to Shoulder Script Flow
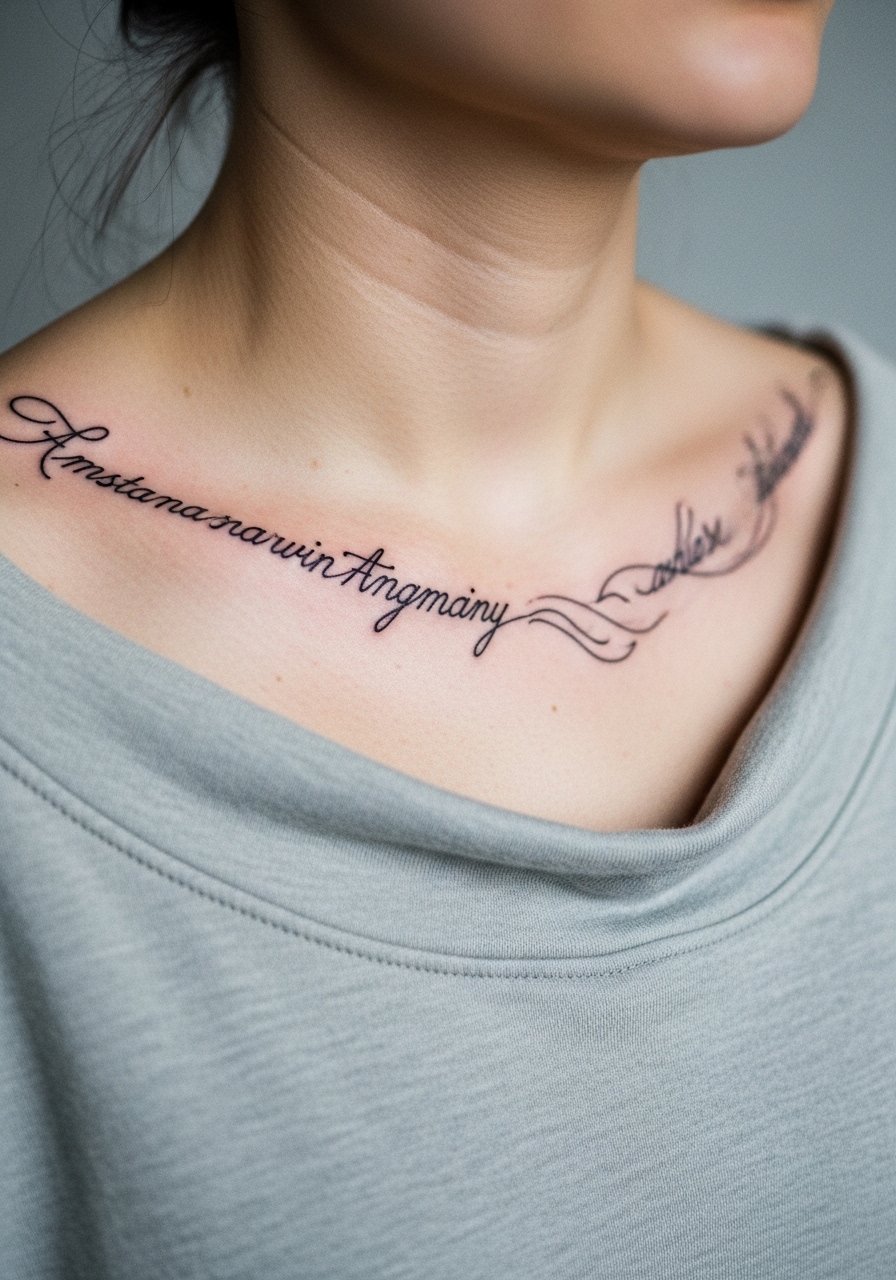
Flowing script that follows the collarbone into the shoulder catches light and moves with clothing. Request thicker downstrokes near the shoulder to compensate for movement and lighter strokes over the collarbone so letters do not sit on bone. The main mistake is ignoring how shirts will cover or reveal the flow. Sessions are short to moderate in length. For styling, open collars or a wide-neck sweater frame the curve tastefully.
16. Upper Thigh Scene with Negative Space
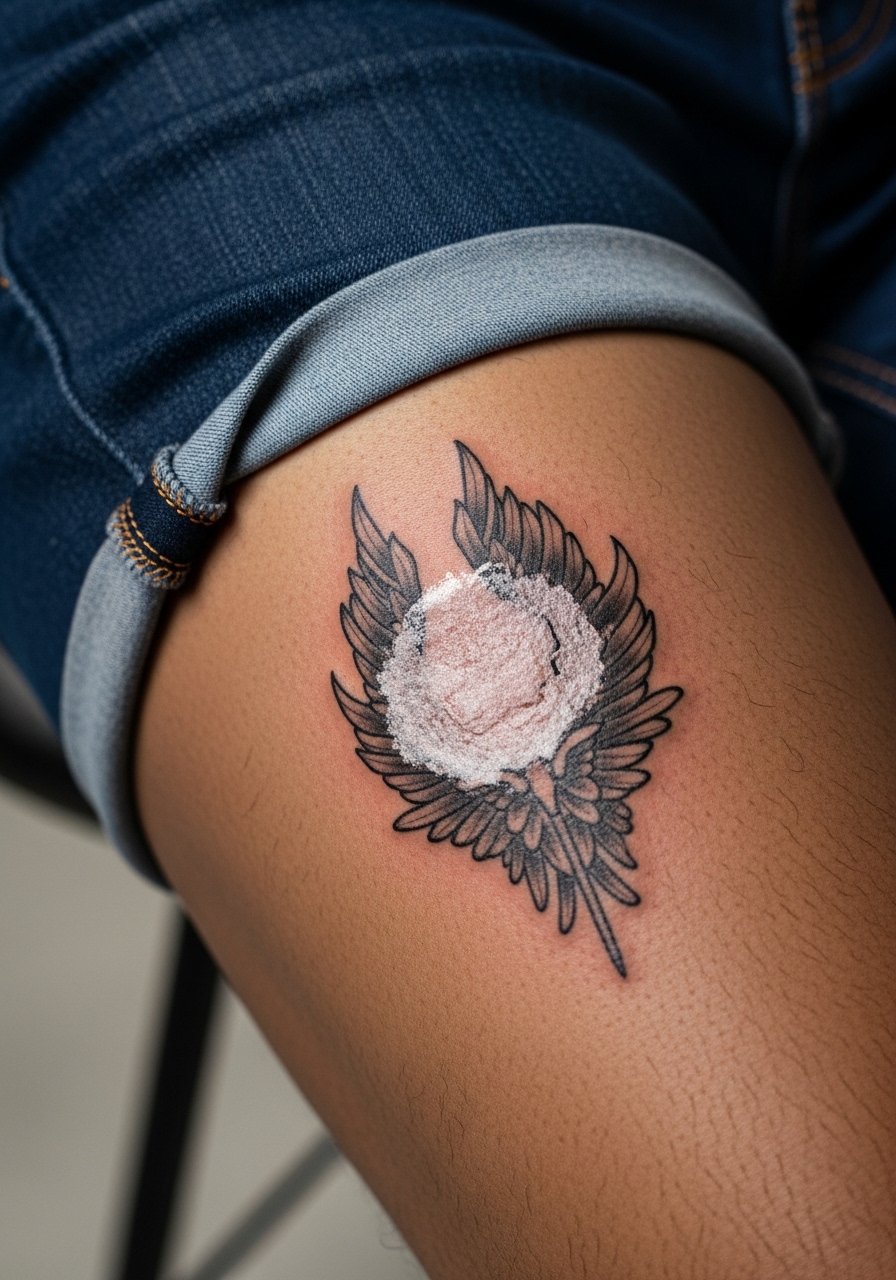
Upper thigh canvases allow larger Tony-inspired scenes while keeping the piece more private. Use bold negative space to separate elements so they read when the leg moves. A common mistake is crowding the panel with tiny symbols that age into muddle. Thigh sessions can be lengthy but have manageable pain for many. For the appointment wear high-waisted shorts you can shift to expose only the area you need.
17. Neck Side Script Accent
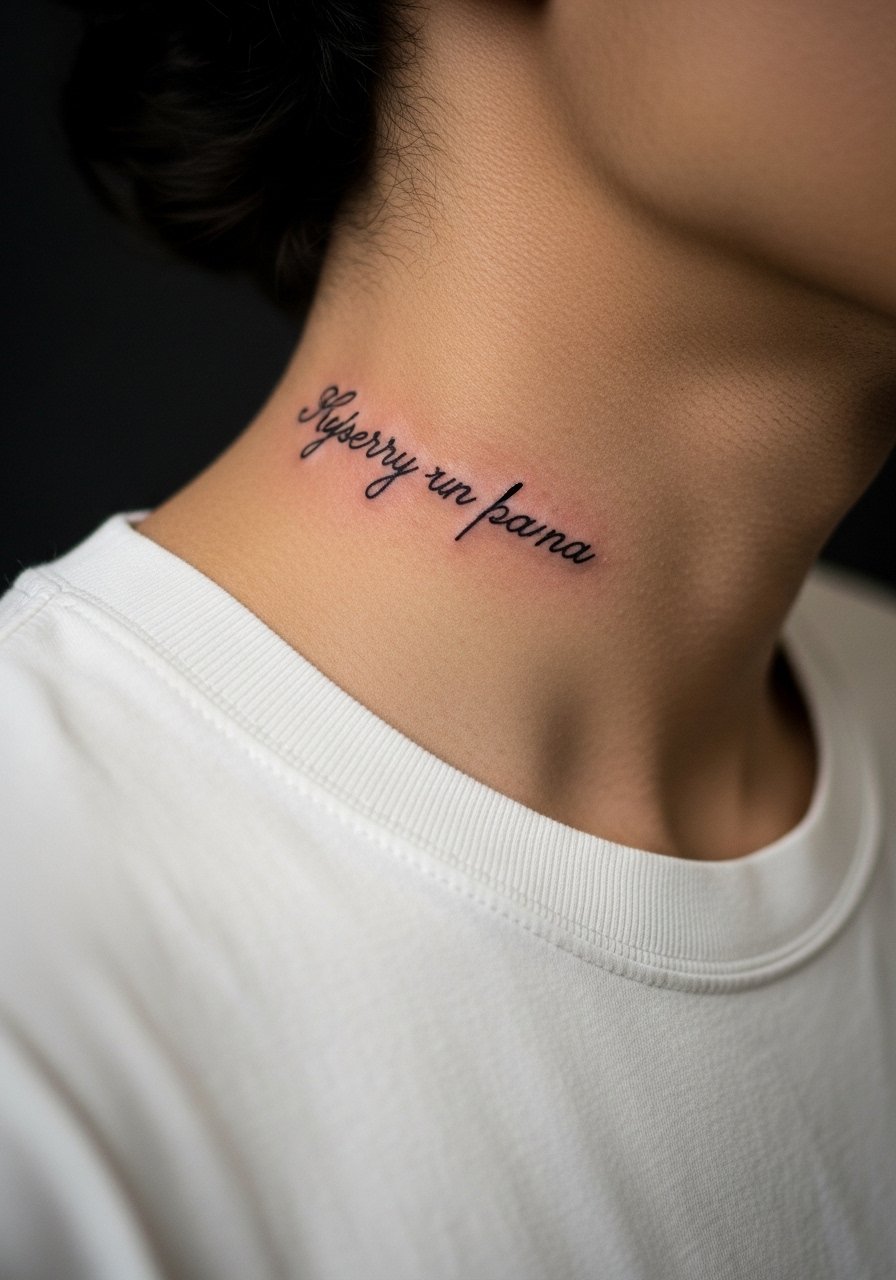
Neck tattoos are visible and sometimes contested in professional settings. Ask for compact lettering with slightly increased spacing to prevent early blurring. One camp sees neck ink as a bold personal statement. The other camp warns it affects hiring perceptions. Name both views and decide what matters more to you. Pain is high and touch-ups are more frequent. For showing it off with minimal fuss, pair it with a wide-neck shirt.
18. Hip Floral Frame around Small Portrait
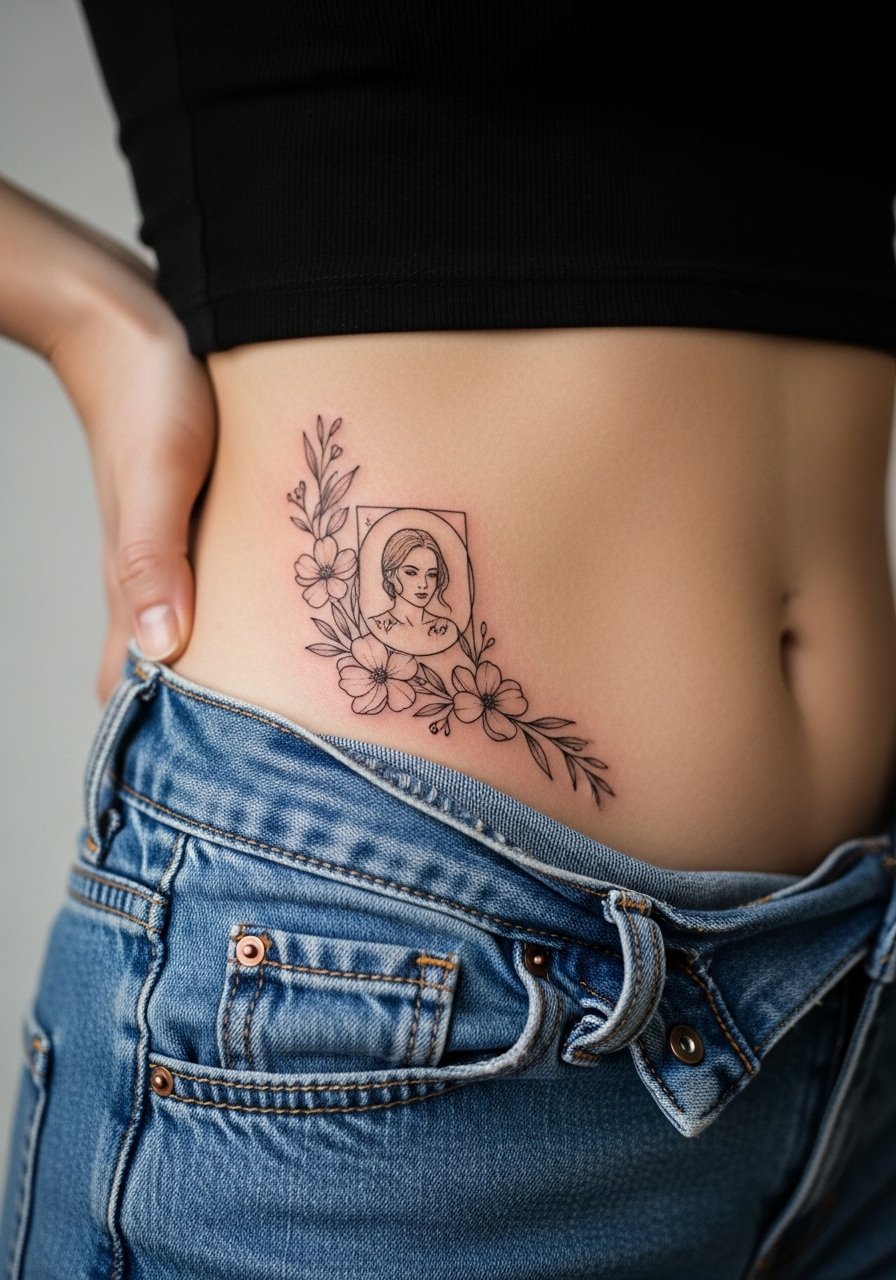
Hip placements let you combine portrait work with ornamental frames. Keep the portrait area simple and let florals provide texture so the central face retains clarity. People often overload the frame with tiny elements that fade into noise. Pain varies and is often moderate. For the session, wear high-waisted jeans you can shift slightly without full exposure.
19. Sleeve Accent: Cuban Flag Ribbon
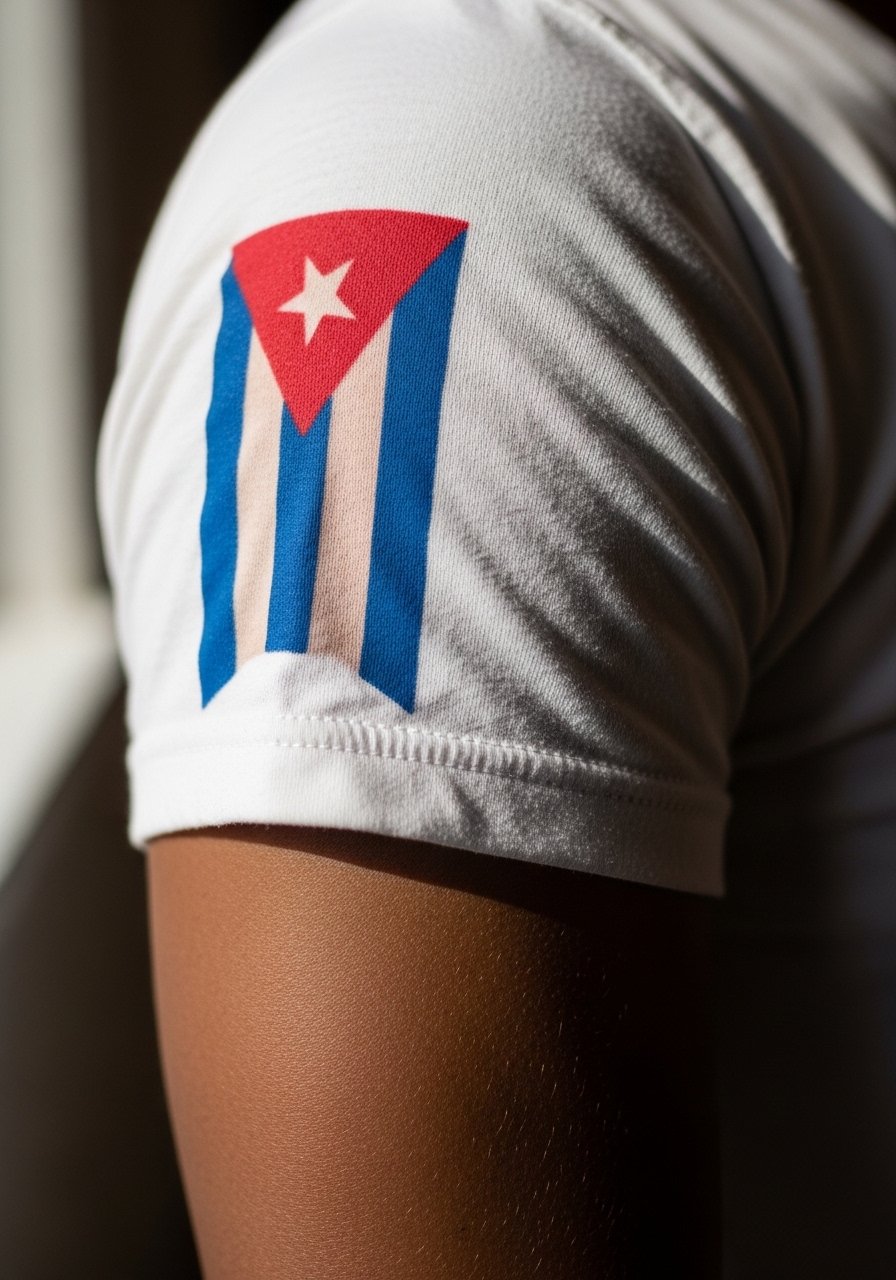
An accent ribbon woven into a sleeve ties heritage elements together without dominating the composition. Request solid black anchors and flat color fields for the flag so it stays readable. The mistake is small, detailed flag work that blurs with adjacent shading. Sessions for sleeve accents are staged over multiple visits. For display, short sleeves or a rolled-up linen shirt let the ribbon show naturally.
20. Minimal Linework Gun Silhouette on Rib Flank
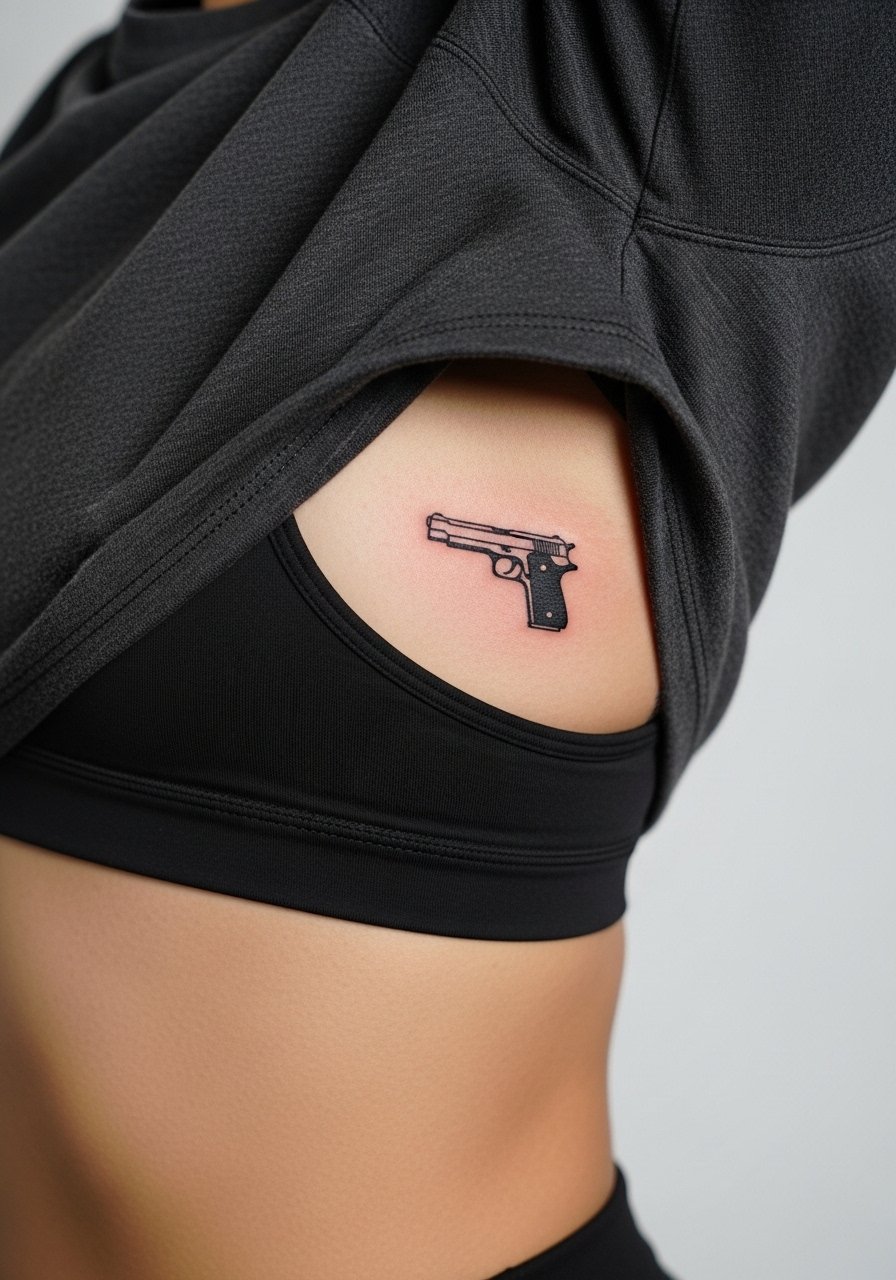
Weapon imagery is polarizing so scale down to a silhouette if you want nods without glorification. Ask for negative space around the silhouette so the shape reads even as fine details soften. One camp argues such imagery glamorizes violence. The other camp says context and personal meaning matter. Acknowledge both views and decide how explicit you want to be. Rib flank sessions are painful and require steady breathing control.
21. Inner Wrist Tiny Portrait with Chain Accent
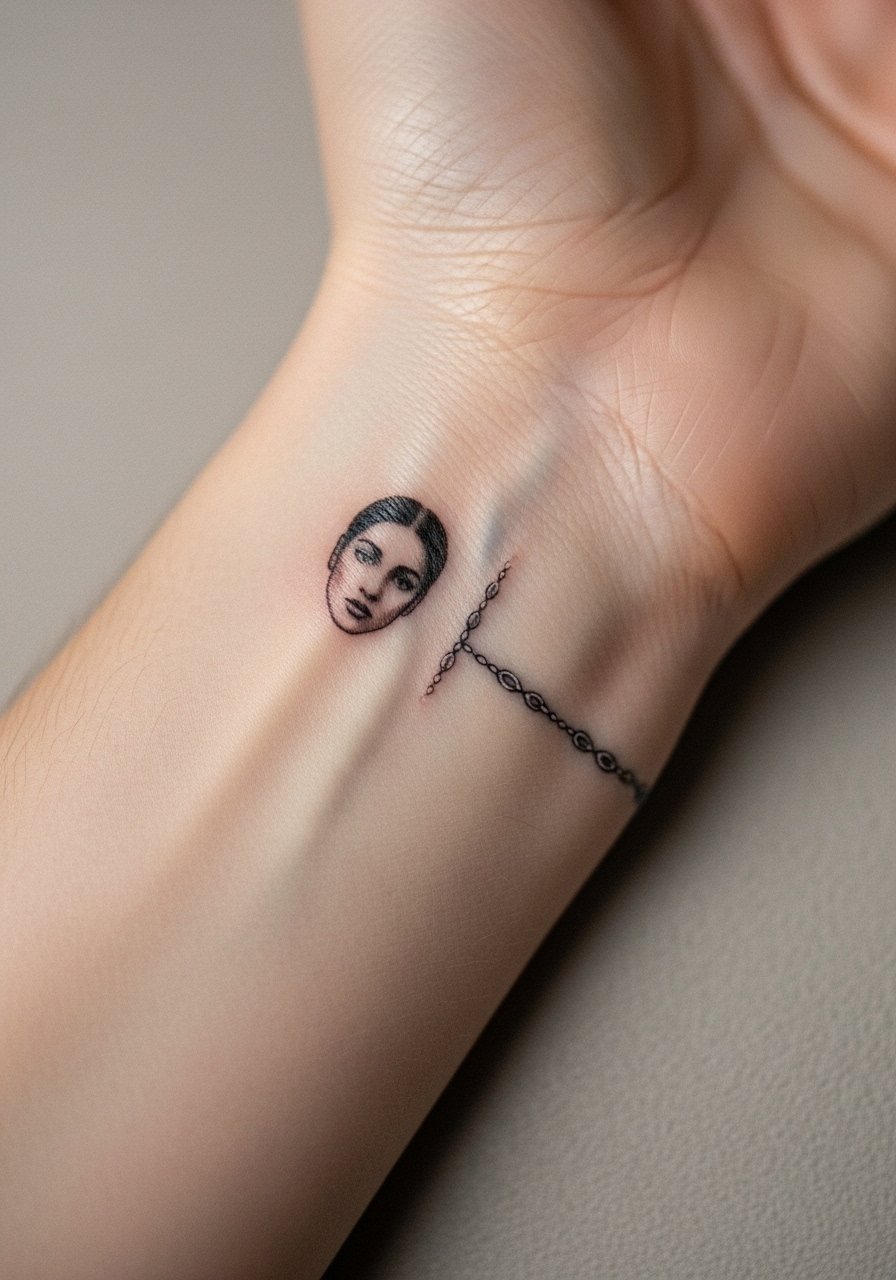
Inner wrist portraits are very small but can work if paired with a graphic accent like a chain to draw the eye. Ask for slightly increased scale for facial features and thicker entrance strokes for the chain links. The common error is micro detail that dissolves under regular hand use. Expect touch-ups earlier than larger pieces. For the session wear a sleeveless top with a loose cuff that keeps the wrist free.
22. Lower Back Baroque Panel
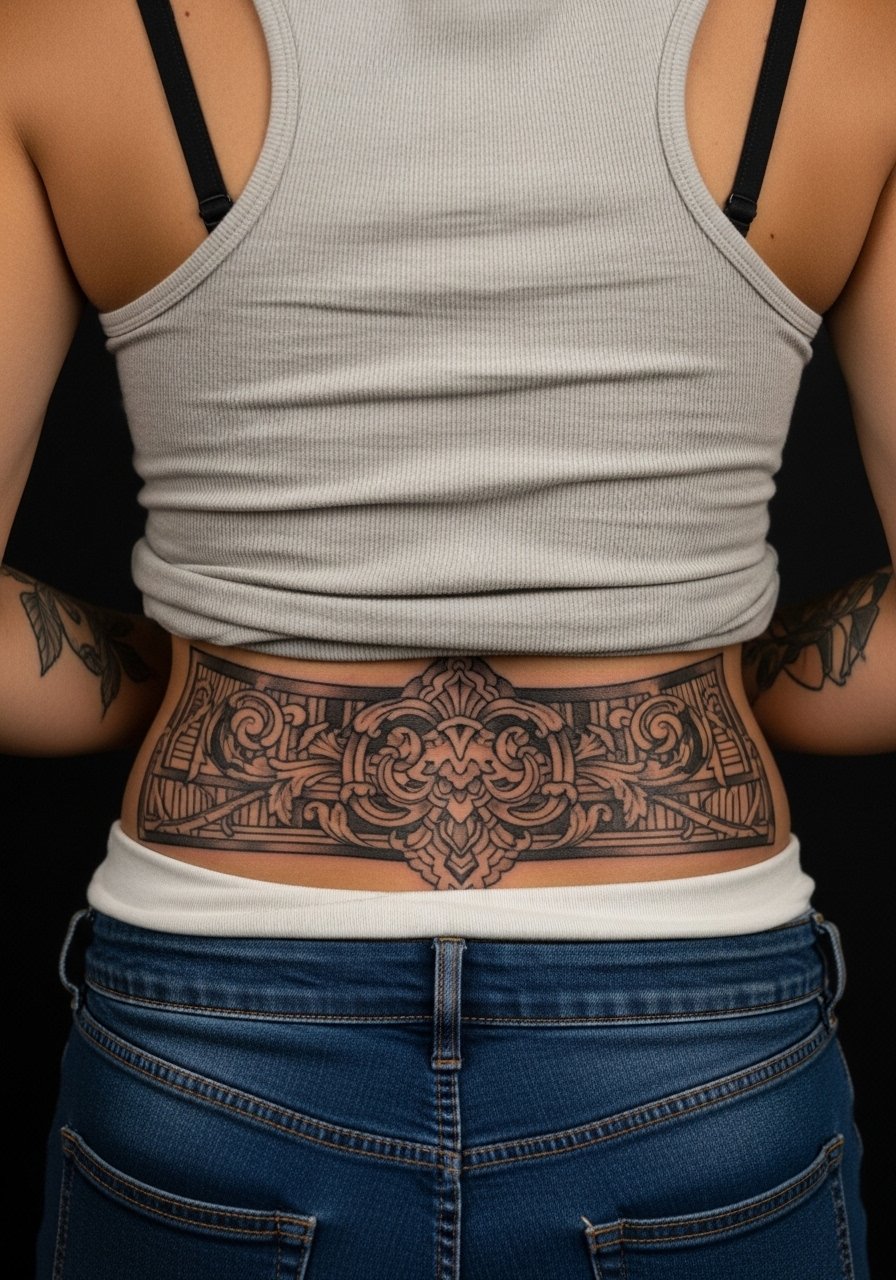
A baroque lower back panel gives ornate framing for a central portrait or emblem. For aging gracefully, pick bolder fill areas and restrained filigree so the piece does not become visually noisy. A common mistake is too much thin filigree that blurs into texture. Lower back sessions are moderate and healing benefits from clothing that does not rub constantly.
23. Chest-to-Arm Transitional Piece
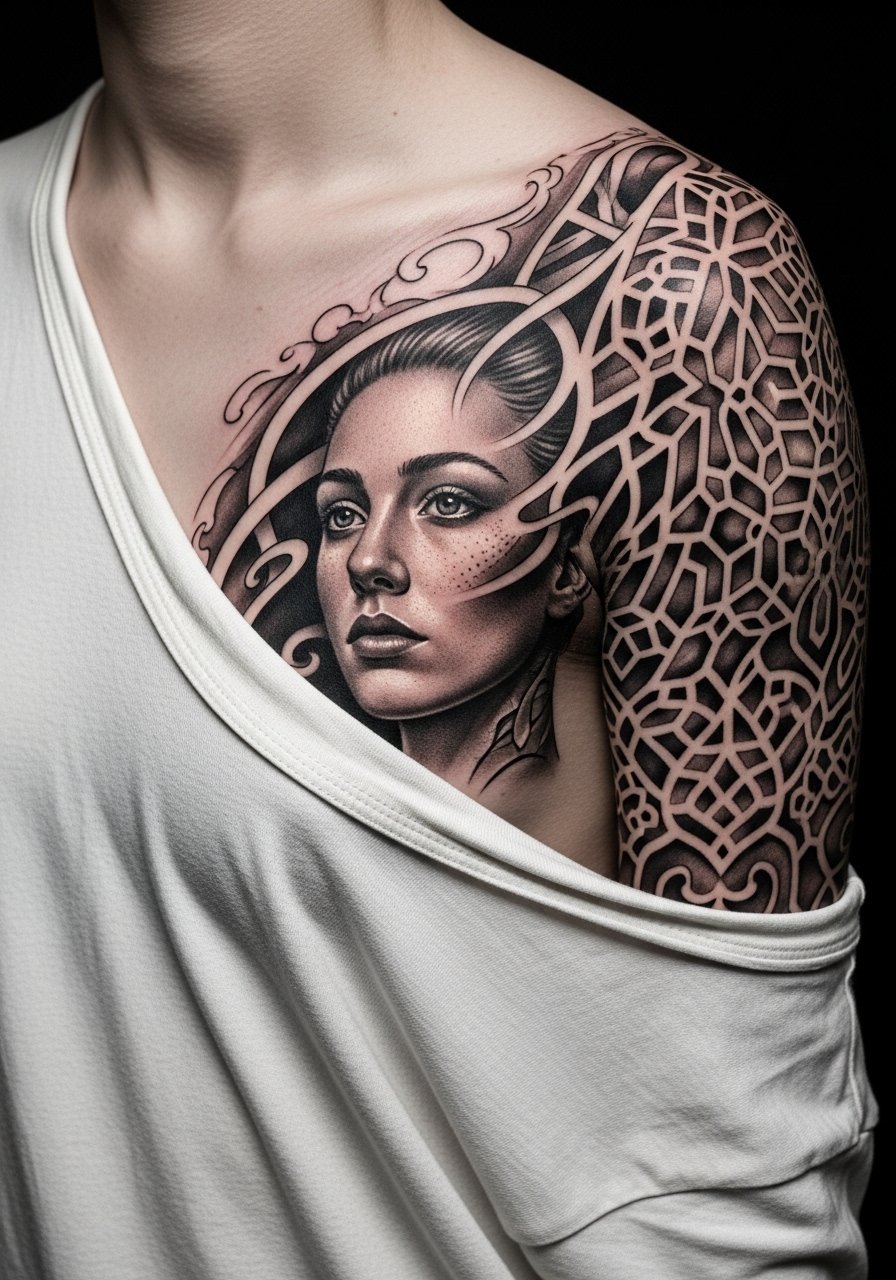
Transition pieces unify chest and arm work when the flow matches muscle lines. Request anchor elements at shoulder seams so the transition reads on the move. People often forget how shirts will sit over transitions and pick a flow that disappears under sleeves. Sessions vary and often split into multiple sittings. For the session wear an easy-to-shift button-down shirt so the artist can access both zones.
24. Thigh Portrait with Film Reel Border
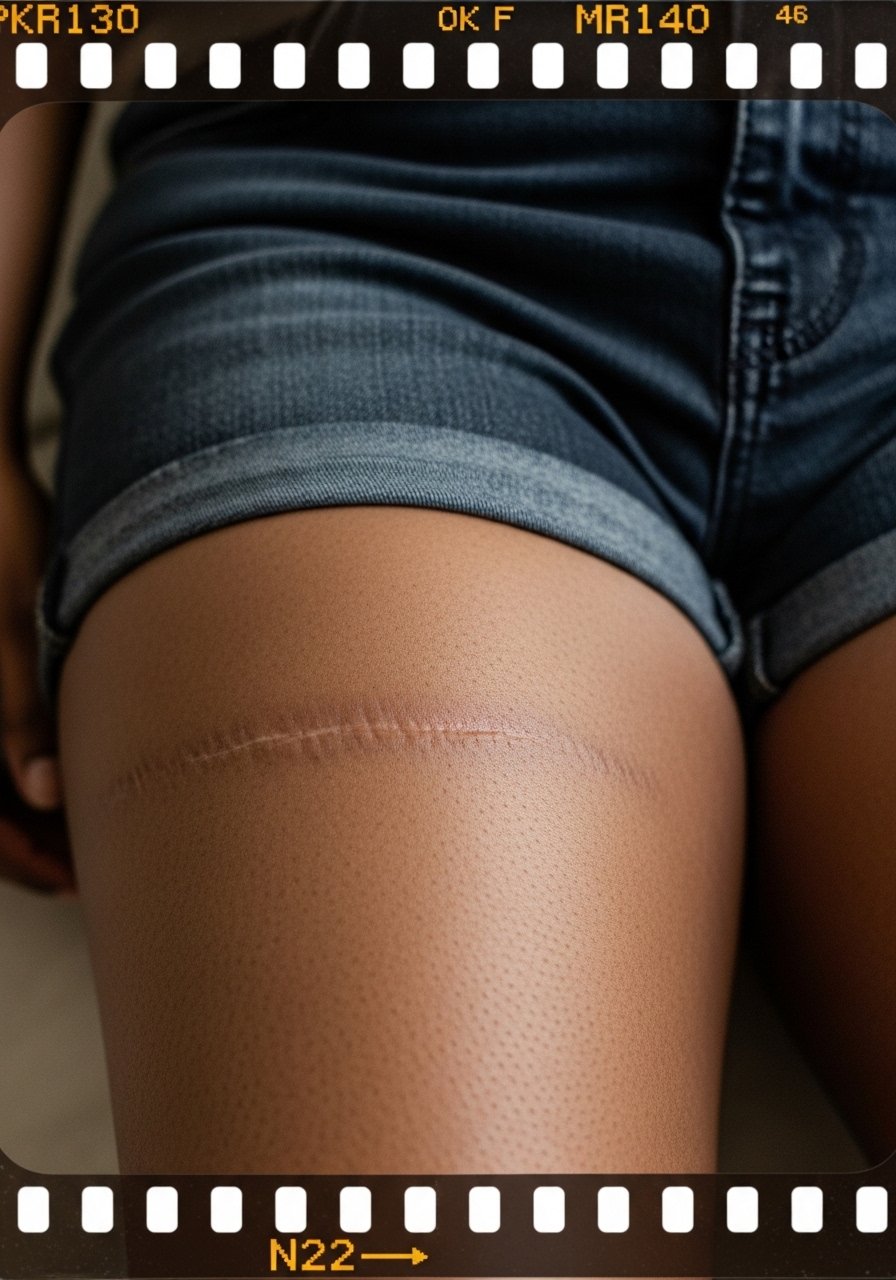
Thigh pieces let you frame portraits with motifs like film reels without crowding. Keep reel holes larger so they do not fill in as the skin moves. A mistake is tiny perforation details that lose definition. Thigh sessions are often comfortable enough for longer sittings. For the appointment wear loose shorts you can shift and still stay covered.
25. Collarbone Miniature with Single Star Accent
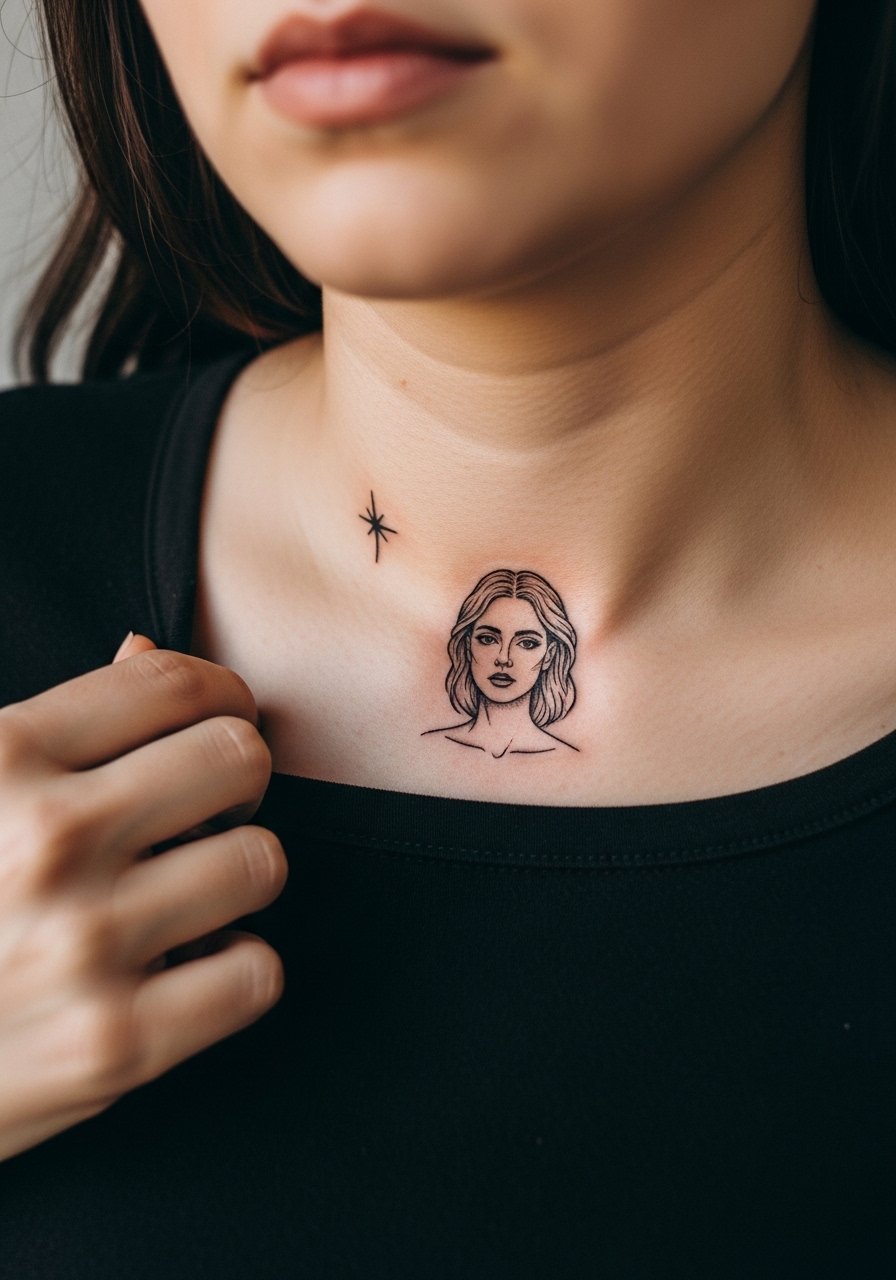
Small collarbone pieces with a star accent keep things subtle. Ask for slightly heavier main strokes where the tattoo sits close to the bone and leave open space around the star so it remains distinct. The common error is crowding the area with additional marks that fight the main image. Sessions are short and pain is moderate. For nights when you want a little reveal, a wide-neck top does the framing.
26. Hip Bone Script with Micro Portrait
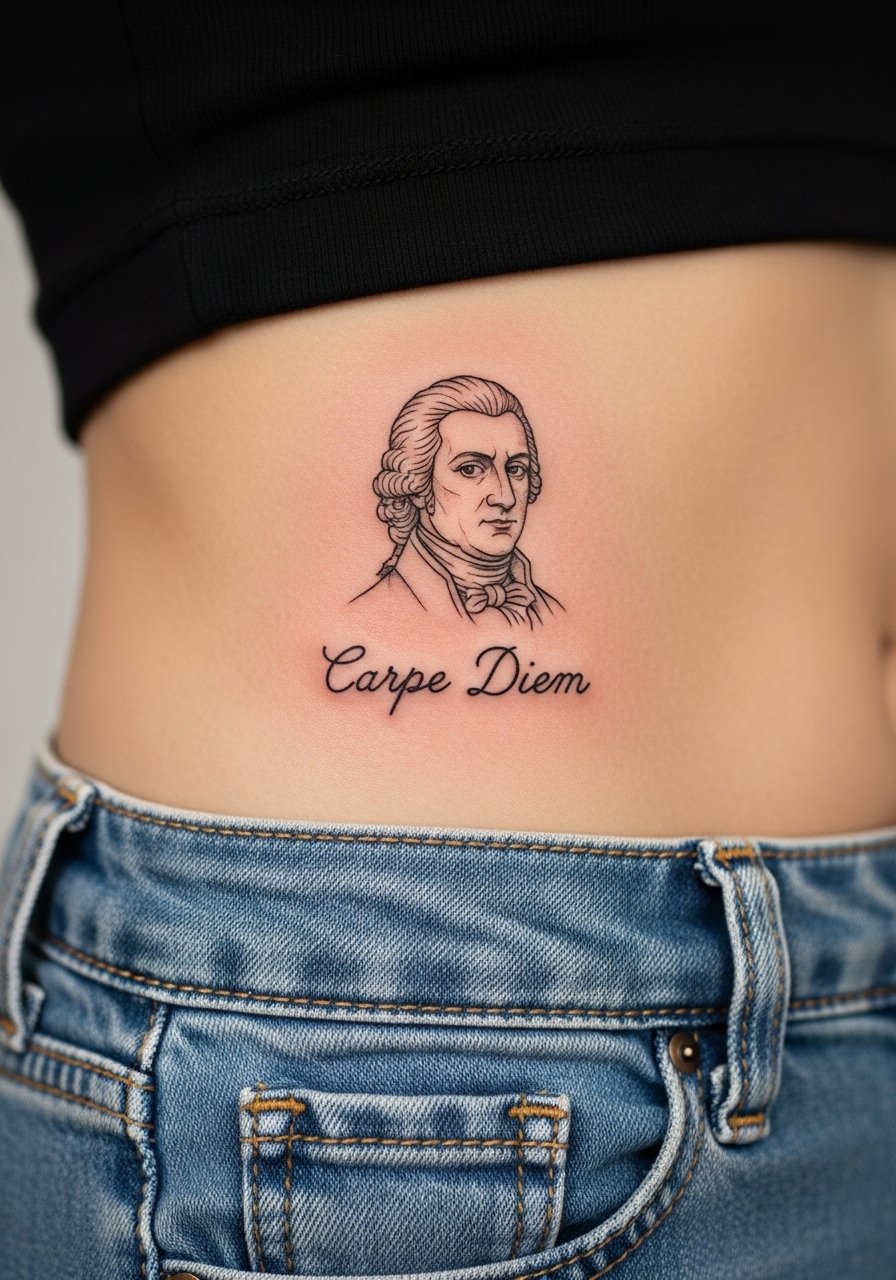
Hip bone placements are great for combining script and a small image. Use increased letter spacing and slightly larger portrait features to keep legibility. The mistake is relying on tiny type that blurs with movement. Pain is variable depending on proximity to bone. For the session wear high-waisted denim that can be shifted a little without exposure beyond the area.
27. Behind-the-Ear Micro Portrait Accent
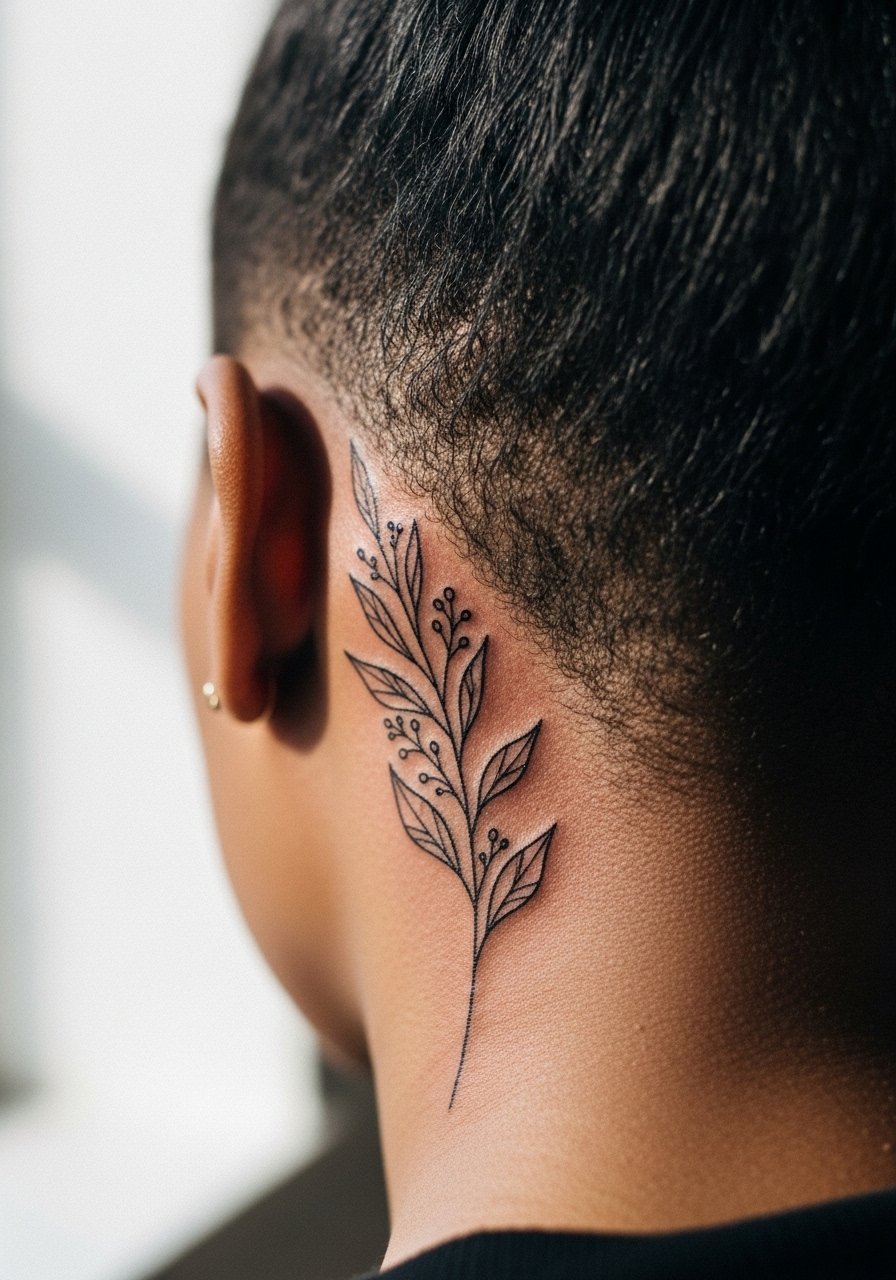
A behind-the-ear micro accent reads private and subtle when framed by hair. Be explicit in the consultation that the design sits on the skin behind the ear below the hairline so the spacing and direction are right. The area has limited room so avoid full portraits there. A common mistake is asking for too much detail in a spot that is rarely viewed up close. Sessions are quick but the skin is thin and touch-ups are common.
Frequently Asked Questions
Q: Will a micro-realism Tony portrait on the forearm need touch-ups sooner than a chest portrait?
A: Yes, forearm portraits often experience more sun exposure and friction from clothing which accelerates fading. Chest portraits have less daily abrasion but move with breathing. Plan for touch-ups around year two to three for forearms and slightly later for chest work, depending on exposure and how the piece was spaced.
Q: Is fine line safe for ribs if I want a Tony silhouette with thin detail?
A: Artists are split on rib fine line. One camp says the skin stretch blurs hairline work in two years. The other camp says correct needle depth and spacing keep fine line stable. Given the split, ask for increased spacing and slightly bolder lines if longevity matters more than extreme detail.
Q: How should I dress to a session for a chest-to-arm transition piece?
A: Wear a button-down shirt you can pull aside so the artist has access to both chest and arm without you getting cold. Easy layering helps you move between short sittings and keeps the area covered between passes.
Q: Do hand or finger pieces affect employment prospects?
A: Some industries still frown on visible hand or finger tattoos. One perspective views them as bold personal expression. The other perspective warns of professional limitations. Consider your field and whether the piece needs to be hidden before committing to fingers or hands.
Q: How will a neo-traditional cigar motif age on the outer bicep compared with a tonal portrait?
A: Neo-traditional relies on bold outlines and saturated fills which age into a graphic silhouette that reads well from a distance. Tonal portraits depend on midtone fidelity which softens faster. If you want longevity, favor contrast and clear outlines for the outer bicep.
Q: Where should I look to find artists who can do micro-realism and neo-traditional styles without naming anyone?
A: Search local shop portfolios, tag-specific hashtags, and convention guest lists to see consistent examples. Use community directories and recent convention photos to vet portfolios. Look for healed shots in portfolios so you can judge how the artist's pieces settle over time.
