
Fine line florals look incredible fresh but they can soften faster than bold work, especially on a shoulder that gets sun and friction. Stencil placement, sweat during the session, and sleeping on your side are the three common things that trip people up. Read these shoulder stencil ideas with notes on placement, what to tell your artist, and wardrobe picks that make the healed piece read the way you expect.
1. Fine line floral shoulder cap
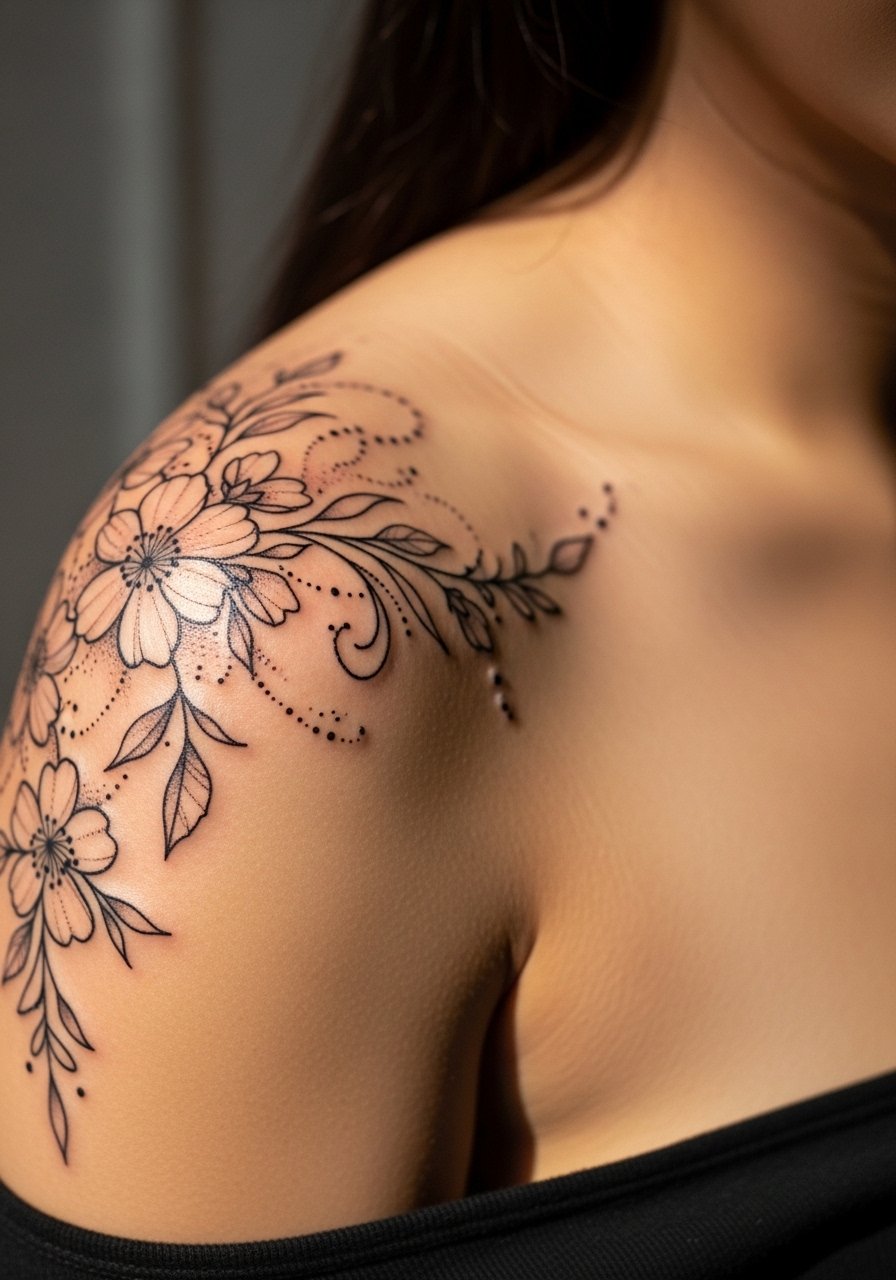
I recommend this when you want a delicate curve that follows the deltoid without overwhelming it. Tell your artist to keep spacing between petals and to use a single-needle approach with slightly heavier exit strokes so the petals do not blur over time. A common mistake is packing too many tiny petals into a 3-inch piece, which crowds the linework and forces touch-ups at year two. Expect a one-session, low-to-moderate pain experience and a touch-up window around year three if you spend a lot of time in the sun. For the session wear bring a linen tank top loose so the artist can access the cap without straps digging into the stencil.
2. Neo-traditional snake wrapping the outer shoulder
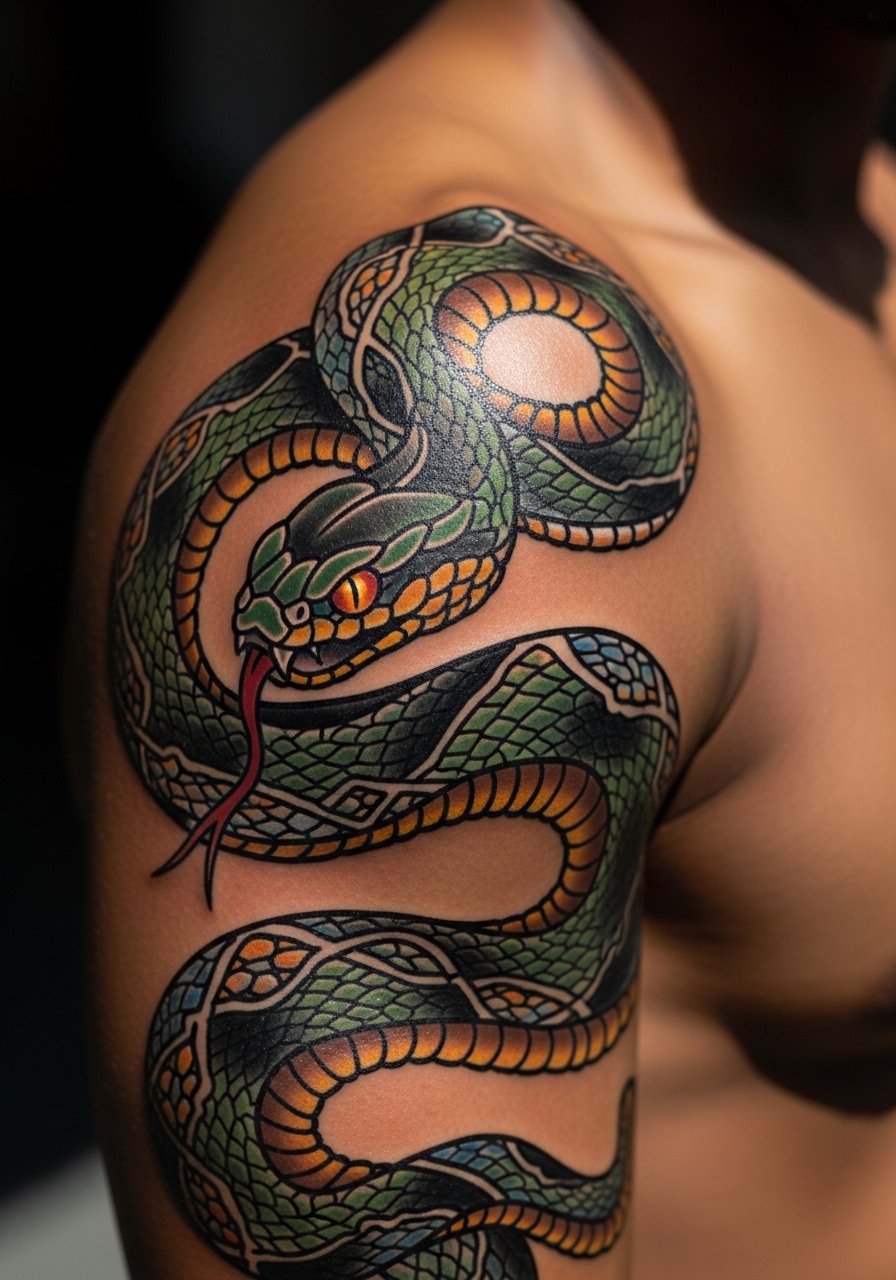
Choose this if you want motion in the stencil that reads as you move your arm. When you consult, ask the artist to design the coil to land on the shoulder muscle in a way that looks dynamic when you flex. The piece ages well because bold outlines resist blowout on curved skin, though color saturation may need a touch-up at year two or three. A common mistake is making the snake too thin where it crosses the joint, which leads to fading. Session time is moderate and discomfort is manageable on the outer shoulder. Show it off with a fitted black t-shirt and wear a sleeveless athletic top to the appointment so fabric does not smear the stencil.
3. Minimalist Medusa head on the shoulder blade
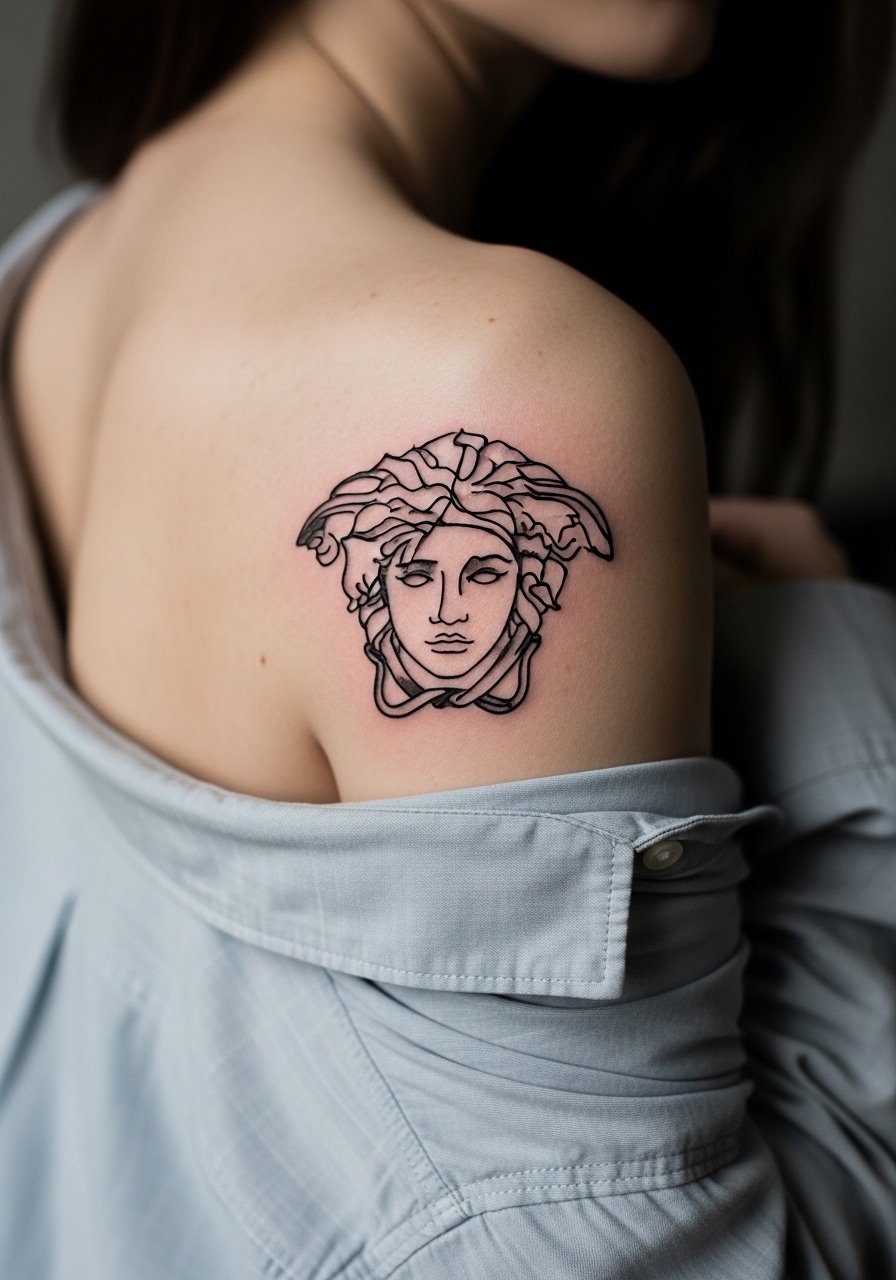
This compact, symbolic stencil sits tucked under straps and peeks out with halters or low-back tops. In consultation ask for simplified snake shapes and open areas in the hair so the face keeps definition as it heals. The biggest mistake is over-detailing the hair snakes in a small 3-inch design, which blurs into a single dark patch after a few years. For session wear bring a loose backless shirt so the artist can work and you can leave with minimal rubbing from straps. Hand a mirror to the artist and approve the stencil from both seated and standing angles before the needle touches skin.
4. Blackwork mandala framing the deltoid
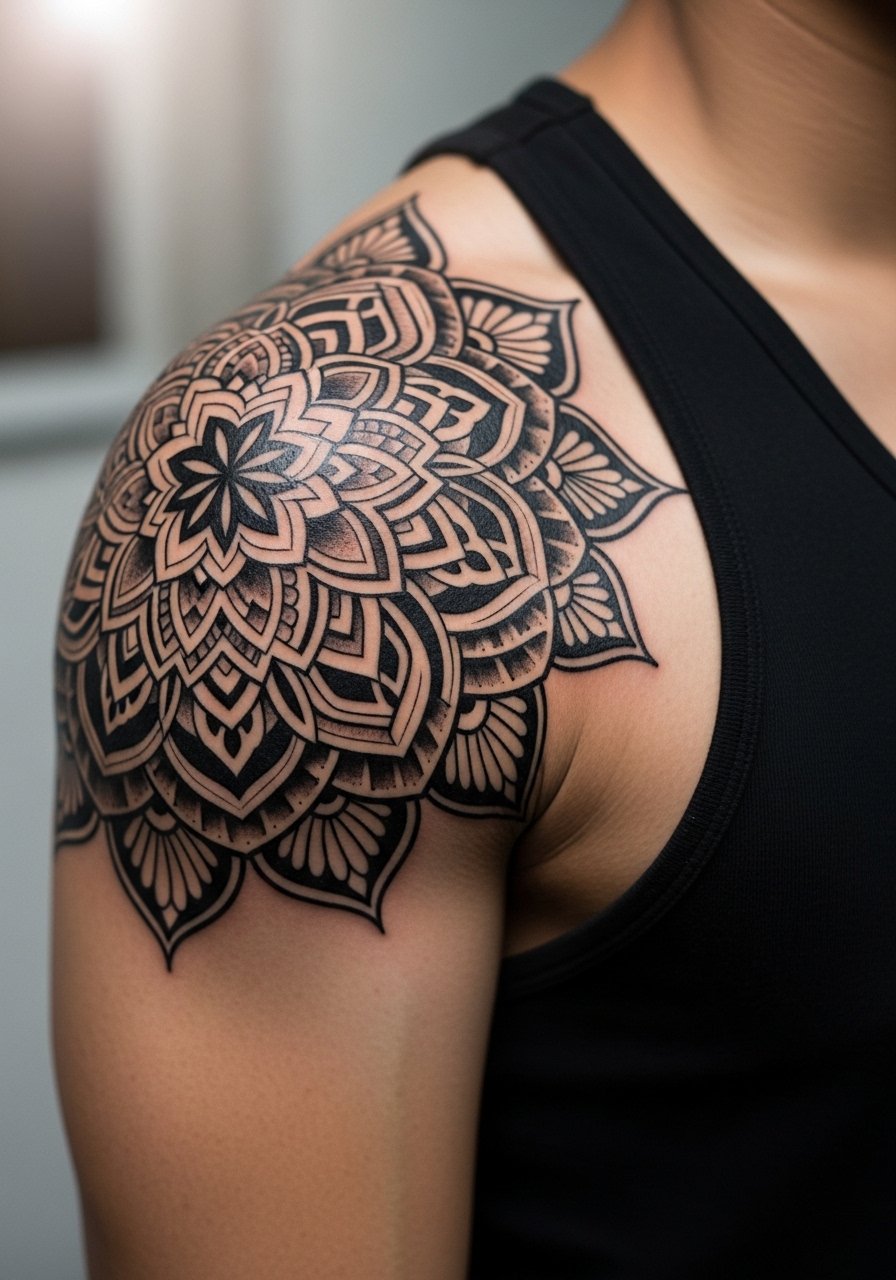
There are two camps on heavy black saturation near the shoulder. One camp prefers large solid areas because bold saturation resists smoothing and holds contrast over time. The other camp cautions about heavywork near joints because dense black can feel stiff as it ages. Tell your artist you want negative space radiating from the center so the mandala breathes and the geometry does not merge. Expect longer sessions over two appointments and moderate pain where the needle moves over bone. For show-off looks pair with a crewneck tank top in monochrome to let the symmetry read clearly.
5. Watercolor rose cluster sweeping to the upper arm
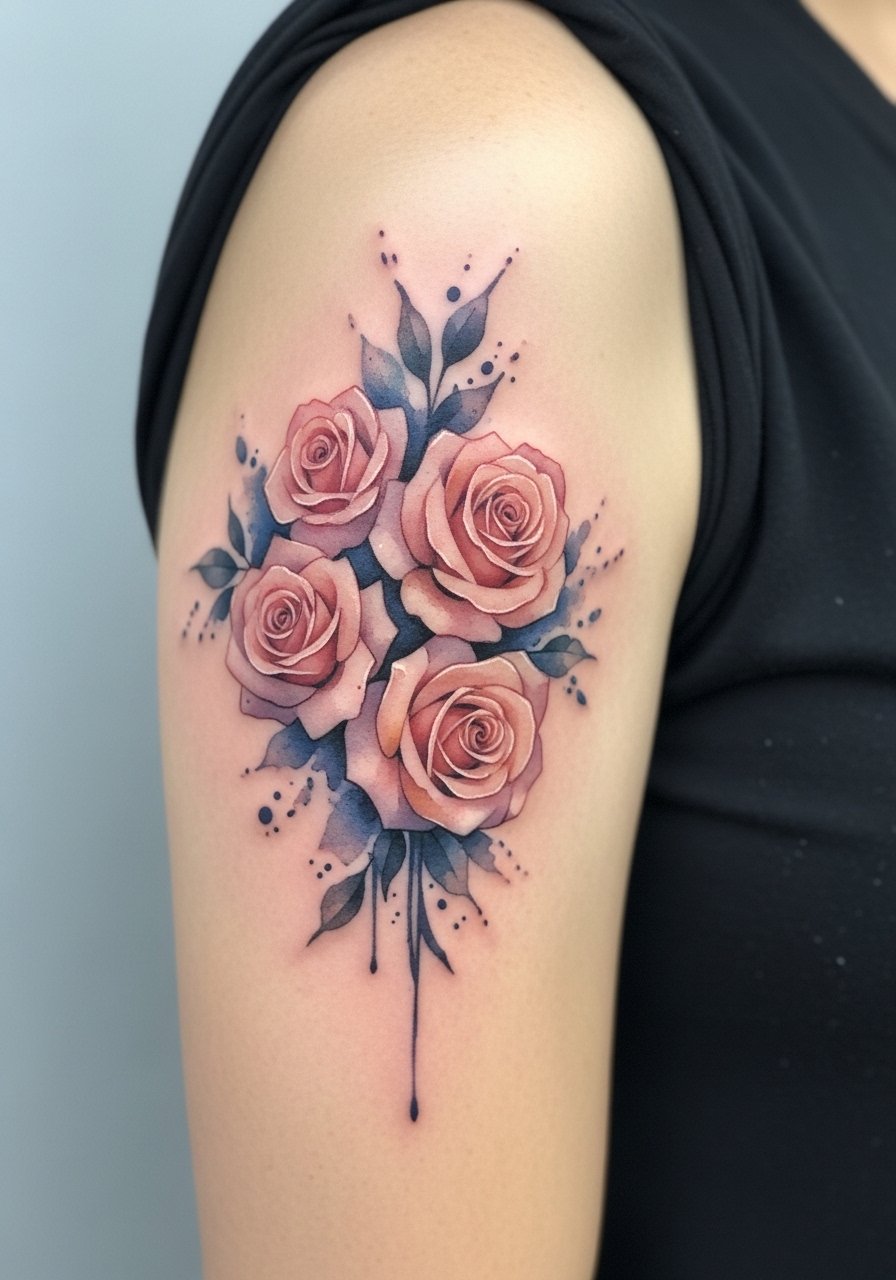
Watercolor effects give a soft, painterly feel but they can lose punch on mobile areas like the shoulder. Ask for color anchors in the petals with thin black outlines to prevent color migration. The common mistake is pure wash without contrast, which looks washed out at six months. For the session wear a short-sleeve raglan so you can pull it down without tugging at the stencil. Expect one to two sessions depending on size and moderate soreness when the artist blends color across the curve.
6. Micro-realism butterfly on the top shoulder
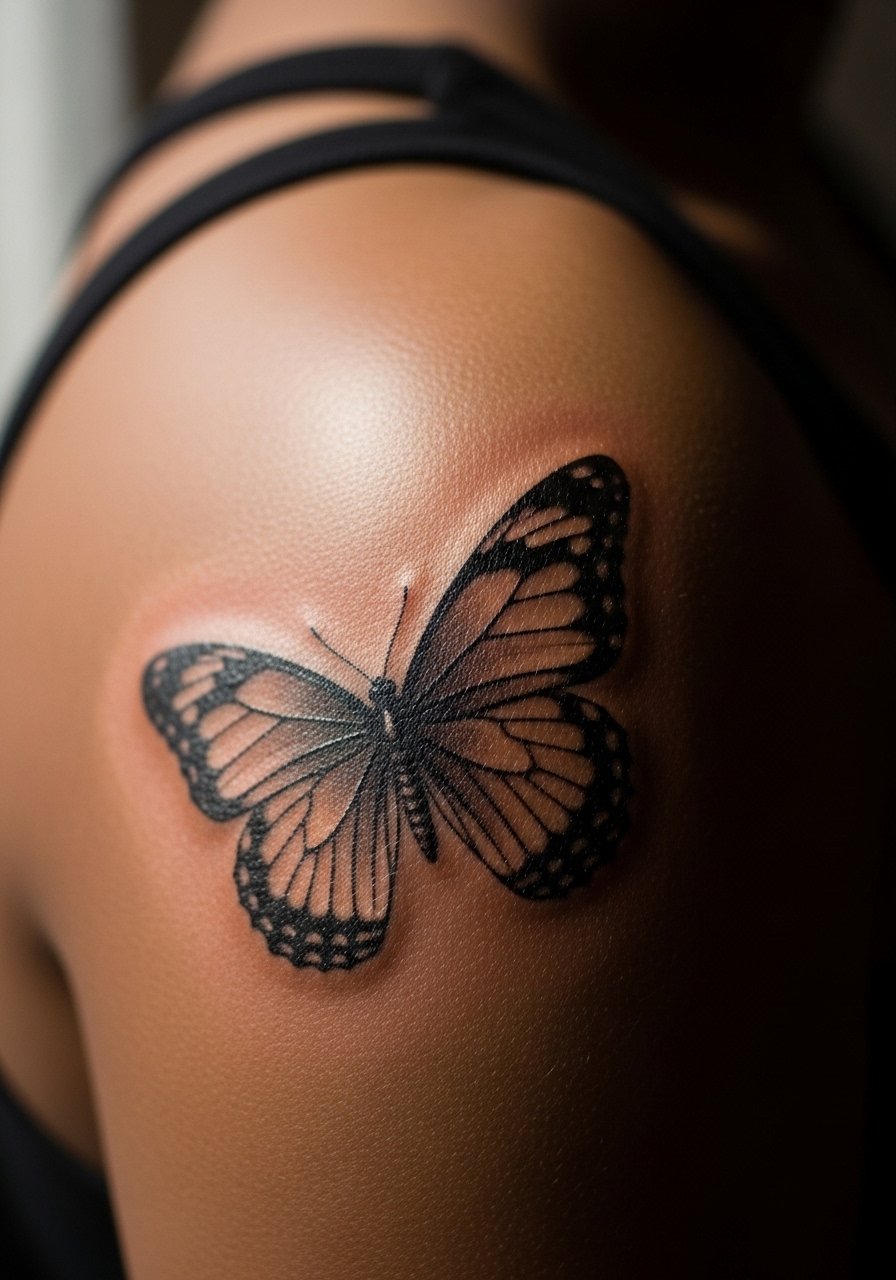
Micro-realism on a motion-prone shoulder needs careful stencil placement so wing edges do not cross high-friction zones. During consultation point to photos showing the scale you want and ask for slightly simplified wing veins to preserve detail at year two. A real mistake is asking for hyper-detail in a 2-inch canvas, which the skin cannot hold long term. Session feels like short bursts of intensity with fine needle work and usually two sittings. Wear a sleeveless athletic top to the appointment to avoid smudging the stencil during undress.
Pack Smart
The shoulder pieces above involve small, mobile canvases and a few prep items smooth both the session and the first week.
-
Stencil transfer paper kit. Lets you preview placement on the curved shoulder before inking which is handy for cap and blade pieces.
-
Topical numbing cream. Applied per instructions before the session it eases the sting on sensitive shoulder spots without dulling the artist's linework.
-
Thin protective film roll. Useful for the top shoulder and outer arm where friction from straps and bags is common during the first week.
-
Fragrance-free body wash. Cleanses the tattoo gently during showers without irritating fresh linework on the shoulder.
-
Aquaphor healing ointment. A thin layer in the initial days helps prevent cracking for delicate linework and keeps the stencil edges crisp during early healing.
7. Ornamental vine draping from collarbone to shoulder
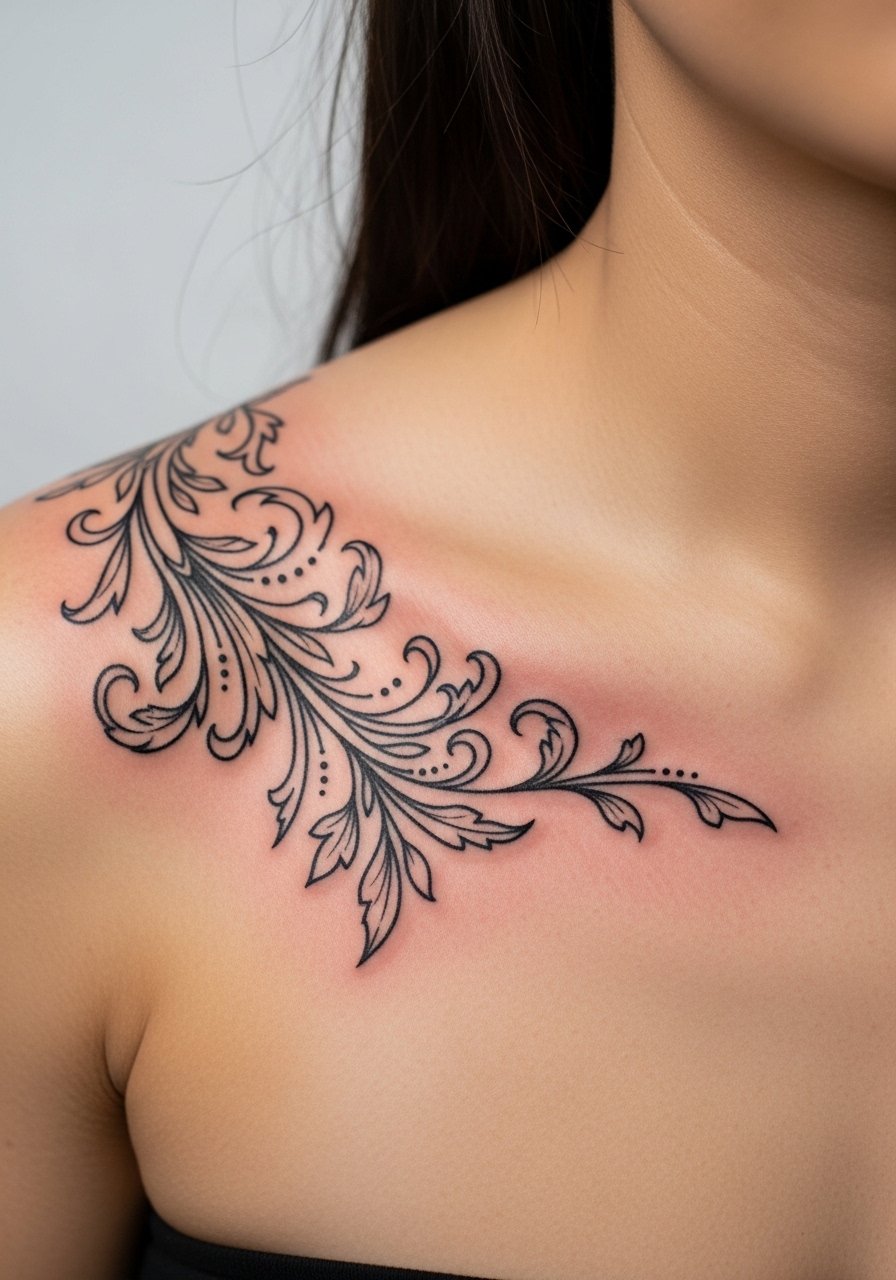
This elongated stencil accentuates the neck and shoulder line and works well when you want something that reads with clothing. Ask for the vine to be drawn to follow your collarbone angle so it does not look like a flat sticker when you move. A common mistake is making the vine too repetitive, which ages into a band of thin lines that lose rhythm. Expect low-to-moderate pain and one to two sessions if you want more nodes. For showing off pair the healed piece with an off shoulder blouse women in light linen so the vine follows the neckline naturally.
8. Ignorant style sketch skull on the shoulder cap
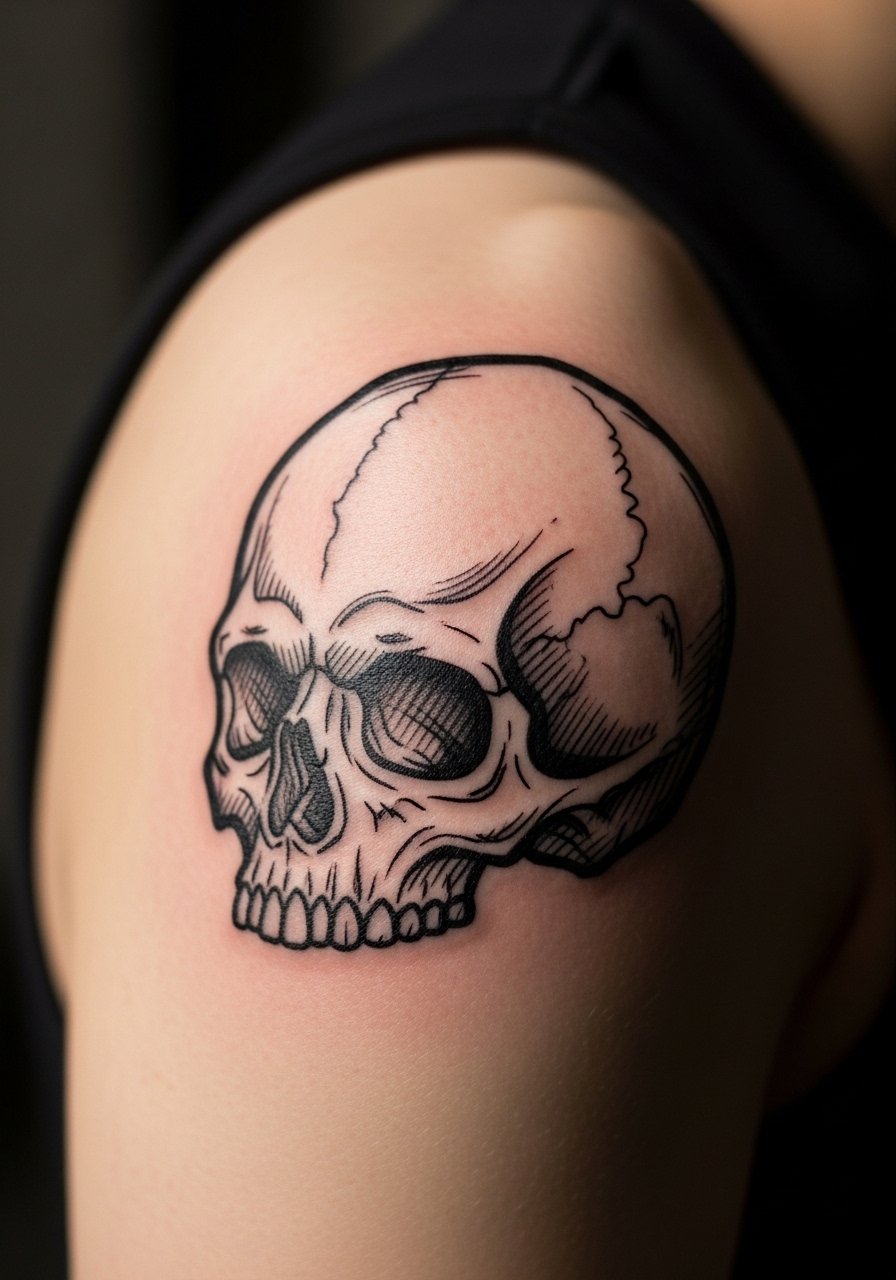
The ignorant or sketchy style reads raw because of loose linework and intentional imperfections. Tell your artist you want visible guide strokes and not a smoothed-over finish, otherwise they may tidy the lines too much. The piece is lower risk for blowout because the strokes are meant to be irregular, but avoid tiny cross-hatching which can merge with time. Session is usually quick and less painful on the shoulder cap. This design pairs well with a cropped jacket or fitted tee for an edgy silhouette without hiding the stencil.
9. Fine line laurel wreath arcing over the shoulder blade
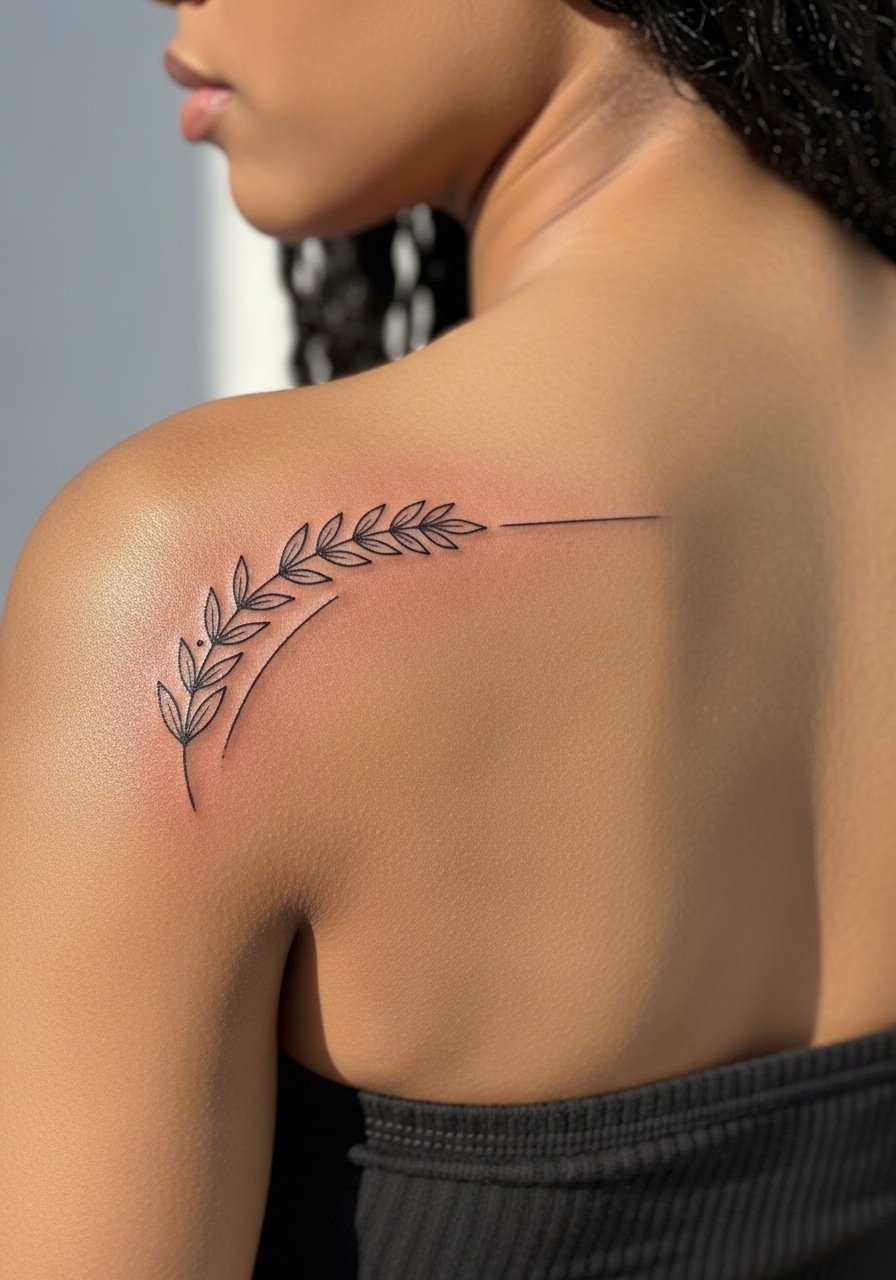
A laurel wreath follows bone structure and flatters the shoulder blade when sized correctly. During consultation ask for slightly separated leaves instead of continuous loops so each leaf keeps definition at year two. The biggest mistake is tightening the arc too small which forces overlapping lines. Pain is low to moderate and a single session usually suffices. For showing off try a strapless tube top in nude tones so the wreath peeks out without distraction.
10. Traditional anchor with ribbon on the deltoid
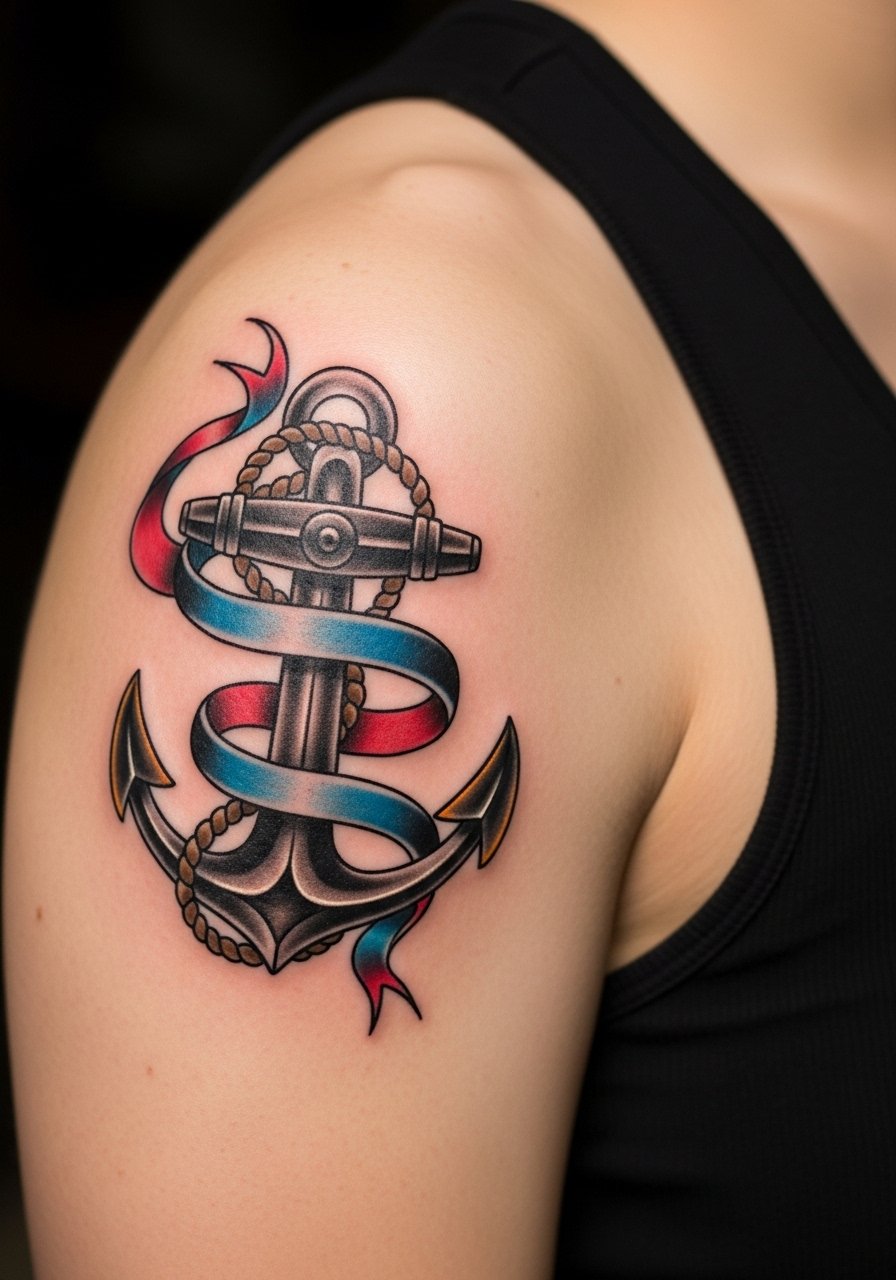
Traditional pieces rely on bold outlines and flat color which age cleanly on the deltoid because of good contrast and simpler fills. Tell your artist you want thick primary outlines and clear negative space around the ribbon text to prevent the ribbon from merging into the anchor. A typical mistake is cramming script into a narrow ribbon which blurs into a dark stroke. Expect two sessions for color saturation and moderate soreness near the bone. This piece looks classic with a cropped faux leather jacket or a fitted tee when you want the deltoid to stand out.
11. Black and gray feather fading into the shoulder
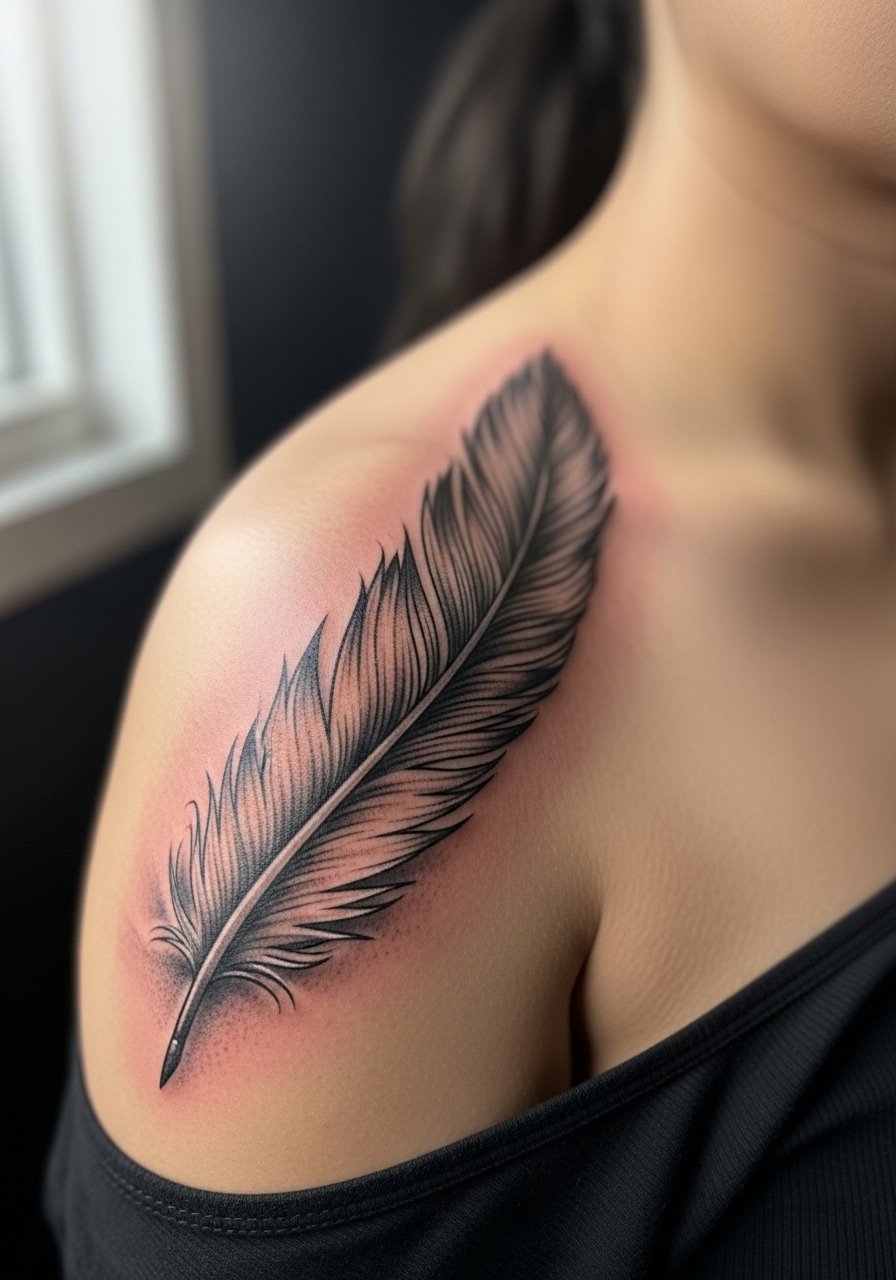
Feather stencils that fade into the shoulder create an optical illusion of weightless movement. Ask for stipple shading and soft gradients rather than dense solid fills so the feather retains texture at two years. A mistake is making the quill too dark with hard edges, which reads heavy and ages into a visible line. Session is moderate because of long shading passes and touch-ups may be needed for soft gray gradients. Pair with a v neck sweater women rolled at the neckline to reveal the soft shading casually.
12. Neo-traditional Medusa full shoulder wrap
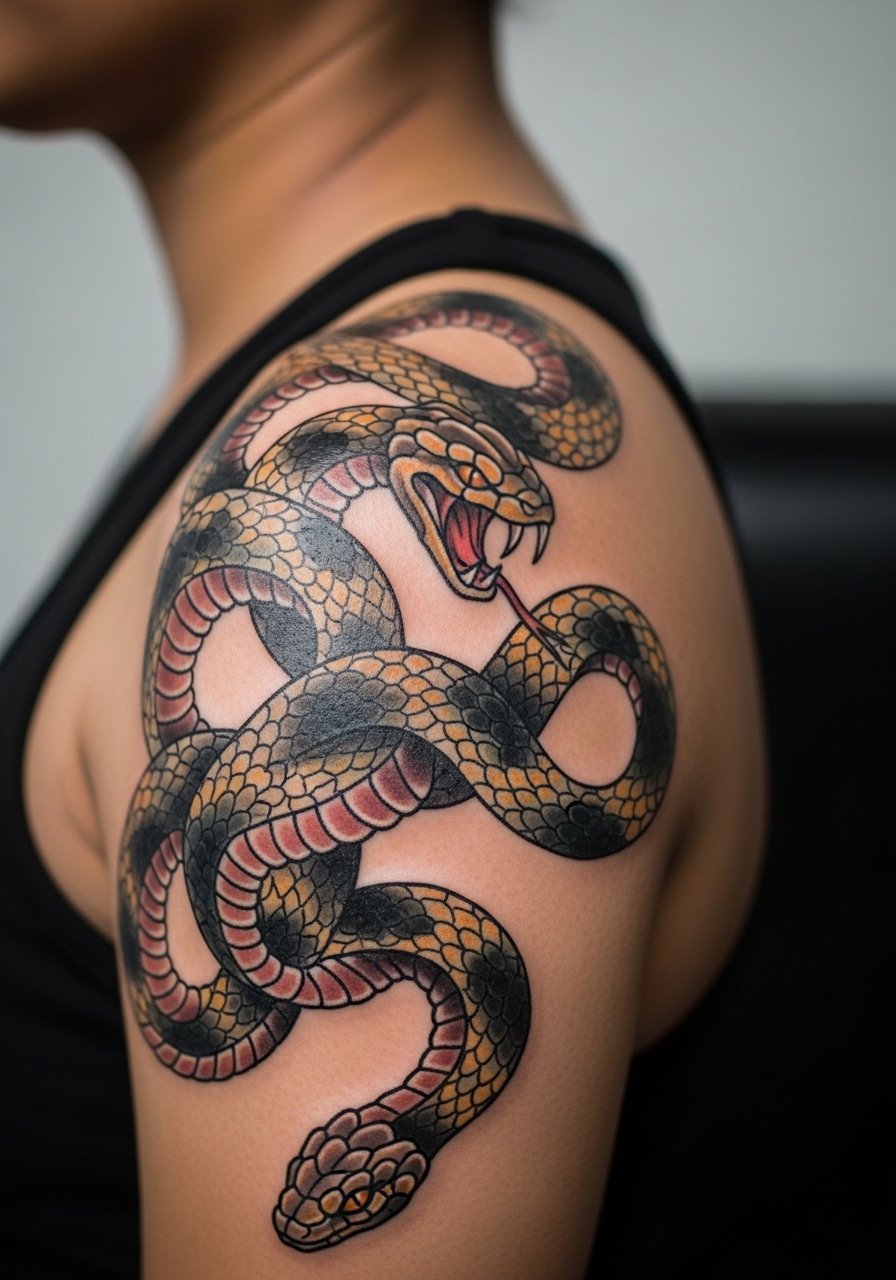
This larger wrap uses color and dynamic linework to move around the shoulder joint. The design needs intentional paths for snakes so coils do not bunch where the arm meets the torso. A common error is forcing too many scales or textures in overlapping snakes which blurs with time and requires touch-ups. Expect multi-session work and moderate to high discomfort across the wrap area. This motif reads as a protective talisman to some people and can be personalized through snake shapes and hints of color in the eyes.
13. Ornamental compass on the front shoulder cap
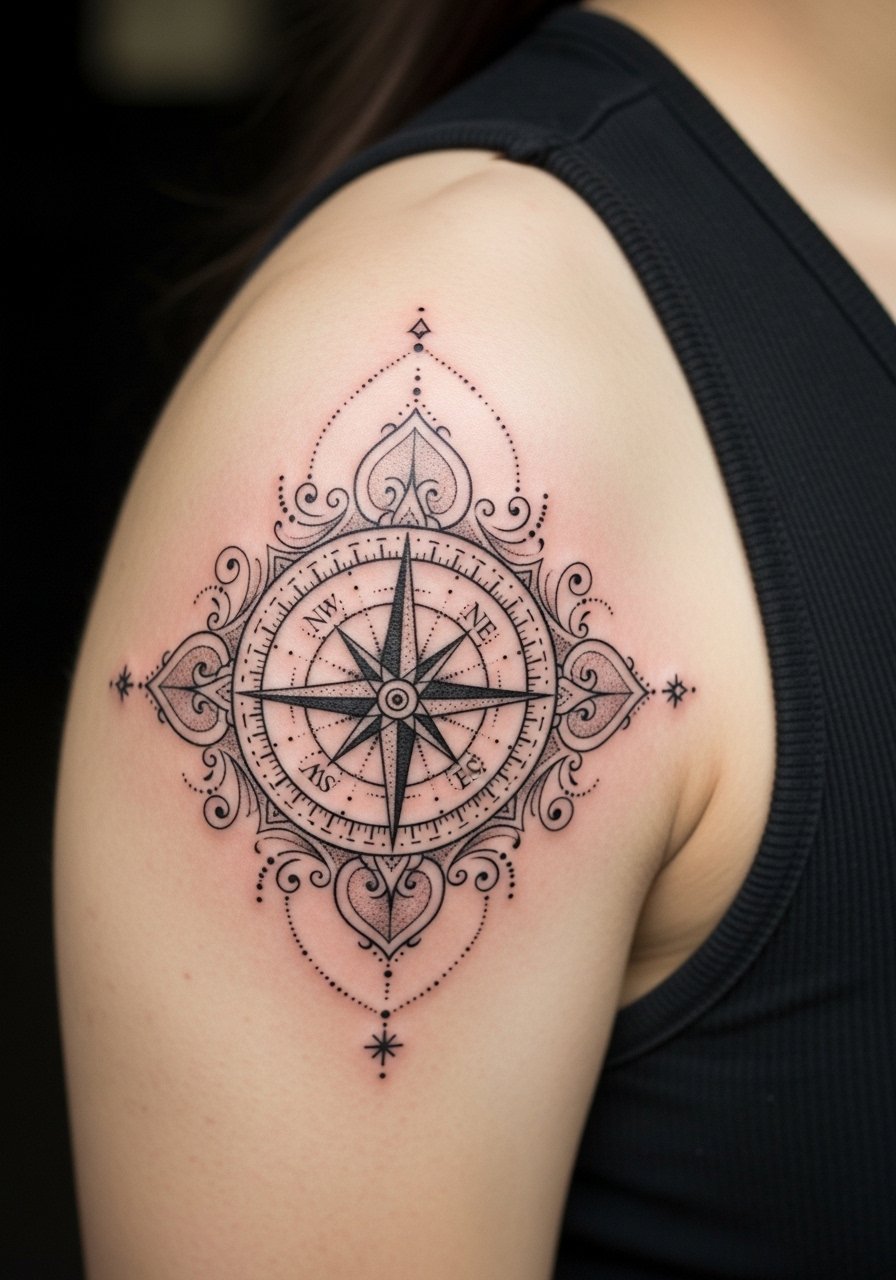
A compass makes a strong focal point and holds up if you prioritize spacing and center symmetry. When you review the stencil make sure the compass center aligns with the highest point of your deltoid so the geometry reads symmetrical when you raise your arm. Common mistakes are tiny directional marks that blur, so ask for slightly bolder cardinal points. Session is brief to moderate and pain varies over bone edges. Wear a crewneck tank top you can pull aside for access and to show the compass cleanly.
14. Feather fading into natural shoulder shadow
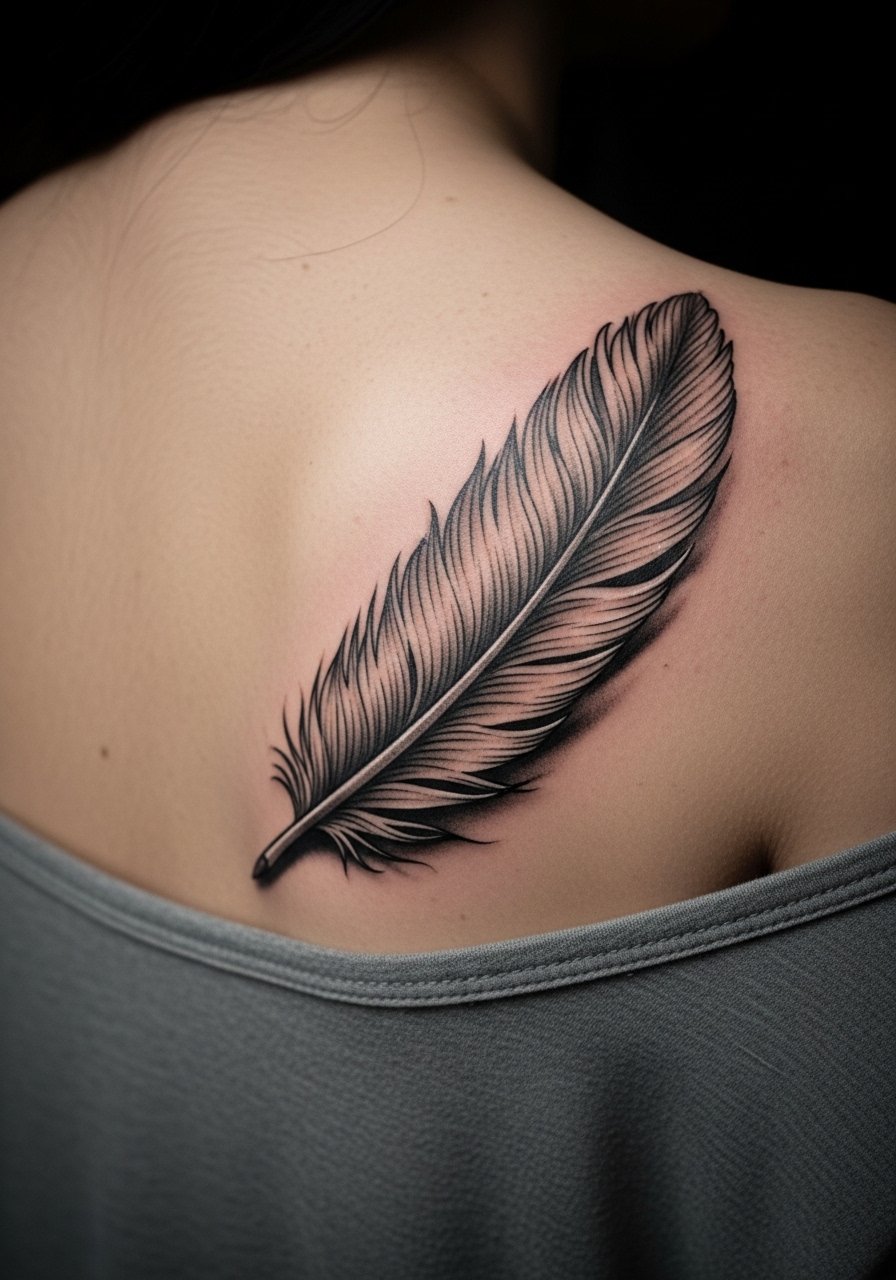
This idea expands the feather concept by using your shoulder shadow as part of the composition. Ask your artist to map the fade so it follows the natural shadow when standing, not just when seated in the chair. A mistake is placing the fade against high-friction areas where fabric rubs the stencil during healing. Expect soft shading passes and low-to-moderate pain. For the session wear a wide neck t-shirt you can shift without rubbing the area.
15. Small anchor peek on the upper arm near the shoulder
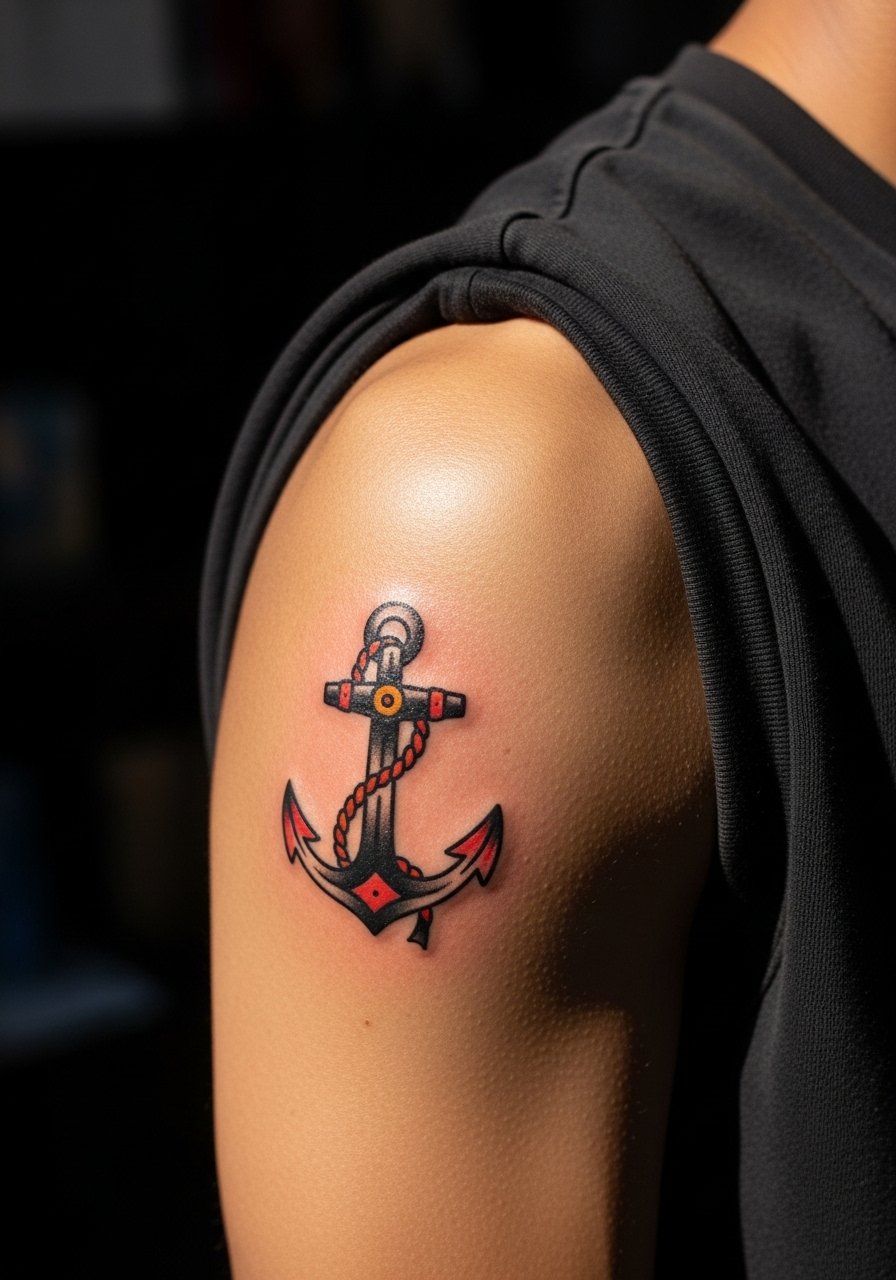
Tiny anchors are low-commitment pieces that sit well on the upper arm when you want classic symbolism without a wrap. Tell your artist you want a strong outline and avoid tiny script on the ribbon. The usual mistake is making the anchor too fine for the area which weakens as it ages. Session time is short and pain is low. Pair it with rolled sleeves or an open front hoodie for casual days when you want the anchor visible.
16. Ornamental vine that coaxes into the shoulder joint
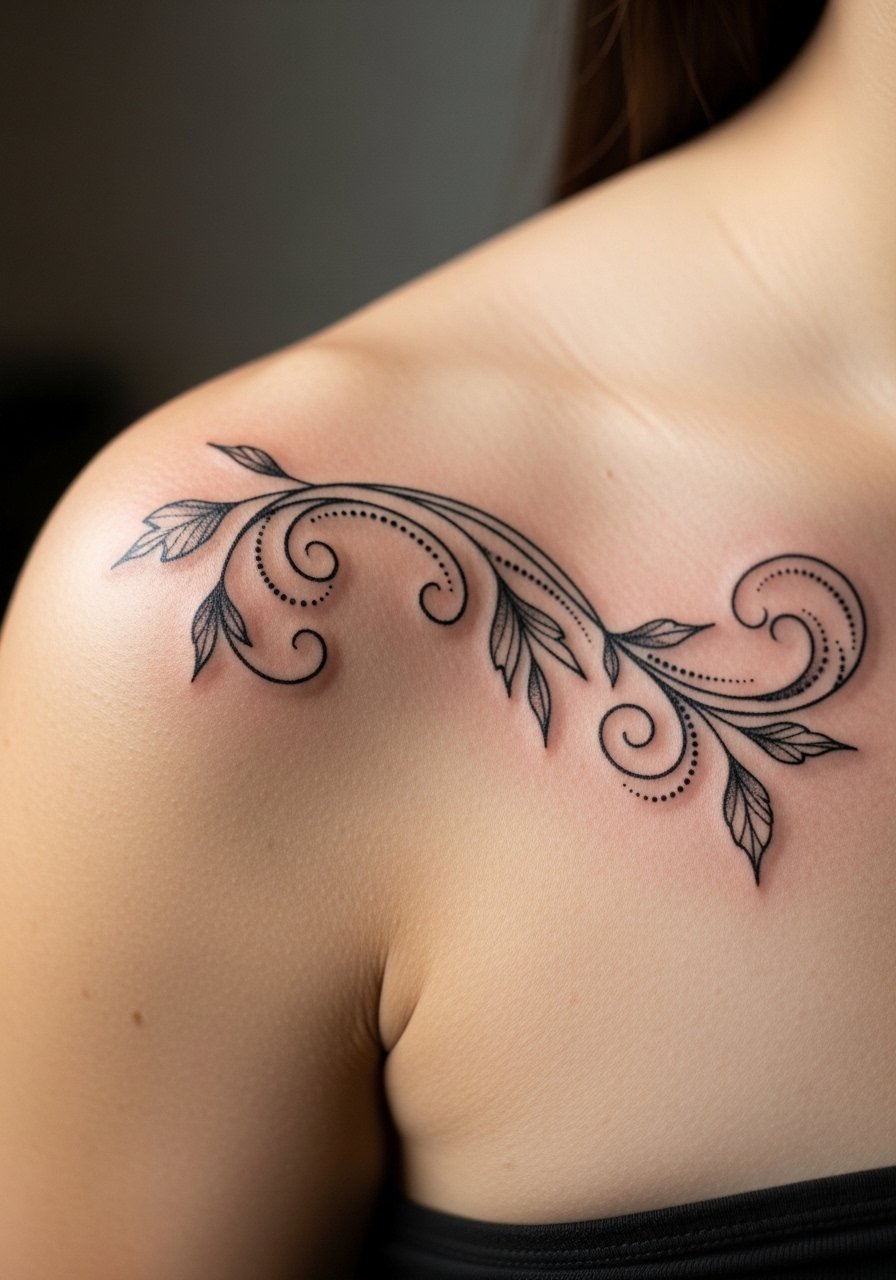
A vine that traces into the joint looks deliberate if the artist plans for muscle movement. Ask for the vine to avoid the exact crease of the shoulder when you raise your arm so it does not collect friction. A common mistake is drawing the vine across the shoulder crease without testing the stencil in motion which leads to distortion when you lift heavy things. Expect low-to-moderate pain and a single session for a medium-length vine. For the appointment wear a loose tank top so the artist can position the stencil and you can approve it from standing.
17. Micro-realism single wing on the cap of the shoulder
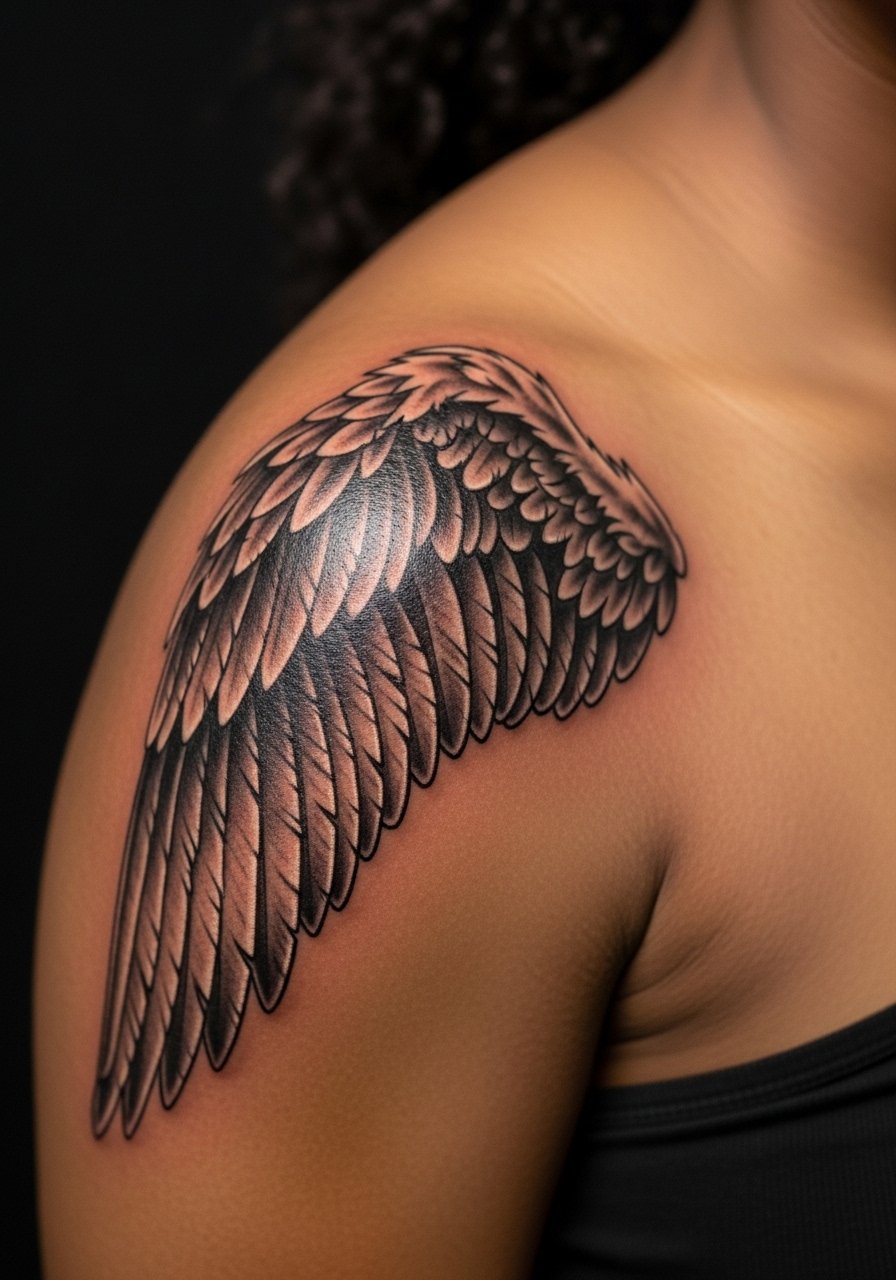
A single wing uses micro-detail to imply motion and pairs well with clavicle and back pieces later on. In consultation say you want the wing scaled so its barbs are slightly simplified to avoid merging at year two. The mistake is insisting on hyper-fine barbs in a tiny span which cannot hold after healing. Sessions can be longer because of careful shading and patience from both artist and client. Wear a loose button-down shirt unbuttoned you can pull aside to show the shoulder without rubbing the stencil.
Frequently Asked Questions
Q: Will a fine line floral on the shoulder fade faster than a bold blackwork piece?
A: Fine line work tends to show softening sooner on mobile, sun-exposed areas like shoulders because the lines are thinner and friction accelerates spreading. Bold blackwork holds contrast longer. If you prefer fine line, build in touch-ups around year two to three and protect the area from sun with clothing or SPF during the first year.
Q: How do I prevent the stencil from smearing during a sweaty session on the shoulder?
A: Arrive with clean, dry skin and wear a sleeveless athletic top so the artist can place the stencil precisely. Artists often use alternate transfer papers or wipe the area with alcohol and let it dry completely before pressing the stencil. If you sweat easily ask for short breaks and a fan in the room to keep the skin dry.
Q: If I gain muscle, will my shoulder tattoo stretch and distort?
A: It depends on location and design. Designs with bold outlines and open negative space handle muscle changes better than dense fine-line clusters. Ask your artist to place key design elements across stable areas of the shoulder and to avoid tiny repeated details where the muscle bulges most.
Q: Do watercolor tattoos on the shoulder need different aftercare than traditional ones?
A: The basic aftercare is the same but watercolor relies on subtle saturation so keep the area out of direct sun and avoid heavy rubbing during healing. Use the protective film product listed above for the first few days if you expect friction from straps or bags.
Q: How should I dress the day of my shoulder stencil appointment to avoid smudging?
A: Wear clothing you can remove without pulling over your head such as a loose button-down or a tank top. For upper shoulder work choose a tank or a shirt with a wide neckline so no fabric brushes the stencil. Bring an extra loose shirt to wear home that will not rub the fresh ink.
Q: Are there real disagreements among artists about fine line on shoulders and Saniderm for mobile areas?
A: Yes, artists split on both topics. One group says fine line on shoulders blurs faster and prefers bolder work for longevity. The other group argues that with correct depth and spacing, fine line can settle well. On Saniderm some artists favor it for active spots because it protects while you move. Others worry about trapped moisture on sweaty areas and prefer dry healing. Ask your artist where they stand and why before the session.
