
Fine line roses are all over my saved boards, but the trick is picking one that still reads clear after two years, looks right with your wardrobe, and fits your tolerance for touch-ups. Expect honest tradeoffs here. I’ll walk you through 17 small rose directions, the placements that help them age, what to say at consults, and which pieces pair best with your everyday clothes so you don’t wind up with a tattoo that lives only on camera.
1. Single-Line Outline on the Inside Wrist
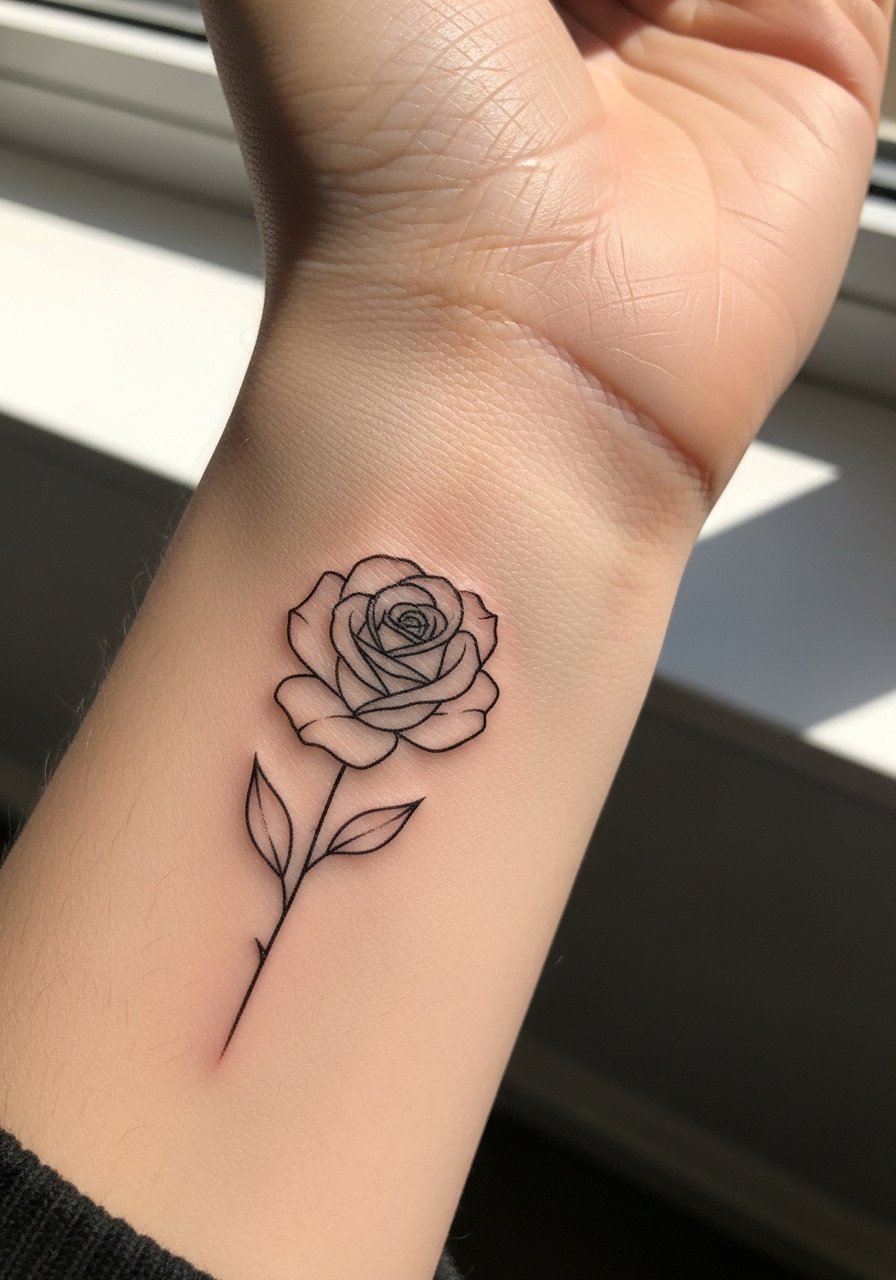
I recommend this if you want a tiny, readable bloom that peeks from cuffs. I tell clients to ask for a single-needle outline with a slightly heavier anchor line where the stem meets the bloom. That extra anchor reduces the chance the center blurs into a smudge at year three. Pain is mild for most people. Session time is short, often under 30 minutes. Common mistake is asking for hairline lines across the whole bloom. Those vanish on medium and dark skin tones. For the session wear a sleeveless tank so the artist can position your arm comfortably. Expect a touch-up around year two if you swim or spend lots of time in strong sun.
2. Neo-Traditional Bud on the Inner Forearm
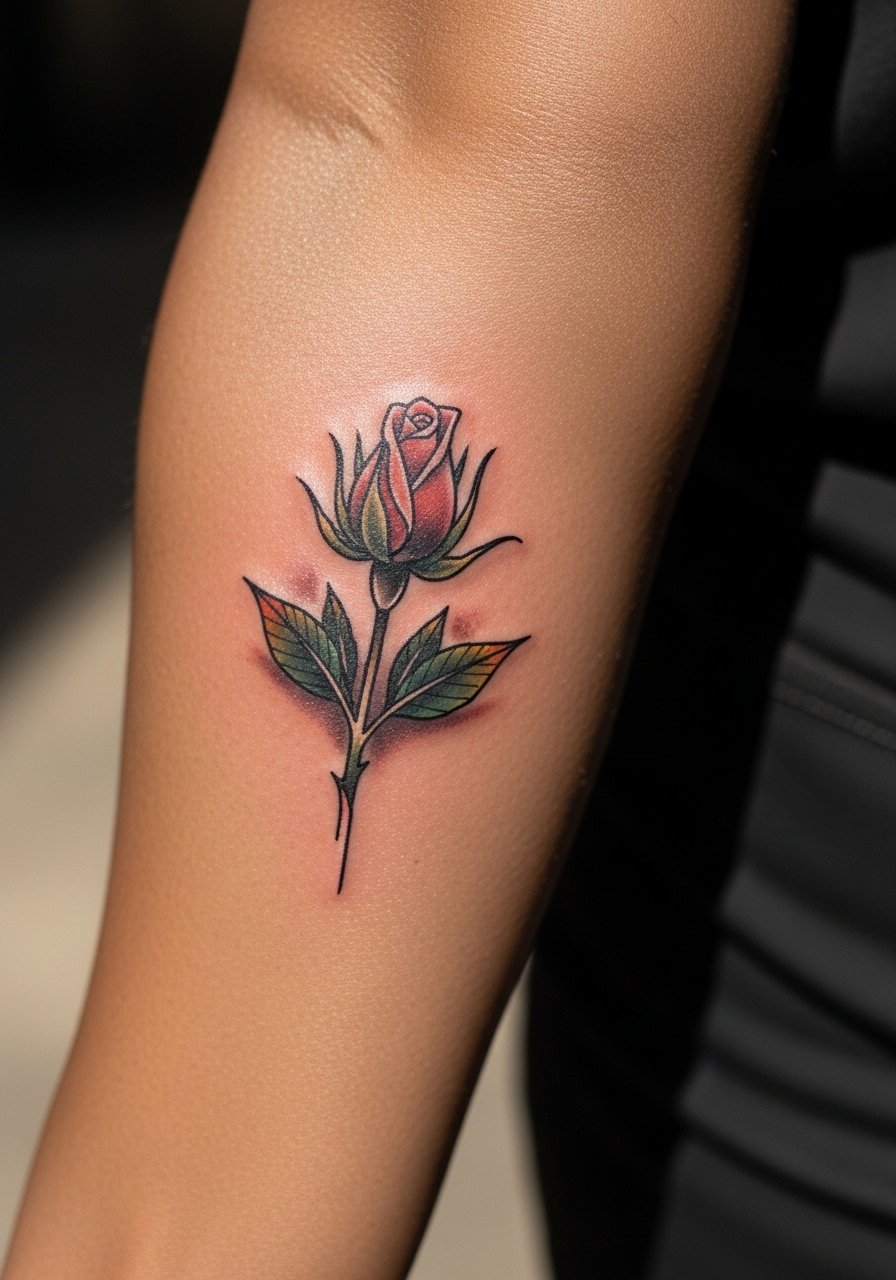
From what I’ve seen, neo-trad micro roses last well because artists use stronger outlines and measured saturation. Tell your artist you want bold outlines with restrained color fills, not a watercolor wash. The inner forearm lets the piece breathe and gives artists room to space petals so they do not merge over time. Pain is low and sessions usually run 45 to 90 minutes. A mistake is compressing a full bloom into a tiny patch. That invites blowout as the ink settles. Pair this with a rolled sleeve or an linen button down to show off the forearm without overtaking the look.
3. Fine Line Bloom on the Collarbone
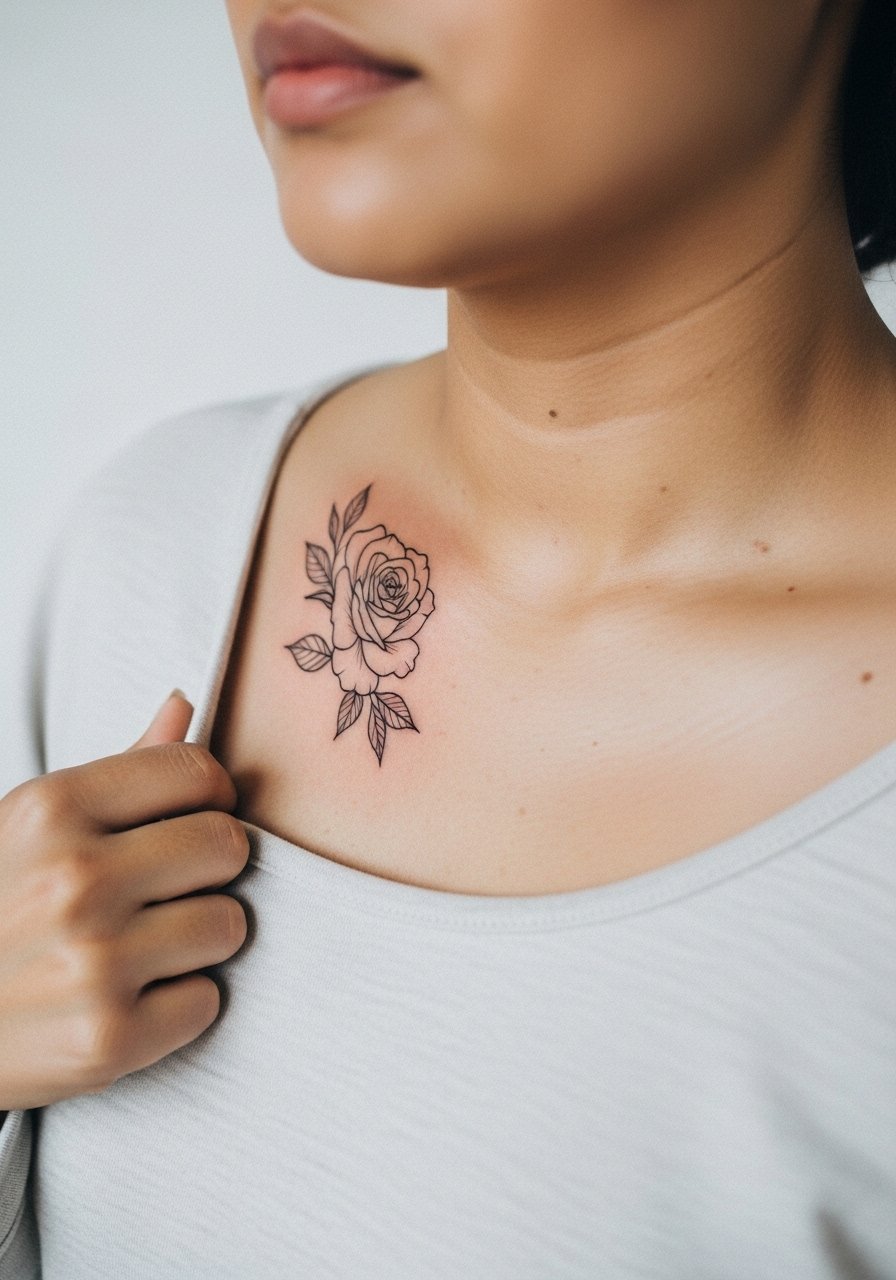
The collarbone is a top pick if you want something visible but elegant. I warn clients that collarbone skin shifts with posture and weight changes. Ask for a slightly open composition and one or two thicker anchor lines so the fine details don’t bunch after a year. Session time is usually under an hour. A common aging issue is doing ultra-fine nested petals with no negative space. Those lines tend to blur. For showing it off, pair with an off shoulder sweater or a strapless top that frames the linework. Expect a light touch-up at two to three years depending on sun exposure.
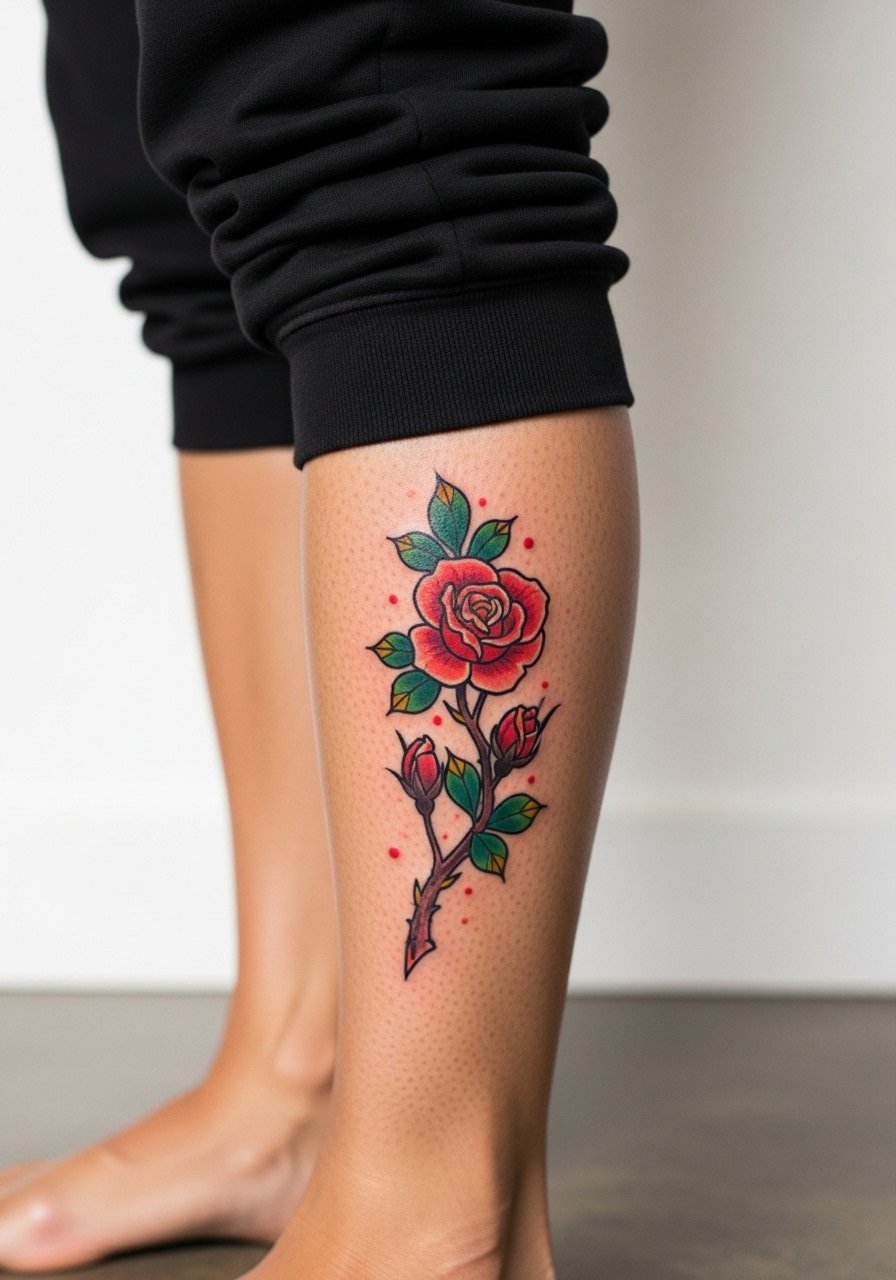
4. American Traditional Thorny Stem on the Ankle

If you like the sailor-jersey look, this is the version to choose for longevity. I tell people to commit to a 3-inch scale so the reds and greens have room to sit without bleeding into each other. Ankle work can hurt more because of bone proximity. Sessions may run 45 to 90 minutes. The mistake is trying to cram bold traditional shading into a tiny one-inch ankle mark. That tends to soften into a blob. Show it off with strappy flat sandals or cuffed jeans. Traditional saturation often ages cleaner on darker skin than fragile fine line pieces do.
5. Micro-Realism Petals on the Finger Side
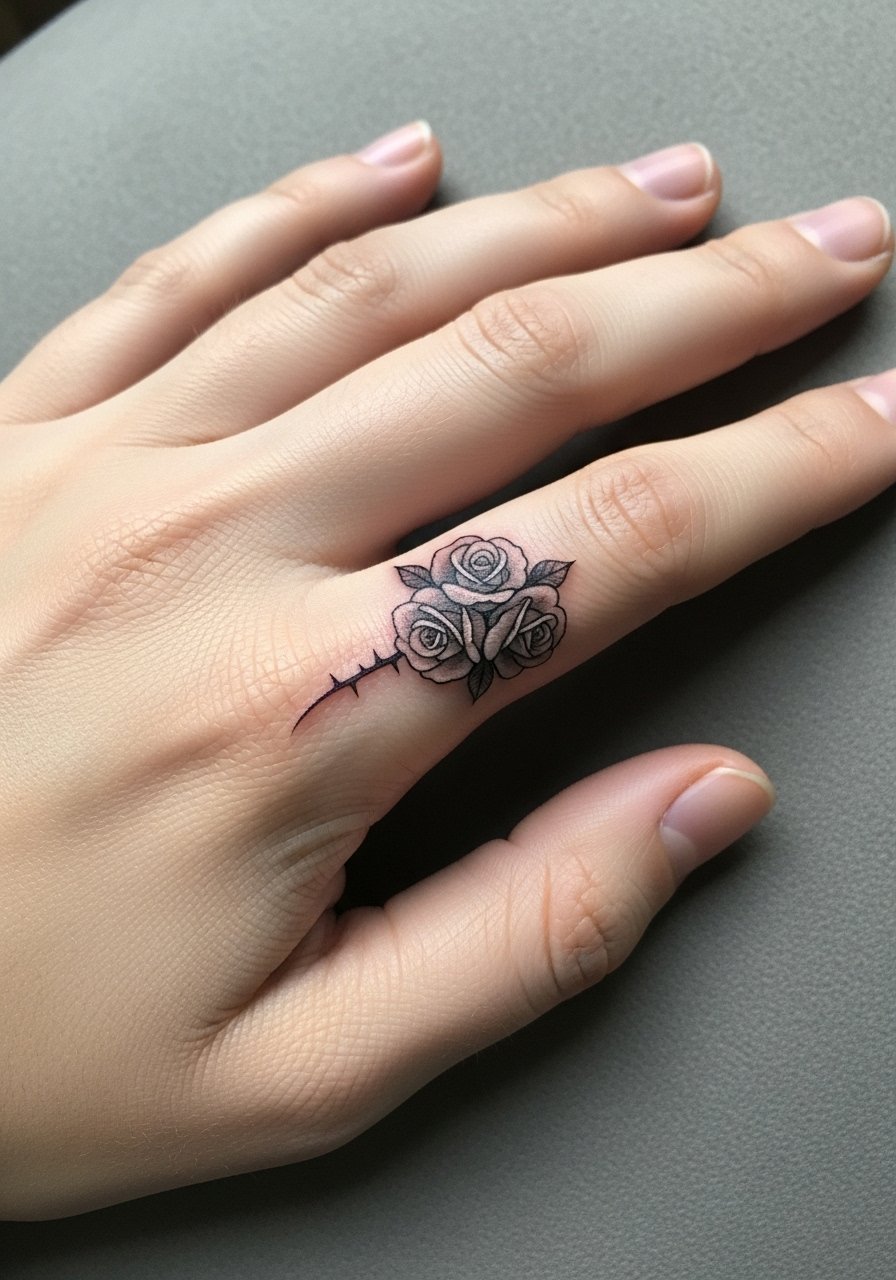
Finger work is intimate and demands careful expectations. I always say fingers are a high-friction zone so micro realism should focus on a single petal cluster rather than a full rose. Ask for a denser dotwork core and soft shading around it. Expect touch-ups more often because washing and movement fade ink faster here. Sessions are short but can sting more than you'd guess. The common mistake is going too small across multiple fingers. Instead pick one side and let the composition breathe. For the session try a thin silver chain bracelet on the opposite wrist to keep your hands steady and styled in photos.
6. Watercolor Splash on the Shoulder Blade
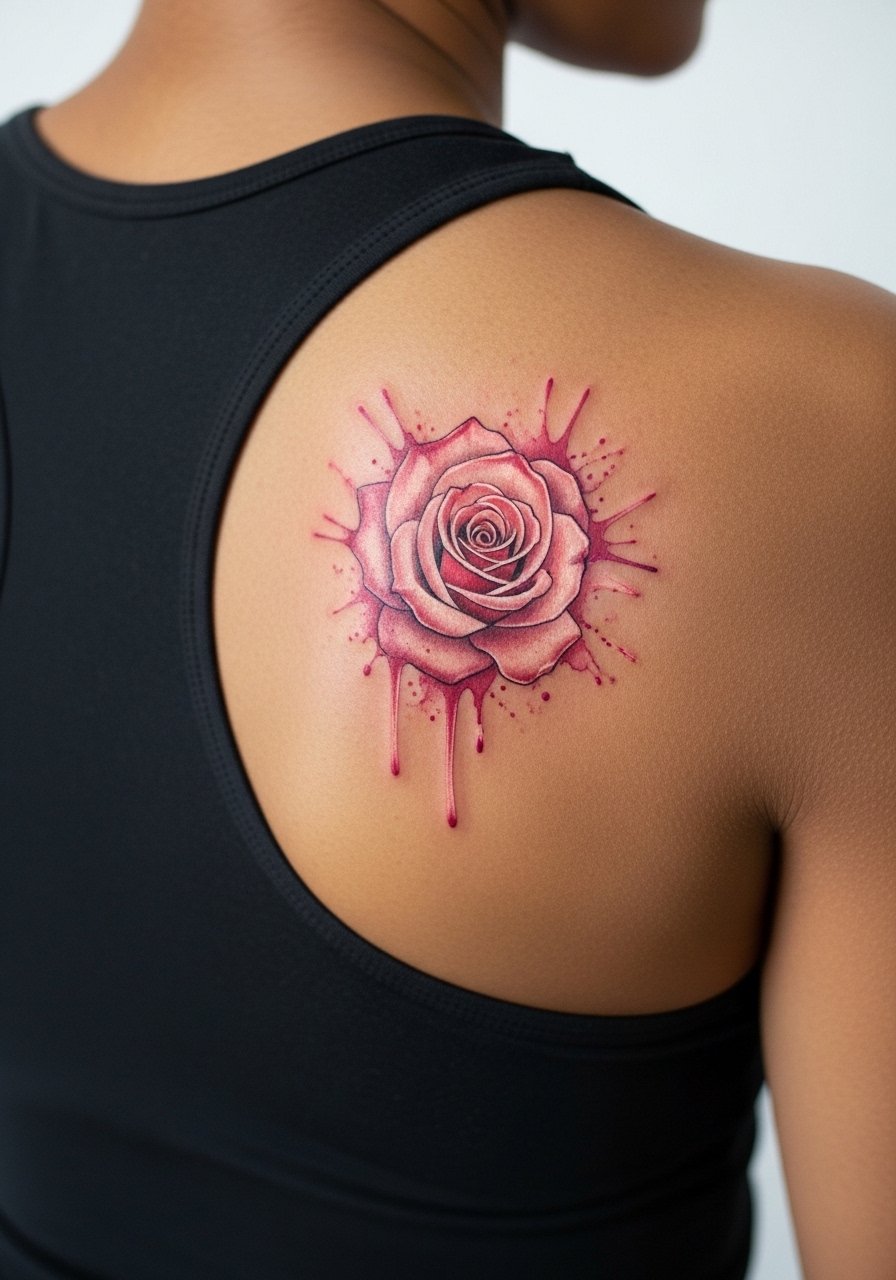
Watercolor roses read painterly on the shoulder blade, and this placement gives the washes room. I caution that watercolor techniques have trended down in popularity because some versions fade to a bruise-like wash over time. If you want the painterly feel that lasts, ask for a stronger black or brown outline for crucial petal edges and ask the artist to layer pigment in one or two dense passes. Sessions typically take an hour. A frequent mistake is asking for a full watercolor gradient with no anchor lines. That can be unpredictable on darker skin tones. For showing it off, pick a racerback tank or backless halter so the splash reads without interruption.
Pre-Session Essentials
The wrist, finger, and shoulder blade ideas above each ask for different prep and first-week care, and a few smart items make the chair time and the first days easier.
- Ink-Ich thin healing balm. A thinner formula that users report sits lighter on fine line work and reduces the greasy buildup that can obscure micro shading.
- Alcohol-free aftercare spray from Australia. Spray applications keep small areas like fingers and wrists clean without excessive rubbing.
- UK-style breathable salve for dot work. Favored by some dot work artists because it moisturizes without clogging tight stipple shading.
- Thin protective film roll. Useful for finger and wrist placements that meet soap and water frequently during the first week.
- Aquaphor healing ointment. A standard thin occlusive for the initial days that many people still reach for when advised by shops.
7. Blackwork Geometric Rose on the Outer Thigh

Blackwork on the thigh is forgiving because the skin there is stable and less exposed to sun. I tell clients to expect longer sessions if the piece has dense fills. The visual impact comes from bold shapes and negative space rather than tiny strokes. Mistakes include making the geometry too tight. Give the shapes breathing room so they do not blur together at year five. Pain is moderate. Wear high waist shorts for the session so the artist can access the area without discomfort. This style ages well when saturation is even and lines are given ample spacing.
8. Japanese Irezumi Mini Rose Branch on the Calf
Irezumi-influenced roses work when scaled to the calf because they follow the leg’s natural flow. I suggest asking for traditional bold outlines with restrained color panels. The debate over cultural origins matters here. One camp sees borrowing as homage, and another urges careful adaptation and credit to the style’s lineage. I recommend discussing motifs with your artist so the design nods to the form without copying sacred iconography. Sessions run one to two hours. Pair with cropped jogger pants or sneakers to show it off in streetwear looks.
9. Ignorant-Style Sketchy Rose on the Ribs
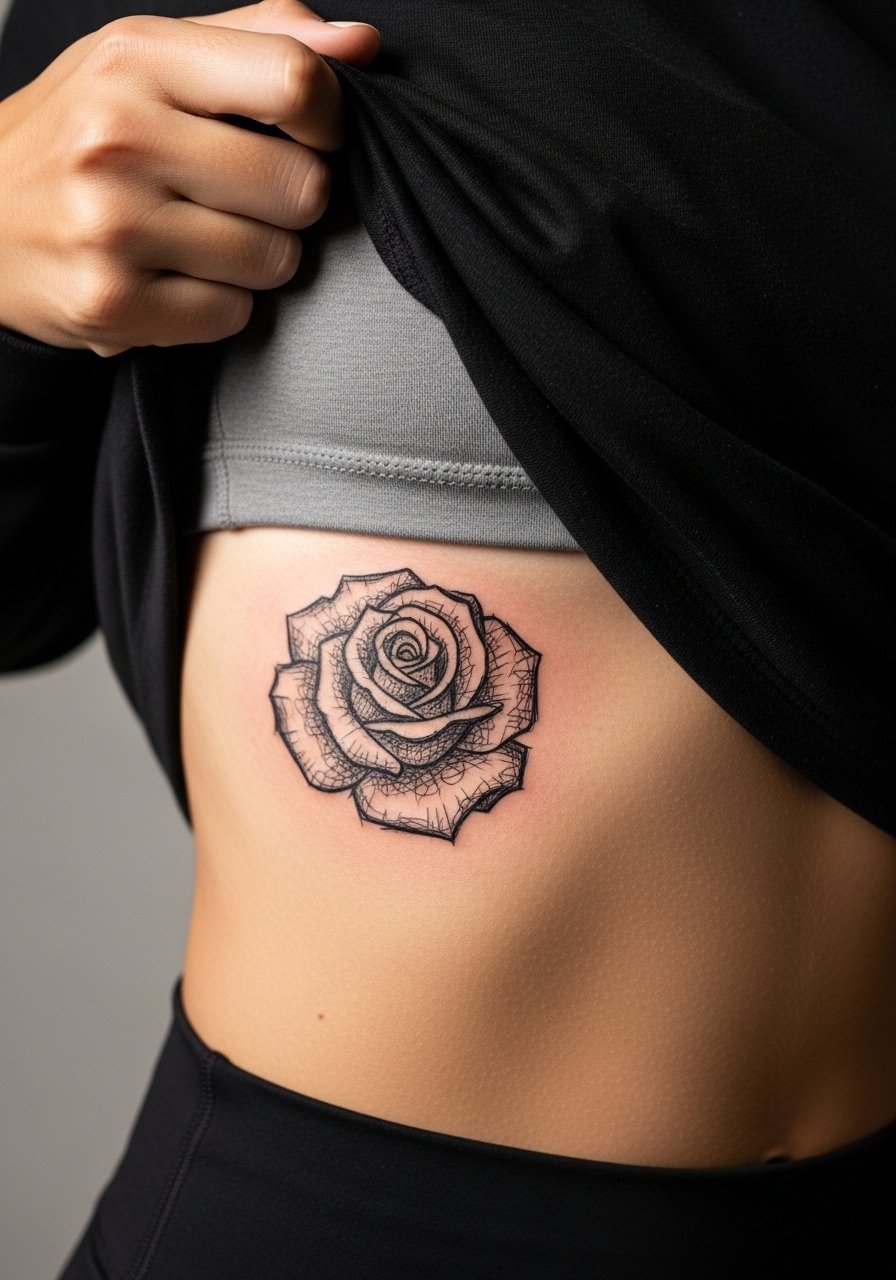
Fair warning, ribcage sessions hurt more than most placements. The ignorant style embraces raw, hand-drawn lines and looks intentional when executed loosely. Ask your artist to keep linework confidently uneven rather than shaky. A common mistake is trying to micro-scale the sketch too much. The ribs stretch and compress with breathing and weight changes so give lines space. Sessions are usually single long sittings. If you work in a conservative office, remember ribs are easy to keep private. For session comfort, a zip-up hoodie you can open for access helps maintain modesty during long sessions.
10. Dotwork Rose Mandala on the Inner Bicep
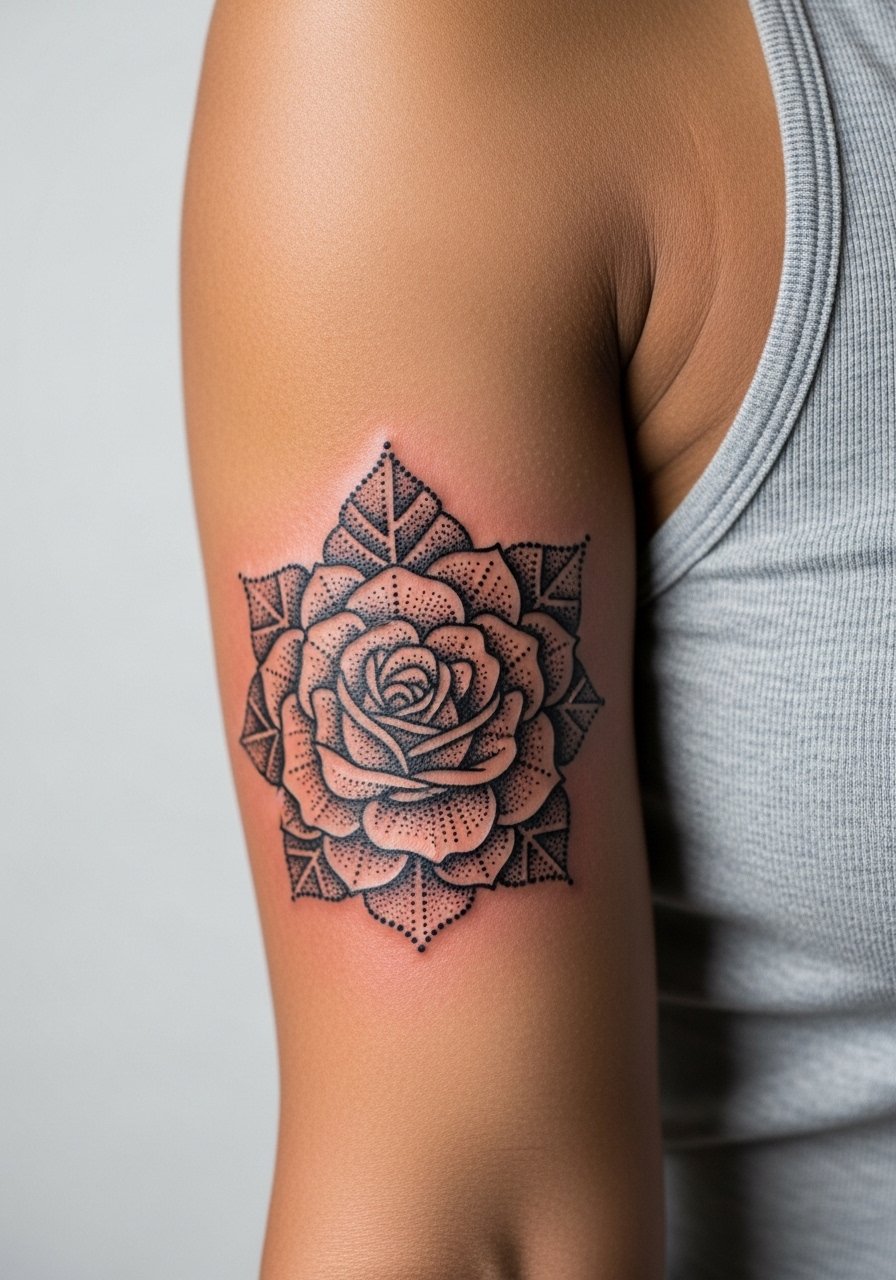
Dotwork thrives on contrast and spacing, so the inner bicep’s canvas is ideal if you want symmetry without stretch. Tell your artist you want gradated stippling and to avoid packed dot clusters that can merge. The pain is moderate and tapping sensations are different from linework. A mistake is requesting an overly dense mandala at a tiny size. That structure needs room. For the session wear a sleeveless muscle tank to keep the arm accessible. Expect touch-ups in high-density areas after a year if you exercise the arm frequently.
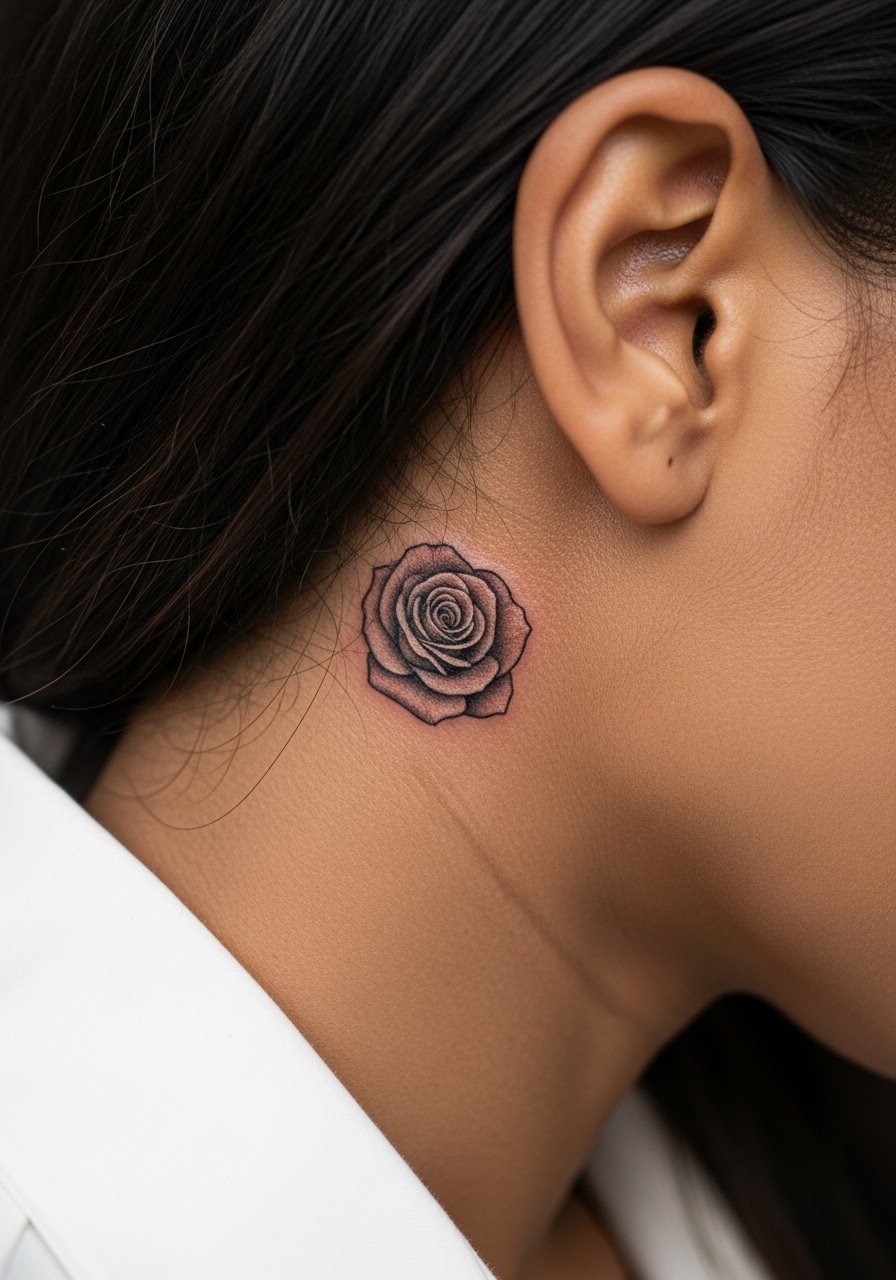
11. Realistic Wilted Rose on the Side Neck

Small realistic roses on the side neck read as emotional statements because they sit in a visible zone. Ask for softer gray transitions rather than heavy black cores so the wilted look reads authentic. Neck skin is thin and touch-ups may be needed sooner than forearm work. There is also a practical note about visibility and career implications. Some employers still scrutinize neck tattoos. The session is quick but can be sensitive. Mistakes include asking for ultra-fine micro shading without density. That can wash out on darker mid-tones. For the session pick a wide-neck shirt you can shift aside easily and that keeps photos modest.
12. Minimalist Bud Behind the Ear
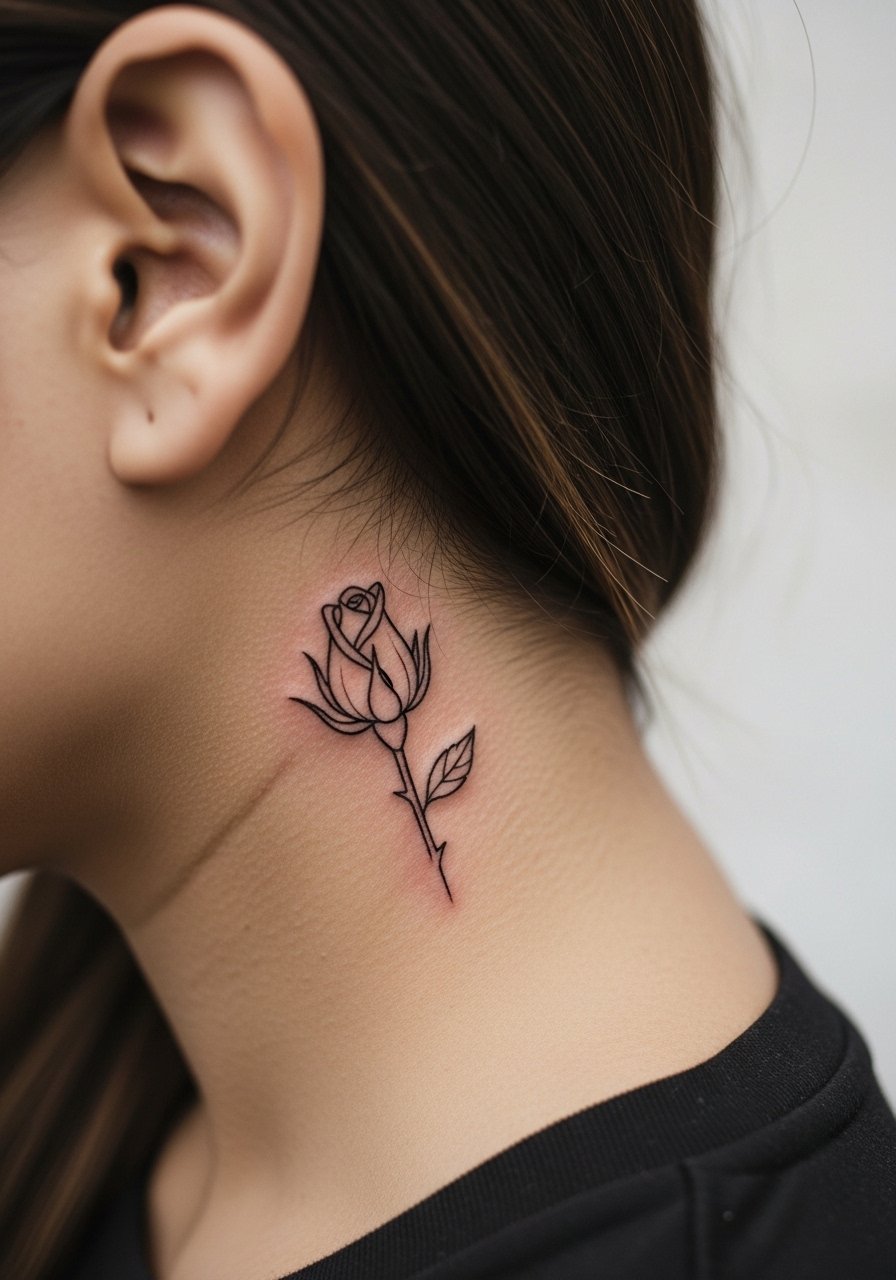
Behind-ear micro pieces are perfect for workplace discreetness. I recommend a single-line bud no larger than one inch and ask the artist to place it below the hairline so it hides when you want it to. The area heals quickly but is tender. A common mistake is trying to add too much texture behind the ear. Keep it simple. Wear hair down for the session if you want it hidden afterward or tuck it back so the artist has clean access. If you need to find more references, search hashtags like #SmallRoseTattoo and local studio feeds rather than pinning a composite image.
13. Rose Vine That Wraps a Smartwatch
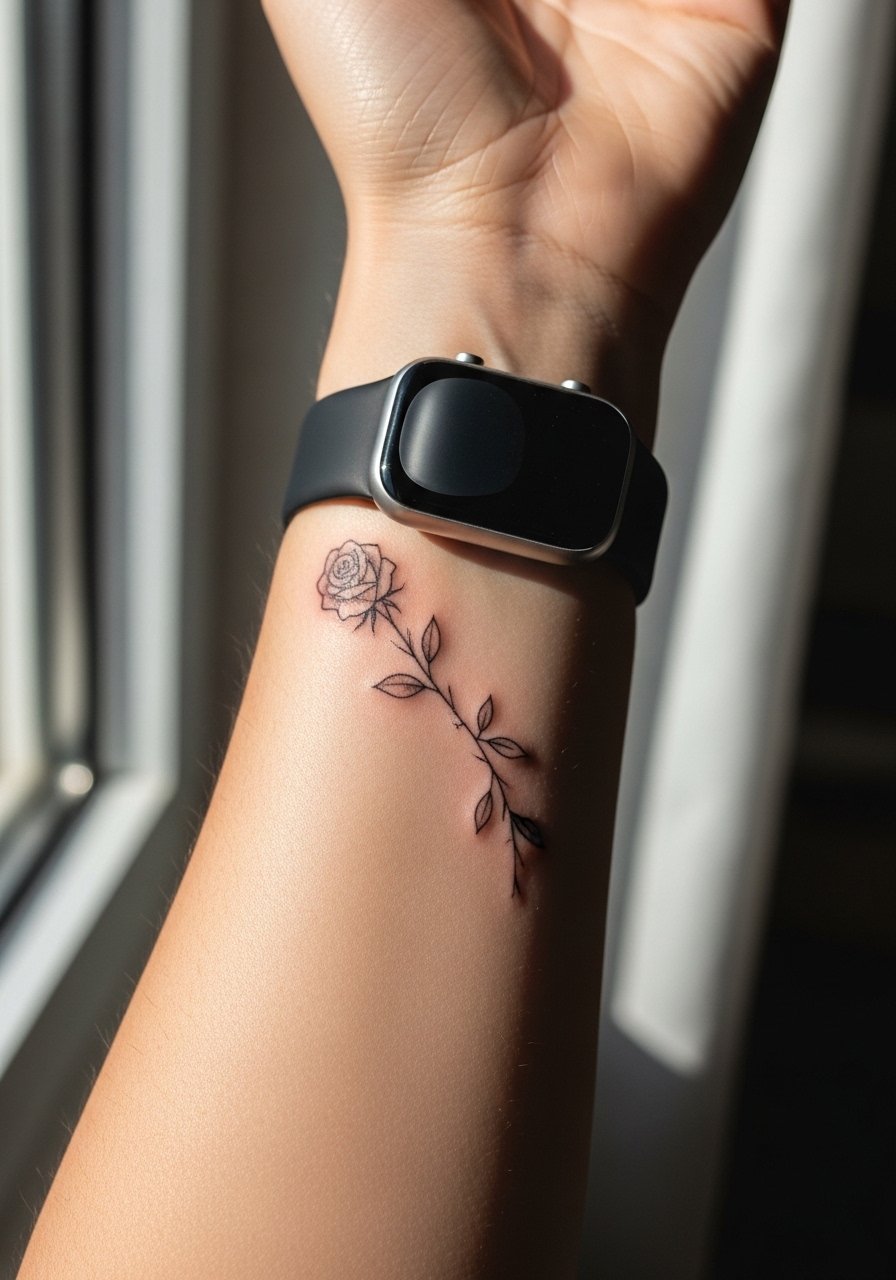
This placement is a fresh twist. I advise designing the vine to follow the watchband curve so movement does not distort petals. Tell the artist you want staggered spacing between leaves so the tattoo does not blur where the band rubs. The wrist area gets friction from watch straps and daily use. Session time is short. A mistake is placing dense shading directly under the band where constant rubbing accelerates fading. For showing it off pick a minimalist bracelet on the opposite wrist to balance the tech look.
14. Micro-Realism Behind the Ear Lobe Line (Hidden)
This hidden placement gives the secrecy of a tattoo that only appears in certain hairstyles. Micro-realism here should focus on a single petal or tiny bloom. Expect very short sessions and potential for fading if hair products sit on the area. The mistake is trying for excessive petal detail in a sub-half-inch design. Keep contrast. For a show-off look in private, use hairstyles that reveal the back of your neck occasionally. If you plan to photograph it, lighting and hairline framing make a bigger difference than extra shading.
15. Small Blackwork Rose Near the Ankle Bone
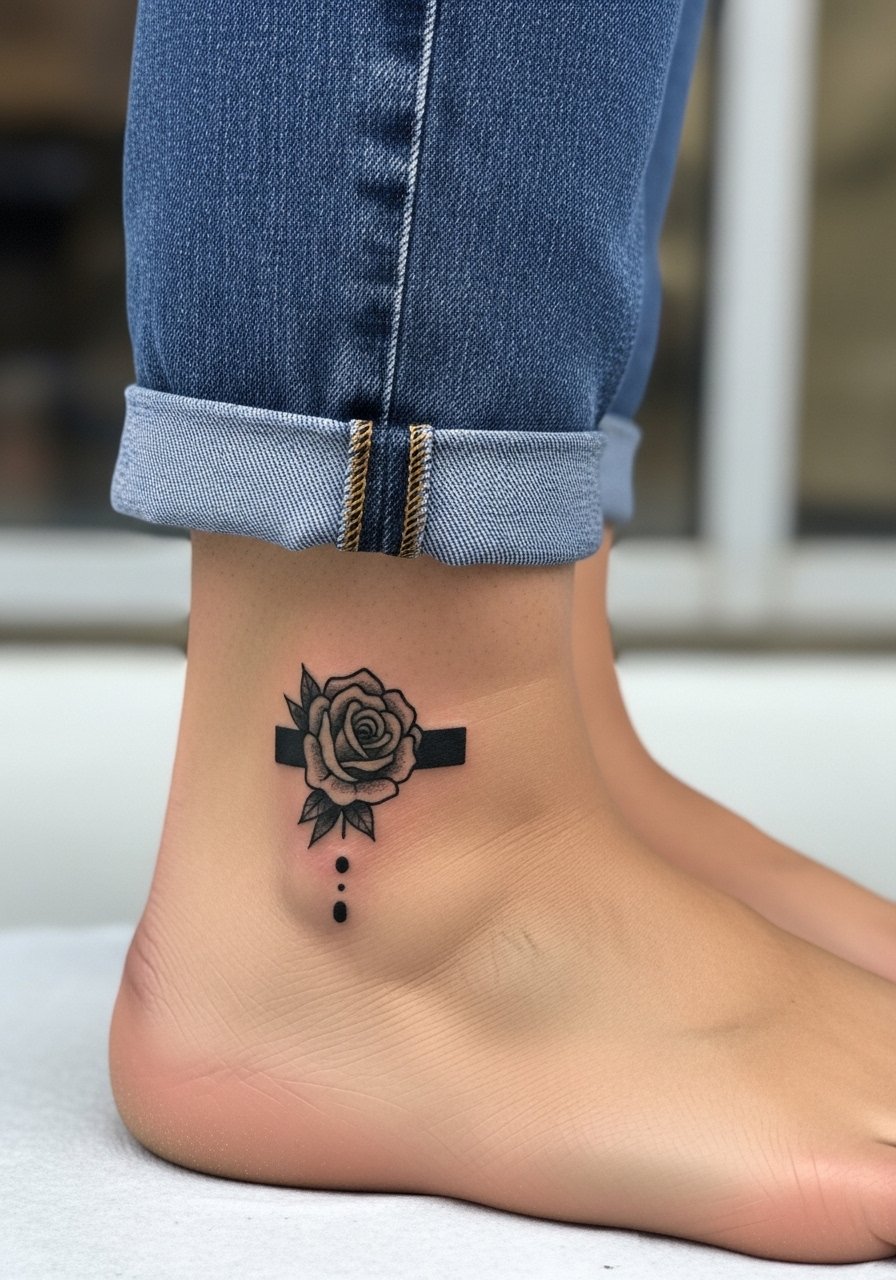
Ankle bones are thin and present more pain. For blackwork roses here I suggest a compact silhouette with clean negative space to keep the design readable from across a room. Sessions can run 30 to 60 minutes. A common mistake is over-detailing the stem and thorns. Keep stems bold enough to resist blowout. Show it off with cuffed ankle jeans or sandals. If you want a colored traditional palette, plan for two sessions so saturation remains even.
16. Micro Constellation Rose on the Side of the Finger
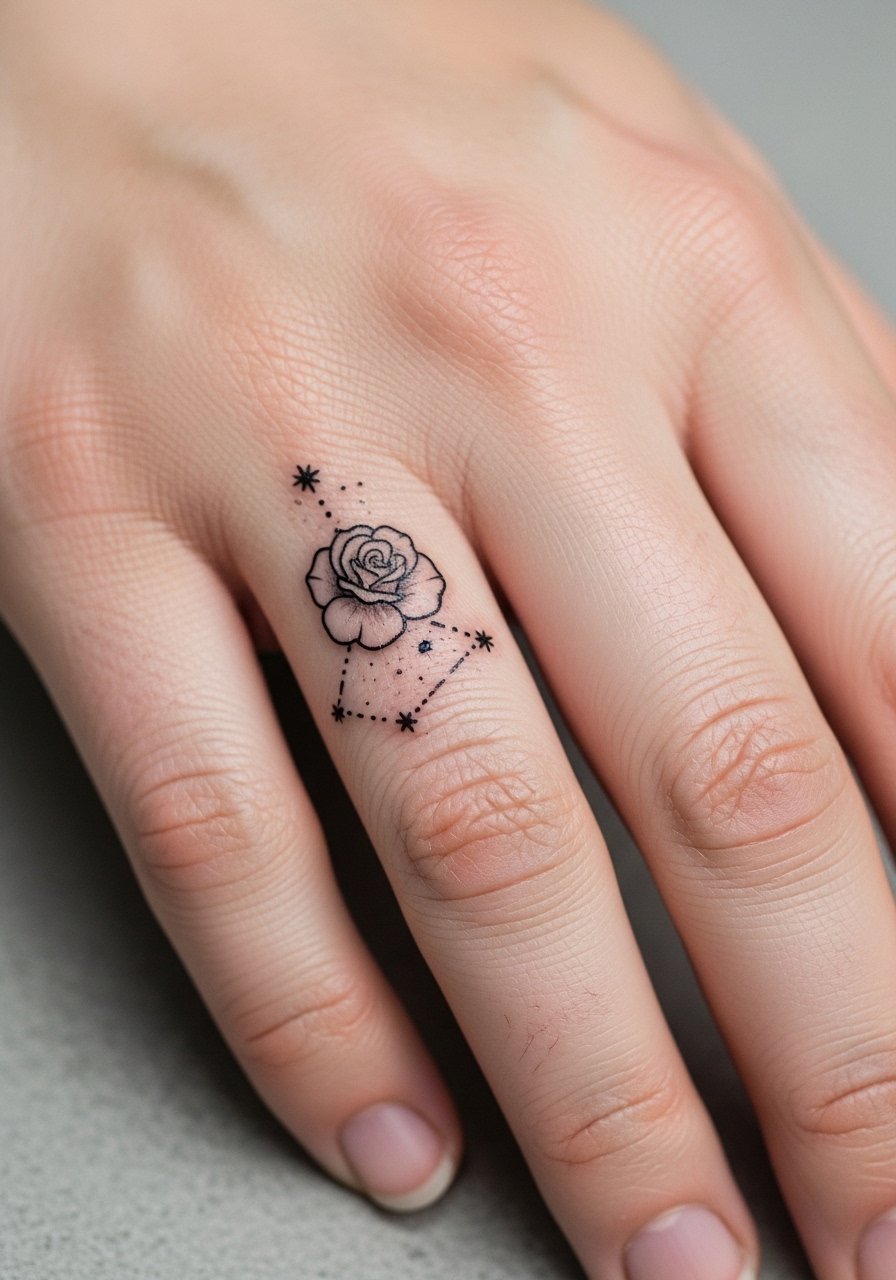
This idea mixes astrology and floral micro work. Fingers demand simplified silhouettes. I recommend integrating dots or tiny coordinate style stars rather than thin script. The friction zone and frequent washing make touch-ups almost inevitable. The mistake is trying to place several small motifs across multiple fingers in one go. Pick a single finger and keep elements tight. For session comfort try to keep your hand relaxed on a soft surface and avoid gripping. A thin chain pendant necklace can balance photos when you display the finger in styled shots.
17. Small Stemmed Rose Behind the Collar of a Shirt
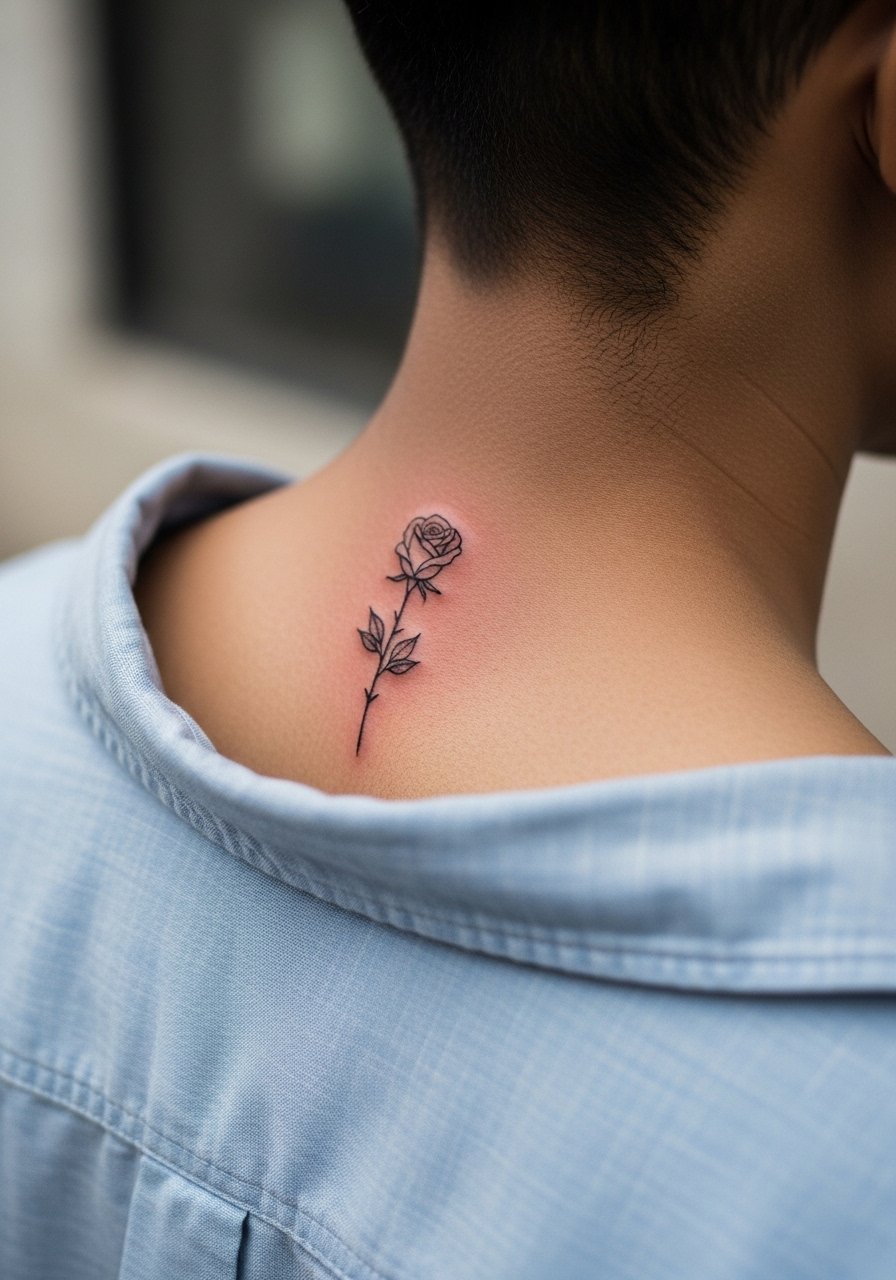
Upper-back collar-area pieces sit between discrete and visible when you wear certain tops. I advise a vertical stem with a single bloom so it naturally aligns with shirt lines. Ask for medium-weight linework in the stem and slightly lighter petal shading to avoid merging against movement. Sessions are quick and relatively low on pain. A common mistake is placing the bloom too close to the spine where sitting pressure and backpacks can affect healing. For showing it off pick an open-collar shirt or a backless top when you want it visible.
Frequently Asked Questions
Q: Will fine line roses fade faster on medium and dark skin tones, and should I pick a different style?
A: Fine line work can appear to fade faster on darker tones because the contrast is lower and the hairline strokes are harder to read. I suggest opting for a slightly heavier anchor line or a micro-scale neo-trad approach if you want more longevity. Also ask your artist to show healed examples on skin tones similar to yours. It depends on placement and daily sun exposure.
Q: How do I choose between Saniderm-style second-skin and air drying for a small wrist or finger rose?
A: Artists split into two camps. Some swear second-skin reduces infection and friction for tiny wrist and finger pieces. Others prefer dry air healing and say occlusives trap bacteria. My practical take is follow the shop’s protocol and ask for a quick briefing on why they use one method. If you travel a lot during the first week, a protective film can be helpful.
Q: If my artist cancels or reschedules, how should I manage timing for a small rose appointment?
A: Confirm deposit and cancellation policies before booking and have a backup shop or an app like Booksy ready. For fine line work timing matters because seasonal humidity and sun exposure affect healing. Reschedule within two to three weeks when possible and avoid making major body change plans immediately after the session.
Q: What’s realistic touch-up timing for a small micro-realism rose on a finger versus an ankle traditional rose?
A: Fingers commonly need touch-ups within 1 to 2 years because of washing and friction. Ankle traditional pieces with strong outlines and proper saturation often hold for longer and may only need a touch-up at year three or four. Use realistic expectations and look at healed portfolios from your artist to set a plan.
Q: Can I find the right artist without naming names, and where should I search for healed examples?
A: Search hashtags like #SmallRoseTattoo and #FineLineRose, use the Tattoodo app filters by style and location, and check Reddit threads for recent guest-spot mentions. Look specifically for healed photos on artists' pages rather than fresh snaps, and prioritize portfolios showing the exact placement and skin tone you have.
