
Fine line Jesus portraits and watercolor crowns are everywhere online right now, and that popularity hides a few practical headaches. Small wrist pieces often blur sooner than owners expect, bright red watercolor can age unevenly on darker skin, and hand placements still carry hiring risks in some offices. If you want ideas that look intentional today and still read well at year three, this list balances the trend pieces with versions you can live with long term.
1. Jesus Face with Crown of Thorns, Forearm Watercolor
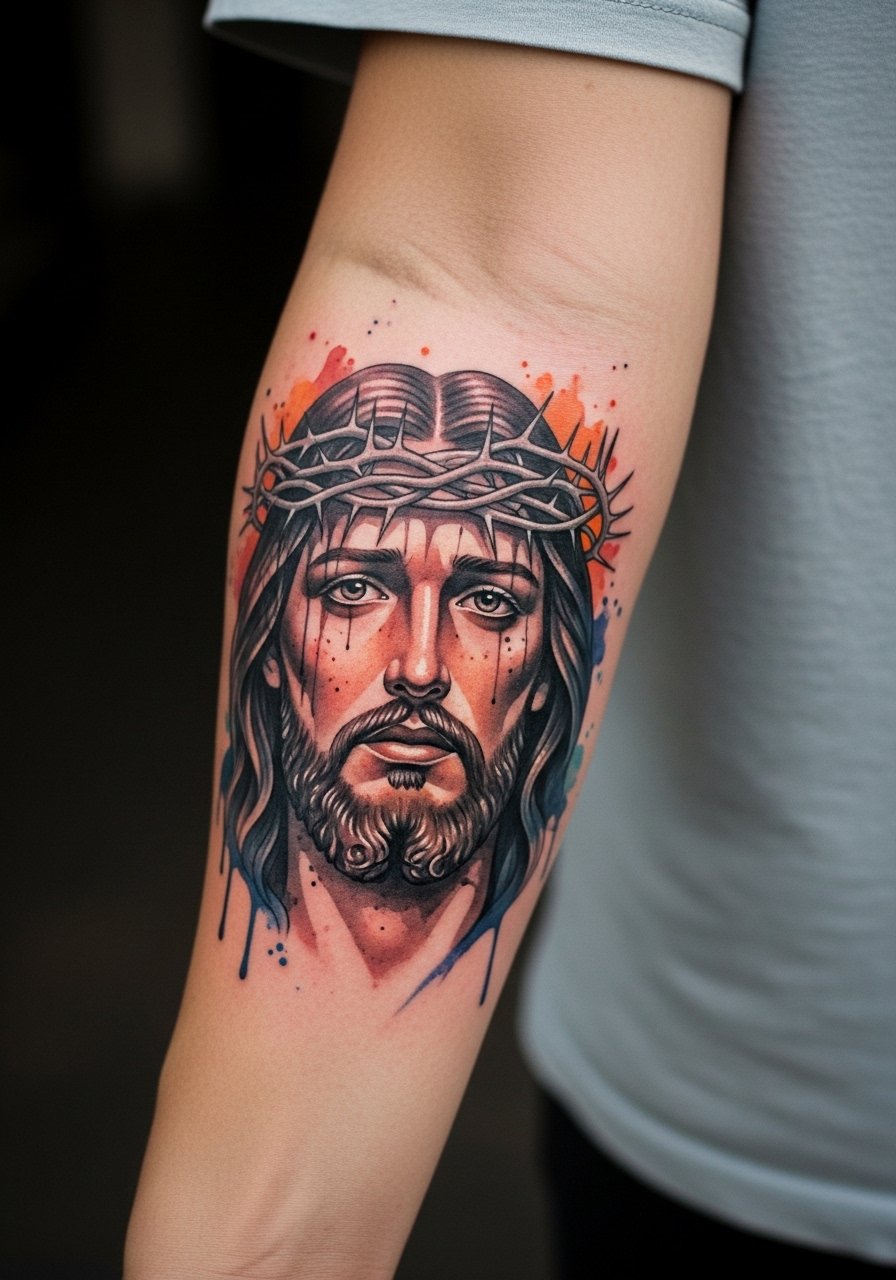
I recommend this if you want color and an emotional focal point that still fits under a sleeve when needed. Tell your artist to keep the crown detail slightly graphic so the red drip accents sit on top of bold linework. A common mistake is relying only on soft watercolor without an anchor outline, which tends to bleed and lose detail at year two. Expect moderate forearm pain and a one to two session layout. For showing it off, roll sleeves and try a rolled sleeve chambray shirt in navy or white, and wear a thin leather cuff bracelet on the opposite arm.
2. Intense Gaze Jesus Portrait, Back of Hand Realism

Hand placements read like daily reminders, but they also demand compromise. Fine detail on the hand often needs heavier contrast or thicker linework to survive frequent washing and friction. Ask for slightly stronger saturation and expect a sharper touch-up timeline than for arm work. The session feels brisk but stingy because the skin there is thin. Professionals split on numbing for highly detailed hand work, so ask your artist how they handle longer realism pieces. For display, stacked thin rings look intentional with a hand piece, so consider a thin stackable rings set for non-tattoo fingers.
3. Jesus on Cross Silhouette, Upper Arm Traditional
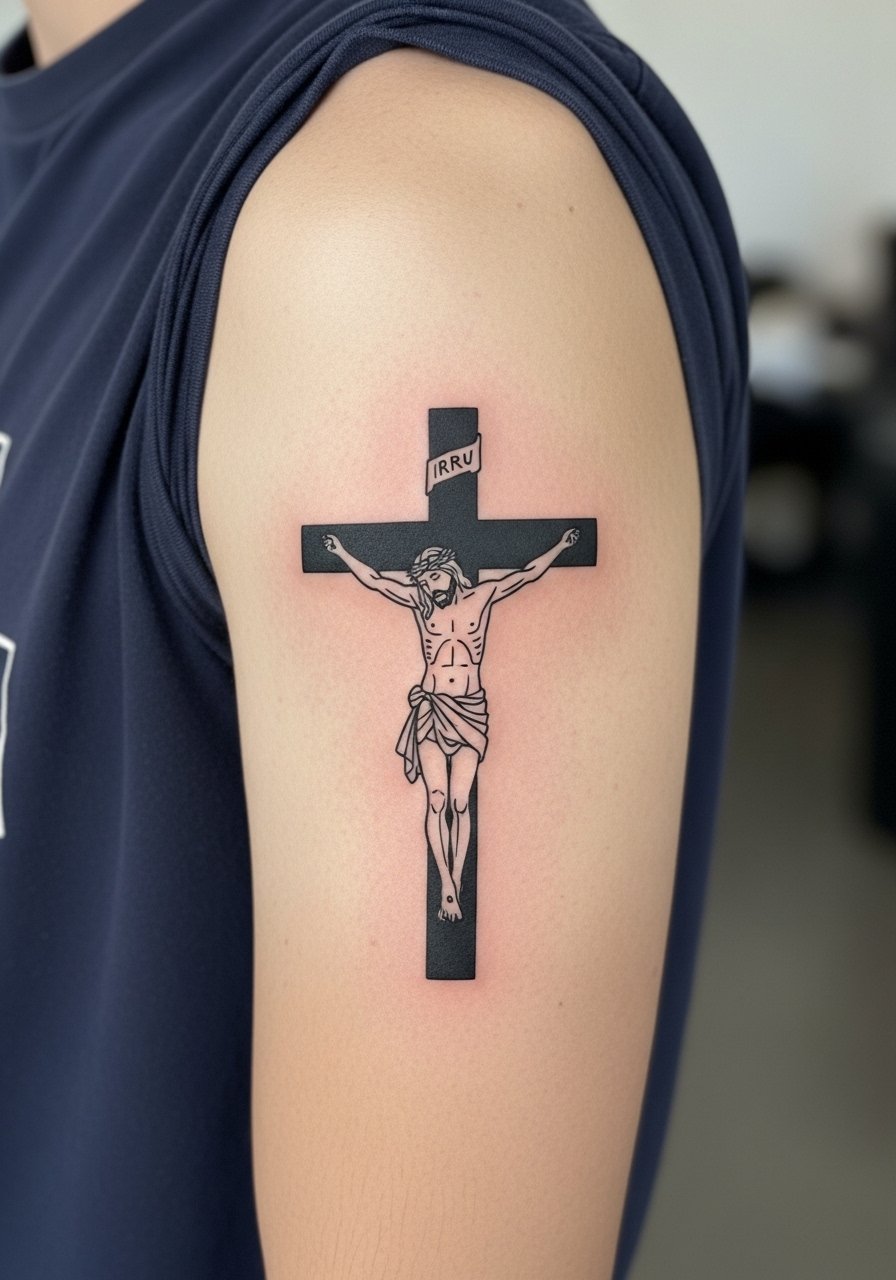
Upper arm silhouettes are forgiving and age well because of their bold linework and strong negative space. In consultation, say you want a classic outline with negative space for rays so the silhouette stays readable from distance. The mistake to avoid is packing tiny detail into the silhouette, which disappears over time. This placement is low to moderate on pain and usually done in one session. For casual show-off looks, cuffed slim chinos and a watch on the opposite wrist keep the visual balance, and a cuffed slim chino pants silhouette pairs well.
4. Crown of Thorns Close-Up Sketch, Wrist Linework
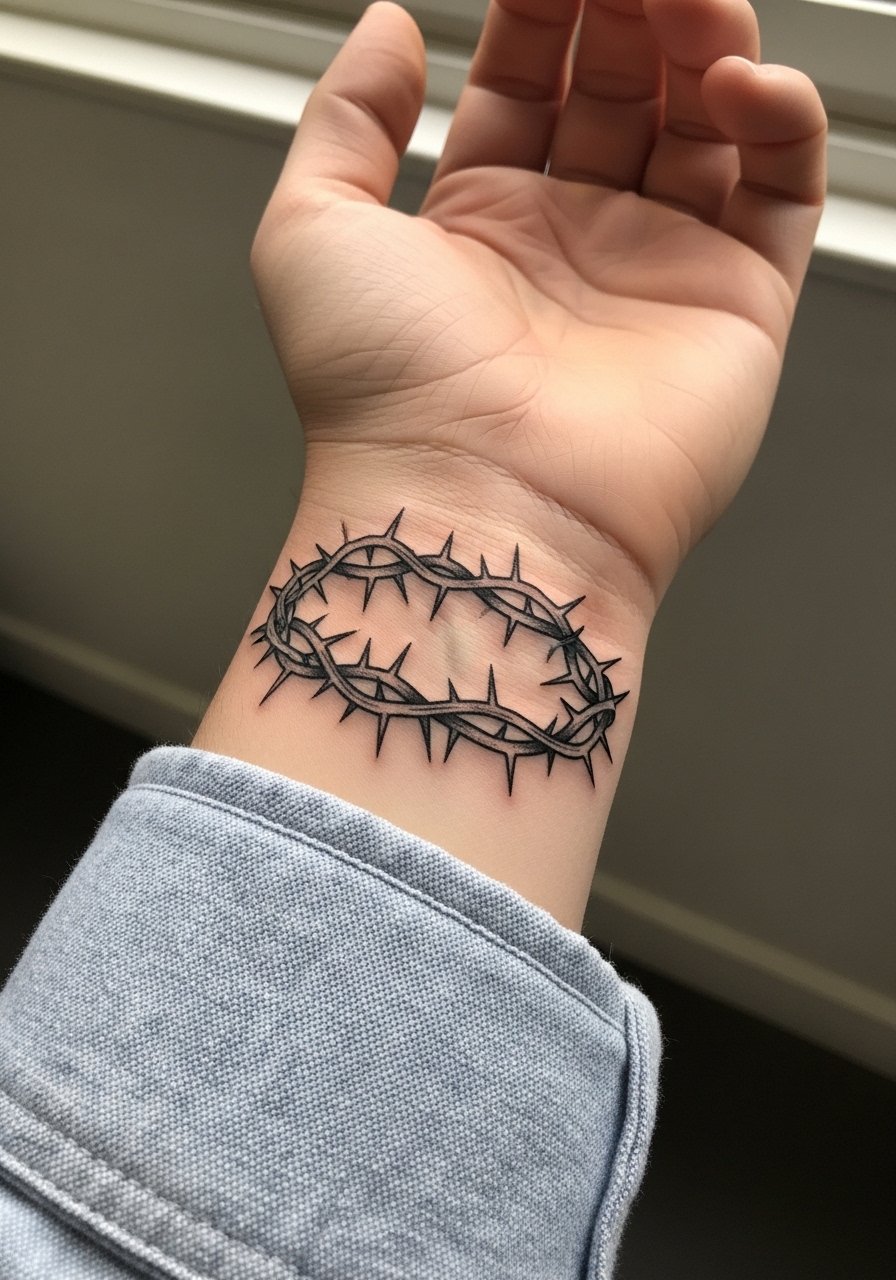
Wrist tattoos are highly visible and prone to motion blur. I usually tell people to bump up line weight for any element that will walk the wrist. During the consult ask the artist for reference shots of healed wrist work on similar skin tones. A typical error is choosing ultra-fine twigs and thorns that merge in a year. The session is short and sharp, and touch-ups at year two are common for fine work. For showing it off, pair this with a minimal watch men or keep the opposite wrist accessorized.
5. Radiant Jesus Head with Rays, Upper Chest Neo-Traditional
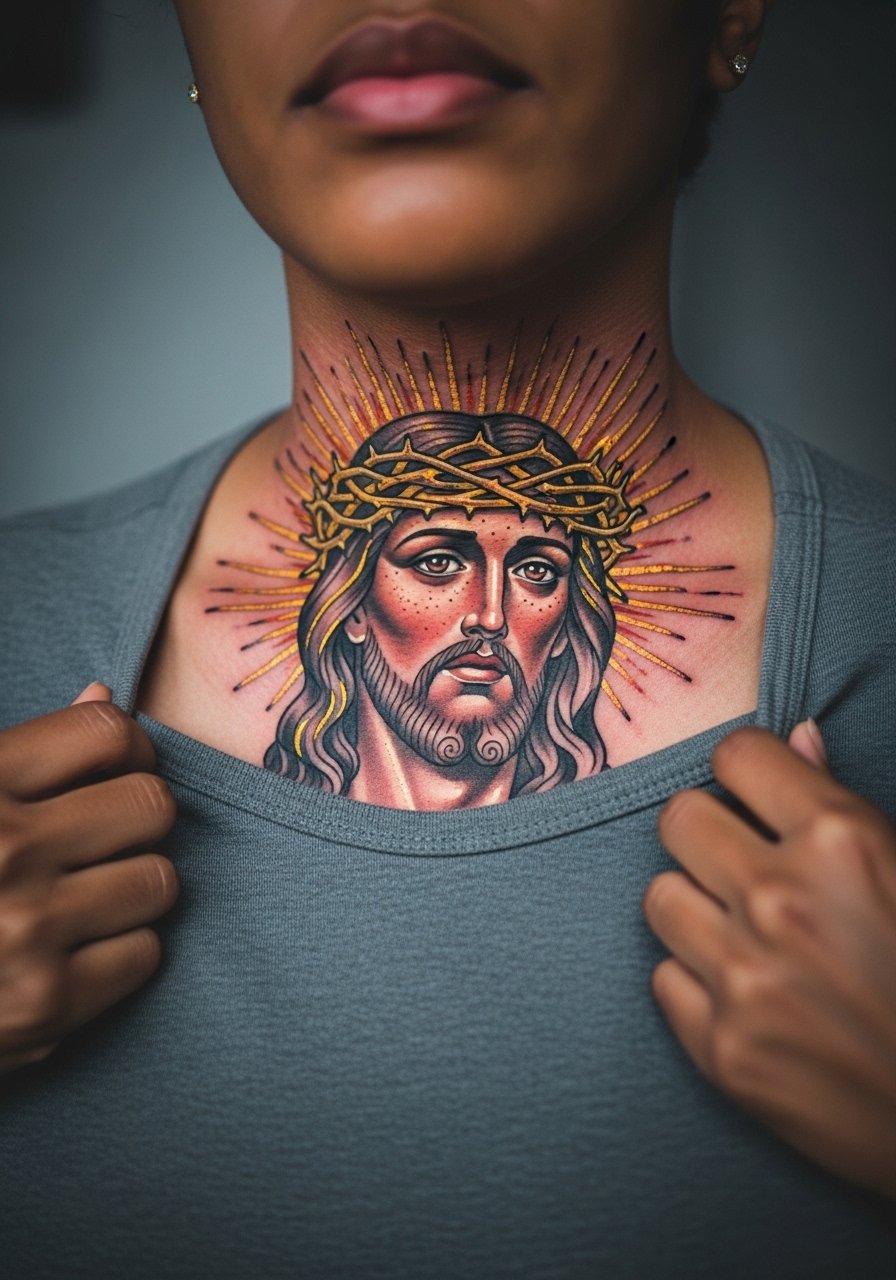
Chest portraits have a strong presence but come with a higher pain bill. If you are nervous, split the piece into two shorter sessions. Ask for color gradients that read as blocks of saturation rather than feathered watercolors, which helps on darker skin. The common mistake here is overworking the chest in one marathon session and burning out on saturation. Expect medium to high pain on the sternum edge and plan for a touch-up in the first year to settle gold tones. For framing the piece, deep v neck tees work well with this placement and a deep v neck tee makes for an easy show-off option.
6. Jesus Christ Full Figure Praying, Thigh Blackwork
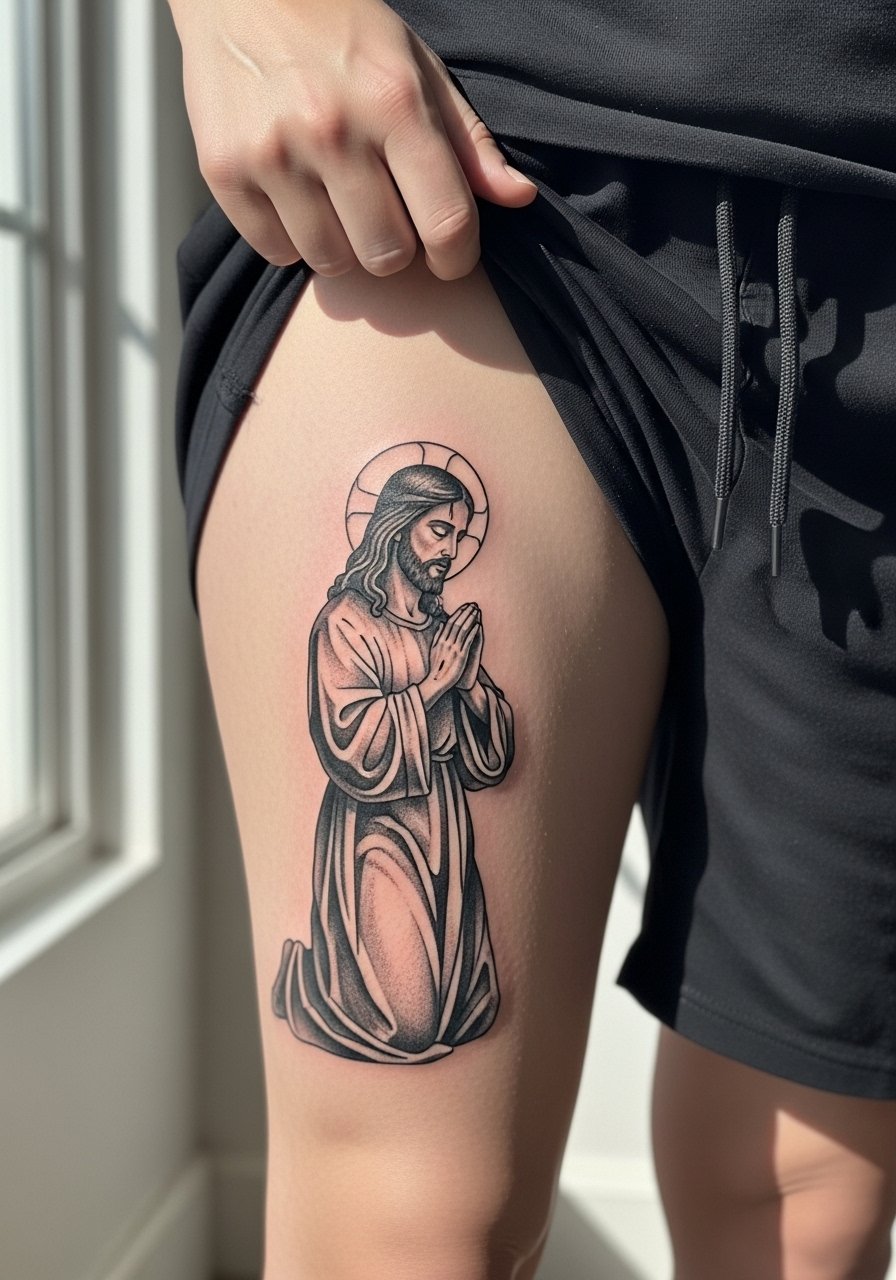
Large blackwork on the thigh gives room for dramatic contrast and will age predictably because of heavy saturation. Tell your artist you want dense black fields with stipple shading in robes so the silhouette keeps definition if the piece settles. The main mistake is compressing too much detail into a small thigh patch. Thigh sessions run longer and may require 2 to 3 appointments for depth. For session comfort wear loose shorts or tailored swim shorts so the artist can access the leg without constraint and consider a tailored swim shorts option for aftercare comfort.
Studio Day Picks
The first six ideas cover everything from wrist and hand sensitivity to chest and thigh saturation, so these items smooth the session and the initial healing window.
- Stencil transfer paper kit. Lets you preview exact placement and lineweight on skin before the needle, which is helpful for the forearm and wrist pieces above.
- Topical numbing cream. Useful for chest or ribcage work when you want to break sessions into manageable chunks.
- Thin protective film roll. Keeps finger and wrist tattoos cleaner through the first days of friction from washing and clothing.
- Fragrance free gentle body wash. Cleanses healing areas without stripping saturation, handy for larger blackwork on the thigh.
- Aquaphor healing ointment. Thin layers in the first few days help retain moisture on fine line wrist pieces without clogging the area.
7. Thorny Crown with Red Drips, Collarbone Watercolor Accent
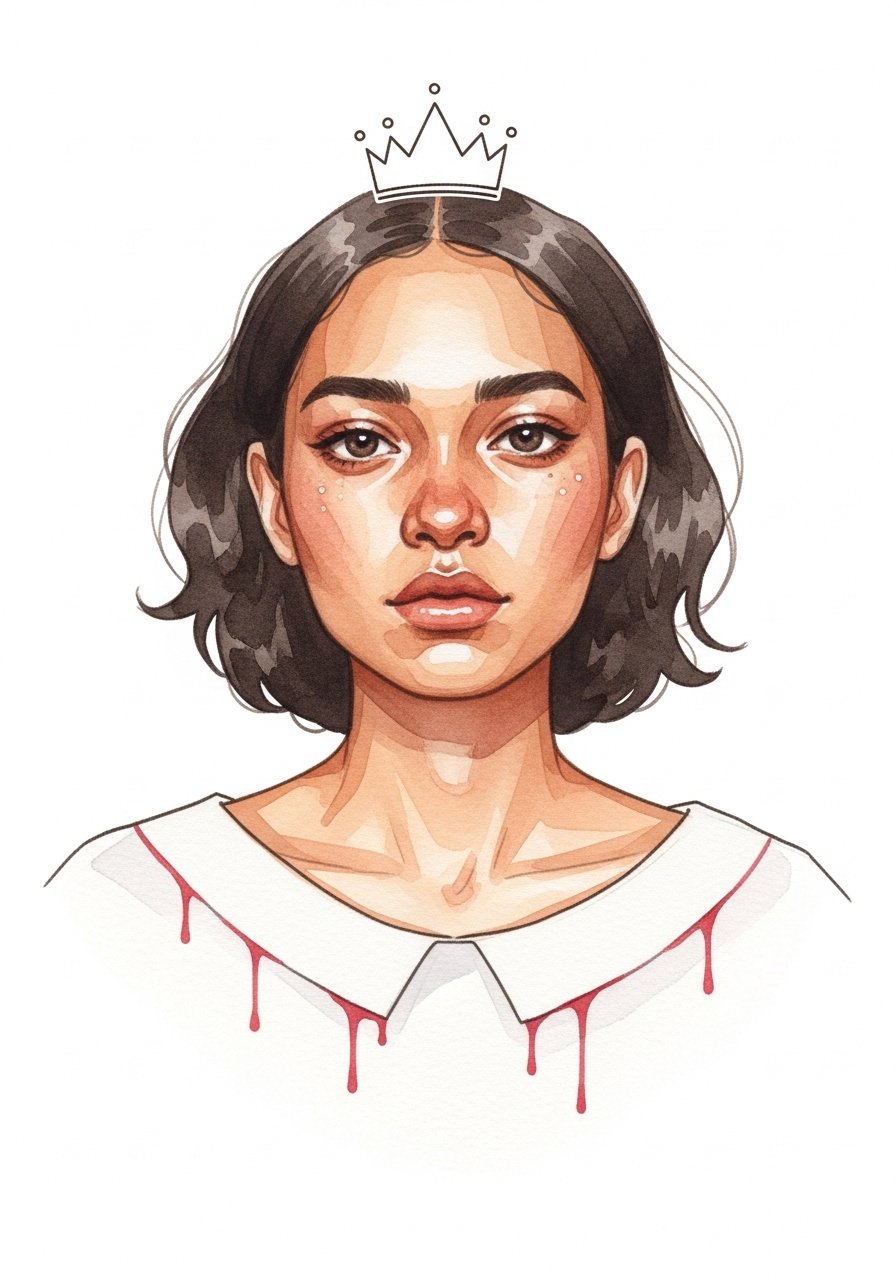
Collarbone pieces are beautiful but scab and movement can affect color at the edges. Ask the artist to keep the red drip as an overlay on a strong black outline so the drops do not feather into a bruise look. People often request pure watercolor there and then regret how patchy the reds look after a summer. The session hurts more when the needle rides bone, so short 30 to 45 minute bursts are sensible. For evening looks, pair this with an open button down shirt or a deep v neck tee to keep focus on the color accents.
8. Jesus Eyes Staring Forward, Minimal Behind-Ear Micro-Realism
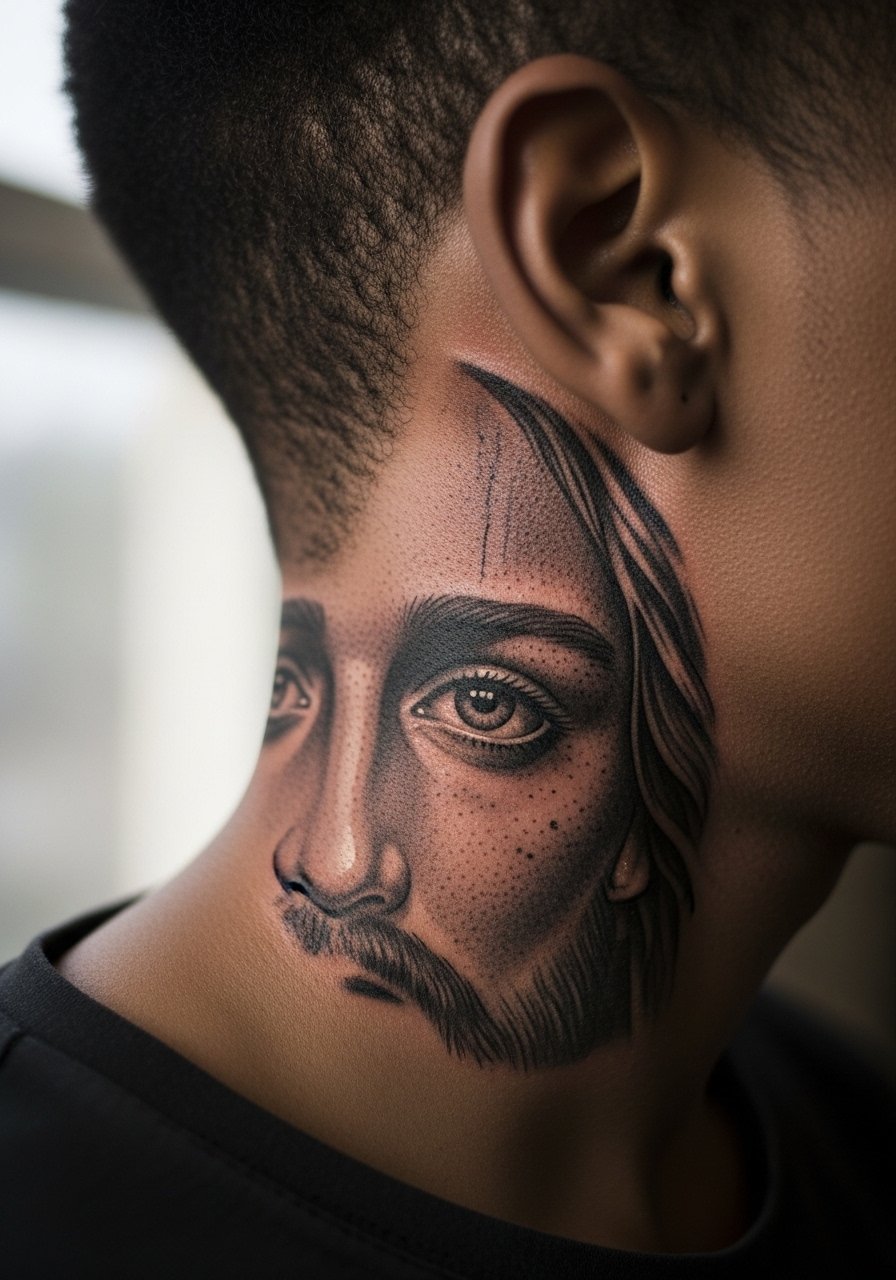
Behind-ear micro work reads as an intimate nod and has limited space for detail. If you want this look, ask for simplified eye forms with high-contrast pupils so the gaze survives small-scale healing. A mistake is trying to cram full portrait detail there. The area heals fast but is vulnerable to touch and hair oil for the first week. For career-conscious folks, bear in mind neck-adjacent tattoos can affect hiring in some fields. This placement needs an artist comfortable with small-scale black and gray.
9. Crucifix with Jesus Outline, Inner Wrist Minimalist
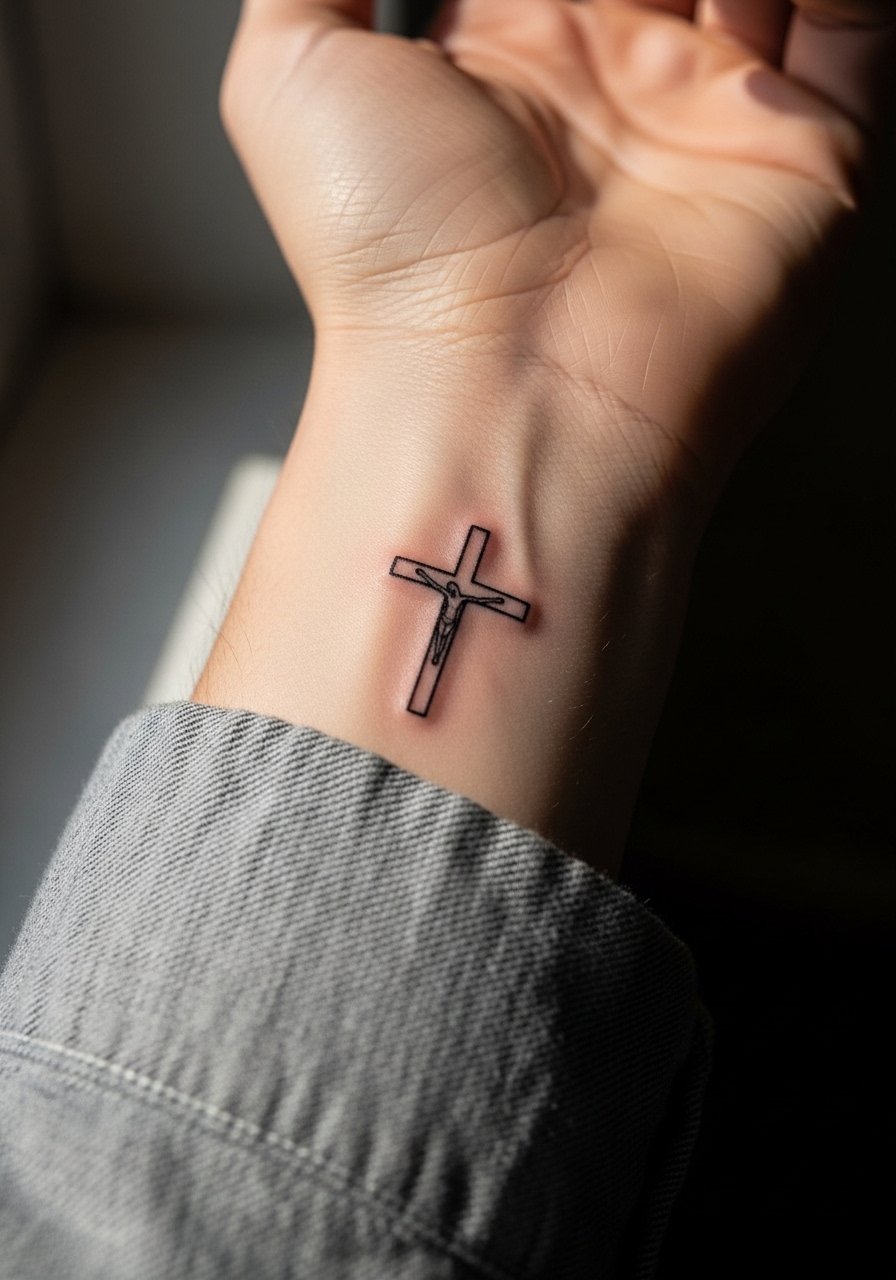
Minimalist wrist crucifixes are readable and modest when done at the right scale. I suggest you request a clean single-line transfer and ask the artist to show healed examples of similar line widths on wrists. The typical error is asking for too fine a line that fades into a ghost after frequent use. This placement is low session time and low to moderate pain. For everyday wear, a cuffed slim chino look with a minimal watch men on the other wrist creates a balanced aesthetic.
10. Sacred Heart Jesus Motif, Forearm Traditional Start
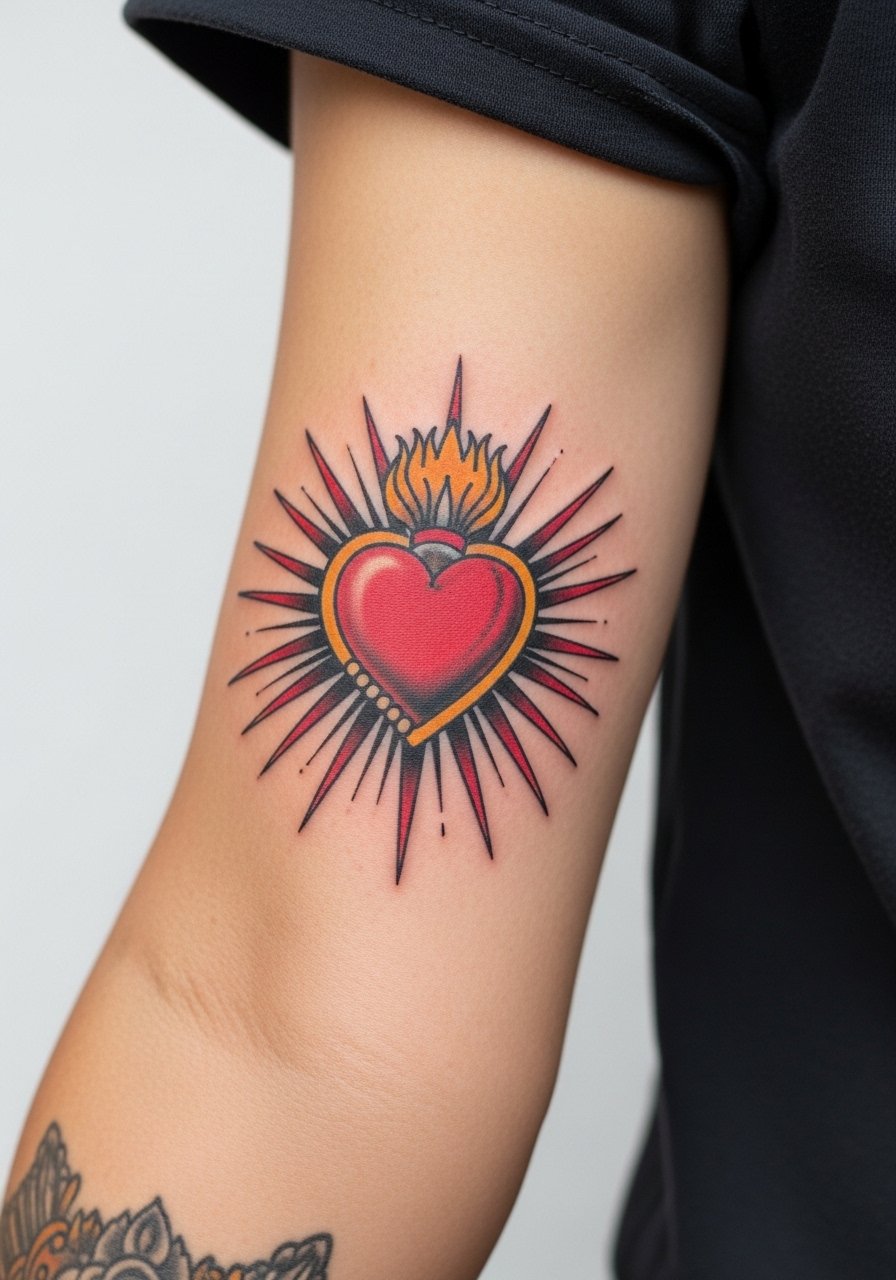
Sacred heart motifs benefit from saturated red and gold to communicate the emblematic look. Ask for clear separation between the heart and surrounding rays so the gold does not muddle into the red. A frequent mistake is softening the rays into wash, which looks muddy on darker tones. Forearm work tolerates bold color and ages more predictably than wrist or hand. For showing it off, rolled sleeves and a thin leather cuff keep attention on the forearm color without competing.
11. Resurrection Rays Burst, Shoulder Blade Ornamental
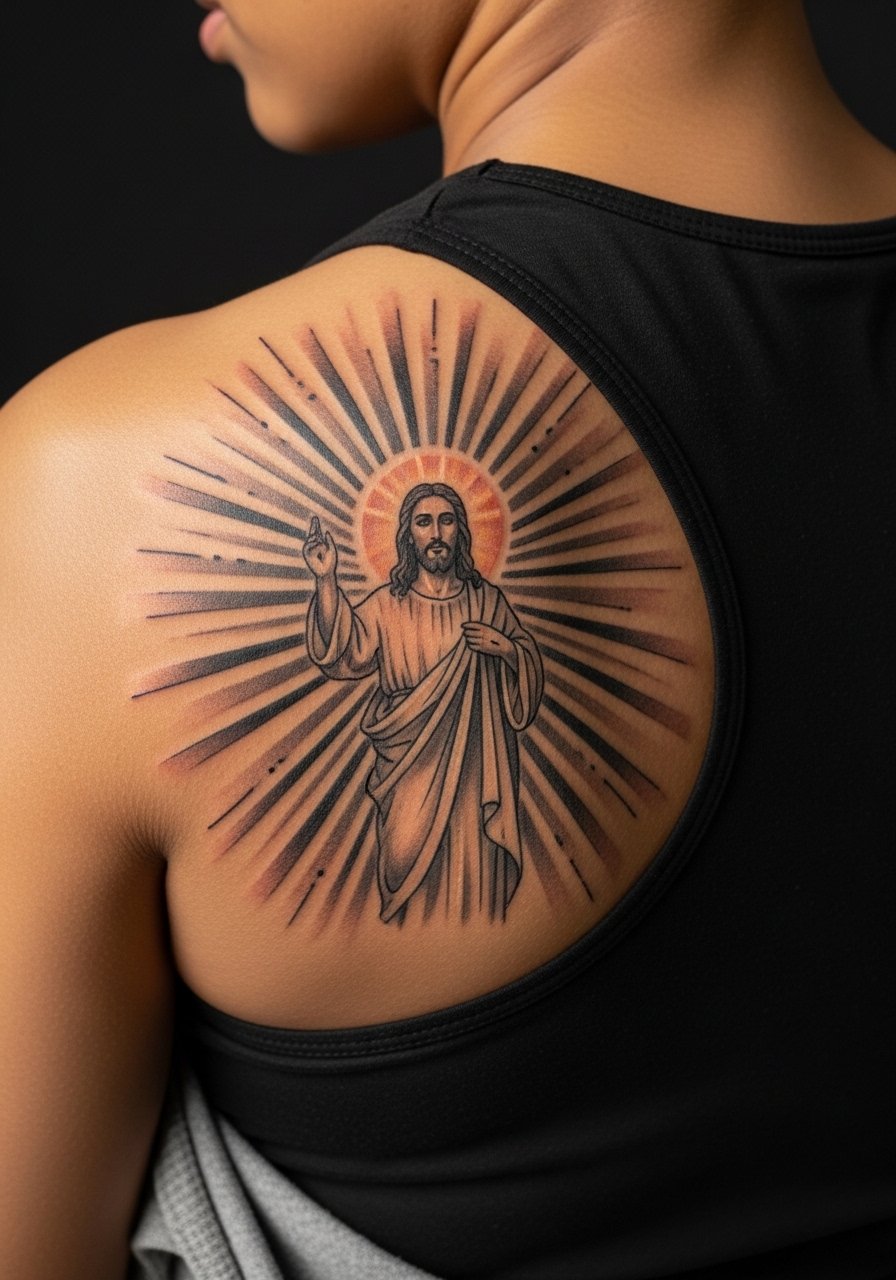
Shoulder blade pieces let you play with ornamental rays without immediate visibility unless you want them shown. Tell the artist you prefer rays as negative space bands rather than dense stippling so they stay crisp as the skin moves. One mistake is overloading the area with tiny lines that soften after a year. Sessions are moderate with easy positioning. For summer wear, an racerback tank or an off shoulder top does a nice job of framing this placement.
12. Bearded Jesus Profile Silhouette, Calf Fine Line
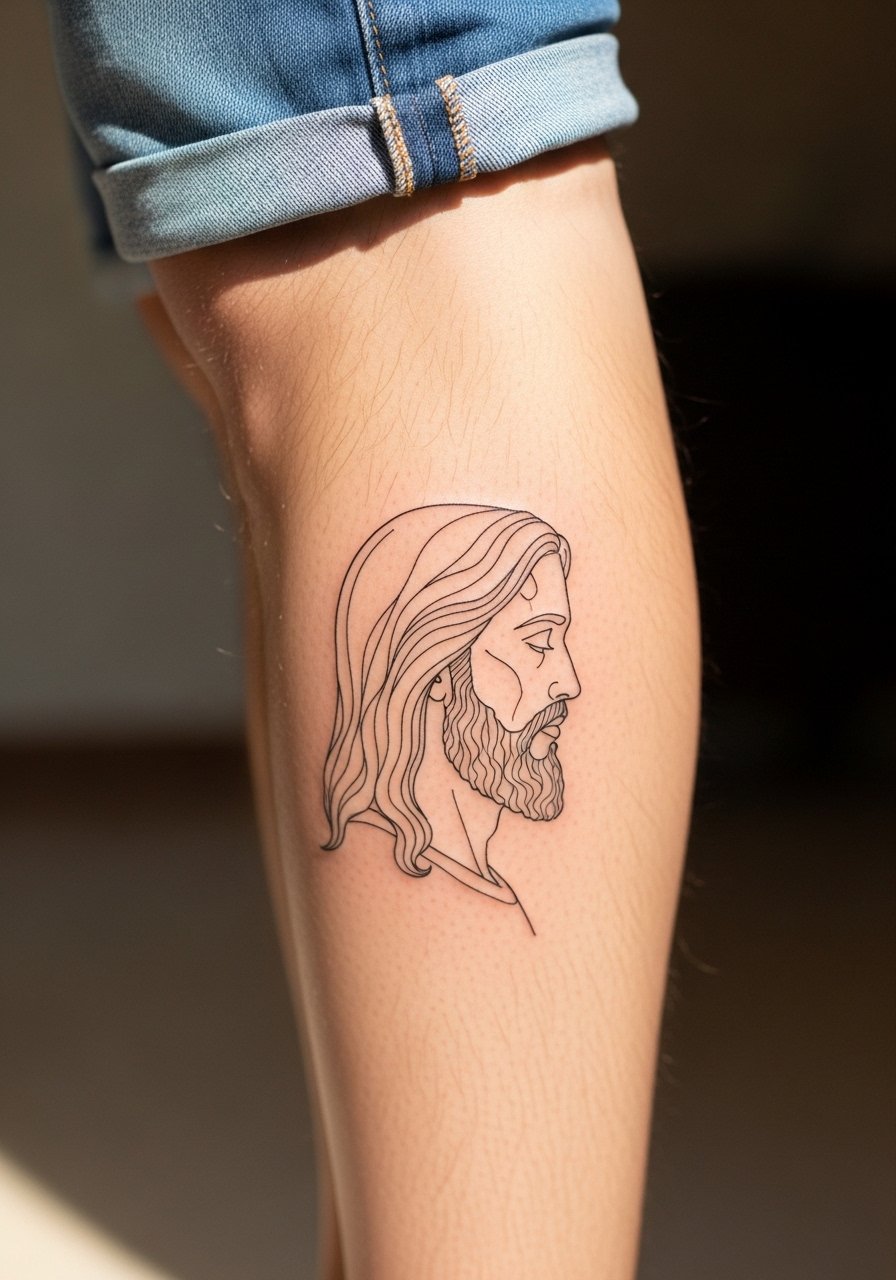
Calf silhouettes are a subtle way to carry a portrait without committing it to the chest or forearm. Ask for slightly increased spacing between lines so fine work does not merge over time. The common error is squeezing too much facial detail into a narrow profile. Calf work is moderate pain and an easy spot for one longer session. For casual summer looks, rolled joggers or slim shorts keep the piece visible and clean, consider rolled jogger pants.
13. Jesus Hand with Sunlight Rays, Inner Bicep Small Portrait
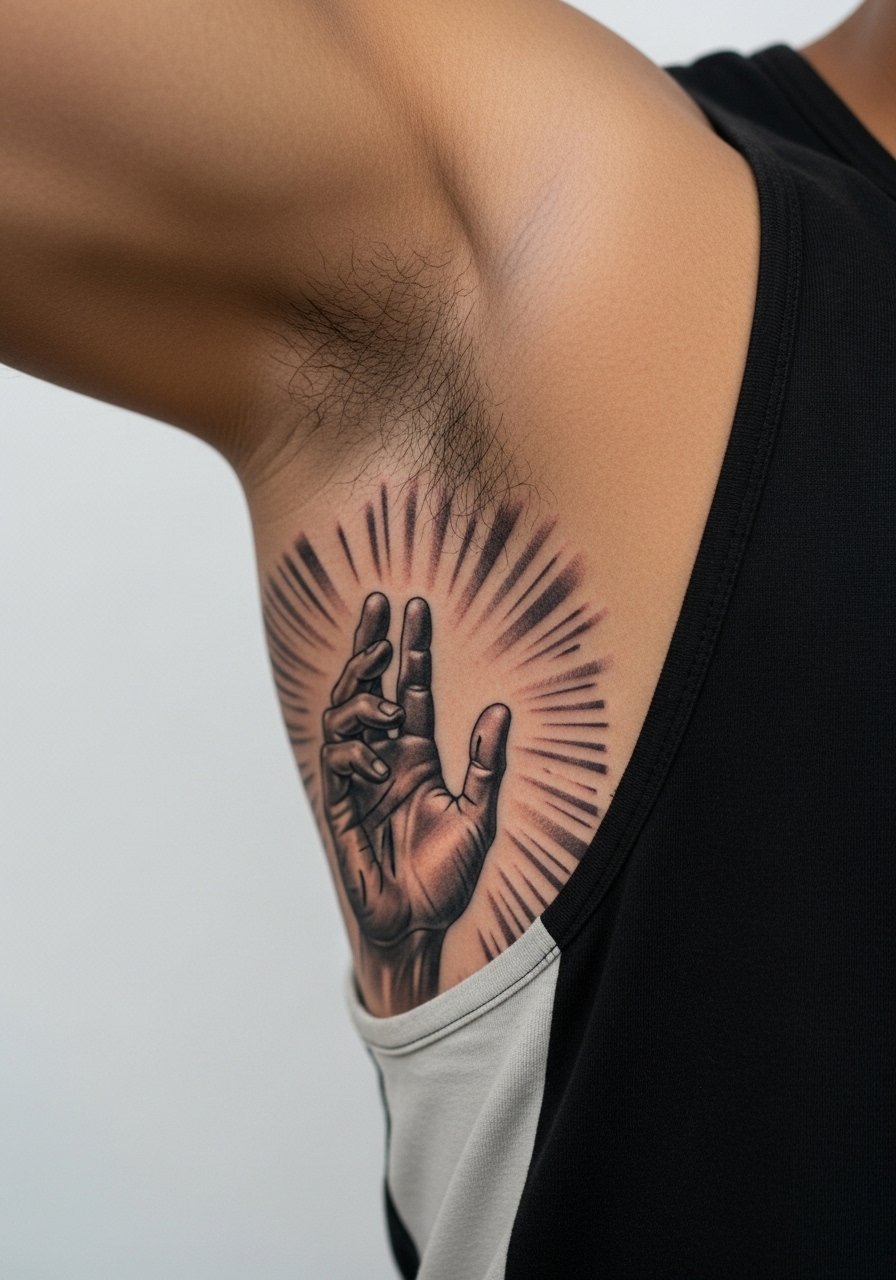
Inner bicep placements let portrait details sit protected from daily abrasion. I advise asking for denser shading near the hand and softer rays outward to preserve contrast. Artists disagree on fine line on this spot. One camp says the skin stretch makes thin lines blur within two years. The other camp insists that proper depth and spacing makes fine line last. Ask your artist where they stand before booking. Sessions are doable in one to two blocks and pain is moderate.
14. Micro Jesus Eyes, Finger Tip Micro-Realism
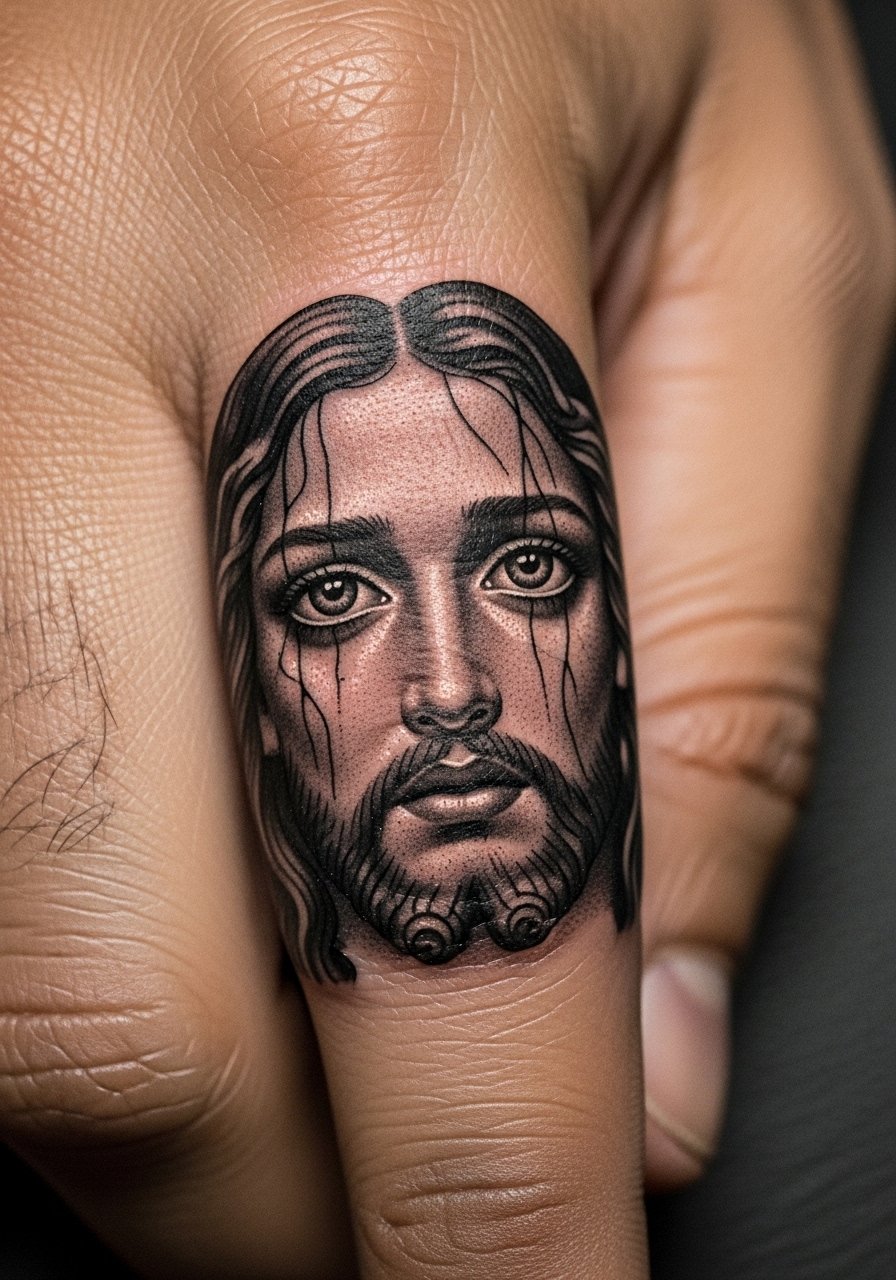
Finger tattoos are exposed to constant washing and sun. For micro eyes, request bolder pupils and minimal surrounding shading so the feature reads longer. The mistake is asking for soft graduation that disappears after heavy use. Expect a short but painful session and an almost certain touch-up at year one. Keep in mind friction from rings and typing will affect healing, so plan the first week with minimal metal contact.
15. Stylized Halo with Rays, Back of Neck Fine Line
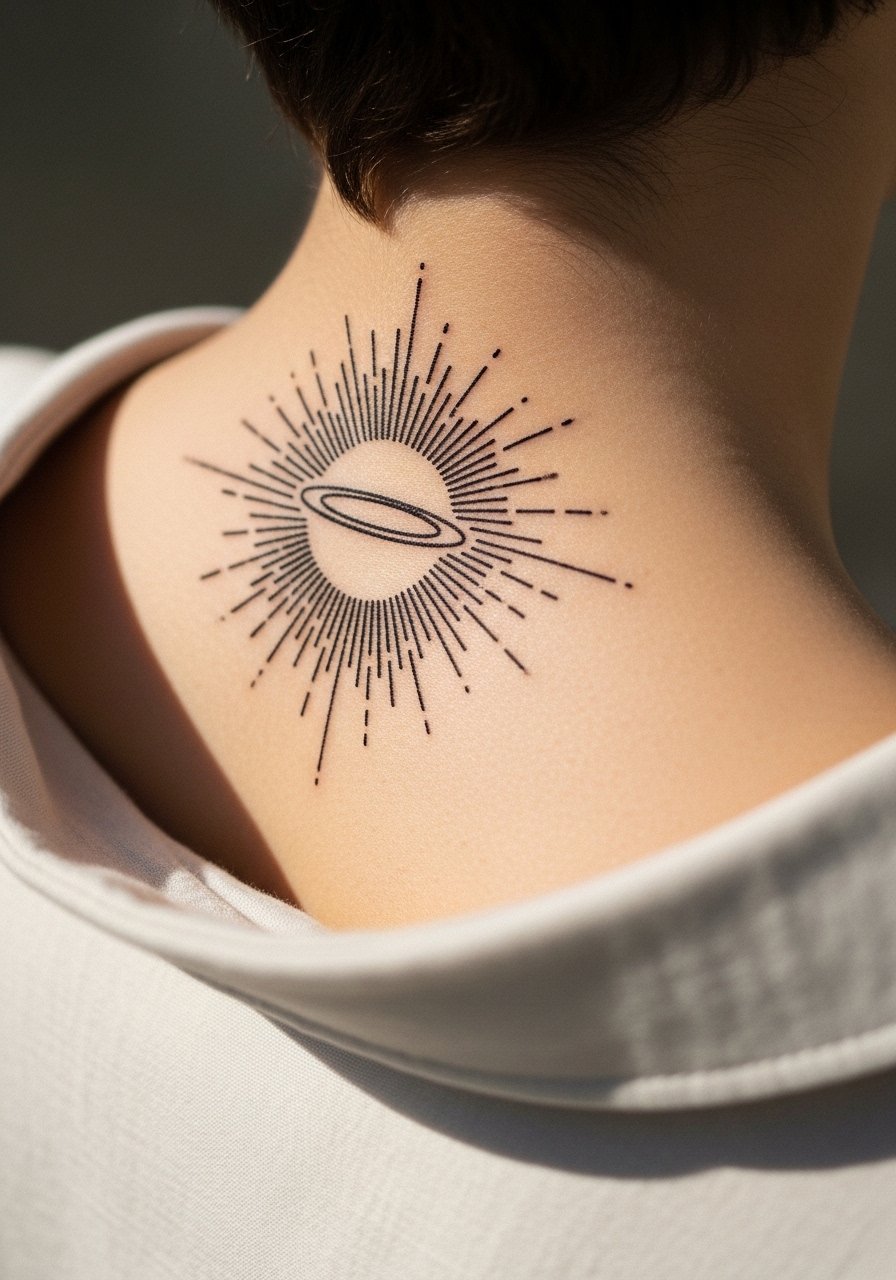
Neck-adjacent pieces need a conversation about visibility and career impact. Ask for a compact halo design with simple rays and ask to see healed neck work in the artist portfolio. A common misstep is pushing linework too thin for such a mobile area. Sessions are quick but the site sees a lot of sun, so factor in UV protection when healed. For daily wear a wide-neck shirt or a collared top left open can help show or hide the piece as needed.
16. Scripted Name with Jesus Motif, Sternum Accent
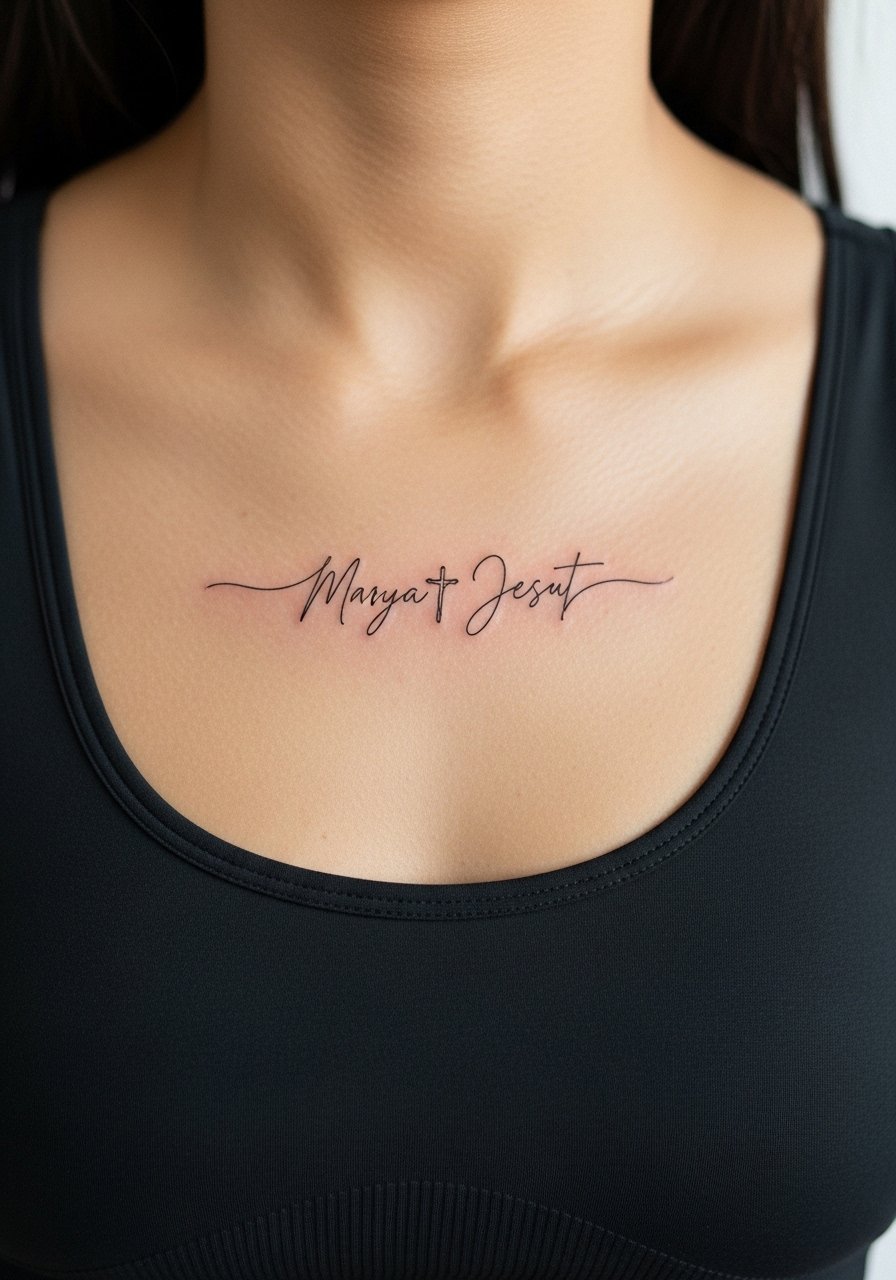
Sternum work is intimate and can be painful near the bone. For text plus motif, ask the artist to align kerning and motif spacing so the script does not drift into the symbol over time. People often pick overly tight lettering that blurs as the chest shifts. Break this into shorter sessions and expect longer healing. For the session wear a fitted sports bra or a bandeau so the artist has clean access and you can leave with garments that keep the area covered.
17. Jesus Resurrection Detail, Shoulder Sleeve Start Neo-Traditional
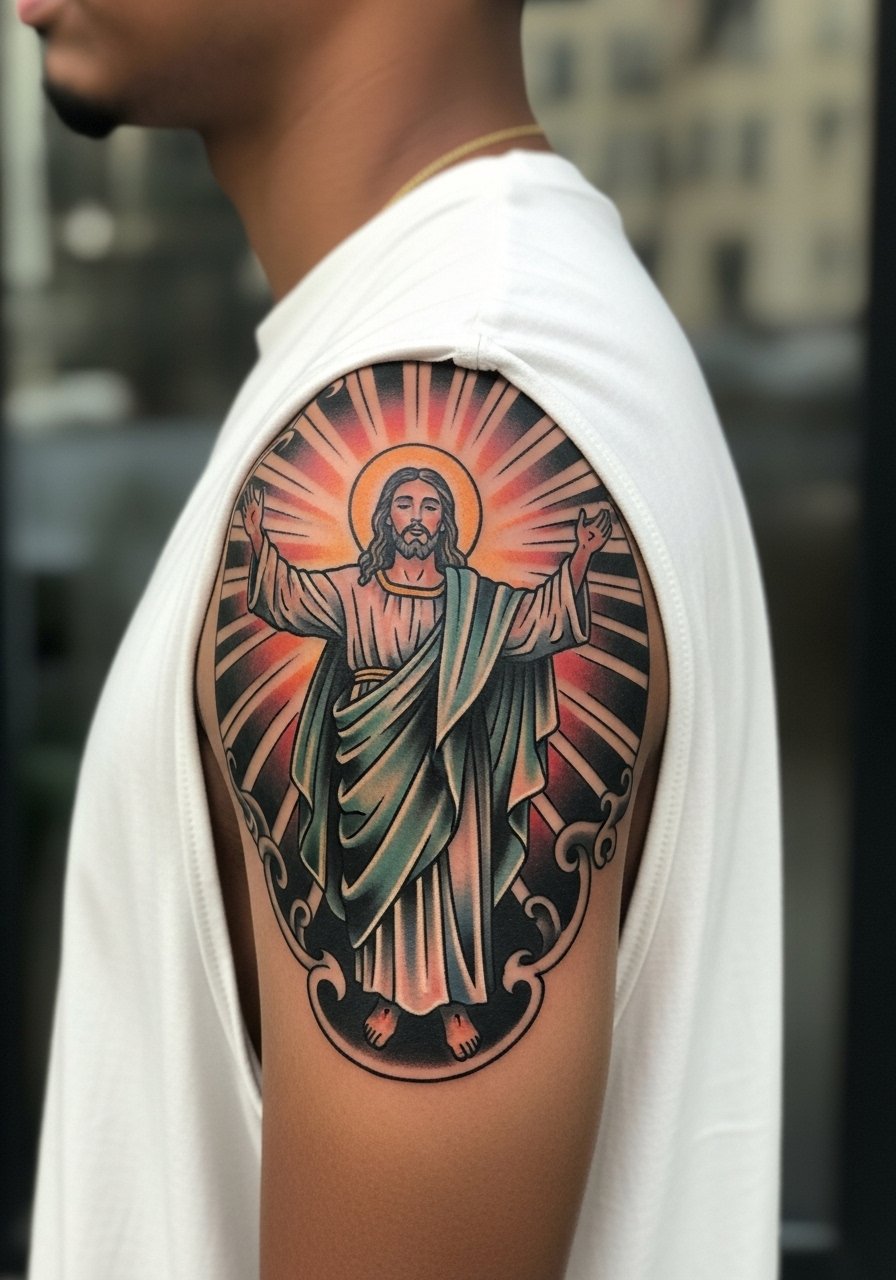
Starting a sleeve with resurrection imagery gives you room to build narrative elements later. I recommend strong outlines with block color fills so the design can accept future tattoos without muddling. A mistake is choosing watercolor fills early in a sleeve, which can clash with later blackwork. Expect multiple sessions for saturation and layering. For session ease wear a loose button-down shirt you can slide aside without rubbing the fresh ink.
18. Tiny Jesus Silhouette, Ankle Minimal

Ankle tattoos are low-profile and a good first spot for someone worried about workplace perception. Ask for slightly thicker outlines for this area to avoid creep from shoe rubbing. The frequent mistake is choosing ultra-thin detail that fades under sock friction. Sessions are short and healing depends on shoe choice. For reveal, rolled jeans or slim shorts paired with low socks highlight ankle work well, try slim fit shorts.
19. Praying Hands with Rays, Ribcage Blackwork
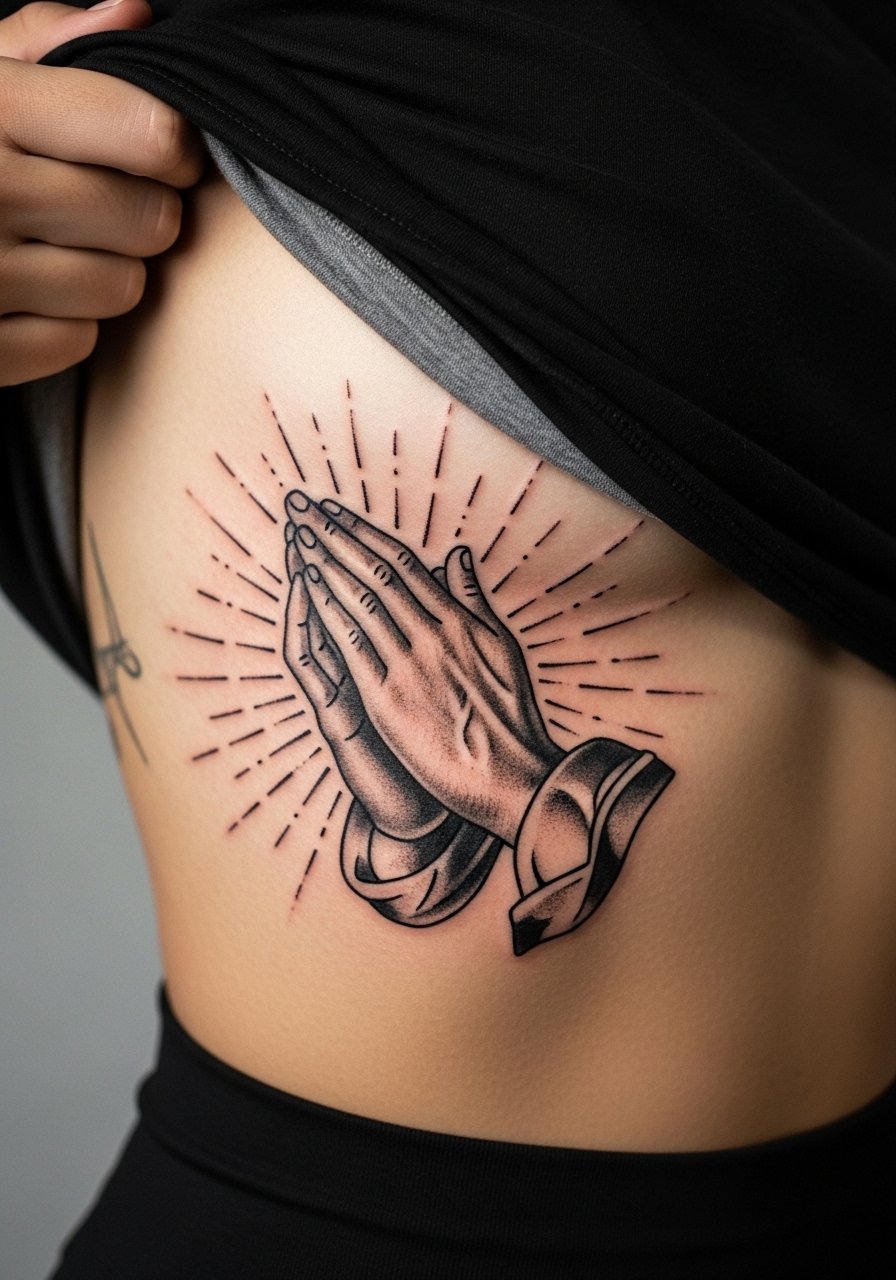
Ribcage pieces hurt more than most placements, and that can affect session choices. If you want bold blackwork there, plan two shorter sessions to let the skin recover between passes. A common error is insisting on a marathon session to finish a large area, which increases swelling and risks uneven saturation. Artists split on fine line for ribs. One camp warns about stretch and movement causing blur. The other argues spacing and depth can make fine line last. Decide after you see healed rib examples and consider numbing if your artist allows it.
20. Bearded Profile with Ornamental Halo, Calf Extension
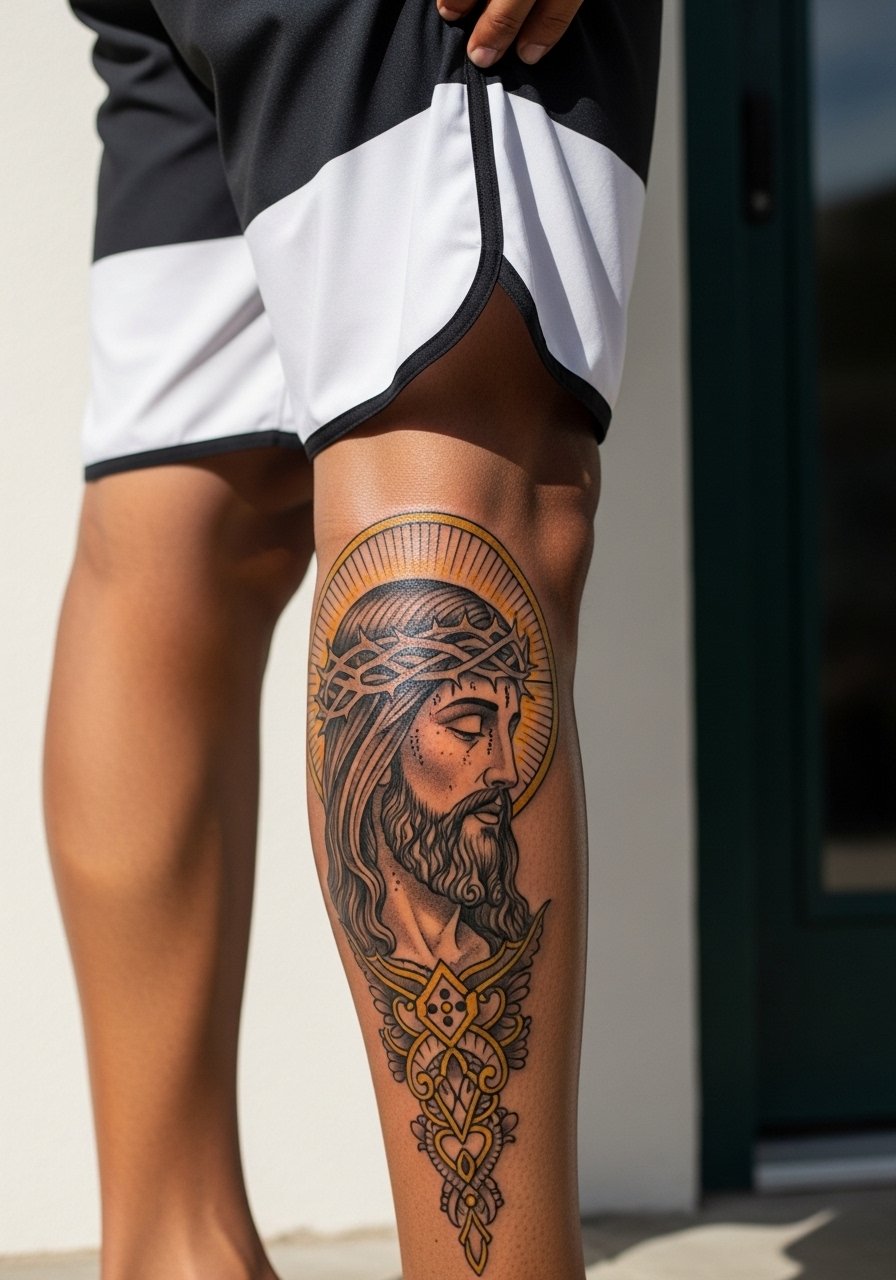
Calf extensions let you build a vertical narrative that reads well when sitting or walking. Tell the artist you want the halo as an ornamental frame with negative space bands for clarity as the calf moves. A mistake is adding too many tiny ornaments that flatten when the muscle changes. Sessions are straightforward for most people and healing is forgiving. For display, mid length board shorts or tailored swim shorts keep the canvas clean and visible.
21. Minimal Jesus Profile, Ankle or Behind-Ankle Fine Line
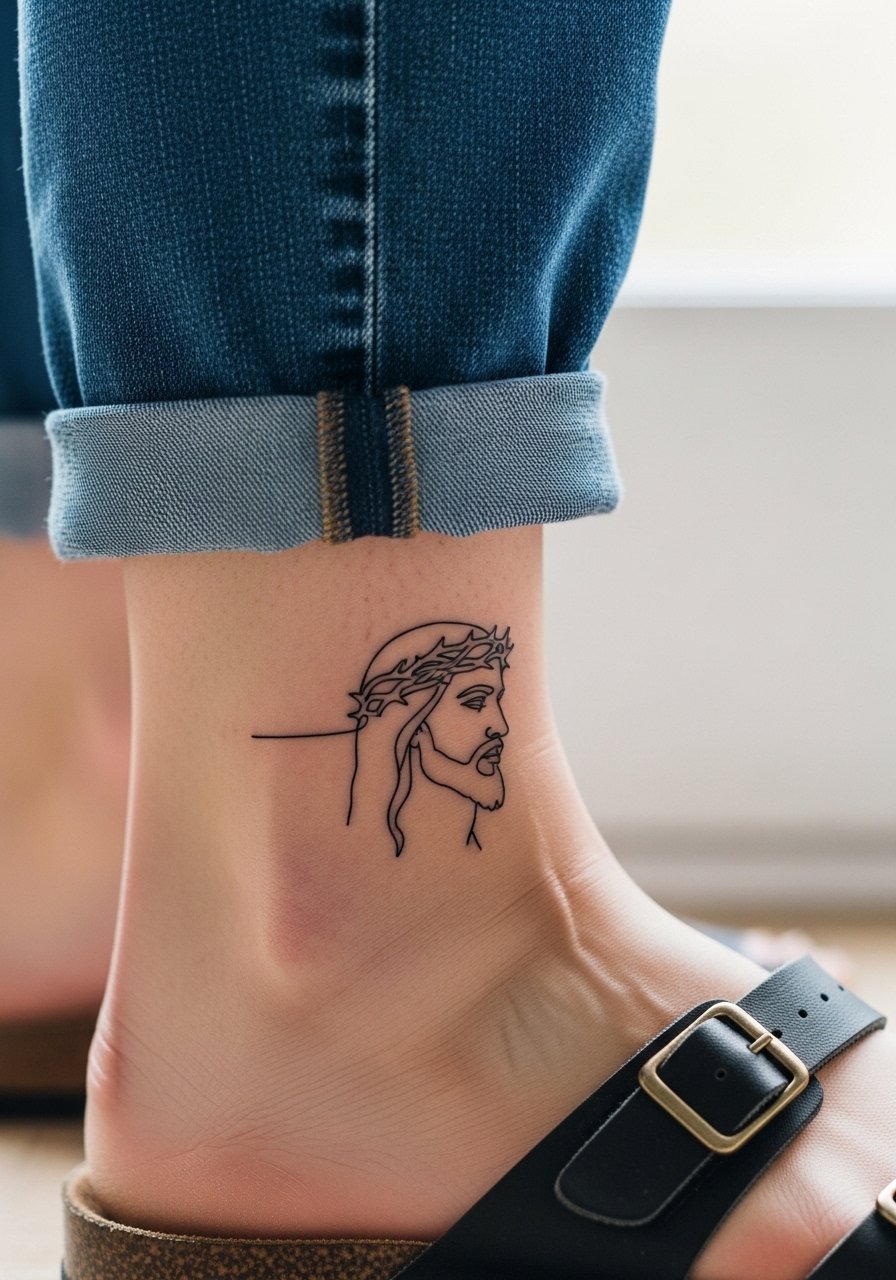
A last-minute minimal profile gives you a low-commitment option that still carries the full name and imagery. Request a simple contour with slightly increased spacing from the start to avoid early merging. People sometimes copy tiny reference photos without scale adjustments, which causes loss of definition. The session is quick and healing is predictable. For an easy show-off pair, ankle tattoos sit nicely with low sandals and a rolled pant leg.
Frequently Asked Questions
Q: Will a watercolor crown of thorns fade differently on darker skin than on lighter skin?
A: Watercolor pigments, especially reds, can read differently across skin tones. From what I have seen, artists who plan watercolor with accompanying graphic outlines and test healed examples on similar skin types get more even results. Ask to see healed photos of the artist's work on skin tones like yours and consider slightly more contrast in the design.
Q: How often do hand and wrist Jesus portraits need touch-ups compared with forearm pieces?
A: Hand and wrist work faces more friction and washing, so touch-ups are more common. Expect a possible touch-up at year one or two for hand pieces. Forearm tattoos usually hold longer and often need a touch-up later, around year three, depending on sun exposure and skincare.
Q: I want a fine line Jesus portrait on my ribs. Are artists united about this?
A: No, artists split into two camps. One group says the ribs' movement and thin skin make fine line blur within two years. The other group says with correct needle depth and spacing fine line can last. The practical step is to ask your artist to show healed rib work and to plan a spaced session approach so you can reassess after the first pass.
Q: What should I wear to a session for a chest or sternum Jesus portrait?
A: Wear something you can easily pull aside that keeps most of the torso covered, like a fitted sports bra or a wide-neck shirt. That gives clean access while keeping you comfortable during breaks and on the trip home.
Q: Are there wardrobe tips to show off a forearm sacred heart or a chest radiant Jesus piece?
A: For forearms try rolled sleeve chambray shirts in neutral tones and a thin leather cuff to balance the arm. For chest work, deep v neck tees or open button-down shirts frame the art without competing. A linked rolled sleeve chambray shirt is a good starting point.
Q: Do watercolor Jesus designs require different aftercare than black and gray portraits?
A: The basics are similar, but watercolor areas with softer edges benefit from diligent sun protection after healing and slightly longer avoidance of abrasive clothing during the first two weeks. Your artist will give instructions based on their ink choices, and their healed portfolio is the best guide for expectations.
