
Fine line neck butterflies are everywhere on feeds right now, and the gap between what trends and what lasts shows up fast on the neck. Tiny outlines and watercolor washes look incredible fresh, but thin neck skin, sun exposure, and constant movement mean some versions need touch-ups sooner than people expect. Below are 17 practical, stylish butterfly neck tattoo concepts that balance look, placement, and how they wear over time.
1. Minimalist Butterfly Outline on Side Neck
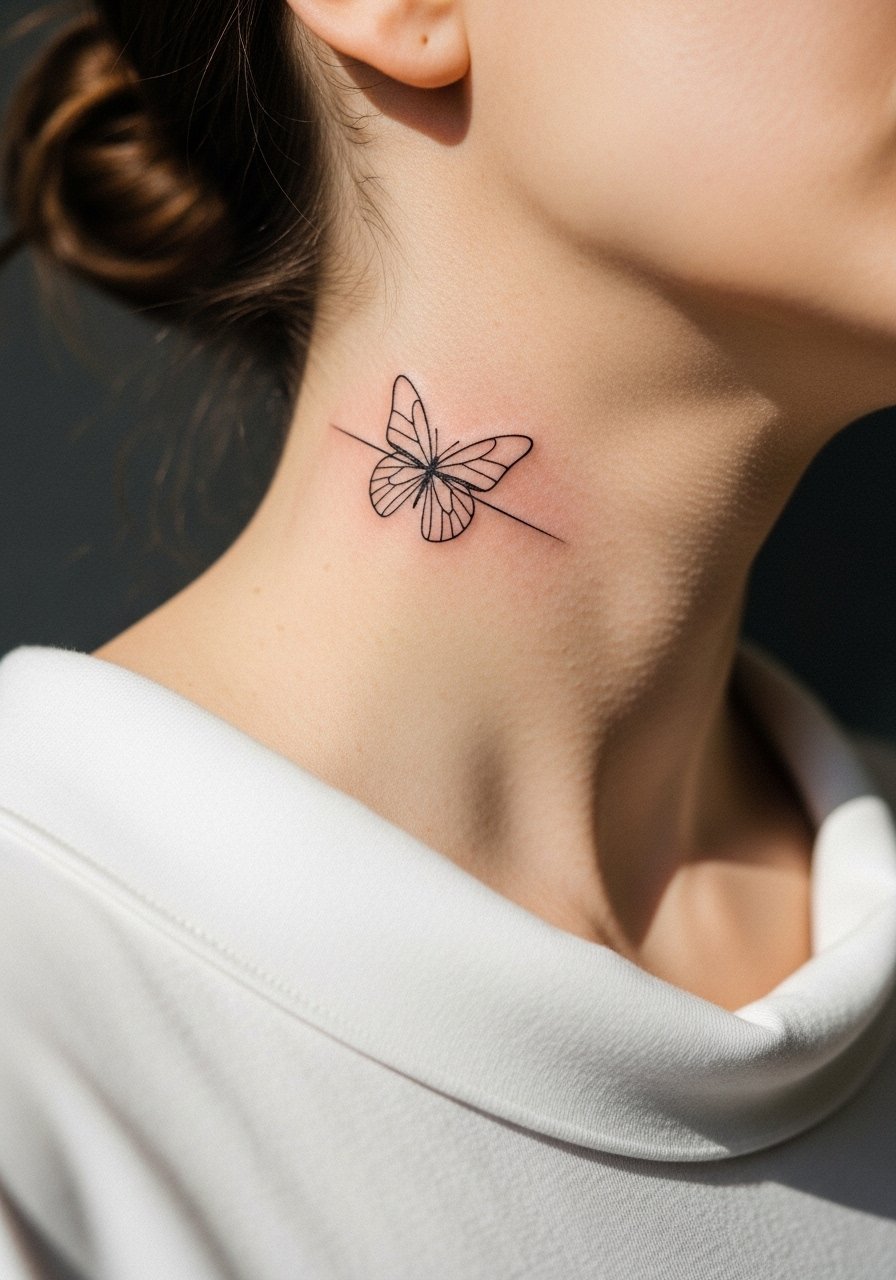
I recommend this if you want visible ink that still reads subtle. Bring a single reference showing the exact line weight you want and ask the artist to scale the wings to the curve of the neck, not the flat stencil photo. Expect a quick session around 20 to 40 minutes and a pain level most people call a three out of ten. The common mistake is asking for lines too thin for the skin type, which leads to early fading and a patchy look. For showing this off, pair it with a high neck crop top or layered necklaces on the opposite side so the butterfly peeks out without being covered. Plan on a touch-up at 6 to 12 months for thin-line pieces on the neck.
2. Watercolor Butterfly on the Nape
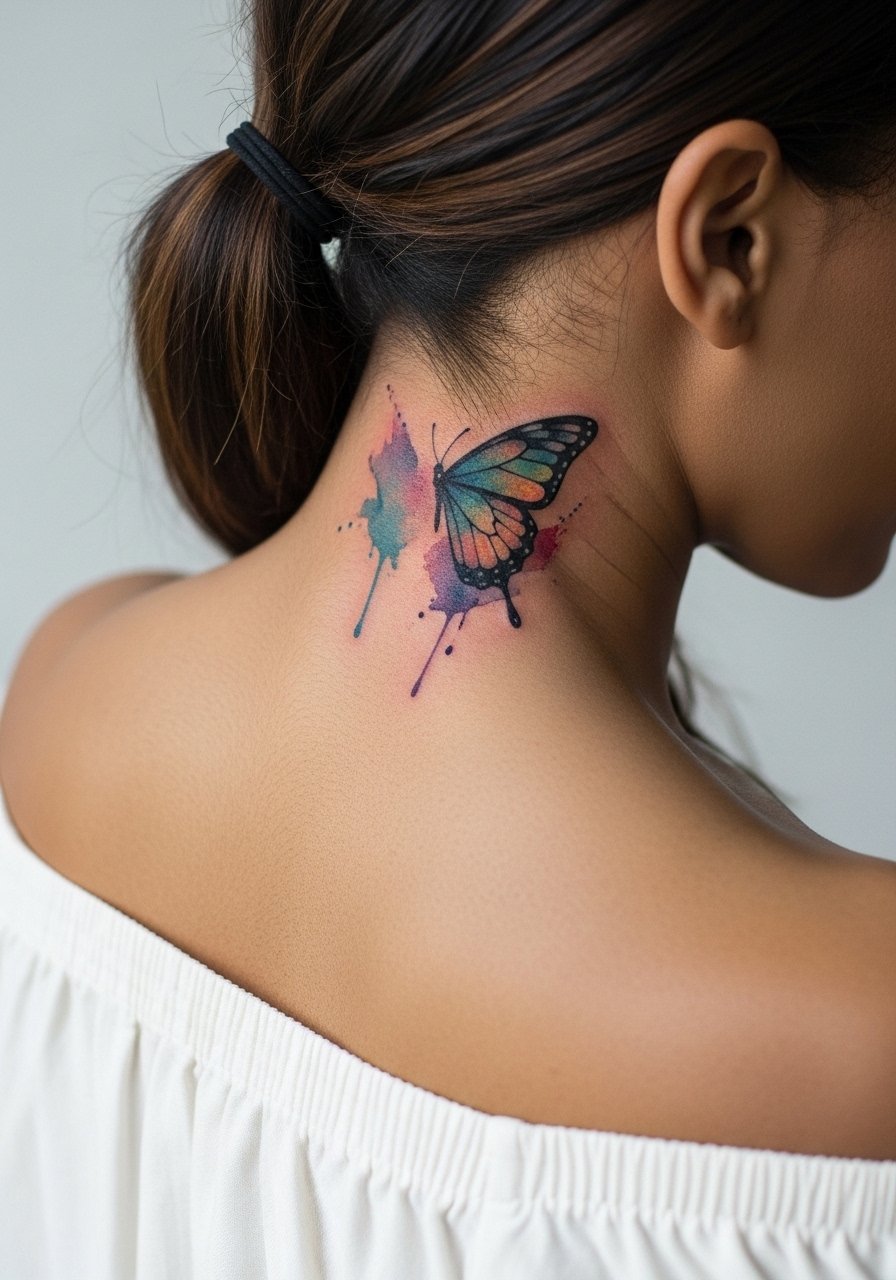
Most people choose watercolor here for the painterly vibe, but this placement meets humidity and hair products daily. One controversy is whether to use a protective film right after the session or to let the skin breathe. One camp argues a thin protective film keeps sweat and friction off the fresh work. The other camp warns it can trap moisture on thin neck skin. If you go watercolor, ask your artist about placement high enough to avoid constant hair contact and expect a two-session process for layered saturation. For sessions wear a linen tank top so you can tie hair up without rubbing the area. Color will look vivid at six months if you avoid sun, but colors can soften by year two in exposed neck spots.
3. Fine Line Butterfly with Floral Accents at Collarbone-Neck Junction
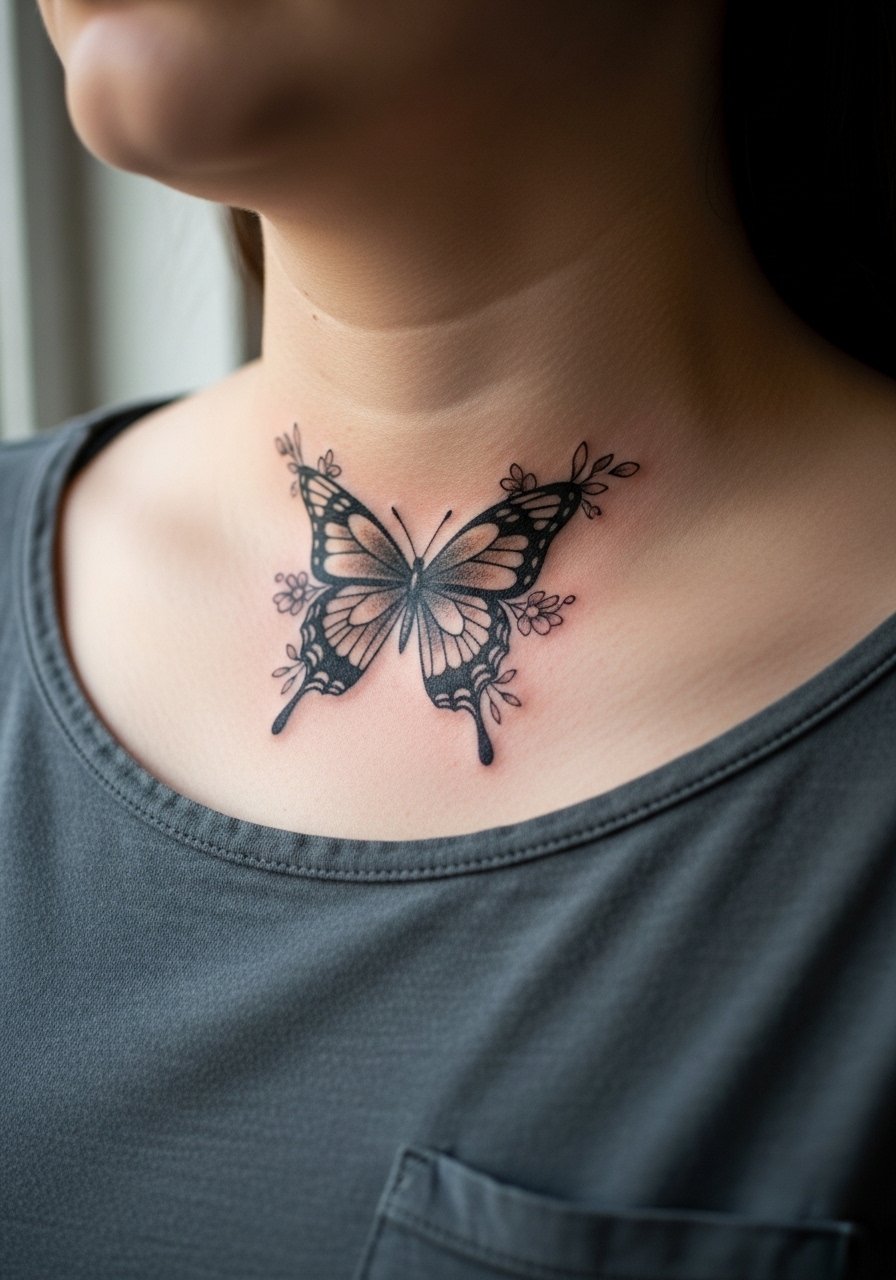
When you want a piece that flows with body contours, this is the one. During consultation mention you want the floral stems to follow bone lines so the design never looks skewed when you move. Artists split on whether ultra-fine single-needle work holds forever in this area. One camp says spacing and depth are critical to avoid dot merging. The other camp maintains that with proper technique fine line lasts if you avoid heavy sun. Avoid asking for dense florals next to the butterfly since too much detail on this curve can blur. For evenings out, this piece pops under a strapless crop top or a halter neck that leaves the collarbone clear. Expect a gentle touch-up in a year for the lightest lines.
4. Black and Grey Realistic Morpho on Back of Neck
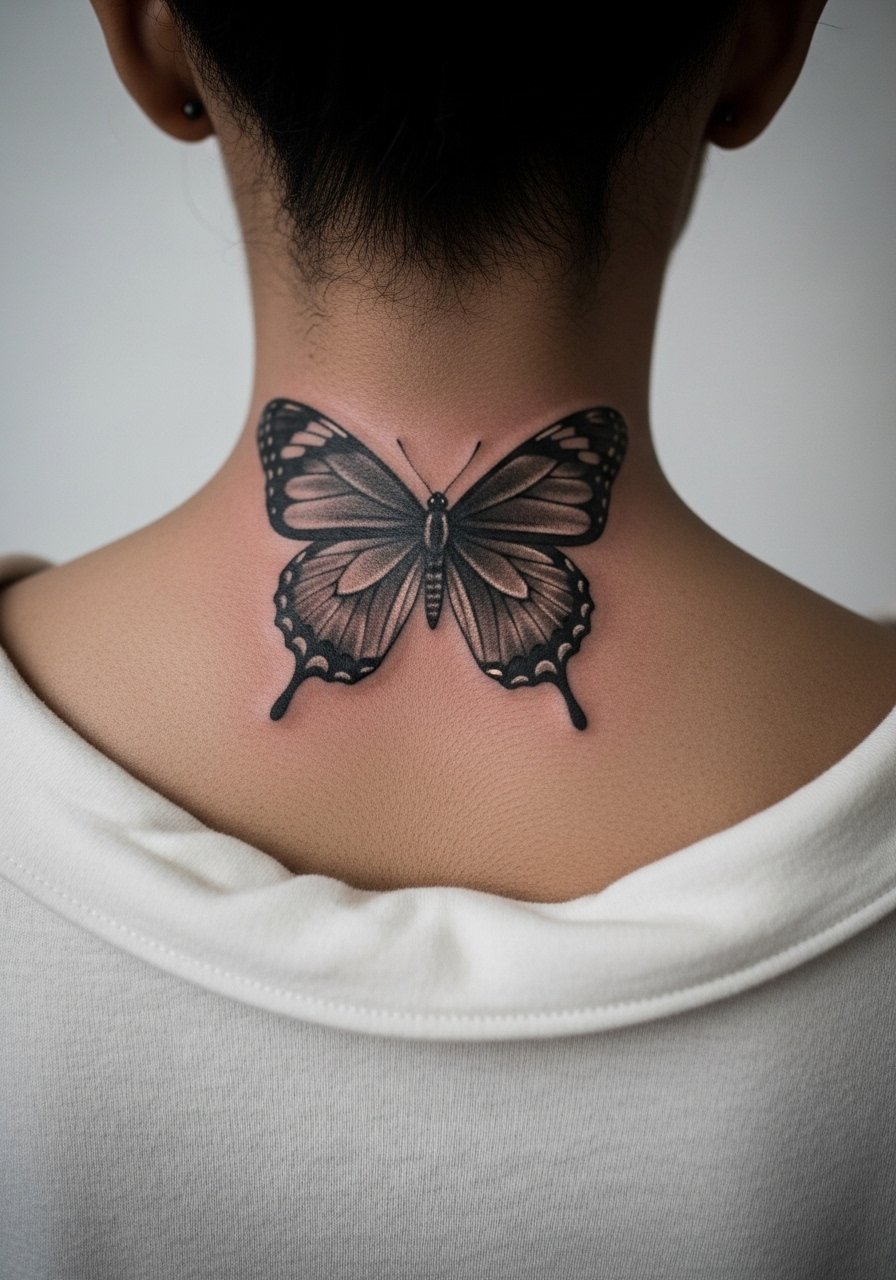
There is real value in choosing black and grey for nape pieces. The saturation and contrast age more predictably when the area gets sun and friction from collars. Book a two-session appointment for layered shading and ask the artist to map the highlights to the natural muscle contours. Pain stays around a three in this zone, but the second pass can feel rawer. The mistake I see most is trying to force a photo-real color morpho into tiny scale, which loses the detail quickly. A black and grey approach maintains the illusion of depth at year two and five with fewer visible losses. For the session, wear an off shoulder blouse so the artist can access the nape without tugging at fabric.
5. Single-Needle Blue Morpho on Side Neck
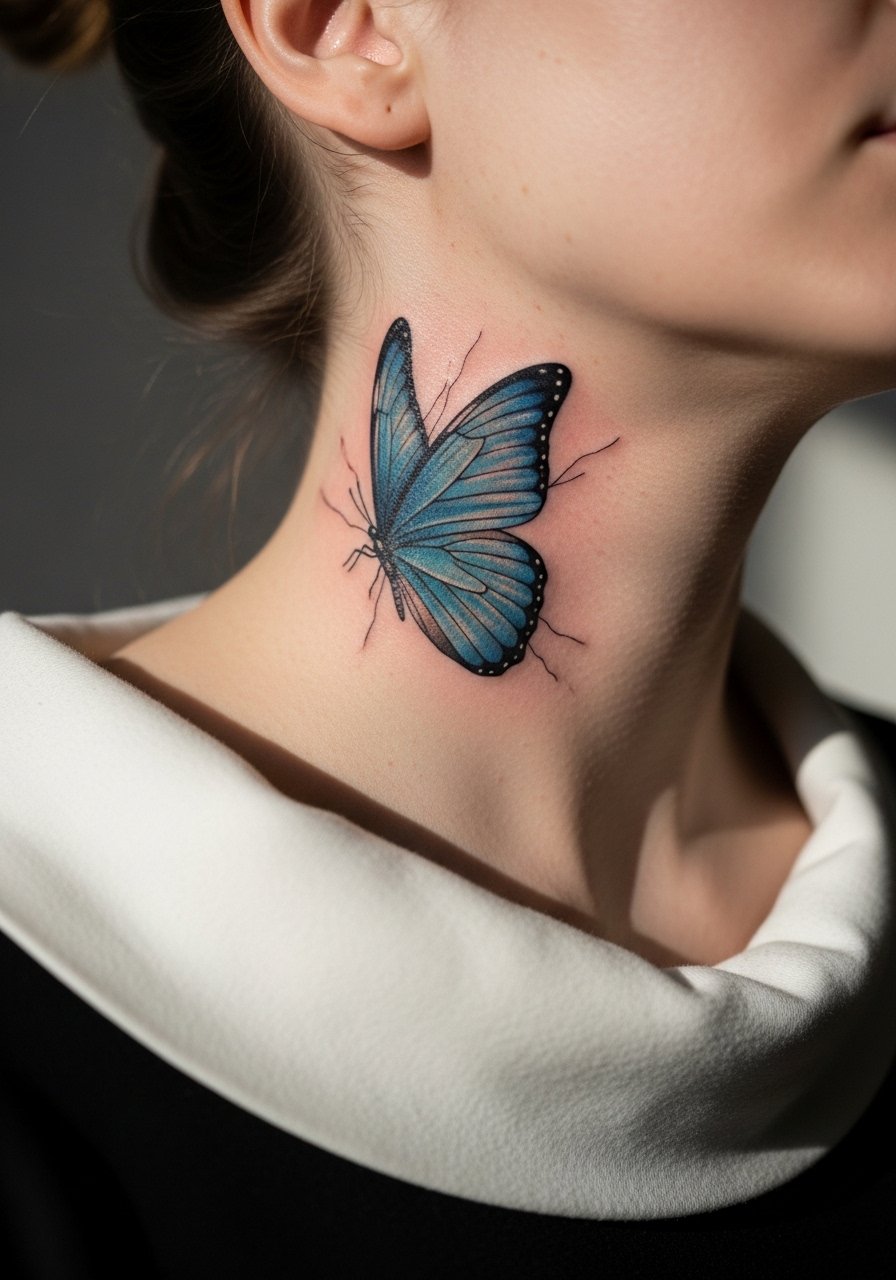
This one reads like travel memory when the blue tones are right. Tell your artist you want tiny gradients rather than full saturation so the blue reads luminous without heavy color blocking. Single-needle feels delicate in the chair and the session time is typically 30 to 60 minutes. The common error is over-saturating the blue on thin neck skin which turns patchy during healing. For showing it off, consider a layered gold chain necklace that sits lower on the chest so the morpho remains the focal point. Fine single-needle work often needs a touch-up between six months and two years, especially in sun-exposed spots.
6. Neo-Traditional Butterfly with Dot Trail on Front Neck
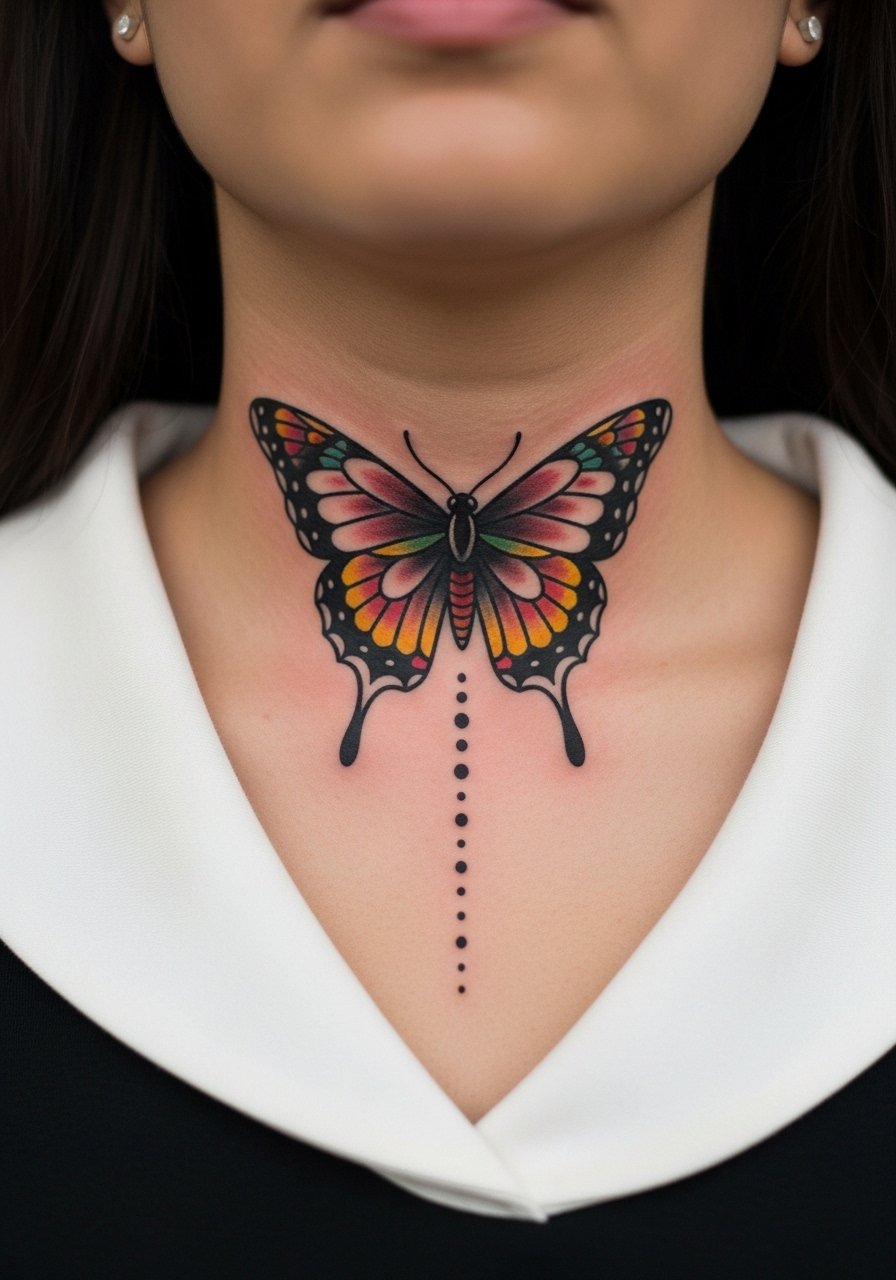
There is a visual impact to bold outlines on the forehead of the neck that reads from a distance. If you want that graphic presence, ask for a consistent outline thickness and a dot trail that follows natural vertical lines so it looks intentional with movement. Session time is usually one hour and the front neck feels more sensitive because it sits over tracheal structures. A common mistake is getting the design too small for the face framed area which makes the dots look crowded as healing progresses. For appointments wear an open-collar shirt you can pull aside easily. Bold line work here tends to hold shape longer than ultra-fine lines in the same spot.
Studio Day Picks
Those first six neck concepts face different healing challenges, from fine line fading to color bleed on the nape, so a few well-chosen items smooth the session and the first week.
-
Stencil transfer paper kit. Lets you test placement on the curve of the neck before you commit, which matters more than most people expect.
-
Topical numbing cream. Applied per instructions it can reduce the sting for front and side neck sessions without altering linework.
-
Thin protective film roll. Useful for the nape in humid conditions where hair products and sweat can disturb the fresh surface.
-
Fragrance free gentle body wash. A mild cleaner for the first week that avoids irritating thin neck skin.
-
Aquaphor healing ointment. A thin layer for the earliest healing window helps keep fine line work from drying into flakes that pull ink.
7. Micro Butterfly Silhouette at Lower Neck Base
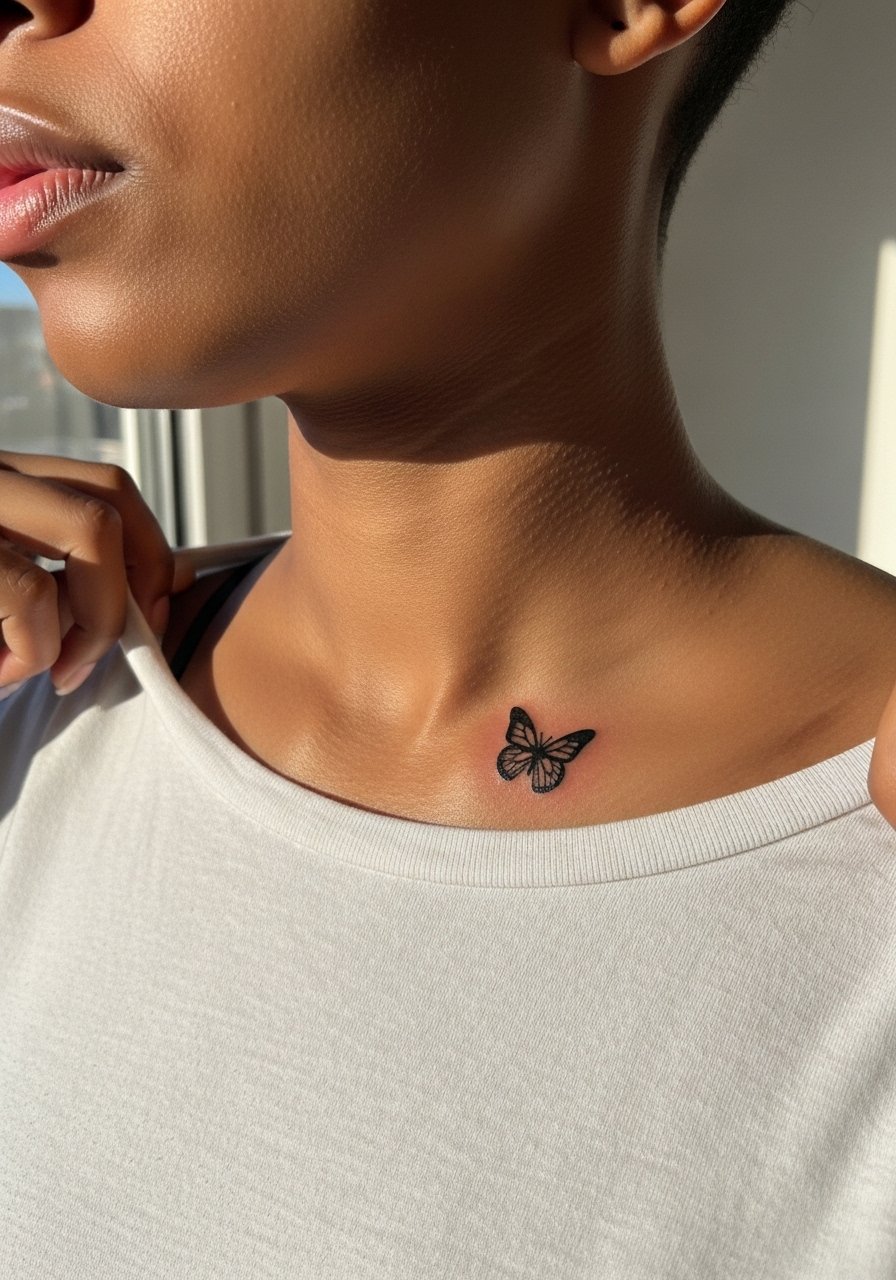
This is a great first-neck option for people who want a discreet symbol. It often takes less than 30 minutes and pain is minimal, rated around a two to three. The mistake is asking for an even tinier silhouette than the skin can hold, which can disappear into the texture of the area. For session wear pick a boat neck top so the artist can access the lower neck without fabric rubbing against the fresh ink. Micro silhouettes can still blur over several years if they sit on high-friction collars, so plan a light touch-up after the first year if line clarity is important.
8. Butterfly with Quote Integration on Side Neck
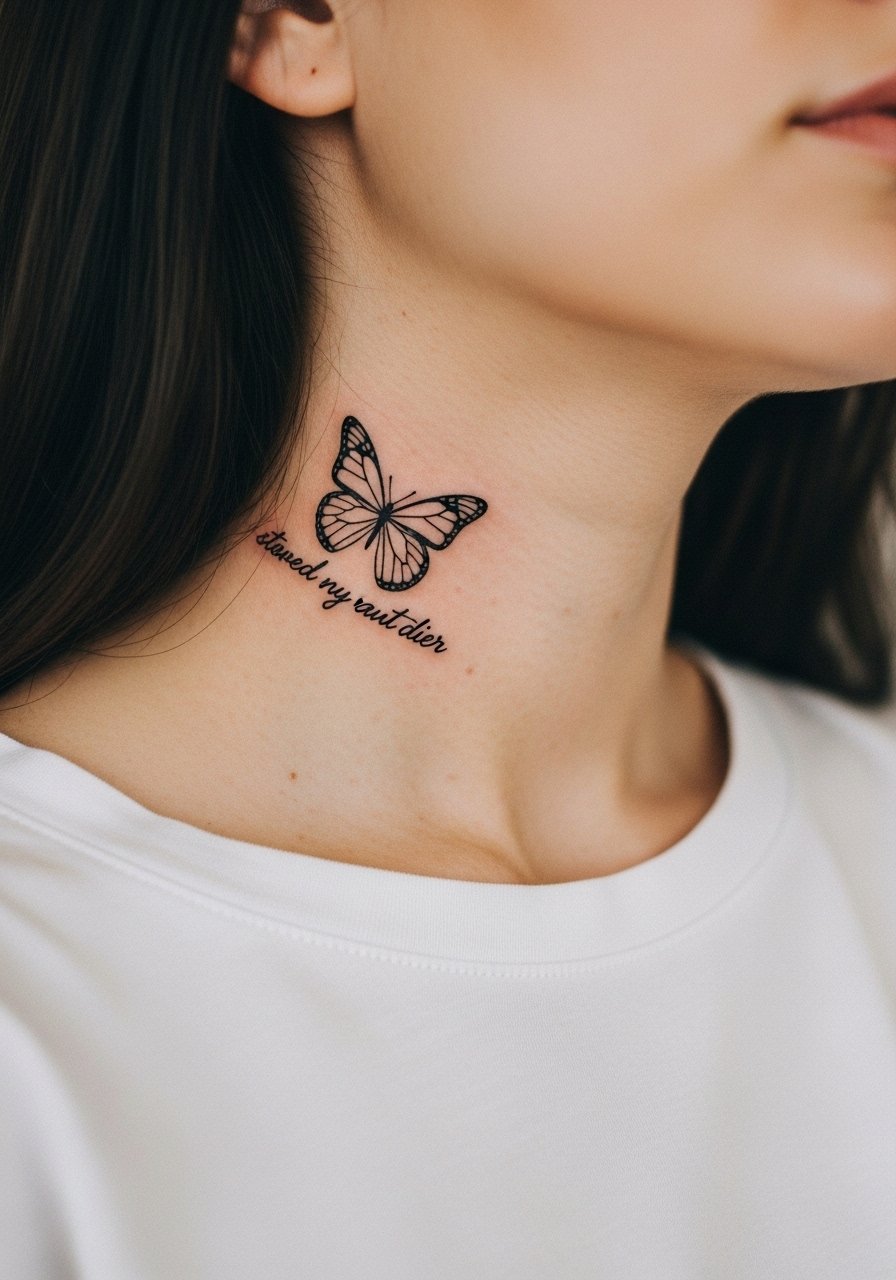
If you want a compact narrative, pairing a two-word or four-letter script with a small butterfly is effective. Be specific about font size and spacing in consultation and provide the exact wording so the artist can layout lettering without guessing. A frequent mistake is choosing a font that looks good on paper but becomes illegible at small scale on neck skin. For show-off styling, a thin chain pendant necklace can sit just below the quote without competing with it. Script ages unevenly in exposed neck spots, so consider slightly thicker strokes in the lettering for longevity.
9. Symmetrical Butterfly Pair on Collarbone Extending to Neck
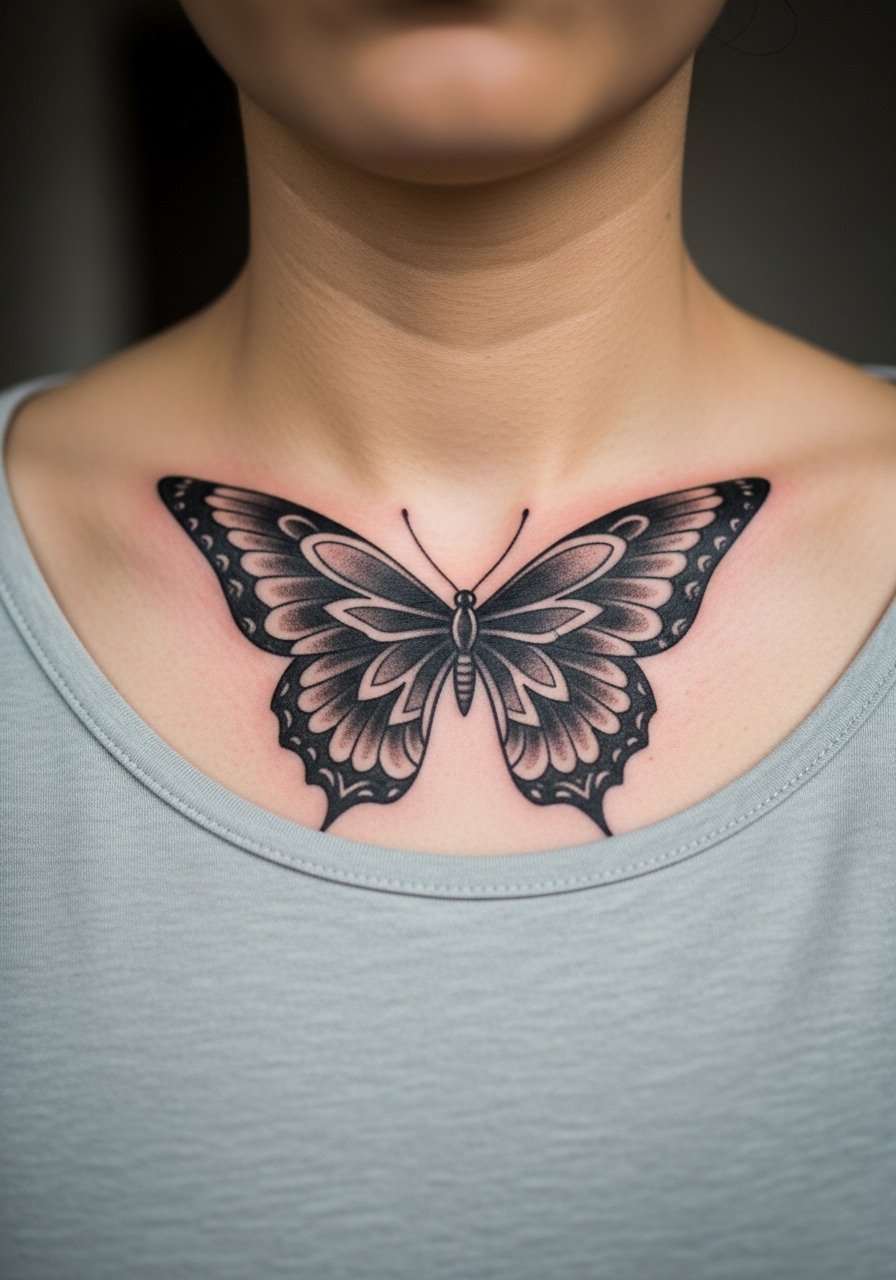
Symmetry across the collarbone creates a face-framing effect that works with certain haircuts. Ask the artist to measure and mark the midline on your sternum so both wings mirror perfectly when you stand upright. Sessions commonly take two to three hours for scale and shading. The common error is relying on photos that were taken at an angle, which leads to an off-center result. For evening wear this layout pairs well with a plunging V-neck dress that keeps the focus on the mirrored composition. Expect the shaded gray areas to soften gracefully over years compared with tiny fine lines.
10. Ignorant Style Abstract Butterfly Wings on Nape
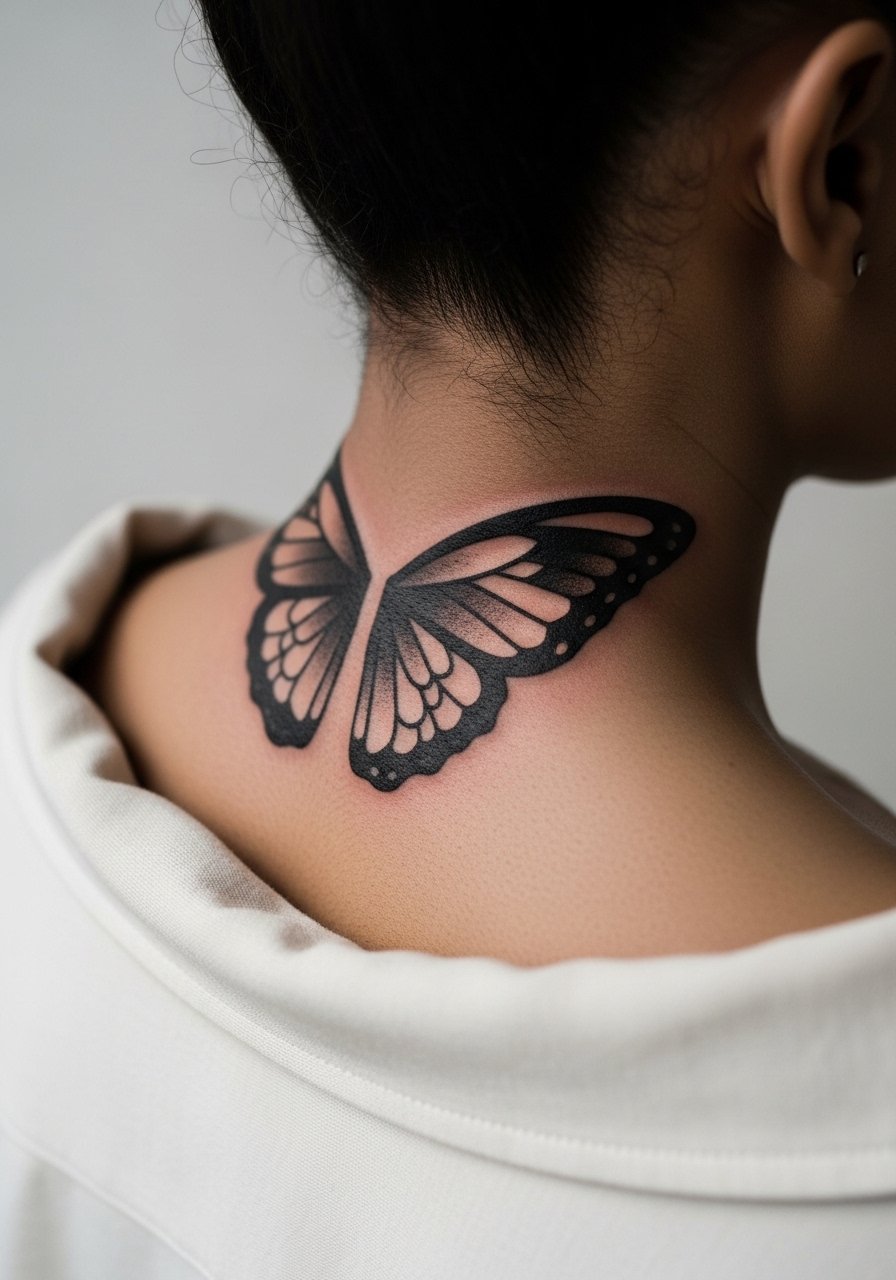
If you want something graphic and unapologetic, ignorant style blackwork offers bold movement that ages well because of thick lines. These designs need room so the negative space breathes. The mistake is cramming tiny geometric details into the wings, which tend to fill in as the skin settles. Artists will recommend a two-session plan for heavy blackwork to avoid trauma to the area. For session comfort wear a loose tank top to avoid fabric pressure on the fresh work. This approach keeps contrast strong at year two and five with less touch-up than ultra-fine work.
11. Flight Trail Dots That Move with Neck Turns
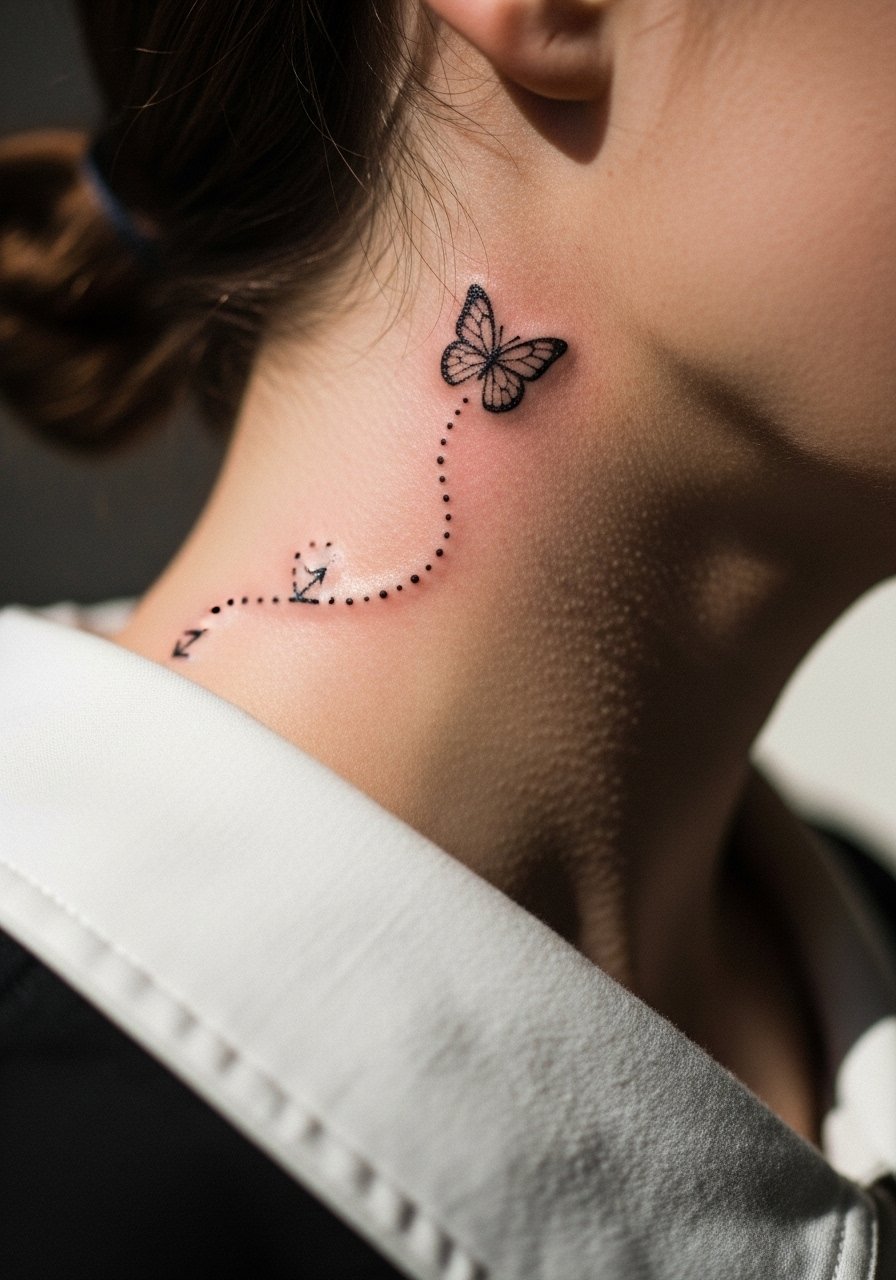
This is one of the under-covered ideas that looks like motion when you turn your head. During the consult point out the exact arc you want so dots follow a natural muscle line and do not sit across a joint. The session is short but precision matters, and the main error is placing the trail too close to a collar seam where friction will fade the dots. For wearing it off-duty a loose V-neck tee frames the arc without covering it. The dot trail design tends to hold clarity better than tiny connected lines because dots age into subtle texture rather than merges.
12. Cultural Motif Butterfly with Frangipani Details
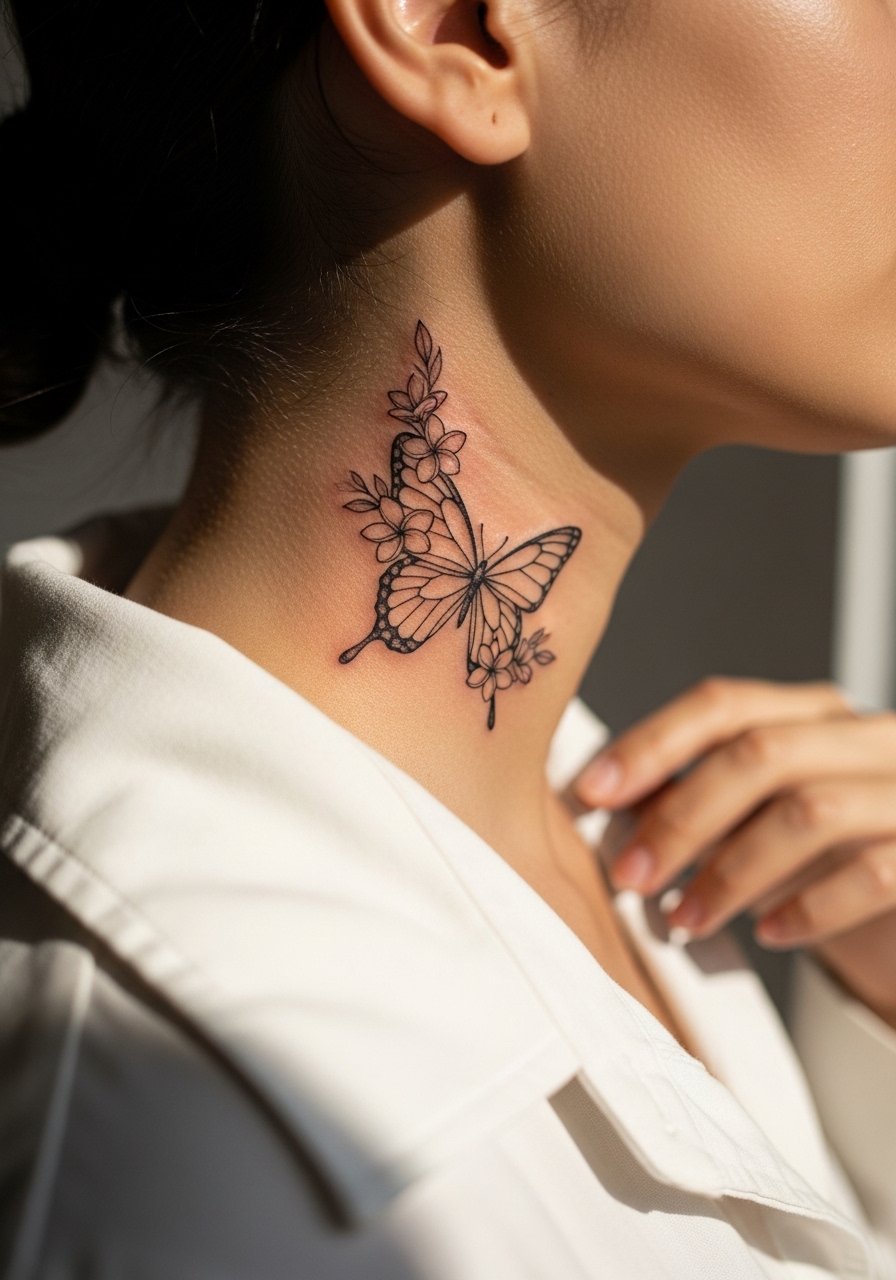
If your travels inspire design choices, a morpho butterfly with frangipani accents can be elegant and meaningful when handled respectfully. Make sure you explain any cultural elements you want and ask the artist about subtle variations that honor the source without direct copying. The common mistake is crowding cultural motifs into the wings so the tattoo loses a coherent silhouette. For session day, wear a loose button-down shirt you can pull aside so the artist can access the side neck comfortably. Color integration should be restrained on the neck to avoid early fading in high-friction spots.
13. Symmetrical Sternum-Neck Pair for Upper Body Flow
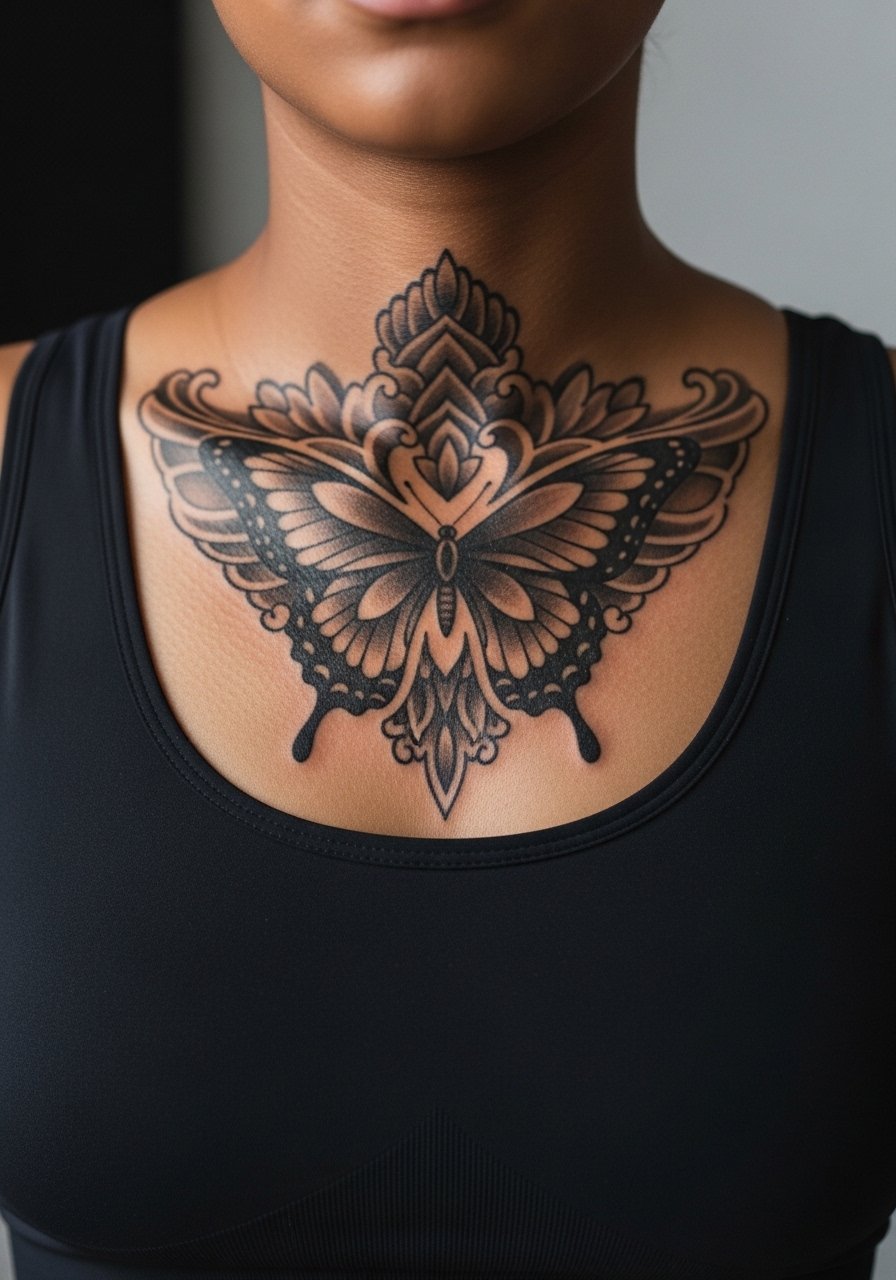
Pairing sternum and neck pieces gives a deliberate upper-body flow when you wear lower necklines. This requires coordinated planning so both halves align when you stand relaxed. One practical issue is session logistics since sternum work often needs separate setup from neck ink. The common error is starting both pieces without a mapped midline, which creates misalignment. For the appointment wear a fitted sports bra so the artist can access the sternum and the lower neck without fuss. Expect multiple sessions and moderate pain on the sternum, with the neck portion comparatively gentler.
14. Black and Grey Minimalist Wingline Along the Side Neck
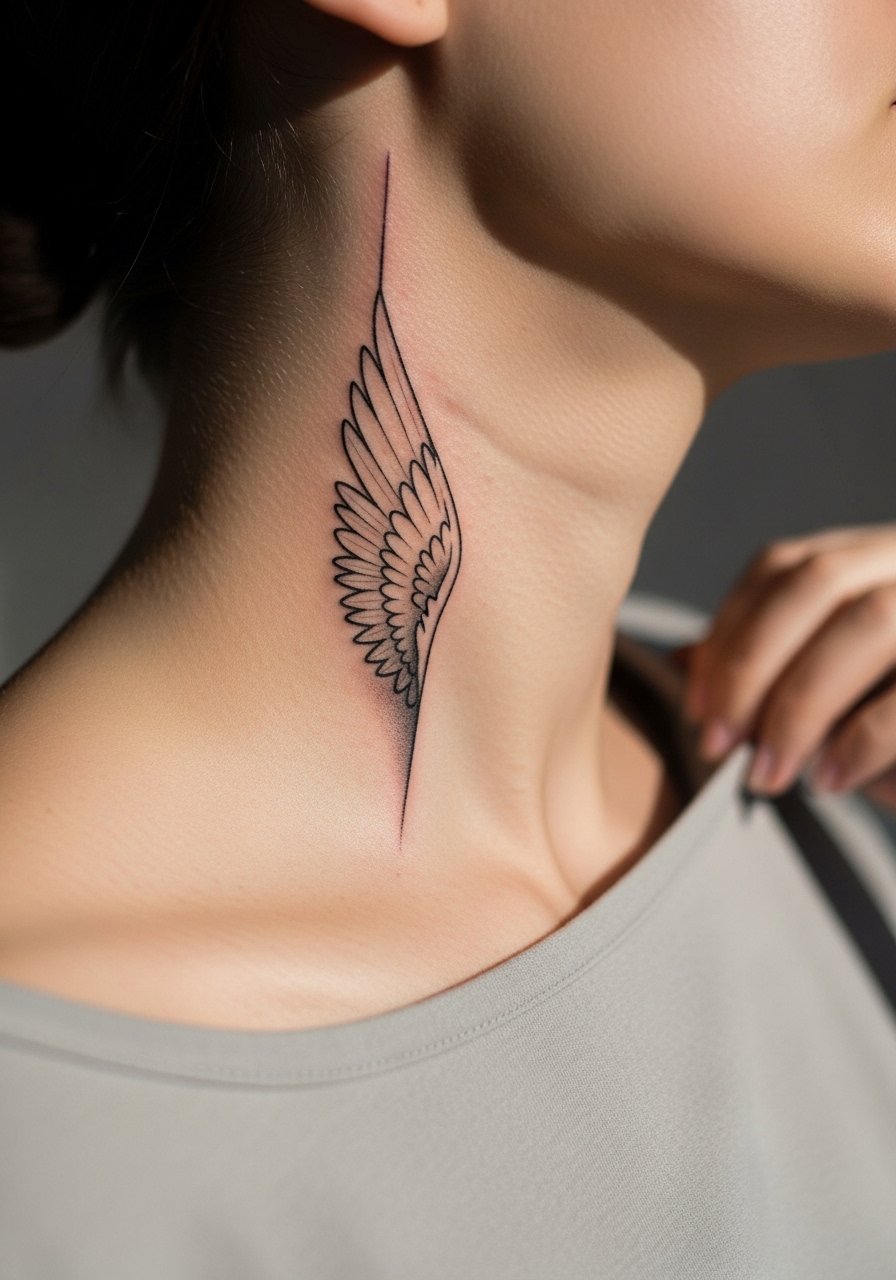
There is an aging reality to very thin winglines on exposed neck skin. I advise asking for slightly heavier anchors where the design meets bone to preserve shape over time. Sessions are usually short and the pain is manageable. The mistake people make is prioritizing ultra-fine single-needle delicacy without accounting for sun exposure and collars. For showing this at gatherings, a halter neck blouse keeps the side neck open and lets the line read clean. Expect a touch-up window around the one to two year mark for the most delicate strokes.
15. Abstract Geometric Butterfly on Back Neck
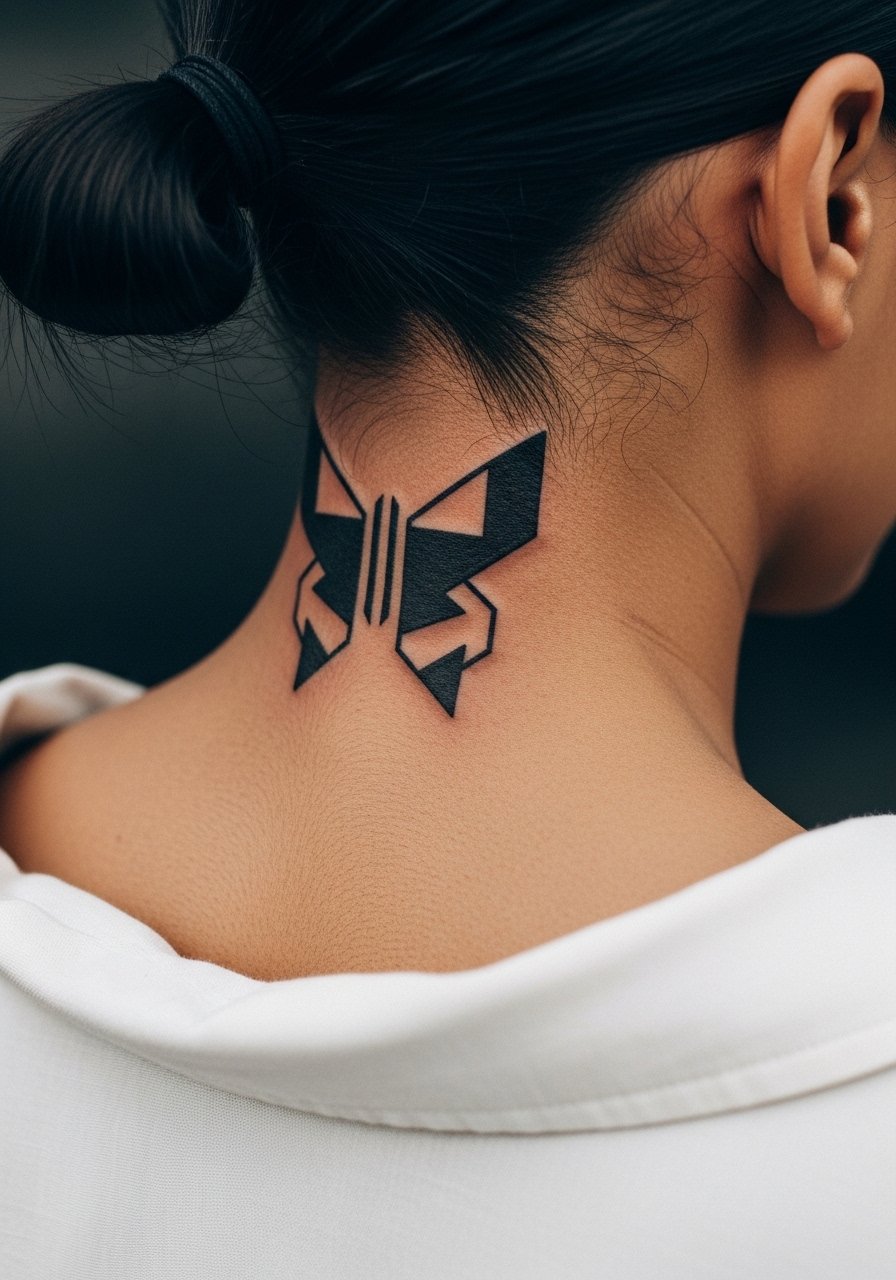
If you want an edge, geometric interpretation reads modern and deliberate. Ask your artist to test a stencil against the hairline so shapes do not collide with the natural shadow of hair at rest. The biggest error is letting the shapes get too small for the skin texture, which makes the geometry lose crispness as the skin settles. For the session wear something that allows an easy hair tie and a hair updo accessory so the artist can work without hair interference. Geometric blackwork tends to hold well if the negative space is respected.
16. Blue Morpho Accent with Collarbone Extension
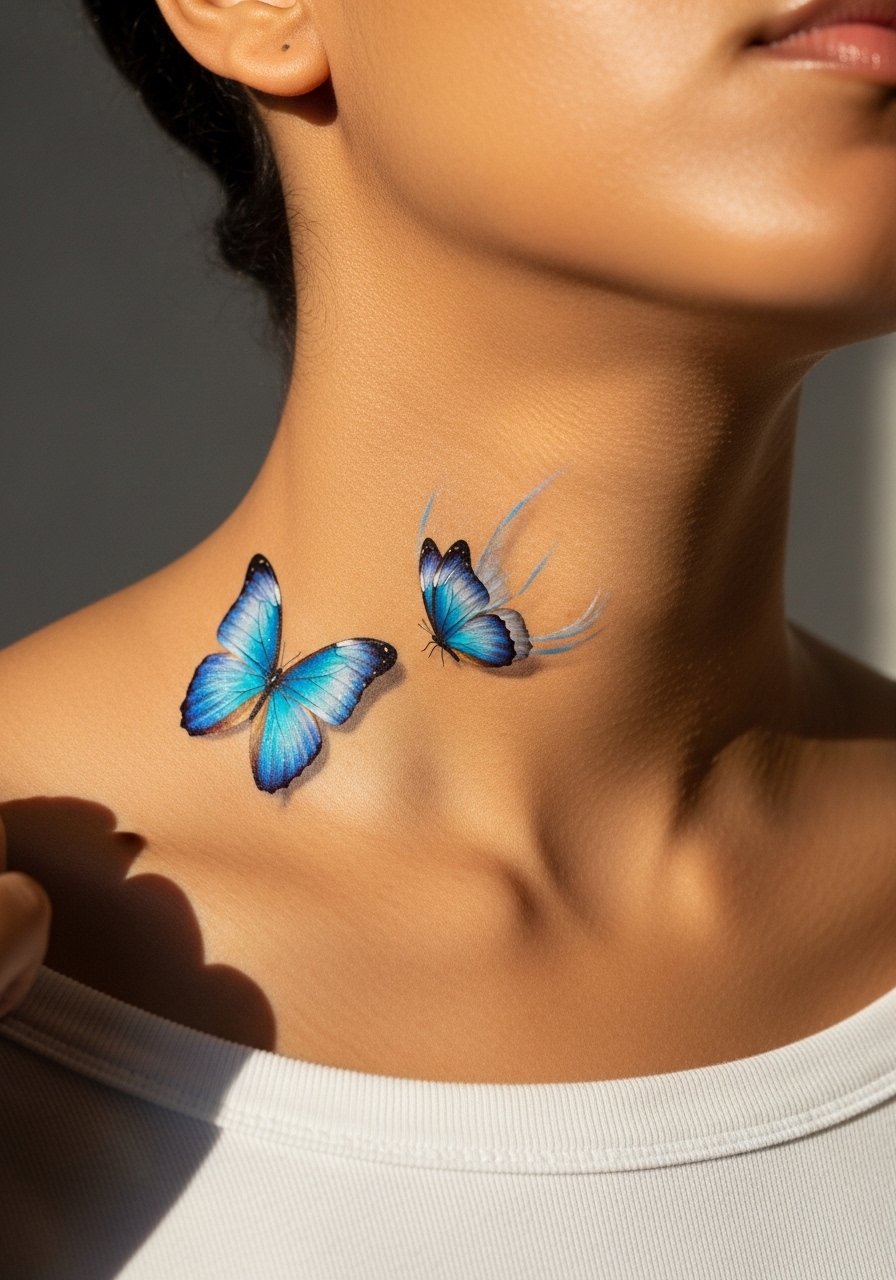
This is an elegant way to tie neck and collarbone pieces together for a cohesive look. During the consult ask for reference showing how the wing tips will point down toward the collarbone to avoid awkward float. The session can take an hour if color layering is involved. A common mistake is expecting bright blues to behave like black ink on neck skin, which they do not. For showing it off try a halter neck blouse or strapless top so the color sits in context with your neckline. Touch-ups for blue tones are normal after the first year if you spend a lot of time outdoors.
17. Micro-Realism Single-Butterfly Above the Collar
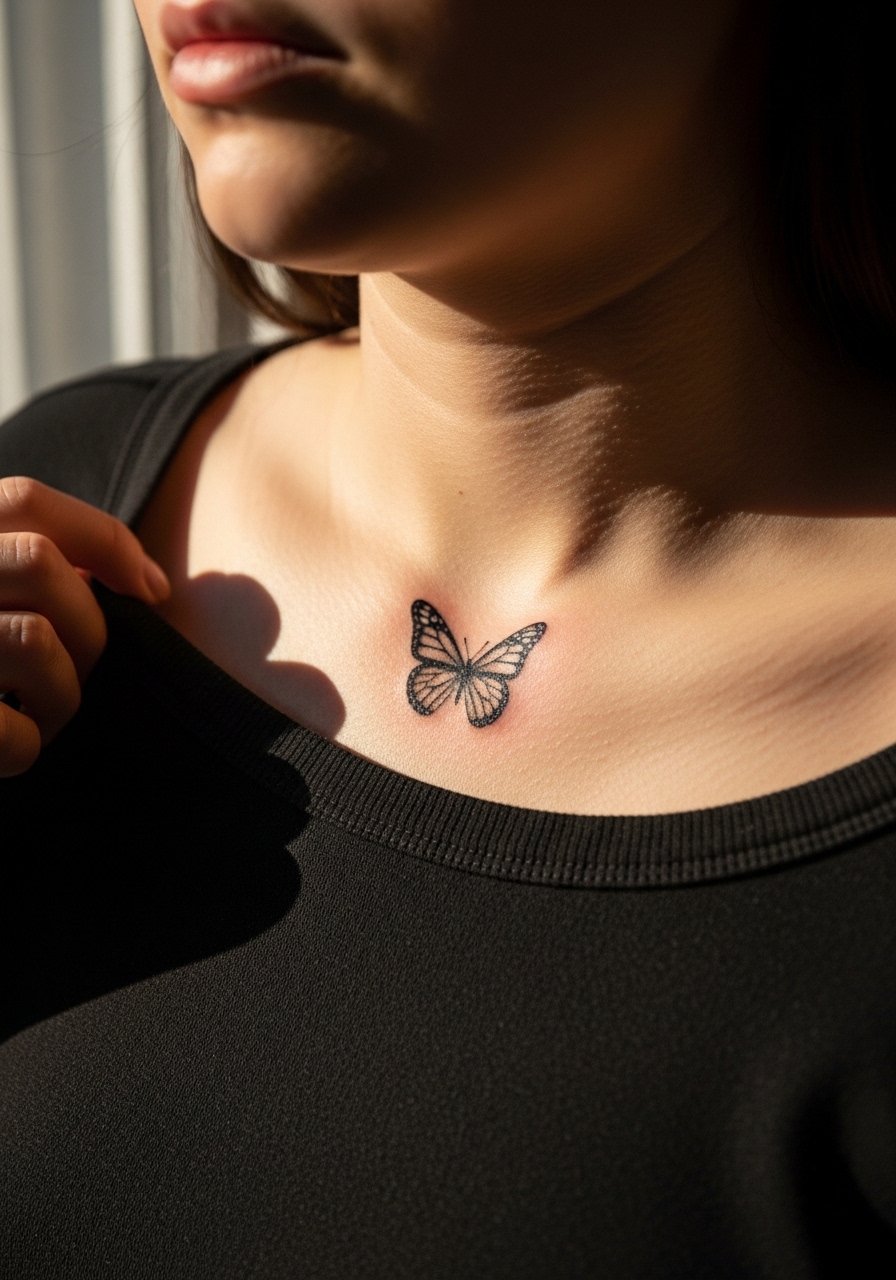
Micro-realism up high gives the feeling of a delicate accent without overwhelming the face frame. Ask for photographic references scaled to one inch so the artist understands the level of micro detail you want. The session usually takes 30 to 60 minutes and the area is forgiving for small pieces. The mistake is trying to compress photographic detail into too small an area which ends up looking muddy after healing. For show-off outfits, pair with a thin pendant necklace that sits just below the piece and does not compete with it. Plan on a light touch-up at the one-year mark for micro shading clarity.
Frequently Asked Questions
Q: How much does a small butterfly neck tattoo usually cost and what affects that price?
A: Prices vary by studio and style, but expect a range from small micro pieces to multi-session color work. The factors that move the needle are size, color complexity, session length, and the artist's experience with neck placement. Fine line single-needle work and watercolor layers typically take longer per square inch than a simple silhouette.
Q: Will a fine line butterfly blur faster on the neck than a bolder design?
A: From what I have seen, ultra-fine lines tend to soften sooner on the neck because of skin movement and sun exposure. Bold outlines and heavier saturation usually keep form longer. If you love delicate linework, plan for touch-ups around the one to two year mark and daily sunscreen once healed.
Q: Which neck placements hide better for job interviews or conservative workplaces?
A: The nape and the lower neck base hide best since hair or collars cover them easily. Side neck pieces are more visible, especially with short hair. I suggest testing placement with a temporary sticker and wearing a wide-neck shirt during interviews if you need to keep it concealed.
Q: What is the Saniderm versus dry healing debate for neck tattoos?
A: The two camps are clear. One group recommends protective film for the neck to block sweat and friction during the first days. The other group prefers breathable healing because they worry film traps moisture on thin neck skin. Ask your artist which method they use on necks and why, then follow their protocol for the cleanest outcome.
Q: Do watercolor neck tattoos need different aftercare than black and grey pieces?
A: Watercolor and color-saturated work need careful sun protection post-healing because pigments can fade faster with UV. The physical aftercare steps in the first week are similar for both styles, but long-term maintenance relies more on sunscreen and touch-ups for color work.
Q: Can I use numbing cream for a neck session and does it affect the result?
A: Many people use topical numbing to reduce the sting in sensitive neck zones and I have seen it work when applied correctly. Discuss timing and product with your artist so it is applied without interfering with stencil adhesion or linework precision.
