
Fine line Anubis designs dominate feeds, but what looks delicate on a phone often fades fast where shoes and socks rub. I've noticed the trend on TikTok and in five shops across Brooklyn, and the pieces that last are the ones planned around ankle motion and footwear. Below are 21 ankle-focused Anubis ideas that balance bite, longevity, and the way you actually wear sandals and jeans.
1. Fine Line Head Profile on the Ankle Bone
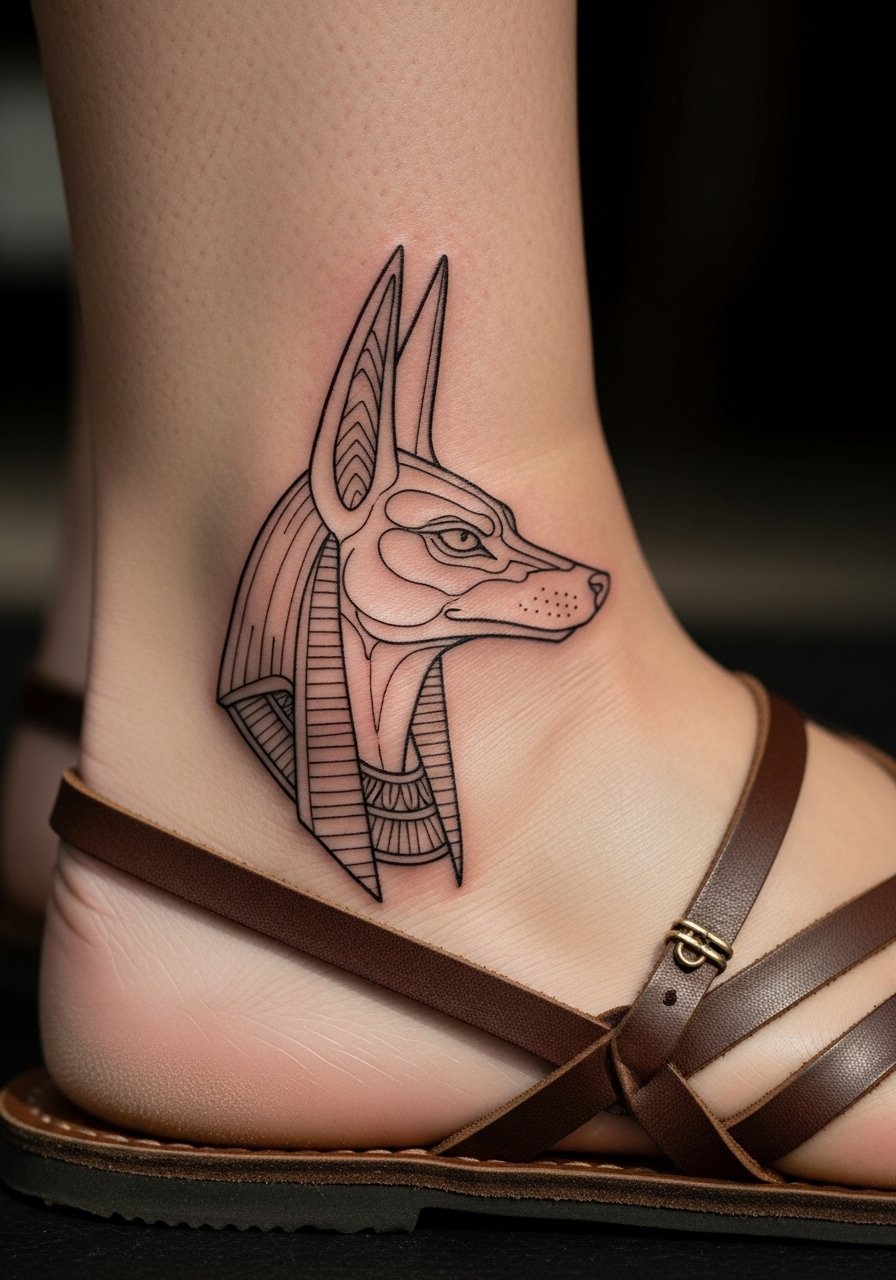
This classic small profile reads like a personal talisman when placed right over the ankle bone. I recommend 1–2 inches so the single-needle linework keeps its shape without overcrowding the jaw details. Tell your artist to use slightly bolder primary contours and keep interior shading sparing, because thin cross-hatching on the bone tends to soften within a year. Expect a painful session for about 20 to 40 minutes depending on your tolerance, and plan a touch-up at year one if you want crisp ears and muzzle. For showing it off, pair the piece with strappy leather sandals that leave the ankle visible, and wear loose pants to your session so the artist can roll fabric away without dragging.
2. Minimalist Silhouette with Staff on Inner Ankle
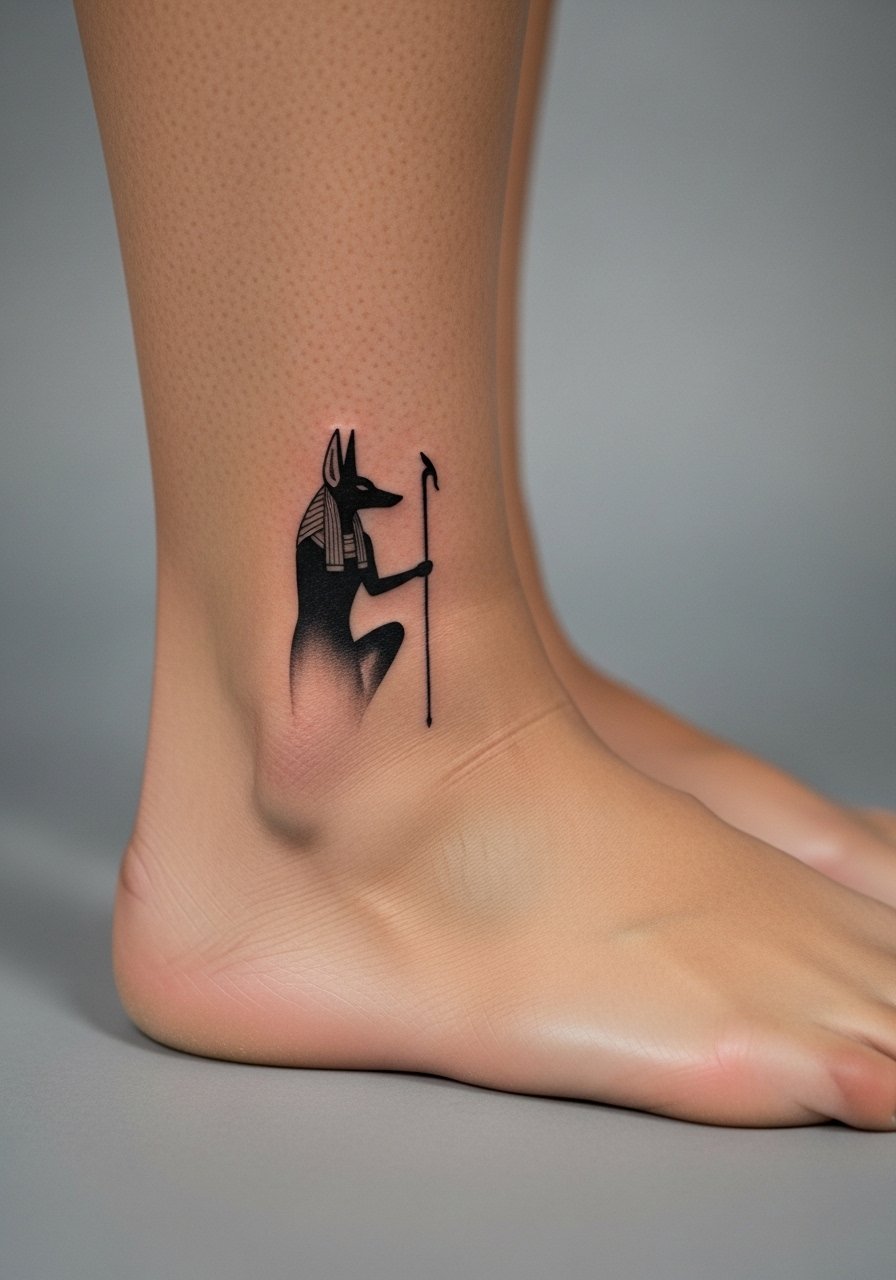
The inner ankle shelters a discreet silhouette that slides under footwear most days. Go tiny, about an inch, and keep shading to soft gray washes so the silhouette reads instead of becoming a smudge of black. When you consult, ask the artist for a compact staff that echoes the jackal’s posture, not a long staff that will force the whole design larger. Pain is modest but hovering near the bone feels concentrated for short bursts. This is a great first Anubis if you want a private piece that only shows in sandals or when you sit. For summer reveal, wear espadrille wedge sandals to make the silhouette peek out under the strap.
3. Micro-Realism Jackal Head on Outer Ankle
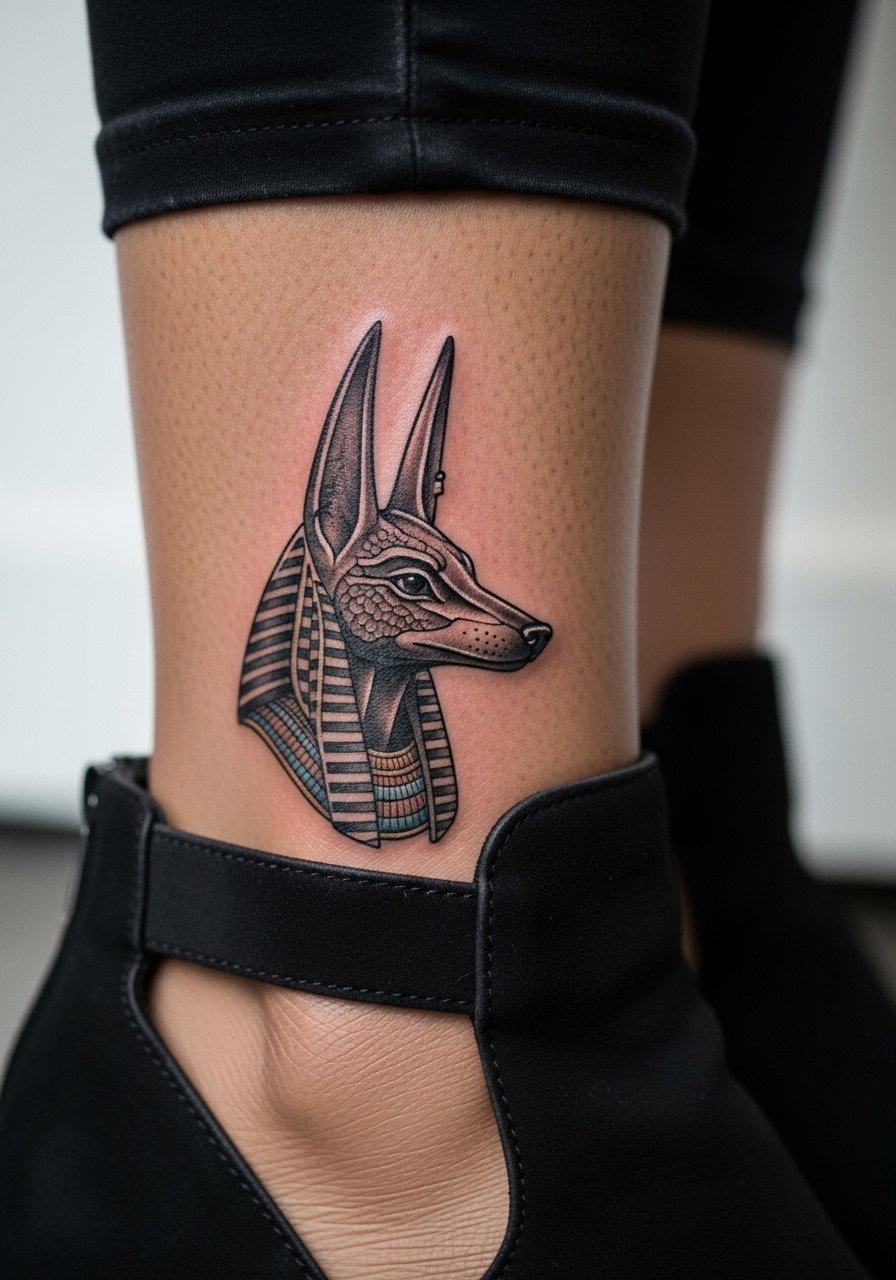
Micro-realism packs sumptuous fur texture into a 1.5 inch area and reads stunning in side profiles. Ask your artist for compressed contrast around the eye and muzzle so those features survive shoe friction. The common mistake is overfilling tiny fur strokes, which blend into a muddy patch after a few washes. Expect a focused session of 45 to 75 minutes and a likely touch-up at 12 to 18 months. Outer ankle placement tolerates slightly heavier saturation versus inner ankle because denim or boots protect it. Show it off with cutout ankle booties that frame the profile without rubbing the exact spot.
4. Blackwork Full-Figure Wrap Around Ankle
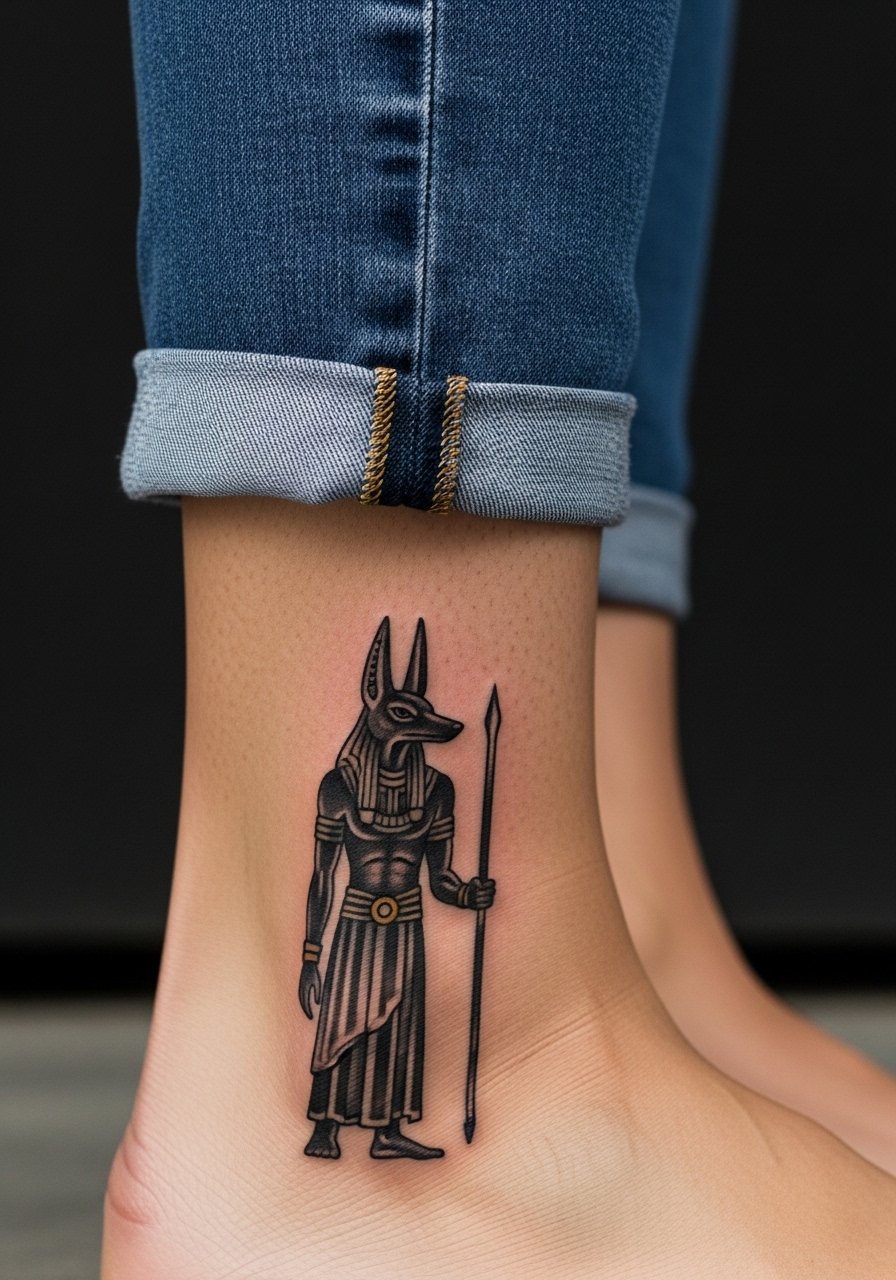
Blackwork thrives on bony ankles because saturation creates contrast that ages into a graphic band. The design works as a two-part session for wrap continuity, so expect two sittings if you want flawless fill. Artists disagree about Saniderm on ankles. One camp says thin film speeds a clean heal and prevents scabs, the other cautions that trapped sweat breeds issues on high-movement lower limbs. If you choose film, plan lighter activity and loose footwear for the first 48 hours. This style pairs best with cuffed slim jeans or low socks, and you can show it off with cuffed ankle jeans that let the wrap read as intended.
5. Ornamental Anubis with Geometric Borders
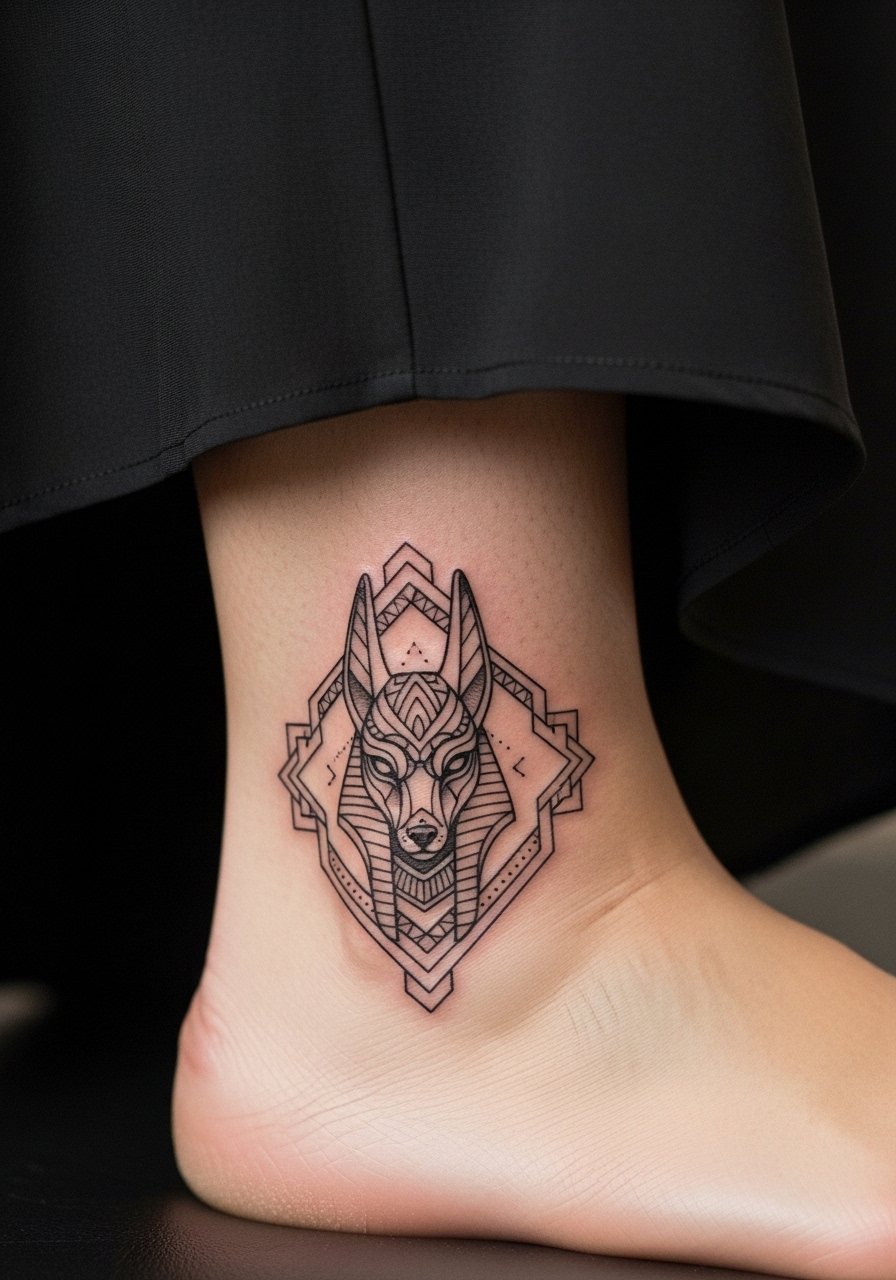
An ornamental frame gives the god a talismanic feel and keeps the eye away from tiny interior detail that would blur. Ask the artist to space the border pattern slightly wider than you think it needs, because cramped geometry on an ankle will merge in high-density areas. This piece travels well under heels, so consider sizing for visibility under straps. Session time is usually 45 minutes to an hour for a 2 inch design, and touch-ups are common for border crispness. For evenings out, this reads especially well with gold ankle strap heels that place the motif center stage.
6. Neo-Traditional Anubis with Scarab Accents
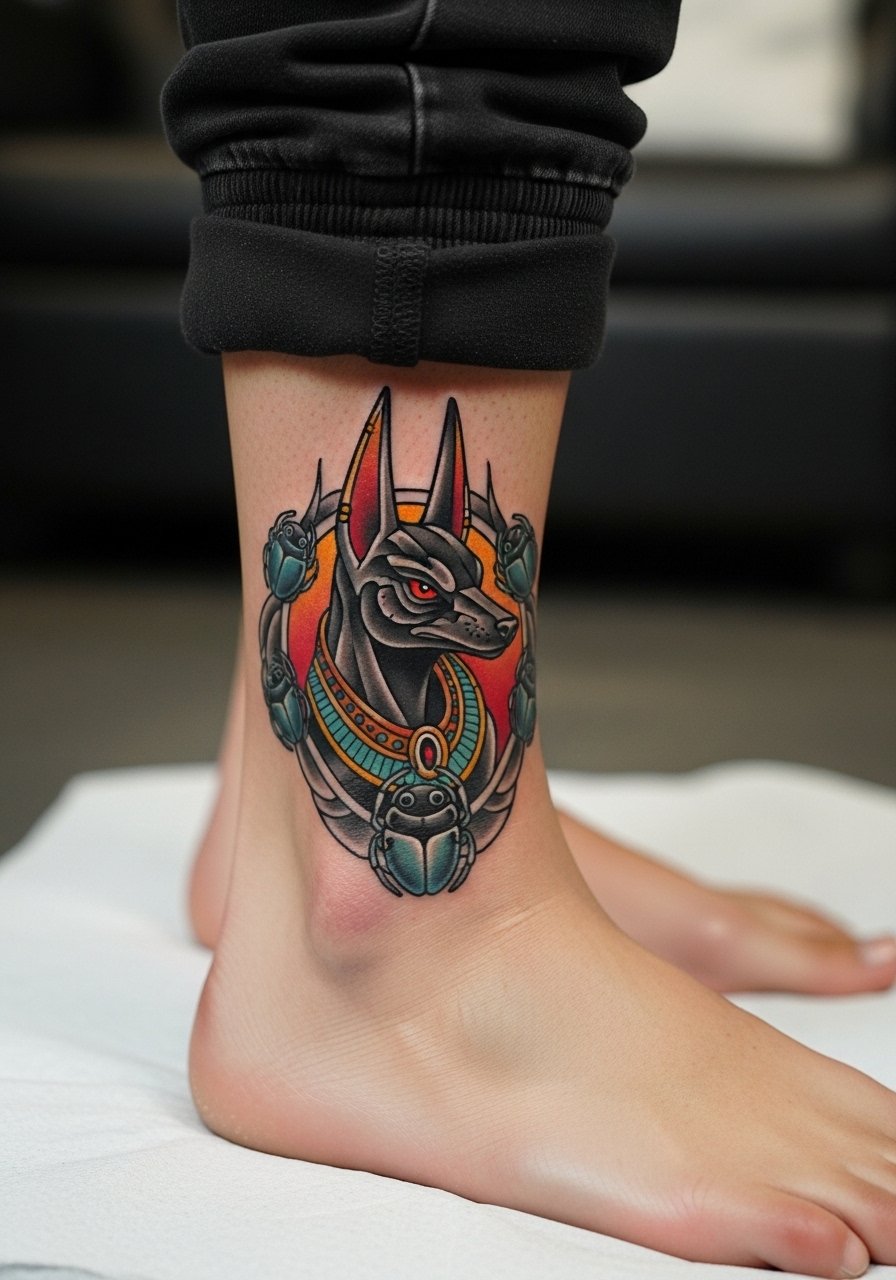
Neo-traditional uses saturated color and bold outlines to resist early blur, but small-color patches on ankles can dull faster than on larger canvases. Tell your artist to prioritize strong black outlines and keep color blocks chunky rather than painted micro-details. If you have medium to dark skin, ask for color tests so blues and golds read instead of muddling. Two sessions may be needed for layering and saturation. This style looks great with rolled joggers or booties with cutouts that show the scarab accents without constant rubbing.
Pack Smart
Lower leg and ankle work above demand different prep than arm pieces, and the right kit eases the session and the first week.
-
BV Tattoo Balm. A thinner, less greasy balm many recommend for ankle areas where thick butters can gather under socks and trap moisture.
-
Ink-Illusions Salve. Lightweight salve that users report breathes better than heavy butters during the first few days of healing for bony placements.
-
Hada Labo lotion. A gentle hydrating lotion some artists dilute for moisturizing healed skin without clogging the needle channels on thin ankle skin.
-
Recovery Ink spray. A no-touch mist option favored by people who dislike rubbing ointments on sensitive ankle zones.
-
Second Skin tattoo bandage. Thin protective film that many prefer for ankles during hot weather because it traps less sweat than heavier films.
7. Traditional Bold Outline Low Ankle
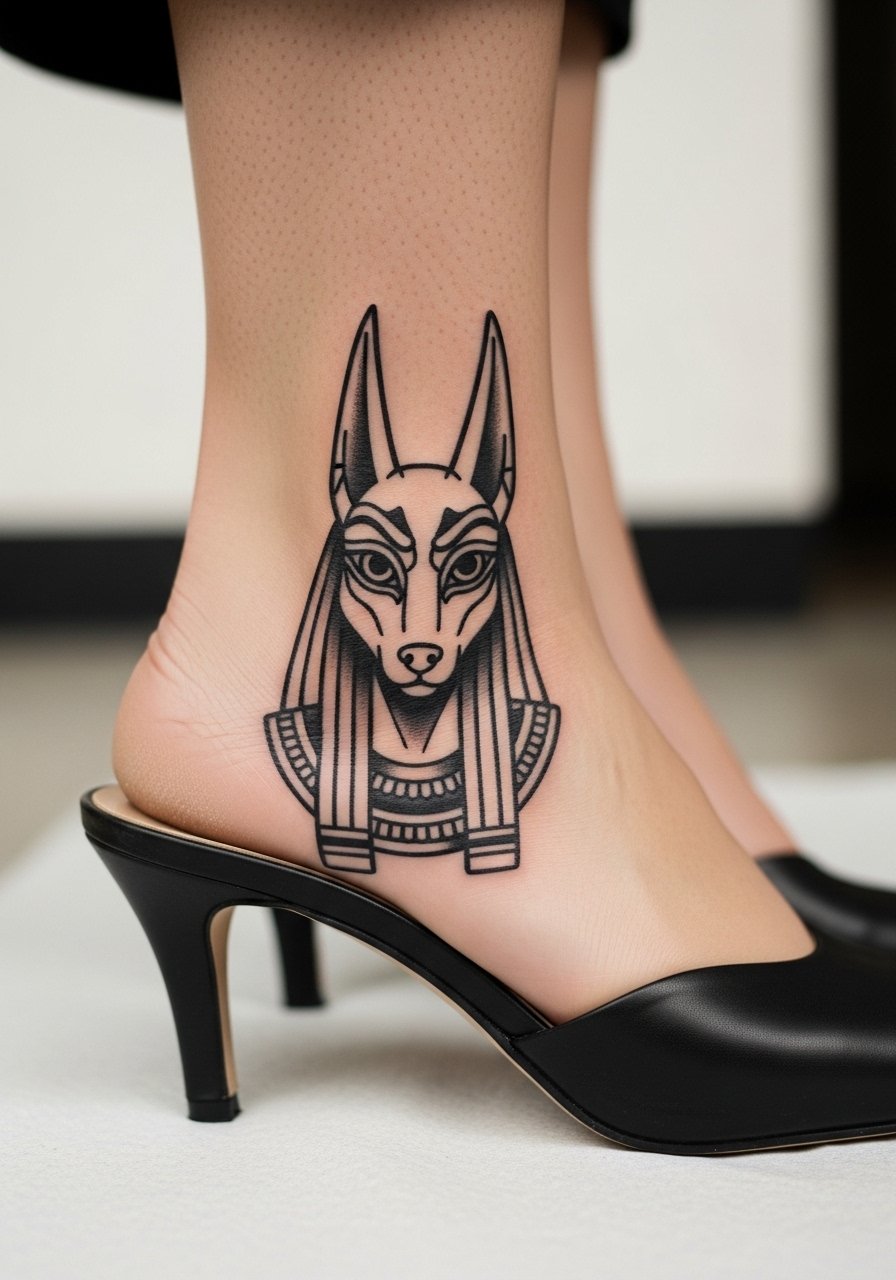
Traditional outlines use heavy linework that stands up to ankle movement and shoe rub. Keep the design about 2 inches and ask the artist to anchor with a thick primary contour so the eye detail has room to age. The low ankle near the heel is unforgiving during sessions because the skin is thin and motion is high. Expect a short but sharp 30 to 45 minute session and a likely touch-up for the small eye detail at year two. Pair with nude mule heels when you want the design to frame the foot arch.
8. Dotwork Mask with Ankh on Wrap
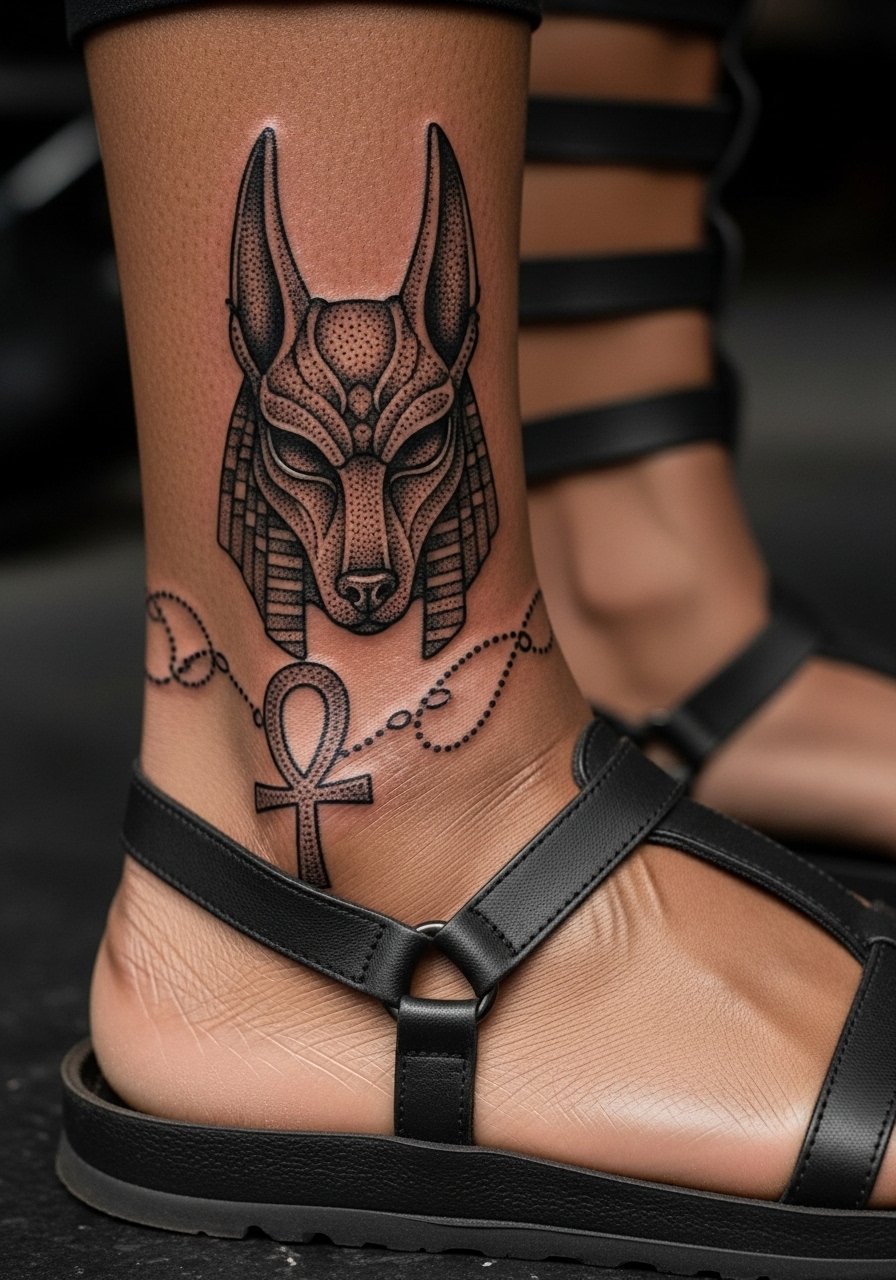
Dotwork plays well on ankle curves because stippling follows shape and breathes visually. Make the dot density lighter in curved areas to prevent heavy-looking patches after a year. This style often needs 2 to 3 sessions for consistent stipple density on wrap designs. The common error is packing too many dots close together on thin skin, which creates a stamped look later. For an earthy pairing, wear gladiator strap sandals that complement the stipple texture and keep the ankle mostly exposed.
9. Micro-Realism Eyes with Hieroglyph Accent
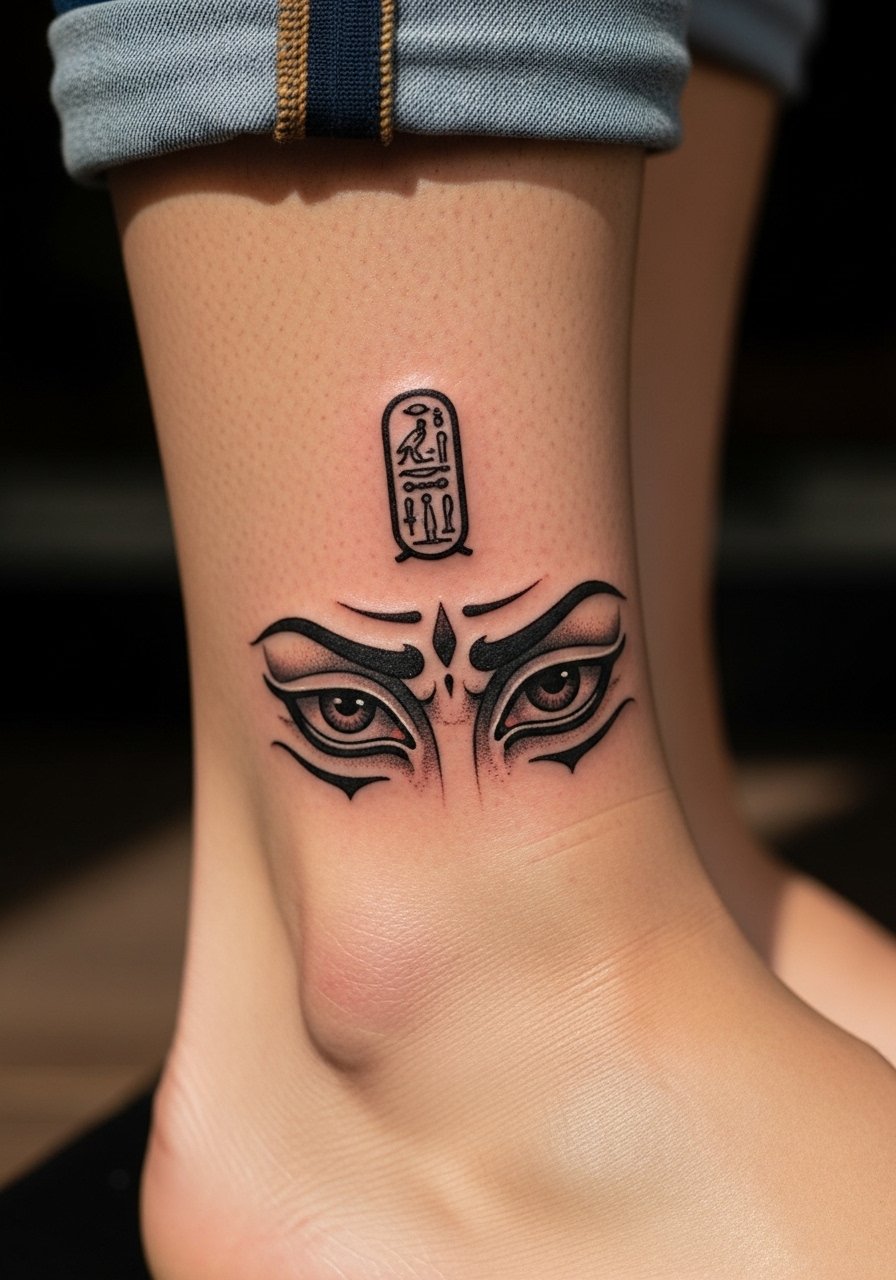
Tiny realistic eyes are trending because they read like a living glance on the ankle, but they require expert contrast to avoid graying into a dot. During consultation, ask for a high-contrast focal point and simplified surrounding shapes. Expect a focused one-hour session with a high chance of a minor touch-up at year one if you want the iris to remain crisp. Hieroglyph accents should be bold and isolated to avoid blurring. For daytime wear, pair this with rolled shorts or cutoffs that let the eyes peer above sandal straps.
10. Watercolor Staff and Pyramid on Inner Ankle
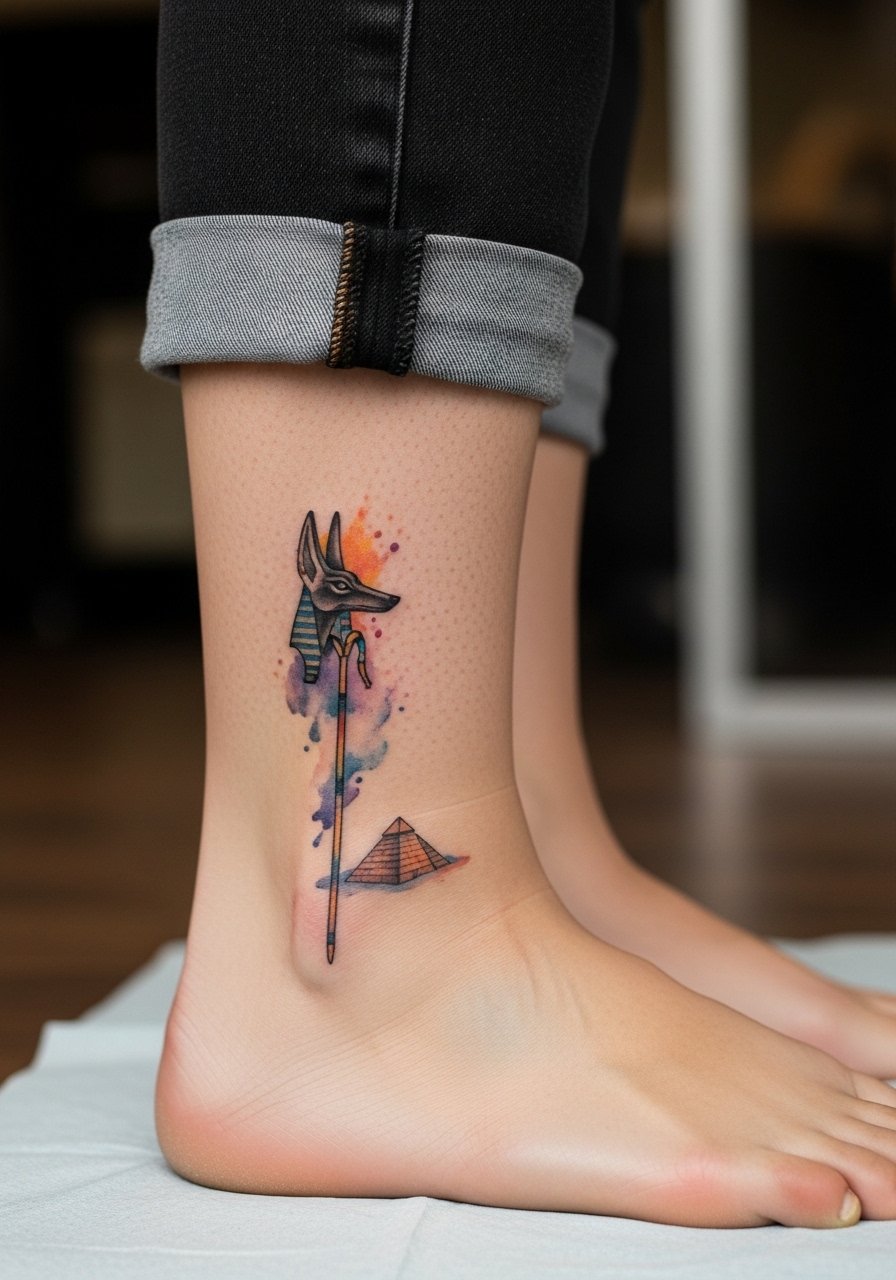
Watercolor can be ethereal but tends to fade on small, high-friction areas like inner ankles. If you want color, ask for bolder pigment placement and areas of solid black anchor to protect washes. The risk is early dilution into an indistinct wash on darker skin tones, so color testing is important. Sessions often run 60 to 90 minutes with layered passes for saturation. If you love watercolor, think of adding a black outline or dotwork frame to hold the colors in place. For a barefoot reveal, wear open toe flat sandals that showcase the inner ankle without constant rubbing.
11. Ignorant Style Jackal with Hieroglyph Calf Extension
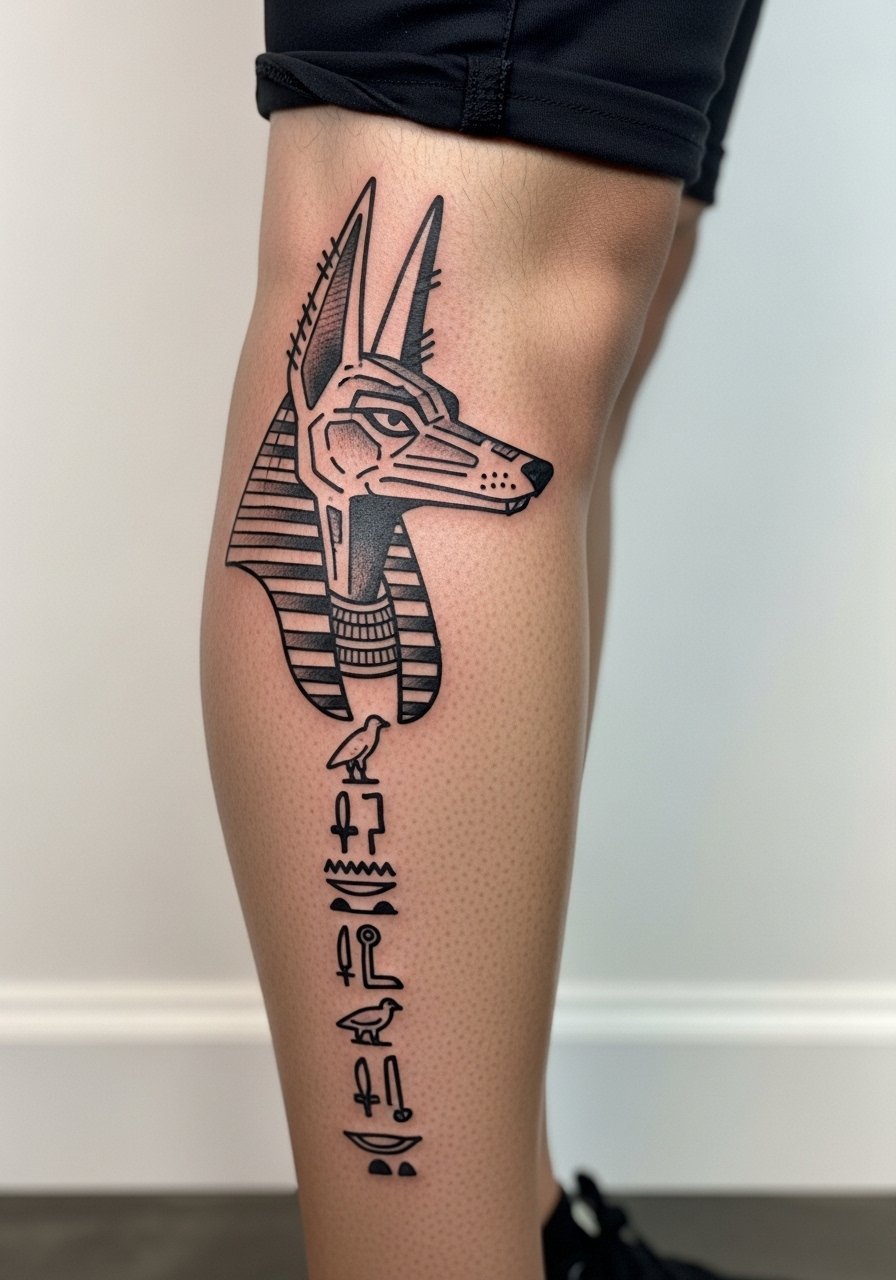
Ignorant style embraces raw, hand-drawn marks that can read bold even as they age, because their charm includes irregularities. For a calf-to-ankle piece keep negative space between scribbles so the design does not compress into a single dark mass. Session time is usually split across two appointments for flow and composition. The challenge is finding an artist comfortable with intentional imprecision who can still maintain clear silhouette contrast at the ankle. Pair this look with high-water shorts or midi skirts so the extension reads as a statement when you walk.
12. Black and Gray Realism Weighing the Heart
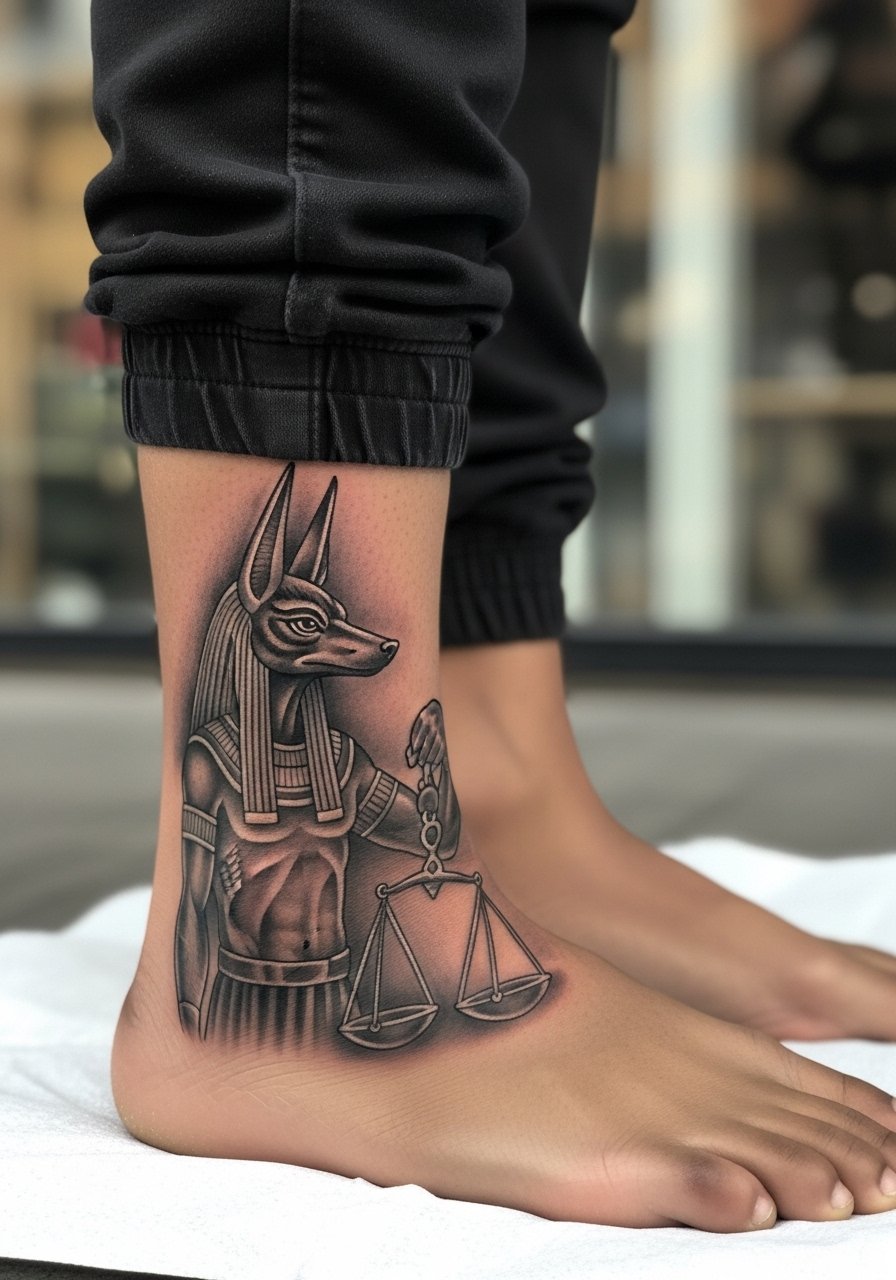
A compact scene of Anubis weighing a heart can carry narrative weight if the tonal range is respected. On ankles, avoid micro detail in the scales chain because tiny links blur into a line after a year. Ask for a clear focal contrast between the jackal head and the heart motif, and plan for two sessions if you want soft shadowing that reads at arm's length. Expect a more painful session where shading hits thin skin and bone. Artists split on numbing cream for this area. One camp allows topical numbing to manage pain and motion. The other prefers no numbing so clients can signal discomfort and the artist can adjust pressure. Ask where your artist stands before the needle hits.
13. Fine Line with Eye of Horus on Side Ankle
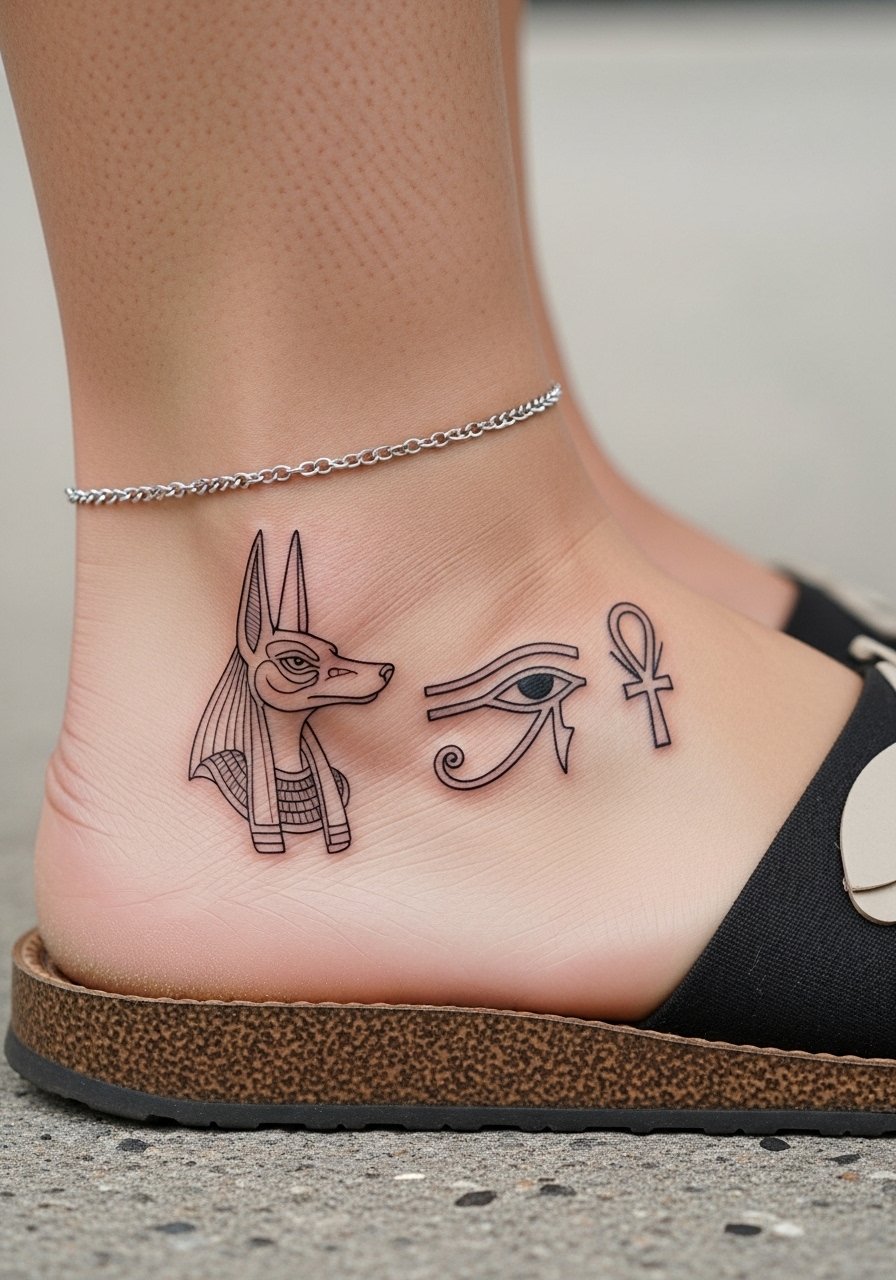
Pairing the eye of Horus with a fine line jackal creates an intimate mythic combo that sits quietly on the side ankle. Fine line here needs careful spacing and slightly heavier outer contours to survive rubbing from straps. The most common mistake is insisting on single-needle detail without allowing thicker anchor lines. Session time is short, usually under an hour, but expect early fading and a likely touch-up at year two. For a delicate complement, style with a thin silver ankle chain that draws attention without covering the art.
14. Neo-Traditional Erect Anubis with Pyramid Backdrop
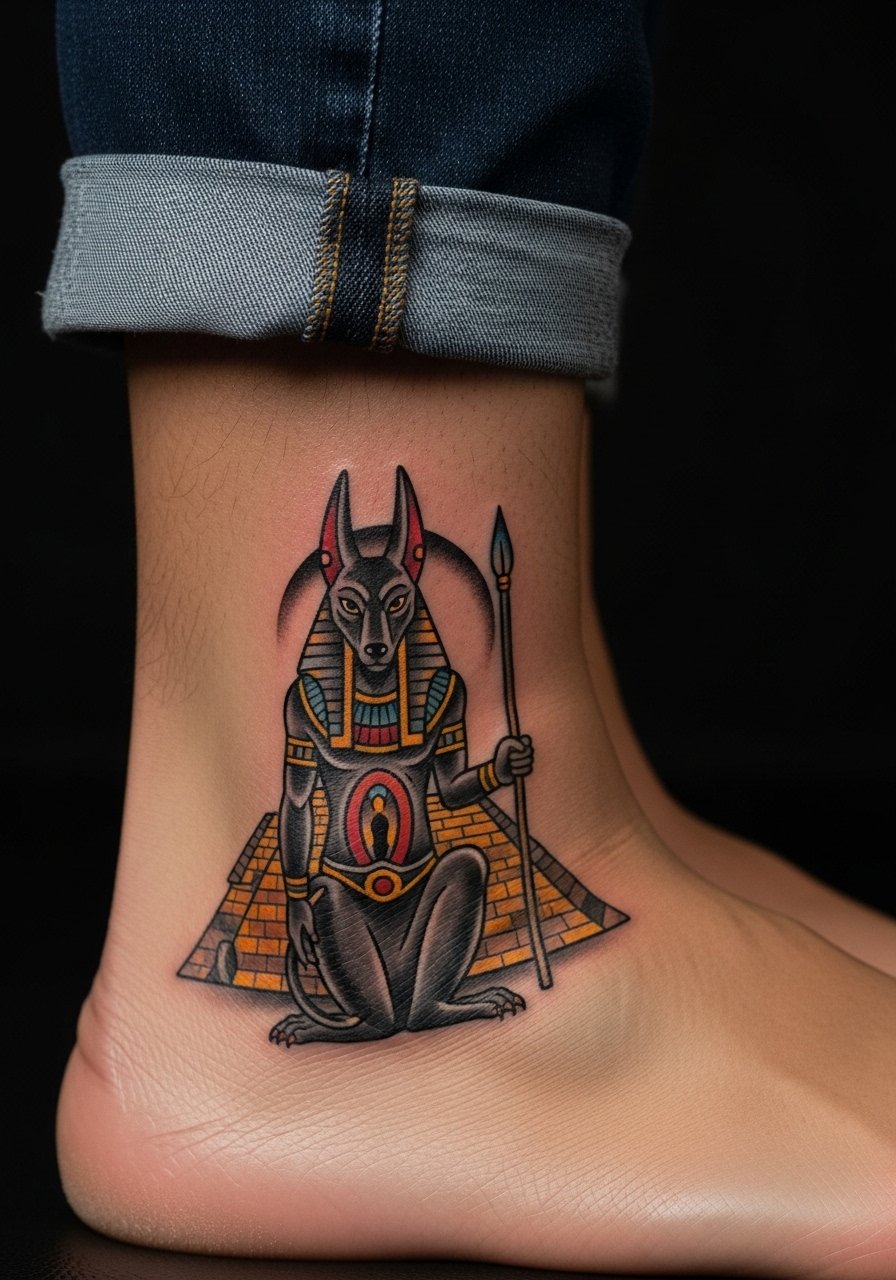
Front-of-ankle pieces are highly visible but at risk of constant shoe contact for certain footwear. Neo-traditional color and bold outlines help, but scale matters. Go 3 inches if you want the pyramid backdrop to register from distance. Plan for two sessions to lock color and to allow the artist to layer without overworking. A common mistake is packing too many tiny color transitions in a small canvas. For styling, front ankle pieces pair well with open heel clogs or low-rise sandals that keep the design unobstructed.
15. Inverted Anubis for Upward Gaze
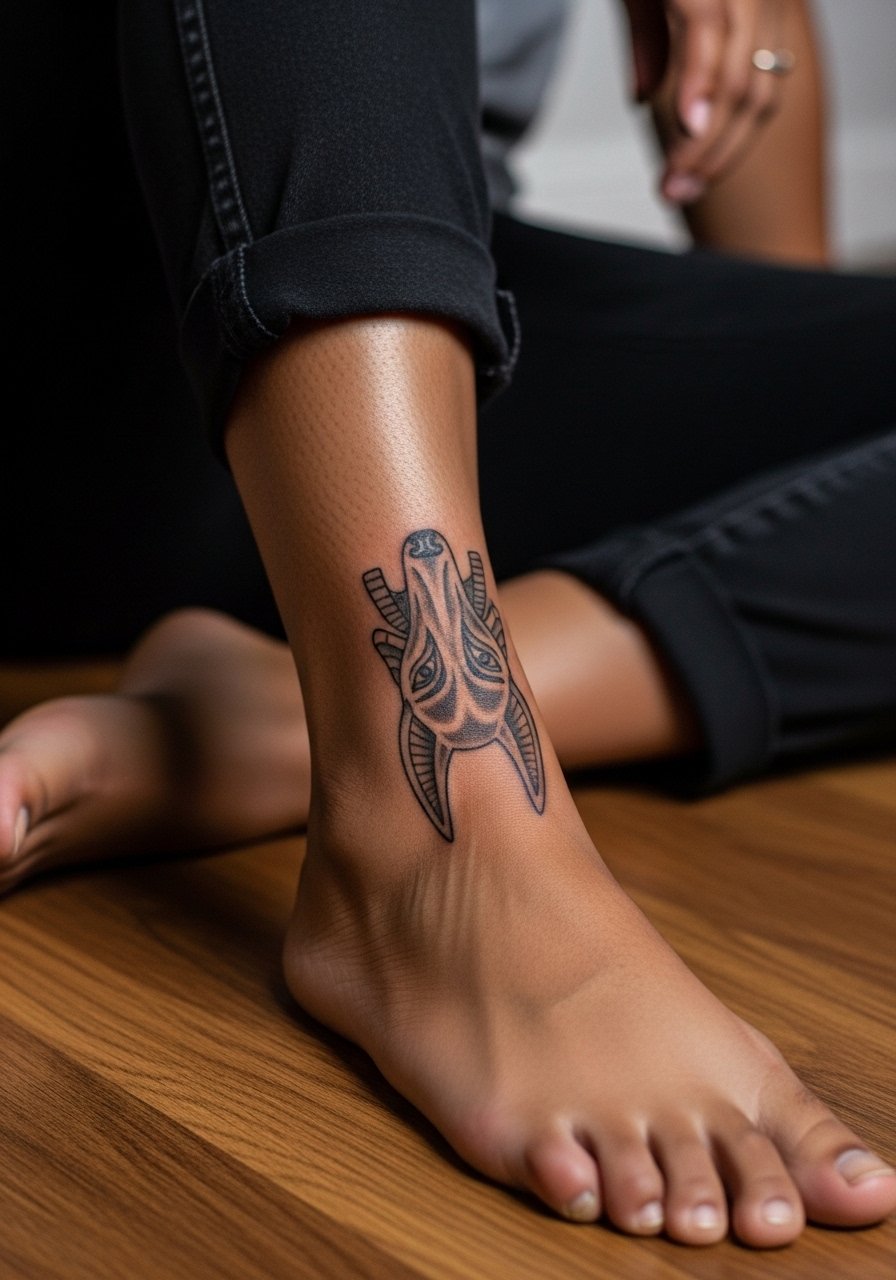
Inverting an Anubis so it faces upward when you sit is a simple trick that changes how the image reads in daily life. It creates the sensation of the deity looking up toward your feet rather than forward, which can be striking when you cross your legs. Tell your artist you want the piece inverted relative to standard orientation so the muzzle and ears align when seated. The design ages like any other, but the orientation choice affects how you show it off. Expect a 30 to 60 minute seat for a small inverted profile. Show it off casually by sitting in sandals or barefoot conversations.
16. Scarab Gear Fusion for Steampunk-Egypt Mix
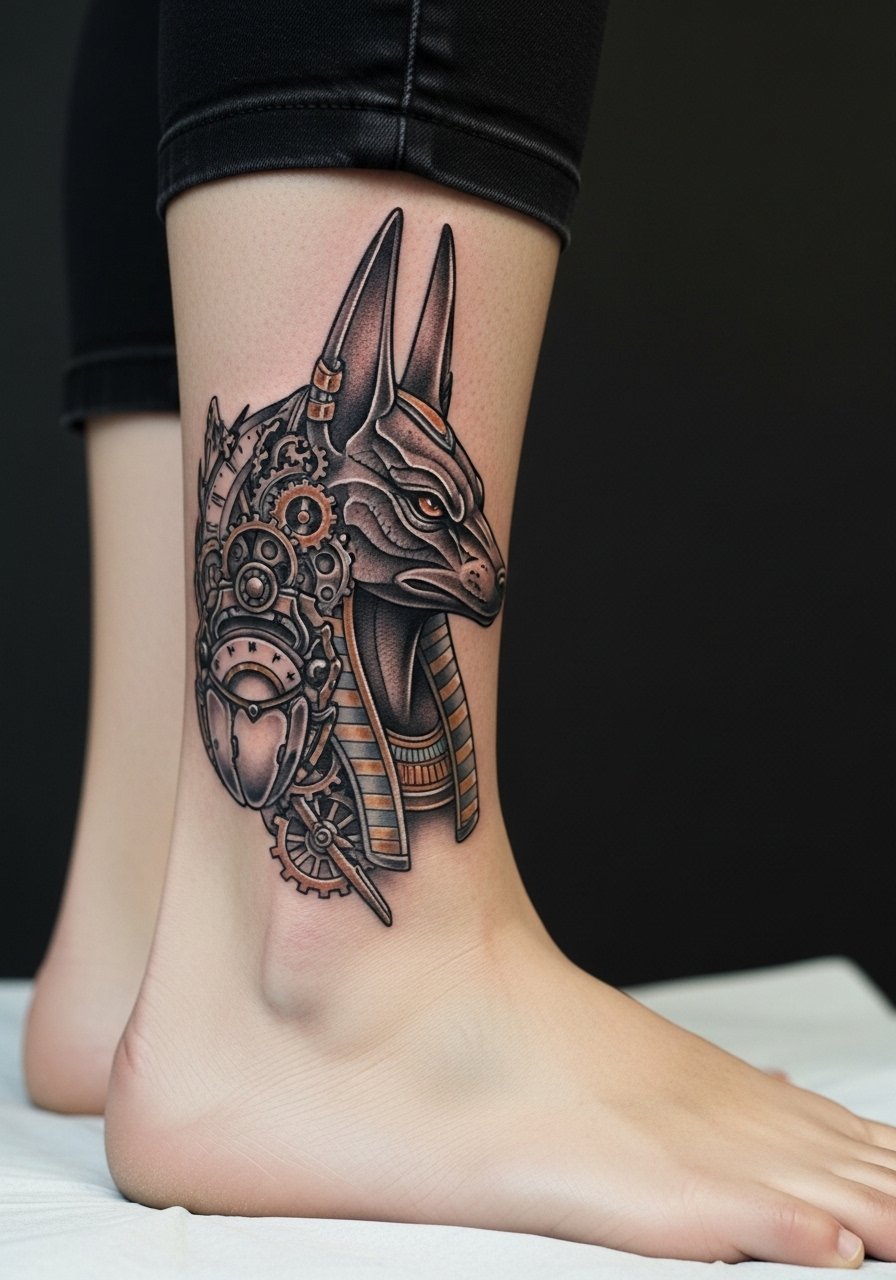
This hybrid pairs Anubis iconography with mechanical scarab elements for a modern twist that reads well on an ankle because gear lines can be simplified into bold shapes. In consultation, ask the artist to keep gears as silhouette elements rather than adding fragile teeth that will blur. The session usually takes between 60 and 90 minutes for clear linework and a small color wash if desired. The risk is cluttering the small canvas. For everyday wear try slim fit cropped pants that show the ankle profile without constant abrasion.
17. Anubis Mask with Ankh Under Bone
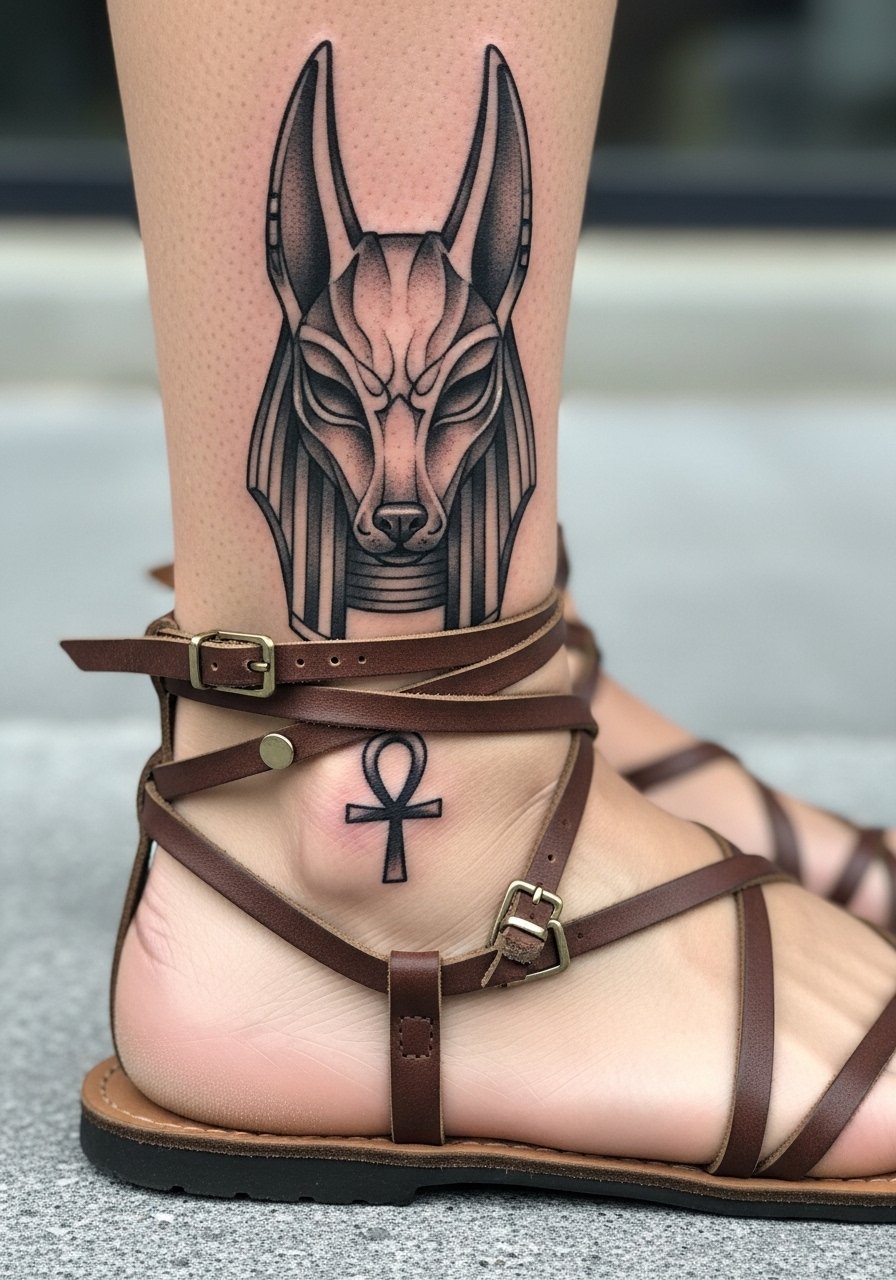
Centering a mask on the bone gives symmetry and keeps pressure distributed across the design during shoe wear. Ask for slightly spaced internal linework and a bold ankh so the lower detail does not vanish. Expect a 45 minute single session for a 2 inch mask, and anticipate a touch-up for the ankh at year two. The ankle bone placement is painful but it tends to hold bold shapes better than delicate cross-hatching. Pair this with gladiator strap sandals to enhance the talismanic look.
18. UV Reactive Anubis Eye on the Inner Ankle
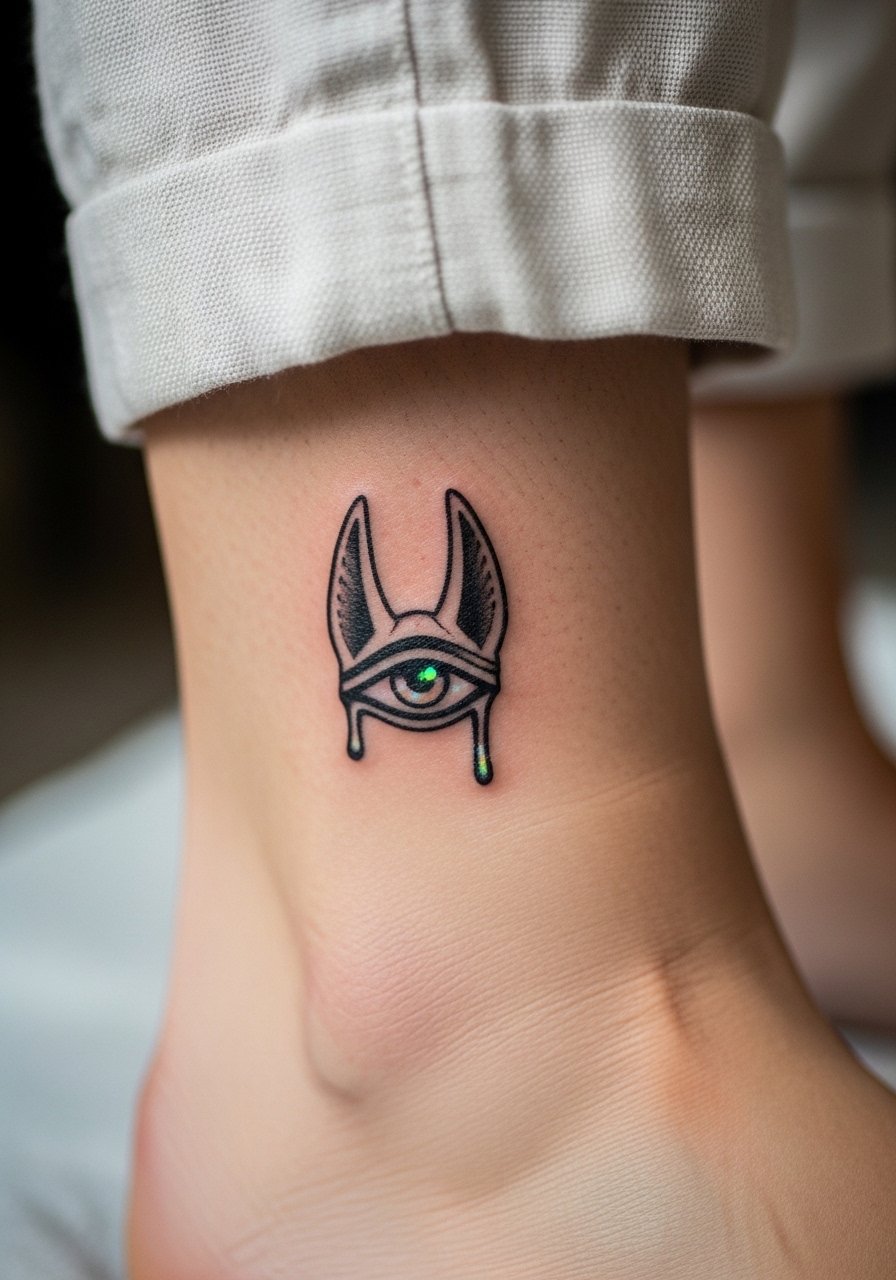
UV-reactive ink lets you hide a playful element that only shows under blacklight, such as a glowing pupil or an iris accent. It is experimental, and you should be explicit with your artist because not everyone stocks UV-safe pigments. Expect a short session for a small accent, but know that UV ink behaves differently over time and may require maintenance. This is a novelty rather than a longevity strategy, so plan it as an add-on to a solid black anchor. For evening reveals, wear open-back midi dresses or sandals that let the inner ankle peek under low light.
19. Anubis Sized to Slot Under High-Heel Straps
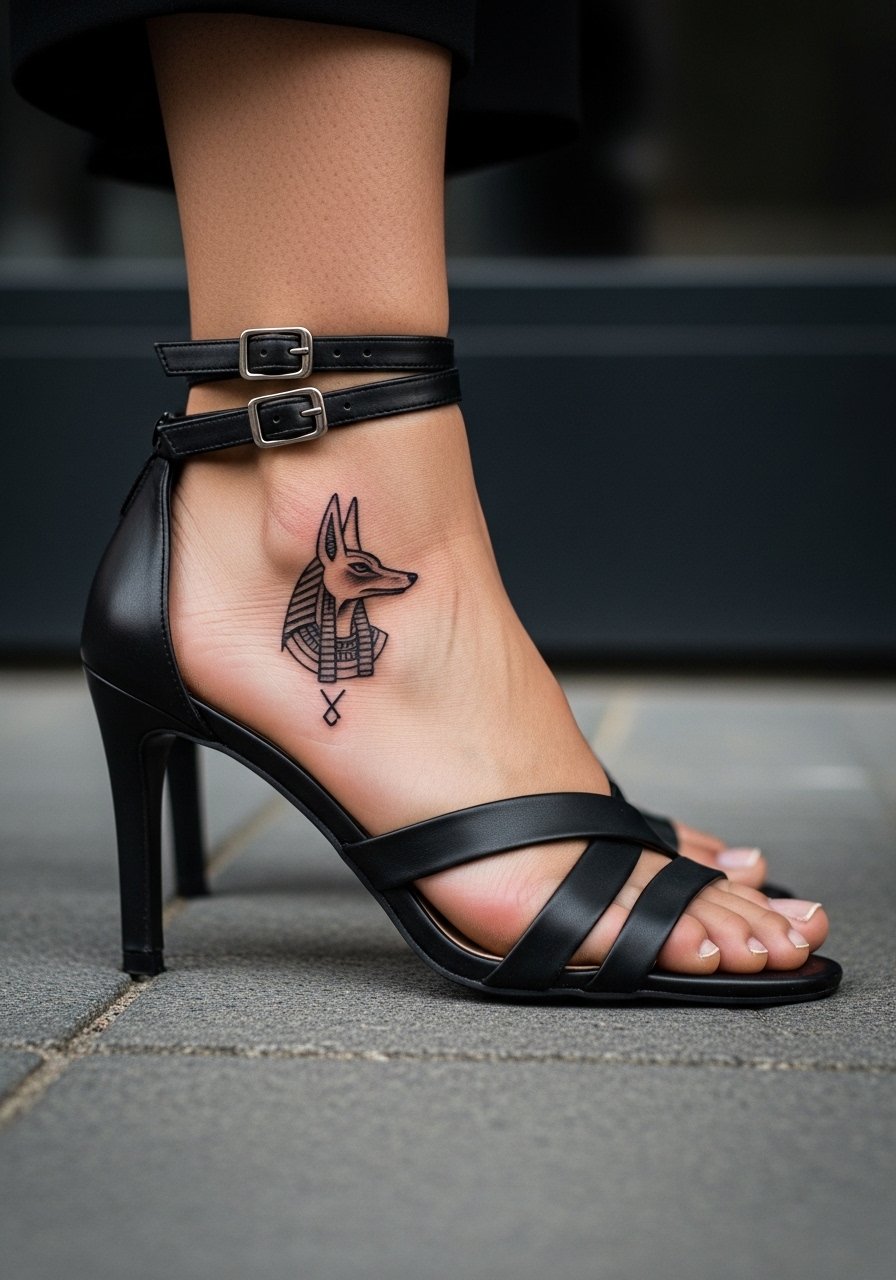
Sizing a tattoo to sit under a high-heel strap is a functional design choice that makes the art a reveal for special occasions. During consult, bring the heel or a photo so the artist can scale the stencil to the strap placement. The mistake people make is anticipating the strap will always sit in exactly the same spot. Shoes shift, so allow a millimeter buffer around the strap edge. Session time is typically short, and the piece should be designed with bold anchors because straps can rub while breaking in. This look pops with gold ankle strap heels or any shoe that exposes the targeted area.
20. Dotwork Mask with Ankh Wrap for Darker Skin
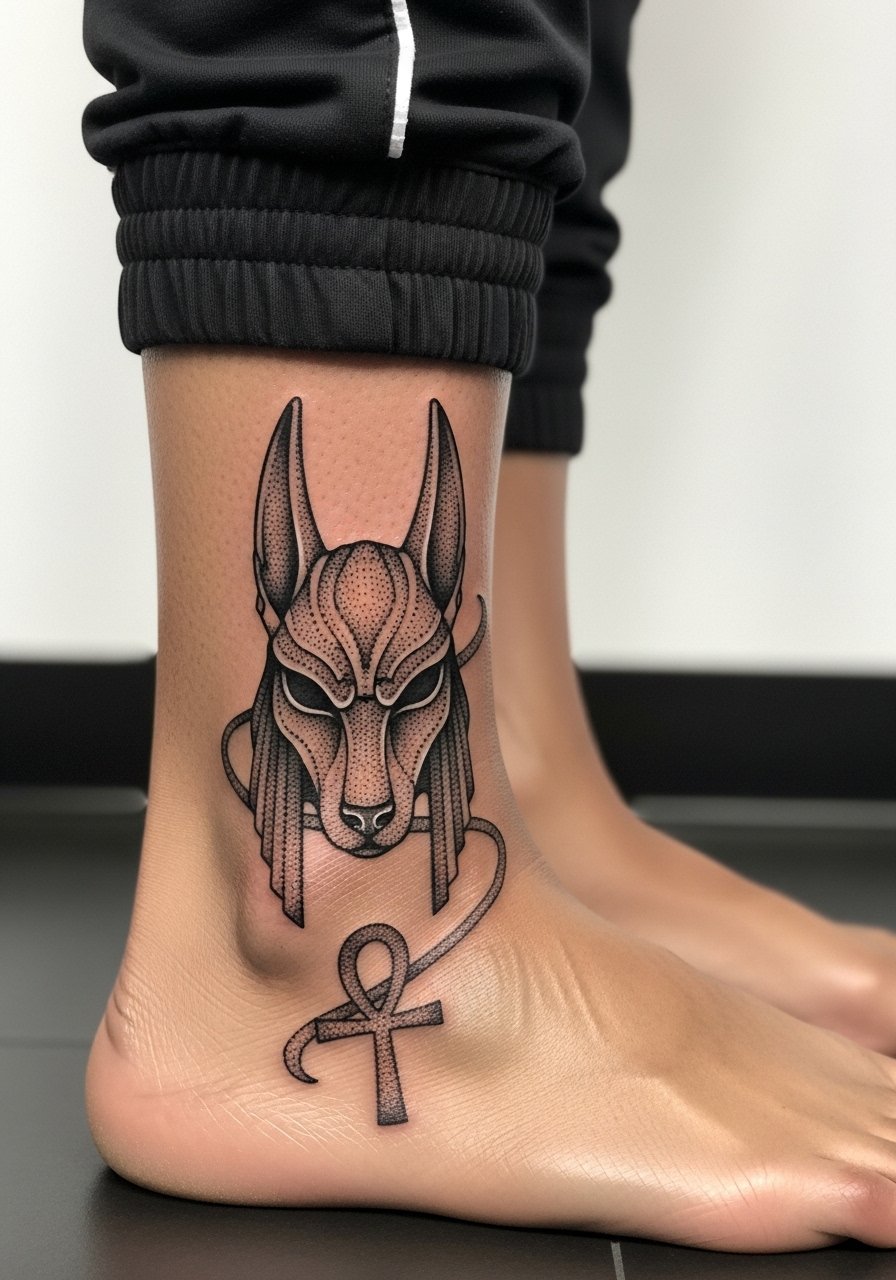
On darker skin tones, dotwork and strong black contrast often read better than fine gray washes. Ask the artist experienced in black and gray realism to map out negative space so the mask keeps visual separation from the skin tone. The technique usually requires two sessions for consistent stippling across the wrap. The common misstep is trying to translate micro-gray realism directly from lighter skin references. A test patch and portfolio checks for similar skin tones help. For casual wear, pair with rolled joggers that reveal the stipple pattern in side light.
21. Minimalist Anubis Silhouette for Sandal Season
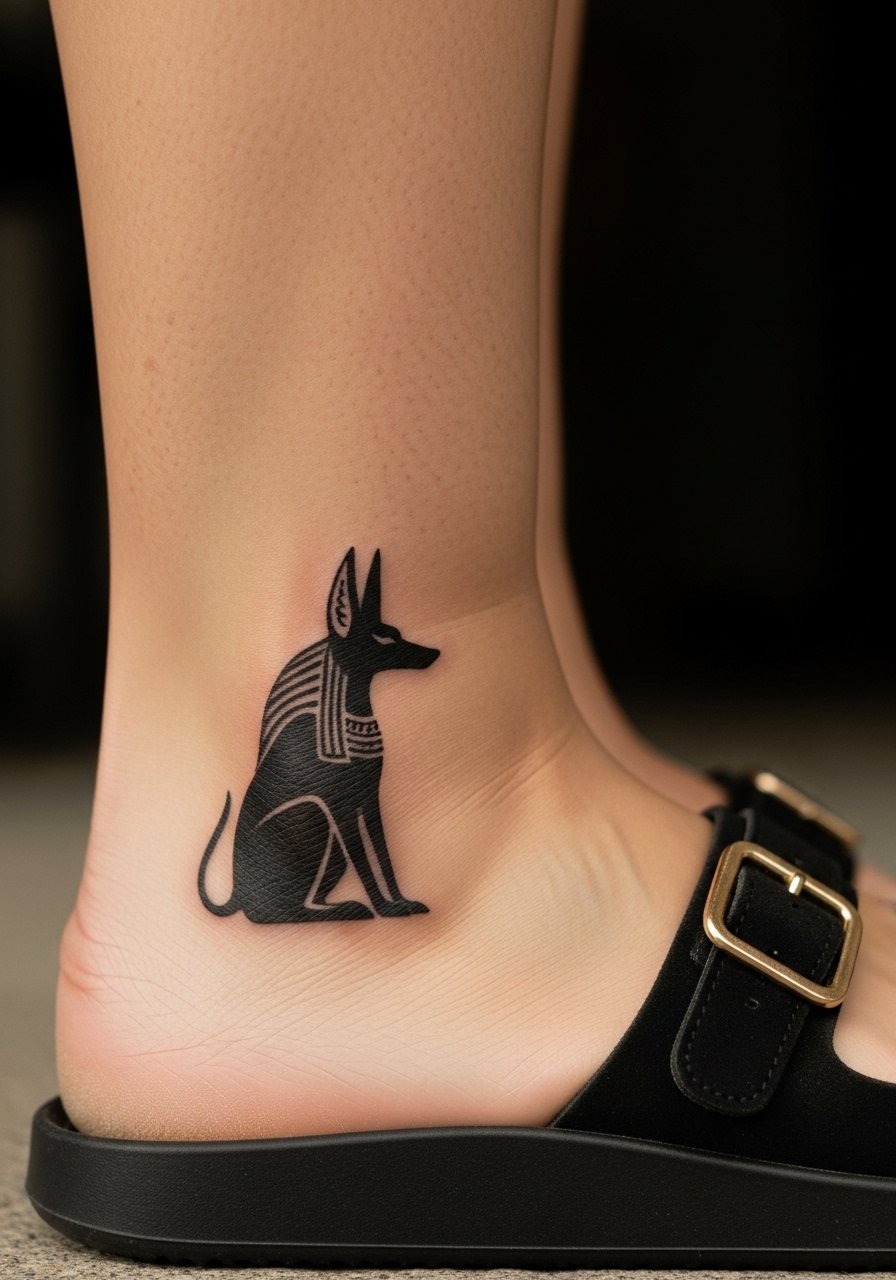
Rounded off the list, a tiny minimalist silhouette is the easiest to maintain for summer visibility. Keep the silhouette compact, avoid internal detail, and request a thicker outer contour than you might for a wrist piece so it survives months of friction. A quick 20 to 30 minute session usually does it, and touch-ups are less frequent if the outer line is bold. This is the best small Anubis for people who wear sandals regularly and want immediate impact. Style it with open toe flat sandals that leave the ankle visible and avoid socks during the first week of healing.
Frequently Asked Questions
Q: Will a fine line Anubis on the ankle fade faster than a blackwork version?
A: From what I have seen, fine line pieces on ankles tend to soften sooner because the needle channels are shallower and friction from shoes and socks accelerates wear. Blackwork with bold outlines and solid fills generally holds up better on bony, high-movement areas, though it will age differently. Plan for at least one touch-up in the first two years for fine line ankle pieces.
Q: Should I use protective film or dry healing for an ankle tattoo?
A: Artists and community users split into two camps. One group prefers thin protective film for short windows because it can keep dirt and rubbing fabric off the fresh ink. The other group favors dry or light ointment healing to avoid trapping sweat on the lower leg. Ask your artist where they stand and factor in your activity level and climate when deciding.
Q: How do I pick shoes for the first week after getting an ankle Anubis?
A: Leave socks and closed shoes out of the equation when possible, and choose open sandals or loose slip-ons so the area can breathe. For session comfort, bring loose drawstring linen pants you can pull up without rubbing the ankle. Avoid anything that presses the band or strap directly over fresh ink for the first week.
Q: Does dark skin change how Anubis designs should be planned for the ankle?
A: Yes. On darker skin, black and gray realism or dense dotwork often reads clearer than ultra-fine gray shading. Ask to see healed examples on similar skin tones and consider stronger contrasts and simplified details so the subject remains readable over time.
Q: How much pain should I expect for ankle Anubis placements and can numbing cream help?
A: The ankle is generally more painful due to thin skin and proximity to bone. Numbing creams are debated. Some artists accept topical numbing to reduce pain spikes, while others avoid it so clients can communicate discomfort during delicate work. Discuss pain management and timing with your artist before the appointment.
Q: Can I get a UV-reactive detail added safely to an ankle Anubis?
A: You can, but it is experimental. Not all pigments perform the same and UV inks may fade or require more maintenance. Be explicit in consultation and treat UV accents as novelty elements layered over a solid black anchor so the design still reads in daylight.
