
Fine line Vivienne Westwood motifs look gorgeous on a saved board but they live and age on skin, not on pixels. Sketch-style linework reads fresh when the spacing is right and the needle sits at proper depth. Placement, spacing, and realistic expectations beat trends every time, and the first section shows a simple version you can wear in a sleeve or show off on its own.
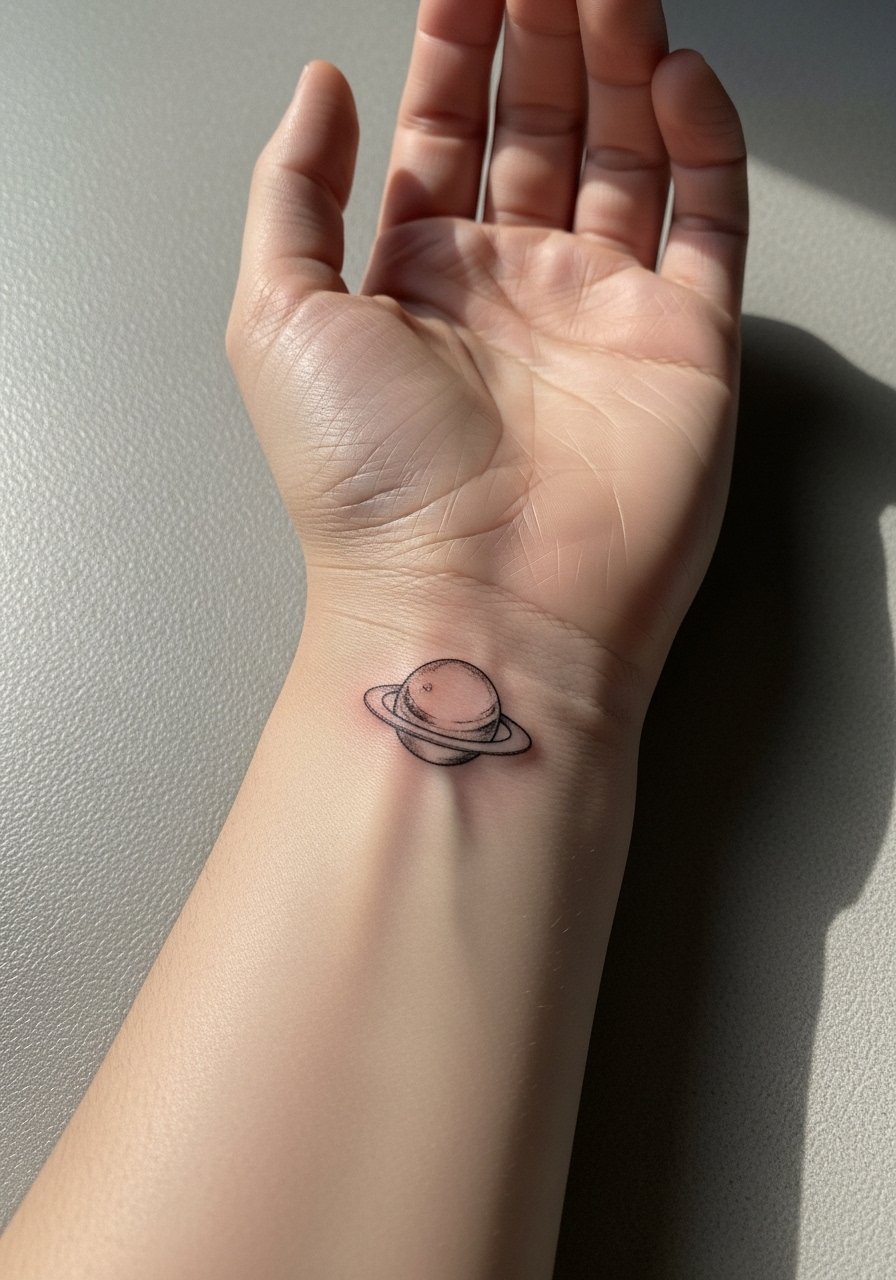
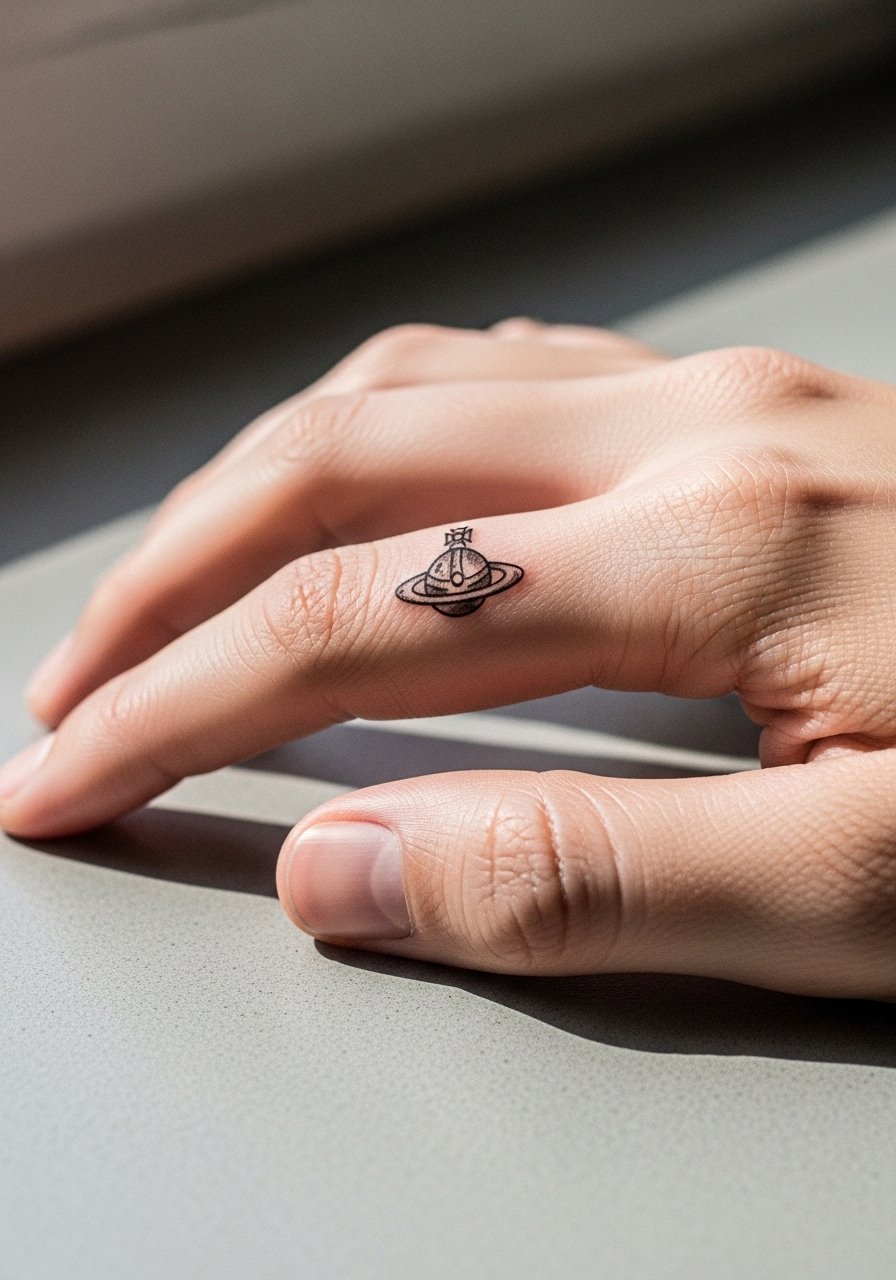
1. Tiny Orb on the Inner Wrist, Minimal Sketch Lines
I've seen this tiny orb held up as a subtle nod to the label, and it works best when the linework stays airy rather than overworked. Fair warning, wrists are a high-movement, high-wash zone so the biggest mistake is asking for ultra-fine scribbles with no spacing. Tell your artist you want soft sketch strokes with slightly bolder anchor lines and ask for preview stencils to check scale. Expect a 30 to 45 minute session and mild soreness. The healed look at six months still shows the core orb clearly, but by year three thin strokes can soften and need a light touch-up. For showing it off, roll sleeves or wear a thin chain pendant necklace that sits above the wrist to balance the negative space.
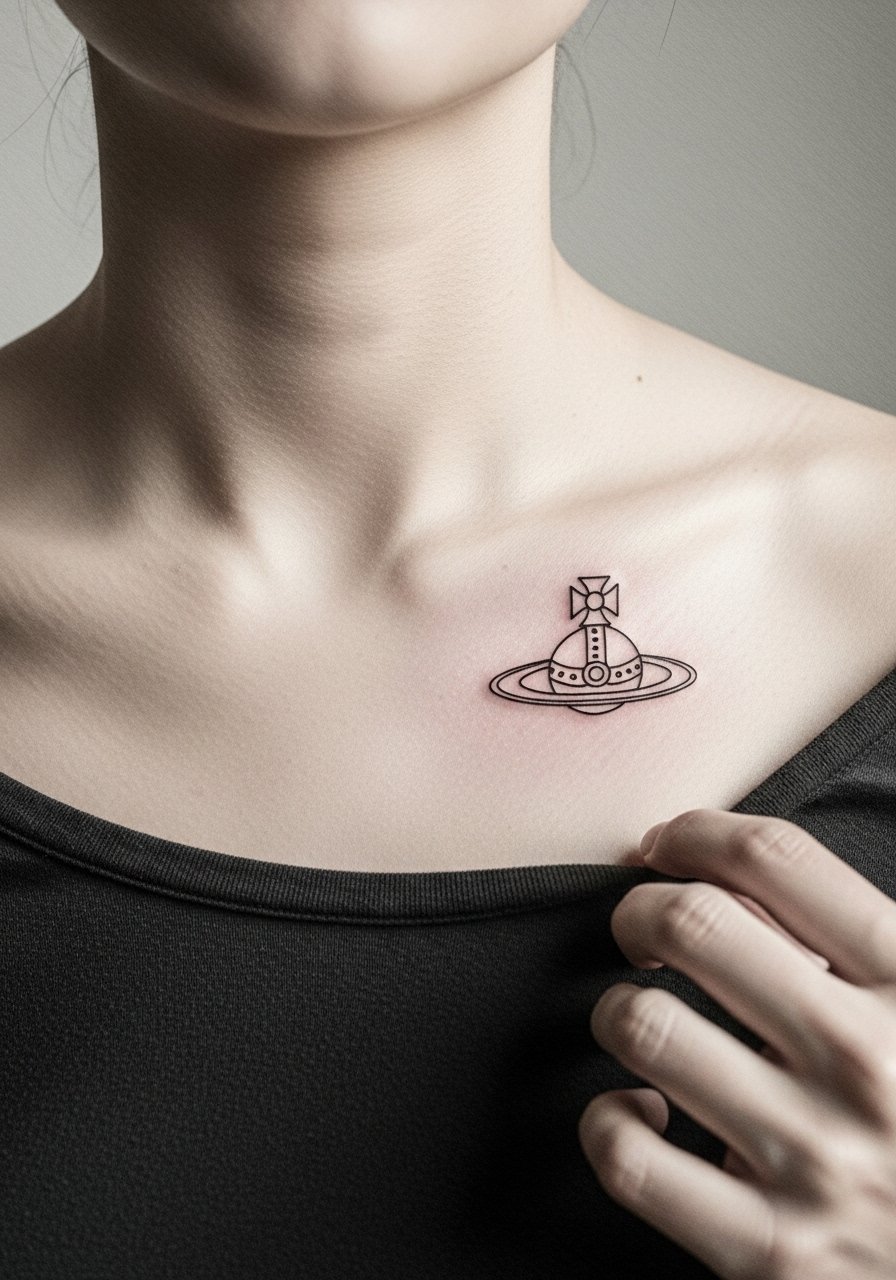
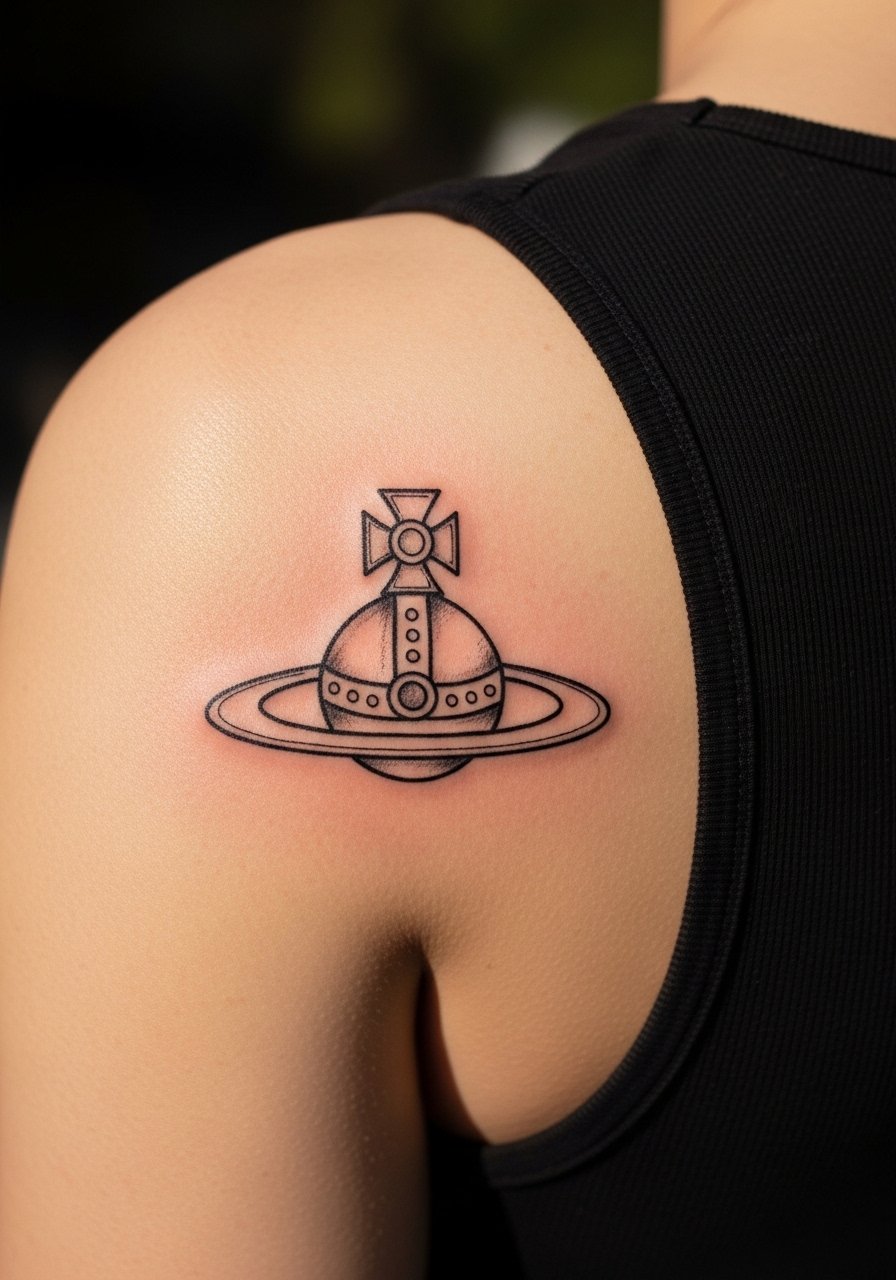
2. Asymmetrical Orb and Crown on the Collarbone
Most of the collarbone pieces I’ve seen read like jewelry when composed with empty space around the design. Pain is moderate because the bone is close to the surface, and session time runs around 45 to 75 minutes depending on scale. A common mistake is cramming detail into a narrow strip along the clavicle. Ask your artist for a floating composition that follows the collarbone curve and for a preview with clothing to ensure it sits where you want. For session comfort, wear a wide-neck shirt you can pull slightly aside so the artist has clean access and you stay covered. Expect fine lines to stay crisp at six months but plan on touch-ups around year three if you want exact crispness to persist.
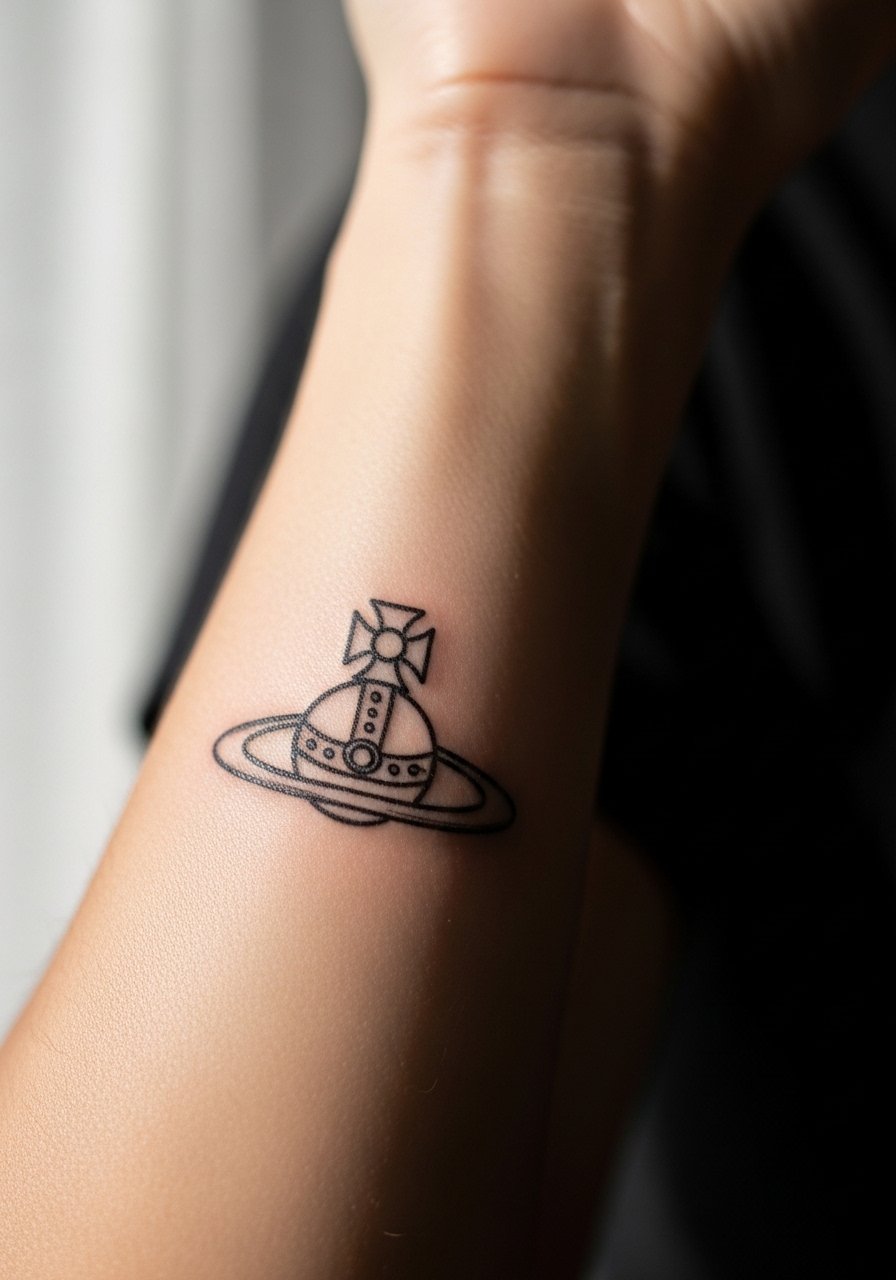
3. Single-Needle Orb on the Inner Forearm for Sleeve Starters
There is something about a sketch-style orb on the inner forearm that anchors a sleeve without dominating it visually. If you want future sleeve work, ask for slightly heavier anchor lines so the piece reads from a distance and leaves breathing room for surrounding elements. The session feels easy; forearm pain rates low to moderate and most of this takes under an hour. A mistake I see often is insisting on ultra-microscopic detail that disappears into surrounding tattoos over time. At two years the sketch texture will soften, so factor a potential touch-up into your planning. For a casual show-off look, rolled-up sleeves or a linen button-down lets the forearm sit center stage.
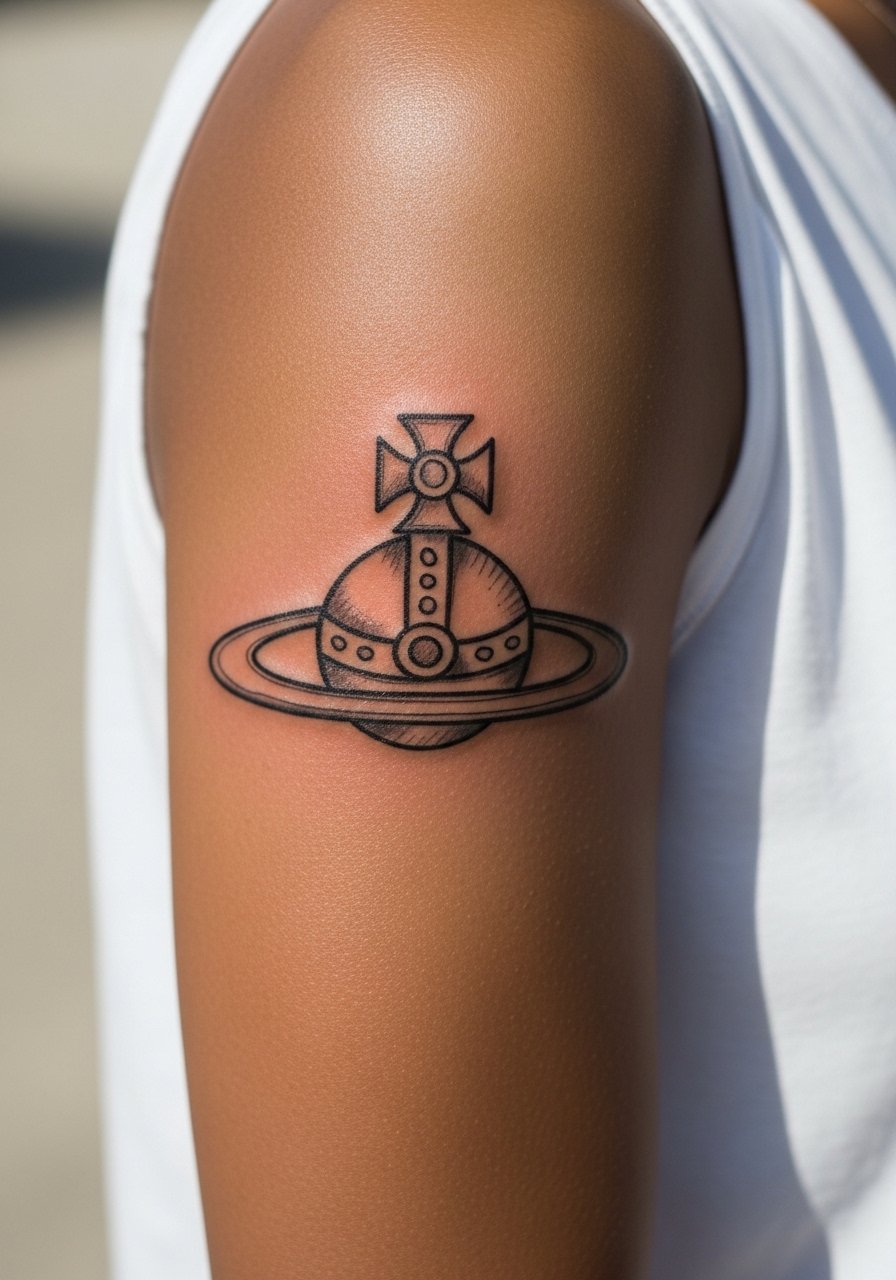
4. Orbiting Saturn Ring Orb on the Upper Arm
Artists split on whether dense orbit rings work best as tiny details or as bolder sketch marks. One camp says tight rings blur over time, especially on softer skin. The other camp argues that if the rings have deliberate spacing and slightly heavier outer lines they keep structure. If you like the floating planet vibe, ask for staggered rings with stipple shading rather than packed micro-lines. Pain is mild on the upper arm and this piece often sits in a single-session 60 to 90 minute slot. Expect the center orb to hold while micro-rings soften at two to five years. Pair this placement with rolled sleeves or a loose tank top to frame the piece in warm weather.
5. Tiny Orb on the Side of the Finger, Loose Sketch Marks
Finger tattoos are high-visibility and high-maintenance. The biggest mistake is demanding dense sketching in a tiny area because skin on fingers sheds and stretches differently. For a sketch-style orb, ask for open linework and expect touch-ups sooner than for larger placements. The session is short but the sting is sharper than on the forearm. The healed look at six months can be patchy, and many people need a refresh around year one. Also consider career implications because some workplaces still react to visible hand ink. If you plan to protect it, simple rings worn on adjacent fingers can draw attention away and give the small orb a composed look.
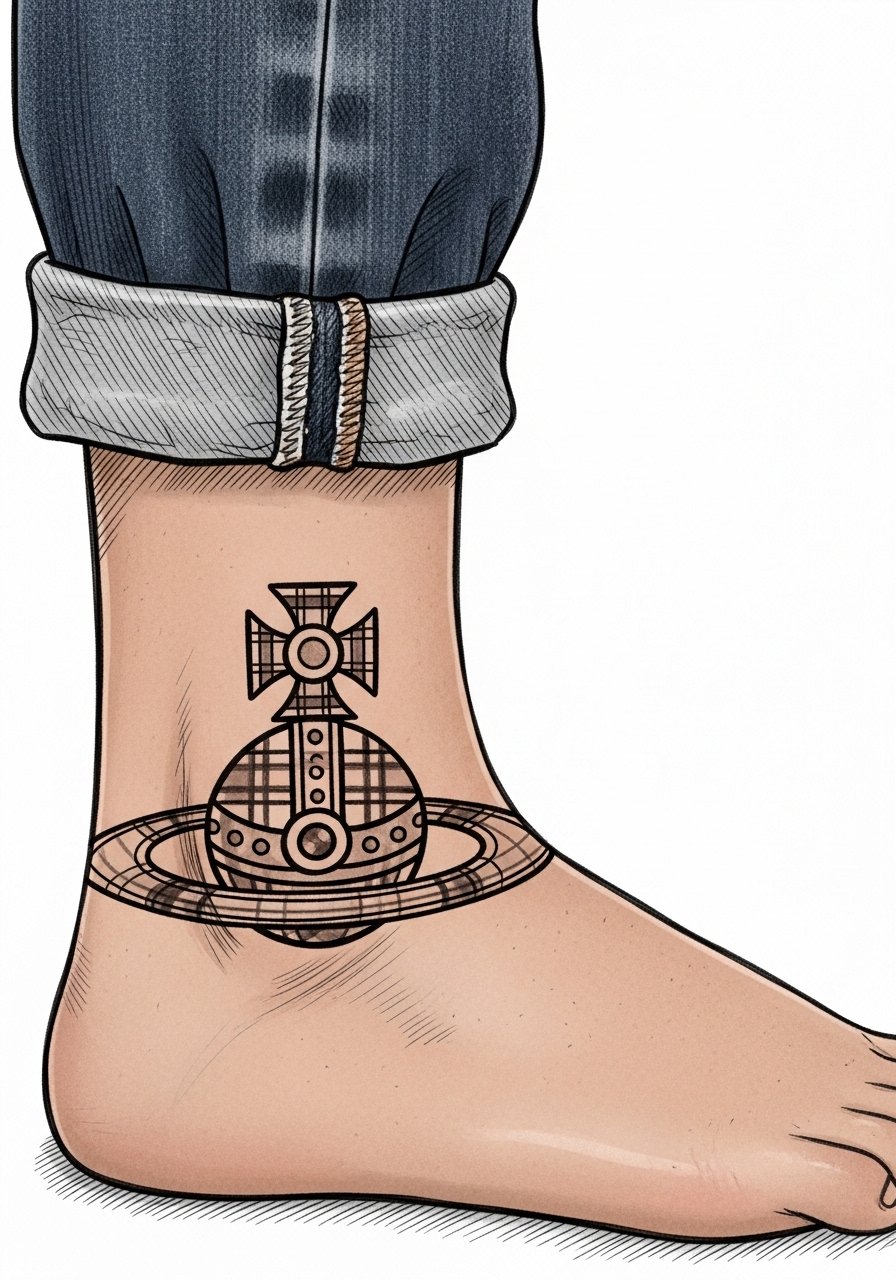
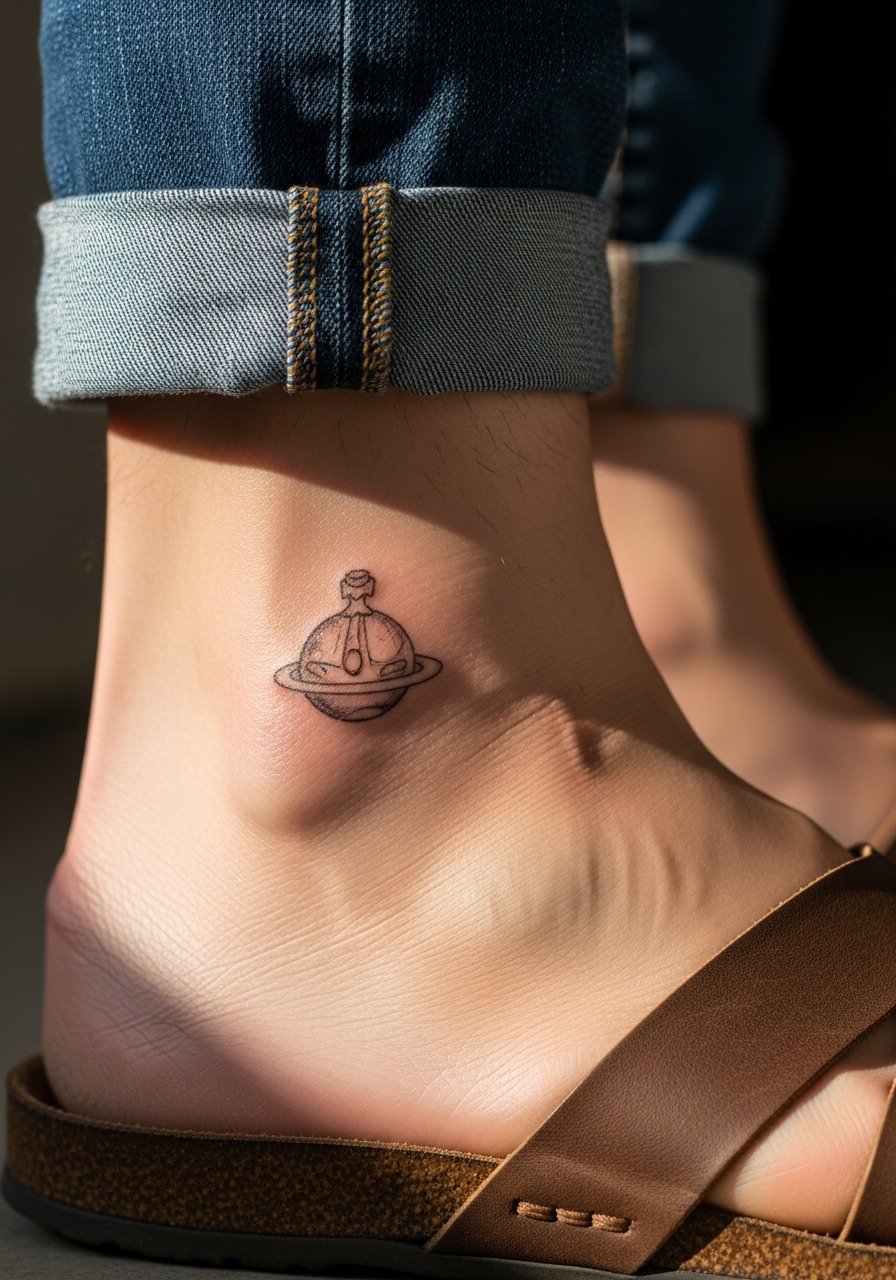
6. Small Orb with Tartan Lines on the Ankle
This low-visibility placement shows well when you want it to and hides easily when you do not. Fair warning: the ankle experiences a lot of friction from socks and shoes, so ask your artist for slightly bolder anchor lines and minimal fine shading. Session time is often under an hour and pain sits in the moderate range. A common mistake is placing tightly packed tartan lines too small for the ankle; spacing makes the difference between long-lasting pattern and a smudged grid. For the day of the session and the first week, wear jeans rolled up or a long skirt you can lift to expose only the ankle area and avoid chafing.
Studio Day Picks
Those small, visible pieces above heal differently than larger work, and a few focused items make the session and first week much less fussy.
- Stencil transfer paper kit. Lets you preview exact placement and scale on skin, especially useful for the wrist, finger, and collarbone pieces above.
- Thin protective film roll. Keeps ankle and wrist tattoos clean during the first week of friction from shoes and daily washing.
- Topical numbing cream. Applied per instructions before the session eases sensitivity on the collarbone or rib area without altering the artist's work.
- Fragrance-free gentle body wash. Cleans the healing area without irritating fine line work on forearm or shoulder.
- Aquaphor healing ointment. Thin layer for the first few days locks in moisture for delicate sketch lines without clogging.
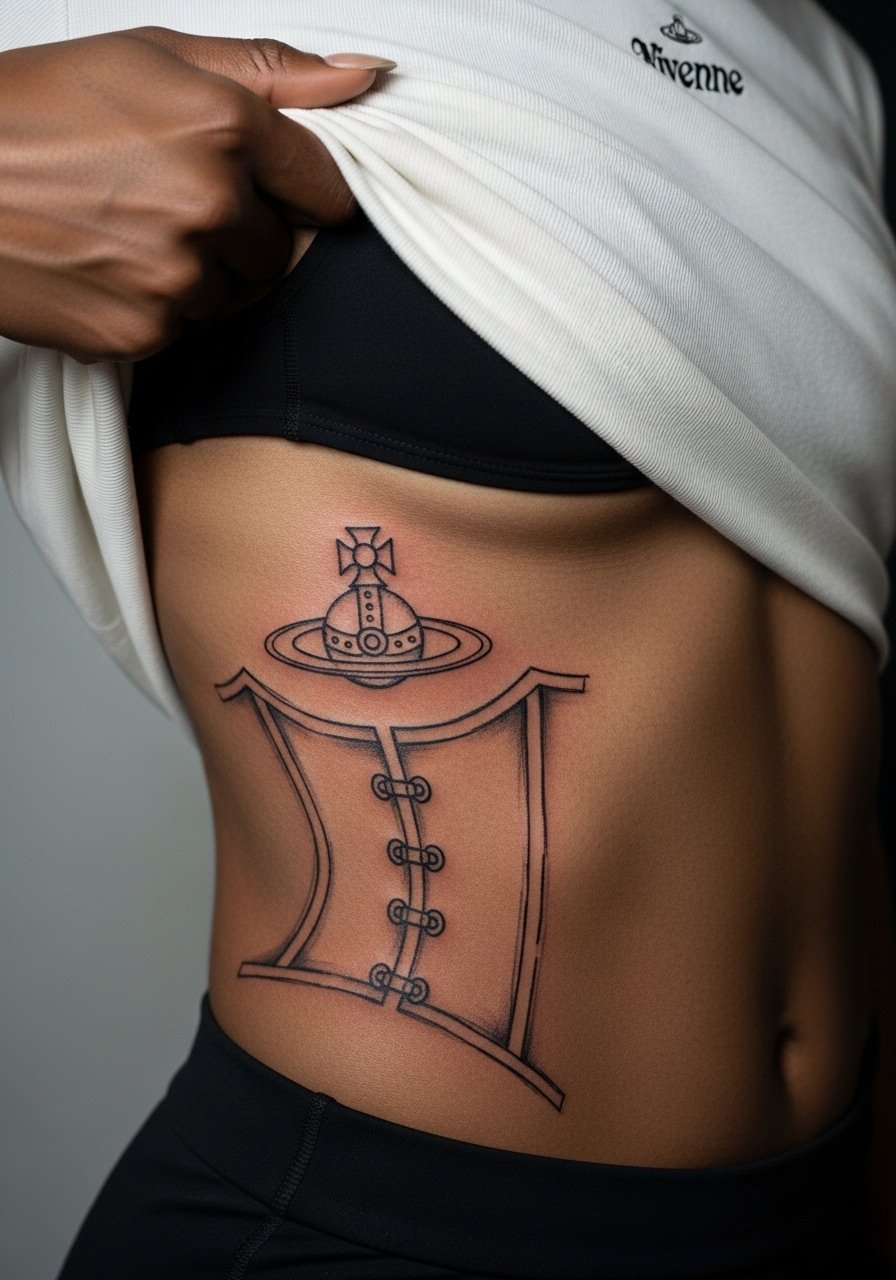
7. Orb with Corset Lines on the Ribcage
Fair warning: the ribcage is a 7 out of 10 on most pain scales. I bring this up because scale and spacing matter more here than anywhere else. Fine sketch lines on the ribs risk blurring if they sit too close together. One camp of artists says ribs stretch and blur fine line within two years. The other camp argues that with correct needle depth and wider spacing the design settles fine. In consultation, ask for mockups that include breathing poses so you see how the design moves. Session time varies but plan for multiple passes, and bring a loose cropped top or zip-up hoodie so you can expose only the tattoo area when needed.
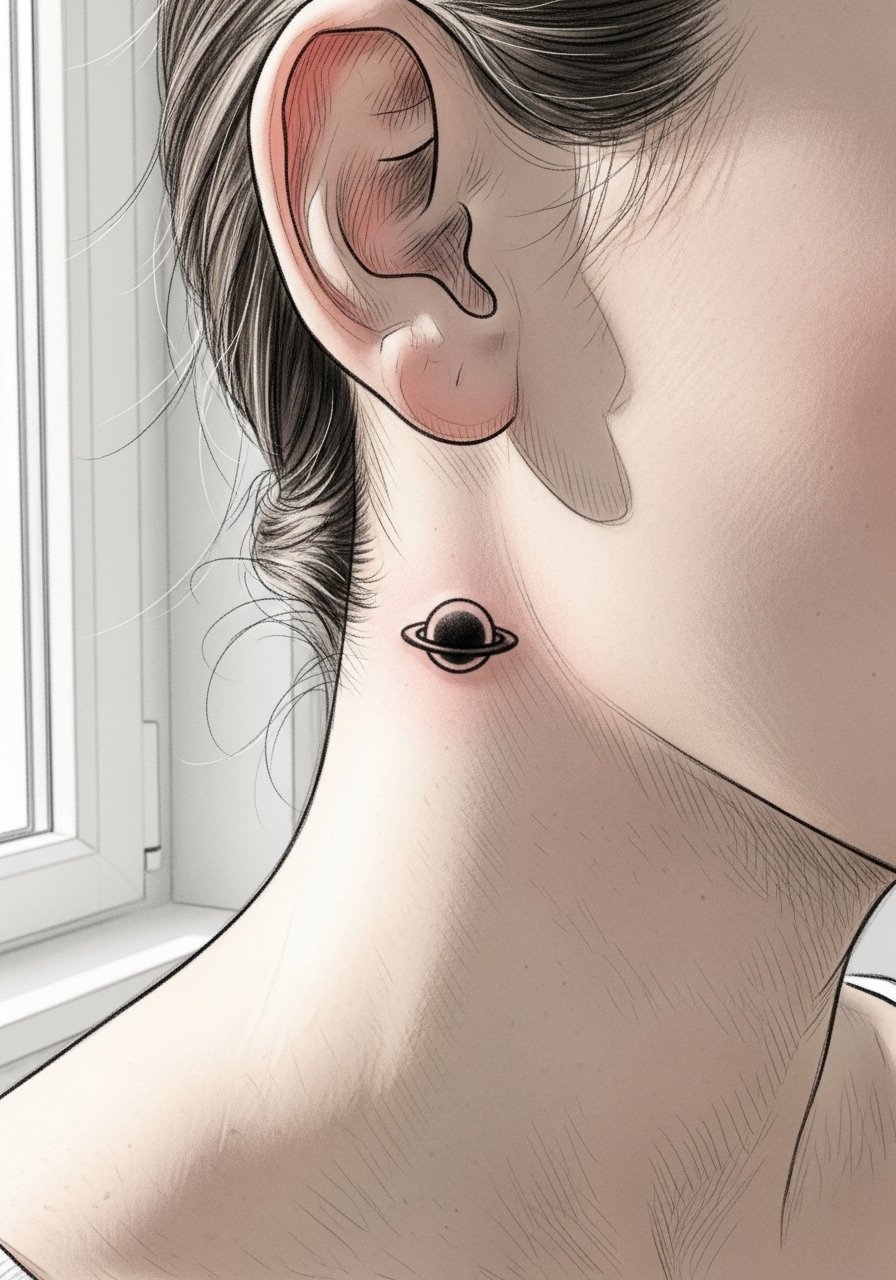
8. Micro-Sketch Orb Behind the Ear, Hairline Framing
When done properly this tiny behind-the-ear nod reads like a secret detail rather than a statement. The common mistake is placing lettering or dense detail in that flat, curved spot. Ask for a light sketch touch and make sure the artist positions it below the hairline on the neck so it sits naturally with hair movement. The session is brief and discomfort is minimal. For aftercare and visibility, short hair will show it off while longer hair keeps it private. If you want to reveal it on occasion, a cropped hairstyle or half-up knot works well.
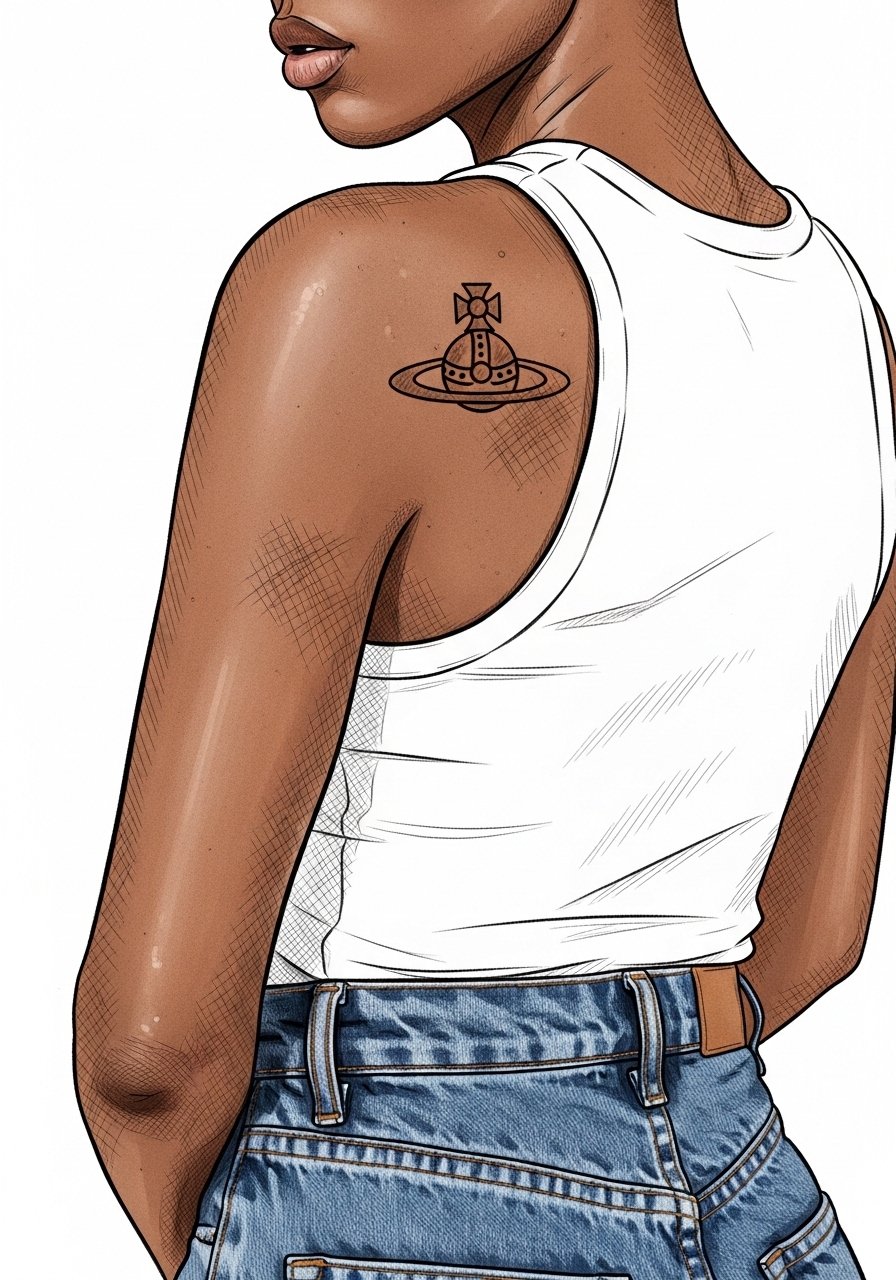
9. Larger Back-of-Shoulder Orb with Rough Sketch Shading
There's a visual impact to a larger sketch orb placed on the back of the shoulder that reads like wearable art. When you want it to pair with a jacket or an open-back top, coordinate the center point with the shoulder blade so the piece moves with your posture. Mistakes happen when people ask for too much micro-detail in that area; broader strokes and stipple shading hold better over time. Session time is usually 90 minutes and pain is low to moderate. For evenings out, the design looks great with an open-back midi dress that frames the piece without exposing the whole back.
10. Small Orb Above the Ankle Bone, Sketch Dots and Lines
There are two camps on ankle detail. One group argues that tiny stipple and dot work survives well if spaced and anchored. The other camp warns that socks and shoes create rub and fade that eats detail. If you want stippling, ask for slightly bolder primary lines with lighter dotted texture outside them. The session is quick but the area often needs a touch-up at year two. Wear sandals or rolled pants to show it off and avoid tight socks during the first two weeks. The healing feels itchy as skin gets dry, so expect frequent gentle cleanses.
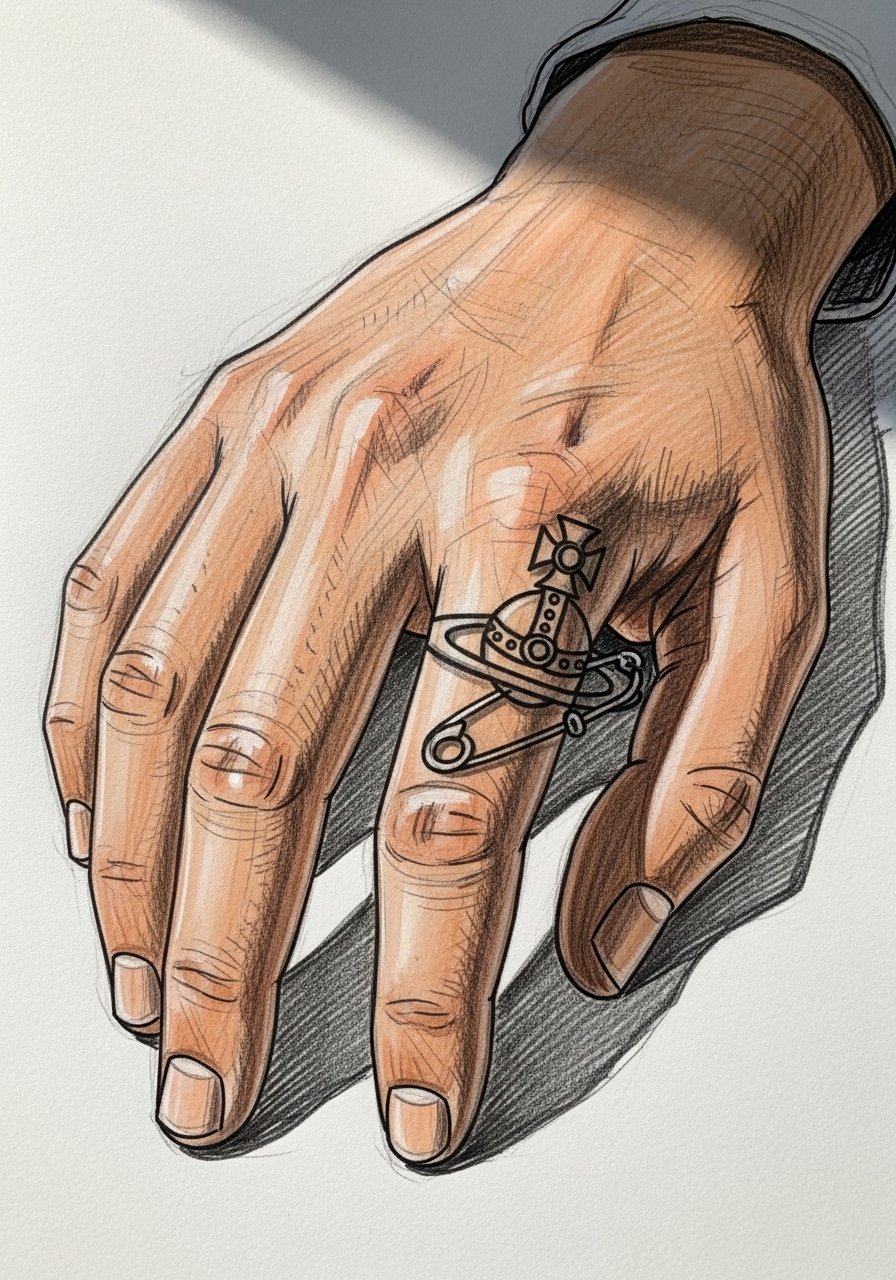
11. Orb with Safety Pin Accent on the Hand Edge
Hand-edge tattoos still affect hiring in some industries, so consider placement before committing. The edge of the hand reads like an accessory when done in a sketch approach with negative space. Common mistakes include overloading the tiny canvas with too many intersecting lines. When you consult, ask for preview photos of healed hand work from the artist's portfolio and plan for annual touch-ups. Session time is short but pain is sharp. For showing this piece off without overpowering your wardrobe, stack simple bracelets or choose a minimalist watch that keeps the eye near the wrist and hand.
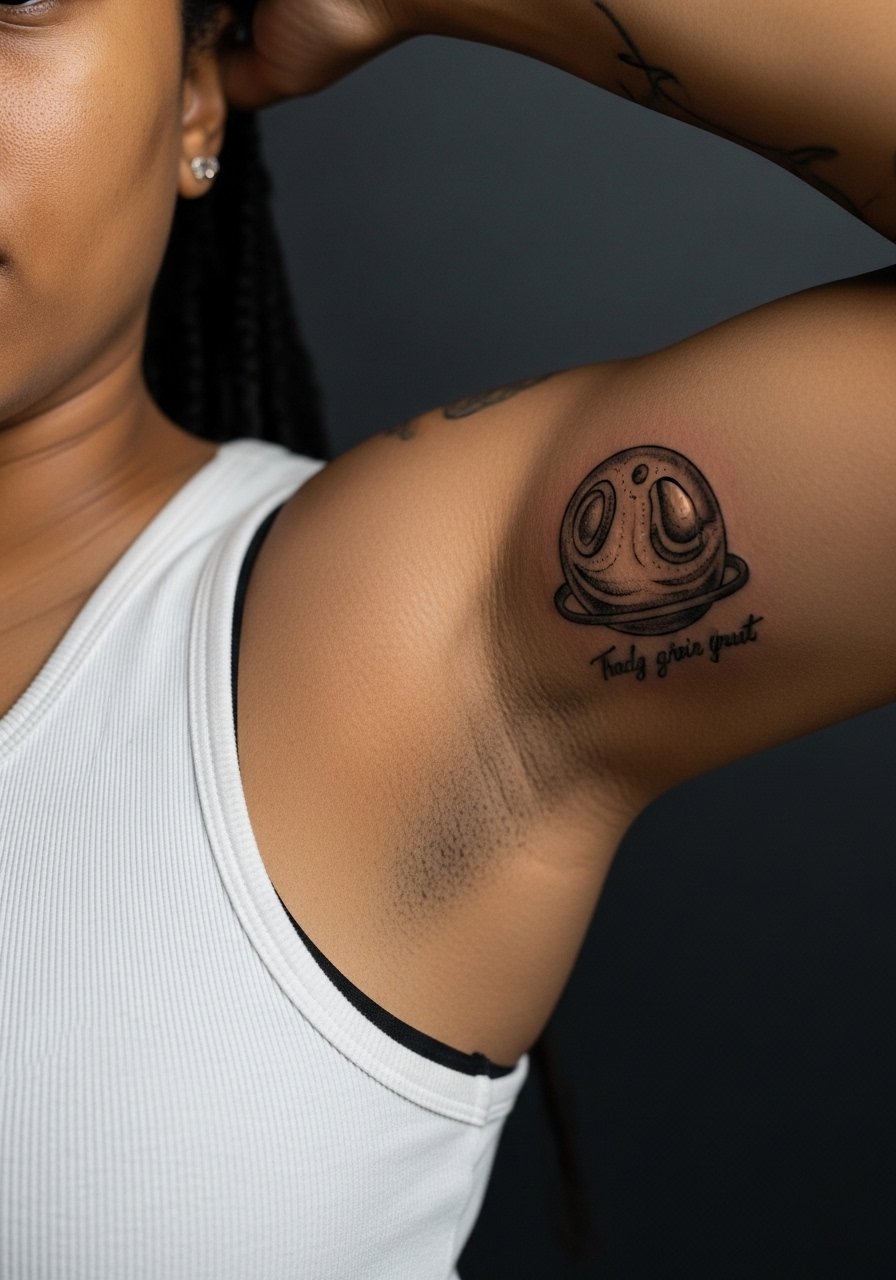
12. Scripted Orb Tagline on the Inner Bicep
Inner bicep tattoos can be intimate and visible depending on arm position. For a script tagline next to an orb, spacing and font weight are critical. A common error is asking for tiny, tightly packed script that runs with arm movement. Ask your artist for slightly larger lettering with airy spacing and for a raised arm preview so you see the stretch. The session is moderate in time and discomfort. If the phrase has cultural origin or references, consider a small nod to that origin rather than a straight replica. The healed look at two years keeps the phrase readable with a likely lightening of the thinnest hairlines.
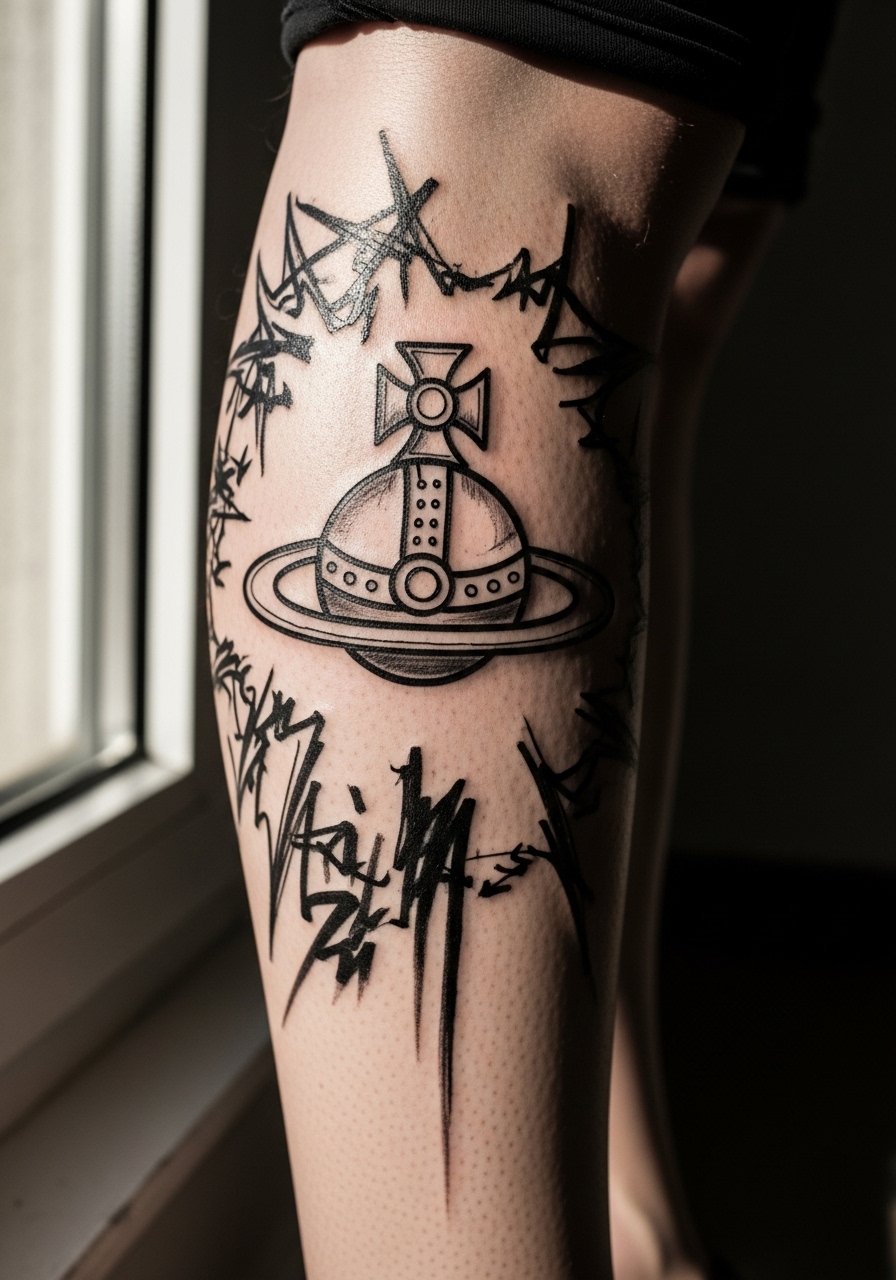
13. Orb with Abstract Punk Strokes on the Calf
The calf gives you space to exaggerate sketch gestures and keep negative space intact. If you plan to wear boots, think about how the pattern will peek from the top. A mistake people make is compressing too many strokes into a narrow vertical band; let the scribbles breathe. Pain is low and session time is often one to two hours for a mid-sized composition. For showing it off in warmer months, wear mid-calf boots with a cropped skirt so the tattoo sits between boot cuff and hem rather than being fully hidden.
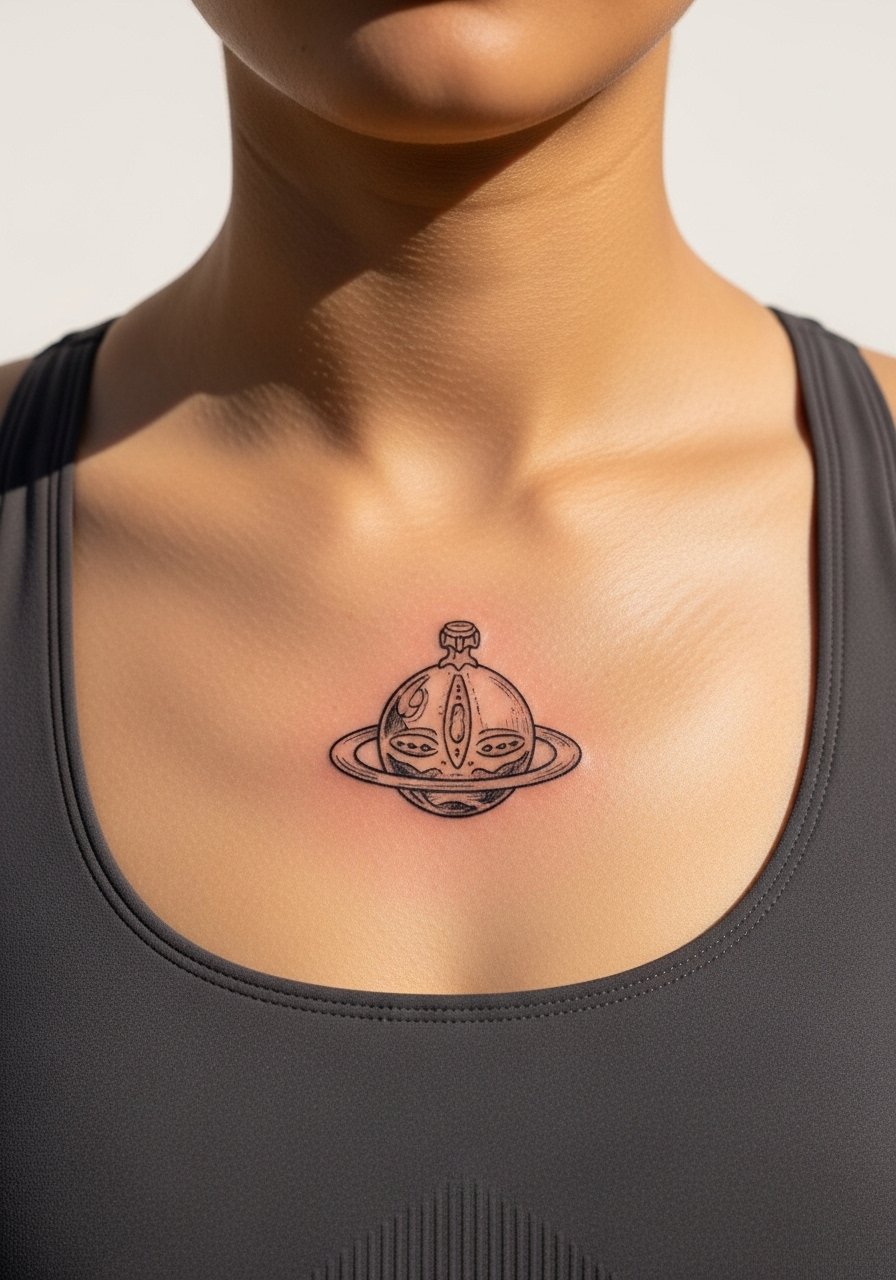
14. Minimal Orb Over the Sternum with Fine Sketch Rays
Sternum placement has a practical etiquette. It needs an artist experienced with chest work and a session plan that includes wardrobe considerations. One camp says fine line over the sternum fades due to constant movement and subtle sweating. The other camp says with proper depth and slightly bolder anchor lines it settles well. If you choose this spot, plan for longer session time and bring a fitted sports bra or bandeau so the artist sees only the small area without you being exposed. Expect tenderness for a week and plan clothing that keeps fabric off the immediate area while it heals.
15. Shoulder Blade Orb with Cross-Hatch Sketch Shading
A shoulder blade placement lets the artist play with larger, sketchy hatch marks that keep their character as the piece ages. The common mistake is cramming cross-hatch too tightly; loose, directional strokes age more gracefully. Sessions often run 90 minutes and pain is moderate. For showing off this location occasionally, an open-back top or halter frames the piece without exposing the whole torso. If you plan to expand into a back piece, ask for composition notes so future elements have room to breathe.
16. Orb with Chain Motif Across the Collarbone
This editorial placement reads like layered jewelry when the chain motif sits parallel to the collarbone. Avoid tiny repeated chain links that start to merge with movement. Ask for alternating line weights and slightly broken links so the sketch effect remains legible. Session time sits around an hour and discomfort is low to moderate. For evenings out, pair the tattoo with a racerback tank or an open-collar top to show the line across the clavicle. If you plan career visibility concerns, a lightweight scarf can hide it without smothering the area during the first month of healing.
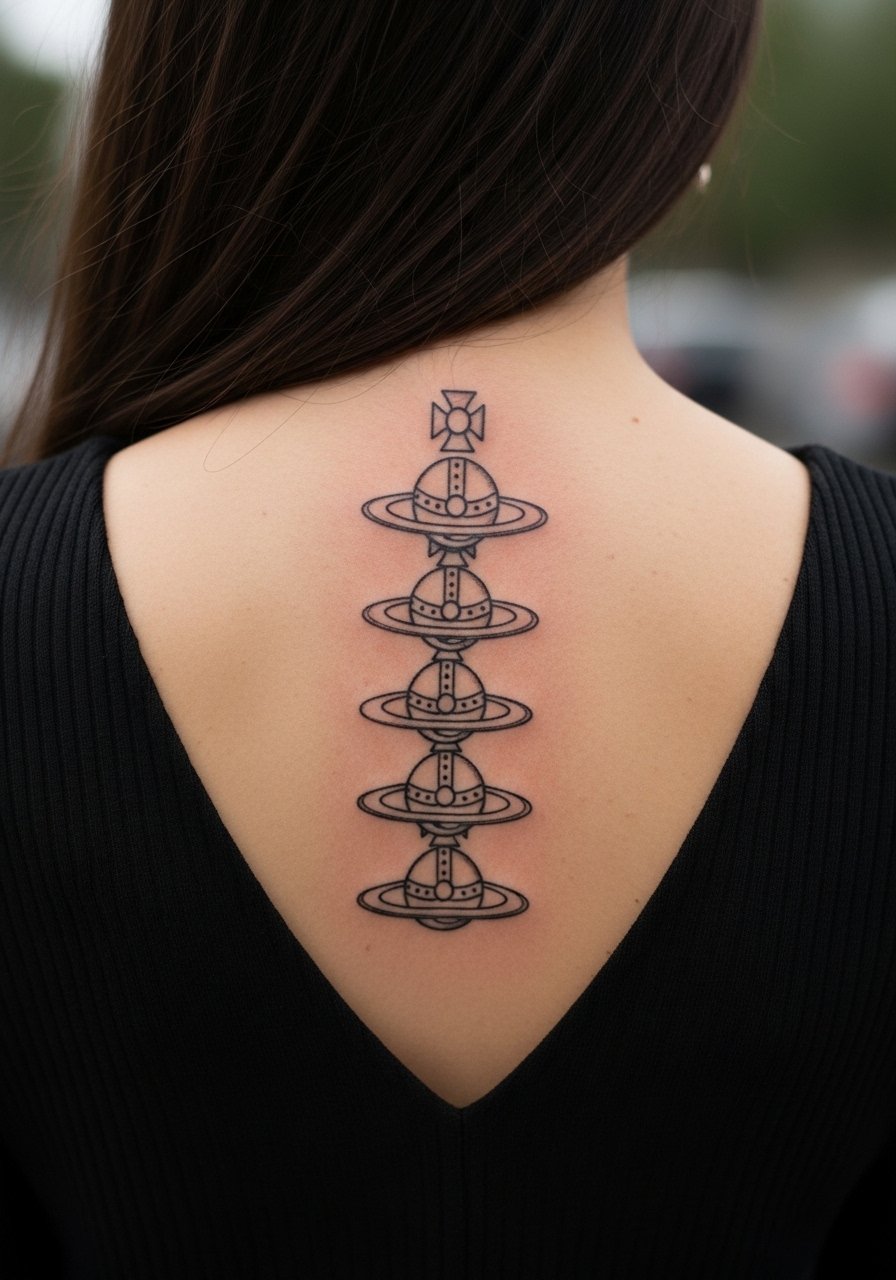
17. Stacked Orbs in a Vertical Line on the Spine
There is a neat symmetry to stacked orbs down the upper spine and a sketch finish keeps the set feeling informal and worn-in. The main mistake is making each orb too small; vertical sets need scale so the negative space reads between elements. Expect a longer session if you want three or more orbs and moderate discomfort along the spine. For showing it off, open-back dresses or halter tops frame the line while keeping most of the back covered. If you plan future extensions horizontally, tell your artist so they space the orbs with expansion in mind.
Frequently Asked Questions
Q: Will sketch-style fine lines stay legible on the ribs and sternum?
A: It depends on spacing and needle depth. One camp thinks those areas blur quickly. The other camp says correct spacing and slightly bolder anchor lines help. Ask to see healed photos of similar placements and plan for a possible touch-up at year two to three.
Q: How often do tiny wrist and finger orbs need touch-ups?
A: Fingers and wrists face a lot of washing and friction so a refresh around year one to two is common. Choosing slightly heavier anchor strokes and allowing spacing helps extend the time between touch-ups.
Q: What should I wear to a tattoo session for a collarbone or sternum piece?
A: Wear clothing that exposes only the area the artist needs and stays comfortable during movement. For collarbone work a wide-neck shirt you can pull aside works well. For sternum, a fitted sports bra or bandeau is ideal.
Q: Are sketch-style Vivienne Westwood designs culturally sensitive to reproduce?
A: The orb motif is tied to a designer brand and modern fashion culture. If a design borrows from historical or cultural symbols, consider slight variation or personal adaptation rather than a direct replica.
Q: How should I vet an artist for sketch-style linework?
A: Look for healed photos in portfolios that show the same scale and placement you want. Use local shop directories, convention lists, and hashtag searches to find candidates, and ask for healed images specifically rather than fresh work.
