
Fine line tattoos are everywhere on mood boards right now, and the same quiet aesthetic that looks perfect in a photo can surprise you in real life. Some styles hold up with heavy blackwork and saturation, while delicate sketch lines need careful placement and occasional touch-ups. Read these 21 Arctic Monkeys tattoo concepts with practical notes on aging, session feel, and what to tell your artist so the result still reads years from now.
1. Vintage Microphone with Musical Notes on the Forearm
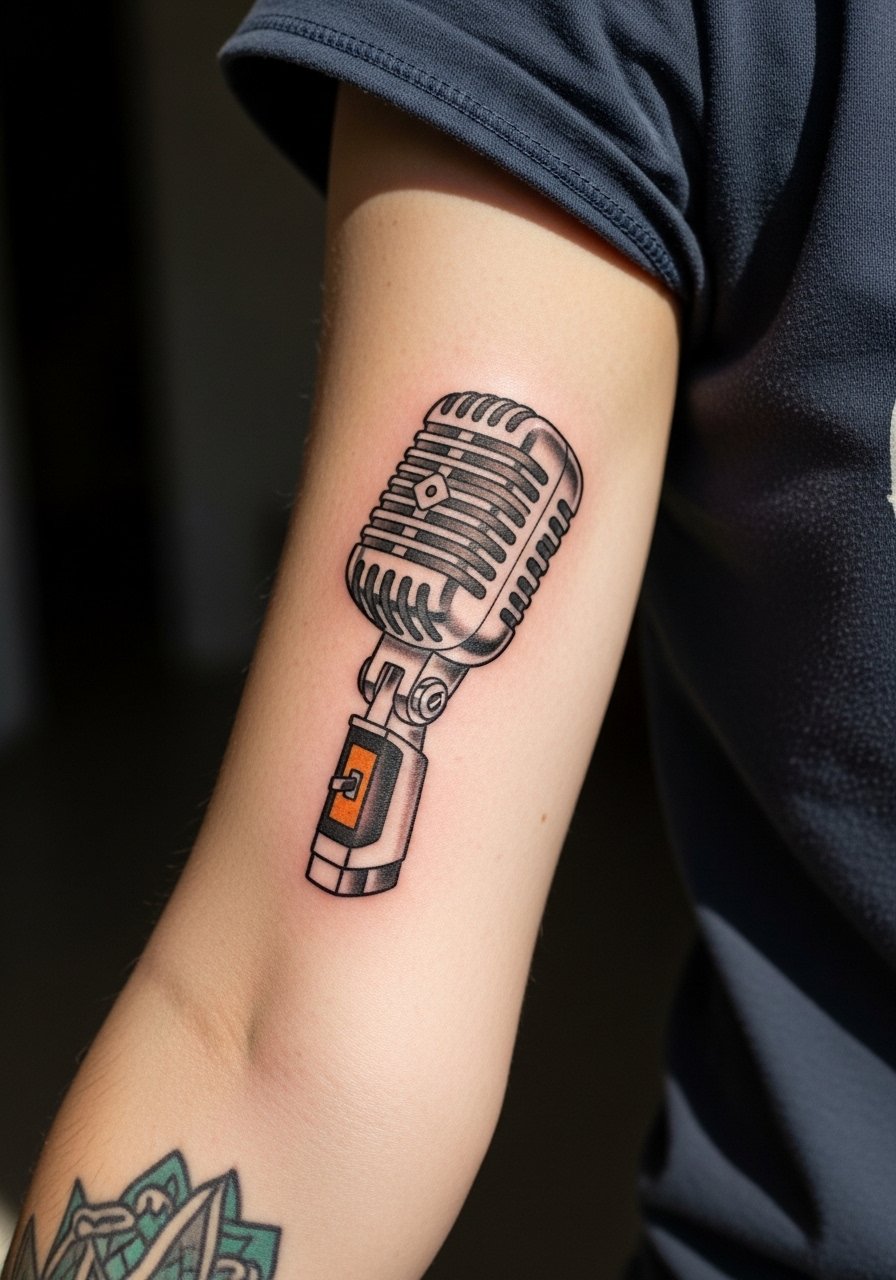
I see this one on forearms at almost every gig-inspired consultation. The neo-traditional approach uses bold linework around the mic and softer whip shading for the notes so the design stays legible as it heals. Fair warning, forearm pieces are visible day to day and show sun wear, so ask for solid black outlines and moderate saturation to avoid early fading. During the consultation, request reference images with the exact mic angle and ask for touch-up timing at four to six weeks. The session feels like sustained vibration, not sharp stabs, and runs around one to two hours for a medium piece. This placement looks great with rolled sleeves like a chambray shirt to frame the artwork.
2. Classic Car Silhouette on the Outer Thigh
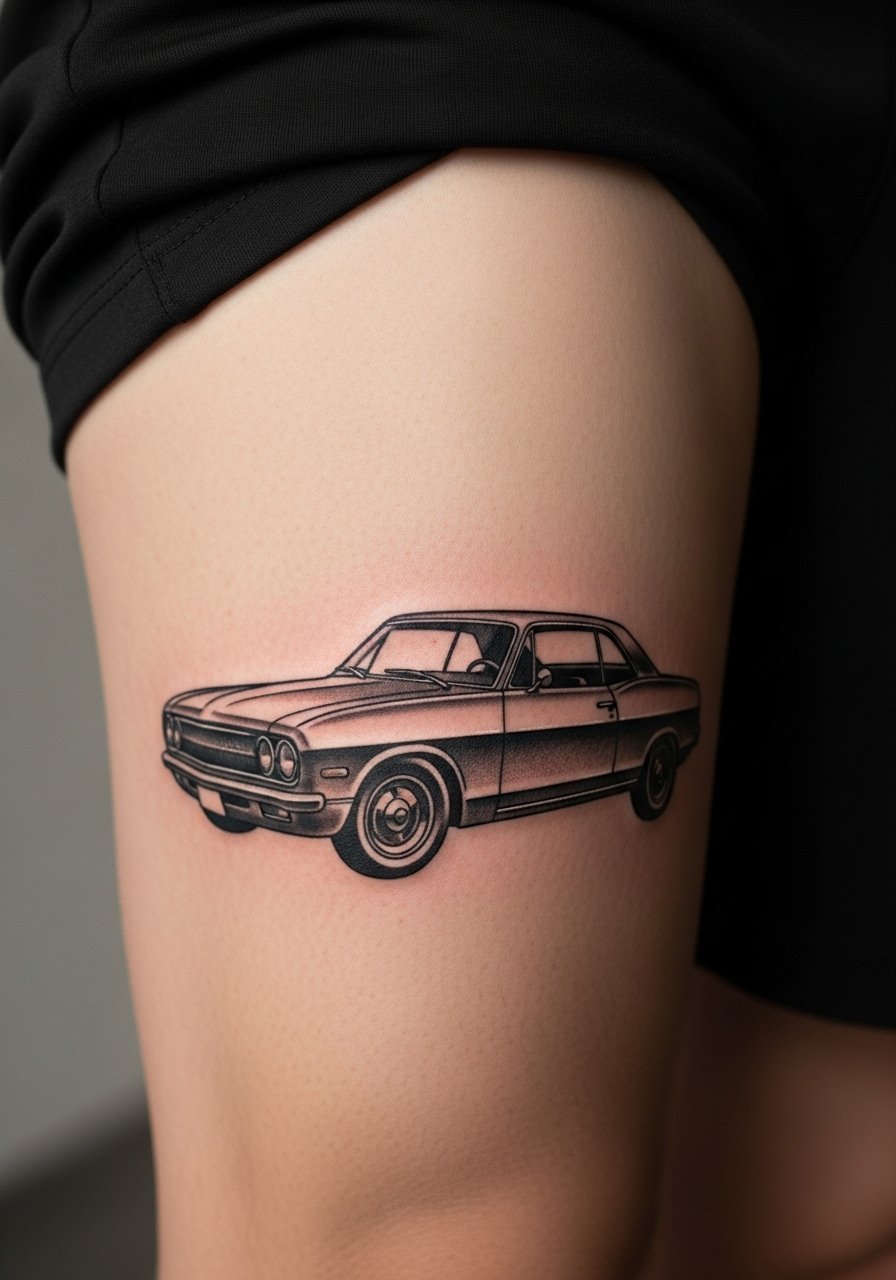
The outer thigh is forgiving for larger blackwork pieces and the solid silhouette reads clean from a distance. People pick the car silhouette for the Sheffield driving imagery it evokes, and the simple fill minimizes blowout risk on soft tissue. Tell your artist you want dense black saturation with crisp negative space around windows and wheels so the shape remains clear at year five. Typical session time is a single, longer block since it is a straightforward fill. For the appointment, wear loose shorts or joggers so the artist can access the area without pinching fabric, and show it off later with slim-fit cuffed jeans that sit above the ink.
3. Abstract Geometric Microphone on the Shoulder
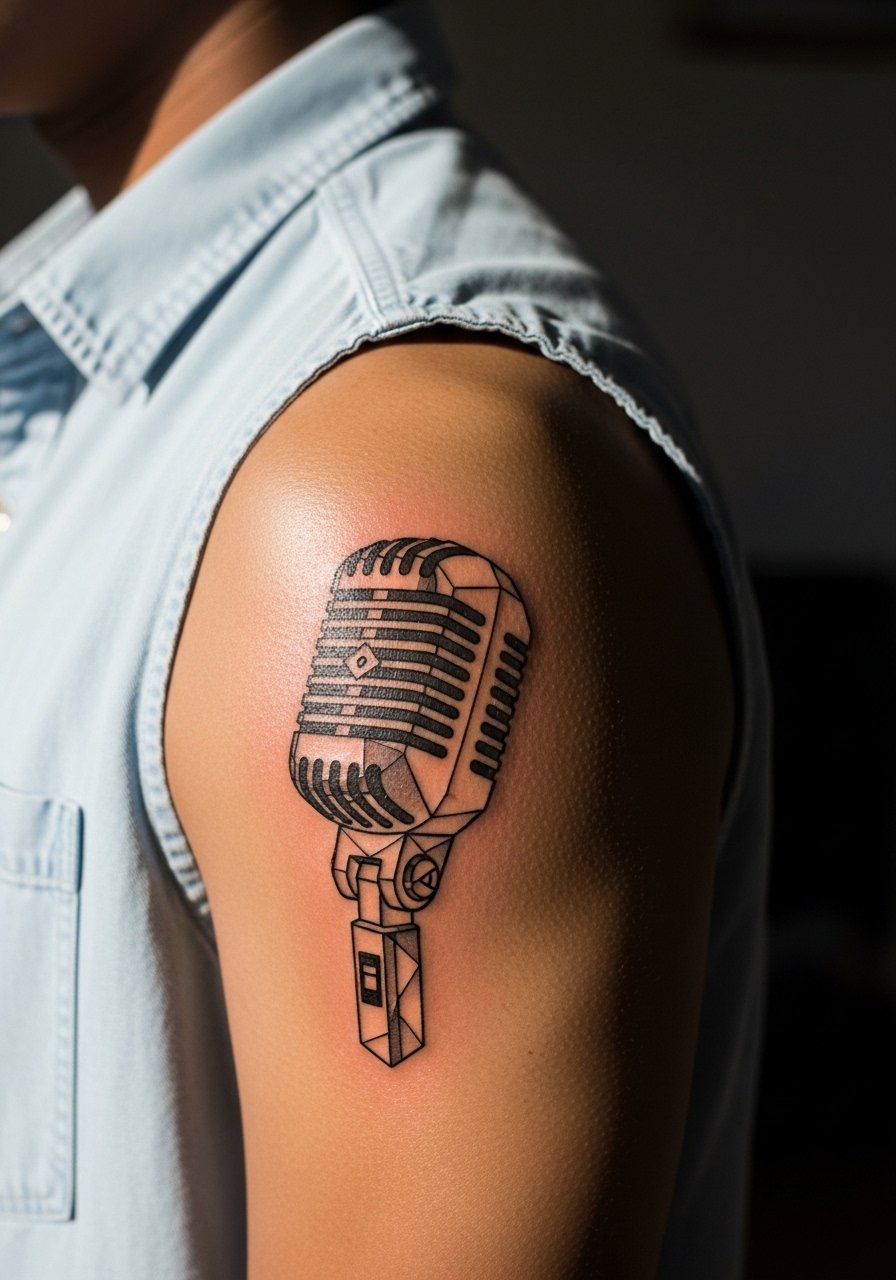
The shoulder is ideal for compact geometric work because the rounded surface keeps lines from compressing. The trick is spacing. The biggest mistake is packing too many thin lines into a small area which causes merging as it heals. Ask for bolder primary anchors and thinner connecting geometry so the negative space remains intentional. Artists split on micro geometry done tiny versus leaving room. One camp says fine geometry holds with precise depth and spacing. The other warns that tiny geometry on moving shoulder skin softens fast. Expect a one-hour session for a small-to-medium piece and wear a sleeveless muscle tank to the appointment so the artist has clear access.
4. Lyric Script in Sketch Style on the Inner Bicep
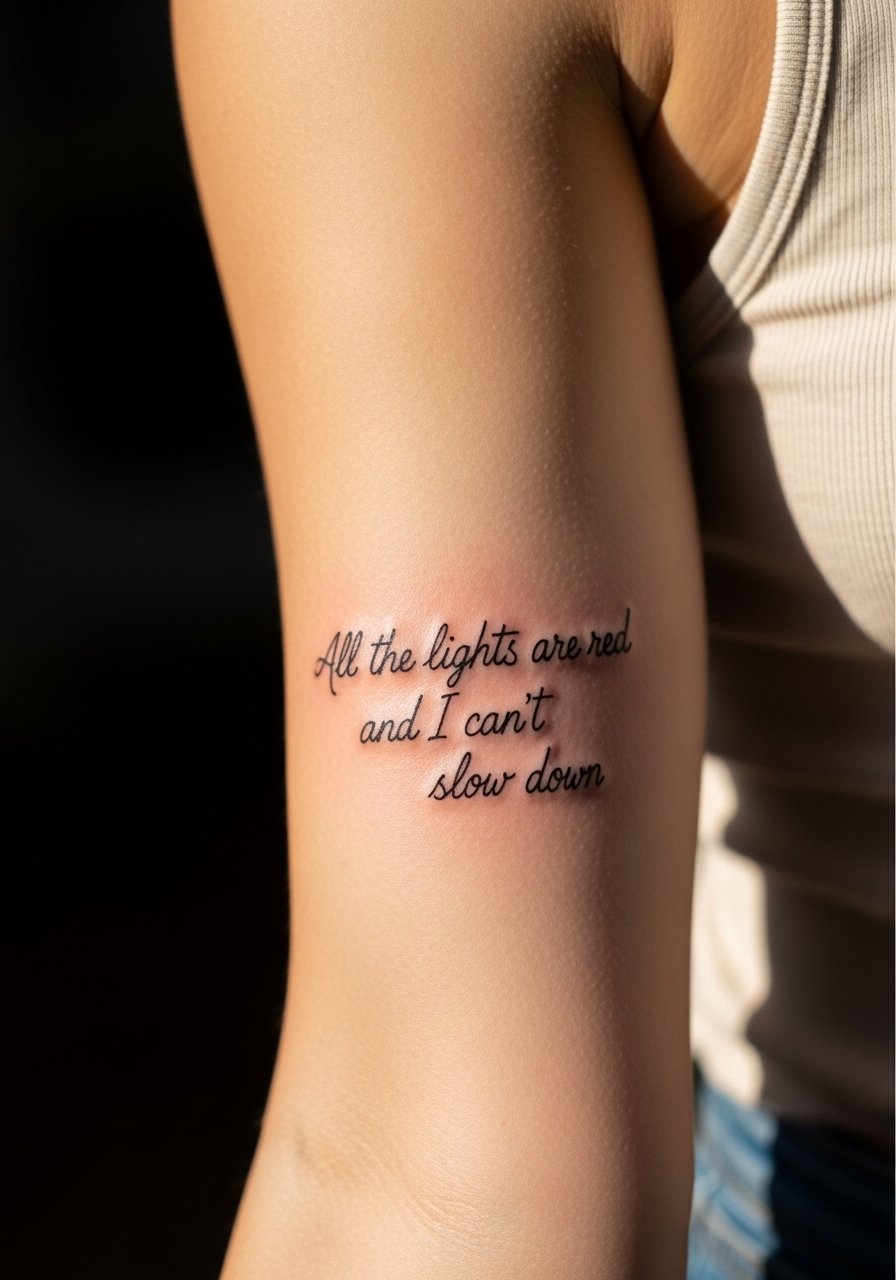
Inner bicep scripture reads intimate and personal, and the skin there can be touchier during sessions. Expect a session of about an hour for a short line. A common mistake is asking for ultra-fine script without specifying contrast; thicker hairlines with sketchy shading give better longevity. Tell your artist which song and exact lyric you want, and whether you prefer hand-drawn sketch strokes or a clean handwritten script. The skin stretch and motion mean touch-ups are common at year two, especially if the lines are extremely fine. For the session, wear a fitted muscle tank so the arm can be raised comfortably and the artist can work without tugging fabric.
5. Watercolor Album Cover Elements on the Calf
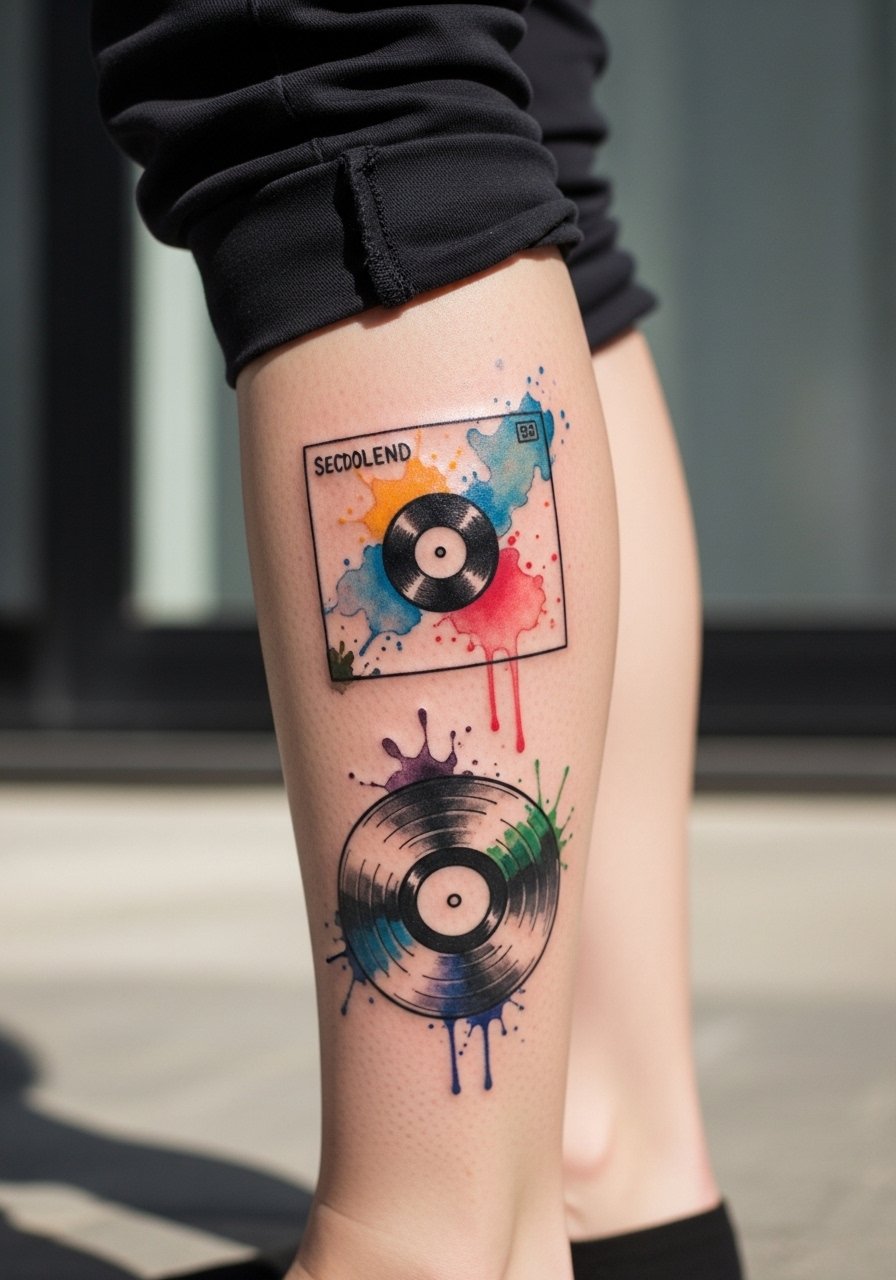
Watercolor pieces look incredible fresh and capture the band’s more psychedelic moments, but they also demand realistic expectations. The controversy is clear. One camp loves watercolor for color dynamics and emotional match to album art. The other warns that watercolor fades and can look patchy without regular touch-ups. For a calf piece, opt for strategic black outlines around focal elements and softer color fills behind them. That combo preserves the watercolor feel while giving the design structure as it ages. Sessions usually run two hours for medium calf work and you will want to wear bootcut or cropped pants that can be pulled up for access and for showing the tattoo later.
6. Humbug-Era Wolf Silhouette on the Ribcage
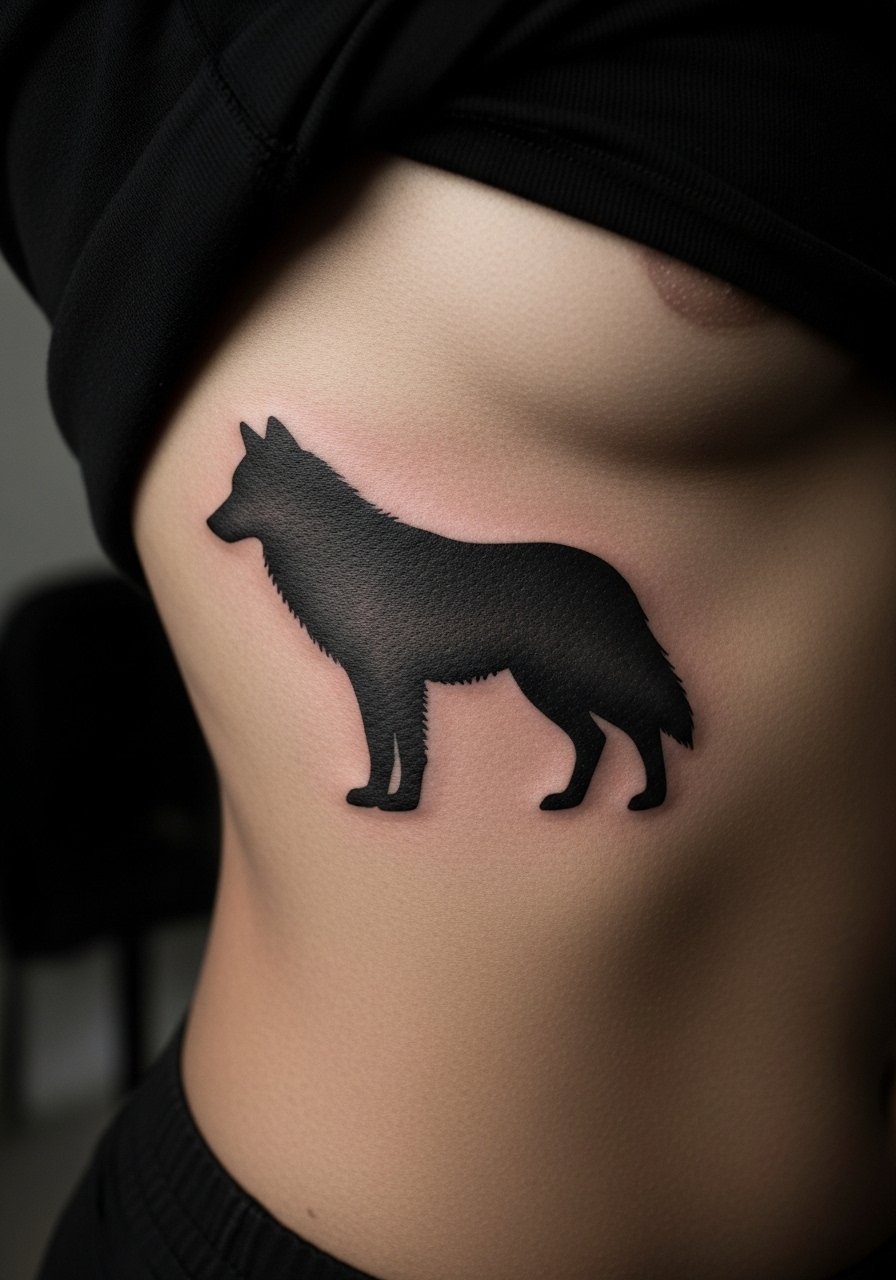
Fair warning: the ribcage rates high on pain scales, often a 7 or 8 depending on your tolerance. That raw, shadowed wolf suits the Humbug era, and a small, well-spaced silhouette preserves the dark mood without dense shading that can bruise. The biggest mistake is requesting heavy stippling in a single session on ribs; break it into two shorter sessions to reduce swelling and get cleaner gradients. During consultation, specify the silhouette edge crispness and whether you want a subtle gradient or almost solid black interior. Expect one to two sessions and plan for tight breathing control during the appointment. For prep and recovery, pack a loose cropped athletic top so the artist can lift fabric without exposing more than the work zone.
Studio Day Picks
The first six designs above include both visible forearm pieces and sensitive ribcage work, so a mix of prep items smooths the session and the first week of healing.
-
Stencil transfer paper kit. Lets you preview and reposition linework on skin before the needle touches down, which is crucial for small mic and script placements.
-
Topical numbing cream. Applied about 45 minutes before helps manage ribcage and inner bicep sensitivity without blurring the stencil when used as directed.
-
Thin protective film roll. Handy for covering the lower-thigh and calf pieces during the first few days, keeping friction and dirt away while you move.
-
Fragrance-free gentle body wash. Cleans healing areas without stripping pigment, useful for forearm and ribcage aftercare routines.
-
Aquaphor healing ointment. A thin layer during the initial healing window helps keep fine line work supple without suffocating the skin.
7. Neo-Traditional Scorpion with AM Initials on the Forearm
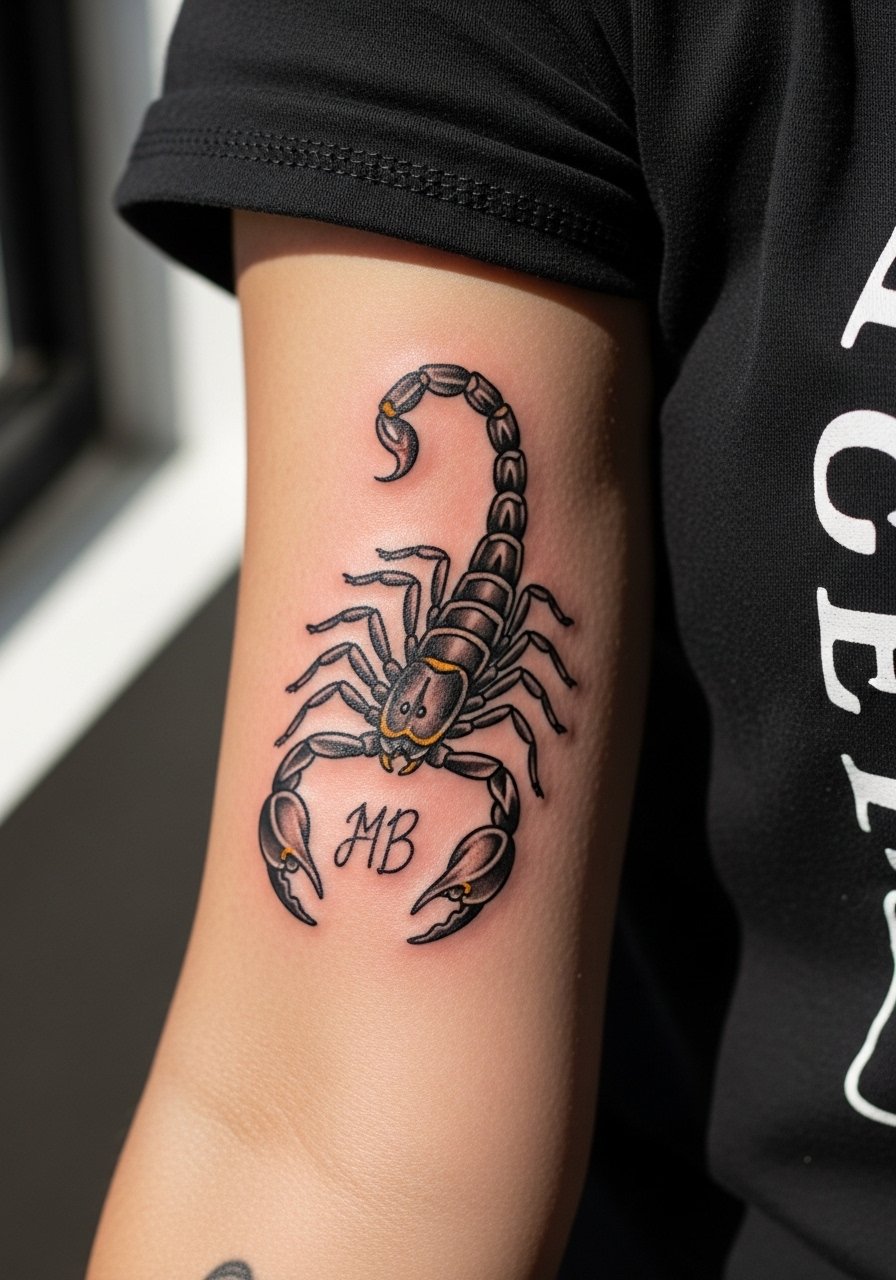
Neo-traditional scorpions read bold and hold detail well because of their strong outlines and controlled color fills. If you want initials integrated, ask the artist to inset them within a negative space segment rather than overlaying script on top of dense color. That prevents premature blurring of the letters. The session will likely be two sittings if color accents are involved. People often go too small for the scorpion’s pincers and the tail, which causes those thin elements to soften with time. This piece pairs nicely with rolled sleeves and chambray or linen, try a loose short sleeve button up when you want to show it off.
8. Minimalist AM Logo in Fine Line on the Wrist
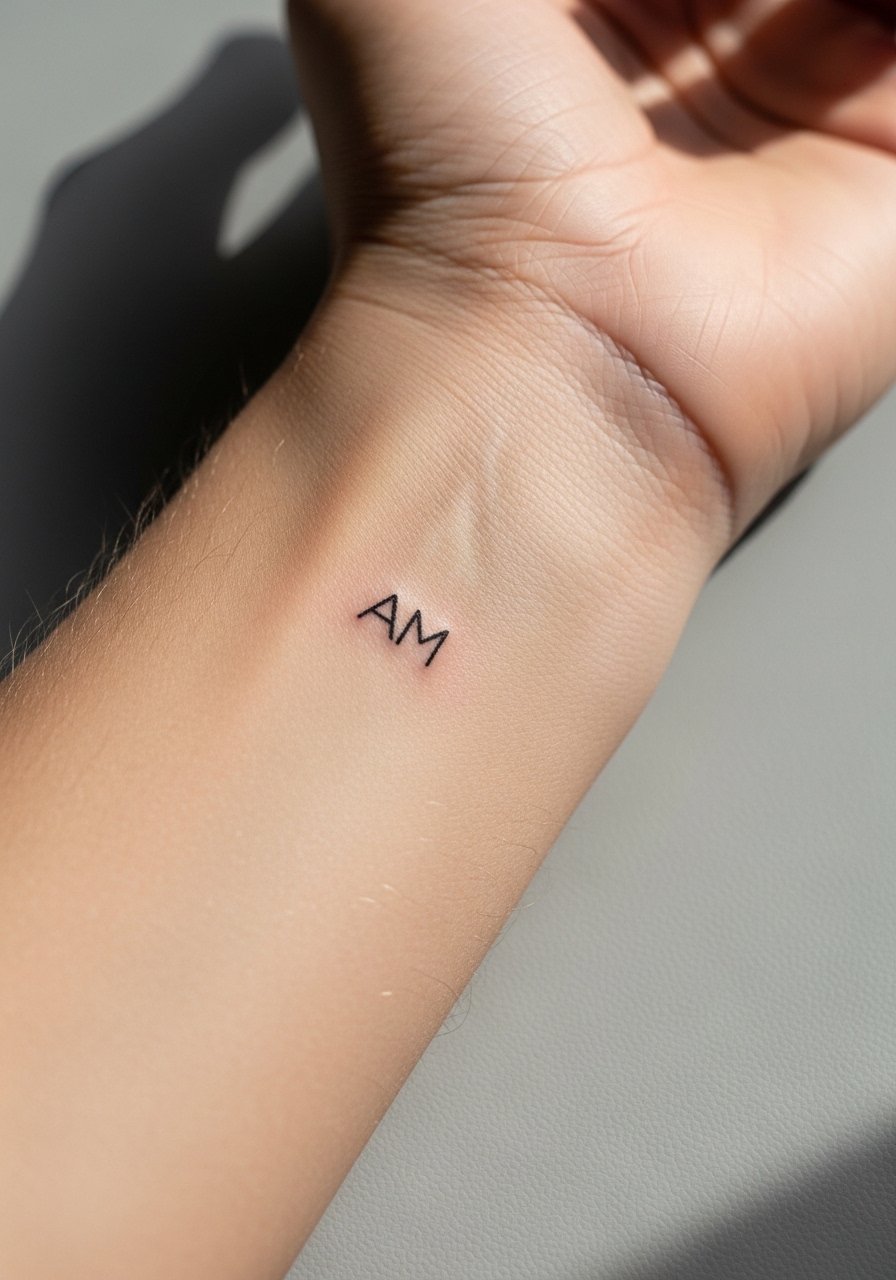
Wrist tattoos are delicate and constantly exposed to washing and sun. Fine line logos solve the discreet-fandom need, but there is a known divide. One camp insists fine line on wrists fades fast and needs frequent touch-ups. The other camp argues that with slightly bolder anchor lines and careful needle depth, a small logo can settle for years. Be explicit with your artist about line weight. A small appointment, typically under an hour, and immediate careful aftercare stave off early feathering. For the session and the look after, pair the piece with a thin leather wrist cuff on the opposite wrist to keep attention balanced.
9. Ornamental Guitar Neck with Lyrics on the Upper Arm
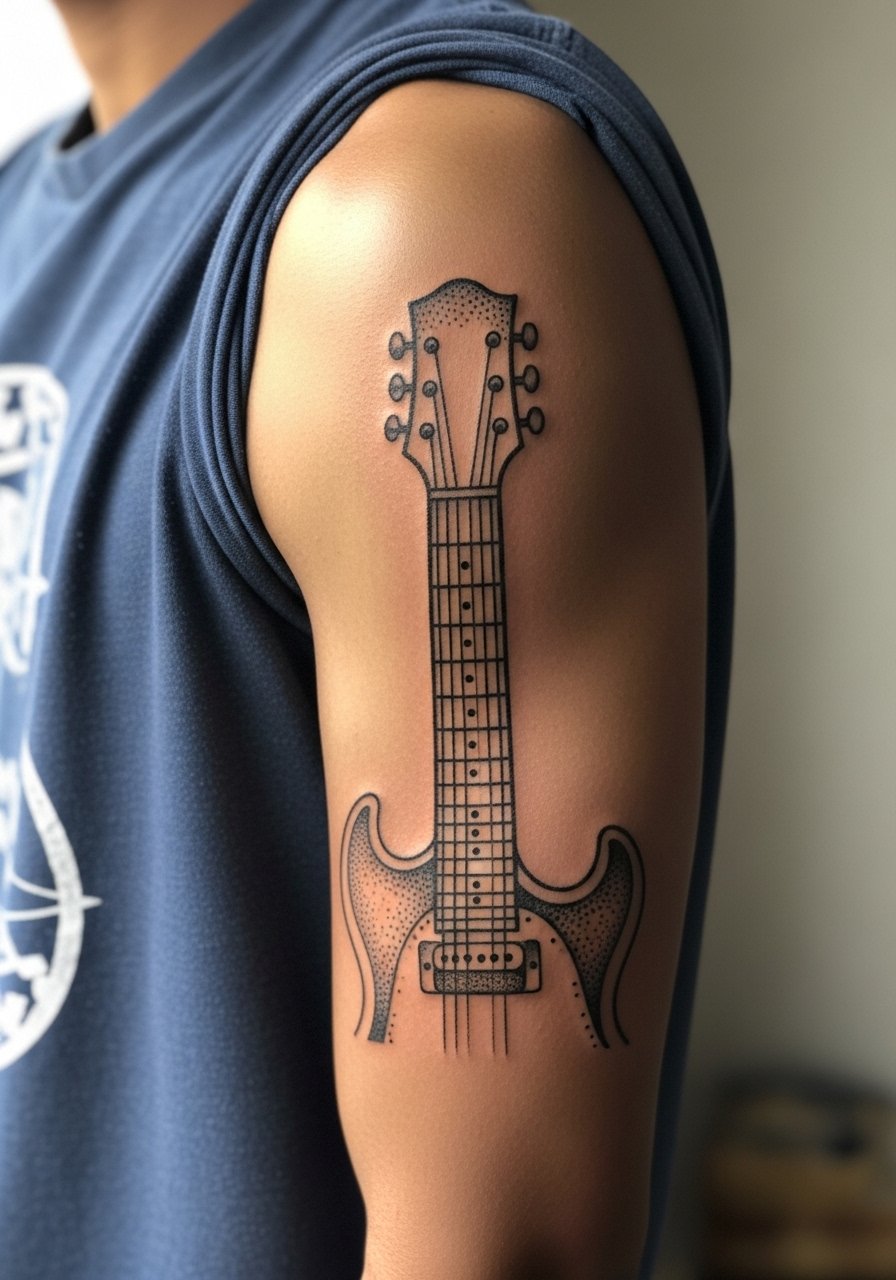
This design suits someone planning a sleeve because the ornamental guitar neck provides a linear anchor you can expand later. The common mistake is over-detailing the fretboard in a tiny area which becomes muddled after healing. Ask for clear negative spaces between frets and whip shading for the decorative elements. Plan for two to three sessions for a medium-to-large upper arm ornamental piece. It ages best when the main structural lines are slightly bolder than the decorative dot work. For the appointment, wear a loose button-down shirt you can pull aside so the artist has full upper-arm access.
10. Micro-Realism Outline of Alex Turner on the Collarbone
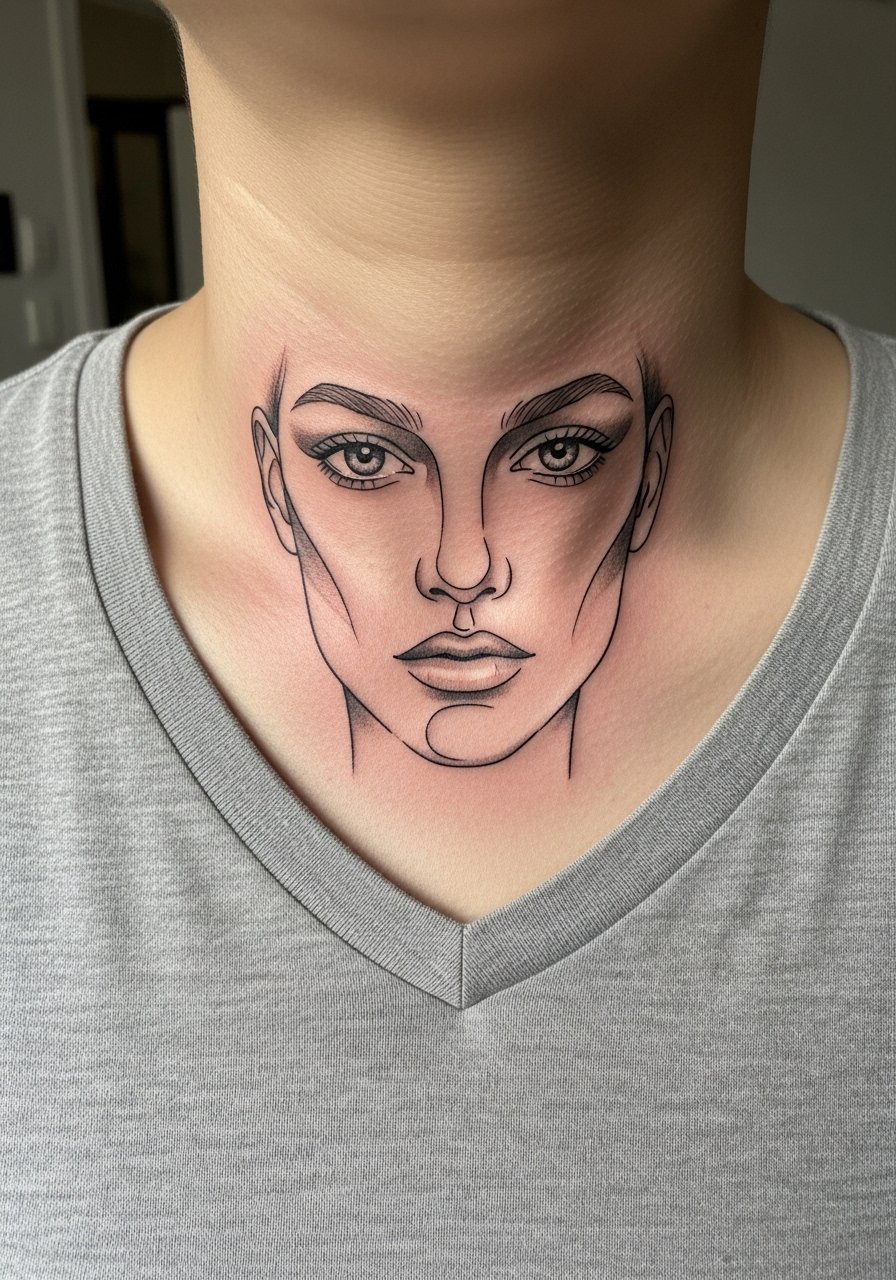
Collarbone portraits require careful scale because the area curves and stretches with movement. The micro-realism outline gives tribute without committing to full photorealism, which is safer for the contour. The main mistake is asking for extreme detail in a tiny patch; that looks great fresh but softens. Tell your artist you want a simplified outline with strategic shadow nodes rather than full shading. Sessions are short for outline work, usually an hour. For showing the piece off, a v-neck cotton tee keeps the neckline clean and focuses attention on the artwork.
11. Black and Gray Humbug Wolf Mini on the Ribcage
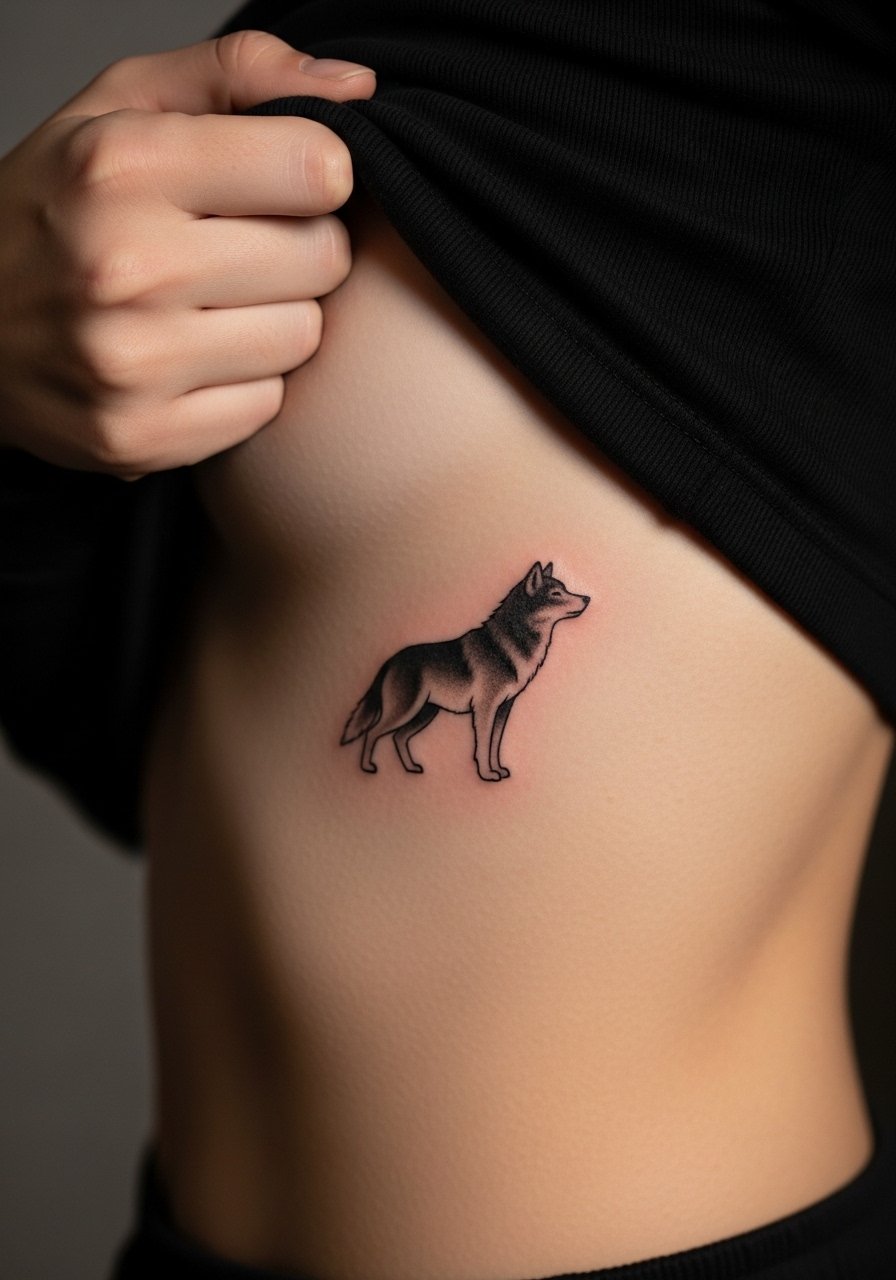
This smaller ribcage wolf leans into mood with subtle gradients rather than heavy black fill so it moves with the body. Ribcage sessions hurt more than arm sessions, and the skin stretches during breathing, so short breaks make the session manageable. A frequent misstep is requesting dense stippling in a single long sitting which leads to excess swelling. Ask to split heavier shading across two sessions and confirm a touch-up window at month one. Because ribs are sensitive, pack a lightweight zip-up hoodie you can slip on after the session to protect the area.
12. Geometric Soundwave Cluster on the Upper Back
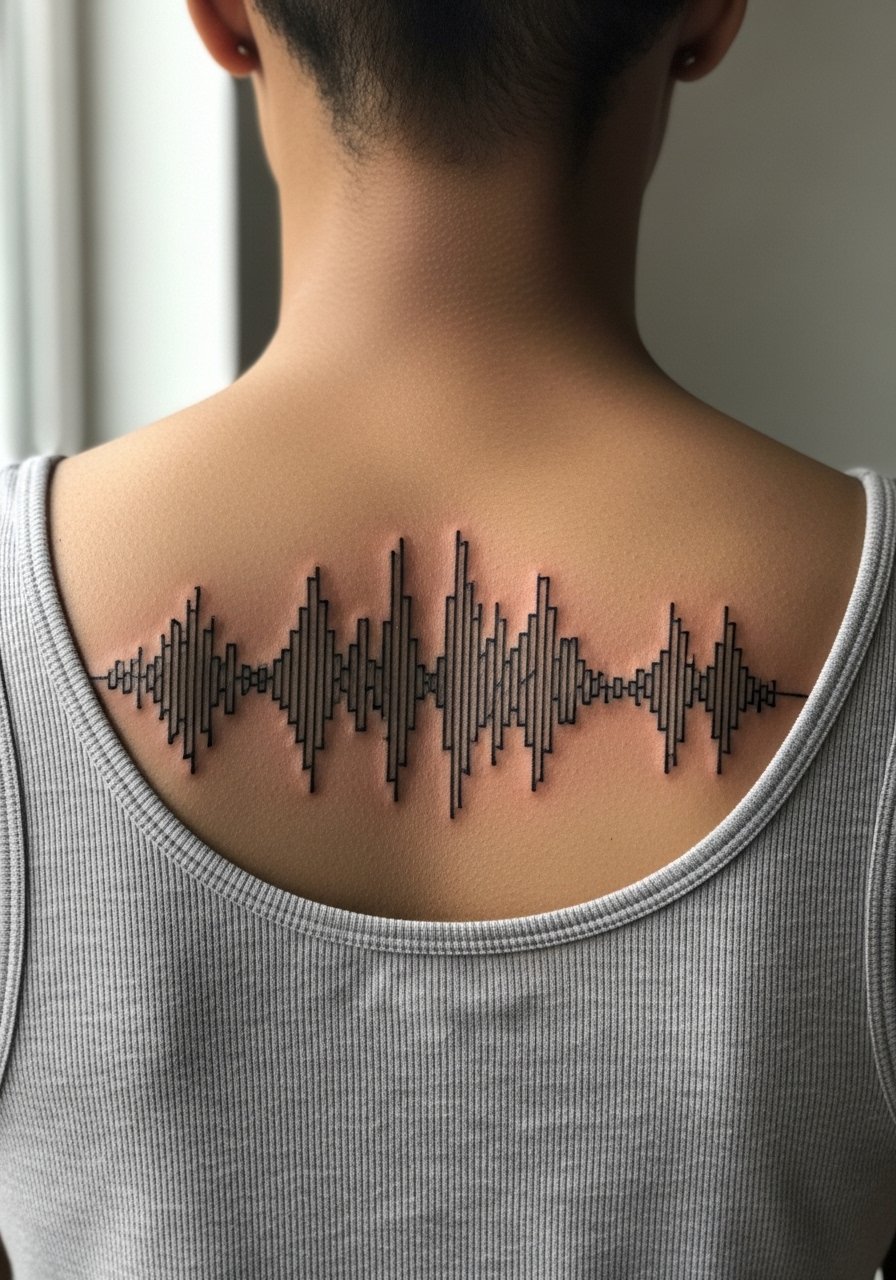
An upper-back soundwave cluster makes for a discreet band nod that scales well into a larger back piece later. The visual impact comes from measured spacing between lines and enough negative space so the waves do not merge. On the back, blowout risk is lower than on hands, but dense parallel lines still need room. Tell your artist the exact tempo of the waveform you want and whether to include small dots as timing markers. Sessions run one to two hours depending on size and detail. For showing the piece, wear open-back dresses or a loose tank top that keeps the upper back visible.
13. Tiny Micro-Realism Record Player on the Ankle
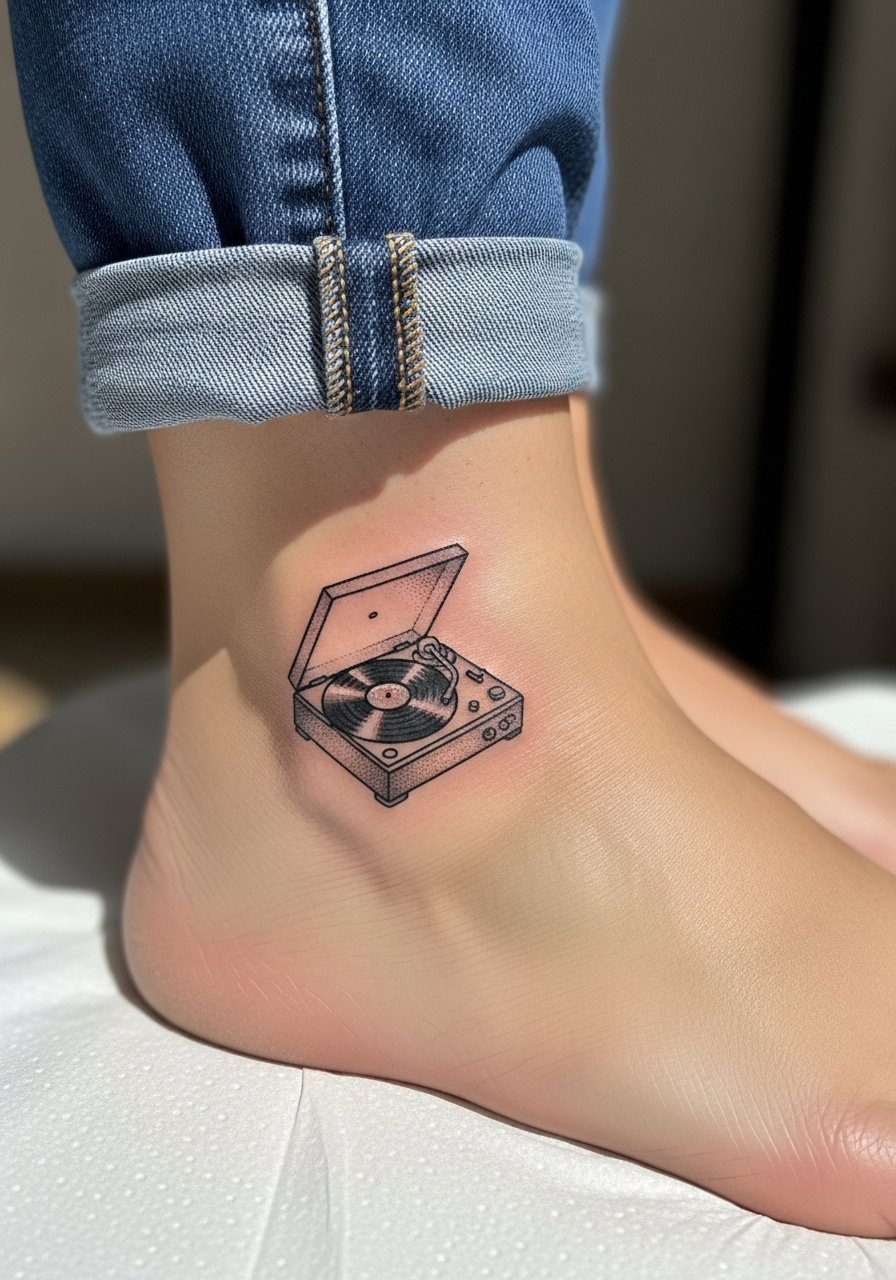
Ankle tattoos face a lot of friction from shoes and socks, and tiny micro-realism requires crisp contrast to avoid fading into texture. A common error is placing the player too low near the tendon where movement distorts the lines. Ask your artist for a slightly bolder outline than a typical micro-realism piece to account for abrasion. Session time is short, usually under an hour, but expect local swelling overnight. When showing the ankle, cuffed jeans or sandals work best, so try cropped pants like cropped straight pants that stop above the ink.
14. Minimalist Lyric Line Along the Side of a Finger
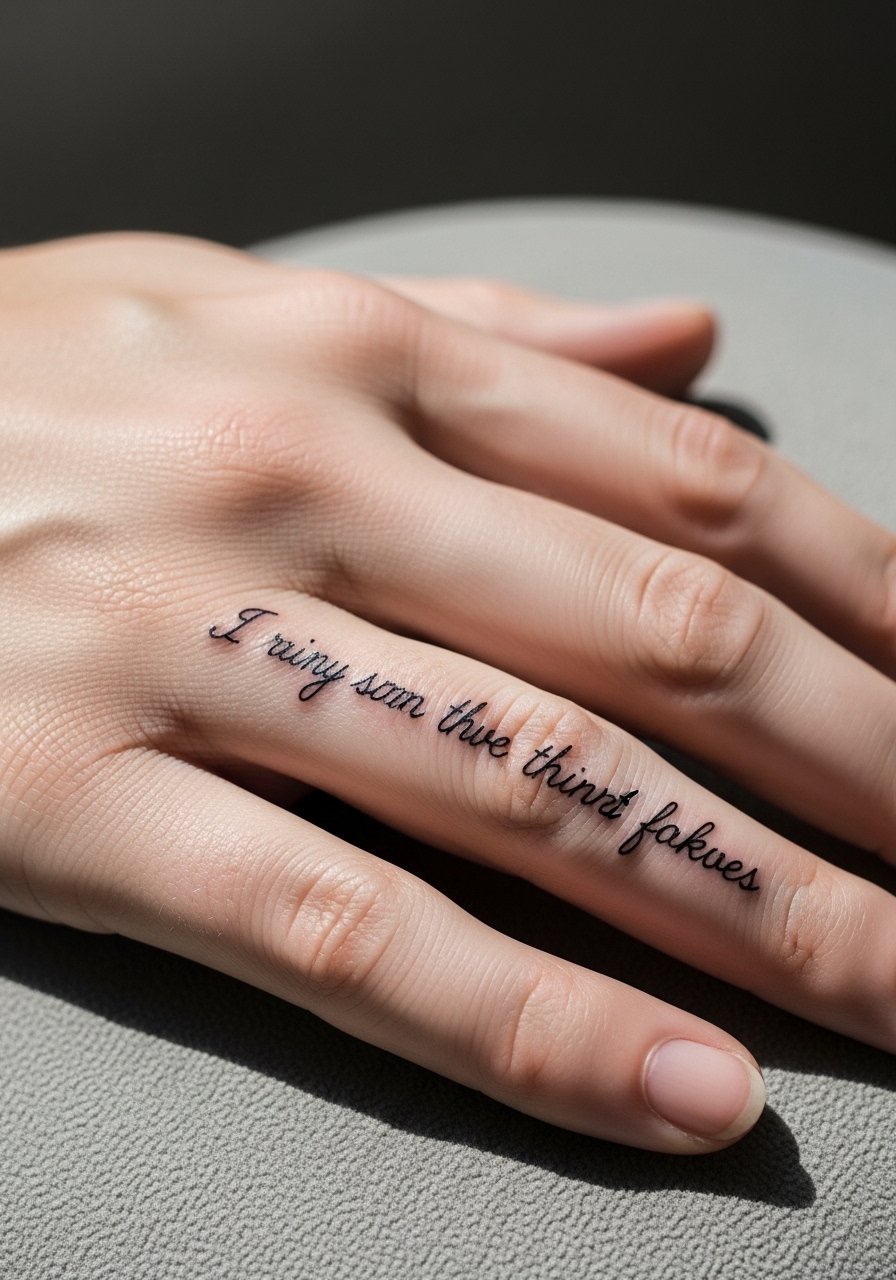
Finger script is intimate and seen up close, but fingers are notorious for fast fading. Expect touch-ups at year one and again at year three. The most common mistake is choosing loose cursive with very thin connections; those lines separate and fragment under constant hand motion. Ask for slightly separated letters with small negative space between each so the text remains legible. Sessions are quick but the healing window is delicate due to constant washing and use. Avoid heavy rings for the first month to reduce friction.
15. Stylized Scorpion Tail Around the Wrist
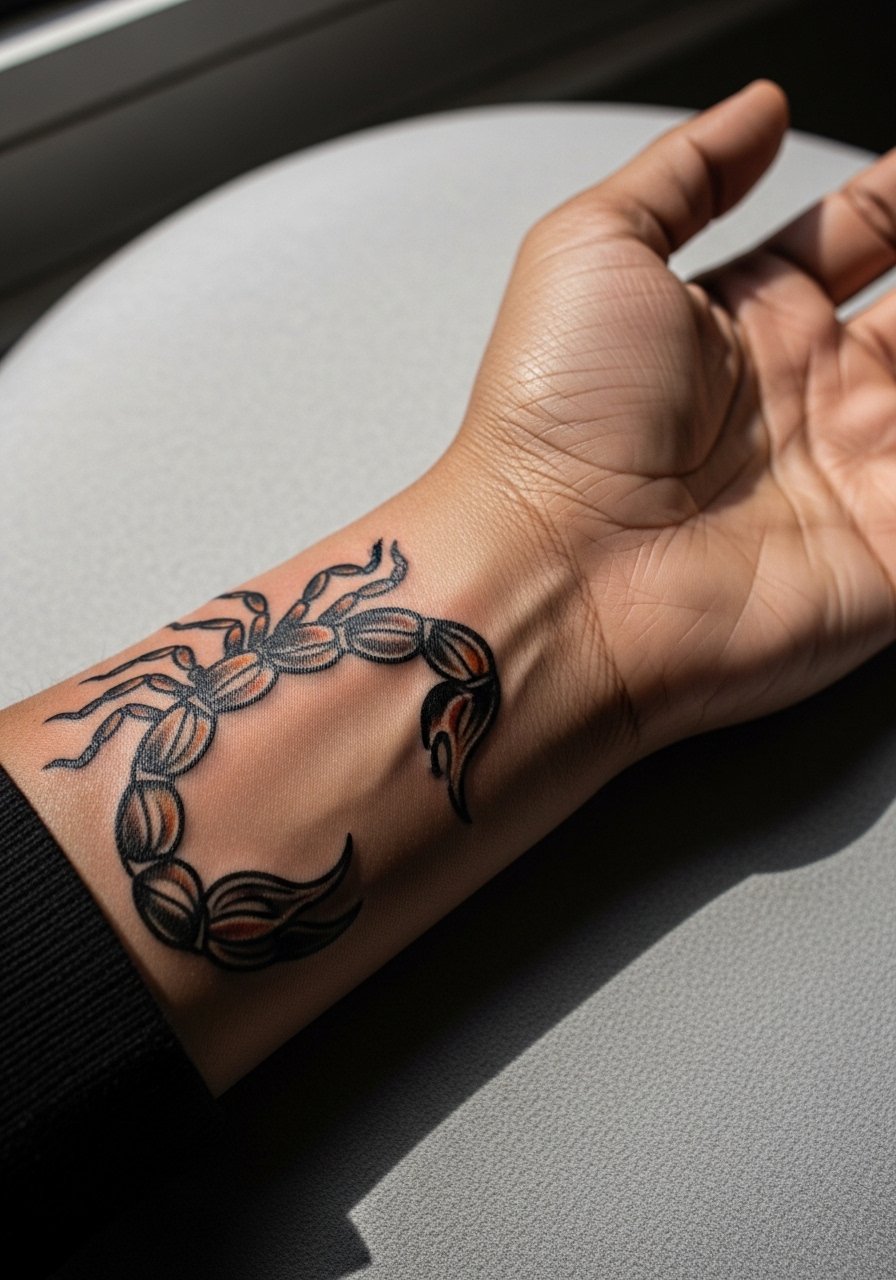
Wrist wraps need clean anchors where the tail meets the bone. The problem with too many color accents here is that they sit close to the cuff and get rubbed by clothing. Ask for bold primary outlines and keep color accents minimal and high-contrast. Sessions are short and comfortable, but healing depends on how much you wear tight bracelets. For styling, a minimal stack works; try a minimalist leather bracelet on the opposite wrist so the tattoo stays visible without crowding the area.
16. Stipple-Shaded Lyric Band Around the Bicep
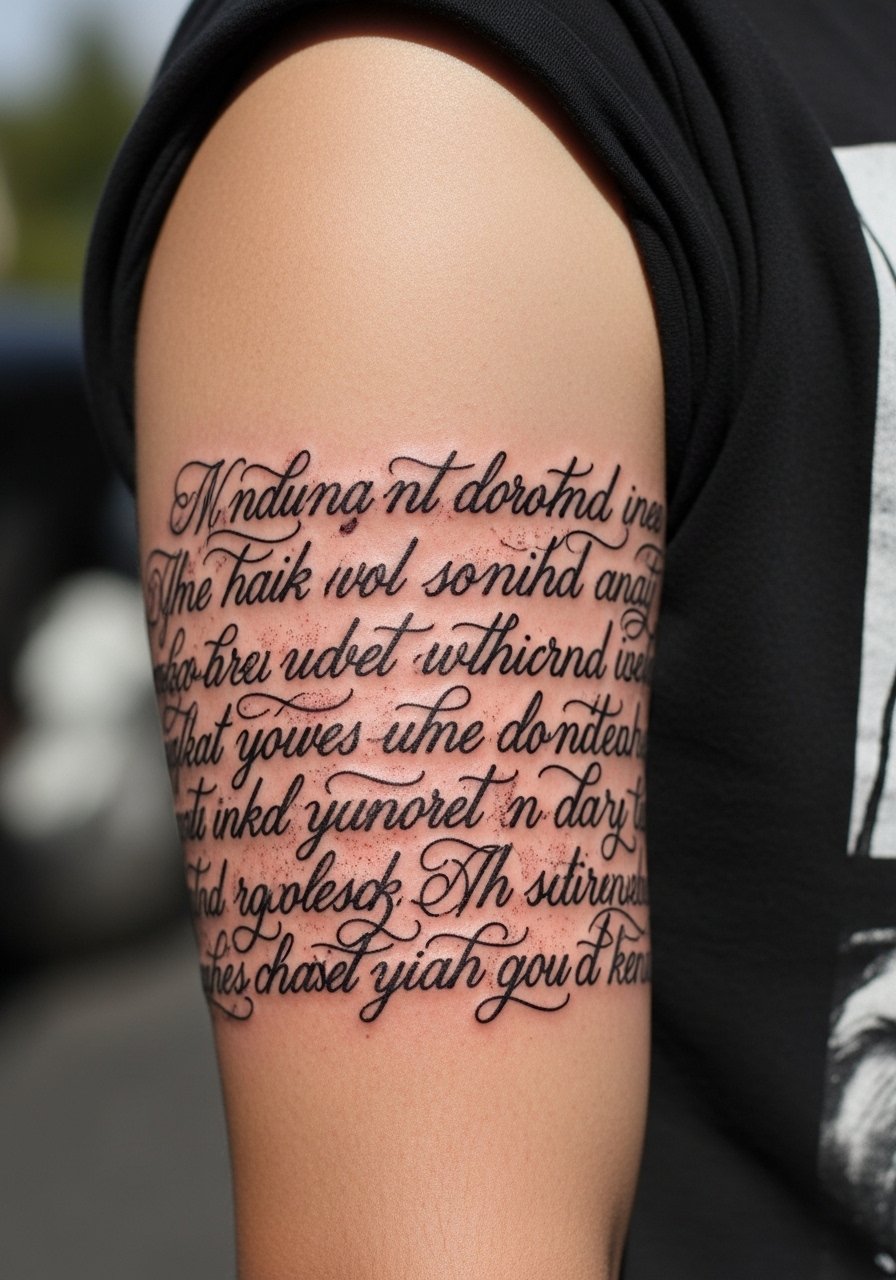
A lyric band encircling the bicep can be a subtle statement and it is forgiving as the arm changes with muscle. Stipple shading gives texture without heavy saturation, but the frequent mistake is squeezing too many words into a narrow band. Plan spacing that keeps each letter breathing and request sample stencils wrapped around the arm to check scale. Sessions are usually under two hours for a medium band. For the session, a short-sleeve tee is perfect and later it pairs well with rolled sleeves to reveal the band periodically.
17. Ornate Compass with LP Grooves on the Upper Thigh
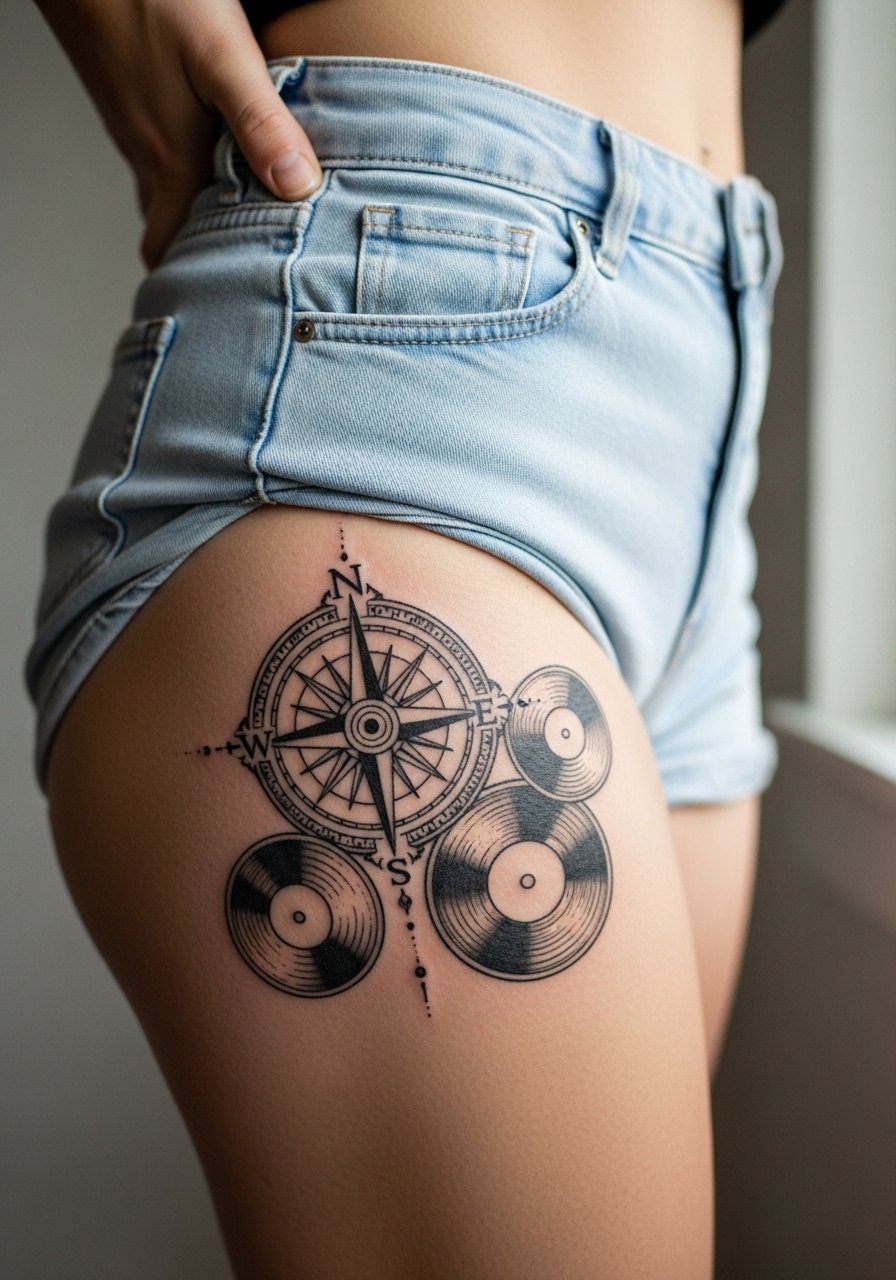
Upper-thigh designs give room for ornate pieces that breathe. The groove detail in an LP ring must keep spacing wide enough to prevent merging over time. A common mistake is trying to compress tiny concentric rings, which blur with skin movement. Ask for negative banding between grooves and consider a single session for linework and a second for any shading. For showing off the ink, high-waisted denim or shorts are a good choice, such as high-waisted denim that reveal the upper-thigh artwork.
18. Minimalist Album Wave on the Side of the Neck
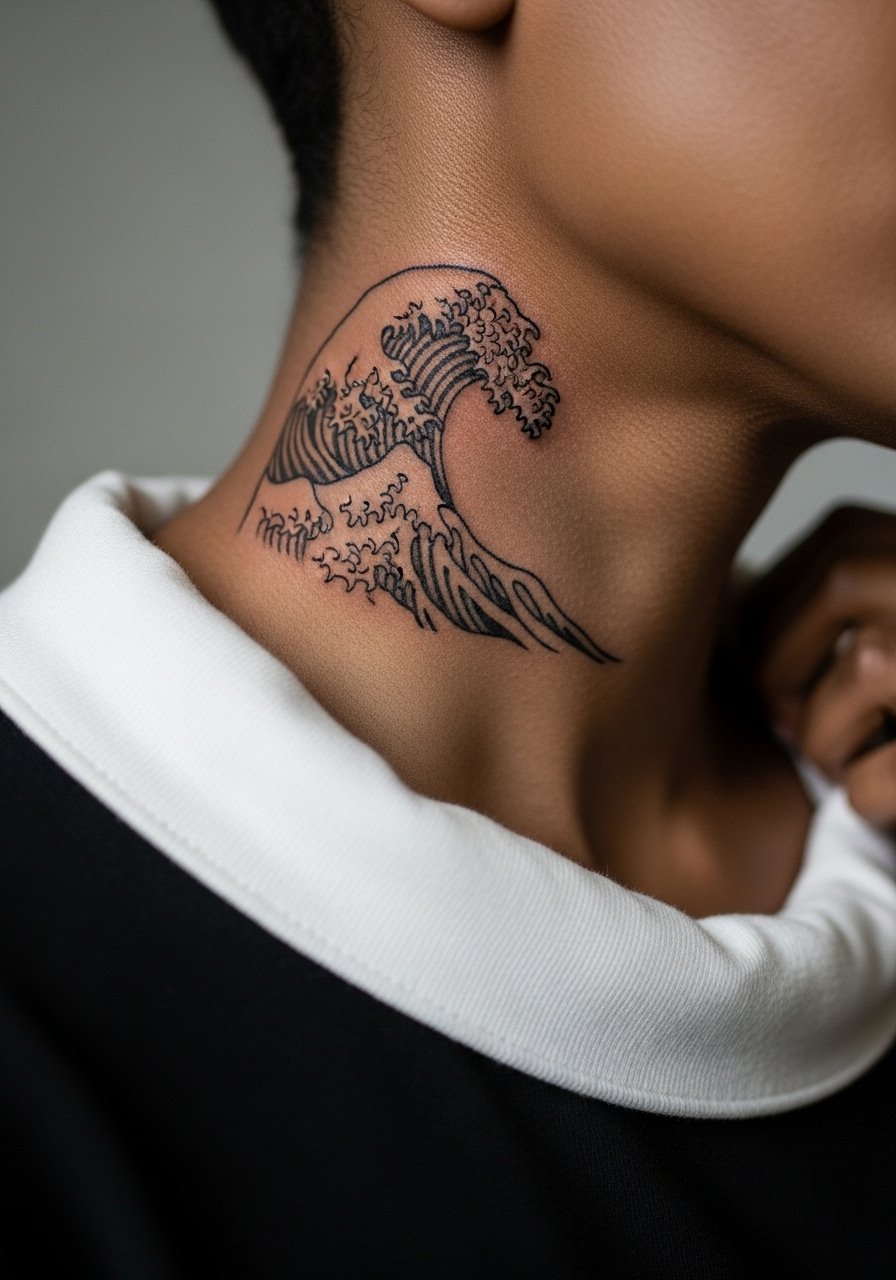
Neck tattoos are visible and can affect professional settings, so think through placement and size. The side-neck wave does well when kept minimal and slightly offset from the jawline. The error people make is asking for dense shading that ages unevenly in this high-motion area. Sessions are brief but the sensitivity is higher than on the arm. When booking, ask how the design will look with hair down and when tucked behind the ear. For showing the piece if appropriate, a wide-neck shirt pulled subtly to one side keeps the presentation tasteful.
19. Micro-Realism Cassette Tape Behind the Ear
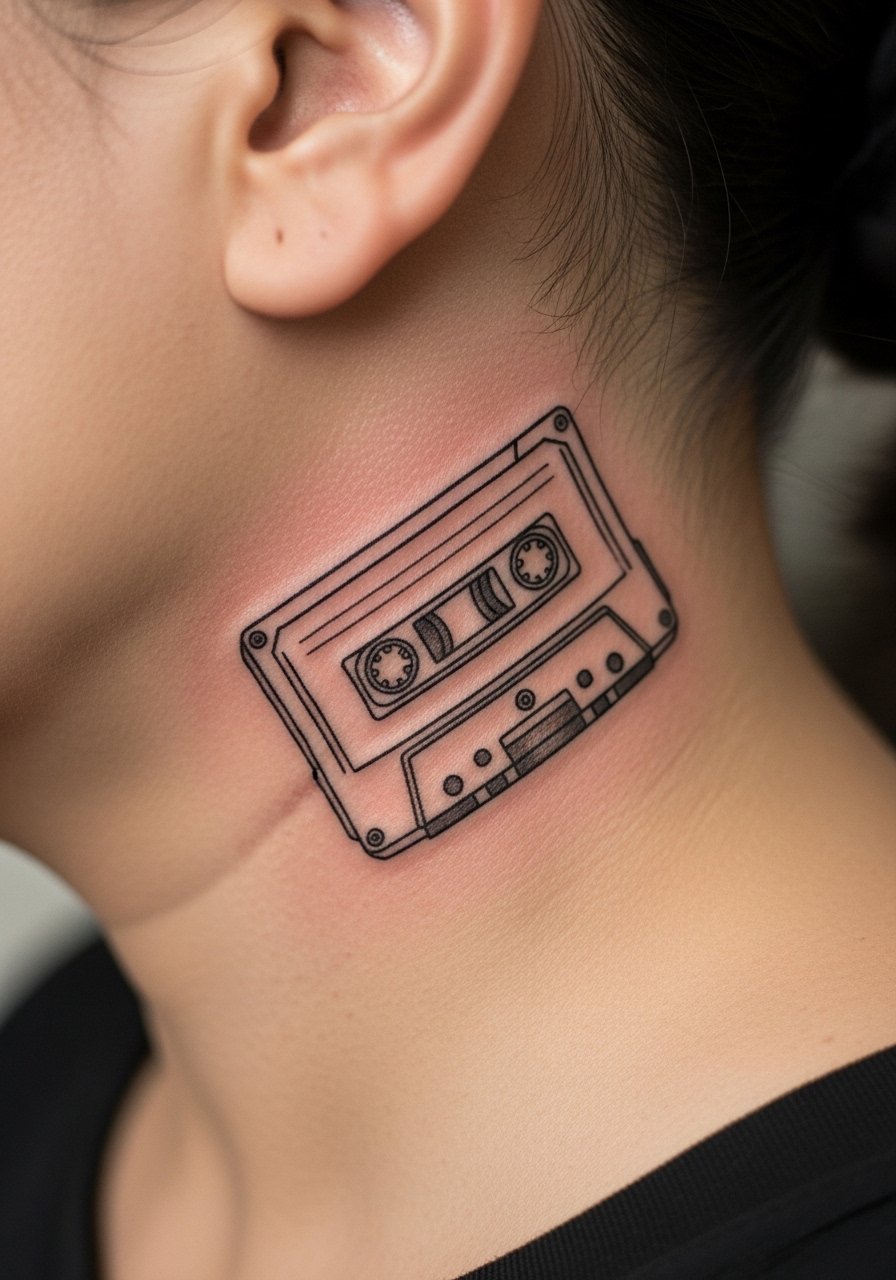
Behind-the-ear pieces are small, discreet, and healing is quick if the area is kept dry. The usual mistake is trying to include too much detail in a tiny silhouette which ends up as a smudge. Tell your artist the exact scale and ask to see a hairline-scale stencil. Sessions are short but the area requires careful aftercare since hair products can irritate healing skin. Keep hair tied back for the first few sleeps and consider subtle placement so the tape reads as a silhouette rather than a portrait.
20. Ornamental Matchstick and Flame on the Hand Edge
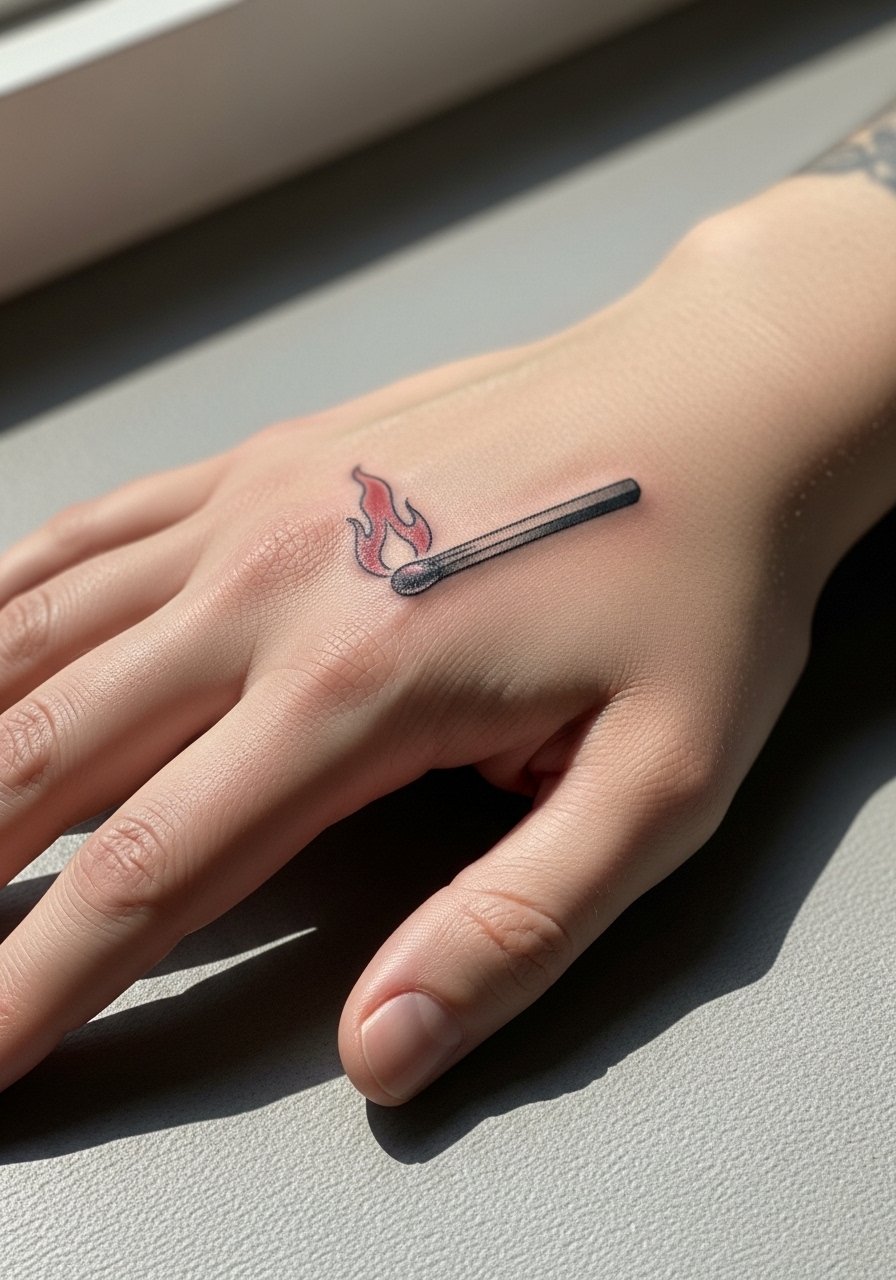
Hand-edge tattoos are high-contact areas and demand bold outlines that resist washing and abrasion. People often choose too much fine detail here and regret early fading. Ask for strong anchors and a plan for touch-up at year one since hands receive the most daily wear. Sessions are uncomfortable but quick. Keep in mind some workplaces still frown on visible hand ink, so weigh that social factor before committing.
21. Ornamental Crescent Moon Sleeve Starter on the Inner Forearm
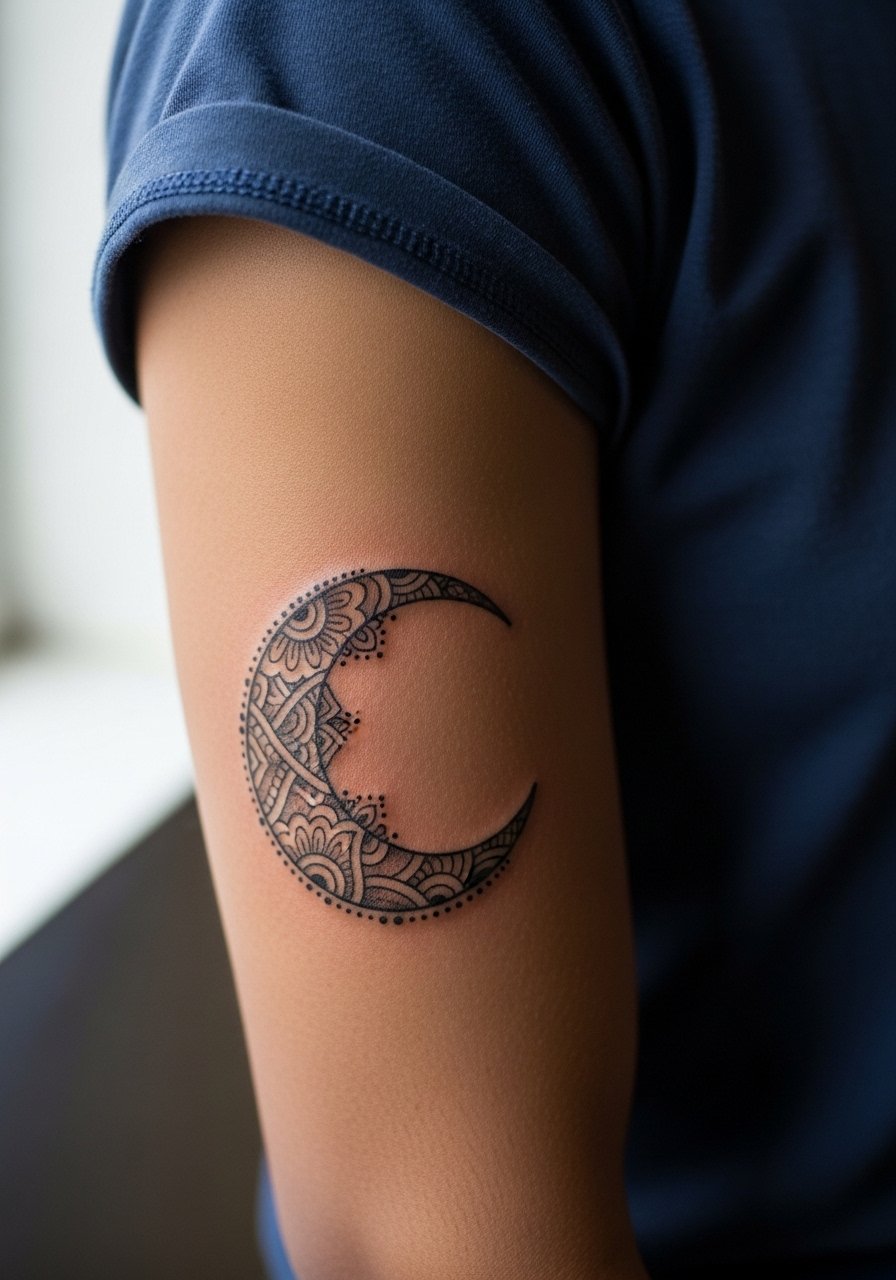
Inner forearm sleeves begin with a single focal motif like this crescent moon. I recommend leaving ample negative space around the moon so adjoining pieces later do not overcrowd it. The common mistake is trying to fit a full sleeve density into the starter piece; that makes future expansion harder. Session time for a medium starter motif is one to two hours. This placement shows well with rolled sleeves and casual shirts, and a chambray shirt works nicely to frame the artwork.
Frequently Asked Questions
Q: Will a fine line AM logo on my wrist blur faster than a thicker blackwork version?
A: It depends on placement, skin type, and how thin the ink is laid. Fine line logos on wrists tend to need touch-ups sooner because of constant washing and sun exposure. If longevity is the priority, ask for slightly bolder anchor lines around the logo so it keeps shape while still reading delicate.
Q: Do watercolor album elements require special aftercare compared with black and gray pieces?
A: The practical difference is that color usually benefits from stricter sun avoidance during healing and sunscreen use later. The initial healing steps are the same, but color pieces often look their best with scheduled touch-ups to restore vibrancy. Avoid excessive scrubbing during showers and cover the area when in direct sunlight.
Q: How should I prep clothing-wise for a ribcage session versus a calf session?
A: For ribs, wear a cropped top or zip-up hoodie you can lift so only the work area is exposed. For calf sessions, loose pants or shorts that can be pulled up easily are ideal. Bringing a spare top that is easy to adjust speeds the artist’s setup and keeps you comfortable.
Q: If I want a lyric placed as a band around my bicep, how do I check the scale before tattooing?
A: Request a printed or transfer stencil wrapped around your arm in the consultation. Seeing the text at full scale in situ helps you judge spacing and readability. Ask the artist to show the stencil in different font weights if you are unsure which will age best.
Q: Are there discovery paths to find artists who specialize in Arctic Monkeys-inspired work without naming anyone?
A: Yes. Search hashtags like #arcticmonkeystattoo and #neotraditionaltattoo on Instagram, filter results on platforms such as Tattoodo, and check recent TikTok clips with location tags. Reddit threads titled "Arctic Monkeys tattoo recs [city]" are also useful for local suggestions.
Q: Do tattoo styles like geometric soundwaves or micro-realism need different touch-up timelines?
A: Generally, micro-realism and fine geometry both demand more frequent touch-ups than bold blackwork because their detail is finer. Expect a possible touch-up at year one for micro-realism and plan for small adjustments to geometry if lines merge over time. Ask your artist for a realistic touch-up window during the consult and book it in advance if you want predictable follow-through.
