
Fine line is trending hard right now, but the tattoos that still look clean after a few years are usually the ones planned for movement and skin tone from the start. People complain about bands that warp when they flex, thin rings that fade out after a season, and black ink that disappears on darker skin. Below are 17 arm band references that work when you measure, space, and ask the right questions before the needle hits.
1. Geometric Line Band on Upper Arm
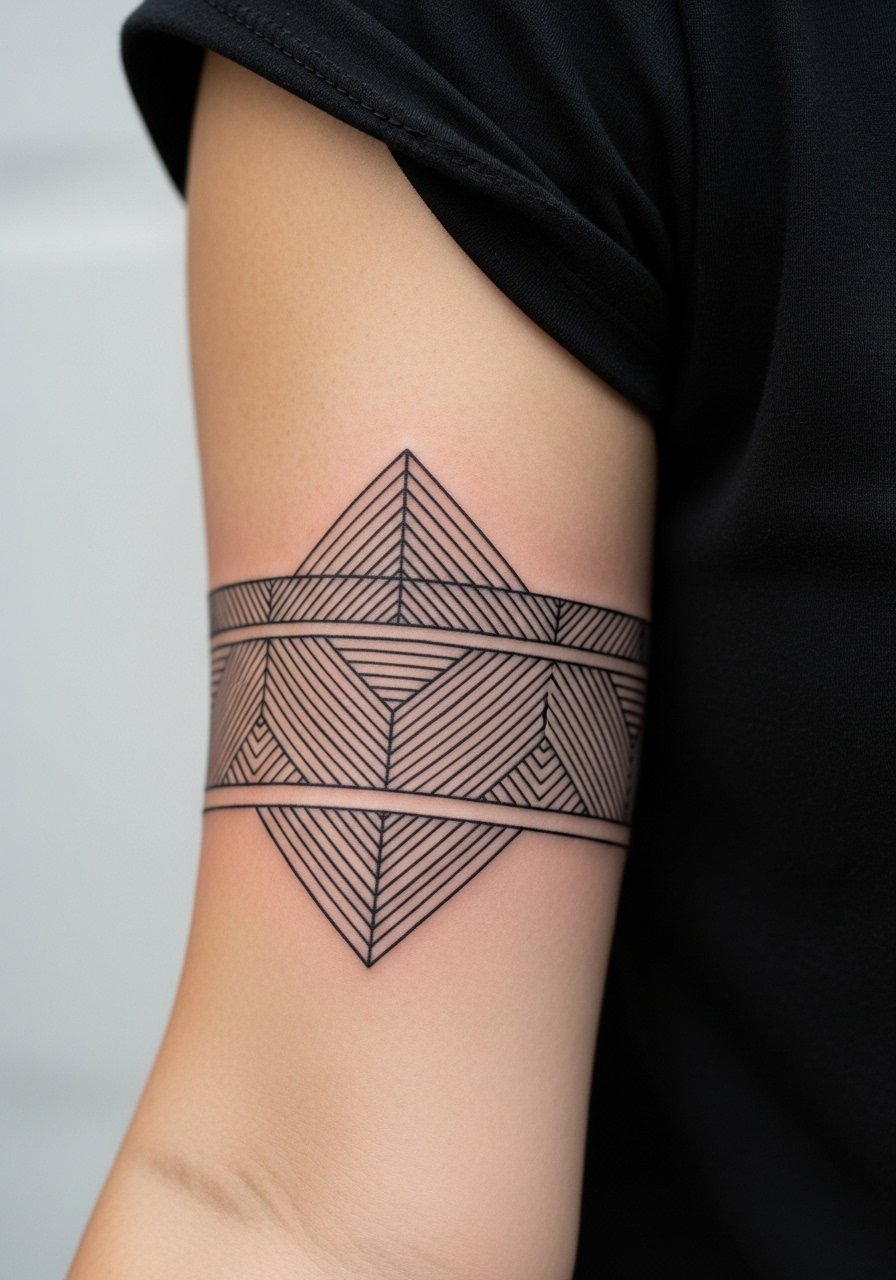
I recommend this when you want a modern wrap that does more with negative space than tiny detail. Measure your bicep at rest and ask the artist for a mock stencil that sits centered on both the inner and outer curve. The biggest mistake is making the pattern too tight; the lines need breathing room to avoid merging after a year. Expect a low to moderate pain level and a single session under two hours for a 2–8 centimeter band. If you plan to show it off, wear a fitted black tank top to frame the wrap, and tell the artist you want slightly heavier lineweight on the inner curve where blowout risk is higher.
2. Tribal Knotwork Band for Forearm Contrast
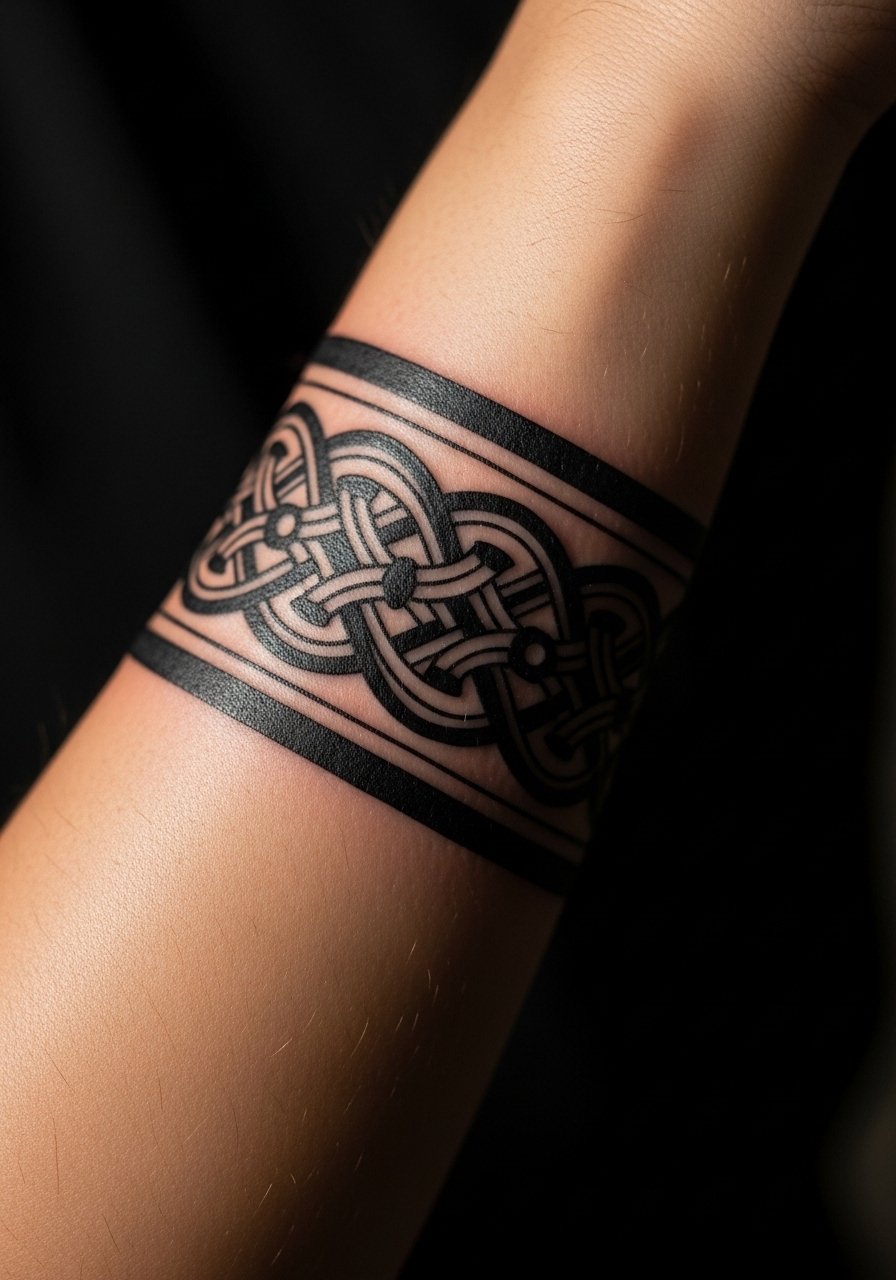
Fair warning, repeating knots on the boney forearm behave differently than on fleshy areas. Ask for slightly thicker bars in the pattern so the motif holds when you roll your sleeve. The common regret is copying a tiny flash pattern and expecting it to read the same after healing. For forearm placements plan one to two short sessions and mention you sleep with your arm uncovered so the artist can advise on early movement. For showing it off, pair the look with a rolled cuff chambray shirt and a woven leather bracelet to balance texture against the solid blackwork.
3. Dots and Dashes Morse Code Band on the Bicep
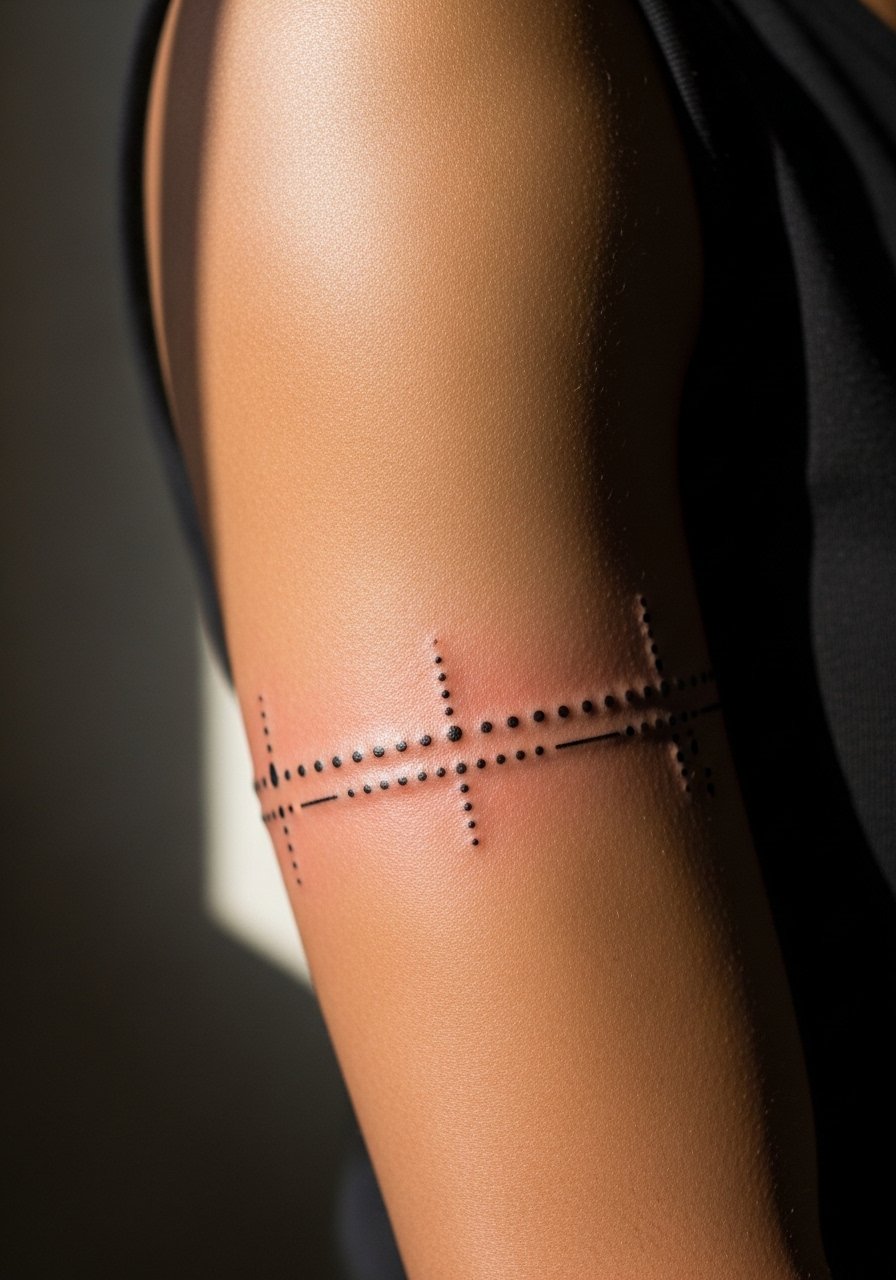
This minimalist dotwork solves the need for a hidden message without screaming for attention. Tell your artist the exact sequence you want so spacing is even around the circumference. The usual mistake is squeezing the code too narrow; when the bicep flexes it can blur the pattern. Expect low pain and a quick single session, but plan a touch-up at 6 to 12 months if any dots fade on the inside curve. For the appointment wear a sleeveless hoodie or tank so the artist has full access to the upper arm.
4. Arrowhead Repeating Band Across Mid-Forearm
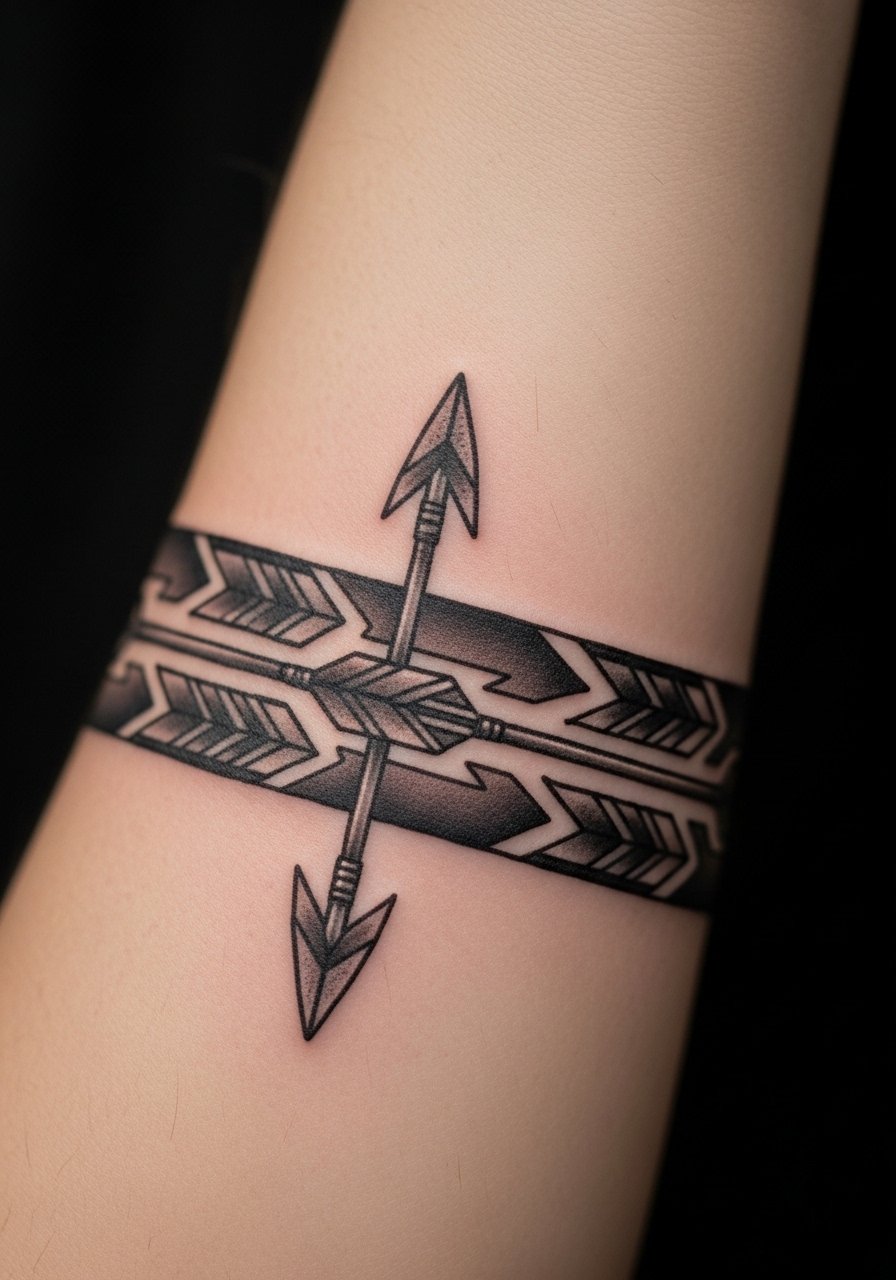
There is a directional energy to arrow motifs that works well on the forearm because the shape follows the limb. The design ages best when the arrowheads are spaced and have small negative-space separators. A common error is insisting on heavy gray fill that softens into blur on the inner bend after two years. Tell your artist you want crisp contrast and lighter gray gradients only on the outer edges. Session time is usually under an hour and pain is modest. Pair this with a rope bracelet if you want a nautical nod.
5. Sacred Geometry Mandala Wrap for Upper Arm

Most mandalas that look jammed on the first day soften into a visual mass if done too small. The aging reality is clear here, bigger spacing and fewer micro details keep the symmetry readable at two and five years. This is a two-session piece for wide wraps and it needs precise stenciling to avoid off-center symmetry. People sometimes try to shrink a full mandala into a 2 centimeter band and regret it. For this kind of ornamental work mention you want the pattern scaled for movement, especially over the outer bicep, and expect a longer session and a possible touch-up after initial settling.
6. Feather Cascade Band From Wrist to Elbow
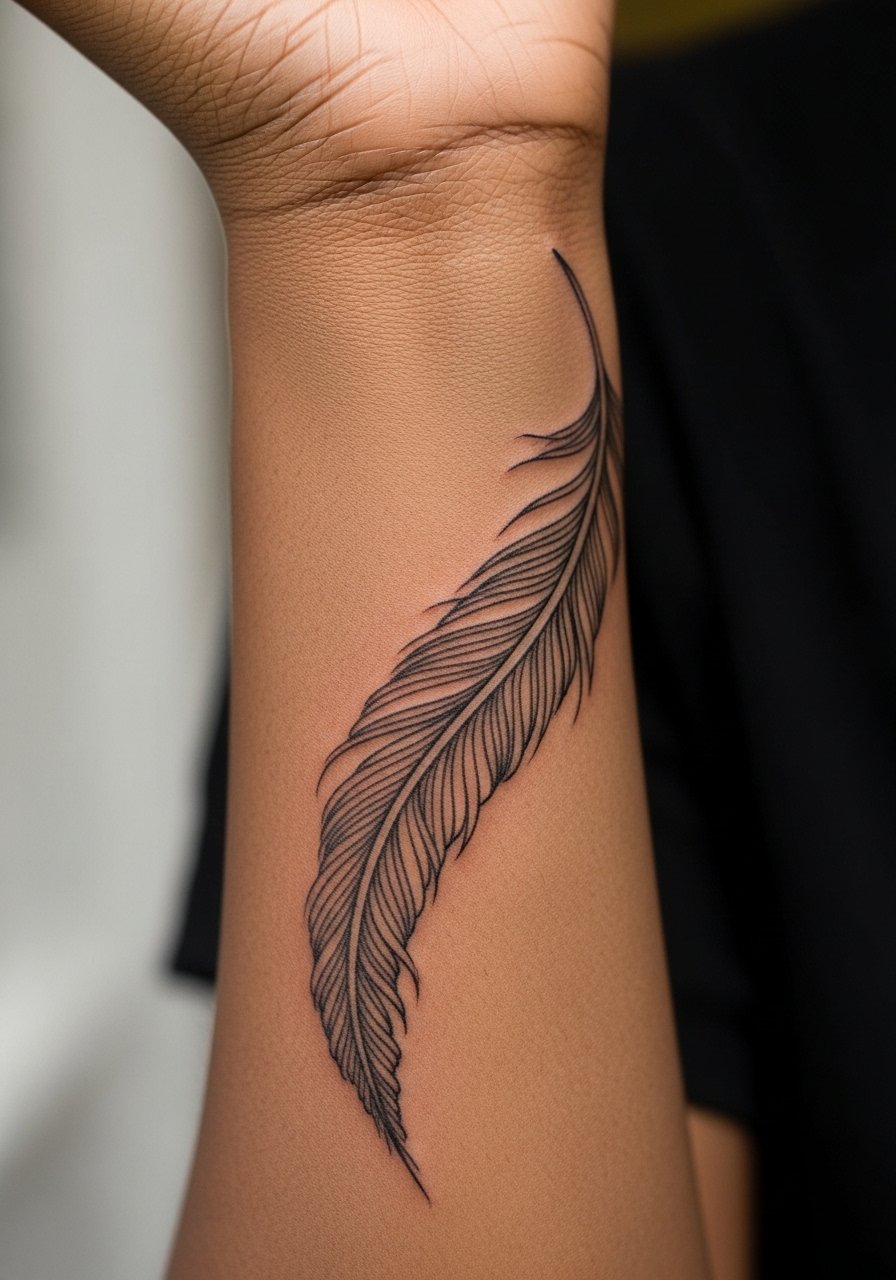
There is a lightness to layered feathers that reads feminine and fluid, but fine line here is fragile. If you want longevity ask for slightly bolder quills where the band crosses joints. A common failure is using ultra-thin lines across the wrist, which can fade or blur quickly with constant washing. Session time is typically under two hours and pain is low to moderate. For showing off, cuff a linen shirt with rolled sleeves so the cascade peeks out without being crowded by jewelry.
Pre-Session Essentials
The narrow bands above include wrist, forearm, and upper arm pieces that face different friction and curve issues, so a few targeted items smooth the session and early healing.
-
Fragrance-free CeraVe healing ointment. A gentle, low-irritant option for the first few days that users report avoids the greasy feel some balms bring to tight band curves.
-
Australian tea tree balm for tattoos. Lightweight and breathable, useful if your band crosses a high-friction zone and you want a breathable salve alternative.
-
Tattoo salve with zinc. Thinner formulations with zinc can help dry winter skin without smothering fine-line work, especially on upper arm wraps.
-
Rice bran aftercare balm. A plant-based option some people prefer for sensitive skin when the band crosses thinner tissue.
-
Saniderm tattoo bandage roll. For those who prefer a film dressing versus dry healing, this makes early movement easier on wrist and forearm bands during the first five days.
7. Celtic Braid Band Around the Bicep

When ancestry and continuous form matter, Celtic braid is a durable pick if proportioned correctly. The mistake people make is asking for ultra-fine interlocks on a narrow band; the weave needs scale so the knots do not merge on curves. Tell the artist you want clear knot crossings and ask to preview how the braid sits when your arm is flexed. Expect moderate pain and one to two sessions depending on width. For showing it off, slim fit tees with arm slits or a compression arm sleeve on the opposite arm keep the silhouette balanced.
8. Wave Ocean Band for Mid-Forearm Movement
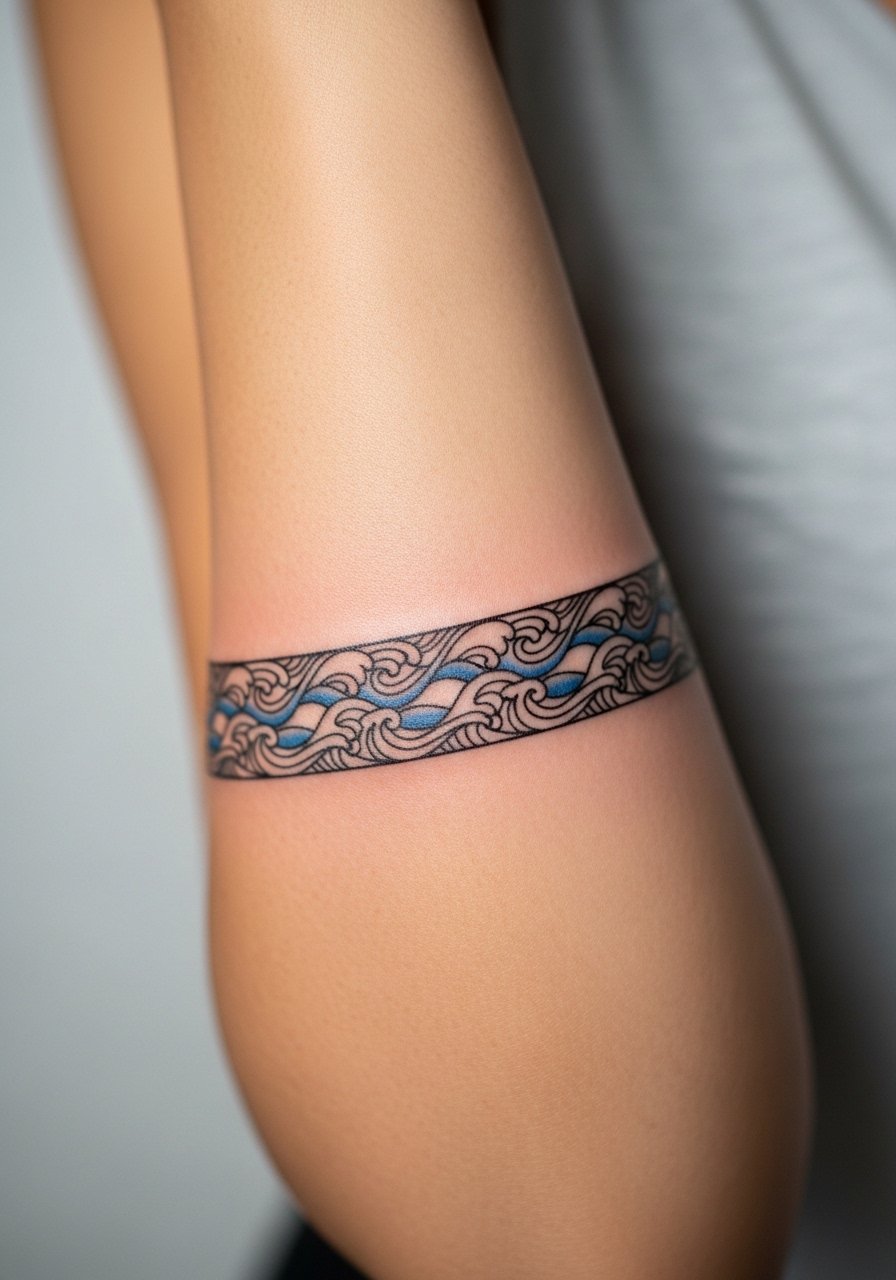
Wave bands are forgiving when spaced so the rhythm reads even while you twist your wrist. The go-to error is making the undulations too tight, which makes the inner arcs blend as the skin moves. Ask the artist for slightly thicker crests on the inside curve and a single session touch-up plan. This design is ideal for surfers or water lovers because it masks small shifts from changes in muscle. Pair with rolled sleeves on a sleeveless chambray vest to emphasize the nautical vibe.
9. Skull and Chain Band for Upper Arm Edge
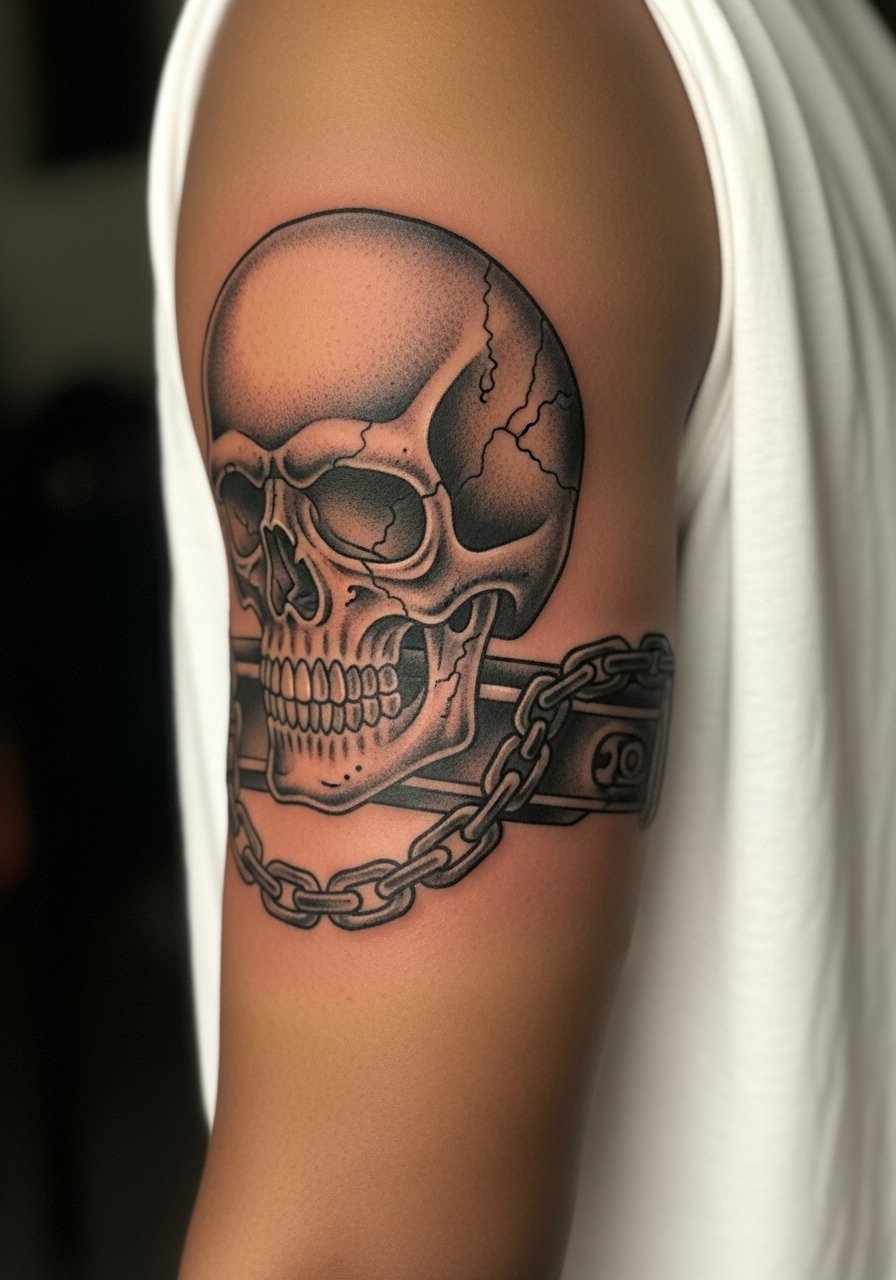
This is a bold collector choice that requires scale to avoid muddy shading on curved anatomy. Expect multiple sessions and plan for heavier gray saturation to keep the skull and link detail from softening. One controversy around heavy shading is how it sits on elastic areas; name both camps in the consultation. One group favors dense saturation to age into a classic black-and-gray look. The other warns that very dark fills can read flat on certain skin tones. Ask your artist how they handle layered shading and schedule a follow-up for contrast touch-ups.
10. Minimalist Solid Band at the Wrist
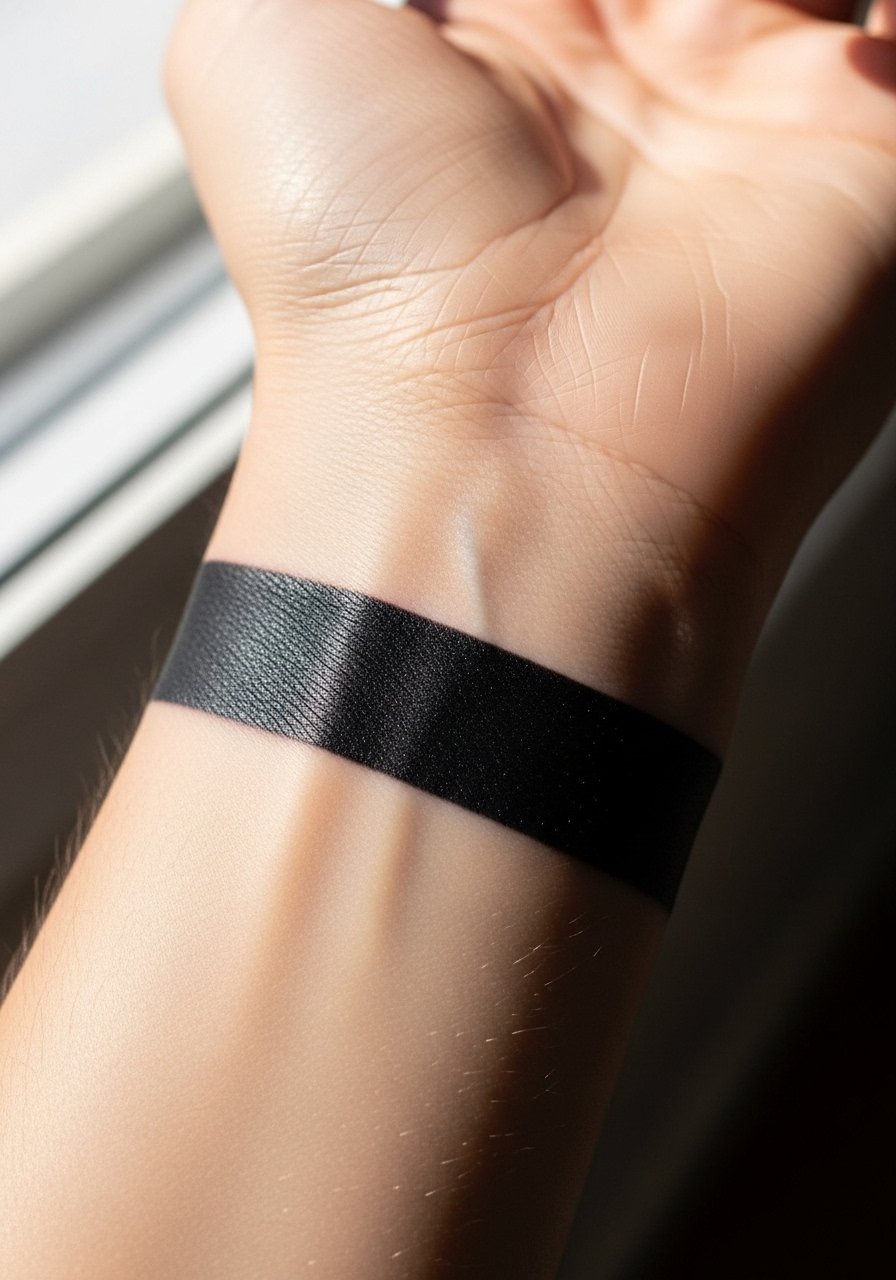
A single thick line at the wrist is deceptively simple. The common mistake is placing it too close to the bone where constant hand movement and washing dulls edges. Tell the artist you want the band centered on the soft tissue and discuss lineweight so the black stays crisp after six months. This is a short, low-pain session that often finishes in under 30 minutes. For daily wear choose a cuffed linen shirt or a thin silver chain bracelet on the opposite wrist to keep the band from feeling visually heavy.
11. Floral Vine Band on the Inner Forearm
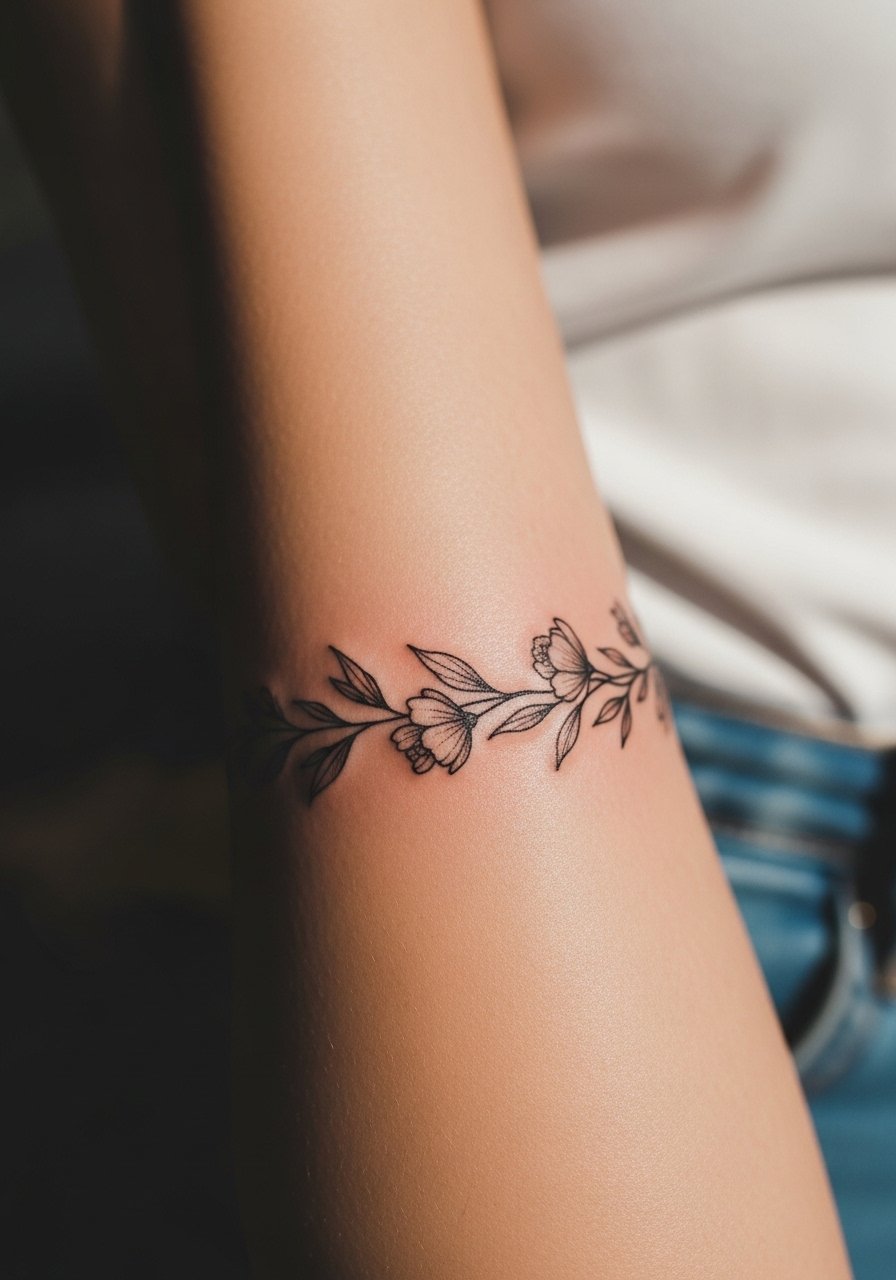
Floral vines look great when they follow the arm's natural line, but fine line here ages faster if the petals are too small. Ask for slightly larger petal spacing and modest color accents rather than dense color fills. A common aging pattern is faded inner-curve detail by year two, so plan a touch-up window at 6 to 12 months. Pain is low and the session feels mild compared with bony placements. Show this off with cuffed short sleeves and a loose short sleeve blouse that frames the vine.
12. Knotwork Infinity Band That Wraps the Elbow
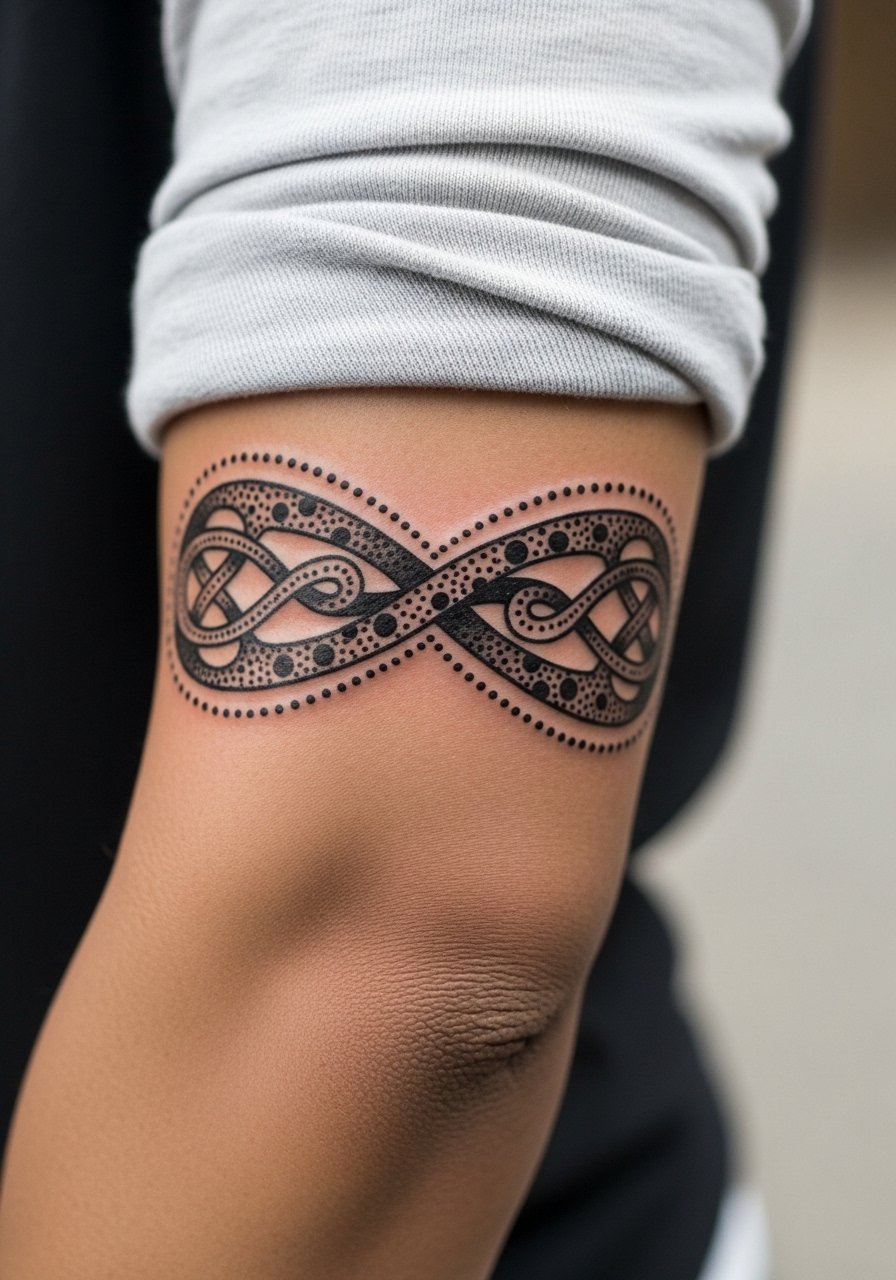
Elbow wraps are a tricky canvas because the skin folds and stretches. Artists split into two camps on fine detail here. One camp says dense knotwork blurs quickly because of constant bending. The other camp argues that with proper spacing and stitch depth, a knotwork band can last. When you book, ask where the artist stands and request a mock with extra negative space over the crease. Expect a bit more discomfort when needles cross the joint and plan for a solid touch-up after the first healing cycle. For shows or shoots, an olive 3/4 sleeve henley looks right with the wrap.
13. Negative Space Contrast Band for Darker Skin

Dark skin can make solid black bands read as flat, so use negative space as a contrast tool instead of relying solely on saturation. The mistake is stacking black layers without deliberate gaps; you end up with a blob rather than a pattern. Ask for clean cutouts and test a small mock patch on a less visible area if you are concerned. This approach often needs less touch-up because it leans on the skin as part of the design rather than covering it. For showing it off, rolled cuffs and textured bracelets emphasize the cutouts nicely.
14. Modular Patchwork Band as a Sleeve Starter
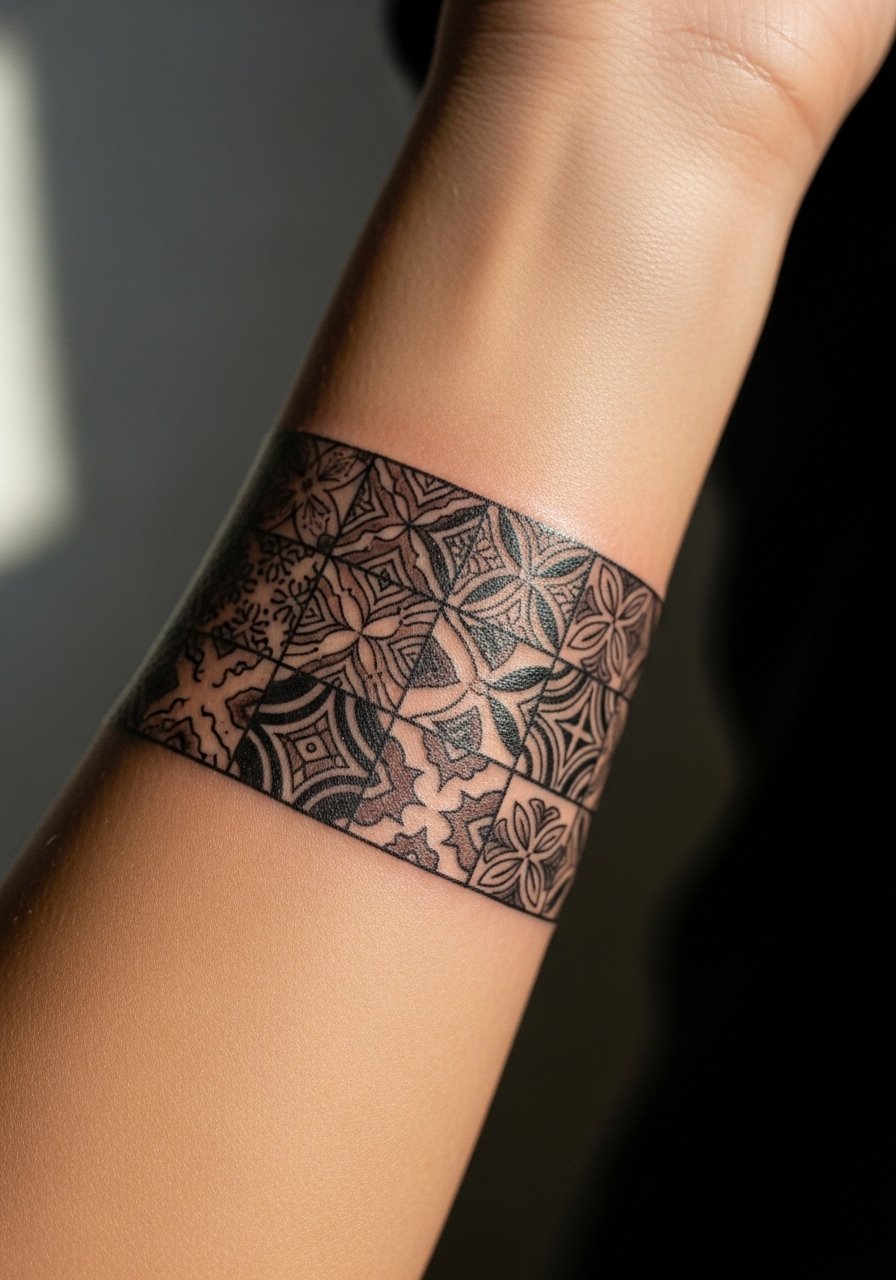
If you want to grow into a sleeve, a modular band works as a repeatable anchor. The design that ages best gives each module room and a consistent rhythm so new pieces slot in later. A common misstep is trying to combine three different styles into one narrow band without a unifying scale. At the consultation ask how future modules will connect and request a neutral anchor line to tie sections together. Session time varies, but modular pieces are friendly for walk-ins and guest spots. For the day, wear a loose tank so the artist can roll the sleeve up easily.
15. White Ink Accent on a Black Band
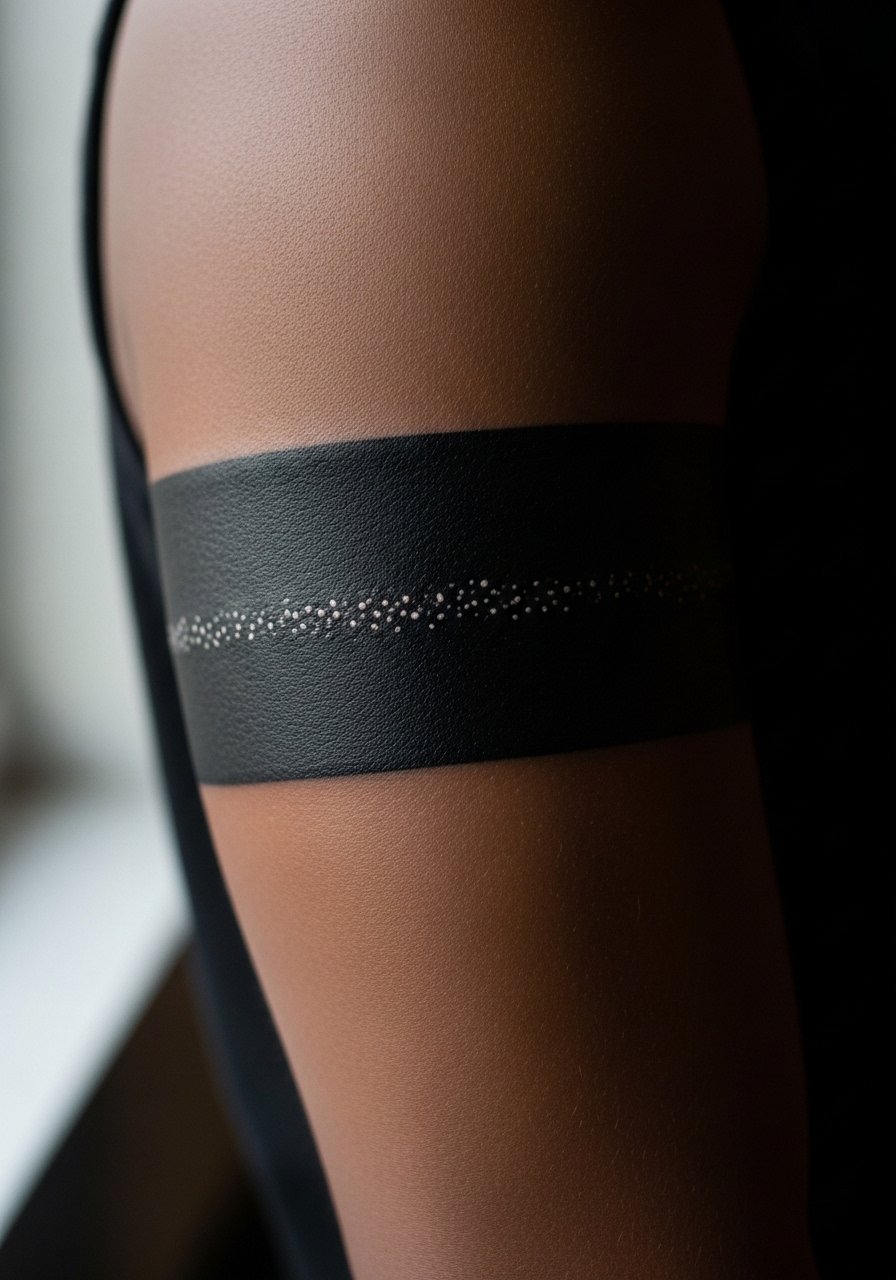
White ink can add pop or a faux-UV effect on black bands when used sparingly. It is rare and needs testing because white behaves differently across skin tones. The danger is trusting a single white pass to stay visible; plan for at least one touch-up and be ready to accept subtlety rather than high contrast. Request a tiny patch test if you are on darker skin and expect the artist to advise on longevity. This style often takes two short sessions and reads best with a clean, saturated black base.
16. Barbed Wire Neo-Traditional Band for Edge

Barbed wire bands are a classic edge look but they suffer when the barb spacing is too tight. Tell the artist to keep each barb distinct with small negative spaces between loops so the silhouette holds while you flex. Many people do this too thin and find the shapes soften over time. Pain is low on the forearm and sessions are quick. Pair this with a rolled sleeve or a simple sleeveless chambray vest for a lived-in contrast.
17. Stackable Micro Bands for the Wrist
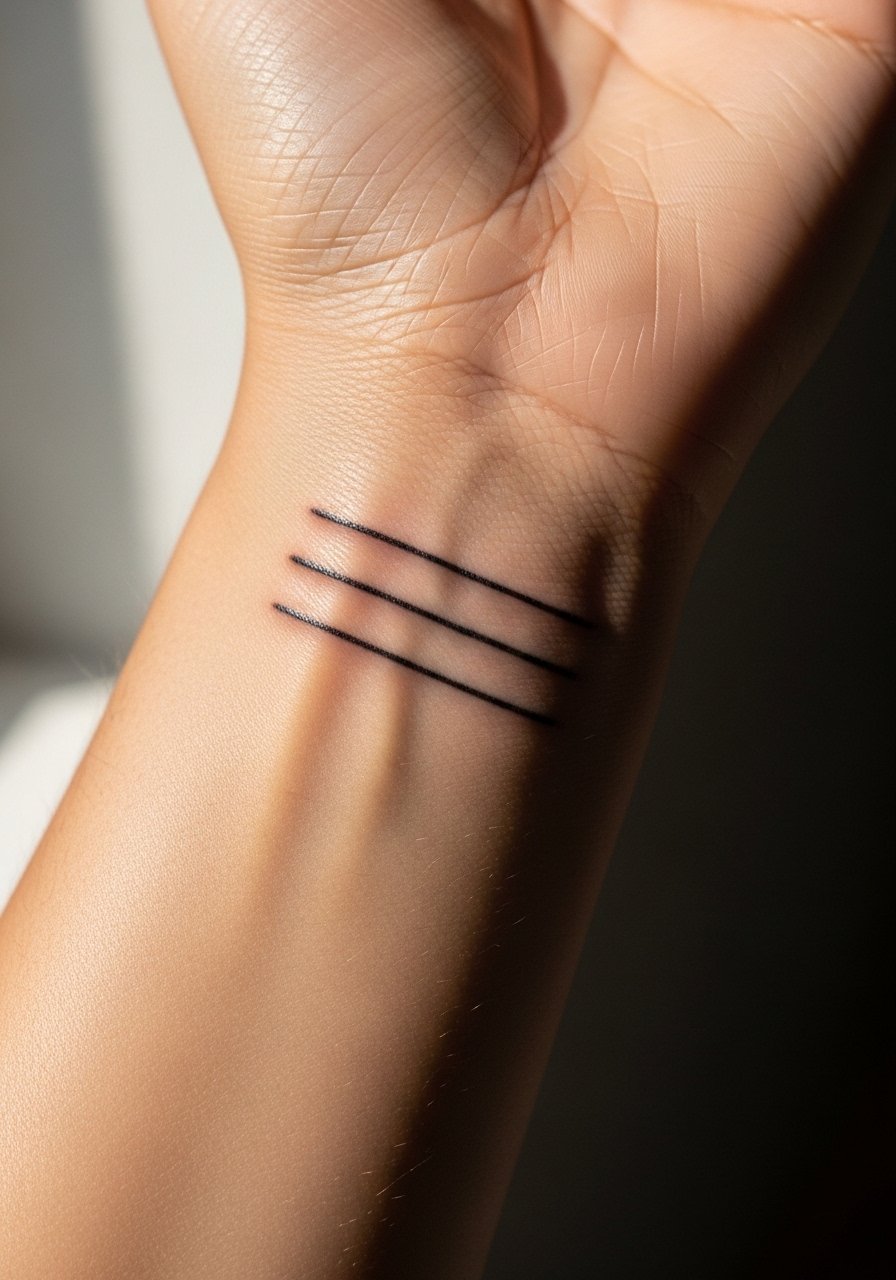
Tiny stackables look clean when spaced intentionally rather than cramped. The common error is ordering three micro lines too close to the bone, which leads to rapid fade and visual merging. Ask for measured spacing and slightly heavier lineweight than you think you need. These are quick, low-pain sessions and you can build over time as wear shows. For everyday styling, a thin silver chain or layered bracelets can complement without overwhelming the micro bands.
Frequently Asked Questions
Q: Why do some arm bands warp when I flex and others stay crisp?
A: Bands distort when the design sits across areas that change shape a lot, like the bicep during flexing. Designs with more negative space and slightly heavier lineweight on inner curves tend to tolerate movement. Measure your arm at rest and ask the artist to mock the band while your arm is both relaxed and flexed so you can see where adjustments are needed.
Q: I heard fine line fades faster. Which band styles need touch-ups sooner?
A: Fine line work and tiny dotwork are more likely to need touch-ups within a year or two, especially on wrists and inner curves. Thicker blackwork and geometric bands generally hold longer. There is a split in opinion among artists about how fine is too fine, so name that debate during your consult and get a clear touch-up plan.
Q: Does darker skin require different band approaches?
A: Yes, darker skin often benefits from negative space and contrast instead of relying on subtle gray washes. Some people use white ink accents as highlights, but that needs a patch test and realistic expectations. Ask an artist experienced with a range of skin tones or look through hashtags focused on bands in your city to find examples that match your skin.
Q: How should I dress for a session based on placement?
A: Wear session-friendly clothing that gives the artist clear access. For upper arm bands a fitted black tank top or sleeveless hoodie is ideal. For forearm pieces a short sleeve button-up you can roll works, and wrist work calls for a loose short sleeve so the artist can work without tugging at fabric.
Q: Saniderm versus dry healing, which camp should I join?
A: Both camps are vocal. One group favors film dressings like Saniderm for protecting band edges during the first few days. The other prefers open air after initial cleaning, arguing film can trap moisture. The safest route is to ask how the artist manages dressings for tight bands and follow their protocol, then reassess at the first check-in if a different approach feels better.
