
Fine line tattoos are everywhere on feeds right now, and the reality is they do not all age the same. I've seen delicate triceps pieces look sharp for a year then blur, and I've watched tribal armbands survive gym gains when they were placed and spaced correctly. Artist reliability and aftercare matter as much as the design. Read the next section for a set of back-of-arm ideas that balance trends with how they actually heal.
1. Tribal Armband Wrapped Around the Back Upper Arm
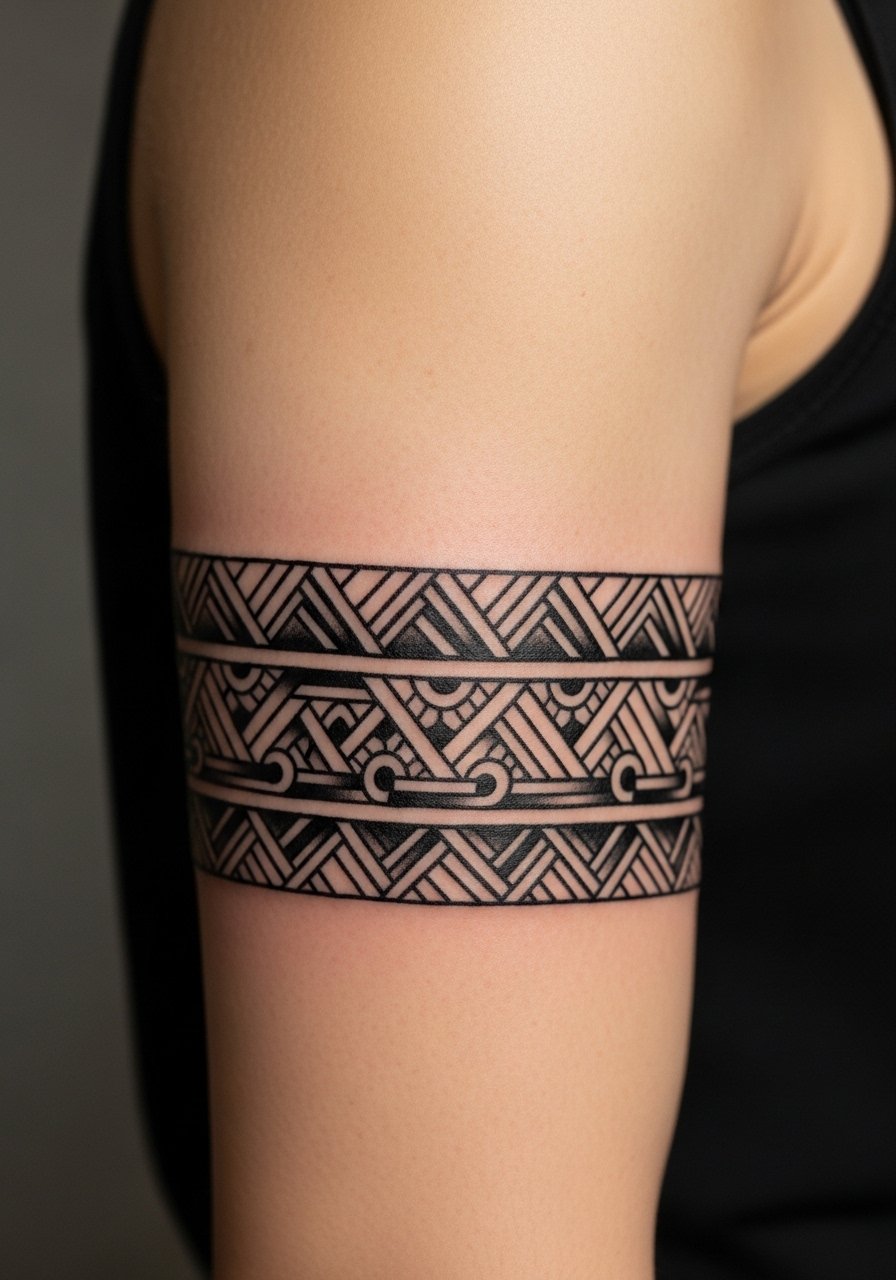
Start this one with clear ideas about wrap and negative space. Tell your artist you want the pattern to follow muscle contours and avoid tight repeats over the triceps peak. Pain is moderate and a session is usually 60 to 120 minutes. The biggest mistake is making the band too thin, which causes stretch distortion when you bulk up. It holds well with solid black saturation and bold linework, and expect a touch-up around year two if you lift heavy. Show it off with a fitted black tank that frames the wrap.
2. Jellyfish with Flowing Tentacles on the Triceps
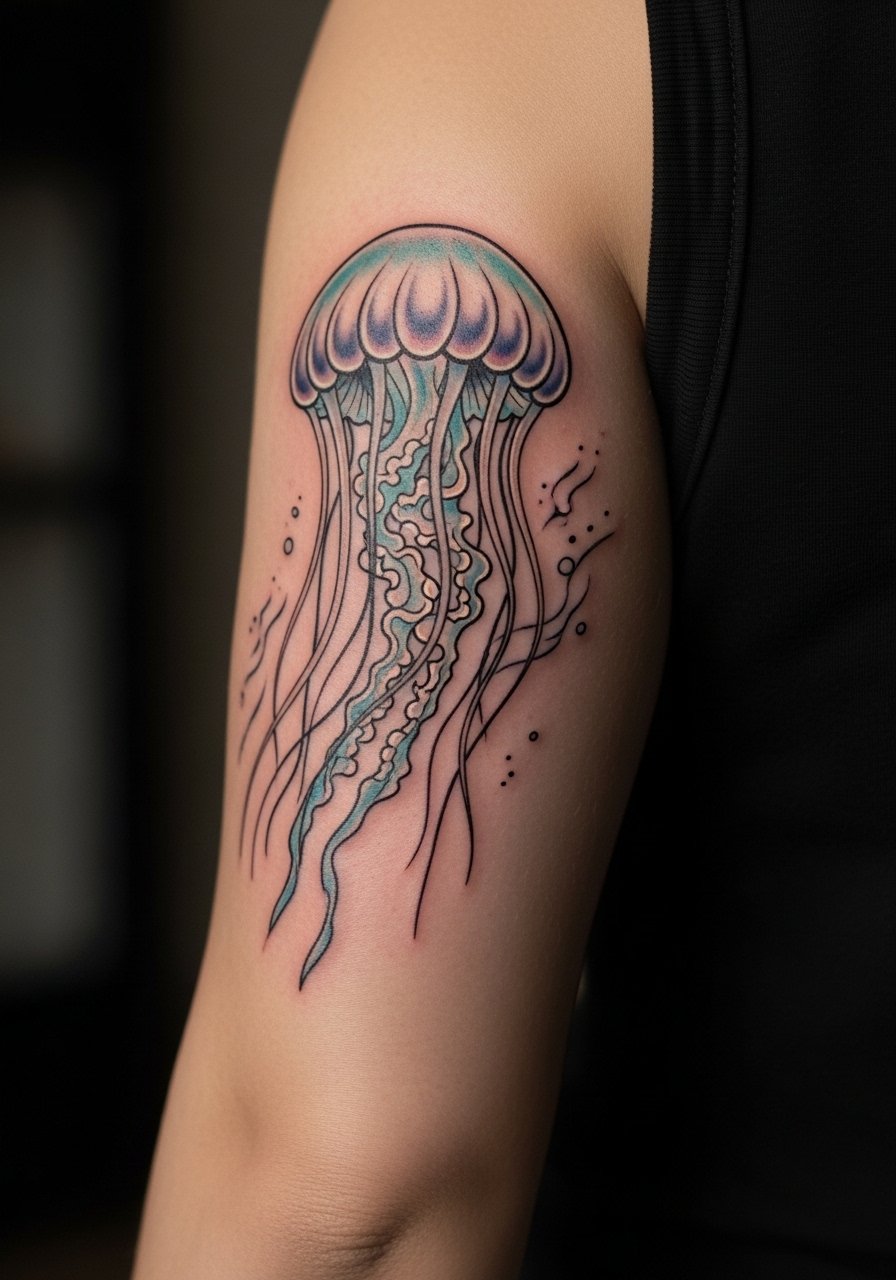
This design uses translucency and movement to follow the curve of the back upper arm. Tell your artist to map tentacles along the muscle so the flow reads while you move. Sessions run two to three hours and can sting more when reaching back. Color with black shading tends to hide minor healing loss better than pale watercolor. A common error is packing too many tiny details that blur after a year. Plan for a touch-up at year two. For casual show-off, a white sleeveless muscle tee keeps the movement visible.
3. Vertical Cross on the Back Upper Arm
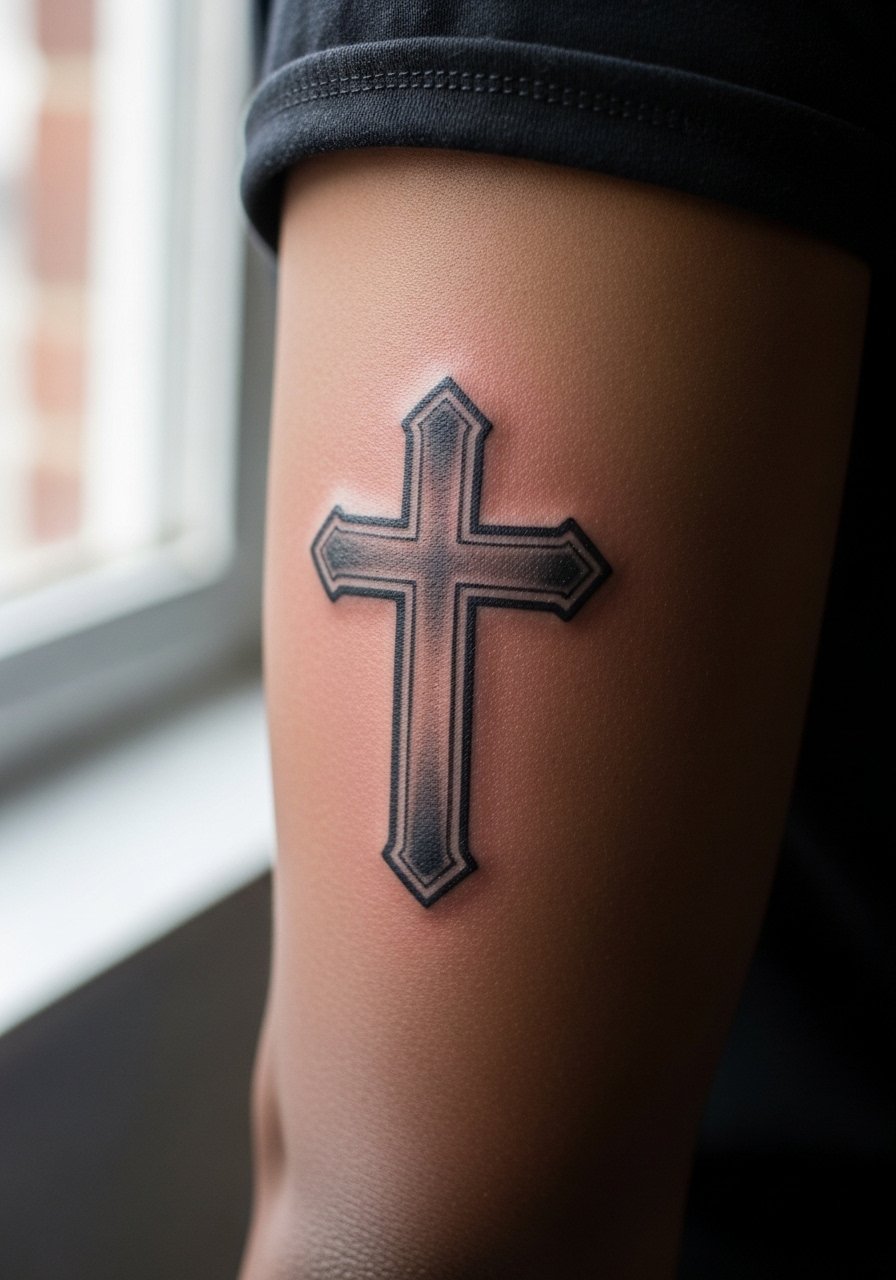
This simple blackwork piece reads solemn and vertical on the rear bicep. During consultation, specify scale and how much gap you want between cross and surrounding skin. Pain is low to moderate and most artists finish it in a single session. The debate on sacred symbols is real. One camp favors literal iconography, and the other suggests stylized versions to avoid direct religious appropriation. Say where you fall. Fine line crosses on friction zones risk early softening, so ask for slightly thicker linework. Pair with a slim fit polo when you want subtle visibility.
4. Mechanical Gears Mural Blending with Muscle Contours
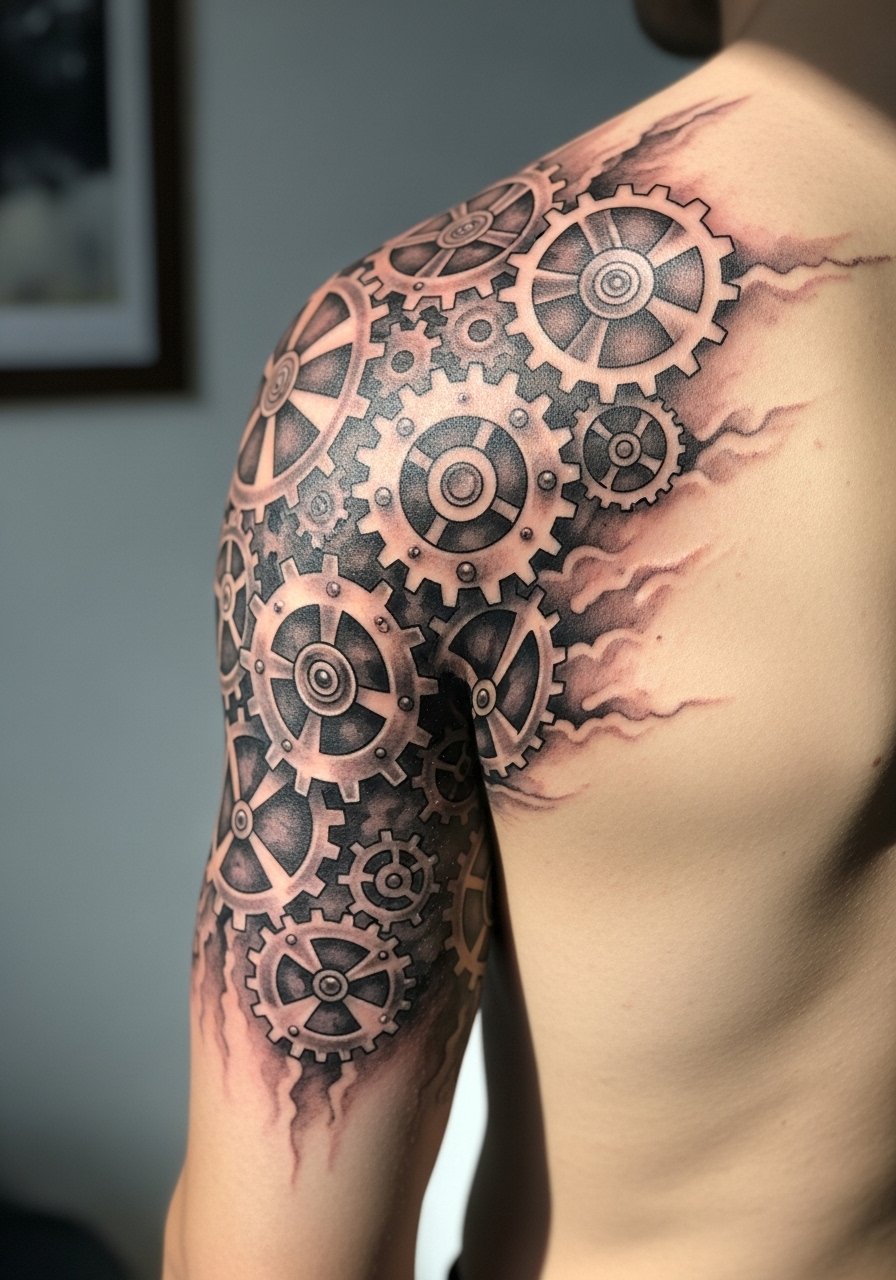
This steampunk-style mural looks best when the artist sketches gears to match muscle lines. Say you want negative space where the elbow crease will be if planning a half-sleeve later. Sessions can be long, expect multiple sittings for layer work. A common mistake is using uniform gear sizes which flattens the effect. Proper stipple shading and shadow placement create the illusion of depth that moves with your arm. Pain ranges from moderate to high near the triceps insertion. For session comfort, wear a loose short sleeve shirt you can pull aside.
5. Vintage Rose on the Back Forearm That Ages Clean
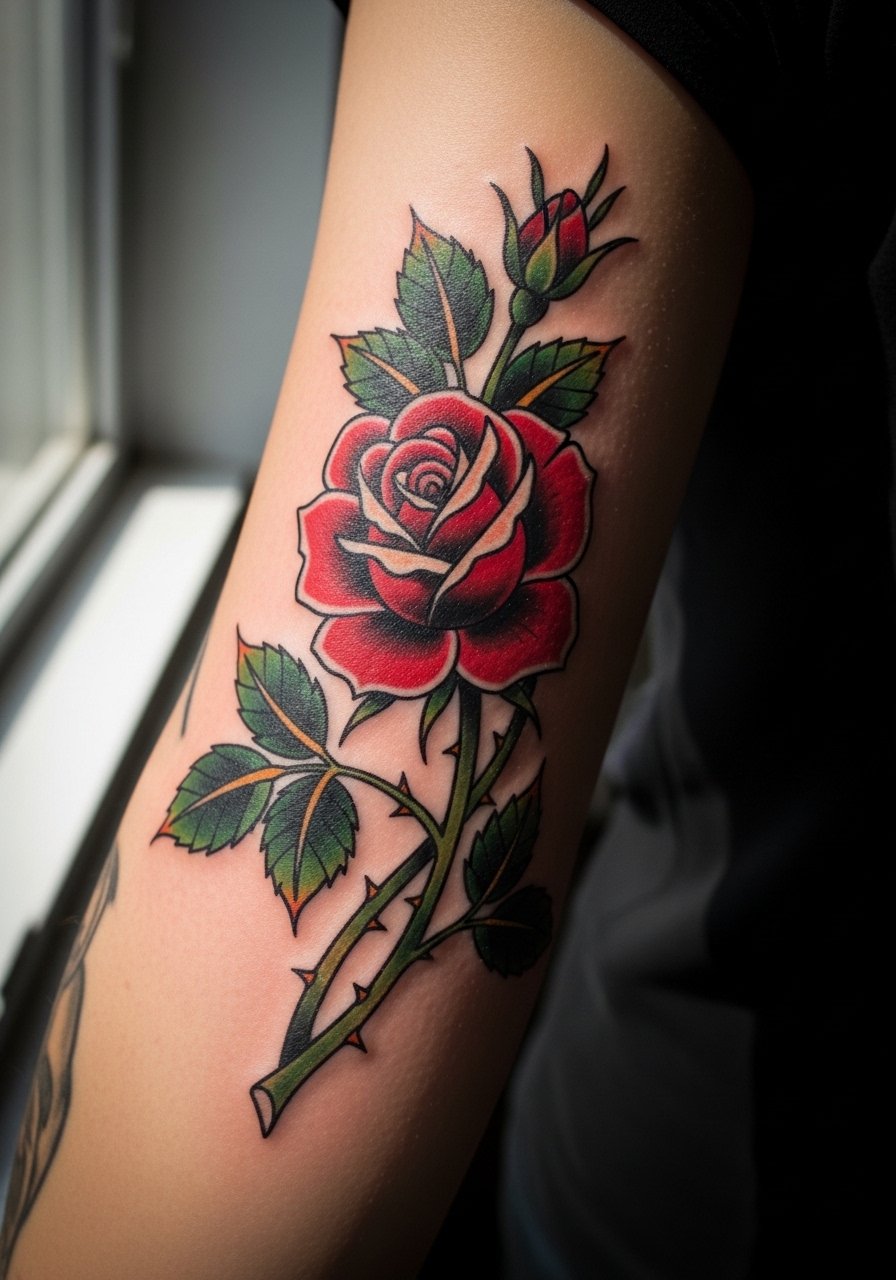
A classic rose on the back forearm can extend into a sleeve later. Ask for mid-weight linework and saturated color at the start so it does not wash out under friction. Session time is typically 60 to 120 minutes. The most common mistake is using ultra-fine detail in petals that disappears when the arm rubs against clothing. Expect the piece to look strong at six months and need a light touch-up around year three if you wear tight sleeves often. For that rolled-sleeve look, go with a chambray shirt you can roll up.
6. Pin-Up Neo-Traditional Girl on the Back Upper Arm
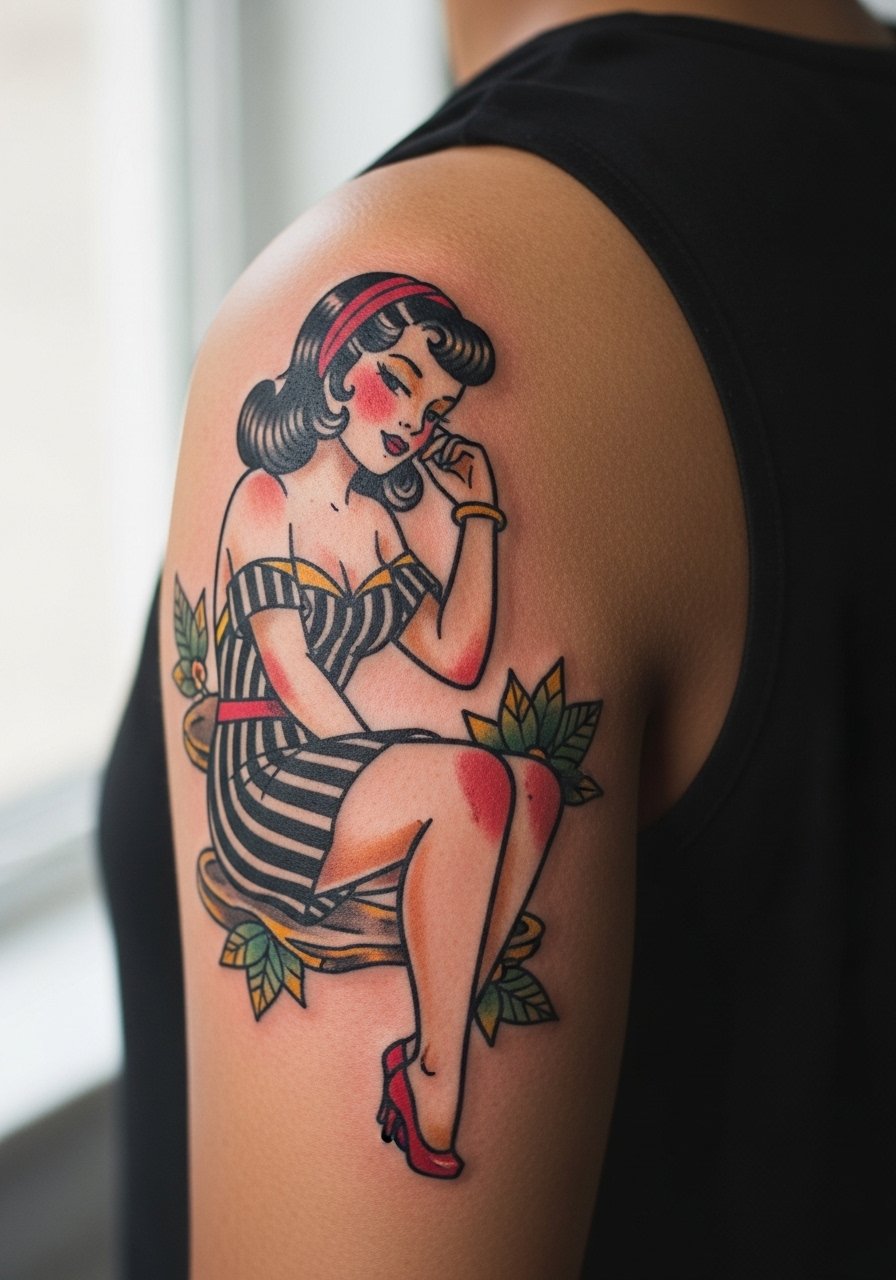
Pin-up work needs confident linework and clear color blocking. Tell your artist whether you want vintage 1950s flash proportions or a more modern pose. Pain is moderate and sessions range two to four hours depending on color. A mistake I see is asking for tiny facial details that get lost on curved arm surfaces. A pin-up holds best when scaled to the arm and balanced with elbow-negative space. For show-off outfits, pair with a vintage band tee or denim jacket that frames the art when rolled or slipped off the shoulder.
Studio Day Picks
These back-of-arm ideas above involve both delicate linework and heavier black saturation, so a small kit for the chair day and first week smooths the experience.
- Tea tree balm. Fabled in forums for a non-greasy feel in humid climates, it helps calm itch on triceps work without heavy residue.
- Lanolin-free moisturizer. Good for winter arm pieces where lanolin can clog pores and cause irritation during healing.
- Rice bran salve. Lighter than some mainstream balms and useful on forearm linework that needs quick absorption.
- Mushroom extract serum. Used by a few artists for anti-inflammatory support after long triceps sessions.
- Saniderm protective film. Helps keep back-of-arm areas clean when you need short-term protection, but check with your artist on film timing.
7. Nature Elements Mandala Wrapping the Back Arm
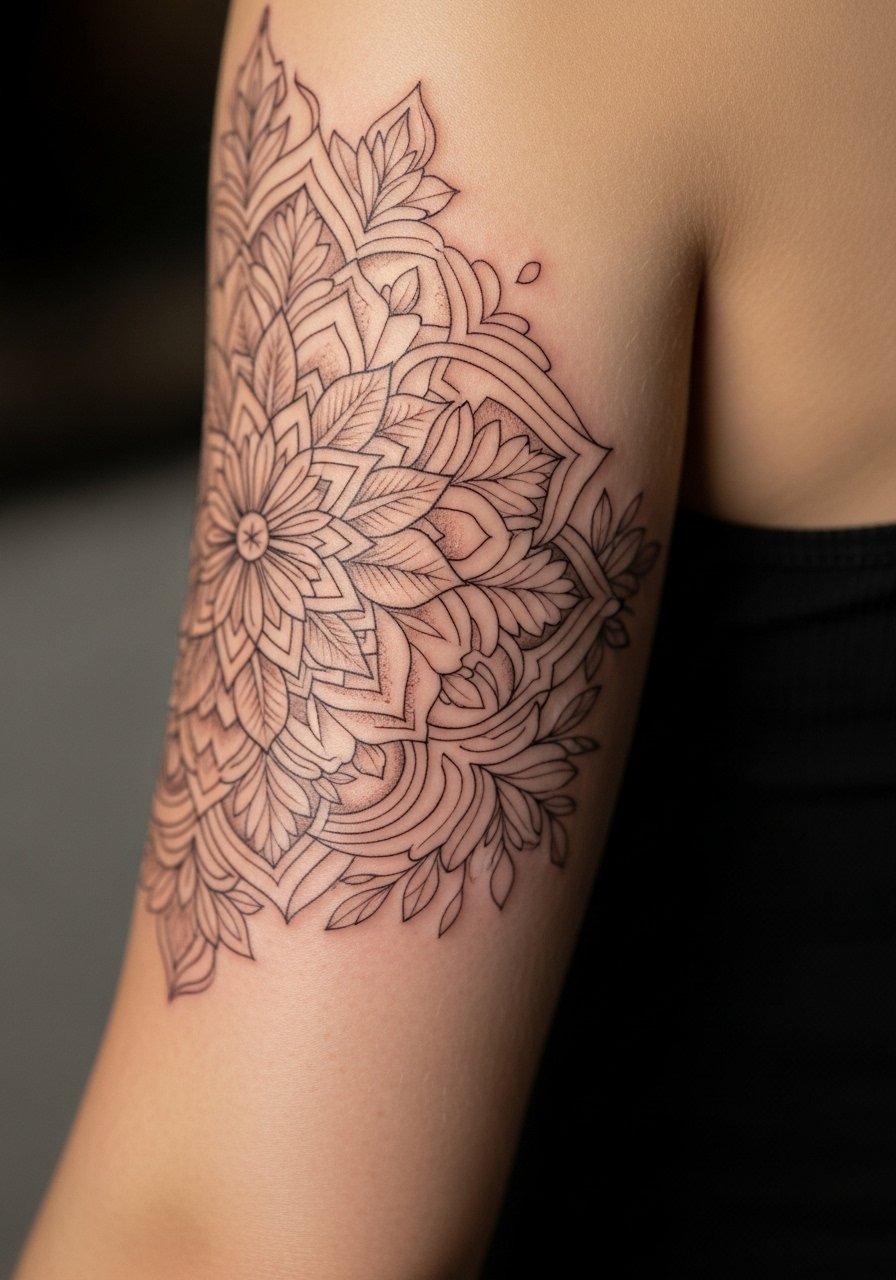
Mandala wraps need spacing to avoid dense linework merging. Ask for larger gaps in the pattern when the design approaches the triceps fold. Sessions usually take two sittings for crisp symmetry. The error to avoid is asking for too many tiny concentric lines, which can fuzz with motion. For longevity, black ornamental work with slightly thicker lineweight beats ultra-fine lines here. If you want to show it off, pair with a sleeveless top that leaves the arm open and simple jewelry on the opposite wrist.
8. Textural 3D Abstract on the Back Triceps
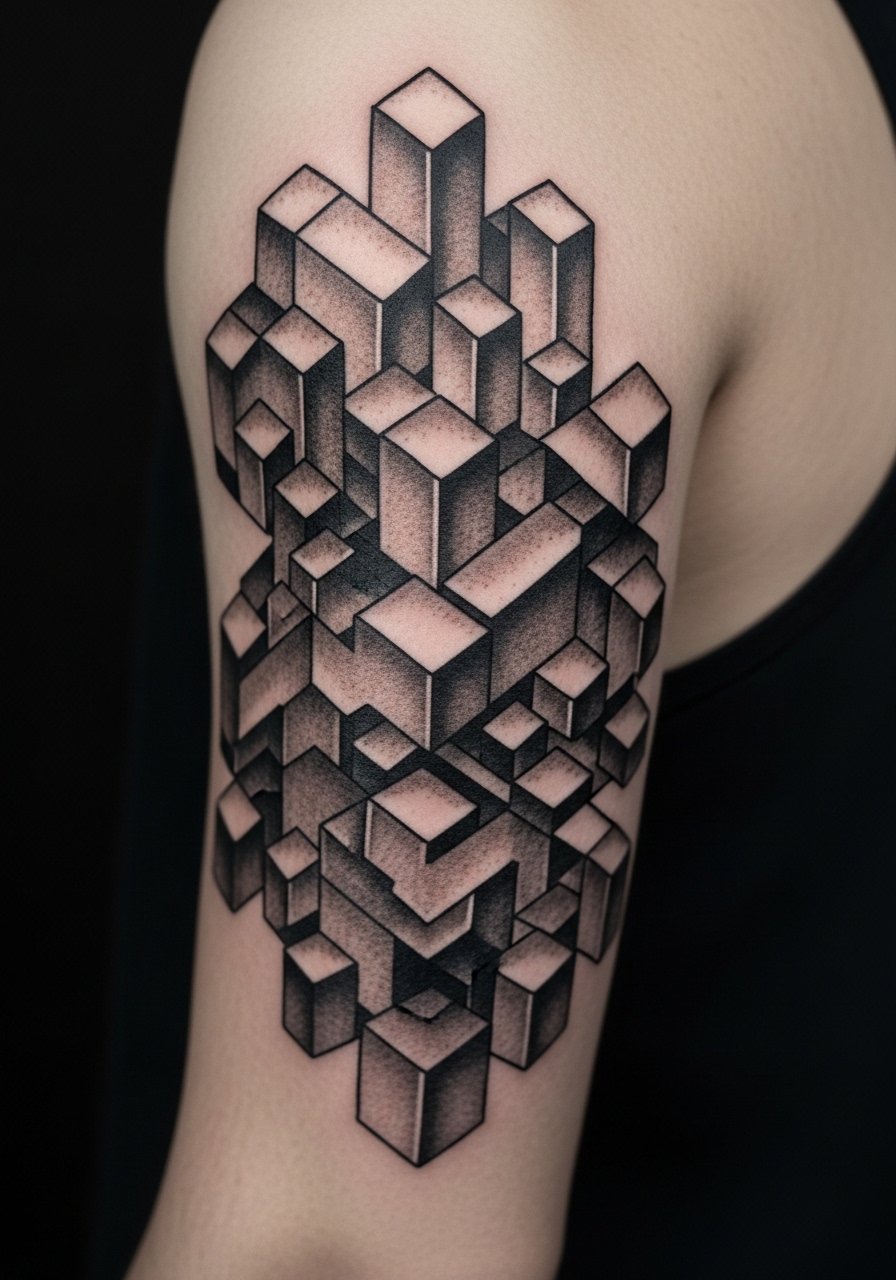
Textural abstracts use stipple and whip shading to create movement that changes when you flex. Tell your artist you want a design that flexes with muscle, not against it. Sessions are medium length and often staged over three sittings. Common mistakes include forcing symmetrical patterns on an asymmetrical muscle which ruins the illusion. This style ages well because it relies on contrast more than tiny detail. Expect a touch-up in two to three years. For session comfort, wear an open vest or sleeveless muscle tee.
9. Bicep Half-Sleeve Skull with Negative Elbow Space
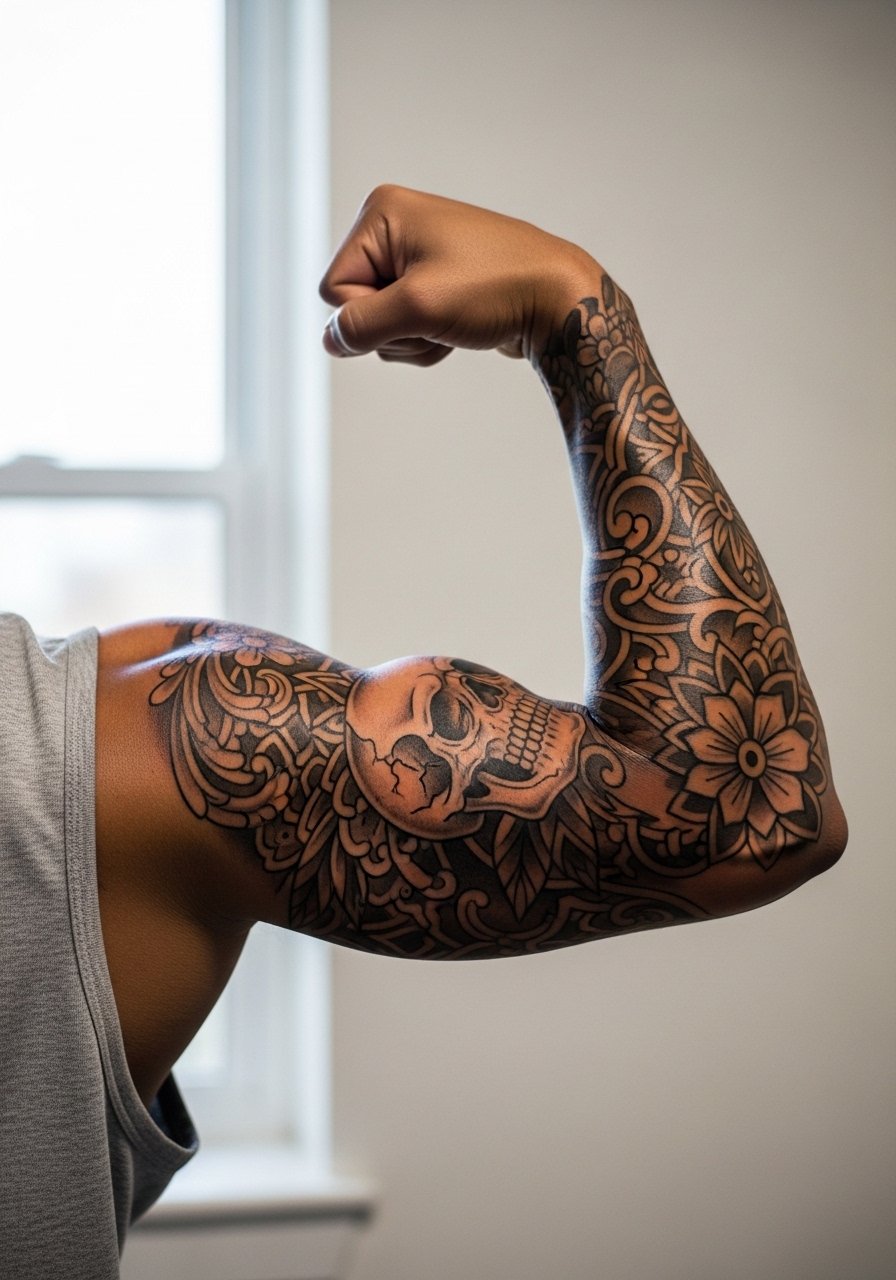
A half-sleeve skull balances bold blackwork with pockets for skin to breathe near the elbow. Tell the artist you want a hard stop before the elbow crease to make future expansion easier. Sessions take multiple appointments and can be intense near the insertion points. A misstep is overcrowding the lower bicep, which makes joining a forearm piece tricky. This ages steadily if saturation is consistent. Expect touch-ups after a couple years if you sweat a lot in training. Pair it with a solid henley with 3/4 sleeves to reveal the top of the design when rolled.
10. Patchwork Sleeve Starter on the Back Upper Arm
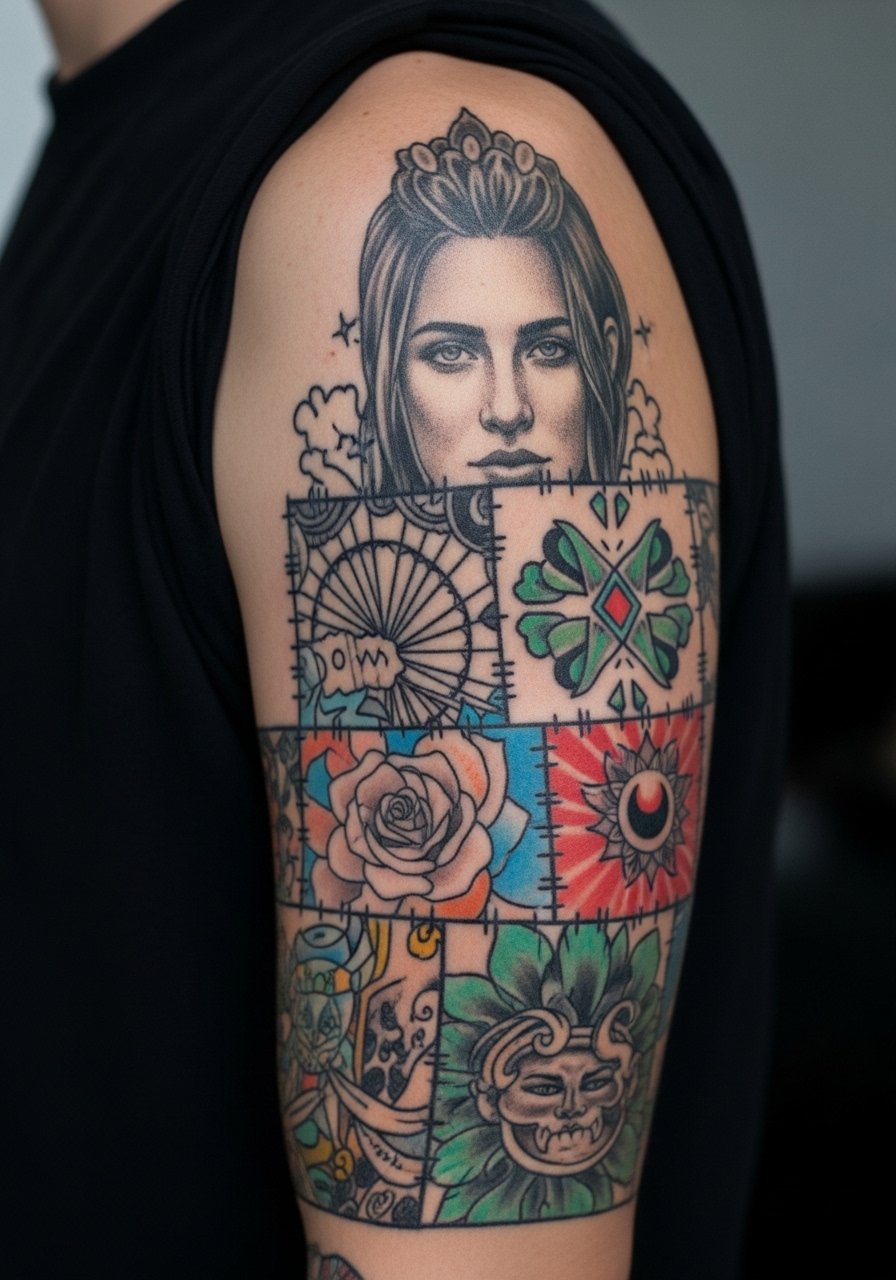
Patchwork sleeves begin with modular motifs positioned for later connection. In a consult, ask the artist to leave consistent negative spacing and a common tonal thread so future pieces mesh. Sessions vary by piece; small modules can be done in one sitting. The common mistake is letting different artists use conflicting saturation or line weight. Over time, mismatched pieces need color balancing. If you travel for guest spots, use community discovery tags to find compatible artists. Wear a loose tank or button-down you can pull aside on session day.
11. Micro-Realism Portrait on the Triceps
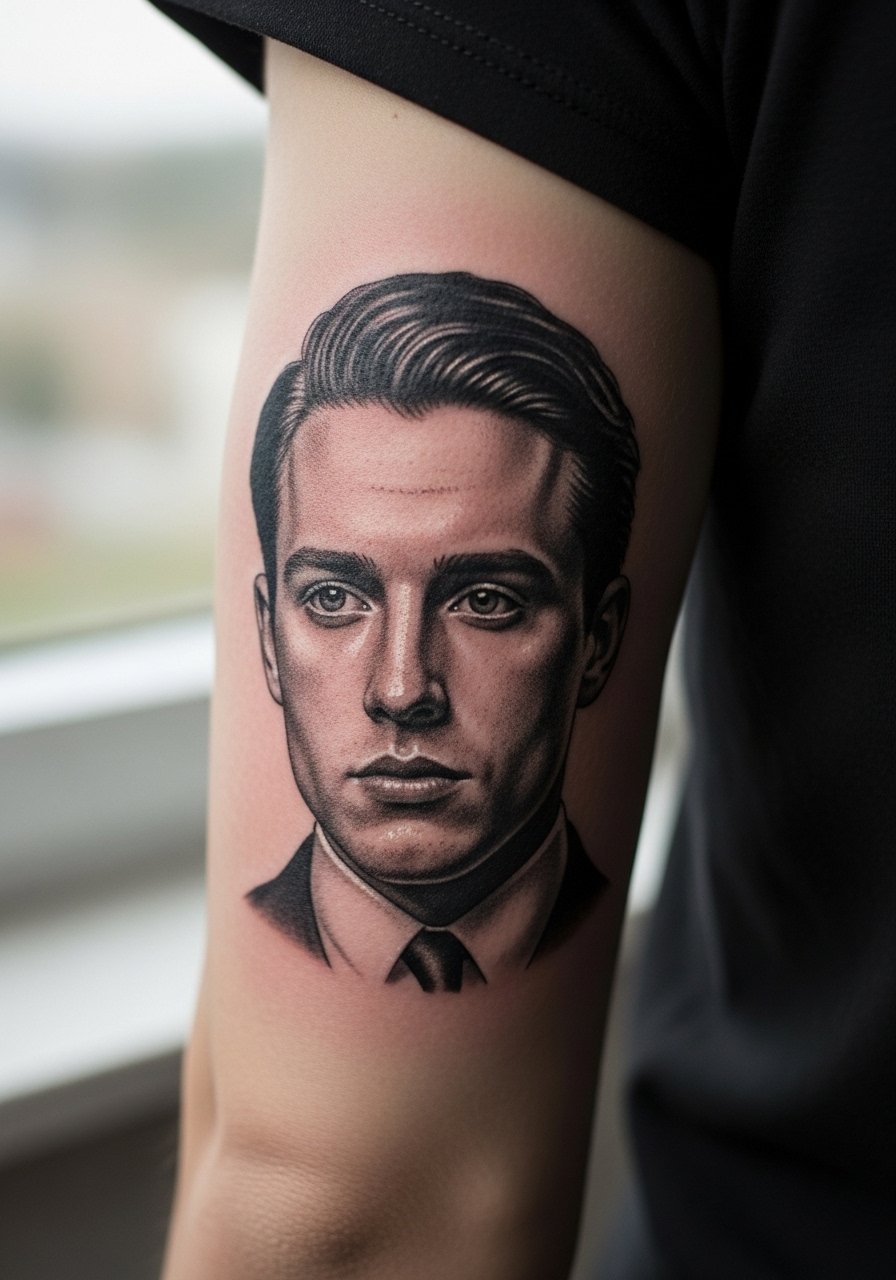
Micro-realism on the back of the arm looks intimate but demands an artist who understands skin movement. Be explicit about scale and reference high-contrast photos for clarity. Expect a tight, focused session and a potential touch-up at one year. The main mistake is asking for too much facial detail at too small a size. On darker skin tones micro-realism can need heavier contrast up front. Discuss realistic expectations with the artist. For the session, wear a white sleeveless top so the area is easy to access.
12. Geometric Armband with Leaf Motifs Across the Back Arm
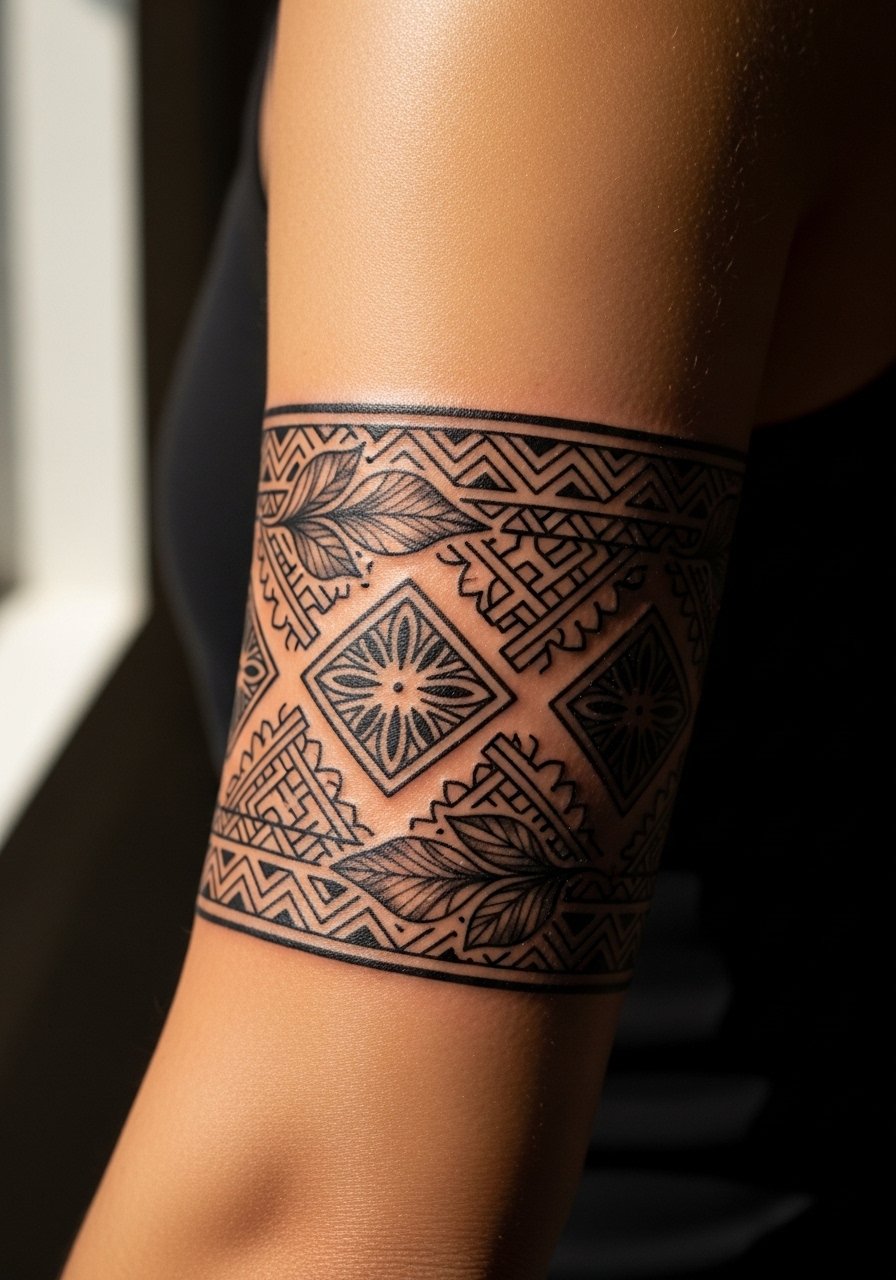
This ornamental armband blends crisp geometry with organic leaf lines that sit well on the back of the upper arm. Ask for alternating line weights so the geometry reads at distance and the leaves read up close. Sessions are usually short to medium. Too-small geometry is the typical mistake because lines need breathing room. For longevity, favor bold negative space over micro detail. For evenings, this pairs with a fitted black tank or navy tee to frame the band.
13. Scripted Name or Date Running Down the Back Arm
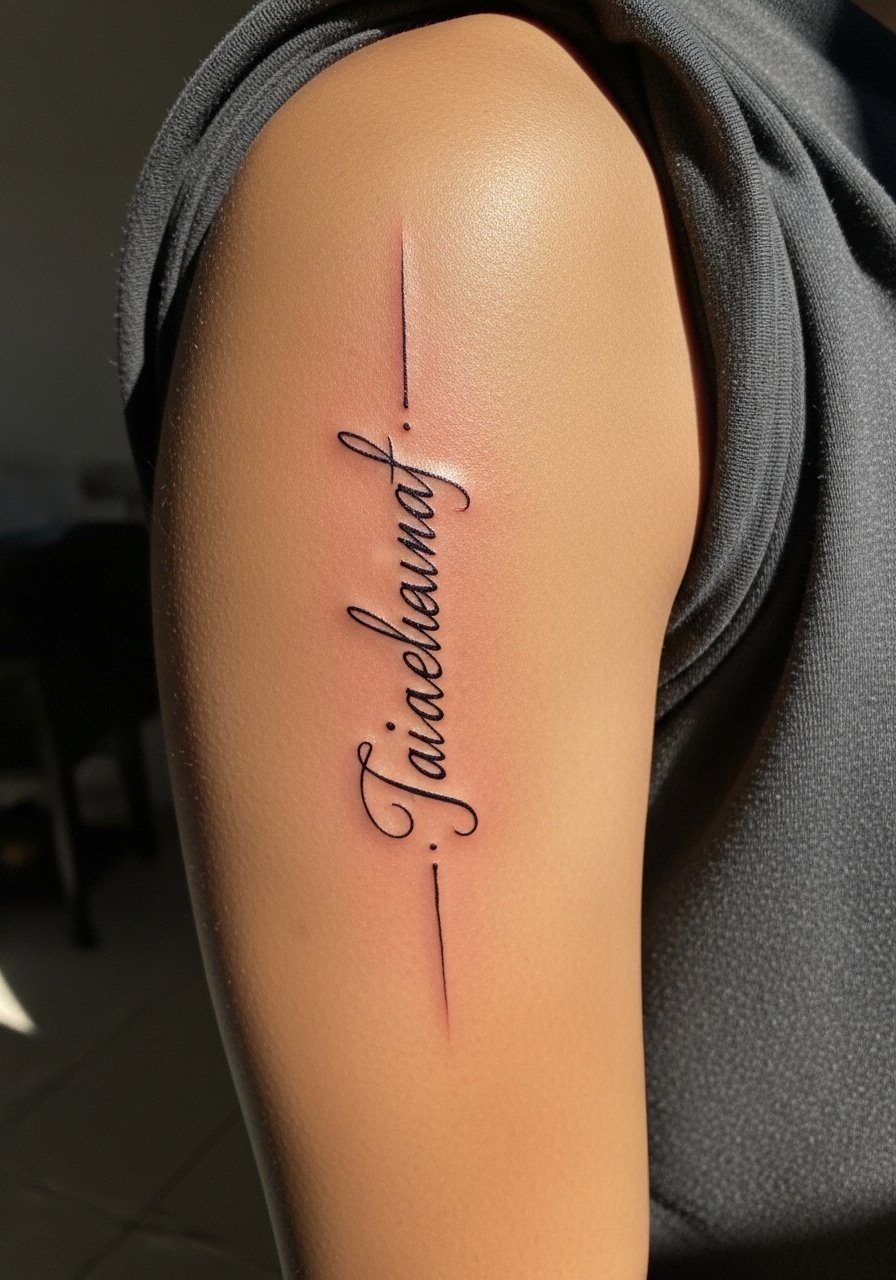
Text on the back arm looks elegant when spaced for movement. Specify exact lettering and size in the consult and ask to preview a stencil on your relaxed arm and flexed arm. Pain is low to moderate. A frequent error is choosing tiny cursive that thickens into a blur after a year. If you want the script to last, go slightly bolder than your initial instinct. Expect touch-ups sooner than larger pieces. Pair a vertical script with a cross pendant necklace if the theme allows.
14. Minimalist Arrow or Compass on the Back of the Arm
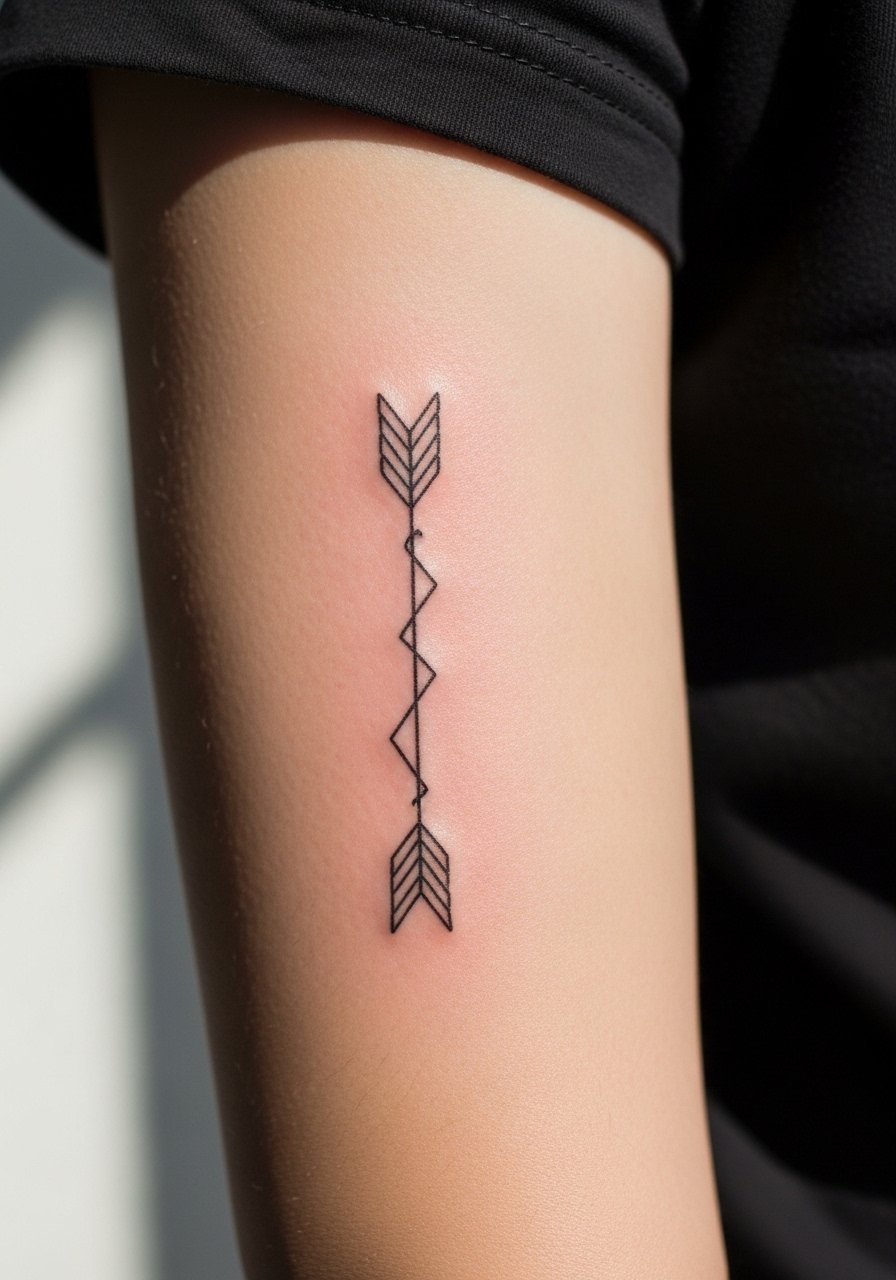
Minimal motifs like an arrow or compass read well on the outer back arm when scaled correctly. Tell the artist you prefer a modest thickness so the line stays visible. Sessions are short and the pain is low. The biggest mistake is making the arrow too fine for movement zones. Over two to five years you will likely need a touch-up for a single-line design. For showing off, a racerback tank top keeps the silhouette visible.
15. Botanical Vine That Wraps the Back Forearm
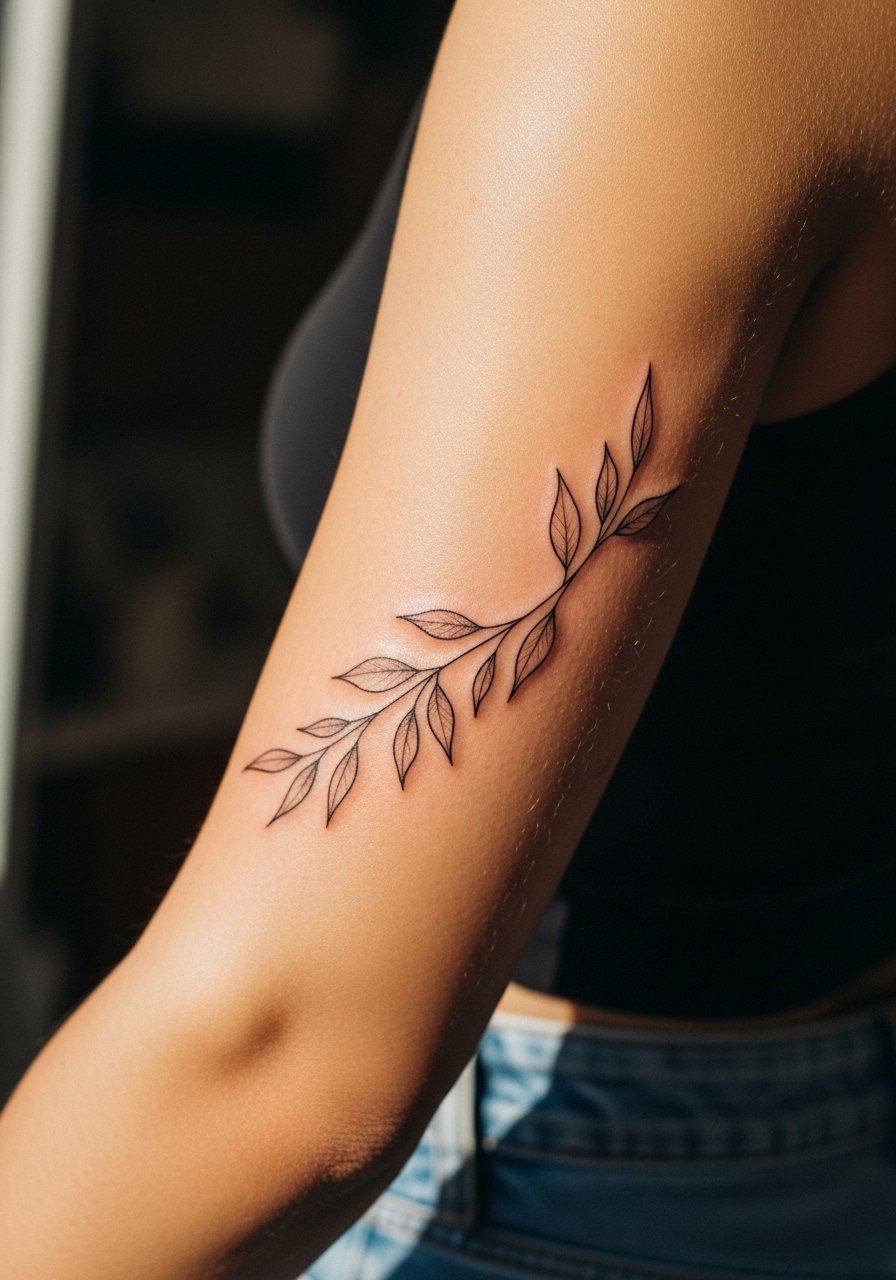
Vines that trace the back forearm need space between stems to avoid merging. Ask for moderate lineweight and slightly open spacing. Expect a one to two hour session. People often ask for hyper-detailed leaves that vanish in a year. For better longevity, choose stylized leaves and solid stems. When healed, color accents tend to lose saturation faster on forearms than black outlines. Pair this with a thin chain bracelet or minimalist watch to balance attention.
16. Small Geometric Cluster Near the Elbow Adjacency
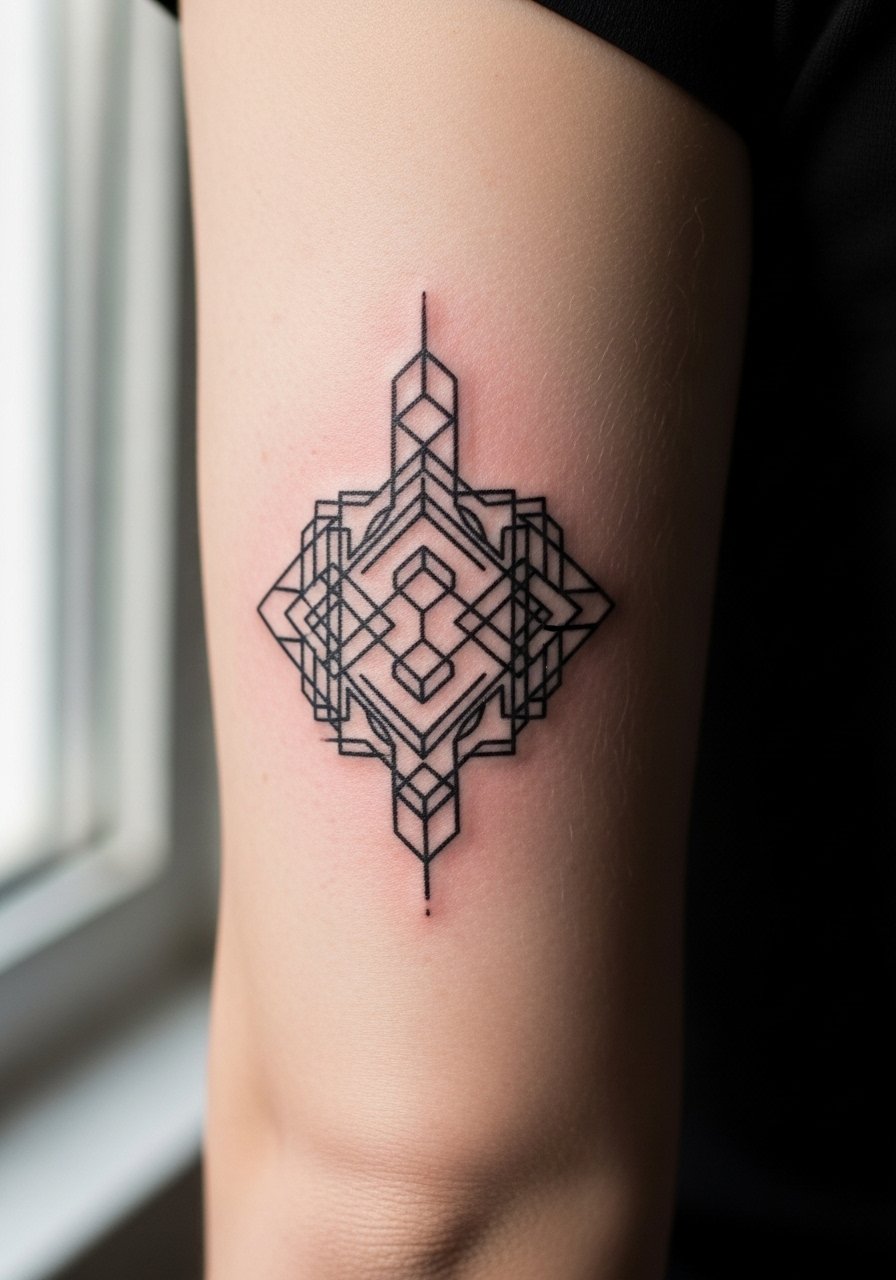
Elbow-adjacent placements test line stability. Ask the artist to keep shapes slightly larger so the lines do not bleed into the crease. Sessions are short but the pain spikes near the elbow. The controversy on fine line here is direct. One camp says avoid fine line because the crease blurs details. The other says careful needle depth and spacing can make it work. Ask where the artist stands before booking. For presentation, push up sleeves or wear a slim fit polo pushed up to reveal the design.
17. Scripted Lyric Band on the Back Upper Arm
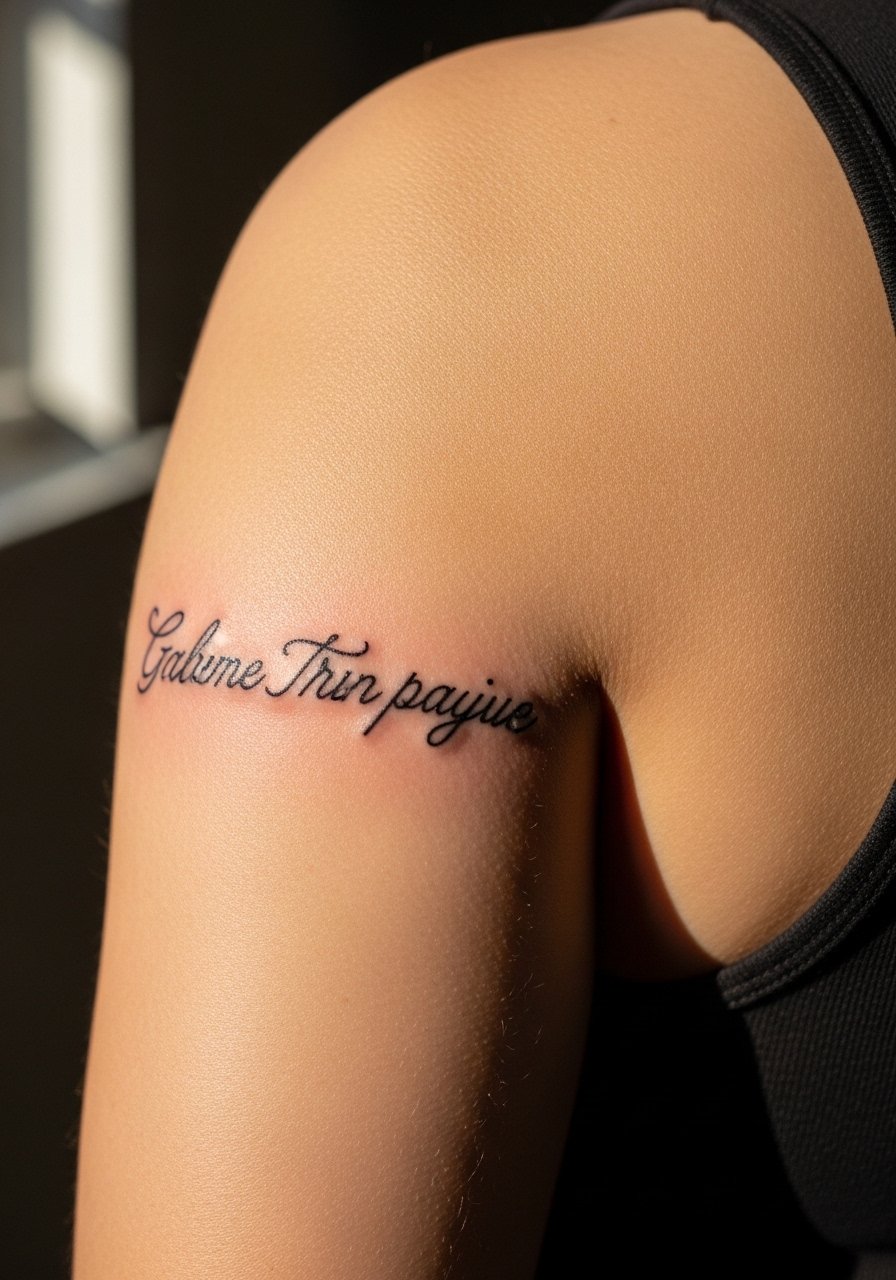
A lyric band needs a balance of length and letter height. Bring the exact text and specify spacing and line breaks on the stencil. Sessions vary with text length. The frequent mistake is cramming long phrases into a narrow band. That leads to cramped letters that blur. Expect to need a touch-up in a couple of years if the band sits where clothing rubs. For session ease, wear a loose button-down shirt you can pull aside.
18. Wave or Ocean Scene Curving on the Back Arm
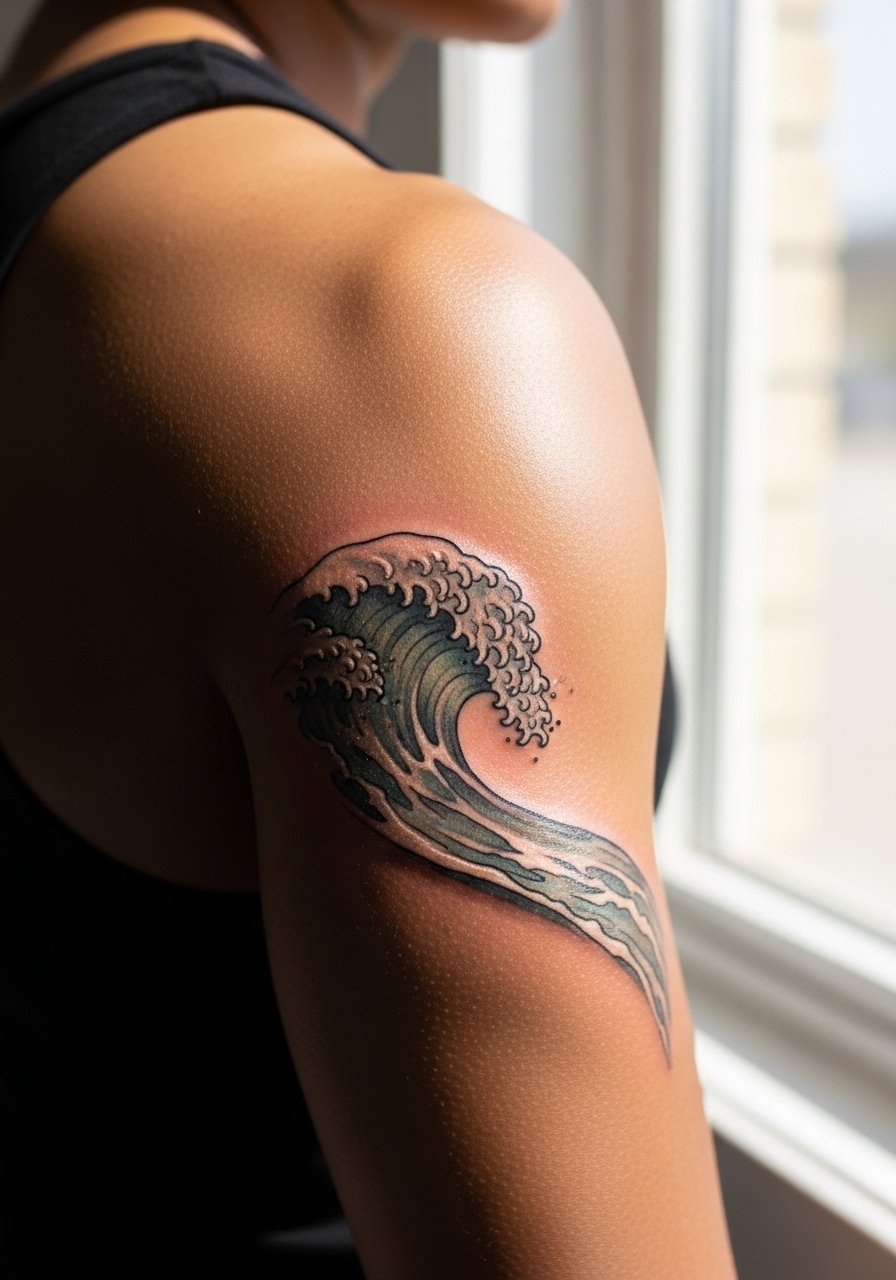
Small marine scenes follow the arm curve and read well when composed for motion. Tell the artist you want the crest positioned toward the outer bicep for visibility. Sessions are medium length and can sting near bone. A common mistake is adding too many tiny waves which become a muddle after healing. Black and gray keeps the scene crisp longer than pale blue gradients. For outings, a vintage band tee or denim jacket off shoulder complements the seaside vibe.
19. Negative Space Skull Outline on the Back Triceps
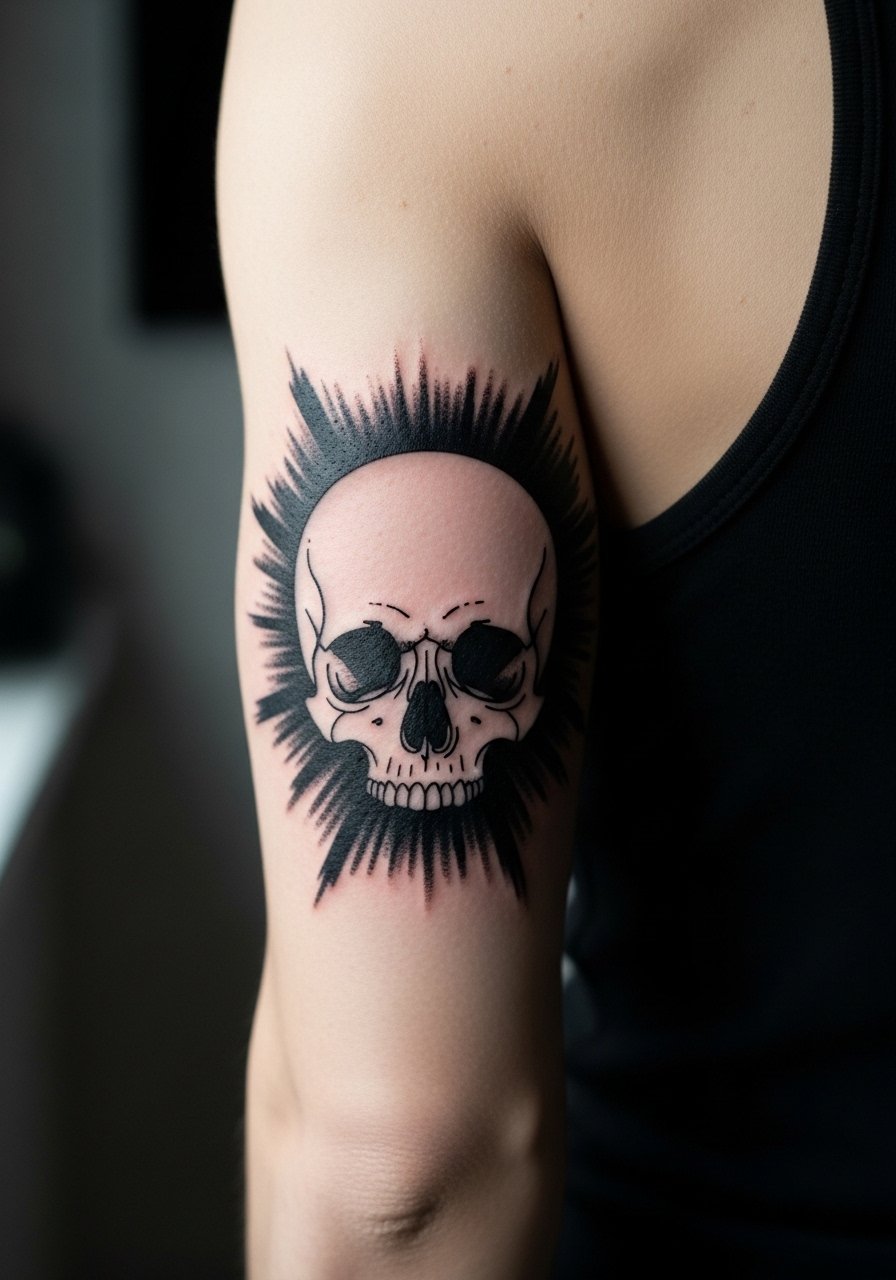
Negative space work needs deliberate planning so the skin tone becomes part of the design. In consults, ask the artist to map how shadows will read in motion. Sessions require precise saturation around the negative areas. A mistake is relying on too-narrow negative gaps that will fill in after healing. This technique ages predictably when contrast is maintained. For a minimalist reveal, wear a solid color henley with rolled sleeves.
20. Patch of Dot Work Stipple Shading on the Back Arm
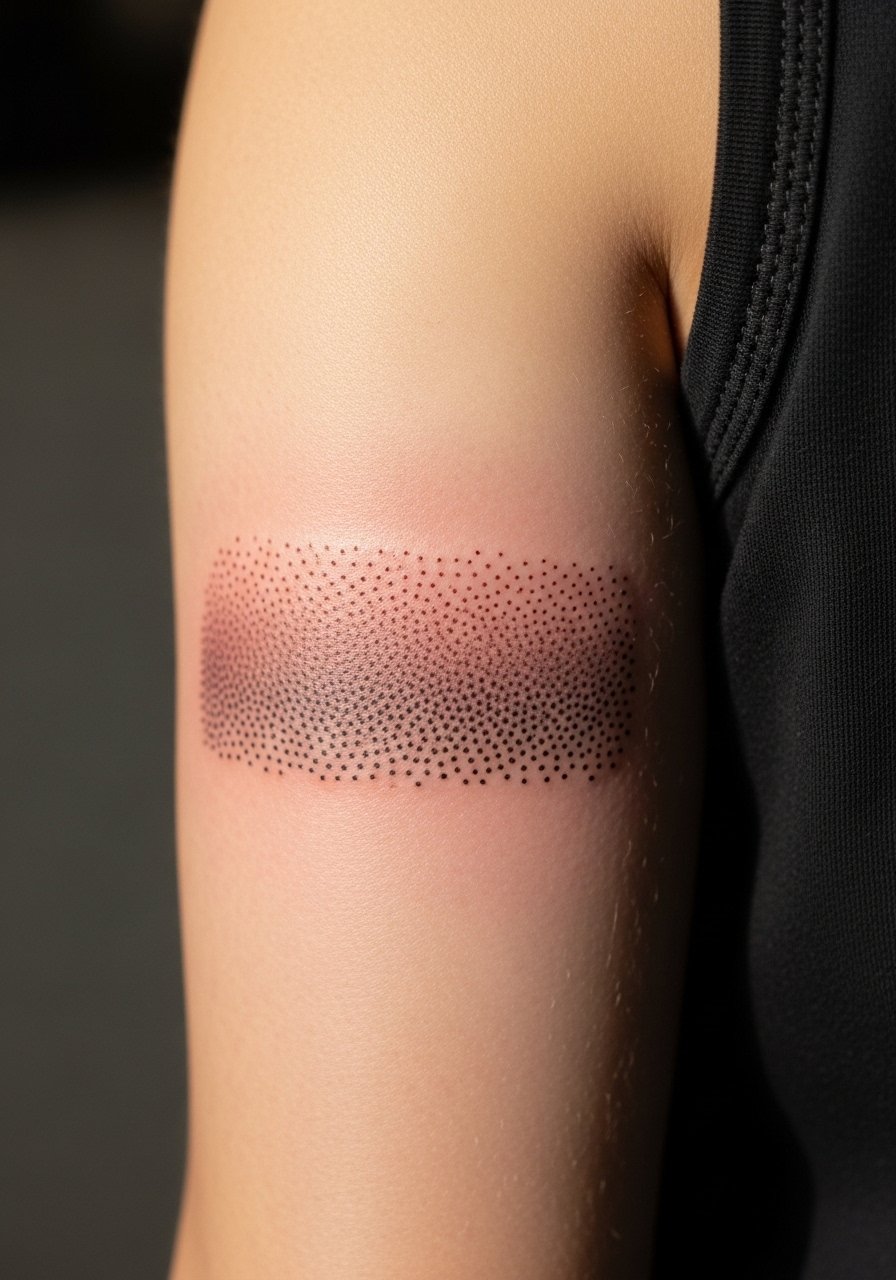
Stipple shading gives texture that shifts with flexing. Ask for spacing maps so dots do not cluster too tightly on high-friction spots. Sessions are methodical and can take a while. The mistake is over-dense stippling that looks muddy after a year. Dot work that leans into negative space holds up best. Expect touch-ups in two to four years depending on sun exposure. For session wear, a loose tank top keeps access clean.
21. Botanical Half-Wreath Sitting on the Back of the Arm
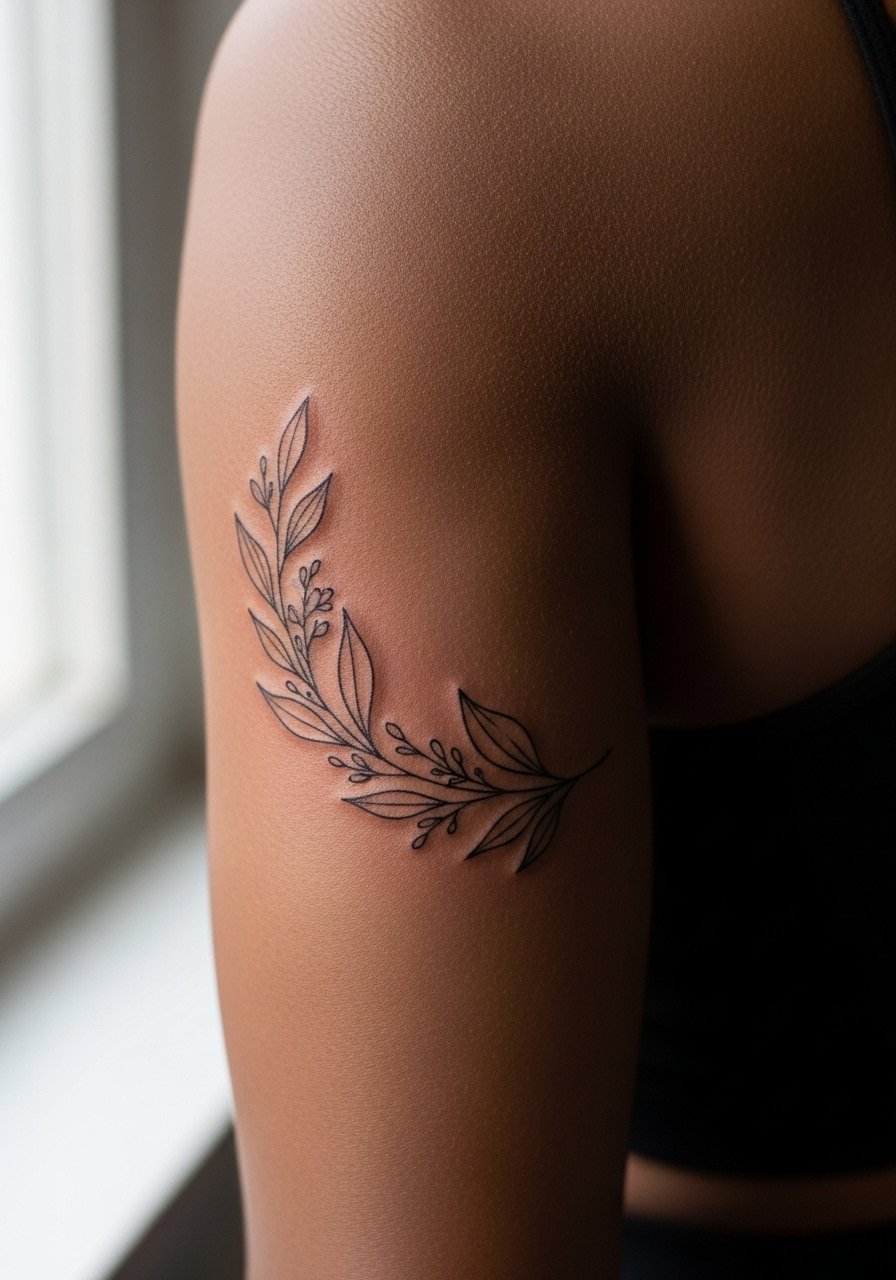
A half-wreath hugs the back arm and looks delicate when sized correctly. Tell the artist you want open spacing in leaves and stems to avoid merging. Sessions are short to medium. People often request tiny leaf veins that disappear. For longevity, pick simplified leaf shapes and slightly bolder stems. Expect to check colors at the one-year mark. To accessorize, a thin chain bracelet or minimal watch sits opposite the wrist and balances the look.
22. Cybernetic Muscle Lines for a Mechanical Look
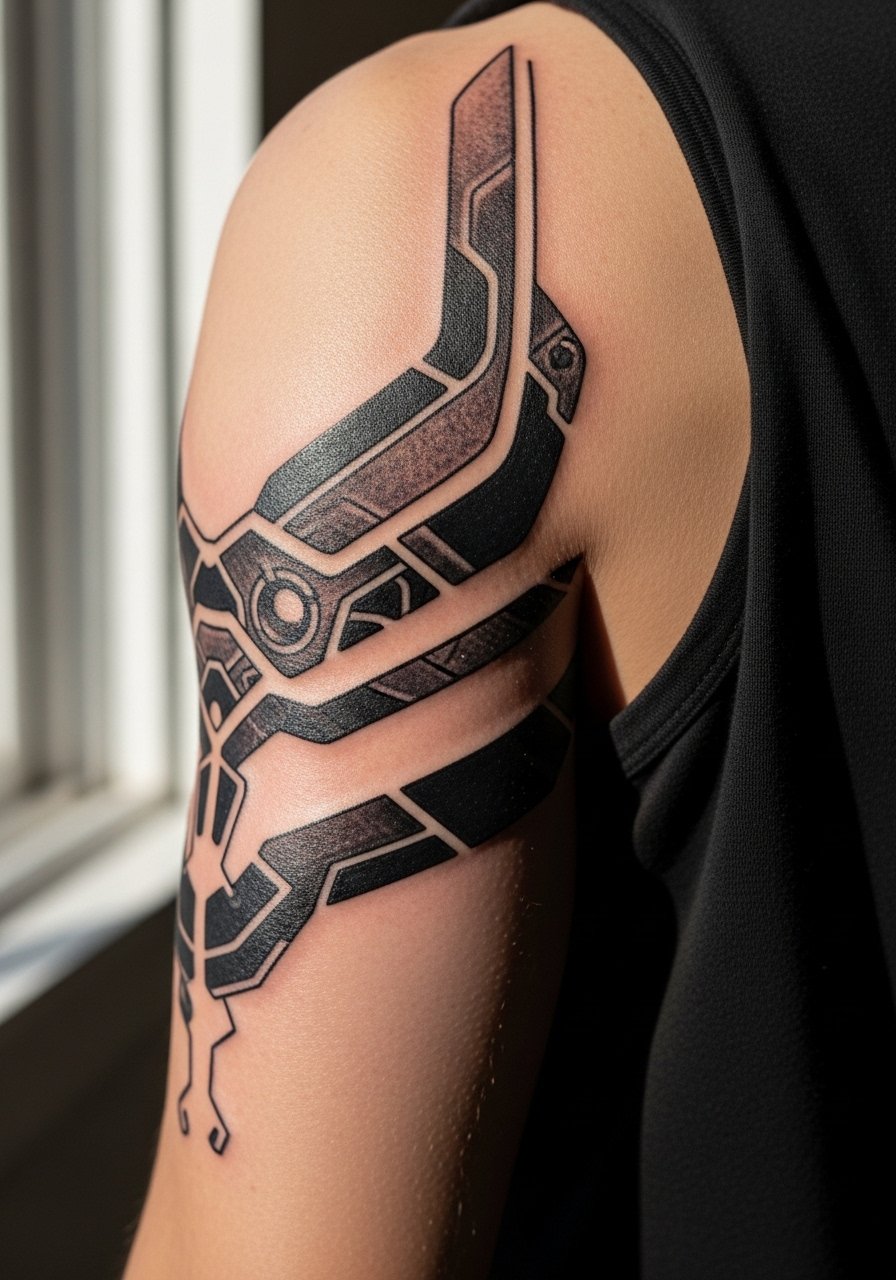
These designs trace muscle shapes and read like mechanical reinforcement. Be explicit about the direction of lines so they accent muscle instead of fighting it. Sessions are long and may need multiple sittings. The mistake is forcing rigid geometry over curved anatomy. When done right, the piece flexes with you and keeps its shape. Touch-ups depend on how much you sweat and train. For a showroom look, pair with a minimalist watch.
23. Small Constellation or Star Cluster Near the Elbow
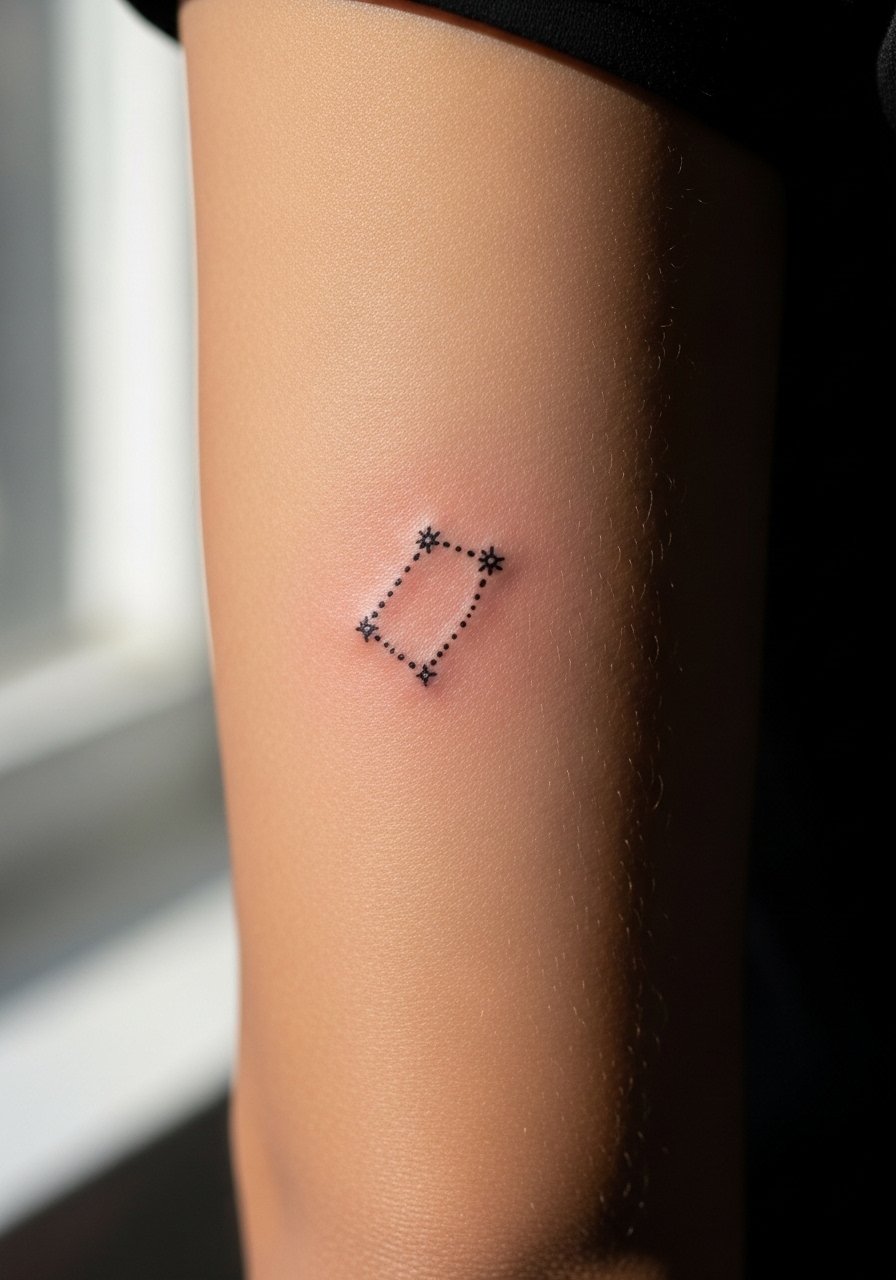
Small star clusters read like accents when placed correctly. Ask the artist to vary dot sizes and leave spacing so constellations do not blur into a speckled patch. Sessions are short and pain is low. The usual error is over-concentrating stars in the crease zone which harms longevity. Expect a minor softening after a couple years and plan a touch-up if placement sees heavy friction. For easy display, push sleeves up or wear a three-quarter sleeve henley.
24. Ornamental Band with Vine and Dot Work
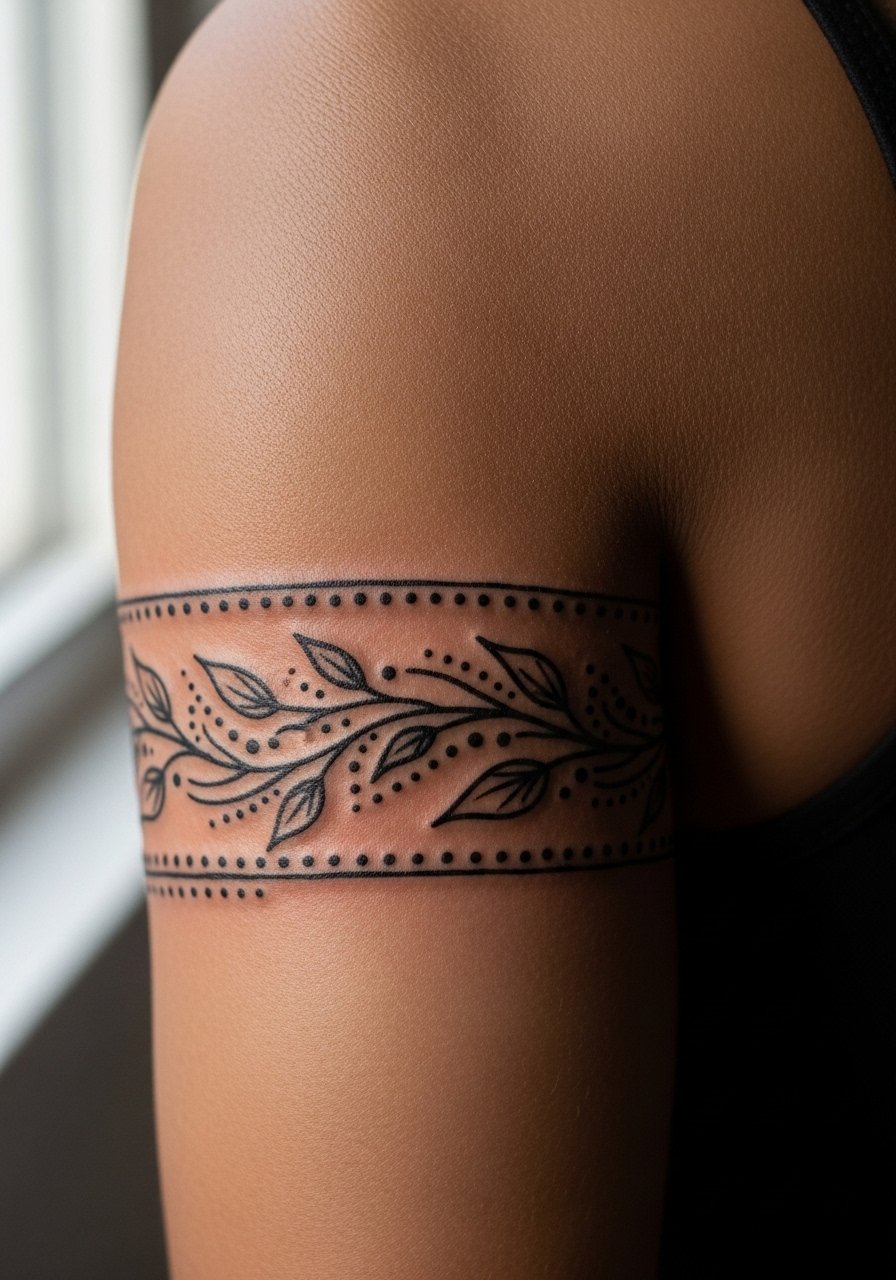
This hybrid band mixes dot work with flowing vines for texture. Tell the artist to keep dot gradients looser near the elbow and tighter on the central bicep. Sessions are medium length. A mistake is too many tight dots which can create a gray patch over time. The combination of open vines and dots tends to age smoothly if spacing is respected. For evenings out, a v-neck shirt with rolled sleeves frames the band without overtaking it.
25. Anchor or Nautical Icon on the Back Forearm
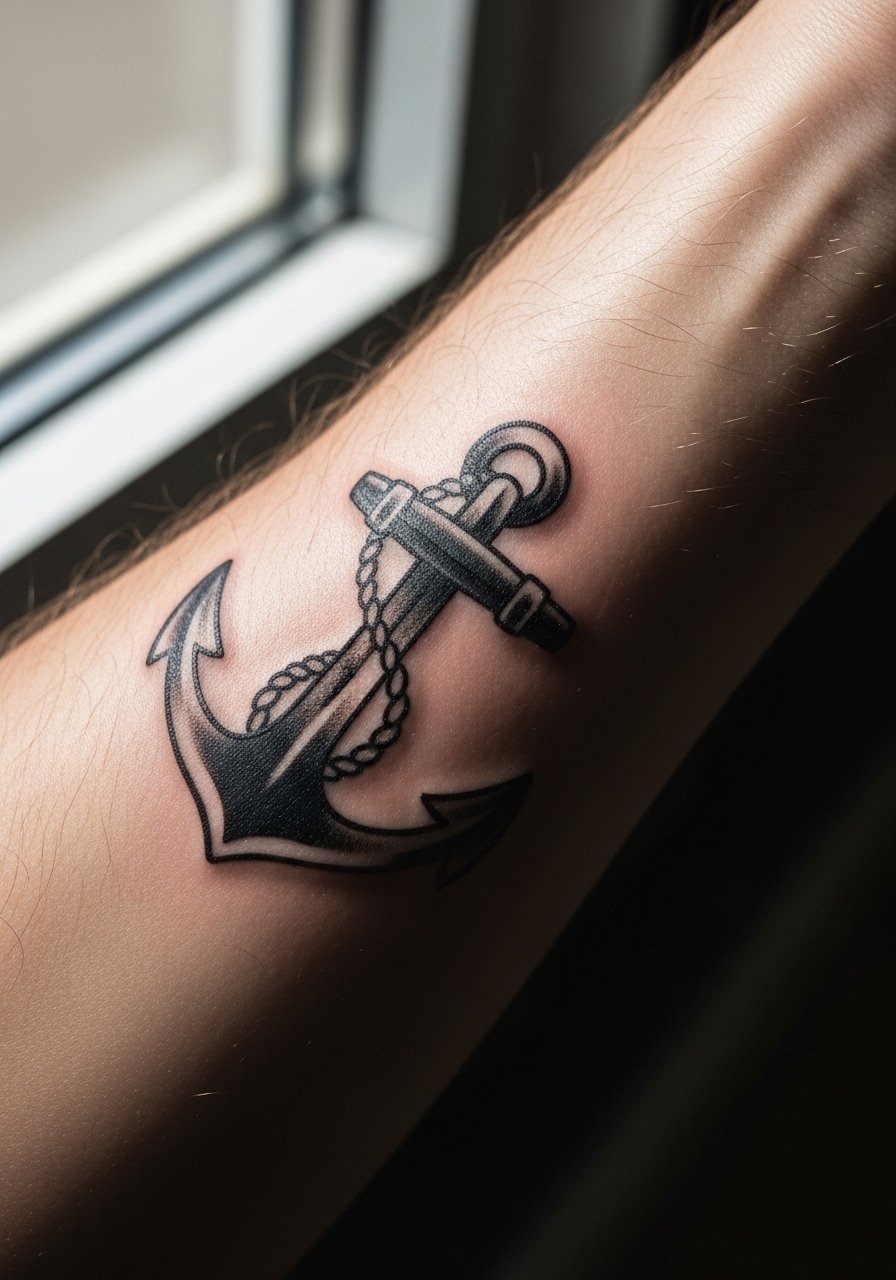
Nautical icons read reliably when drawn with traditional saturation. Be clear about scale so the anchor sits comfortably on the forearm curve. Sessions are short and pain is moderate. A common mistake is adding tiny rope details that fuzz. This imagery ages predictably and tends to hold contrast well. Expect a light touch-up in a few years if you expose your forearms to a lot of sun. Style it with a rolled sleeve chambray shirt for a classic look.
26. Interactive Muscle-Shift Textural Tattoo
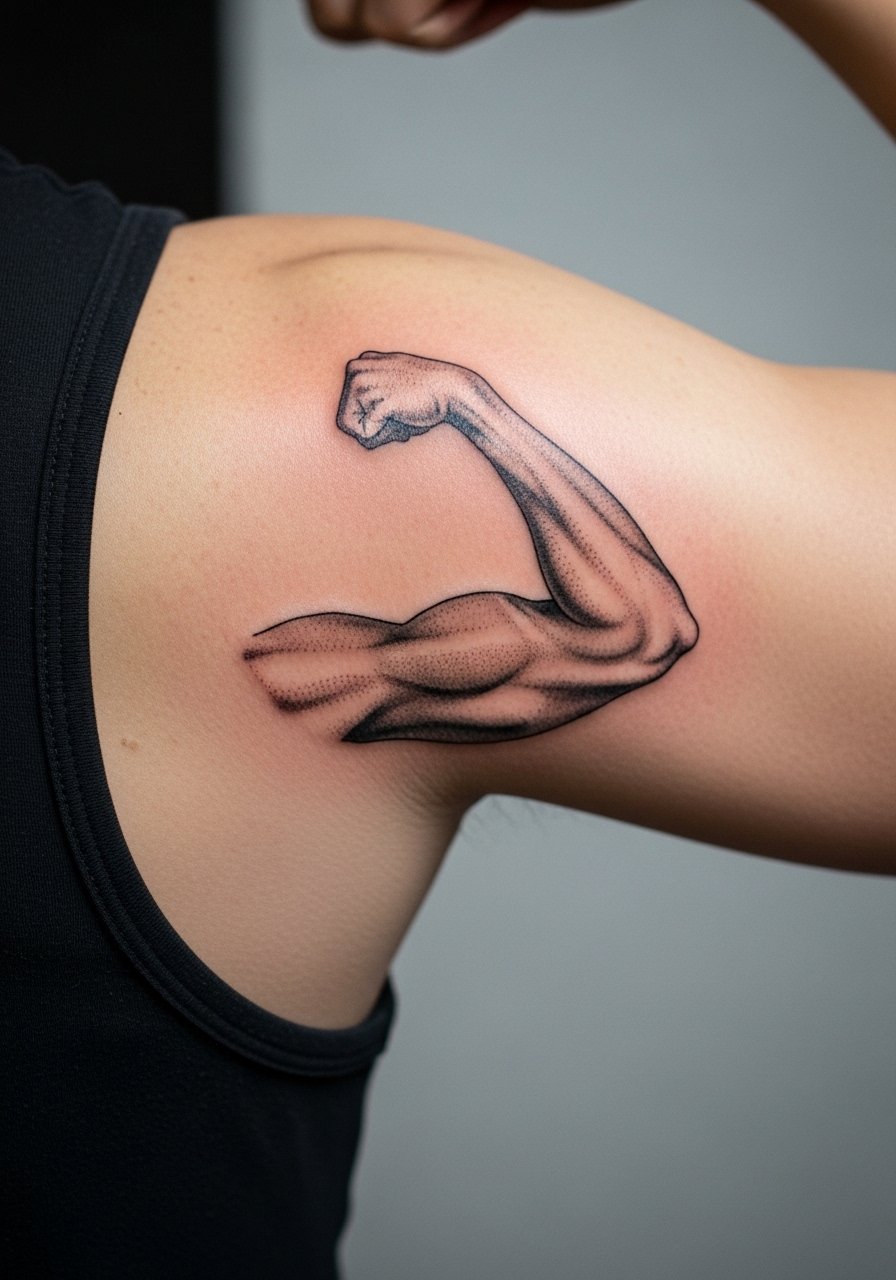
These are niche pieces that use shadow and highlight to change when you flex. Bring examples and ask the artist to mock the design on a flexed photo. Sessions are longer and require planning. A real mistake is not testing on movement before inking. When mapped correctly the effect lasts because it relies on shape and contrast. This is one of the under-covered ideas that looks especially good on athletes. For the session, wear an athletic tank top to make flex checks easy.
27. Full Sleeve Scene Starting at the Back Arm Edge
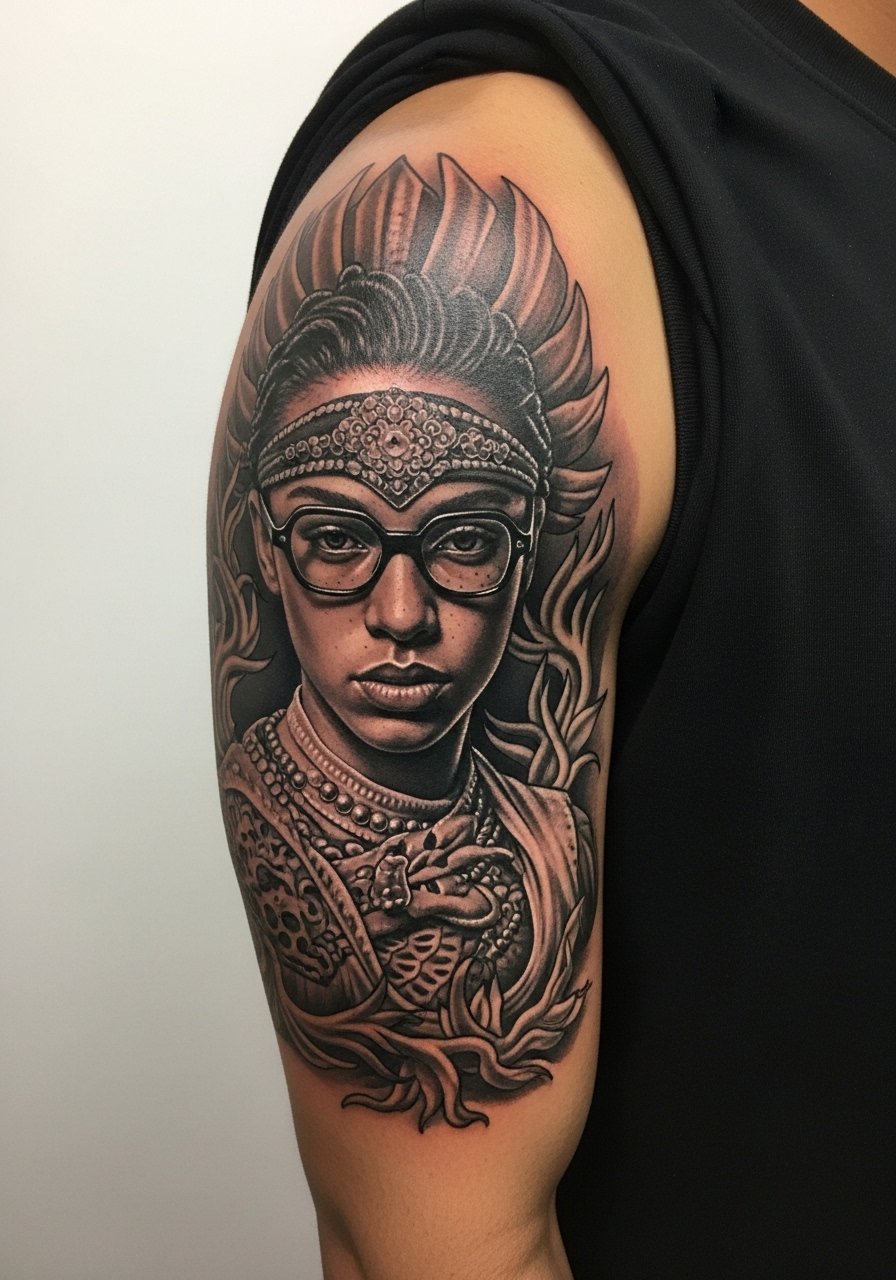
If you plan a full sleeve, beginning at the back of the arm with a scene anchor helps future cohesion. In your consult, discuss color palette and a plan for negative spaces by the elbow. Sessions will span multiple long sittings across months. The common mistake is treating initial pieces as standalone flash without planning for expansion. A well-planned start means fewer stressful cover-ups later. Expect substantial touch-ups after completion as the sleeve ages. For session comfort, pick a tank top or loose button-down you can pull to the side.
Frequently Asked Questions
Q: Will fine line back-of-arm tattoos blur faster than bold work, and what should I ask my artist?
A: Fine line tends to blur sooner in high-friction zones. Ask the artist about line weight and whether they recommend a hybrid approach that uses slightly heavier linework where clothing and movement will rub. Also ask about touch-up policy before booking.
Q: How do back-of-arm pieces react to muscle gain from weight training?
A: Designs that run across the triceps can stretch visibly when you bulk. Ask your artist to map the piece on a flexed and relaxed arm. Choosing wrap directions that follow muscle fibers reduces distortion over time.
Q: Is Saniderm recommended for back-of-arm healing or should I dry heal?
A: Artists split into two camps. One side uses protective film for the first 24 to 72 hours to reduce bacteria exposure. The other prefers short-term film followed by dry healing to avoid maceration. Ask the artist where they stand and follow their timing.
Q: What should I wear to a back-of-arm session for easy access and comfort?
A: Bring clothing that provides full access, such as a loose tank top or a button-down you can pull aside. For longer sessions, layers are ideal so you can stay comfortable without compressing the area.
Q: My skin is darker. Will blackwork on the back arm look muddy in photos?
A: On darker skin, ask for higher contrast and bolder saturation up front. Artists can test shading during the consult. Professional lighting for photos also helps capture crisp outlines.
Q: How common are artist cancellations and deposits, and how do I protect myself?
A: Cancellations happen. Use booking platforms with clear policies or get deposit terms in writing. If you travel for a guest spot, confirm dates and follow up the week before to avoid last-minute issues.
