
Fine line tattoos are everywhere on saved boards, but the tattoos that still read clean in five years are rarely the exact ones that trended on day one. Placement, needle spacing, and how much skin stretches matter more than the reference photo. Below are 27 soft, feminine bicep ideas with practical notes on pain, aging, what to ask your artist, and how to wear each piece so it looks intentional when you lift your arm.
1. Micro-Realism Eye on the Inner Bicep
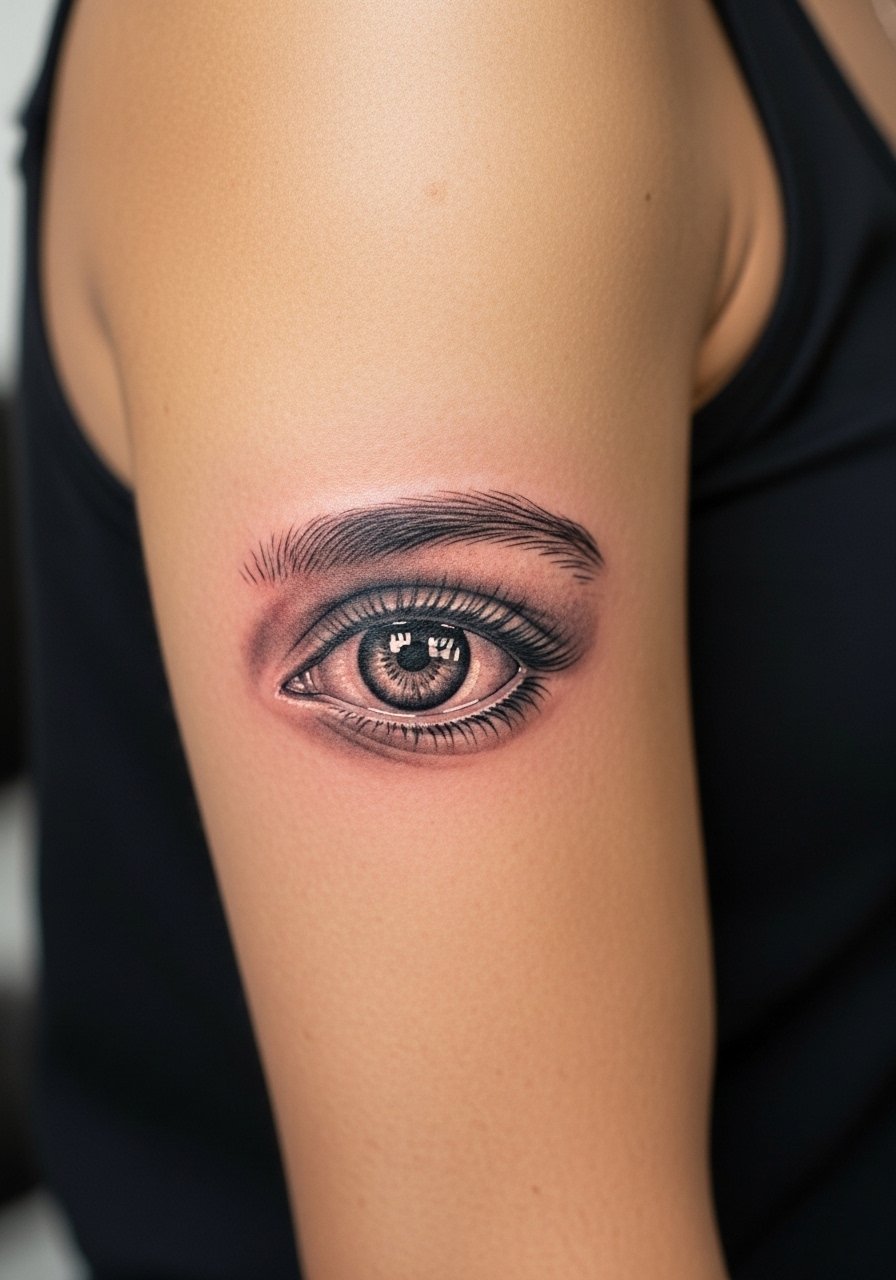
I've seen this micro-realism eye function like a private focal point, best when scaled around four inches so the pupil and iris keep detail. Mention "soft contrast" and "no ultra-thin lashes" in consultation to avoid hairs that blur with time. Pain here is above average because the skin is thin, so plan two shorter sessions rather than one marathon. A common mistake is asking for ultra-fine detail packed into a tiny space, which often becomes muddy by year three. For showing it off try a sleeveless tank women neutral that frames the inner arm without competing with the ink.
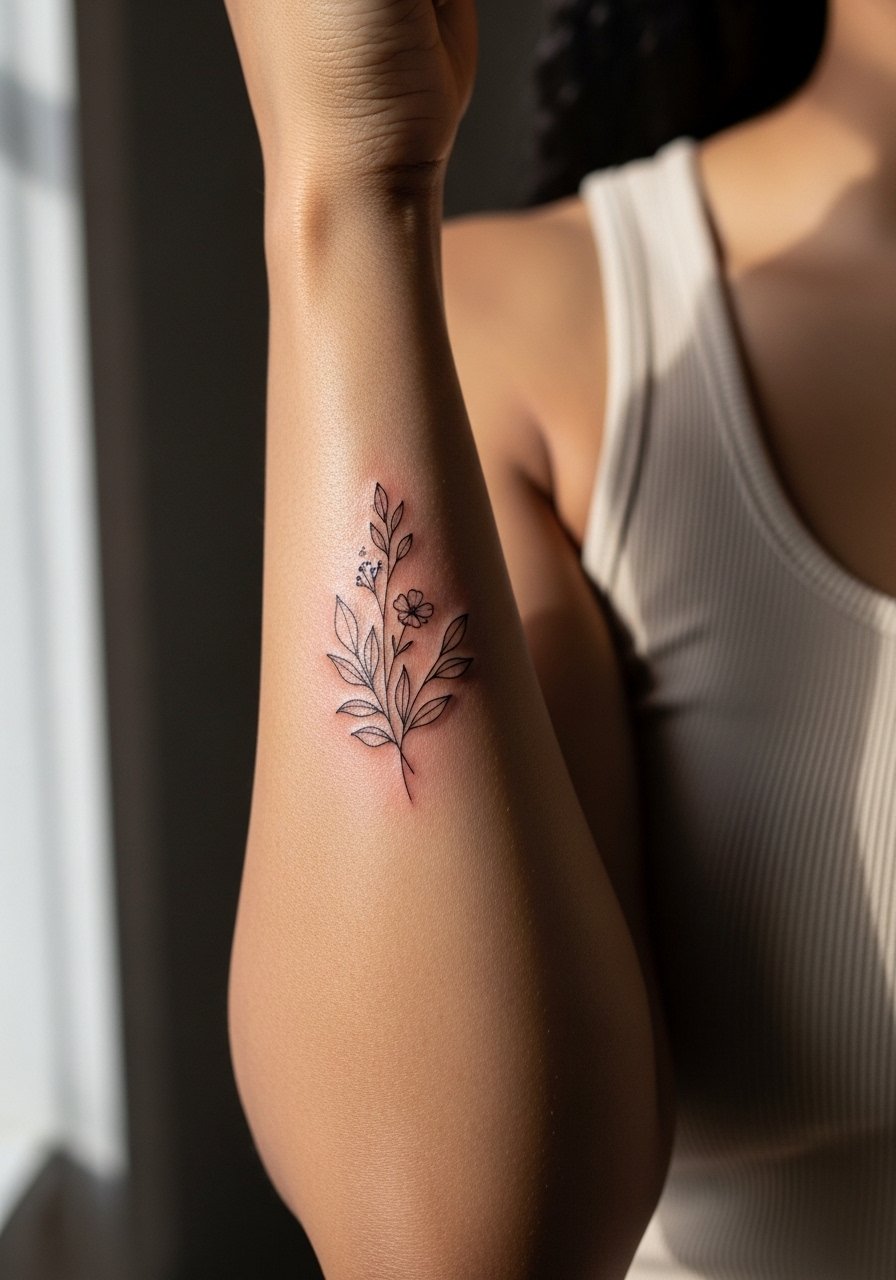
2. Minimalist Fine-Line Floral Stem
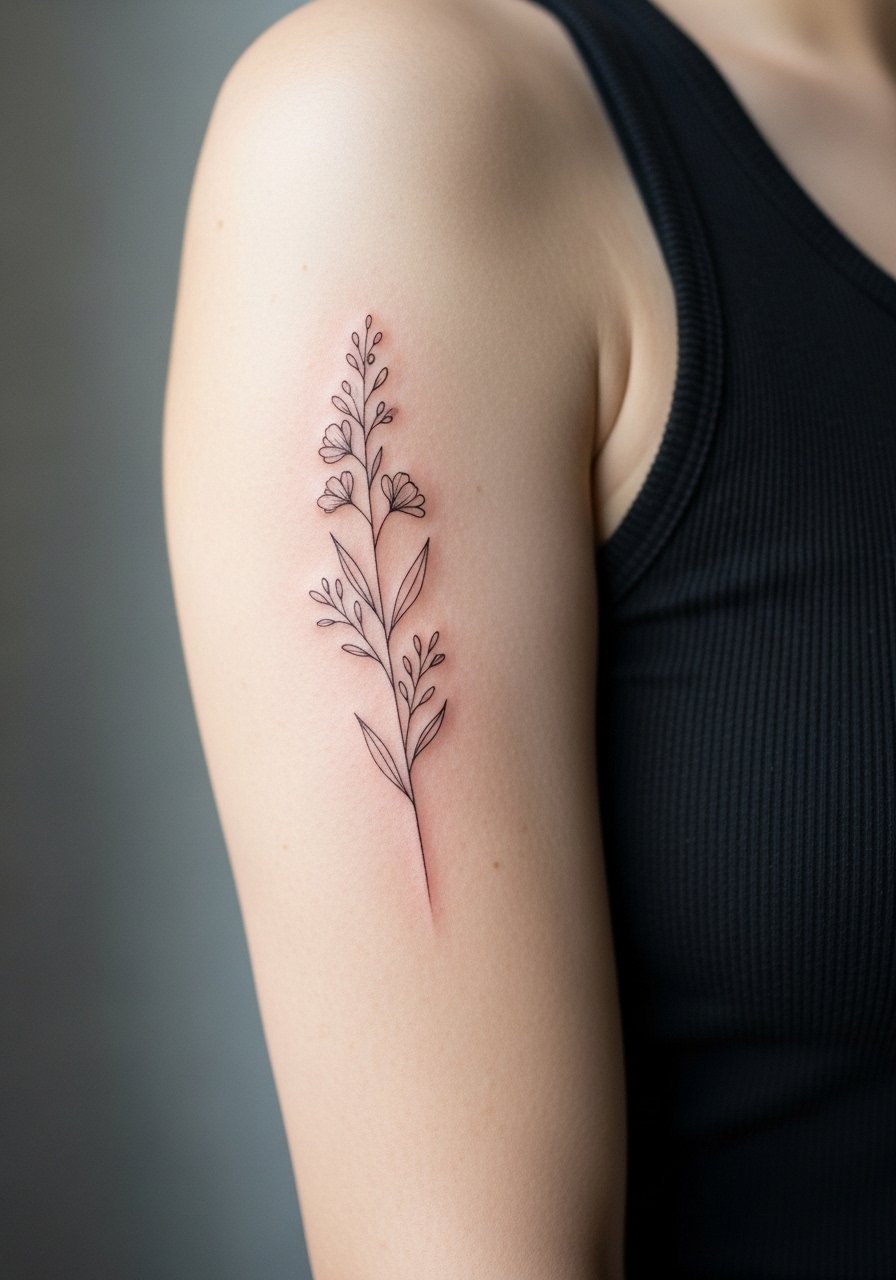
Fair warning, the inner bicep favors vertical compositions because the arm elongates with movement. Ask your artist to keep spacing between petals and stem so the lines have room to settle. Session time is usually a single one-hour sit for a 3×6 inch piece, but expect tenderness for several days. A mistake I see often is squeezing too many blooms into a narrow area. For easy reveal wear a sleeveless tank women neutral or slip on a loose button up shirt to keep the area accessible during the appointment.
3. Black and Gray Realism Animal Face

When you want depth on the flat inner arm, animal faces read with striking texture if scaled to about 4×5 inches. Tell your artist you want gradual saturation and stipple shading in the fur areas to avoid heavy blocks of gray that can look like a smudge later. Expect a two-session plan for full shading. One common error is requesting too small a portrait, which loses life when healed. Because this placement moves with flexing, touch-ups at year two to three are not unusual.
4. Colorful Neo-Traditional Floral Arrangement
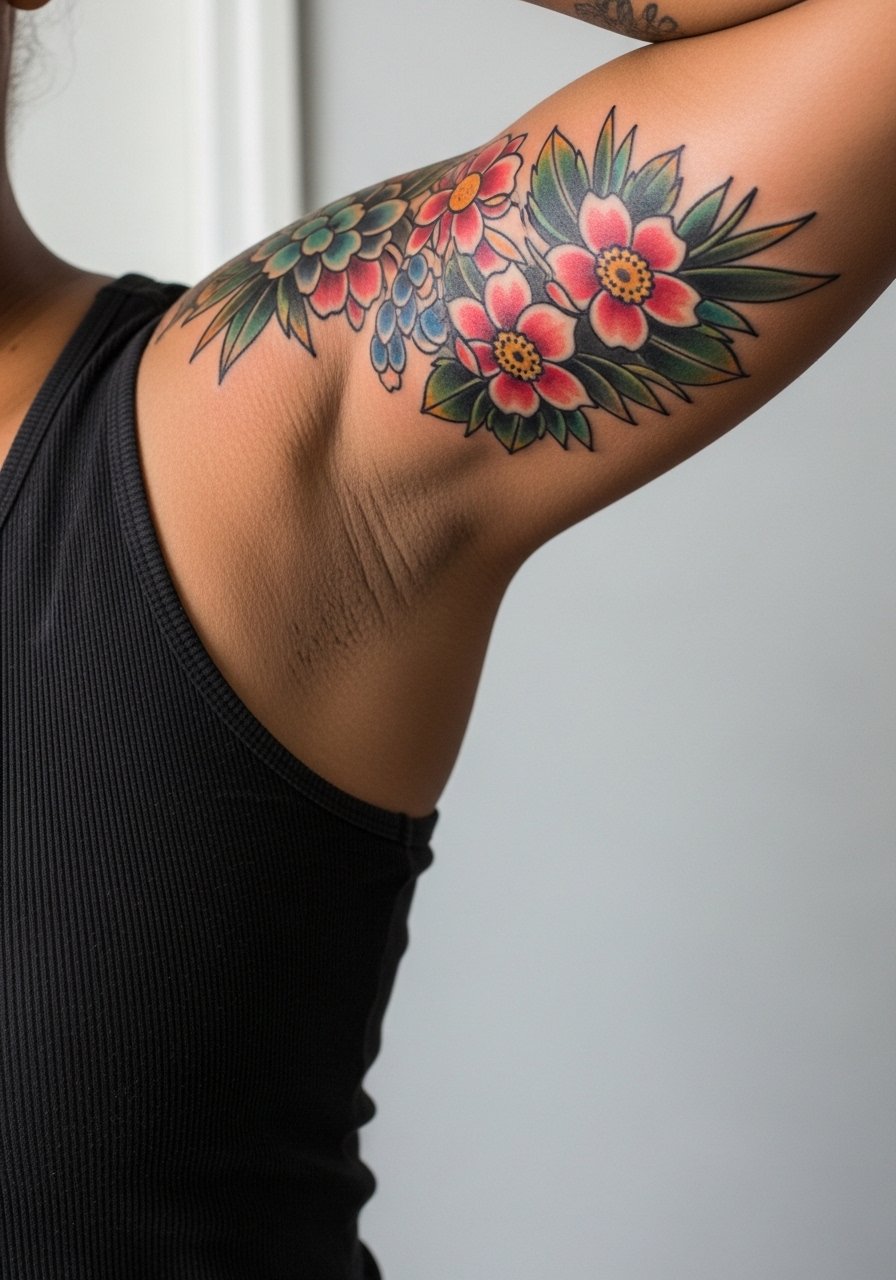
There is a debate about color on the inner arm. One camp favors bold color for the reveal impact. The other camp warns that pigment can fade faster here. If you want color, ask for richer black outlines and denser color packing so saturation lasts longer. These pieces usually take two to four sessions depending on size. Wear a strapless top women colorful or a raglan sleeve shirt when showing it off, since the contrast between skin and color reads best against solid fabrics.
5. Delicate Geometric Symbol, Small and Vertical
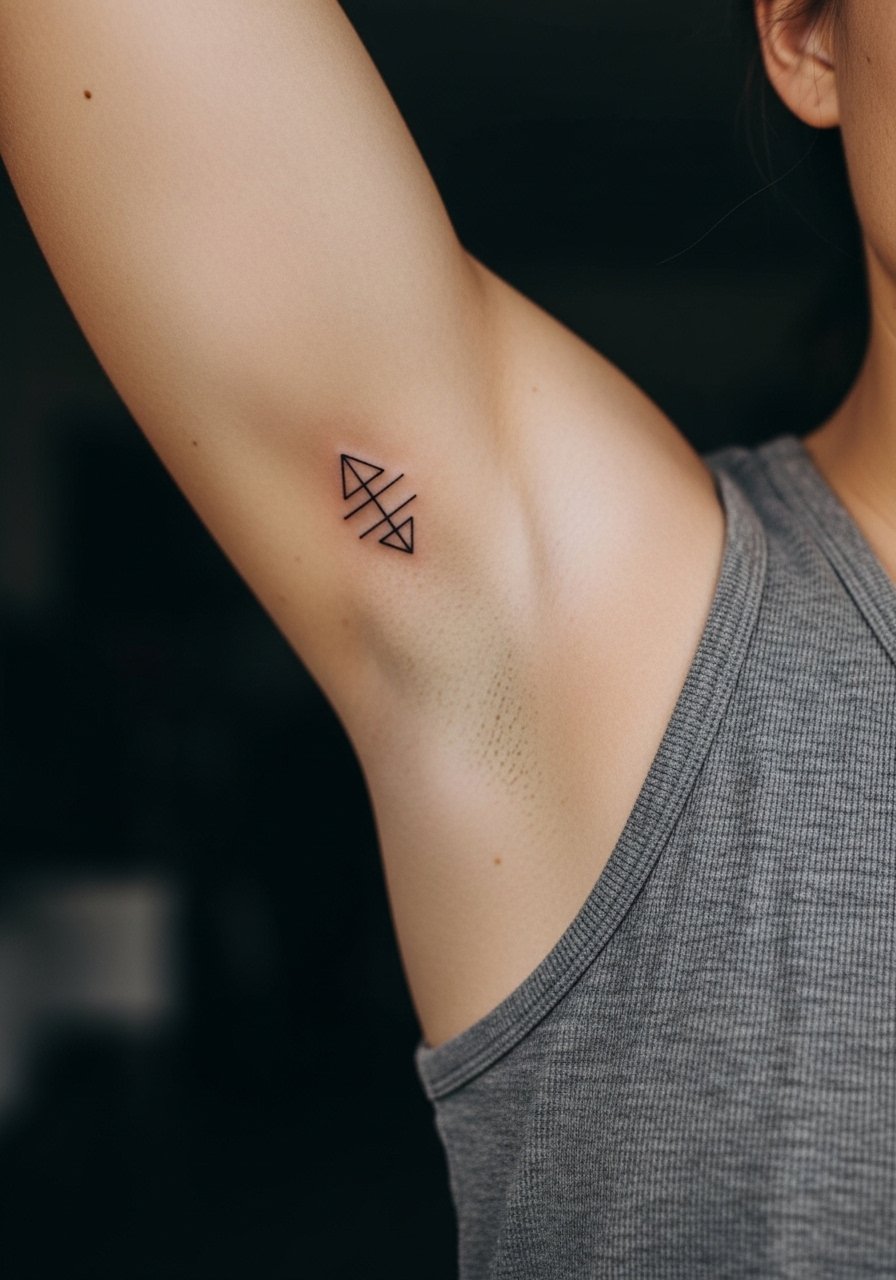
Geometric work needs breathing room. The biggest mistake is going too small with tight angles, which leads to merged lines after a few years. Ask for slightly thicker core lines with thin secondary lines so the geometry keeps its shape. This one is low session time and relatively low pain, but avoid machines with extreme needle groupings on thin skin. For a subtle show-off pair this with a fitted vneck tee women that exposes the inner arm without overpowering the design.
6. Fine-Line Butterfly Wing on the Inner Upper Arm
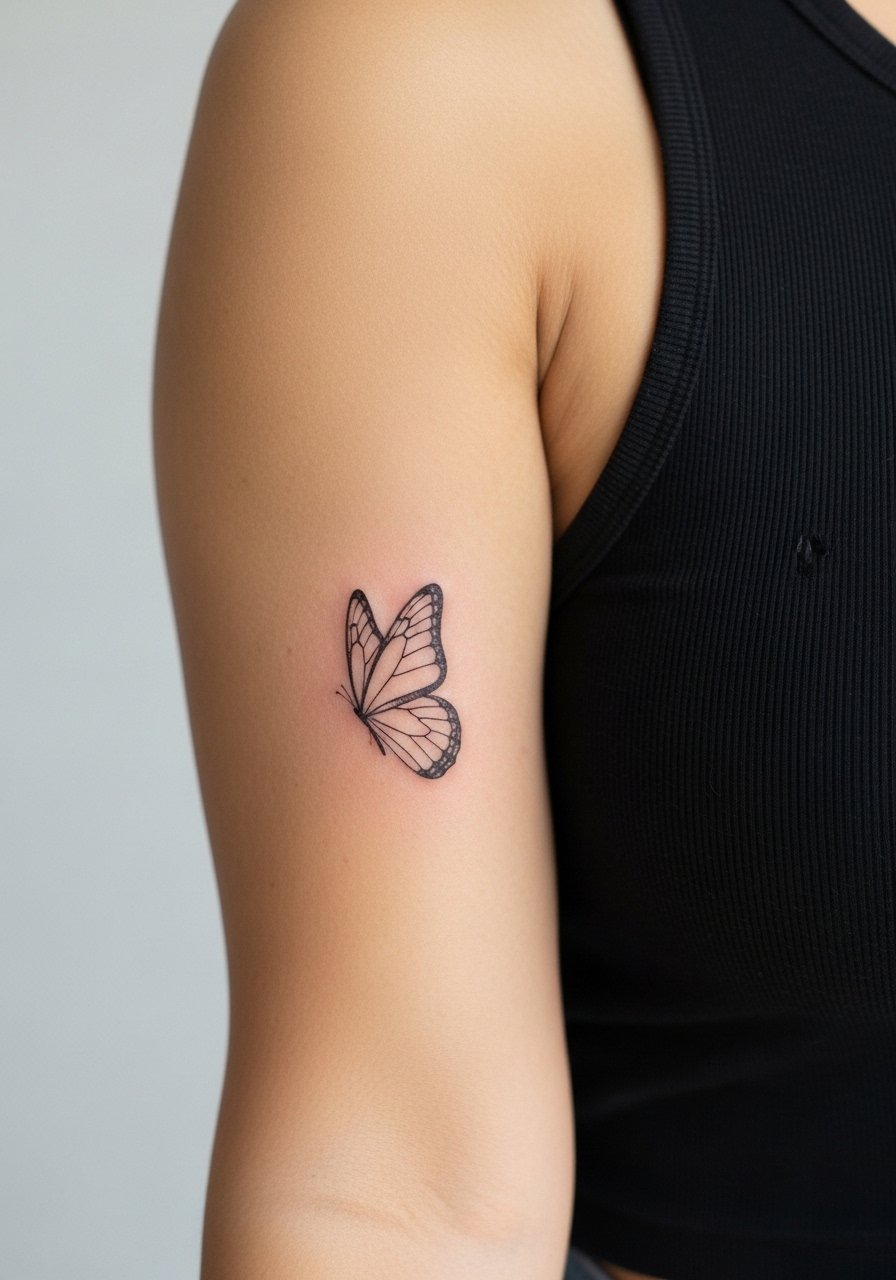
Most people pick the wing for the way it follows musculature when the arm moves. In consultation specify "one-sided wing" and exact vein thickness so the artist spaces lines for long-term clarity. The pain is comparable to other inner bicep pieces, and a 1 to 2 session timeline is typical. A common aging issue is overcrowded veins in the wing, which blur. Pair this with thin bracelets as accessories or wear a simple thin gold bangle stack to echo the wing lines when your arm is down.
Pre-Session Essentials
The inner bicep pieces above ask for short sleeves and easy access, so a few specific items smooth the appointment and first week.
-
Stencil transfer paper kit. Lets you preview placement on skin before the needle hits, which matters for the vertical stems and micro-realism eye above.
-
Topical numbing cream. Applied per instructions it reduces the edge of sensitivity for inner bicep shading sessions.
-
Thin protective film roll. Helpful for early days when sleeves rub the inner arm after the butterfly or floral pieces.
-
Fragrance-free body wash. Gentle cleansing keeps fine line work from becoming irritated during showers.
-
Aquaphor healing ointment. Thin layers for the first few days help prevent excessive scabbing on areas with dense shading like the animal face or realism eye.
7. Watercolor Celestial Cluster
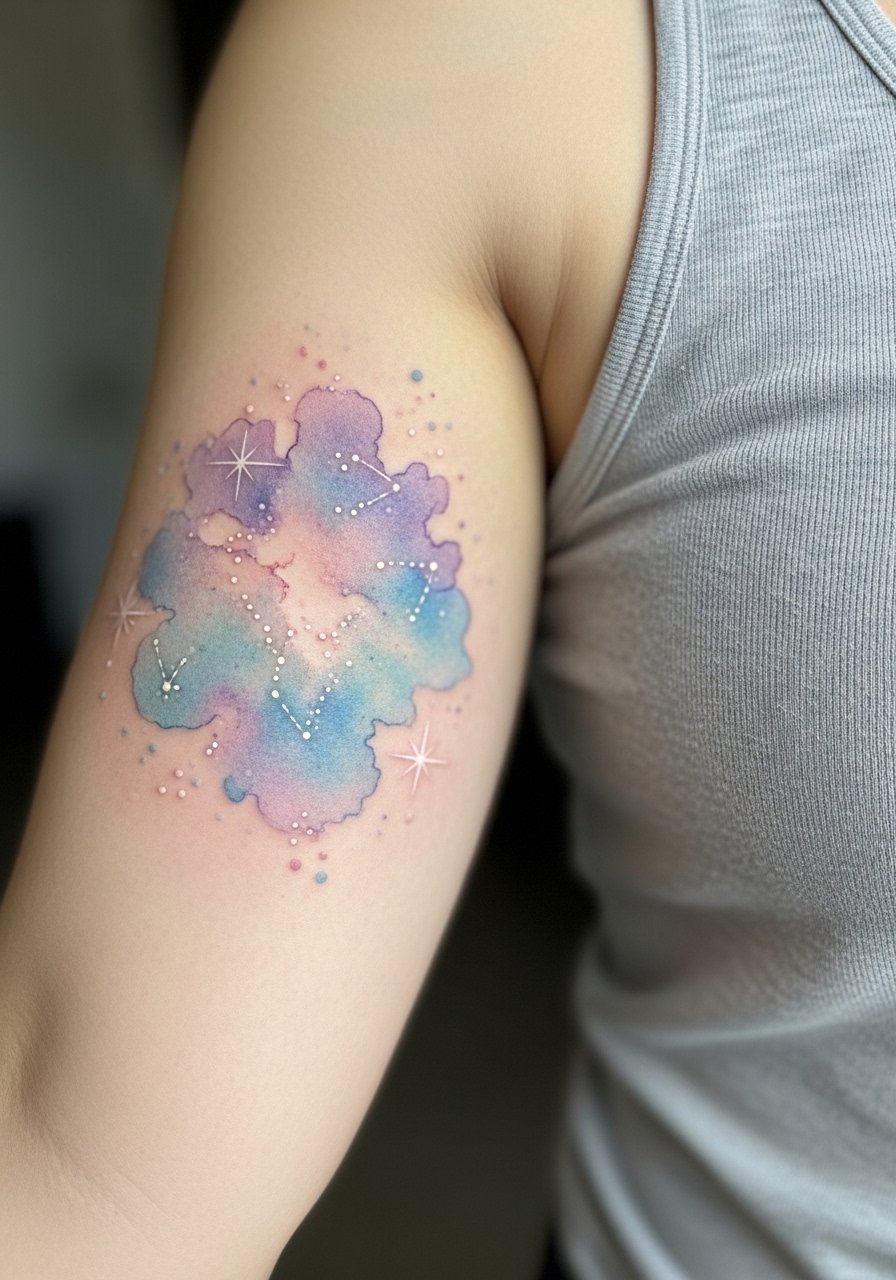
Watercolor on the inner bicep reads painterly when executed with soft edges and careful negative space. Tell your artist you want defined anchor points in black or gray so the color has structure and does not bleed into indistinction. Healing feels like a tender bruise for a week. The common error is asking for fully washed gradients with no line anchors, which often turns into a faded patch later. For showing it off try a coral tube top that picks up warm tones in the palette.
8. Ornamental Pattern Band That Wraps Slightly
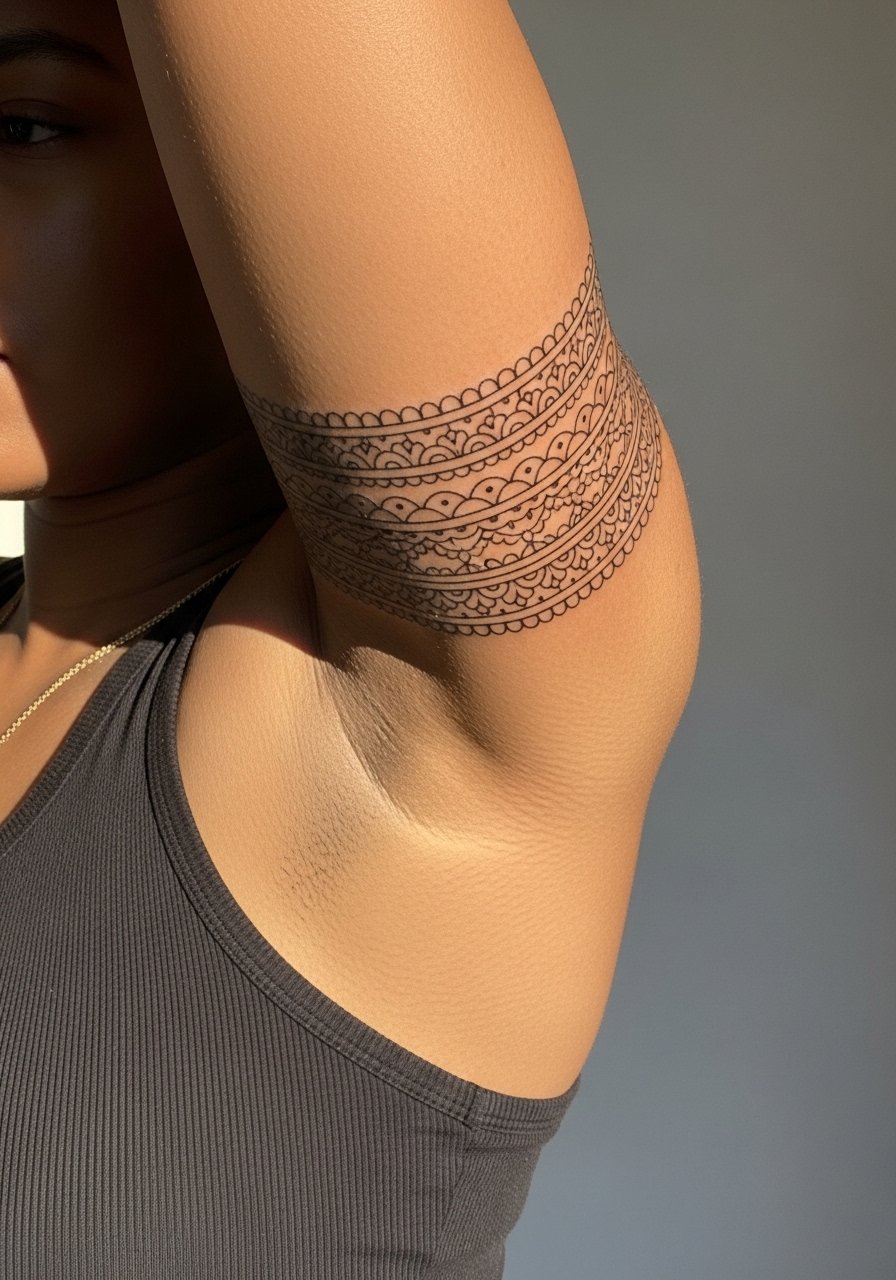
This jewelry-like band works when the repeat pattern has breathing room and the band is mapped to your bicep circumference. In consult ask for the band to be drawn on while your arm is relaxed and then flexed to check how it sits. Pain is moderate and the session is usually short for a two-inch band. A common mistake is tight repeating motifs with tiny dots that merge over time. Pair the look with a minimalist cuff on the opposite wrist or a minimal silver cuff bracelet when you want the illusion of inked jewelry.
9. Minimalist Quote Script, Vertical
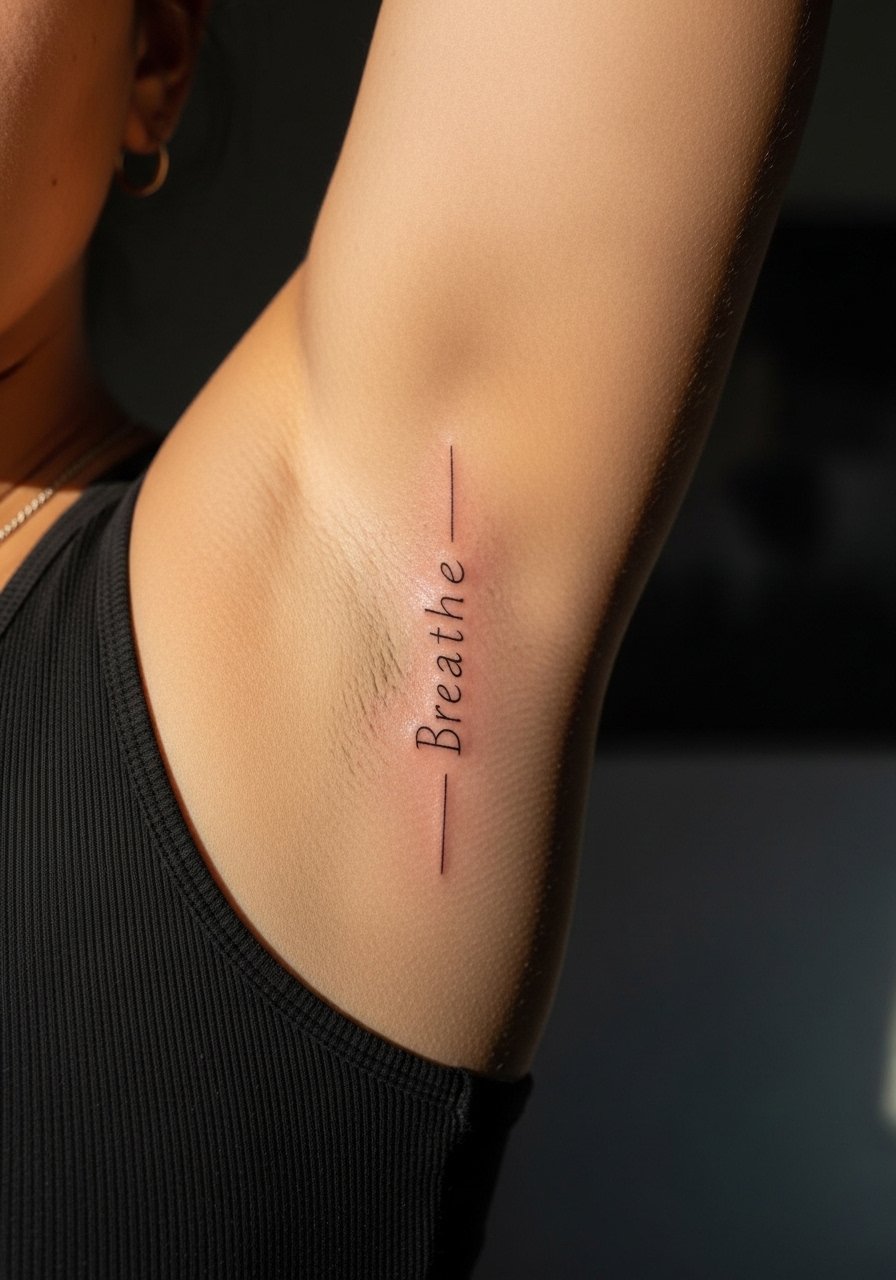
Text on the inner bicep is intimate because only certain arm positions reveal it. Pick a font that is legible at the size you want and ask your artist to stencil it on exactly where you read it most naturally. One session usually suffices, but small script can need a touch-up at year three. The mistake is choosing overly ornate lettering that looks beautiful in a mockup but blurs on thin skin. For subtle daytime reveals try a fitted vneck tee women that lets the line peek when you move.
10. Flower Forearm-to-Inner Bicep Extension
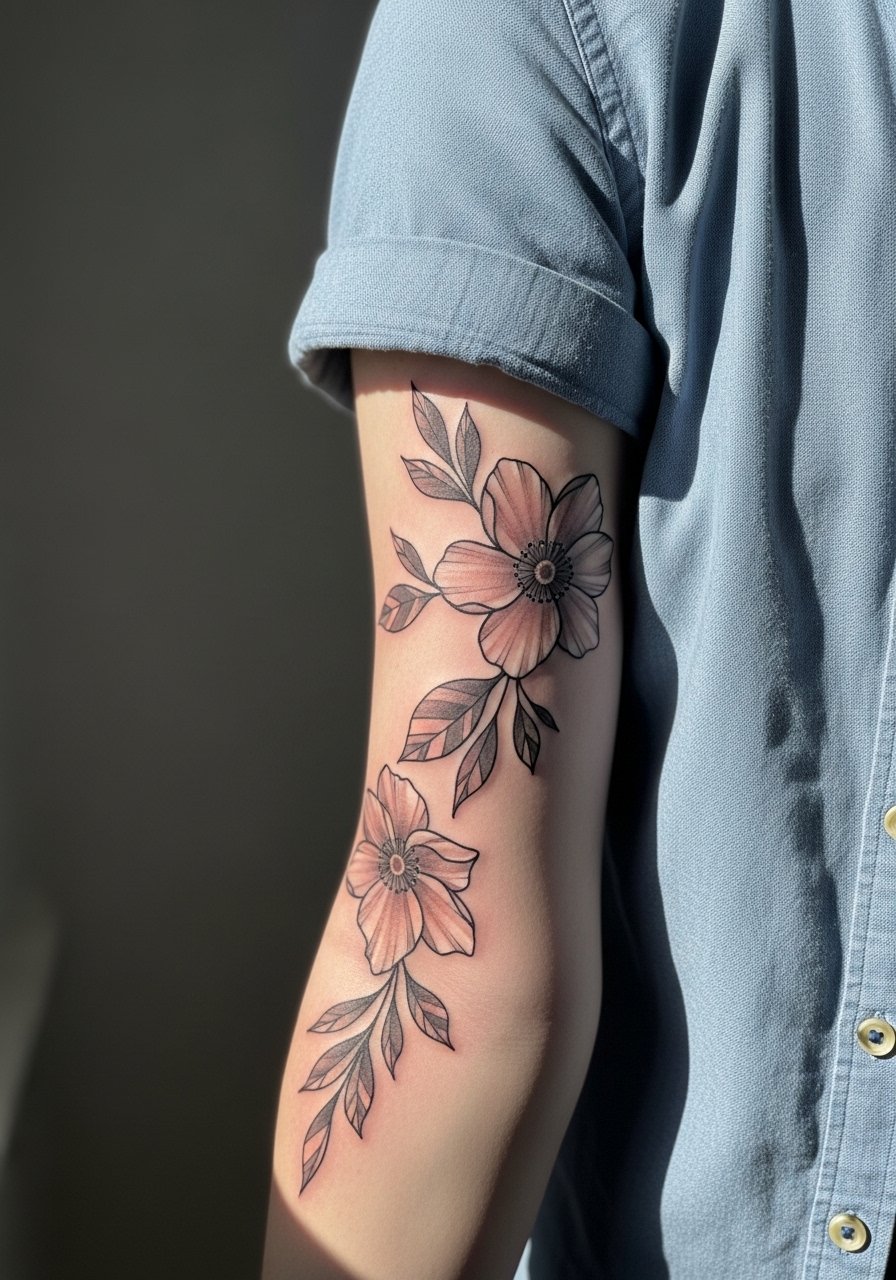
This extension is ideal if you want continuity from forearm to bicep. During consultation provide images of how the bloom flows along muscle curves, and ask for a composition that reads both when the arm is down and flexed. Sessions are usually two and sometimes three for color. The common error is mismatch in line weight between forearm flash and new bespoke work. For a refined reveal wear a linen rolled cuff shirt that echoes the organic flow when you roll sleeves up.
11. Text-Based Personal Slogan, Small Curve

Curved slogans follow the bicep arc and read when your arm is down. Tell your artist you want the line to sit along the natural contour so the words do not stretch oddly with flex. Pain is comparable to other inner arm pieces and most slogans are a single-session job. The common mistake is long phrases cramped into narrow curves. For understated show-off pair with a delicate chain necklace and a simple tee.
12. Single Line Botanical with Negative Space
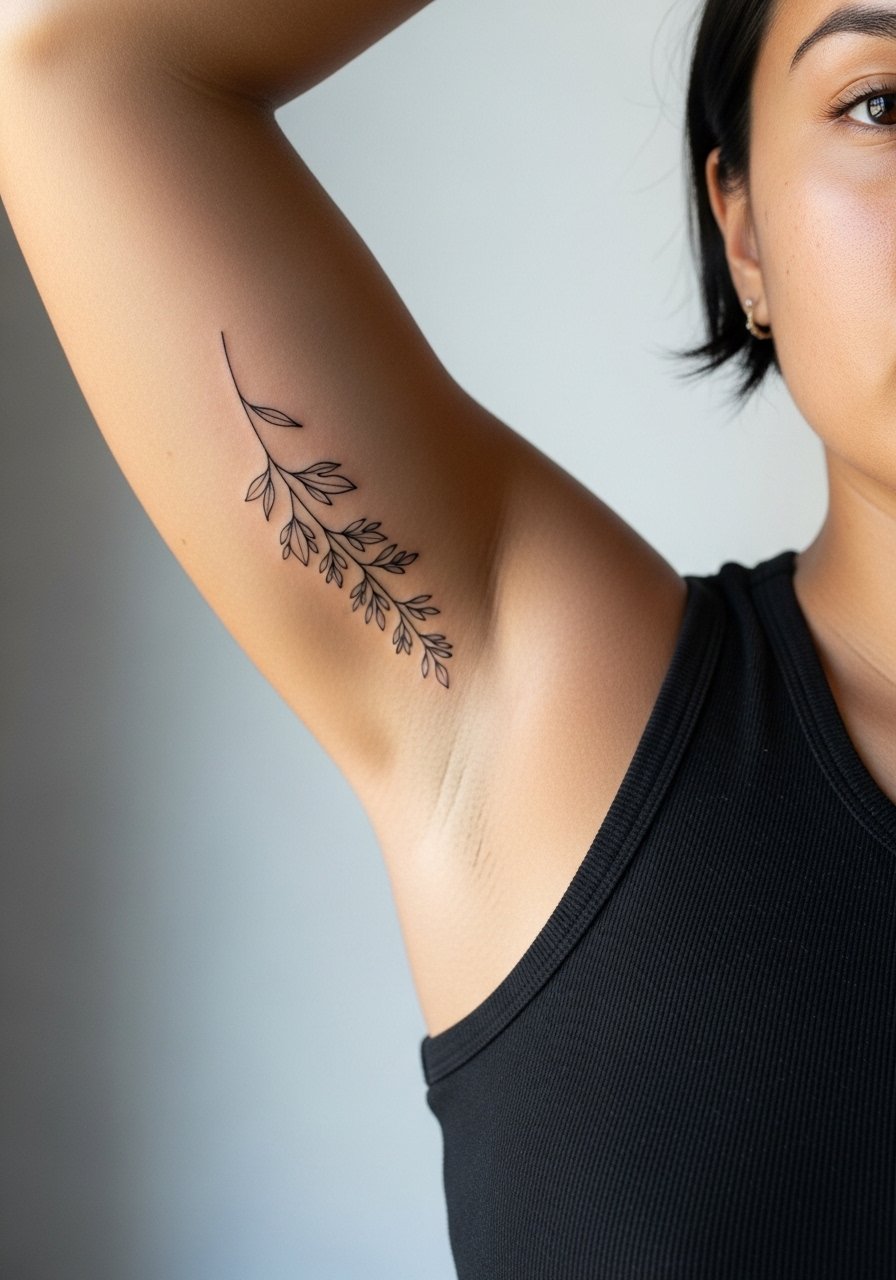
Single-line tattoos feel soft because they emphasize motion over detail. Ask for slightly heavier anchor points at joints in the design so those sections last as the thinner stretches settle. Expect brief session time and mild soreness. A mistake is demanding a perfectly unbroken continuous line without room for slight joins, which makes touch-ups tricky. This style ages well when given space and is a quiet complement to layered bracelets.
13. Geometric Symbol with Personalized Coordinates
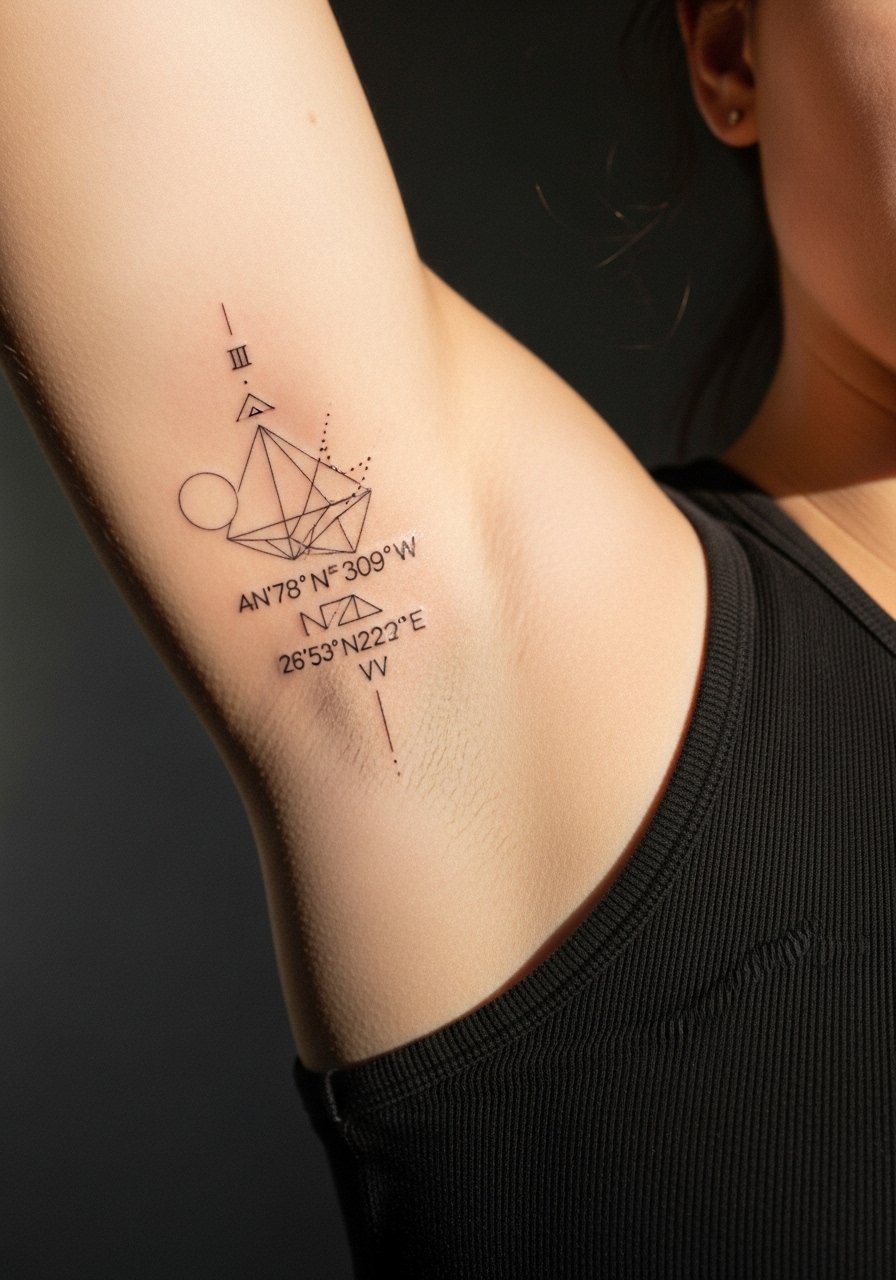
Geometric pieces that include numbers or coordinates must have exact text in the stencil. Ask for a slightly larger font than you think you need so numerals remain crisp after healing. Pain and session time are modest. The common mistake is tiny numerals that blur; scaling up solves this. For a balanced outfit when showing it off choose a loose short sleeve tee to keep attention on the symbol rather than patterns.
14. Stipple-Shaded Crescent Moon
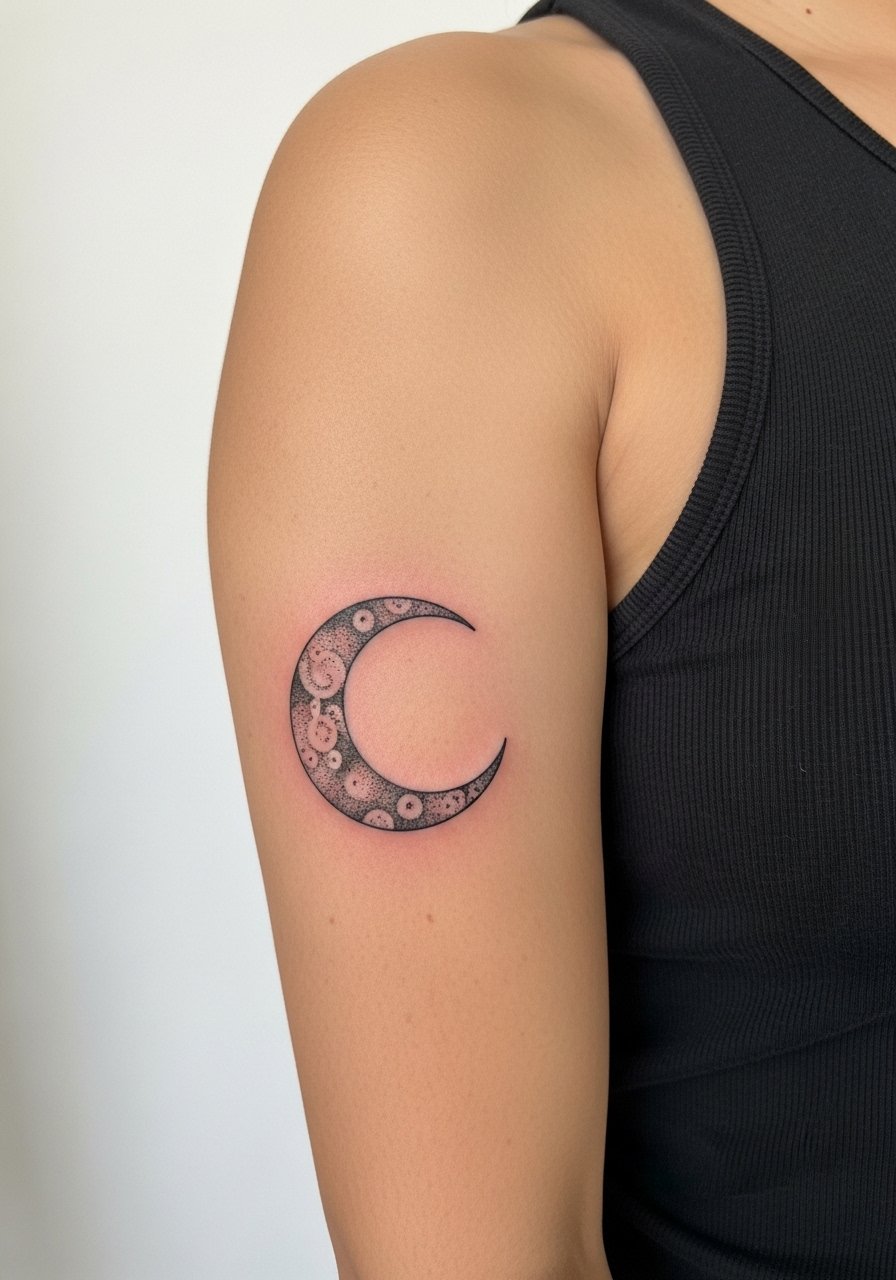
Stipple shading uses dots to build tone and that technique holds well on thin skin if the artist spaces the dots correctly. In consult ask for sample sections of stipple density so you know how bold the moon will read at one month and one year. Sessions are typically short to medium. A common error is asking for overly dense stippling which can read as a block later on. This pairs naturally with thin rings or a thin gold bangle stack to keep the aesthetic delicate.
15. Tiny Botanical Cluster Near the Inner Elbow
Placement just above the inner elbow has more movement, so keep designs small and spaced. Tell the artist you prefer flexible placement so the piece does not sit on the crease when you bend the arm. This area is moderately painful and may need a short touch-up. The common mistake is positioning directly on the crease which accelerates fading. A loose button up shirt works well for session wear here since you can roll sleeves and give full access.
16. Minimal Crescent with Dot Trail
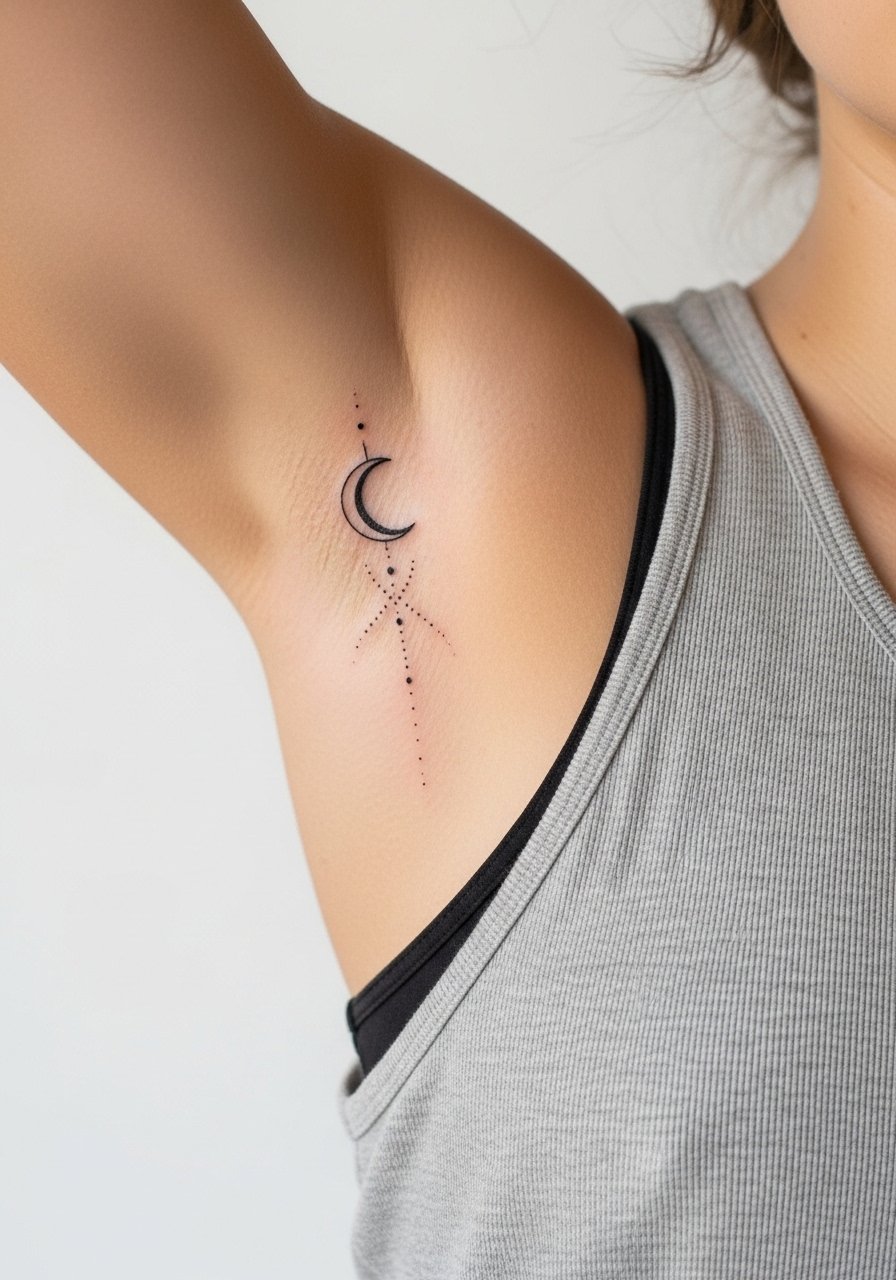
This pared-back motif ages predictably when the dots are slightly separated rather than touching. Ask for spacing that keeps dots visible at year two. Session time is short and pain is mild to moderate. The common error is requesting micro-dots right next to each other, which merge. For a casual reveal pair with a fitted vneck tee women or a rolled sleeve to let the dots peek out.
17. Illustrative Small Rose with Soft Shading

Illustrative roses on the inner arm read feminine without being ornate. Ask for stipple and whip shading to keep depth while avoiding large filled blacks that can look heavy here. Plan for one to two sessions. A common aging issue is overly tight petal lines that fill in, so make sure the petals have negative space. When you want to show it off wear an off shoulder blouse black that creates dramatic contrast.
18. Abstract Wave Linework
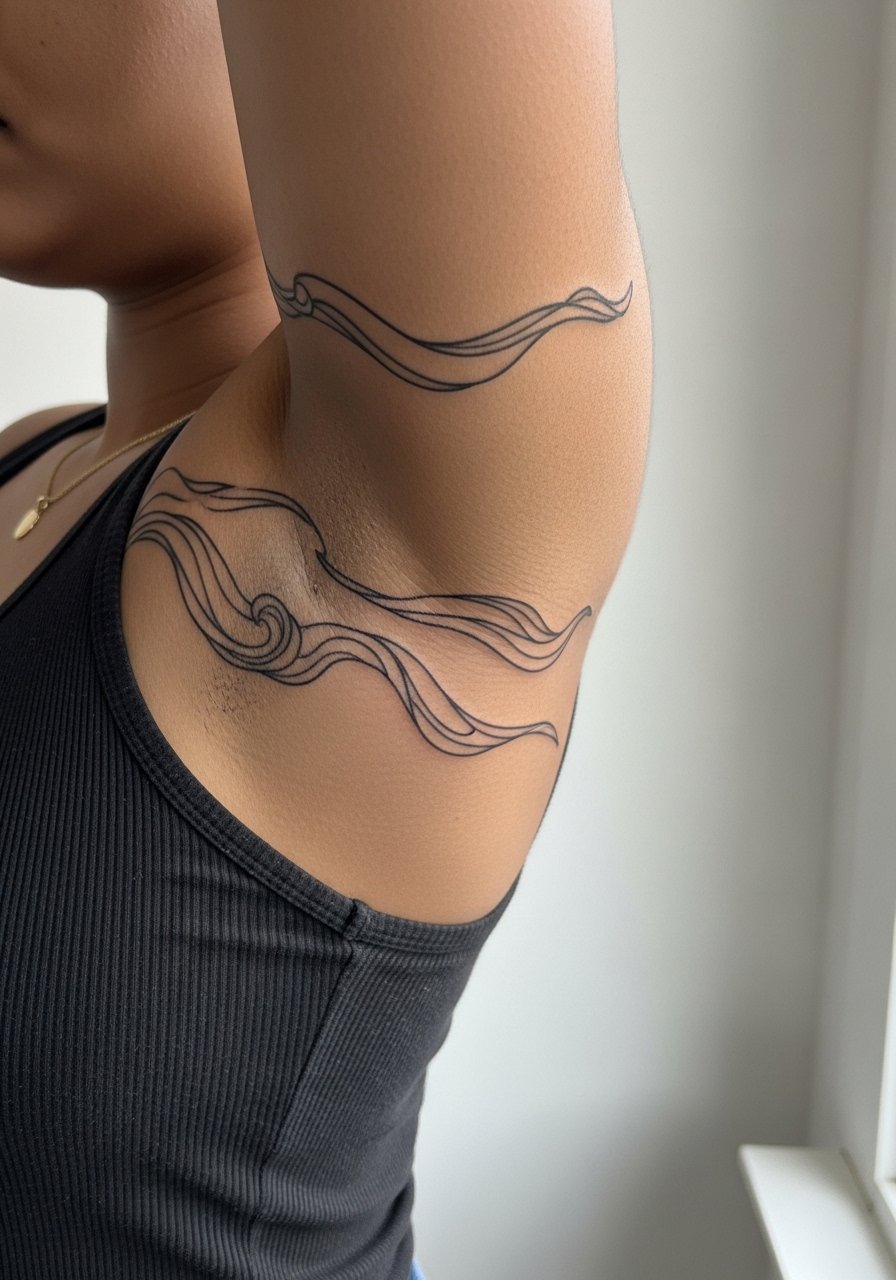
Abstract waves complement the bicep curve and are forgiving as skin stretches. In consult, request variable line weight so the pattern breathes over time. Expect a single session for a medium-length design and mild soreness after. The common mistake is repeating the same line thickness throughout. This piece is low maintenance and pairs well with stacked thin bangles.
19. Small Mandala Petal Cluster
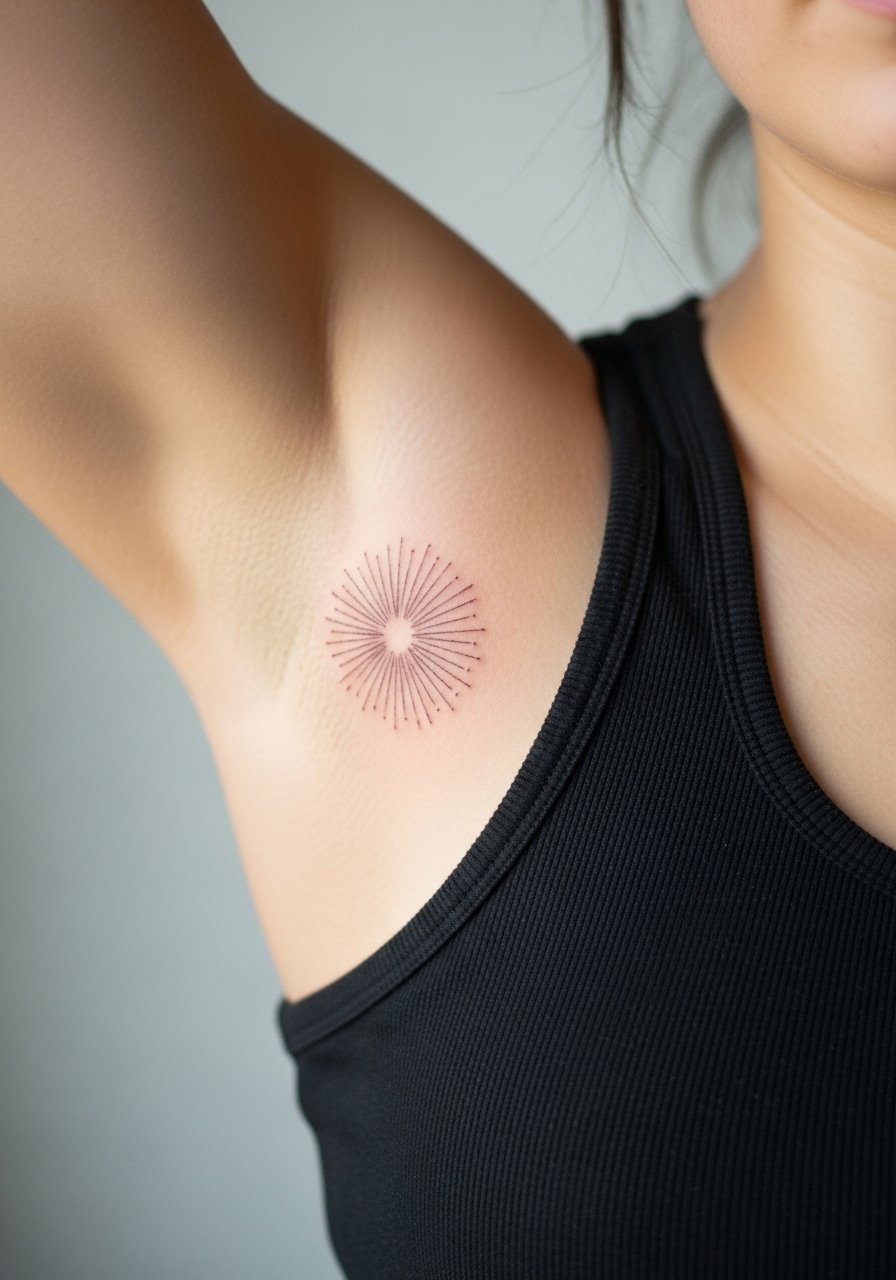
Mandala elements need spacing between radial lines to prevent merging. Ask your artist to test spacing on similarly textured skin before committing to final line weight. This piece is a tad more sensitive due to proximity to the inner arm fold and may need a short touch-up. A common error is cramming too many concentric rings into a small diameter. Wear a loose short sleeve tee to let the radial symmetry show without distraction.
20. Tiny Constellation with Micro Stars
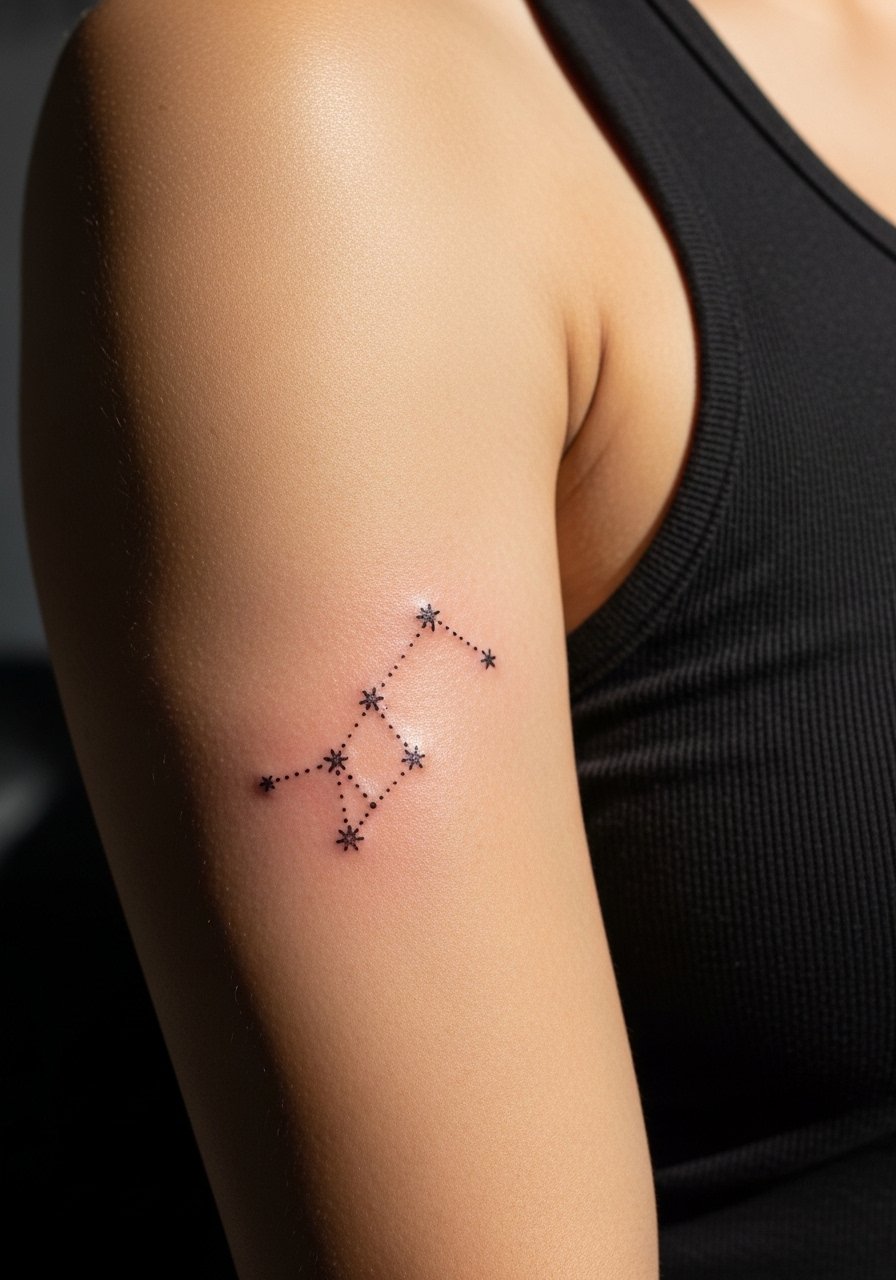
Constellation pieces feel private and read beautifully when the connecting lines are kept minimal. Ask for small but spaced stars and slightly thicker anchors so they do not blur into dots over time. Session time is brief and pain is manageable. The typical mistake is asking for too many tiny stars packed closely. This works nicely with neutral sleeveless tops that let the tiny constellation peek.
21. Single Stem Daisy, Slightly Curved
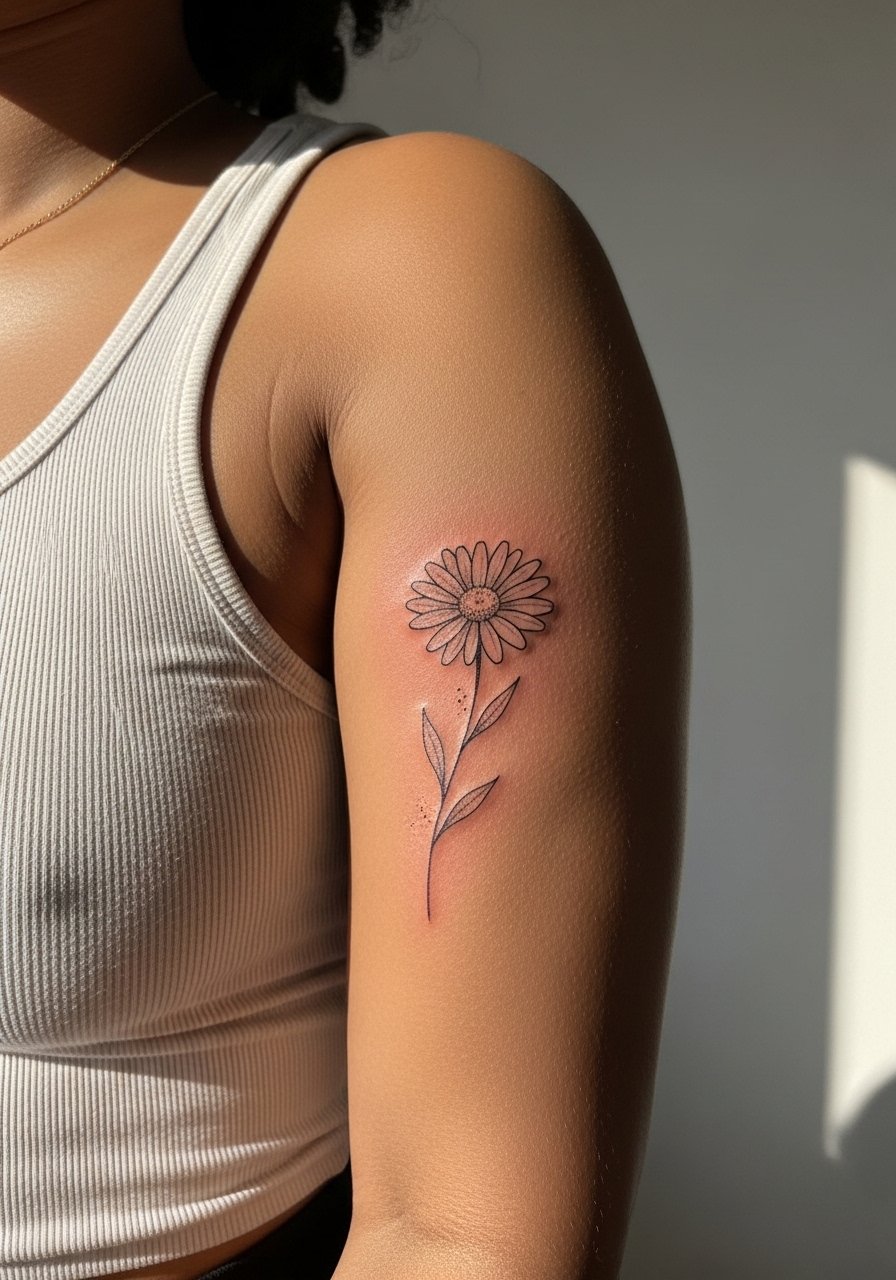
Daisies with slight curvature follow the muscle line and look soft. Ask for open petals with slight gaps so the shape keeps clarity. One session usually covers this work. Pain is mild to moderate. A common mistake is filling the center too densely which ages into a dark spot. Pair with delicate bracelets or a thin gold bangle stack for a feminine touch.
22. Small Anchor with Rope Detail
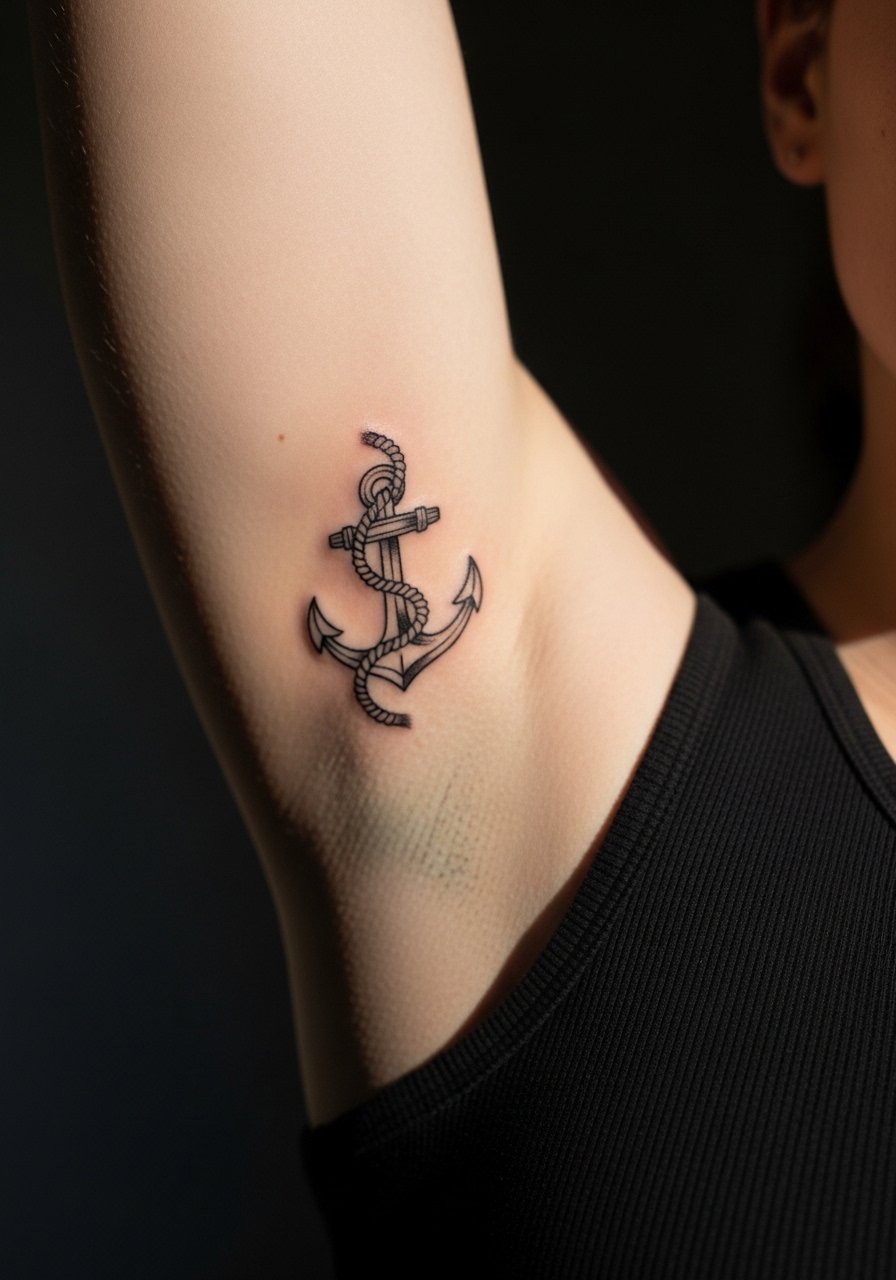
Anchors read classic and hold up when rope details are spaced out. Ask your artist to keep the rope lines a touch thicker than micro to prevent merging. This is a short session and the area is moderately sensitive. The common error is too many tiny rope twists that turn into a blur. For session comfort, a loose button up shirt makes access easy.
23. Petite Floral Wreath Around a Small Word
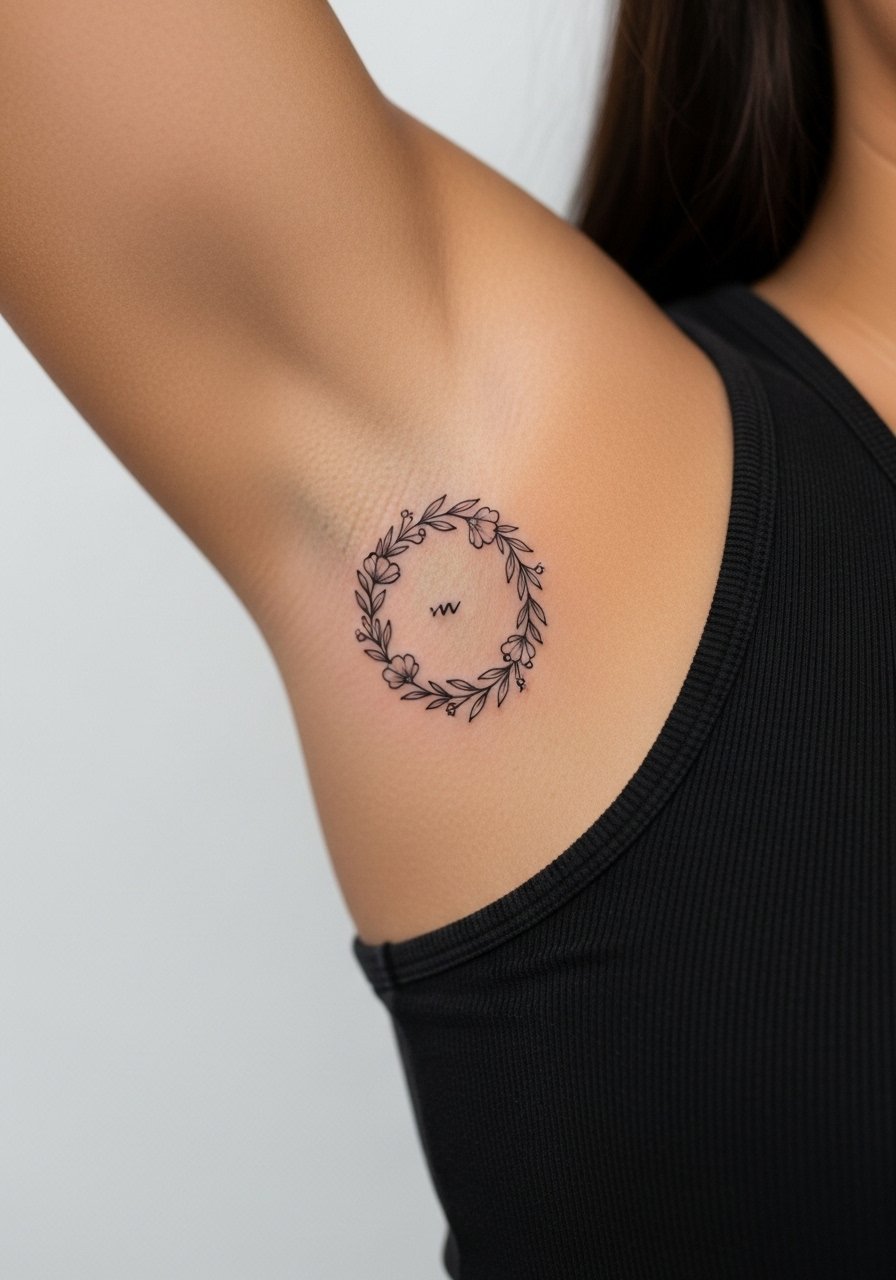
Wreaths framing words require careful spacing so the type remains legible. Tell your artist you want letter spacing increased slightly to compensate for healing. This combination often fits into a single session. A common mistake is tiny script squeezed into narrow wreaths. Wear a delicate chain necklace to echo the wreath without competing.
24. Semi-Abstract Female Silhouette
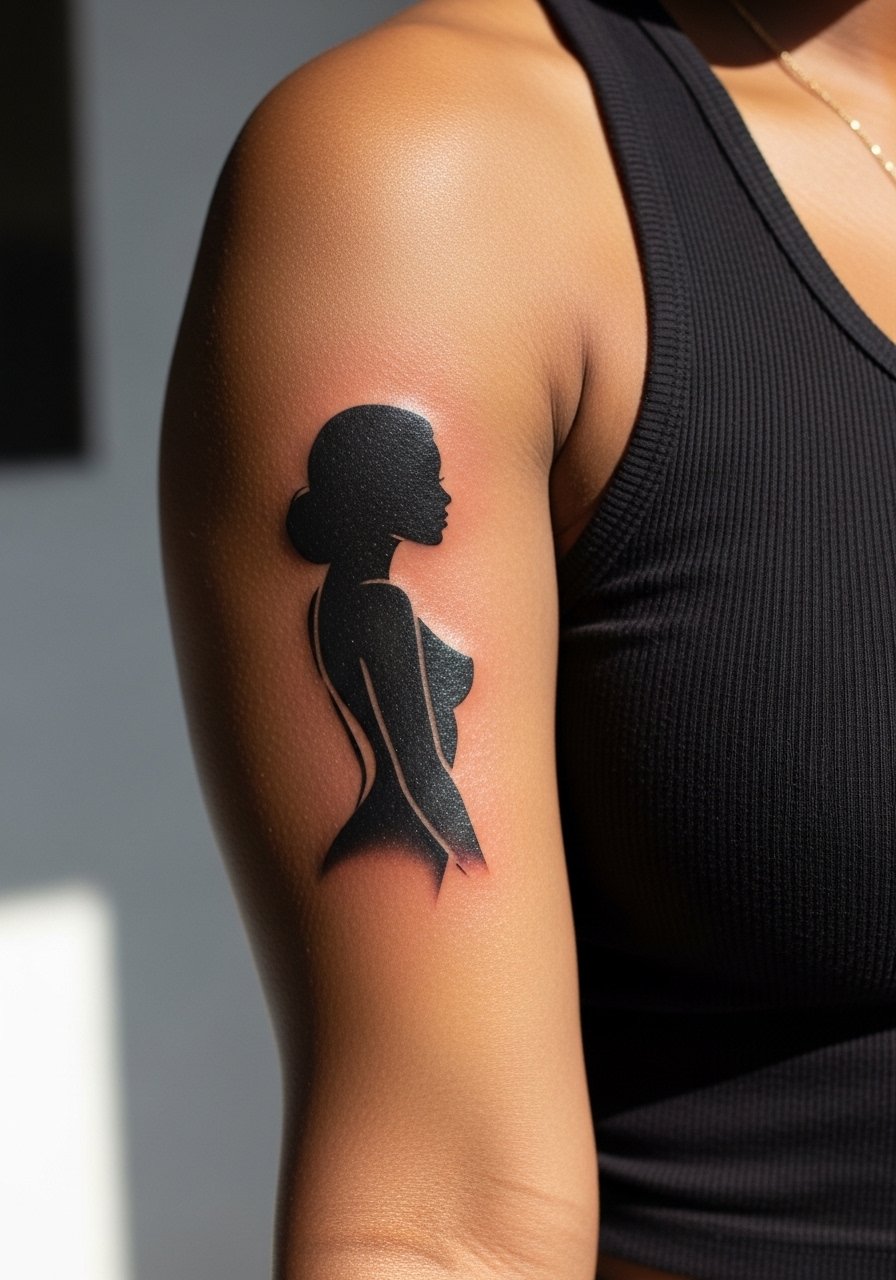
Silhouettes rely on clean linework and negative space. During consultation ask for bold anchor lines with thinner interior detail so the silhouette keeps definition when healed. Pain and session time are moderate. A mistake is overcomplicating the interior, which detracts from the silhouette effect. This piece pairs elegantly with a minimalist watch or thin bangles.
25. Fine-Line Fern That Follows Muscle Curve
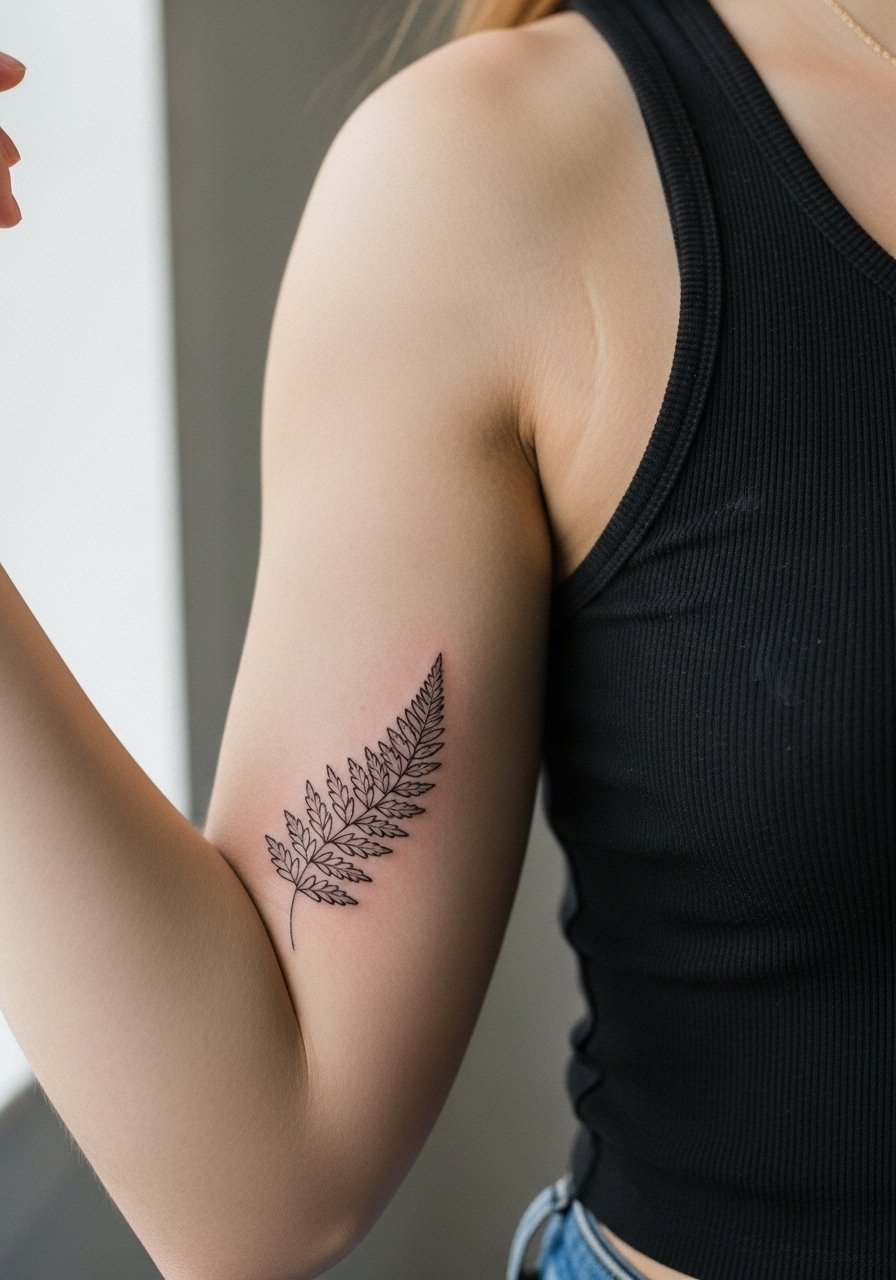
Ferns work well as elongated compositions since the fronds can be spaced to age cleanly. Ask your artist for a mix of stipple and linework to add texture without heavy fills. Session time is short to medium and soreness is typical for a few days. A common mistake is crowding fronds too close. For daytime reveals wear a loose short sleeve tee so the fronds can be seen without noise from patterns.
26. Tiny Keyhole with Ornate Surround
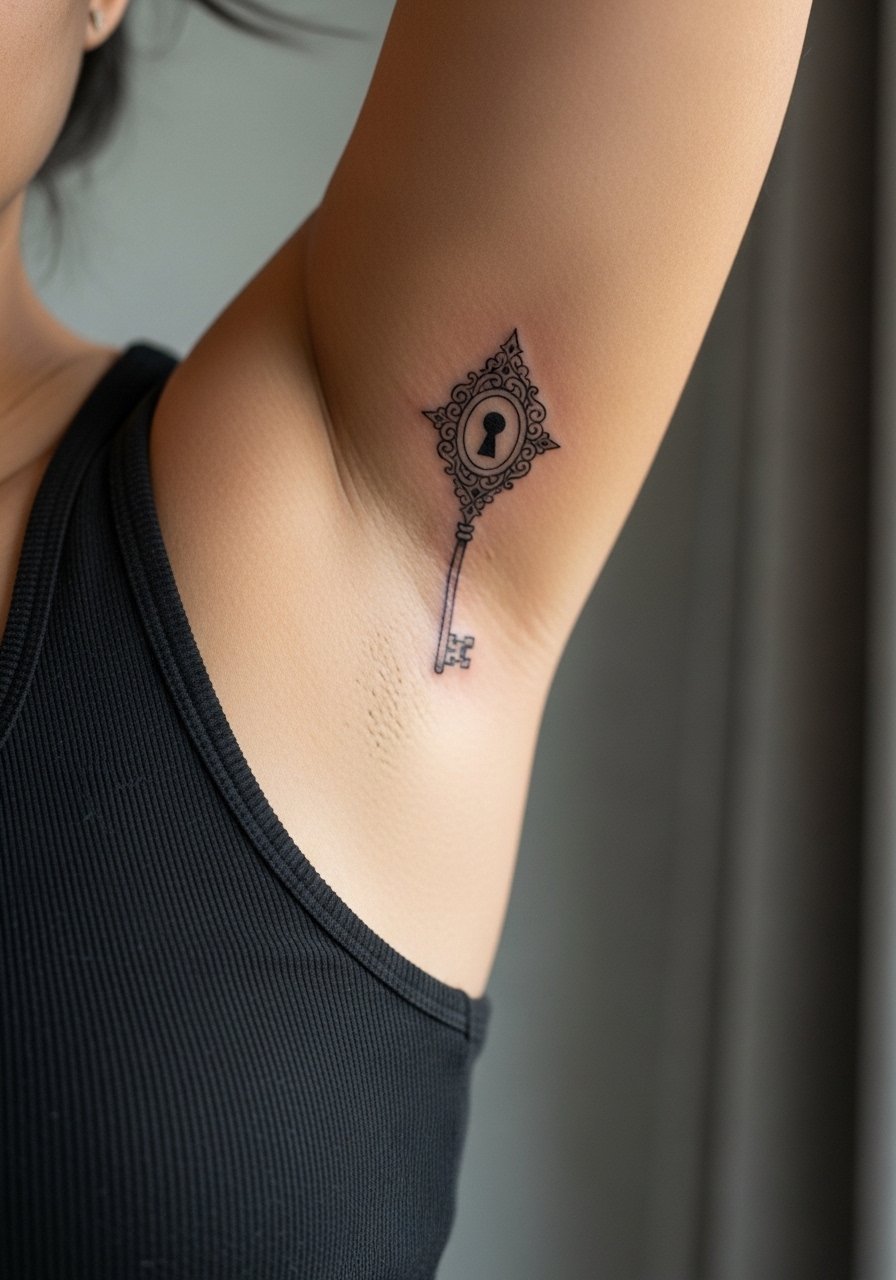
A keyhole motif reads like a private secret when placed on the inner arm. Ask for simplified ornamentation that reads at small sizes and avoid micro filigree. Session time is short and pain is manageable. The common mistake is over-detailing, which leads to merged ornamentation. Pair it with a thin ring stack so the small emblem feels intentional in everyday styling.
27. Soft Script Single Word with Micro Flourish
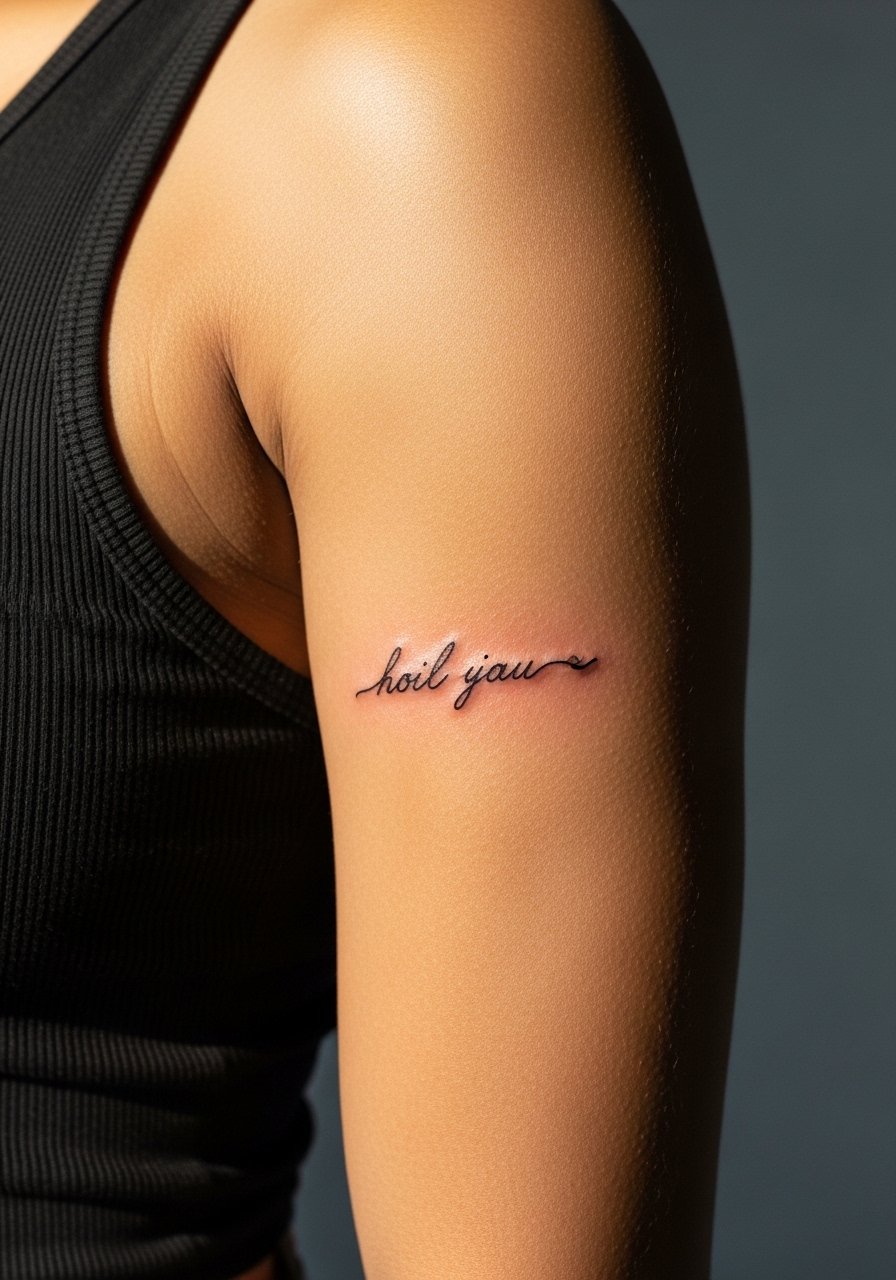
A one-word script is one of the most private bicep placements because it only reads when you lift your arm. Tell your artist you want a slight flourish that does not touch the primary letterforms so it keeps clarity over time. Expect one session and mild tenderness. The common mistake is cramped flourishes that invade the letters. For low-key showing off pick a fitted vneck tee women or an open collar that reveals the curve of the word when you move.
Frequently Asked Questions
Q: How much does an inner bicep tattoo cost and how many sessions will it typically take?
A: Prices vary by artist and city, but plan on multiple sessions for larger realism or color pieces and a single session for minimalist or small script work. Complex realism like an eye or animal face often needs two to three visits, while a delicate stem or small script is usually one. Discuss session length and a touch-up plan during your consultation.
Q: Will fine-line work on the inner bicep blur faster than bolder pieces?
A: Many artists see thin fine-line work soften sooner, especially on thinner skin that moves a lot. One camp argues fine lines are fine if spaced and inked slightly deeper, while the other camp prefers bolder weights for longevity. Ask artists how they approach depth and spacing and plan for a touch-up at year two or three if you want it crisp.
Q: Is color on the inner bicep a bad idea for longevity?
A: Color can look beautiful here, but it may fade faster than black and gray because of friction and occasional sun exposure when you lift your arm. If you choose color, request denser packing and strong outlines. Expect possible refresh sessions down the line and prioritize aftercare strategies supplied by your artist.
Q: How should I dress for the appointment for an inner bicep tattoo?
A: Wear clothing that allows easy arm access, like a loose button up shirt or a tank. Button-ups let you expose the area without pulling fabric over your head and tank tops provide a full range of motion for the artist. Comfortable, loose clothing makes the session smoother.
Q: What are realistic touch-up expectations for different styles on the inner bicep?
A: Fine-line and micro-realism often need touch-ups sooner, around year two to three, while bolder neo-traditional or heavily saturated black and gray may hold longer. Stipple and dot work usually age predictably if dots are spaced. Have a talk about a planned touch-up policy with your artist before booking.
Q: How do I find an artist who specializes in the styles shown here without naming individuals?
A: Use targeted searches like your city plus "inner bicep tattoo women" on appointment platforms, check TikTok tags such as #biceptattoowomen for recent reels, browse Pinterest boards for style matches, and read local convention listings to discover traveling specialists. Spend time reviewing healed photos in portfolios and ask about healed work, not just fresh images.
