
Fine black and grey ink reads like a mood rather than a color. It settles into shadows on the body and keeps its drama without screaming for attention. If you want Game of Thrones imagery that still looks deliberate at year five and ten, think about contrast, spacing, and placement before you book. The first idea is a forearm piece that shows how line weight and negative space make a direwolf feel like armor.
1. Direwolf Head, Inner Forearm
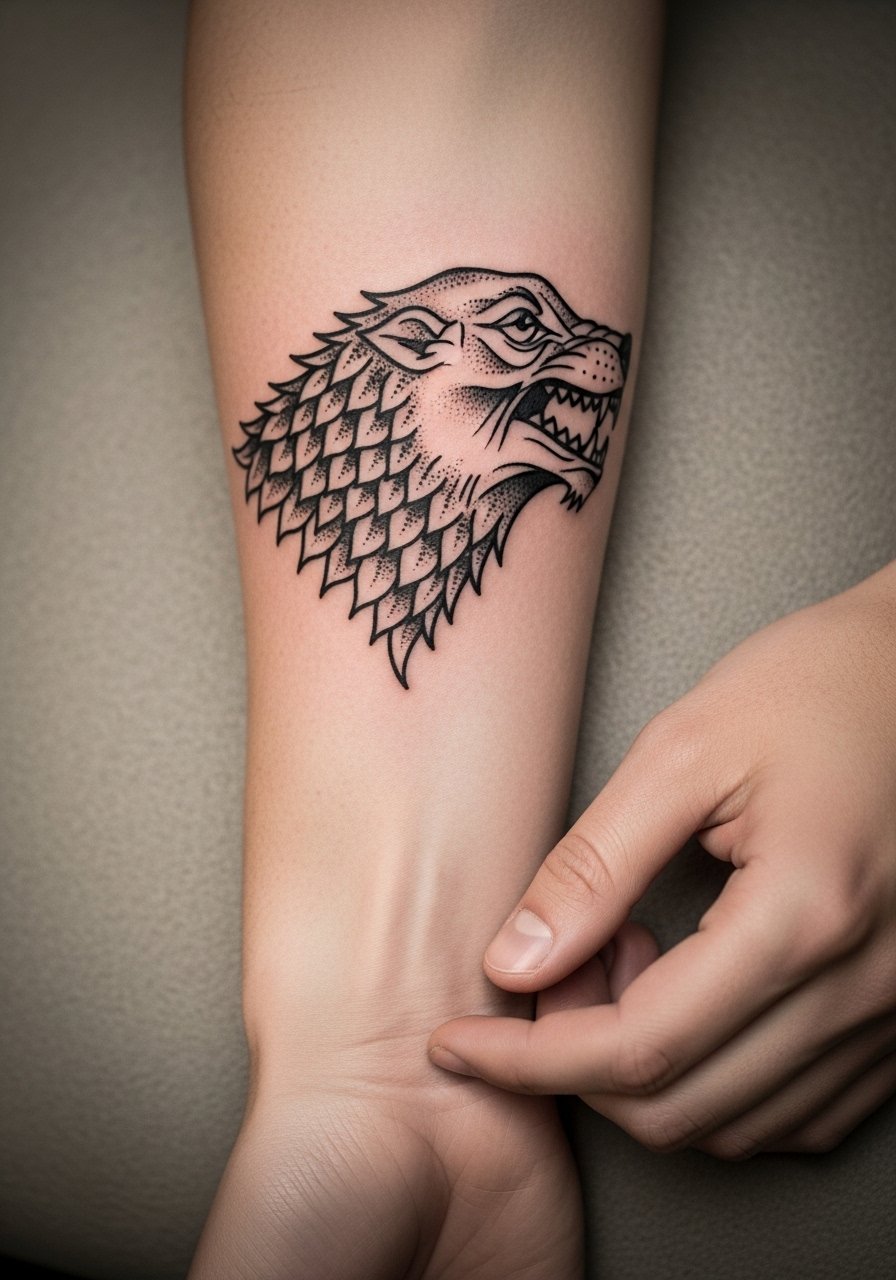
I recommend the inner forearm for a direwolf because the flat surface keeps linework consistent and the design reads well from distance. Tell your artist you want strong contrast in the muzzle and stipple shading for the fur so the texture holds instead of blurring. A common mistake is packing tiny fur lines too close together. They look great fresh and then merge after a few years. Expect moderate session pain and a one to two hour session depending on scale. Pair it with rolled sleeves and a loose button-down shirt when you want to show it off.
2. Winter Is Coming Script, Collarbone
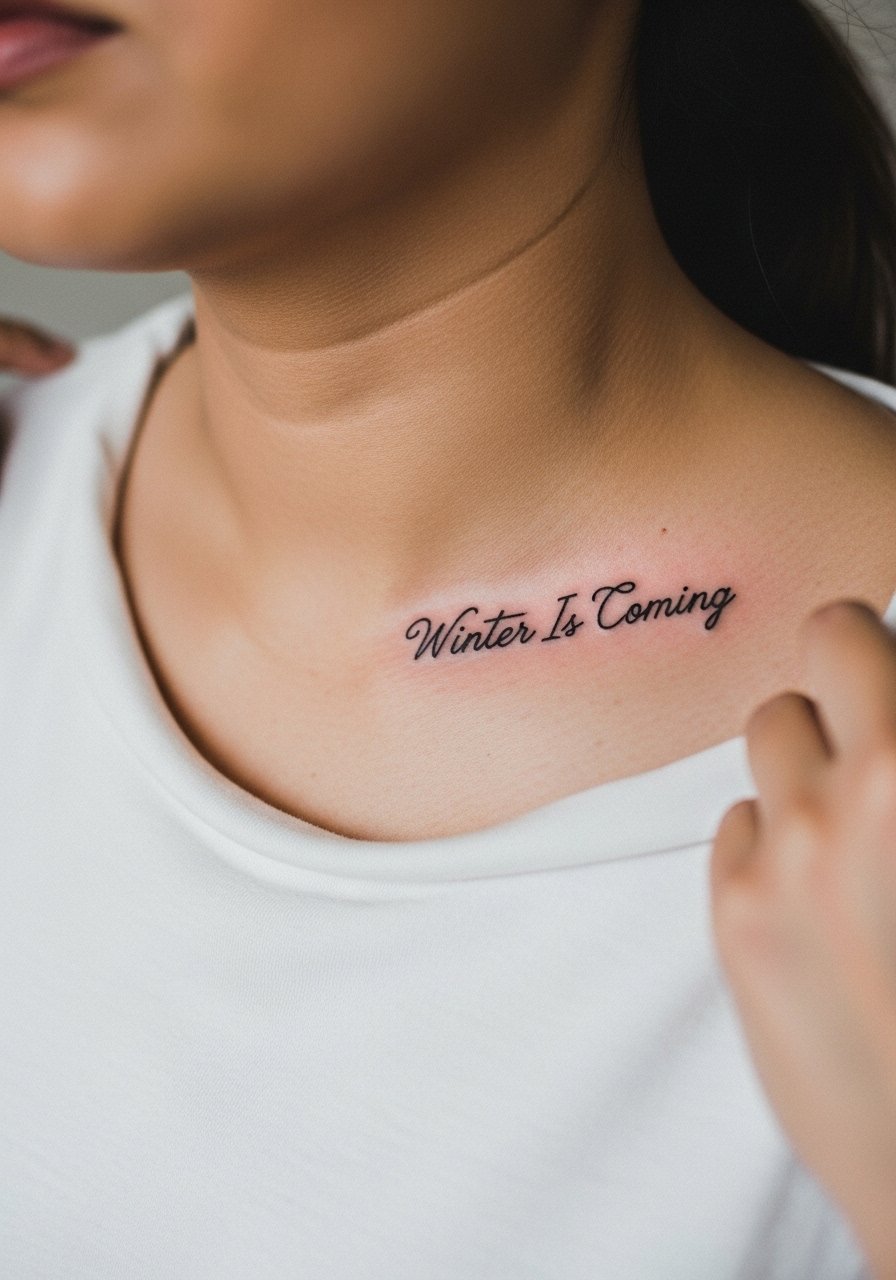
Fair warning: collarbone script can look delicate one week and thin a year later if the letters are too light. Ask for a slightly heavier line weight and consistent spacing between letters. Tell your artist to stencil the phrase across the bone to follow the collarbone's curve rather than cutting straight across. The session is short but the area is boney and sensitive. For showing it off, an open-back midi dress or a wide-neck tee keeps attention on the lettering without competing.
3. Iron Throne Silhouette, Upper Back
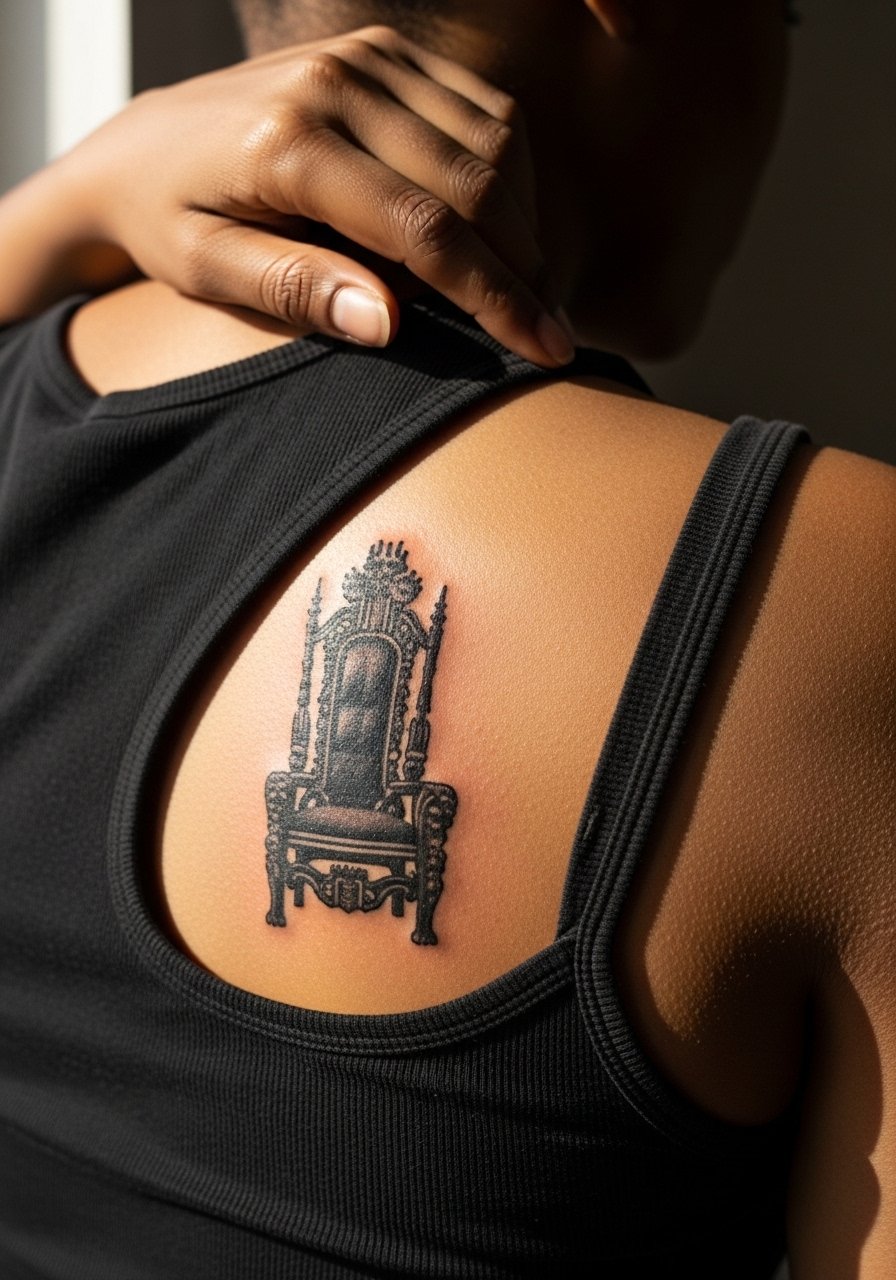
When you want a graphic statement that still reads as subtle from across a room, a throne silhouette uses solid black shapes and soft grey washes. In consultation, ask for a balance between saturated blacks for the throne's base and feathered greys for the spires. The upper back tolerates longer sessions but needs careful positioning so the spine alignment looks intentional. For session comfort, wear a loose tank top you can pull down slightly. Expect touch-ups at year three in high-contrast zones.
4. Three-Eyed Raven, Nape of Neck
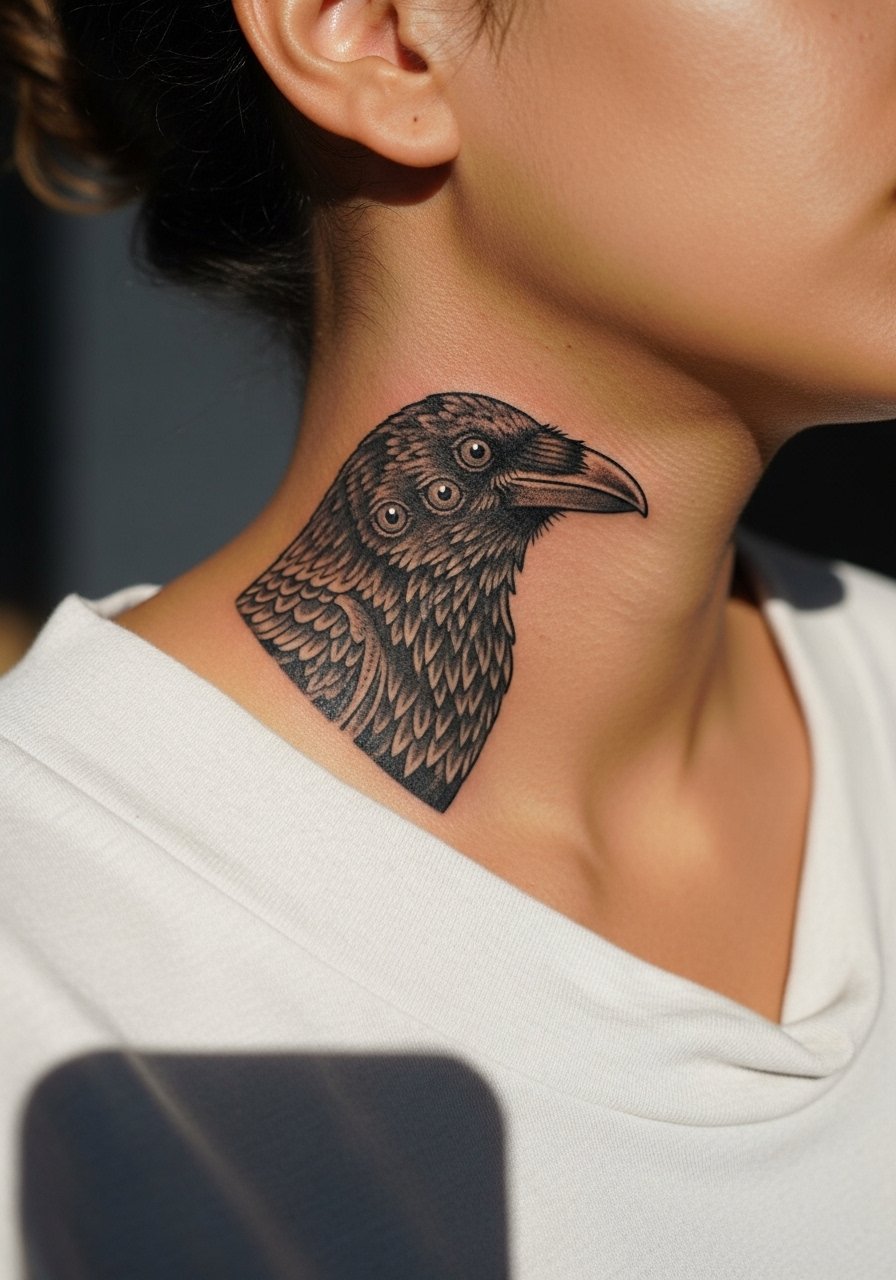
The side-neck placement is visible and intimate, so bring references that show exact eye spacing and feather texture. Some artists split into two camps on neck ink. One camp says the area moves too much and fine work blurs within two years. The other camp says precise needle depth and spacing keeps detail intact. Ask your artist where they stand. The session stings more than an upper arm piece. For evenings out, pair this with a thin chain pendant necklace that frames rather than hides the tattoo.
5. Valyrian Steel Sword, Outer Calf
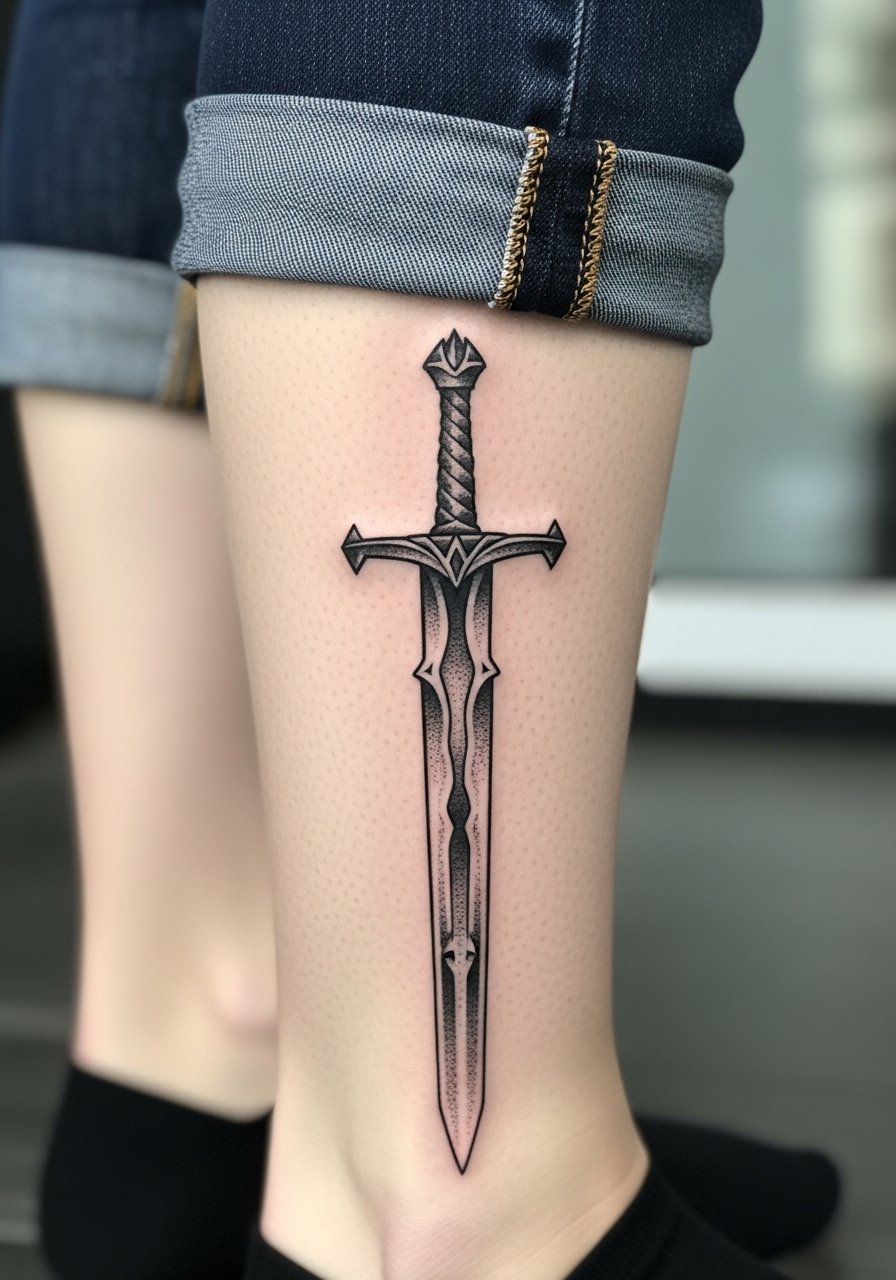
The outer calf is forgiving for long, vertical designs like a sword. Tell your artist you want a hint of reflected light along the blade with graduated grey washes so it does not read flat. A common mistake is too many micro-details in the crossguard, which age into a muddle. Session time can run two hours depending on length. Wear loose drawstring linen pants to the appointment so you can roll the leg up comfortably.
6. Dragon Skull, Sternum
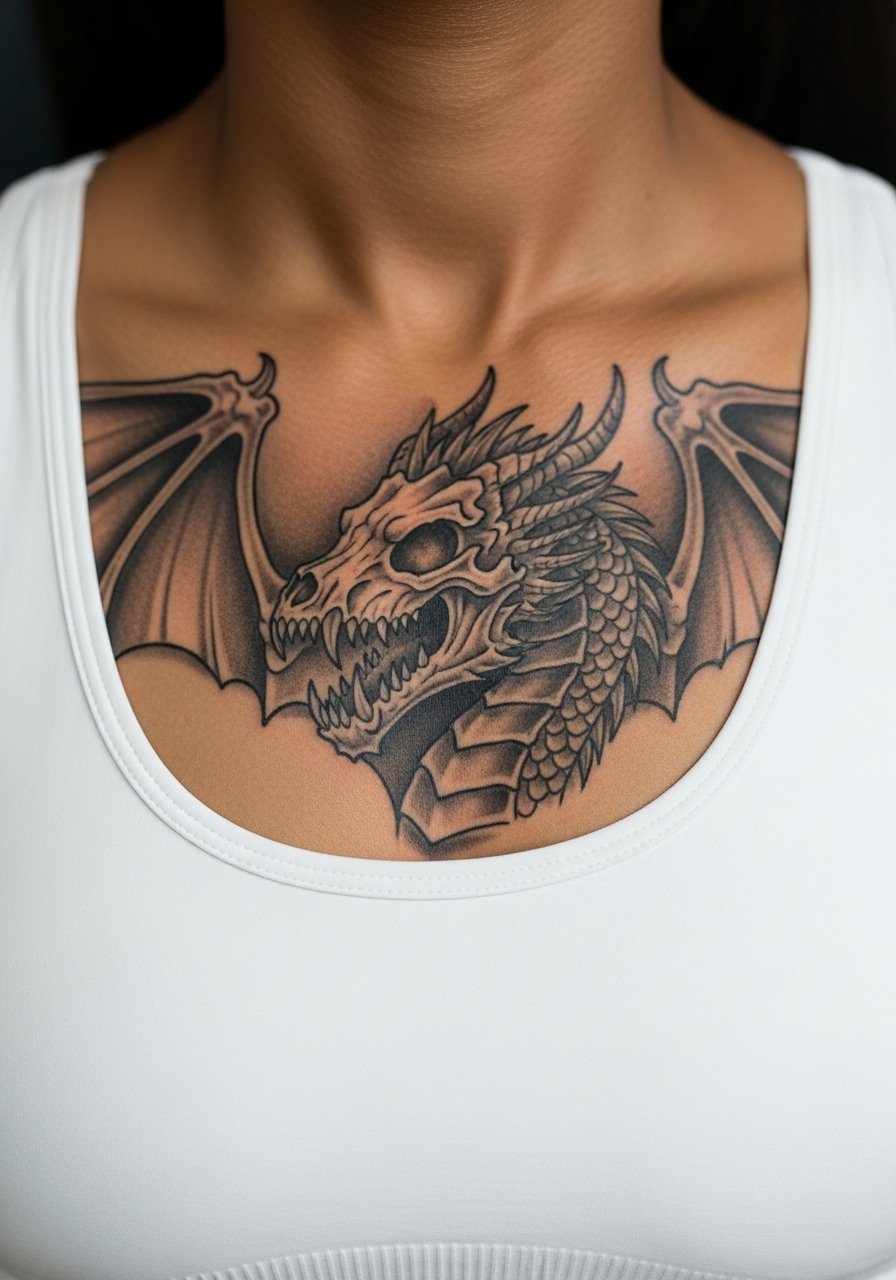
Sternum tattoos are high on the sensitivity scale but reward you with a dramatic centerpiece. Ask for more spacing in dense shading near the center so the negative space survives healing. One real mistake is forcing heavy black over the sternum's thin skin. It can scar and require a touch-up. Sessions are intense and usually done in shorter passes. For the appointment, wear a fitted sports bra so the artist can access the area without full exposure.
Studio Day Picks
The chest, calf, and sternum pieces above ask for different prep than wrist or forearm work, and a few specific items smooth the session and the first week.
-
Pre-transfer stencil paper kit. Lets you preview placement on skin before the needle hits, especially useful for collarbone and sternum phrases.
-
Topical numbing cream. Applied as directed before the appointment, it can reduce edge pain on ribs and sternum without affecting linework.
-
Thin protective film roll. Handy for finger and wrist designs that face daily friction from washing and typing.
-
Fragrance-free gentle body wash. Cleanses healing areas without stripping the ink in delicate linework zones.
-
Aquaphor healing ointment. A thin layer for the first few days locks in moisture and helps fine lines settle without suffocating the skin.
7. Night King Lattice, Upper Arm Sleeve Accent
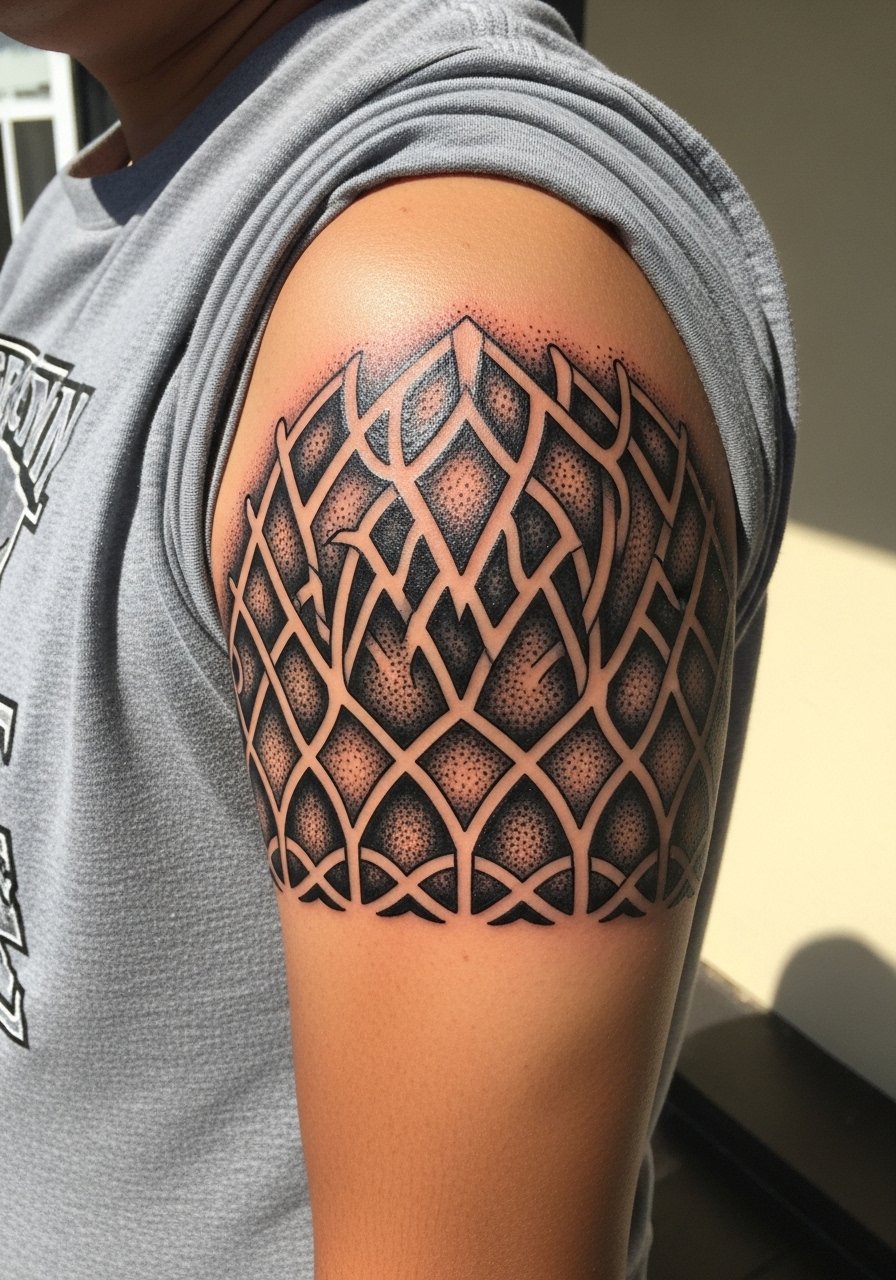
There is something about icy textures in black and grey that reads like worn armor. For a Night King lattice, ask for stipple shading and subtle negative space to keep it readable at two years. The biggest mistake is over-detailing small frozen elements so they merge with broad shading. Upper arm tolerates longer sessions and the pain is moderate. Pair it with a short-sleeve linen shirt for a casual way to let the sleeve peek.
8. Dragon Trio, Shoulder Blade
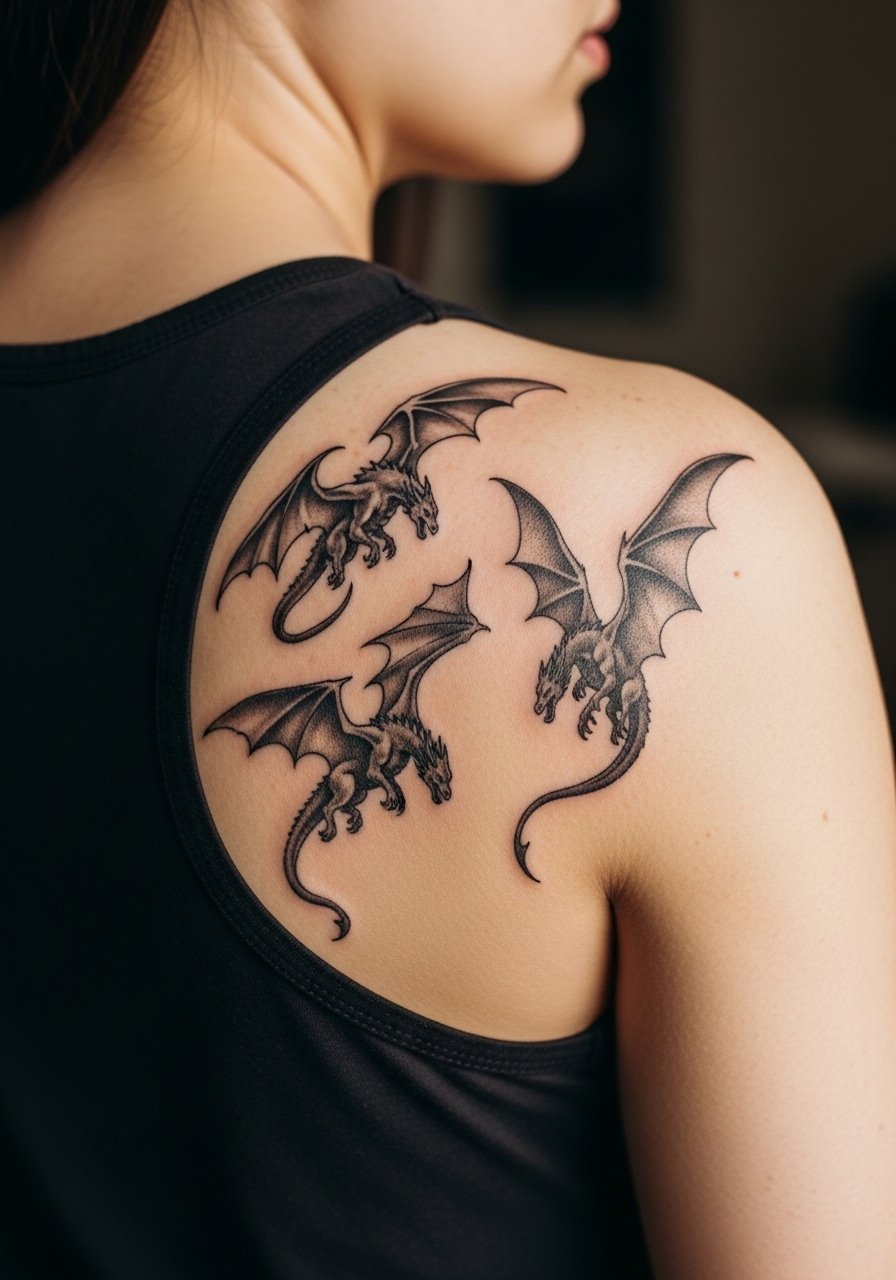
Shoulder blade pieces allow movement in composition, so stagger the wings and heads to follow the scapula. In consultation, point out where the shoulder blade shows when you raise your arm so the artist can plan the flow. A common error is putting too much dense shading near the spine end of the blade. That area can darken unevenly. Sessions can be split into two passes to manage fatigue. For evenings, an open-back top shows the creatures without revealing too much skin.
9. Rhaegal Profile, Outer Thigh
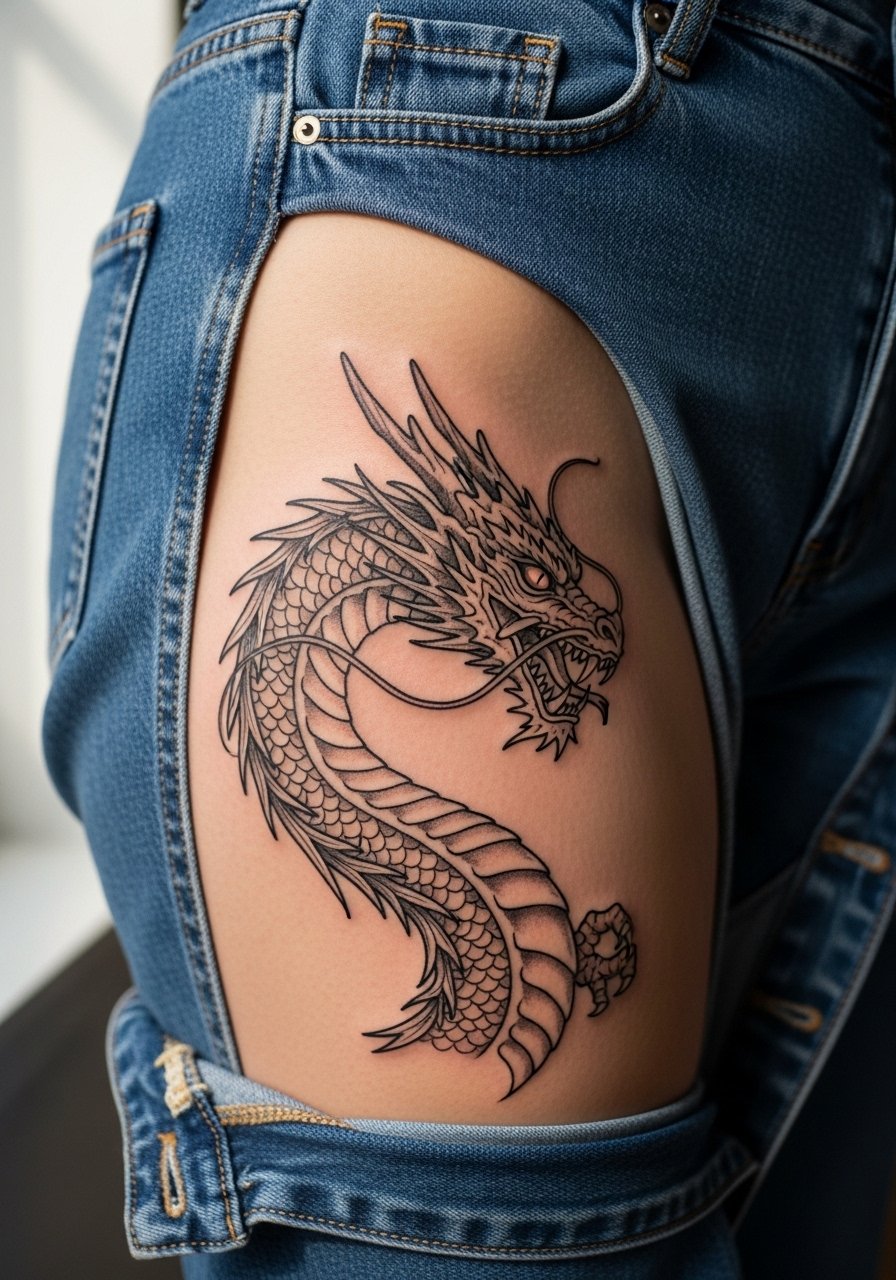
Outer thigh is forgiving for pieces that need scale. Tell your artist you want a balance of linework and soft wash so the scales hold definition without becoming a single gray mass. The real mistake is squeezing too many tiny scales into a small area. Pain is lower here but sessions can be long if you want full detail. For the appointment, wear high-waisted shorts so the artist can access the hip without discomfort.
10. Drogon in Flight, Full Rib Panel
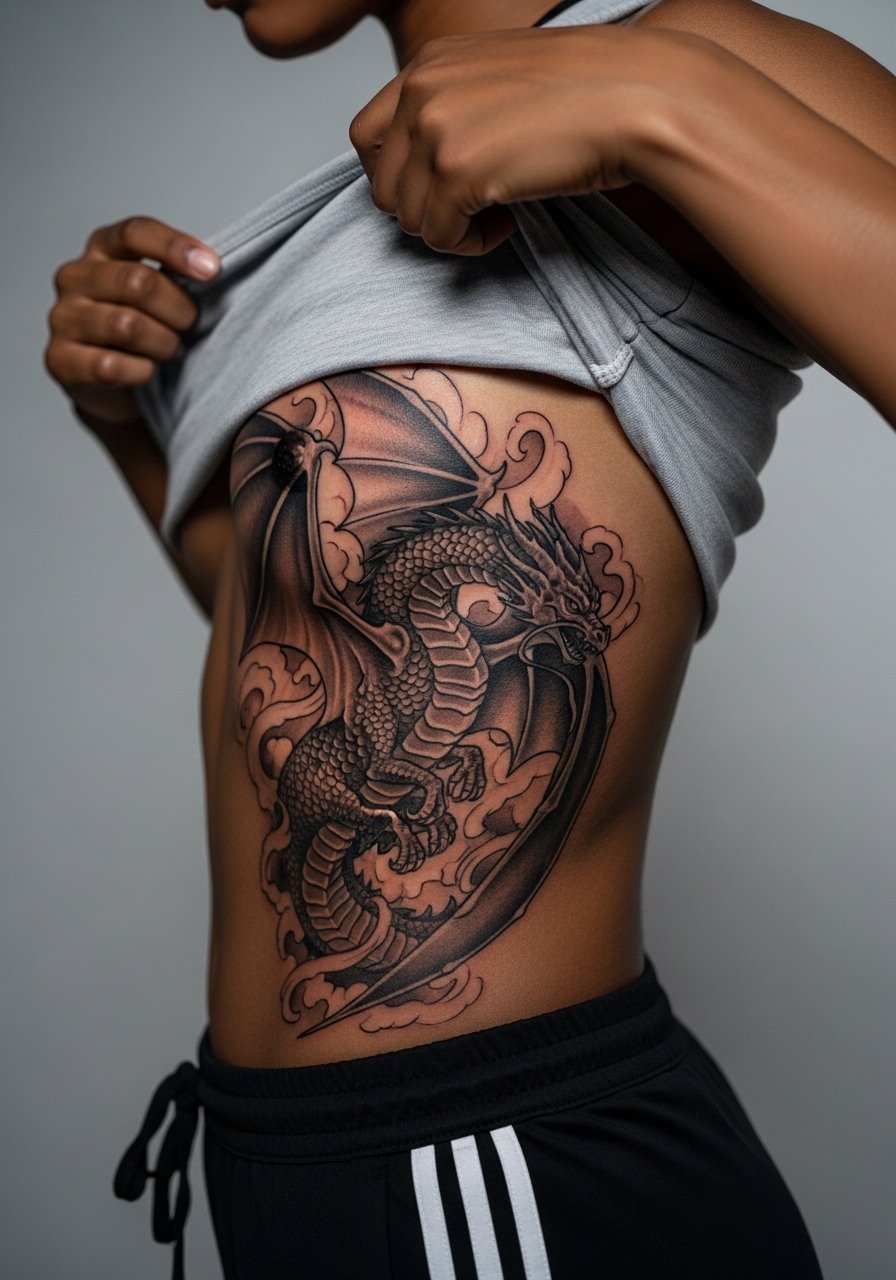
Rib pieces are notorious for pain and for how some work blurs over time. Artists split into two camps on rib detail. One camp warns that the skin there shifts and tight micro-lines become blurred. The other camp says deep, confident strokes with proper spacing settle well. Ask your artist which approach they use and why. Break a long rib session into multiple passes to manage pain. After it heals, open-back tops or a bandeau top are the best ways to show the sweep.
11. House Sigil Collage, Upper Chest
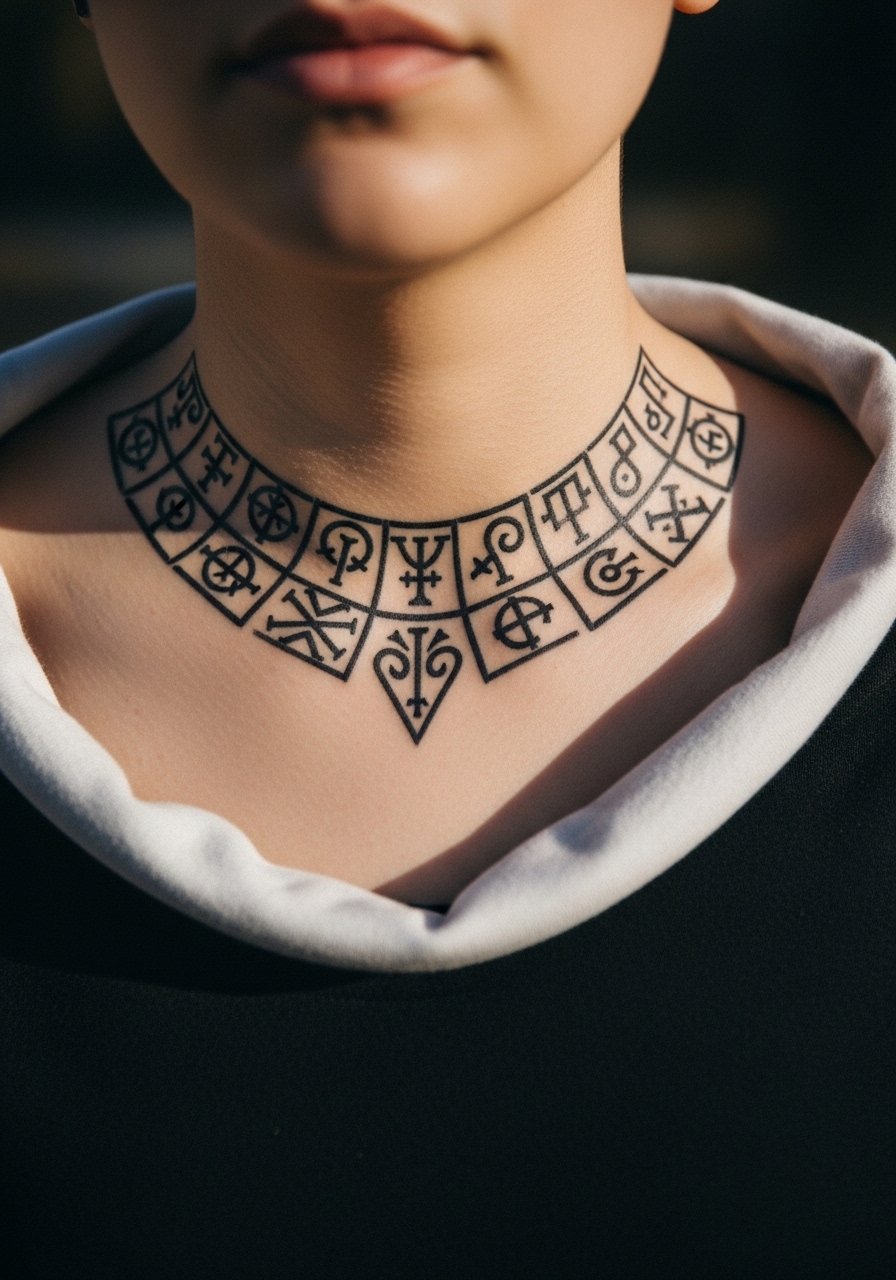
An upper chest collage reads like a family crest when the sigils are spaced and scaled intentionally. During consultation, prioritize which insignia gets the darkest blacks so your eye has a resting point. Common mistakes include equalizing contrast across all pieces so nothing stands out. The chest moves with breathing so precise placement is essential. For show-off outfits, an open-back midi dress or wide-neck sweater frames the work.
12. Weirwood Tree, Spine
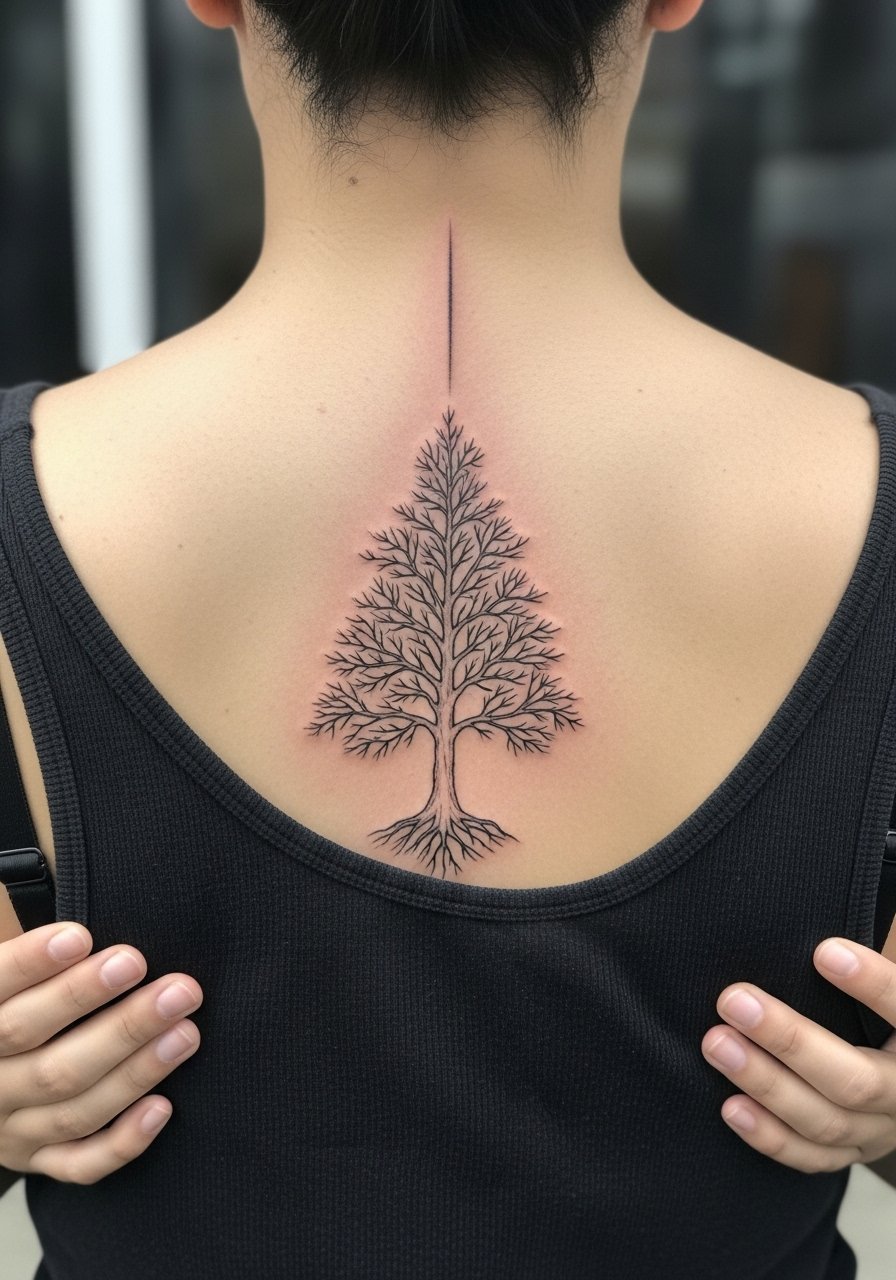
Spine pieces follow the body's central axis, so let the trunk align with the vertebrae and the branches fan toward the shoulder blades. Tell your artist you want more negative space in the canopy so heavy shading does not pool at the top. Sessions on the spine are painful but look striking when healed. Pair this with open-back dresses or halter tops. For the appointment, wear a backless-friendly tank to make access easy.
13. Faceless Man Mask, Inner Bicep
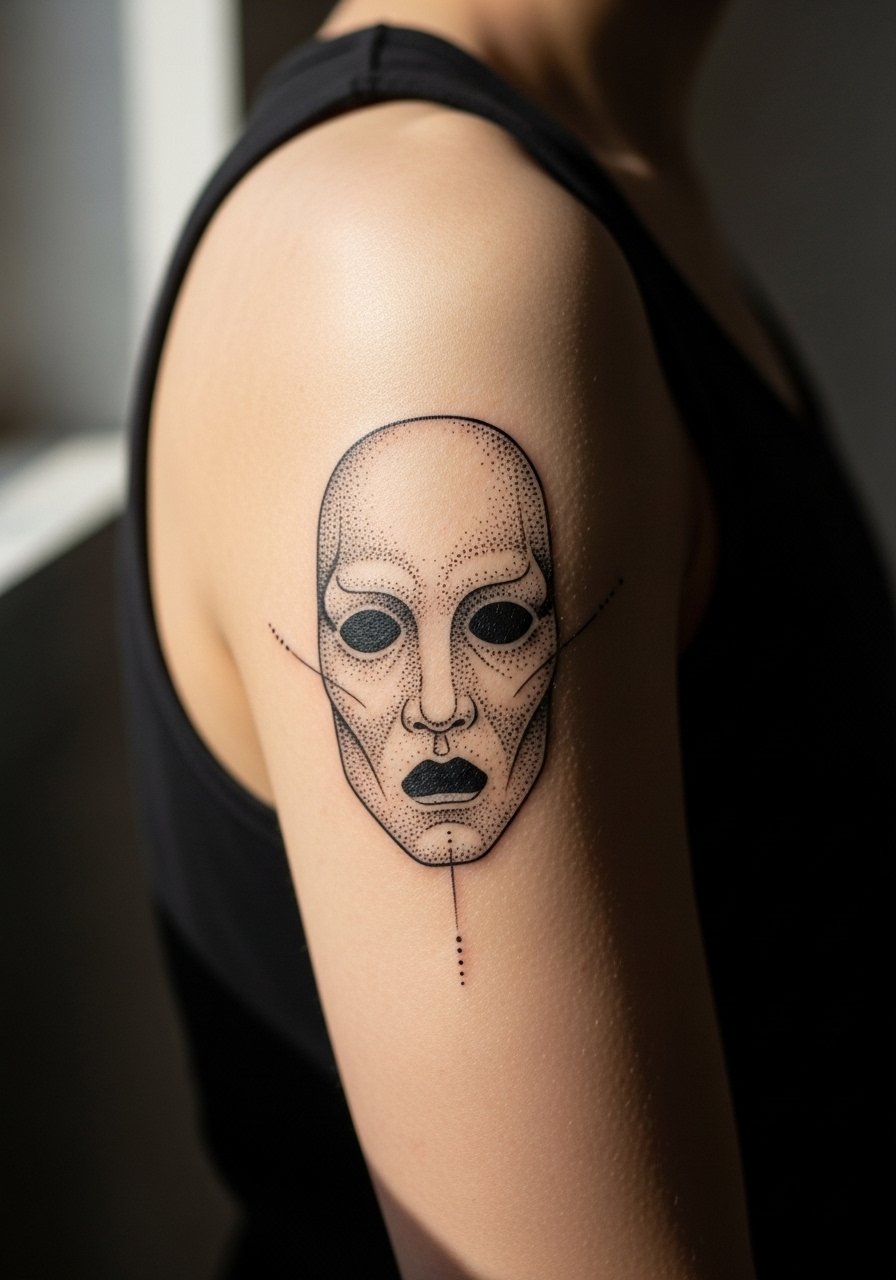
The inner bicep holds fine detail well but it is a sensitive zone. A common mistake is requesting hyper-fine contours without accounting for the soft skin there, which increases blowout risk. Ask for slightly bolder linework that still reads delicate. Sessions can be shorter but intense. For the appointment, a loose tank top lets you move freely and gives the artist access without exposure.
14. Dragon Egg Trio, Lower Abdomen
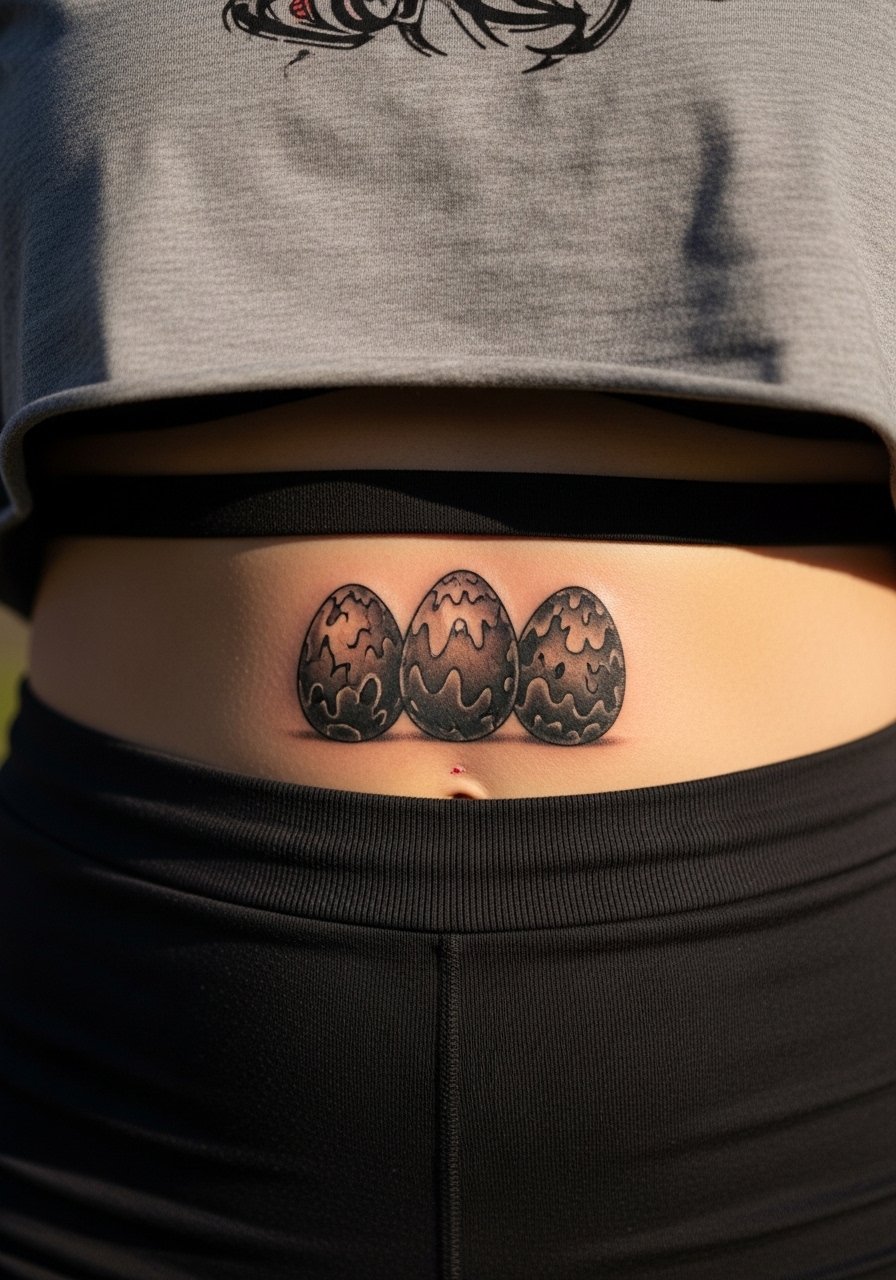
Lower abdomen tattoos should be planned around clothing lines so the eggs sit where waistbands will not constantly rub the ink. Tell the artist where your high-waisted pieces usually hit so they can place accordingly. A mistake is putting delicate dot work under a waistband that rubs raw during healing. Pain varies with core sensitivity. For session comfort, wear high-waisted bottoms you can lower slightly like high-waisted jeans that do not pinch.
15. Longclaw Close-Up, Inner Forearm Sleeve
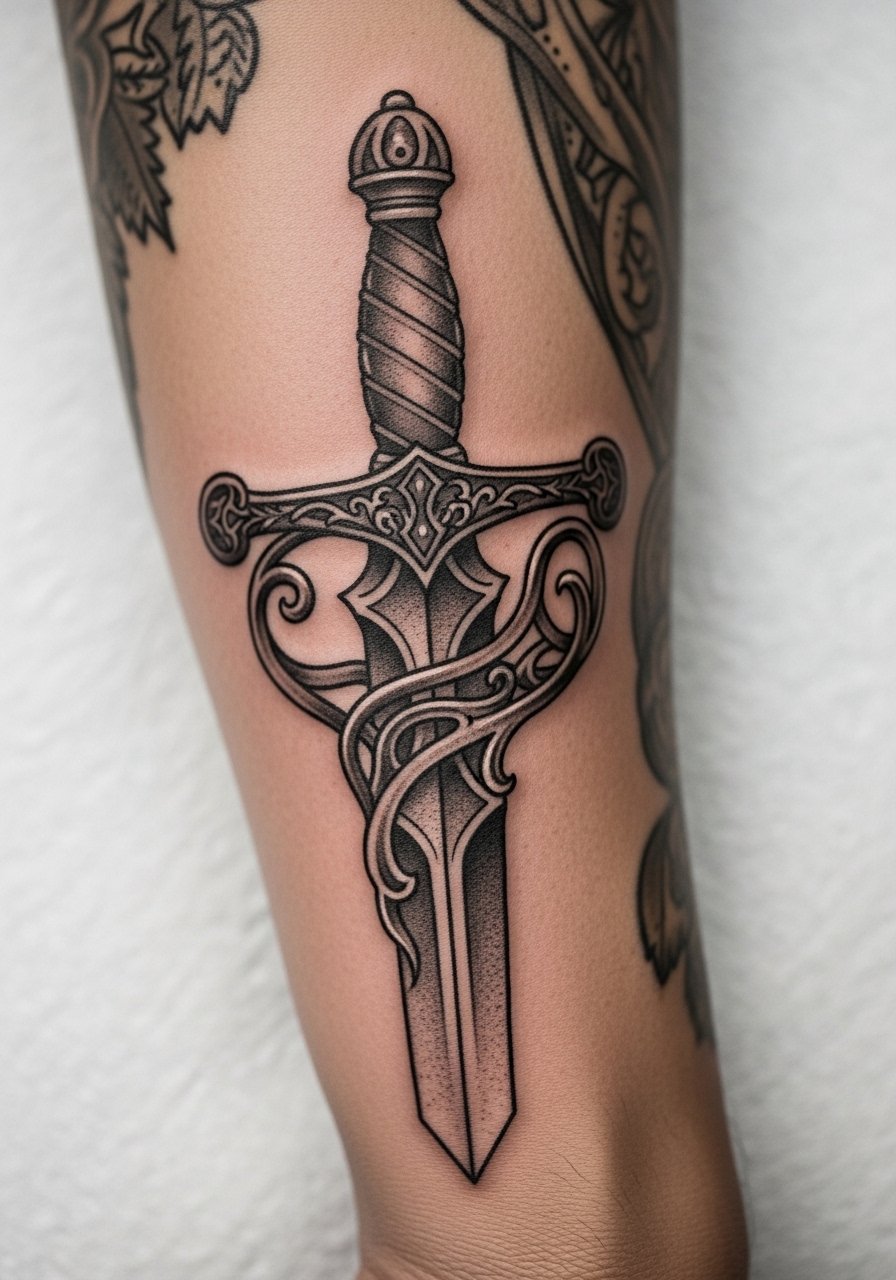
Inner forearm sleeves let you show off intricate hilts and metal reflections with minimal distortion. Ask for a mix of linework and stipple shading so the texture holds. The mistake is relying on hairline cross-hatching alone for metal gleam. It can fade unevenly. Sessions are moderate and often split into two. Roll sleeves or wear a loose button-down to reveal the sleeve when you want to show it.
16. White Walker Ice Lattice, Hand
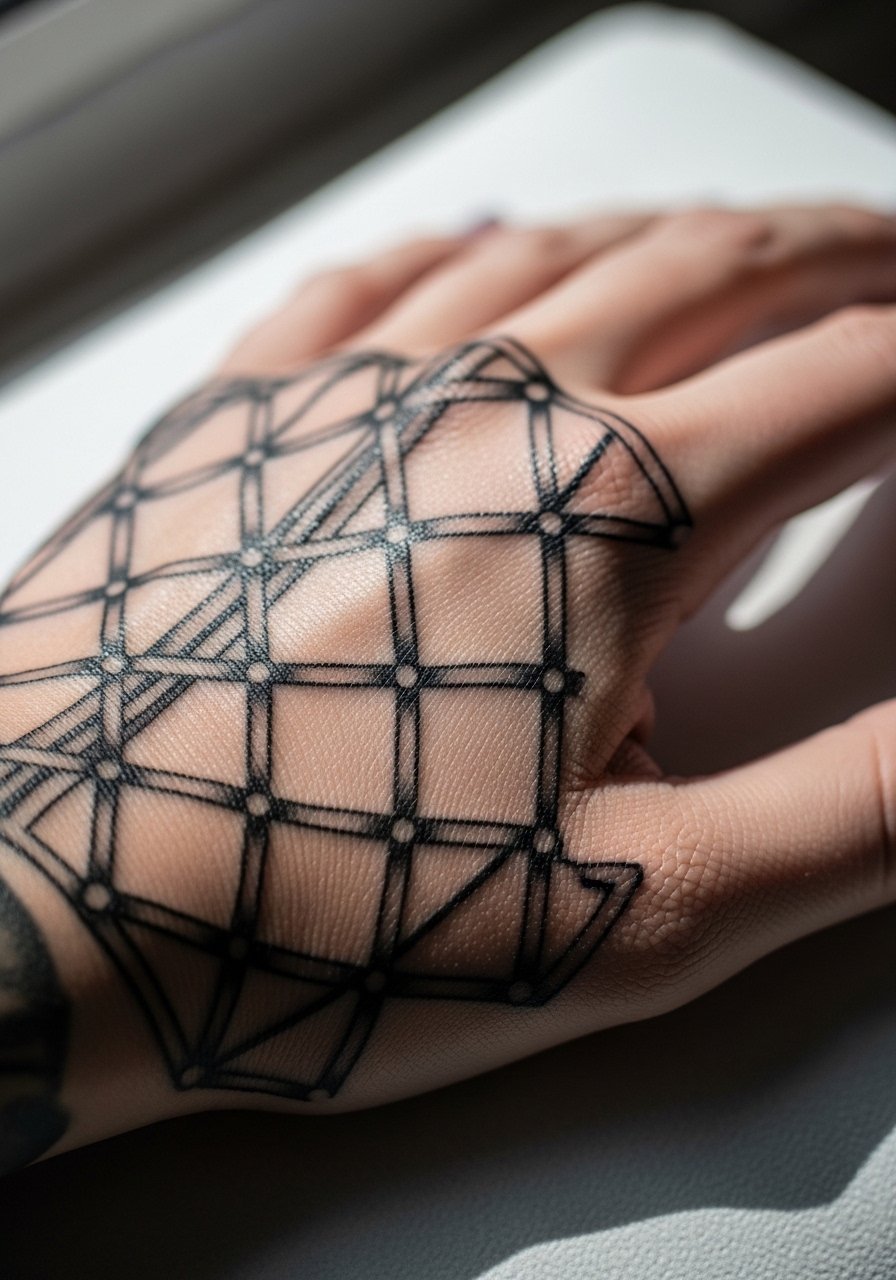
Hand tattoos are highly visible and subject to fast fading from washing and friction. The best approach is bold linework that accepts a touch-up at year two. A common mistake is choosing micro-fine details for a hand piece. They will soften quickly. Expect higher pain and talk to your artist about placement away from joints when possible. For the session, hands can be shown easily without special clothing so no session wear link is necessary.
17. Faceted Dragon Scale Sleeve, Full Arm
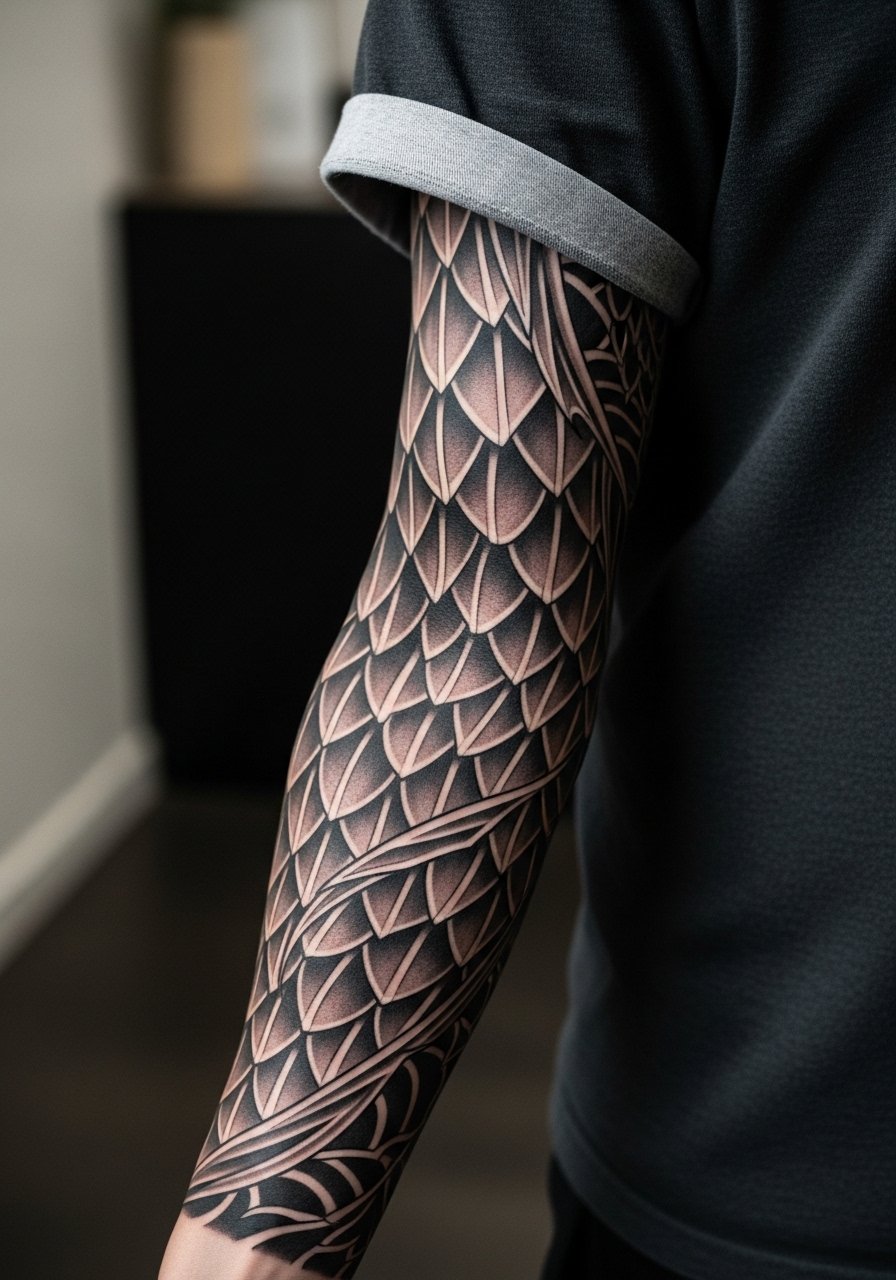
Full-arm scale sleeves benefit from repeating shapes with varied shading so the pattern breathes. Tell your artist to alternate heavy and light scales to prevent a flat grey field. The error I see most is uniform shading across every scale. Sessions are long and usually done across several visits. Pair the sleeve with rolled sleeves and a short-sleeve linen shirt when you want it to peek without being exposed.
18. Broken Crown with Thorns, Wrist
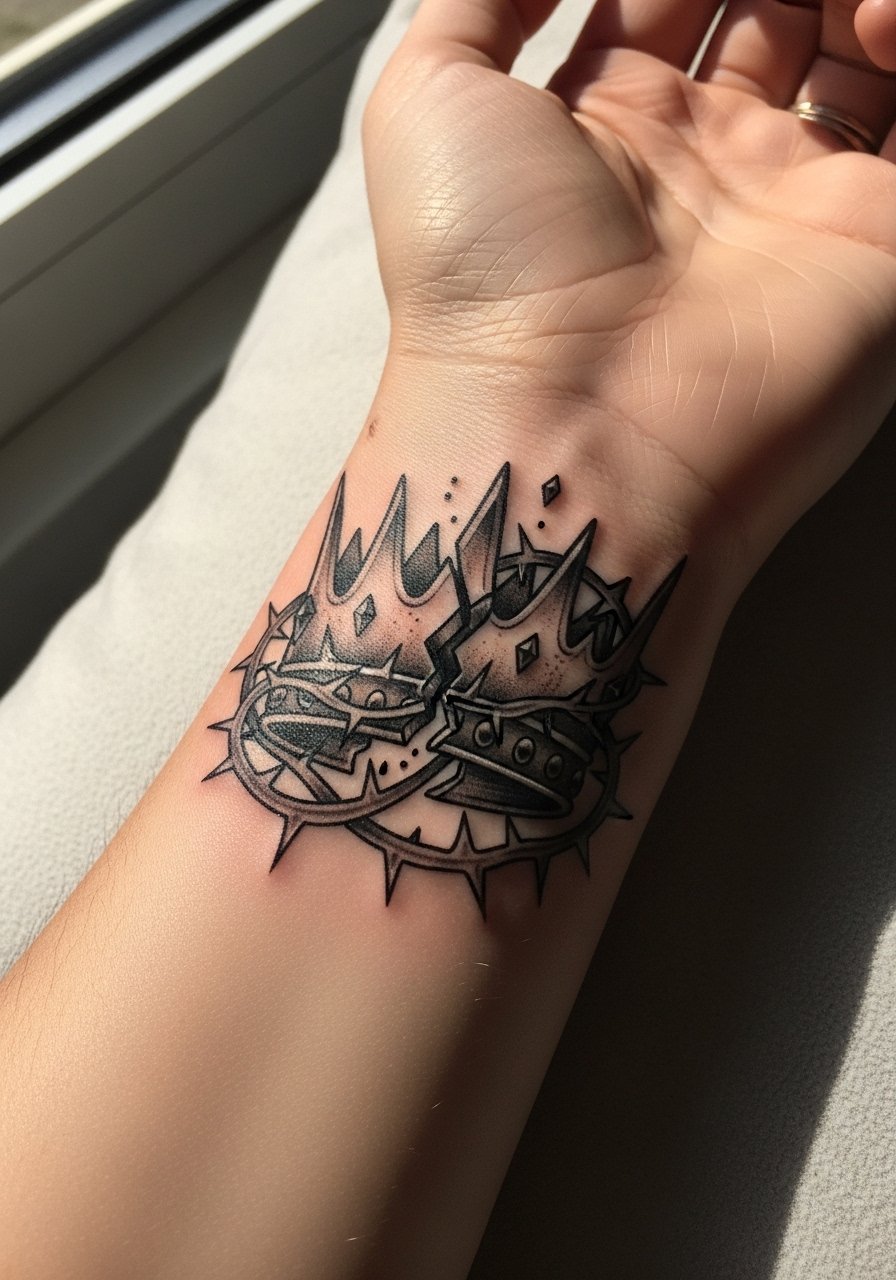
Wrist pieces sit in a high-motion, high-wash zone. Design for negative space and slightly bolder contours so the crown does not merge into a ring of grey. The common mistake is squeezing too much intricate shading into the smallest wrist band. Pain is mild to moderate and healing needs attention because wrists rub against clothing. Show it off with stacked dainty bracelets or a minimalist watch that frames the piece.
19. House Targaryen Sigil, Upper Arm Patch
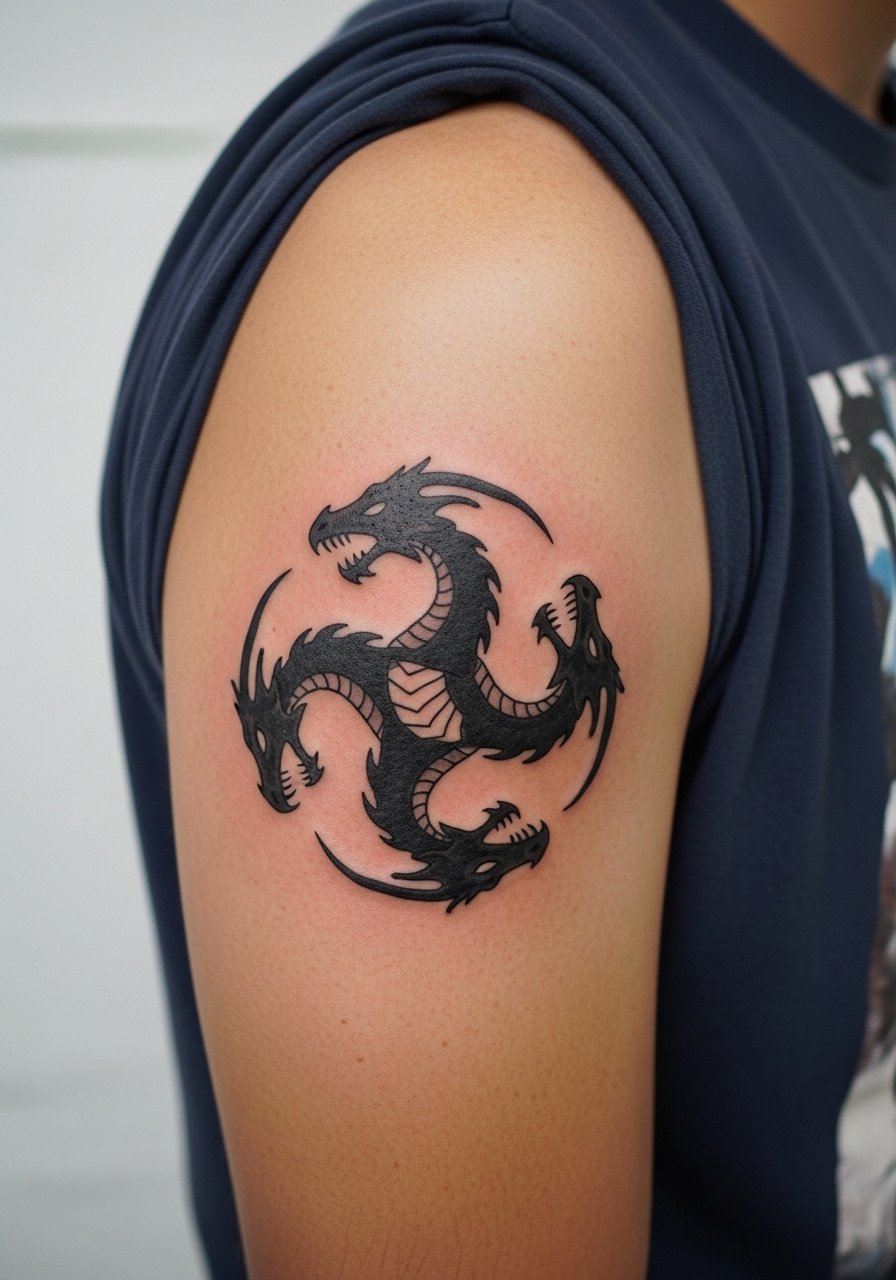
Upper arm patches are classic for sigils because the round surface helps the piece read as a badge. Tell your artist to anchor the heads with varied saturation so one focal head leads the eye. A mistake is making all three heads identical in contrast and scale. Sessions are moderate and age well if blacks remain saturated. For casual show-off, roll the sleeve or pick a short-sleeve tee.
20. Map of Westeros Fragment, Thigh Wrap
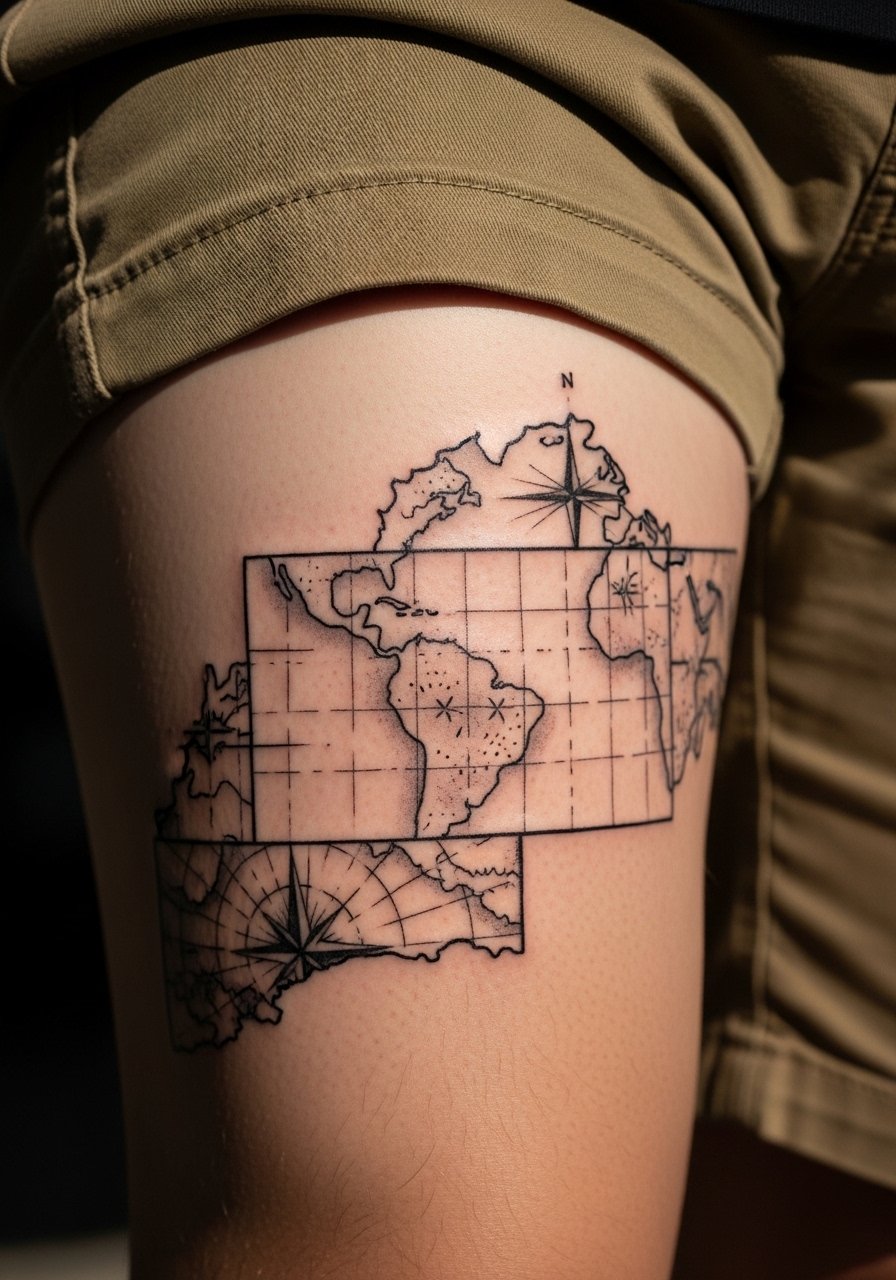
Thigh wraps let you place cartography where it curves with the leg. In the consult, mark landmarks you want visible when standing. A common error is doing tiny place names that fade into ink smudges. Opt for larger script or coordinate points instead. Sessions are comfortable and can be long. For the appointment, wear loose drawstring shorts so the artist can shift fabric without tension.
21. Black and Grey Portrait of a King, Chest
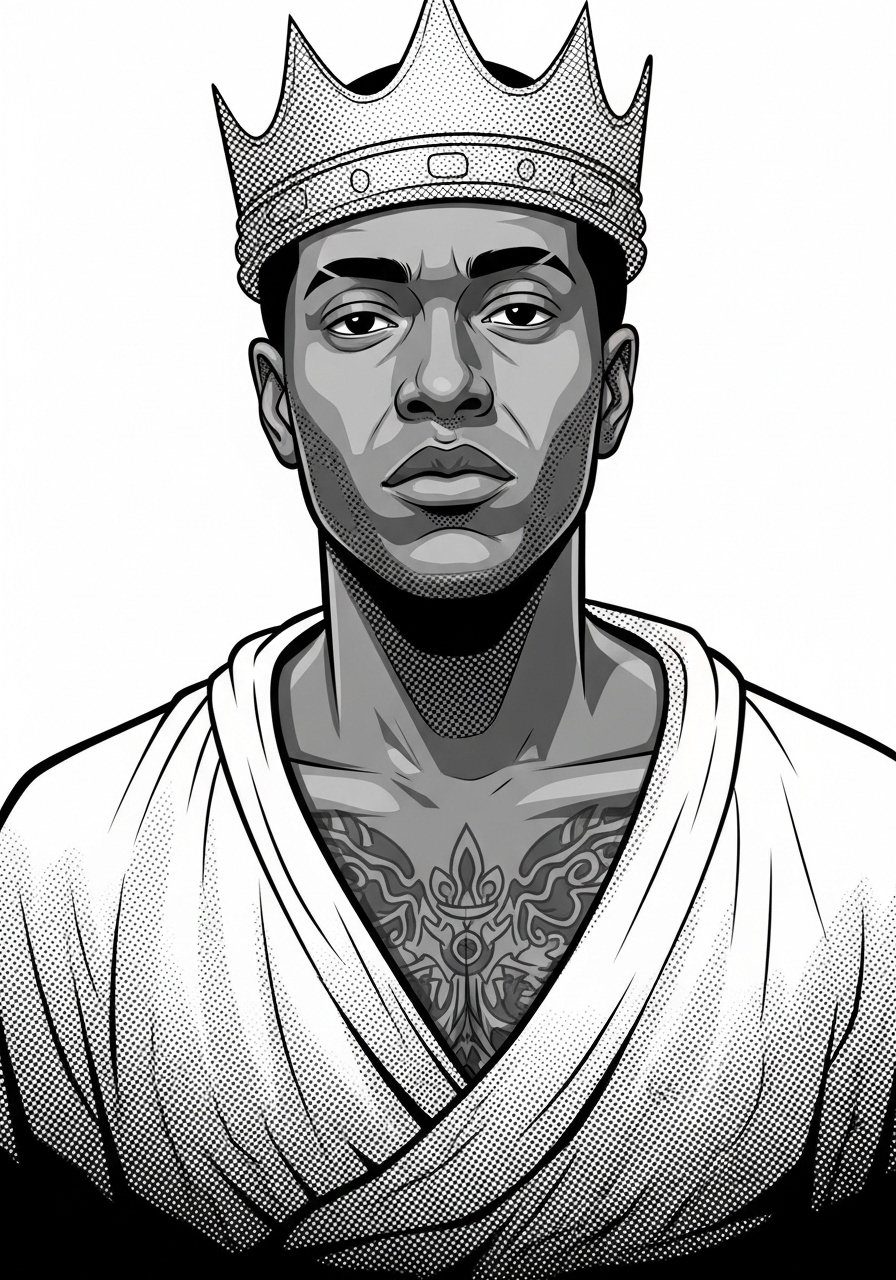
Chest portraits need reference photos that show expression and lighting. Tell the artist how much stylization you want versus realism. Too much tiny tonal work near the sternum can scar or blur. Sessions are intense and usually split into sections. For showing off, a wide-neck shirt or unbuttoned collar frames the portrait without exposing more than intended. Consider career visibility when placing large chest portraits.
22. Red Priestess Silhouette, Rib Flank
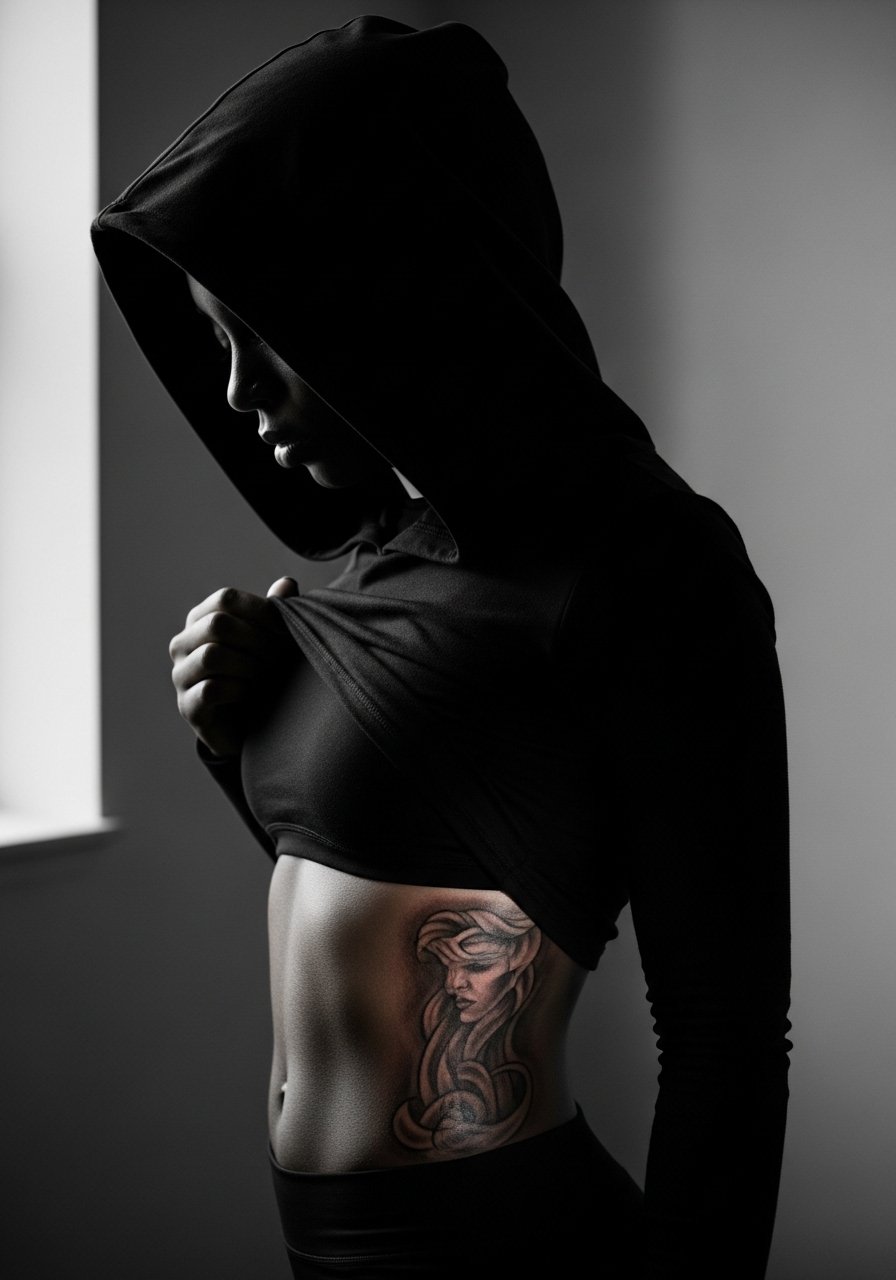
Rib flank silhouettes read well when the design leans into negative space. Ask your artist to keep edges crisp and to avoid excessive internal detail. The mistake I see is packing internal shading into silhouettes that then flatten into mush. Sessions hurt, and breathing affects placement so plan breaks. For a session, wear a cropped athletic top you can lift without exposing your torso.
23. Faceted Dragon Eye, Behind the Ear
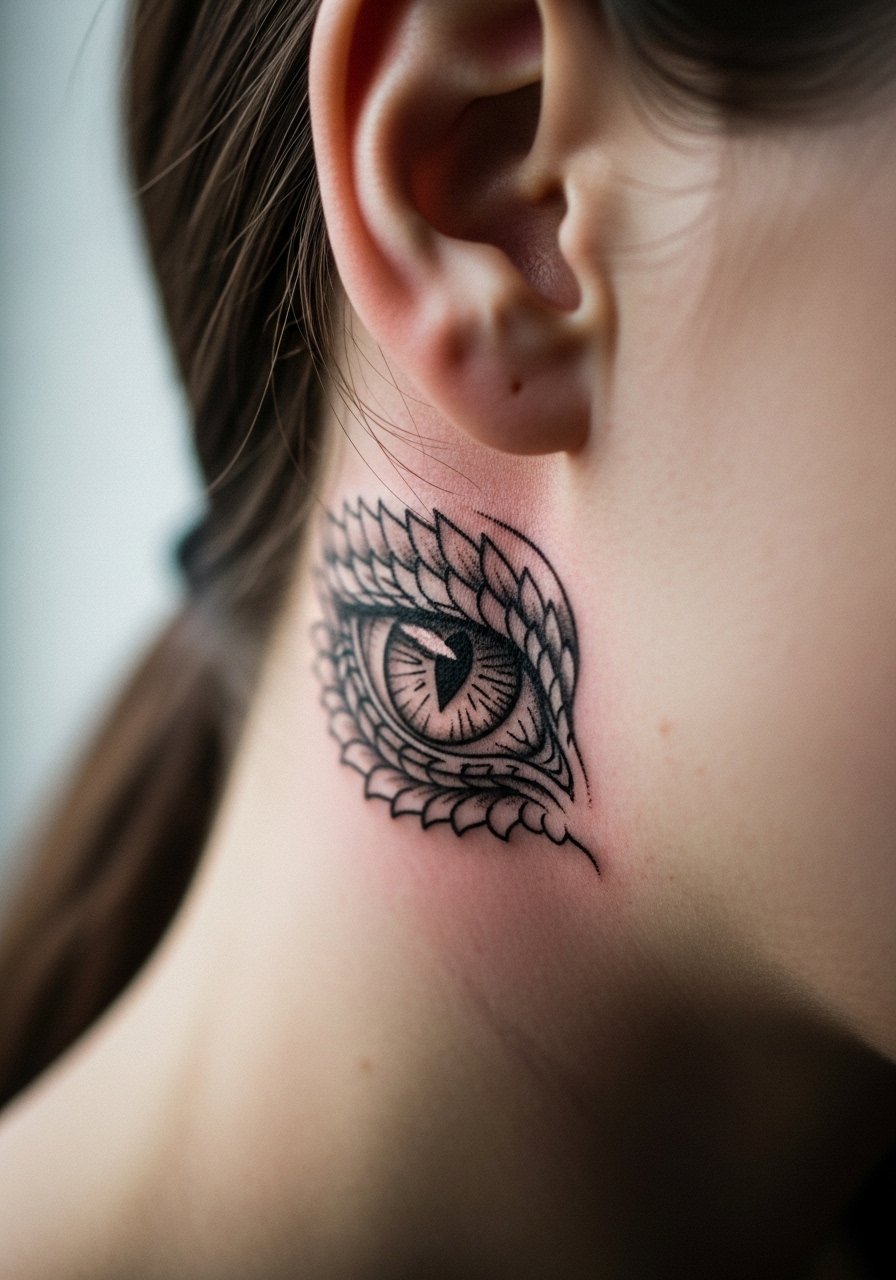
Behind-the-ear pieces need close planning because the small field demands clarity. Always describe the exact size during consults and avoid ultra-fine iris detail that will blur. The area is discreet and the pain is low but healing can be tricky because hair and collars can irritate the spot. It's a good idea to have short hair or a pulled-back style for the session. A subtle jewelry piece will not compete with this placement.
24. White Walker Ice Crown, Nape
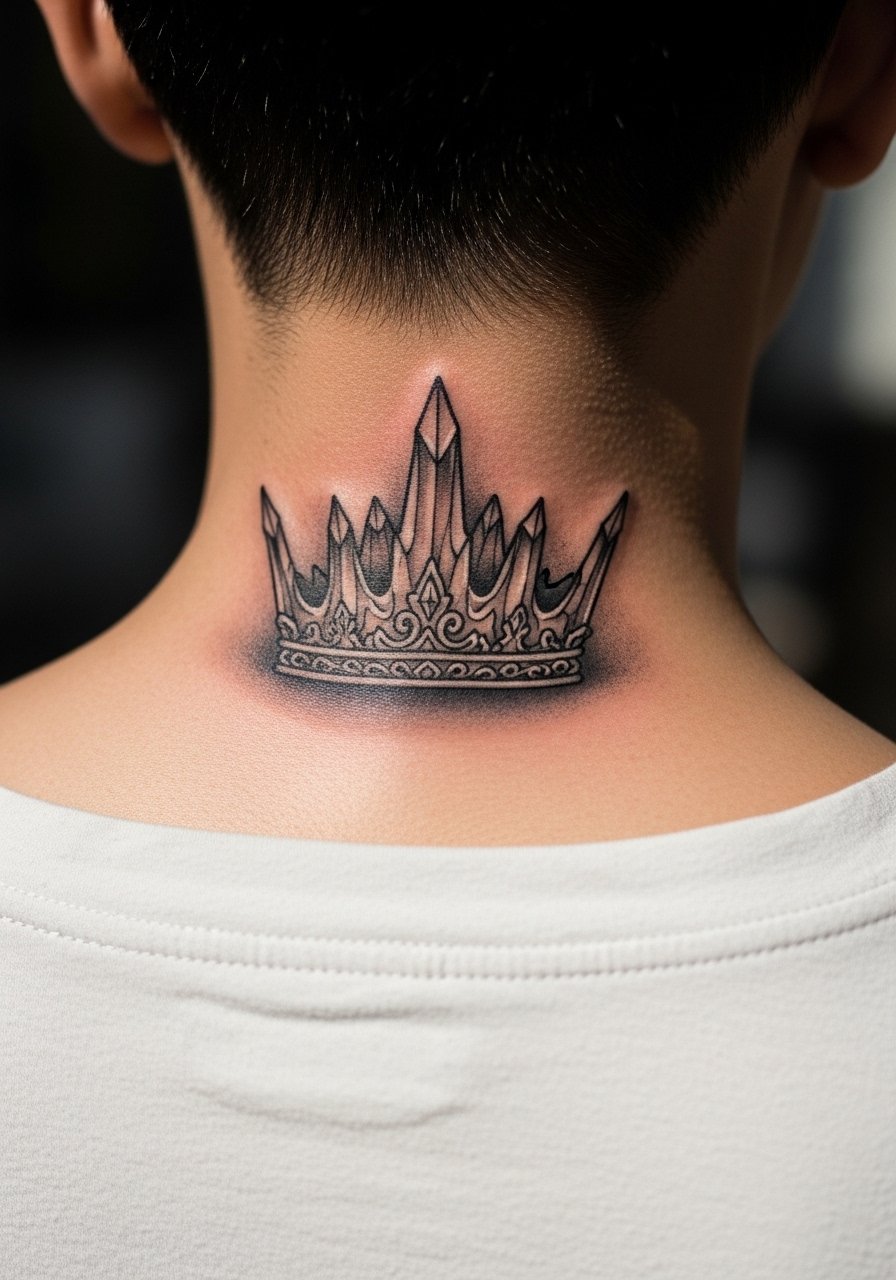
Nape tattoos sit at a visible intersection of styling and workplace visibility. Ask for slightly bolder linework so the crown holds detail through movement and washing. The common mistake is relying on tiny texture cues that stop reading after a year. A short session can place crisp outlines and then return for shading. For showing it off, a wide-neck shirt or a low bun that reveals the nape works well. Consider how often you plan to wear your hair up.
25. Valyrian Script Band, Wrist Wrap
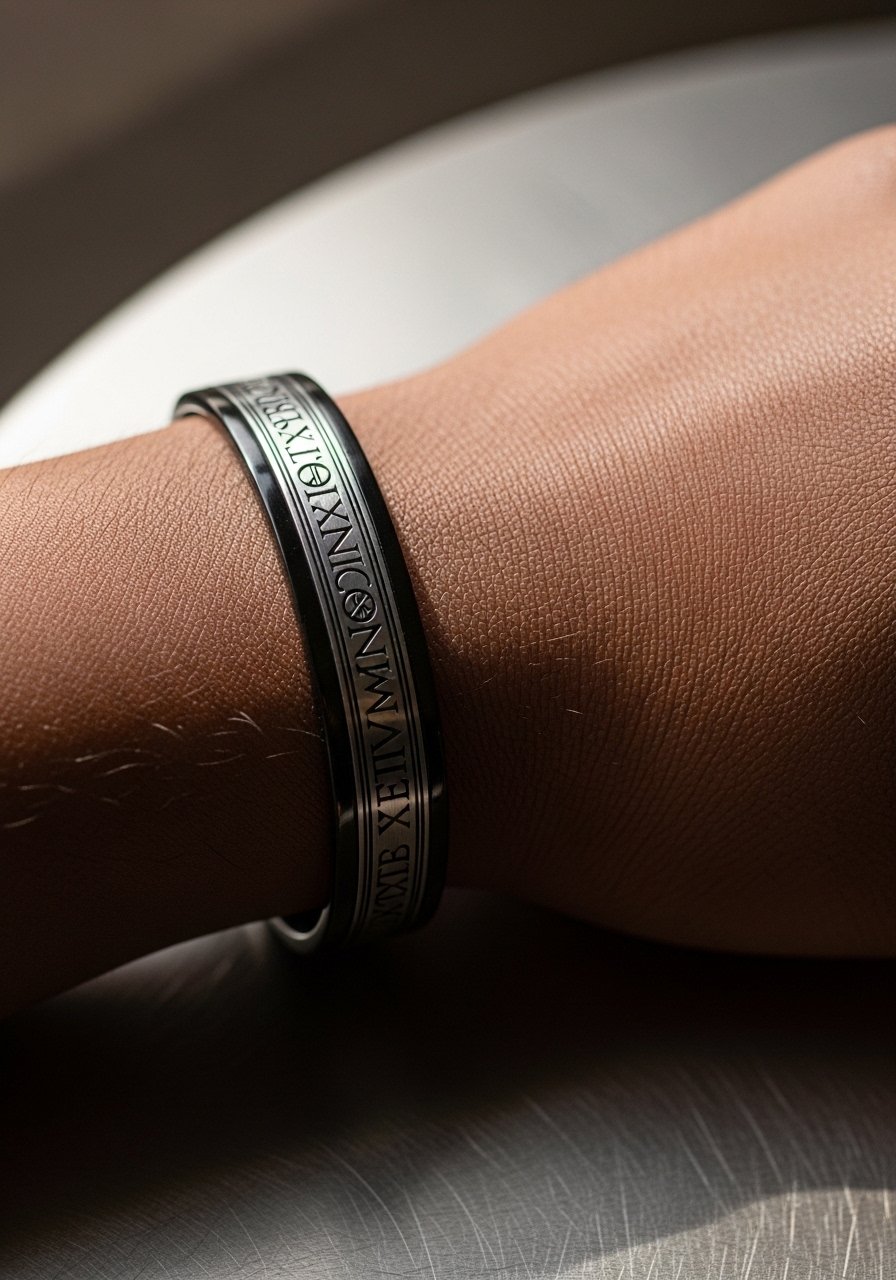
Script bands on wrists look elegant when the lettering has breathing room. In consultation, choose slightly wider character spacing so the letters do not merge with daily motion. A mistake is requesting extremely fine serifs for wrist wraps. They will soften quickly. Pain is moderate and touch-ups are common in high-motion bands. Pair with minimalist bracelets or a thin chain bracelet that complements rather than hides the script.
26. White Walker Frost Lattice, Ankle
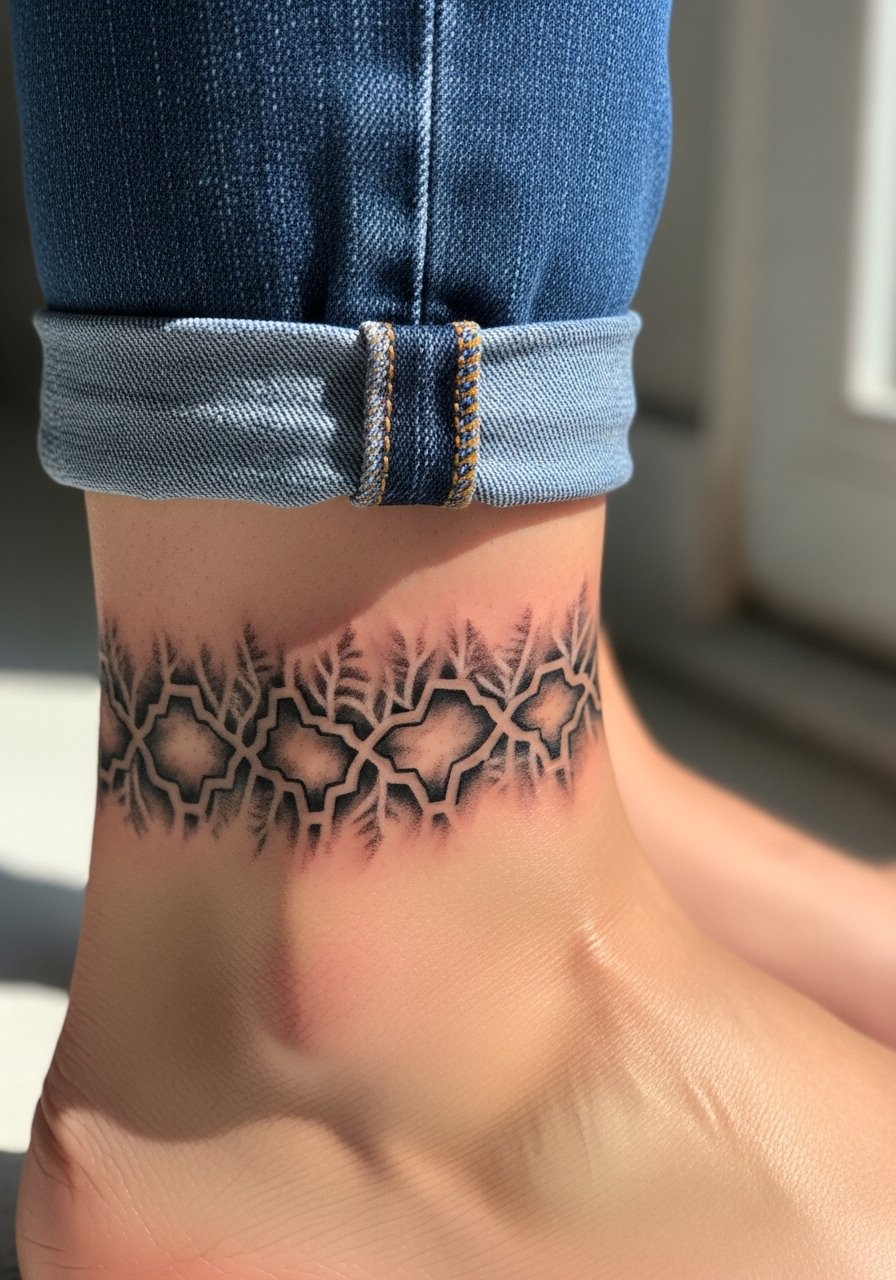
Ankle tattoos suffer from shoe and sock friction during the first few weeks. Design with slightly bolder outlines and ask your artist to avoid packed grey fills in high-friction zones. A frequent error is placing tiny lattices too close to the joint where movement distorts the pattern. Sessions are short but healing requires caution. Show it off with sandals or rolled jeans and consider a light ankle bracelet to frame the work.
27. Dragon Wing Half-Sleeve, Outer Shoulder to Chest
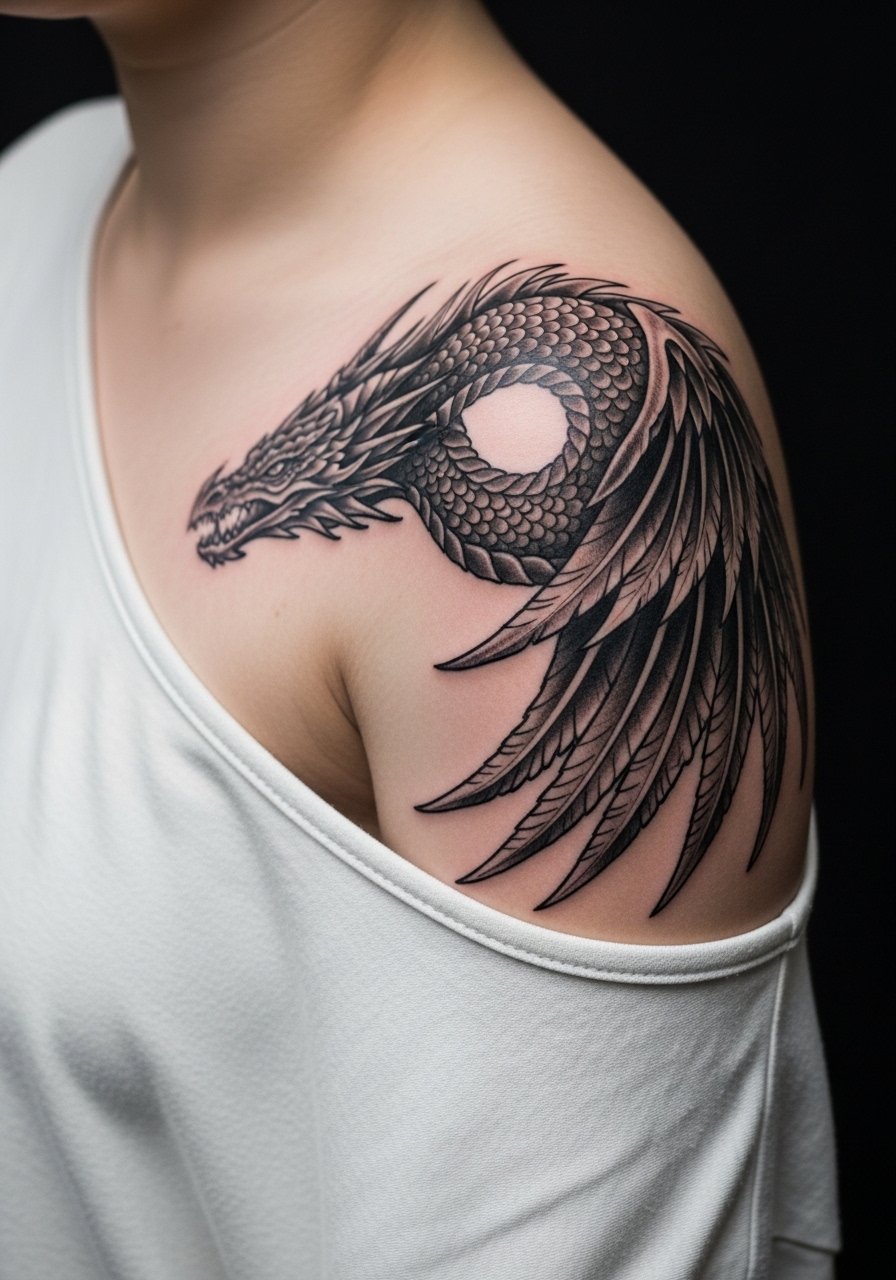
A half-sleeve that arcs from shoulder to chest needs careful planning so the wing's tip lands comfortably on the chest without twisting with movement. Tell the artist where sleeveless tops sit on your shoulder so the composition reads when you dress. A mistake is ending the wing too close to the armpit where fabric rubs. Sessions run long and are often split. For show-off outfits, a wide-neck tank highlights the transition from shoulder to chest.
Frequently Asked Questions
Q: Will fine black and grey details like scales and script blur quickly on the ribs or sternum?
A: It depends on spacing, needle depth, and how much movement the area sees. Many artists fall into two camps. One camp says ribs and sternum move too much and tight micro-lines blur faster. The other camp says with deliberate spacing and slightly bolder linework, details settle well. Ask your artist to show healed examples in similar placements and plan for a possible touch-up in year two or three.
Q: How should I dress to make access easy for a sternum or chest session?
A: Wear something fitted but easy to shift, like a fitted sports bra or a wide-neck shirt you can pull aside. Loose button-downs are helpful for shoulder and back access. The goal is to expose only the tattoo zone so the artist has clear access without you having to undress.
Q: Do hand and finger Game of Thrones motifs require a different design approach?
A: Yes. Hands and fingers face constant washing and friction so go with bolder strokes and accept that touch-ups are more likely. Avoid ultra-fine cross-hatching and plan negative space to preserve contrast as it ages.
Q: Are there cultural concerns I should consider when using mythic or medieval symbols?
A: Some symbols trace to real cultural or religious traditions. If a motif resembles specific religious iconography, consider adapting it or asking your artist for a variation that honors the source while keeping a personal touch. Discovery pathways like museum collections and folklore archives can help you find respectful reference material.
Q: What is a realistic timeline for touch-ups on detailed black and grey pieces?
A: Expect a possible touch-up window around year two to three for high-detail areas like ribs, hands, and wrists. Less mobile zones like the upper arm and thigh often go longer before a touch-up. From what I have seen, placement and lifestyle matter far more than the initial flash.
