
Bold blackwork riffs on a classic religious motif and still surprises me. What looks like a single bold silhouette from across the room often holds up better than tiny detail when skin stretches and sunlight gets involved. If you want a high-contrast "God's Hands" piece that stays readable, think about scale, placement, and how you plan to show it off. The first idea jumps right into a forearm take that balances presence with longevity.
1. Bold Forearm Panel with Radiant Lines
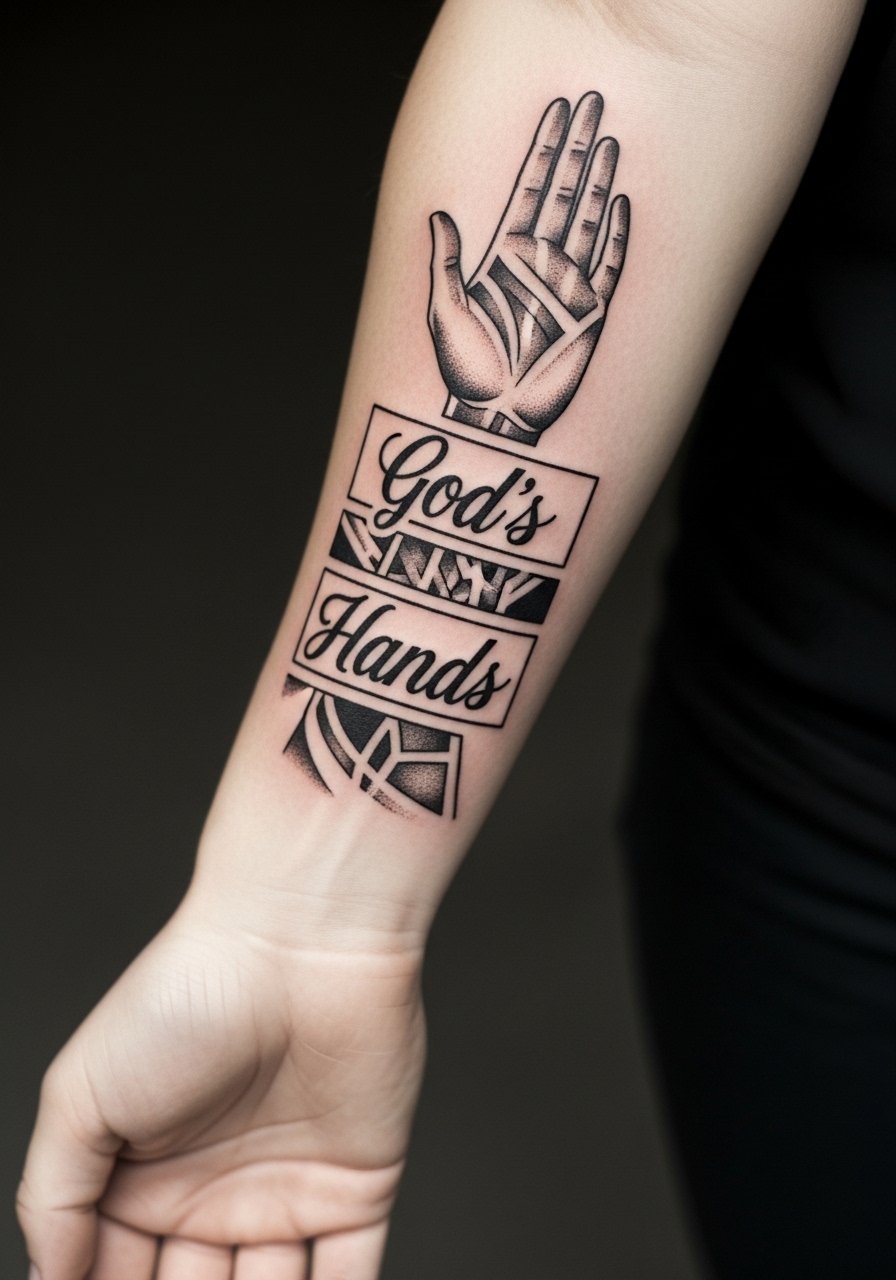
A forearm panel reads well at arm distance and ages predictably because the skin there does not shift as much. I recommend asking your artist to scale the hands to fill one third of the forearm length so the negative space around the fingers holds up. Pain is moderate and the session usually runs 60 to 90 minutes. The most common mistake is shrinking the fingers too fine. Expect the piece to look slightly bolder at six months then soften by year three, with touch-ups possible at year five. For showing it off, roll up sleeves and pair with a rolled linen shirt that keeps attention on the forearm.
2. Negative-Space Halo on Outer Bicep
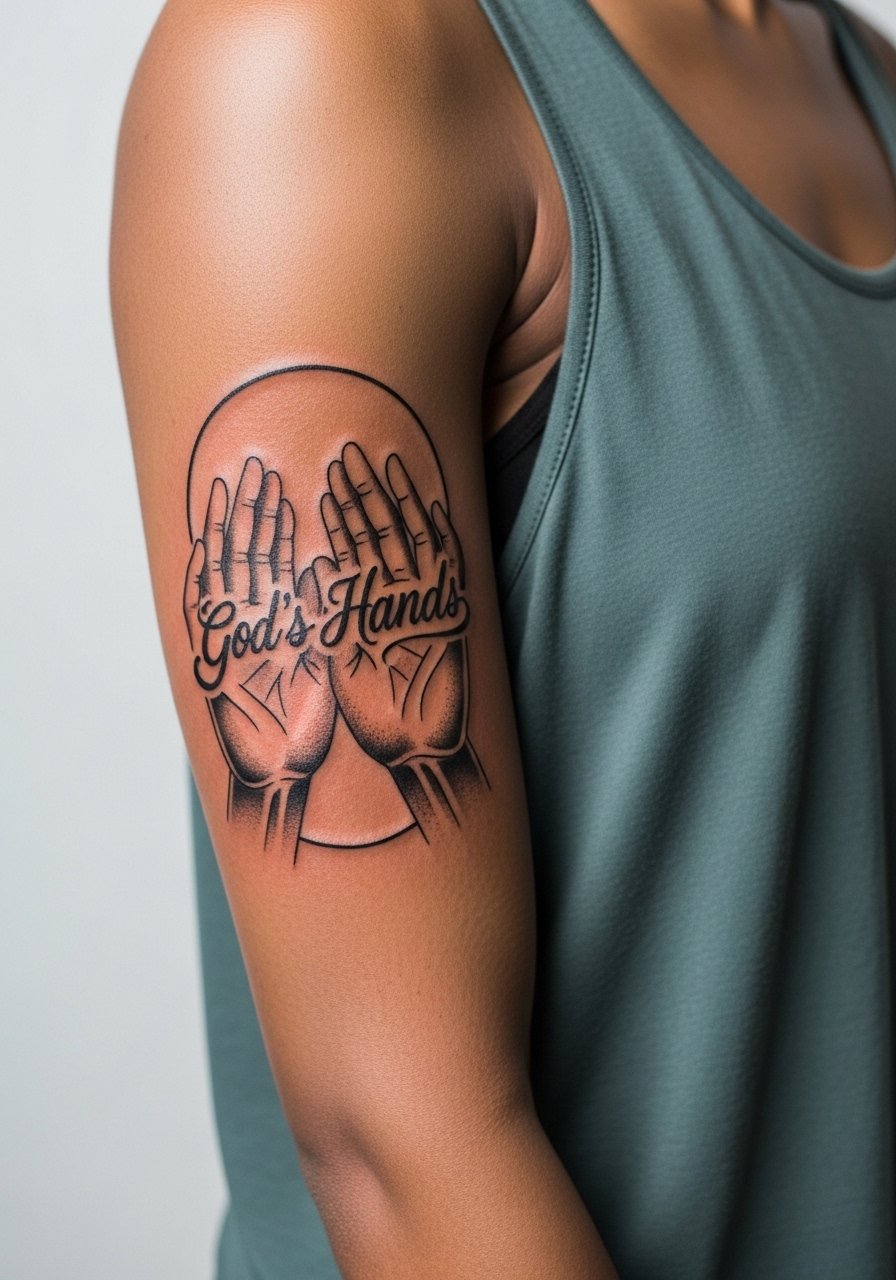
Outer bicep pieces sit nicely under short sleeves and hide easily when needed. I tell clients to request a bold silhouette for the hands and a three-finger-width halo of untouched skin to preserve contrast over time. Session time is around 90 minutes and pain is mild. A common error is adding too much fine detail inside the halo, which blurs into the fill by year two. Pair this with a loose tank top for the session so the artist has clear access and you can test how the design looks with sleeves.
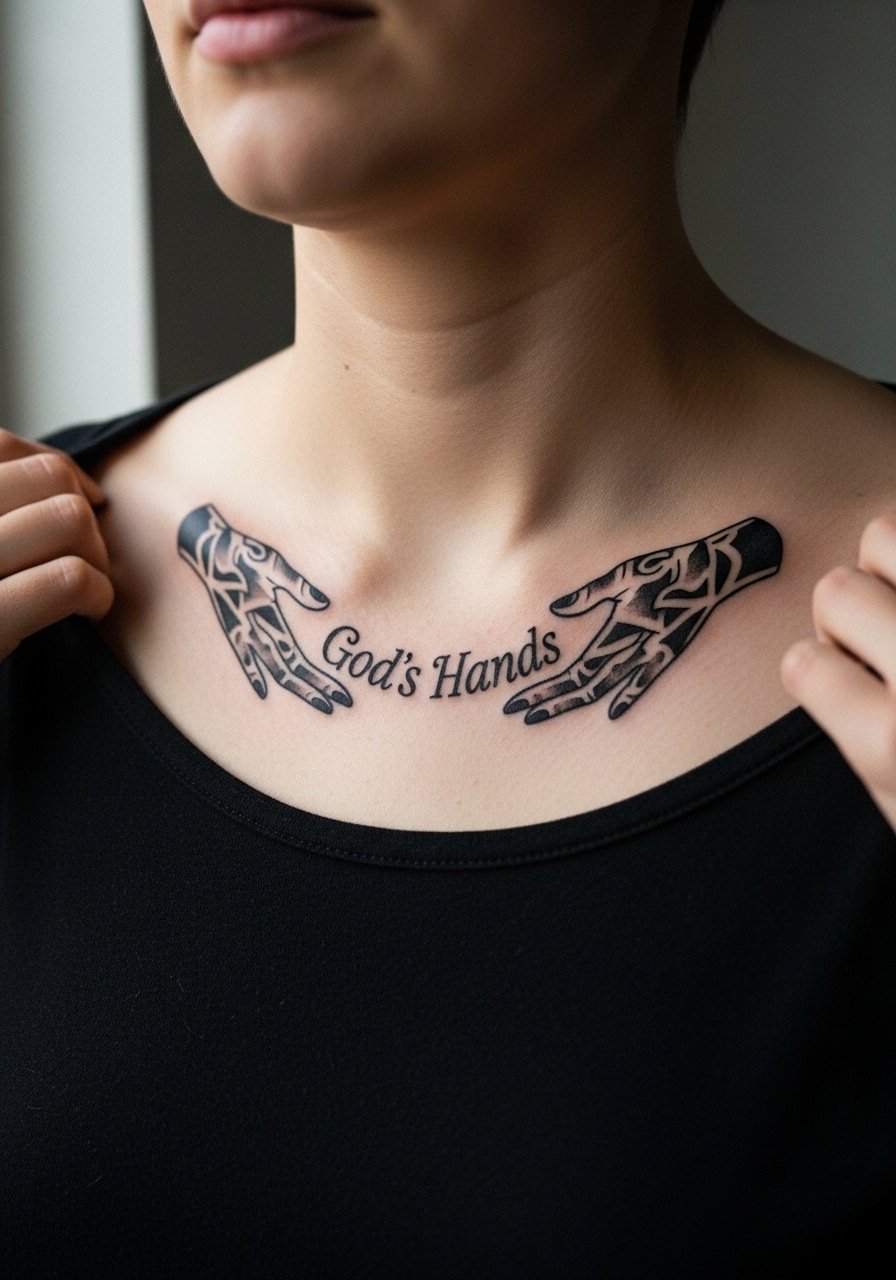
3. Sternum Centerpiece with Solid Fill
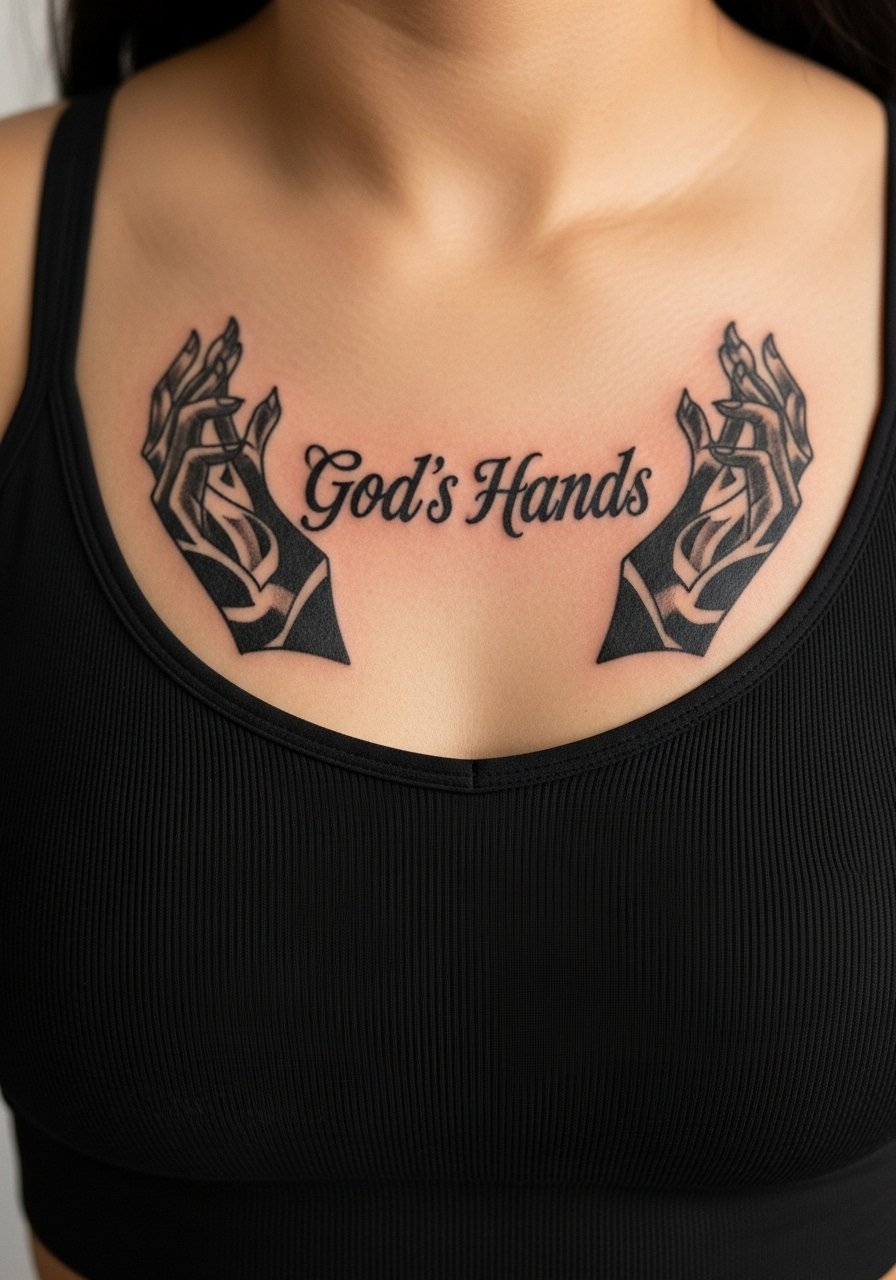
Sternum work demands a setup that respects the area and the pain. Fair warning: chest placement rates higher on most pain charts, but the central location gives the motif a strong altar-like presence. Ask for a saturated fill and slightly larger negative gaps between fingers so the hands read after healing. Artists split on this placement. One camp says chest movement and perspiration complicate healing. The other camp argues that with solid saturation and a careful bandaging routine it settles reliably. Expect two shorter sessions or one long session and plan to wear a supportive sports bra to the appointment.
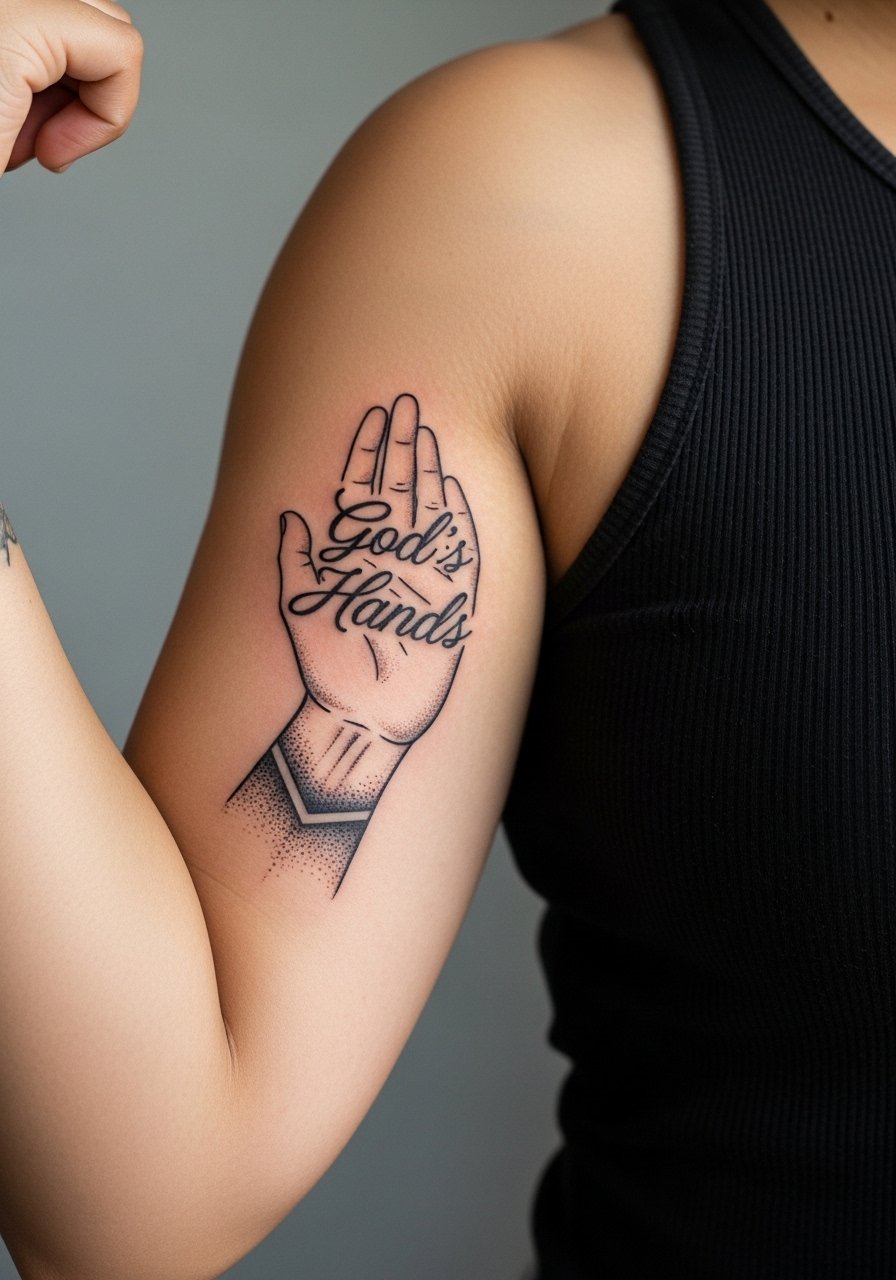
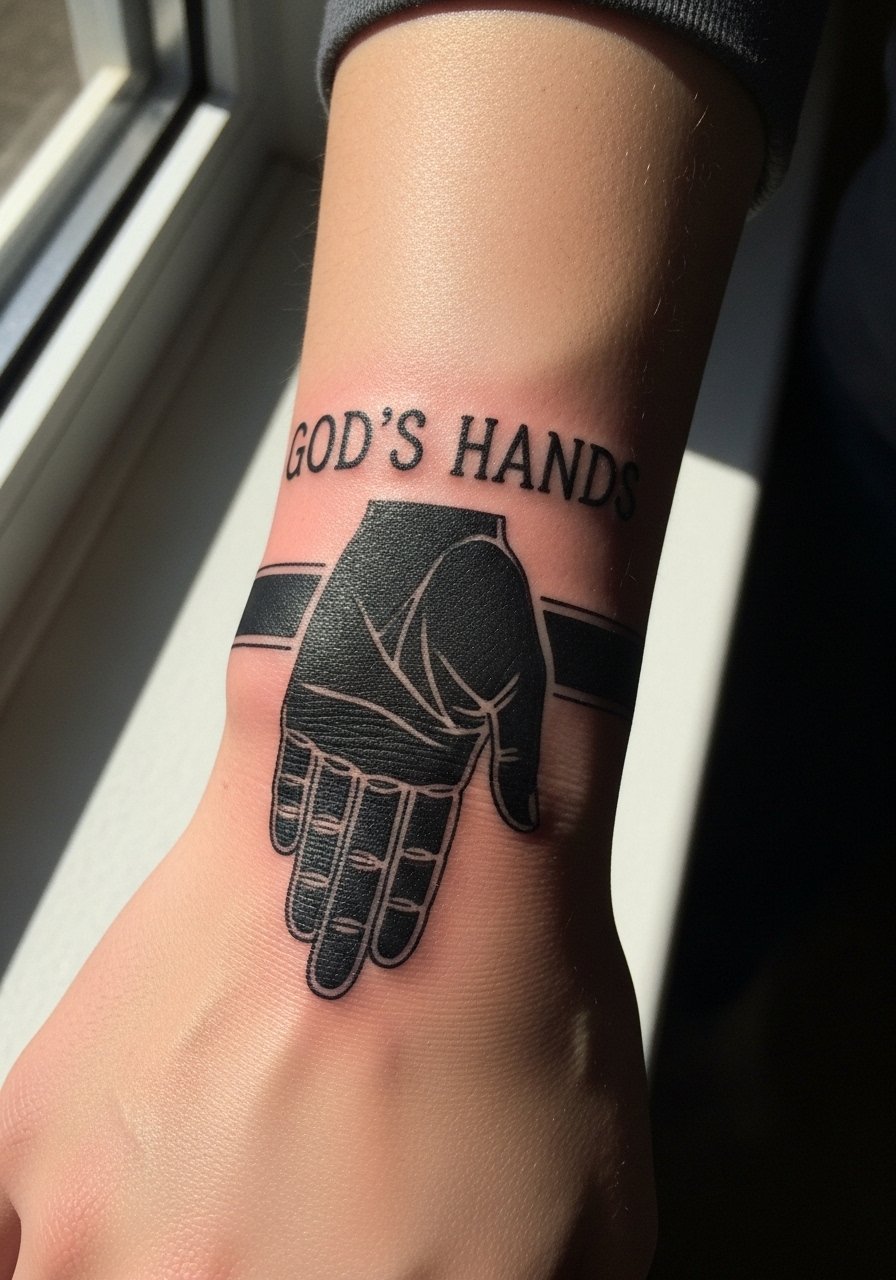
4. Small Wrist Wrap, High Contrast
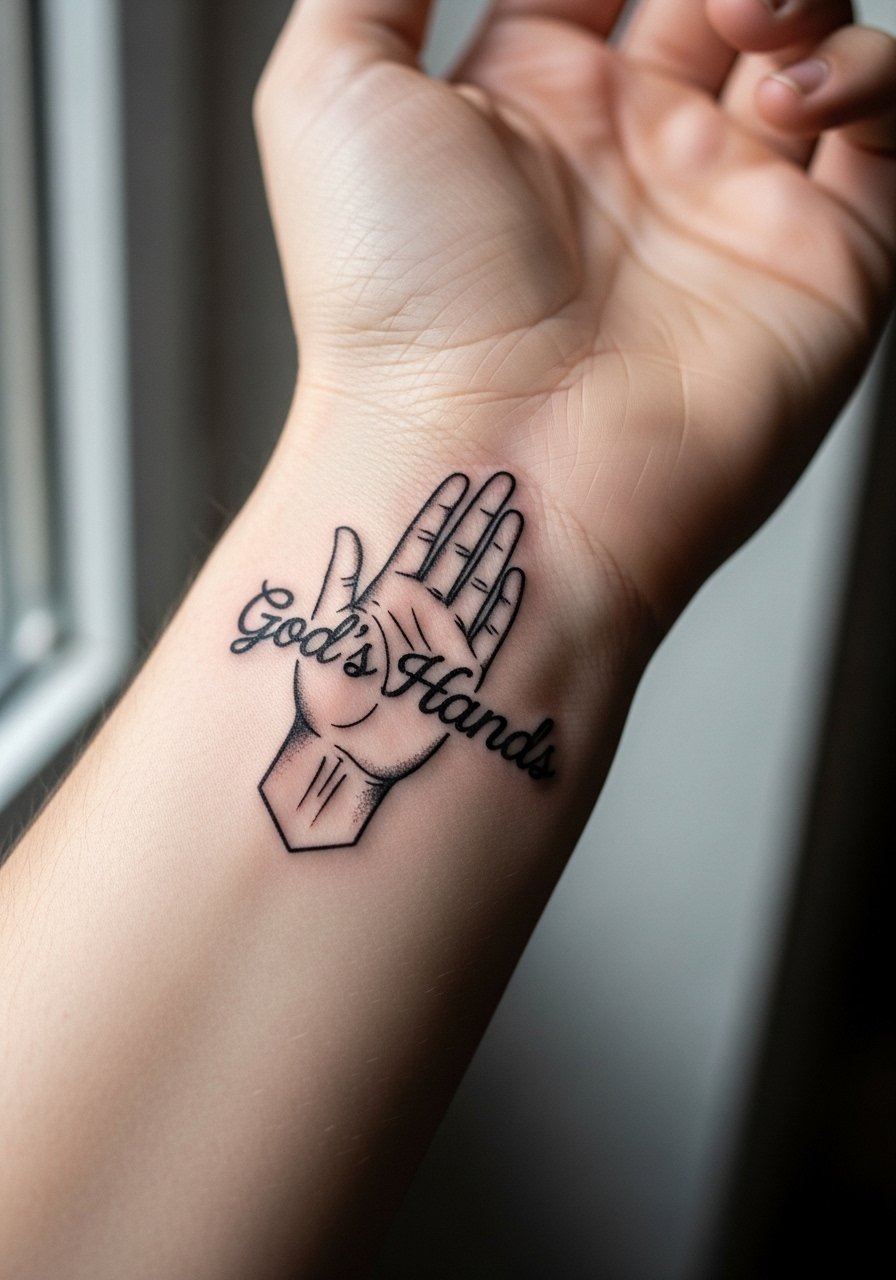
Wrist wraps show off instantly but face heavy wash and friction. I recommend a slightly simplified hand silhouette rather than fingers full of tiny details. Session time is short, often under 45 minutes, and pain is higher because of thin skin. The usual mistake is asking for a tiny, intricate hand which turns muddy after daily washing. Wear a thin chain pendant necklace or minimalist bracelets when showing it off, but protect the area during showers for the first two weeks.
5. Inner Bicep Panel with Dot Shading
Inner bicep gives a private display and lets you include stipple shading without overcrowding. For this placement I suggest a bold outline for the hands with subtle dot work around the wrist. Pain is moderate to high depending on how close to the armpit you go. A common mistake is packing dense shading right up to the outline, which ages into a flat block. Ask for a three-stage shading fade so the contrast holds at six months and beyond. Bring a loose button-down shirt you can pull aside for the session.
6. Full Shoulder Cap with Radiating Rays
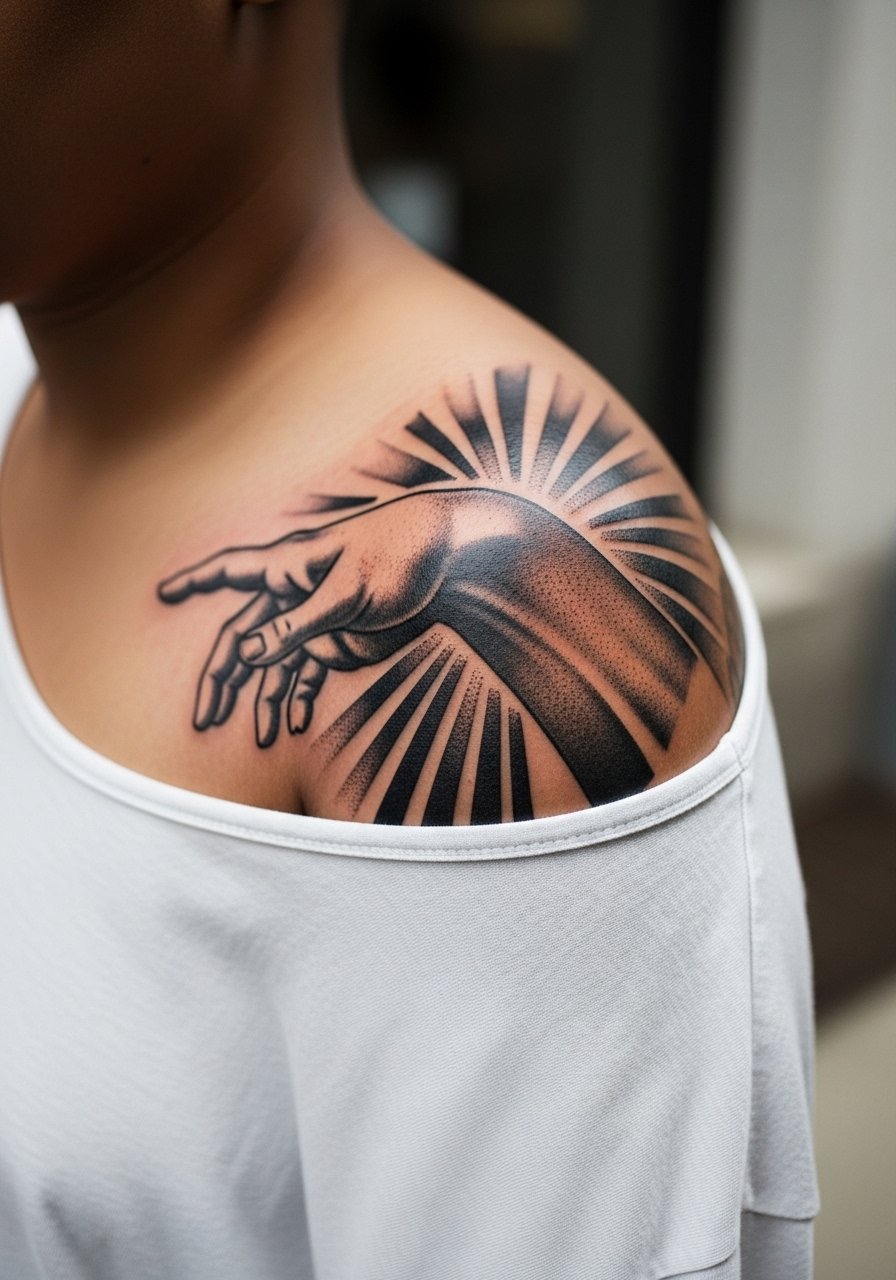
Shoulder caps carry well because skin is stable and you can push saturation without risking blowout. I advise broad strokes for the hand silhouette and thin negative lines for rays to keep the composition readable. Sessions run 90 to 150 minutes depending on size. People sometimes ask for micro-detail on the fingertips which tends to flatten over time. Wear a loose tee with rolled sleeves to the appointment so the artist can access the shoulder cleanly.
Studio Day Picks
The chest and inner arm pieces above ask for different prep than wrist and hand sessions, and a few targeted items smooth out the session and early healing.
-
Stencil transfer paper kit. Lets you hold the composition against the skin and confirm scale on chest or arm pieces before the needle hits, which is especially helpful for layered shoulder and sternum layouts.
-
Topical numbing cream. Applied 30 to 45 minutes before a sensitive sternum or inner bicep session it reduces edge pain without disrupting linework.
-
Thin protective film roll. Ideal for wrist and hand placements where friction from daily life threatens the first-week scab and ink retention.
-
Fragrance-free body wash. Gentle cleansing is crucial during the healing window for high-contact spots like forearms and shoulders.
-
Aquaphor healing ointment. A thin layer for the first few days helps keep saturated blackwork from drying into tight scabs on chest and arm pieces.
7. Sleeve-Style Hand Pairing on Upper Arm
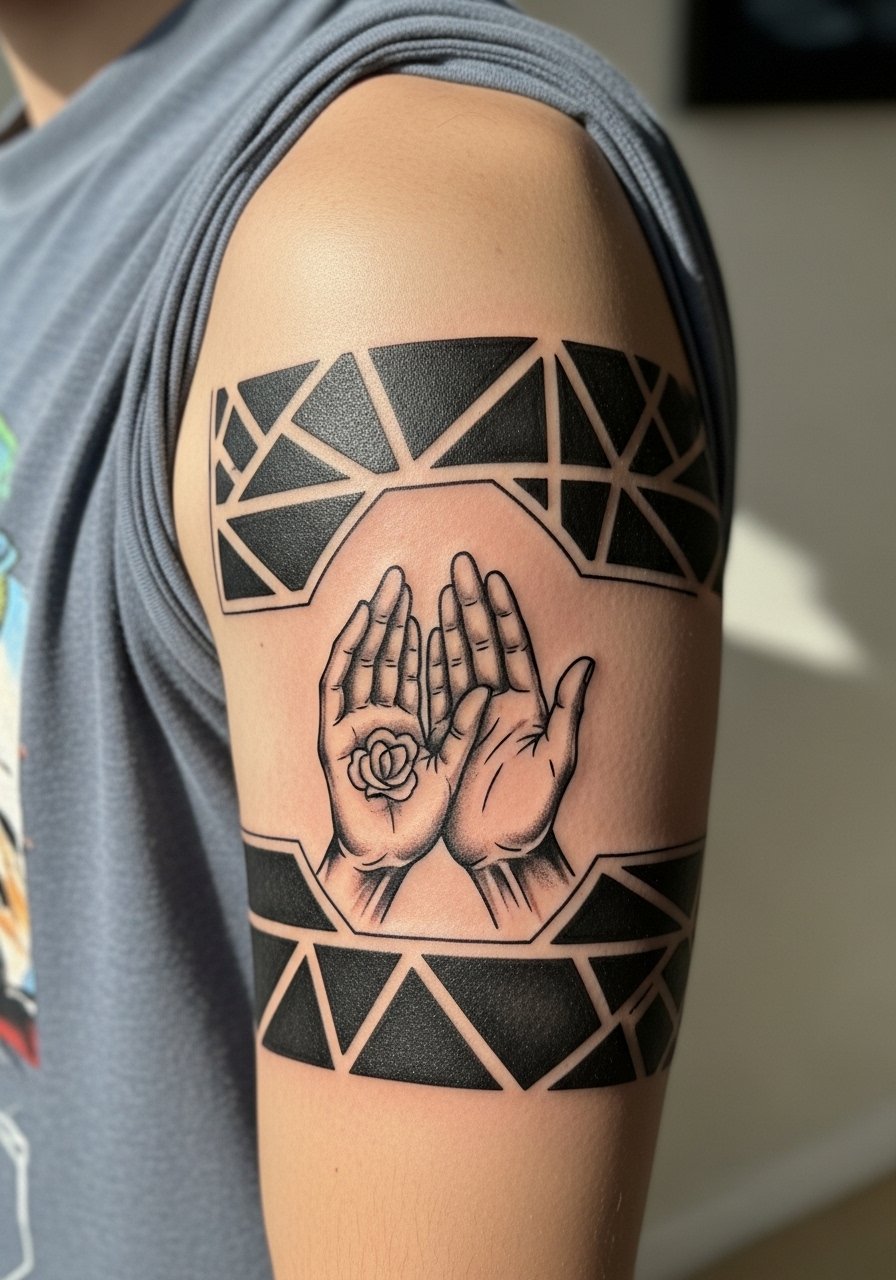
A sleeve-style approach lets the hands sit among shapes so the motif feels like part of a larger narrative. I suggest making the hands two to three inches across so they anchor the arm visually. Sessions can span multiple sittings and pain is moderate. People often cram tiny religious symbols around the hand which reads noisy after a year. Tell your artist to leave breathing room and to plan panels that age at similar rates. For daytime looks, roll sleeves and wear a short sleeve linen shirt to highlight the upper arm composition.
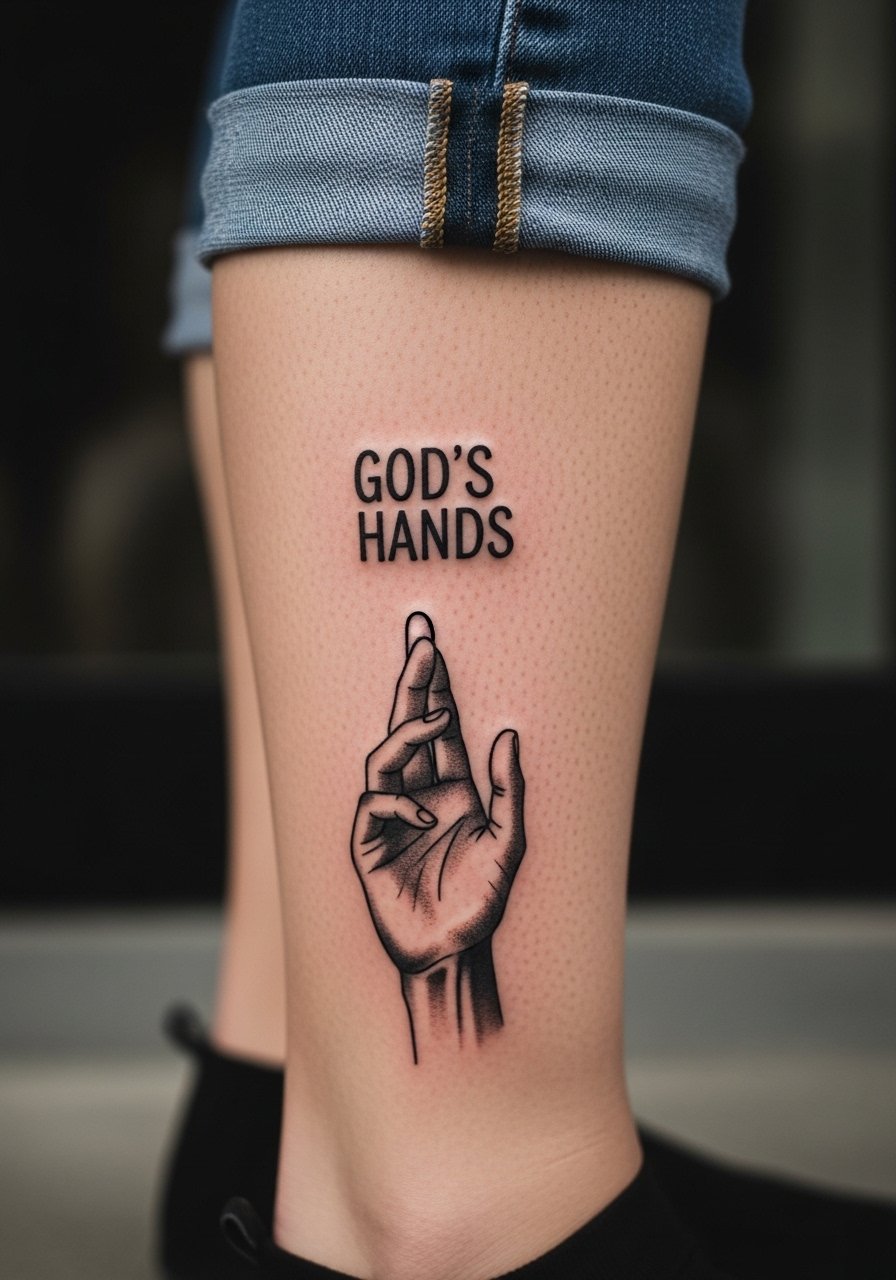
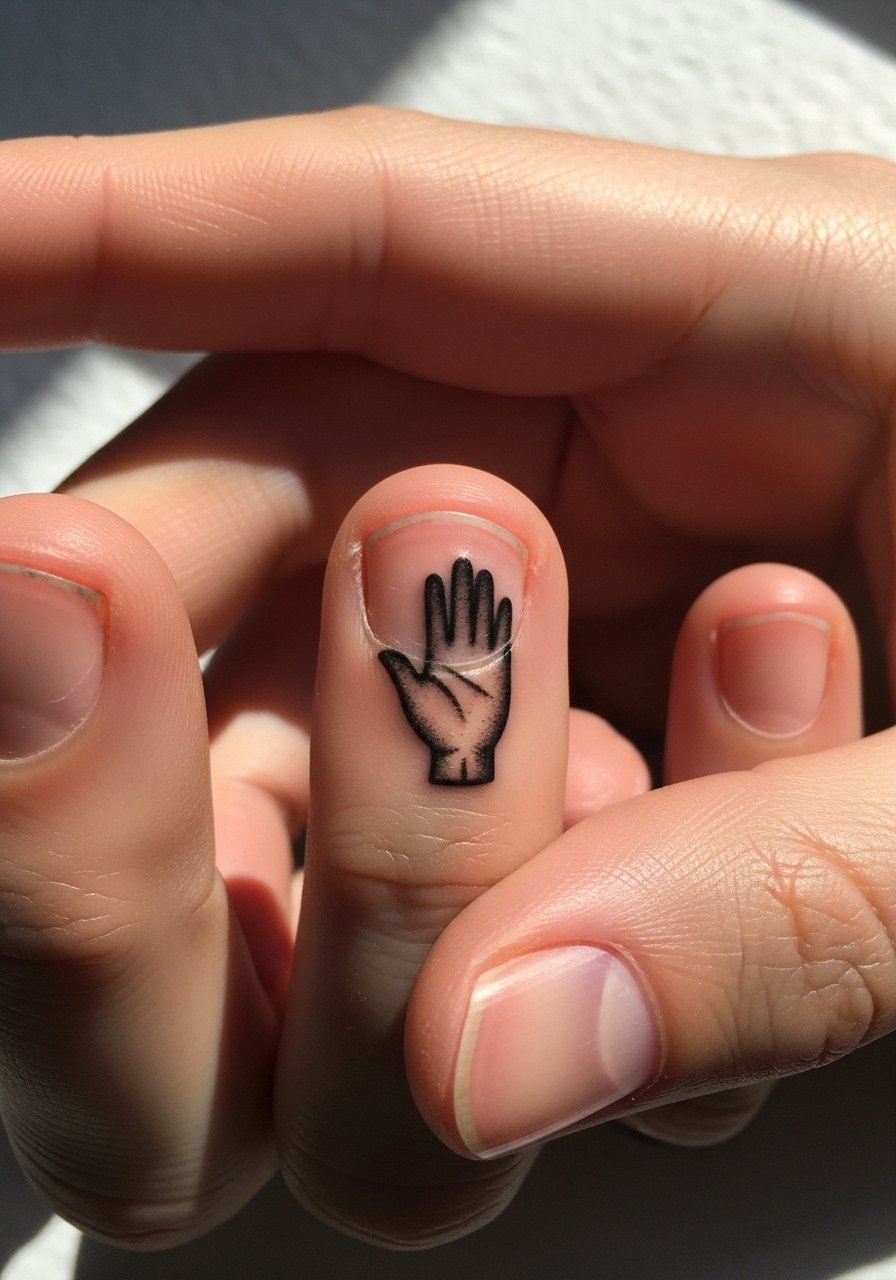
8. Minimalist Single-Hand Finger Tip
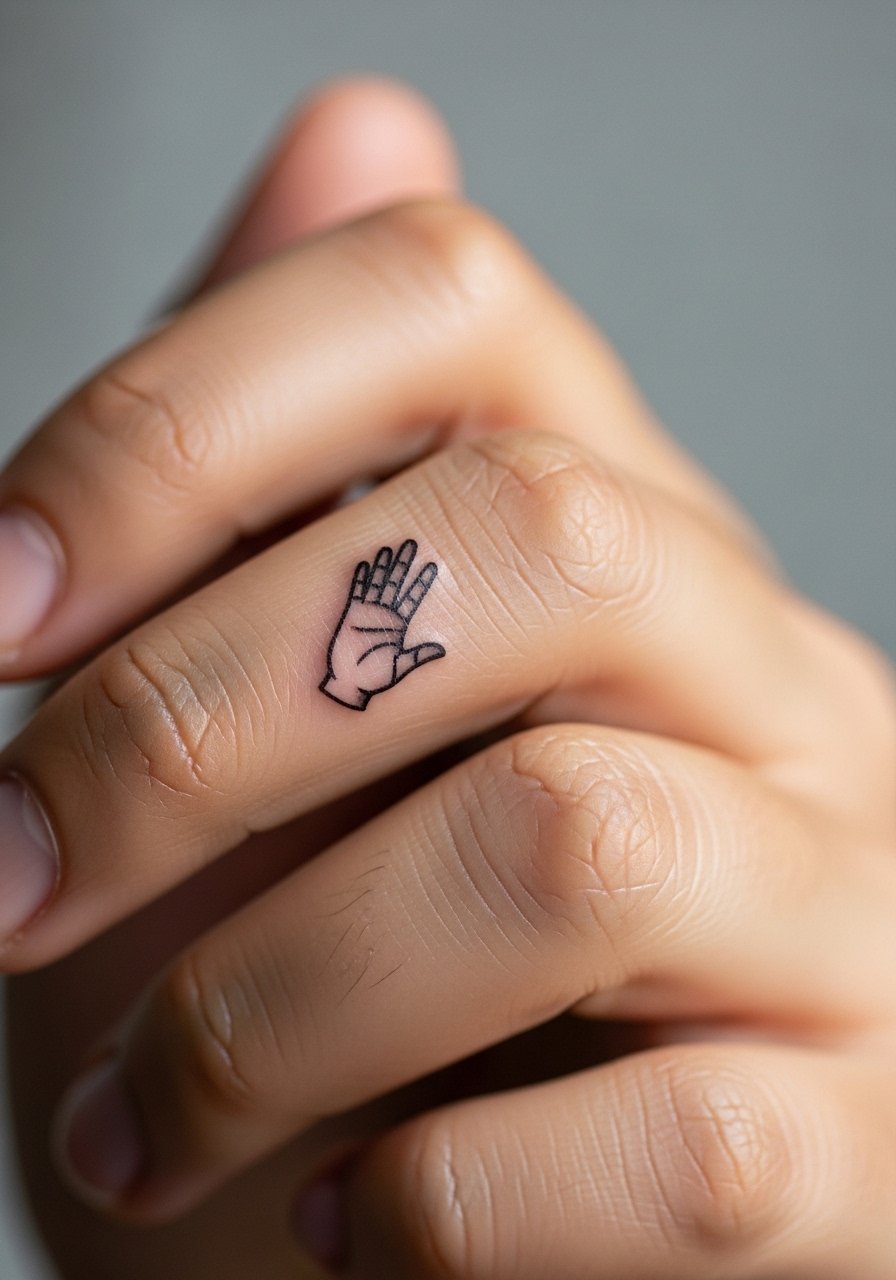
Finger placements are intimate and tough. Pain is high and touch-ups are likely within a year because of constant skin turnover. I advise a simplified hand with the outline thicker than you might want at first because thin lines vanish quickly on fingers. The common error is asking for micro-detail there. Expect a short session but plan for a touch-up timeline at year one. Finger pieces pair well with thin rings or a minimal band ring when you want the tattoo to read as part of your everyday jewelry.
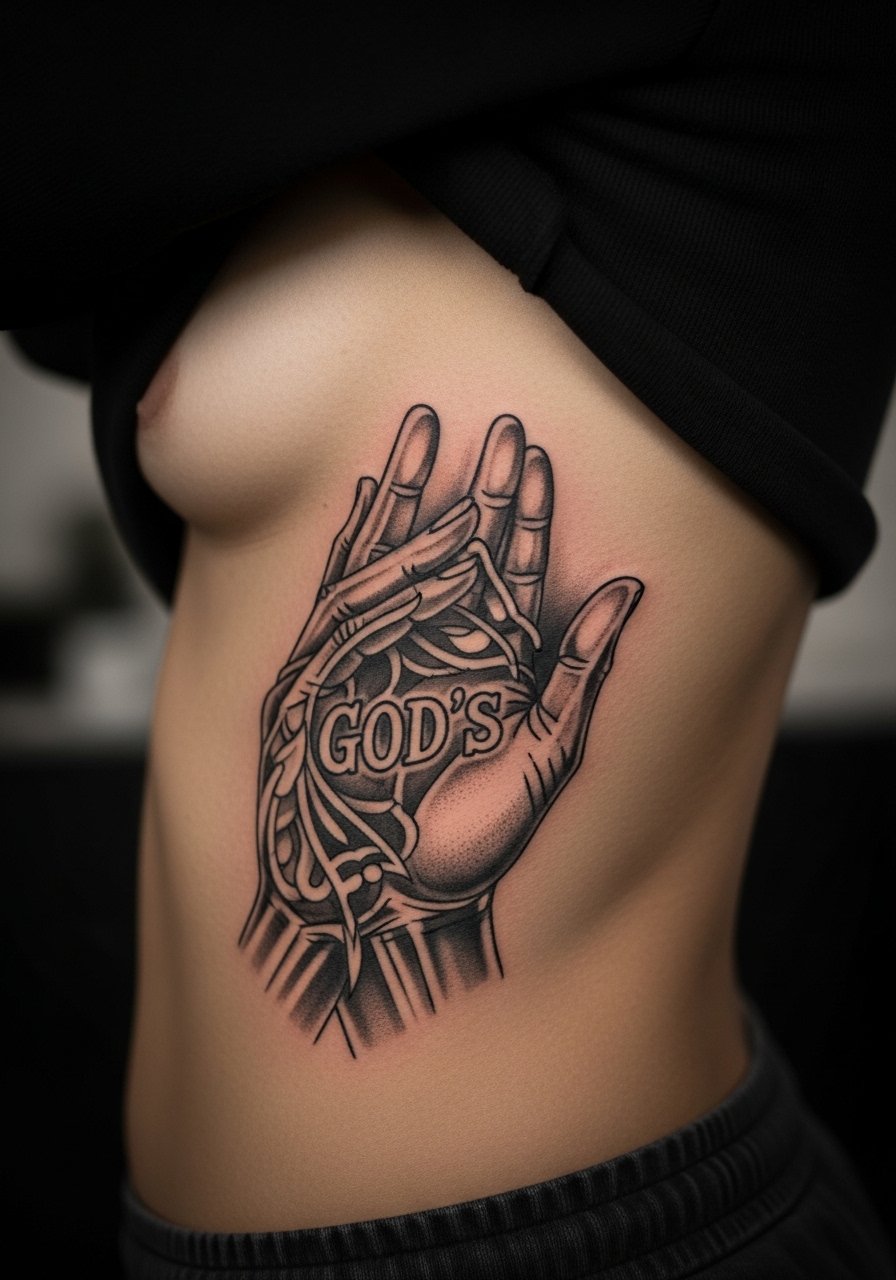
9. Ribcage Panel with Bold Negative Space

Ribcage pieces have two main trade-offs: striking presence and heavier pain. Artists split on fine detail here. One camp says fine line blurs on ribs due to skin stretch. The other says that with correct needle depth and spacing it can hold. Be explicit in consultation about wanting bold silhouettes and open negative space. Sessions are often done in one long sitting or split into two. The usual mistake is trying to pack too much detail into a small rib panel. Wear a cropped top that you can lift for the session.
10. Collarbone Accent with Solid Palm
Collarbone placement reads elegantly when the hands are scaled to follow the bone line. Pain is moderate and the session is short. I recommend solid black fill for the palm area and a small gap between the fingers and the collarbone so the design does not blur into body contours. A common mistake is placing the hand too low where shirt rub causes extra irritation. For outfits, an open-neck blouse frames the collarbone without exposing too much.
11. Thigh Block with Dramatic Contrast

Thigh pieces tolerate saturation and large scale well because skin is thick and less exposed to sun. Expect a longer session and moderate pain. I recommend a composition that reads from a distance with broad planes of black and negative space for highlights. A mistake I see often is over-detailing within the palm area, which flattens after healing. During the session wear comfortable shorts or a wrap skirt and consider an elastic waist short for easy access.
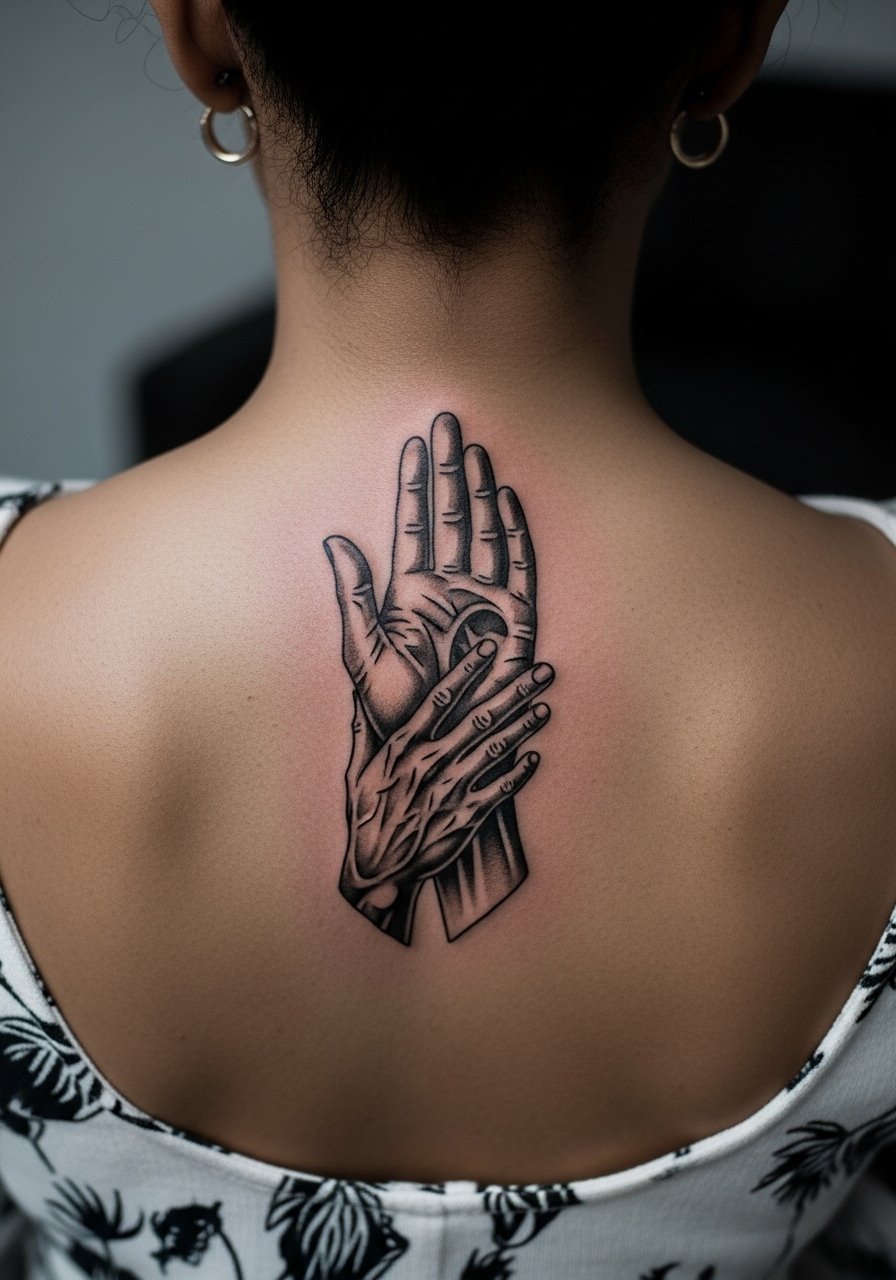
12. Back-Centered Altar Panel

Centered back pieces let you play with scale and symmetry. I suggest a bold silhouette with secondary motifs in low-saturation fill around it to avoid competing contrast. Sessions tend to be long and split. The usual error is crowding the center with many small symbols that get lost when the patient moves. For showing it off, open-back tops work best but plan clothing that protects the area during healing.
13. Hand and Wrist Stack with Ring Motif
Hand-to-wrist flows are visible and make a statement. Expect higher pain and faster fade because of constant washing. I advise a thicker outline and simple palm fill so the image survives heavy use. The mistake is asking for tiny internal lines on the hand that disappear within months. Pair with thin stacking bracelets or a minimal leather cuff to create intentional framing that does not rub the tattoo during healing.
14. Calf Portrait with Bold Silhouette
Calf placements offer good longevity and are friendly if you want a larger bold piece. Sessions are moderate in length and pain is mild to moderate. For this placement I recommend a strong vertical composition so the hand follows the leg line. Over-detailing inside the silhouette tends to flatten under muscle movement, so keep interior work minimal. Roll jeans during the session and wear casual slip-on shoes that let you remove socks easily.
15. Rib-to-Back Flow with Dramatic Negative Space
Flow pieces that cross the rib and side back make use of shifting planes. Expect higher pain on the ribs and plan two sessions. Tell your artist you want wide negative gaps between fingers and surrounding shapes since the ribs will stretch and compress. A common complaint is asking for delicate cross-hatching which blurs on the rib side. Bring a supportive top to the studio and plan a calm recovery day.
16. Gold-Leaf Illusion with Heavy Fill

Using heavy black to create the illusion of a metallic silhouette is a simple trick that reads well on forearms. Ask your artist to reserve tiny islands of skin rather than relying on fine lines. Session time is moderate and pain is manageable. The main mistake is trying to mix tiny gold-colored inks with heavy black in the same small area, which tends to muddle. For evenings out, pair this with a rolled sleeve blazer that frames the forearm.
17. Ankle Icon with Compact Palm
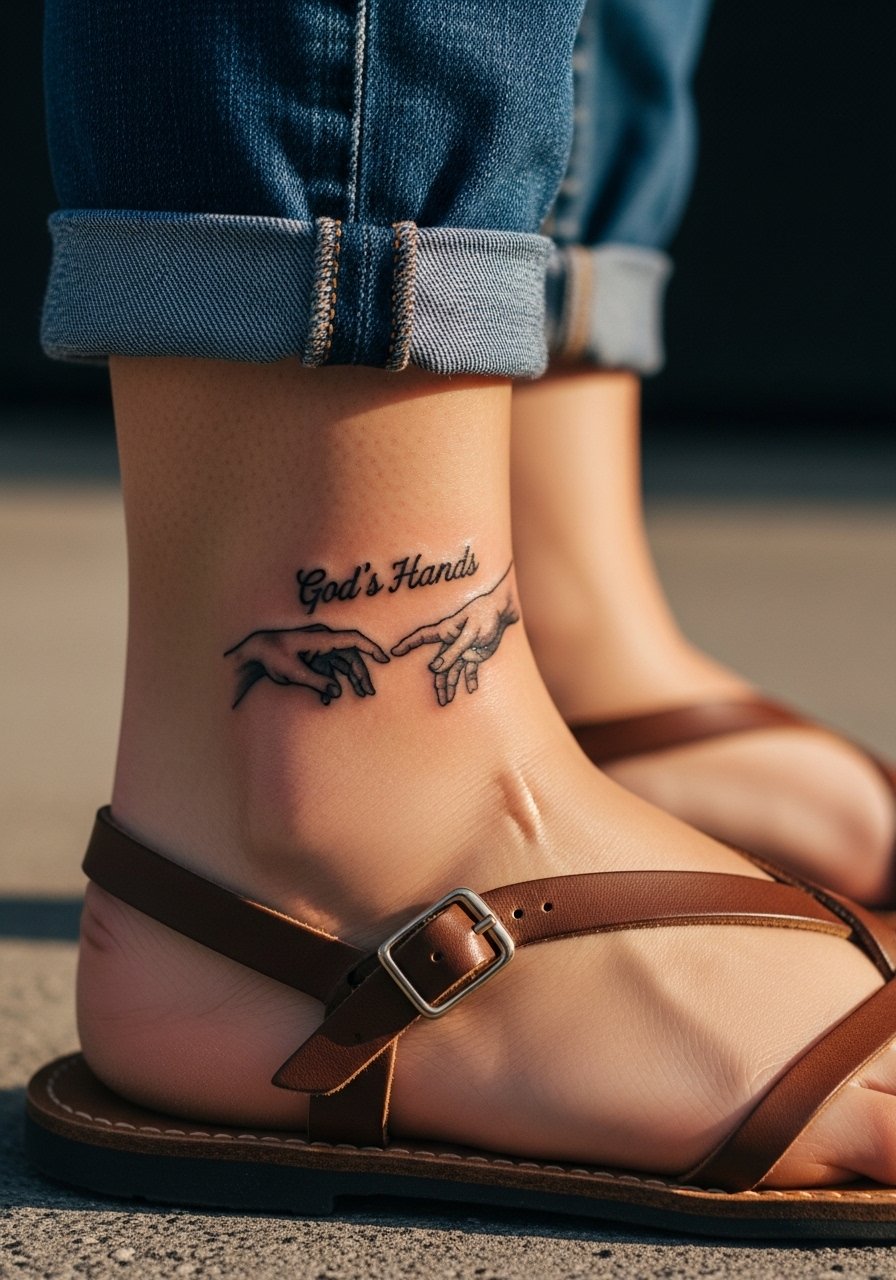
Ankle tattoos face constant rubbing and shoe friction. I recommend a compact palm silhouette with thicker outlines to hold up through activity. Sessions are quick and pain is moderate. The mistake is choosing a very thin outline for an ankle piece which fades fast. For footwear, choose open sandals during the healing week and consider a simple slide sandal to reduce rubbing.
18. Neck-Side Statement Near Hairline
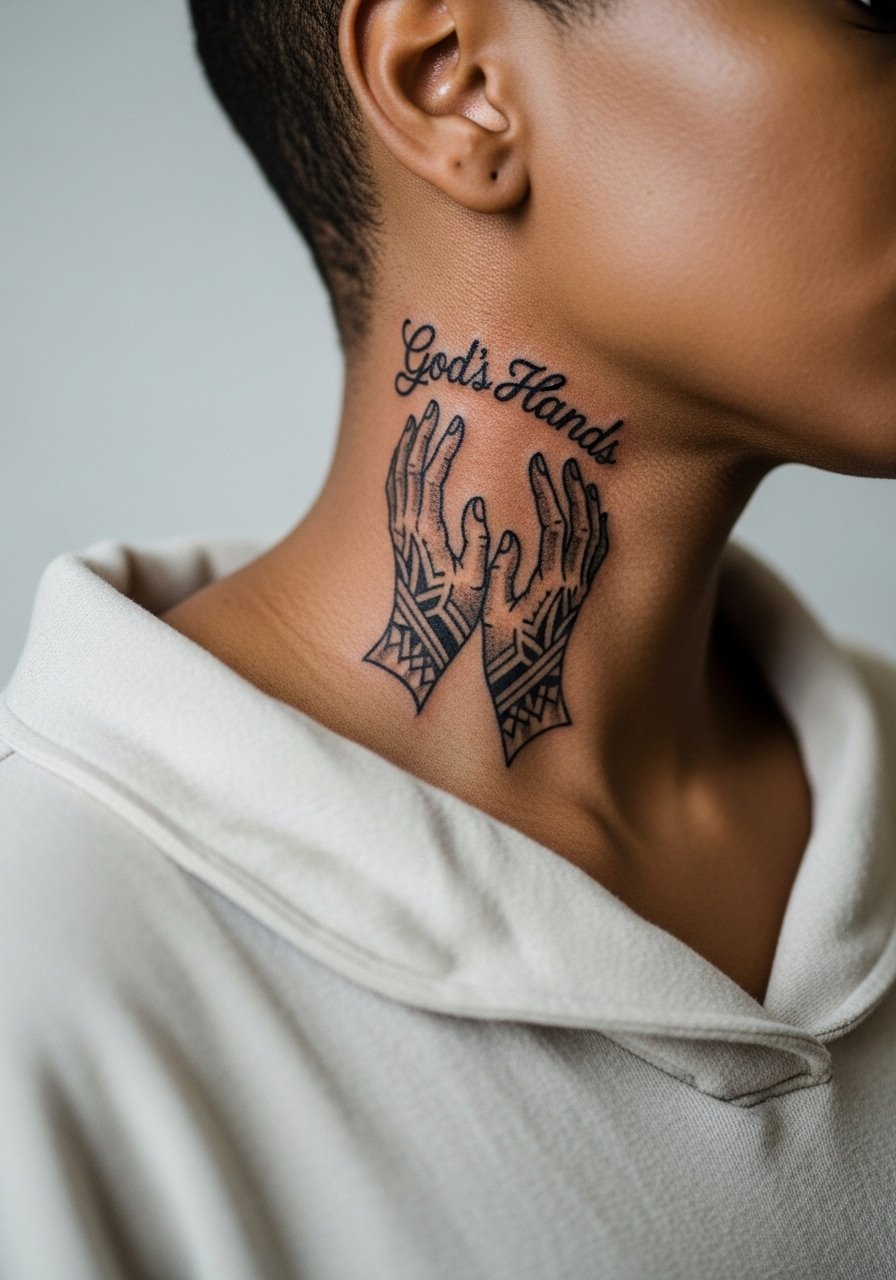
Neck pieces are bold and visible. Expect higher social visibility and moderate pain. Ask for a scaled-up silhouette that avoids tiny neck lines and keep the palm wider than you think you need. The common debate here is about career implications versus personal freedom. One group warns of workplace impacts from neck tattoos. The other group says visible art is more accepted now and that placement is a personal call. Be explicit in your consultation about long-term implications.
19. Lower Back Anchor with Solid Hands
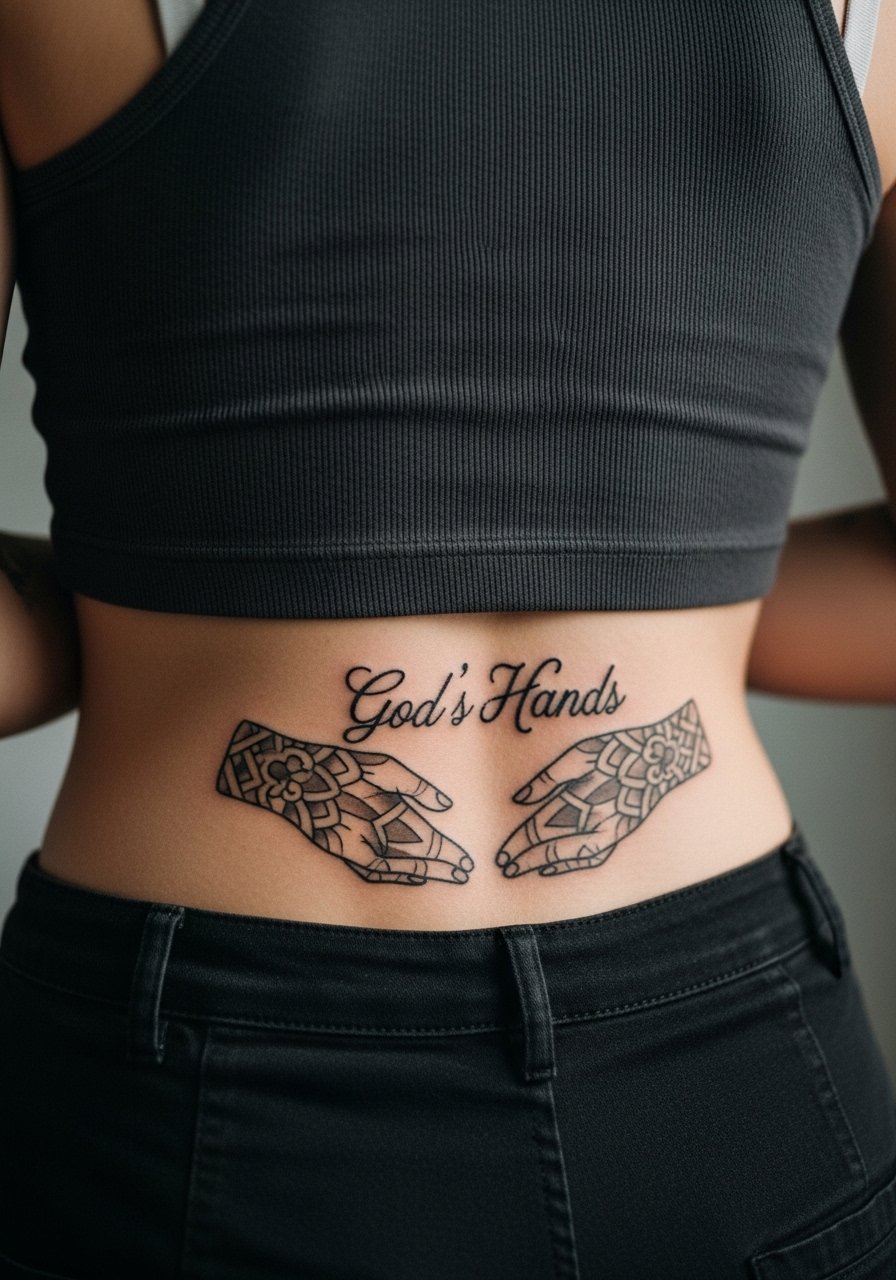
Lower back tattoos live under clothing and do well with strong saturation. Sessions are moderate in length and pain is low to moderate. I often advise making the hands wider than expected because the lumbar curve can distort narrow forms. The typical mistake is using too many fine strokes that the body motion blurs into a single dark block. For outfits, high-waisted jeans with a cropped tee show the area without excessive exposure.
20. Hip Accent with Curved Silhouette
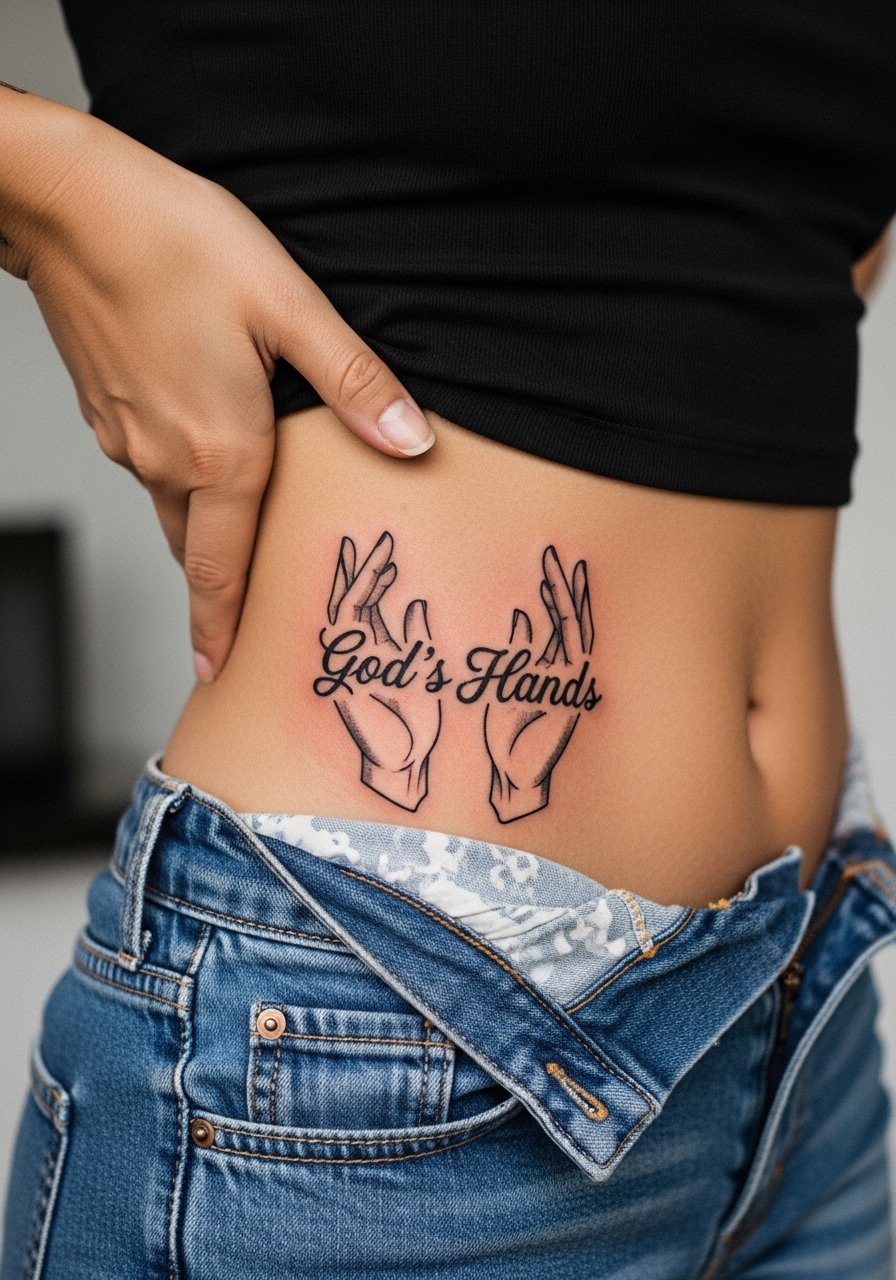
Hip placements are intimate and curve with the body. Pain is moderate. I recommend shaping the hands to follow the hip line and leaving clear negative margins so the piece does not warp visually. A common error is insisting on tiny fingers that vanish when clothing rubs. For the session, wear high-waisted bottoms you can lower slightly like high-waisted denim shorts.
21. Inner Thigh Private Panel

Inner thigh ink requires discretion and careful aftercare. Pain varies and sessions can be awkward because of positioning. Tell your artist you want bold silhouettes with open space so the design survives movement. The mistake is packing too many detailed elements in a high-friction area which tends to break down faster. Choose loose bottoms to wear after the session and bring a pair of comfortable lounge shorts for the ride home.
22. Finger-Edge Micro Silhouette
Edge-of-finger placements are delicate experiments in minimalism. Pain is sharp and touch-ups are common because of constant skin turnover. I recommend a slightly bold outline and no inner detail. The typical mistake is asking for script or small inner markings that disappear. Keep expectations realistic and plan a touch-up at around twelve months.
23. Spiritual Chest Pairing with Twin Hands
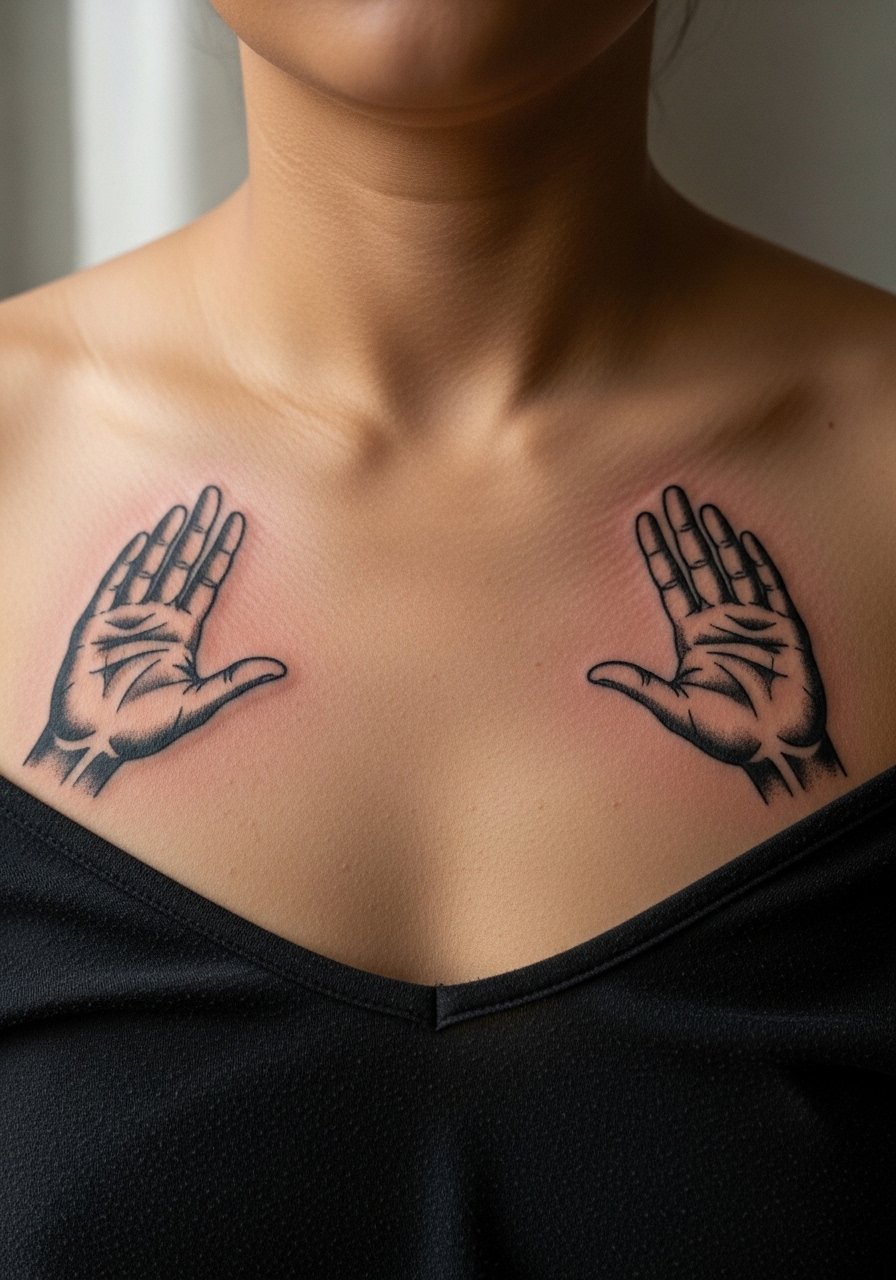
Symmetrical chest pairs have a ceremonial feel but require precise placement to align with the sternum and collarbones. Sessions may be split, pain is moderate. One pitfall is mismatched scaling between the two hands. Ask your artist to stencil both sides simultaneously so you can test balance. For layering with clothing, a wide-neck sweater frames the motif without exposing too much.
24. Spine-Aligned Vertical Panel
Spine pieces read dramatically and make use of verticality. Expect longer sessions and higher discomfort near the vertebrae. I advise bold silhouettes and avoiding intricate interior lines near the bone where blowout risk is higher. The mistake is compressing too many elements into a narrow column. For showing the design, open-back tops are ideal but plan for gentle movement during the first two weeks.
25. Petite Clavicle Crescent with Negative Space
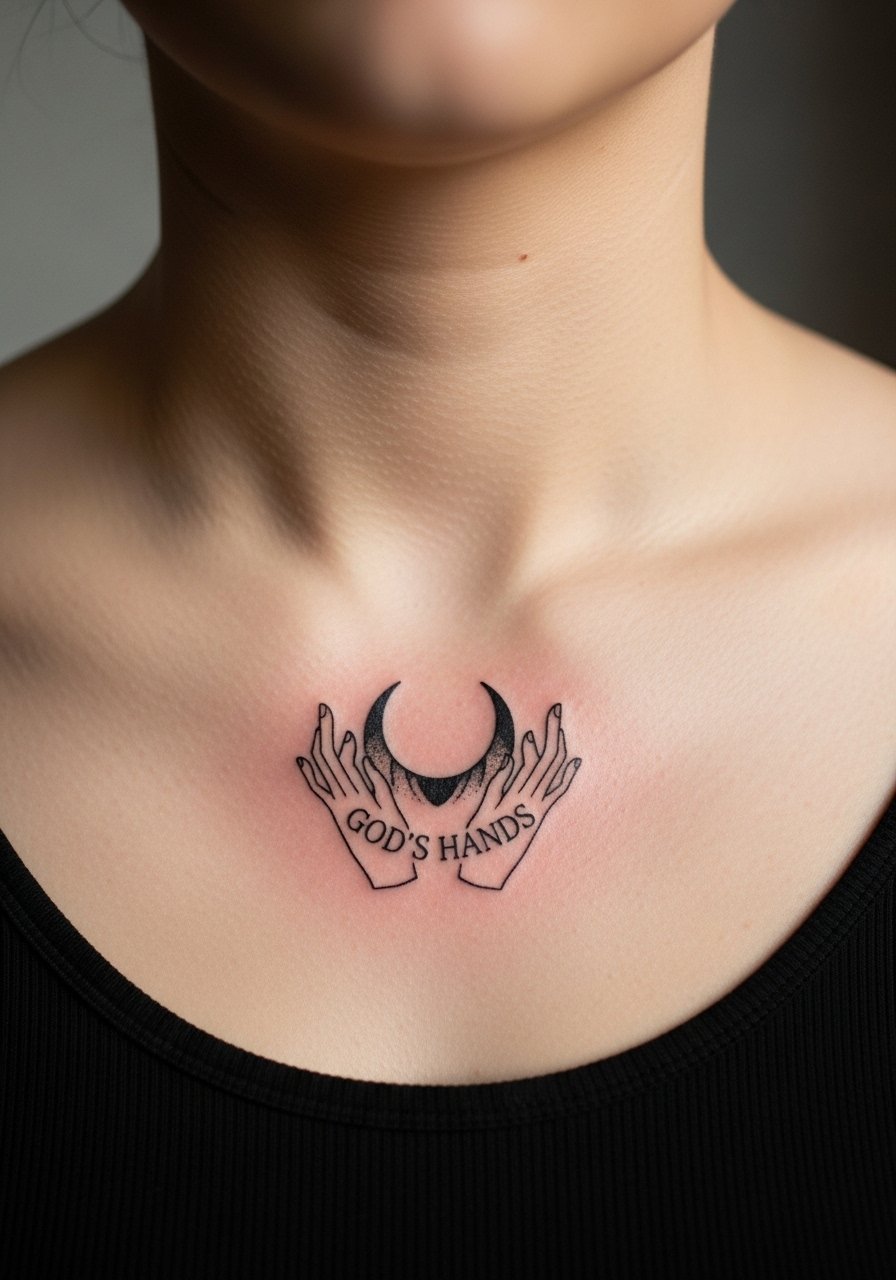
Small clavicle placements are subtle and visible with certain necklines. Pain is moderate and the session is short. I recommend a crescent orientation that follows the bone curve and leaving clean negative space between fingers to prevent merging. A common error is squeezing in extra symbols that compete with the silhouette. Pair with a thin chain necklace that sits above the motif.
26. Palm-Edge Bold Mark
Edge-of-palm placements are high-contact and often require touch-ups sooner than other spots. Pain is high. For longevity, make lines thicker and avoid inner palm detail. The usual mistake is expecting palm-edge ink to last as long as forearm work. Consider your daily hand use and plan for a possible touch-up at year one.
27. Large Back Panel with Ornamental Fills
A full-back approach lets you build an altar composition with hands as the focal point. Expect multiple long sessions and moderate pain that varies across the back. I recommend keeping the central hands bold and using ornamental negative fills around them so the piece ages evenly. A common mistake is asking for a lot of tiny hairline strokes across the panel which can merge. Schedule recovery days and plan clothing that avoids tight straps on the area during healing.
Frequently Asked Questions
Q: How does bold blackwork compare to fine-line versions of "God's Hands" for long-term readability?
A: From what I've seen, bold blackwork holds up better because thick silhouettes resist blowout and sun fading. Fine-line versions can look crisp at first but often need touch-ups sooner, especially on high-motion or high-friction areas like fingers and ribs.
Q: Will a chest or sternum "God's Hands" tattoo need a different touch-up schedule than an arm piece?
A: Yes, sternum and chest areas often experience more movement and moisture which can affect healing. I usually tell people to expect a higher chance of a touch-up within three years for chest placements than for a well-saturated forearm piece.
Q: Are there cultural or religious concerns I should consider when using "God's Hands" imagery?
A: Some people treat sacred iconography as personal devotion while others see direct religious imagery as something to approach with care. One camp welcomes visible religious motifs in contemporary art. The other camp prefers adapted or abstracted versions to avoid direct appropriation. If the symbol matters to you, discuss respectful options and small adaptations with your artist.
Q: Can I wear normal clothes to sessions for sensitive placements like ribs or sternum?
A: Yes, but plan your outfit around access. For ribs or sternum, wear a cropped top or a sports bra you can lift or unzip. For shoulders and back pick a loose button-down. Comfort and access make the session smoother for you and the artist.
Q: How likely is a finger or hand "God's Hands" to need touch-ups compared with a forearm piece?
A: Finger and hand placements almost always need touch-ups sooner because of constant washing, exposure, and thin skin. Forearm work tends to retain saturation longer. Expect to factor a touch-up into the timeline for any hand or finger piece.
