
Archangel imagery often gets painted as soft and sentimental, but the versions that age best on men are the ones built with structure and contrast. Heavy black and gray holds up differently from fine line detail, and placement matters more than you think. Read on for 27 bold angel tattoo directions that pick a lane, show how they age, and tell you exactly what to bring to the consult.
1. Minimal Single Wing on Inner Forearm
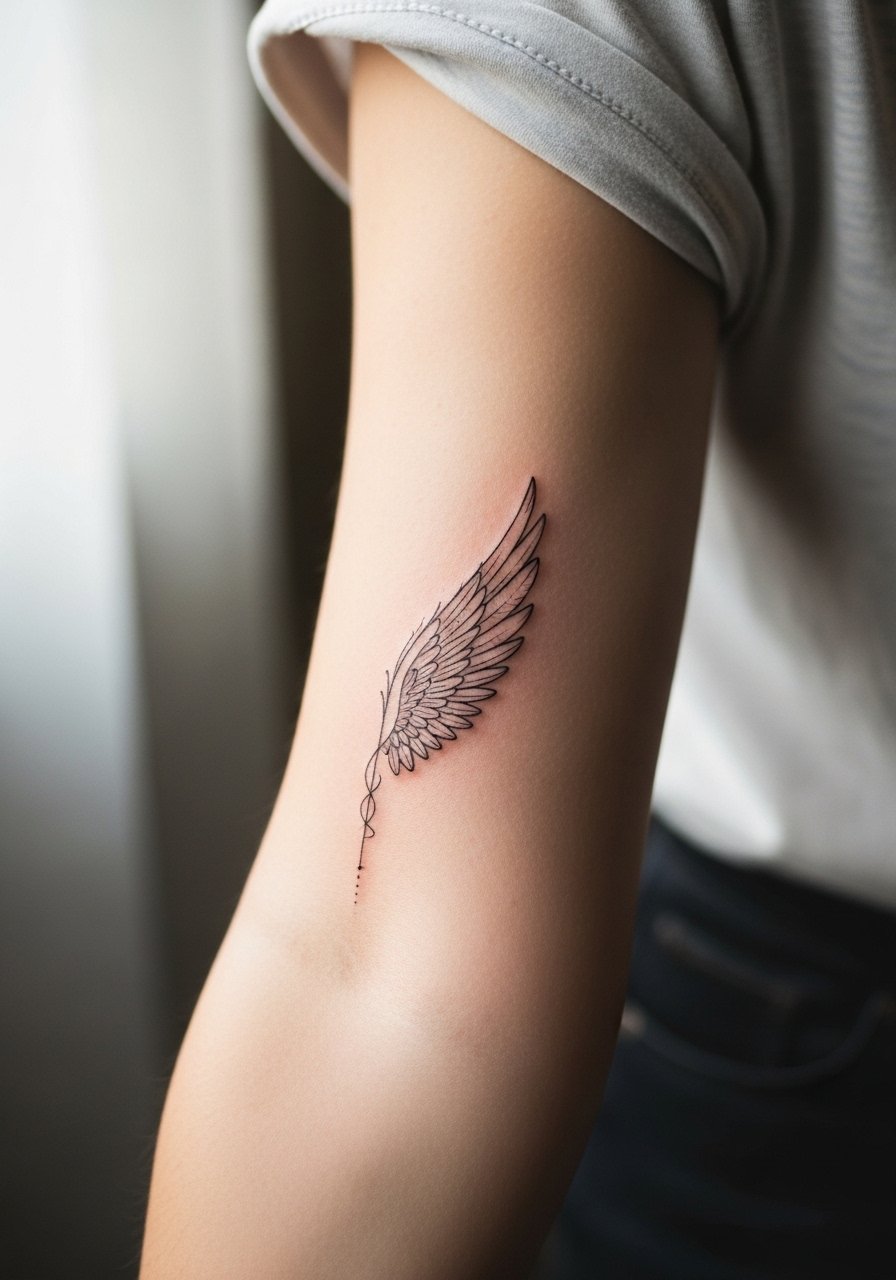
Consultation tip first: ask the artist for a single-needle approach with slightly increased spacing between feather strokes so the lines do not merge. I recommend this when you want something discreet that still reads masculine. Expect a one to two hour session and a 2 out of 10 pain level for most people. Common mistake is requesting ultra-tiny feathers that blur into a gray wash after a couple years. To avoid that ask for slightly bolder stem lines and a touch-up plan at year two. For the session wear a short sleeve shirt you can roll up easily so the artist has full access.
2. Archangel Michael Mid-Battle, Upper Back Panel
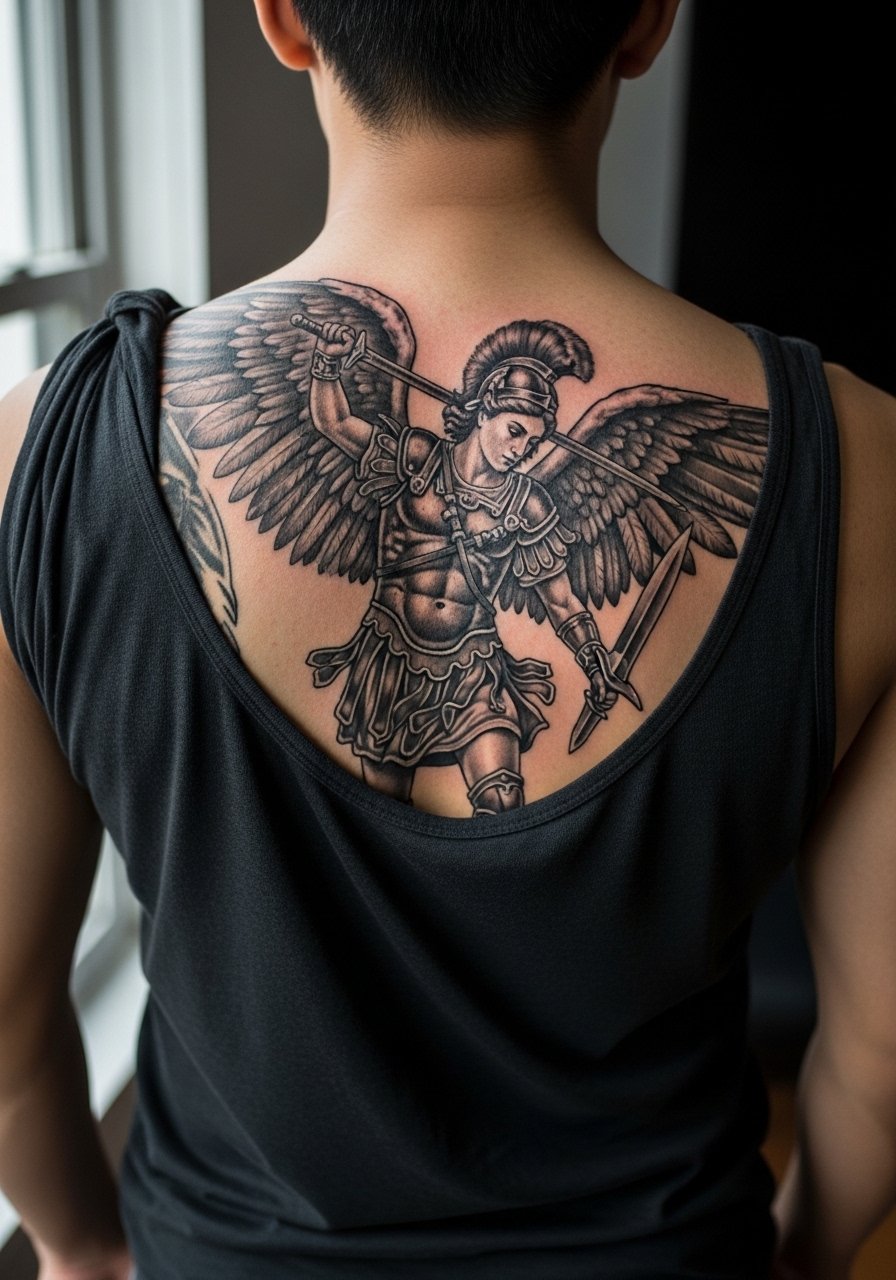
When you want drama that matches your upper-body anatomy, this is the go-to. Tell your artist to map the angel so the wings flow into the trapezius and shoulder curve, that preserves the pose as you move. Expect multiple long sessions across months, with saturation work to build depth. The common aging issue is over-detailed midtones that soften into a muddy patch; insist on crisp contrast and feather separation during inking. This placement is high friction if you sleep on your back, so plan clothing and touch-up timelines with the artist. For showing it off, an open button down shirt frames the panel without crowding the composition.
3. Fallen Warrior Angel, Chest Centerpiece
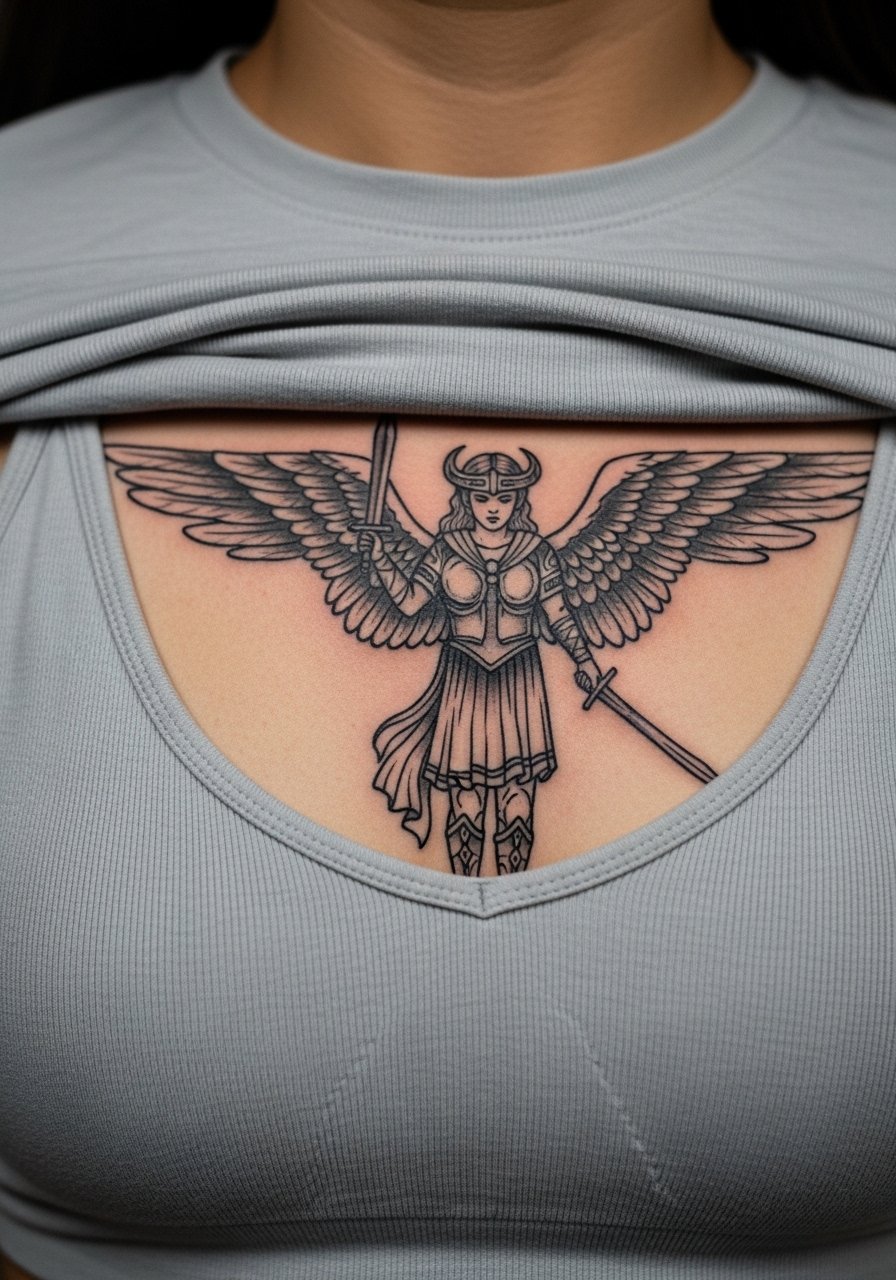
Fair warning, sternum and upper chest are sensitive areas and can be a 7 out of 10 on most pain scales. This design works when you want a redemption narrative that sits over the heart but reads rugged. Ask the artist to plan negative space between torn wing feathers and armor so the piece breathes when healed. A common mistake is packing too much micro-detail into the sternum zone which later reads as blur. Expect 10 to 20 hours split into sessions and plan loose tops for the studio visit. For nights out try a men's v-neck shirt that opens the chest without exposing everything.
4. Symmetrical Full-Back Wings, Black and Gray
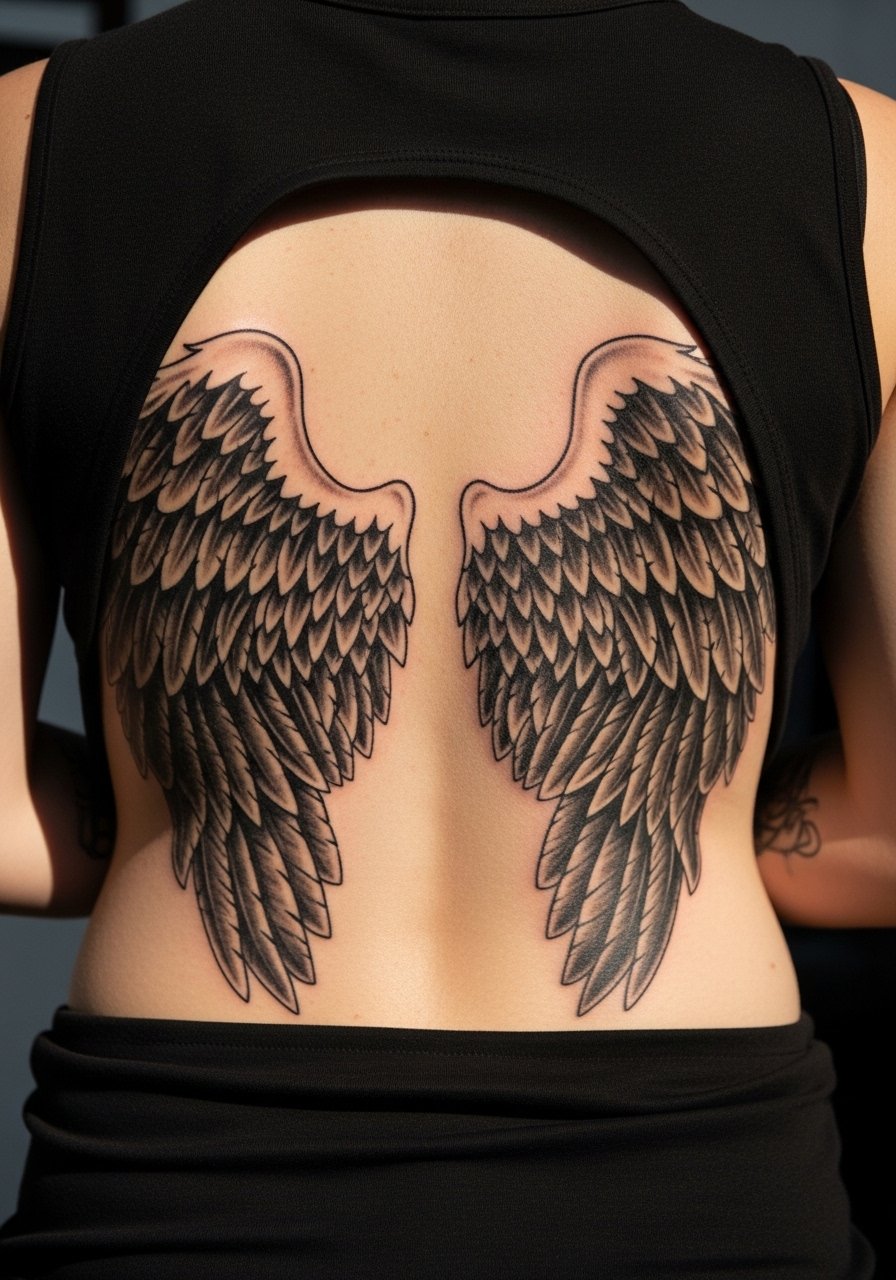
I've seen full-back wings hold their presence longer than expected when the artist prioritizes feather structure over tiny texture. This is the choice when you want protection implied from behind without a figure in the center. Tell your artist to plan long feather strokes with varied saturation so the wings read from a distance. Blowout risk increases near the spine and shoulder blade edges, so avoid overly dense stipple shading there. Sessions will be long and recovery requires loose tops. For casual show-off days pair the piece with a sleeveless tank top that keeps the wings visible without fabric rubbing during healing.
5. Guardian Protector Over the Heart, Left Chest Mini-Scene
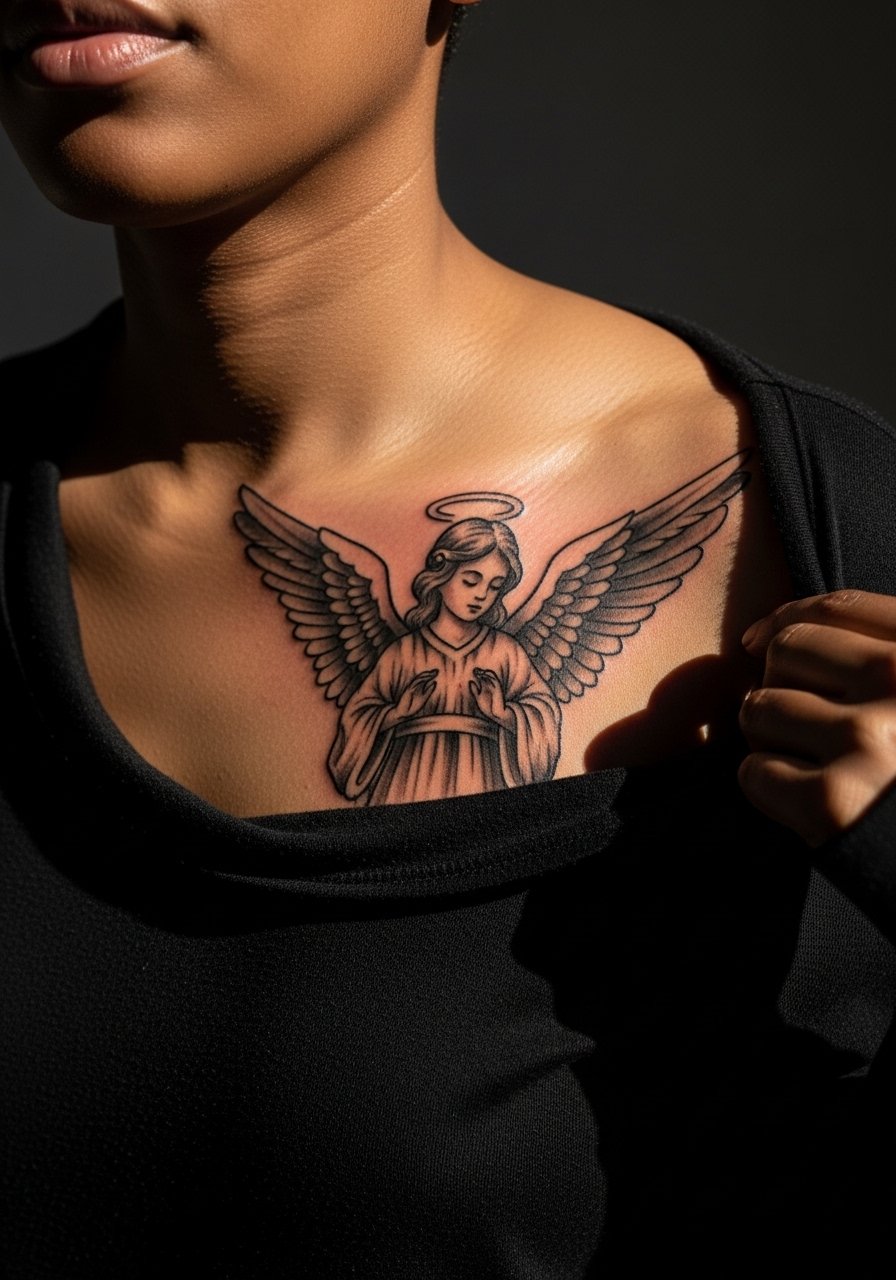
A chest guardian works if you want a piece that reads intimate when shirted and bold when unbuttoned. During consult ask for a modest scale that follows the pectoral curve and for armor lines that mirror your muscle shape. Mistakes show when people pick overly wide wings that pull across the sternum and distort with movement. Pain varies but most men manage it with pauses and short sessions. Expect touch-up at year three for any delicate feather gradients that soften. For the studio come in a loose button-down shirt that opens so the artist has clear access.
6. Angel and Skull Combination, Upper Arm Wrap
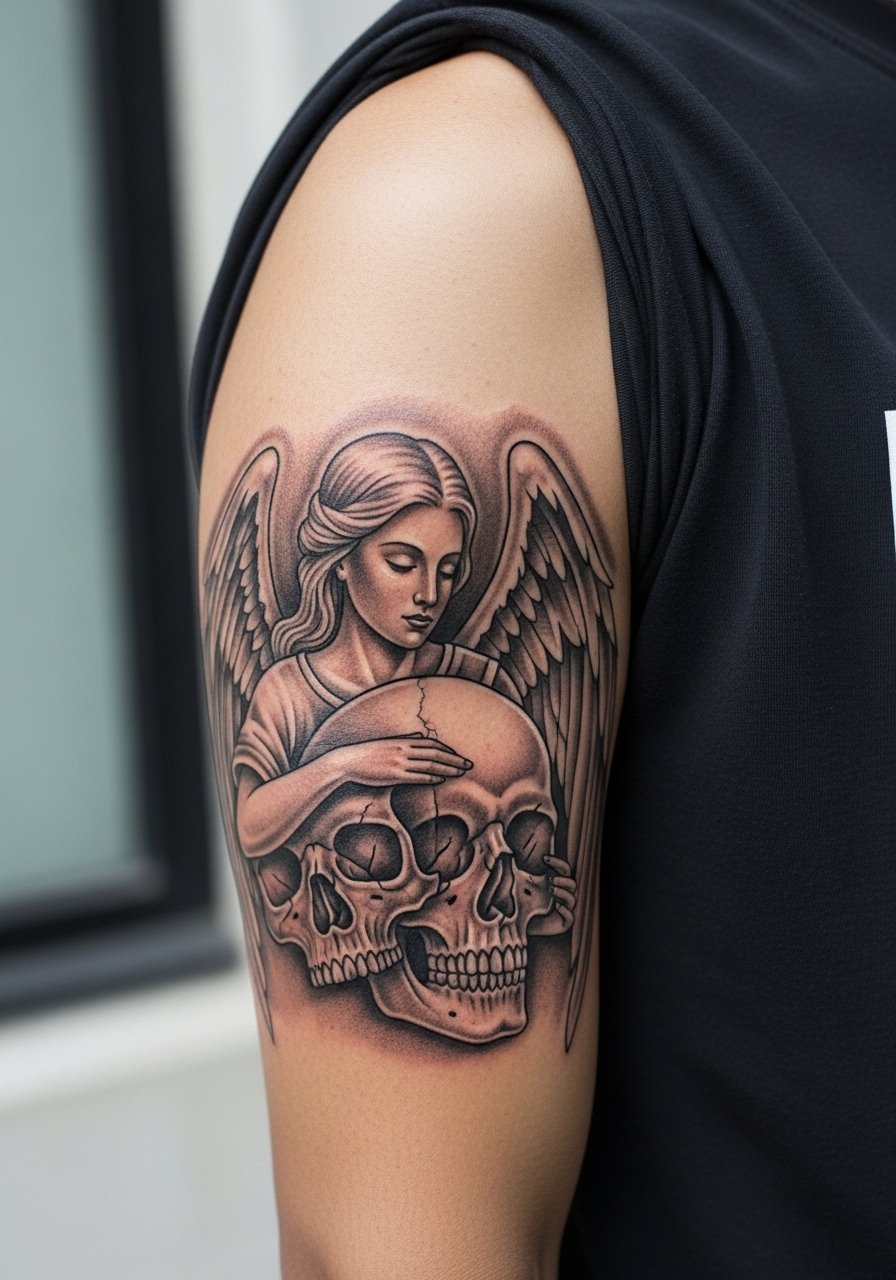
When you want duality in one sleeve piece this pairing balances celestial and mortality well. Tell your artist to use contrast to separate the angel from the skull, that prevents the two elements from merging as the ink settles. Typical mistake is equal shading across both elements which makes the angel lose form. Placement on the outer bicep keeps visibility high with moderate pain. Expect multiple sessions, each focused on saturation and contour lines. For casual wear a short sleeve shirt frames the wrap without hiding the main face.
Studio Day Picks
Those first six pieces ask for different prep compared with tiny wrist or finger work. A few targeted items smooth the session and protect delicate linework during healing.
-
Stencil transfer paper kit. Lets you preview placement and scale on skin, especially helpful for chest and back panels above.
-
Topical numbing cream. Applied before the session to reduce edge pain on sternum and ribcage work while keeping the artist’s lines readable.
-
Thin protective film roll. Keeps forearm and wrist tattoos clean during the first week of frequent hand washing and friction.
-
Fragrance-free gentle body wash. Cleanses healing areas without irritating fresh linework on chest or arm pieces.
-
Aquaphor healing ointment. Thin layers help keep fine line work hydrated during the initial days without clogging the needle channels.
7. Single Wing on Bicep That Follows Muscle Flow
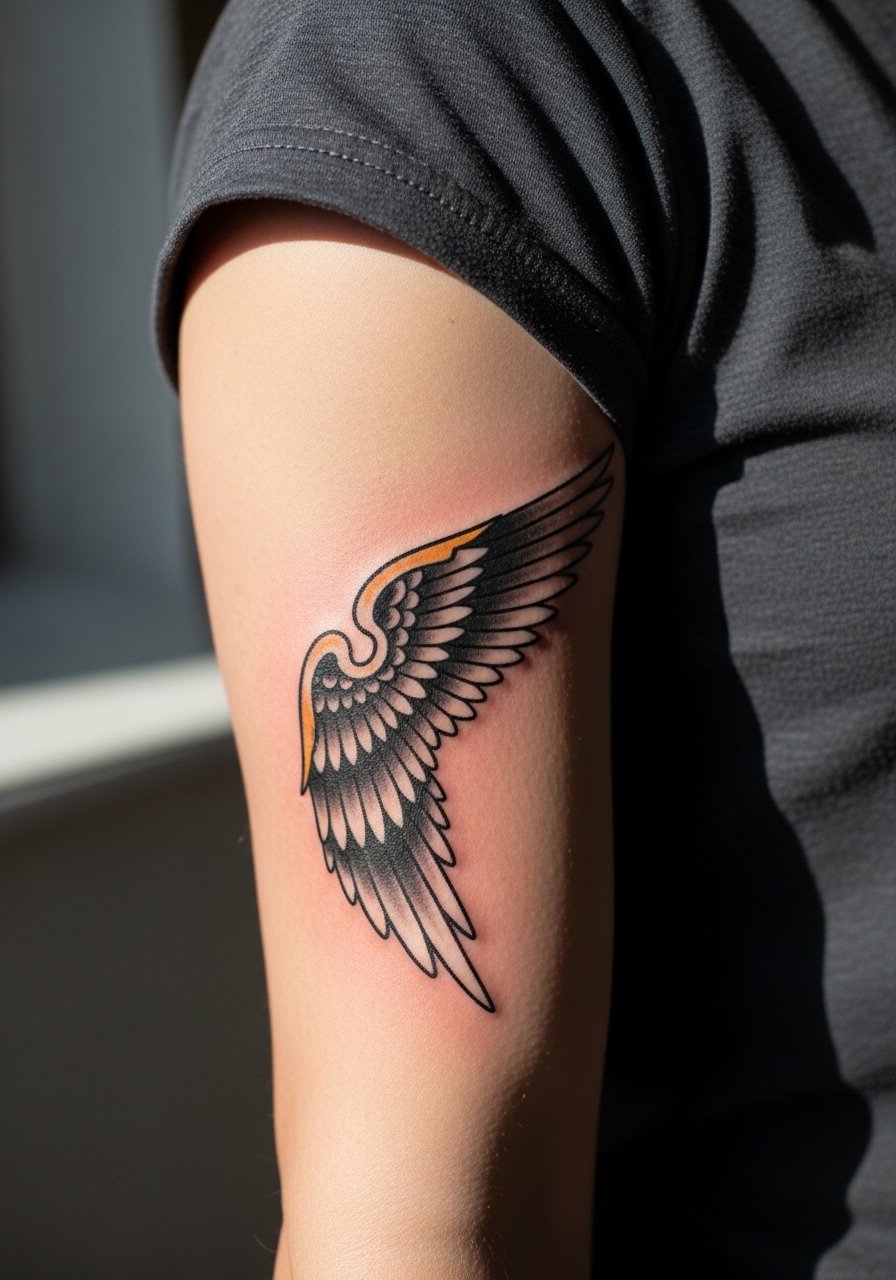
Consultation lead: ask the artist to draft the wing so the primary feather lines align with your biceps peak. This mirrors anatomy and keeps the image dynamic in flexed and relaxed states. Common mistake is a static wing that ignores muscle bulge, which looks off when you move. Expect moderate pain and one long session or two shorter ones. For studio wear choose a short sleeve shirt that rolls up easily so the artist can access the whole bicep.
8. Micro-Realism Angel Figure on Forearm
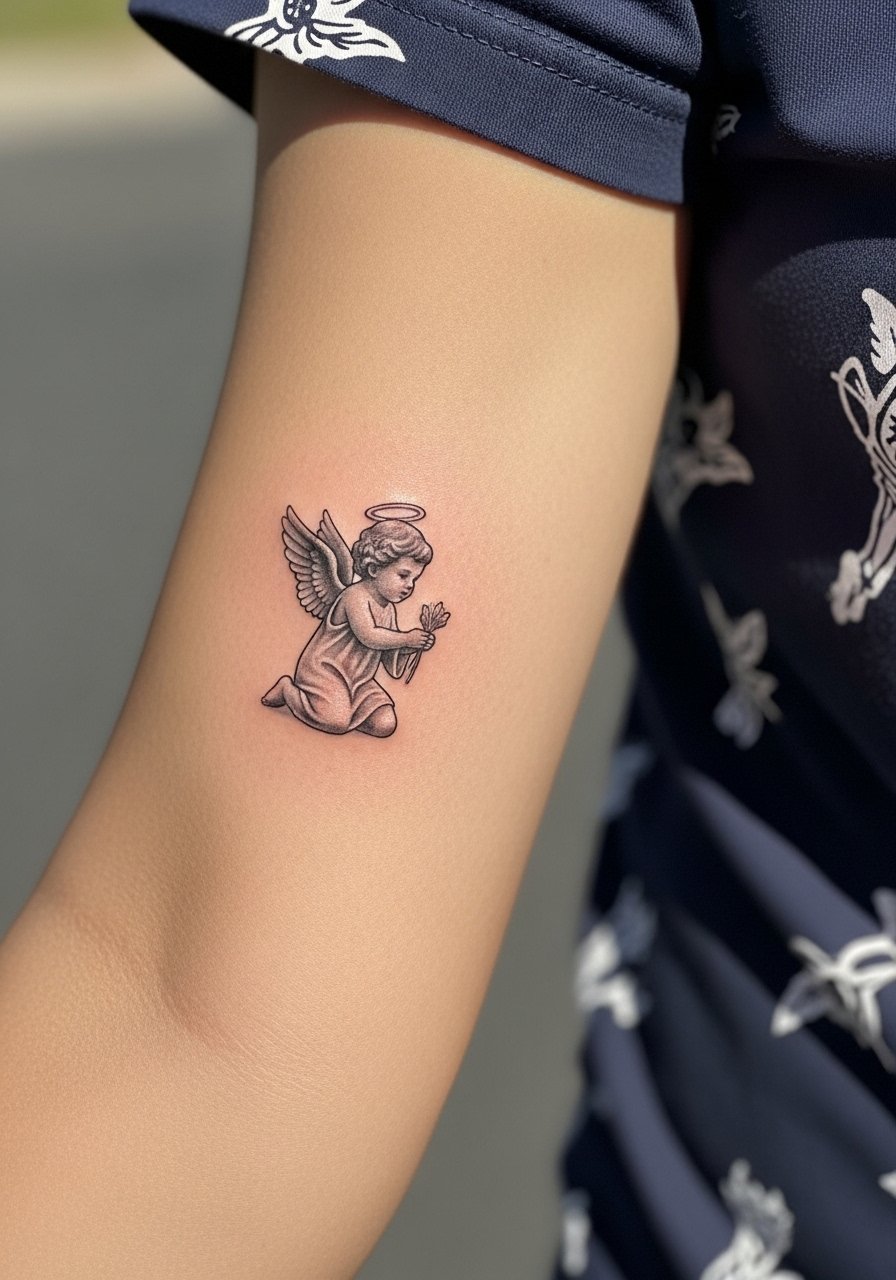
Aging reality lead: micro-realism shines up close but loses fine texture faster than bold work when on high-movement areas. For forearms tell your artist to prioritize contrast edges around the figure so it still reads at year three. A frequent error is packing hairlike detail without anchor lines which later softens into a blur. Pain is low to moderate and touch-ups at year two are common for micro detail. During the session bring a minimalist watch on the opposite wrist to avoid smudging the fresh work.
9. Neck Wing Accent, Side Neck Script Pairing
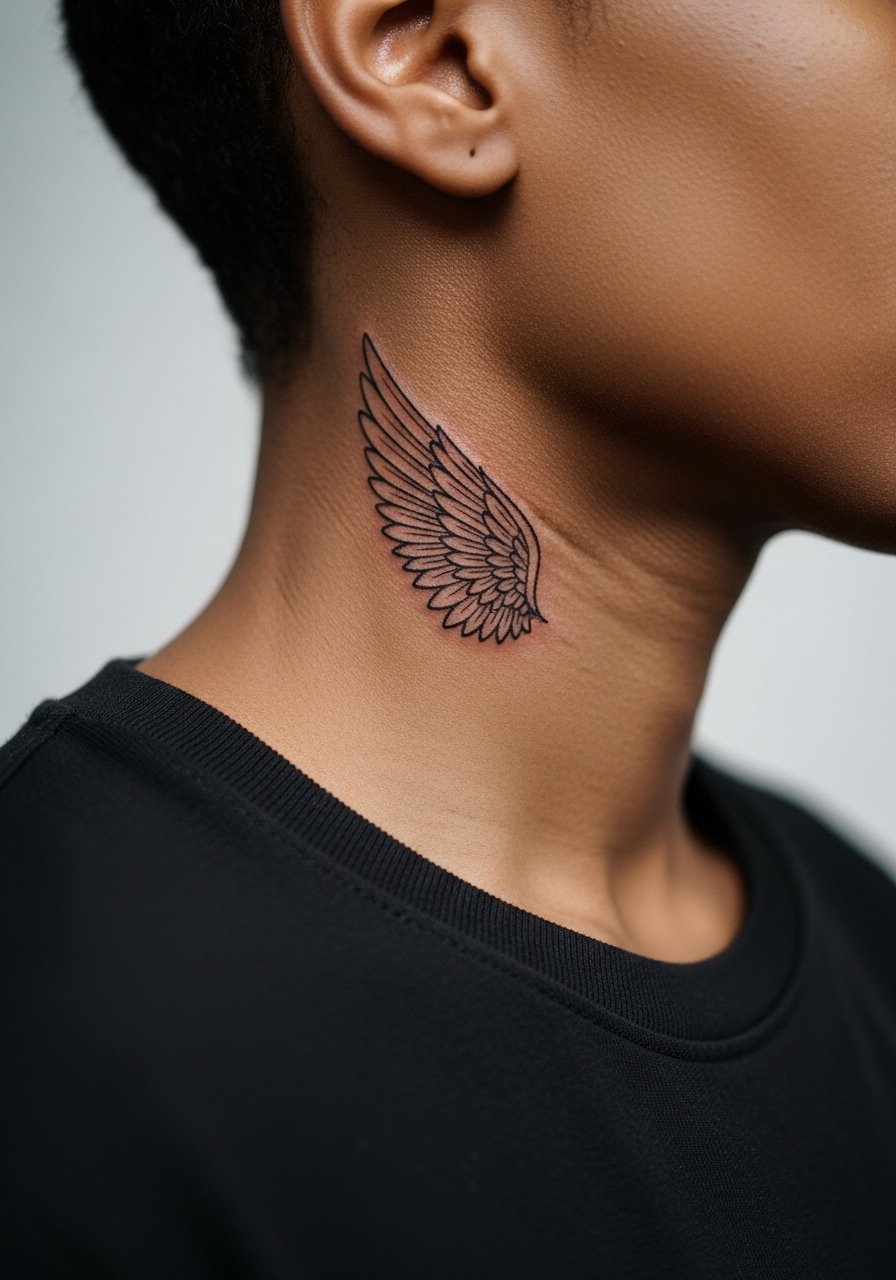
Decision-pressure lead: the neck is statement territory and needs a clear career and lifestyle check before booking. Ask for a smaller scale that tucks behind the jaw line so it can hide under collars when needed. Artists split on fine line neck work. One camp says the skin movement blurs lines quickly. The other camp believes spacing and depth fix that. Ask your artist where they stand and for photo examples of healed work. For presentation wear a crew neck t-shirt you can lift slightly to give access without full exposure.
10. Angel of Death Motif, Full Torso Scene
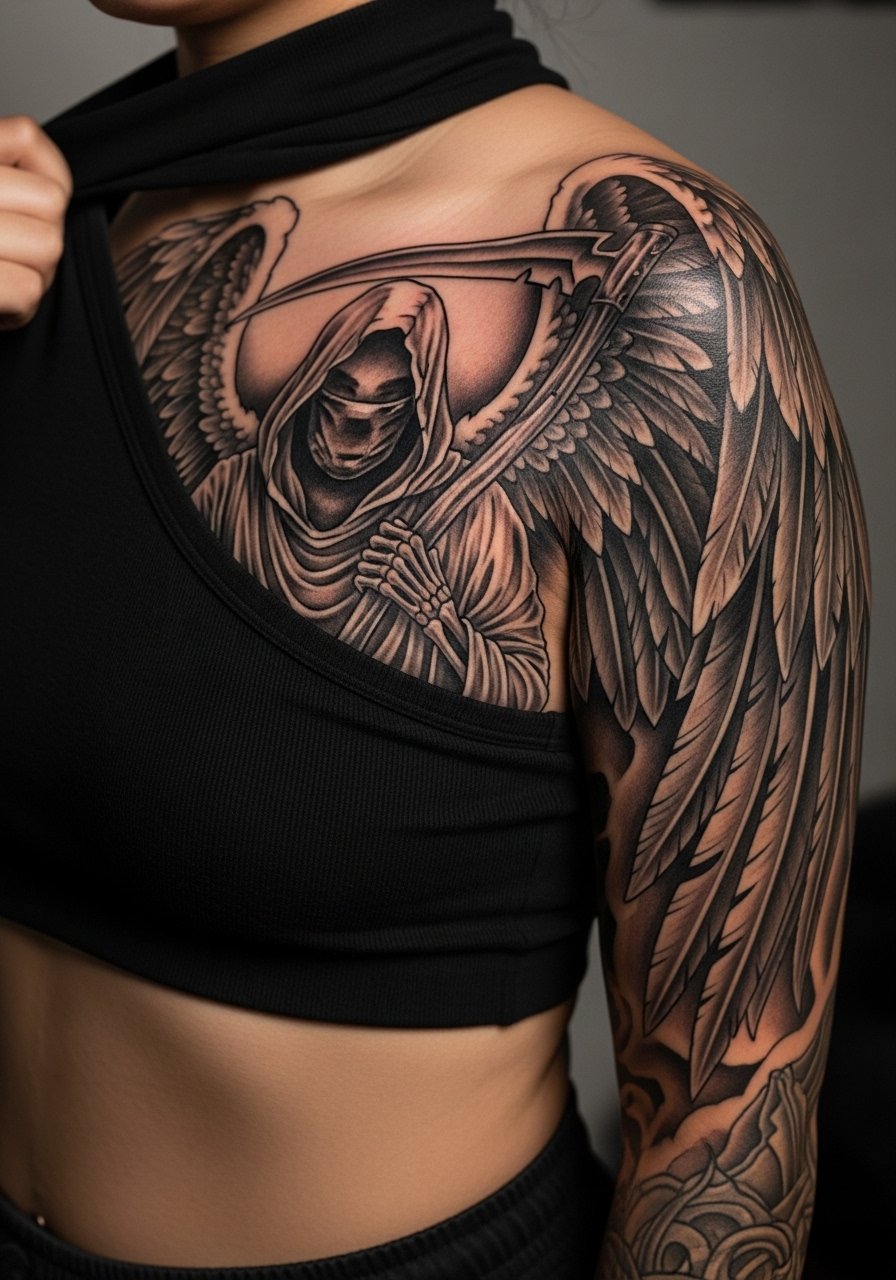
Visual impact lead: this is for men who want philosophical edge. The key is a clear hierarchy between figure, scythe or broken weapon, and background architectural elements so the composition does not collapse as it ages. Mistakes involve over-texturing the background, which flattens with time. Large torso pieces need staged sessions and extra aftercare attention because clothing rub can slow healing. Expect heavy sessions and a touch-up plan at three to five years. For the session choose a button-down you can open fully so the artist has room to work.
11. Half-Sleeve Angel with Armor Detailing

Personal observation lead: armor lines help an angel read masculine without losing celestial detail. Ask for bolder outlines around plates and a mix of whip shading for texture so the armor reads mid-distance. The common mistake is thin armor lines that fade and leave the figure looking flat. Half-sleeves need staged sessions and careful sleep positioning to avoid rubbing. For after the initial bandaging stage wear a short sleeve shirt you do not mind getting a little ink on.
12. Single Wing on Chest, Pectoral Flow

Mistake lead: the biggest error here is a wing that ignores pectoral curvature and ends up looking crooked when walking. Tell your artist to stencil and check the piece in standing and flexed positions. Expect moderate pain and sessions split to manage soreness. Over time thin feather tips can soften, so plan a light touch-up at year three. For showing it off a loose button-down shirt left open keeps attention on the pectoral sweep without competing.
13. Small Haloed Wing at Collarbone
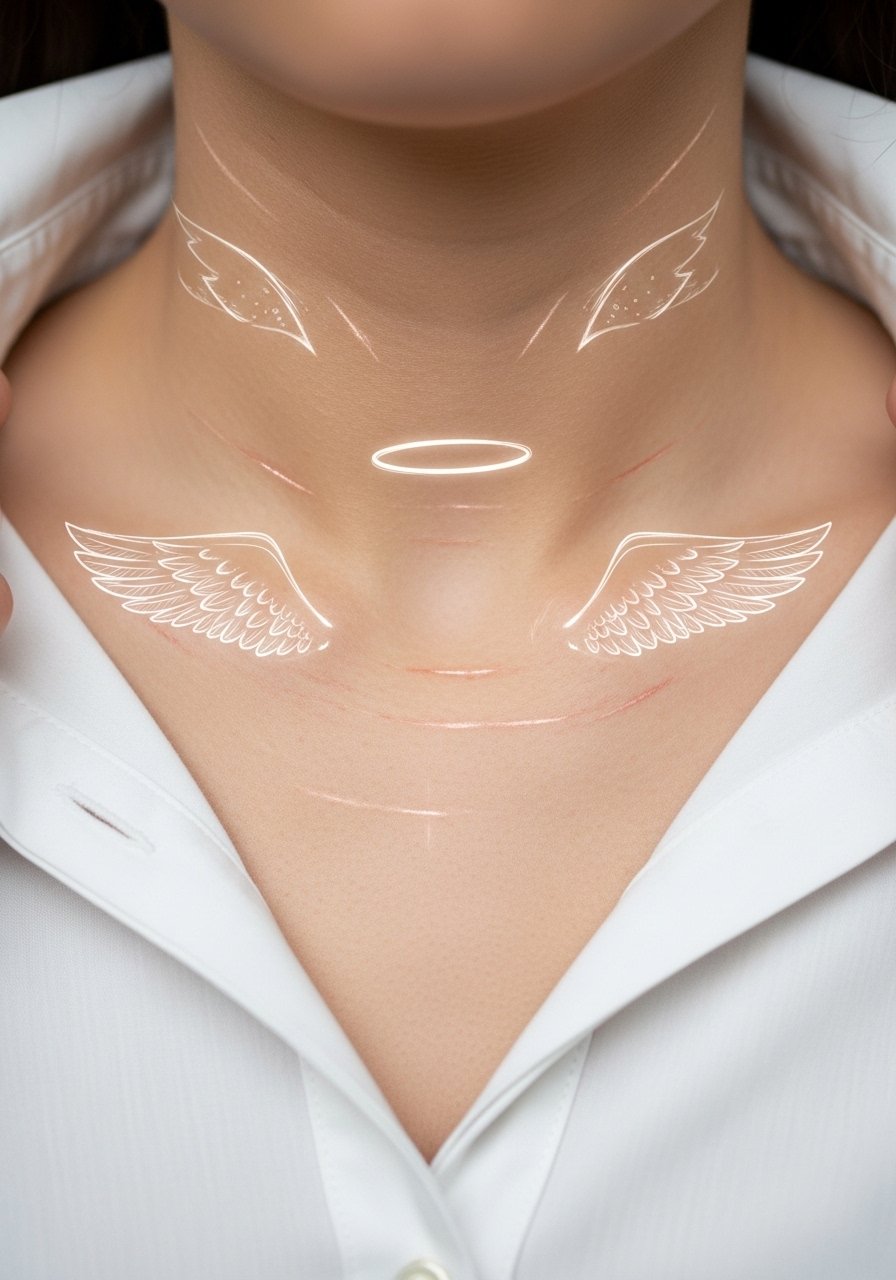
Visual impact lead: collarbone pieces look crisp when spaced properly and when the halo uses negative space rather than tiny dots. A common aging mistake is too-small halo dots that blur. This spot is a good low-commitment location with moderate pain. If you want to show it subtly pair it with a simple chain necklace that rests above the line without covering the piece.
14. Full-Figure Angel on Forearm, Flying Pose
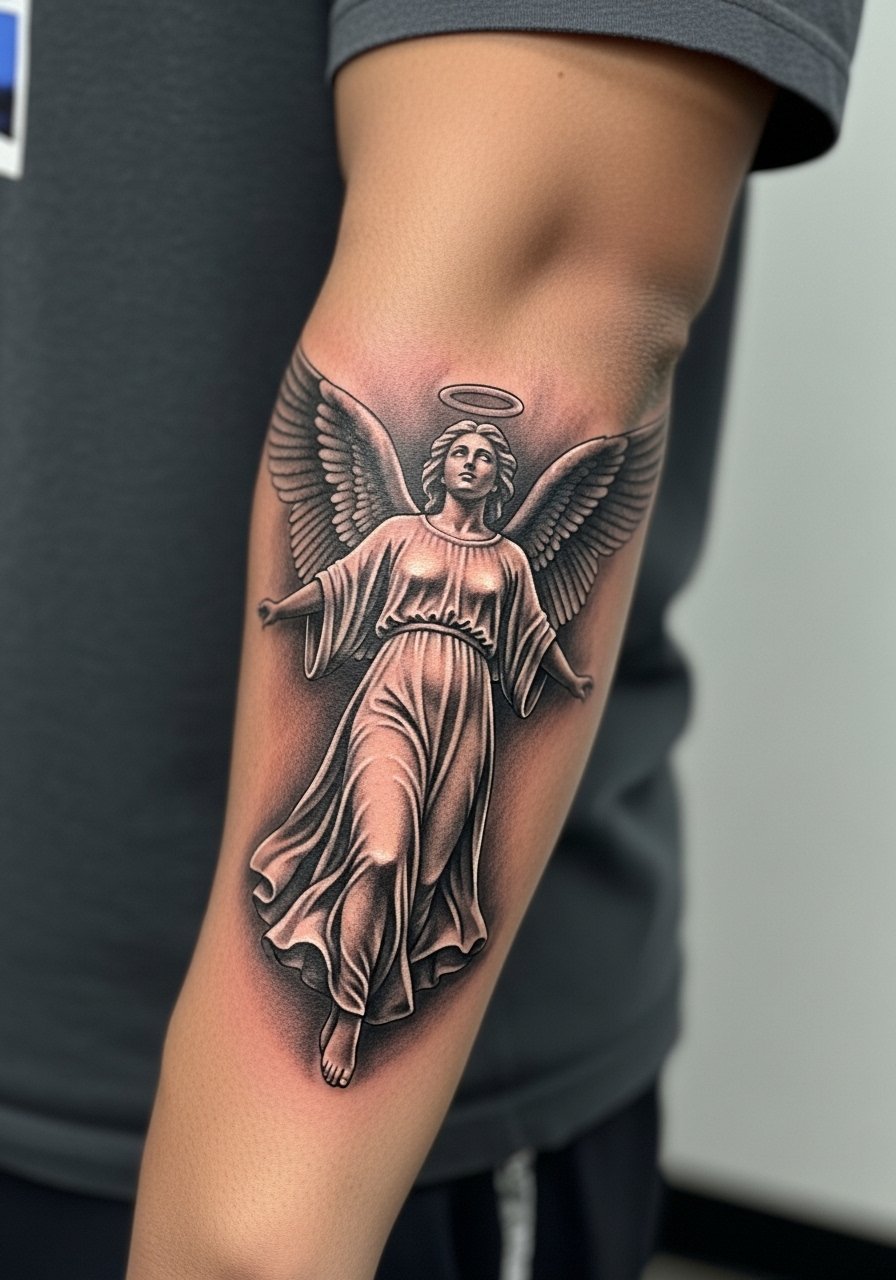
Consultation lead: for forearm figures ask the artist to set the head and hands so they read when your arm is relaxed at your side. Many people request upright poses that distort when the arm twists. Explain which angle you want photographed and how you typically wear shirts. Forearms are medium pain and frequent movement speeds fade, so expect a touch-up at two to four years depending on sun exposure. For the session keep a short sleeve shirt on that you can roll up.
15. Single Small Wing Behind the Ear with Script
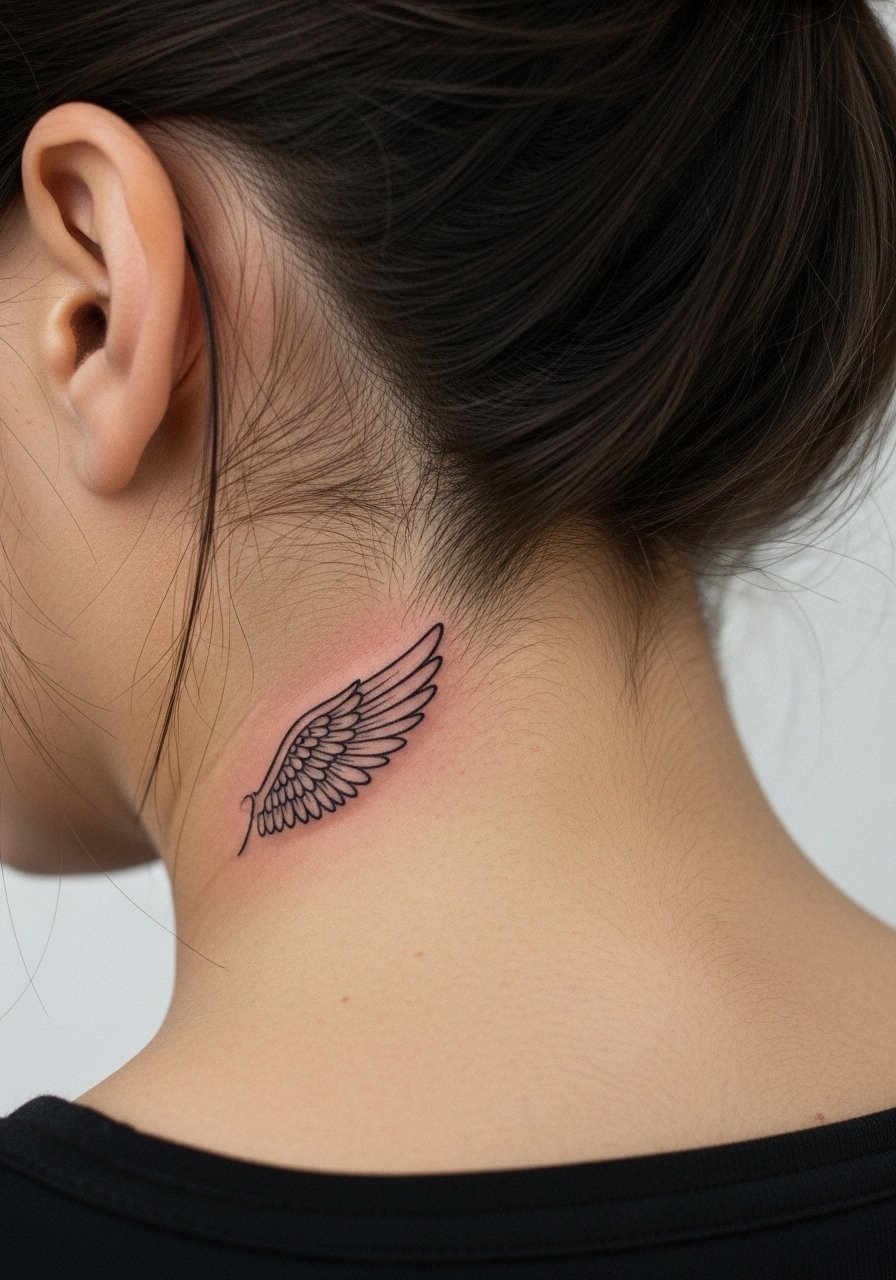
Pain warning lead: behind the ear is sensitive and shows quickly so keep the scale tiny. Artists debate whether fine line here holds. One camp warns that constant movement and hair friction blur small detail. The other camp says careful depth and spacing prevent that. Ask to see healed photos from both camps before you commit. For studio access pull your hair into a high bun and wear a crew neck t-shirt so the artist can work without adjusting clothing.
16. Thigh Angel with Draping Robe, Large Panel
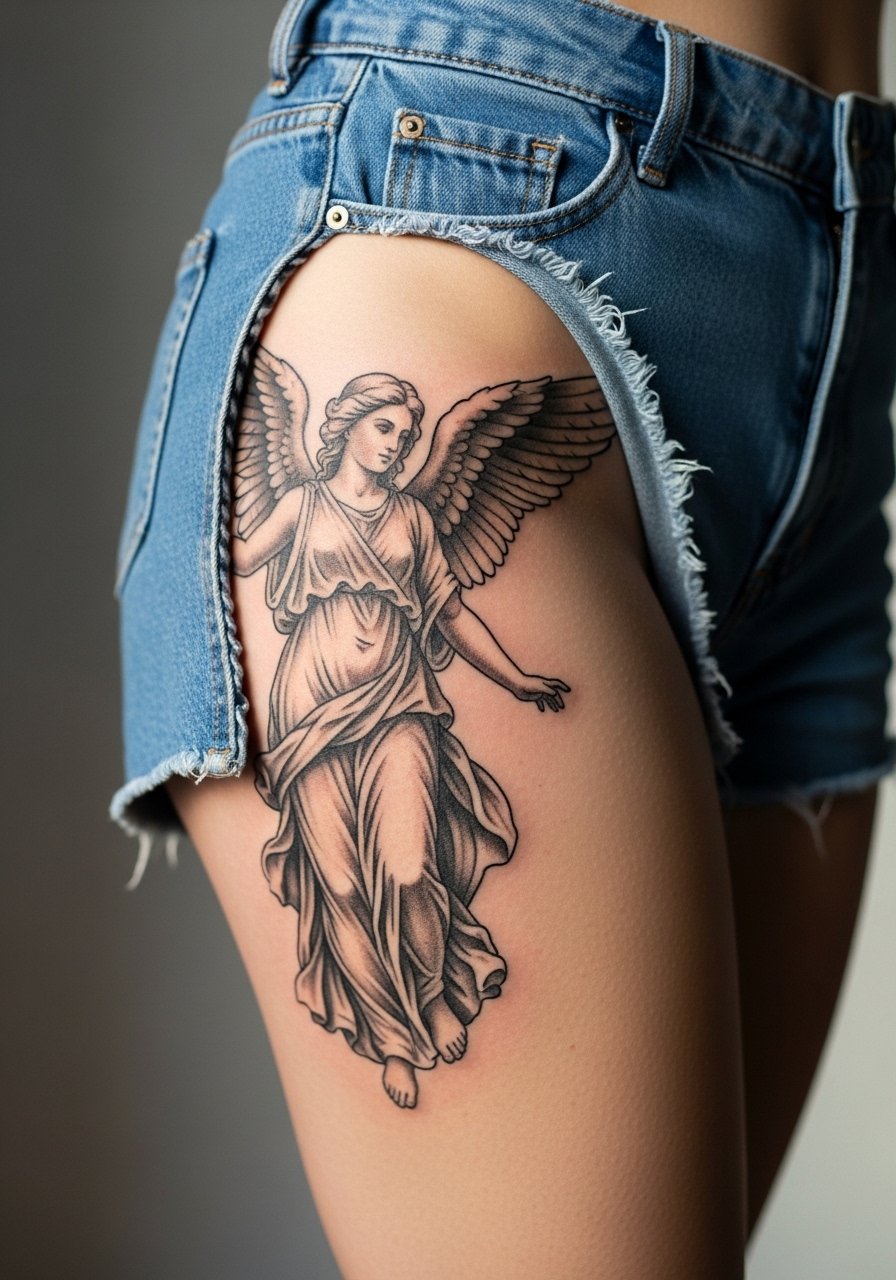
Styling lead: thigh pieces let you go large and private. Ask the artist to anchor the robe folds with deep shadow lanes so the design holds as it ages. A common mistake is too many small details along the fabric which can blur into indistinct gray. Expect extended sessions and plan studio wear with loose shorts or swim trunks. For showing it off pair with rolled-up shorts or swimwear that frames the upper thigh.
17. Minimalist Wing Tattoo on the Wrist
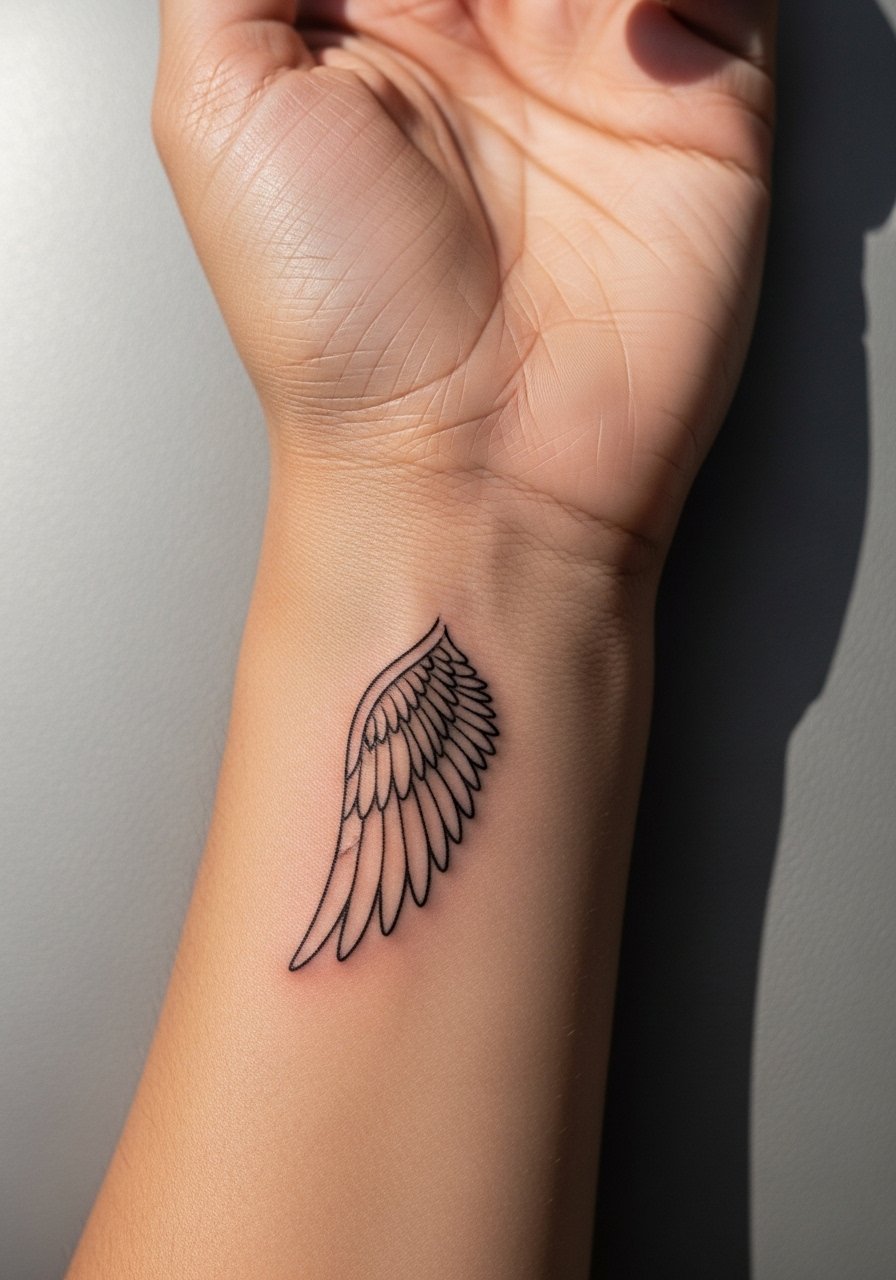
Mistake lead: the wrist is easy to over-scale. Tiny wings too close to the thumb crease can blur quickly. Tell your artist to leave breathing room around the wrist bones and to avoid ultra-thin single-needle hairlines unless you accept touch-ups at year two. The session is brief and pain is moderate. For daily wear a minimalist watch on the opposite wrist keeps the area visible without rubbing fresh ink.
18. Gothic Angel with Architectural Background on Back
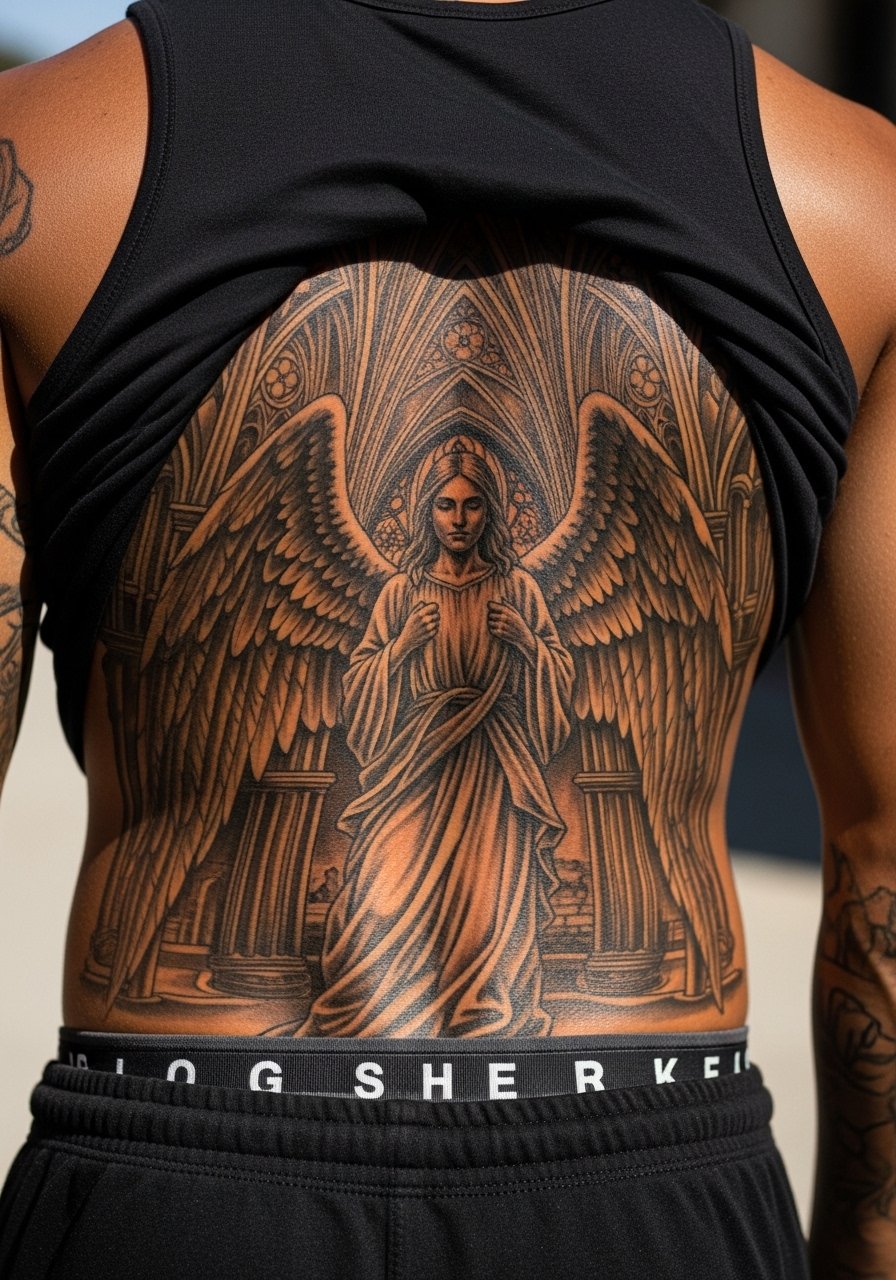
Personal observation lead: complex backgrounds need deliberate negative spaces so they do not merge into the figure over time. During consult request layered value study rather than dense texture everywhere. The back allows large scale so use it to sequence narrative elements. Pain is manageable in stages but be ready for long sessions. Plan for touch-ups where high detail sits over the scapula. For session wear a button-down you can remove fully so the artist has unobstructed access.
19. Chest Half-Figure Angel with Broken Wing
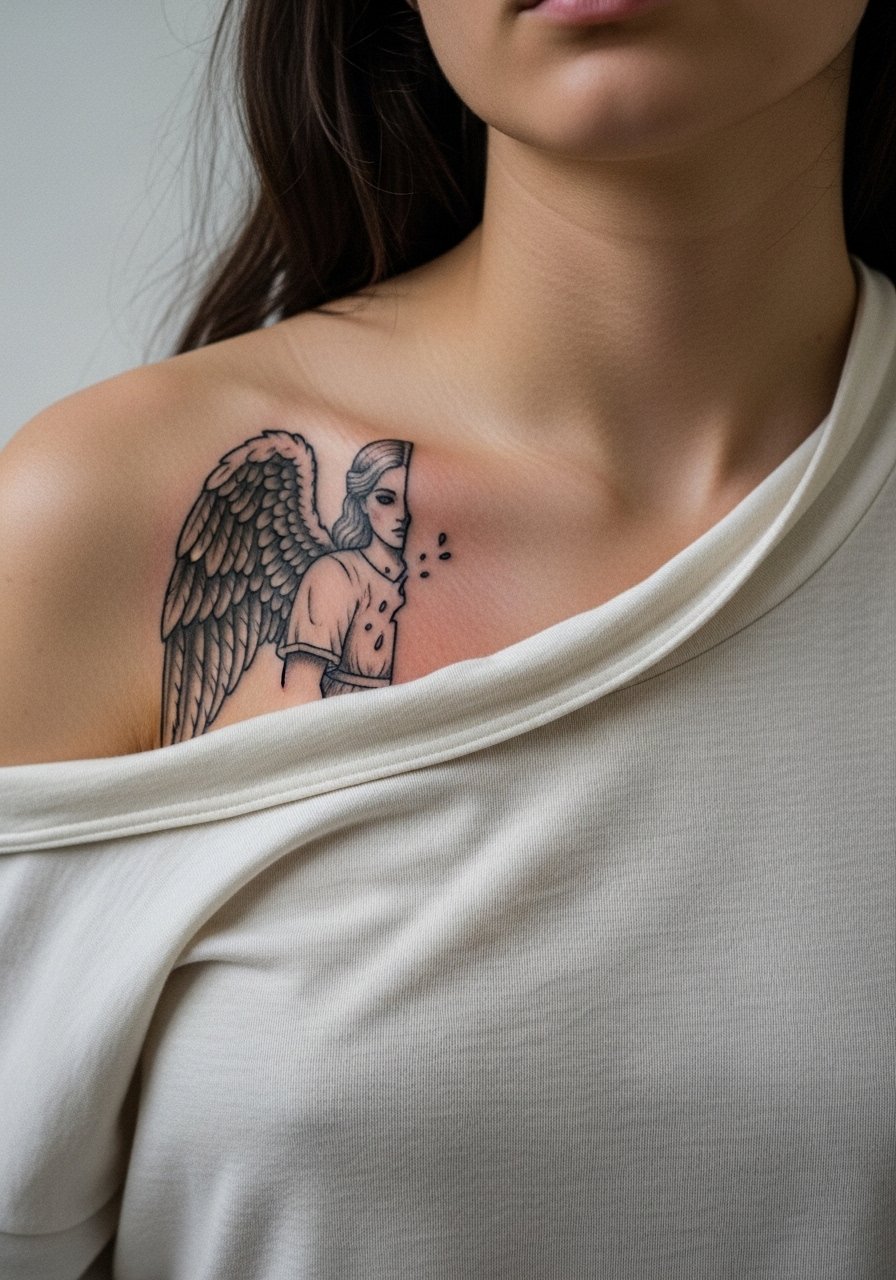
Aging lead: broken wing motifs read as narrative and age well if the breaks are executed with clear negative space. The common error is shallow break lines that blur into the main wing mass. For consultation ask for a stronger outer contour and a lighter inner texture. Pain is moderate and recovery needs clean shirts to avoid friction. For evening styling pair the piece with an open button down shirt to show the asymmetry without exposing the whole chest.
20. Small Haloed Wing on the Ankle
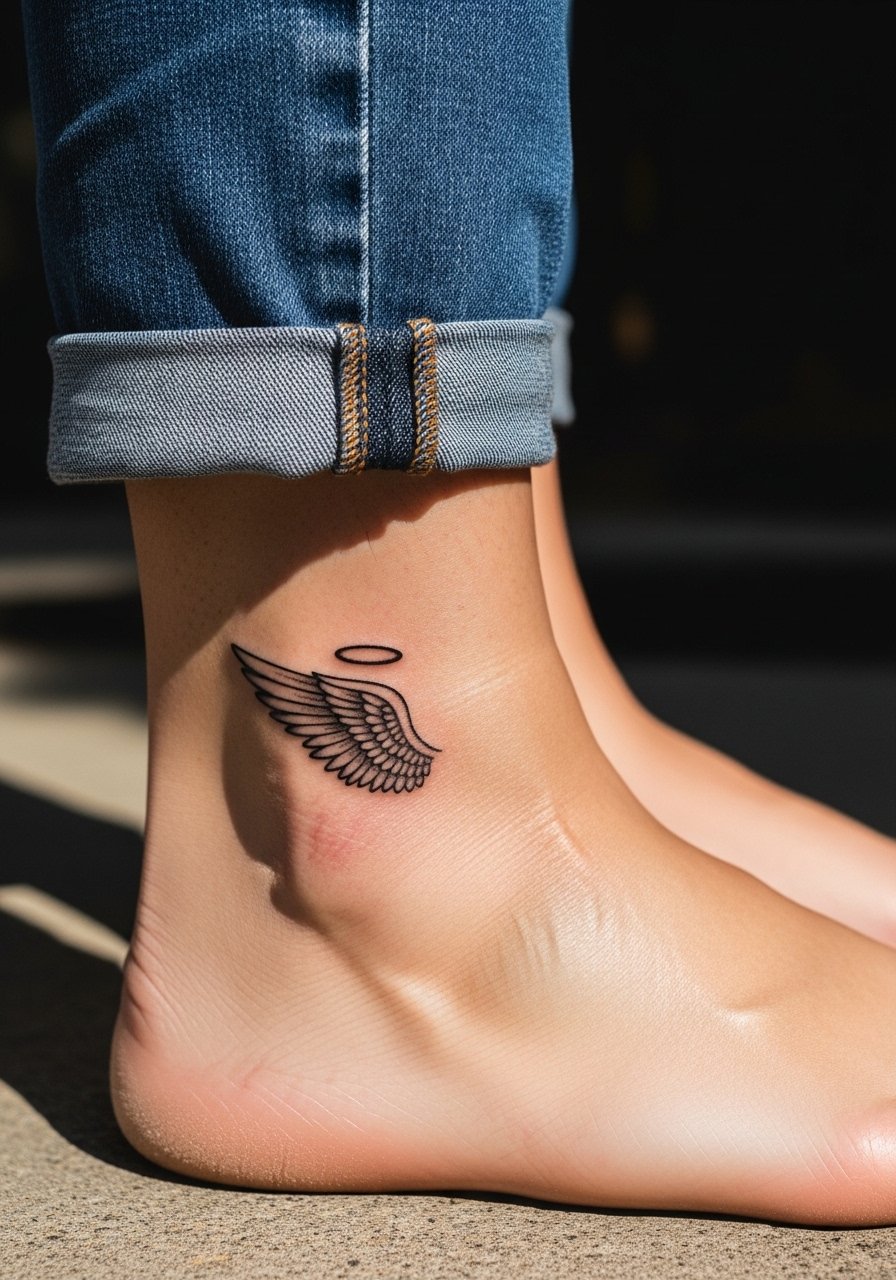
Session-wear lead: ankle work is sensitive to shoe pressure during healing. Wear sandals or shoes with room so the fresh tattoo does not get irritated. Small motifs need clear spacing from bone and tendon. The common mistake is sitting the design over high-friction zones which leads to accelerated fading. Plan for touch-ups if you wear socks and shoes that rub the area often. For casual styling roll up jeans to highlight the ankle detail.
21. Realistic Feather Cluster Along the Ribcage
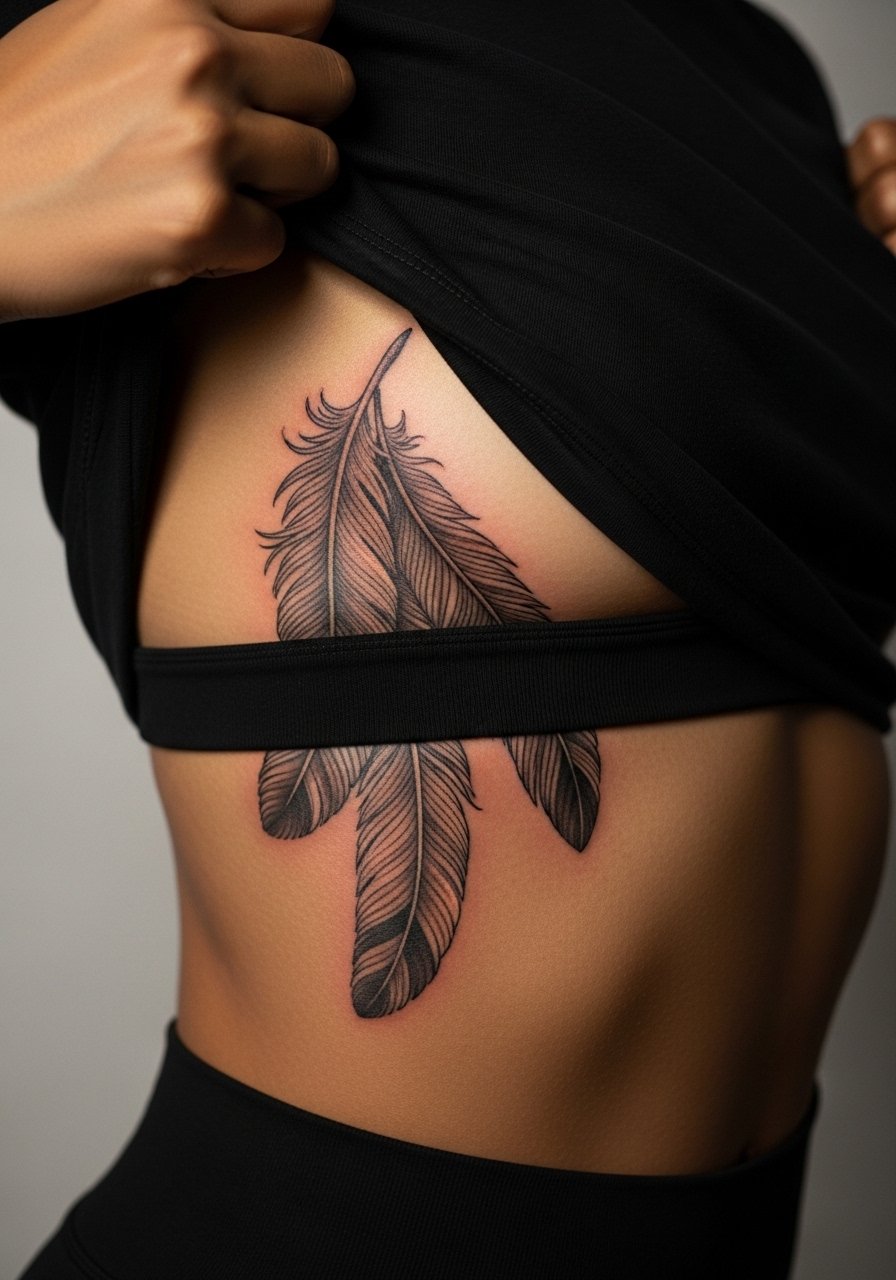
Pain warning lead: ribs are one of the more painful sites for many men, often a 7 to 9 out of 10. This design looks incredible when the feather stems follow rib contours and leave negative space between quills. The typical error is over-detailing feather barbs into tiny lines that blur. Ask your artist for slightly bolder quill lines and plan for breaks between sessions. For the studio wear a cropped top or zipper hoodie you can shift without pulling over your head.
22. Winged Skull Thigh Wrap
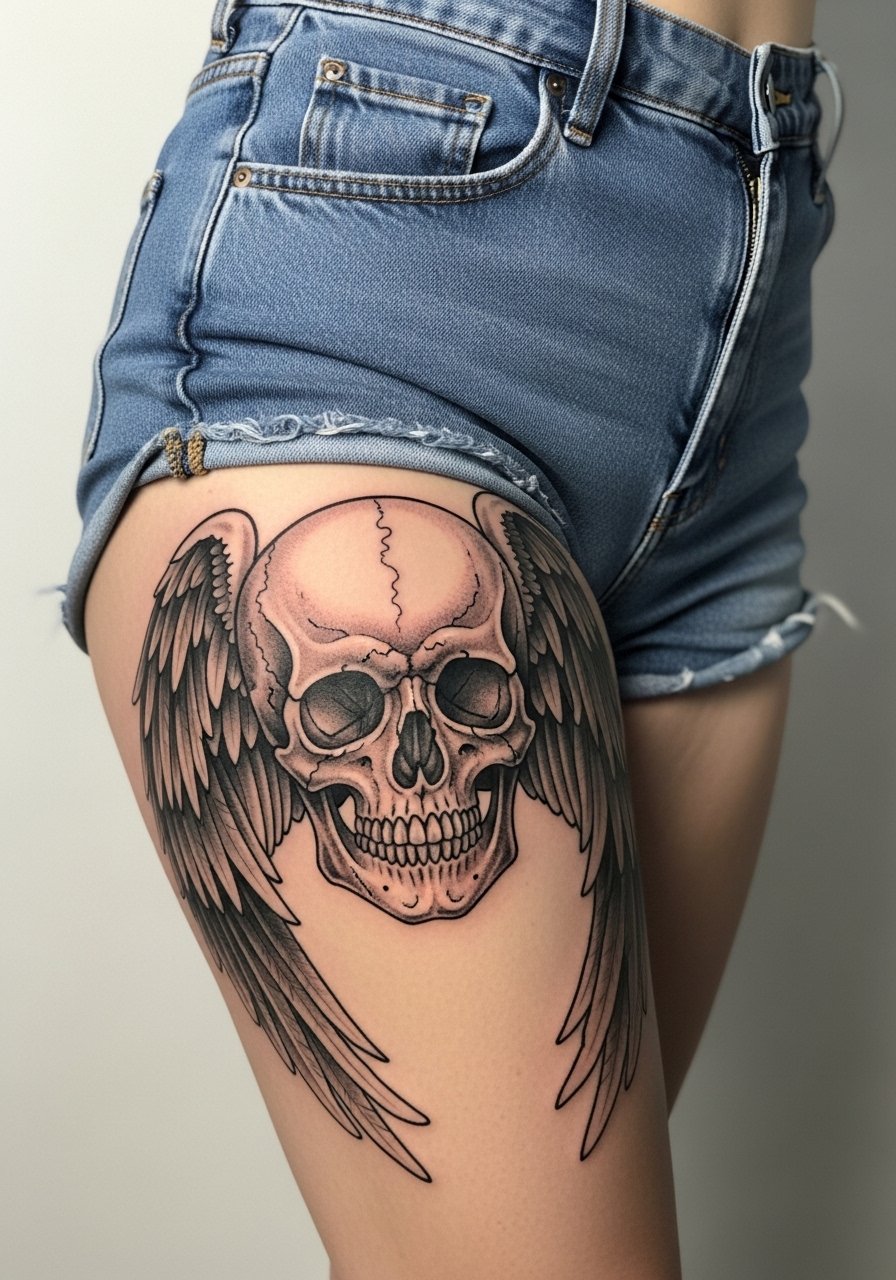
Visual impact lead: large thigh wraps allow narrative flow around the leg. Tell your artist to plan seam lines where the wrap will meet the hamstring so the composition does not split awkwardly when you move. Mistakes include ignoring how pants and shorts fold over the piece during healing which can rub ink. Sessions are long but less exposed, which helps controlled healing. For session wear loose drawstring shorts you can raise without friction.
23. Fine Line Angel Profile on the Neck Spine
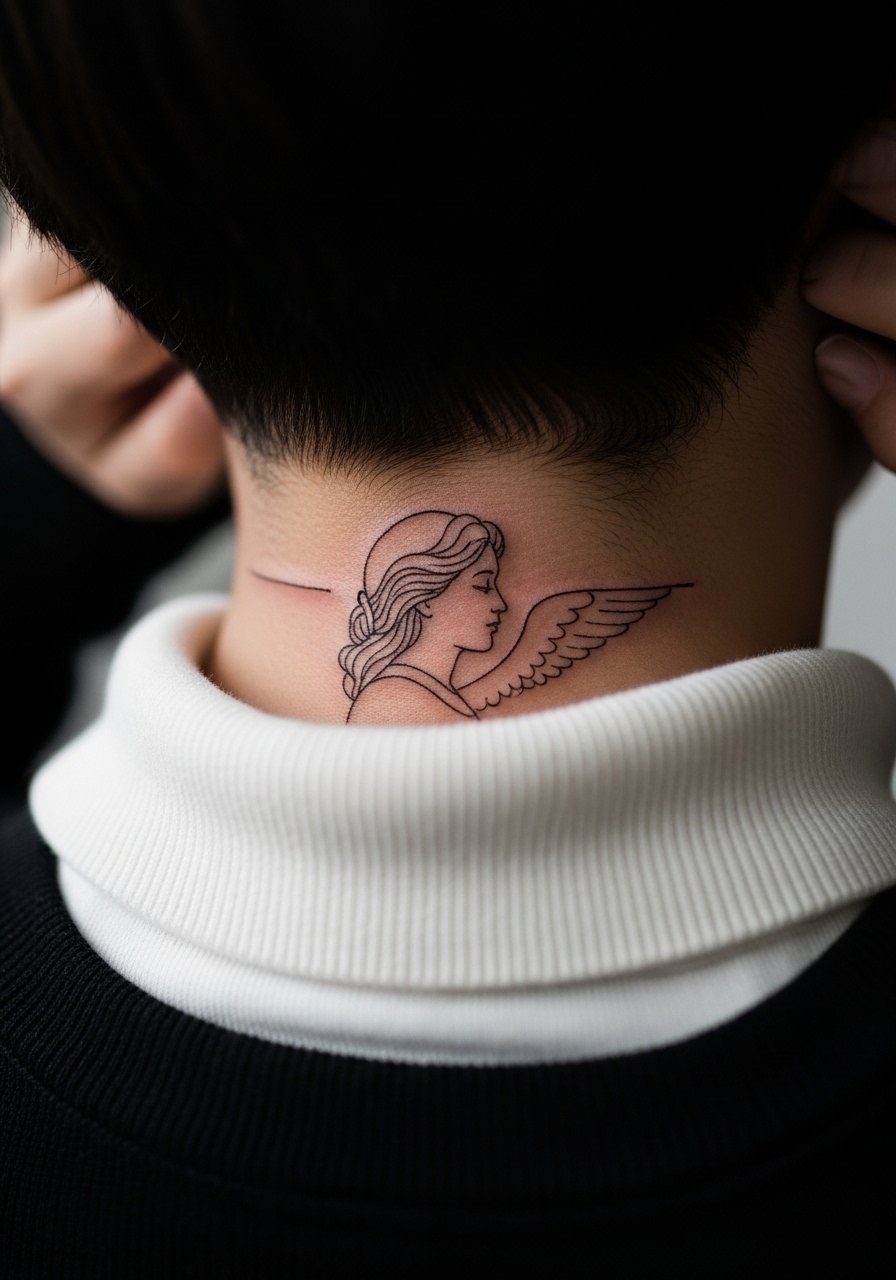
Consultation lead: fine line profiles on the neck require spaced strokes and modest sizing. Artists split views here as well. One camp says neck movement and sun exposure blur fine lines faster. The other camp counters that careful depth and regular sunscreen use maintain clarity. Ask to see healed neck examples from the artist before committing. For discreet studio access wear a wide-neck shirt or a turtleneck you can pull down slightly.
24. Armor-Clad Archangel on the Thigh
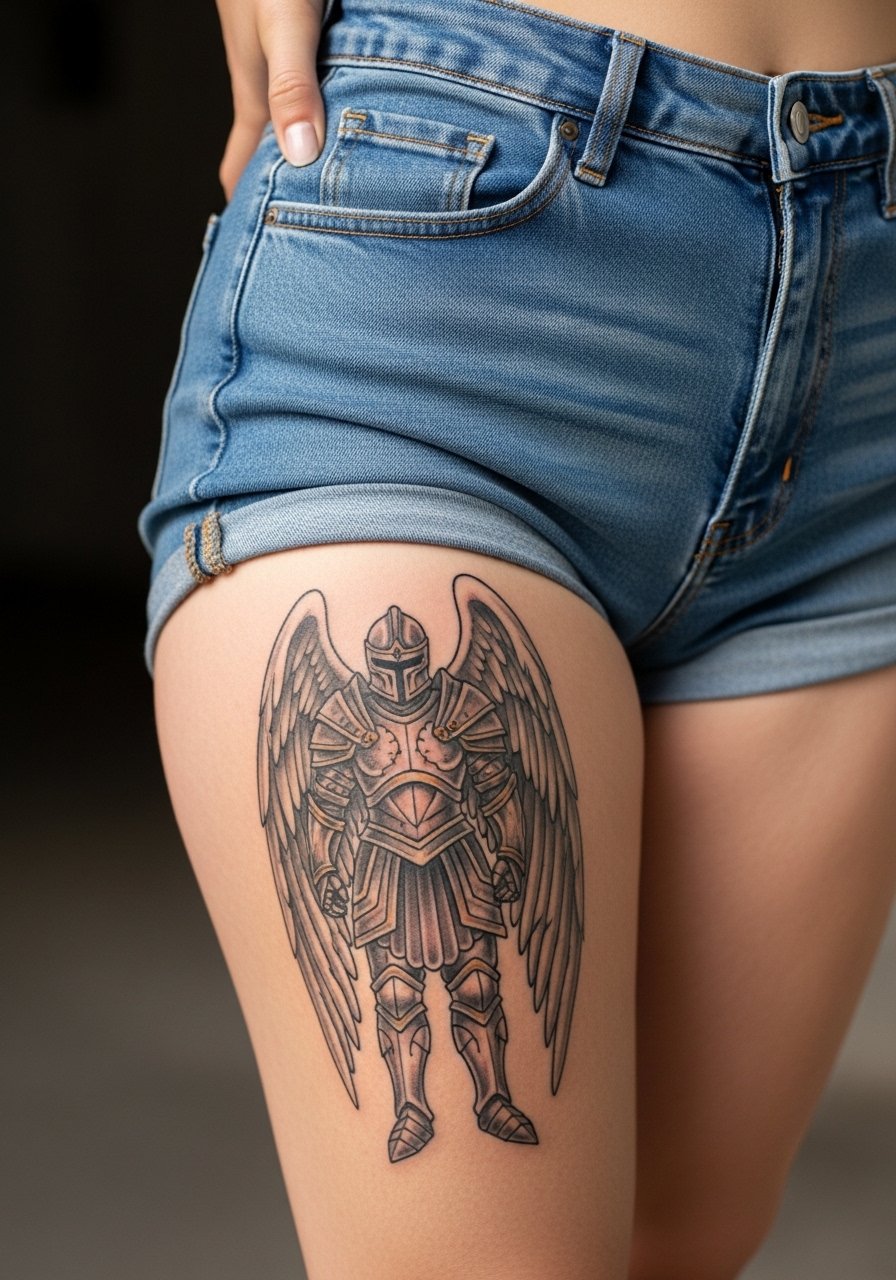
Visual impact lead: thigh armor reads powerful when plate edges use strong outlines and interior cross-hatching is kept airy. Avoid heavy all-over texture which compresses into gray over time. Sessions can be long but healing benefits from reduced sun exposure compared with arms. For post-session comfort wear loose drawstring pants or shorts that do not press into the bandaging area.
25. Small Winged Skull on the Hand Side
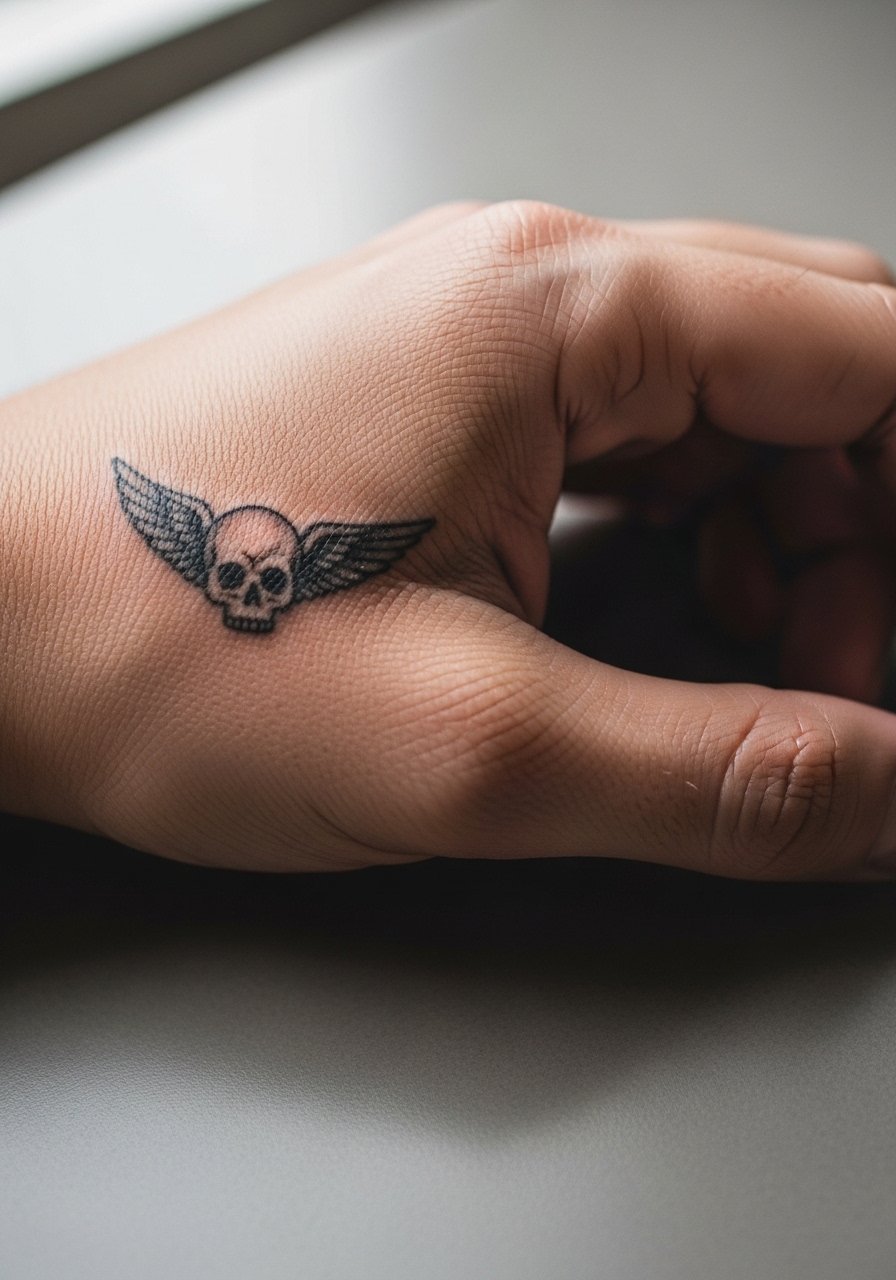
Mistake lead: hand tattoos are exposed to constant washing and abrasion which accelerates fading and needs frequent touch-ups. If you pick this area ask for bold outlines and limited interior fine shading. The session is brief but painful, and aftercare must avoid heavy chemicals. Many men choose hand work as a deliberate choice knowing the maintenance. For daily wear avoid rings that sit over the fresh ink during healing.
26. Stipple-Shaded Angel Bust on the Upper Arm
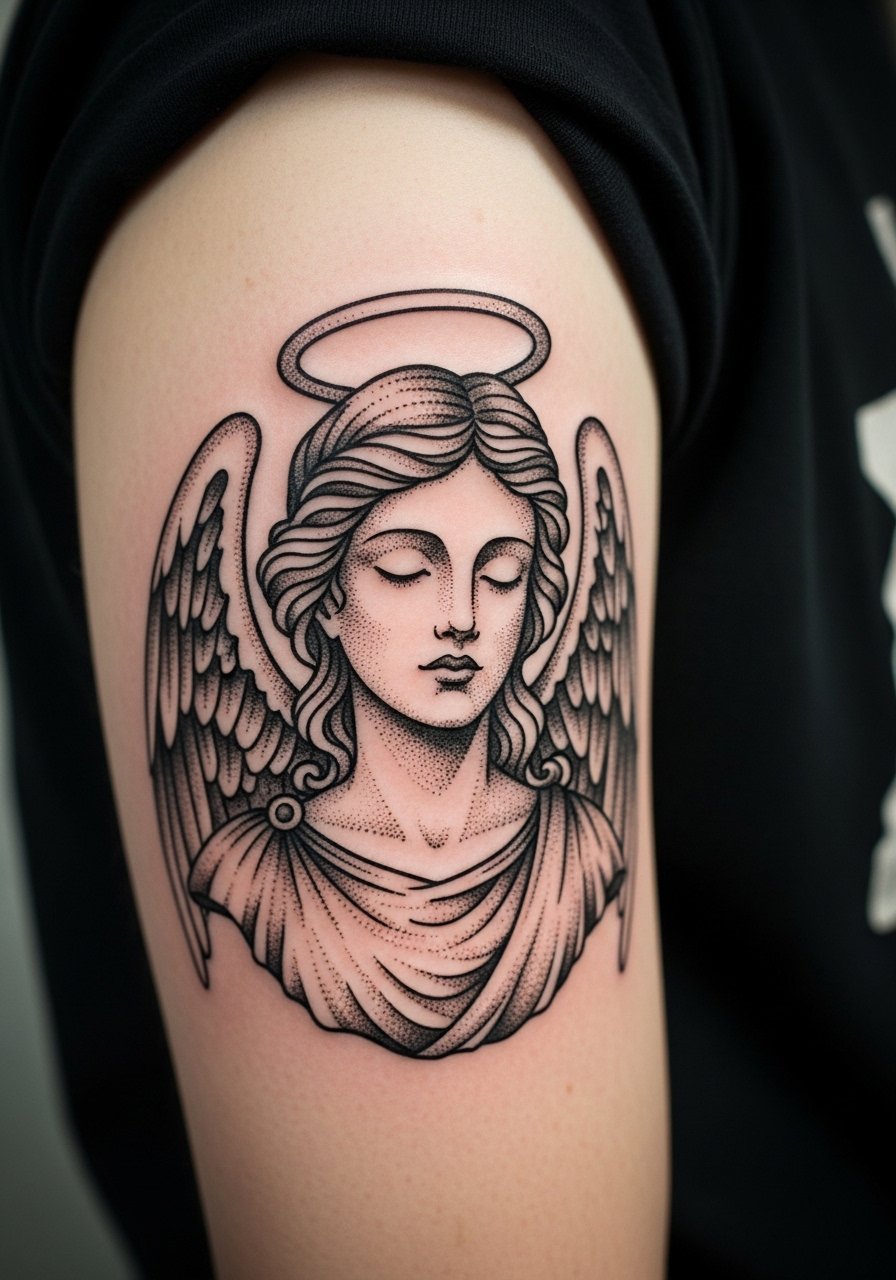
Consultation lead: stipple shading gives a textured, vintage feel and it holds well if the dots are spaced for long-term clarity. A mistake is packing stipple too densely near thin outlines which blurs edges. Upper arm work is moderate pain and ages better than hands or wrists. For the session wear a short sleeve shirt you do not mind getting a bit of ink on.
27. Minimal Single-Feather on the Collarbone Edge
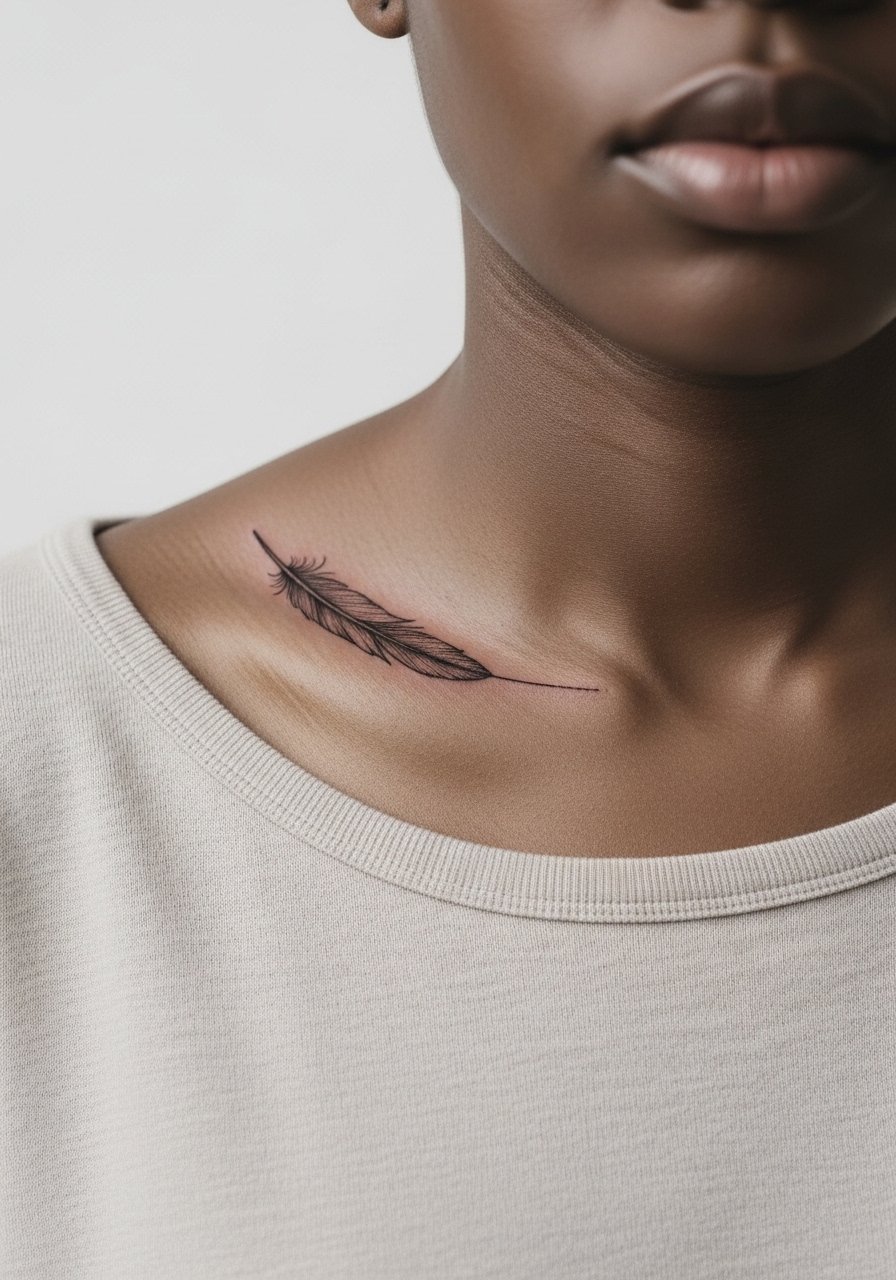
Mistake lead: tiny collarbone feathers often suffer from poor spacing and end up thickening with age. Ask your artist for a slightly heavier central shaft with lighter barb lines to keep the silhouette crisp. This is a low-commitment piece with moderate pain and a quick session. For showing it off pair with a loose button-down shirt left open so the feather sits above the collar without crowding.
Frequently Asked Questions
Q: Will fine line angel wings blur faster than black and gray wings on forearms?
A: It depends on scale and placement. Fine line work on the forearm can blur sooner because of frequent movement and sun exposure. If you prefer fine line ask for slightly increased spacing and darker anchor lines so the silhouette stays readable, and plan a touch-up around year two to three.
Q: How do I pick between a warrior angel back panel and a chest-focused protector piece?
A: Think about visibility, pain tolerance, and wardrobe. Back panels allow epic narratives and age more gracefully when shaded deeply. Chest pieces connect to the heart area and feel intimate but can be more painful around the sternum. During consult ask the artist to show how each option maps to your anatomy so you can visualize movement and clothing interactions.
Q: Are neck and hand angel tattoos safe for professional settings?
A: They can be, but both are high-visibility spots that some workplaces still judge. If you need flexibility pick neck work that tucks behind collars or hand pieces that are small and easily covered with gloves in controlled environments. Use the discovery pathways I mentioned to find artists who document healed examples on similar skin tones.
Q: How often should I plan touch-ups for realistic feather work on the ribs or thigh?
A: Expect realistic feathers on high-movement or high-friction areas to need touch-ups every three to five years depending on sun exposure and your lifestyle. Thigh pieces can last longer between touch-ups because they get less UV and abrasion. Ask your artist for a realistic maintenance plan during the booking.
Q: What should I wear to a chest or sternum session to make the day easier?
A: Bring a wide-neck shirt or a fitted sports bra you can pull aside so the artist has clean access without you being topless. Loose layers help after bandaging. For chest sessions I recommend a loose button-down shirt you can open fully when leaving the studio.
