
Fine line Medusa portraits are everywhere on feeds right now, but the pieces that still look deliberate after five years are rarely the ones that photographed best fresh. Color saturation, placement, and spacing make the difference between a bold heirloom and a faded blur. Below are 27 colorful, feminine Medusa ideas that balance immediate impact with how they heal and age, plus what to ask your artist in the chair.
1. Delicate Medusa on Inner Forearm
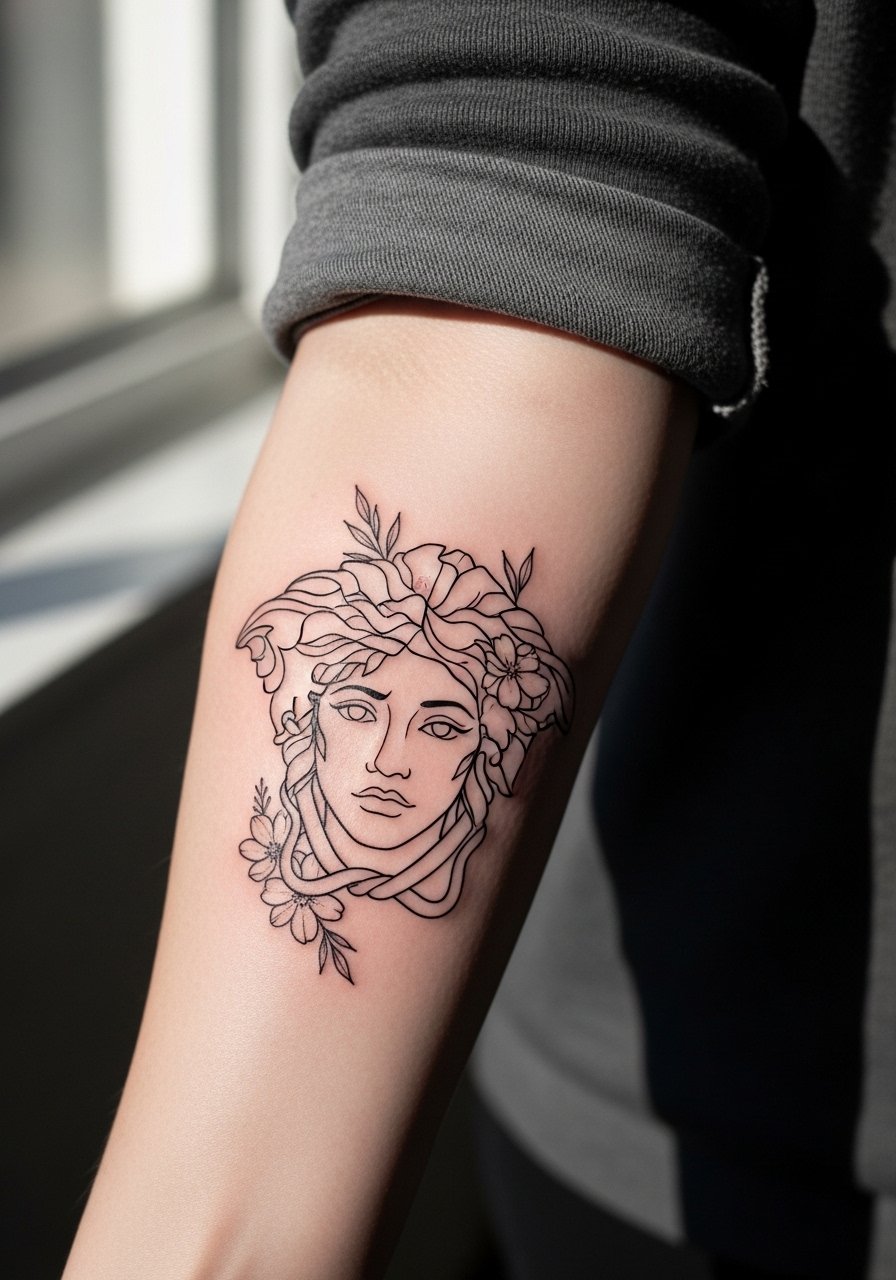
I've seen this placement hold detail best when artists use slightly heavier linework around the eyes and softer stipple shading across the cheeks. Tell your artist to preserve negative space in the hair so the snakes read as separate elements rather than a single dark mass. Pain is moderate. Session time is usually two to three hours for a mid-sized portrait. Common mistake is asking for overly thin single-needle lines across the entire face because those blur faster. For showing it off, roll sleeves and try a loose button down shirt that frames the forearm without hiding it.
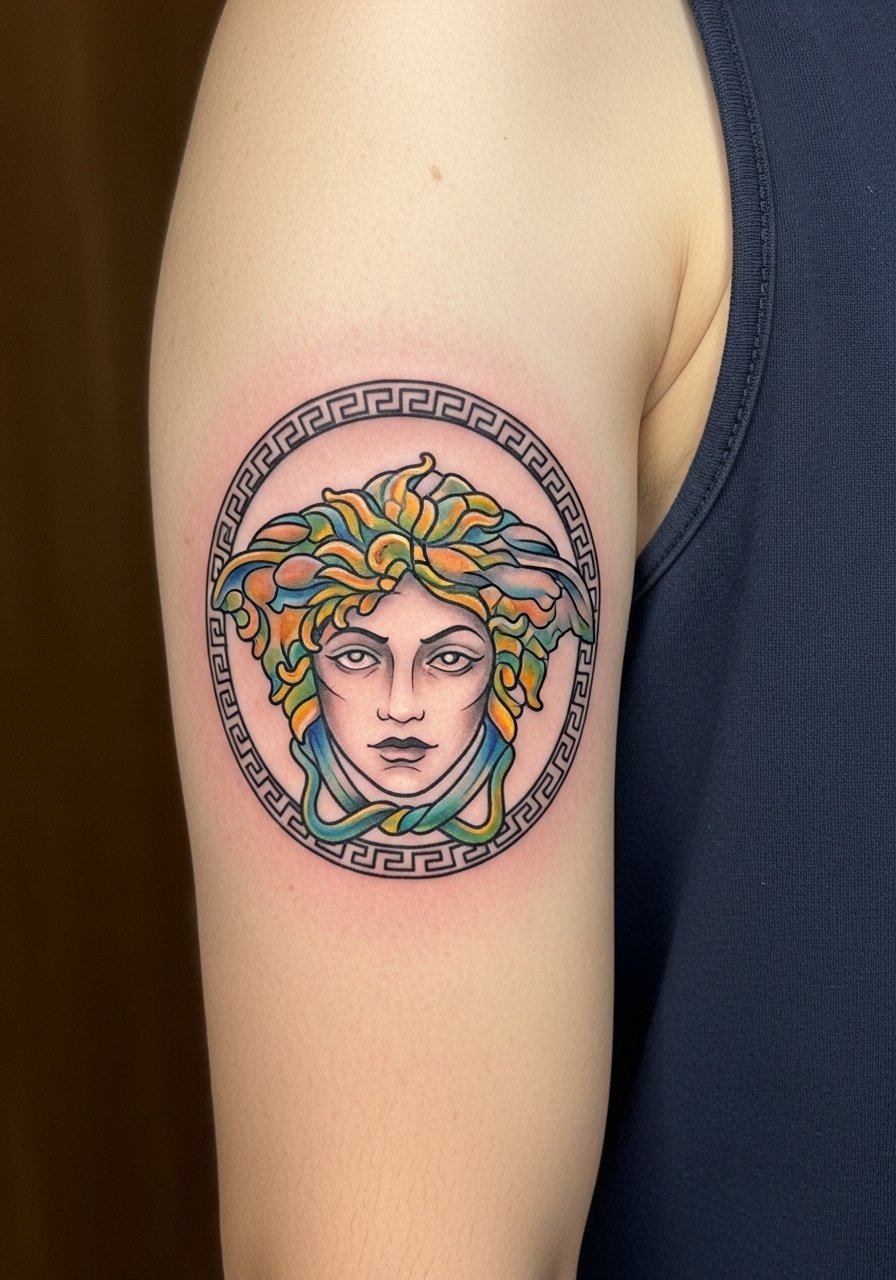
2. Neo-Traditional Shoulder Cap Medusa
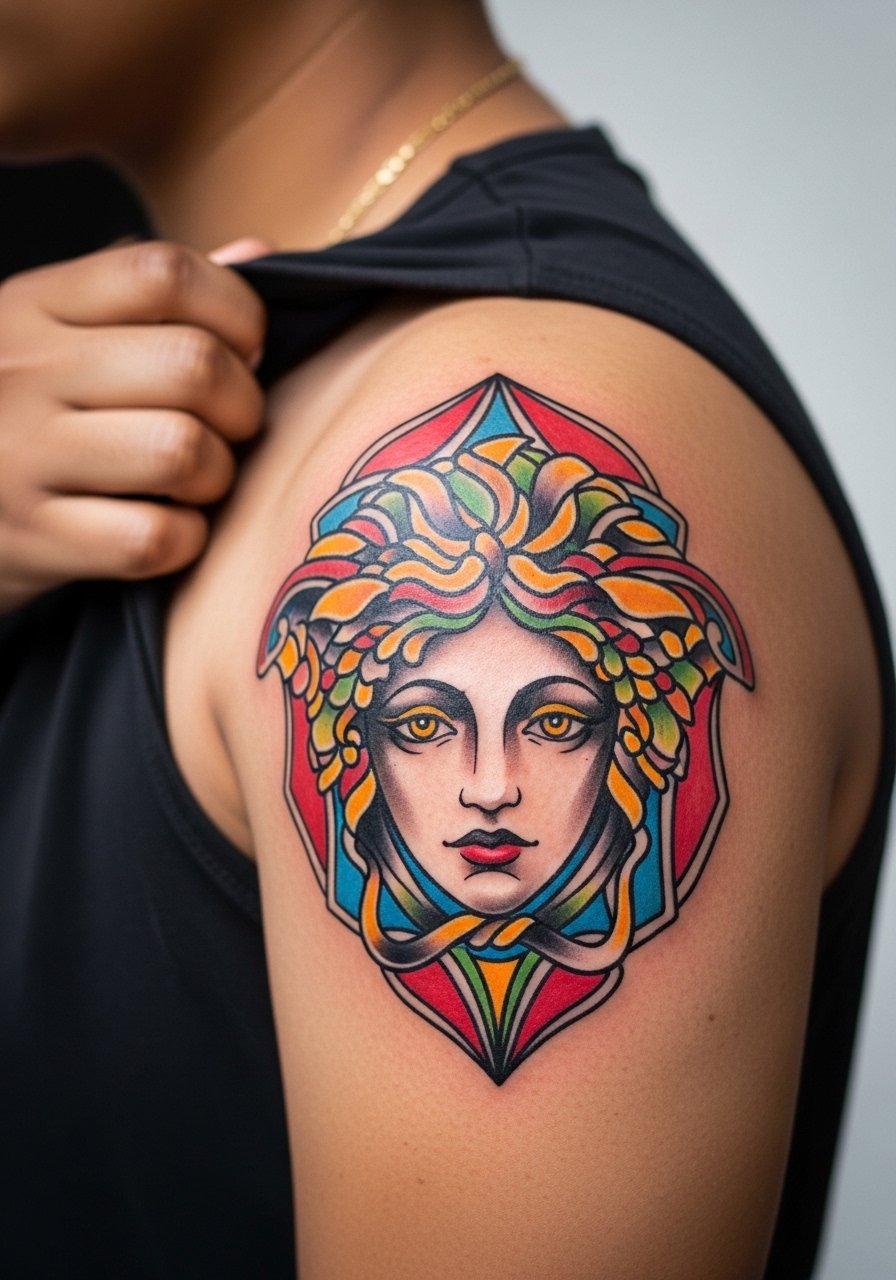
Visual impact is the priority here. The heavy outlines and strong color saturation age well because they resist early softening. Pain is low to moderate and a typical session runs two to four hours depending on color layering. Ask the artist for layered color fields instead of tiny gradients across the snakes to reduce the need for early touch-ups. A common mistake is crowding the shoulder with tiny decorative flourishes that get lost when you wear jackets. For the session, wear a racerback tank top so the shoulder is fully accessible.
3. Watercolor Medusa Thigh Portrait
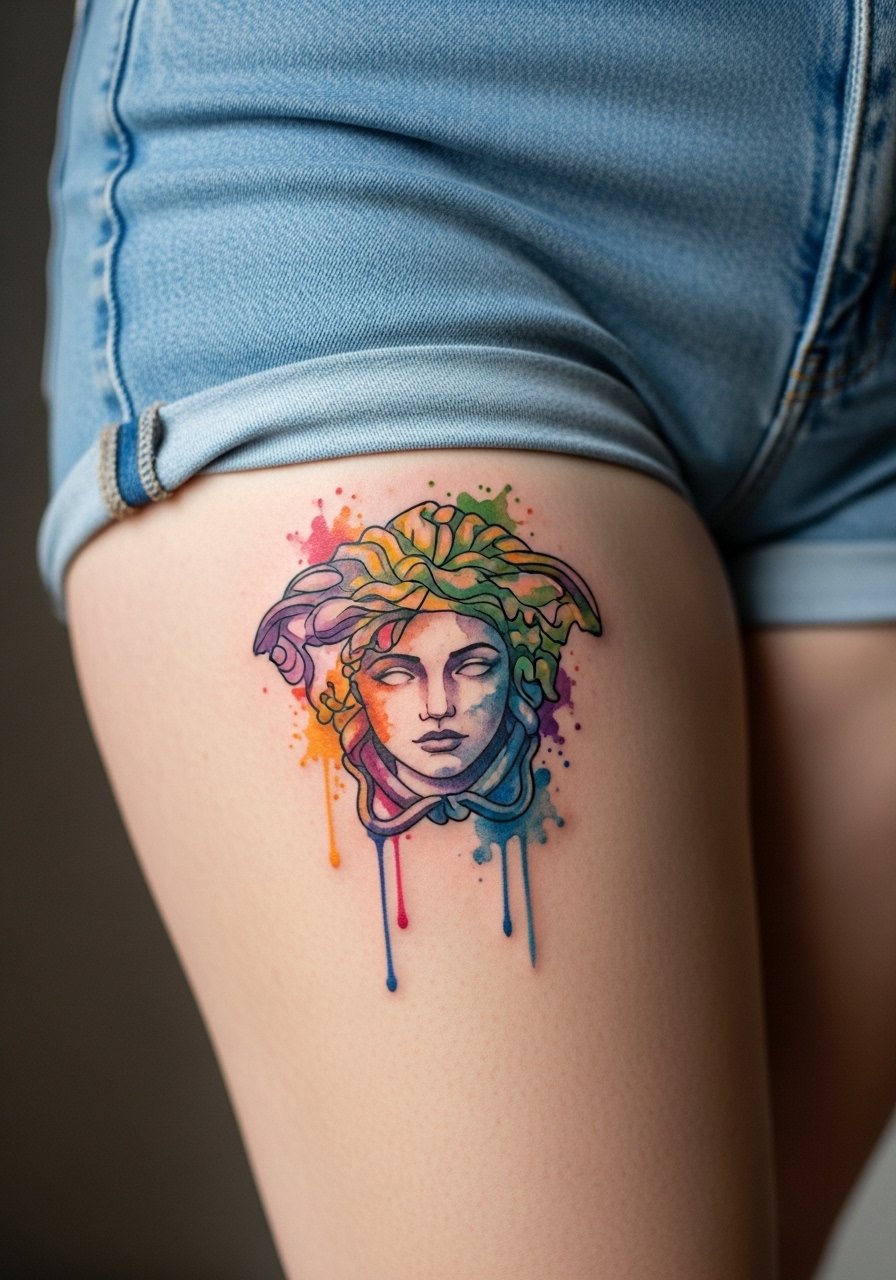
Fair warning, thighs tolerate saturation well so watercolor washes can look luminous for years if placed where the skin does not stretch over surgical scars or weight fluctuation zones. This piece often needs two sessions to layer colors safely. During consultation, ask for reference photos showing the exact wash intensity you want and request touch-up planning at the one-year mark. Session discomfort is low to moderate. For showing it off, a high-waisted denim short frames the piece while keeping it tasteful.
4. Ornamental Sternum Medusa with Color Accents

Sternum pieces require a comfort check. Pain can be high and sessions are often split into shorter sittings. Artists split on how dense color should be here. One camp says heavy saturation keeps lines visible despite the skin movement. The other camp prefers sparse color to avoid early scabbing issues. Ask where the artist stands and how they plan layering. Common mistake is expecting a full-color portrait in one long session. For the appointment, bring a strapless sports bra that gives access while keeping you comfortable.
5. Geometric Medusa on the Shoulder Blade
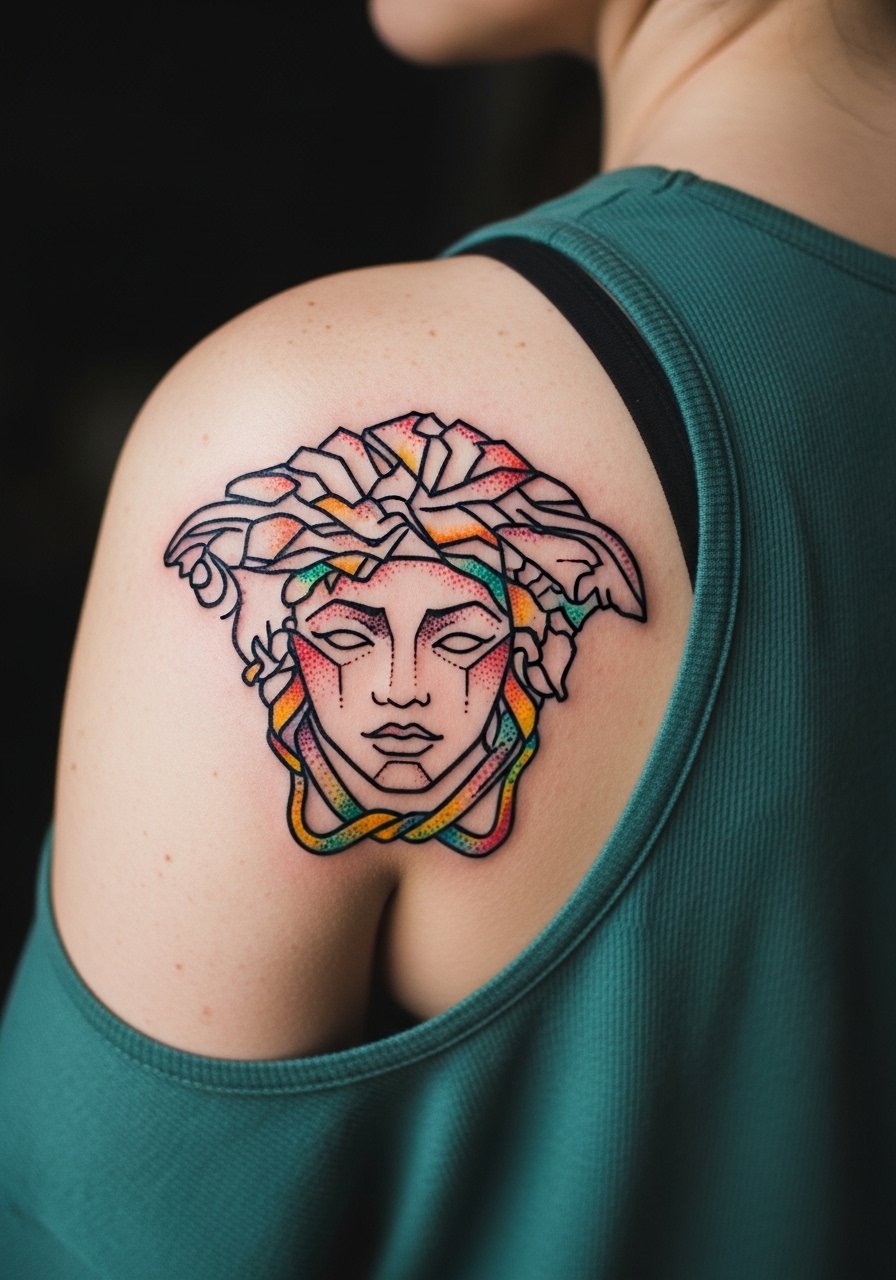
There is something about crisp geometry paired with a soft Medusa face that reads modern and intentional. Blowout risk on the shoulder blade is lower than on the ribcage, but tight geometry needs room to breathe. Ask for slightly thicker anchor lines on key shapes and stipple transitions rather than dense gradients. Expect one to two sessions of two hours each. For nights out, an open-back midi dress showcases the area without competing with the design.
6. Tiny Medusa Ankle Accent

Ankle work is attractive because it peeks out casually. Pain is moderate. The biggest issue is friction from shoes and socks during healing. Tell your artist you want the snakes simplified to avoid tiny details that wear away from rubbing. Expect a short session of under an hour for a tiny piece, but plan for a touch-up if you wear tight shoes. For session day, bring slip-on shoes and pack a pair of sandals to reduce pressure on the healing area.
Studio Day Picks
The inner forearm, ankle, and sternum pieces above each have different prep needs, so a short kit tailored to those placements smooths the session and the first week.
- Stencil transfer paper kit. Lets you confirm exact placement on skin before the needle touches you, especially useful for the fine line forearm and delicate sternum layouts.
- Topical numbing cream. Applied according to instructions it can reduce the edge on high-pain zones like the sternum without changing how the inks sit.
- Thin protective film roll. Keeps ankle and wrist pieces clean during the first week when friction from clothing is most likely.
- Fragrance free gentle body wash. Cleanses healing tattoos without stripping color from fine line work on the forearm.
- Aquaphor healing ointment. A thin layer in the first days locks in moisture for delicate color areas while you sleep.
7. Large Ribcage Medusa in Watercolor Bloom

Fair warning, ribcage placement is where trends meet reality. Artists are split into two camps. One group argues the skin stretches and lines blur within a couple of years. The other group says proper spacing and depth make fine line sit well on ribs. Ask your artist to explain their touch-up plan and pick spacing that gives the watercolor enough negative space. Session pain is high and likely split into multiple visits. For showing this off, a cropped tank top reveals the piece while keeping coverage.
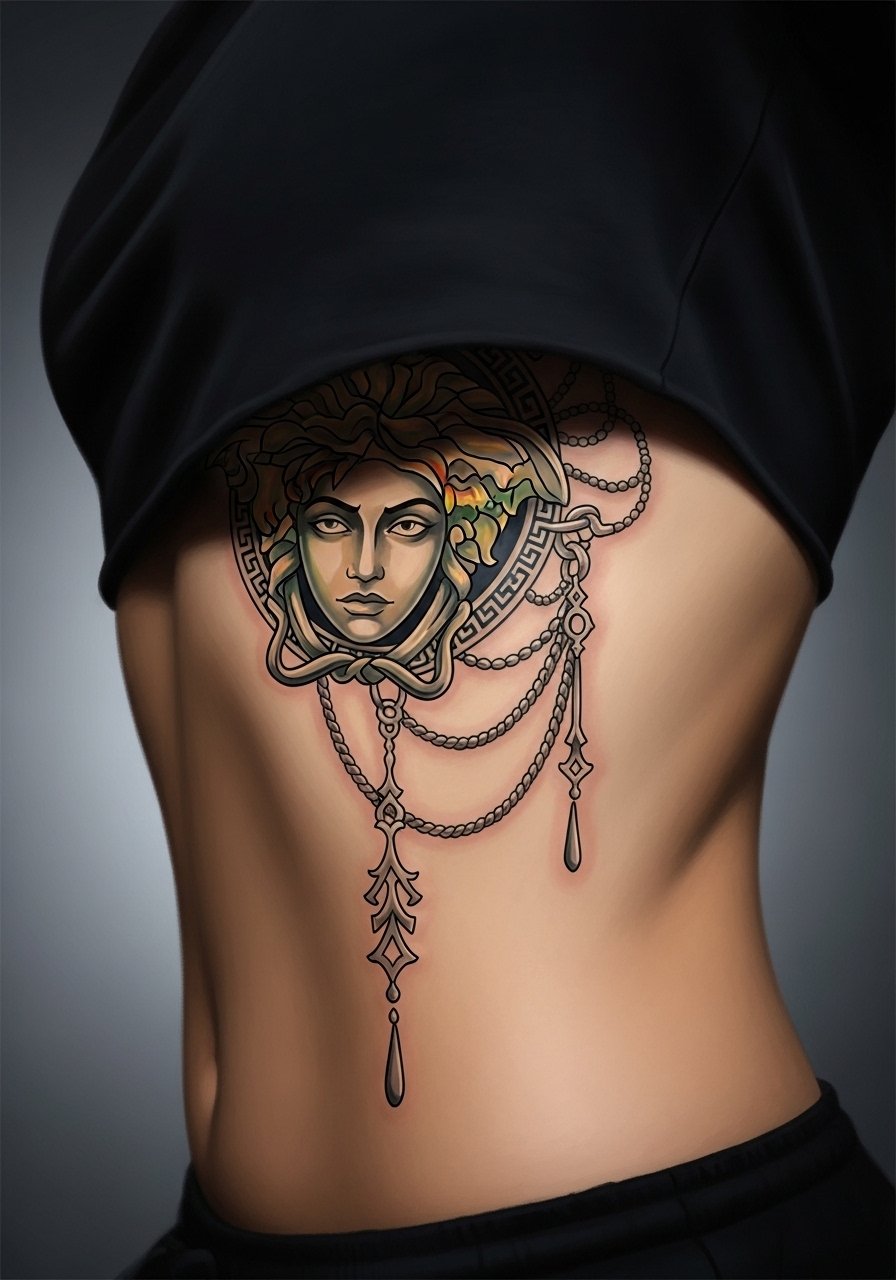
8. Back-of-Shoulder Medusa with Decorative Snakes
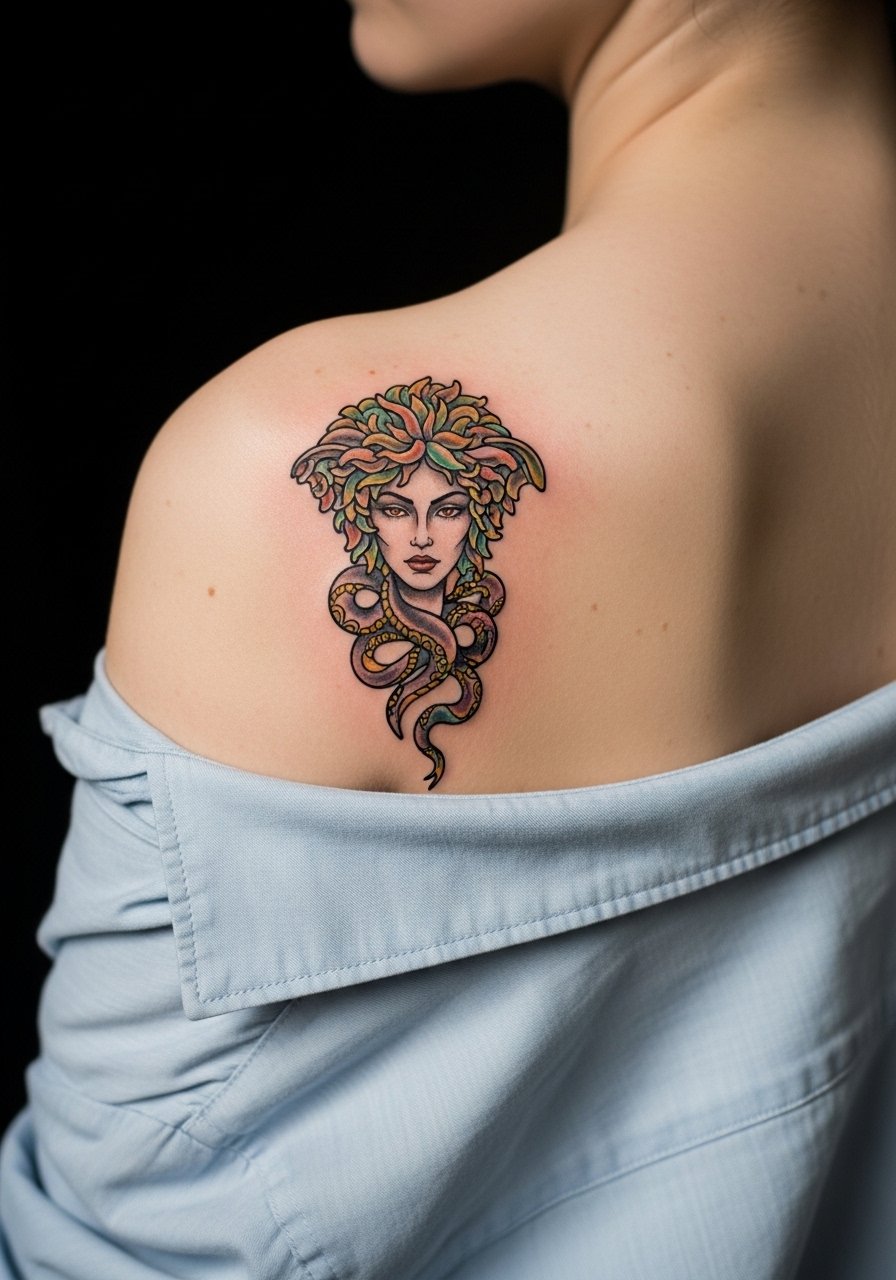
This placement reads like jewelry under clothing. When the snakes flow toward the spine, the movement complements open-back outfits. Tell your artist to plan the snakes' curves with your shoulder movement in mind so they do not kink when you reach or rotate. Pain is low. Typical session length is three hours for a mid-sized composition. For evenings, an open-back top highlights the placement without exposing too much skin.
9. Full Sleeve Medusa Narrative
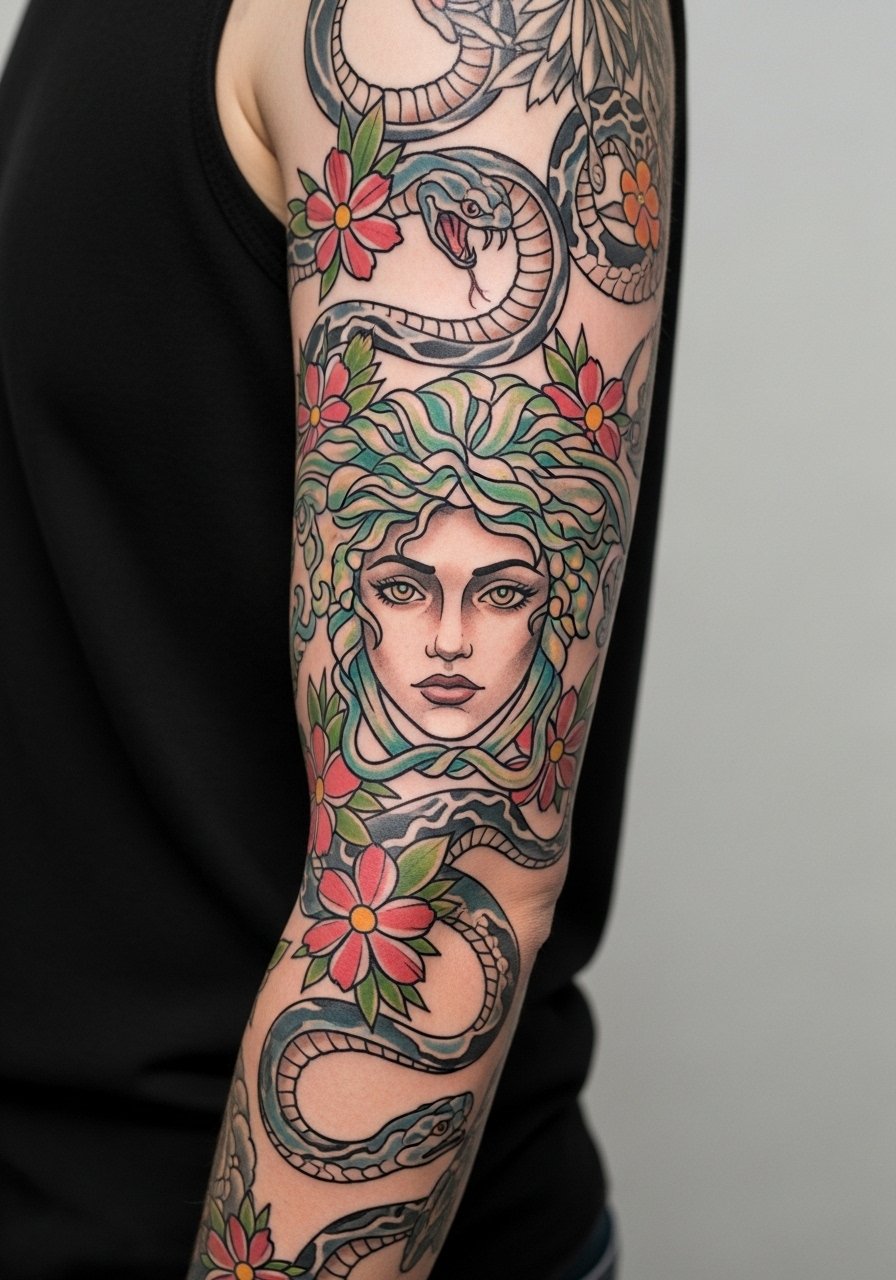
A sleeve lets you tell a story. Start by mapping the anchor image and where color saturation will live so the portrait does not get lost among filler. In consultation, ask the artist to design transitions that work across the bend of the elbow, because heavy gradients there soften fastest. Expect multiple sessions totaling 8 to 20 hours depending on complexity. Blowout risk at the elbow crease is moderate. For staged reveals, roll up sleeves on a loose linen shirt to show the upper arm and forearm panels selectively.
10. Collarbone Cameo Medusa with Pastels
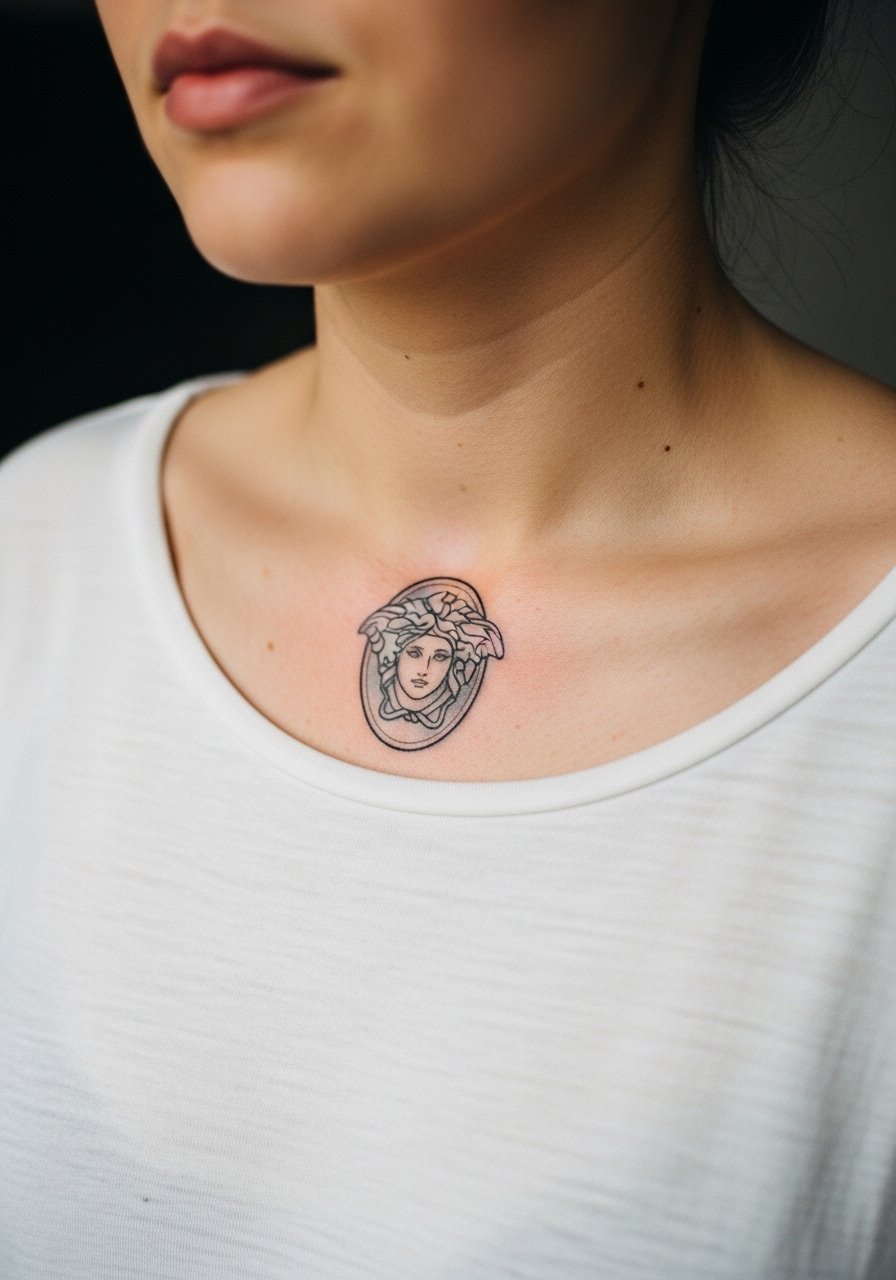
Collarbone pieces read as subtle and refined when balanced with negative space. Pain is moderate due to bone proximity. Ask for softer color placement and fewer tiny dots near the bone. Small, dense shading next to bone tends to become patchy when healed. Session time is often a single two-hour appointment for a medium cameo. Pair with a thin chain pendant necklace that sits above the design without competing.
11. Hand-Side Medusa Accent
Hand tattoos are explicit choices because they remain visible in professional settings. Pain is high and fading is fast due to constant washing and sun exposure. Artists split on whether small detailed portraits belong on hands. One camp says heavy, simple shapes hold up better. The other says with careful depth a detailed face can still survive. Ask your artist which approach they recommend and expect touch-ups at year two. For the session, wear clothing that does not rub the area and plan for light-duty work for the first week.
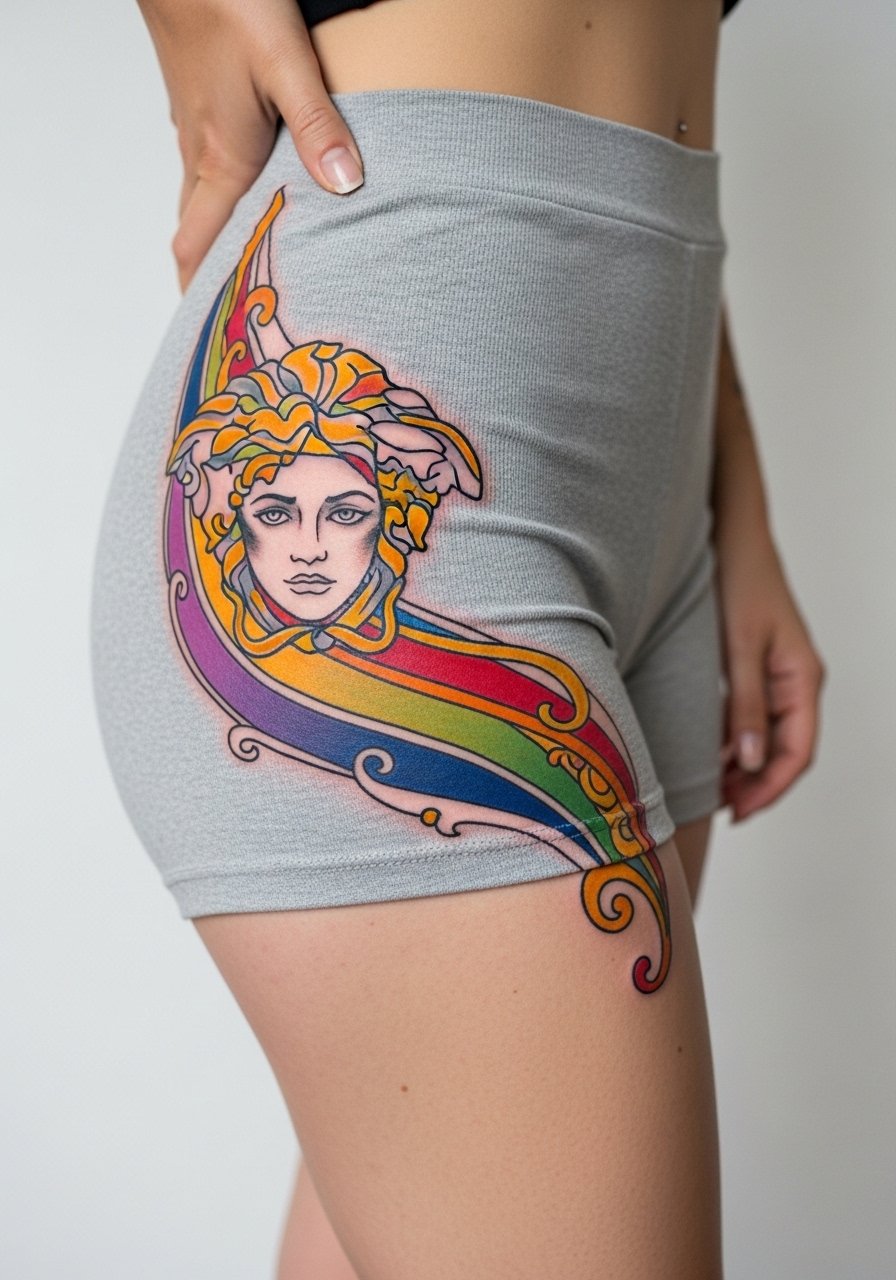
12. Hip-High Cut Medusa with Floral Border
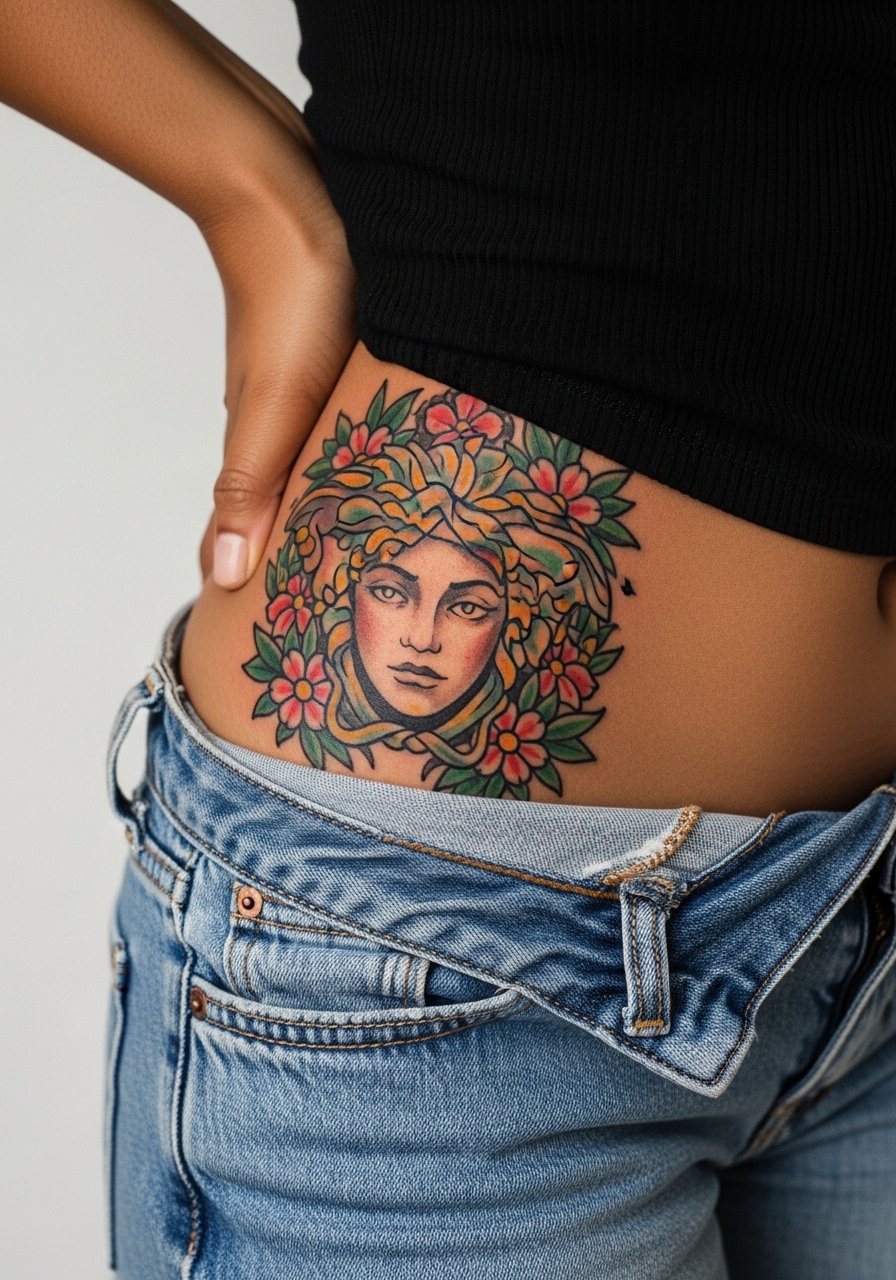
Hips are forgiving for saturation. If you want the snakes and florals to remain distinct, ask the artist for defined color blocks rather than micro shading in crowded areas. Session time can be one to three hours. For the session, wear high-waisted denim you can pull down slightly without losing modesty. Note that body contour shifts like weight change can subtly affect composition over time.
13. Lower Back Medusa with Ornamental Frame
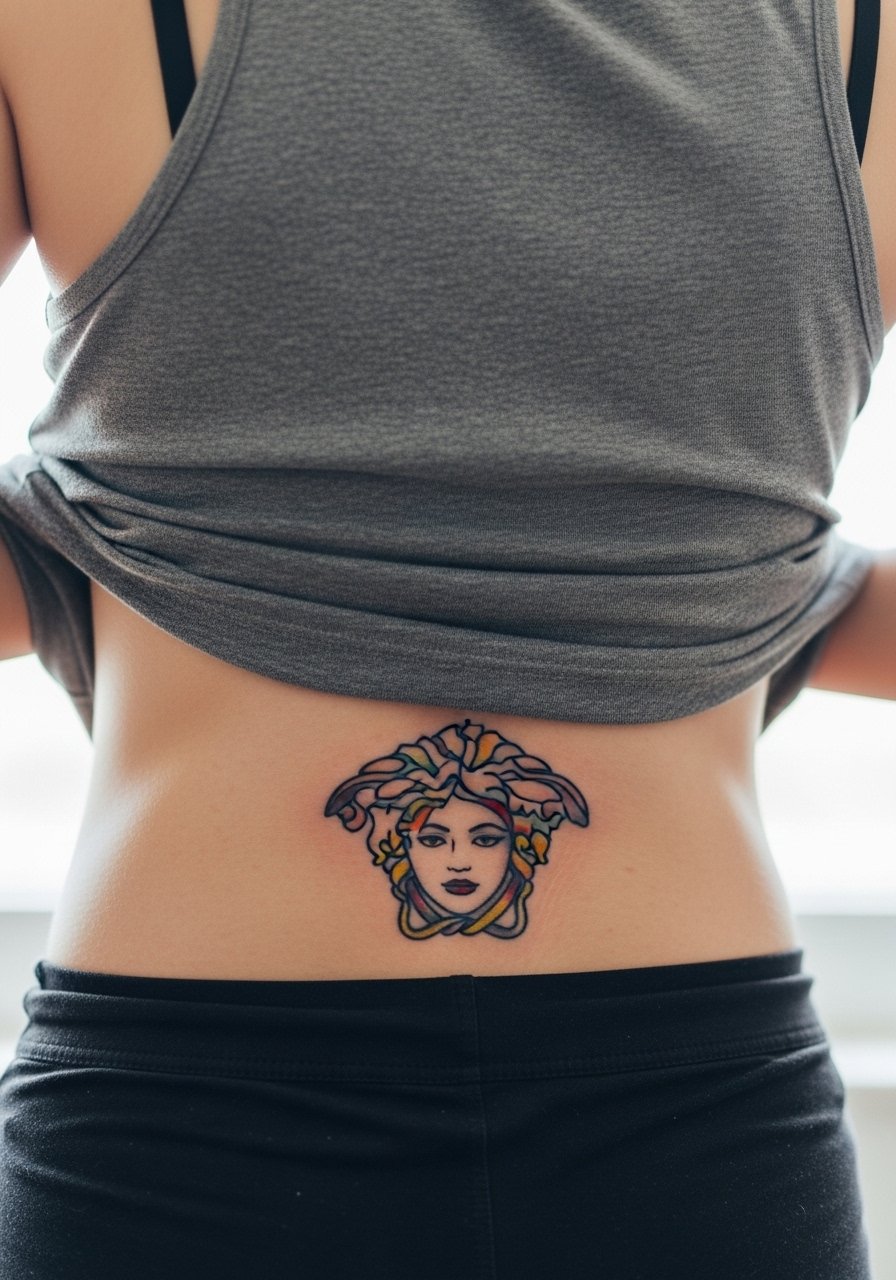
Lower back pieces work well as larger canvases for ornamental framing. Pain is low to moderate. The area tolerates saturation and the frame helps keep the portrait from merging into a single color field. Tell your artist to plan anchor points near the spine and hips so the piece feels balanced when you move. Sessions typically run three to five hours. For showing it off, a tank top shifted up reveals the art without exposure.
14. Micro-Realism Inner Bicep Medusa
This area can produce stunning detail, but the skin is softer and more prone to blowout if the needle sits too deep. I recommend asking for controlled depth and a consult about needle grouping. Expect moderate pain when the arm is stretched and a two-hour session for a medium micro-realism face. Avoid packing too many tiny highlights or the face may lose contrast over time. For the appointment, a sleeveless shirt keeps the area accessible without fumbling.
15. Nape Medusa with Soft Color Halo
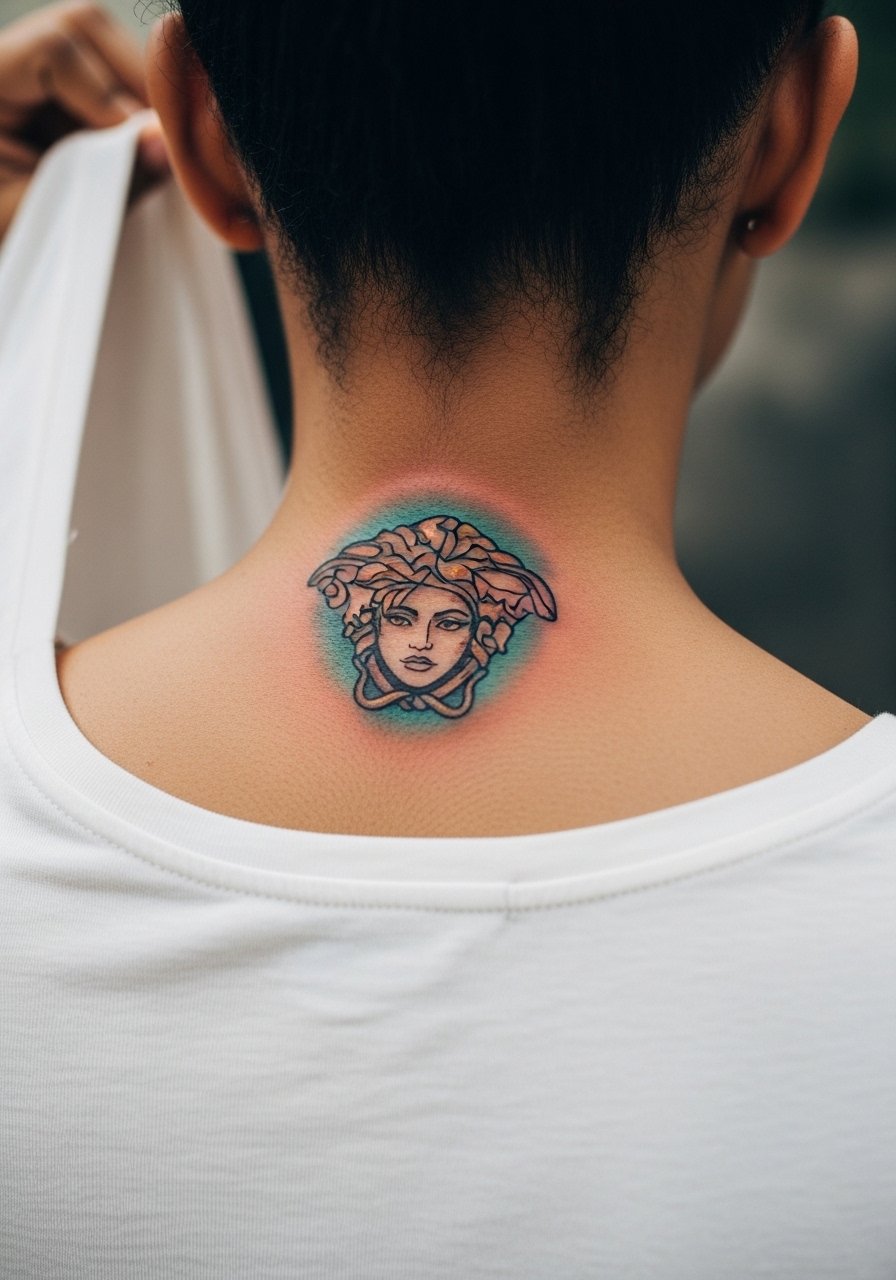
Neck work requires a conversation about visibility and career implications. Pain is moderate. Ask the artist how they handle hairline interface because the nape shifts with hair growth and styling. A common mistake is expecting full color saturation without accounting for quick sun exposure. Sessions are usually brief. For display, pull hair into a low bun or clip to reveal the piece without overstyling.
16. Behind-the-Ear Tiny Medusa Accent
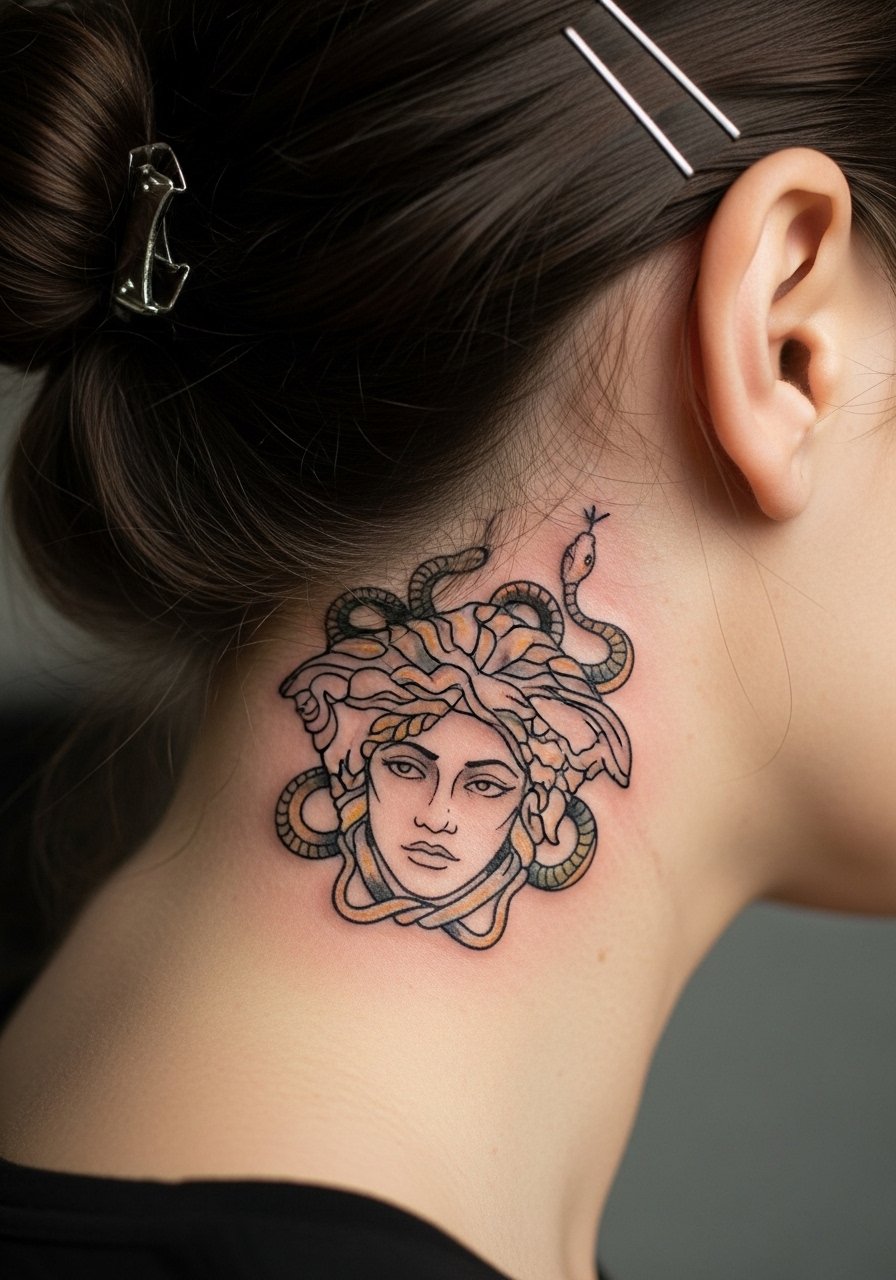
Behind-the-ear pieces are intimate in scale. Pain is low. The biggest practical consideration is hair rubbing and shampooing that can tug at the scab. Ask for simplified snakes and a plan to keep the area dry during the first week. Session time is short. For the appointment, pin hair up with a simple hair clip so the artist has clear access.
17. Tiny Finger Medusa Glyph
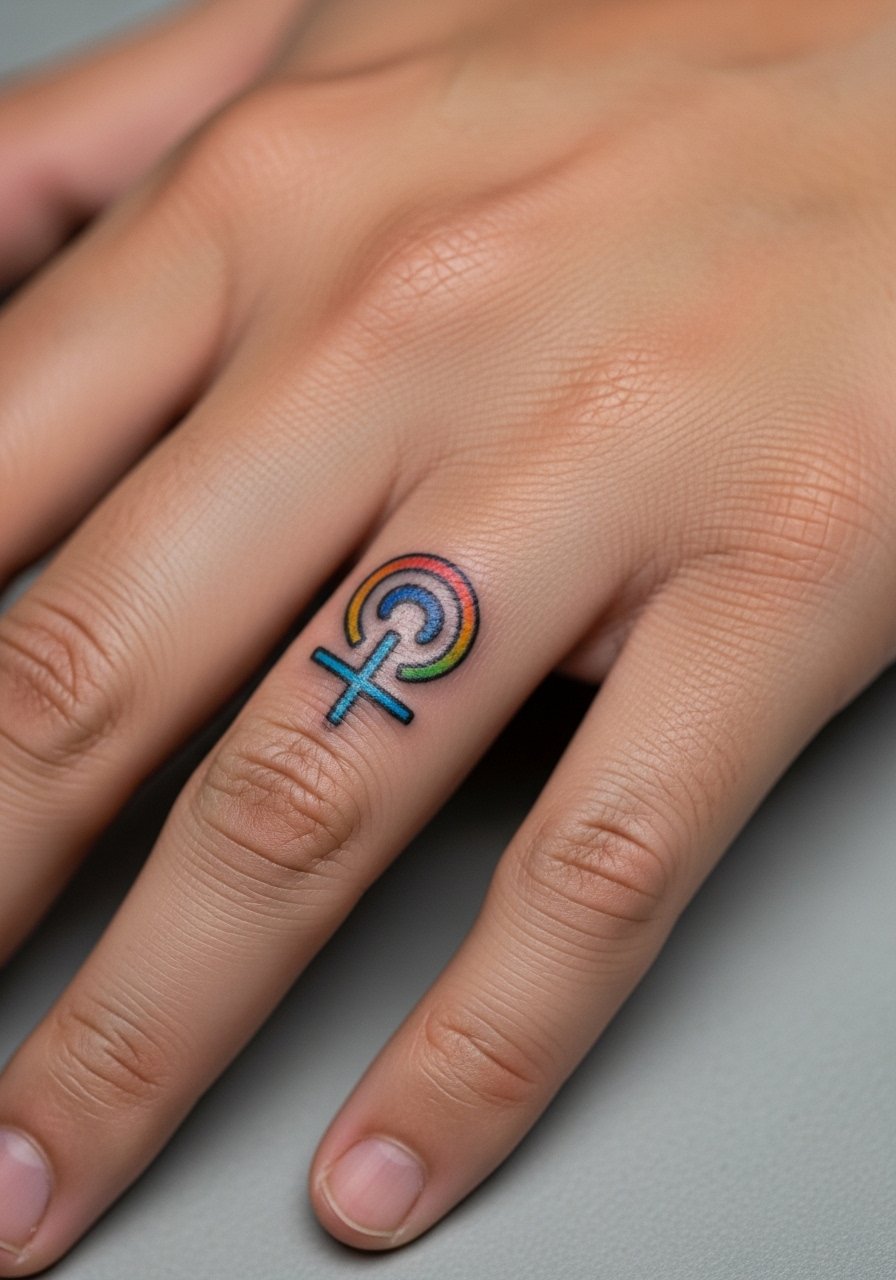
Finger tattoos are high-maintenance. They fade faster and often require touch-ups. Keep designs bold and simplified. Ask the artist for slightly heavier outlines and reduced interior detail so the glyph survives daily washing. Expect a brief session and a touch-up within a year. Rings and constant motion add friction. For shows, pair with thin stacking rings rather than heavy bands that sit over the design.
18. Ankle Wrap Medusa with Tiny Snakes
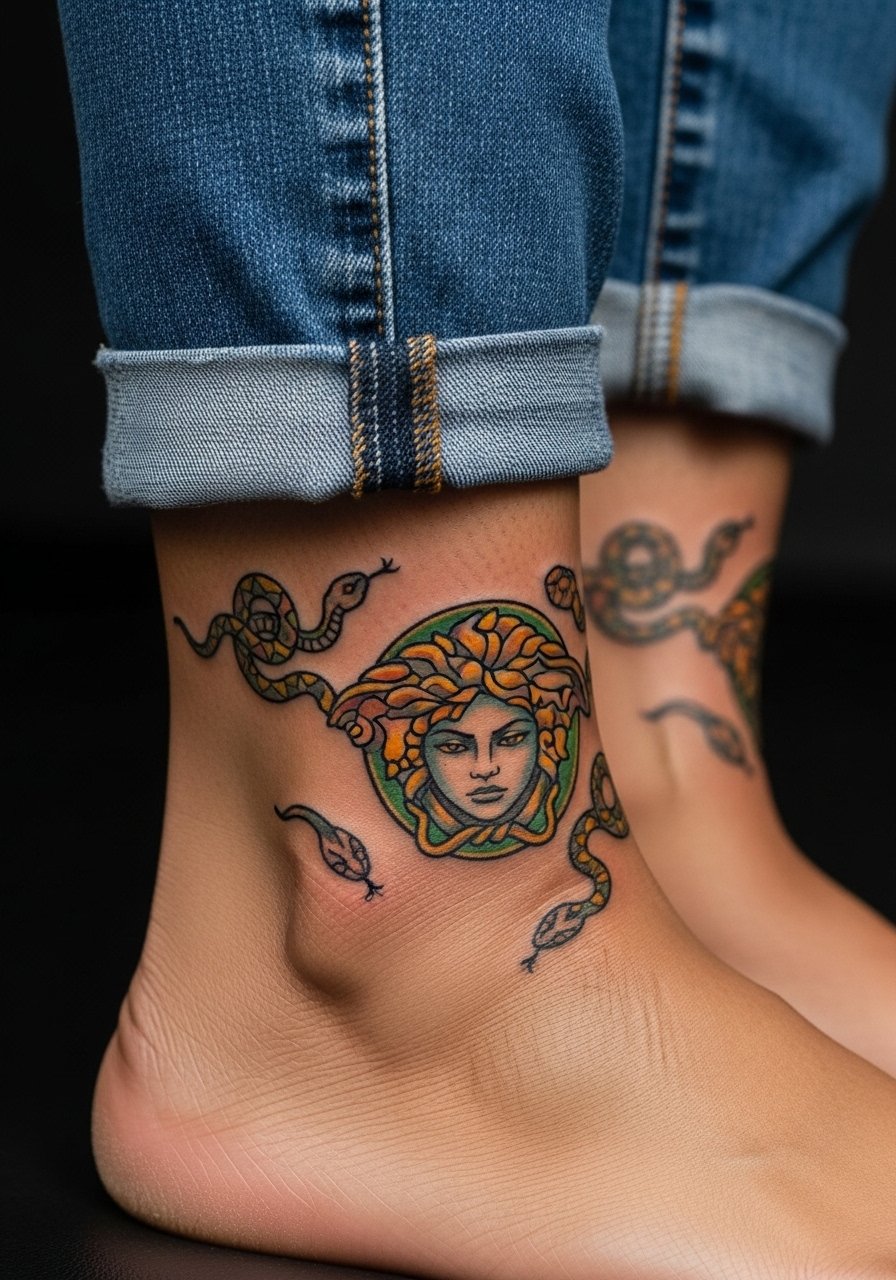
Ankle wraps are playful and can be extended later into a foot or calf piece. The area heals slowly when shoes rub. Ask for simplified snake tails on the lower side to reduce friction points. Sessions are short. For the appointment and the week after, wear slip-on sandals to minimize rubbing and pressure.
19. Upper Chest Medusa in Neo-Realism
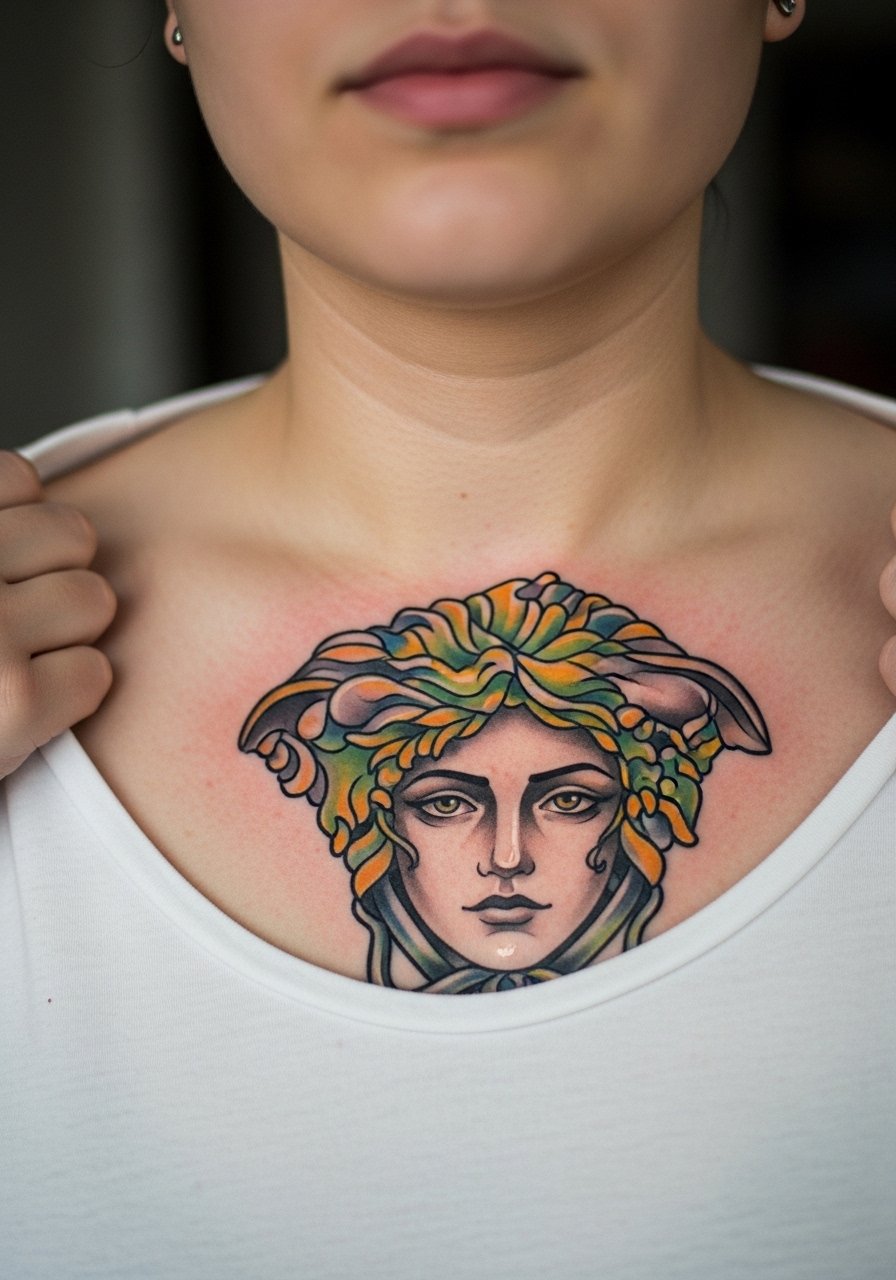
Upper chest pieces age based on sun exposure and neckline choices. Ask the artist to plan a color palette that keeps midtones for skin contrast. Pain is moderate and sessions can run two to four hours. Avoid overly tight clothing in the first week. Pair with a wide-neck blouse to reveal the design with minimal abrasion.
20. Calf Medusa with Wave Motif

Calf placements tolerate larger scale and high saturation. This makes them great for jewel-toned Medusa portraits that keep impact from afar. Pain is low to moderate. Tell your artist you want color blocks that will not rely on tiny shading dots in high-motion areas. Two to three hour sessions are common. For the reveal, wear cropped pants or a midi skirt that sits above the calf.
21. Miniature Medusa Behind the Knee Band

Behind-the-knee tattoos face movement and friction. Expect some color migration over time if the design uses too many tiny details. Ask for a slightly bolder outline and for the band to avoid the creases. Pain spikes when the needle reaches the tendon area. Short sessions are typical. For the session, wear loose shorts you can shift without rubbing.
22. Hip-to-Thigh Medusa Panel
This is a statement option that benefits from planning movement and clothing lines. Ask for a mock-up that shows how the snakes will lie when you sit and when you stand. Sessions are multiple and may be split. Pain varies across the panel. For showing off the finished piece, choose a high-cut swimsuit bottom that frames the artwork.
23. Small Medusa on the Back of the Neck Line
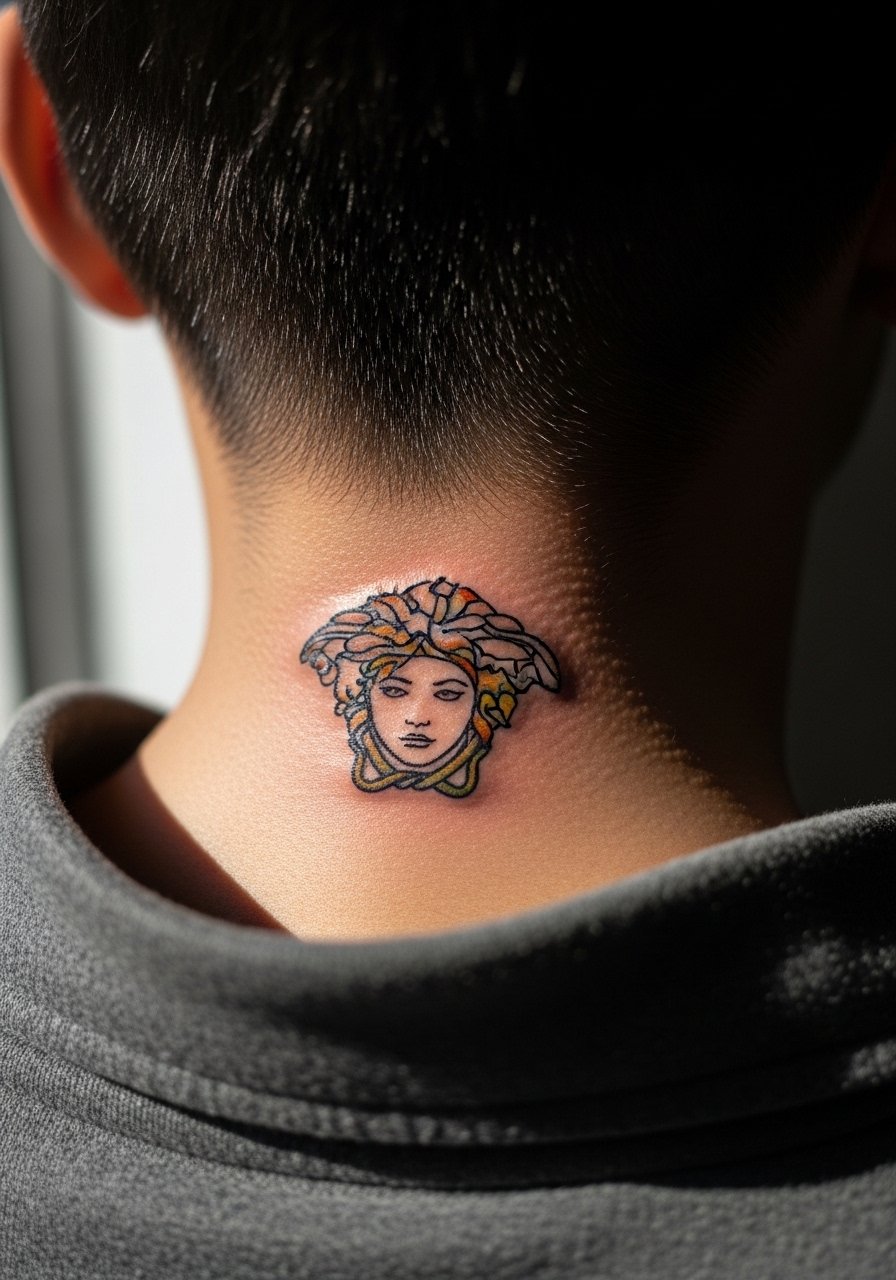
Placement is discreet when hair is down and dramatic when pinned up. Ask the artist to avoid tiny facial details that wash out with neck motion. Expect a quick session and modest pain. For session access, wear a wide-neck shirt that allows the artist to work without tugging.
24. Sternum-to-Underbust Medusa Lace Piece
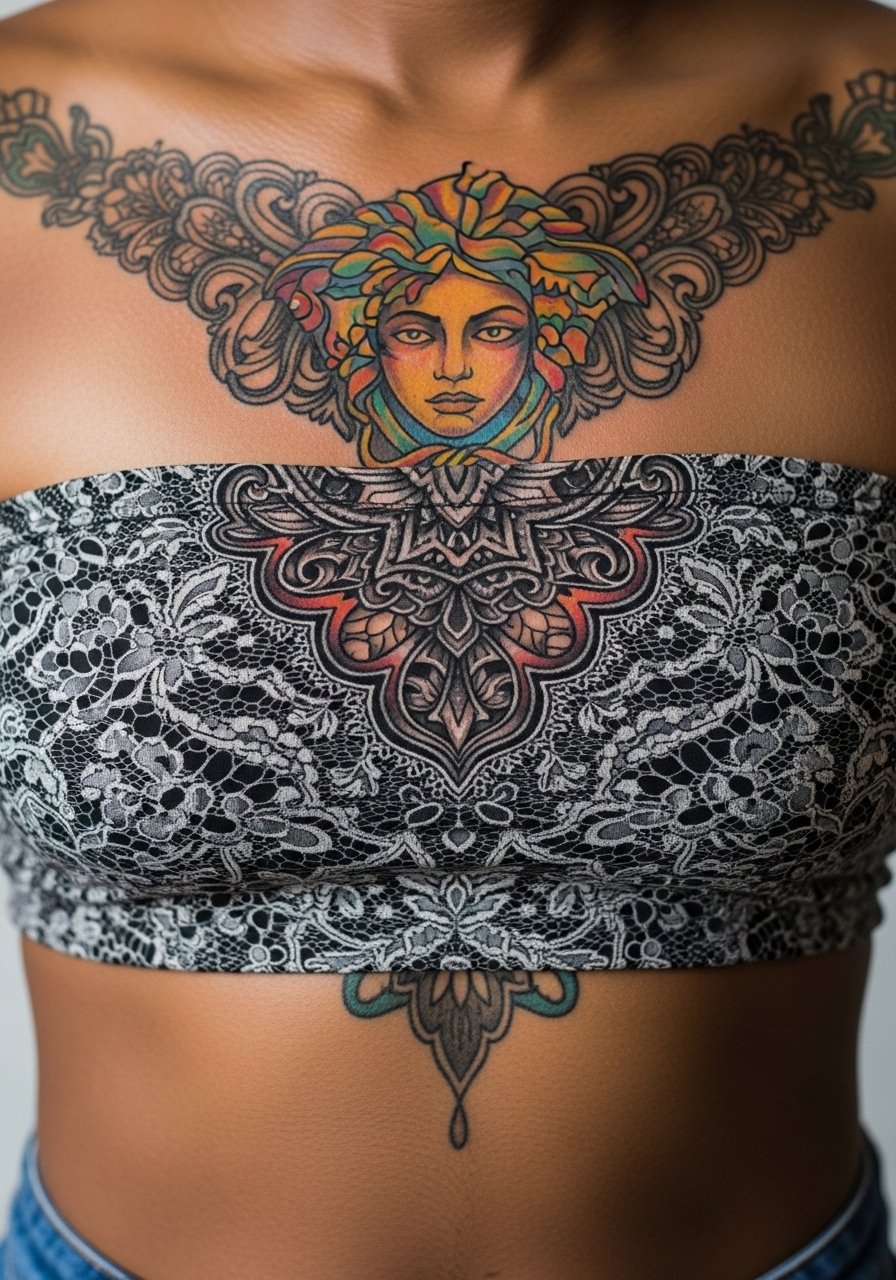
Underbust work requires careful contouring with clothing in mind. The skin in this area moves with breathing and bras. Artists debate dense color here. One camp favors bold saturation to anchor the piece. The other suggests lighter washes to prevent scabbing and pigment loss. Ask how they plan staged layering and how many sessions they recommend. For the appointment, wear a bandeau top that gives the artist access while keeping you covered.
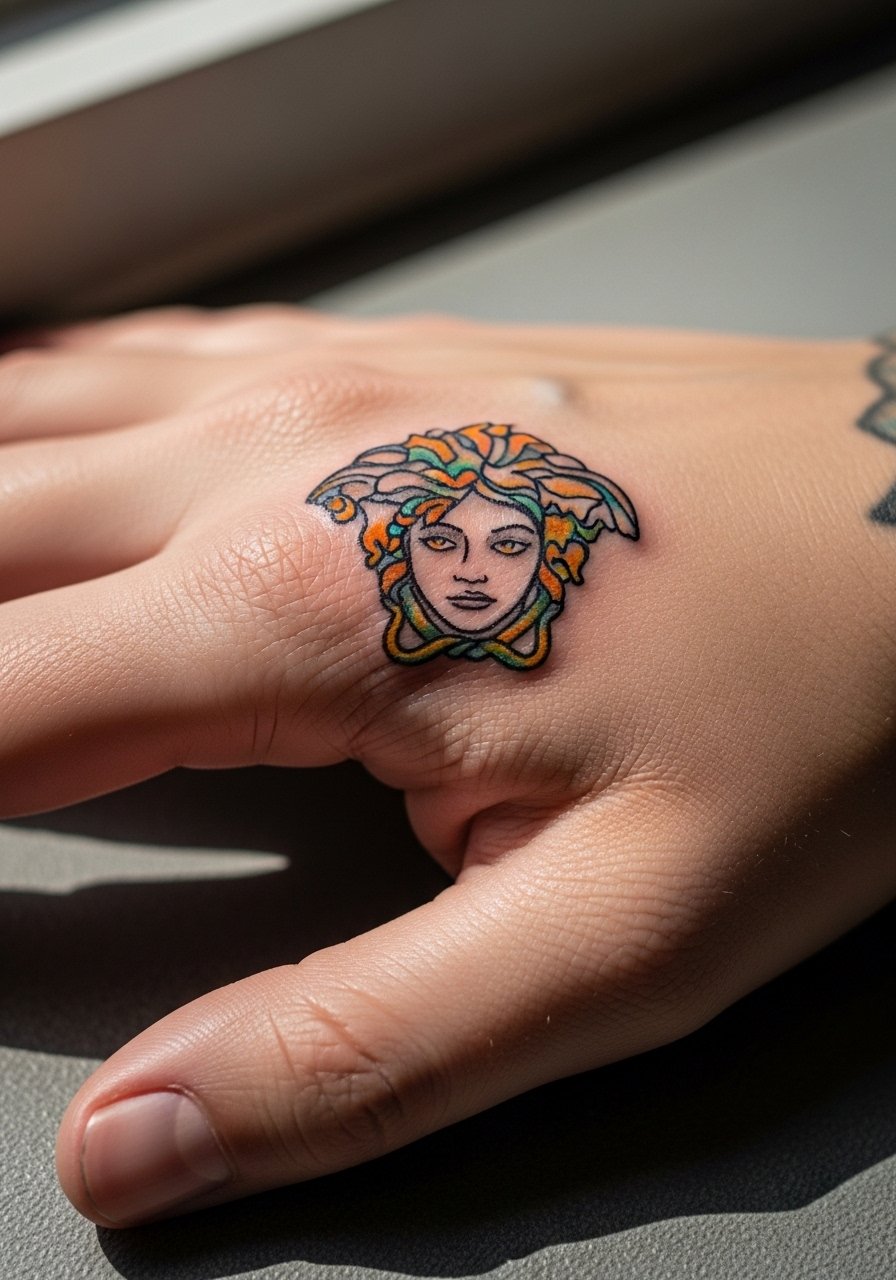
25. Mini Medusa on the Back of the Hand
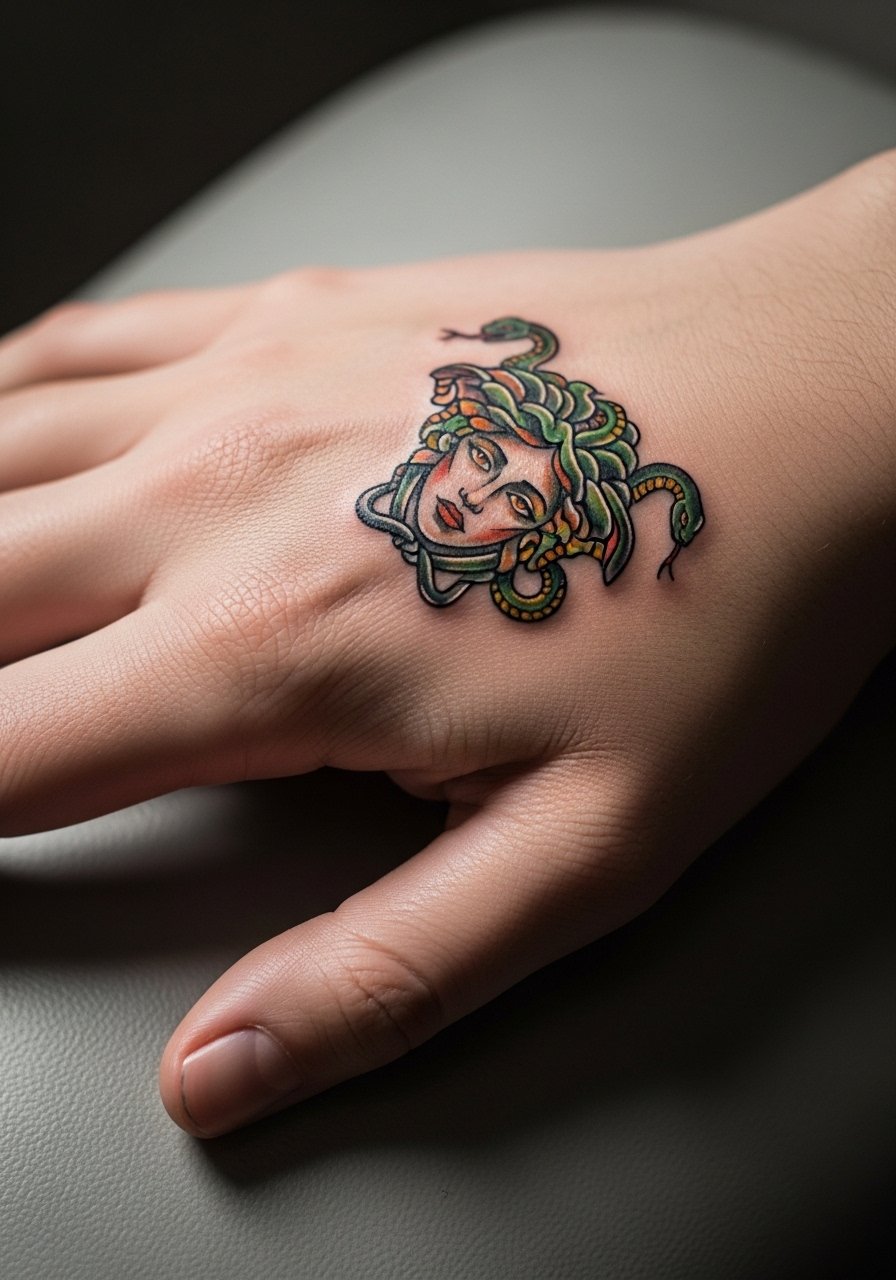
Back-of-hand tattoos are visible and weather fast. The skin here sees a lot of sun and abrasion. Ask for bold simplified forms rather than intricate portraits. Expect quicker fading and more frequent touch-ups. For the session, keep your hand moisturized beforehand and minimize heavy lifting for a few days.
26. Rib-Adjacent Medusa with Decorative Chains
Rib-adjacent placements still trigger the rib controversy. One group of artists warns that tight fine lines here will blur as the skin stretches. The other group insists that with correct needle depth and spacing, fine lines can hold for years. Ask directly which method your artist uses and how they plan spacing for the chains. Sessions are painful and often split. For the appointment, wear a cropped top you can lift slightly without exposing more than the tattoo zone.
27. Color-Saturated Medusa Spine Column
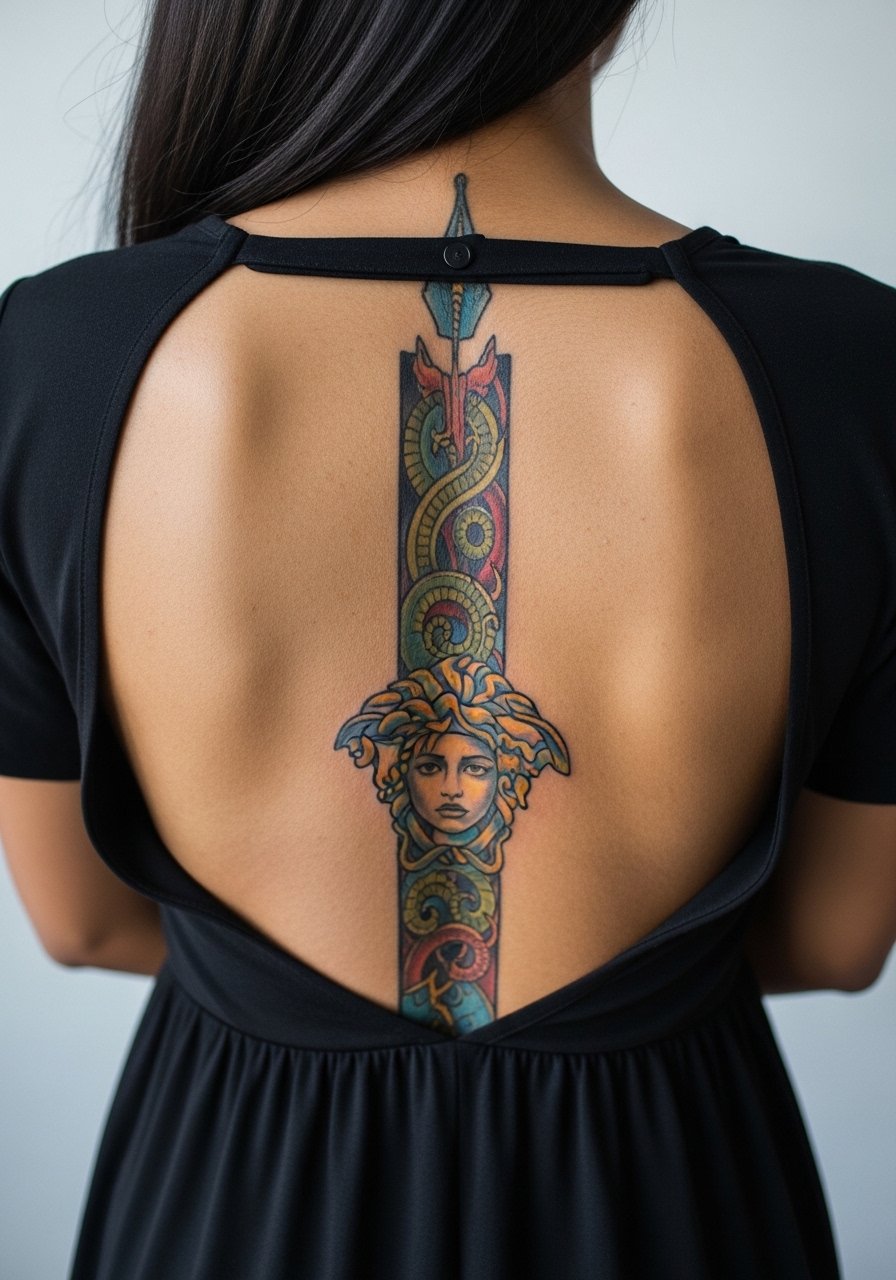
Spine pieces are dramatic and age based on sun exposure and clothing choices. Pain is high near the vertebrae and sessions are usually split. Ask for anchor lines that will remain solid as midtones soften with time. A common mistake is insisting on ultra-fine facial detail that will fade unevenly along spinal movement lines. For reveals, an open-back dress frames the column without showing excess skin.
Frequently Asked Questions
Q: Will a colorful Medusa portrait on the ribcage need touch-ups more often than one on the forearm?
A: It depends on placement and how much movement the skin there undergoes. From what I've seen, ribcage pieces often need earlier touch-ups than forearms because the skin stretches and tightens with breathing. Ask your artist about planned touch-up timing before you commit.
Q: How should I describe color saturation to get the exact pastel or jewel tones I want for a Medusa portrait?
A: Bring reference photos that show healed examples rather than fresh photos. Ask the artist which pigments they favor for pastels and how many layering sessions they recommend to reach your target without overworking the skin.
Q: Are hand and finger Medusa pieces worth it if I want long-term clarity?
A: Hand and finger pieces make a statement but come with a higher maintenance schedule. If you want long-term clarity, opt for simplified shapes and stronger outlines rather than micro-detail. Expect possible touch-ups at year one and beyond.
Q: What should I wear to a sternum or underbust Medusa session to stay comfortable and give the artist access?
A: Pick a fitted sports bra or bandeau that you can easily shift so the artist only exposes the tattoo zone. A strapless or zip-front item works well and keeps modesty intact while providing clear access.
Q: How do I find an artist who understands colorful feminine portraits like these without relying on a single Instagram handle?
A: Use a mix of discovery pathways. Scan local studio directories, check convention artist lists, read forum threads on community sites, and look for portfolios on studio websites. I found that combining searches with a shortlist from a local convention gives better matches than one feed post.
