
Fine line tattoos are everywhere online, and the "Born To Die" script with a tiny moth looks irresistible fresh. The reality is that what looks flawless in a saved photo may not age the same on your wrist or ribcage. Placement, line weight, and how you plan to show it off matter far more than copying a viral image. Below are 27 cute Born To Die tattoo ideas that balance trend energy with real-world wear.
1. Fine Line Script and Micro Moth on Inner Wrist
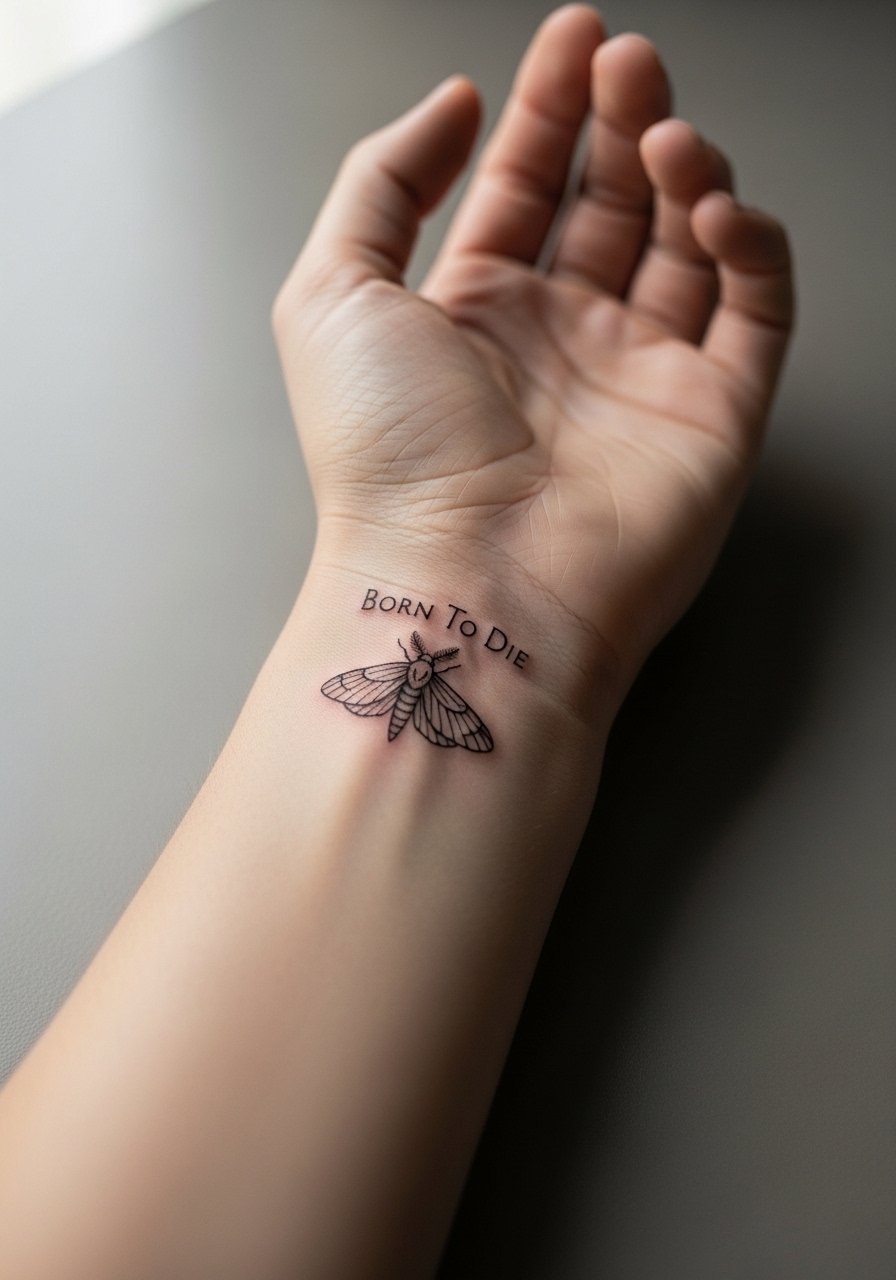
I've seen this tiny combo on dozens of people who want a daily, subtle prompt. For wrists pick slightly thicker single-needle work, not hairline strokes, to avoid the rapid fade many report after a year. Tell your artist you want 0.2mm lines with a hint of spacing around the moth so the dots do not merge. Expect a one-hour session and a touch-up in 12 to 18 months if you use the wrist a lot. Show-off tip: pair it with a dainty chain bracelet and neutral tank tops to keep the wrist uncluttered during warm months.
2. Neo-Traditional Skull with Roses on Outer Forearm
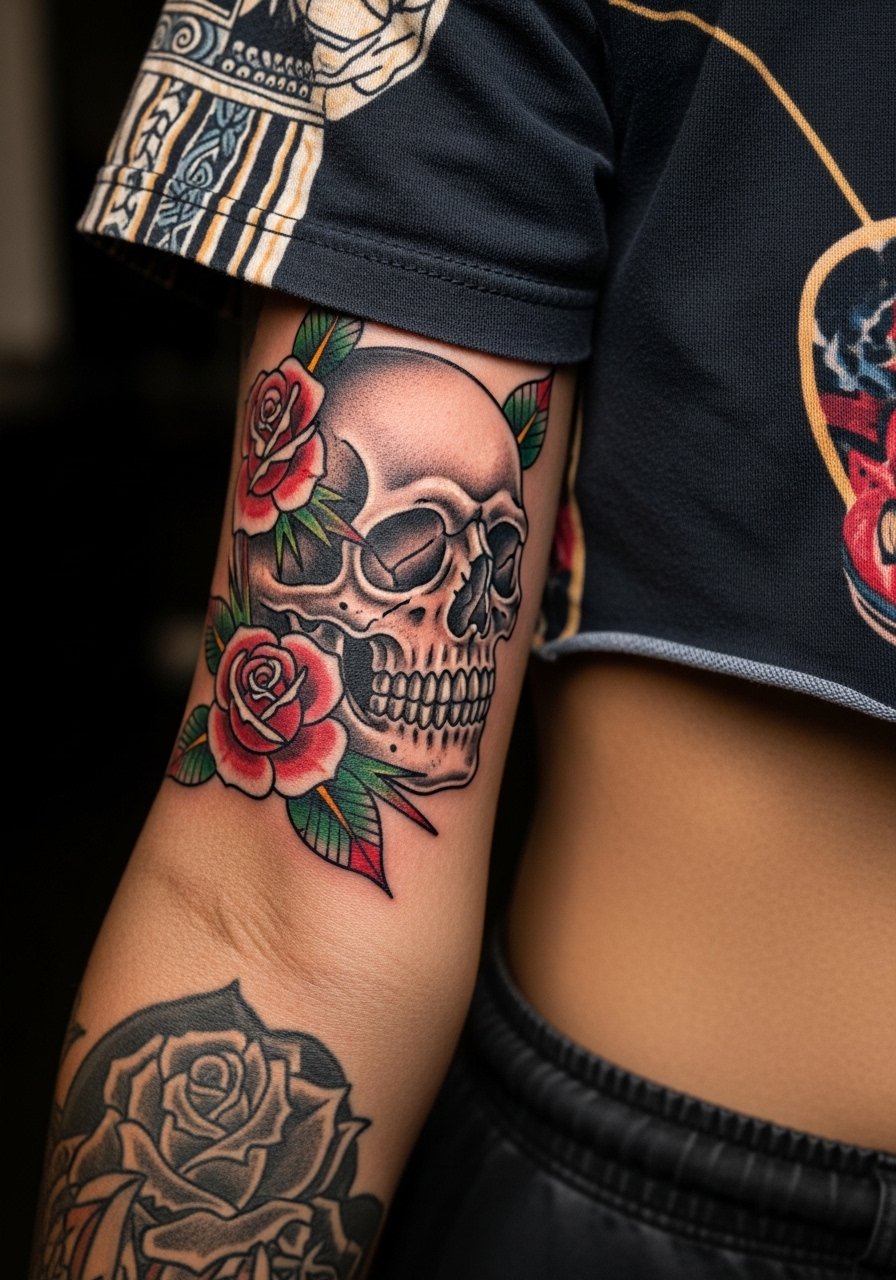
This design reads bold across a room and holds up better than whisper-thin scripts on high-movement skin. Ask for thick outlines and saturated color accents on the roses so the shapes age into form rather than blur. Pain is moderate for the outer forearm and sessions often run two hours for a 4-inch piece. A common mistake is asking for too many tiny petals in tight spaces, which turn into mush over time. For daytime looks, roll the sleeves of a fitted black tee to show the design without crowding it with bracelets.
3. Black and Gray Realism Death's-Head Moth on Upper Arm
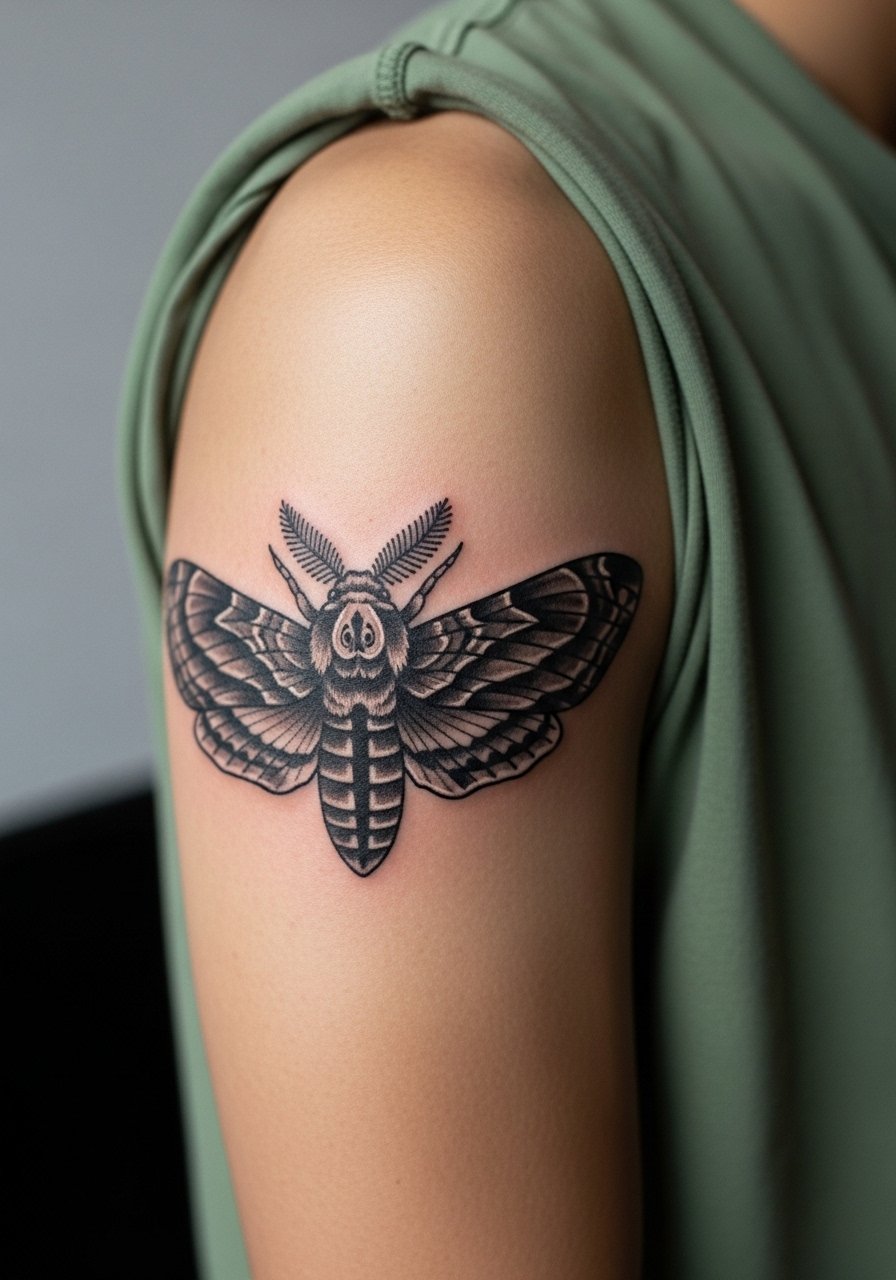
If you want lifelike detail and deep shading, this is the pick. Tell your artist you want contrast between heavy saturation on the thorax and softer stipple shading on the wings to keep dimension without muddying. Sessions can be two to three hours for a 3-5 inch piece and pain is mild to moderate on the upper arm. The trade-off is healing time; heavier shading needs careful dry-heal attention early on. For session comfort, wear a button-front shirt you can open so the artist has clean access without you getting chilly.
4. Watercolor Skull and Flowers on Shoulder Blade
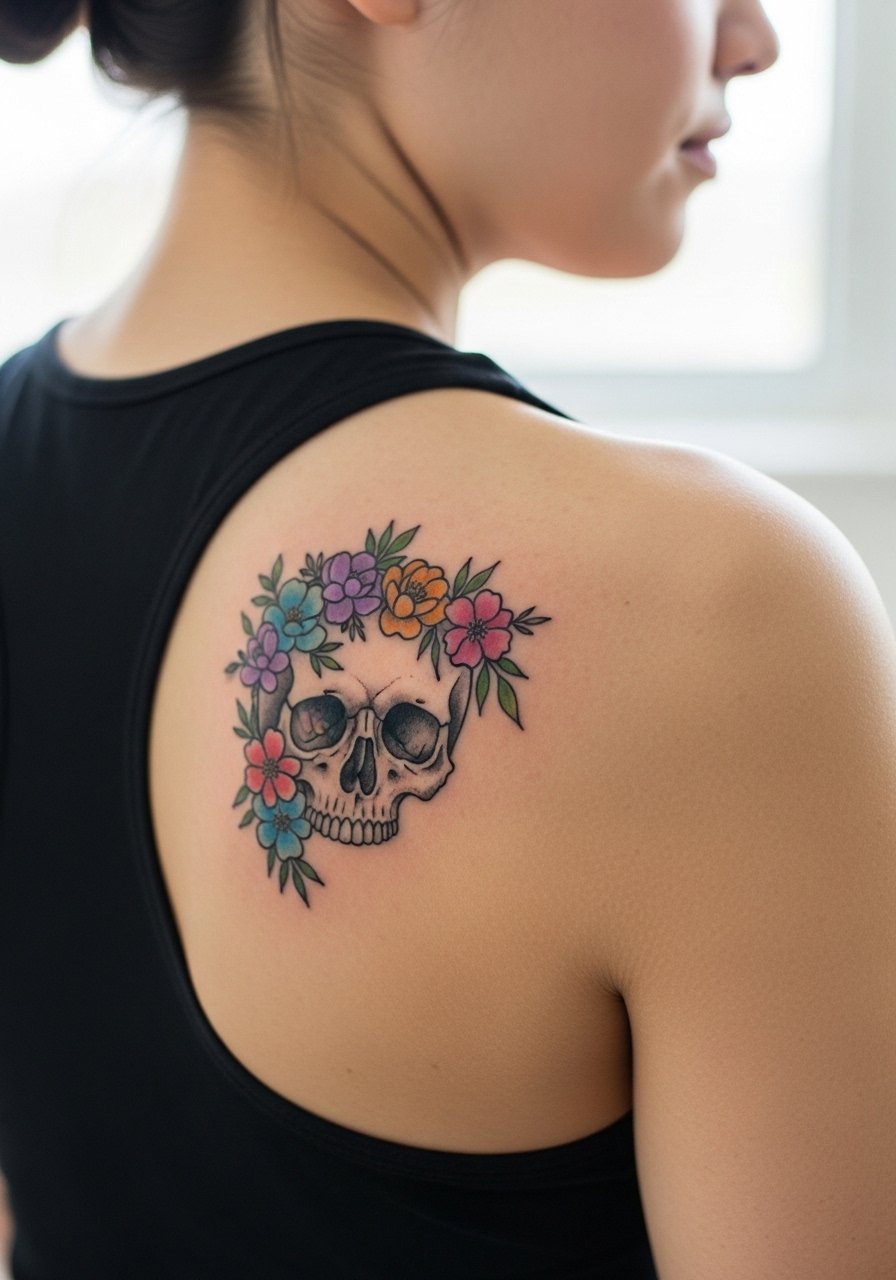
Watercolor gives a soft, painterly flair that contrasts the skull motif, but color bleeding is a risk in humid summers. I usually suggest blackwork outlines under the washes to give the piece a skeleton that remains when pigments recede. One session of a 4-inch shoulder blade piece is common, but expect more peeling than for pure blackwork. When showing it off, strapless or racerback tanks keep attention on the splashy colors without competing with necklaces.
5. Minimalist Geometric Banner on Collarbone
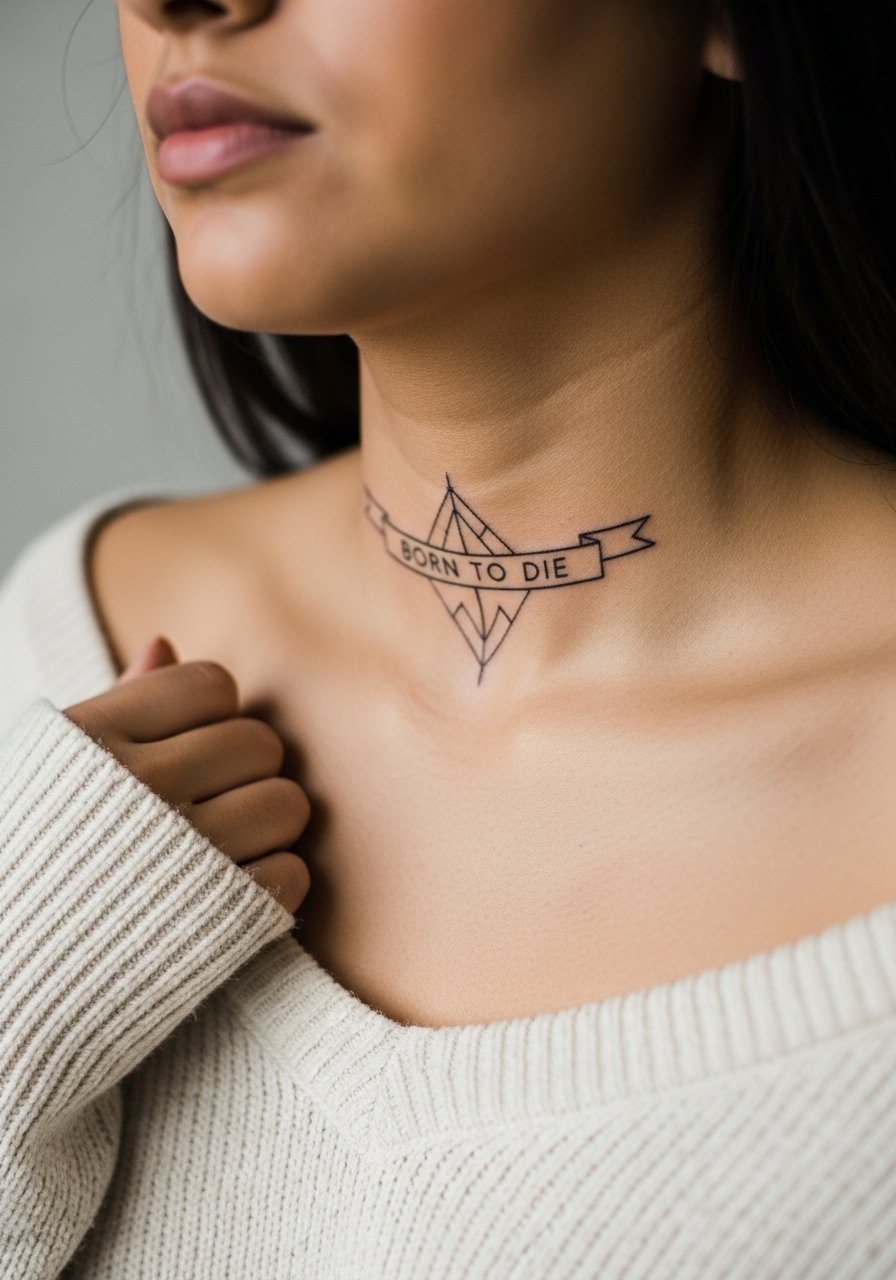
Collarbones are great for small banners that read clean when spaced properly. The mistake is going too tiny with dense geometry. Ask your artist to size up the motif by about 20 percent so lines have breathing room over the curved bone. Pain is lower than ribs but higher than the forearm, and sessions are usually under an hour. Style it with an off shoulder sweater and a thin choker for evenings out. A note for healing debates: some pros prefer dry healing on collarbone work while others favor a short protective film; ask your artist which method they use.
6. Dotwork Skull with Vines on Upper Back
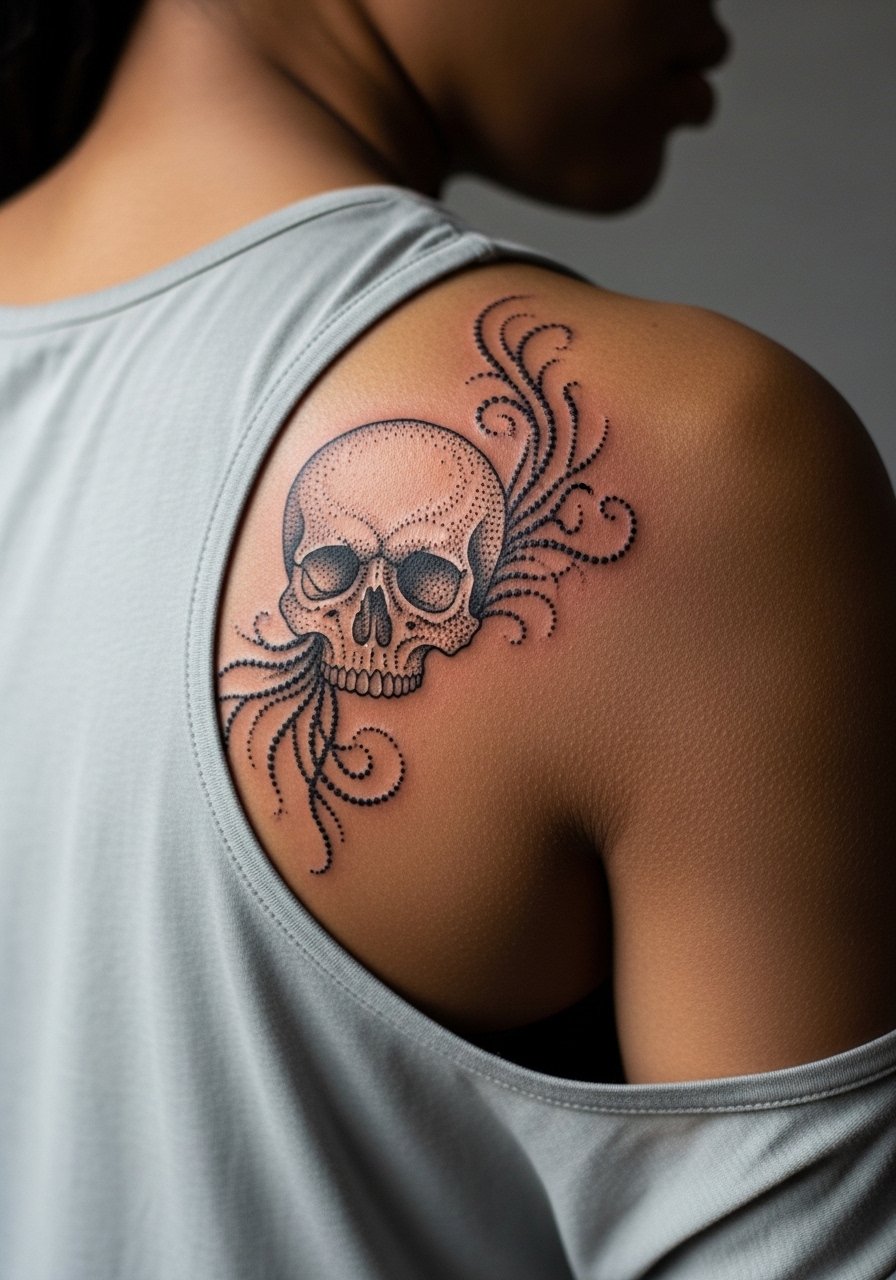
Dotwork brings meditative texture but needs space to avoid dense patches that merge as the skin moves. For back placements, request a layout that follows the shoulder blade curves so the vines wrap naturally when you move. Sessions can run two to four hours depending on size. A common error is too much tiny dot density in one spot, which leads to a muddy patch after a few years. For session wear, a strapless sundress or loose tank lets you show or hide the piece as needed.
Before You Book
The first six ideas include wrist, forearm, chest, shoulder blade, collarbone, and upper back placements, and each area needs slightly different prep and first-week supplies.
- Lush Tattoo Balm. A lighter balm some people prefer over greasy ointments for fine line pieces, it can reduce heavy peeling during the critical first week for wrist and collarbone work.
- Oz Ink Aftercare Spray. Useful in humid summers for shoulder blade color pieces because it is lighter than thicker balms and helps prevent excessive scabbing.
- Nipple Butter. Thin absorption makes this handy for chest and collarbone areas where thick creams feel heavy against clothing.
- CeraVe Healing Ointment. A budget-friendly, ceramide-rich option for short dry-heal windows on larger shaded pieces, helpful when you prefer something less greasy.
- Hustle Butter Deluxe. Often chosen by artists switching from petroleum, it is thin on application and works well on color work like watercolor skulls without trapping moisture for too long.
7. Micro-Realism Rose Fading into Skull on Inner Bicep
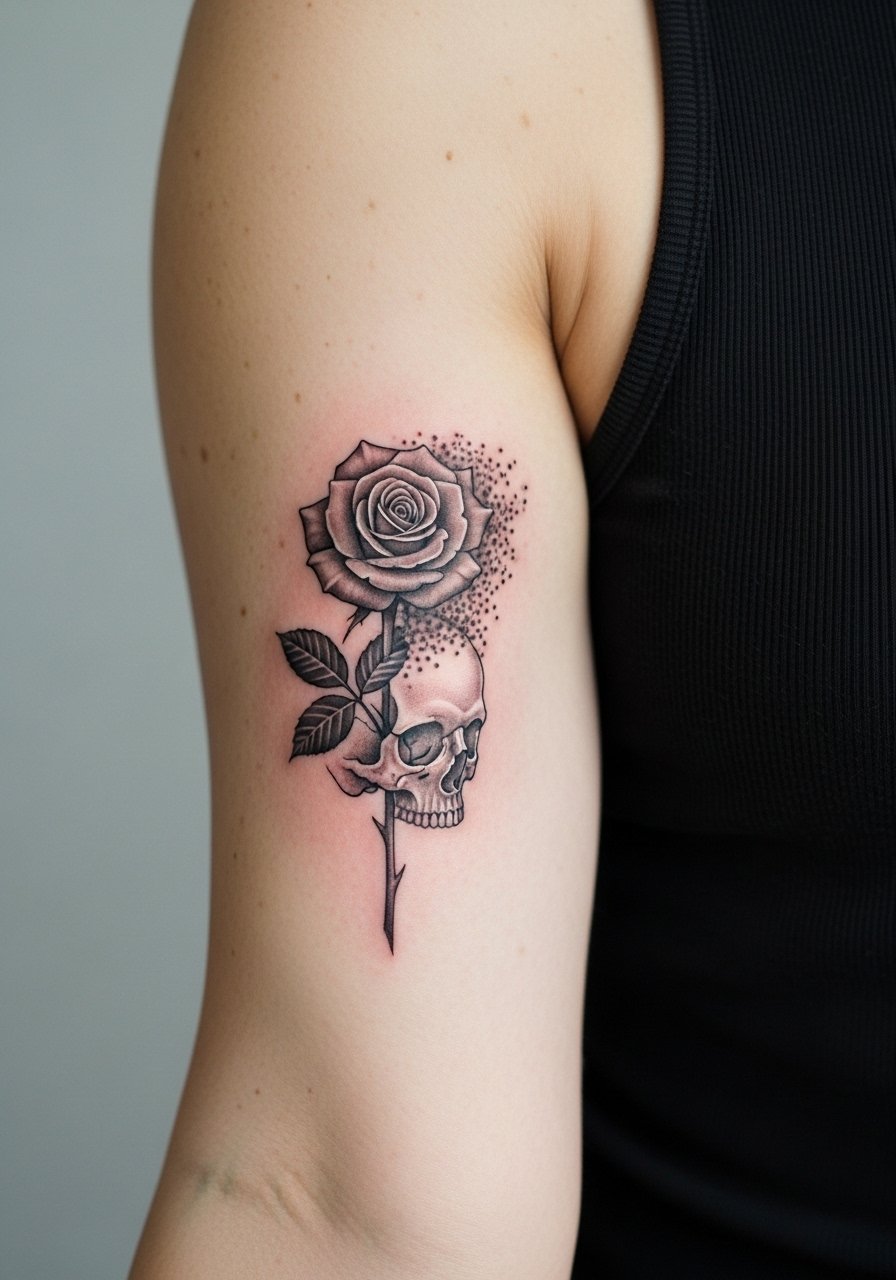
Inner bicep micro-realism looks crisp initially but can blur if lines are too close. For this placement ask for slightly increased spacing between petals and a faint stipple transition into the skull so the two halves read separately as the piece ages. Sessions are short, often one to two hours, and pain is moderate. A mistake is requesting extreme tiny details for a 2-inch canvas. Wear a tank top on session day so the artist can access the inner arm cleanly.
8. Ornamental Mandala with Tiny Moth on Thigh
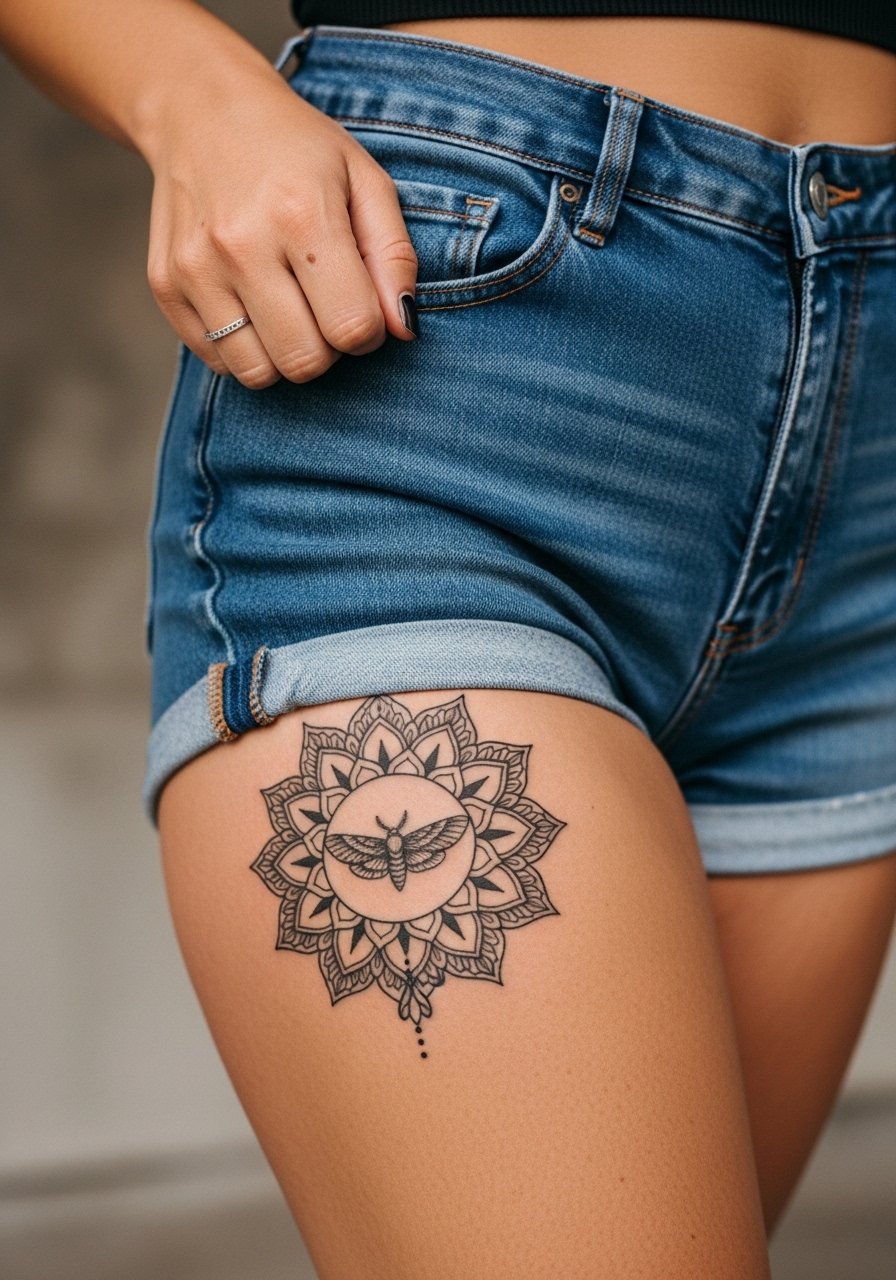
Thighs accept symmetry and detail well because skin there shifts less with daily movement. For a mandala add an ornamental moth at the center to tie into the Born To Die theme without heavy skull motifs. One session will usually handle a 4-inch thigh piece. Watch for heat and friction when wearing tight shorts during the first few weeks. For summer show-off pairings try high-waisted shorts in olive or a slit skirt to frame the piece.
9. Blackwork Bold Text with Stars on Calf
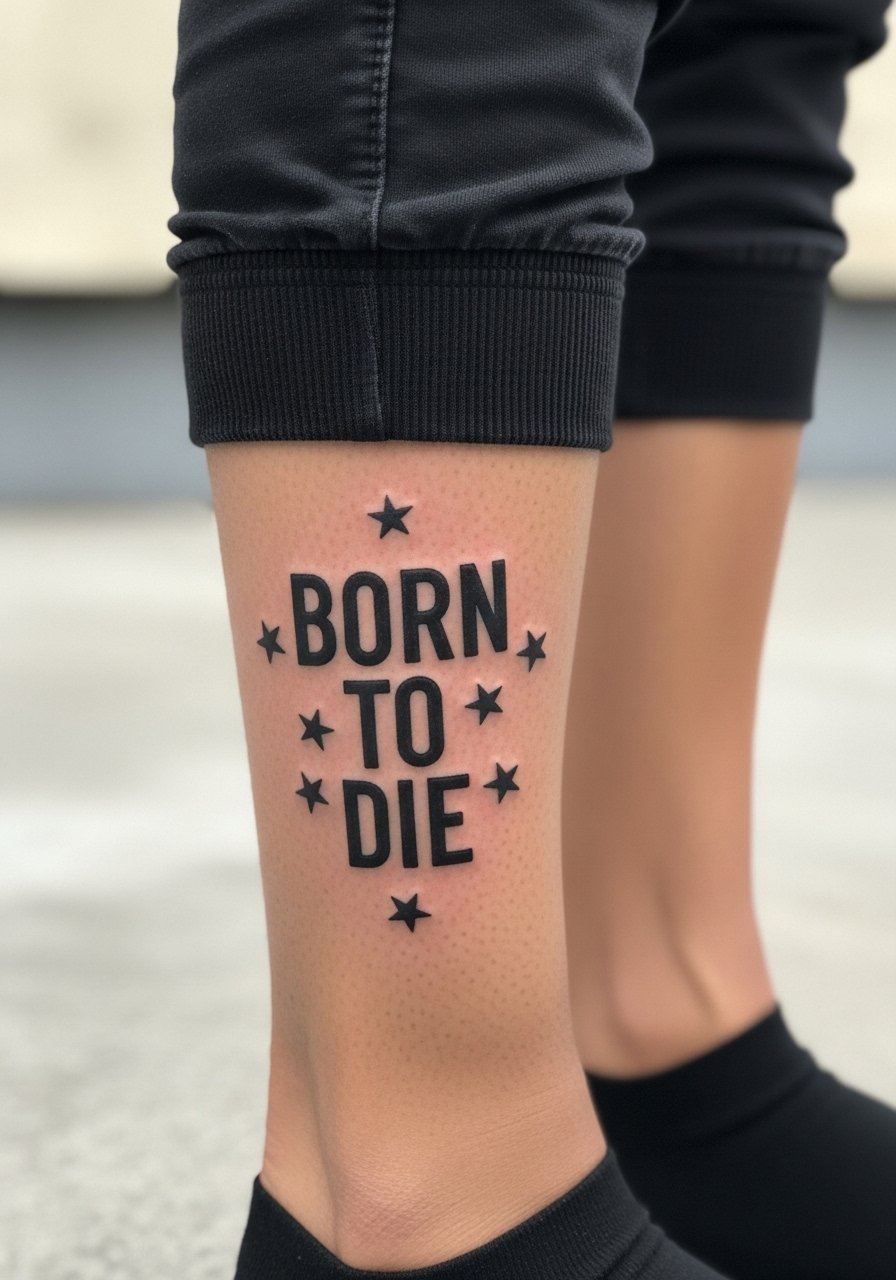
Large black text reads from a distance and resists fading better than thin scripts on high-motion skin. Ask for thick fills and clean negative spacing on the letters so the stars breathe. Calf sessions are usually two hours for a 4-inch design and pain is moderate. A common mistake is cramming too many stars or tiny details around the letters. For casual show-off wear cropped joggers or a midi skirt rolled up to keep the calf visible.
10. Traditional Flash Skull Banner on Ankle
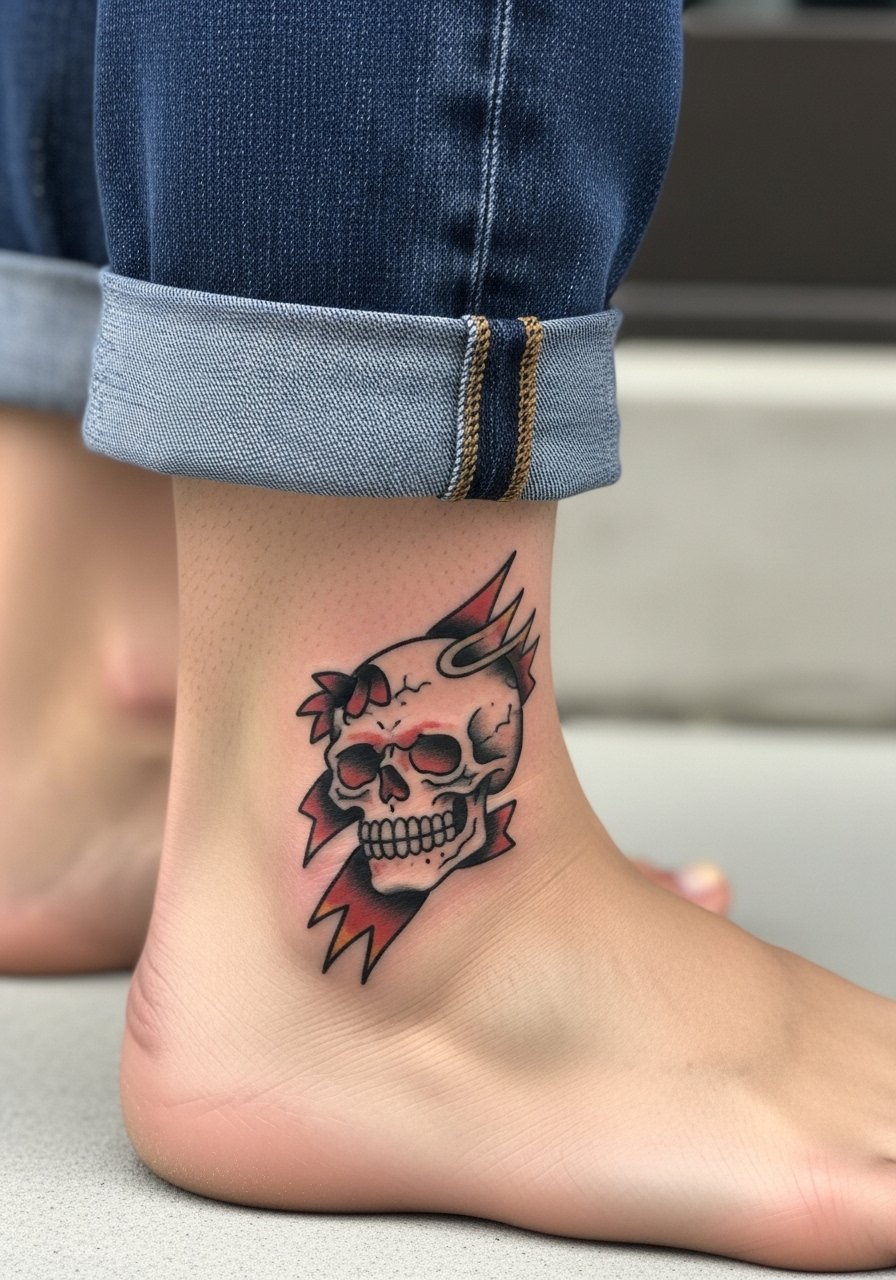
Ankle pieces are small and readable when design elements are bold. Traditional flash banners with red accents hold their shape longer than ultra-fine scripts on the same spot. Tell your artist you want solid fills and clear separation between the banner and skull so the red does not bleed into the black over time. Sessions are quick and pain can spike near bone. For showing it off, roll jeans or wear sandals to keep the ankle framed.
11. Tiny "Born To Die" Behind the Ear
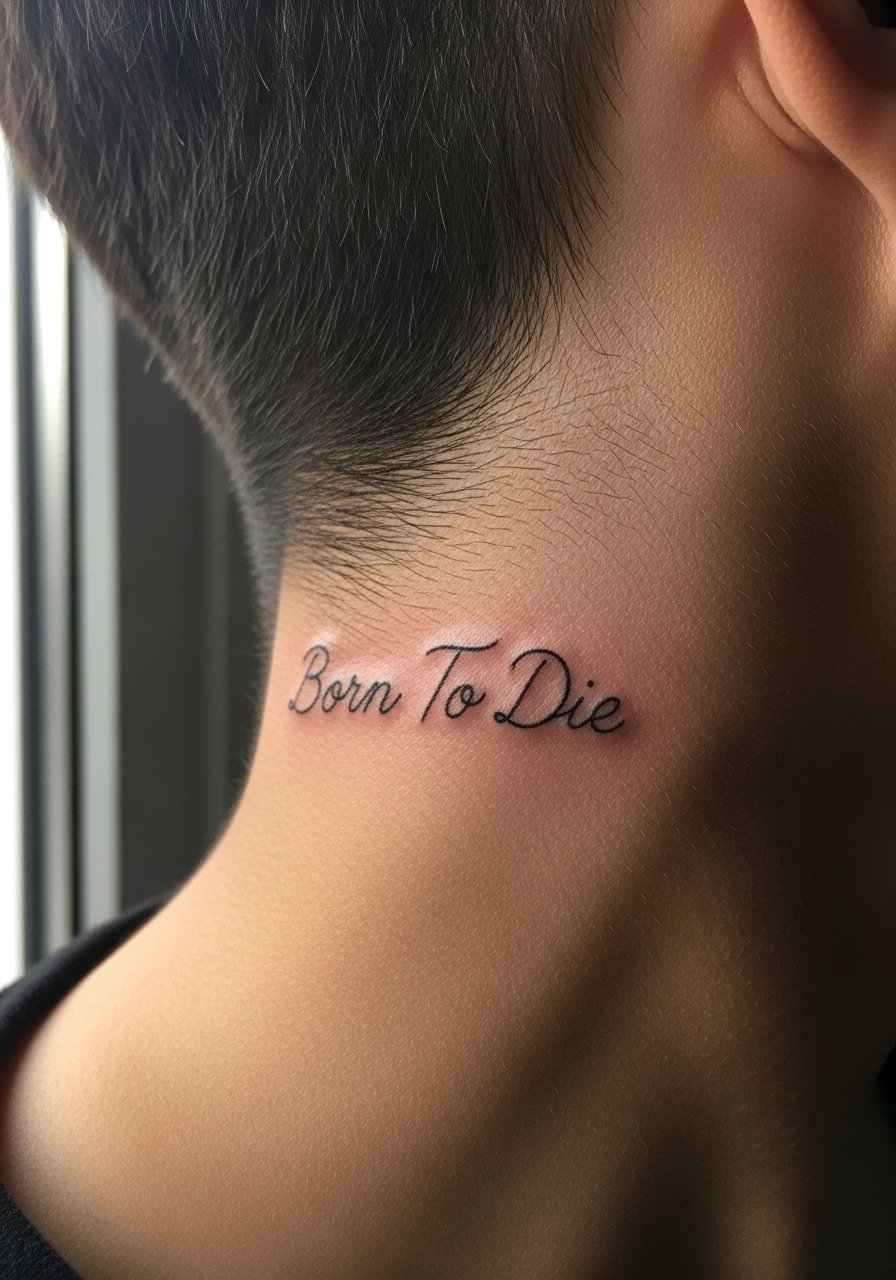
This placement is semi-hidden and personal. Keep the script small and horizontal so the letters do not follow the skin fold and distort. The main mistake is asking for too much line density in a tiny, curved area. Sessions are brief. Also consider job implications because even subtle neck-area work can be noticed when hair is up. For a discreet peek, style hair with a low bun.
12. Geometric Negative-Space Banner on Collarbone
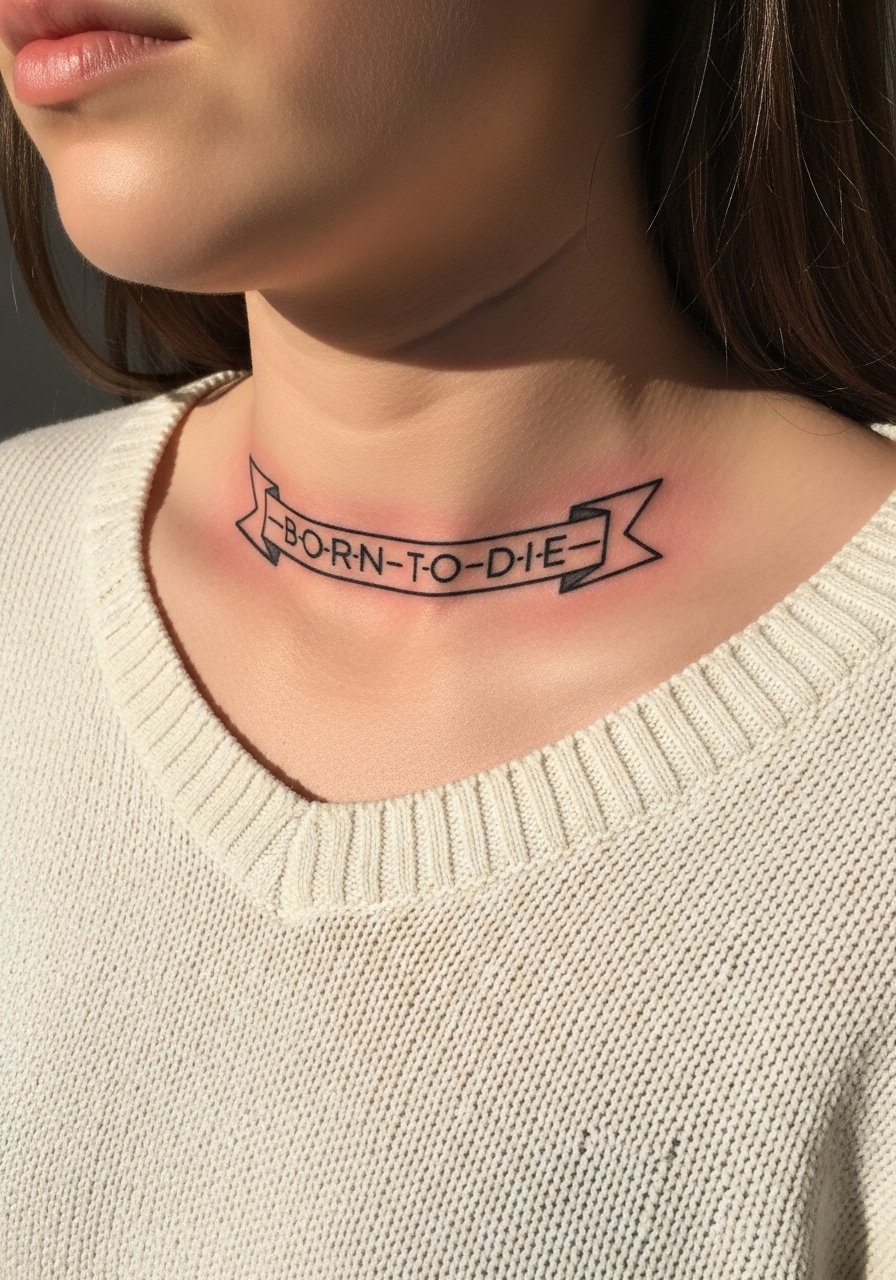
Negative-space geometry creates an optical illusion of fade without relying on pigmentation. The key instruction is to ask for balanced spacing and avoid trying to force ultra-thin parallel lines. This placement ages well with a slightly larger scale. Pain is mild to moderate and sessions are under an hour. Pair with an off shoulder sweater for clean framing.
13. Vines Wrapping Text Down the Spine
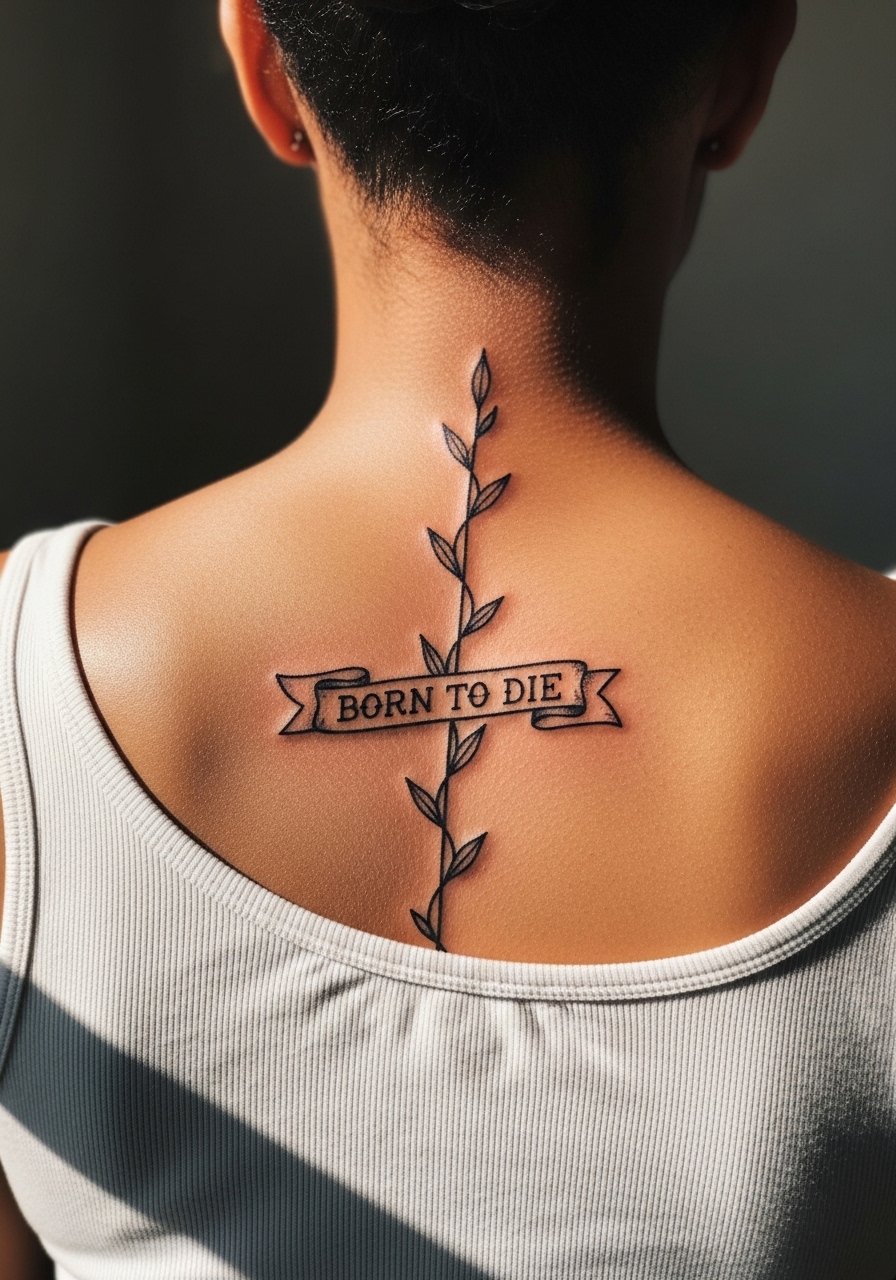
Spine work can be dramatic but requires careful flow across the curve. Vines that wrap asymmetrically prevent lettering from sitting on a single flat plane and reduce distortion when you move. Tell the artist to map the vine following the natural curve so the text remains legible. Pain is higher on the spine but the visual payoff is strong. For outfits that highlight the run, choose open-back tops or halters.
14. Micro Moth Wrist Cluster for a Starter Sleeve Link
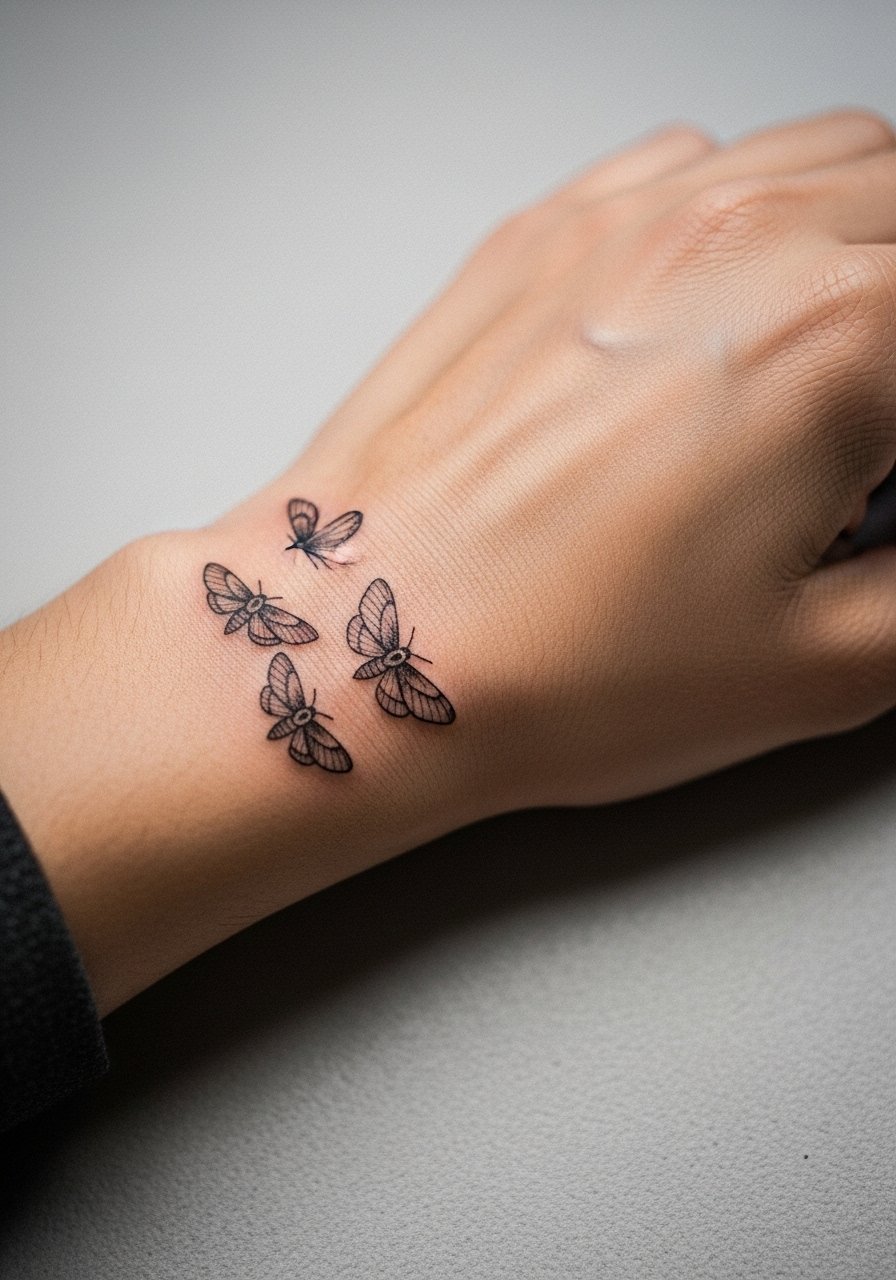
This tiny cluster is a smart starter piece if you plan a sleeve later. Ask for composition that leaves a negative-space path you can connect to future cosmic or floral elements. A common error is packing the area too tightly, which makes future additions awkward. Sessions are short and touch-ups are common after tattoos that get a lot of washing friction. During your appointment wear a neutral tank top so the artist can access the wrist easily.
15. Micro-Realism Date in Roman Numerals on Inner Forearm
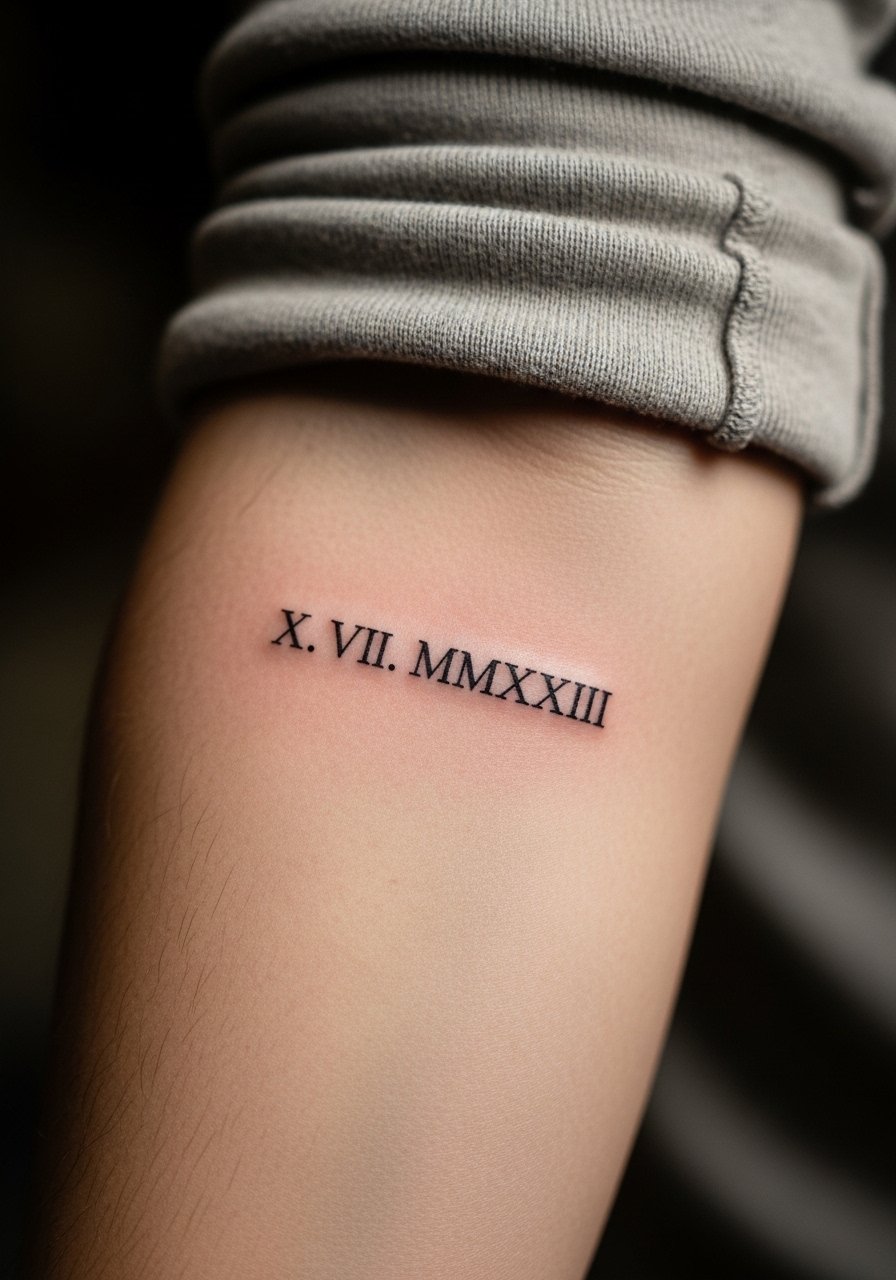
Dates can be memorial or personal markers. For permanence, pick a slightly larger serif weight so the numerals do not blur into each other. Artists sometimes warn that script-style numerals at very small scale can fill in. One to two hours covers this and a six-week touch-up window is typical. Pair with a rolled-cuff chambray for showing the forearm off during casual days.
16. Black and Gray Ribcage Moth for a Bold Centerpiece
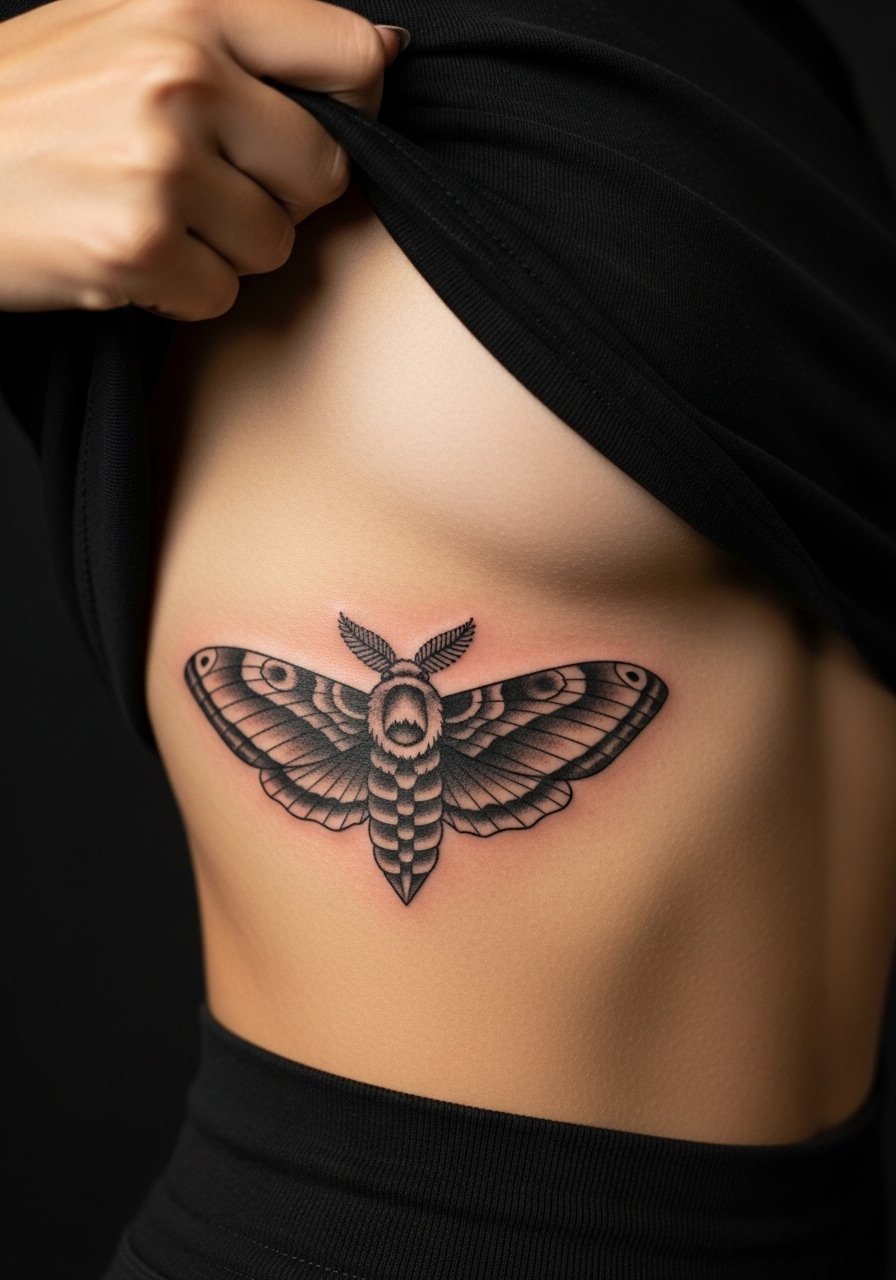
Rib work hurts more than arm placements but can become a dramatic central piece. Artists split on fine line there. One camp says the skin stretch will blur ultra-thin lines within two years. The other camp argues that with precise needle depth and spacing fine work can settle well. Ask where your artist stands and expect a longer session and careful aftercare. Size up the motif slightly to reduce blowout risk.
17. Dotwork Thigh Vines That Hide and Reveal
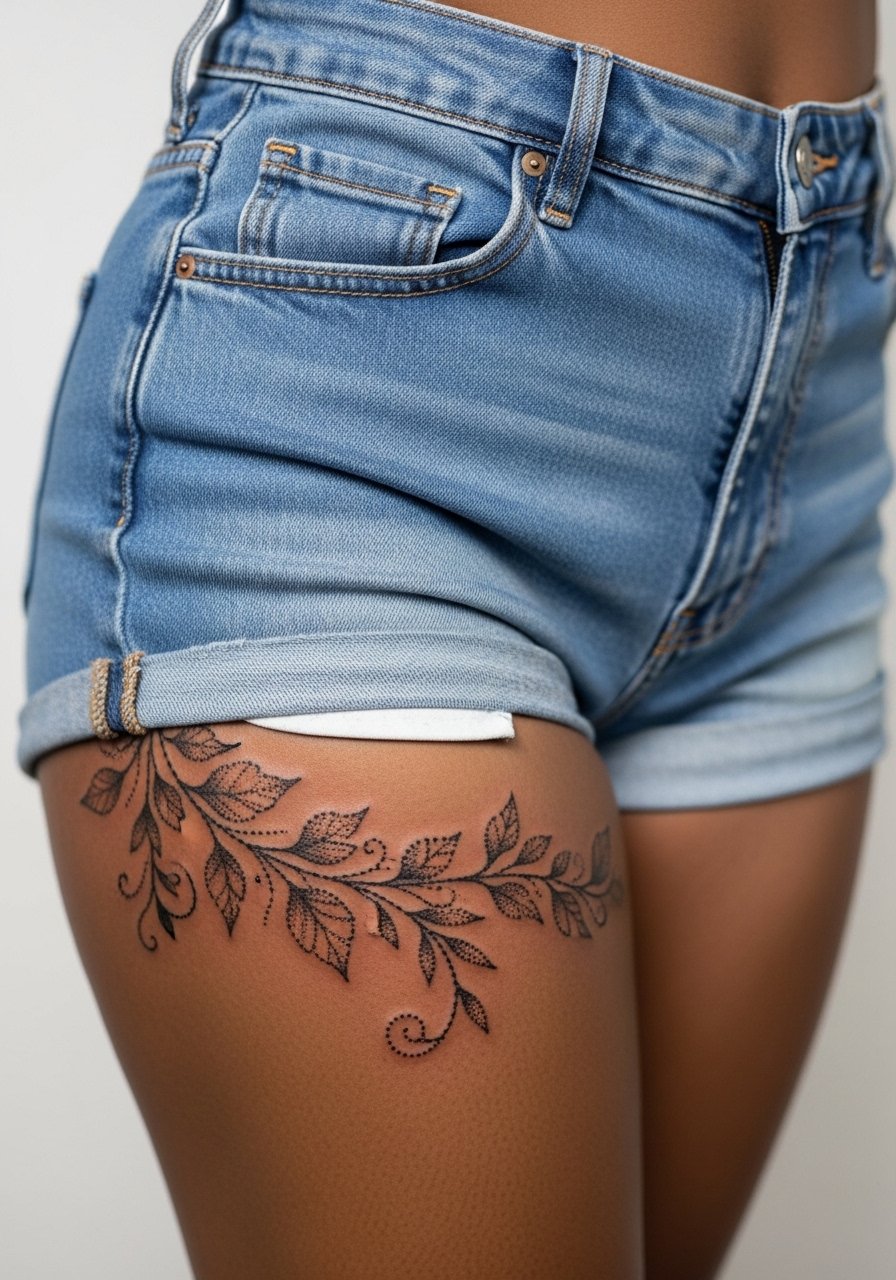
Thigh placements let dotwork breathe and age gracefully if nodes are spaced. For people who fluctuate weight, ask the artist how vines should curve to avoid stretching across stretch-prone zones. Sessions are comfortable and often spread over two sittings for larger vines. Show-off with high-waisted shorts or a swimsuit bottom for beach months.
18. Tiny Skull Ankle Cluster with Negative Space
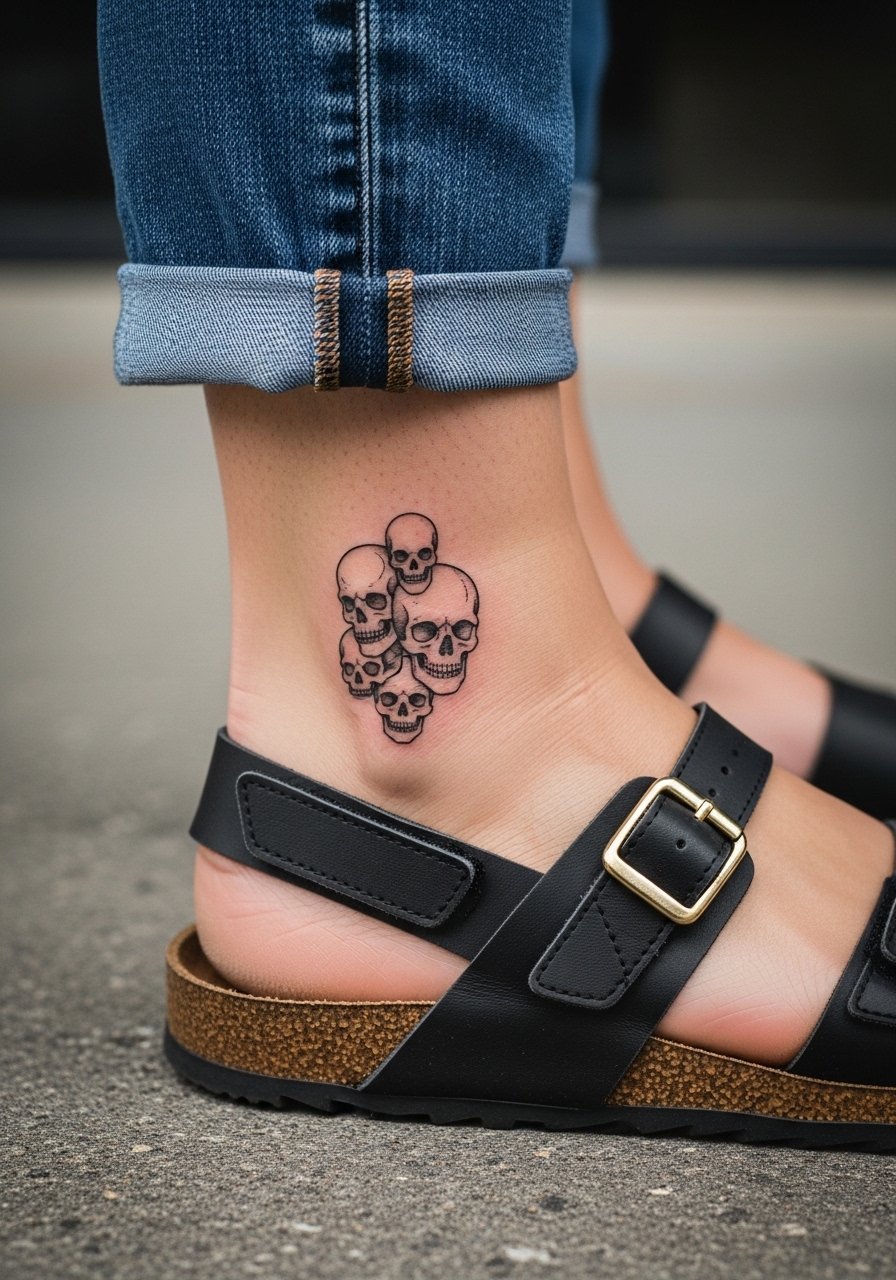
Ankle art sees a lot of abrasion from shoes and socks, so keep designs bold or accept more frequent touch-ups. Negative-space skulls create contrast without relying on tiny black dots that can fade under friction. One session is standard for a 3-inch cluster. For weekend wear, pair with cropped joggers and sandals.
19. Ornamental Mandala Throat Placement Near Collarbone
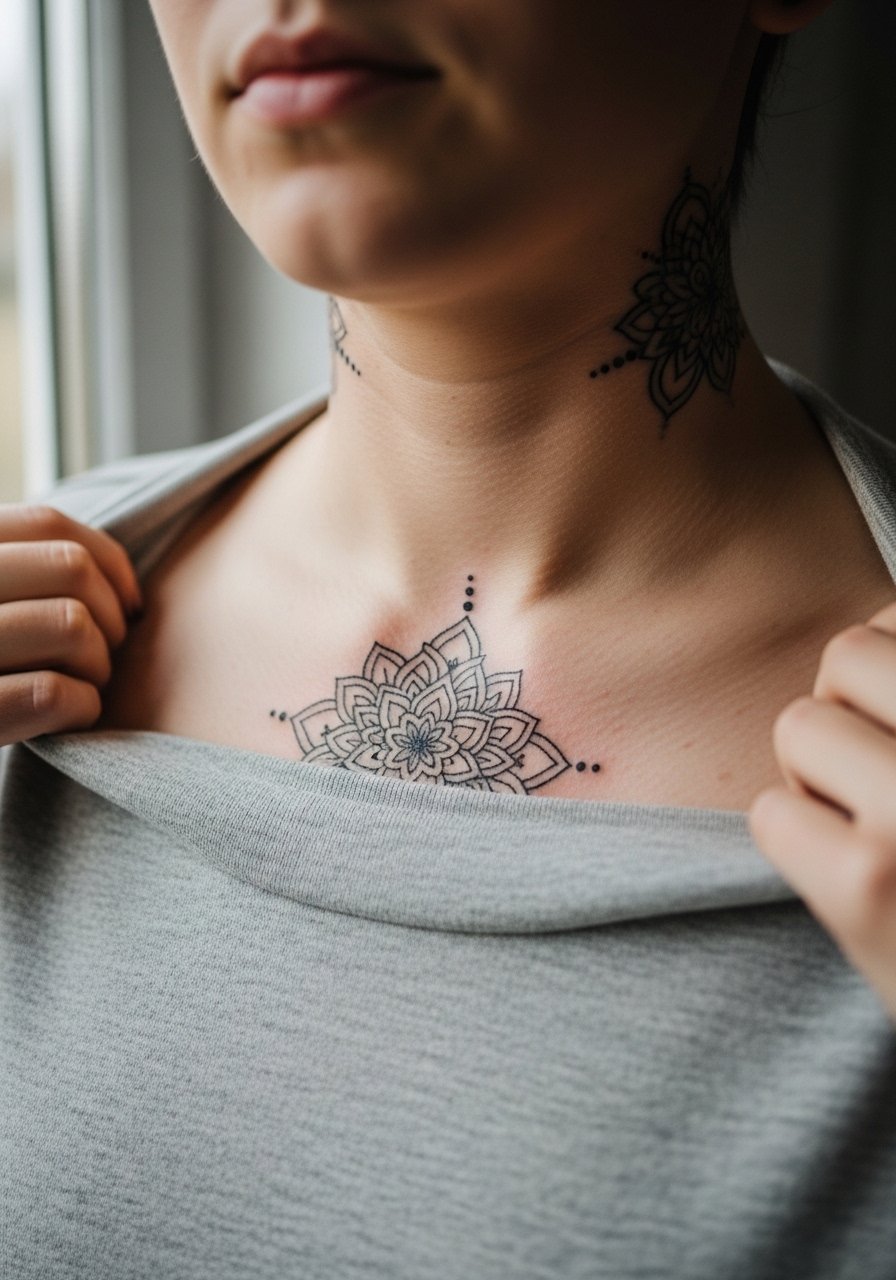
Neck and upper chest placements require extra thought about visibility and career contexts. Keep the mandala slightly offset from the center so necklaces do not rub directly against fresh work. Pain is moderate and sessions are brief. For showing it off layer with a thin chain pendant instead of heavy chokers to avoid rubbing.
20. Watercolor Flower Breaking into a Skull on Shoulder
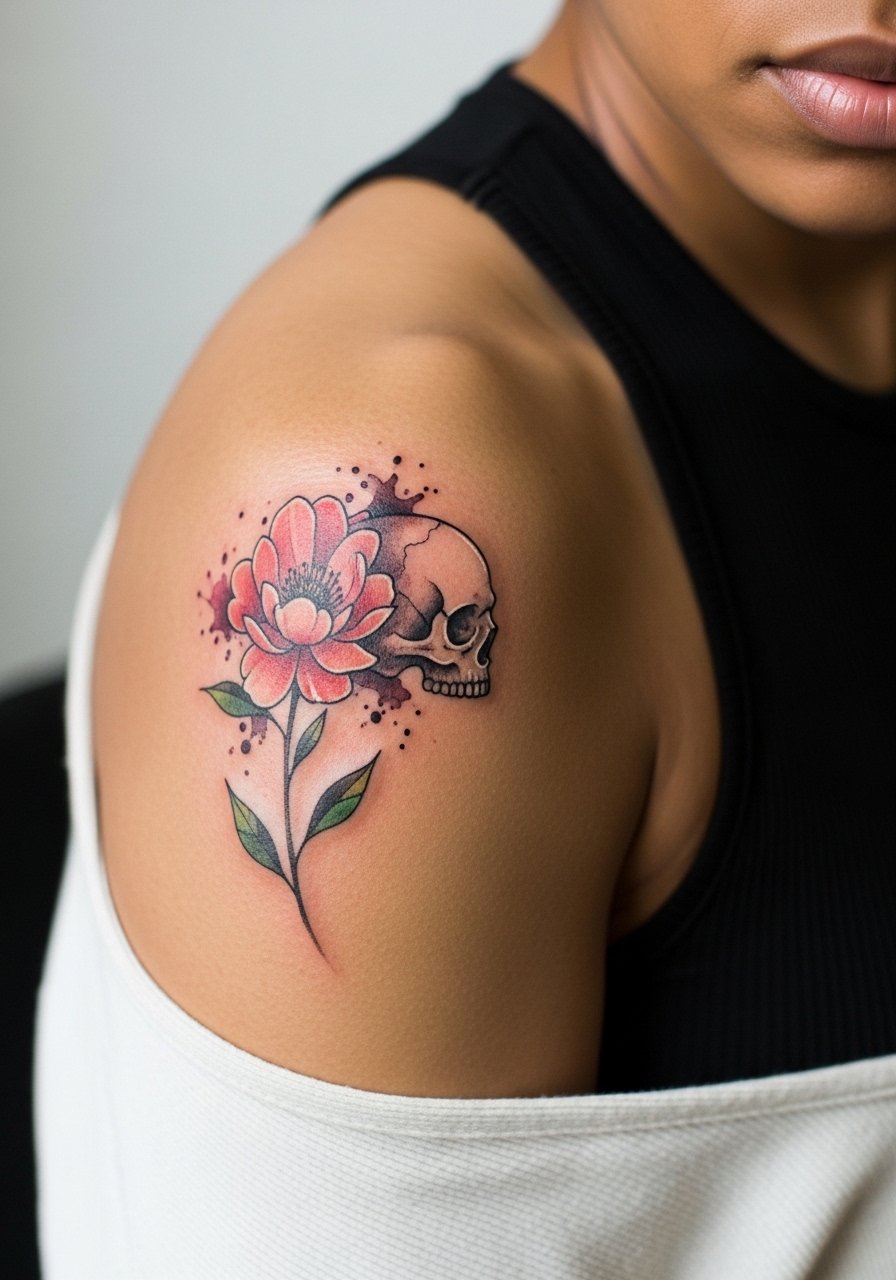
Watercolor on shoulders is seasonal because sun can wash pigments. For better longevity ask for subtle black outlines under the wash to maintain silhouette as colors soften. Sessions usually take a couple hours for a 4-inch piece. Wear a loose tank top on session day so the area is reachable without irritation.
21. Micro Script Behind Collarbone with Tiny Stippling
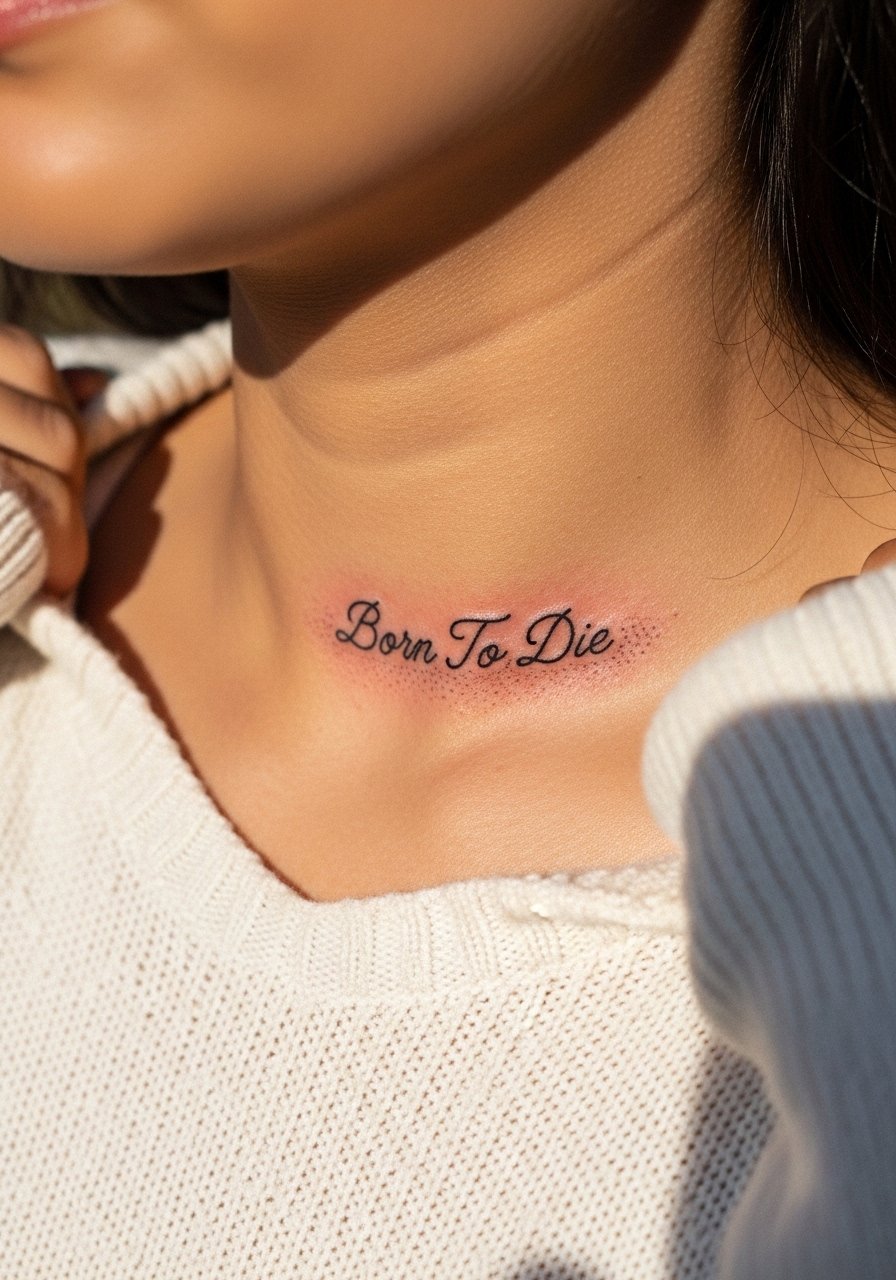
A touch of stipple shading gives a micro script context without overpowering it. Ask for a gentle gradation and clear spacing between letters to avoid merging over time. Pain is mild and a single short session usually suffices. For display, pair with a thin chain pendant necklace so the script sits just above the jewelry line.
22. Ribcage Script with Vines for Asymmetry
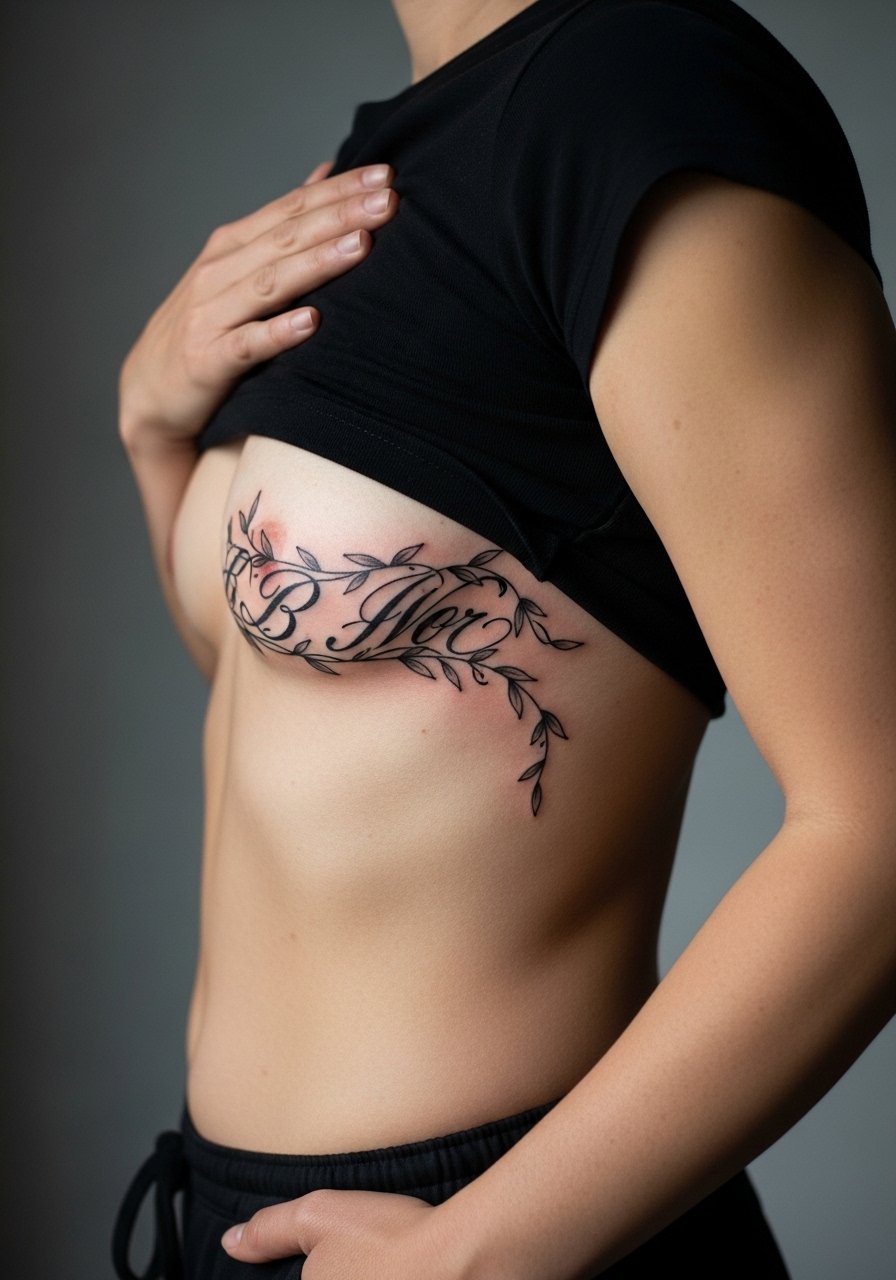
Ribcage curves benefit from vines that follow anatomy, which reduces distortion when you twist. The mistake is forcing perfectly straight text along a curved surface. Expect higher pain and plan for a longer session with a committed aftercare window. Ask the artist about spacing so the letters do not merge as the skin settles.
23. Micro-Realism Rose on the Inner Wrist for Low-Key Impact
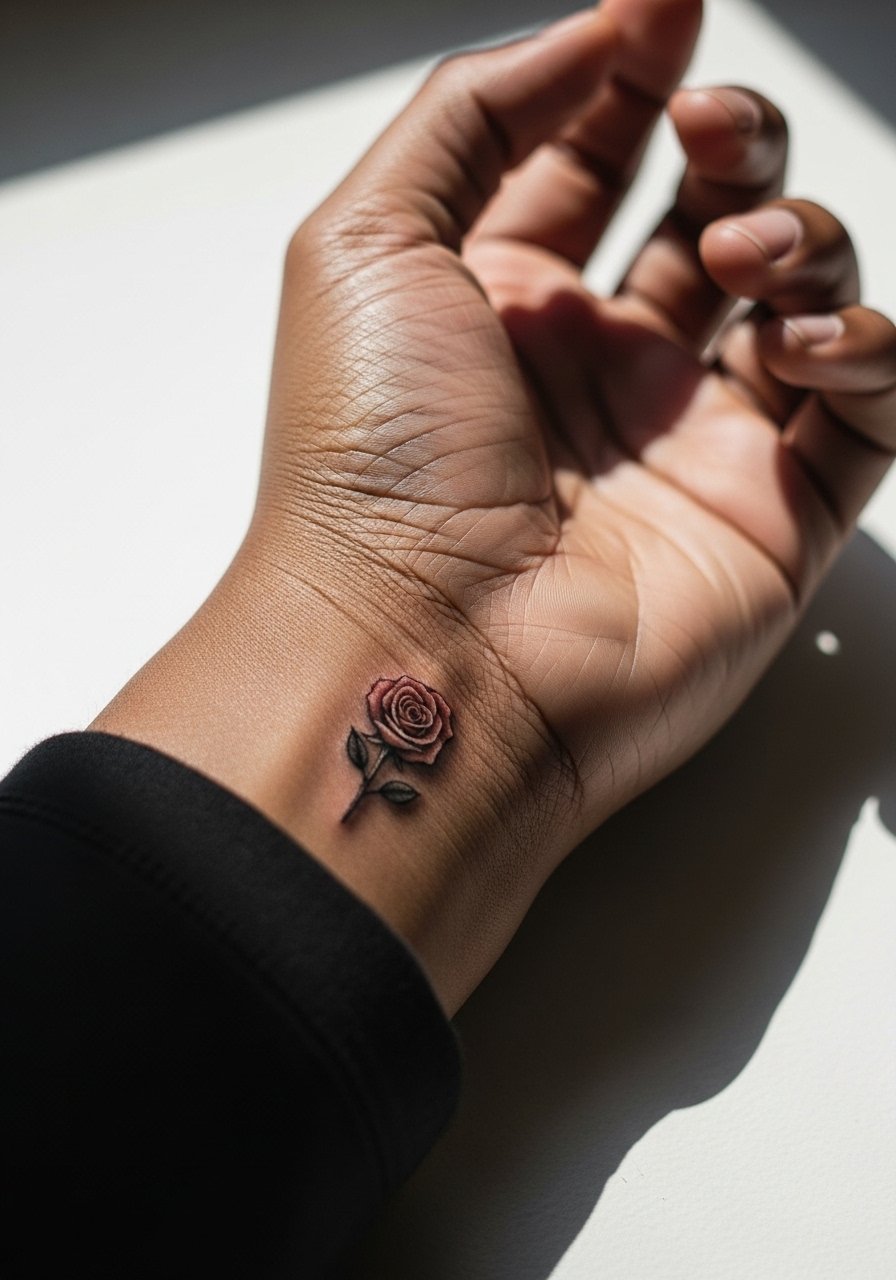
Inner wrist micro-roses look delicate but need slightly bolder contrast than you might assume. Ask the artist to maintain soft shading but keep the outer contour a touch stronger to prevent softening in heavy-use areas. Sessions are brief and touch-ups are common within the first two years. Styling-wise a thin silver cuff on the opposite arm balances without crowding the wrist.
24. Blackwork Crescent Moon with Script on Calf
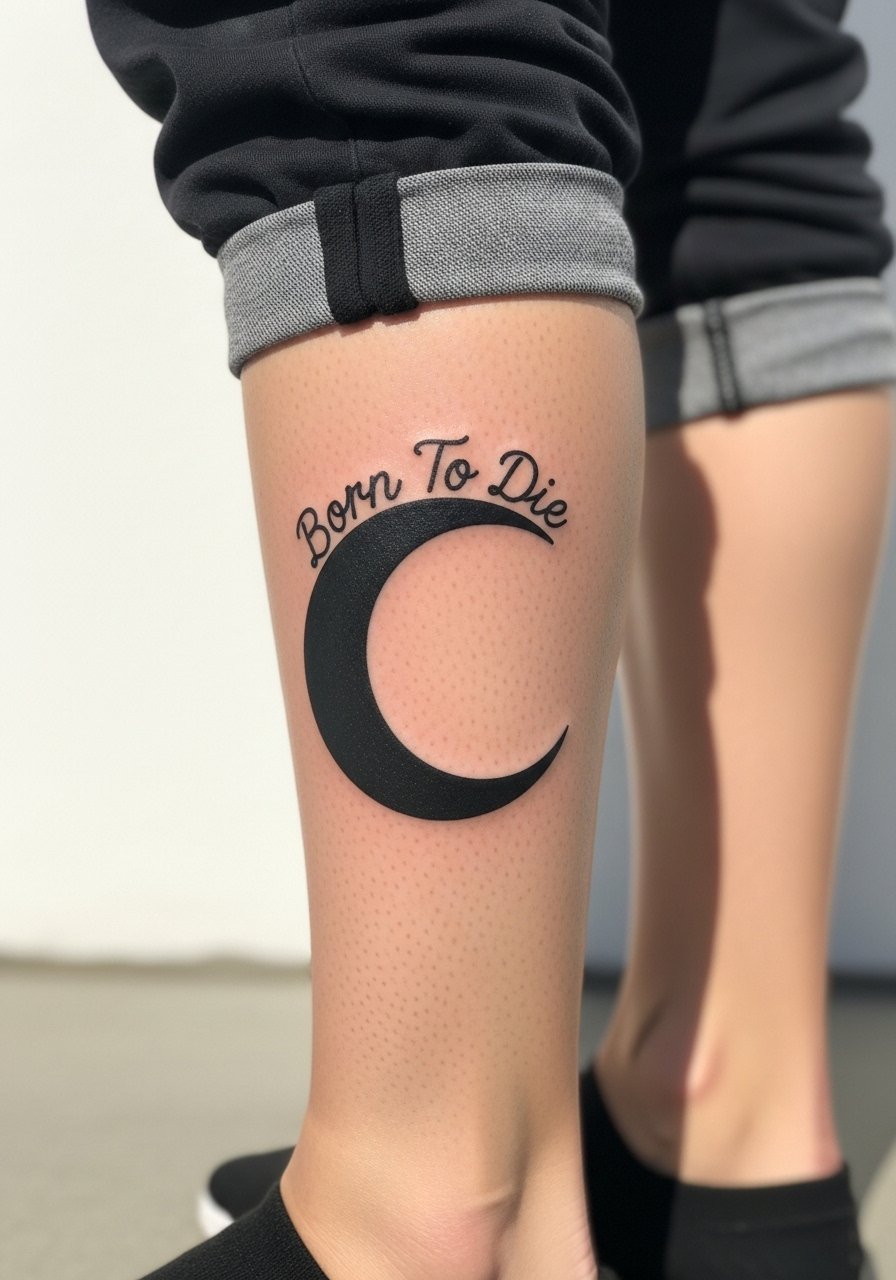
High-contrast blackwork resists sun fading better than pale washes. For calf pieces pick heavy saturation and clear negative space between moon and script to prevent edge softening. Sessions can be in two sittings if the moon is large. Pair with ankle boots or rolled pants for urban styling.
25. Tiny Behind-Ear Moth with Subtle Dot Accent
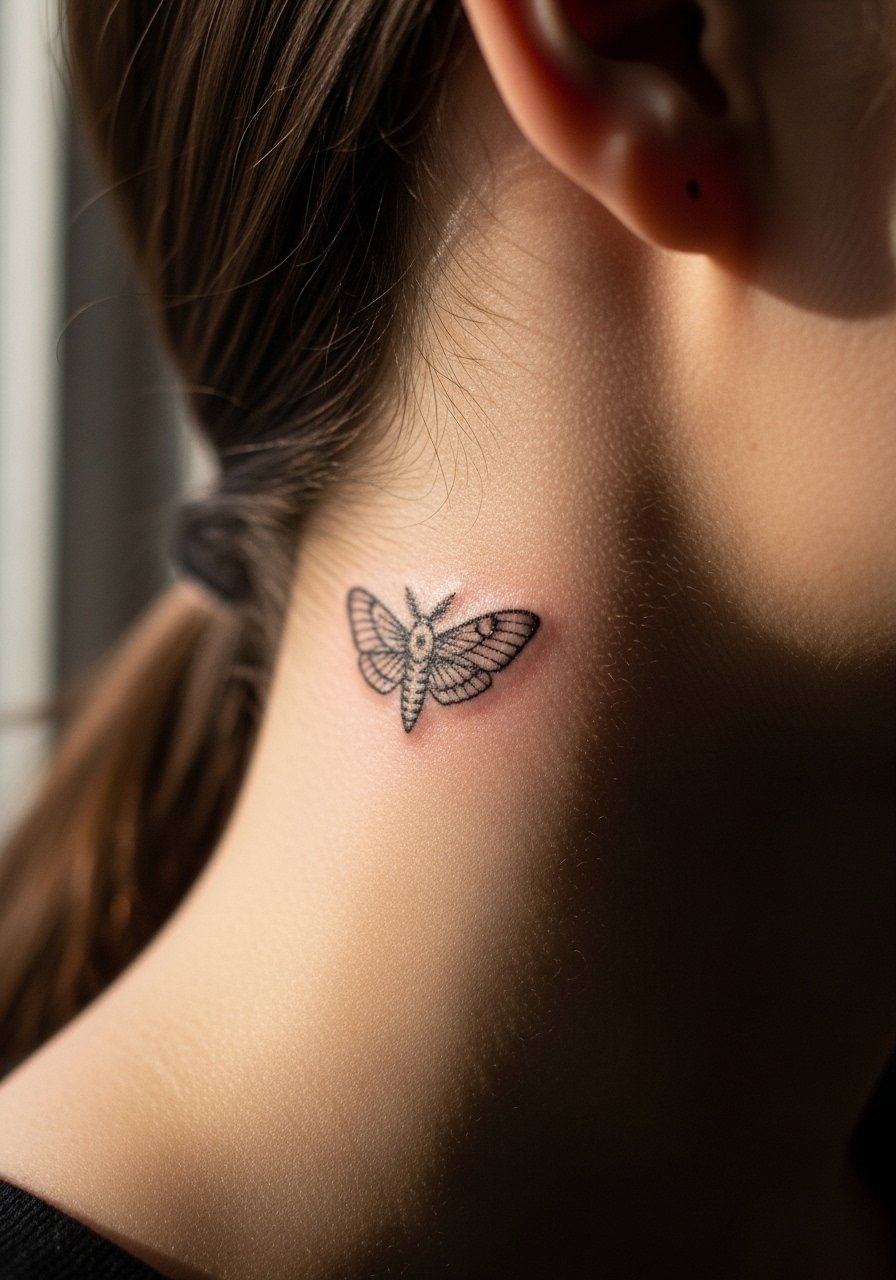
Behind-ear tattoos are discreet and intimate. Keep details minimal and horizontal so hair does not obscure the composition. The area is sensitive but session time is short. Remember to check how your hairstyle will affect visibility and healing.
26. Spine-Aligned Script with Floral Anchors
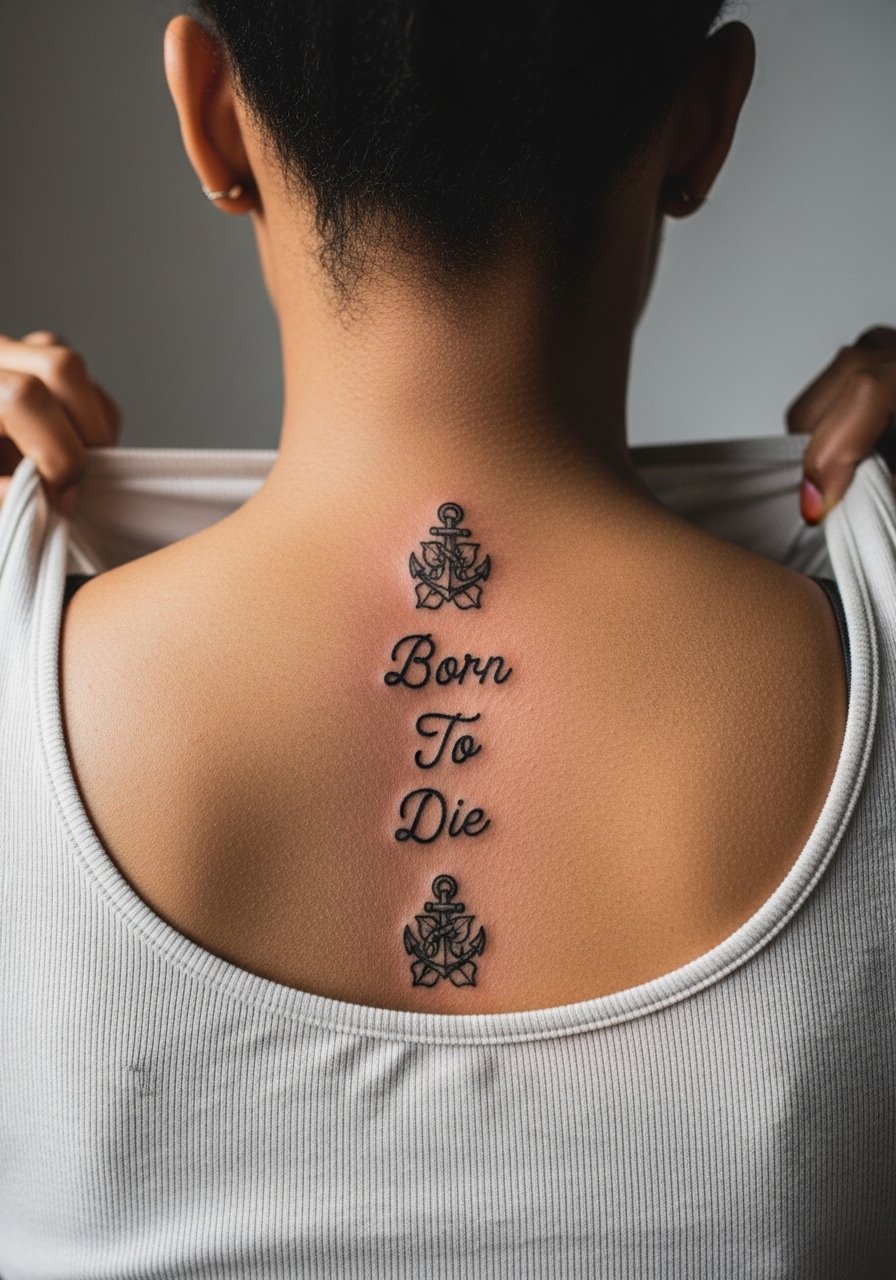
A vertical script down the spine has strong visual impact when balanced with small floral anchors at the ends. Ask for slightly thicker lettering so the vertical flow does not thin out with healing. Pain is above average on the spine and sessions may be split. For wardrobe choose open-back dresses or halter tops to highlight the run.
27. Patchwork Starter Moth That Links to a Future Sleeve
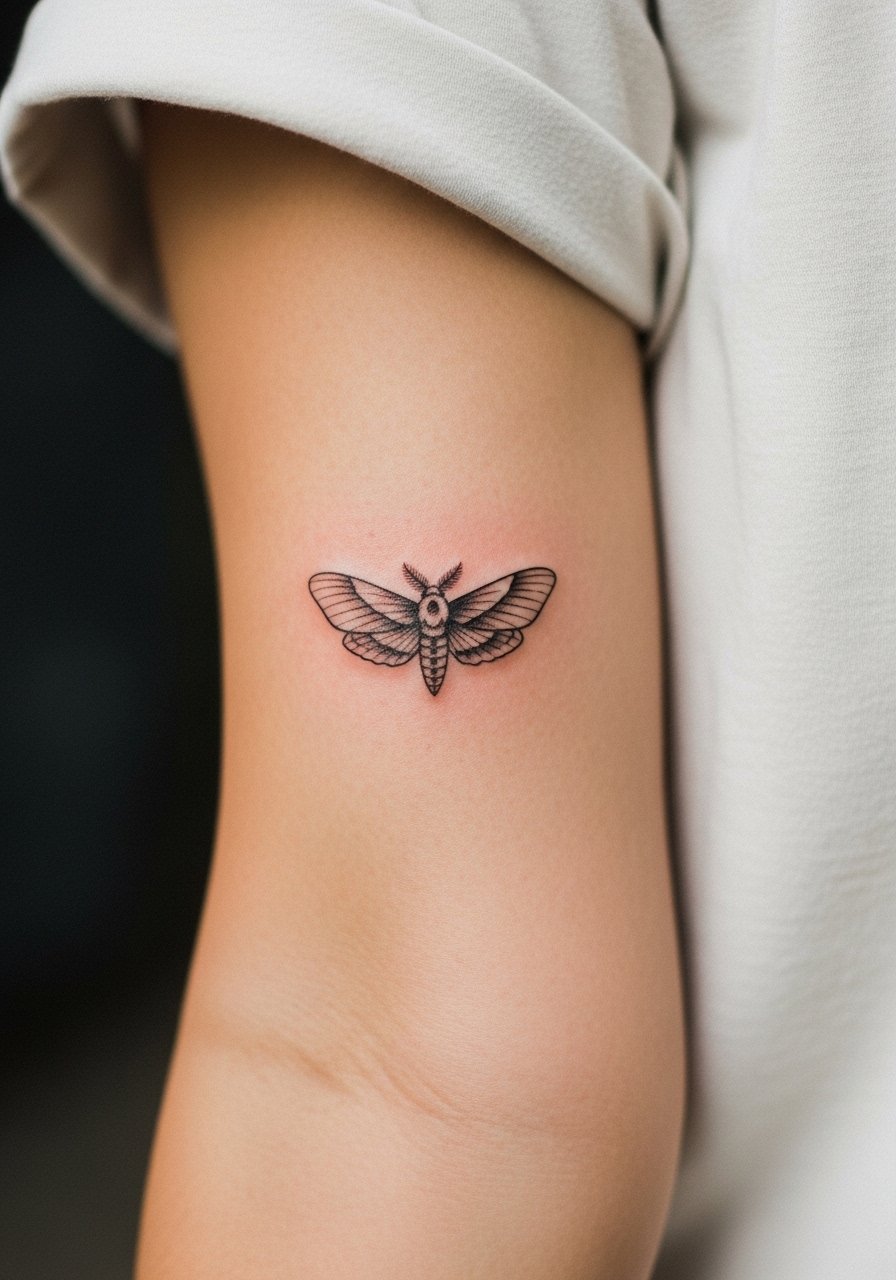
If you plan a sleeve down the line, treat this moth as the seed. Ask your artist to leave a compositional path for future cosmic or floral elements so additions feel natural rather than pasted on. The outer forearm is forgiving and the moth can be scaled to match future pieces. Sessions are short and this approach helps avoid regret when you expand work later. For showing it off roll a fitted tee to mid-forearm.
Frequently Asked Questions
Q: Will a fine line "Born To Die" on the wrist blur faster than one on the forearm?
A: Yes, fine line on the wrist tends to blur sooner because the area gets more friction and washing. If you love the wrist look size up the line weight slightly and plan a touch-up within 12 to 18 months. For better longevity pick inner forearm placement or a thicker single-needle line.
Q: Does watercolor need different aftercare than blackwork for shoulder or thigh pieces?
A: Watercolor can be more sensitive to sun and heavy scabbing, so many people use lighter products and keep the area out of direct sun for longer. Blackwork tolerates a bit more exposure, though sun protection always helps. Discuss whether the artist prefers a short protective film or a dry-heal approach for the specific piece.
Q: How do I find artists who do micro-realism or dotwork without naming people?
A: Search hashtags like #CuteBornToDieTattoo plus the style tag and your city on Instagram. Tattoodo filters for style, and Booksy or convention calendars help locate guest spots. Reddit threads asking for "[style] [city]" often surface recent client photos that reveal real healed work.
Q: Is ribcage placement worth the pain for a small "Born To Die" design?
A: The ribcage is higher on the pain chart but it creates a private, dramatic placement that can feel worth it for many. If you worry, start with a small test piece elsewhere to build tolerance. Expect more aftercare time and a slower session pace.
Q: Will blackwork read well on darker skin tones for a "Born To Die" text piece?
A: Thick outlines and solid saturation tend to read best on darker skin tones. Artists often recommend bolder line weight and selective white highlights for photo contrast. If possible, review healed photos on similar skin tones before booking.
Q: What should I wear to a collarbone session and how should I style the piece after it heals?
A: Wear a strapless top or a wide-neck shirt that you can pull slightly aside for easy access. After healing, an off shoulder sweater or thin choker pairs nicely with collarbone scripts without rubbing the area too much.
