
Fine line Medusa motifs dominate saved boards right now, but trends and longevity often pull in different directions. Fresh, ultra-detailed portraits look incredible in photos, yet the same pieces can soften faster on high-movement spots. Pick a design that reads today and still makes sense in five years. Below are 21 feminine takes on Medusa, each with what to ask your artist, how it ages, and wardrobe notes to show it off.
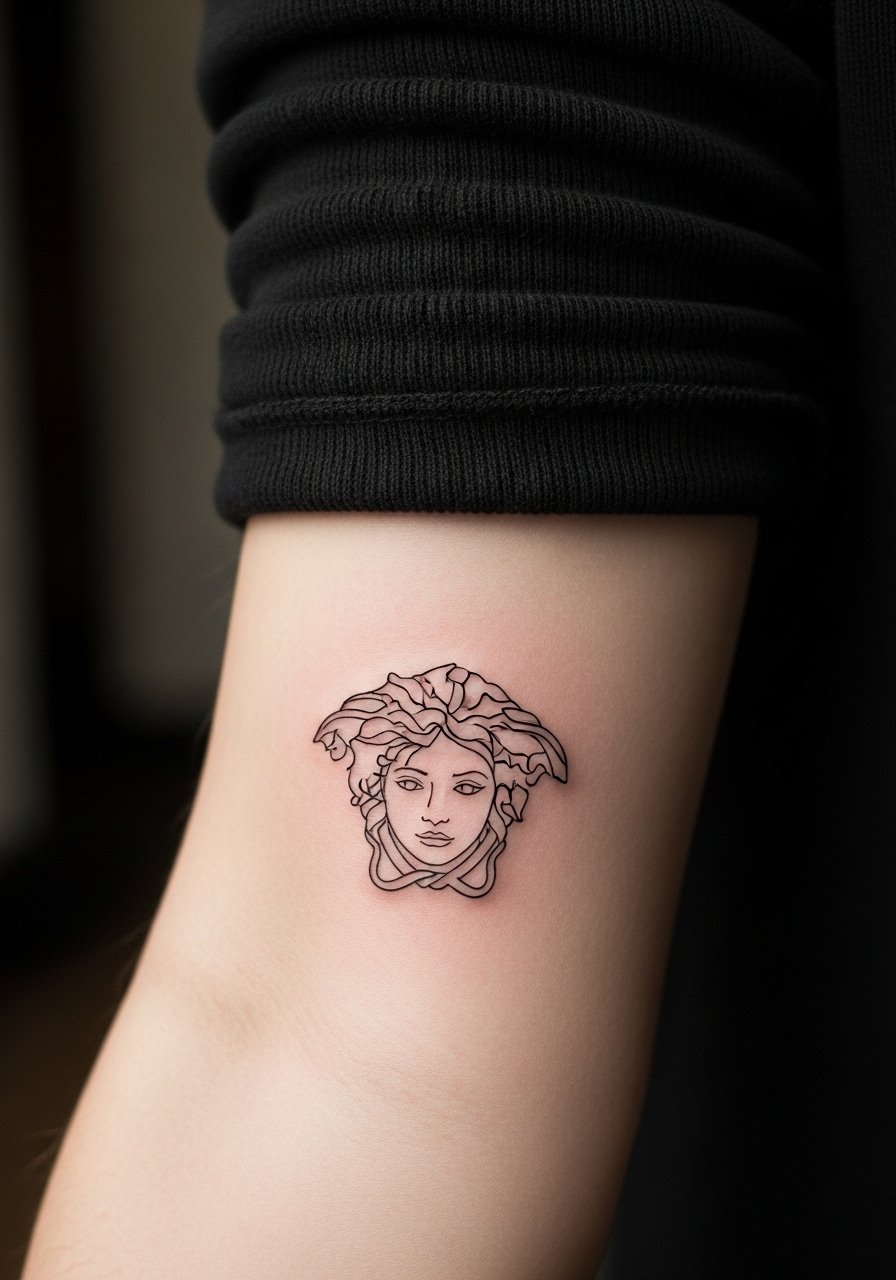
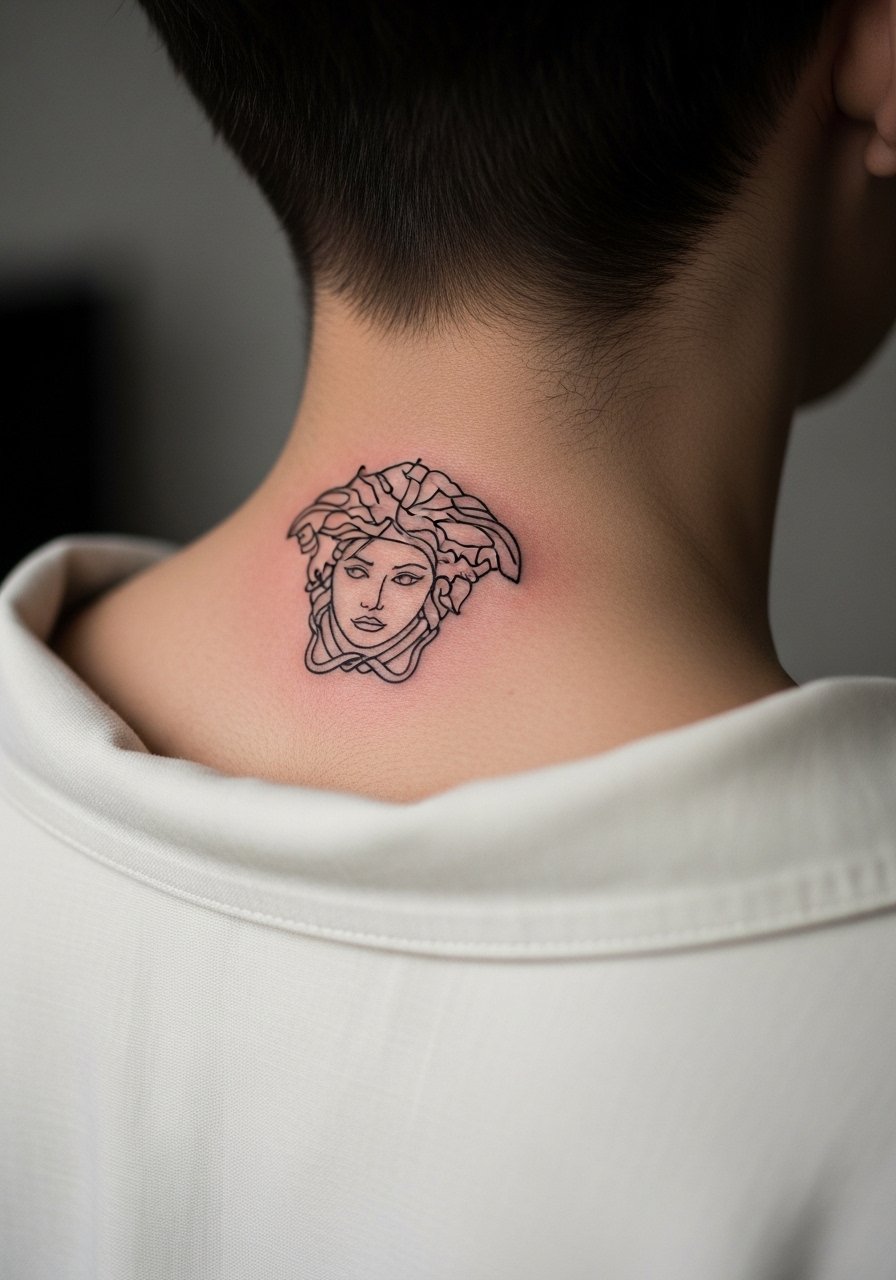
1. Fine Line Medusa on Inner Forearm
I've seen fine line Medusa forearms hold up for years when the stencil gives the hair snakes room to breathe. Ask your artist for slightly heavier primary contours around the face and lighter hair detail so the main features stay readable as the hair softens. Common mistake is packing tiny details too close, which leads to merging after two years. Pain is mild and sessions are short. For showing it off, roll up sleeves and wear a loose button-down shirt that frames the forearm without covering the piece.
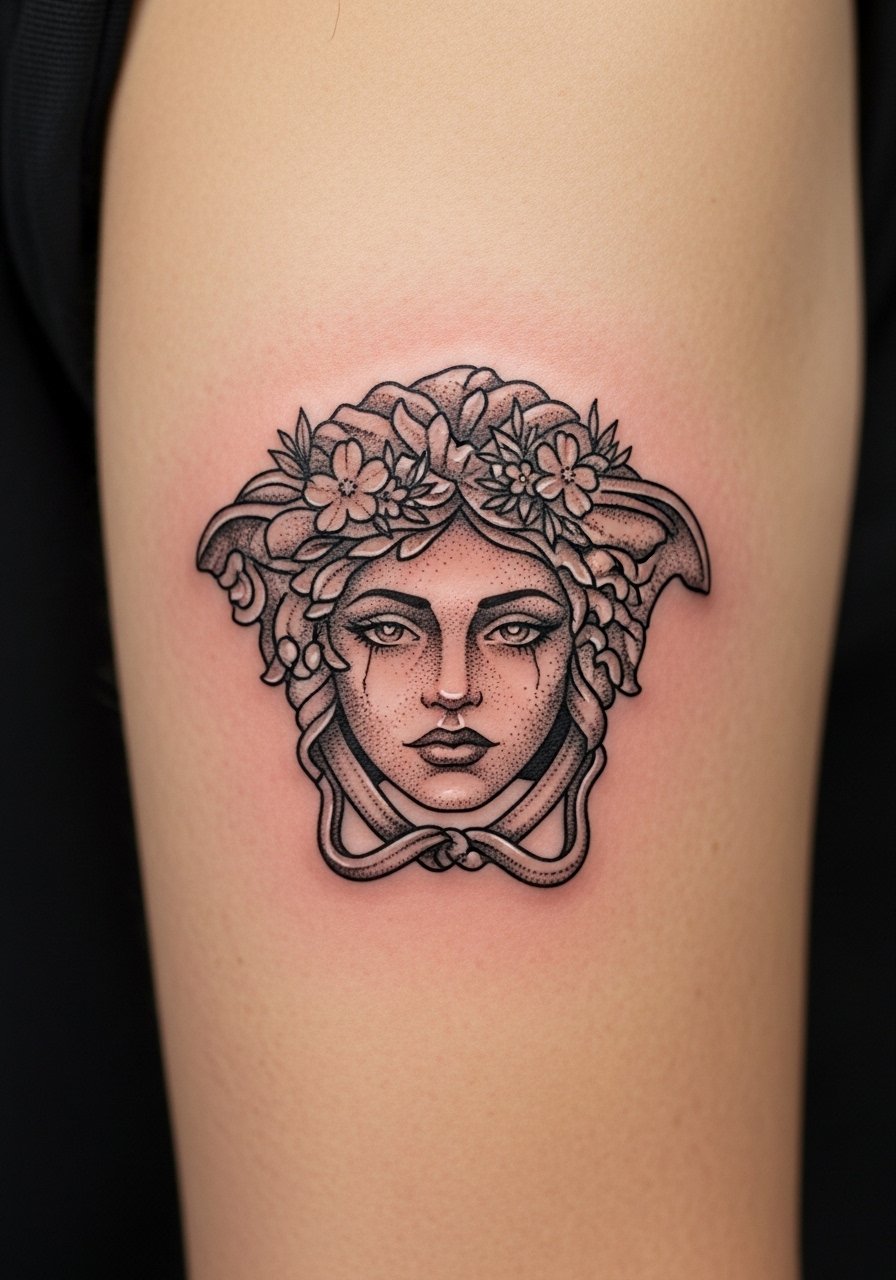
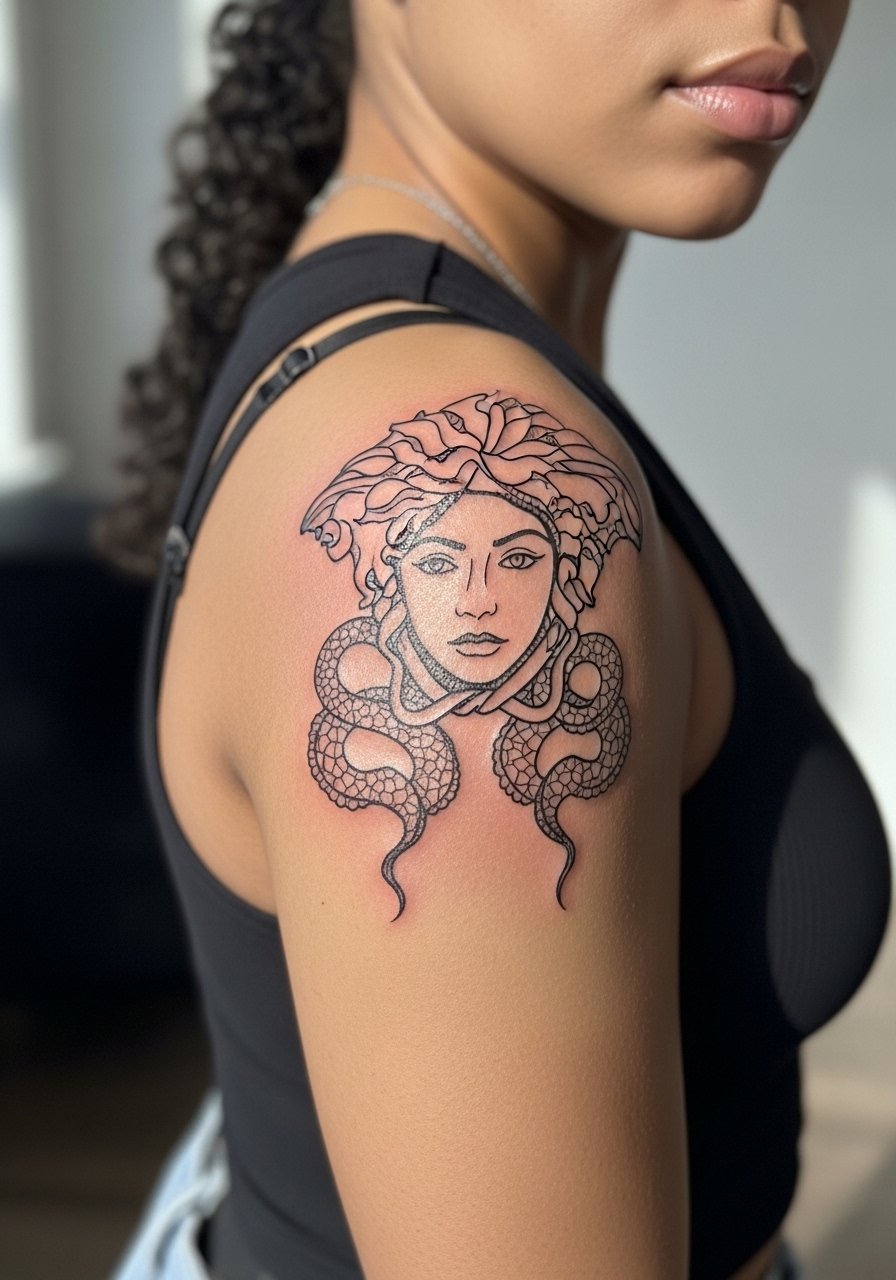
2. Micro-Realism Medusa with Floral Crown on Upper Arm
This version uses tiny shading and stipple shading to make Medusa feel soft and feminine. In consultation, bring both portrait and botanical references and ask for a tester stencil to check face scale on the arm. Sessions run longer because of micro shading, and touch-ups are common at year two. Expect medium pain. For evenings out, a sleeveless wrap dress or a fitted tank keeps attention on the upper arm without competing with necklaces.
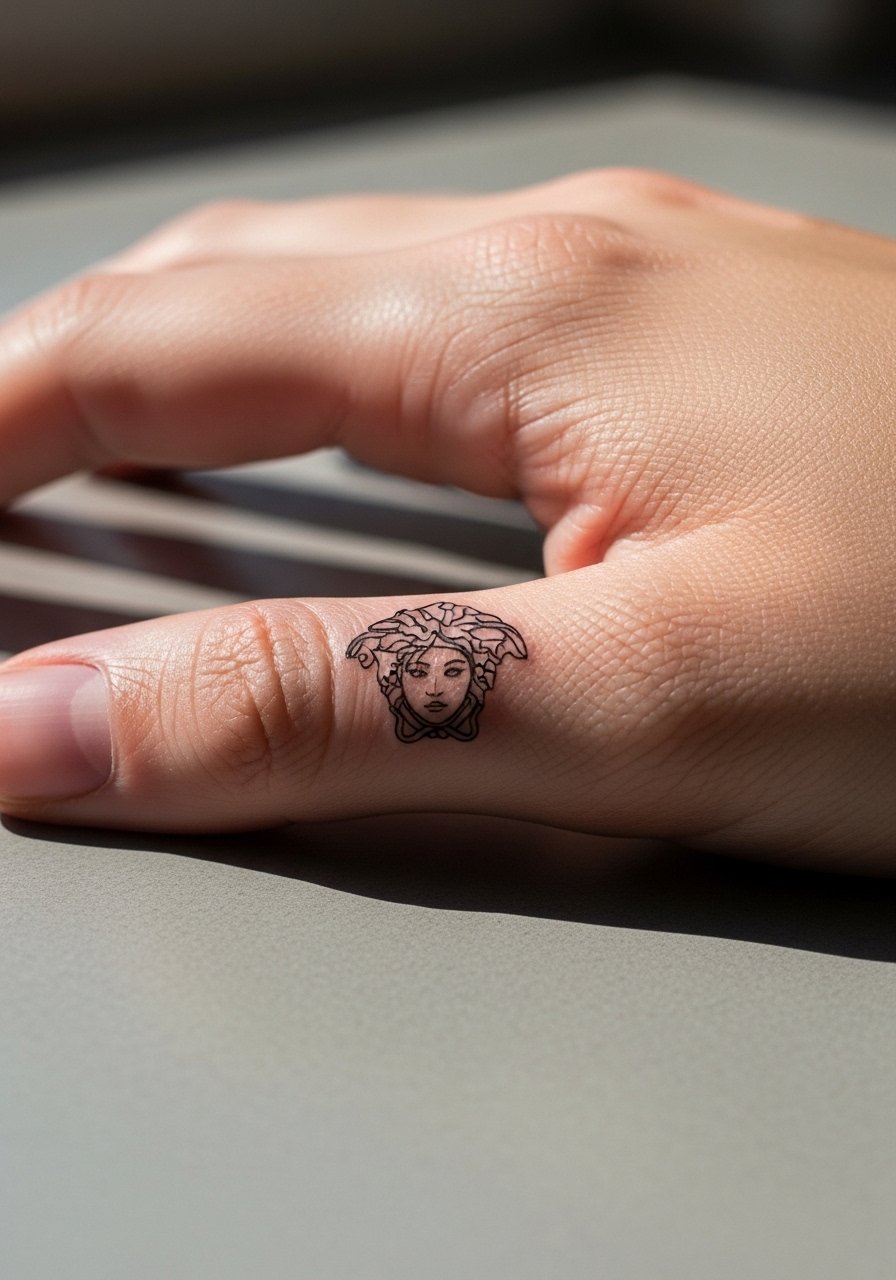
3. Tiny Medusa Finger Accent
Finger tattoos age differently because of constant washing and friction. If you want a tiny Medusa on a side finger, ask for single-needle outlines with open negative space so the design can soften and still read. The mistake is requesting the face too small. Expect quick sessions and higher touch-up likelihood at year one to three. For session wear, slip on thin gloves after leaving the shop or keep the area dry. A delicate ring or stacking midi rings frames the tattoo when you want it to show.
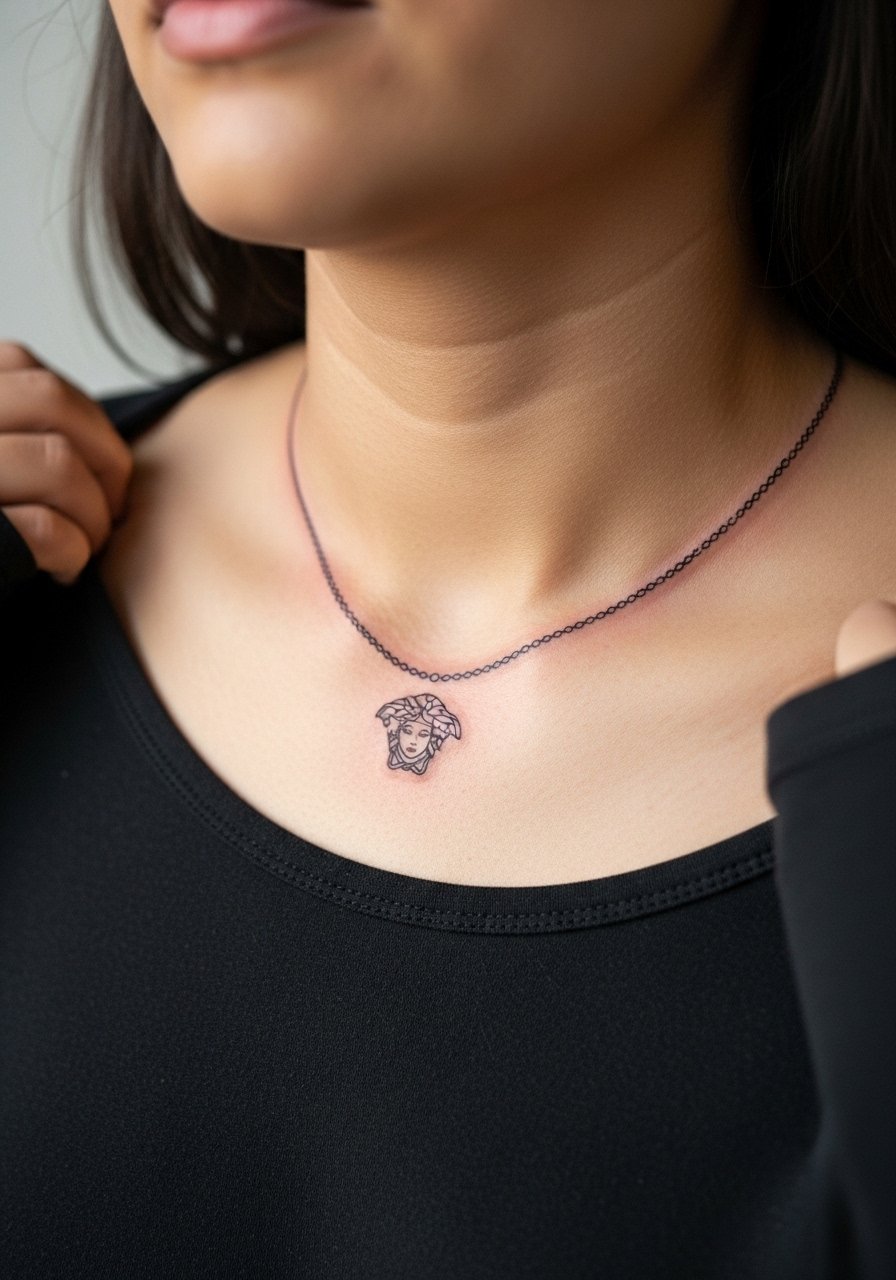
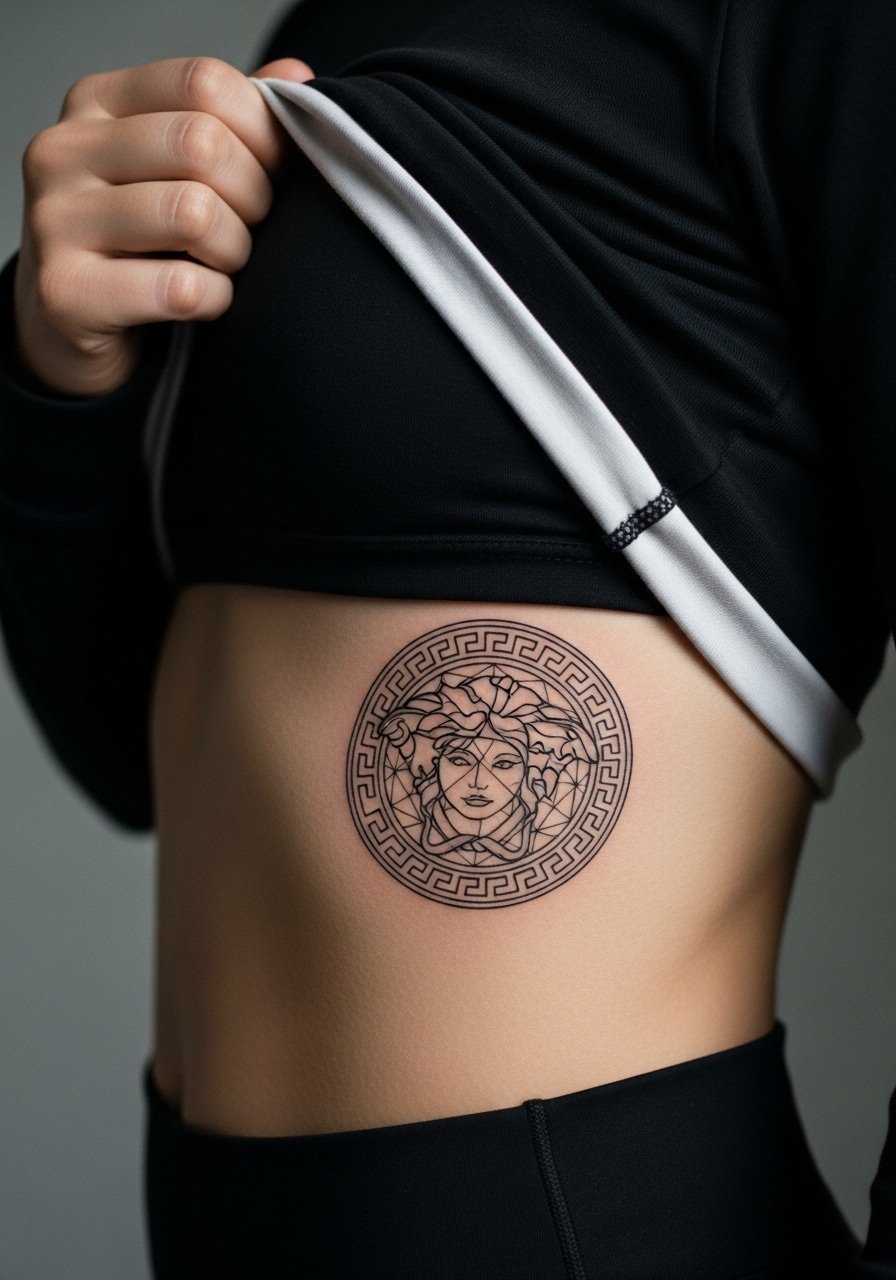
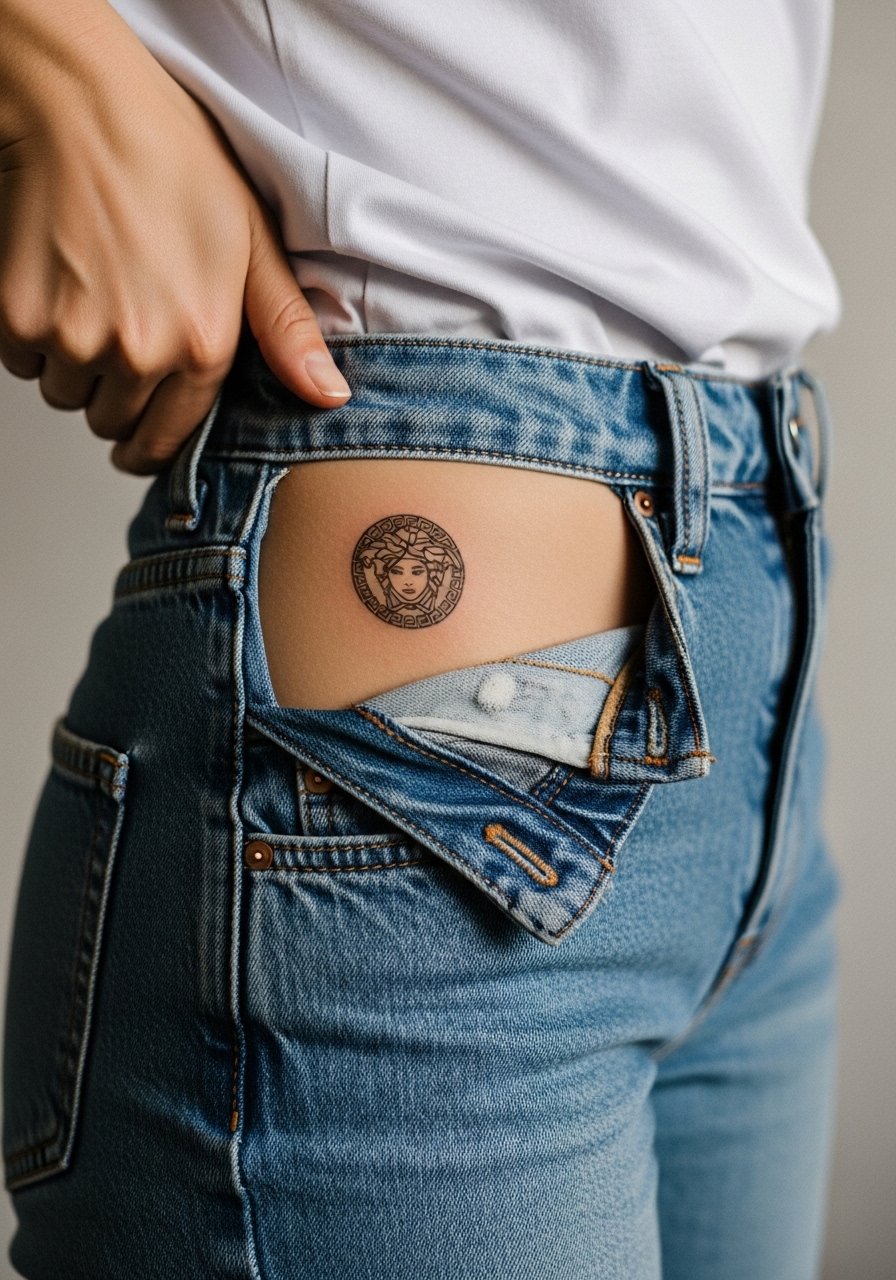
4. Collarbone Medusa Necklace Style
A collarbone placement reads like jewelry when the design follows the bone and centers the face. For sensitive chest areas, request a stencil that sits just above the collarbone so movement does not blur the face. Artists debate whether fine line here holds better with deeper placement or with slight spacing. One camp warns that shallow work fades fast. The other camp says precise depth and spacing keep details intact. Wear an open-neck blouse to show the piece, and during the session choose a wide-neck shirt you can gently pull aside.
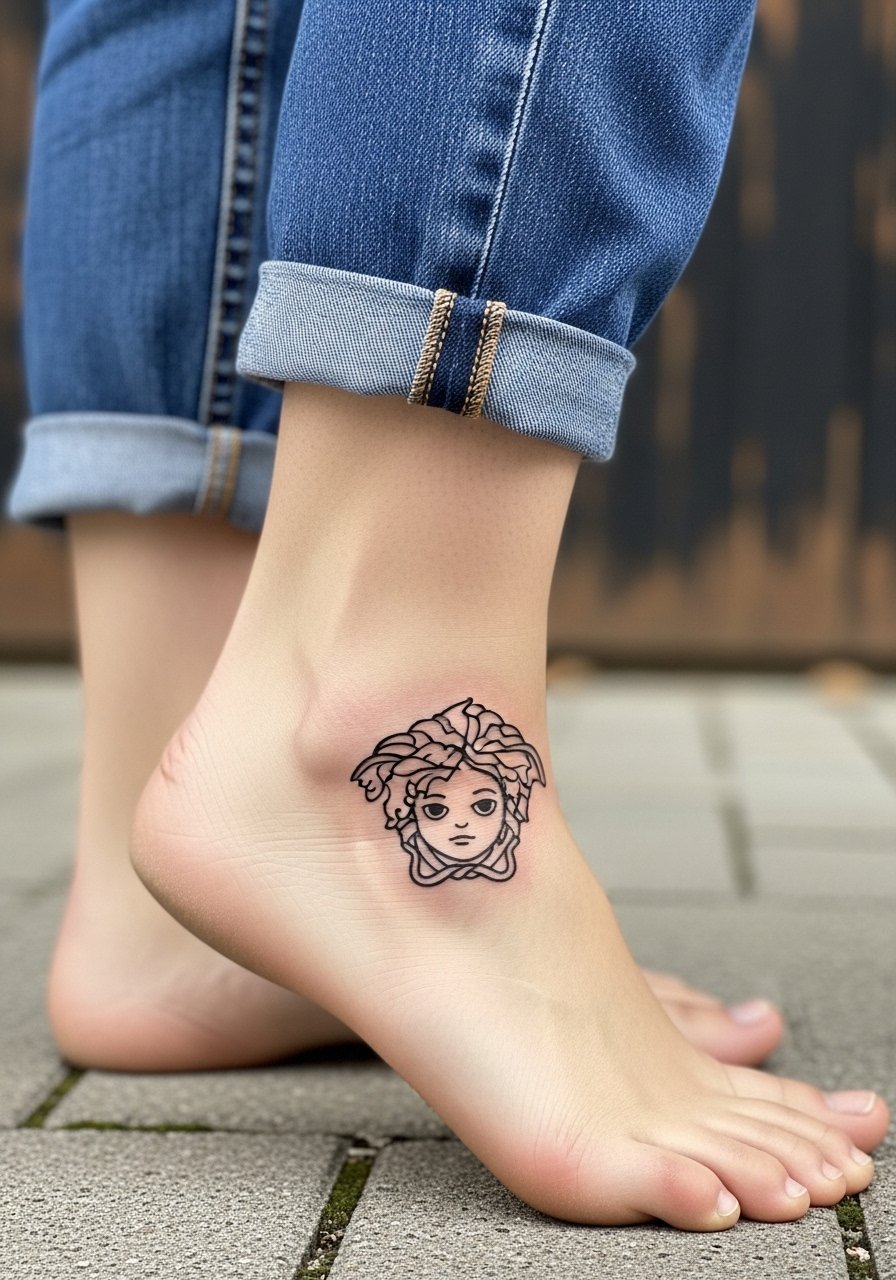
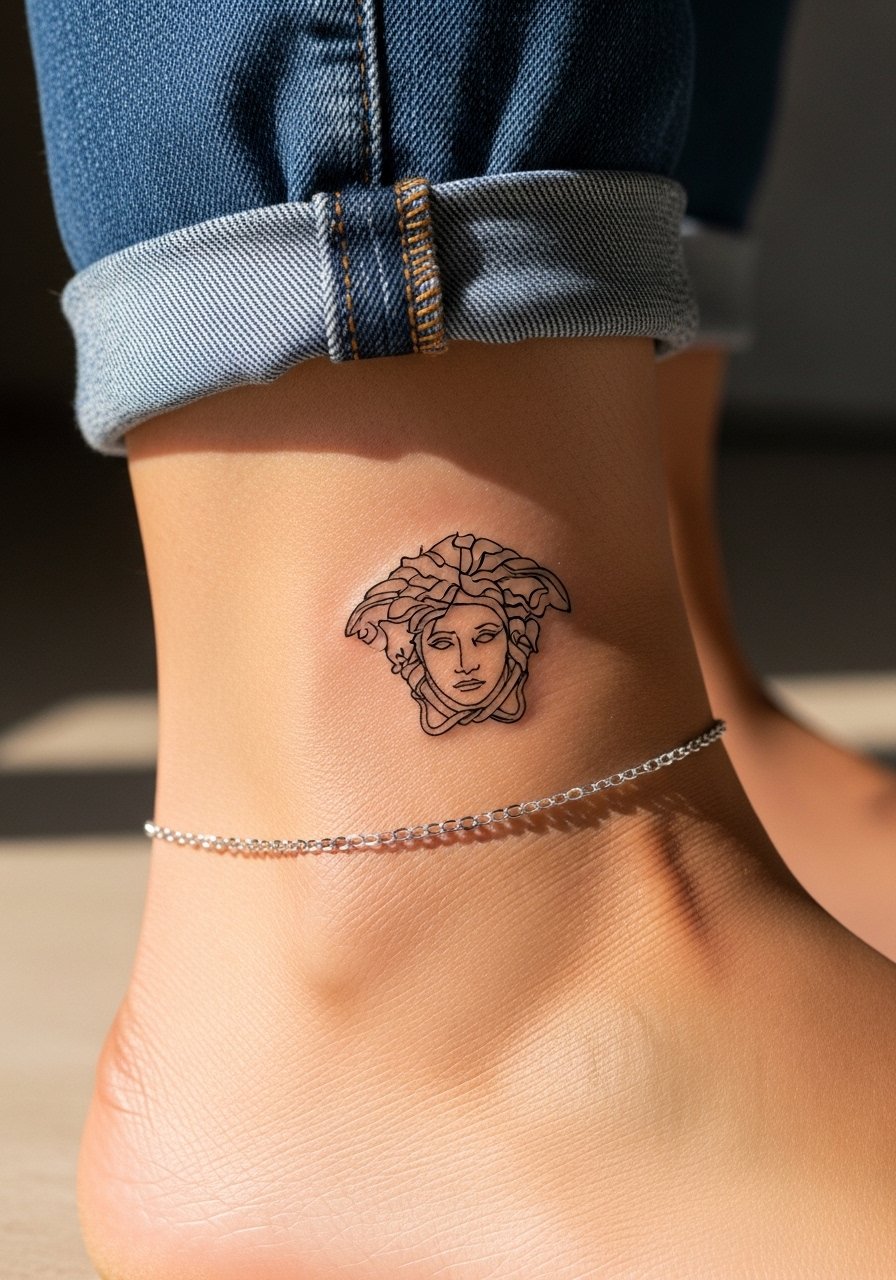
5. Cute Cartoon Medusa Ankle Accent
Small cartoon or chibi Medusa designs translate well to the ankle because they use bold outlines and limited shading. Ask for a slightly larger face than you think you need to avoid blurring from shoes and socks. Sessions are short and pain is low to moderate. The usual mistake is placing the piece too low where it rubs against footwear. For showing it off, roll jeans or wear slide sandals so the tattoo peeks without friction.
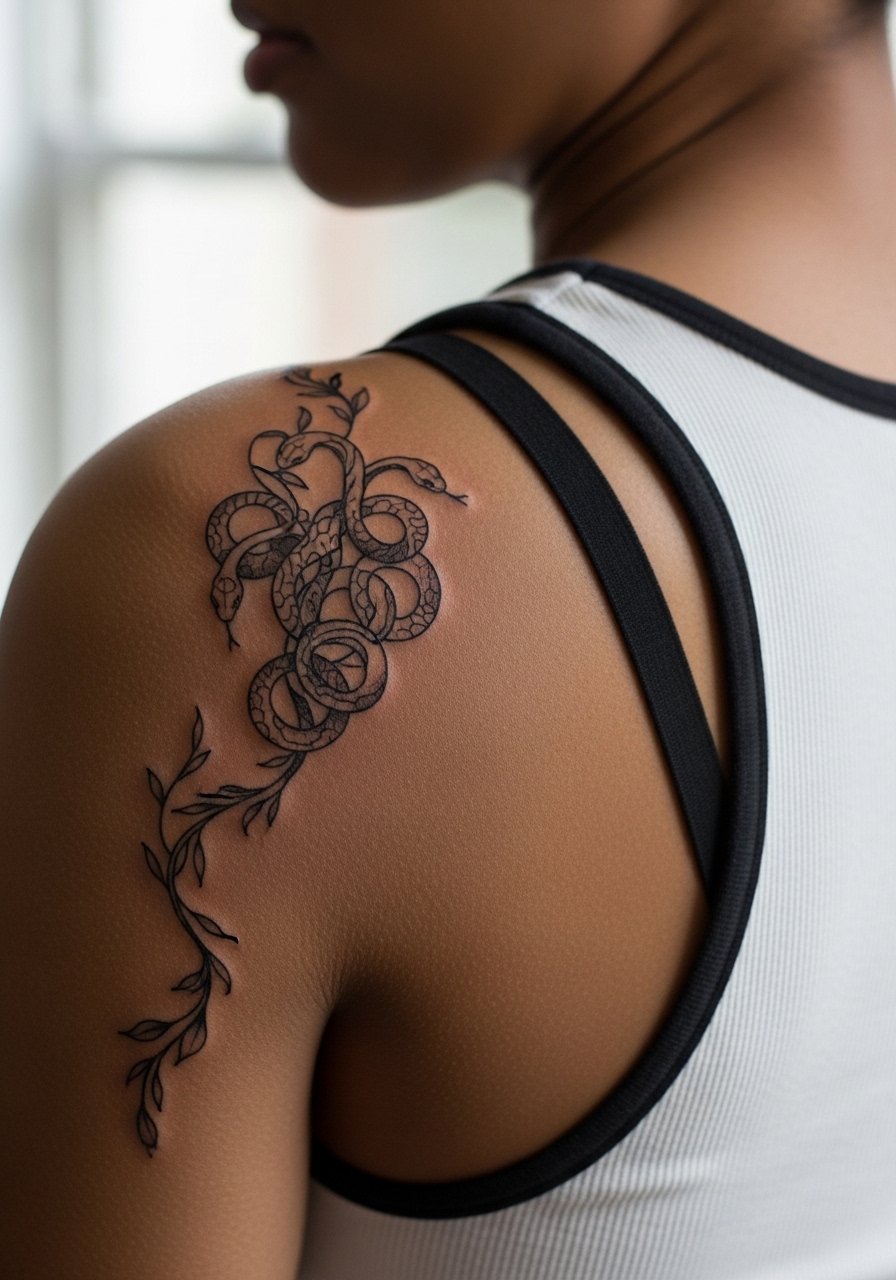
6. Shoulder Blade Medusa with Snake Hair as Vines
Shoulder blade pieces allow scale and motion without constant sun exposure, so detail lasts longer. Tell your artist you want the snakes to integrate into vine shapes, which helps camouflage small blur over time. Session feels like long stretches of sitting and repositioning the arm for the stencil, but pain is moderate. The common mistake is compressing too much detail into the shoulder blade area. Layer outfits like off-the-shoulder tops to show the work without exposing it to constant sun.
Studio Day Picks
The small pieces above and the shoulder blade work ask for different prep and first-week protection, so these picks suit ideas 1 through 6.
- Stencil transfer paper kit. Lets you preview exact placement on skin before the needle touches the area, which is helpful for collarbone and forearm layouts.
- Topical numbing cream. Applied per instructions at home eases discomfort on ankle and shoulder blade sessions without interfering with linework.
- Thin protective film roll. Keeps wrist and finger pieces clean and reduces friction from clothing in the first 48 hours.
- Fragrance-free gentle body wash. Safe for cleansing delicate fine line areas after the first day, especially collarbone and forearm work.
- Aquaphor healing ointment. Thin layers help lock in moisture for small detailed Medusa pieces during the initial healing window.
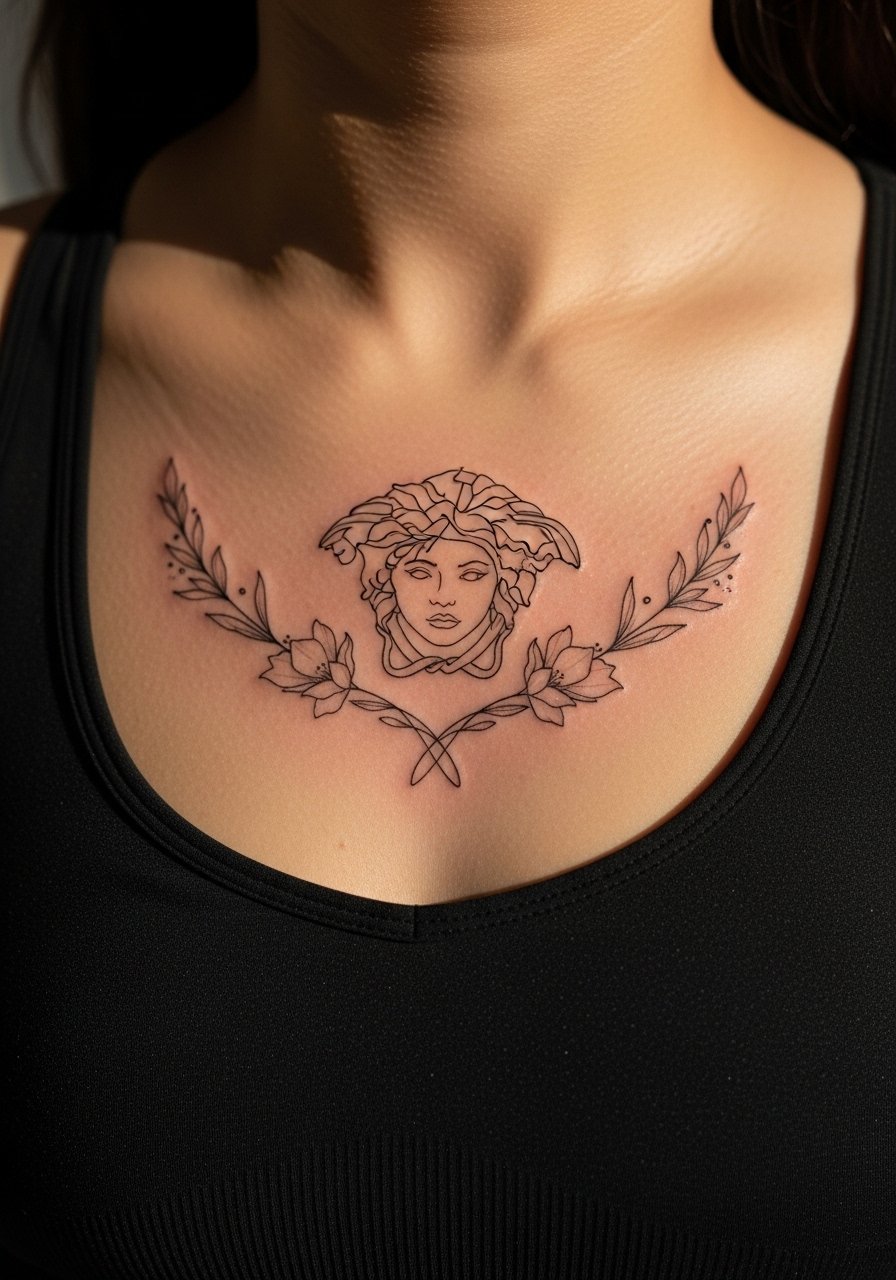
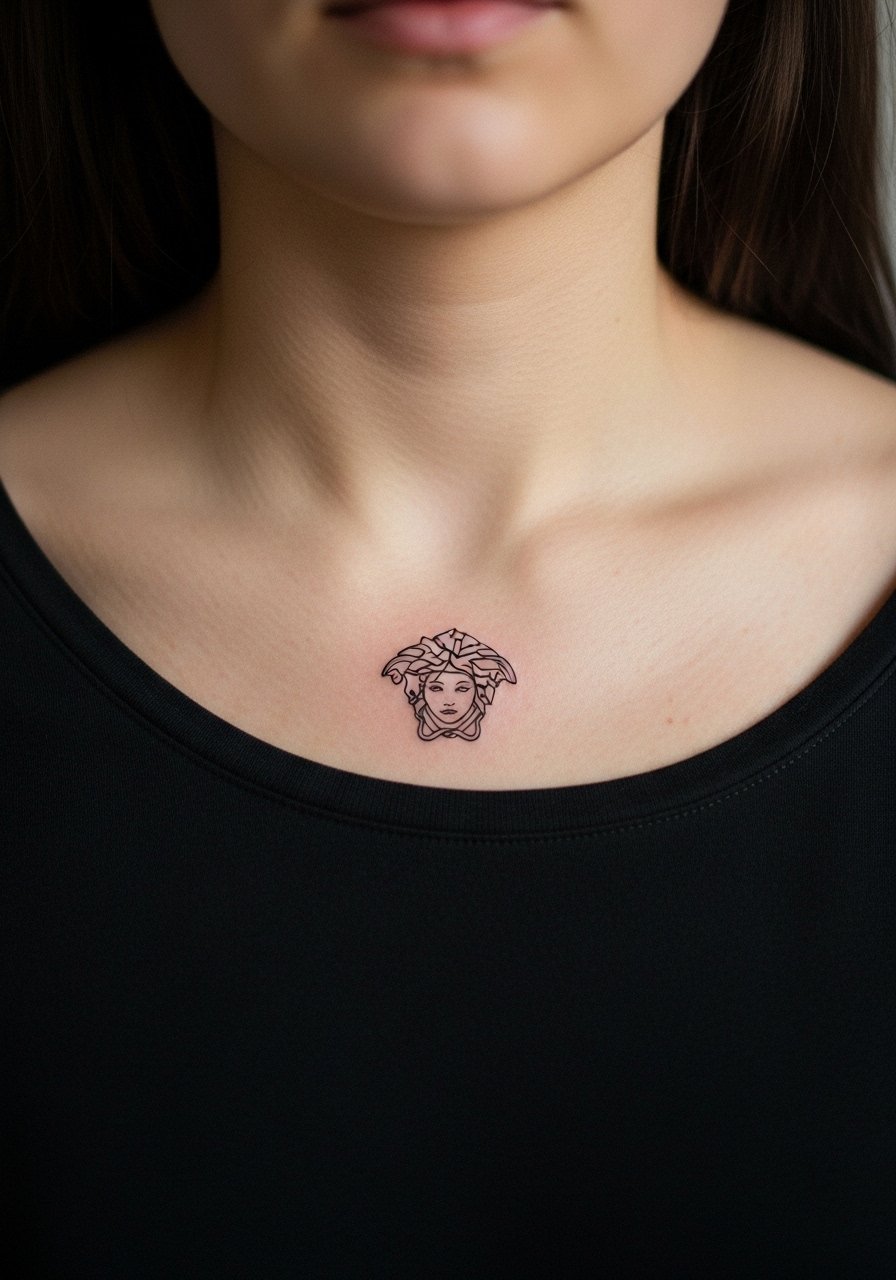
7. Sternum Medusa with Floral Frame
Sternum pieces are intimate and they shift with breath, so tell your artist you want symmetry and slightly bolder facial outlines to compensate for movement. For the image, wear a fitted sports bra so only the tattooed area is visible. Expect a higher pain score and longer session. The mistake is insisting on ultra-fine detail that the sternum will not reliably hold. For showing it off, pair the piece with a bandeau or open-front top that reveals the design without overexposing the torso.
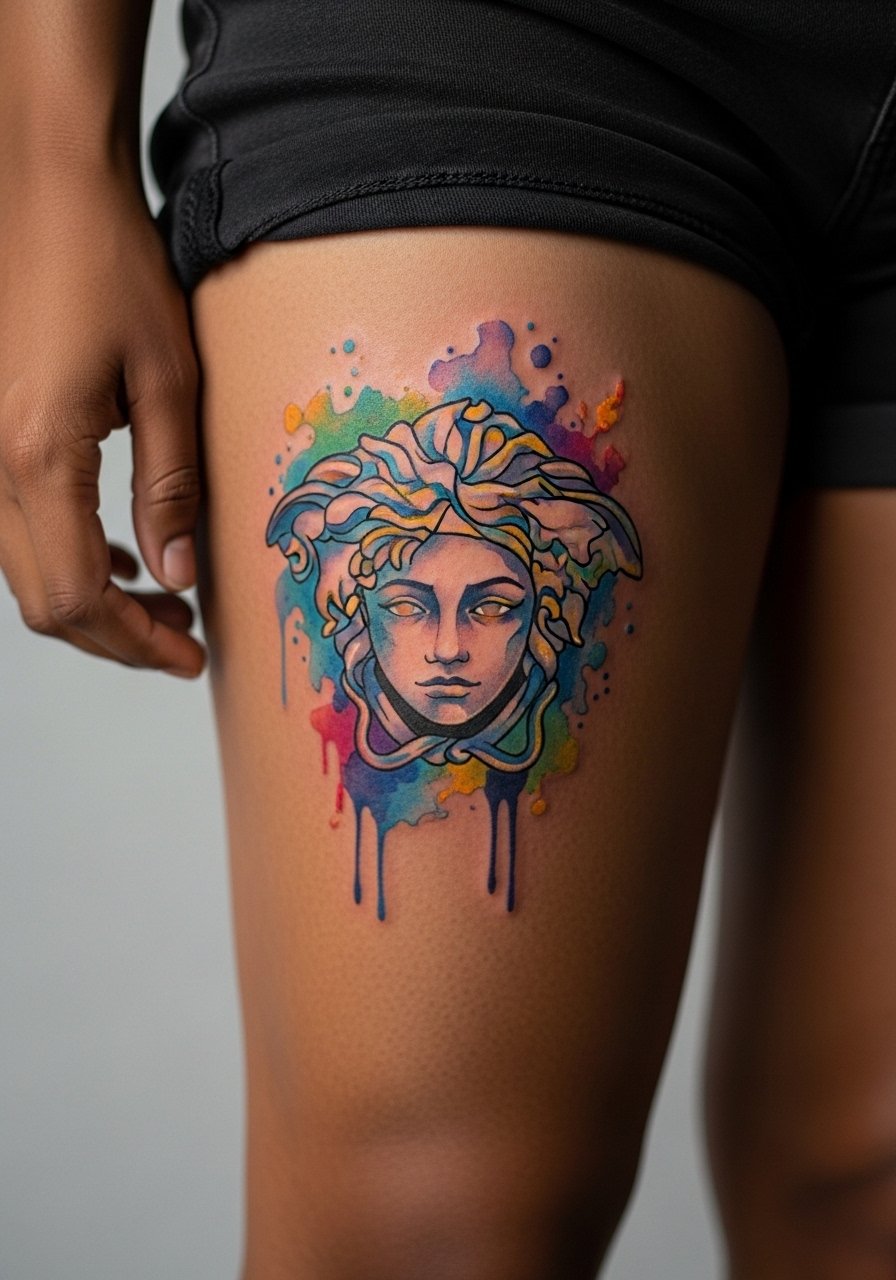
8. Watercolor Medusa Thigh Panel
A watercolor Medusa on the upper thigh lets color saturation and negative space do the work rather than tiny face detail. Thighs tolerate saturation well and age slowly compared with hands. Tell your artist you want soft washes around the snakes instead of dense stipple in the face. Sessions are comfortable if you wear loose shorts and can take longer due to color layering. The common mistake is asking for photoreal detail with watercolor fills, which conflicts. For the appointment, wear loose drawstring linen pants so the artist can roll the leg without pressure.
9. Geometric Medusa Ribcage Medallion
Ribcage placements are high-risk for blurring if linework is too tight. Artists split on the fine line on ribs. One camp says the skin stretch and breathing blur lines within two years. The other camp says precise needle depth and spacing keep fine work crisp. The safe route is to scale the medallion larger and use negative space between geometric elements. Sessions are painful and longer. Ask for a stencil check when you are seated to see how the piece moves with breath. To avoid rubbing, wear a cropped athletic top that you can lift gently for the session.
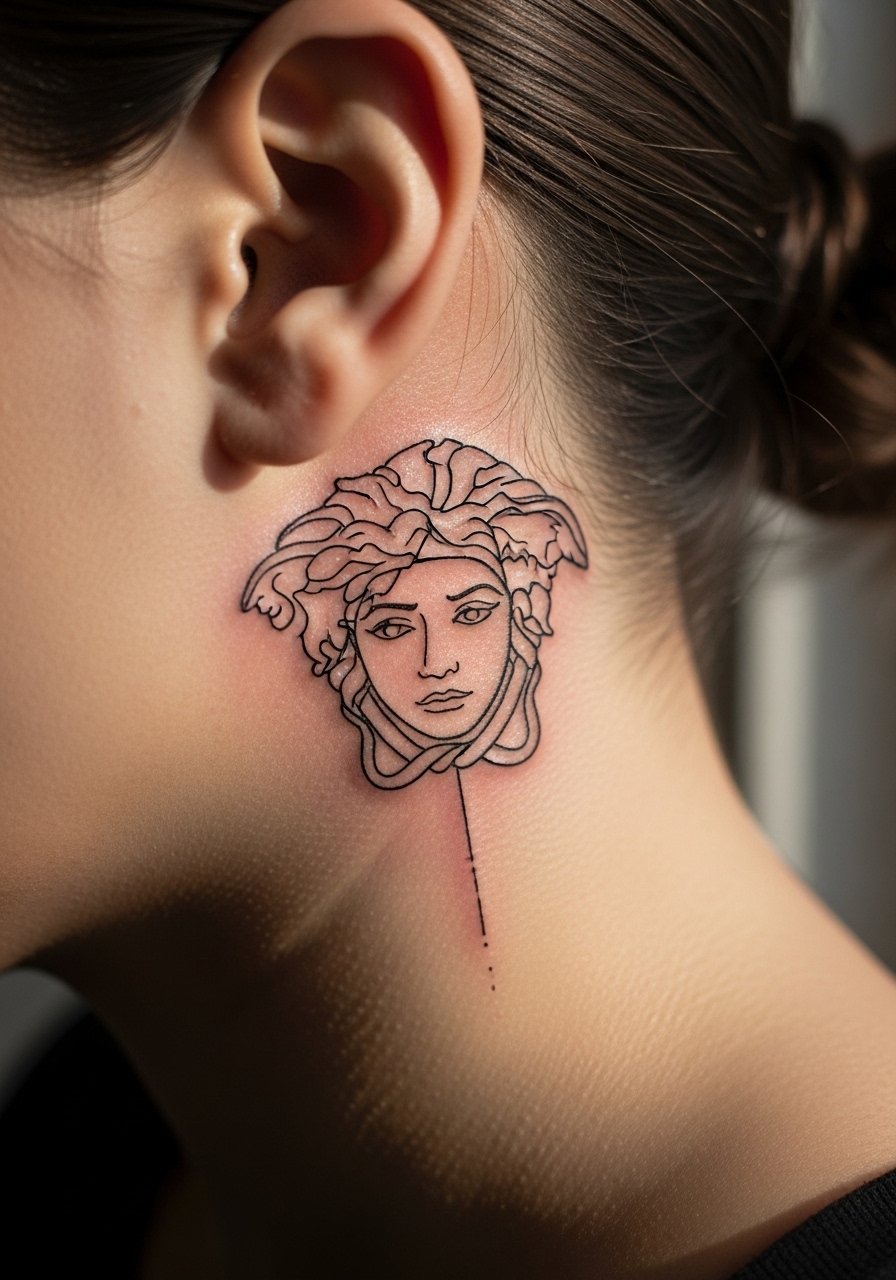
10. Tiny Medusa Behind the Ear Accent
Behind-the-ear tattoos require careful framing language. Ask for the placement "on the skin just behind the ear, below the hairline" so the silkier skin does not swallow detail. This spot is subtle and the session is quick but the area is sensitive. The usual mistake is pushing for a fully detailed face at a scale that cannot hold. For modest show-off moments, tuck hair behind the ear or wear a low bun so the accent peeks through.
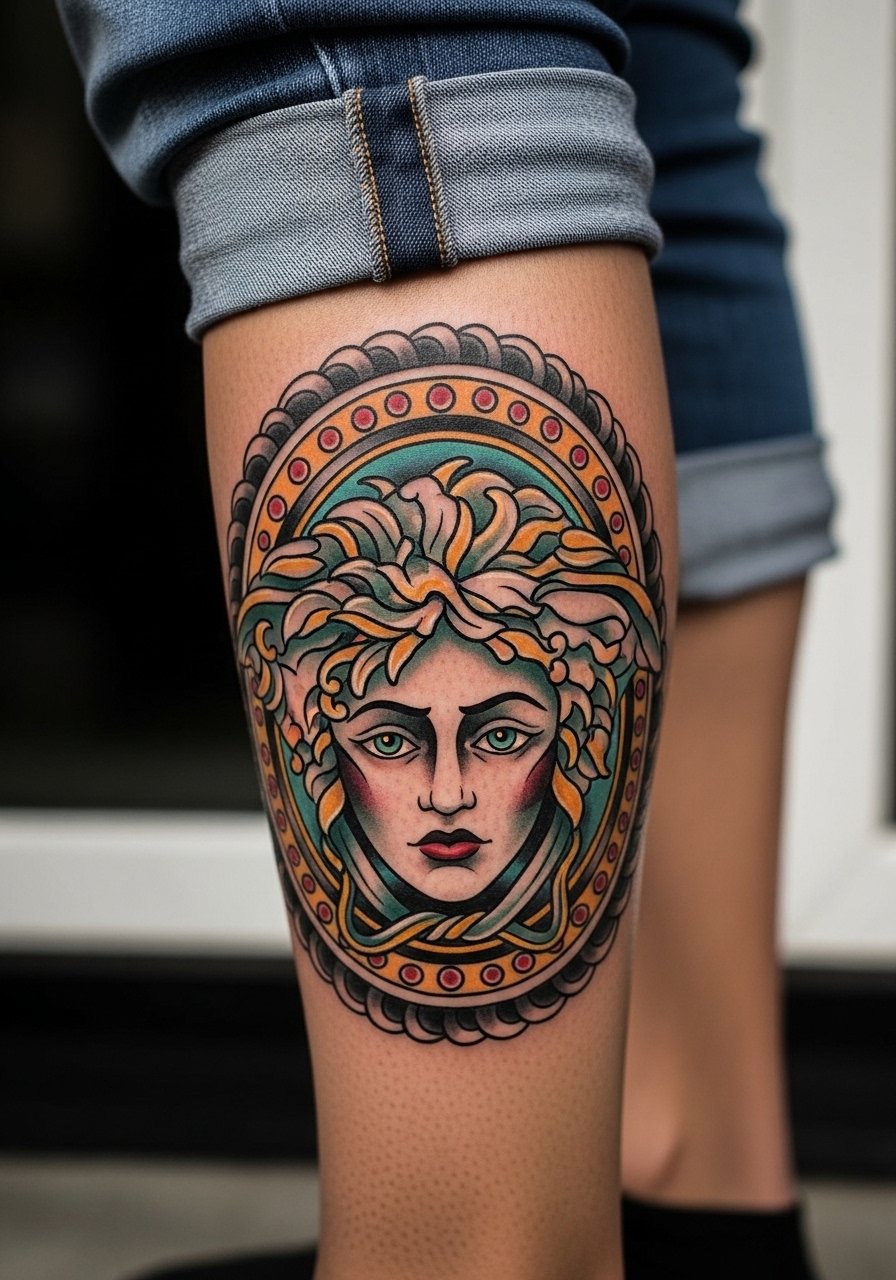
11. Traditional-Inspired Medusa on the Calf
Traditional or neo-traditional Medusa uses bold outlines and saturated fills which age predictably on the calf. This is a low-blowout placement with strong longevity. Tell your artist you want strong black anchor lines on the face and simpler snake fills so touch-ups are rare. Session pain is mild and healing is straightforward. Pair the calf piece with a midi skirt or heeled boot to contrast the bold blackwork with a feminine silhouette.
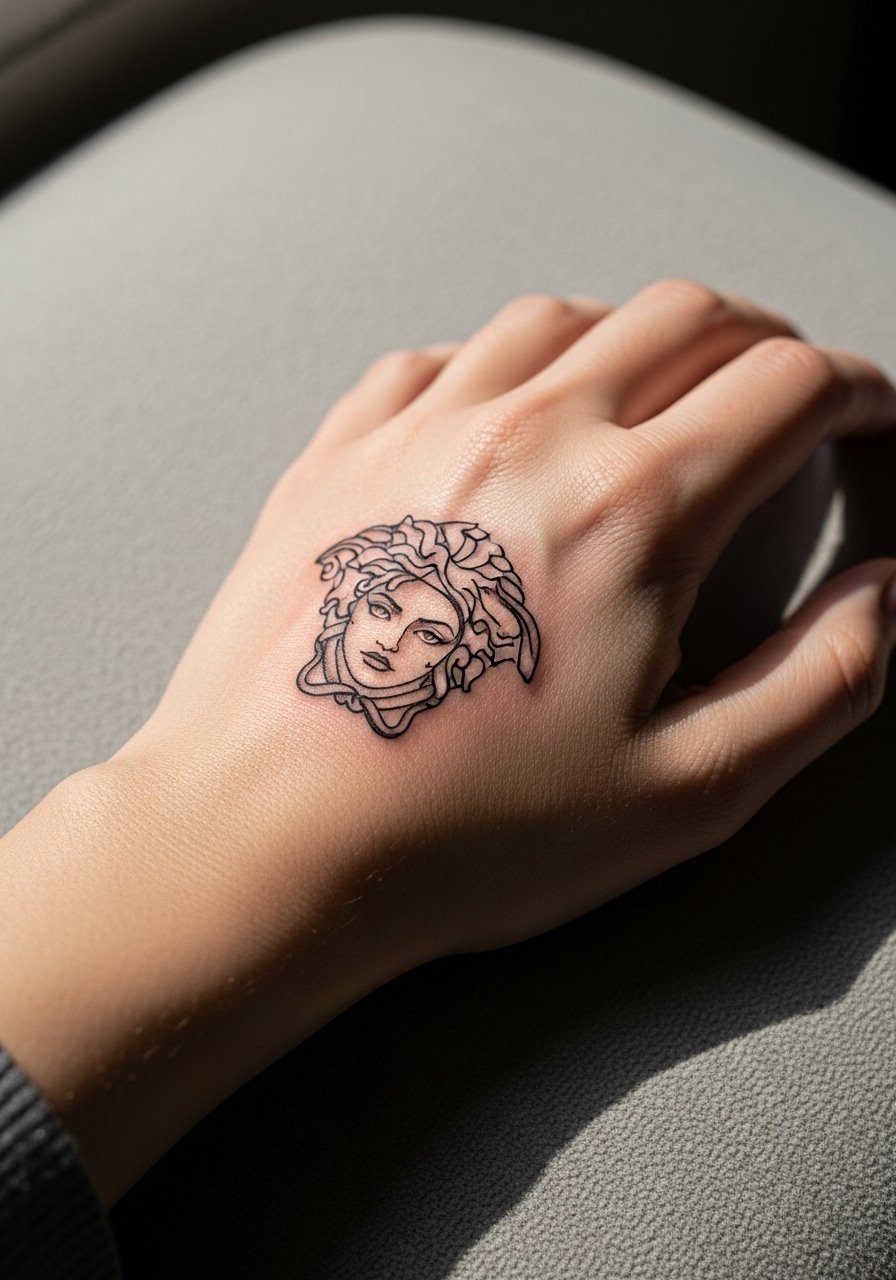
12. Mini Medusa on the Back of the Hand
Back-of-hand tattoos read bold and confident, but they face daily friction and some industries still view them conservatively. If you choose this placement, ask for simplified facial features and open negative space in the hair so the piece reads as it blurs. The session is uncomfortable and the touch-up timeline is sooner than for arm pieces. A common mistake is insisting on portrait-level detail. For showing it off selectively, pair it with simple bracelets rather than chunky rings so the hand art stays visible.
13. Nape Medusa with Draped Hair
The nape is great for a hidden-to-visible effect when wearing certain hairstyles. Ask for a slightly wider face and hair that falls into curved lines, which keeps the profile readable when hair moves. Sessions feel quick but the area can be tender. If you work in a conservative place, consider placement farther down the neck. For styling, a wide-neck sweater or low bun shows the nape without exposing the chest.
14. Medusa Shoulder Cap with Lace Detail
A shoulder cap that wraps slightly onto the upper arm can read like a feminine shawl when the snakes are softened into lace. Ask for lighter stipple shading and leave more skin between elements to prevent saturation merging over time. Sessions are moderate in length and pain. The main error is crowding floral lace and snake lines too closely. A sleeveless top with a loose tank shows the cap elegantly without constant sun exposure.
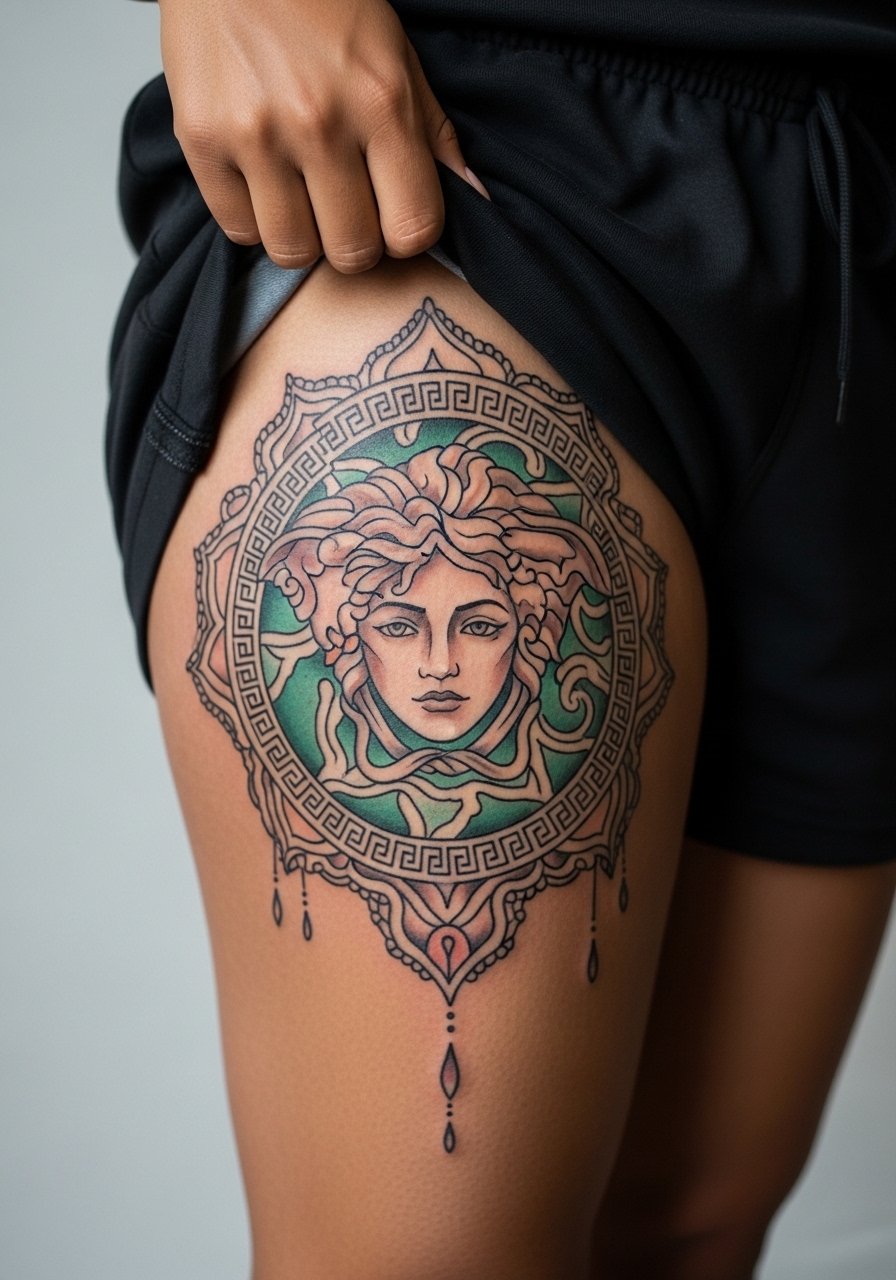
15. Medusa Hip Curve Accent
Hip tattoos sit under clothing often, so they age with less sun but can suffer from friction against waistbands. Ask for slightly bolder outlines and plan the exact curve with the artist while standing. Sessions are moderate and you should wear high-waisted bottoms that can be shifted for access. The mistake is placing the piece where jeans rub constantly. For reveal moments, a high-waisted skirt or swimsuit bottom pairs well without risking daily abrasion.
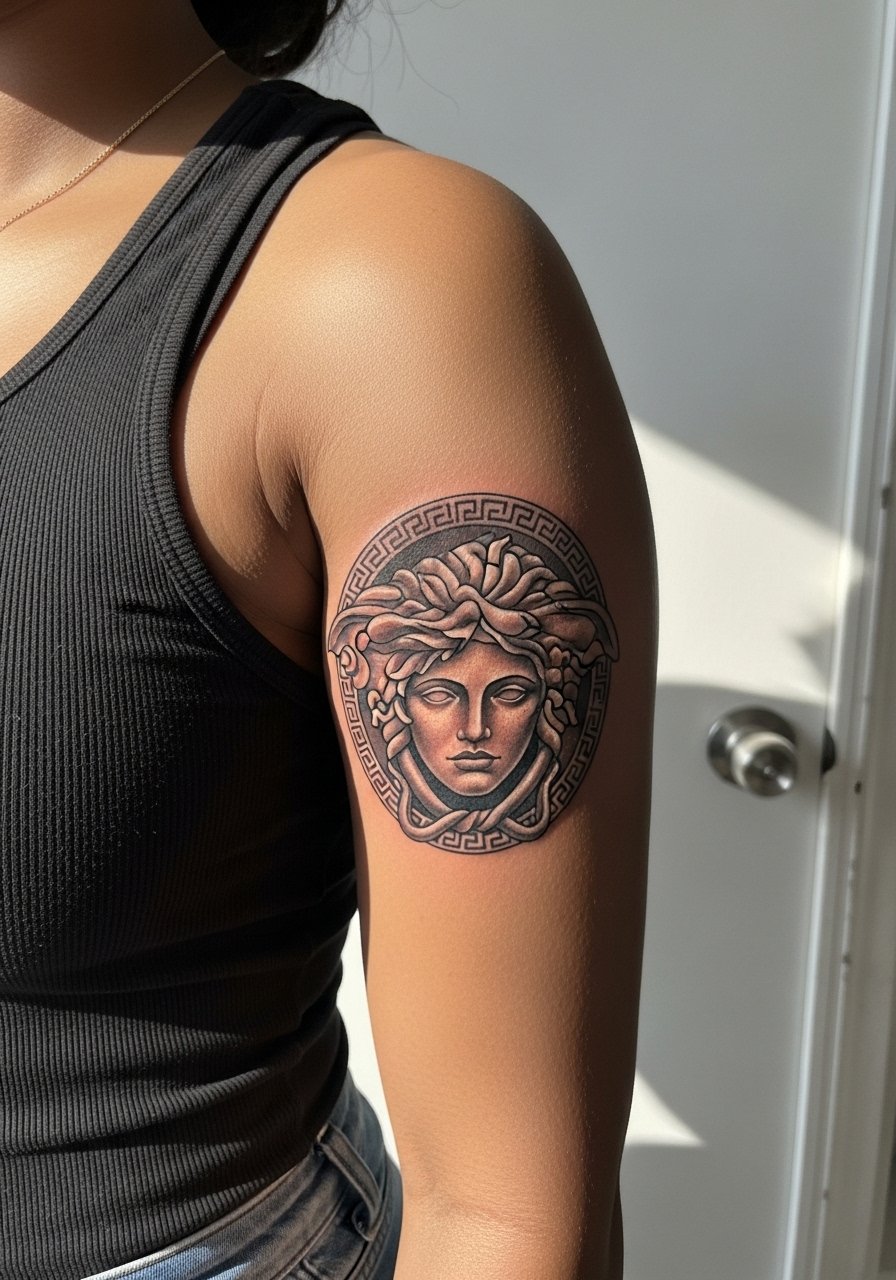
16. Inner Bicep Medusa Portrait
Inner bicep skin can be softer and more prone to blowout, so request shallower hair lines and stronger facial contours. Expect moderate pain when the arm is rotated and the artist works close to the chest. Common mistake is tiny faces with dense hair detail. A good consultation includes seeing the stencil with the arm both relaxed and flexed. Wear a tank top to the session so the artist can raise or lower the sleeve without full undress.
17. Small Medusa on the Ankle Chain
This is a skinny wrap or chain-like design circling the ankle with a small Medusa charm at center. It tolerates motion well when scale is moderate. Ask for clear negative spacing and avoid solid fills that rub. Sessions are quick and pain is variable. The frequent mistake is making the charm too detailed for the small scale. Wear ankle bracelets or slide sandals to let the chain detail read without competing footwear.
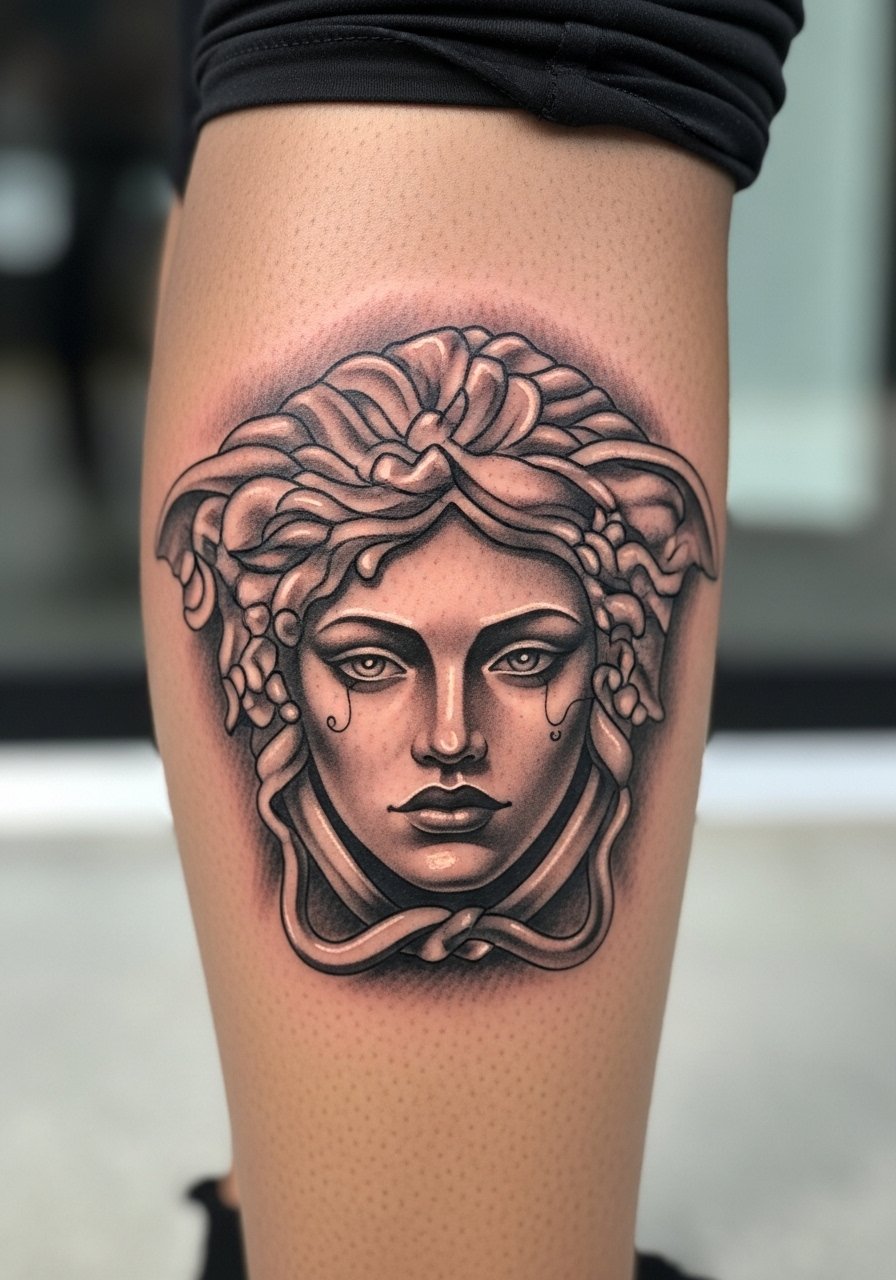
18. Medusa Calf Portrait in Soft Graywash
A grayscale portrait with soft graywash shading reads elegantly on the calf and the area takes saturation well. Ask for layered shading instead of dense black to preserve facial softness. Sessions are comfortable and healing is straightforward. The mistake is expecting photographic clarity without appropriate scale. Pair a calf portrait with mid-length dresses or ankle boots to play with reveal and conceal.
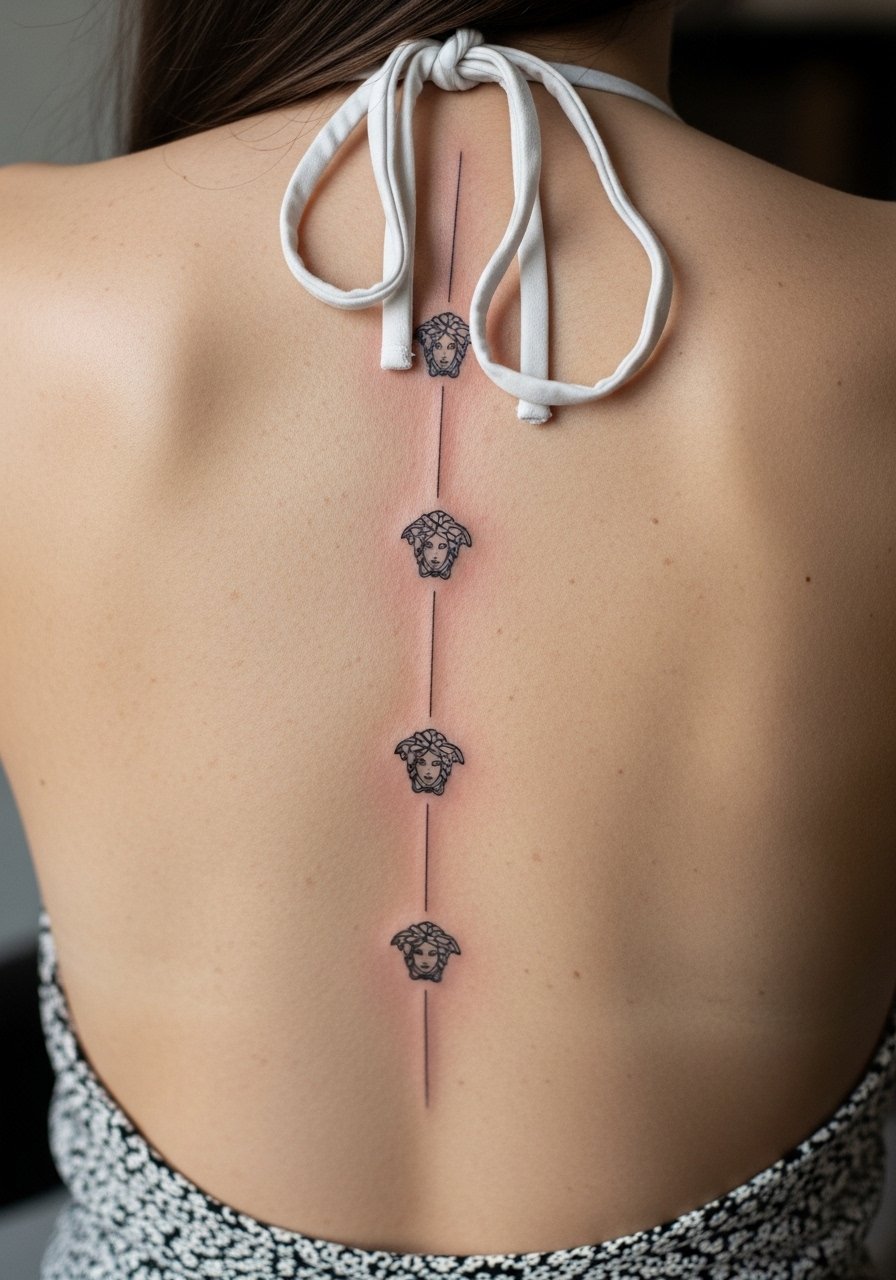
19. Medusa Spine Line with Minimal Faces
A vertical spine piece with repeating small faces spaced out can look delicate without packing details that blur. Tell your artist to leave 6 to 8 millimeters between faces so each mark remains distinct over time. Sessions are long but tolerable. The typical mistake is clustering tiny faces too close together. Pair the spine work with open-back dresses or halter tops so it becomes a focal point.
20. Tiny Medusa Behind the Collar of a Shirt
A micro Medusa tucked behind a shirt collar or at the upper chest near the neckline functions as a private charm. Size it so the face reads from a few feet and keep the hair simplified. Sessions are quick and sensitivity is moderate. Mistakes include asking for dense facial detail at a scale that will blur. For show-off balance, wear an open-back midi dress or a wide-neck tee to reveal the placement when you want it visible.
21. Medusa Hip-to-Thigh Wrapped Scene
When you want a narrative piece that follows the body, a hip-to-thigh wrap lets Medusa move with muscle and stance. Plan multi-session work and accept that color will settle over a year. During consultation, mark the outline on skin and sit, stand, and walk to see how proportion reads. This work needs a multi-pass schedule and honest touch-up expectations. For the session, wear loose shorts that can be shifted easily.
Frequently Asked Questions
Q: Will a fine line Medusa on the forearm need touch-ups sooner than a traditional blackwork piece?
A: Fine line usually needs attention sooner because thin lines can soften with time and sun exposure. Expect a possible touch-up around year two to three for delicate facial details. Choosing slightly bolder primary contours while keeping hair detail airy helps delay that, and consistent sunscreen on the area makes a real difference.
Q: Is a Medusa on the ribcage a bad idea if I want the detail to last?
A: Ribcage pieces can hold detail, but they are higher risk. Artists fall into two camps. One group says breathing and skin stretch blur fine lines quickly. The other group says careful spacing and correct needle depth keep detail intact. The practical move is to scale the design larger and ask for spacing that allows the geometric or medallion elements to breathe.
Q: How should I dress for a sternum or collarbone session to make it easy for the artist?
A: Wear a fitted sports bra or a wide-neck top you can pull aside gently, so only the tattooed strip is exposed. A breathable fabric that you can wash afterwards is helpful. For collarbone show-off, a racerback tank or an open-neck blouse works well.
Q: Are hand and finger Medusas likely to affect hiring or professional life?
A: Hand and visible finger tattoos still carry different norms across industries. If you work in a conservative field, check policies and consider placements that can be covered. If you choose a hand piece, plan for more frequent touch-ups and accept that it may influence first impressions in some job settings.
Q: How does sun exposure change a Medusa portrait over five years?
A: UV exposure is the main driver of fading. Portraits with fine shading soften faster if they spend time in direct sun. Keep the area covered when possible and use sunscreen after healing to preserve contrast. Heavier blackwork and saturated fills generally hold better under sun stress than delicate stipple shading.
Q: What should I ask during consultation to avoid regret on a Medusa design?
A: Ask to see healed photos of similar placements, request a live stencil check while standing, and ask about expected touch-up timing. Ask the artist which parts they recommend bolder and which can be delicate. That specific conversation prevents common mistakes and sets realistic expectations.
