
Fine line dotwork looks delicate on a fresh stencil and stubborn after a few years. The catch with Viking motifs is that dense dot shading and tight knotwork can turn muddy if you place them where the skin stretches a lot, or if you go too small. Think about visibility, pain, and longevity before you sit down. Below are 21 dotwork Viking ideas that balance scale, placement, and technique so they read well at six months and at five years.
1. Micro Dot Vegvisir on the Inner Wrist
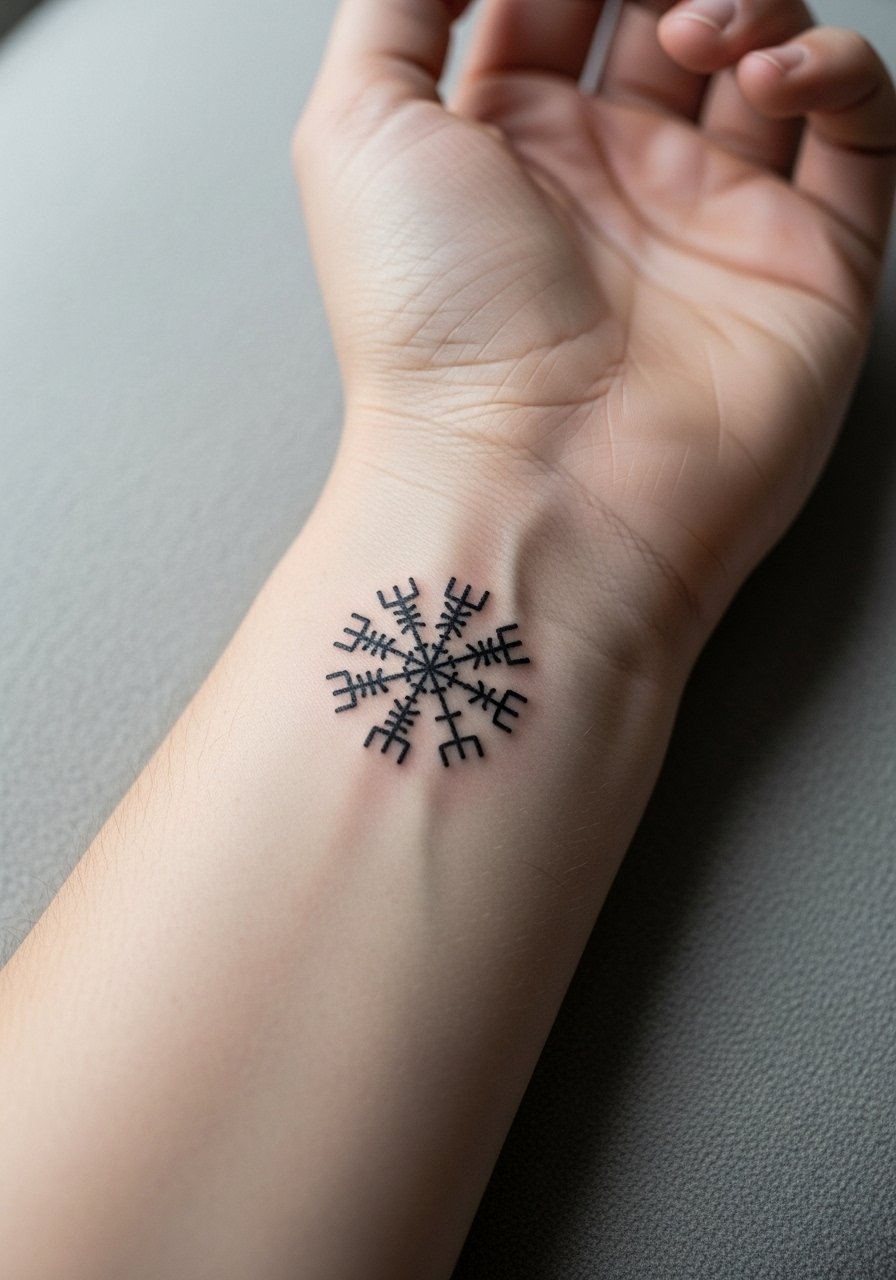
I've seen tiny compasses like this lose their spokes when clients asked for the full Vegvisir scaled down. Keep the symbol slightly larger than you think to avoid dot clusters merging over time. Tell your artist you want negative space between arms and the central disk so the dots sit with breathing room. Expect a low pain session and roughly 30 to 60 minutes depending on precision. Pair this with stacked dainty bracelets or a thin chain pendant necklace to frame the wrist without covering the lines. A common mistake is asking for hyper-fine dots without accounting for daily friction from handwashing.
2. Vegvisir Medallion on the Sternum
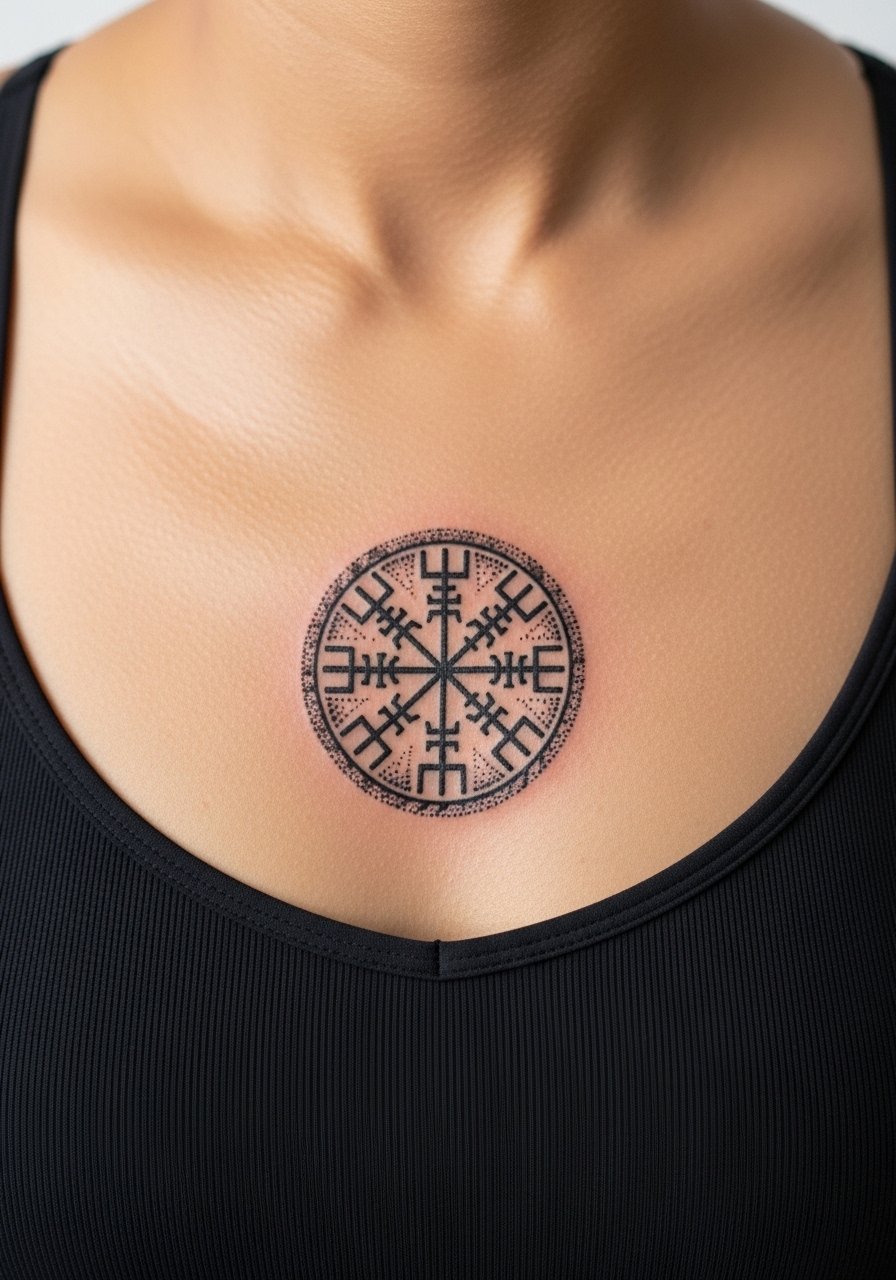
Fair warning, sternum sessions sting more than outer chest work but they reward with a dramatic center piece. Ask for slightly thicker outer rings so the medallion keeps contrast as the tiny dots naturally soften. For the appointment, wear a fitted sports bra that gives clean access without shifting too much. A lot of people pick an overly intricate center that ages into a gray patch. To avoid that, request larger dot clusters in the middle and finer stipple toward the edges. Touch-up expectation is typically around year two to three for dense central areas.
3. Single-Needle Valknut on the Collarbone
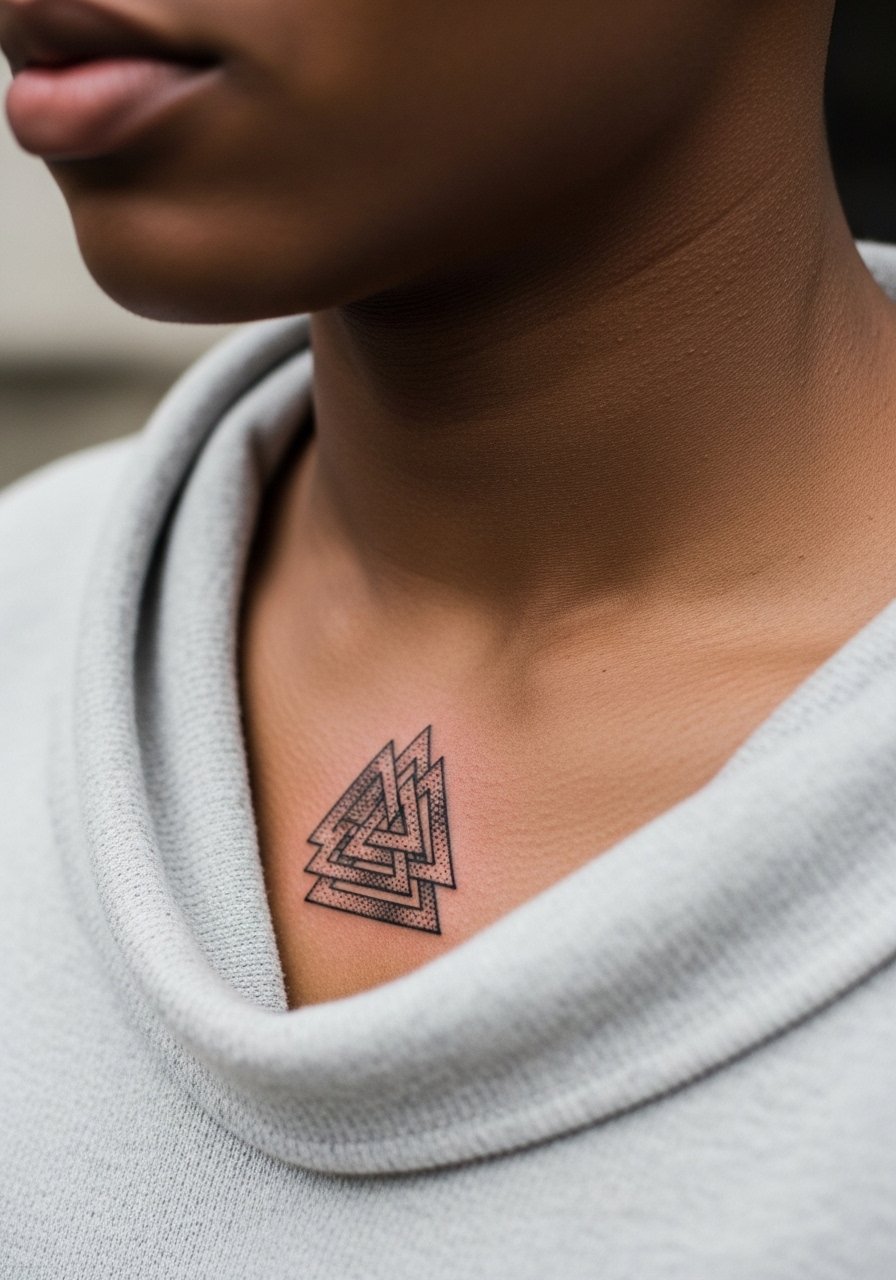
When you sit with the stencil on collarbone, the angle changes how the Valknut points sit. Ask your artist to position it so the top point aligns with the shoulder slope. The collarbone is visible and flat, so the dotwork reads beautifully there. Expect a 45 to 75 minute session and a moderate pain level because of bone proximity. For evenings out, pair it with an open-back midi dress that lets the knotwork peek without crowding it. One mistake is packing too many tiny dots close to the bone. Give the design room and plan for a touch-up in a couple years if you want crisp contrast.
4. Longship Silhouette with Dot Horizon on the Outer Forearm
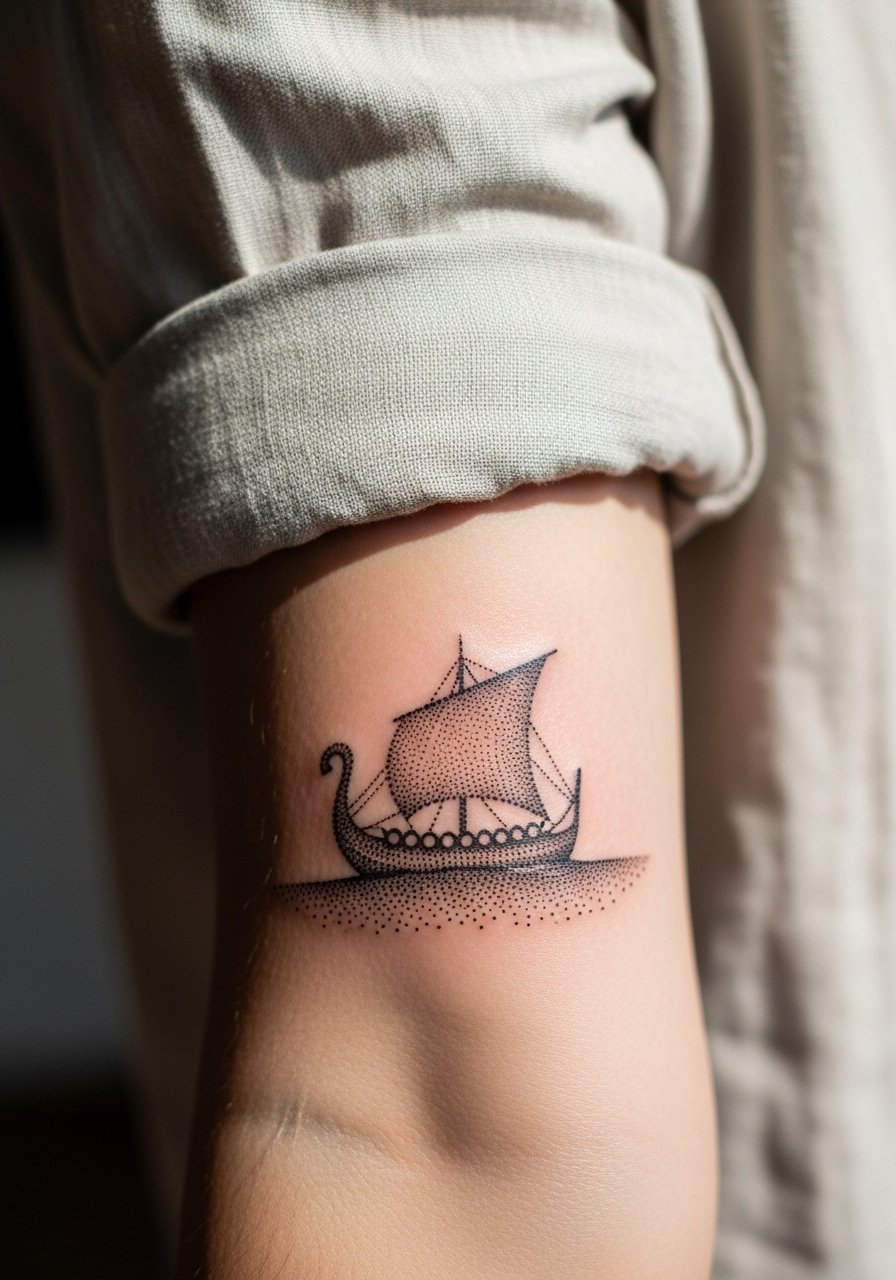
I've seen longships look best when the ship is slightly oversized relative to the horizon. The outer forearm lets the composition breathe and reads well from a distance. During consultation, bring silhouette references and say you want stipple shading for the sea so the ship stays the focal point. Session time is often two to three hours for detailed dot shading. For casual styling, rolled-up linen shirts in neutral tones frame the piece nicely and do not compete with the dot texture. A common regret is asking for micro-detail in a tiny panel. Scale up for longevity and expect a light touch-up if you carry heavy sun exposure.
5. Fenrir Head in Stipple Shading on the Upper Arm
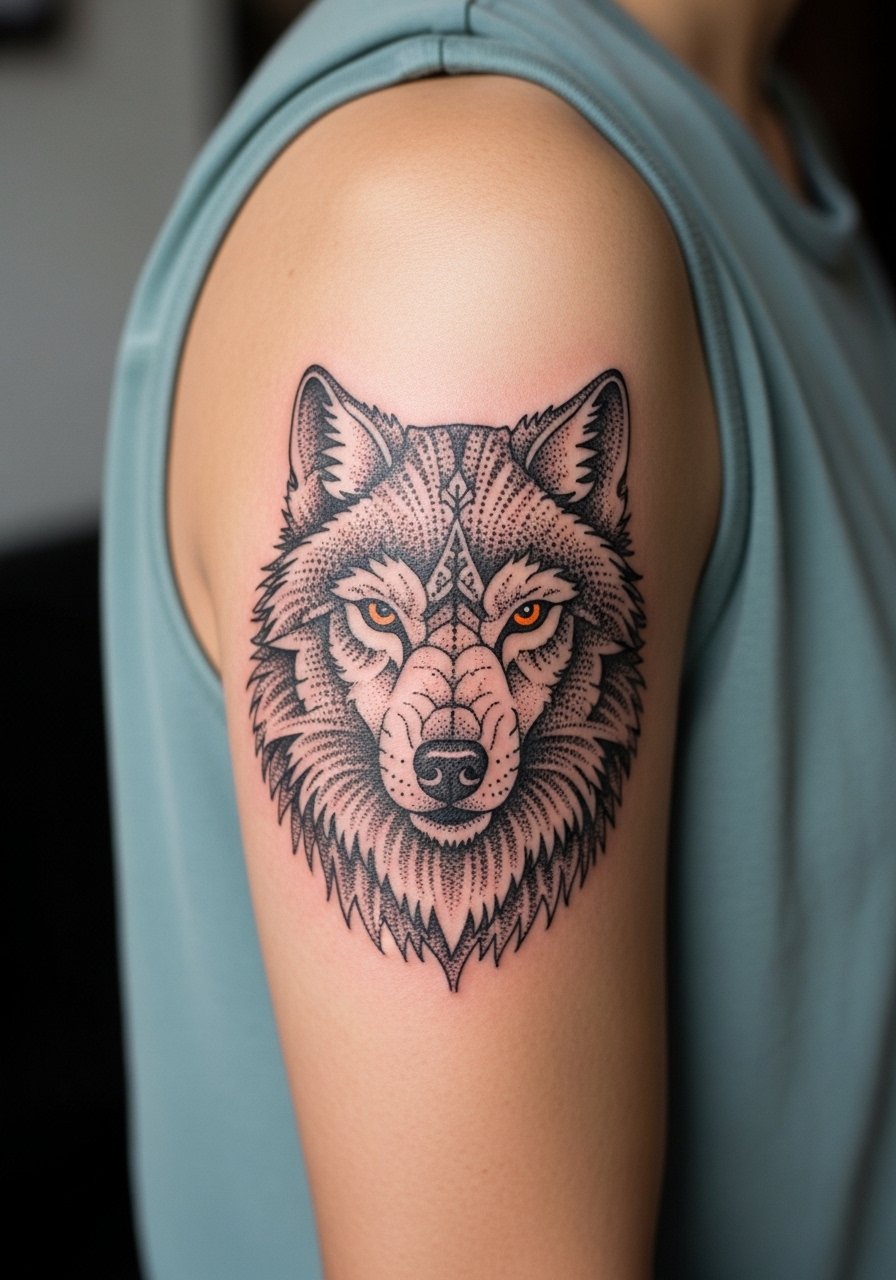
This placement gives muscle movement that animates the wolf face. Tell your artist to use heavier dots for jawline contrast so the expression holds as the skin settles. Upper arm sessions are moderate on pain and often split into 90 to 180 minute blocks. For showing it off, a loose button-down shirt you can pull aside or a tank top works well. A common mistake is requesting too much tiny facial fur detail. Bold dot contrast around eyes and mouth keeps personality over time.
6. Ægishjálmr Minimal Ring Behind the Ear Area
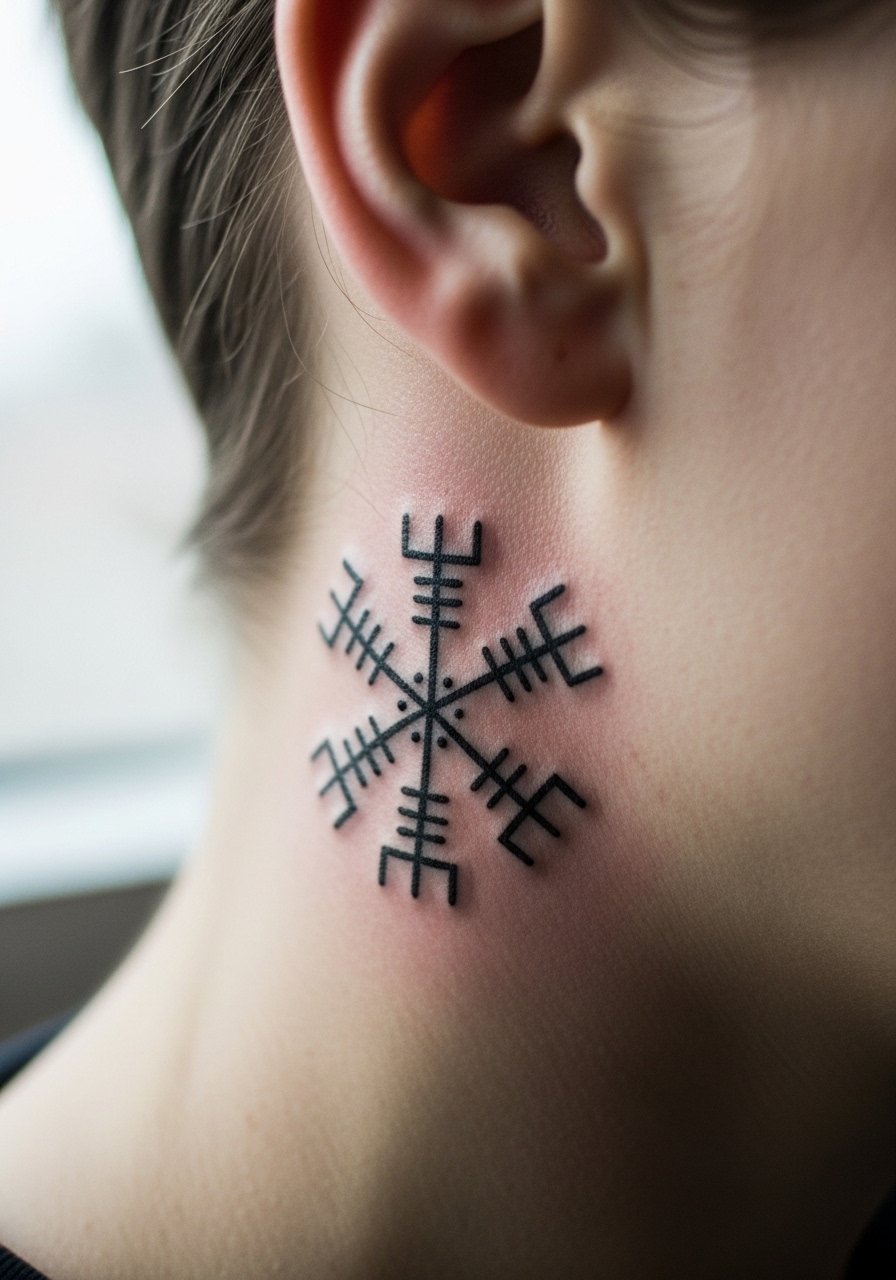
There is a debate about placing precise radial symbols near the hairline. One camp says the skin there is stable enough for clean dots. The other camp warns that hair growth and movement can affect visibility. Ask where the artist places the central point relative to the natural neck crease. The session is short and the pain is mild. For discreet display, style hair in a low bun or pair it with small stud earrings. Keep in mind some people prefer a slightly simplified version so the arms of the helm stay crisp after healing.
Studio Day Picks
The forearm, collarbone, and wrist pieces above need different day-of prep than the sternum and behind-ear work, and a few small items smooth the session and the first week.
-
Stencil transfer paper kit. Lets you preview the exact placement on skin, which is useful for collarbone and wrist pieces where angle changes matter.
-
Topical numbing cream. Applied as directed before a sternum or behind-the-ear session eases pain without affecting dotwork precision.
-
Thin protective film roll. Keeps small wrist and finger dotwork clean during the first week of washing and friction.
-
Fragrance-free body wash. Gentle cleansing helps preserve contrast in stipple shaded areas like the upper arm wolf head.
-
Aquaphor healing ointment. Thin layers in the first days lock in moisture for micro dot work without clogging the delicate channels.
7. Jörmungandr Wrapping Band Around the Calf
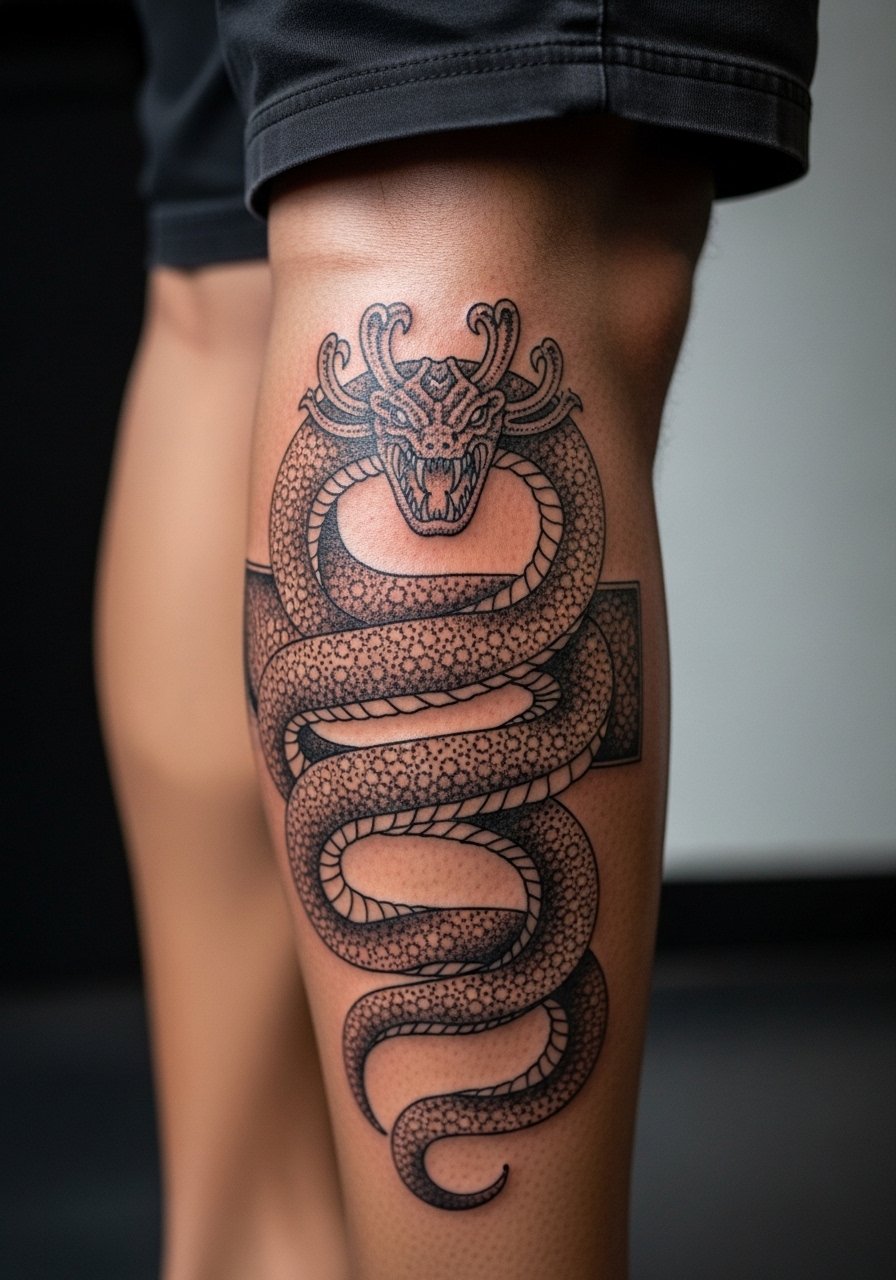
The calf gives room for a circular serpent to breathe. If you want the scales expressed in stipple, ask the artist to alternate dense and airy dots so the pattern keeps definition at distance. Calf sessions have moderate pain and are easy to work in one two-hour block for bands of this size. For showing it off, sandals and cropped trousers let the wrap be visible without being loud. One downside is frequent rubbing against socks. Plan clothing choices for the first week to reduce friction and expect a one-year touch-up depending on outdoor exposure.
8. Knotwork Mandala Shoulder Cap with Dot Halos
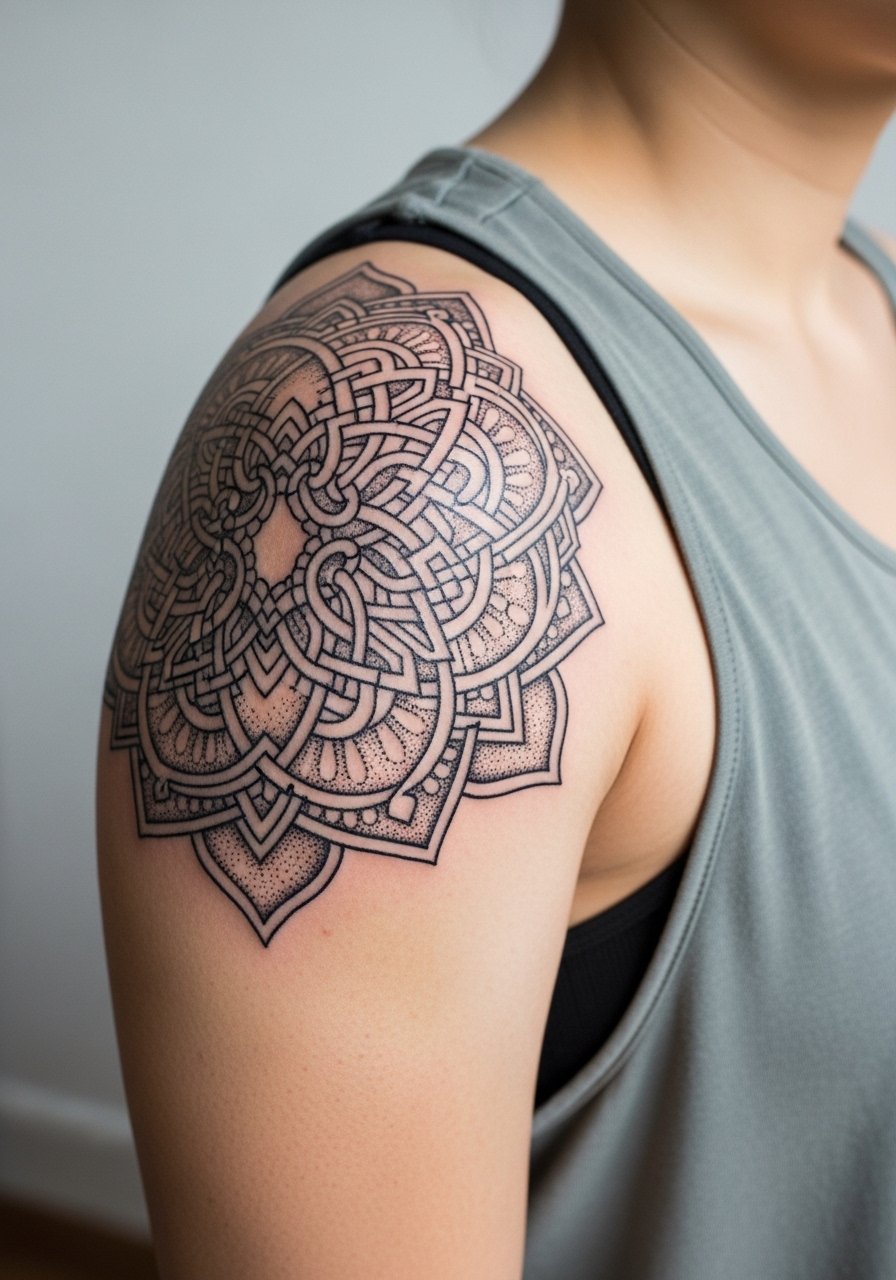
Most artists will recommend spacing the knotwork a little wider at the edges so the halo dots provide negative space. A personal observation is that shoulders hold dotwork well because of even skin tension. When you consult, bring clear mandala references and say you want stipple halos rather than heavy fill. Sessions usually run three to four hours for a full cap and may split into two appointments. For wardrobe, a loose drawstring linen pant is unrelated but comfortable for long sittings. Avoid asking for extremely small knot intersections that will blur into gray patches.
9. Rune Band Around the Finger with Tiny Dots
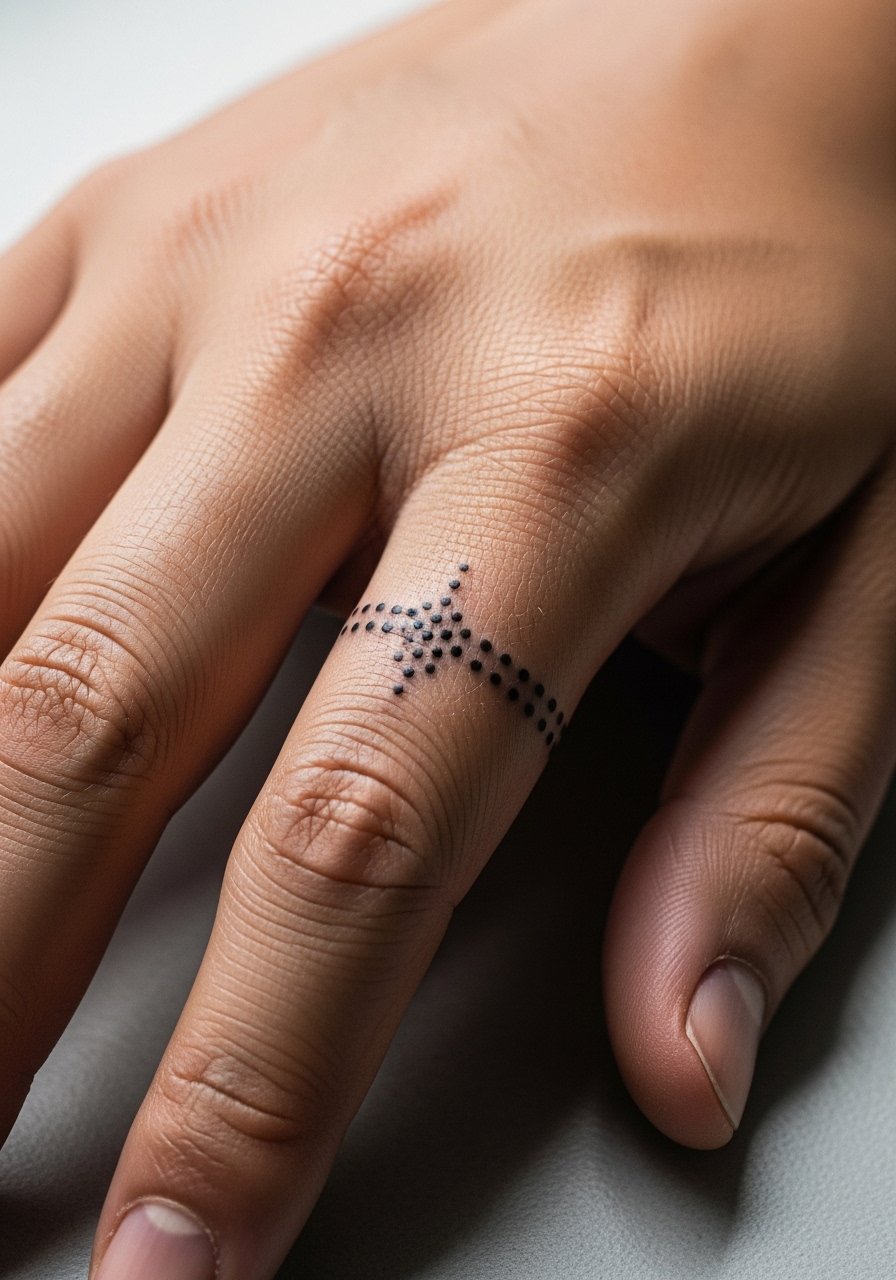
Fingers are high friction and the smallest dot bands need frequent touch-ups. Artists split over whether dotwork lasts on fingers long term. One camp sees finger ink as a temporary adornment that needs retouching. The other camp says bold dots and negative space can last if the band is slightly thicker. For the session, expect brief but intense needle work and bring gloves and support for your hand. When showing it off, stack with thin rings rather than wide bands so the tattoo reads clearly. Budget for a touch-up within the first year if you plan daily hand use.
10. Yggdrasil Tree in Stipple on the Side Ribcage
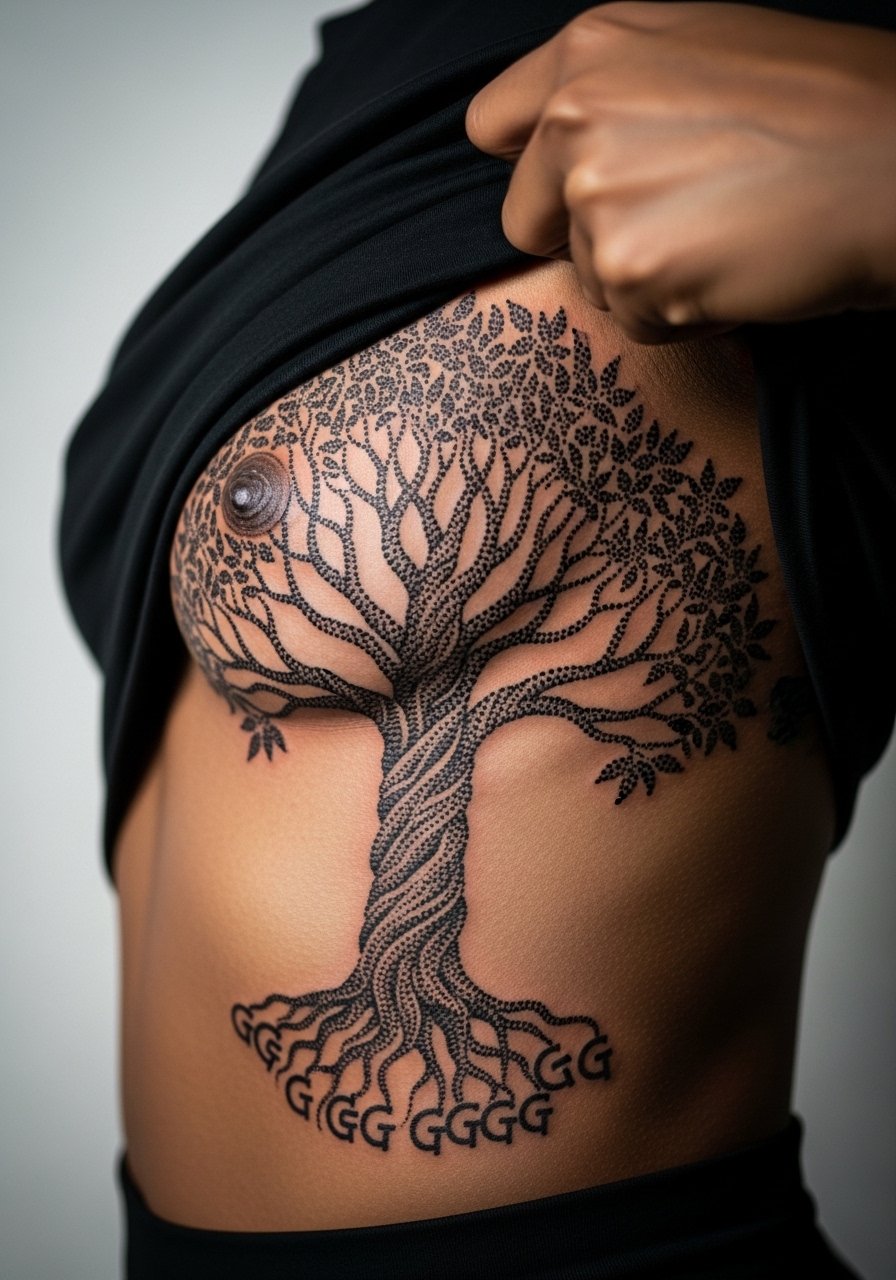
Ribcage sessions are painful and high on movement risk during breathing. If you want the branches fine and airy, tell the artist to space the dots and avoid dense block fills that can turn into a gray area when stretched. Expect multiple passes across appointments for a larger Yggdrasil to maintain comfort. A common mistake is requesting extremely fine root detail close to the sternum where the skin moves a lot. For privacy and comfort during the session, plan a zip-up hoodie you can loosen rather than bare-chested exposure. A respectful note on origins: Yggdrasil is a Norse cosmology motif, so some people pick abstract interpretations rather than literal religious symbols.
11. Thor’s Hammer with Stipple Knotwork on the Bicep
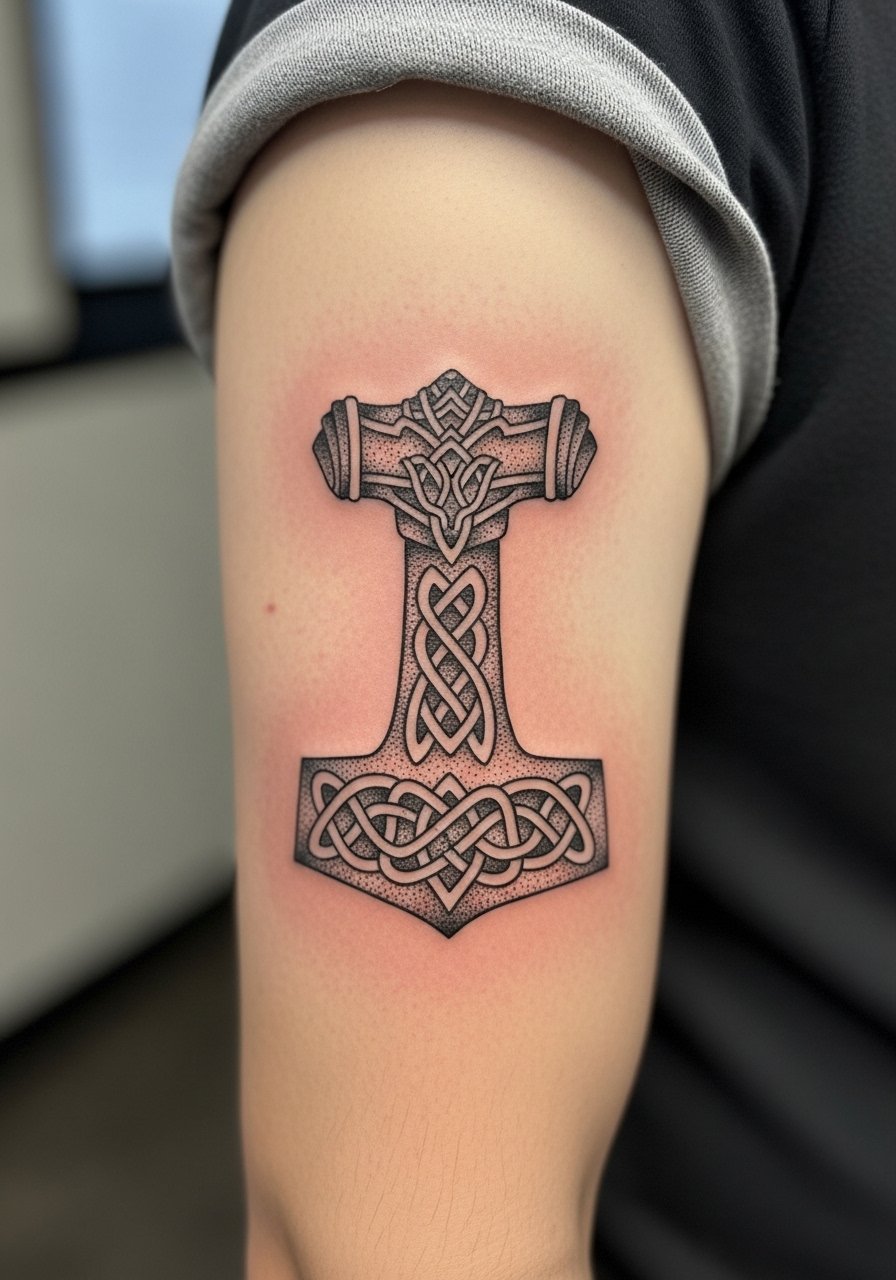
The bicep is forgiving and lets you keep the hammer bold without tiny dot crowding. During consultation, say you want the head of the hammer defined with denser dots and the handle lighter for contrast. Pain is moderate and many artists complete a bicep piece in one to two sessions. For showing it off, a rolled sleeve or a fitted short-sleeve top frames the symbol. A mistake is compressing knotwork into the hammer face. Leave room and plan for a touch-up on the densest black areas after healing.
12. Raven Pair in Negative-Space Dotwork on the Upper Back
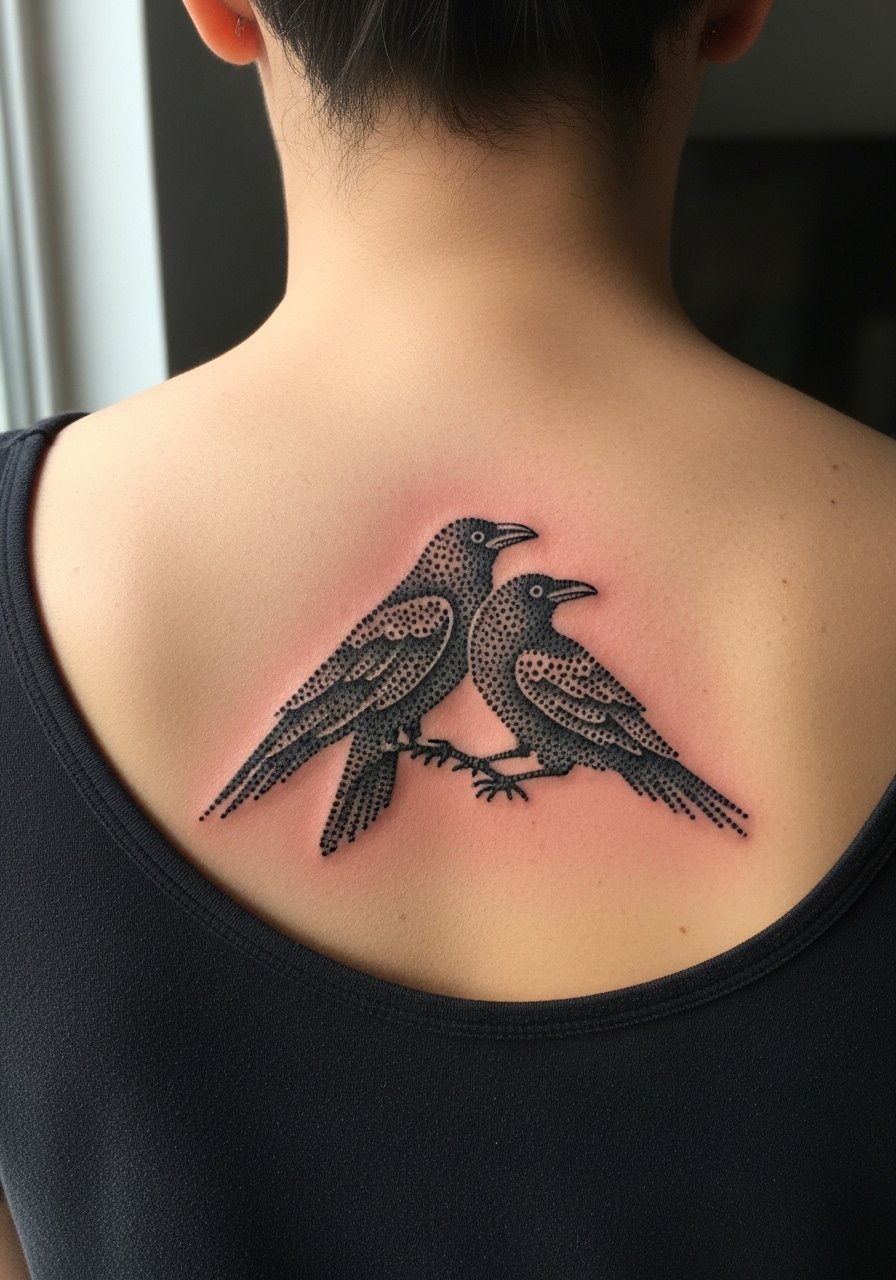
Upper back placement lets the ravens spread without distortion from constant movement. Ask for negative-space wings against stippled sky so the birds keep silhouette clarity over time. Sessions run two to three hours and the pain is low to moderate. For wardrobe, an open-back top or a thin chain pendant necklace that sits at the nape complements the composition. A downside is that you might not see the piece daily. Bring reference photos for symmetry and consider a small touch-up once the skin settles.
13. Shield Maiden Portrait in Dot Cross-Hatching on the Thigh
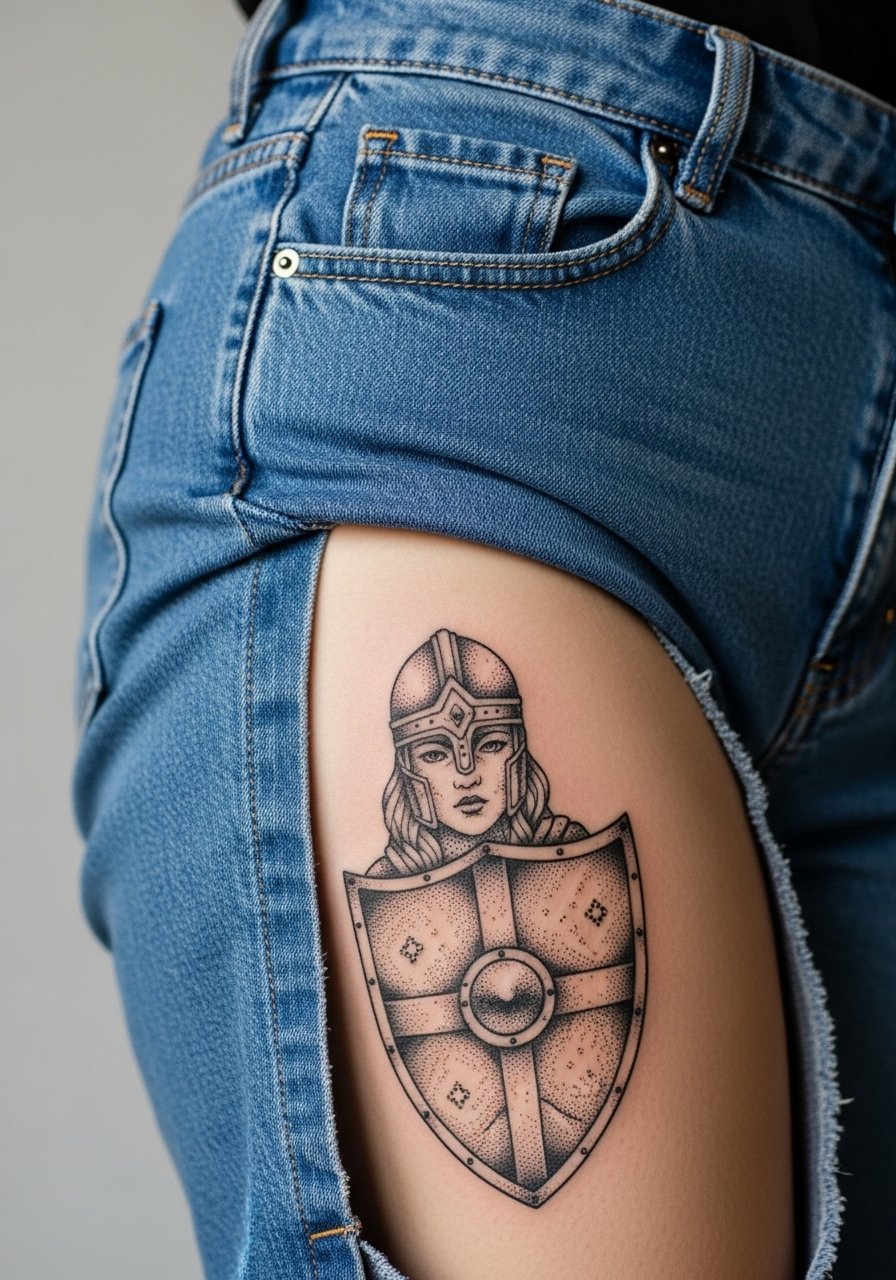
Thigh pieces offer privacy and scale for a portrait rendered in dot cross-hatch. Tell your artist if you want more contrast around the eyes so expression survives softening. Thigh sessions are moderate on pain and can be long, so wear shorts that allow the artist access and comfort during multi-hour sittings. For session wear, a loose drawstring linen pant helps in the hours after the visit. Portrait dotwork can blur if scaled too small, so plan for a larger panel and a one-year review for touch-ups.
14. Knot-Filled Arm Cuff with Negative Space Runic Insets

An arm cuff reads best when knotwork alternates dense and airy sections to prevent the whole band from becoming gray. During consult, request negative-space runes inset into the knot so they remain legible at a glance. Forearm friction is lower than fingers, so longevity is better. Expect a two-hour session for a mid-width cuff. Pair it with a minimalist watch or stacked bracelets that do not sit directly atop the knotwork. A common misstep is packing too many tiny knots into a narrow band. Give each knot room to breathe and plan for a touch-up at two to three years.
15. Helm of Awe Pocket Tattoo on the Ankle
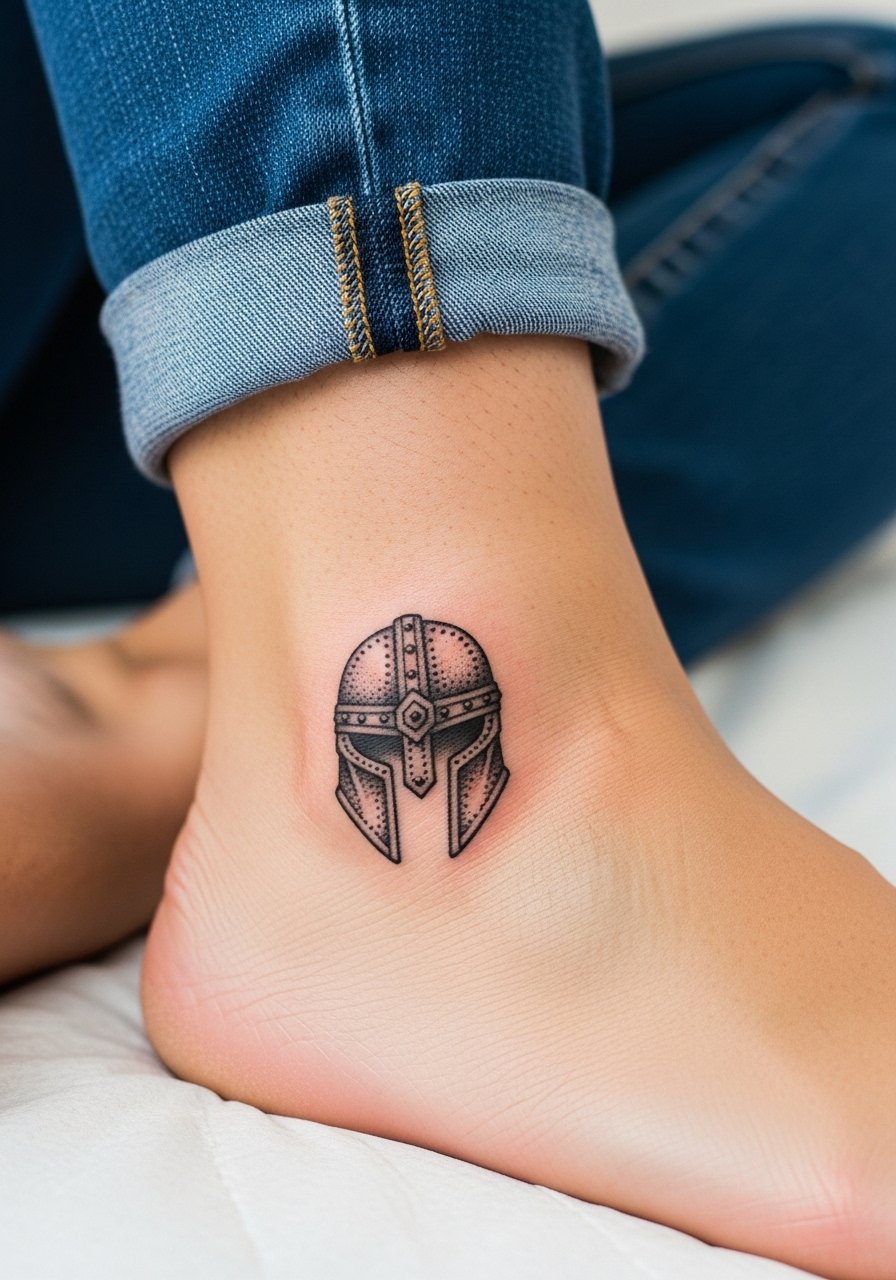
Ankle placements work well for compact radial symbols if you accept potential fade from shoes and socks. Ask for thicker outer arms and airy interior dots to preserve shape despite abrasion. Sessions are brief and pain is moderate. For session comfort, wear shoes that slip off easily and pants you can roll up without tight seams against the ankle. One realistic expectation is occasional fading at the top of the ankle from rubbing. Keeping dress socks loose in the first two weeks helps, and a targeted touch-up at year one is typical.
16. Longboat Prow with Dot Waves Along the Shin
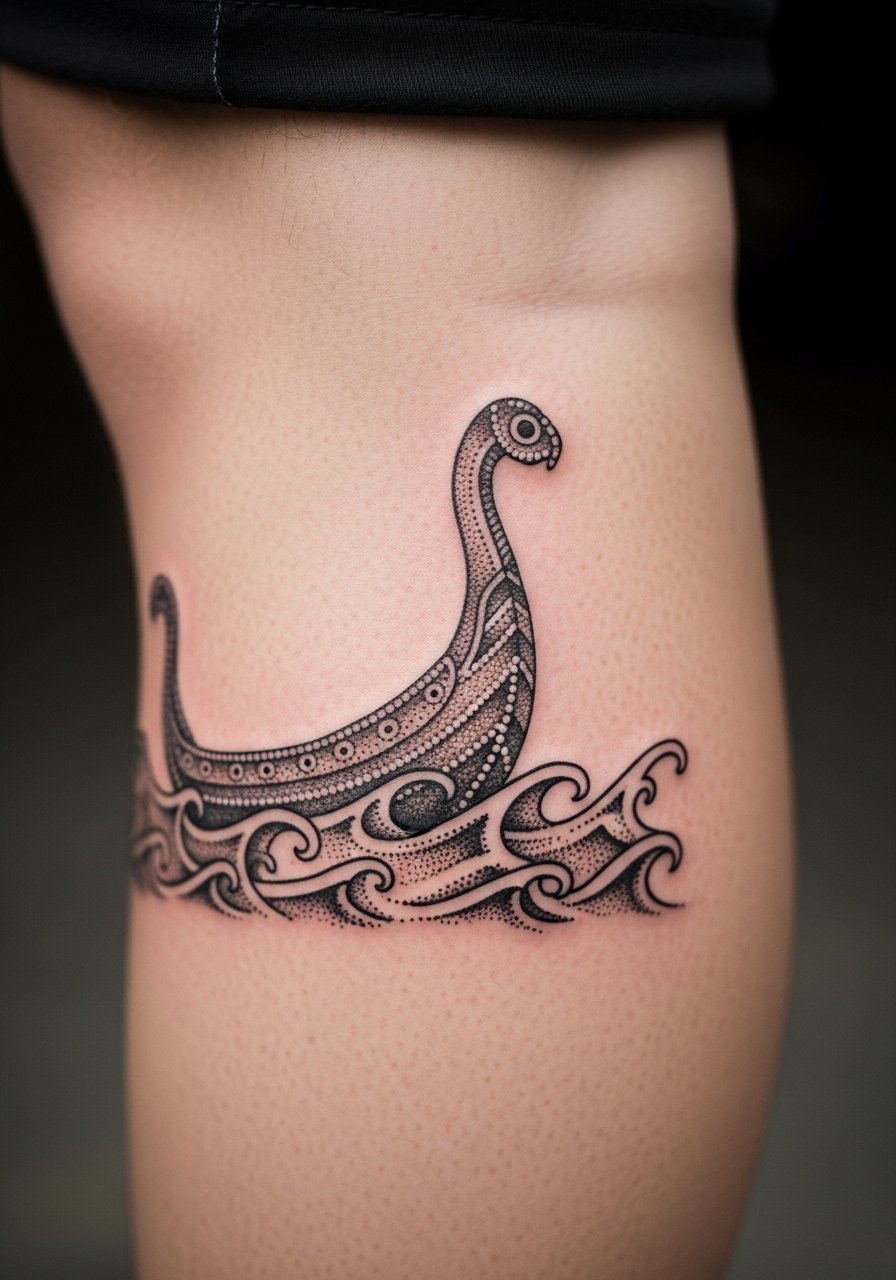
Shin placement can be painful but gives a dramatic vertical canvas for a prow slice. Tell the artist you want the wave stippling to fade outward so the prow remains the visual anchor. Sessions often break into shorter passes because the shin can get sore. For showing the piece, rolled trousers or shorts work well. A mistake is crowding the prow with too many fine details along the blade. Scale the ornamentation so the prow reads clearly even as dots soften over years.
17. Drinking Horn Script with Tiny Dot Embellishments on the Inner Forearm
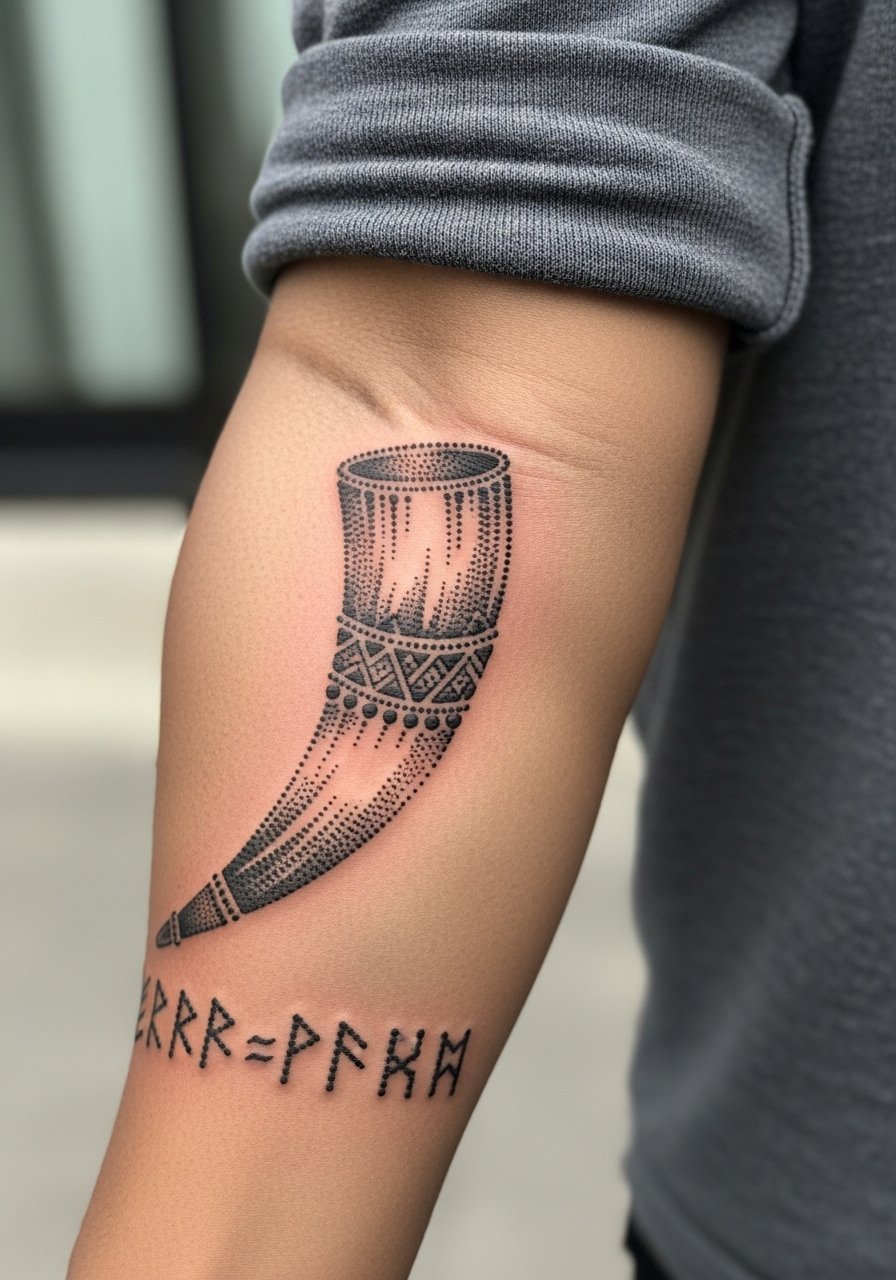
Inner forearm gives plenty of flat space for script and decoration. When you bring reference, point out desired line weight for the runes and whether you want them simplified or ornate. Pain is generally low and many of these take one to two hours. For showing off, roll up sleeves and wear light linen shirts to keep focus on the horn. Avoid tiny script between intricate dot flourishes. Leave breathing room so the script stays legible and ask about a touch-up timeline for the runes.
18. Fenrir Jawline Accent on the Side Neck
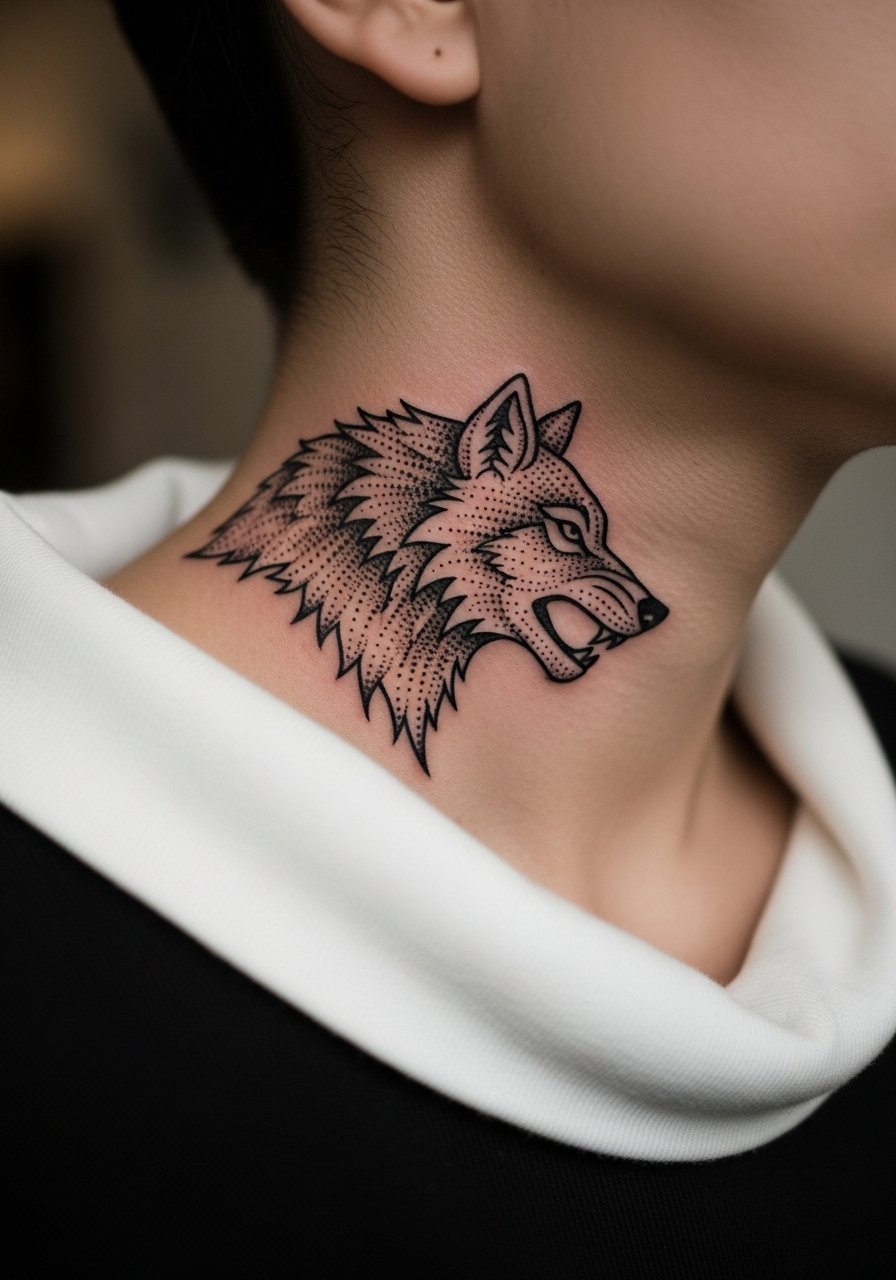
Neck placements are visible and demand careful career consideration. Pain can be higher and healing sensitive. Artists disagree openly about heavy dotwork on the neck. Some argue the area preserves dots with careful spacing. Others warn that constant motion and sun exposure accelerate blur. Ask the artist for a simplified jawline accent and for aftercare advice tailored to daily sun exposure. For wardrobe, wide-neck shirts that can be adjusted during sessions help. Expect to revisit for a touch-up as the area settles.
19. Serpent Knot Sleeve Starter on the Upper Arm and Elbow
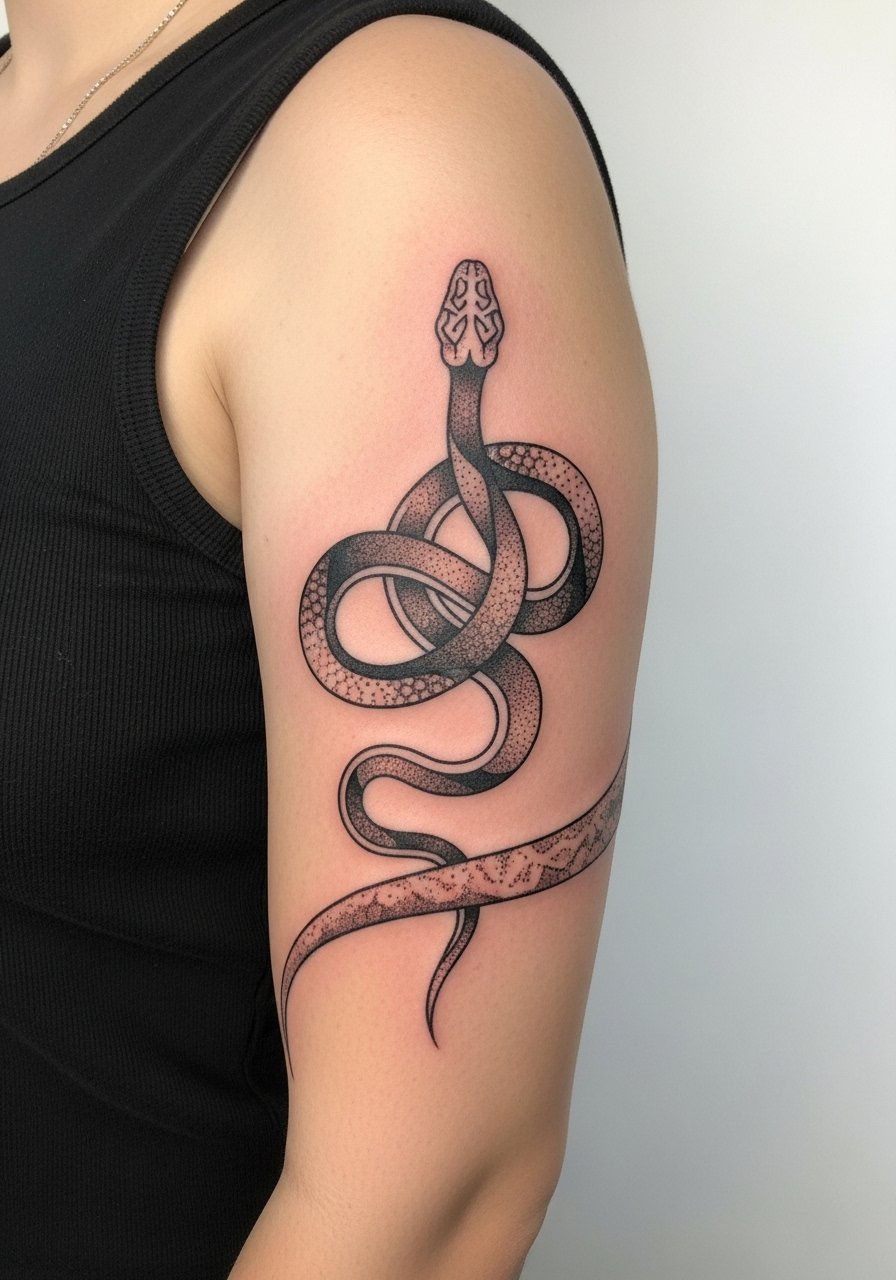
Elbow transitions challenge dotwork because skin creases and moves. When planning a sleeve starter, ask the artist to place heavier dots away from the fold lines and use stipple textures to bridge the crease. Sessions are longer and often split to allow healing between passes. For appointment wear, bring a loose tank top so the artist can work without skin stretch from tight sleeves. One real mistake is starting highly detailed dotwork right across the elbow crease. Build panels outward and allow the elbow zone to be simpler.
20. Norse Saga Scene in Miniature on the Ribcage Flank
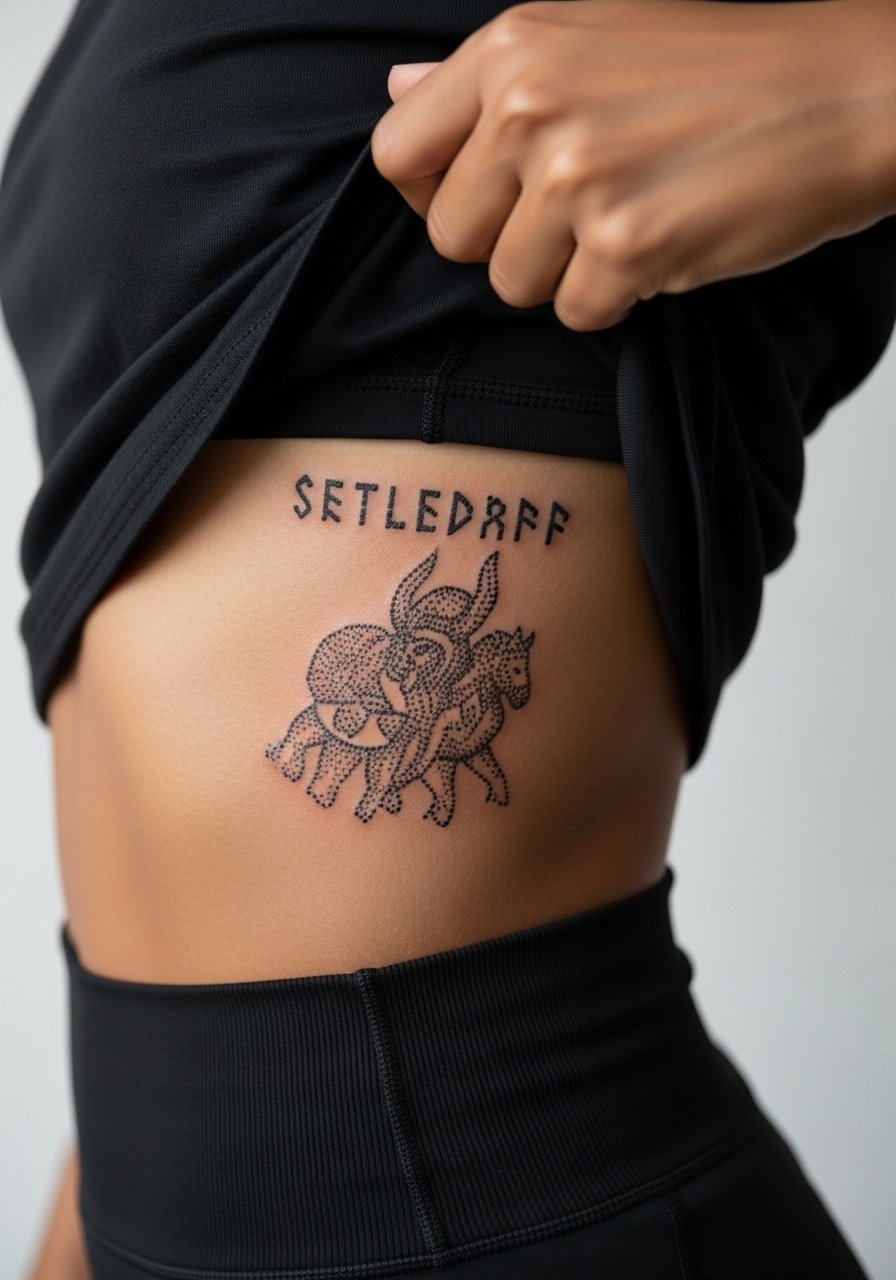
Miniature narrative pieces on the side torso can be emotional but they need scale to keep panel clarity. When describing the scene to your artist, explain focal points and ask for negative-space separators between elements. Ribcage flank moves with breath and clothing, so expect a painful but quick session for a compact vignette. A common misstep is compressing too many story beats into a postage-stamp area. Keep the layout bold and allow time for a follow-up to restore any lost contrast.
21. Odin’s Ravens Interlocked Above the Scapula
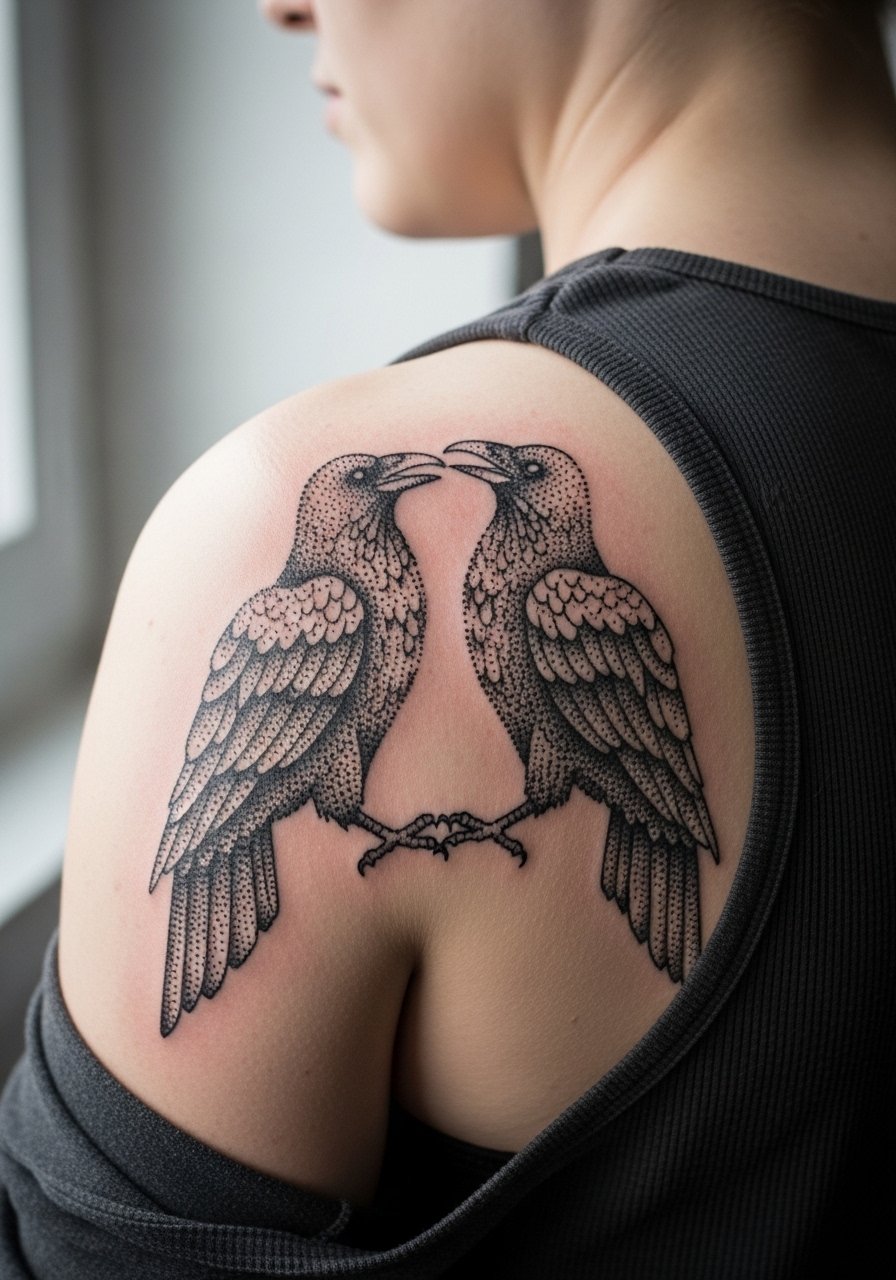
Scapula placement offers a subtle reveal and benefits from negative-space separation in interlocked forms. Ask the artist to keep wing edges defined with heavier dot anchors so shapes remain readable when viewed at a distance. Sessions may be split into two hours depending on symmetry needs, and pain is low to moderate. For showing it off, open-back tops or halters highlight the composition. Cultural sensitivity applies here too because Odin imagery ties into mythic traditions. Some people opt for stylized ravens rather than literal religious icons.
Frequently Asked Questions
Q: How does dotwork compare to solid blackwork when used on Viking motifs like knotwork and runes?
A: Dotwork gives texture and gradation that suits knotwork and runic shading, but it softens faster than solid black fills. Solid blackwork retains bold contrast longer. If longevity is the goal, pick heavier anchors in the design where lines matter most and plan for a touch-up at two to three years.
Q: Will a dot-heavy ribcage tattoo blur faster than the same design on the forearm?
A: Yes, the ribcage moves with breathing and stretches more than the forearm. Dense stipple on ribs can merge sooner. If you want ribs, ask for more spacing and slightly larger dot clusters so the pattern keeps definition as the skin settles.
Q: For visible places like hands, fingers, and wrists, what clothing should I wear to the appointment?
A: Wear easy on and off items that let the artist access the area without contorting the limb. For wrists and forearms, a racerback tank or a loose button-down pulled aside works well. For fingers, avoid tight gloves during the healing window and choose slip-on shoes if you have ankle work.
Q: How important is spacing in dotwork Viking knotwork to its longevity?
A: Spacing is crucial. Tight knots with minimal negative space tend to blur into gray patches. Ask for deliberate gaps and heavier dot anchors at structural points so the pattern reads clearly as it ages. Most artists will show you scaled proofs to agree on spacing before starting.
Q: Are there Viking symbols I should avoid or adapt out of cultural respect?
A: Some people prefer adapted or abstracted versions of mythic symbols rather than exact replicas tied to rituals. If a symbol has specific cultural or religious meaning, discuss respectful interpretation with your artist and consider a stylized approach.
Q: How often should I expect touch-ups for small dotwork pieces like finger bands and wrist Vegvisir designs?
A: Small visible pieces commonly need touch-ups within the first one to three years, depending on sun and friction. Fingers are the most likely to require earlier retouches. Wrist pieces often hold a bit longer if they were given spacing and heavier anchors.
Q: What should I ask an artist in consultation when requesting dotwork Viking pieces?
A: Ask about their experience with stipple shading and show healed photos of similar placements. Request to see scale proofs and ask where they would anchor heavier dots for longevity. Also ask how they manage skin that moves a lot and what realistic touch-up timelines they recommend.
