
Neo-traditional Goku forearms are everywhere online, but the tattoos that still look crisp years later usually share a few habits: bold outlines, mid-sized scale, and realistic spacing so the energy aura does not smudge into hair-thin detail. Expect talks about fading, touch-ups, and session pain during the booking. Read on for twenty-one concrete designs, how they age, what to say in consults, and which pieces pair with specific clothes for easy showing off.
1. Goku Super Saiyan on Outer Forearm
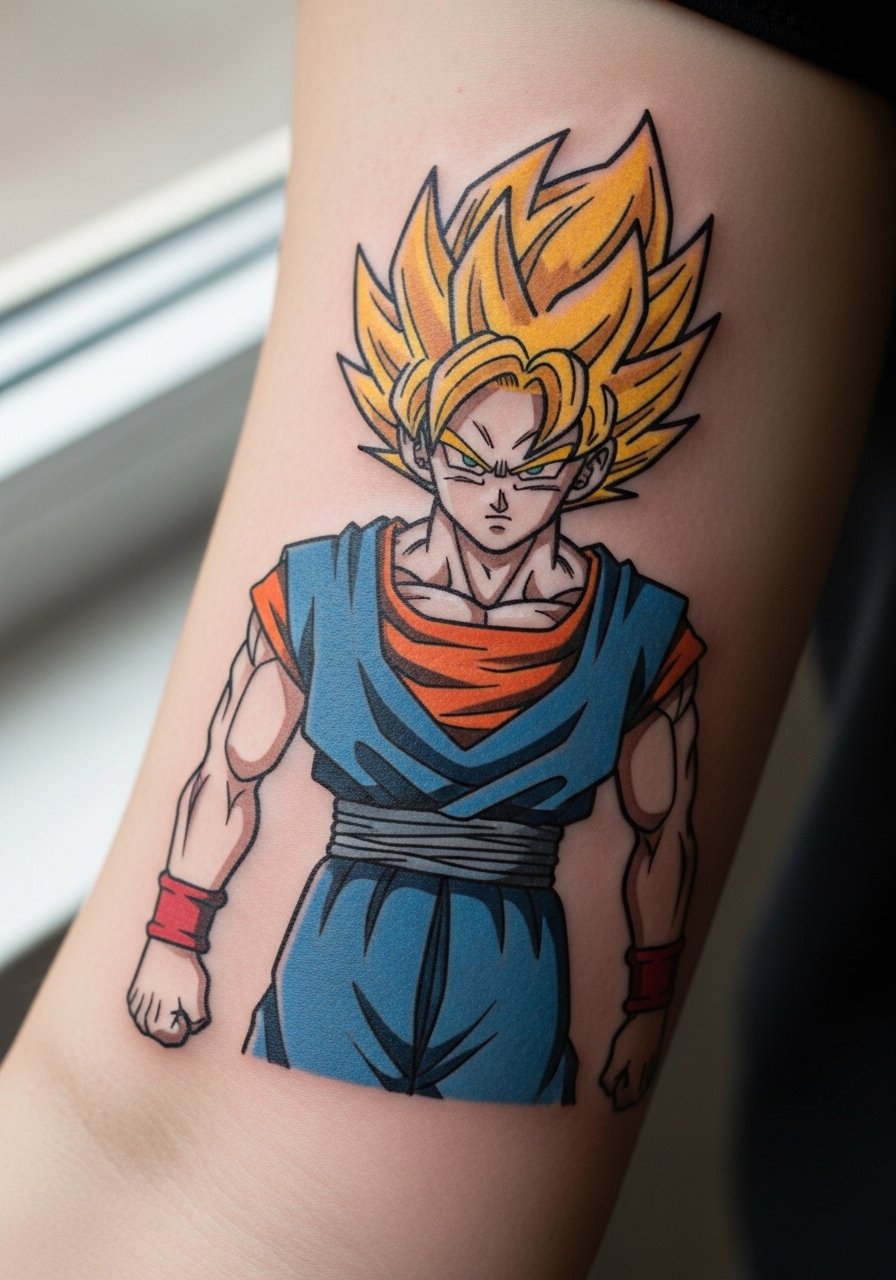
I've seen this placement survive heavy use when the piece is scaled to six to eight inches and set with thick outlines. Tell your artist you want the aura reduced to broad strokes rather than micro-texture so the gradient does not feather into the skin in year two. Common mistake is requesting photo-real detail at a tiny scale. Expect moderate pain on the outer forearm and a two-hour to three-hour session for a mid-size color piece. For showing it off, roll up a fitted black tee sleeve and wear a fitted black t-shirt that frames the art without distraction.
2. Vegeta Final Flash Upper Arm Blast
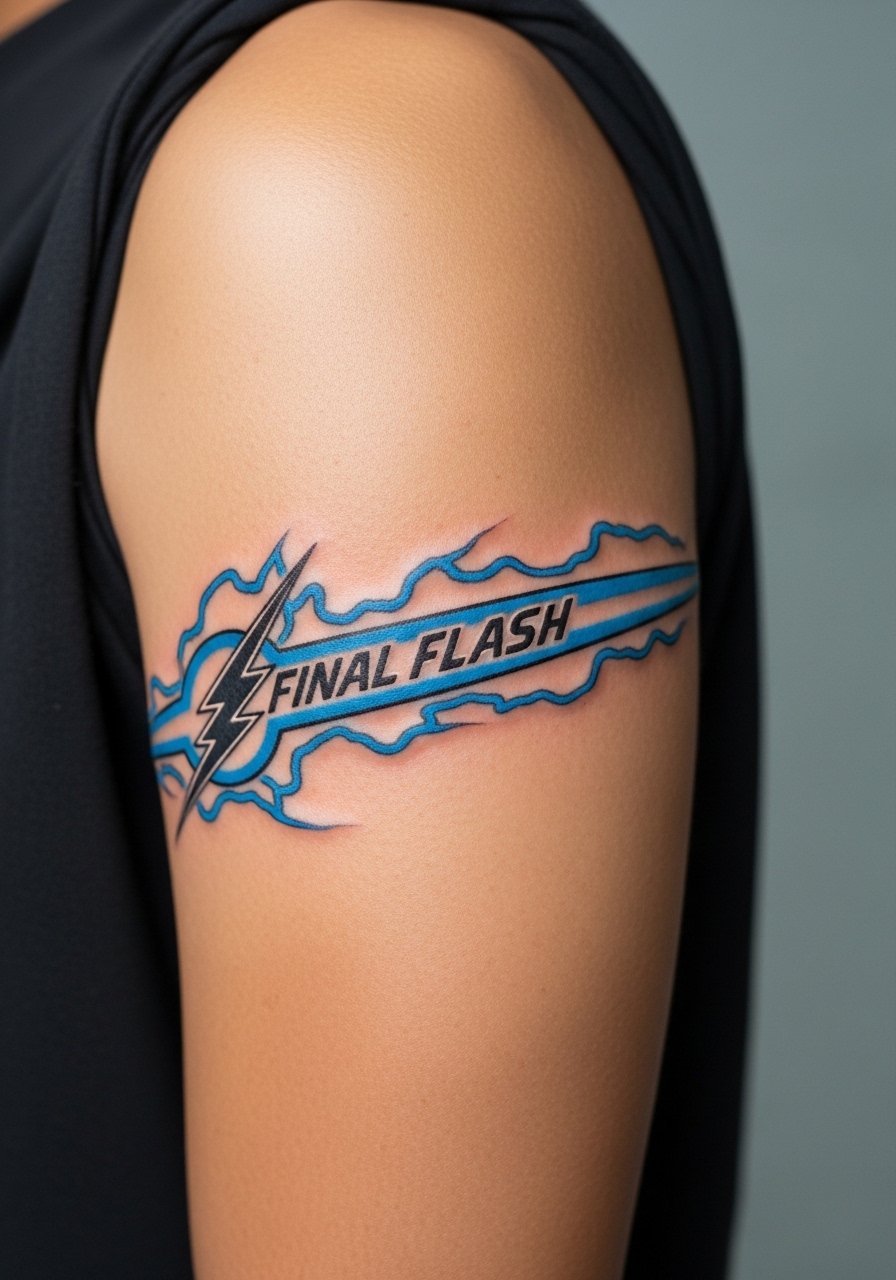
Fair warning, the upper arm handles saturation well but needs staged sessions for large blackwork. One camp prefers pure black and gray with subtle blue accents for longevity. The opposing camp argues color sells the blast better but will need touch-ups sooner. When you consult, ask for bold outlines and layered whip shading so the beam keeps depth as it settles. Sessions run longer for wrap elements, four to six hours split across two sittings. Pair this with a sleeveless muscle tank when you want to show the full arc.
3. Shenron Coil Around the Bicep
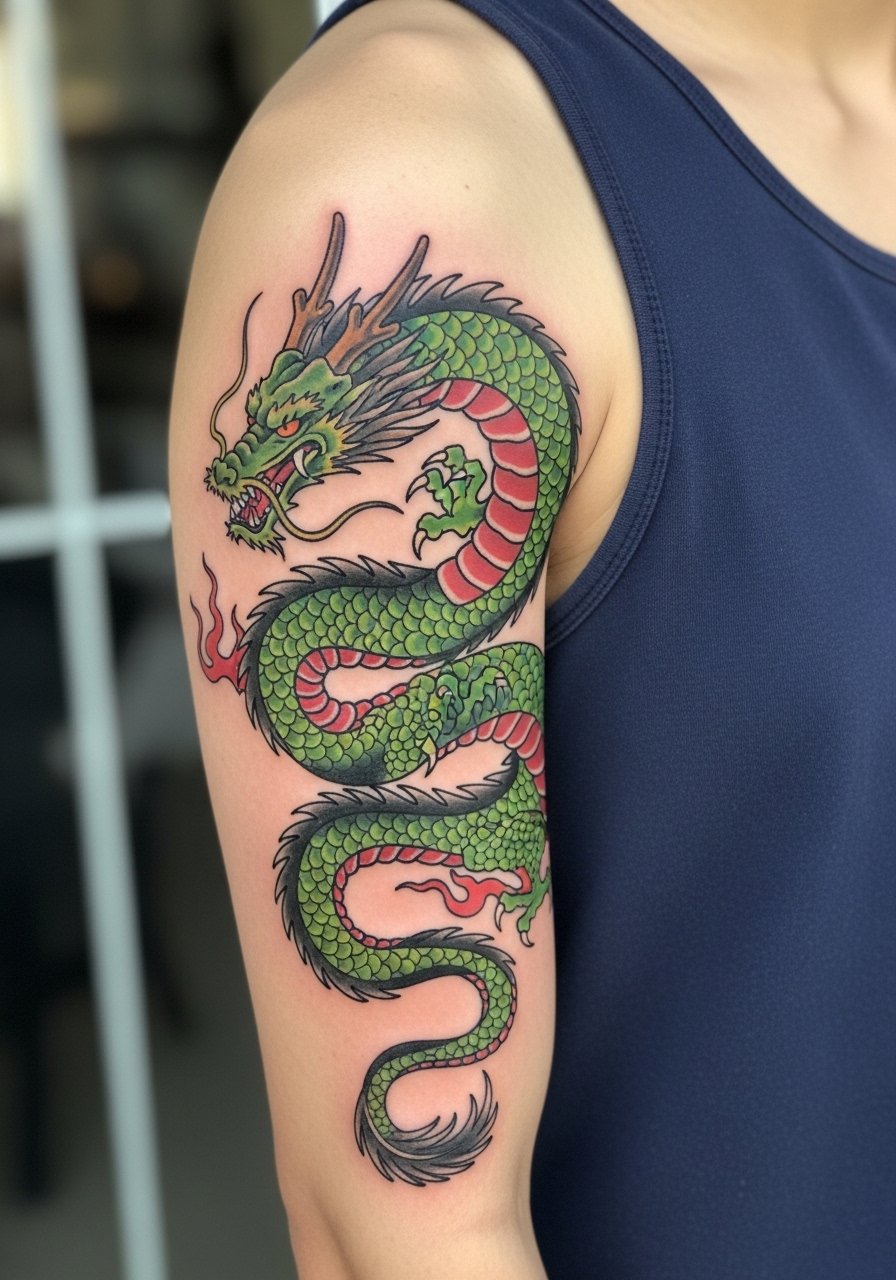
There is something about a wrapped dragon that reads clearly from the hallway when the linework is intentionally chunky. The key instruction in consultation is to avoid ultra-fine scales; ask for scale patterns suggested by stipple shading and thicker contour lines so the texture holds up. Most people mistake small-scale detail for authenticity. The bicep is forgiving on pain and on saturation, and a two- to three-hour session will get a mid-sized wrap. Show it off with a navy tank top that keeps the silhouette clean.
4. Frieza First Form Calf Portrait
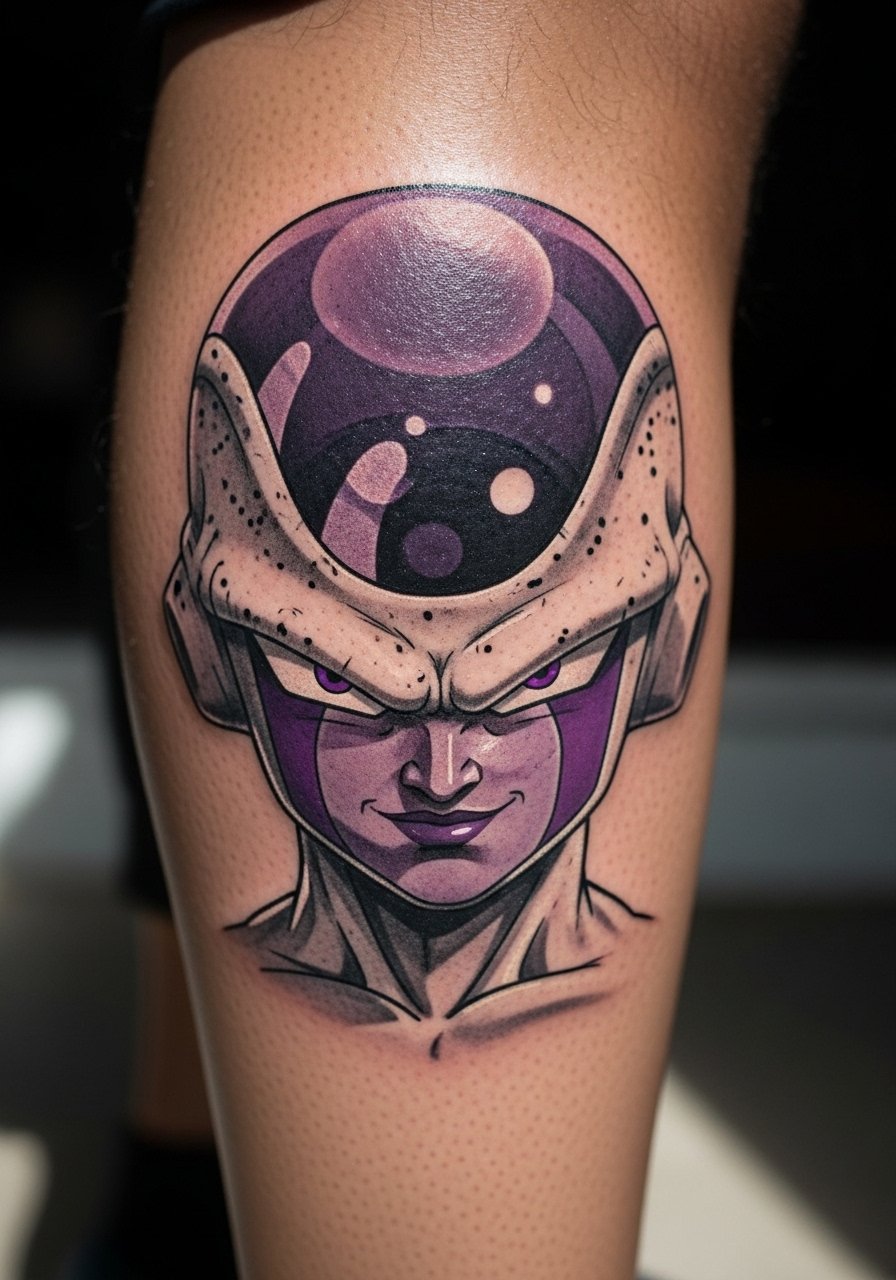
Micro-realism on the calf needs crisp contrast and controlled saturation because the leg flesh can blur fine dots over time. Tell the artist you want tight dot work for gradients and defined edges around the jawline to prevent the portrait from softening into a gray smudge after a few years. People often ask for very small portraits on the calf and regret the loss of facial clarity later. Expect moderate pain, three short sessions totaling around five to six hours, with a likely touch-up at year two.
5. Kamehameha Hand or Wrist Gesture
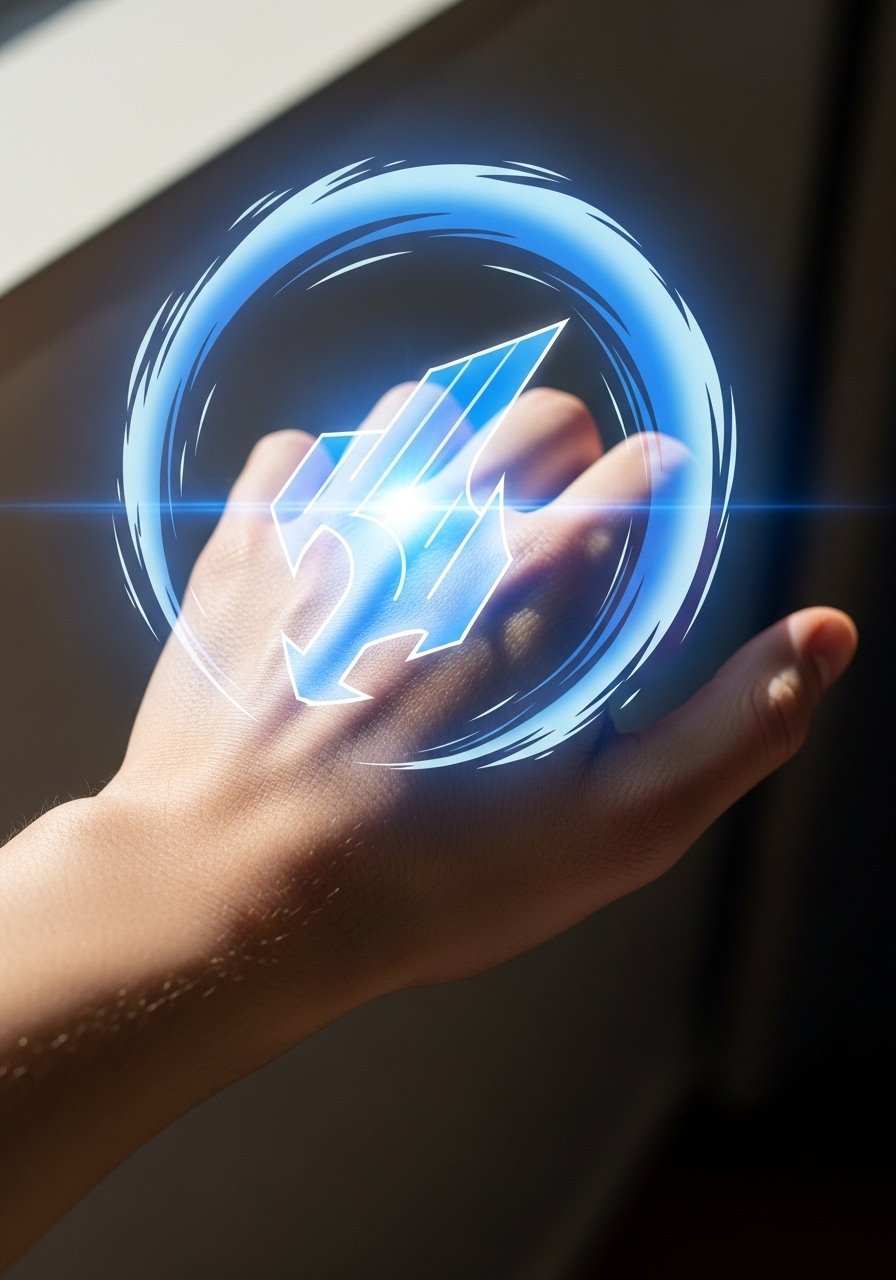
Hand and wrist placements show movement and invite interactive posing, but they also face constant washing and friction which accelerates fading. Artists split on fine line here. One group says thin line is elegant, the other recommends thicker black outlines to keep the orb from turning into a blur. If you want longevity, ask for bolder linework and a compact color block rather than wispy gradients. Session length is short, often under two hours, but expect touch-ups sooner than arm work. For the appointment wear, avoid bracelets and consider a sleeveless tee so the artist has full access.
6. Cell Perfect Form on Outer Thigh
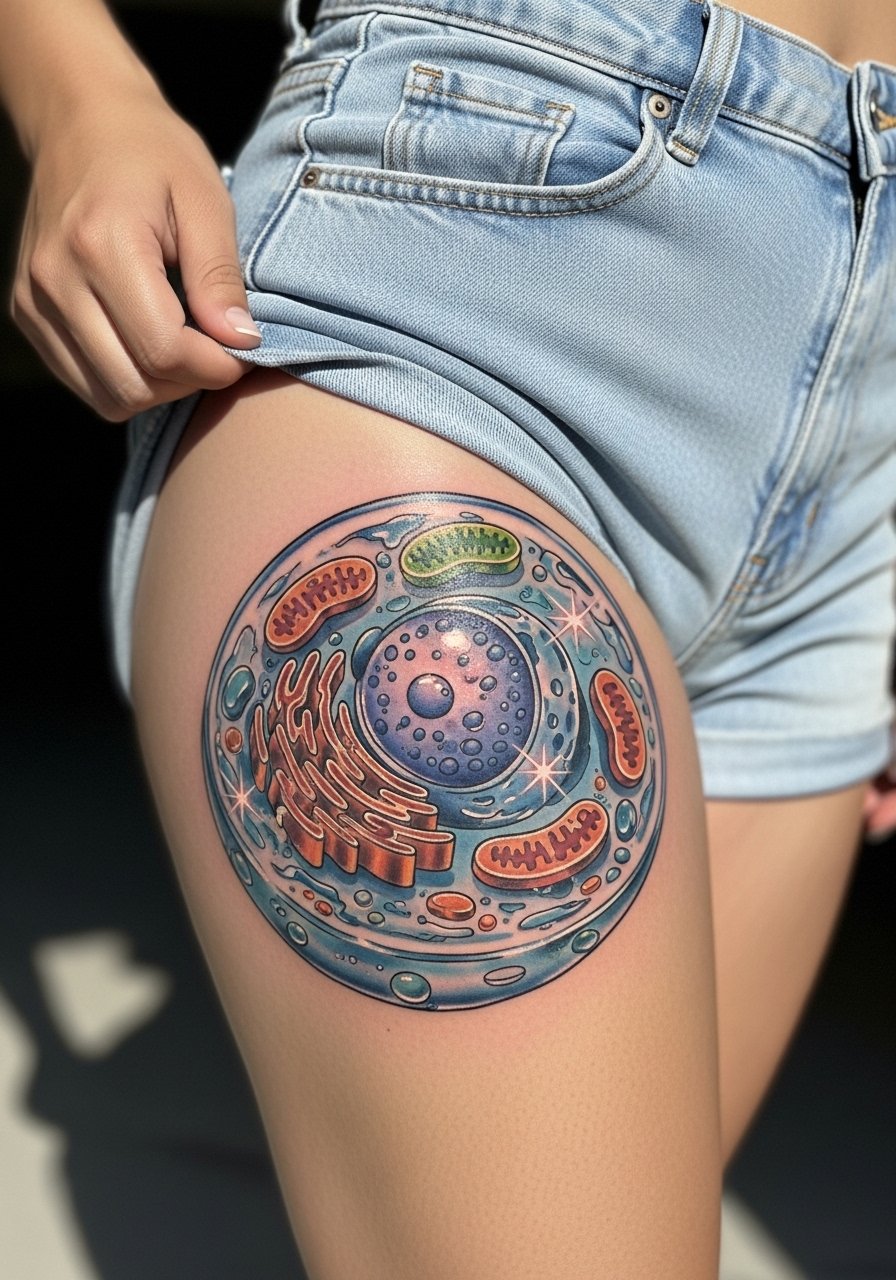
Most thigh realism works because the canvas is large and easy to rest on. In consultation, say you want reflective highlights emphasized with small white ink accents so the biomechanical textures keep dimension as they age. Mistake people make is compressing a full-body character into a narrow strip, losing posture and readability. Expect multiple sessions, often totaling four to six hours across sittings, and a touch-up at year one for saturated areas. For session comfort, wear high waisted denim shorts that you can shift without causing pressure on the area.
Pre-Session Essentials
The forearm, bicep, hand, and thigh pieces above have different access needs and healing challenges, so a short kit tailored to the placement smooths the session and the first week.
- Stencil transfer paper kit. Lets you preview line placement on skin before the needle, which is useful for the forearm and bicep wraps above.
- Topical numbing cream. Applied per instructions ahead of short wrist or hand sessions to ease sensitivity without changing ink saturation.
- Thin protective film roll. Helps finger and hand tattoos survive early washing and friction from daily tasks.
- Fragrance-free gentle body wash. Cleans healing areas without stripping fresh pigment, important for thigh and calf portraits.
- Aquaphor healing ointment. Thin application in the first days keeps fine line sections hydrated without clogging.
7. Piccolo Armband Training Band
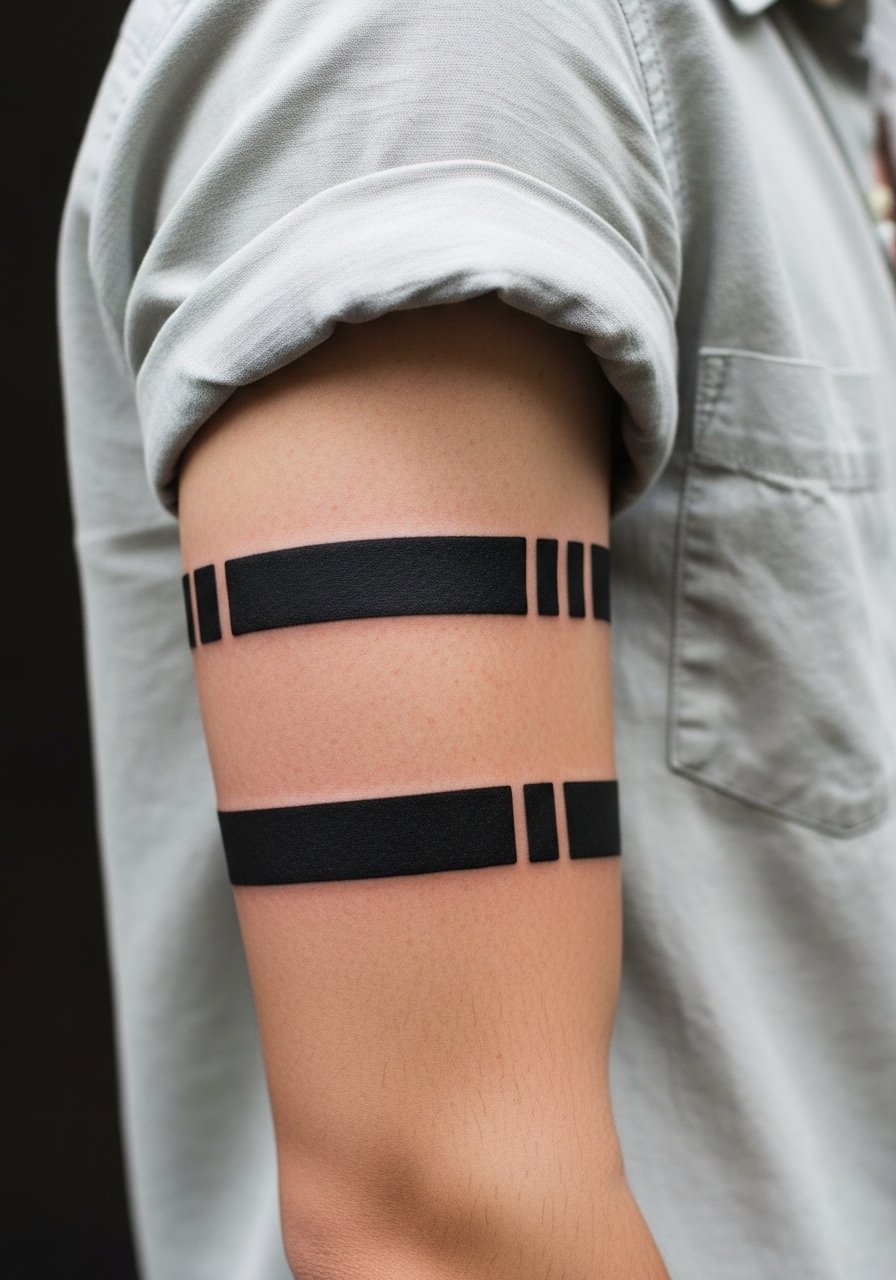
This compact blackwork band reads like a subtle nod to mentorship when executed as a thick, even band. The most common error is too many micro-details inside the band which collapse over time. Tell your artist you want a solid black fill with small negative-space accents so the armband keeps its graphic edge. It is low to moderate pain with a one-hour session for single-pass fill and rare touch-ups. Pair it with a loose button down shirt you can roll to show the wrap without competing patterns.
8. Spirit Bomb Chest Orb, Watercolor Glow
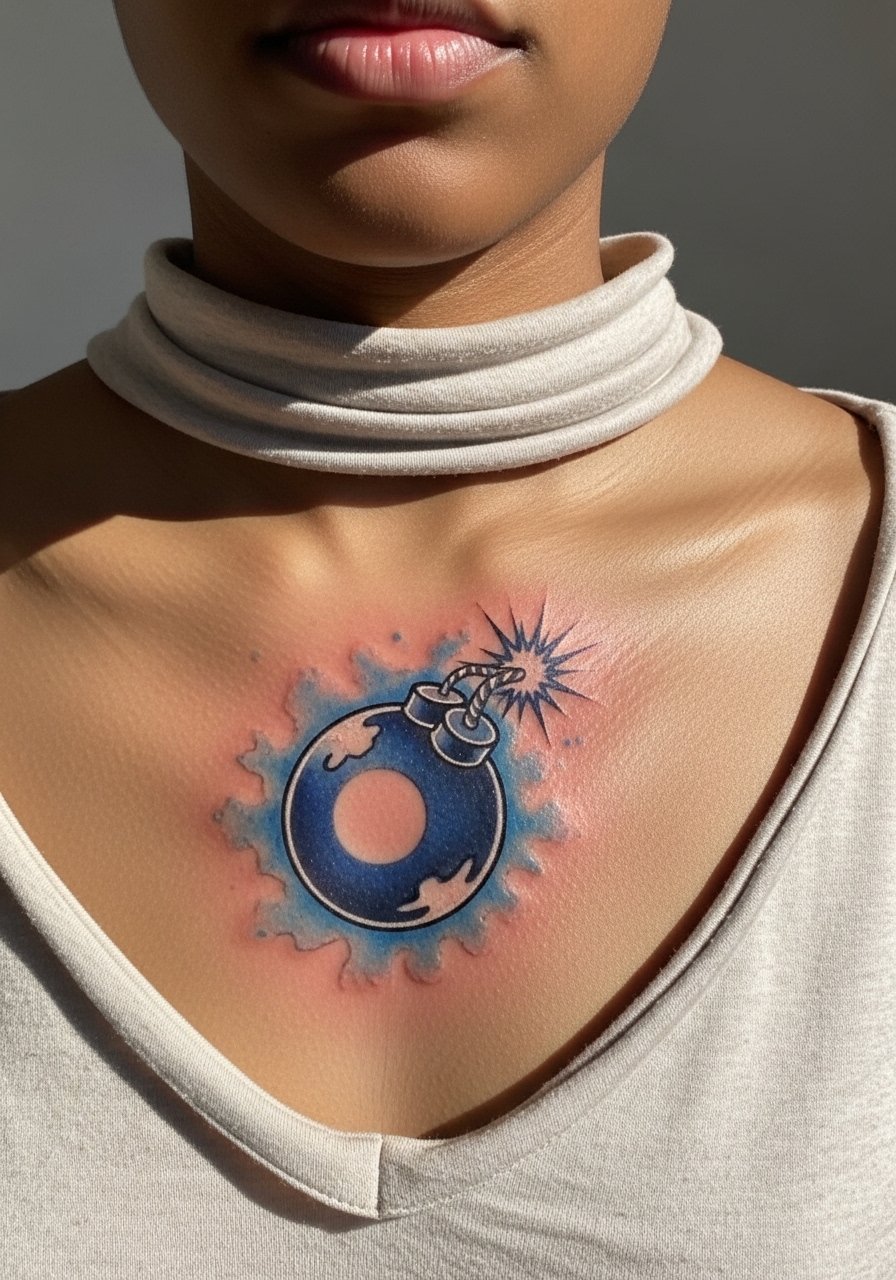
Watercolor pieces on the chest look dramatic but they need clear planning about saturation and placement because chest skin shifts with breathing. One camp favors saturated pigments for a lasting glow. The other prefers softer washes to keep the watercolor feel even as some pigments fade. For better longevity, ask for stronger outer outlines or a thin black halo to retain shape. Chest sessions can be painful for many, and a full orb like this often spans several sessions. For showing the art, try a deep V neck tee that frames the orb.
9. Majin Buu Shoulder Cap
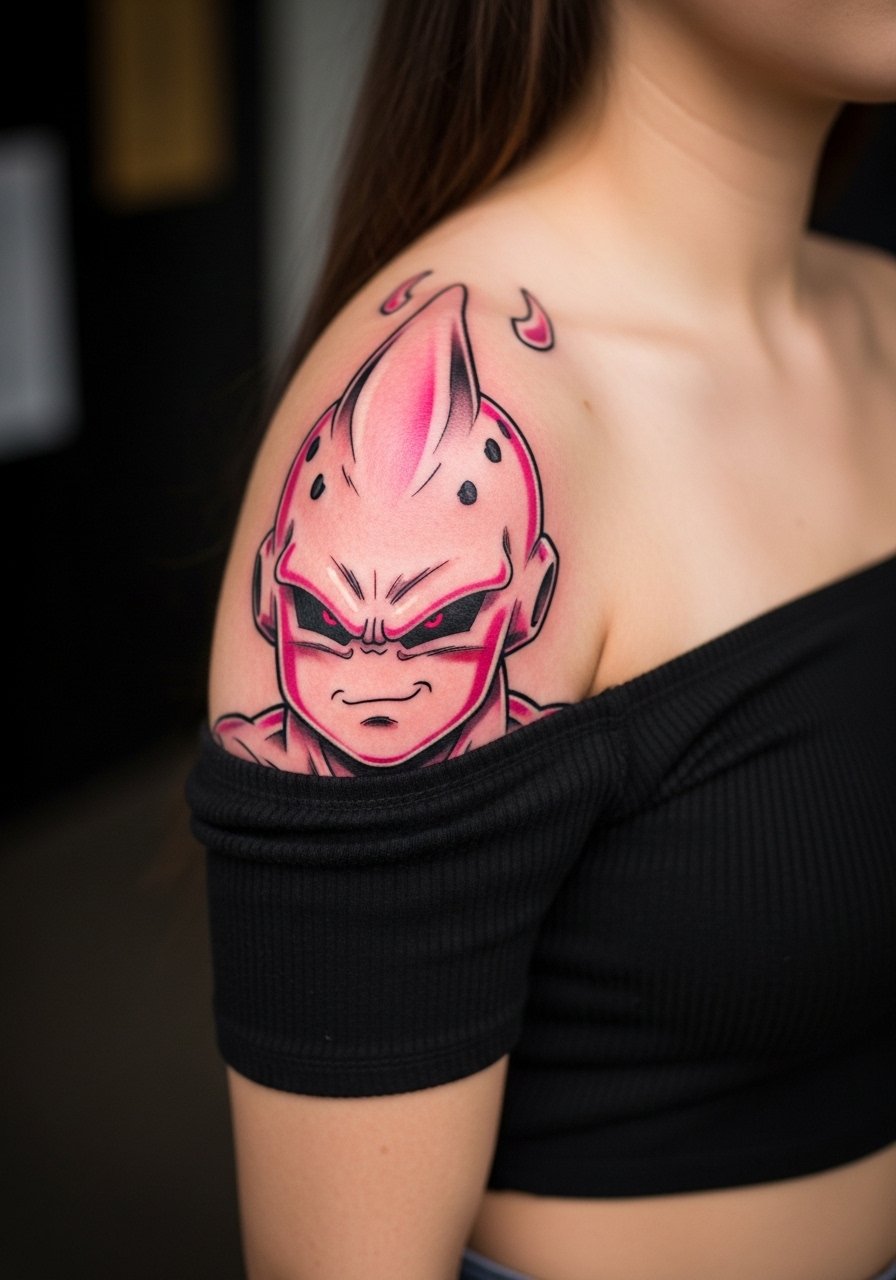
Shoulder caps take color well and are forgiving for playful portraits like Majin Buu, but the common mistake is packing too much small facial detail into a six-inch space. Ask for selective emphasis on the eyes and mouth and use stipple shading for texture so the main features survive settling. The shoulder is a low to moderate pain zone and often completed in two one-to-two hour sessions. For styling, an off shoulder crop top or strapless tank highlights the cap without fabric interference.
10. Dragon Balls Minimalist Wrist Set
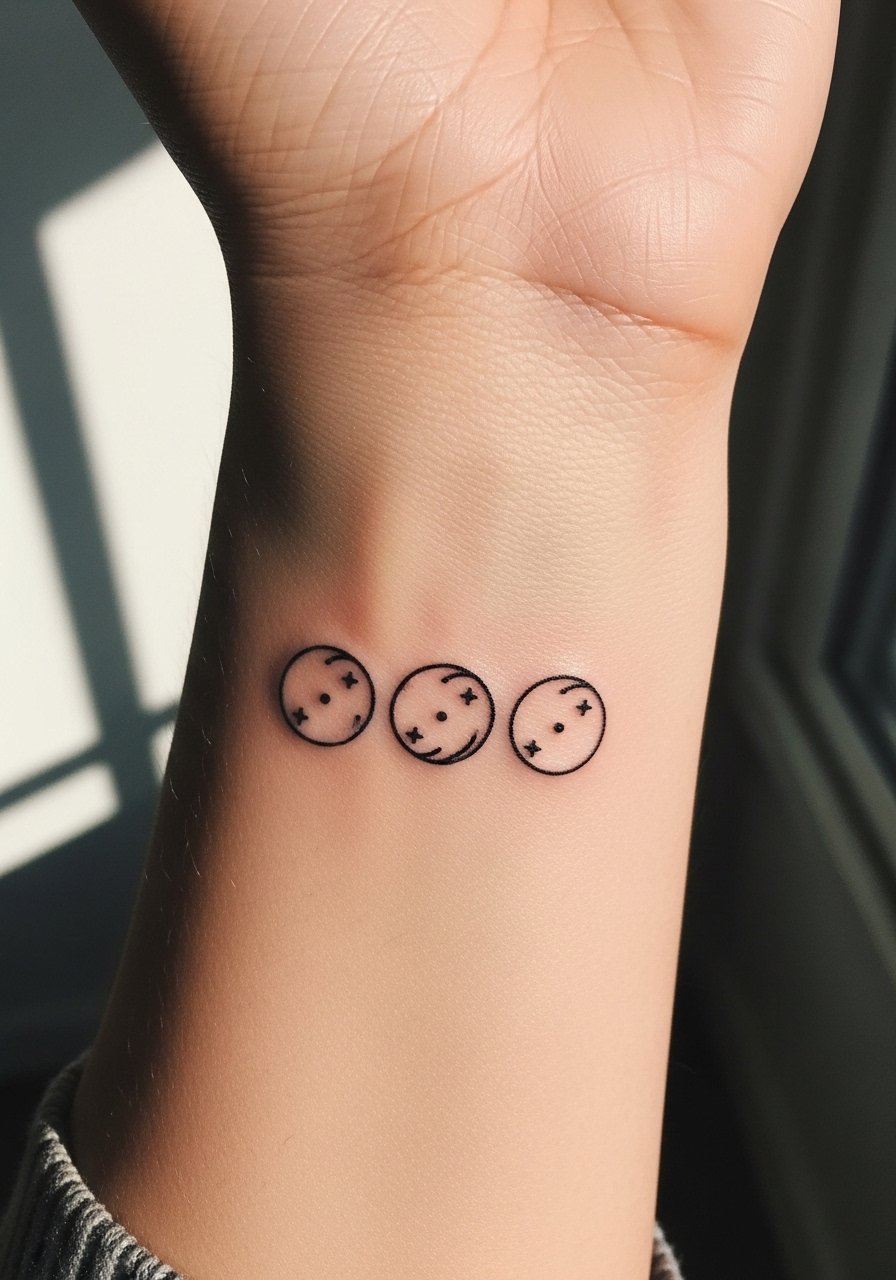
Small wrist pieces are ideal first tattoos but they age faster because the skin sees constant movement and washing. Fine line fans argue for delicate dots and tiny stars. The durability camp recommends a slightly thicker outline to avoid two-year blur. If you want subtlety but stay realistic, ask your artist for 1.5 to 2 mm outlines rather than hairline. Session time is short, and budgeting for a touch-up in year one is practical. While the piece settles, a thin leather cuff bracelet on the opposite wrist keeps attention balanced.
11. Trunks Sword Upper Back Outline
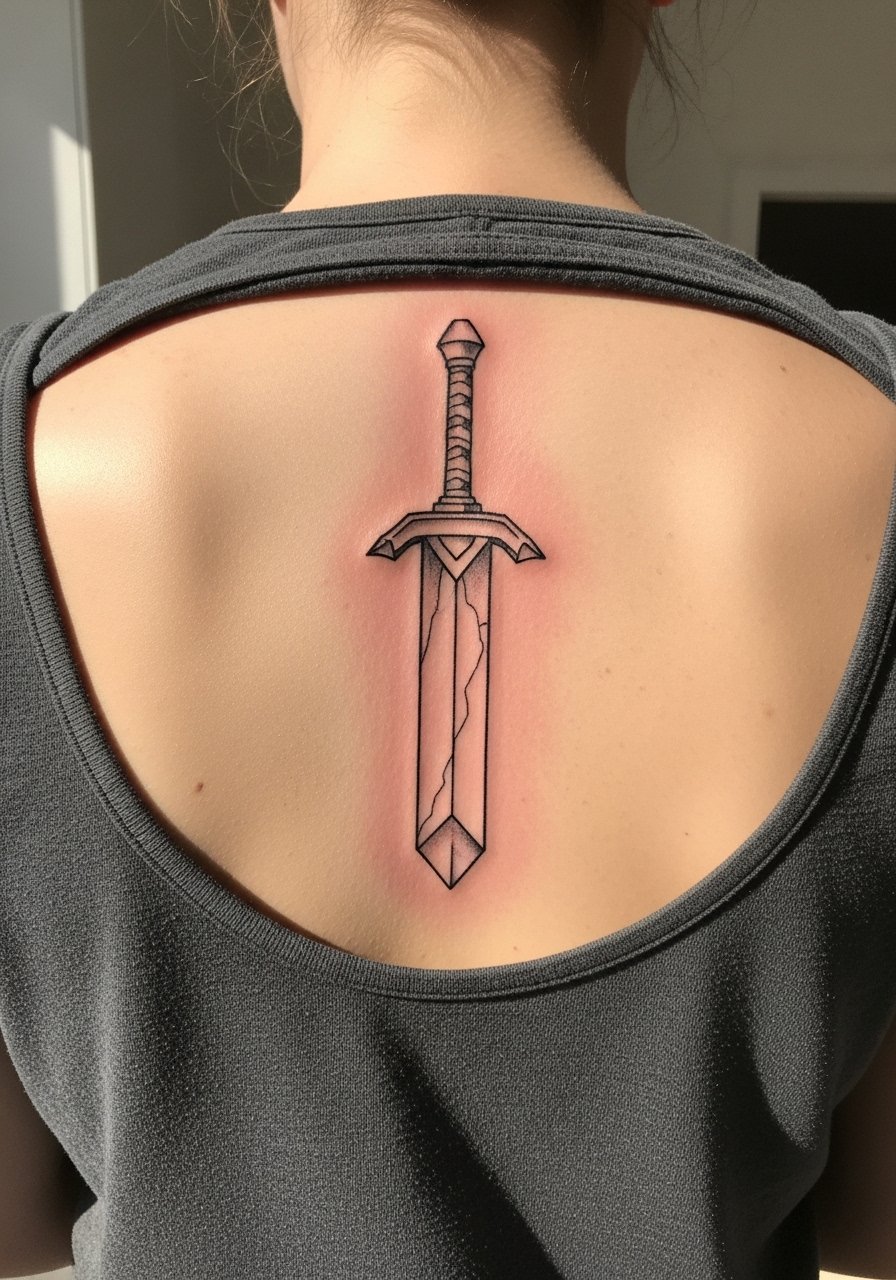
The upper back is great for vertical weapon outlines because the spine gives a central axis for balance. A frequent mistake is asking for extremely thin linework without space for breathing; that leads to muddy lines as the back moves and skin regenerates. Tell the artist you want a clean, slightly reinforced outline and light gray shading for depth. Expect moderate discomfort when lying face down for longer sittings, and plan for a single session of two to three hours for a 12-inch outline. To show this piece at events, a backless tank top frames the blade cleanly.
12. Gohan Beast Mode Inner Arm Half-Sleeve
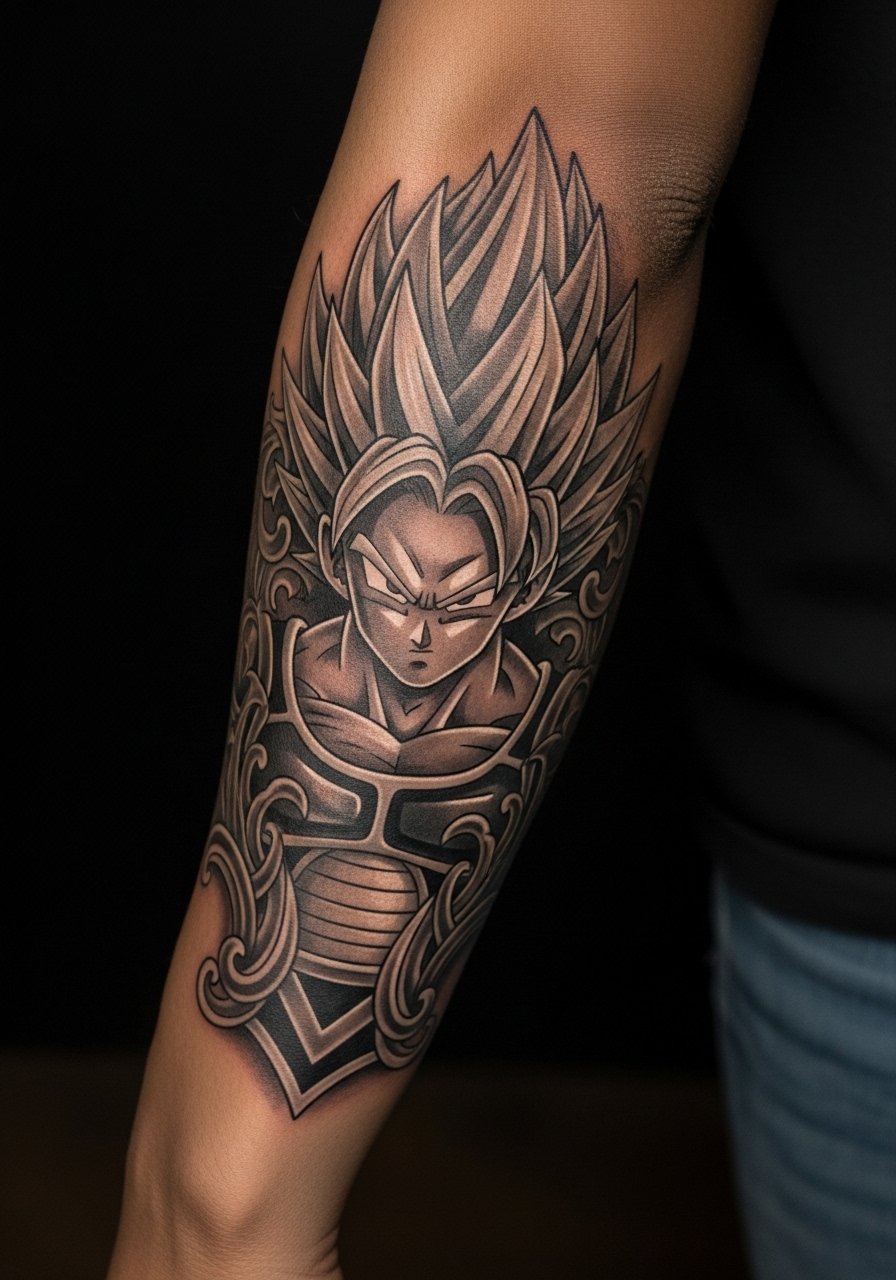
The inner arm can hold ornamental work beautifully but it is a sensitive area that bruises more readily. Artists split on fine detail here because of the soft tissue. The safer approach is to prioritize medium linework and decorative negative space to avoid blurring. Expect higher pain and multiple sessions totaling around five hours for complex ornamentation. A common client mistake is scheduling back-to-back long sittings without rest. For the appointment, wear a loose tank top so the artist can rotate the arm easily.
13. Namekian Armor Ribcage Pattern
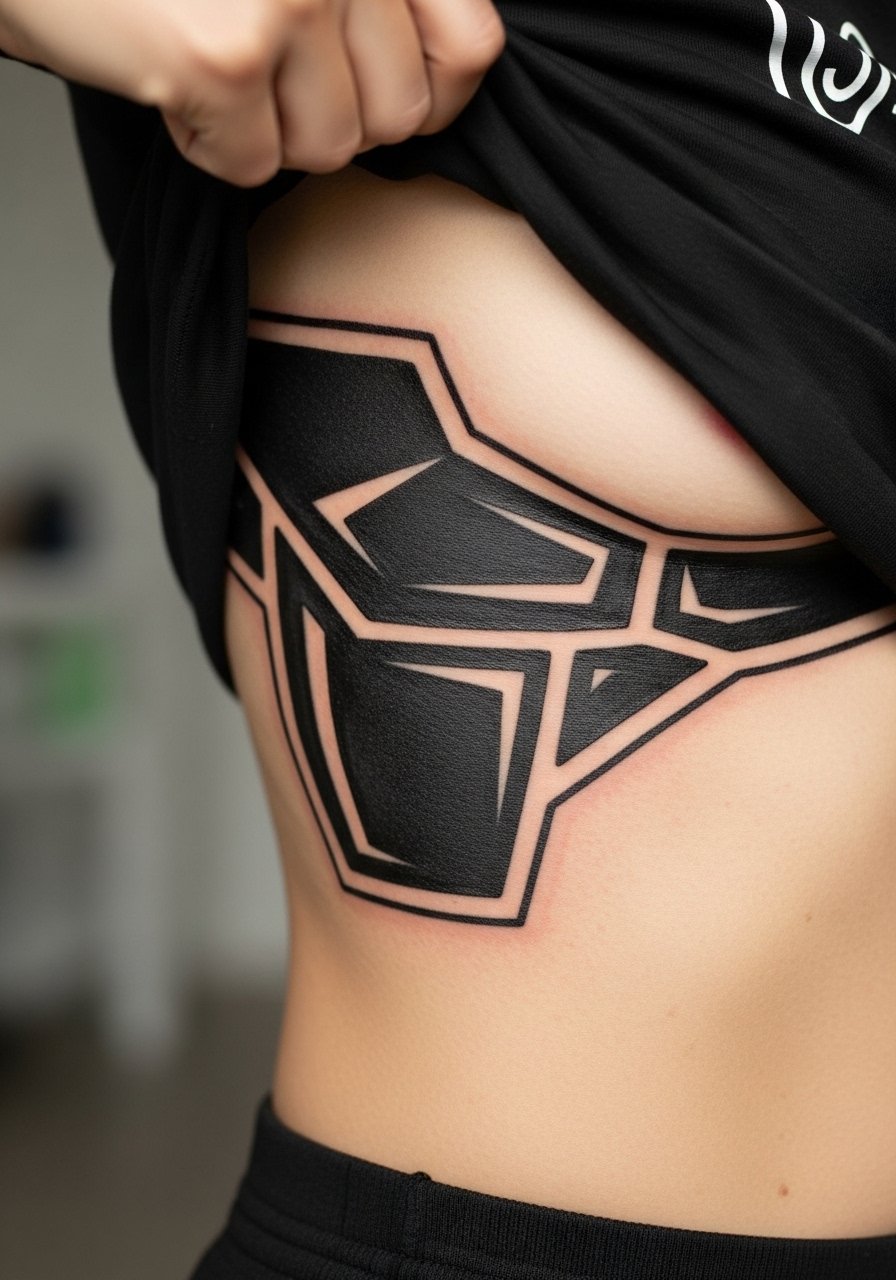
Ribcage placements are notorious for pain but reward with dramatic vertical designs when spaced properly. Fine line here divides artists into two camps. One group warns that dense fine work on ribs blurs quickly because skin stretches and moves. The other says careful needle depth and spacing will stabilize the lines. The honest route is to plan for larger negative space, heavier outlines, and expect a touch-up at year two. Sessions are often shorter with breaks, and bring someone to drive you home if needed.
14. Hand Kamehameha with UV Accent
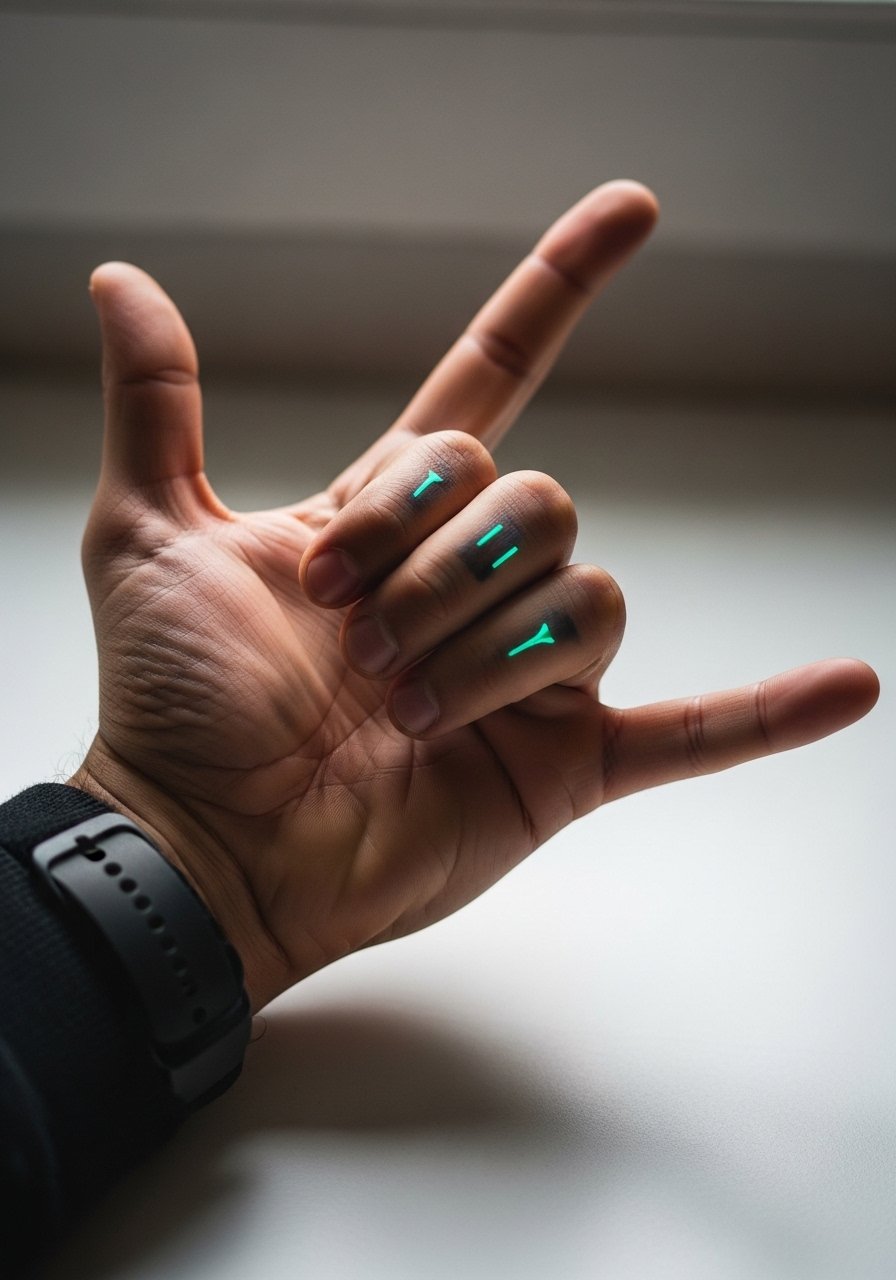
Hand tattoos are public and high-maintenance. The UV accent is a rare technique for night reveals and requires an artist experienced with specialty inks. Expect the fine line versus bold line debate here too. Bold outlines survive longer, but UV allows an extra layer for personal flair under blacklight. Plan for short sessions and frequent touch-ups. For the appointment, avoid rings and wear a sleeveless tee so the hand area is unobstructed.
15. Calf Frieza Villain Portrait
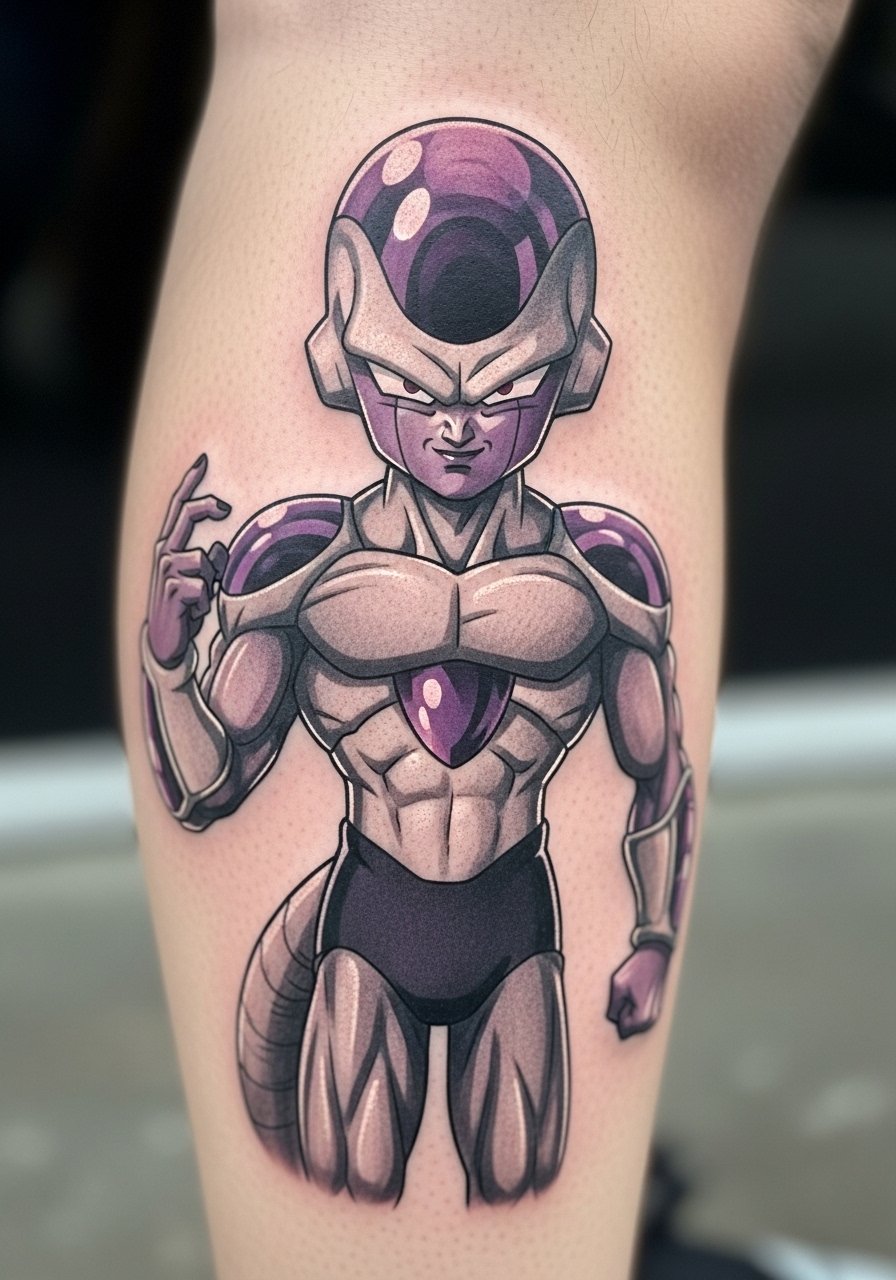
The calf tolerates portraits well because the skin is stable and there is room for fine stippling. Tell your artist you want tight dot work and a slightly larger scale than you think to preserve facial definition. A frequent error is shrinking the reference too much. Sessions add up to three to five hours and a touch-up is common once pigment settles. Show it off in summer by cuffing slim joggers or wearing slim fit athletic shorts.
16. Piccolo Mentorship Armband, Weighted Training Motif
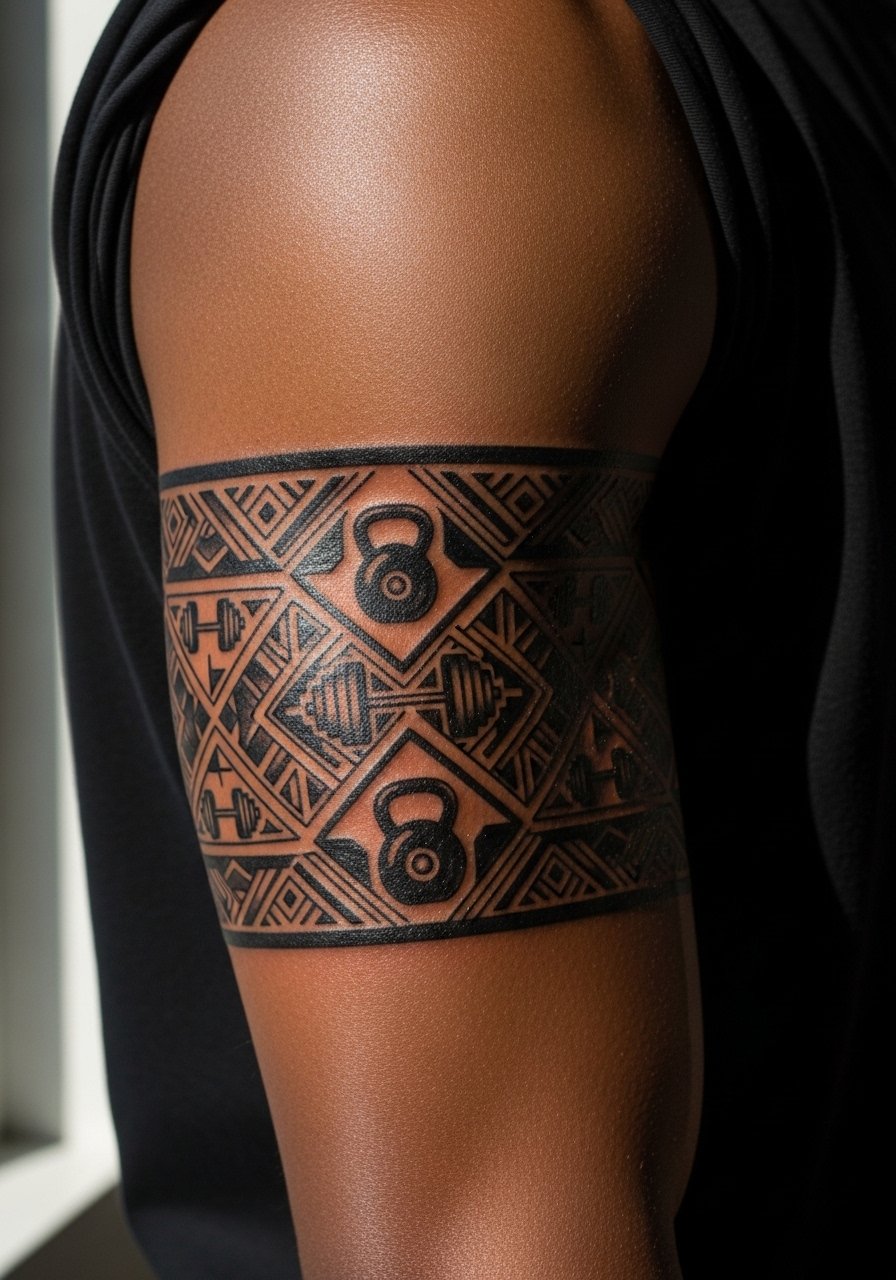
This armband functions as a discreet symbol of discipline and reads best when the pattern is bold and single-pass filled. Mistake clients make is requesting tiny script within the band which becomes illegible. Ask the artist to leave breathing room and to anchor the band with a consistent 3 mm line thickness. It takes under two hours typically and rarely needs touch-ups if filled correctly. Wear a loose button down you can roll to highlight the band.
17. Trunks Sword Thigh Variant
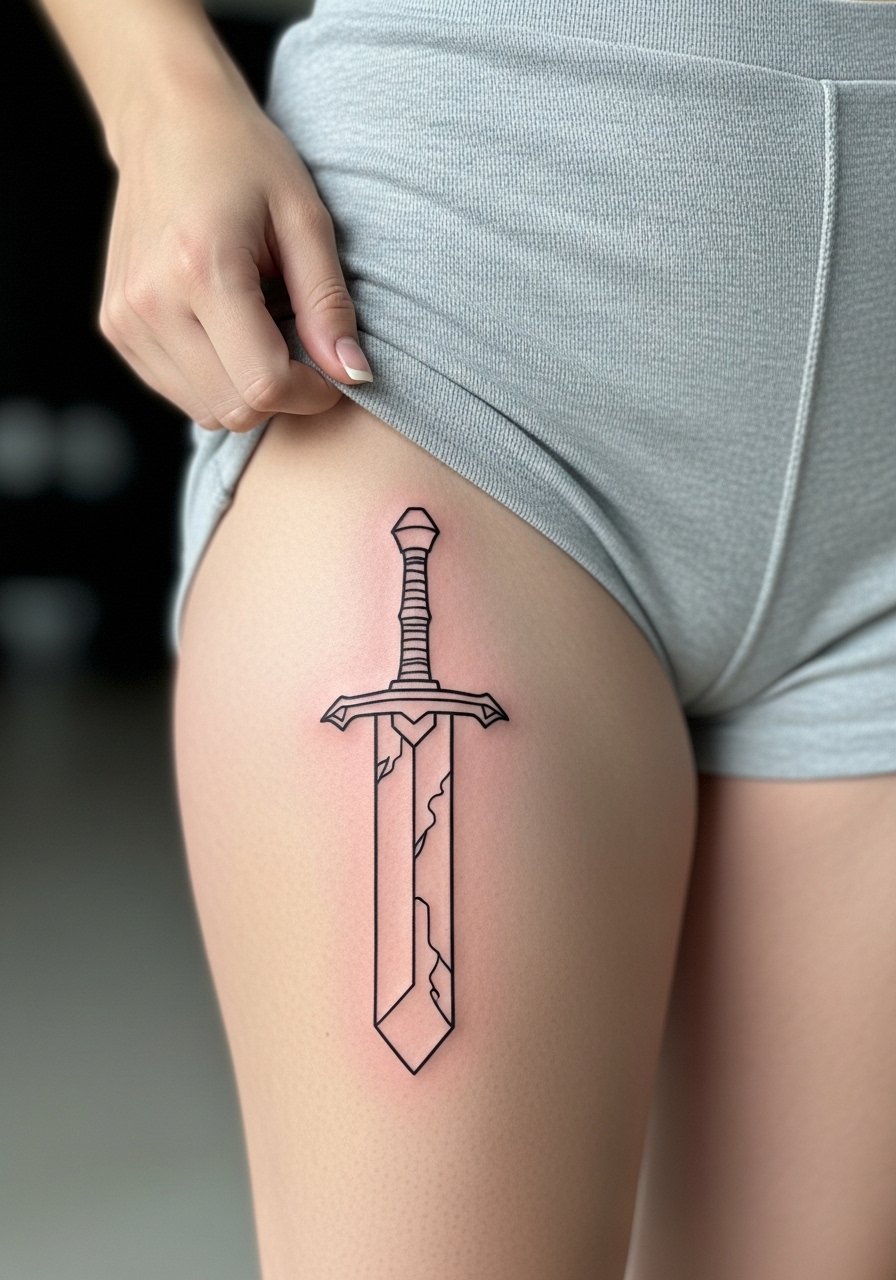
When moved to the thigh, a sword outline benefits from added negative space to emphasize length. The typical mistake is trying to compress background scenery around the blade on a narrow thigh, which makes the piece look cluttered. Ask for a clean silhouette and minimal shading to maintain the blade’s presence over time. Sessions are comfortable and can be longer, and touch-ups are less frequent than on hands or wrists. Pair with high waisted denim shorts for casual showing.
18. Patchwork Sleeve Approach for Multiple Characters
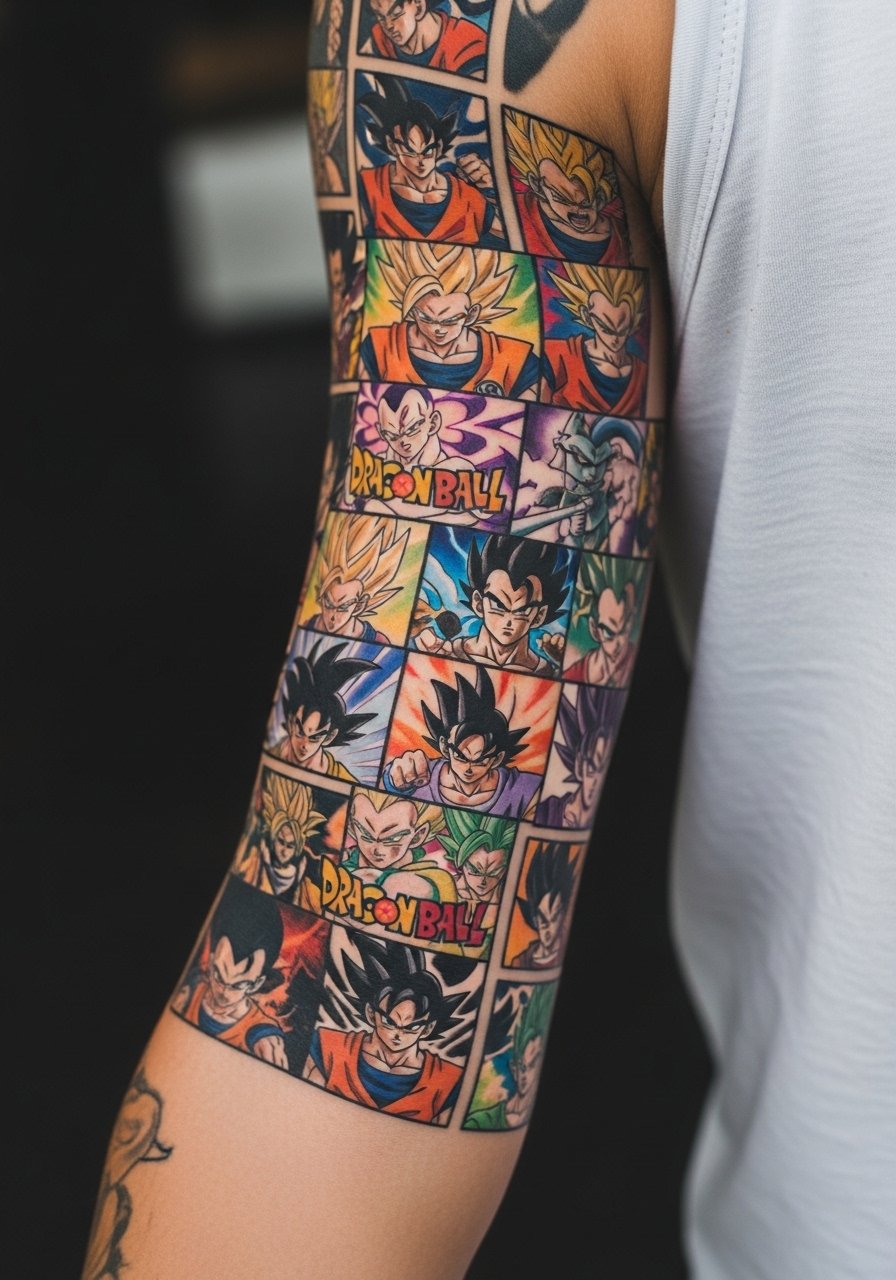
A phased patchwork sleeve is an underused strategy for fans who do not want a single full scene. I have seen collectors add individual panels over a year so each panel heals before the next session. When planning this route, tell your artist you want consistent line weight and a unifying background motif so separate characters read as one sleeve over time. Mistake is failing to decide on a palette or outline thickness at the start. Schedule sessions four to eight weeks apart to let the skin fully recover.
19. Namekian Script Small Rib Accent
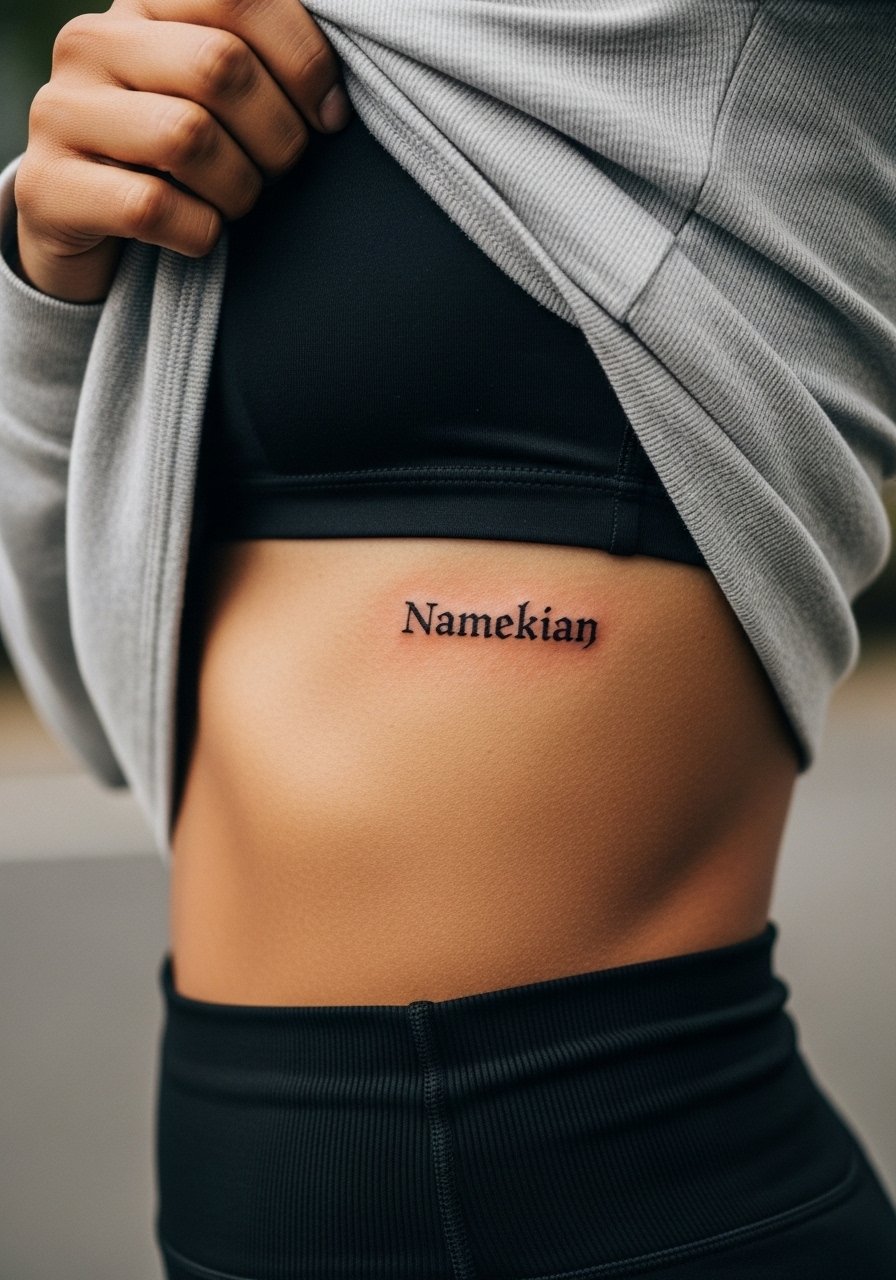
Text on the ribs is intimate and requires an artist who knows spacing on curved surfaces. The most common error is choosing a tiny font that the skin will stretch and blur as you move. Ask for slightly larger letter spacing and a font with thicker downstrokes so the script remains legible. Expect significant pain but short sessions. Consider the career and privacy implications before committing since ribcage pieces can be visible in certain clothing.
20. Minimalist Single Dragon Ball Behind the Ear Accent
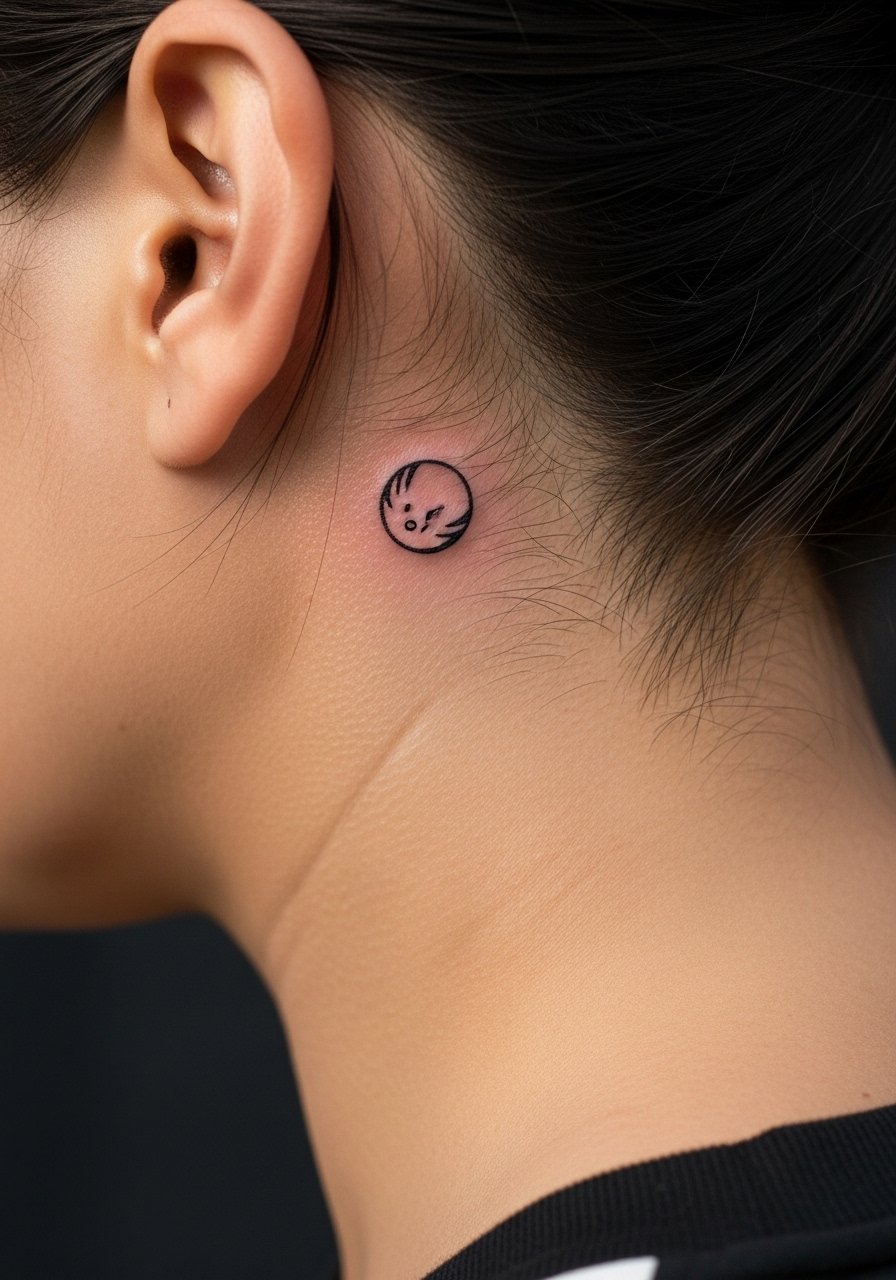
Behind-the-ear placements read as subtle signals and are ideal for a single orb. Because the location is small, the fine line debate matters here. Thinner stars look delicate but can blur faster. A common fix is a slightly thicker outline around the orb to preserve the star detail. Sessions are short and the pain is mild. Keep in mind hair growth and visibility when choosing exact placement. For showing the area at work, style hair with a tucked wide neck shirt or a quick updo.
21. Sternum Spirit Bomb Mini Underbust
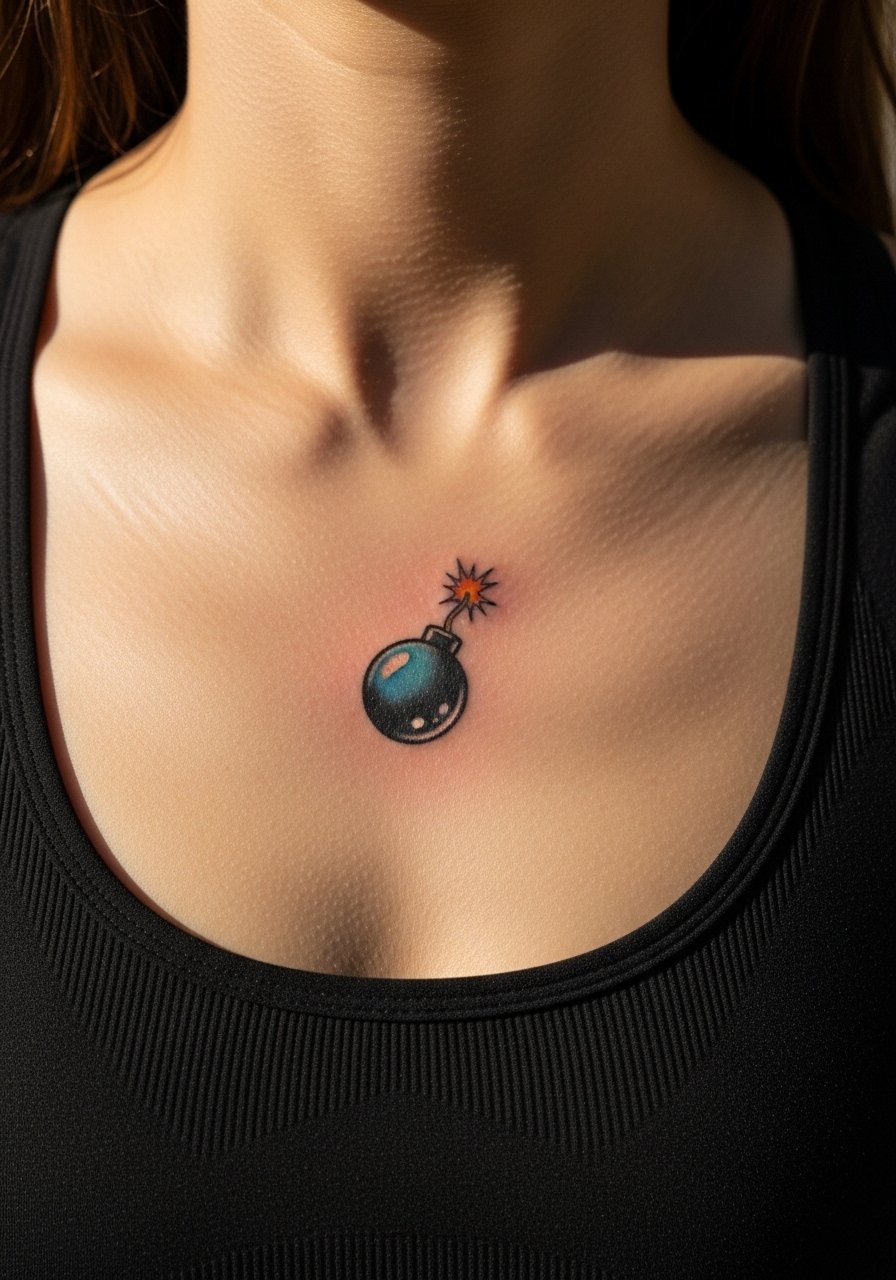
Sternum placements are sensitive and require a practitioner experienced with chest anatomy. A common problem is compressing a large watercolor orb into a narrow sternum band, which leads to color pooling. Ask the artist for a compact orb with a thin black halo to retain shape as the watercolor fades. Sessions are short but intense and sometimes split. For comfort during the appointment, wear a fitted sports bra so the artist can expose only the working area.
Frequently Asked Questions
Q: Will a fine line Dragon Ball wrist tattoo blur faster than a blackwork version?
A: It depends on placement and daily wear. Fine line on wrists is elegant but faces more washing and friction, so many artists recommend slightly thicker outlines for longevity. If you prefer delicate work, accept that a touch-up around year two is common.
Q: How should I plan sessions when building a patchwork sleeve over time?
A: Plan for consistent line weight and a palette plan from the start so new panels match previous work. Space sessions by four to eight weeks to allow full healing if you want the sleeve to look cohesive. Consider booking consults with artists who do phased custom work via discovery tags like #DBZTattoo.
Q: Are chest watercolor pieces more likely to need touch-ups than blackwork chests?
A: Generally yes. Watercolor relies on pigments that diffuse and fade faster on high-movement skin like the chest. A thin black halo or stronger outline helps the image retain its shape longer, and expect at least one color refresh within two to three years for bright gradients.
Q: What should I wear to a thigh or calf session to be most comfortable?
A: Wear loose shorts or high-waisted shorts that can be shifted without pressure on the area. For thigh pieces, loose athletic shorts make positioning easy and keep blood flow comfortable between passes.
Q: Do hand and finger tattoos affect job prospects more than forearm pieces?
A: Many workplaces still view hand and finger tattoos as more visible and potentially problematic. If career flexibility matters, weigh that when choosing placement. Forearm work can be covered with long sleeves for meetings, whereas hands are always visible.
