
Fine line wolf looks are everywhere online, but the pieces that still read crisp after a few years are often not the ones that got the most likes at first. I've spent time in five shops across Brooklyn and watched blackwork and modestly sized realism settle the best on forearms and shoulders. Below are 21 elegant wolf tattoo design directions that balance immediate impact with how they'll age, plus what to say at the consultation to get the result you want.
1. Fine Line Wolf Outline on the Wrist
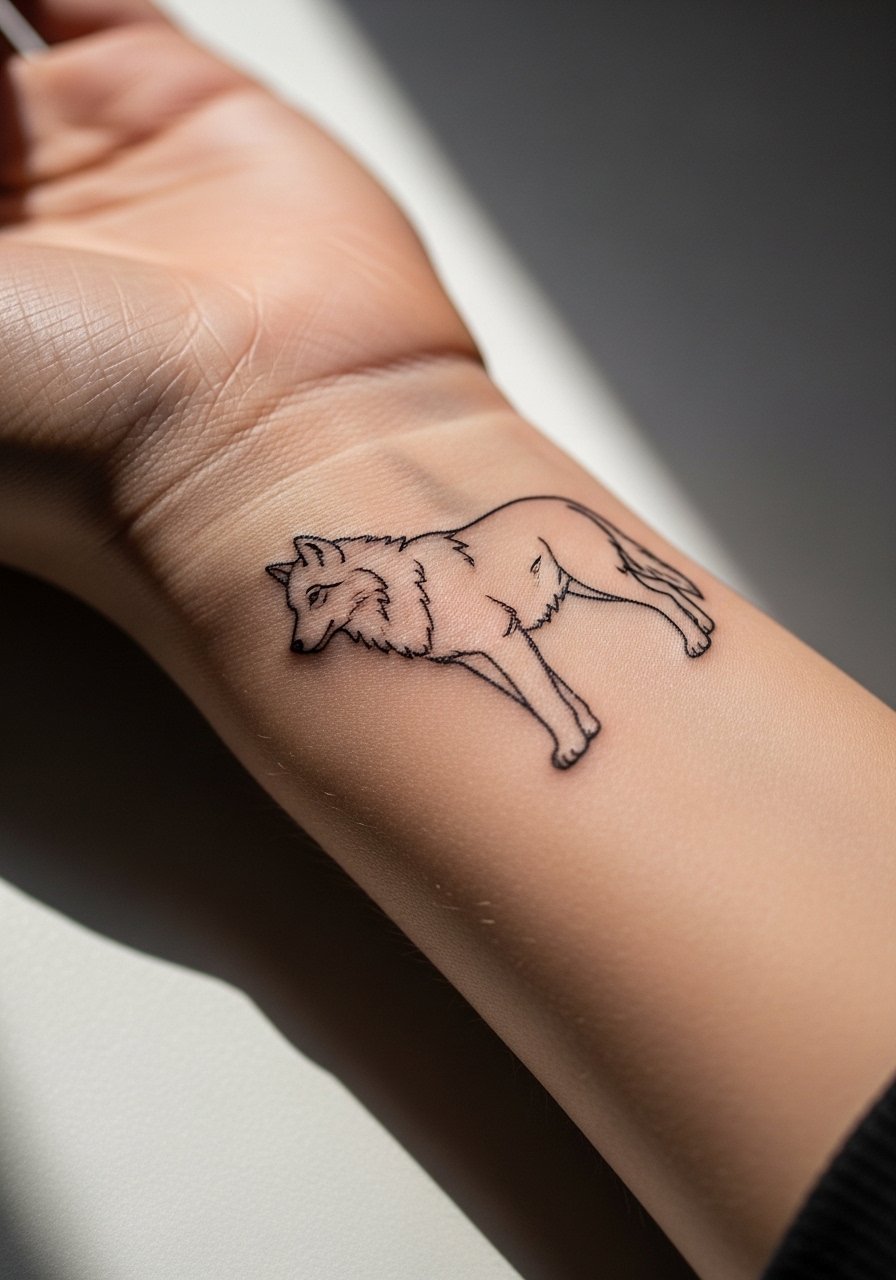
I've seen fine line wrist pieces read like jewelry for the first year and then need a touch-up by year three. If you want subtlety, ask your artist for slightly heavier anchor lines around the jaw and muzzle so the outline has room to settle without losing the silhouette. Fair warning, the wrist is bony and rates a 6 to 7 on most pain scales, so expect sharp stings near the ulna. For show-off outfits, cuffed linen shirts frame the wrist without crowding the linework. Pair it with a thin leather wrap bracelet on the opposite arm for balance while keeping the tattoo visible during warm months.
2. Realistic Black and Gray Wolf Head on the Forearm
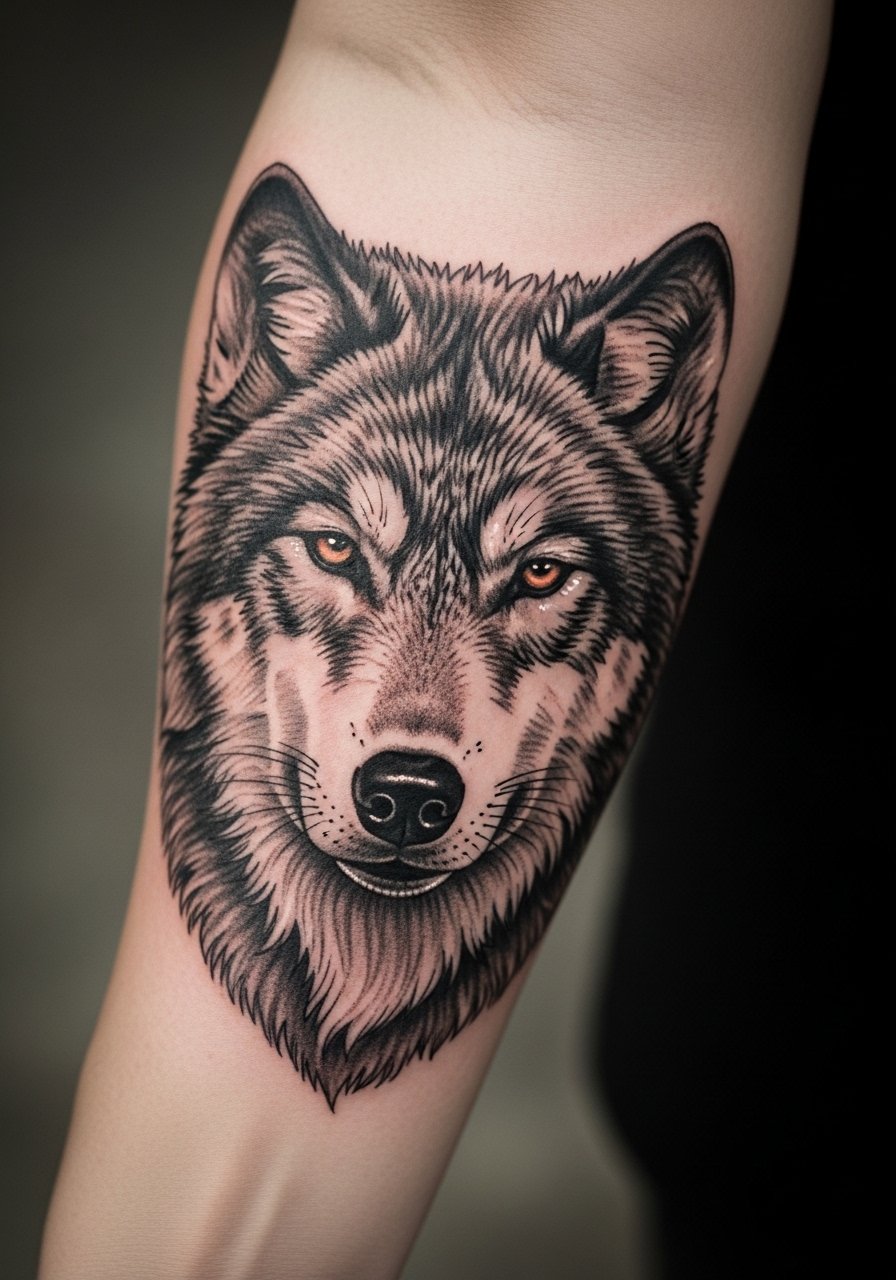
I've seen this style hold up well when the fur texture is translated into deliberate stipple shading rather than hair-fine strokes. Tell the artist you want micro-realism with stipple shading in shadowed areas and bold anchors on the snout so the gaze keeps intensity after two years. Expect a two-hour session for a 4 to 6 inch piece and a moderate pain level, especially near the inner forearm. A common mistake is asking for too many tiny whisker strokes that blur together with time. For session day wear, roll a chambray sleeve up or throw on a loose short-sleeve tee. A chambray shirt for rolled sleeves is easy to push up without tugging at fresh ink.
3. Micro-Realism Half-Face Wolf on the Shoulder
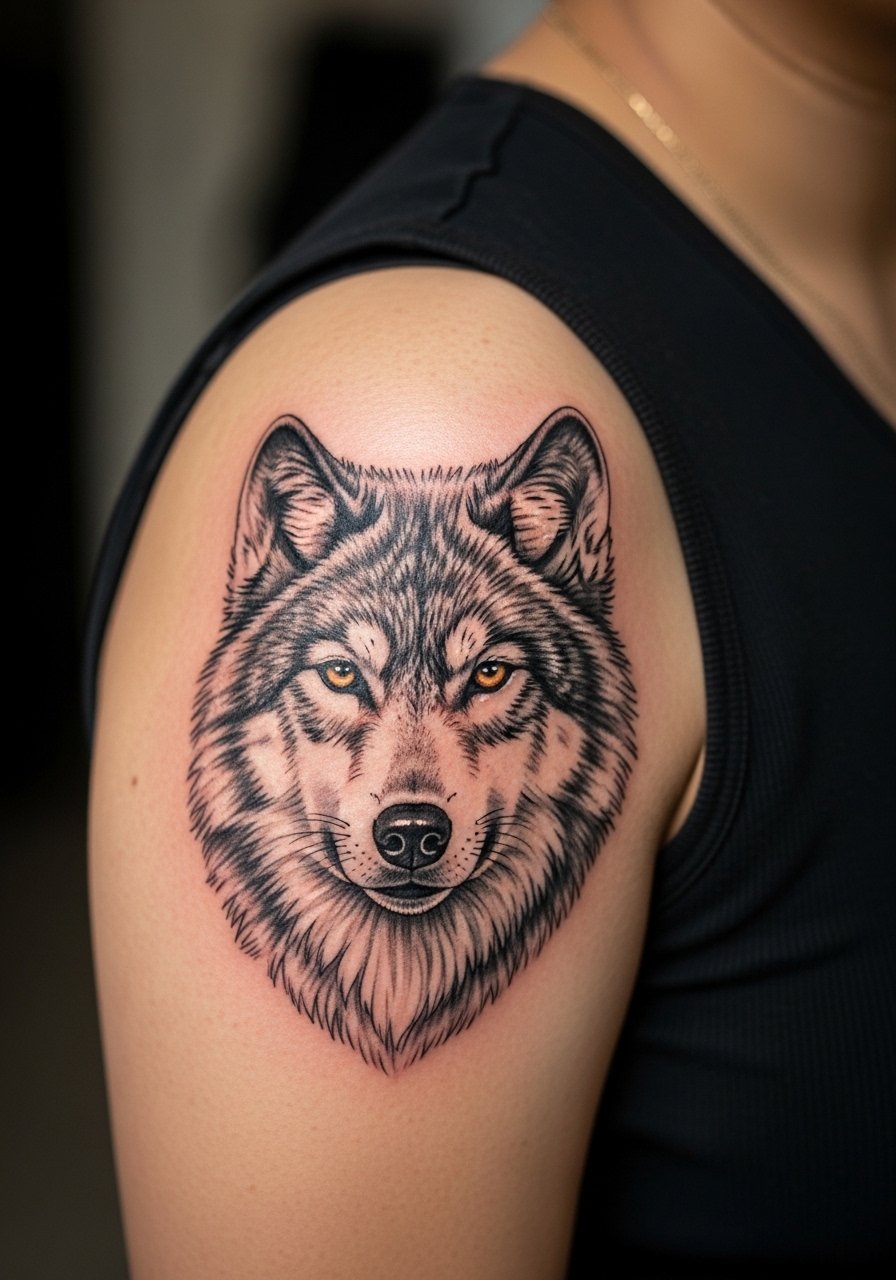
When you want lifelike detail without a full sleeve, a half-face shoulder portrait gives a dramatic focal point while staying easily concealable under a T-shirt. In consultation, bring side-profile references that show both fur direction and how light hits the cheekbone. The shoulder is forgiving, so blowout risk is low when the artist uses appropriate line spacing. Expect one to two sessions depending on size. A common error is crowding the muzzle with tiny cross-hatching that ages into gray. For showing it off, an off-shoulder top or an open leather jacket frames the edge while still protecting the area. Slip into a sleeveless tank top for the session so the artist has full access.
4. Traditional Wolf Profile with Bared Teeth on the Calf
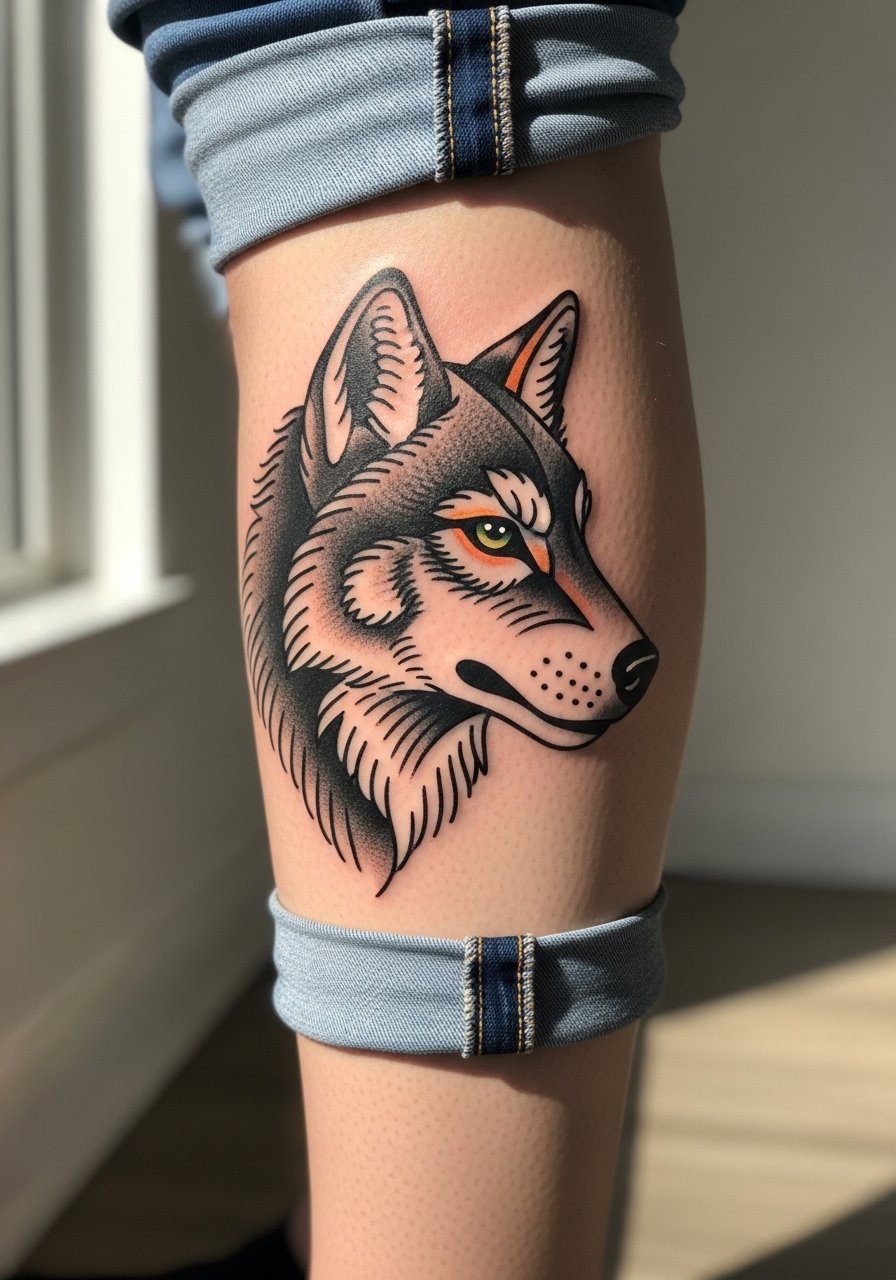
Traditional profiles age affordably because their saturation and bold linework soften into a strong silhouette. Ask for slightly thicker outlines around the jaw and a single color pop in the eye so the expression still reads at distance after several years. The calf tolerates saturated color well and rates low on the pain chart, but long sessions can cramp the leg. A common mistake is crowding the background with tiny details that compete with the primary face. Pair this with slim-fit chinos rolled at the ankle to show the full profile. I like a slim chinos rolled ankle because they reveal calf pieces without cutting off the composition.
5. Abstract Geometric Wolf Silhouette on the Inner Bicep
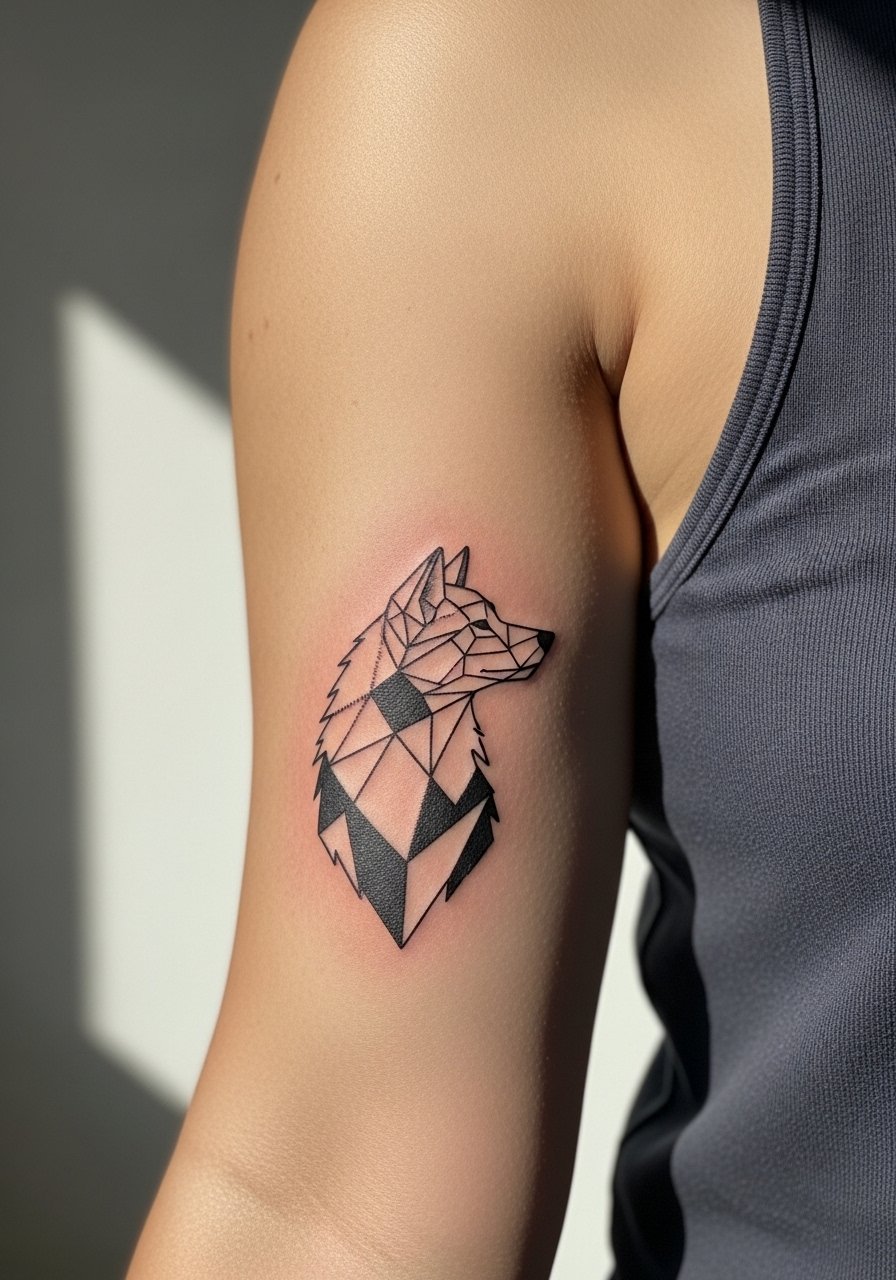
Fair warning, the inner bicep is sensitive and moves a lot. One camp of artists avoids dense black fills there because of greater blowout risk. The other camp will do it if the design keeps ample negative space. For a geometric silhouette, ask for clear spacing and crisp negative shapes so the piece breathes as the skin settles over time. Session pain is moderate to high and touch-ups can be needed at year two if the fill packs too deep. During the session wear, pull on a tank top so the artist can work with the arm raised comfortably.
6. Tribal Wolf with Interwoven Patterns on the Thigh
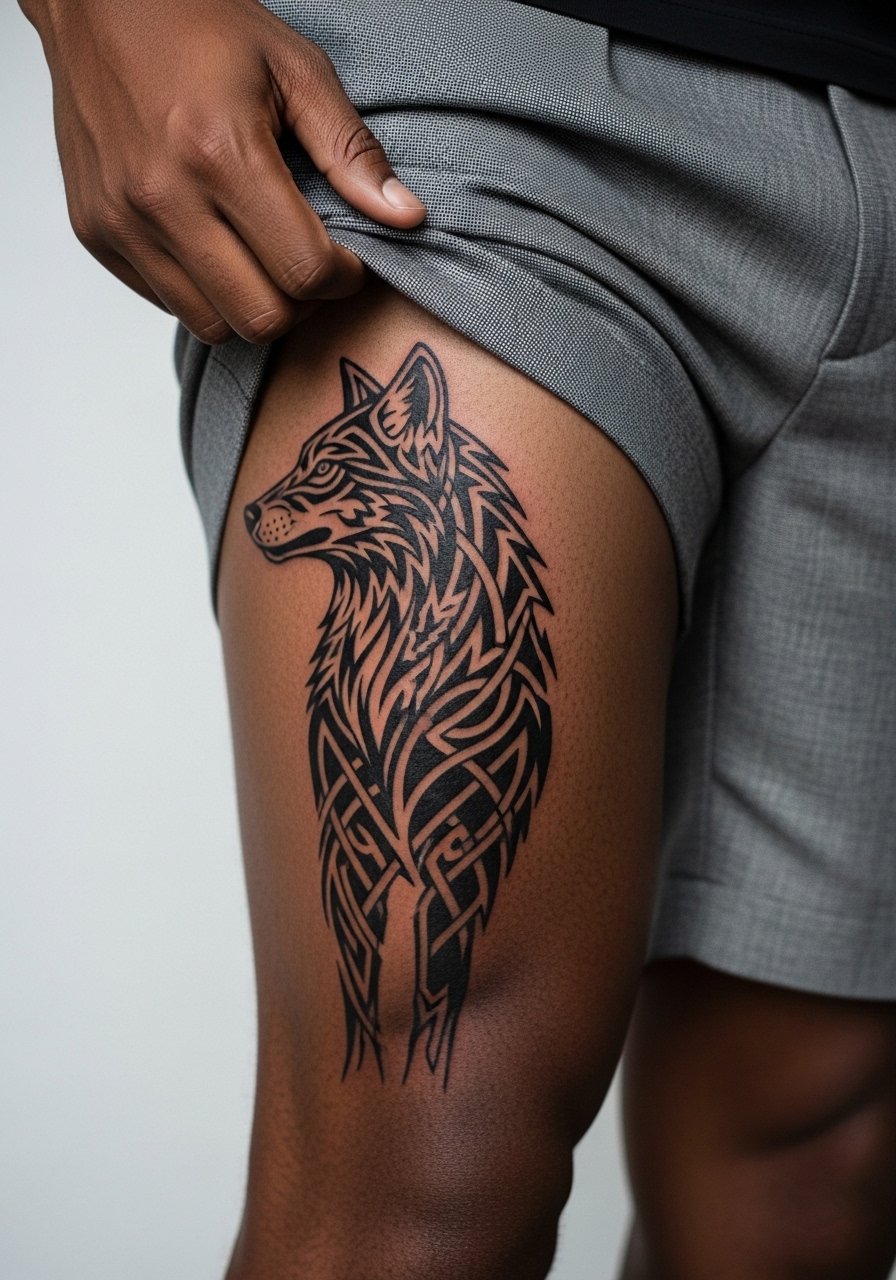
Thigh pieces lend themselves to large, bold tribal patterns that read from across a room and stay crisp for years because the skin there is less exposed to sun. Tell your artist you want interwoven patterns with consistent line weight and negative space channels so the shapes do not merge over time. The thigh is lower on the pain chart but long sessions require comfort breaks and a loose session wardrobe. Avoid asking for extremely tight repeating lines without breaks. For summer visibility, tailored shorts or belted swim trunks showcase the work. Consider a pair like tailored khaki shorts you can wear after the session without rubbing the healing zone.
Pack Smart
The first six designs span sensitive wrists to large thigh panels, so a few small items smooth the session and the first week.
- Stencil transfer paper kit. Lets you preview line placement on skin, which matters for wrist and forearm pieces that sit near joints.
- Topical numbing cream. Applied before the session it can take the edge off during wrist and inner bicep work without obscuring linework.
- Thin protective film roll. Useful for finger and hand placements that face constant friction from washing and typing.
- Fragrance-free body wash. Gentle cleansing reduces irritation for collarbone and chest pieces during showers.
- Aquaphor healing ointment. A thin layer in the first days helps lock in moisture for fine line work without clogging.
7. Celtic Knot Wolf Howling Across the Upper Back
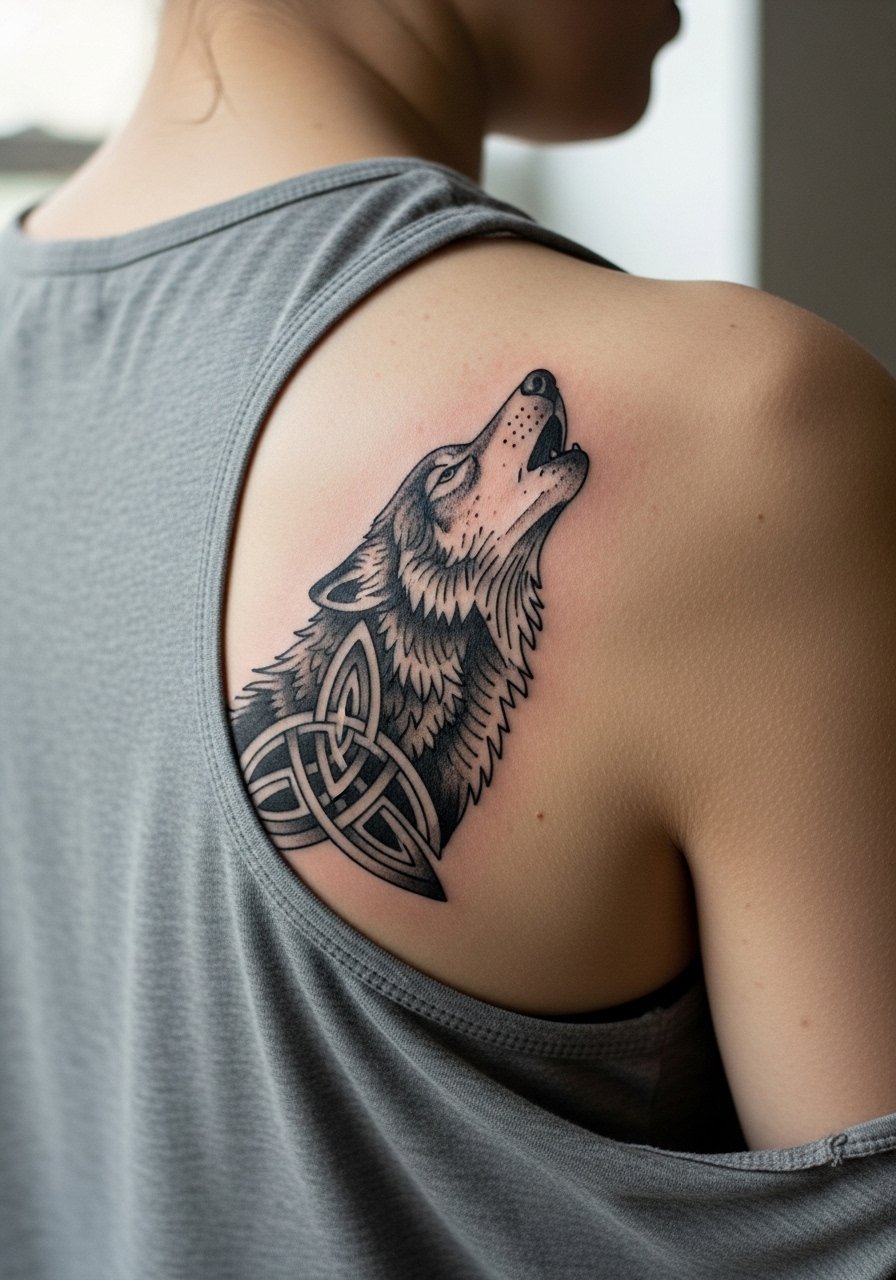
Upper back canvas gives room for knotwork to weave without compressing. Ask for knot lines that maintain consistent spacing and a moon element placed at a natural shoulder blade arc. One common mistake is over-detailing small knots so they merge at year three. The session feels manageable because the back tolerates long sittings, though large compositions require multiple sessions. For showing the work, low-back or open-back tops keep attention on the shoulder blades without exposing more than intended. Try a low back crop top when it is healed to frame the design.
8. Japanese Irezumi Wolf in a Forest Sleeve
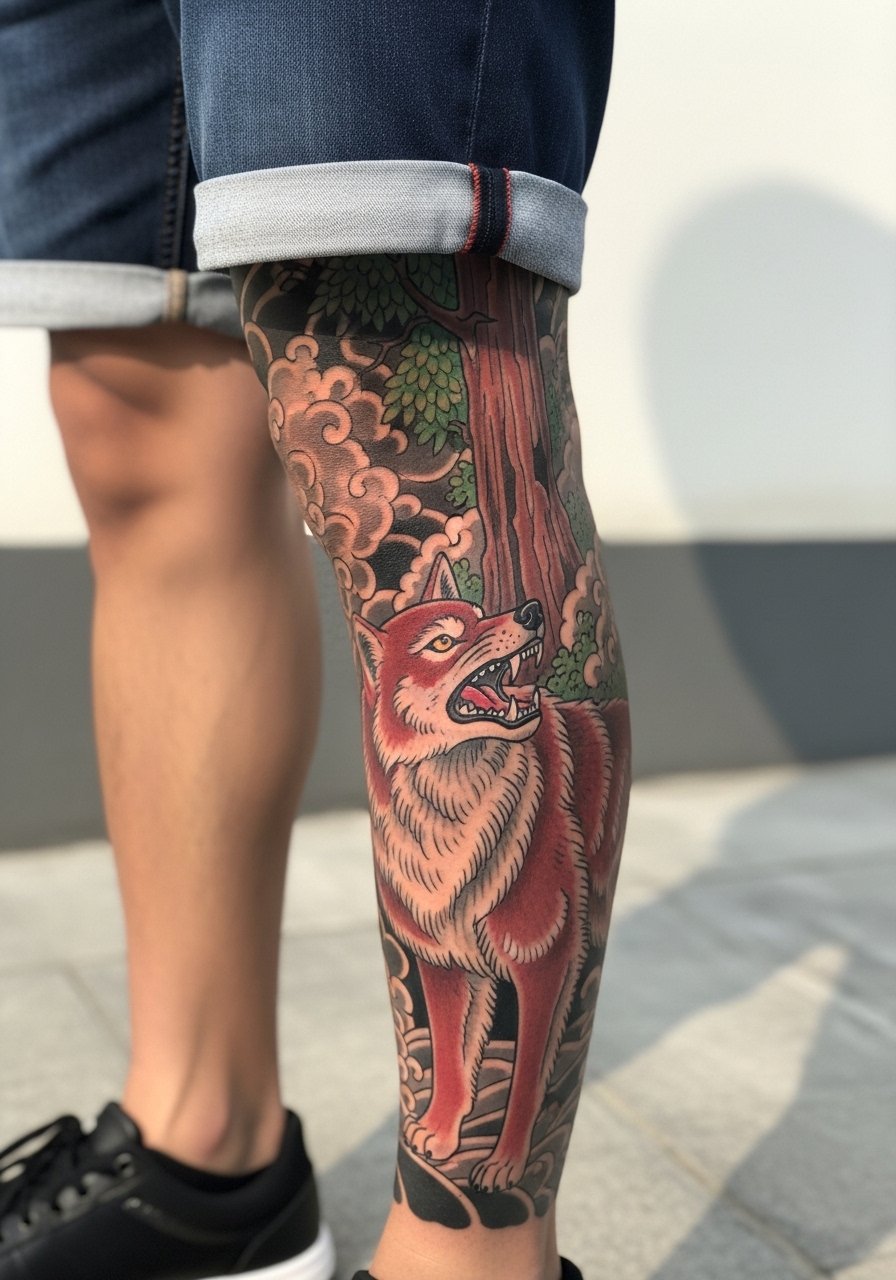
Irezumi-style wolves demand strong composition and color saturation, and they often require three to five sessions. Tell the artist you want bold blacks as anchors and selective color pops rather than full saturation everywhere. The debate about traditional color holds fast in the community. One camp insists heavy saturation is necessary for longevity. The other camp favors carefully placed color to avoid muddying the image over time. Expect more downtime between sessions for color settling. For leg sessions wear loose shorts so the artist can move freely and you can sit comfortably. Slim-fit chinos rolled at the ankle show off the final piece without hiding details.
9. Blackwork Wolf Mandala on the Shoulder Blade
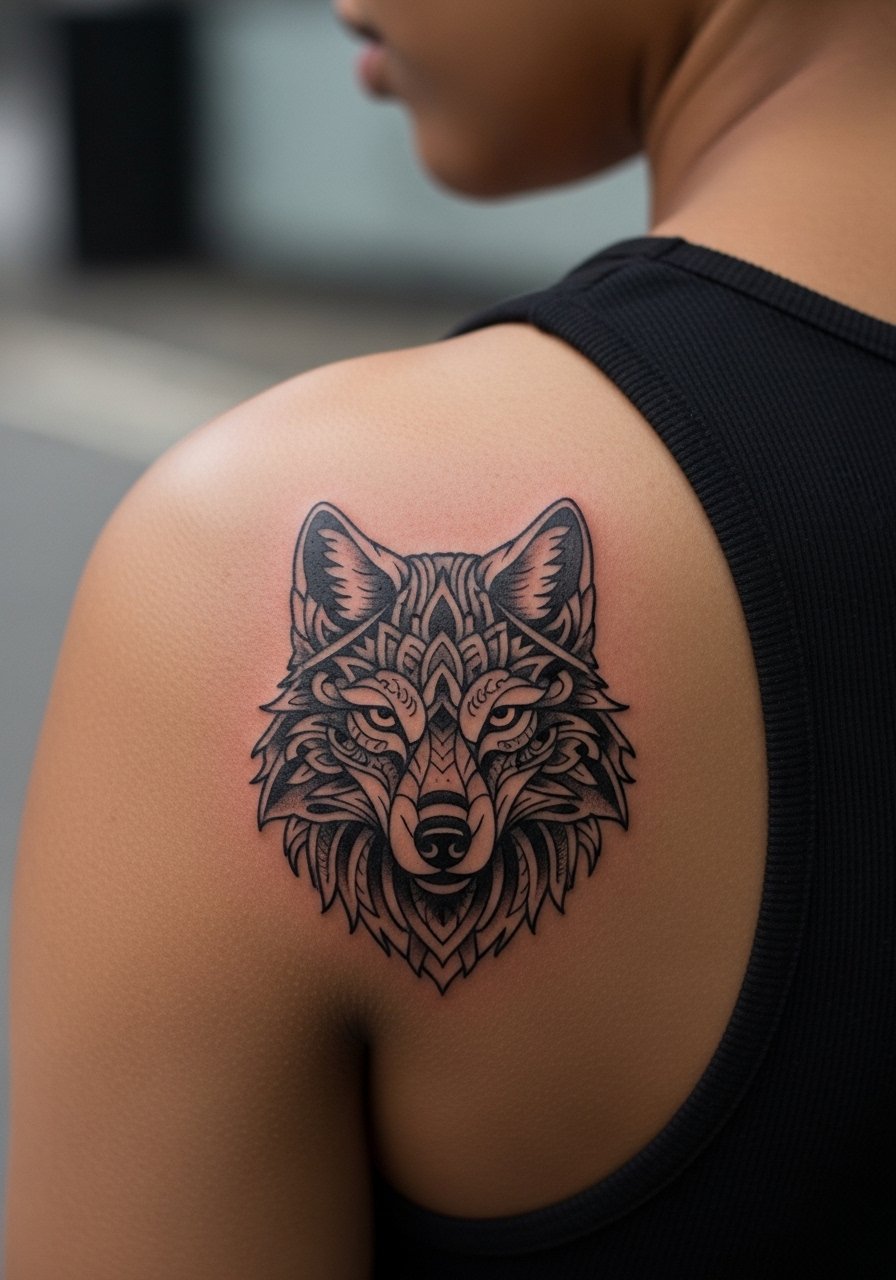
Radial symmetry needs breathing room. If the mandala is too small the dense blackwill close up and lose the wolf silhouette. Ask for spacing that increases gradually toward the outer rings so the mandala retains contrast at 2 and 5 years. The shoulder blade tolerates strong black fills well, but dense areas can feel heavy in a session. A common mistake is asking for maximum detail at a small scale. For session wear, use a loose button-down you can pull aside so the artist works with the canvas flat against the table. A halter or tank top keeps the area exposed and comfortable.
10. Watercolor Wolf Eyes on the Collarbone
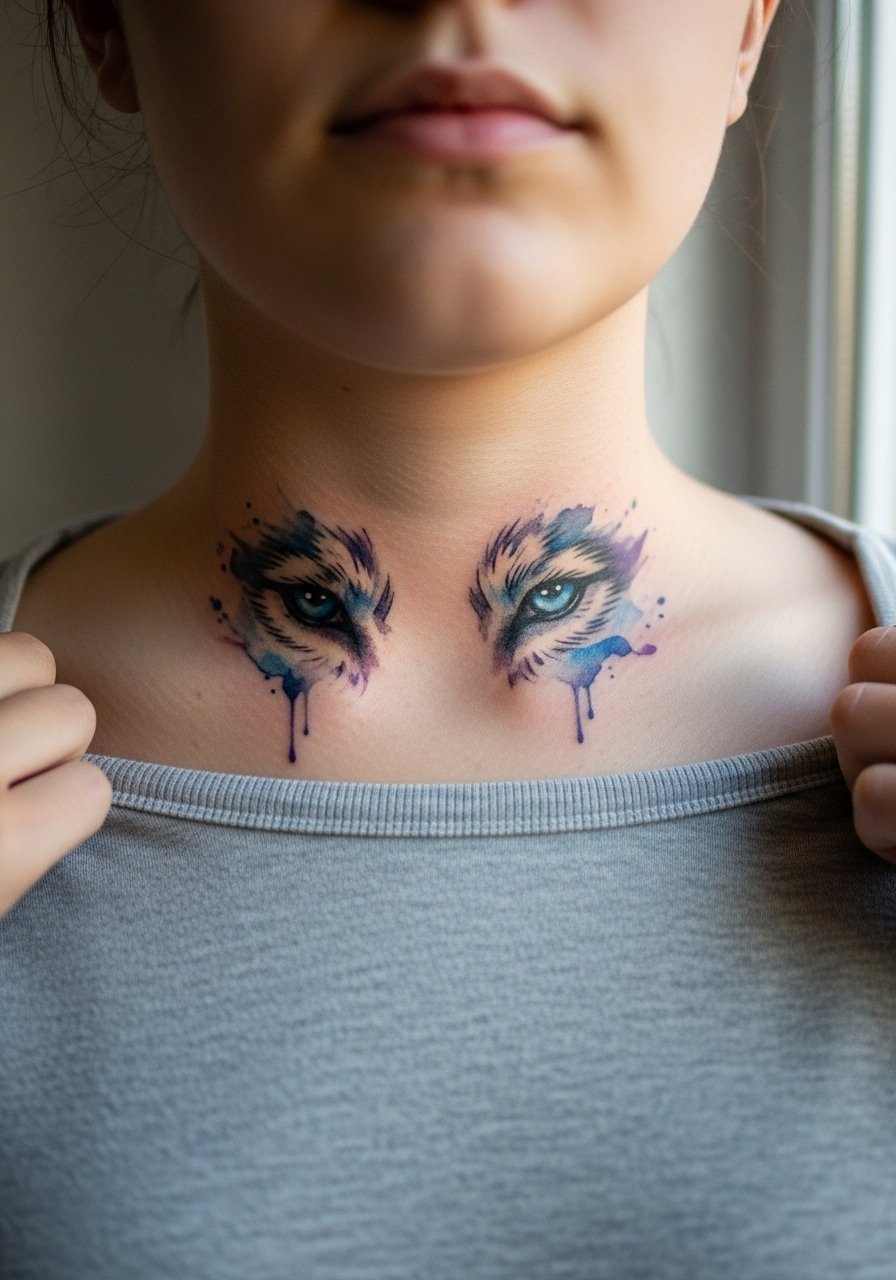
Watercolor effects are vulnerable to fading, especially on high-motion areas like the chest and collarbone. Most artists will advise using color as accents around a subtle black line to hold the composition. For a focused gaze, ask for a thin anchor line beneath the eye and soft blue-purple washes above to mimic aurora-like tears. Expect lighter sessions and the possibility of color touch-ups at year three. For showing it off, V-neck tees or a strapless piece keep the collarbone visible. A simple v neck tee soft gray sits nicely without competing with the washes.
11. Neo-Traditional Wolf Paw Print Trail Along the Forearm
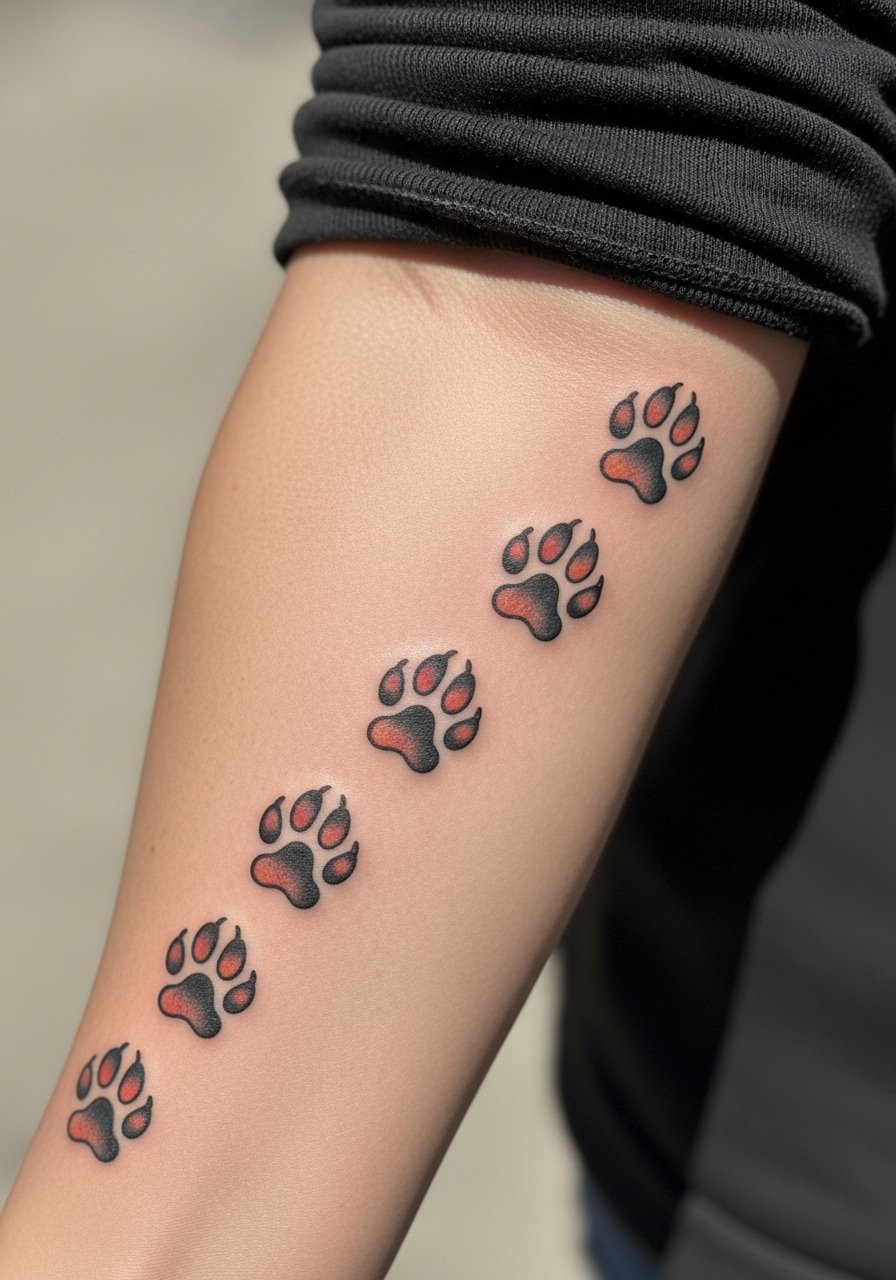
This storytelling layout works when the paw spacing suggests motion and life stages. In consultation, show your artist a sequence of paw sizes and tell them where you want the trail to start and finish so it interacts with muscles and veins without distortion. Forearms expose to sun, so include deliberate shadow anchors near the large pads to keep them readable after sun exposure. Sessions are usually short and linear, which is forgiving for first-timers. For display, rolled sleeves or a slim cuff balance the trail. A slim slim gold cuff bracelet sits opposite the trail and keeps attention on the ink.
12. Tiny Knuckle Wolf Glyphs
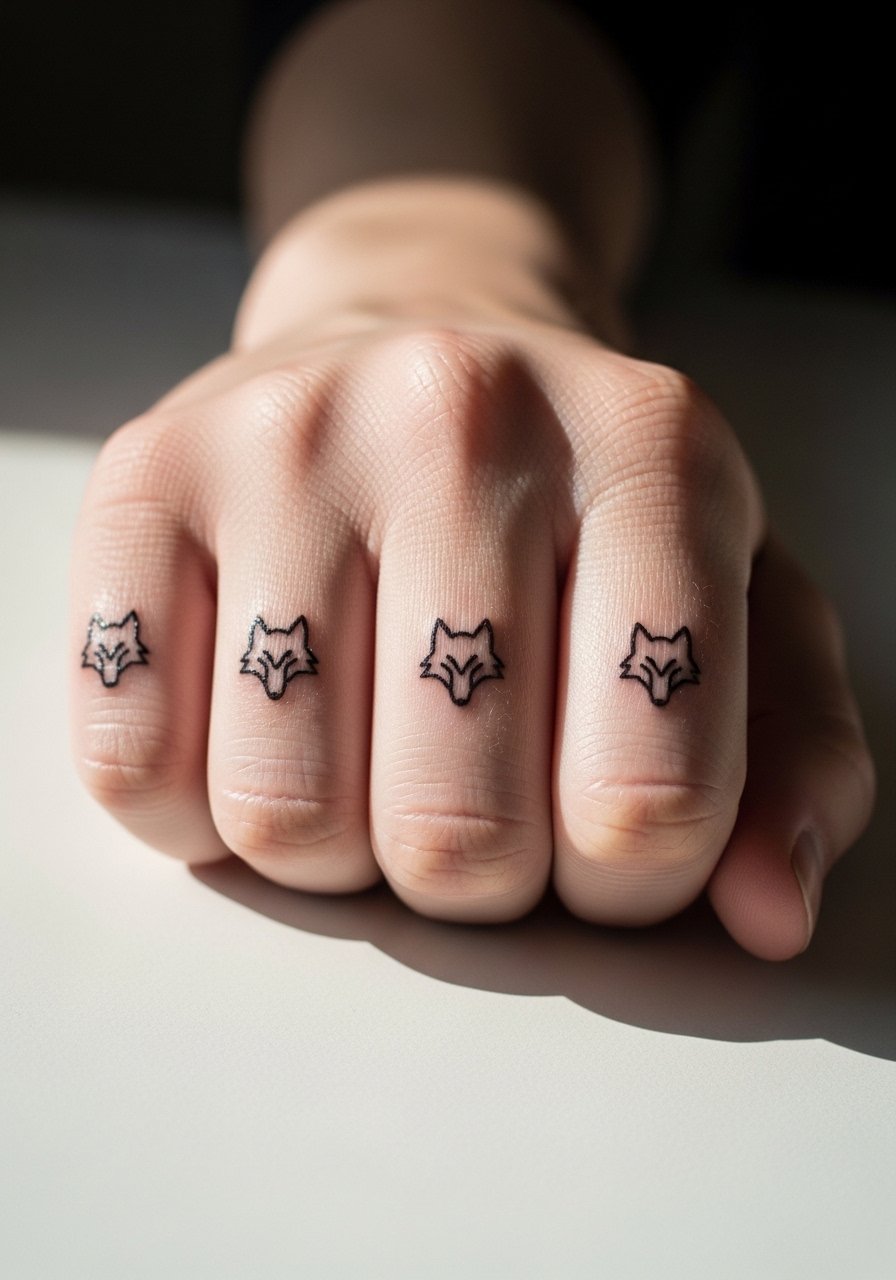
Knuckle tattoos are subtle power signals but they live under constant friction and frequent washing, so they fade faster than larger work. Ask for compact, bold glyphs rather than hairline scripts. Expect touch-ups within a year, and plan your placement so the glyphs do not interfere with joints. Career considerations matter because hands are visible in many industries, so think about how this will appear during interviews or meetings. The session is short and sharp. A thin ring or spare minimalist band on the opposite hand can balance the look without overwhelming the knuckles.
13. Hybrid Wolf-Fox Chest Accent Near Sternum
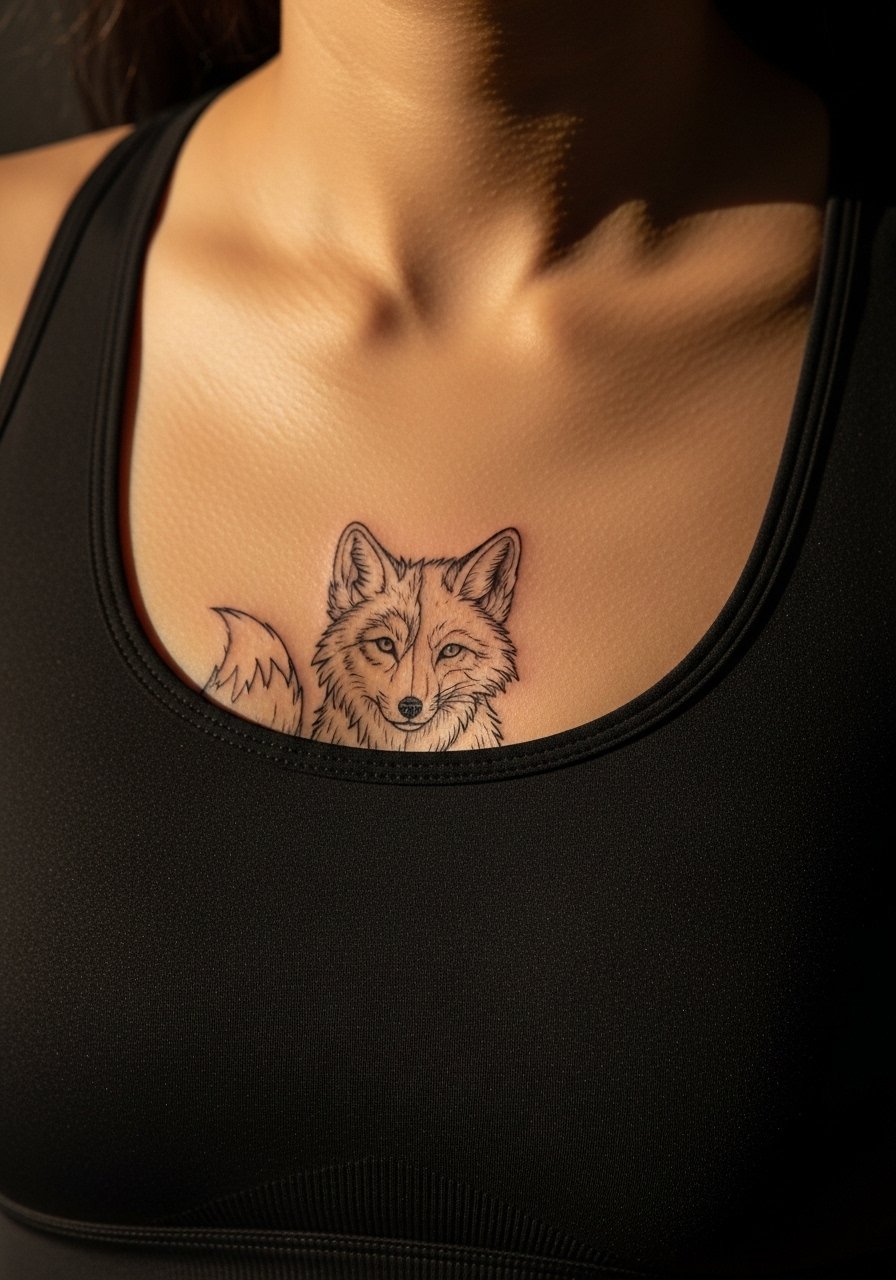
Merging wolf and fox traits gives you a nuanced symbol of loyalty and elusiveness. For a chest accent, ask the artist to emphasize the wolf's eye and the fox's ear line so both animals read clearly. Sternum and upper chest placements require a disciplined line weight to avoid blur as the skin moves. Sessions can be tender around the sternum bone, and many artists prefer a lighter session with a follow-up for detail. During the session wear a fitted sports bra or strapless so the area is accessible without exposing more than needed. Many choose this placement for a personal piece that peeks through low necklines.
14. Howling Wolf with Lunar Phases on the Ribcage
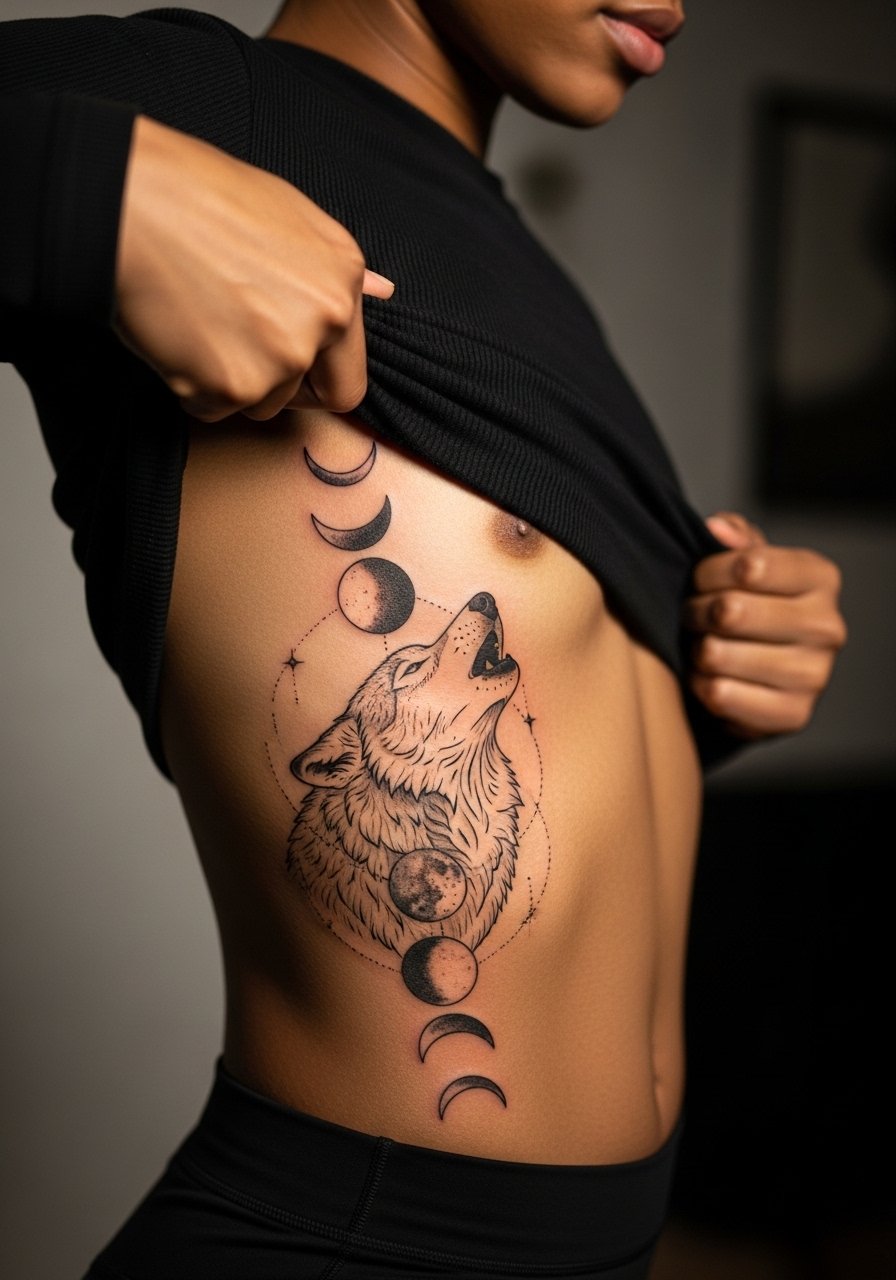
Ribcage tattoos look striking but the placement amplifies both pain and movement. Artists split into two camps on fine line ribs. One camp says the constant expansion and contraction blurs lines within two years. The other camp argues that correct needle depth and spacing make fine line rib work last. Be explicit about where you want heavier anchors, and accept that a two-stage approach with touch-up may be the best path. For lunar sequences, spacing the phases with small negative space windows helps the moons remain distinct as the skin stretches. Wear a cropped tee or sports bra to the appointment so the artist can work with the torso exposed only where needed.
15. Minimalist Negative Space Wolf on the Ankle
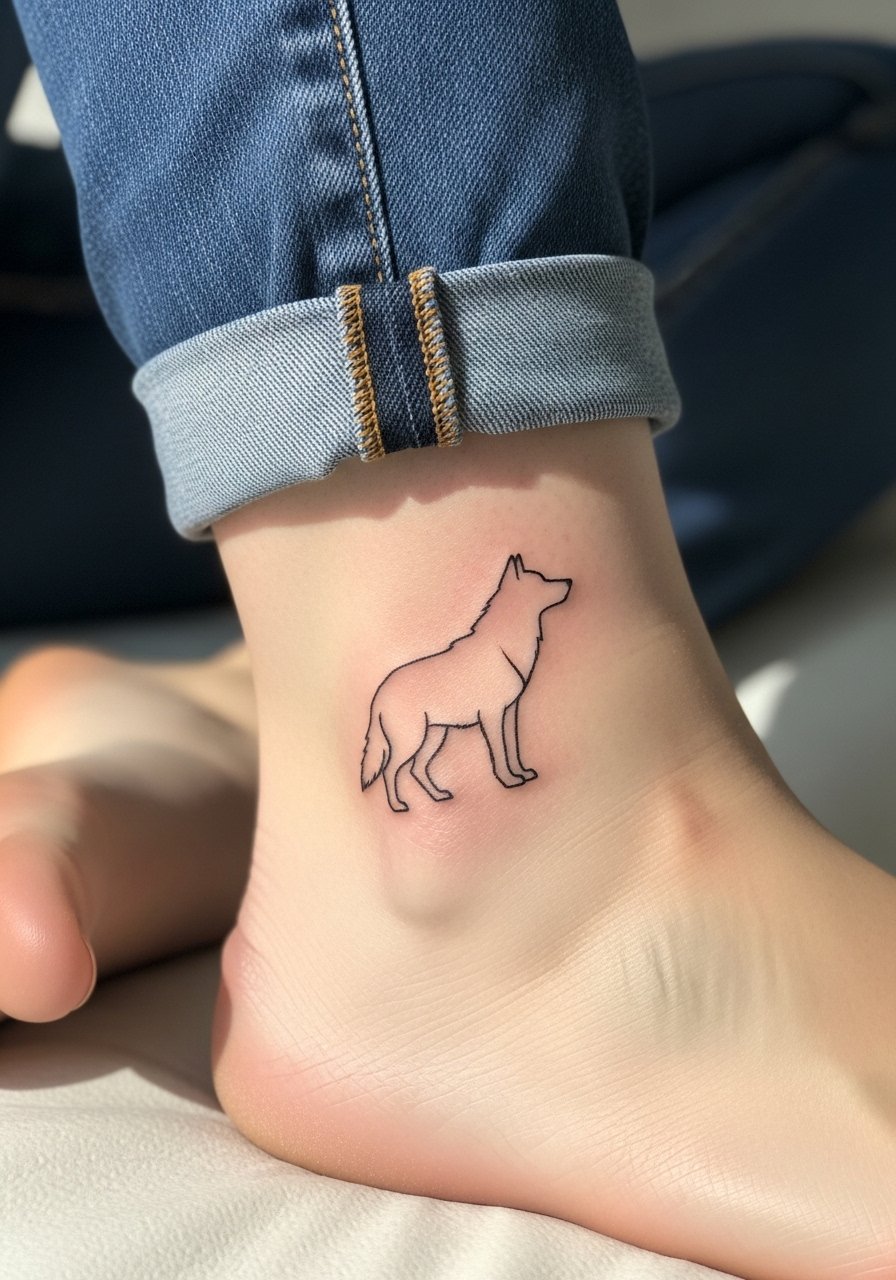
Negative space pieces on the ankle read clean when they keep bold surrounding shapes rather than fragile inner detail. The ankle sees friction from socks and shoes, so place the silhouette where it avoids constant rubbing. Sessions are brief but the area can sting at bony points. A common error is asking for tiny interior dots that blur with washing. For display, roll jeans or wear sandals to show the piece. Try a pair of jeans rolled with a slim chinos rolled ankle aesthetic to keep the ankle visible without damaging healing skin.
16. Stipple-Shaded Wolf Portrait on the Upper Thigh
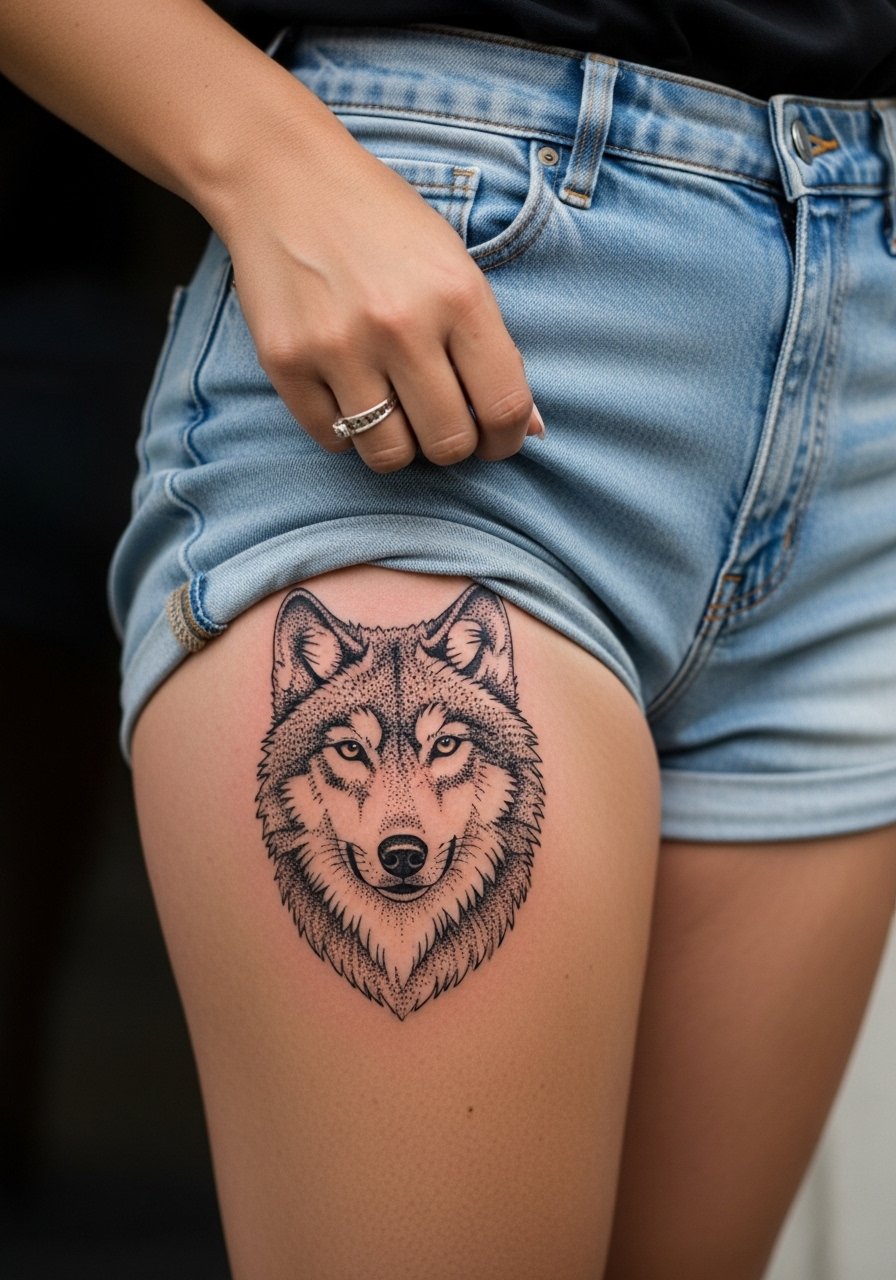
Stipple or dot work ages gracefully because the technique creates texture rather than relying on thin contiguous lines. For thighs, ask the artist to map dot density so darker areas have more space between clusters to avoid muddying over time. Touch-up timelines are longer here because the thighs rarely see direct sun. Sessions can be long, so bring padding and hydration. The common mistake is compressing too many dots into a small face, which loses definition after a year. For session comfort, wear loose athletic shorts you can pull up without irritating the area.
17. Dot Work Wolf Mandala Sleeve Start on the Shoulder
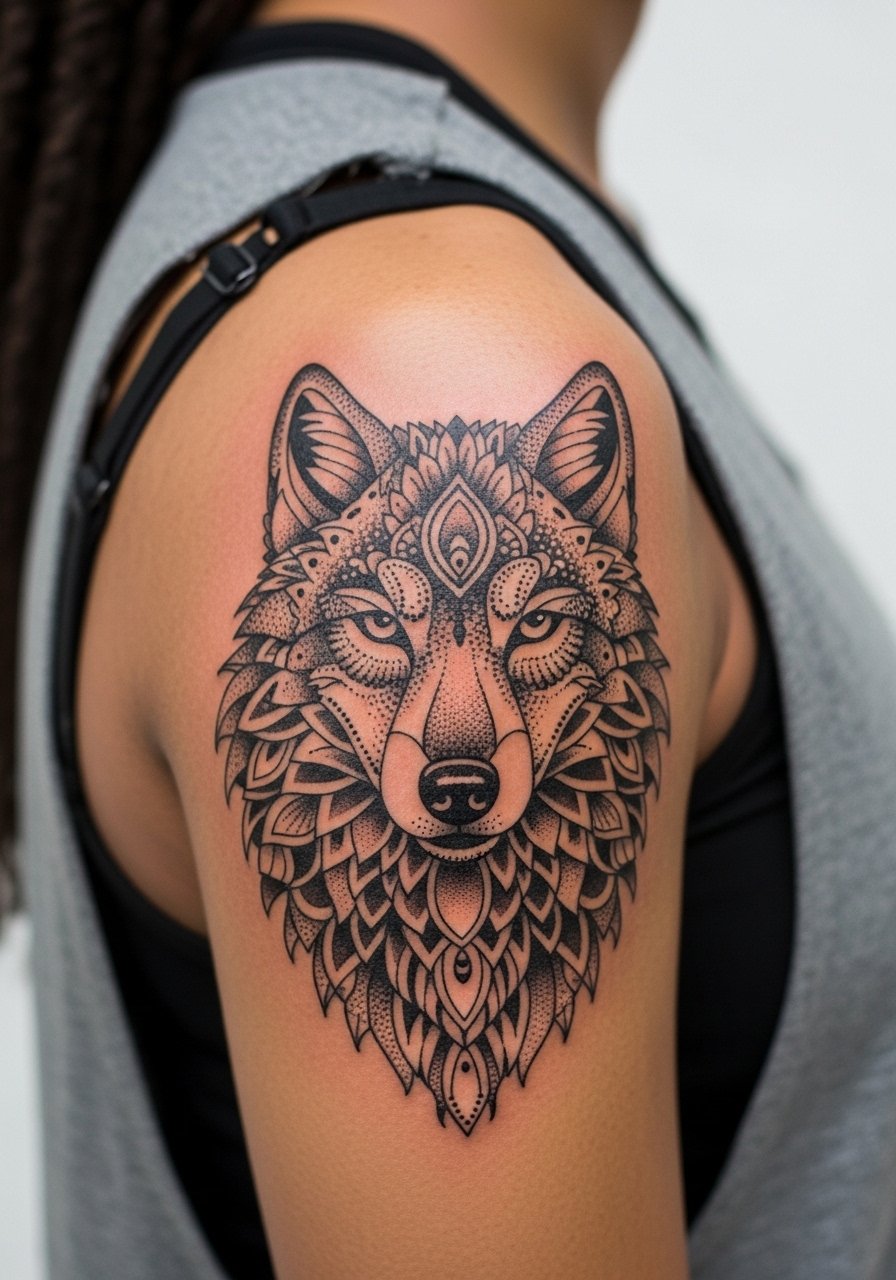
Beginning a sleeve with dot work mandalas gives the piece room to evolve into other styles later. During consultation, define the negative space channels you want preserved so future additions do not collapse the mandala. The shoulder carries dot density well and shows texture from a distance. Pain is moderate and sessions are staged. A mistake is agreeing to overly dense dot clusters at a small scale. For session wear, choose a loose tank so the artist can rotate the arm and keep the canvas flat.
18. Single-Eye Watercolor Gaze on the Inner Thigh
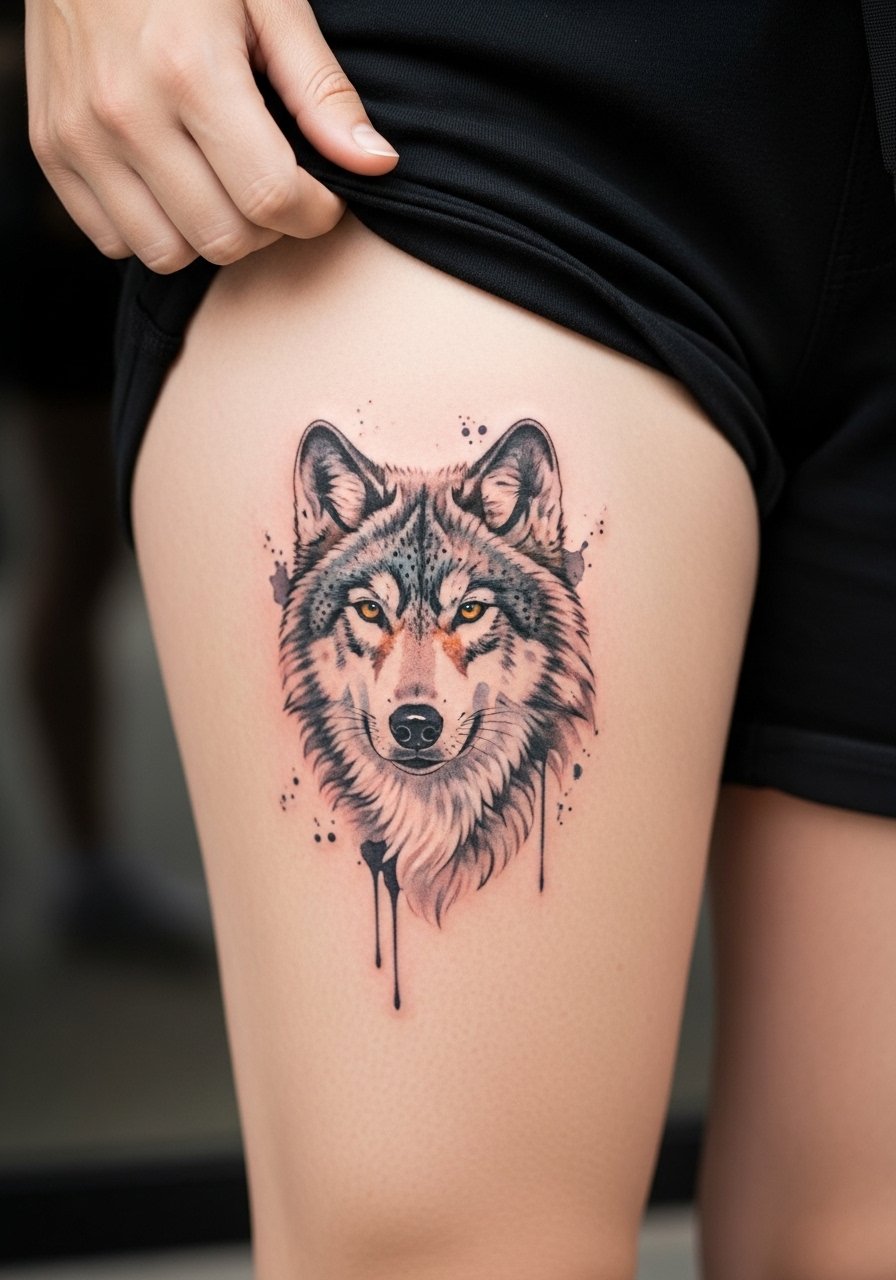
Inner thigh pieces are intimate and often kept private, making them appealing for symbolic inks. Watercolor on the inner thigh blends beautifully with skin tones but tends to fade faster than pigmented blackwork. Ask the artist for a thin black anchor line under the eye and color that sits around rather than on top of the line. Expect moderate pain and the need for careful aftercare because friction from clothing is a real factor. For the session wear, shorts pulled up slightly make access simple while avoiding excess exposure.
19. Wolf Paw Trail Wrapping the Calf
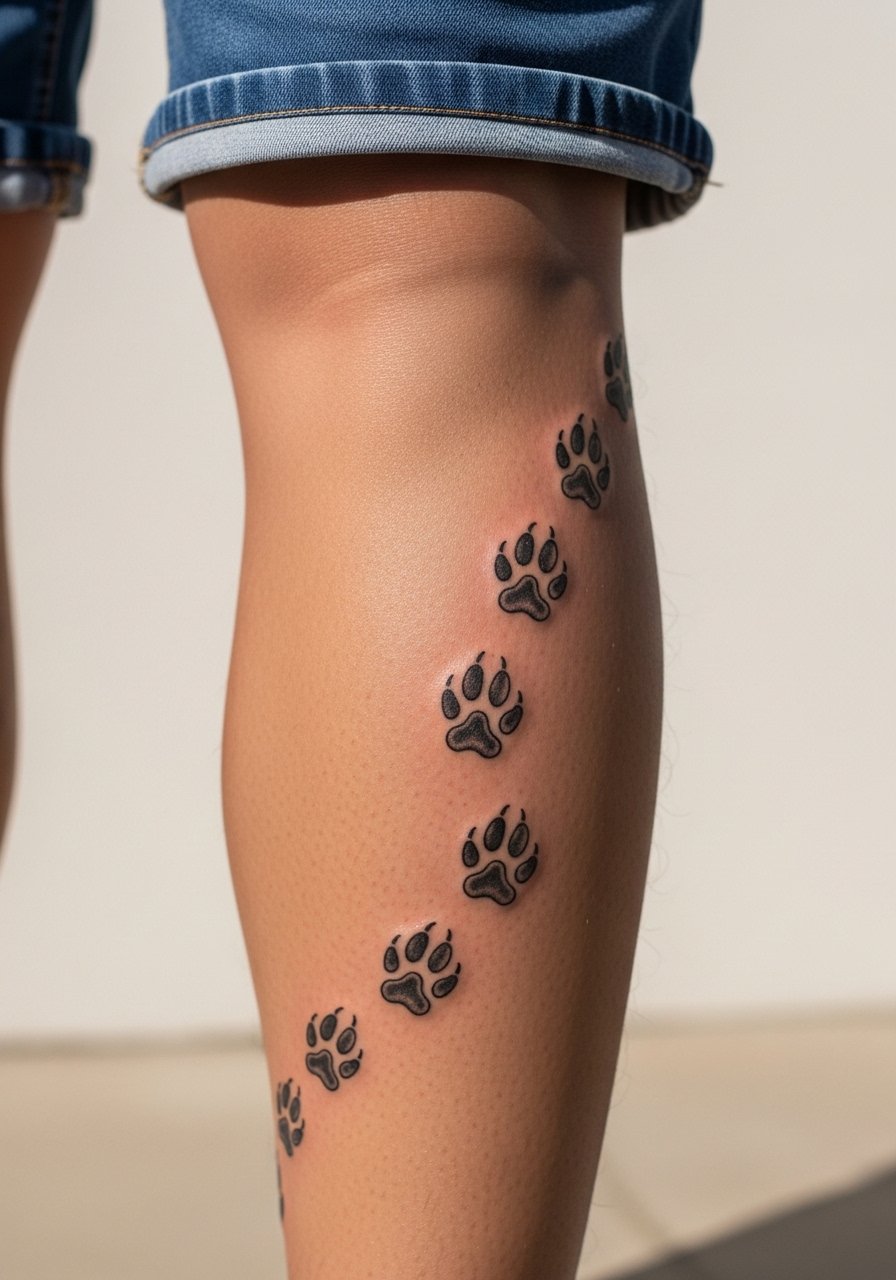
Wrapping a paw trail around the calf reads like motion and fits athletic silhouettes. Tell the artist where you want the trail to wrap so it avoids the Achilles area where movement causes blurring. Calf skin tolerates saturated pads well, and touch-ups are typically cosmetic rather than structural. During sessions bring comfortable seating options because leg cramps happen with long work. For showing it off, slim rolled chinos or boat shoes expose the calf cleanly. A pair of leather boat shoes keeps the look casual and intentional.
20. Negative Space Sternum Wolf Accent
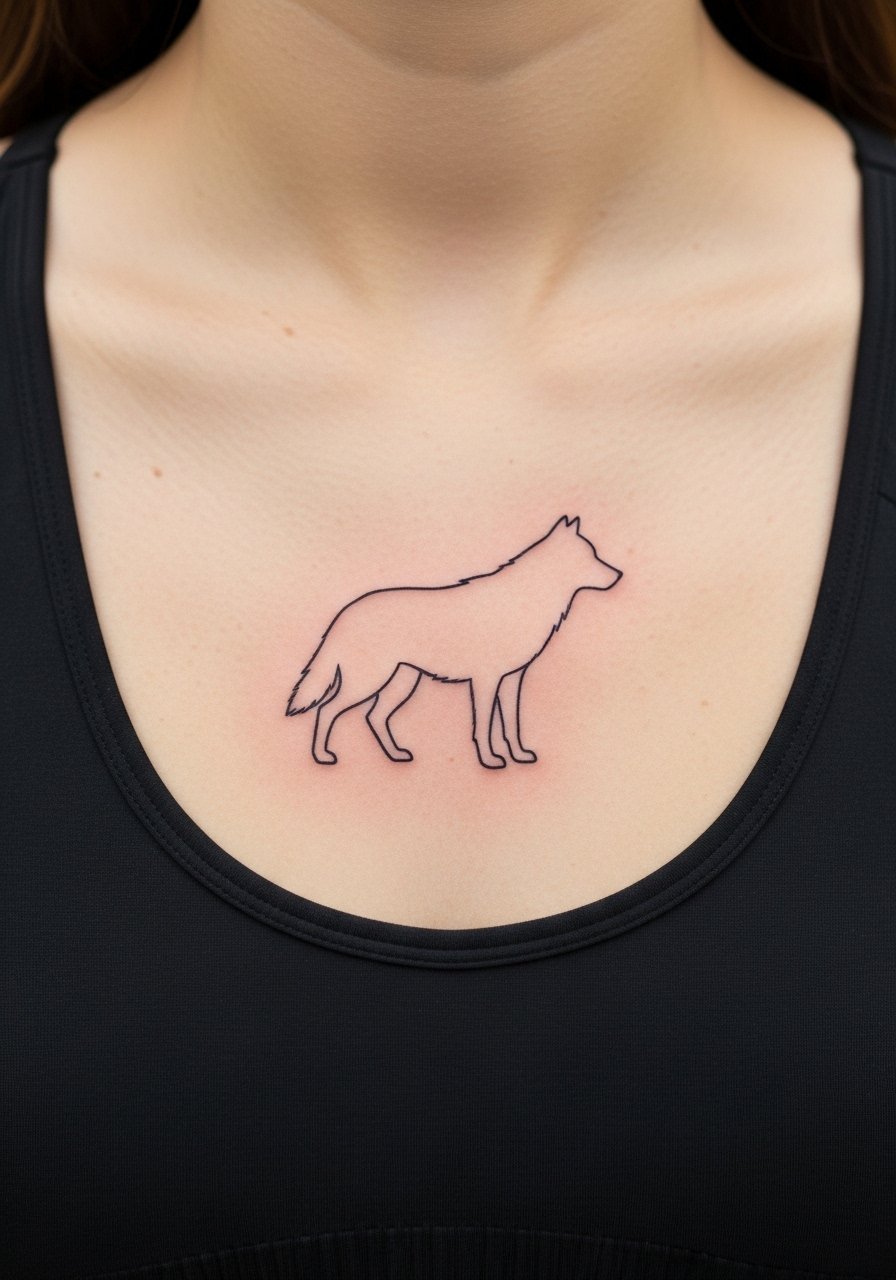
Sternum placements sit at a tricky crossroad between exposure and healing demands. Negative space here can be dramatic, but the skin movement and proximity to bone demand deliberate spacing. One common mistake is over-detailing the center where the sternum meets cartilage. Ask for defined negative shapes and a plan for touch-up after initial healing. Sessions are sensitive, and many artists prefer to break the work into short sittings. Wear a fitted sports bra or open robe to the appointment so the artist has easy access without full exposure.
21. Petite Micro-Realism Wolf Behind the Ear
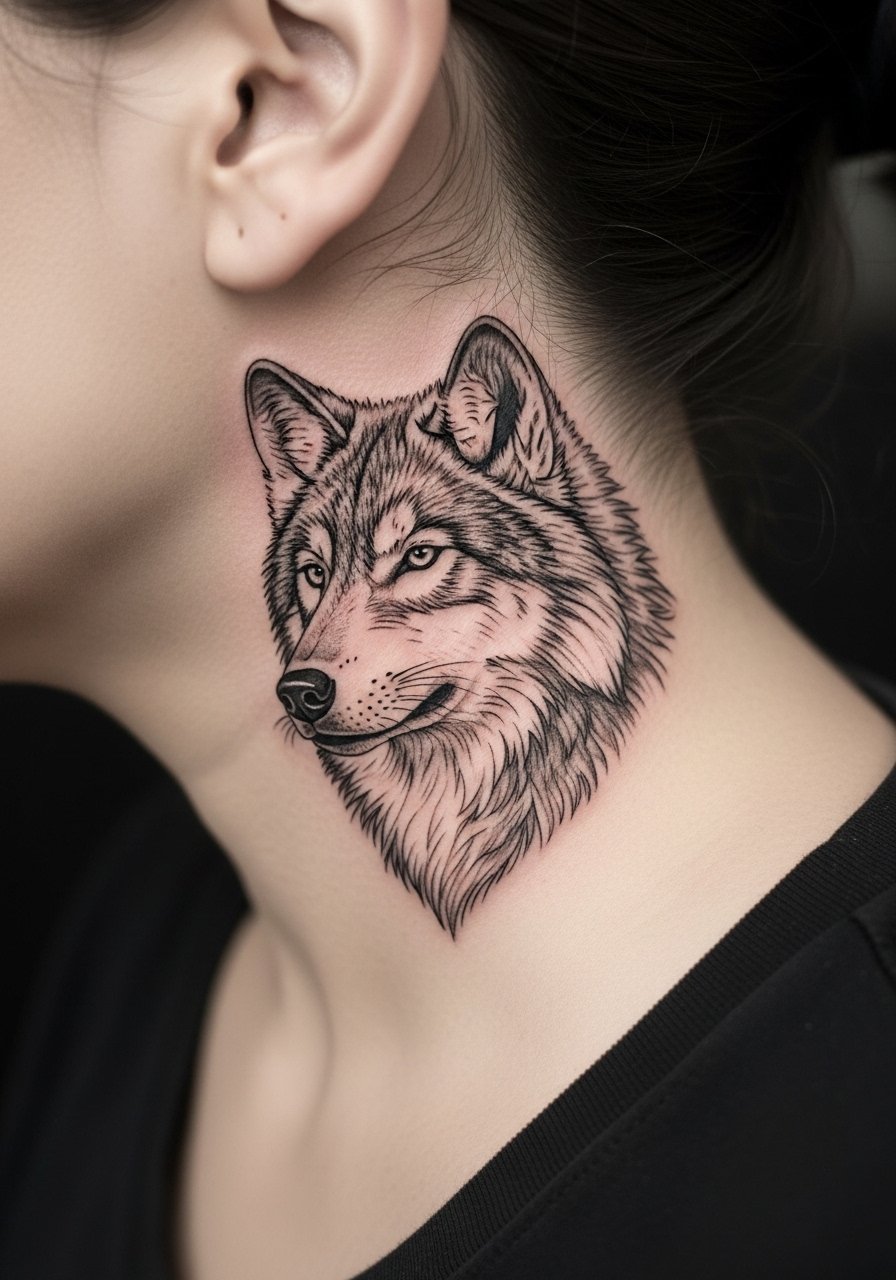
Behind-the-ear pieces are discreet and read like tiny signatures. For micro-realism there, keep the composition minimal and request the design sit below the hairline on the neck so it is only visible when hair is tucked. The area is sensitive and can need touch-up sooner because of hair and sweat interaction. A professional consideration: neck and head placements are more visible in conservative workplaces, so factor that into your decision. Sessions are short but can feel sharp. Bring headphones and plan for a follow-up visit for finetuning.
Frequently Asked Questions
Q: How much does a realistic black and gray wolf tattoo usually cost and how does session count affect that?
A: Prices vary by shop and region, and session count changes the work flow. From what I have seen, a clean 4 to 6 inch micro-realism head tends to take one to two sessions. Larger, highly detailed realism or full sleeves often require multiple sessions spread over months. The key is scheduling enough time so the artist can work methodically rather than rushing through depth and stipple shading.
Q: Will fine line wolf outlines on wrists blur faster than bold traditional pieces?
A: Yes, fine line on the wrist is more likely to soften than bold traditional work. Wrist skin is thin and exposed to sun and friction. To improve longevity, ask for slightly heavier anchor lines and avoid extremely tight inner details. Plan for a touch-up around year two to three, depending on exposure and skin type.
Q: Do watercolor wolf tattoos need different aftercare than blackwork ones?
A: The basic aftercare principles are the same, but watercolor requires extra sun vigilance. Color washes fade more quickly under UV exposure, so keep healed watercolor pieces protected with clothing or sunscreen once fully healed. During the first two weeks follow standard cleanliness and moisture guidance and avoid abrasive fabrics against the tattoo.
Q: Why do geometric mandalas on ribcages sometimes lose definition faster than on forearms?
A: Ribs move with breathing and the skin stretches more frequently, which can cause closely packed lines to merge. On forearms the skin is flatter and sees more consistent tension, so spacing and negative channels hold up better. If you want ribs, ask for increased spacing and slightly bolder outer rings.
Q: Where should I look for portfolios that match these styles without naming specific artists?
A: Search style-specific hashtags like #blackworkwolf or #irezumiwolf, filter by location tags such as your city plus "wolf tattoo," and check platforms like Tattoodo or local studio portfolios on Google. Reddit communities focused on tattoos also offer candid healed photos that show long-term results.
