
Fine line tattoos are everywhere on feeds, but the ones that still read sharp years later are often the heavier work you did not expect to pick. I have watched dotwork and intentional black fills hold where tiny, crowded linework softened. Below are 17 geometric tattoo designs men reach for, which placements age better, and what to say in consultation to get a result that still looks deliberate after a few summers.
1. Sacred Geometry Mandala on the Forearm
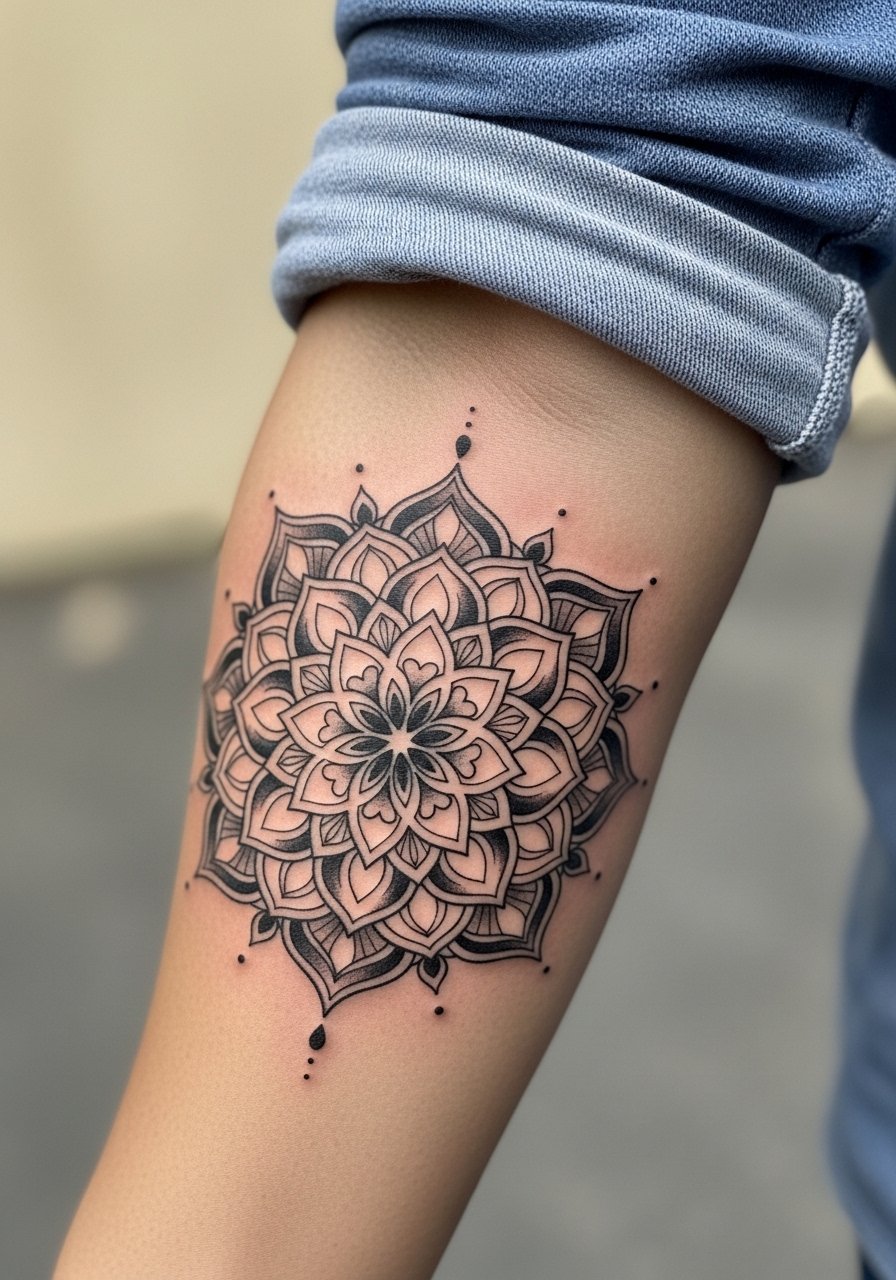
The forearm mandala is the place I send people who want scale without a full sleeve. Practical note, this design needs room between repeating lines so the stipple and dot work do not merge after a year. Tell your artist you want increased spacing and slightly heavier primary rings so the central geometry keeps clarity. Pain sits around a 3 to 4 out of 10 here, and most pieces take one to two sessions for a 4 to 6 inch motif. A common mistake is asking for a tiny mandala that ends up a blurred starburst at eighteen months. For showing it off, roll a fitted crew tee to mid-forearm and pair with a fitted black crew neck tee to frame the design.
2. Dotwork Sacred Geometry Chest Piece
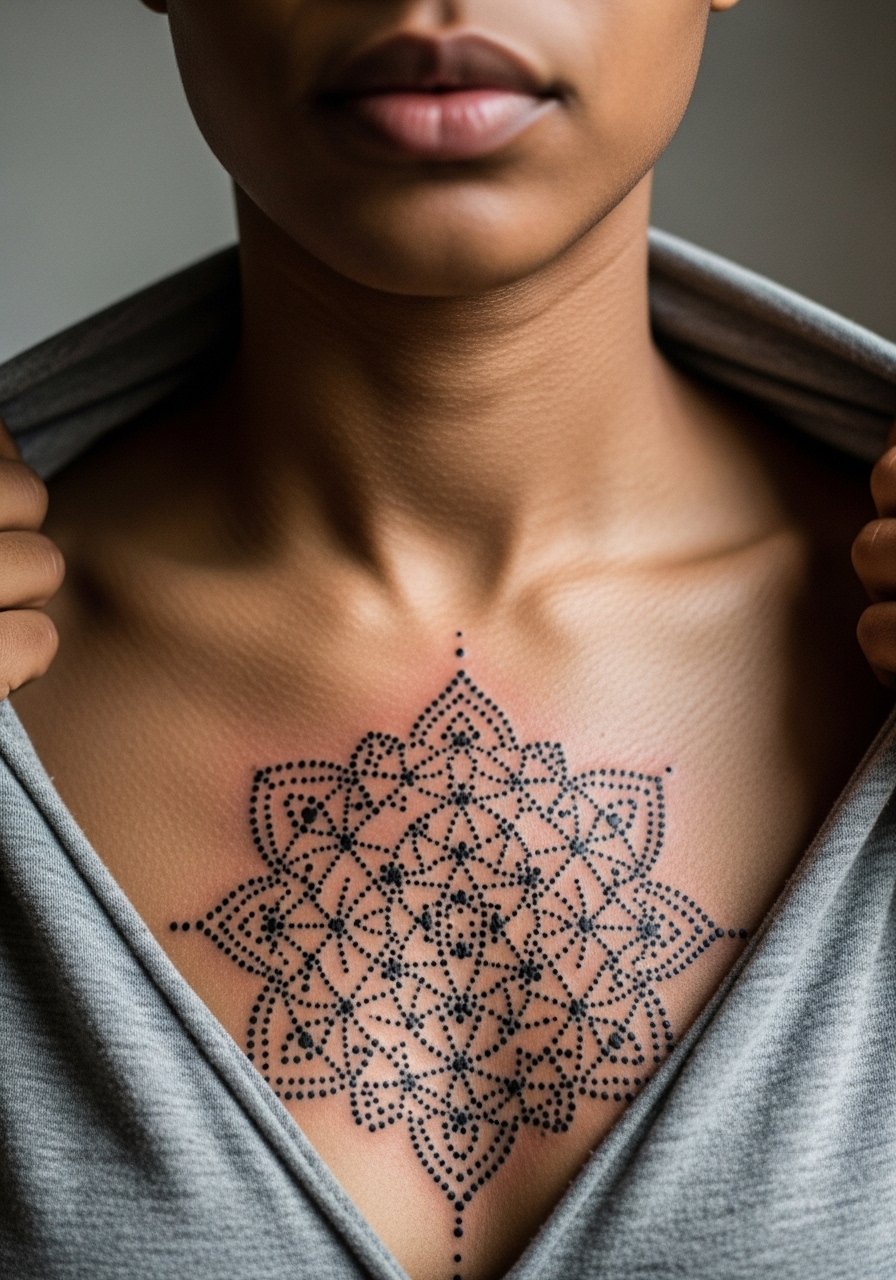
Dotwork on the chest reads spiritual without being literal. Expect 4 to 6 sessions for an 8 to 10 inch piece and a moderate pain level because of bone proximity near the sternum. In consultation, specify you want a range of dot density rather than continuous gray washes so the motif keeps three-dimensional depth as it heals. The version that ages poorly packs dots too tightly in shaded fields. That congestion turns into a muddy area around year two. For session day wear, go with a loose open button-down shirt so the artist can access the center chest easily. Pair the reveal with an unbuttoned henley when you want to show it off.
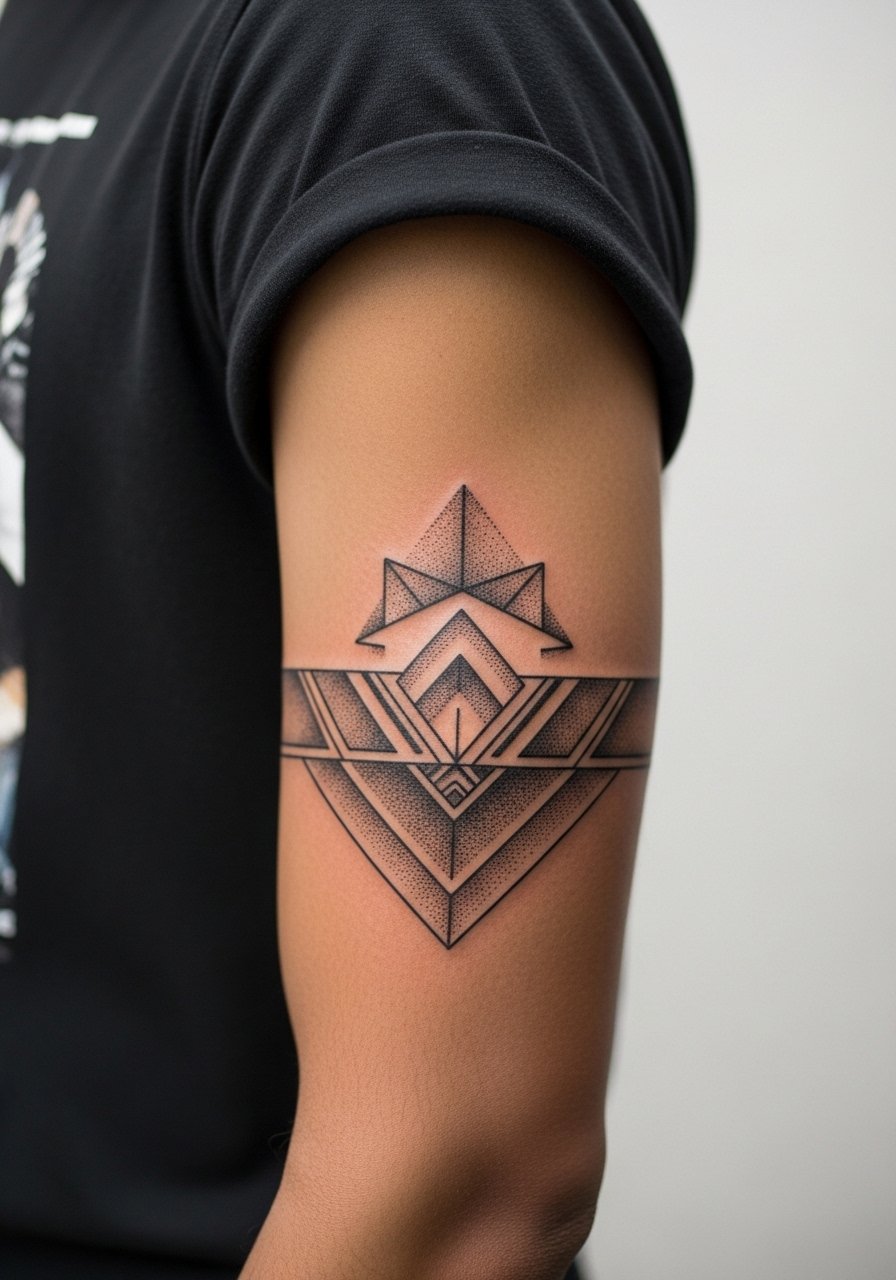
3. Minimalist Triangle Interlock Sleeve
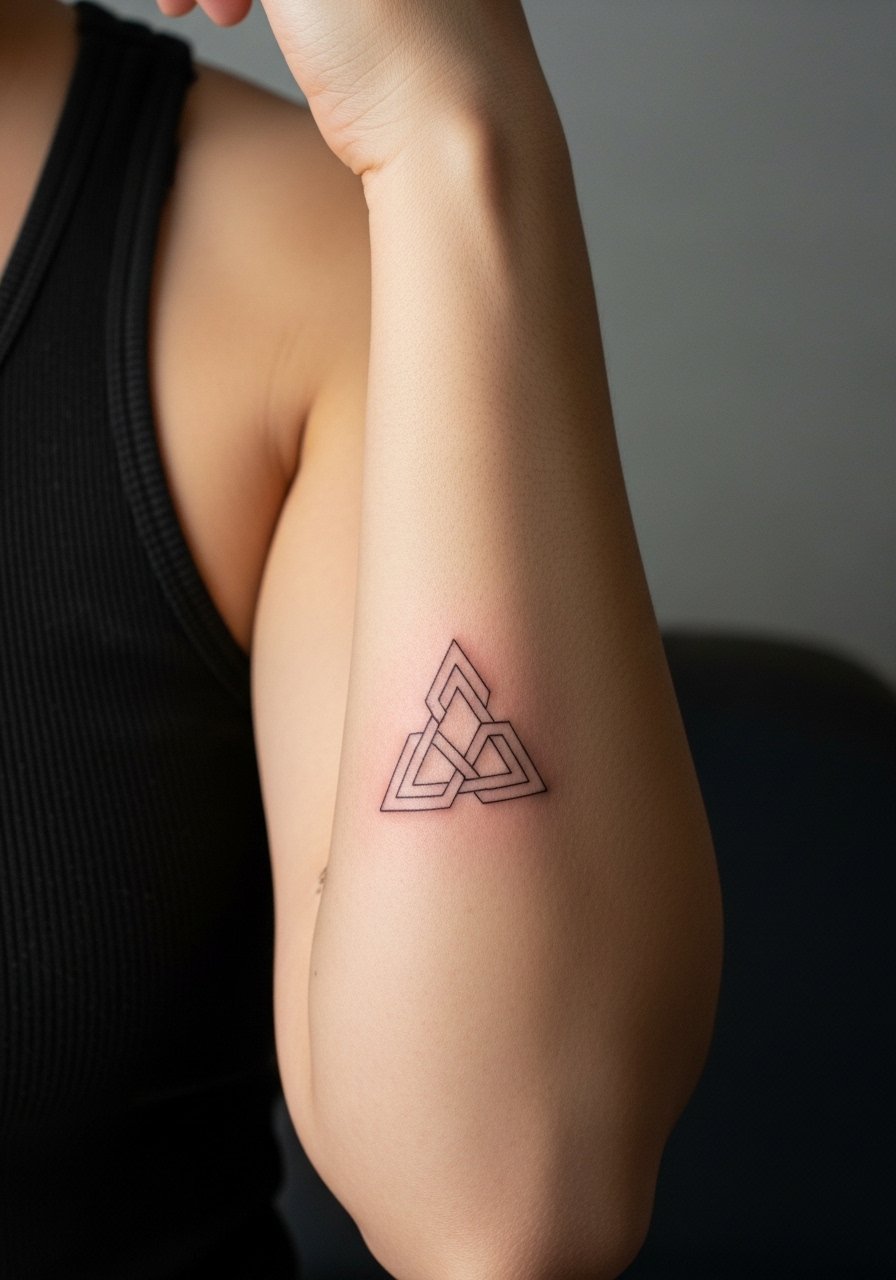
Fair warning, fine line sleeves test both placement and lifestyle. Artists are split on whether thin geometry holds on inner biceps. One camp says the skin stretch there blurs thin lines within two years. The other camp argues careful depth and spacing make fine line settle reliably. Ask your artist which camp they fall into and what spacing they recommend. Session time for a 6 to 12 inch run is usually three appointments. The common error is requesting ultra-thin lines across dense repeating patterns. That choice risks early merging and forces touch-ups. If you plan gym bulk after the tattoo, place heavier elements where skin changes less.
4. Hexagon Grid Upper Back Panel

A grid on the upper back reads like architecture because the skin there stays stable and the canvas is large. Expect multi-session work for a 12×12 inch panel and a moderate pain level. Tell your artist you want crisp negative-space separations between hexes rather than thin connector lines. That spacing is what keeps the pattern from bleeding together as it heals. A mistake I see is requesting full blackout fills in narrow hexes. Those can look heavy and lose the geometric rhythm. For a back piece, plan for a raglan or racerback tank the day of the session so the artist can reach across the shoulders without tugging fabric.
5. Circular Mandala Shoulder Cap
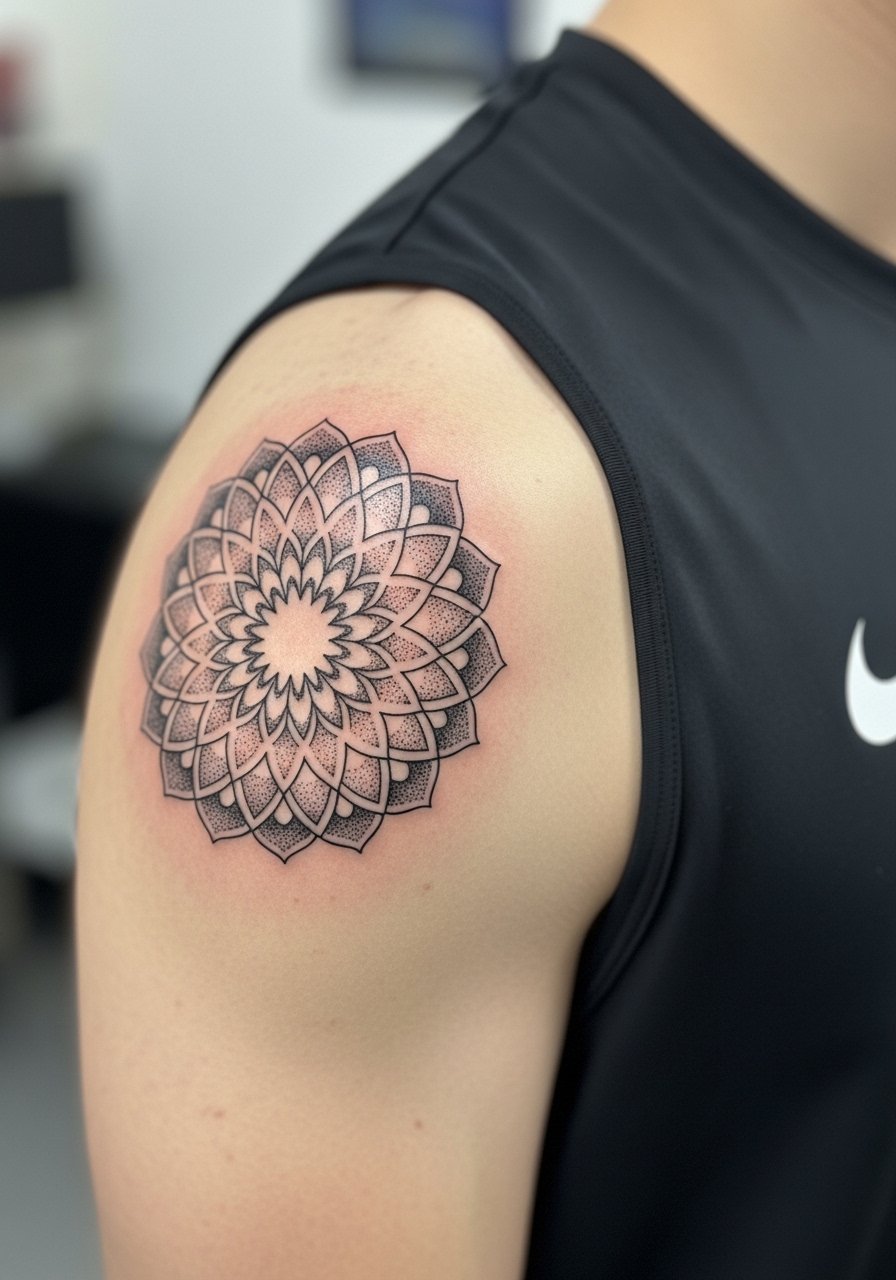
The shoulder cap is forgiving on movement. Two sessions will usually lock in a five-inch mandala and the pain is lower than on ribs or sternum. In consultation, ask for graduated ring thickness so outer bands get slightly bolder. That choice preserves silhouette from a distance and prevents the outermost rings from dissolving into blur. For showing this off, a sleeveless athletic tee in olive or white highlights the deltoid cap without shoulder seams getting in the way. For session wear, bring a strapless or sleeveless top you can move without pain.
6. Polygonal Animal Hybrid on Outer Forearm
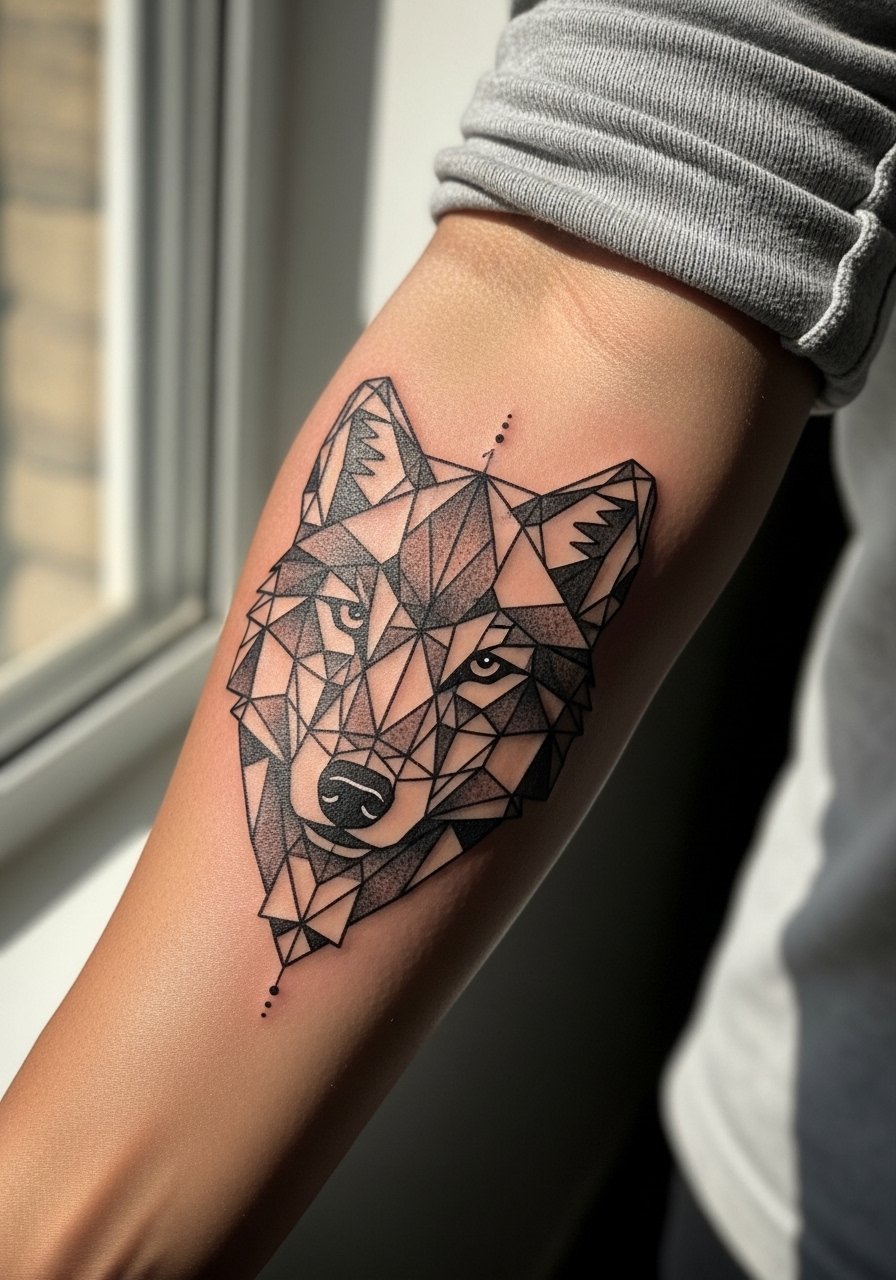
This hybrid is trending because it pairs geometric precision with a personality motif. It works well on the outer forearm at about seven inches long and usually finishes in three sessions. The key phrase for your consult is "geometric planes integrated with realistic eye detail." Ask the artist to keep major polygons larger around facial features so those areas do not lose definition as the piece settles. A common mistake is requesting tiny facets across the muzzle. Those facets can soften into blobbed areas after repeated sun exposure. For a simple show-off look, add a leather cuff opposite the piece and a fitted black crew neck tee when you roll up the sleeve.
Pre-Session Essentials
The wrist, forearm, shoulder, and chest pieces above have different access needs and healing quirks, so a short kit keeps the session smoother and the first week less risky.
-
Indie breathable tattoo balm. Thin formulas reduce clogging in humid healing windows and help keep fine line edges crisper on forearm and wrist work.
-
Australian tea tree salve. Helps prevent cracking on densely saturated blackwork like mandalas without the greasy film that drags dot work.
-
Hypoallergenic tattoo wrap roll. Handy for travel heals after chest or back sessions and thinner than standard films used at guest spots.
-
Fragrance-free gentle body wash. Use during showers to rinse salt and sweat without irritating fresh dotwork or detailed lines on the chest.
-
Aquaphor healing ointment. A thin application for the first couple of days helps hold moisture on high-friction placements like the forearm.
7. Fractal Pattern Outer Thigh Piece

Fractal designs on the thigh offer depth without constant exposure. Outer thigh skin handles dense dot gradients well and sessions usually span three to four appointments for an eight inch square. Choose dot gradients instead of continuous shades to keep the illusion crisp after healing. A mistake is placing too many micro-dots in tight fields on thinner skin. That density can look muddy as it settles. For session comfort, wear loose gym shorts so the artist can prop the leg without fabric rubbing the area after. When you want to show the piece, black mid-thigh athletic shorts frame the work cleanly.
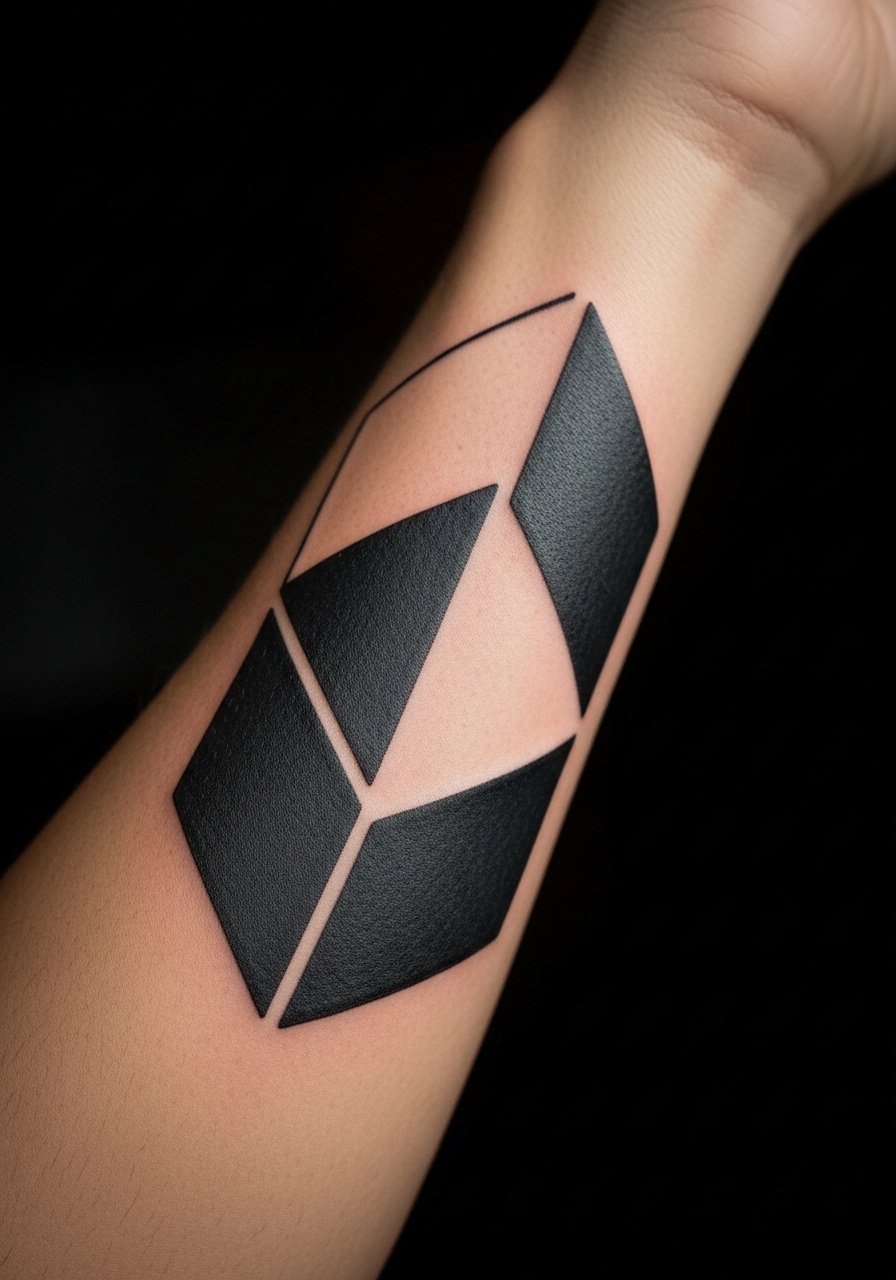
8. Symmetrical Cube on the Chest

A cube with perspective lines reads three-dimensional on muscular chests because the plane of the pectoral adds contour. Two to three sessions covers a 6×6 inch cube and pain is moderate near the sternum. Tell your artist you want the primary edges slightly heavier than connector lines so the optical effect stays sharp after two years. A common error is making every line the same weight. That flattens the illusion once the piece begins to fade. For evenings, pair the chest reveal with a V neck tee fitted to frame the cube without crowding it.
9. Interlocking Gear Wrist Tattoo
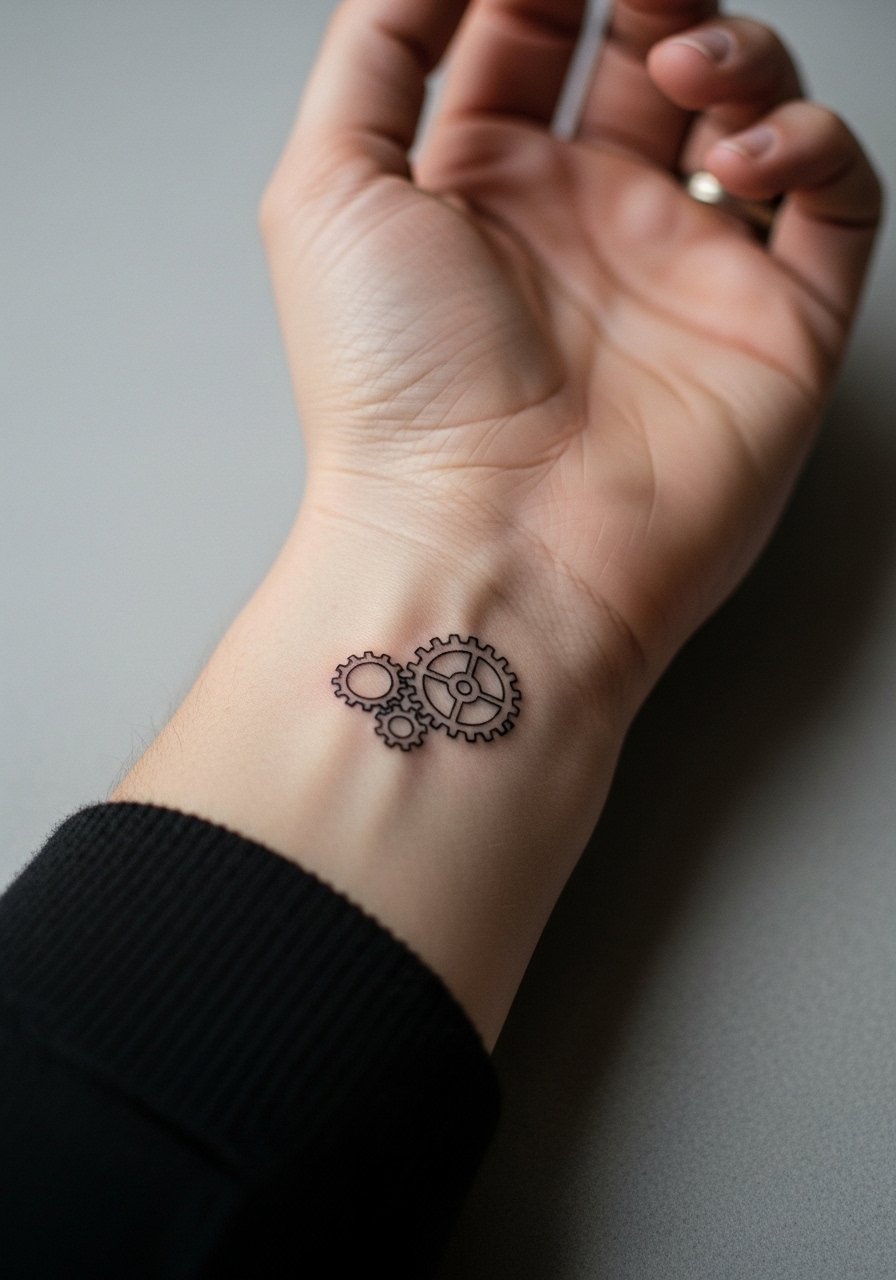
Wrist pieces are low-commitment but high-wear. Expect one short session for a 3-inch gear and higher friction from daily washing. The biggest mistake is making mechanical teeth too fine. Fine small teeth lose definition when the area is scrubbed repeatedly. For this placement ask for slightly bolder connector lines and plan a touch-up at 12 to 18 months. For styling, a slim leather watch on the opposite wrist balances the look and keeps attention off the daily-wear side. Try a slim leather watch men for contrast when you want the wrist to read as intentional.
10. Metatron's Cube Full Back Panel

This is a commitment piece. Metatron's Cube on the full upper back can take six or more sessions and sits higher on the pain scale for extended appointments. The result is transformative if you plan for the time and aftercare. A common failure mode is trying to cram this level of density into too small a surface. Keep the layout large enough that individual nodes and connecting lines have breathing room. For booking, expect multiple long sessions and stagger them to avoid fatigue. Large back work benefits from a pre-session plan that includes travel, sleep, and hydration.
11. Tessellation Wave Armband
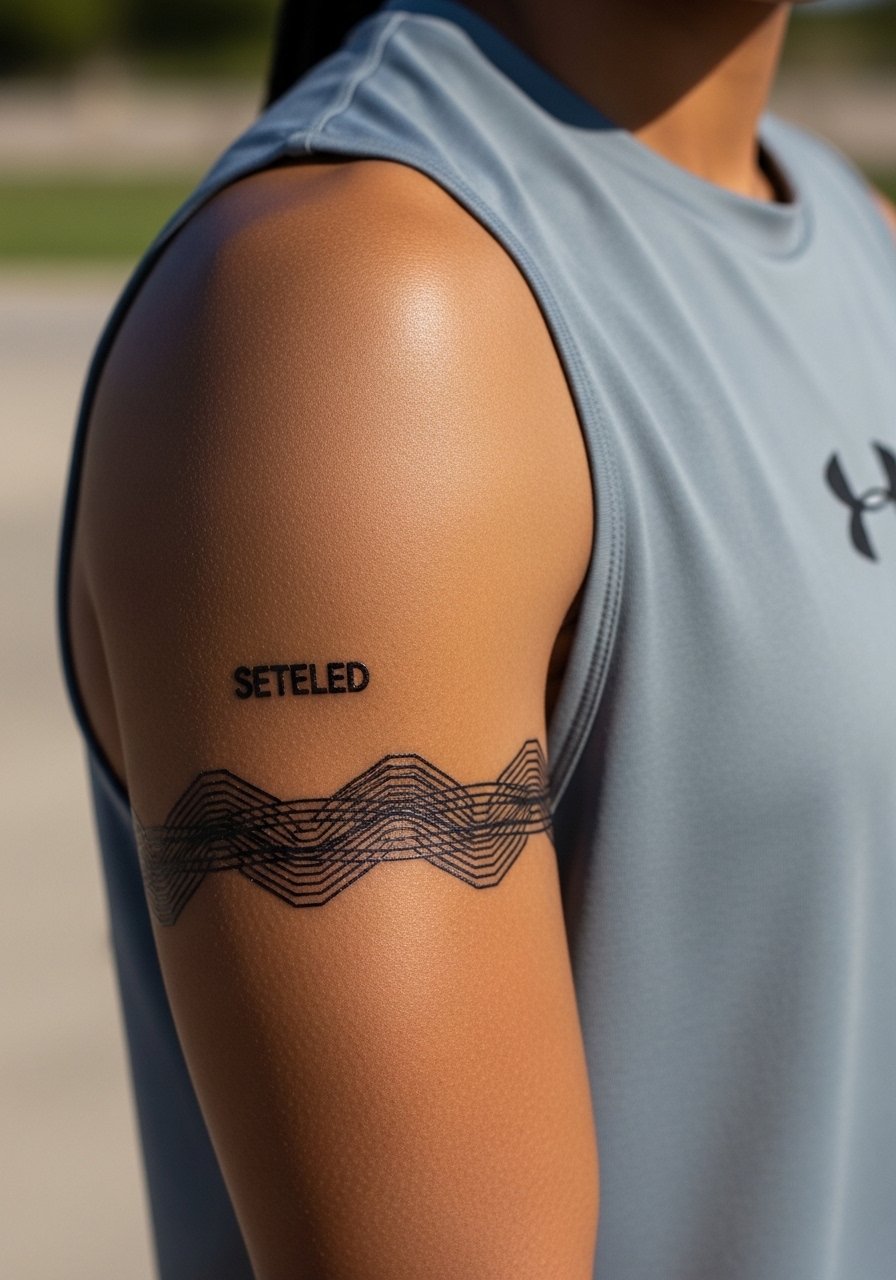
An armband is versatile because it can scale and wrap with muscle movement. A 4-inch band takes about two sessions and tolerates daily wear well when the ink fields are balanced with negative space. The error I see is decreasing pattern scale when wrapping the arm. Tiny tessellation repeats on a curved surface will collapse visually faster. For show-off style, a sleeveless athletic tee keeps the focus on the band edge. If you want a subtle framing piece, the band pairs with neutral tones rather than heavy patterns.
12. Platonic Solids Calf Wrap

Platonic solids suit the calf because the vertical canvas preserves perspective. Expect 3 sessions for a 10 inch tall run. The calf tolerates heavier outlines better than thin precision because joggers and socks apply friction. People often underestimate daily abrasion. Ask for bold primary outlines with finer internal geometry so the overall shapes remain legible over time. For summer, roll cuff joggers or wear no-show socks to show the work without crowding the lower leg. A rolled cuff joggers look keeps the solids visible with sneakers.
13. Hypercube Illusion on the Side Neck

Neck placements punch above their size. Hypercube illusions here are daring and best for people who want a focused optical trick rather than large coverage. Side neck work sits at a higher pain rating and demands a confident artist. Artists are split on numbing cream too. One group sees it as practical for longer neck sessions. The other group says it changes skin response and subtle shading. Discuss numbing preferences ahead of time. Keep the design compact and expect two sessions. This area needs an artist who regularly does micro-realism to avoid early blur.
14. Negative-Space Geometry for Dark Skin
Dark skin changes how thin linework photographs, so negative-space geometry is a strong alternative. Instead of relying on faint lines, this approach uses saturated black fields to carve shapes out of the skin visually. Tell your artist you want intentional negative shapes and a higher saturation strategy in fills, not faint line detail. The common complaint from darker skin tones is that fine lines become invisible in photos. This method reduces that issue and still reads geometric in person. Session time is similar to a forearm mandala and the pain level is moderate.
15. Micro Hex Ankle Tattoo

Ankle geometry is small and discreet. One short session usually covers a neat micro hex and pain can spike near bone. The risk is placing it too close to ankle tendons where stretching and friction from shoes causes early fading. Ask your artist to set the shape slightly above the most exposed bone line and to use a modest line weight for longevity. For showing the design with casual outfits roll jeans to ankle height or choose low-profile sandals. A rolled cuff style keeps attention on the micro hex without forcing the foot into full exposure. Consider touch-ups at year two for public-facing clarity.
16. Sacred Geometry Animal Hybrid Chest Panel
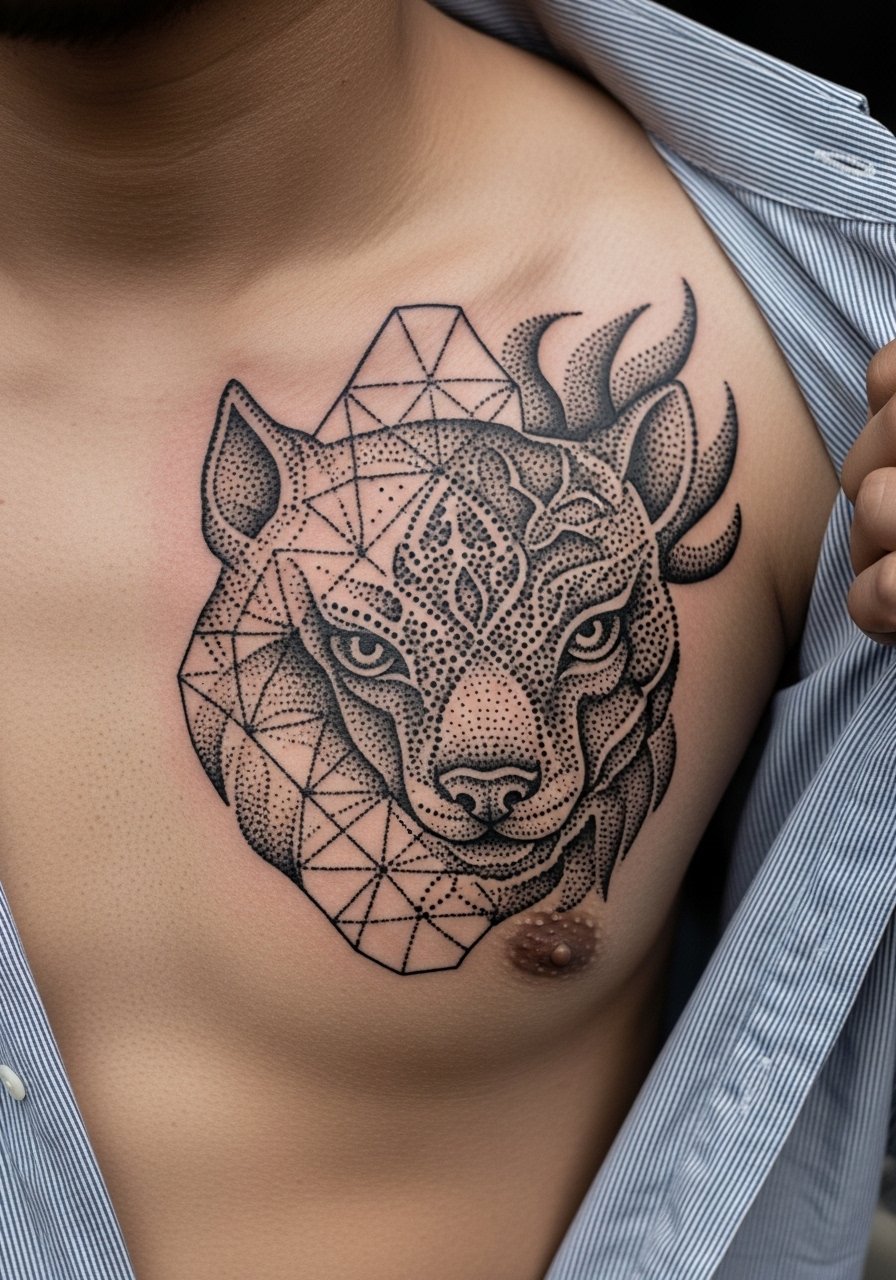
Combining sacred geometry with an animal motif on the chest gives both scale and narrative. This is larger than a single pectoral cube but narrower than a full chest piece. Expect three to four sessions for a balanced panel. The essential consult note is to map the animal features to the chest's natural contours so the geometry reads consistent when you move. A mistake is matching the animal detail scale to the geometric element scale. If one is much finer, the other loses impact as it ages. For session comfort wear an open collar shirt you can pull aside and schedule the session when you can rest the chest area afterward.
17. Stipple-Shaded Geometric Half-Sleeve
A half-sleeve built on stipple and dot shading is forgiving because it uses texture rather than thin contour lines to define form. Expect multiple sessions spread over a few months for the full wrap, and moderate pain during longer appointments. Tell the artist you want graduated stipple density with bold anchor lines so the sleeve keeps a readable silhouette at distance and in photos. The most common problem is making transition areas too busy. Keep primary anchors spaced so the eye can read the pattern as you move. For wardrobe, short-sleeve shirts rolled to mid-bicep fit the sleeve into everyday outfits without feeling like heavy coverage.
Frequently Asked Questions
Q: Will thin line geometric sleeves blur faster than stipple or blackwork?
A: From what I have seen, thin line work tends to soften sooner on active skin and in high-sun placements. Stipple and heavier anchor lines give a visual framework that holds up better. If you prefer thin lines, place them where skin stretches less and plan for a touch-up at 12 to 24 months.
Q: How do I choose between Saniderm-style wrap and dry healing for geometric tattoos?
A: Artists and owners split into two camps. One camp favors protective film for a clean first week and less fuss. The other camp believes dry healing breathes better and keeps pigment in place. The answer depends on your skin type, activity level, and whether the artist prefers one approach. Ask the studio which method they back and why before you book.
Q: What should I tell an artist if I want negative-space geometry on dark skin?
A: Say you want saturated fills and deliberate negative shapes rather than delicate single-line work. Request contrast through black fields and negative gaps so the pattern photographs and reads in person. Ask to preview a temporary stencil so you can check visibility under different lighting.
Q: How painful is neck geometric work compared with the forearm or calf?
A: Neck placements run higher on the pain scale than forearm or calf because of thinner skin and less soft tissue. Forearms are often one of the more forgiving spots. Calves tolerate heavier work better than the neck. Plan for shorter sessions on the neck or numbing if you and the artist agree.
Q: How often do geometric tattoos need touch-ups?
A: It depends on technique and placement. Fine line work commonly needs a touch-up at around year two. Bold blackwork and dotwork can go longer before a refresh is needed. Sun exposure and repeated friction accelerate fading, so plan periodic check-ins with your artist and a realistic touch-up timeline.
