
Fine line and geometric takes on classic Tim Burton motifs have become a quiet favorite in studios, and they force a specific kind of planning. Small spiral hills and angular skull faces read as intent when spacing, linework, and placement are chosen to age into a legible silhouette over time. Below are 21 ideas that translate Burton’s mood into geometry, with what to ask your artist, how these pieces heal, and clothes that show them off.
1. Jack Skellington Face, Inner Forearm Linework

I recommend this placement when you want a design that reads at arm length and stays visible as sleeves roll up. Ask your artist for slightly increased line spacing and a medium lineweight so the eyes and smile do not merge after a few years. A common mistake is shrinking the skull to palm size, which invites blur and touch-ups. Expect moderate pain for the inner forearm and a one-session piece under two hours for compact sizes. Pair it with a rolled-up linen shirt when you want to show it off, the clean sleeve line keeps attention on the face.
2. Spiral Hill Silhouette, Outer Wrist Cluster

Fair warning, wrist work lives in a high-friction zone. The biggest mistake is packing too much detail into a tiny circle. I tell people to scale the hill so the negative space around the spiral remains clear. During consultation ask for reinforced outer lines and lighter internal cross-hatching so the hill keeps shape at six months and beyond. Session time is short but the touch-up timeline is often within two years. Show it with stacked dainty bracelets that frame the wrist without obscuring the silhouette.
3. Beetlejuice Stripe Wave, Collarbone Edge
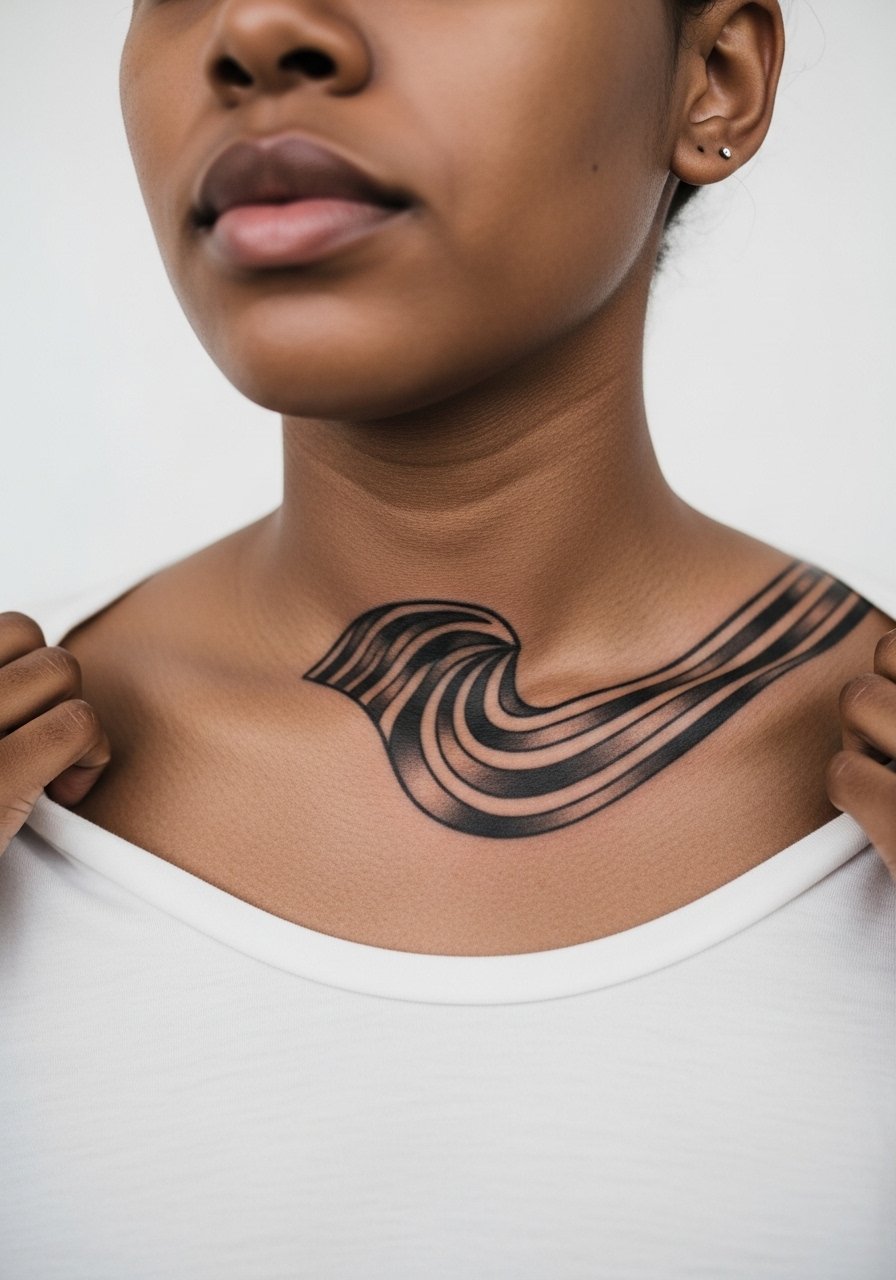
The collarbone takes movement and can distort perfectly straight lines if the stencil sits over the bone. When the design includes parallel stripes, tell your artist you want the lowest stripe a touch heavier so it anchors the composition. Many people expect collarbone to be painless. It is deceptively sensitive and may need breaks. Wear a wide-neck shirt to the appointment so the artist has clear access without you feeling exposed. If you care about longevity, avoid packing stripes too close together.
4. Corpse Bride Silhouette, Ribcage Mandala
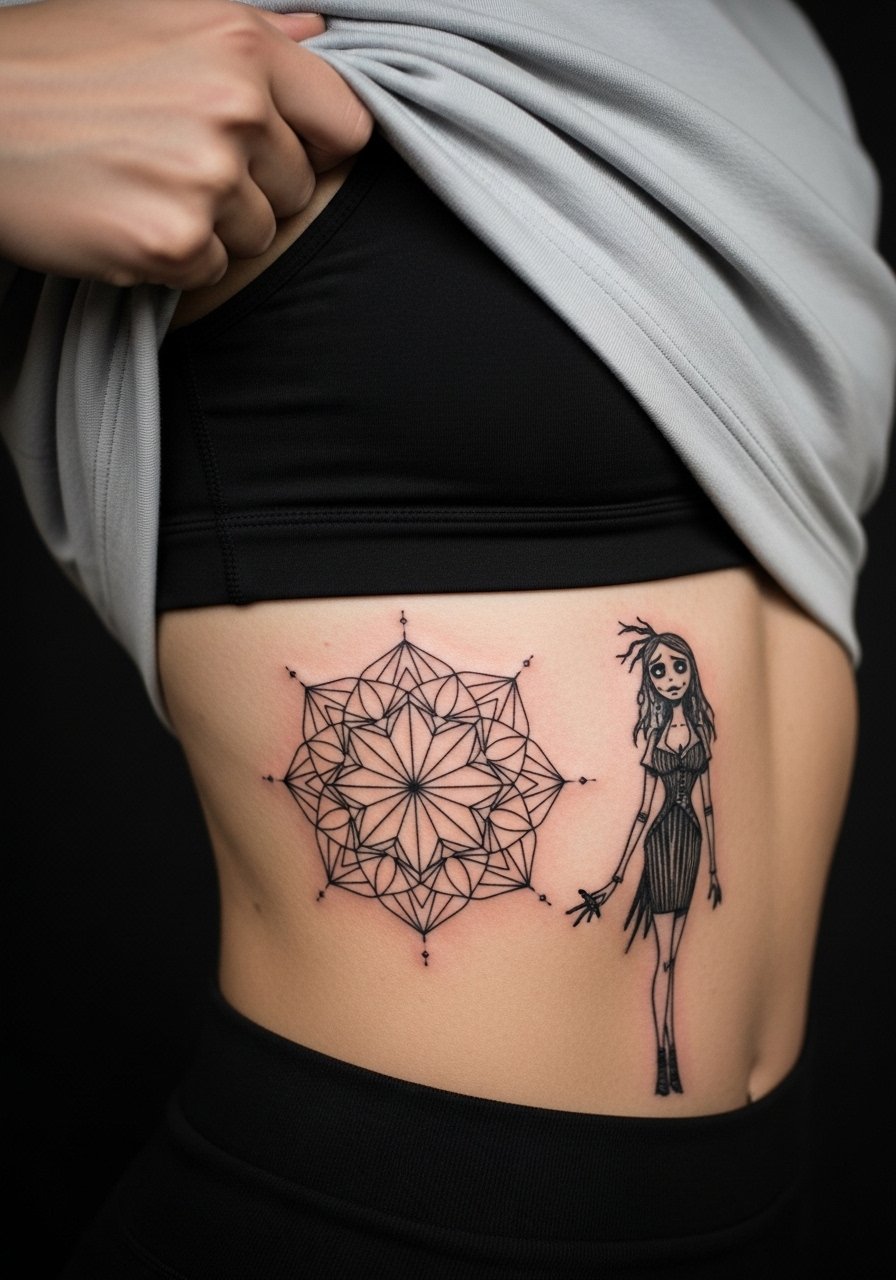
Controversy pops up here. Fine detail on the ribcage splits artists. One camp argues the skin stretch and breathing blur delicate lines within two years. The other camp says with slightly deeper placement and more spacing the design can last. Be explicit in consultation about how often you will want touch-ups. Expect a higher pain level and plan for two shorter sessions if the mandala wraps wide. For healing wear loose low-rise joggers to keep fabric away from the area during the week after the session.
5. Oogie Boogie Dot Work, Calf Band

The calf is forgiving for stipple shading and looks balanced when the band preserves negative space. Tell your artist you want the dots fanned out rather than dense in the center so the texture reads at a distance and avoids patchy fade. Sessions feel like medium discomfort and you can stand if needed. A common long-term error is over-saturating tiny dots which can become muddy after sun exposure. Pair the band with loose drawstring linen pants to keep the area visible without constricting the healing skin.
6. Spiral Eye Stack, Back of Neck Tiny Trio

When you want small matching marks that peek from a collar, the back of the neck is a great choice. Expect stinging near the hairline and plan for a quick session. The most common mistake is placing them too close to the hairline where aftercare is awkward. Ask your artist to map the trio so the top eye sits an inch below the hairline. For showing off with higher necklines try a wide-neck shirt that reveals the work without needing a plunge neckline.
Studio Day Picks
The wrist, calf, and collarbone pieces above need different prep than ribcage work, and these items smooth the session and the first week.
-
Stencil transfer paper kit. Lets you preview line placement on the skin so you can spot spacing issues for small spiral and wrist designs before the needle starts.
-
Topical numbing cream. Used 45 minutes before helps with ribcage and collarbone sensitivity without affecting the stencil.
-
Thin protective film roll. Keeps wrist and finger tattoos cleaner during the first week of repeated hand washing and friction.
-
Fragrance-free gentle body wash. Cleanses healing areas without stripping natural oils, useful for calf and forearm pieces that see sun exposure.
-
Aquaphor healing ointment. Thin layers lock in moisture for tight linework during the initial days without clogging channels.
7. Jack Skellington Pocket Portrait, Upper Arm

There is room on the upper arm to keep contrast strong and allow denser geometry without blowout. I recommend slightly bolder outer linework than you would use on the wrist. In consult ask for a balance of solid black anchors and thinner internal lines so the face reads at arm distance. Common mistakes include over-detailing the mouth area which can merge over time. Plan for a one-session appointment under three hours. During casual wear a short-sleeve button-down keeps the piece visible and frames the geometric portrait.
8. Tim Burton Moon, Inner Bicep Micro-Realism
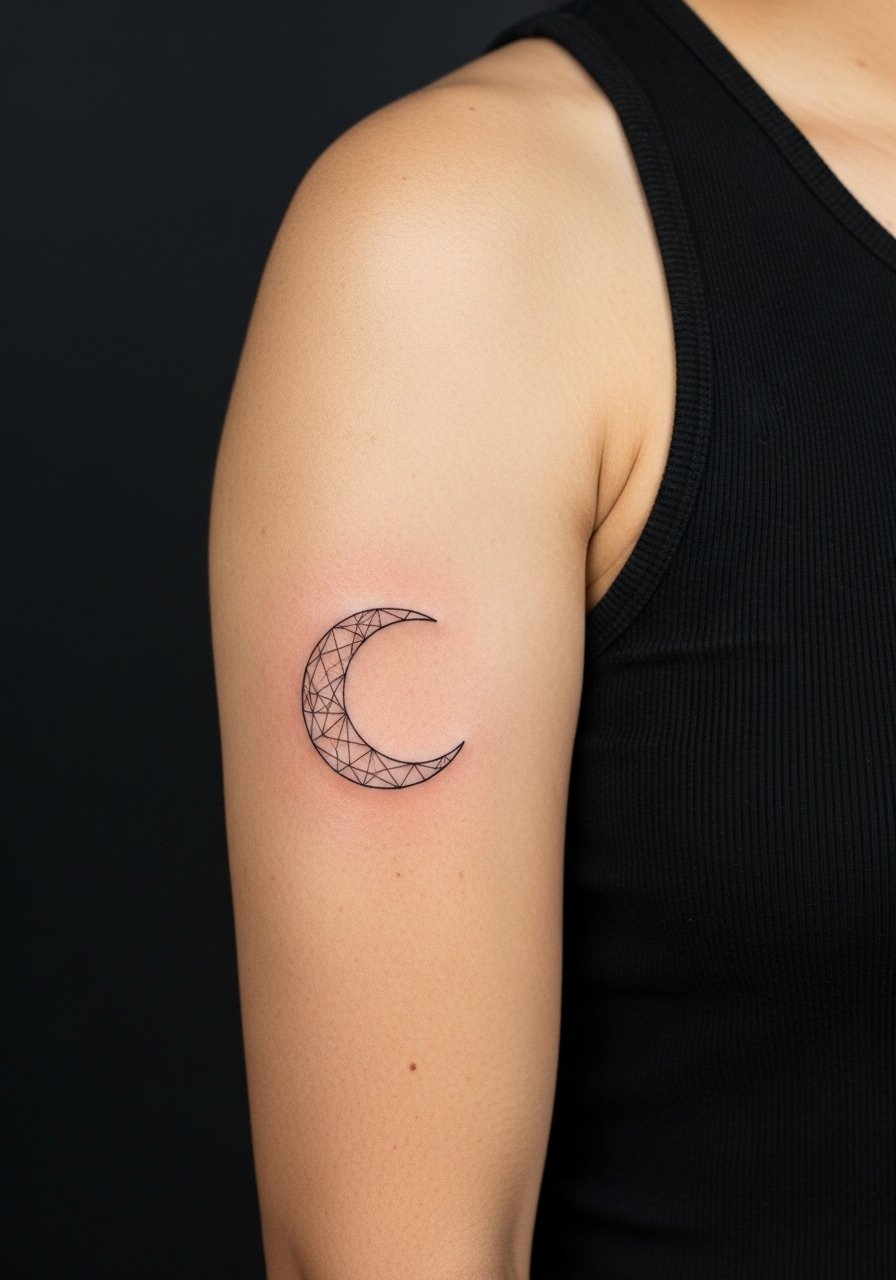
Fair warning, the inner bicep is tender and the skin can move during linework. The biggest mistake is tiny script or micro details that do not hold here. Tell your artist you want slightly bolder strokes around the crescent and lighter interior dot work for texture. Sessions require arm positioning adjustments and short breaks. Expect touch-ups sooner than on flatter areas. For the appointment wear a tank top so the artist can access the area without you removing layers.
9. Scissor Silhouette, Forearm Sleeve Accent

There is a visual impact when a strong silhouette is balanced with negative space in a sleeve. I often advise clients to map the scissor so the blades follow the natural forearm lines, which reduces awkward distortion when muscles flex. A common error is aligning the handle over the wrist bone where movement lowers longevity. Session time depends on accompanying pieces, but the scissor itself is a quick bold element. Pair with rolled-up sleeves and a minimalist watch to draw the eye down the arm without crowding the detail.
10. Bat Swarm Geometry, Shoulder Cap

The shoulder is forgiving for clustered elements that need curvature to follow muscle. The mistake people make is compressing bats into a flat band instead of letting them spread with negative space, which ages poorly. In consultation ask how the pattern will adapt to shoulder movement and whether shading will be stippled or whip shaded. Pain is moderate and session length varies with swarm size. Wear a loose button-down shirt to the appointment for easy access.
11. Oogie Boogie Dice, Hand Side Accent

Hand tattoos are high visibility and high risk for early fading. Be honest about career considerations before booking. The frequent mistake is asking for dense shading on knuckle-adjacent pieces which sees the fastest erosion. Tell your artist to keep geometry bold and the negative space generous. Expect touch-ups within two years and the need to avoid heavy sun exposure. Show it off with simple rings rather than thick bracelets while it heals.
12. Gothic Arch Mandala, Upper Back Center

A central back piece can be scaled to breath with the shoulder blades, which helps prevent compression of radial lines. Ask your artist to map the mandala with the spine as a guide and to avoid putting dense detail directly over the creases. Sessions may require multiple passes for symmetry. A common long-term issue is sun exposure during summer months which can soften contrast. Pair with open-back dresses or racerback tanks to reveal the arch without full exposure.
13. Patchwork Puppet, Thigh Panel
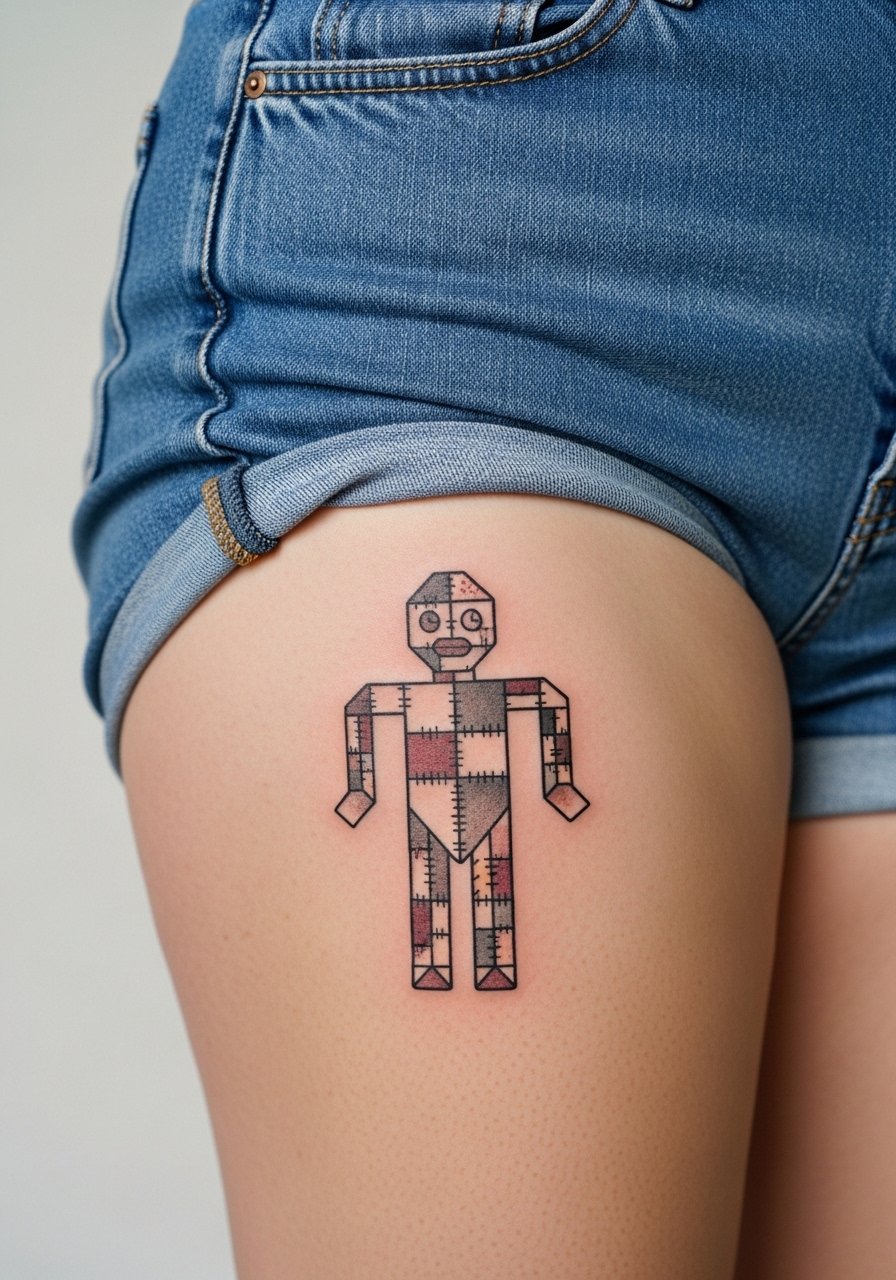
The thigh gives room for panels and heavier saturation that age well. I tell clients that detail will hold longer here than on the forearm, so you can afford more intricate geometry. The usual mistake is choosing a fabric that rubs the area during workouts. For the session wear loose shorts that can be shifted without pressure. Pain is moderate and larger panels can be split across two sessions. For evenings out try high-waisted denim that frames the thigh panel.
14. Coffin Stack Tinys, Fingers Geometry

Finger tattoos are notoriously high-maintenance. The controversy here is cleanly split. One camp says small finger work is a statement worth yearly touch-ups. The other camp warns that the skin and constant use cause rapid fading. My practical take is to choose bold simplified shapes and accept touch-ups as part of ownership. Avoid tiny internal detail and expect a higher likelihood of annual refresh. For showing without covering try thin band rings rather than bulky pieces.
15. Moon & Spiral Coordinates, Sternum Script

Sternum pieces need careful consultation because short breathing cycles change stencil fit. The biggest mistake is asking for fine script that crosses sternum creases. Ask your artist to test the stencil while sitting up and lying back so placement reads in both positions. Pain is higher and sessions are commonly split. For session wear a fitted sports bra that the artist can shift without you feeling exposed. Consider keeping the coordinates in a simple monospace style so the numbers stay legible over time.
16. Geometric Spider, Ankle Wrap

Ankle tattoos face daily friction from shoes and socks. The common error is placing too many fine legs that will blur with movement and rubbing. I recommend a compact body for the spider with slightly thicker legs and open spacing between limbs. Sessions are quick but healing needs mindful sock choices. For showing the piece pair it with sandals or a long skirt lifted slightly to avoid constant contact.
17. Baroque Frame Portrait, Chest-Side Panel

Chest-side pieces respond well to frames that follow pectoral curves. The common mistake is forcing perfect symmetry over the chest which can look off when you move. I advise mapping the frame while flexing gently so the portrait keeps its intended center. Pain ranges higher near the bone and lower near the fleshier side. Wear a wide-neck shirt to the appointment so the artist can show you the stencil in position. If you plan to swim in summer keep the framed portrait protected from prolonged sun.
18. Crossed Scissors Micro, Behind the Ear Neckline

Behind-the-ear placements require hairline consideration or the work will be obscured. Avoid asking for dense shading that can gather in the hairline. I recommend small bold outlines and discuss how haircuts will affect visibility. The session is short and stingy, and aftercare can be fiddly with hair nearby. For easy reveal try a hairstyle that tucks hair behind the ear or pair it with minimal hoop earrings to frame the spot.
19. Clockwork Heart Geometry, Ribcage Line

Ribcage linework asks for breath-aware stenciling because expansion alters spacing. The mistake is overloading gears and tiny cogs that will blur when the skin moves. Tell your artist you prefer fewer, larger gear shapes with open negative pockets. Pain is high and sessions are commonly shorter with breaks. If you want longevity plan for a touch-up at three years. Dress for the session in a cropped athletic top that the artist can shift without you removing layers.
20. Moonlit Tree Negative Space, Lower Back

Lower back pieces can handle heavier silhouettes and strong negative space, which makes them good for geometric adaptations. A common error is centering too low where waistlines and belts rub. Ask your artist to set the lowest branch a finger-width above where your pants sit normally. Sessions are comfortable for most people and heal well if you avoid tight waistbands. For evening looks try pairing with low-rise jeans and a cropped top that reveals the upper arc without full exposure.
21. Minimalist Pumpkin Glyphs, Foot Arch

Foot arch tattoos see a lot of direct pressure and friction. The key error is expecting longevity without annual touch-ups. Ask the artist for simplified shapes and stronger outlines. Expect a few sessions to get saturation consistent because skin on the arch is variable. For healing avoid snug sneakers and favor open footwear like sandals when possible to reduce rubbing during the first two weeks.
Frequently Asked Questions
Q: How do geometric Tim Burton pieces age compared with traditional blackwork?
A: From what I have seen, geometric pieces with strong negative space and slightly bolder anchor lines tend to age more predictably than extremely fine detail. The thinest internal lines soften first, so ask for slightly increased line spacing and plan on a touch-up window around year two to four depending on placement.
Q: Are ribcage geometric mandalas worth the pain if I want them to last?
A: It depends on your pain tolerance and touch-up expectations. Ribcage work can settle well if the artist increases spacing and uses deeper, controlled placement, but many people accept a touch-up at year two. Discuss staging the session into shorter passes so you can manage discomfort.
Q: What should I wear to a session for collarbone or sternum pieces?
A: Wear a wide-neck shirt or a fitted sports bra you can shift so the artist can show the stencil without you feeling exposed. These garments let the artist access the area quickly and reduce awkward readjustments during linework.
Q: Will finger and hand geometric tattoos affect my job prospects?
A: Hand tattoos still affect hiring in some industries, and the visibility is permanent. If you work in a conservative field consider forearm or upper arm placements that are easier to conceal during interviews. If you proceed with hand work accept the higher maintenance as part of ownership.
Q: Do geometric designs need different aftercare than other styles?
A: Not really different, but tight linework benefits from careful sun protection and avoiding friction while healing. Keep the area clean, follow the studio's instructions, and plan on sunscreen once fully healed to preserve contrast and crisp edges.
