
Fine line florals are everywhere online right now, and a lot of people assume collarbone work is all pretty and painless. The reality is different. Collarbone pieces can hurt more than expected, fine line fades fast in high-movement spots, and shops sometimes upcharge for small Japanese-style work. Read on for 17 collarbone-friendly Japan tattoo ideas, the common pitfalls to avoid, and what to tell your artist at the chair.
1. Fine Line Cherry Blossom Branch Along the Collarbone
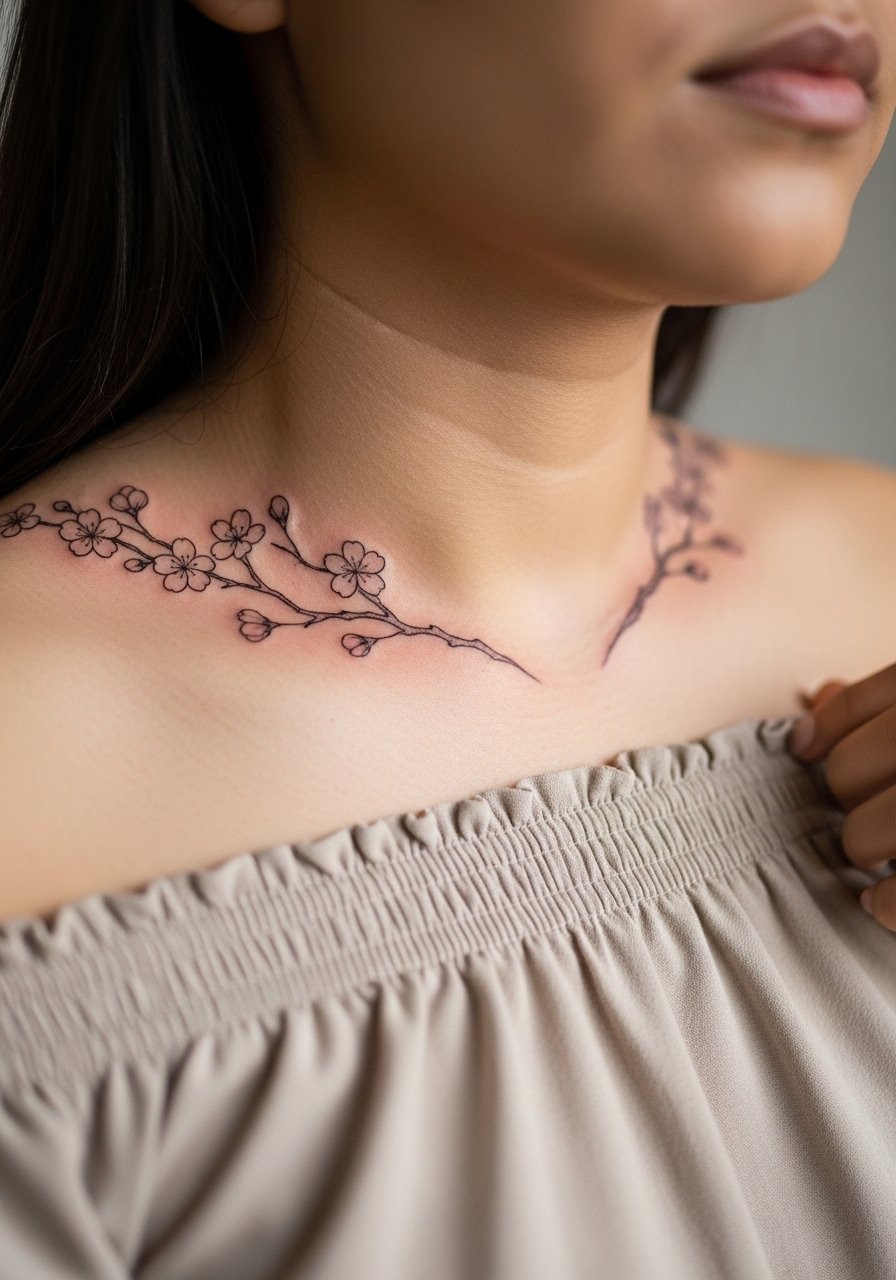
Fine line cherry blossoms read very Japanese on the collarbone when the branch follows the bone contour. I recommend this if you want something small that moves with the body rather than fights it. Tell your artist you want slightly heavier lineweight at the main branch and feathered thinness for the petals so the primary lines age into a readable silhouette. A common mistake is going too micro for every line. That leaves nothing to hold color after a year. Expect a touch-up around year one on high-motion collars. Artists are split on fine line here, one camp saying it fades fast and the other saying depth and spacing solve that. Ask the artist how they handle depth on clavicle placements before booking.
2. Neo-Traditional Koi Flowing Toward the Shoulder
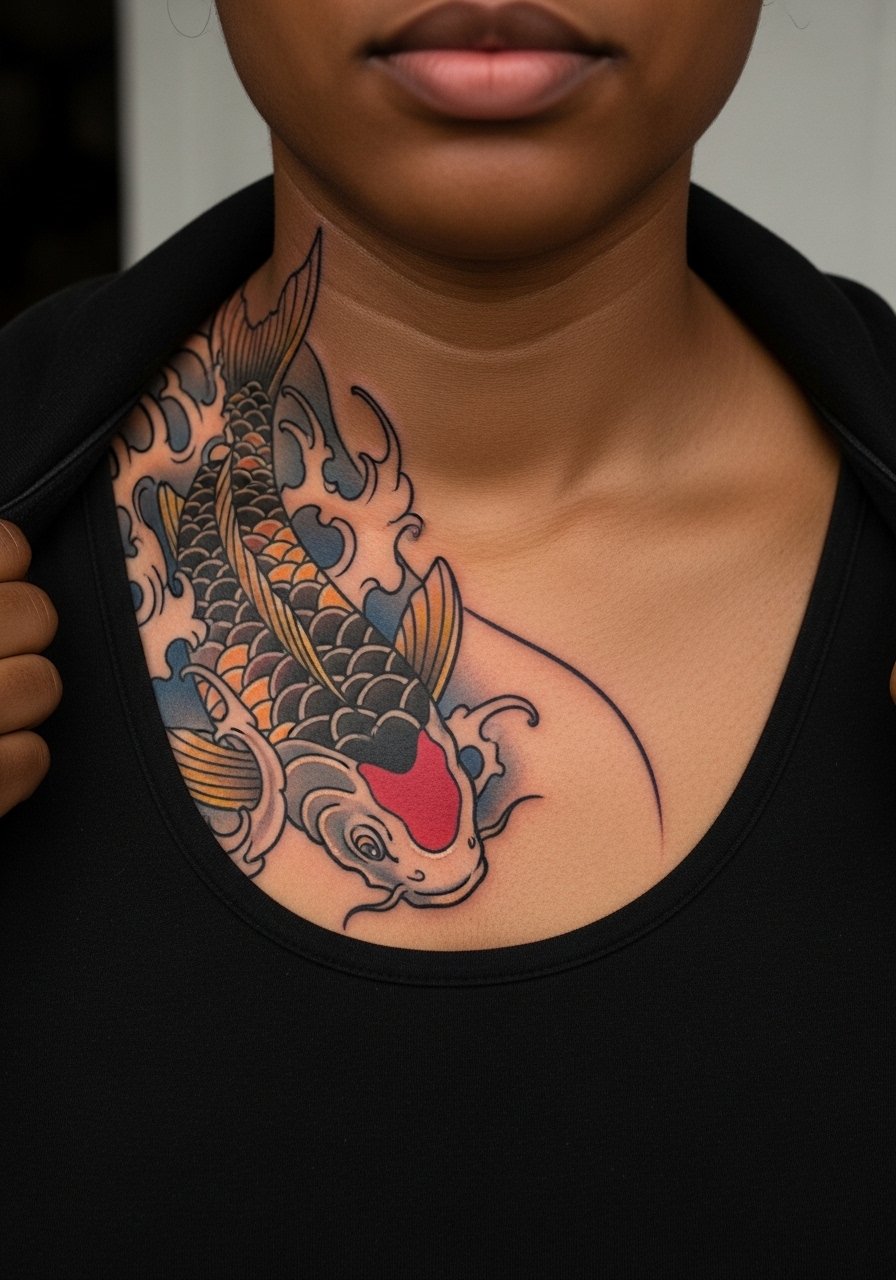
Go for a neo-traditional koi when you want symbolism with color and movement across the collarbone to the shoulder. This piece needs room to breathe, so request a 4–6 inch layout that follows the bone and arcs over the deltoid. The session will be longer and feel more intense near the bone, but the larger shapes reduce blowout risk compared with micro details. Tell the artist you want bold outlines with layered saturation rather than tiny hatch shading. For show-off wear, pair it with a strapless tube top that leaves the shoulder exposed and frames the curve.
3. Blackwork Lotus Centered Over the Collarbone
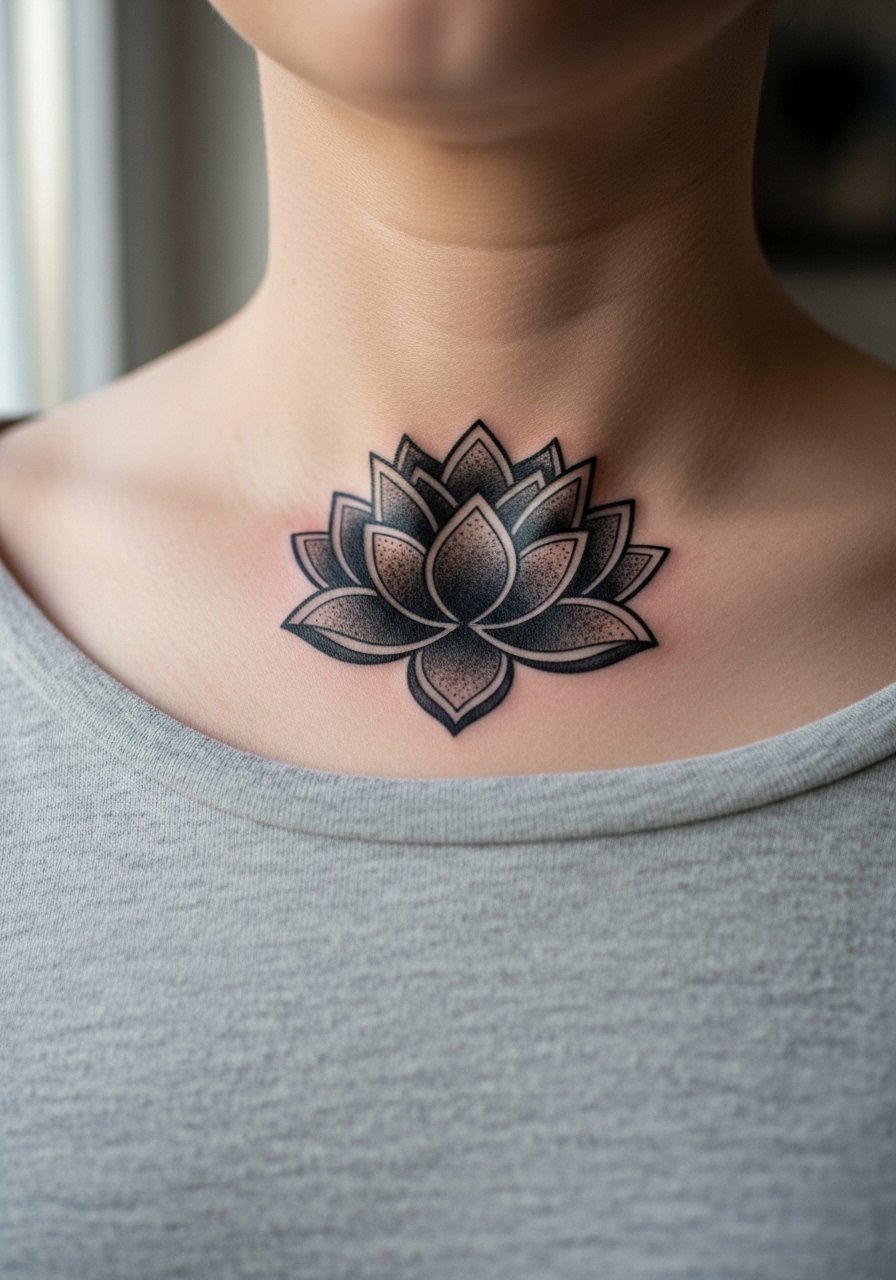
A blackwork lotus in the center of the collarbone reads bold and ages predictably because it relies on saturation instead of fragile linework. I recommend this for anyone whose active lifestyle wears at fine lines. Ask for solid fills and clean negative-space petals so the piece still reads if minor softening occurs. The session is usually one to two hours and feels sharp on the bone edge, so expect frequent short breaks. Some people prefer ointments that seal moisture during the first days while others avoid occlusives; name both camps when you discuss aftercare with your artist and follow the studio’s preferred protocol.
4. Minimalist Kanji for "Strength" on the Upper Collarbone
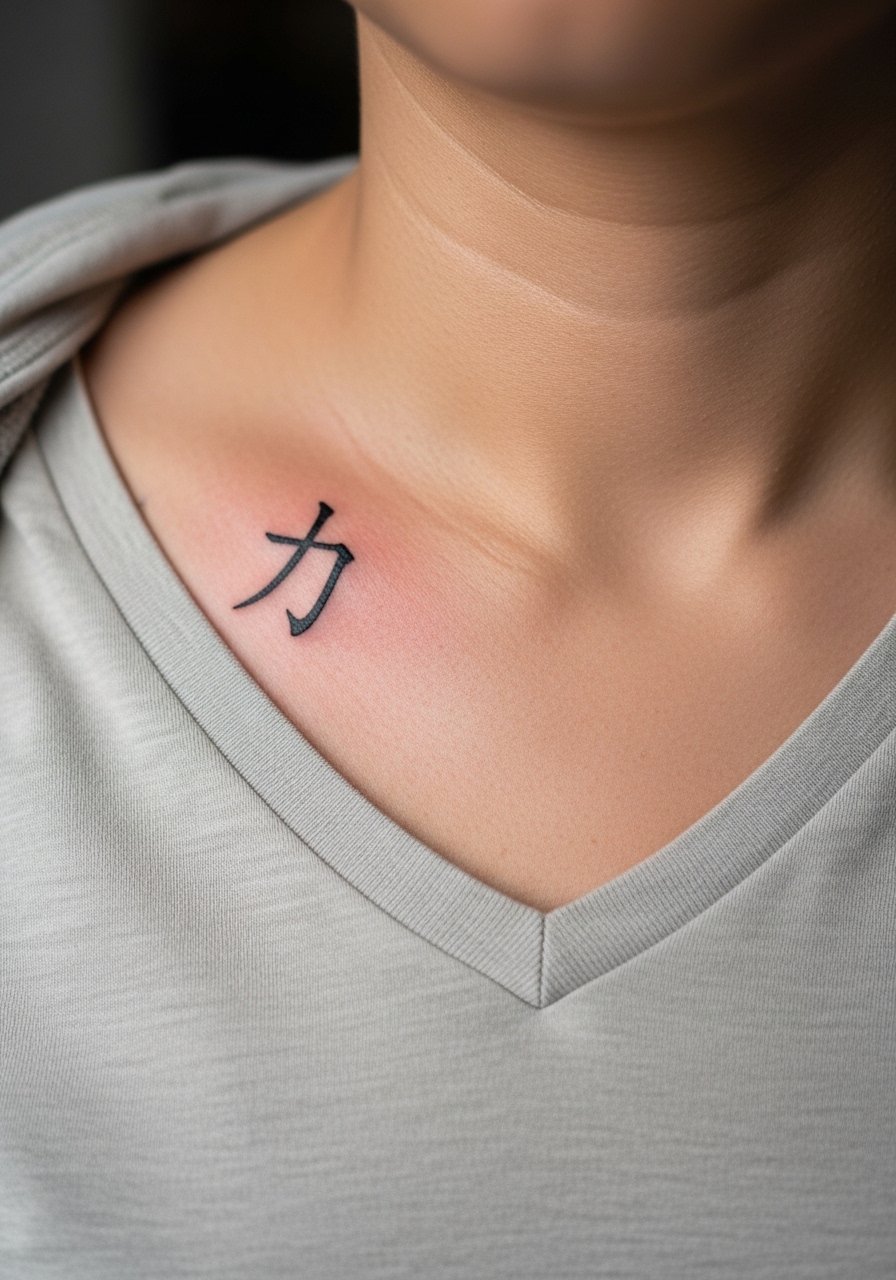
A single kanji character is a first-timer favorite because it is small and relatively easy to conceal. Make sure the character is sized at least 1.5–2 inches on the collarbone so that the strokes do not blur into unreadable marks. When you consult, bring reference of the exact font weight you want and ask the artist to stencil it and reposition until the balance looks right on your bone asymmetry. The pain is brief but concentrated over the bone. For session wear, pull a v neck tee low enough so the artist has clean access.
5. Watercolor Peony Framing the Collarbone
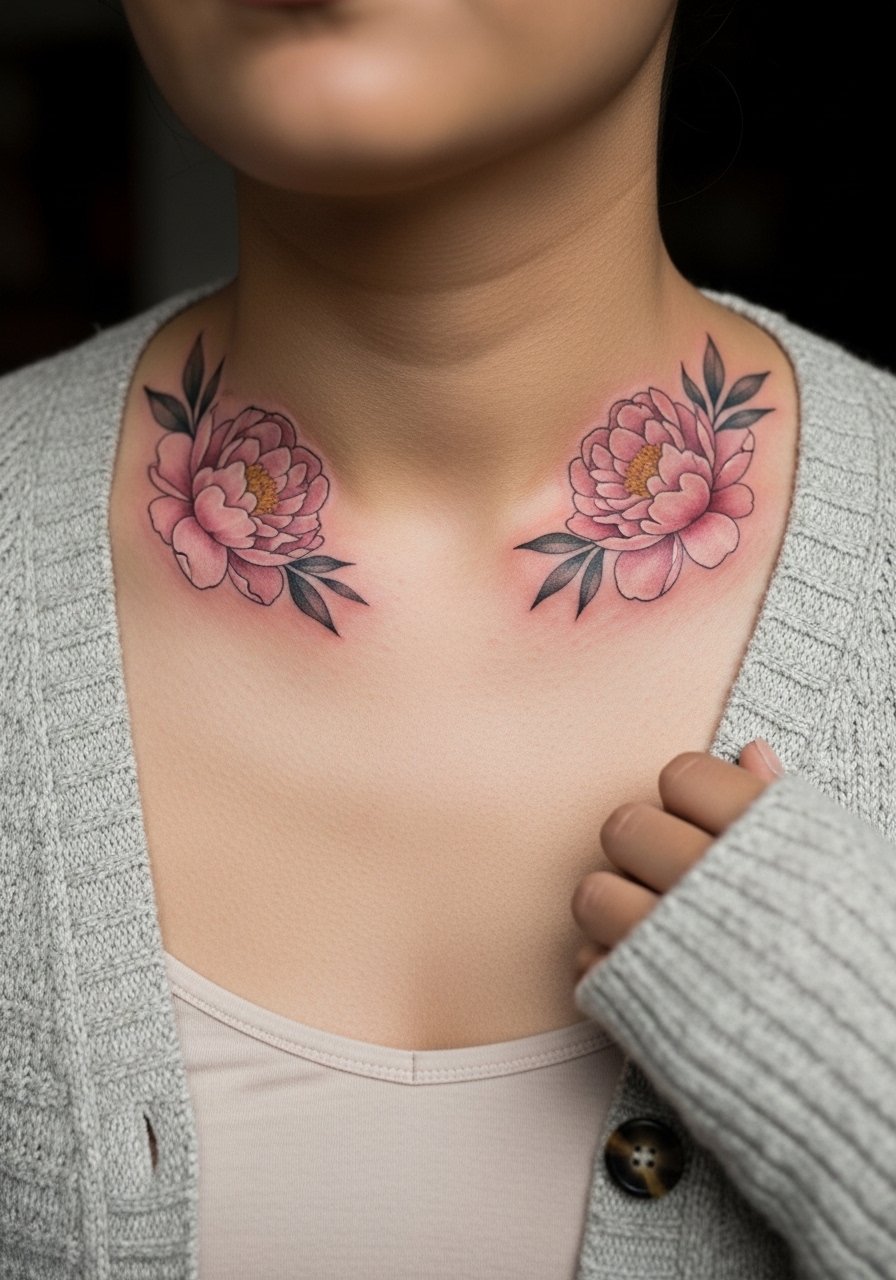
Watercolor peony gives a painterly Japanese vibe when placed to frame the collarbone, but watercolor tends to fade faster in exposed areas. If you want that washed look but more longevity, ask for a hybrid approach with watercolor fills and slightly firmer outlines at stress points. A common mistake is expecting the same vibrancy on darker skin tones; heavier saturation and contrast work better for those skin types. Plan for touch-ups at 12 to 24 months. For evenings out, a wrap dress will show the bloom while keeping the neckline elegant.
6. Ornamental Wave Pattern Tracing the Collarbone Curve
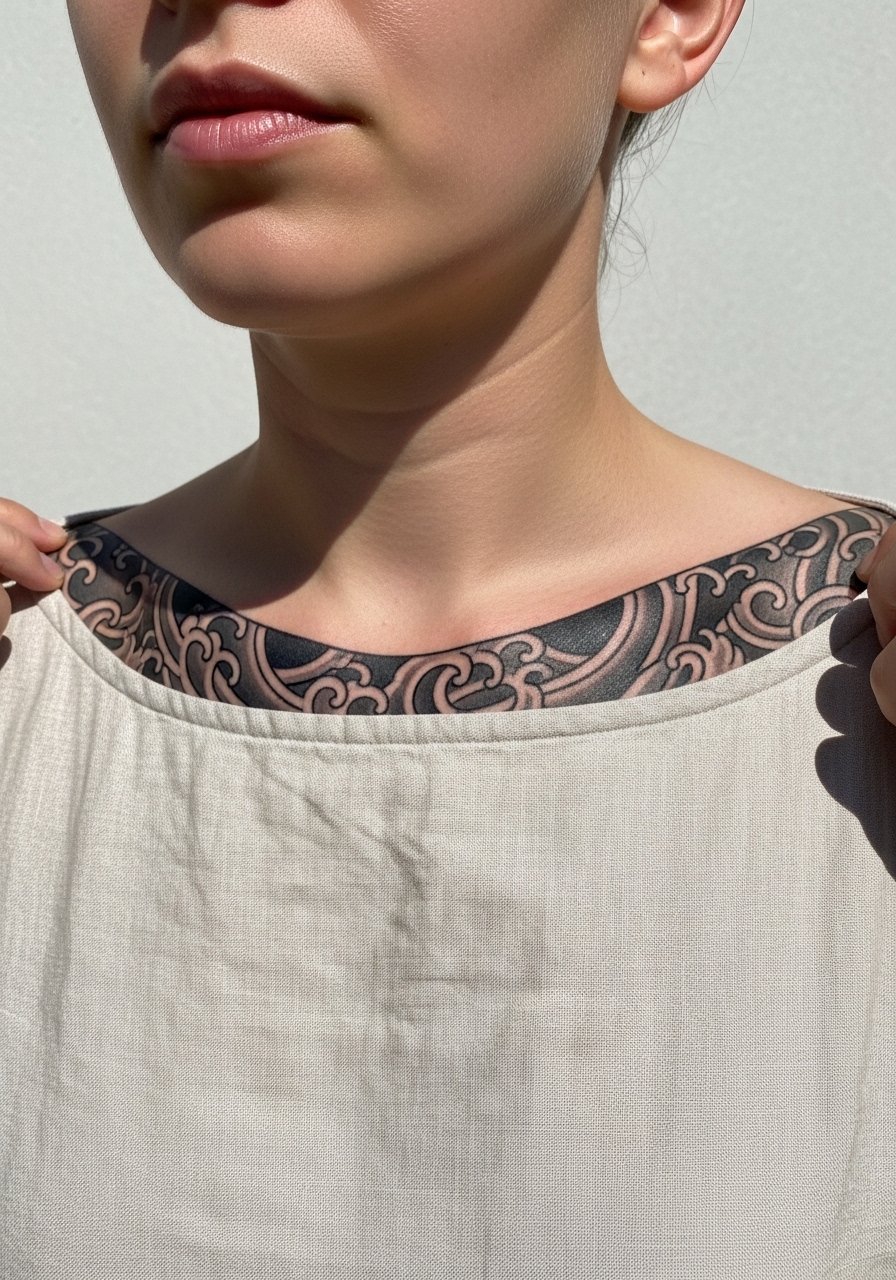
Ornamental waves play with the clavicle’s rhythm and can make the bone look more sculpted when the flow matches the anatomy. Tell the artist you want the wave rhythm to start thinner at the sternum and swell toward the shoulder so it reads like motion. The design resists the common pitfall of over-detailing; simple shapes age better here. The pain is medium and the session is often a single focused hour for a 3–4 inch motif. Pair this with a boatneck linen top when you want to keep the look understated and gallery-ready.
Studio Day Picks
These six collarbone ideas share similar prep needs, from lineweight choices to friction zones under straps.
-
Halo tattoo ointment. A thinner ointment choice that breathes more than heavier balms, helpful for collarbone areas that trap sweat under straps during the first week.
-
Frida healing spray. A no-touch mist to clean the area after showers when the collarbone site is awkward to reach without rubbing.
-
Coco balm. Faster-absorbing balm that artists in humid climates recommend to avoid heavy residue on fine line work.
-
Ink-Eeze breathable patches. Thin protective patches that help reduce friction from straps and necklaces while the tattoo seals.
-
Aquaphor healing ointment. Useful for very dry skin types on the chest area when applied sparingly during the initial days.
7. Micro-Realism Dragonfly at the Shoulder Dip
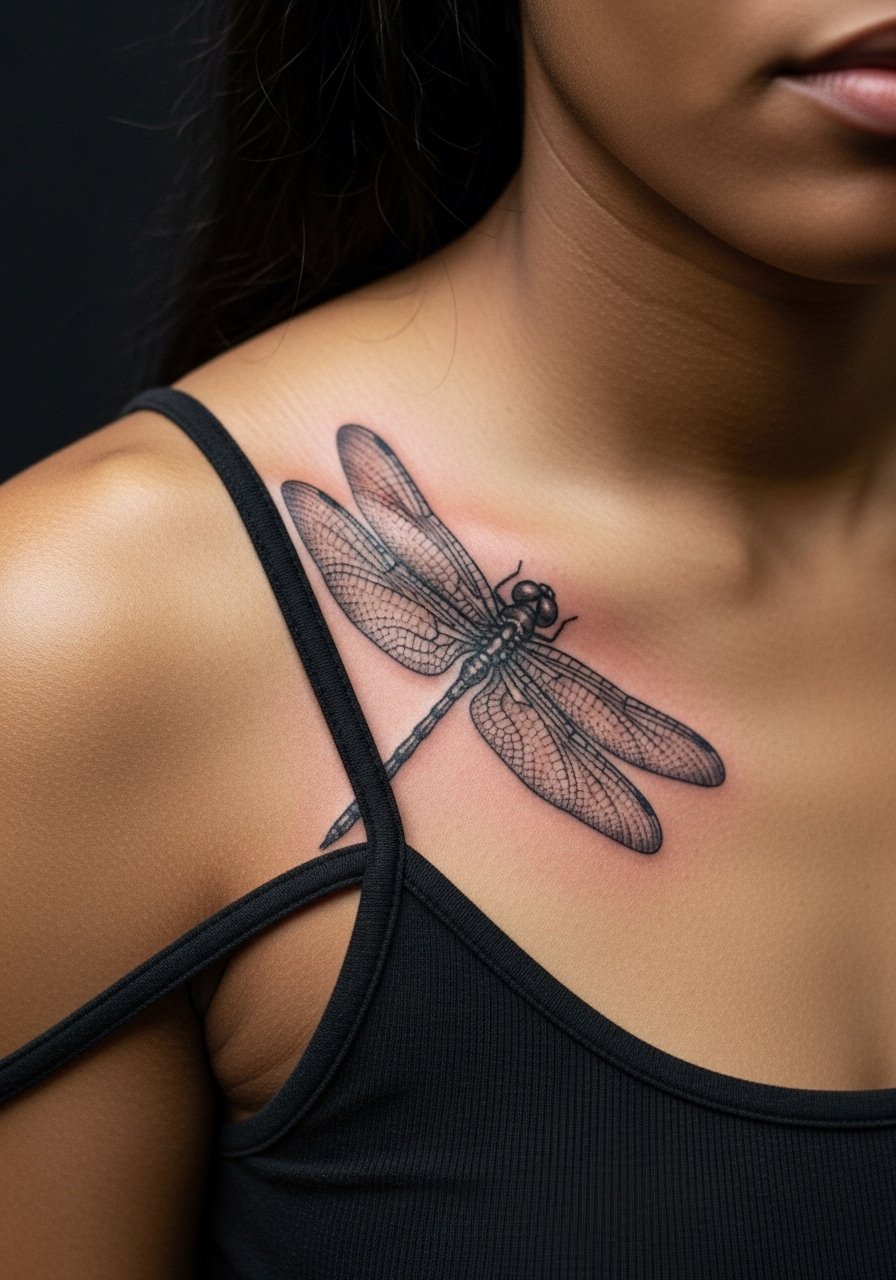
Micro-realism dragonflies rely on tiny strokes and tonal shading, which can be risky on the collarbone because movement and thin skin fade detail faster. I recommend this if you are committed to a crisp, small focal piece and willing to plan for a touch-up at 12 months. Tell the artist you prefer contrast over extra details so the wings keep their shape when healed. Session time will be moderate and the bone area feels sharp near the thoracic edge. Avoid tiny wing rods and opt for slightly bolder veining to reduce blowout risk.
8. Traditional Carp Koi in Bold Lines
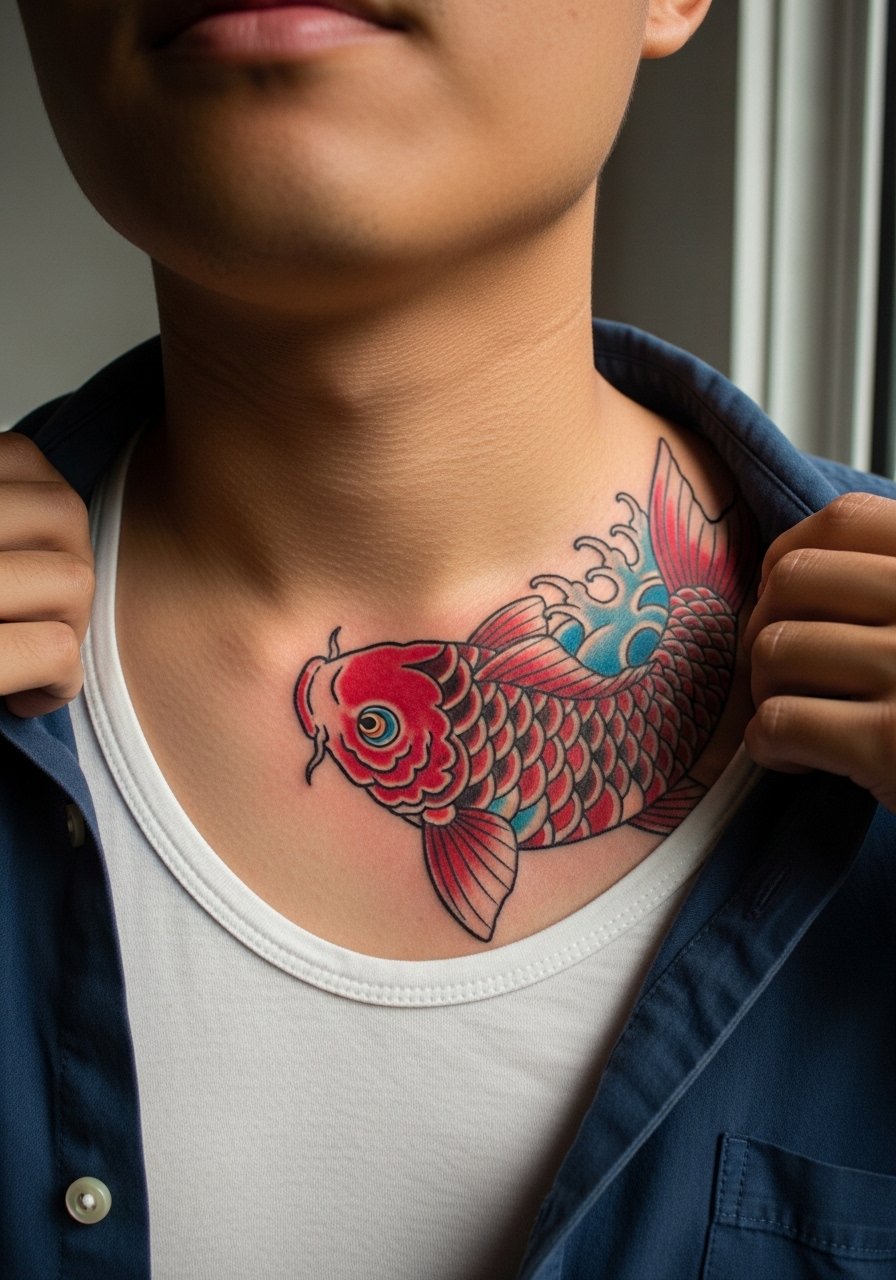
Classic carp rendered in traditional bold lines stands up well to the collarbone’s wear because saturation and contrast age into visible shapes. This is a good choice if you want a piece that still reads from across a room. Ask for clear separation between colored scales and crisp black outlines so the red and white contrast remains readable on your skin tone. Expect a longer session and intermittent soreness along the bony edge. For session comfort, an open-button shirt you can pull aside works better than tightening straps.
9. Fine Line Bamboo Stalk for Vertical Neck Elongation
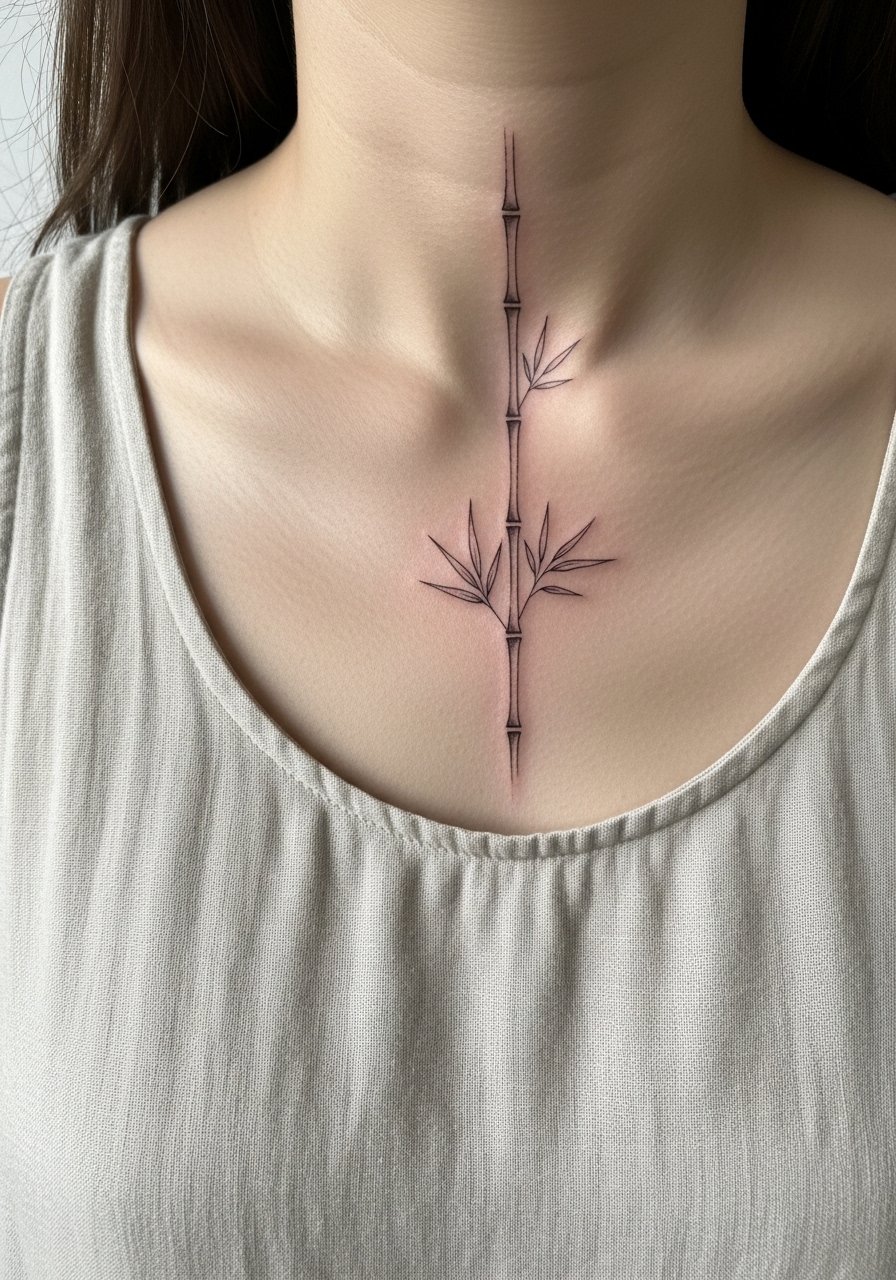
Bamboo stalks are great for elongating the neckline because vertical elements complement the clavicle’s horizontal line. I like this for people who want subtle Japanese symbolism without heavy color. When you consult, ask the artist to space leaves and nodes so they do not merge after healing. The main drawback is that single-needle vertical lines on thin skin need clean depth to avoid early fading. Plan for a possible touch-up at year one if you favor a very fine needle. For casual show-off, rolled sleeves and a loose linen tank top keep the stalk visible without competing with jewelry.
10. Ignorant Style Crane Silhouette on the Inner Collarbone

Ignorant style cranes lean into a hand-drawn, naive aesthetic that reads fresh even as lines soften. This makes it a forgiving choice for people skeptical about long-term fine line upkeep. Ask for slightly uneven lineweight by design, not by accident, so it keeps character as it ages. The session is typically short and the pain is intense where the needle crosses the bone. A real mistake is requesting perfect symmetry for a style that trades on imperfection. Keep sizing to at least 2.5–3 inches on the collarbone so the silhouette remains recognizable.
11. Neo-Traditional Samurai Mask Half-Visible Under the Collar
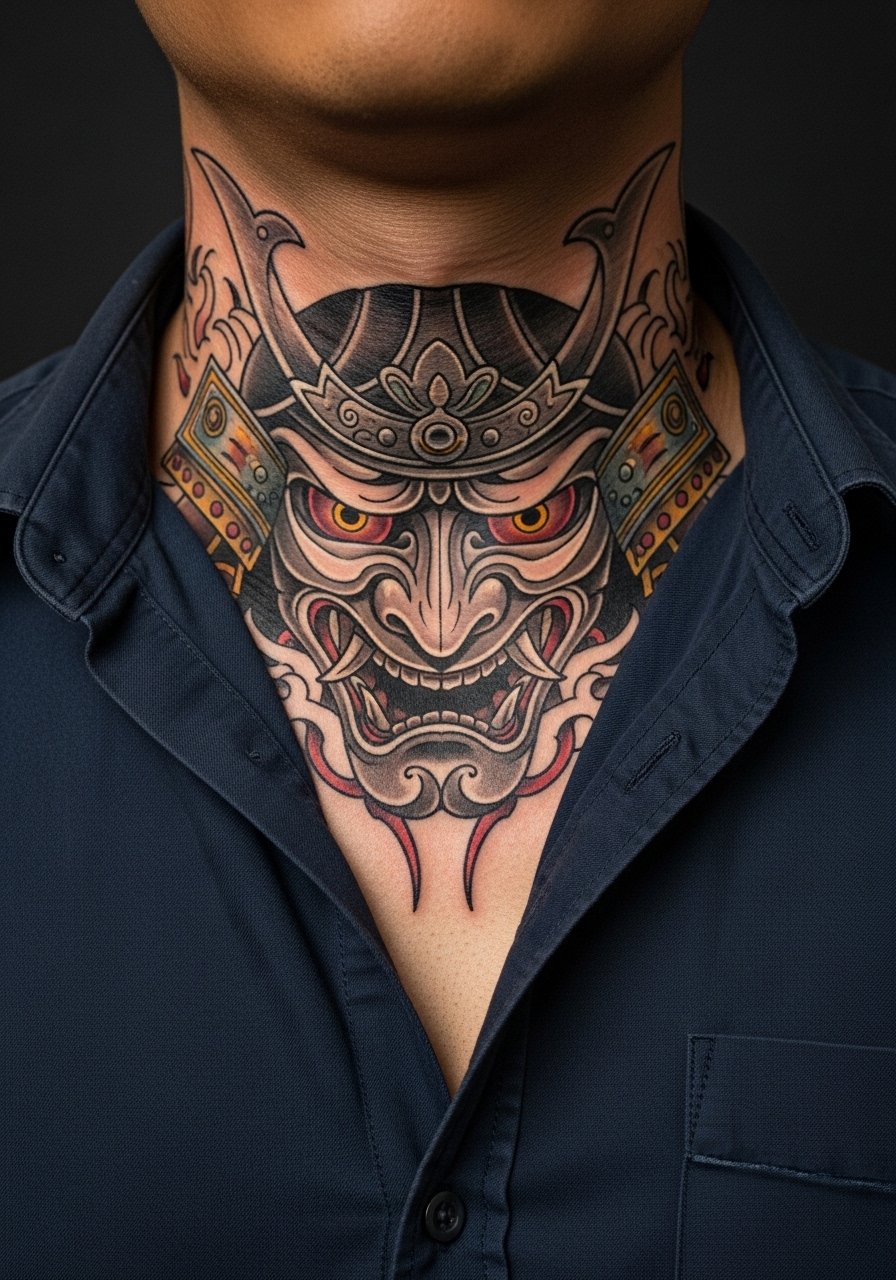
A samurai mask offers dramatic imagery when half-hidden under a shirt collar. I recommend this for those who want protective symbolism and a design that can peek out rather than sit fully exposed. On consultation, request emphasis on mid-tone shading to keep facial planes readable over curved bone. This is heavier work and can take two sessions for full detail and color layering. For session wear, a sleeveless button shirt makes access easy while avoiding strap pressure on fresh ink.
12. Blackwork Fan with Falling Cherry Petals
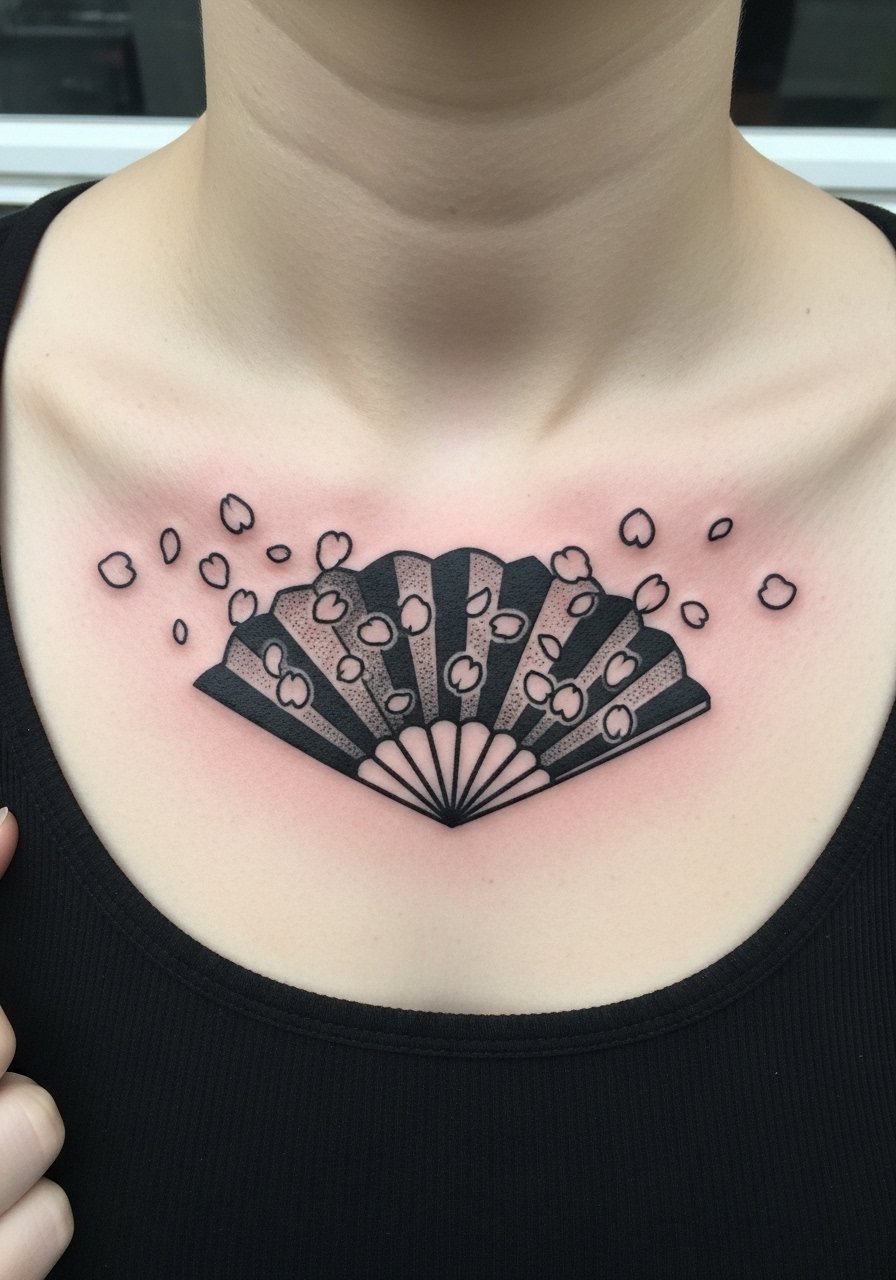
The fan motif gives geometric anchor points that suit the collarbone’s symmetry, and blackwork keeps the design durable. Ask for bold fan ribs and negative-space petals to prevent the petals from turning into gray smudges over time. The biggest mistake is packing petal detail into the fan area with no breathing room. This one ages well because the large black areas maintain contrast, and it usually finishes in two shorter sessions. For low-key wear, a scoop neck shirt loose frames the fan without distracting.
13. Stipple-Shaded Chrysanthemum Across the Collarbone
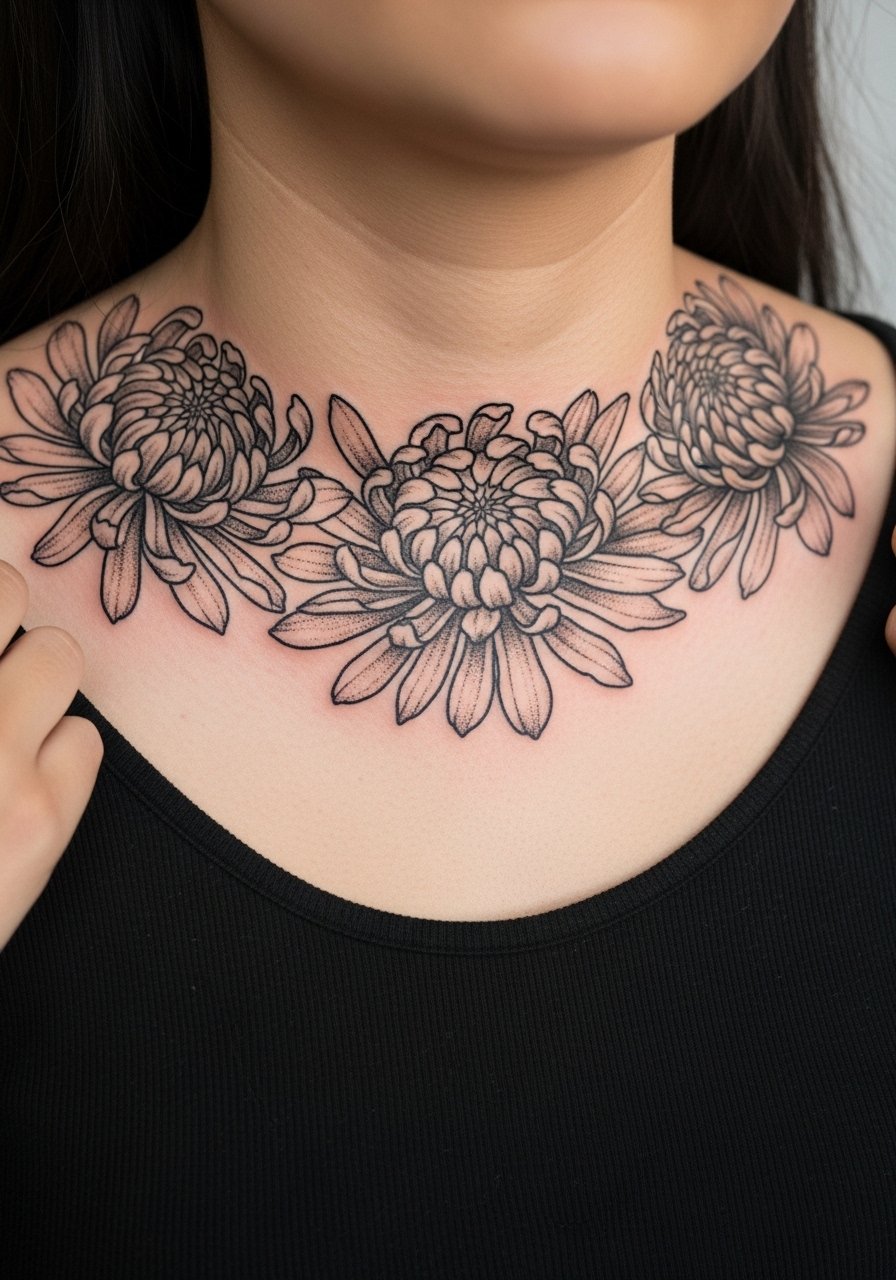
Stipple shading gives a soft, dimensional look while avoiding heavy block fills that can feel stiff on the clavicle. This technique works if you want texture instead of color. Tell your artist you want dot density varied so shadows hold without turning into flat gray. The session feels mildly uncomfortable near bone edges but is steady rather than sharp. A typical mistake is insisting on too much tiny stippling in tight areas; spacing matters. Expect a touch-up at year two if you live in high-sun environments and wear low-neck tops often.
14. Minimalist Crane Outline Paired with a Thin Chain Accent
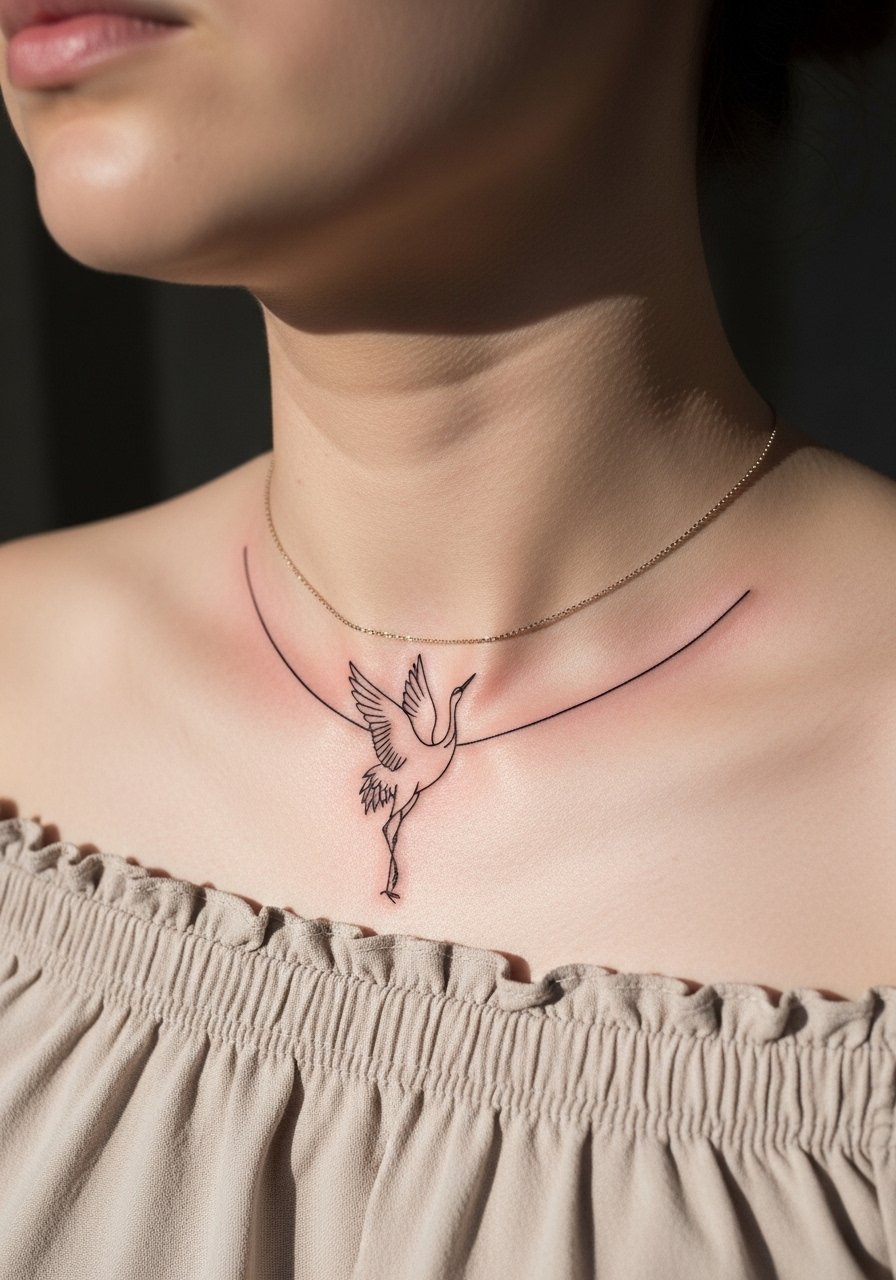
A single-line crane outline gives a modern take on a classic motif and looks intentional when paired with jewelry. Ask the artist for a slightly larger scale than you think you need so lines keep clarity after healing. The main mistake is making the linework too faint for close-up wear. The session is short but sharp over the bone. For styling, a delicate silver chain necklace sits above the curve and complements the negative space nicely.
15. Asymmetrical Cherry Blossom and Fan Combo
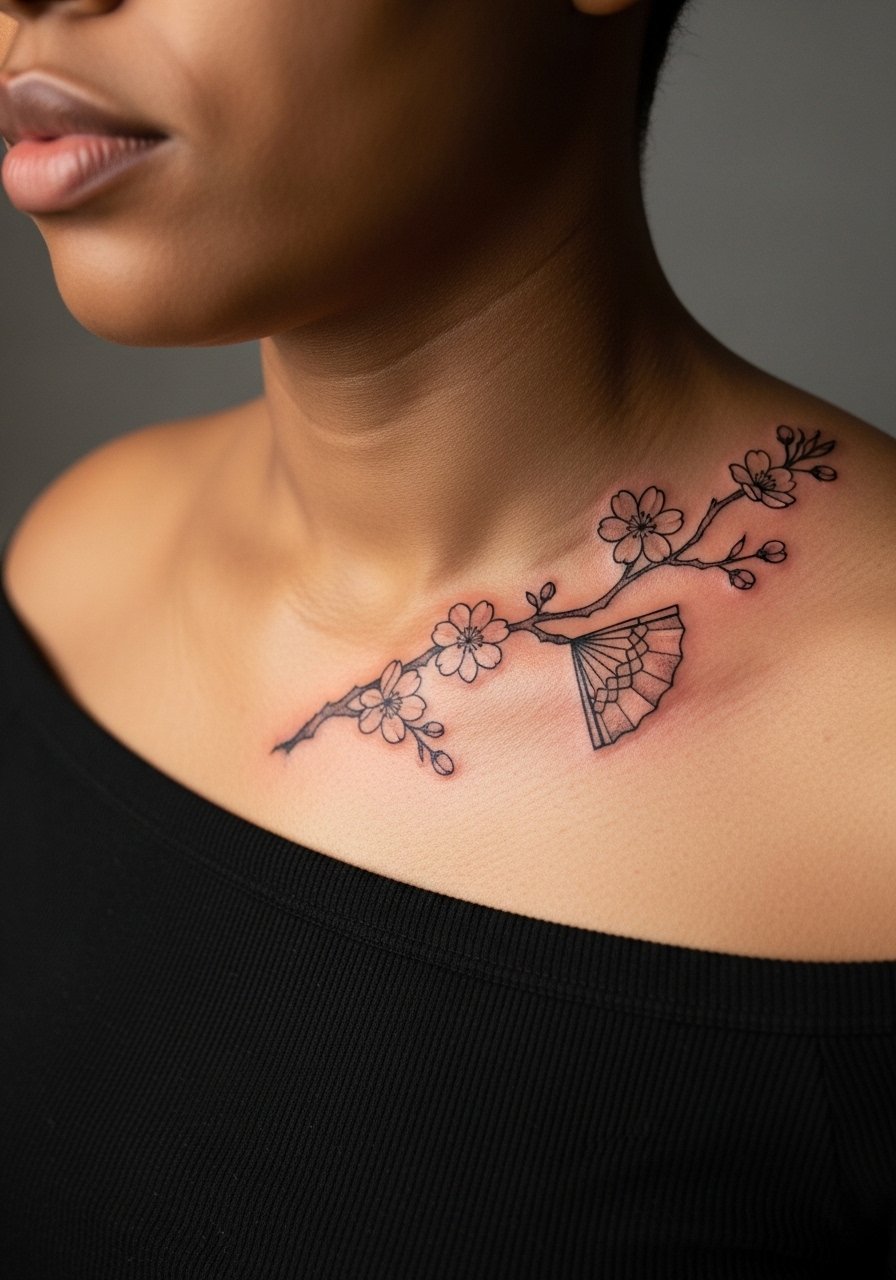
Asymmetry lets you keep one side simple and the other more ornate, which helps avoid the regret of forced matching. For this combo, tell the artist you want one side to remain airy and the other to hold weight so it balances with your shoulder. This approach tolerates body changes like weight shifts because the asymmetric layout disguises small distortions. Expect varying pain across the piece because denser blackwork near the fan will feel more intense than the airy blossoms.
16. Vertical Bamboo and Wave Pairing for Movement
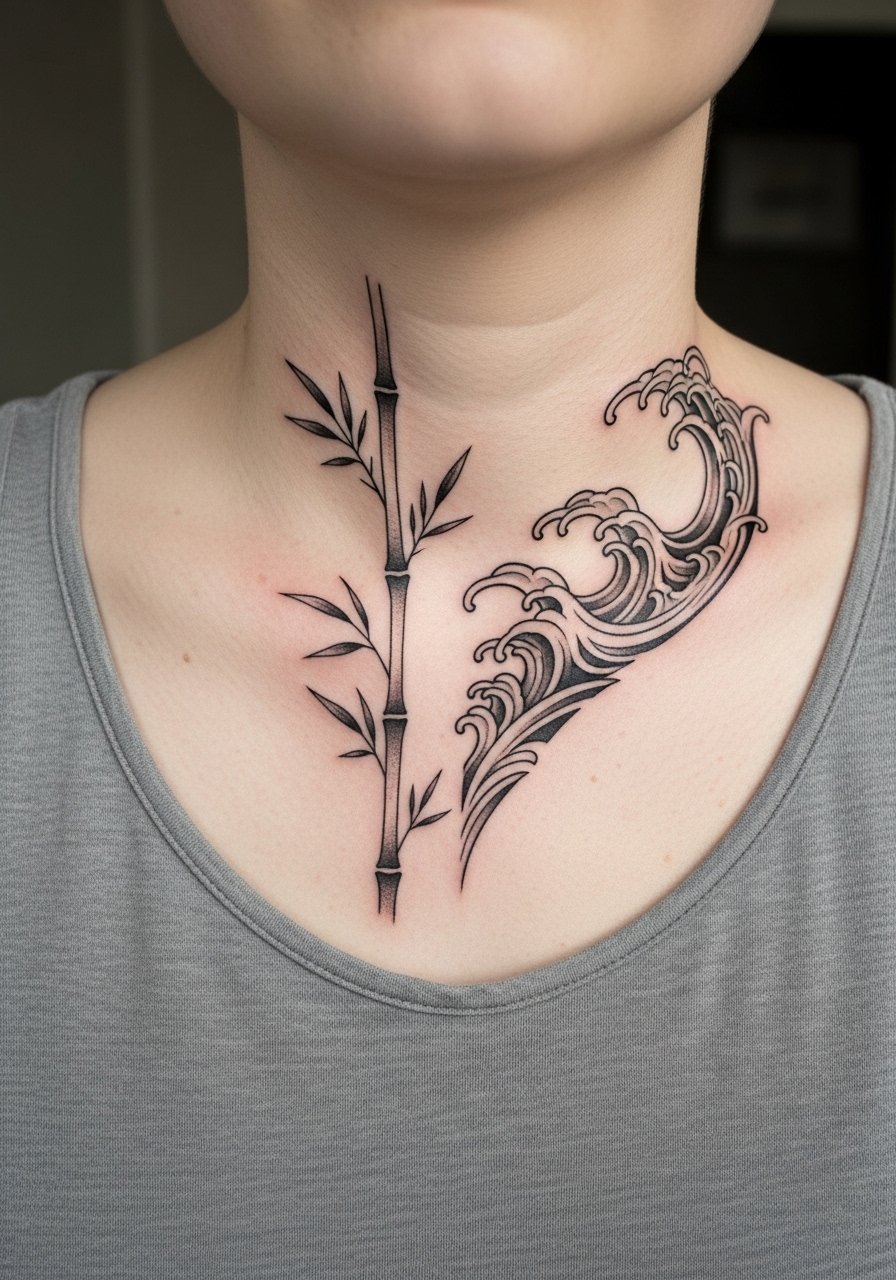
Pairing vertical bamboo with a horizontal wave gives visual flow across and along the collarbone. This works well if you want a dynamic piece that reads from both angles. Ask for slightly bolder junction points where the two styles meet so the eye can rest and the piece survives movement. Sessions may be split to prioritize linework first and fill second. For easy access during the session, a loose linen tank top keeps fabric off the clavicle.
17. Micro-Realism Moon and Petal Cluster Near the Collarbone
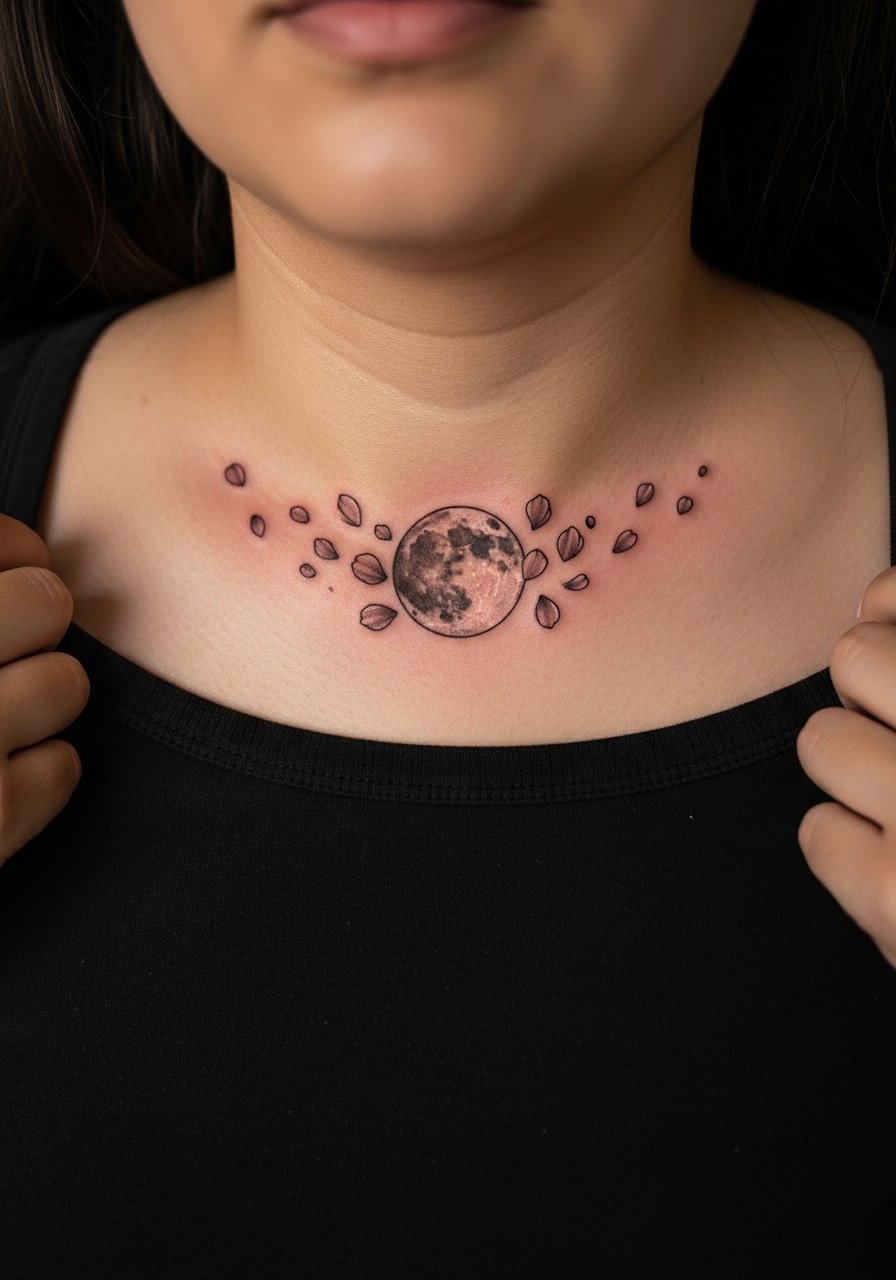
A tiny moon with a petal cluster gives a quiet Japanese nod and suits someone who wants a piece that is intimate but visible in low-neck tops. Micro-realism here should favor contrast rather than tiny competing details, otherwise the petals can merge within a year. Ask for anchor points such as a slightly darker crescent edge so the moon keeps shape as it softens. The session is brief and sharp on bone. For show-off styling, a pulled-down wide-neck top keeps the piece visible without exposing much skin.
Frequently Asked Questions
Q: Will fine line cherry blossoms on the collarbone fade faster than blackwork pieces?
A: In my experience, fine line tends to soften quicker because the needle channels are smaller and the skin over the clavicle moves and rubs more. Blackwork relies on saturation and usually reads better after a few years. If longevity matters most, ask for slightly heavier branch lines and plan a touch-up at 12 months.
Q: How painful is collarbone work compared with an arm or shoulder piece?
A: The collarbone is generally more sensitive because the needle sits close to bone; most people rate it medium to high on pain. Expect sharp moments near the bone and easier sections where soft tissue covers it. Ice beforehand and short breaks during the session help, and some people opt for topical numbing after discussing it with the artist.
Q: Should I use protective film or dry healing for a collarbone tattoo?
A: Artists and healers split into two camps. One camp uses protective film to keep sweat and friction away and reduce contamination. The other camp prefers brief airing and minimal products to avoid trapping bacteria. Follow the aftercare protocol your studio uses, and if you have heavy strap contact, ask about breathable patches to reduce rubbing.
Q: Will a small kanji still read correctly on darker skin tones?
A: Small kanji can lose contrast on darker skin unless strokes are slightly bolder and spacing increased. Ask for clean, slightly heavier strokes and an artist who shows healed examples on similar skin tones. A small size works, but scaling up a bit improves readability over time.
Q: How do I prevent collarbone tattoos from getting distorted after weight change?
A: Asymmetrical layouts and designs that follow bone contours handle body changes better than rigid symmetric pieces. Vertical elements and flowing waves hide small shifts. When you consult, show the artist any recent body changes and ask them to preview the stencil while you change posture to mimic day-to-day movement.
