
Fine line looks perfect in photos and then asks for a touch-up sooner than you expect. Kneecap pieces live on moving skin, and that movement changes everything from pain to how lines blur. Expect raw bone sensitivity, sweating under pants during healing, and a search for artists who show healed knee work. Keep those realities in mind and the first idea below will show how to avoid the common traps.
1. Fine Line Floral Mandala Around Kneecap
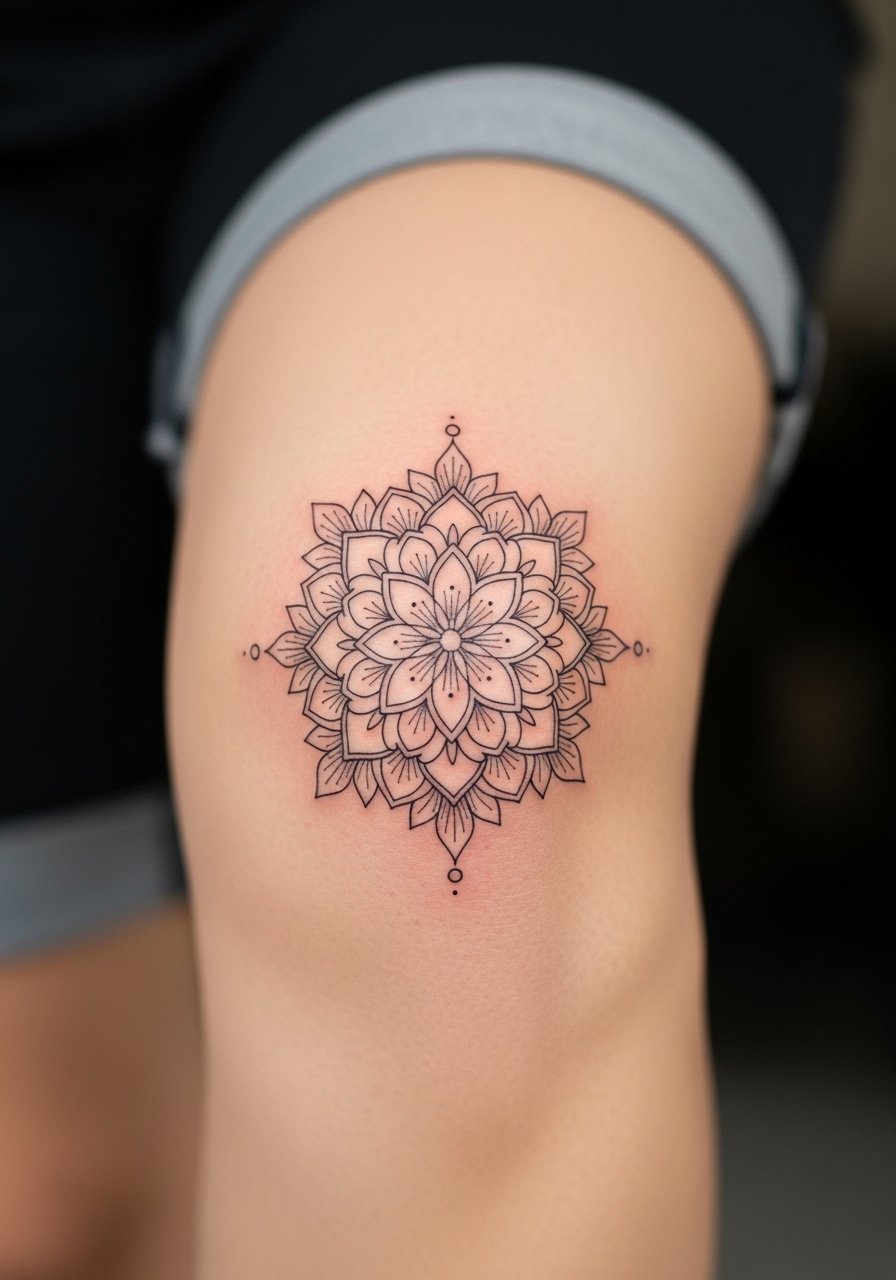
Most people choose a mandala because it uses the kneecap as a natural center point. Tell your artist you want 2 to 4 inch diameter spacing between concentric rings so the pattern breathes when you bend. Pain sits high when needles hit the bone, expect a sharp few minutes then a duller pass across the petals. The common mistake is packing too many tiny elements into the center, which merges after a year. Ask for slightly heavier outer linework to hold through movement and plan a touch-up at 12 months. For showing it off pair it with high waist athletic shorts that frame the circle and keep attention on the knee.
2. Geometric Triangle Stack on Cap
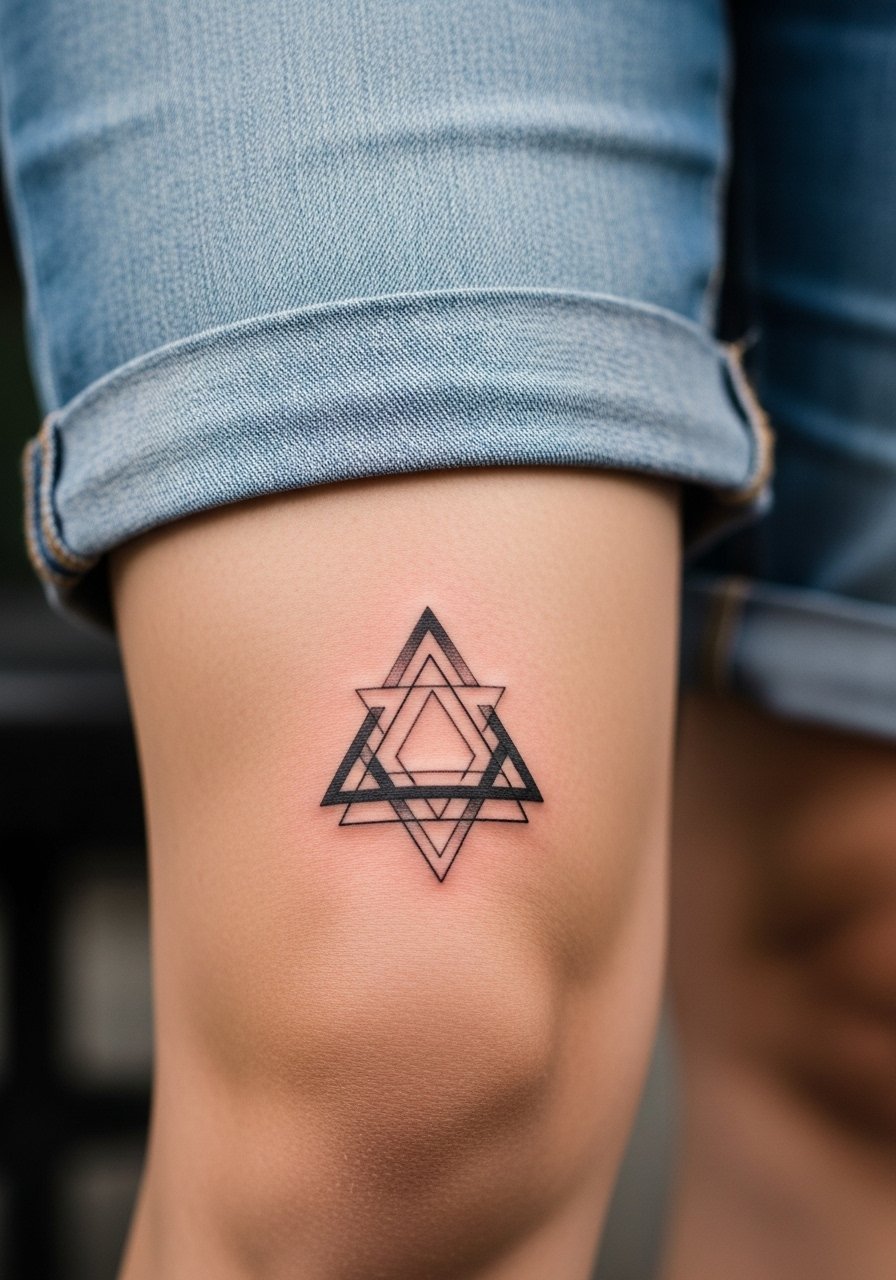
The appeal here is sharp symmetry that follows bone structure. In consultation ask for slightly increased spacing between parallel lines to avoid dense packs that blur around flex points. This style usually means a single session under an hour, but the pain spikes when the needle tracks over the highest point of the kneecap. Blowout risk rises if lines are too close. If you want to keep it crisp over years ask for a bit more line weight and a clean healed photo in the artist portfolio. Show it off with bike shorts women high waist or denim cutoffs for contrast.
3. Script Quote Curving Over the Knee
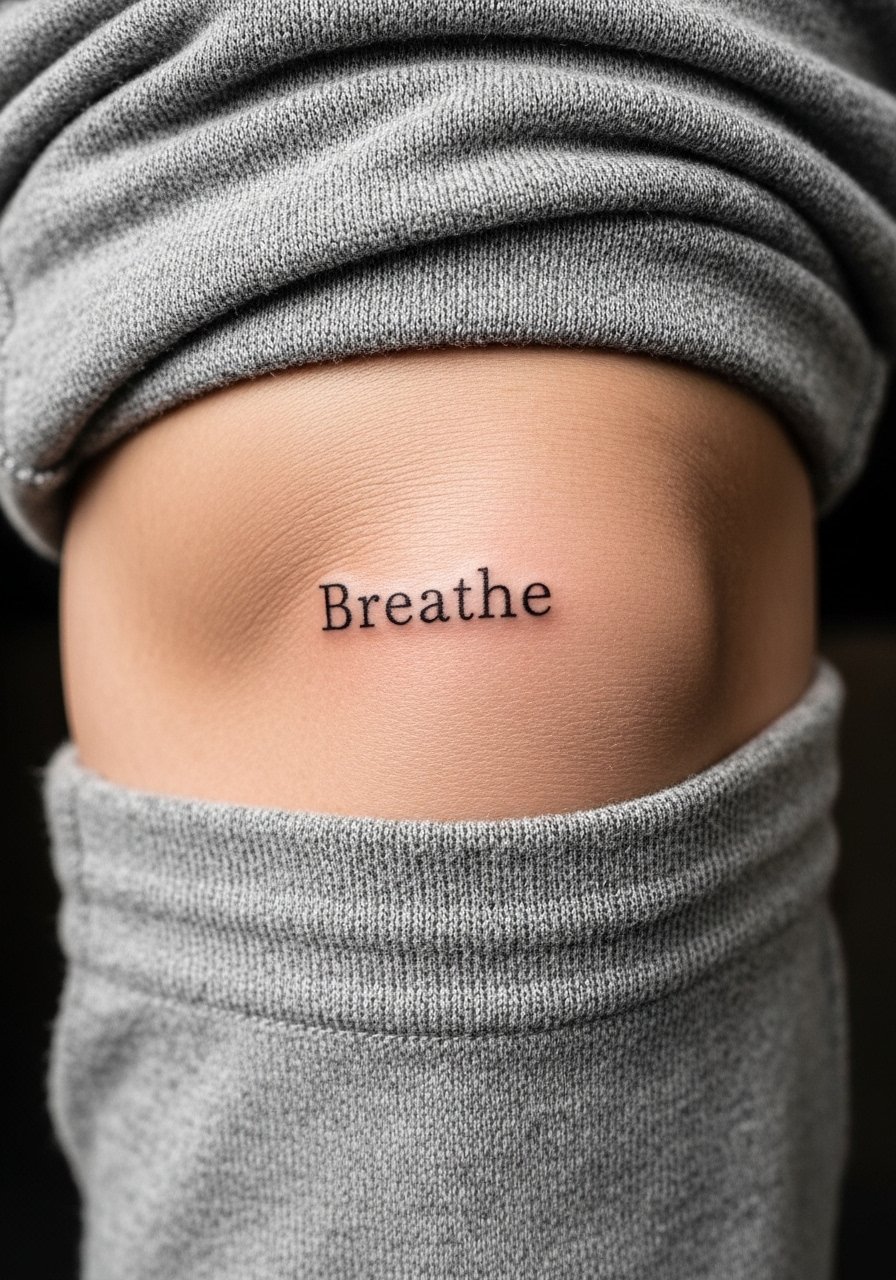
A curved script matches the knee's roundness so the message flexes as you walk. When you sit with an artist, bring the exact font and specify letter spacing because tight scripts bite from movement. Expect painful spots near bone and a calmer pass through surrounding tissue. Fine line script divides artists into two positions. One camp says small script softens and becomes charming as it fades. The other camp says script blurs quickly on joints and prefers bolder strokes. Name which camp your artist aligns with before booking. For session comfort wear cropped yoga pants so they can roll the leg up without irritation.
4. Micro-Realism Butterfly on the Kneecap Edge
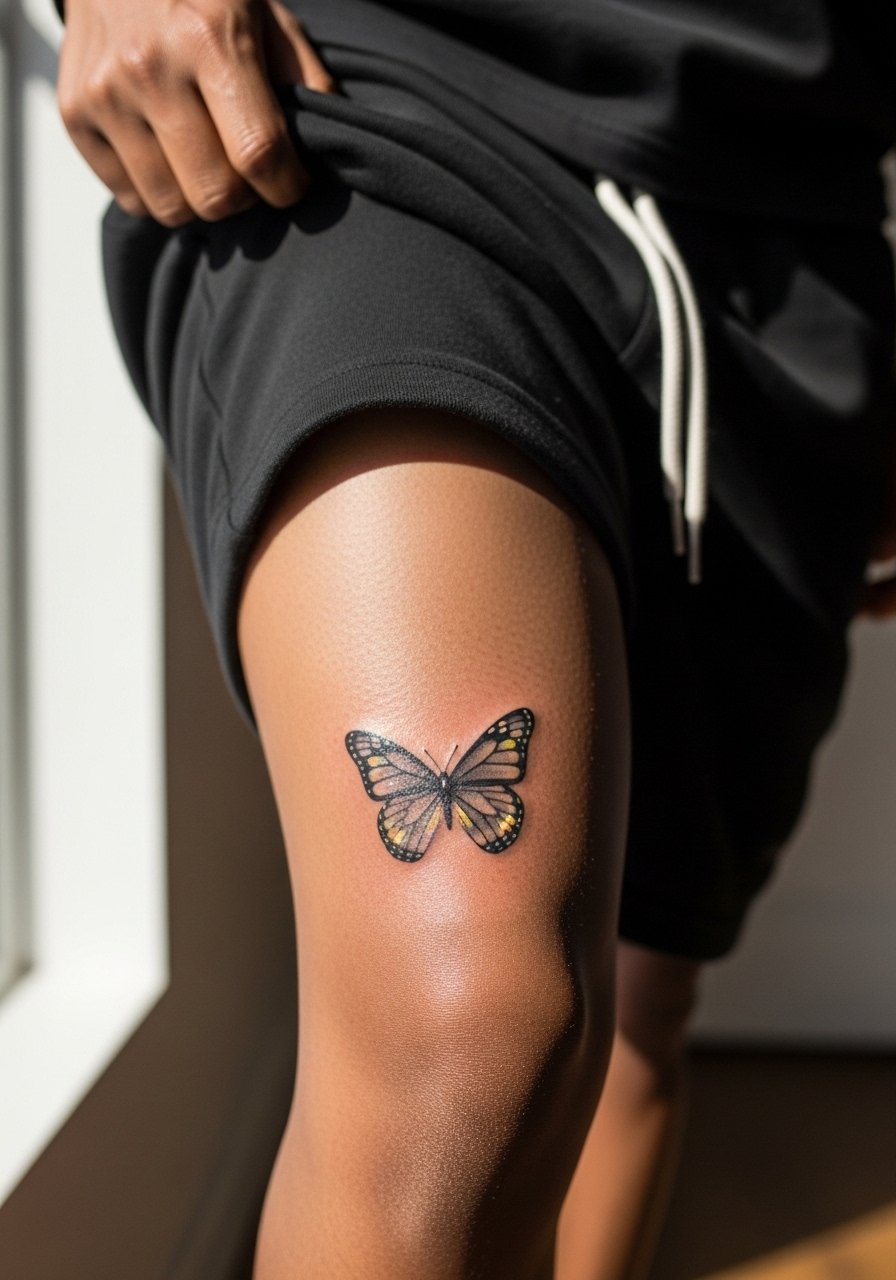
Micro-realism gives delicate shading and tiny detail, but mobile skin on the lower kneecap softens fine dots faster than static spots. Ask your artist to map the wing placement so the most delicate detail sits off the point of the bone. Expect 1 to 2 sessions and a sharper pain near the edge. A frequent mistake is asking for too many tiny gradients at once. That leads to early softening. Plan a touch-up at the six to twelve month mark to refresh micro tones. For the session wear elastic waist shorts so nothing presses on the leg while it heals.
5. Neo-Traditional Rose Wrapping the Knee
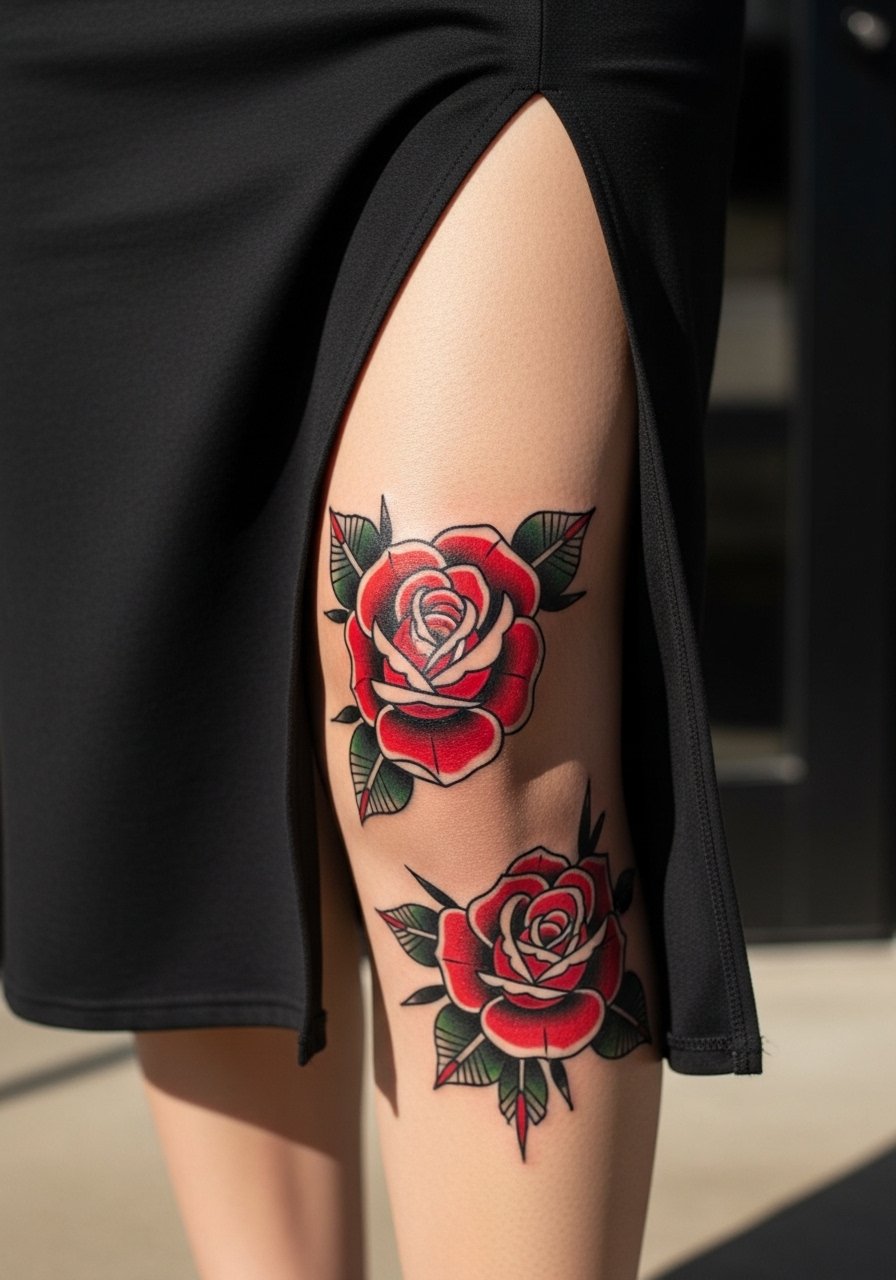
Full-knee roses read as graphic color that works well with skin folds when you bend. The session takes longer because color packing needs saturation to age well. Expect a higher pain tolerance test when the needle passes over the bone for outline work. A common error is asking for excessively fine petal lines inside each bloom. Those micro outlines lose definition. Ask for solid outlines and rich saturation to keep the rose visible on tanned skin and in photos. Pair it with a midi skirt side slit when you want to show off the full wrap.
6. Blackwork Sacred Geometry Cap
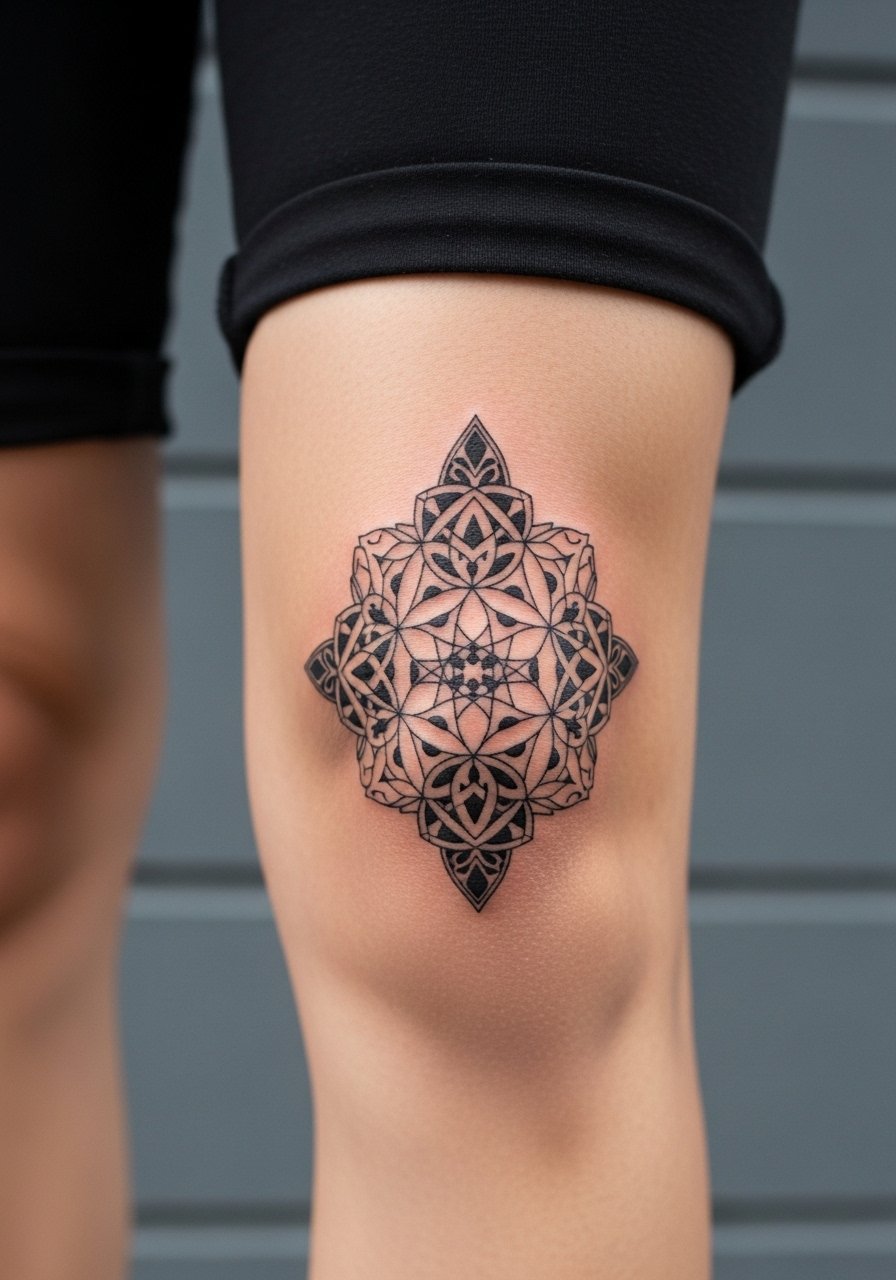
High-contrast blackwork holds up well on bony areas because saturation resists early fading. During consultation request slightly larger negative space intervals so density does not merge from repeated bending. Pain is intense for the first outline pass then more tolerable during block filling. Artists disagree about covering the entire cap versus a centered motif. The common error is too many packed elements on a small cap, which creates a muddy healed look. For showing off the geometric edges, wear denim cutoff shorts that let the pattern read from a distance.
Studio Day Picks
Those first six kneecap concepts include fine line work and concentrated black saturation, and a few quick items make the session and first week much smoother.
-
Indie thin tattoo balm. A lightweight balm that reduces friction from clothing on the first few days, useful for fine line mandalas and script around the knee.
-
Australian tea tree salve. Anti-microbial properties soothe bony areas prone to sweat during healing, handy for full-knee wraps and micro realism near creases.
-
Topical numbing cream. Applied under artist guidance it can soften the initial kneecap sting, especially for dense blackwork fills.
-
Thin protective film roll. Keeps knee pieces clean during the first week when clothing rubs against the area and helps reduce scabbing in high-friction zones.
-
Aquaphor healing ointment. A thin layer over fresh linework locks in moisture without heavy clogging, which helps delicate fine line and micro-realism pieces while they settle.
7. Watercolor Abstract Splash Over the Knee
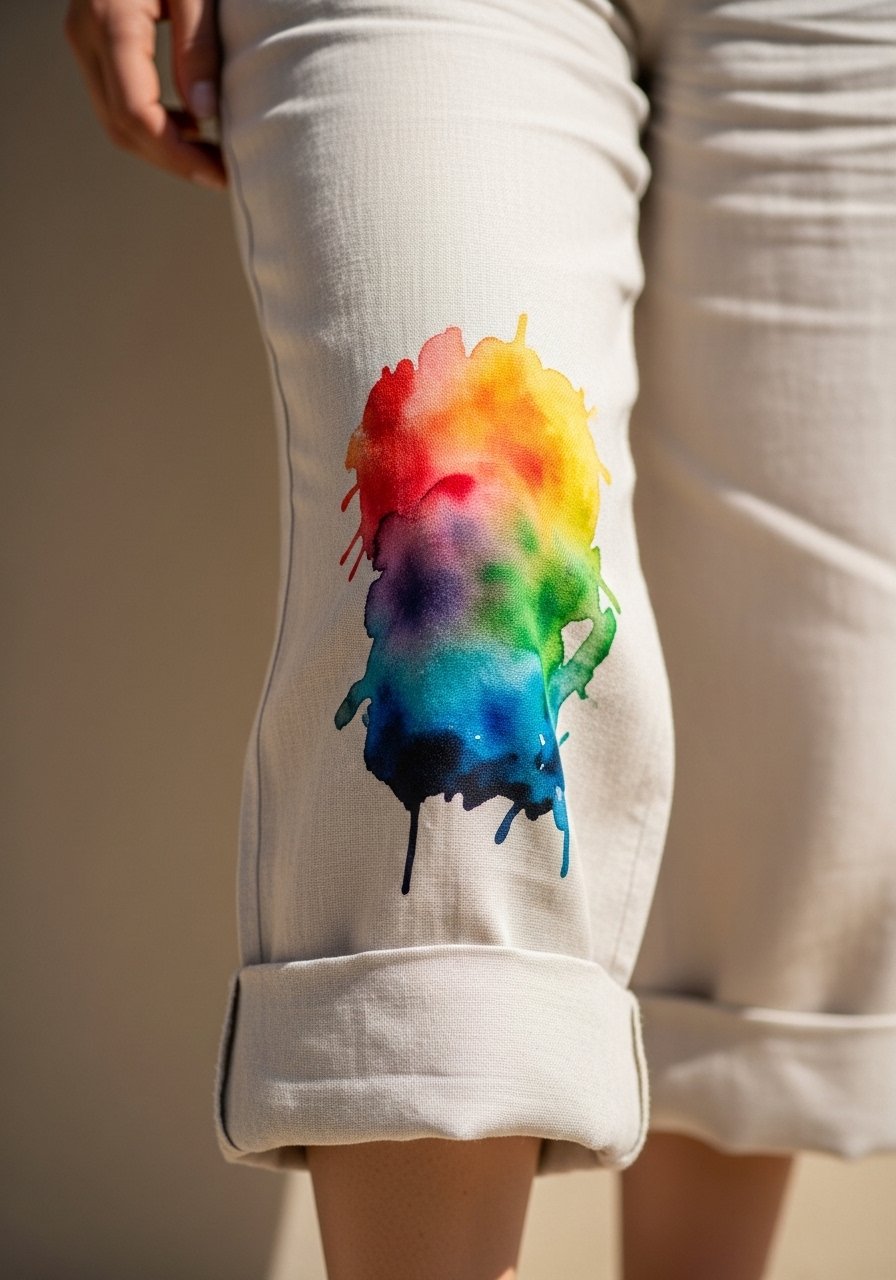
Watercolor produces soft fades that move with the knee, but wash-style pigments can fade faster on joints. Most watercolor knee pieces are medium size and need 1 to 2 sessions. The common mistake is asking for too little saturation in the initial pass, which makes the tattoo look washed out by year two. For better longevity request stronger initial saturation with softer edges thrown in rather than thin washes alone. For wardrobe pair it with wide leg linen pants rolled to the calf so color reads against neutral fabric.
8. Ignorant Style Doodle Knee Wrap
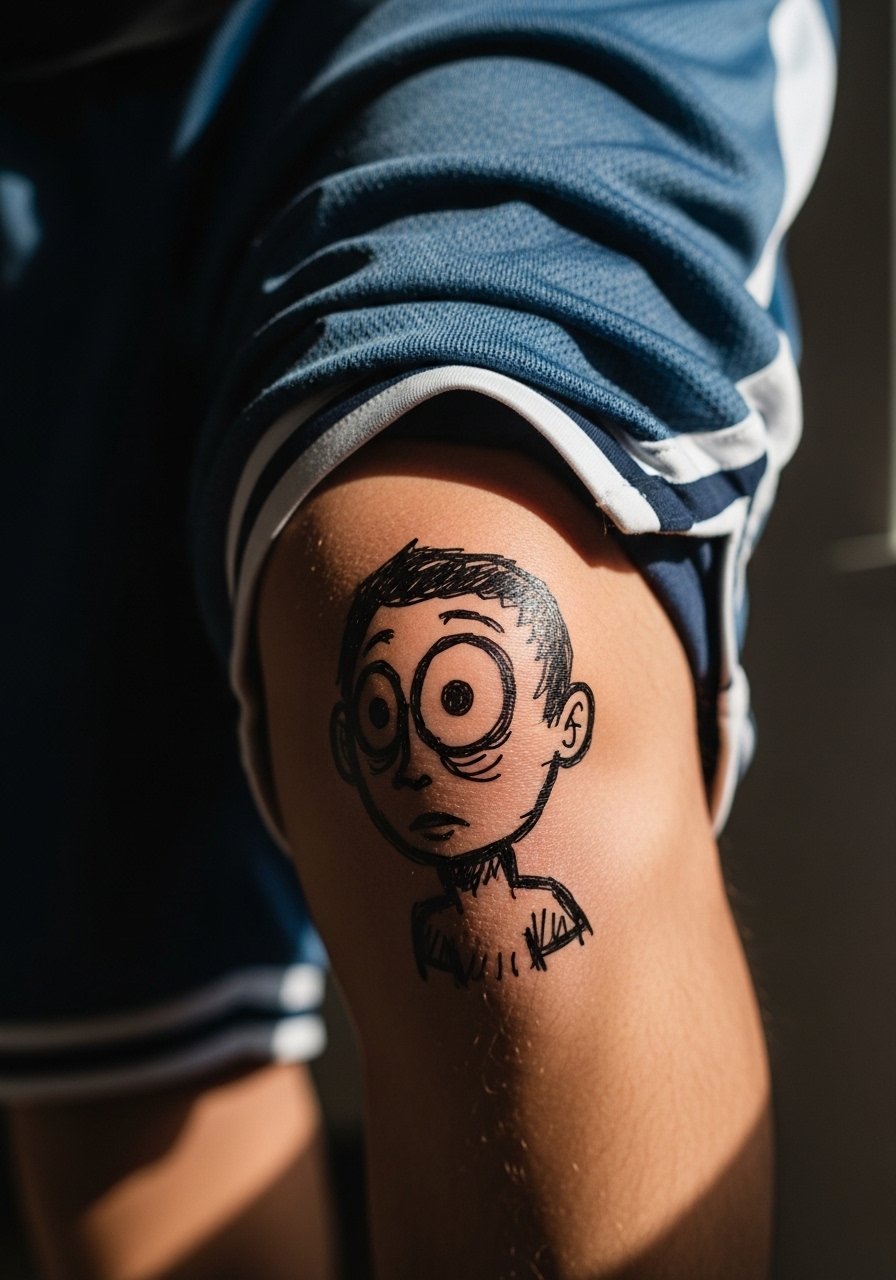
Playful, imperfect doodles suit casual streetwear and heal into a loose, lived-in look. The session is usually quick, minimal shading, and pain focuses on outline passes over the bone. A frequent misstep is trying to combine too many separate doodles into one tight wrap. Let the composition breathe so icons do not merge. This style pairs naturally with baggy basketball shorts during the session and while showing it off.
9. Ornamental Dotwork Mandala on Cap
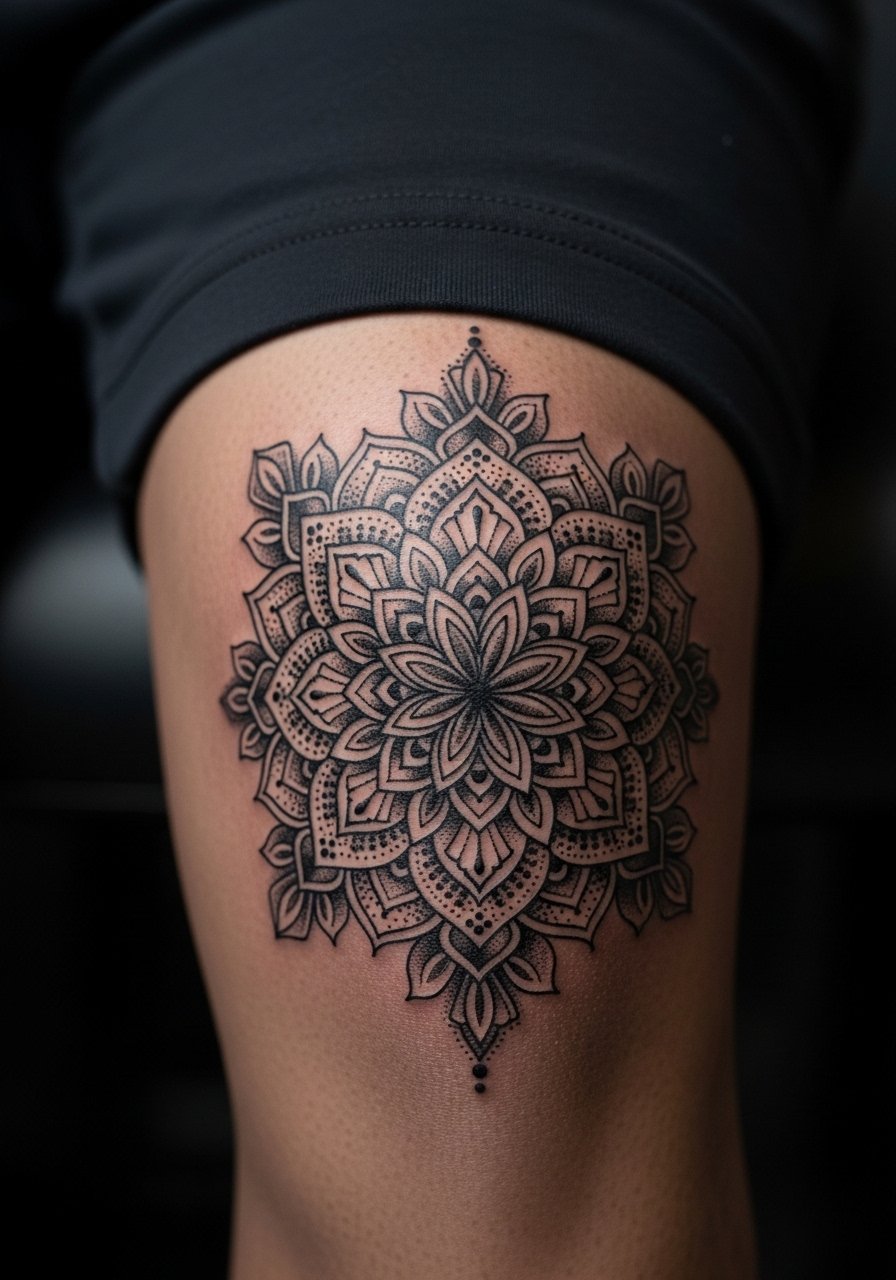
Dotwork creates meditative texture but requires a steady hand and time. Expect longer sessions and a fair amount of needle passes for stipple shading, which raises immediate discomfort near the bone. Dotwork done too small tends to blur into gray areas in two to five years. Ask for larger dots and layered negative space so the radial pattern stays readable. This style suits people who practice yoga or movement, and it pairs well with breathable shorts for session wear.
10. Traditional Anchor with Banner on Knee
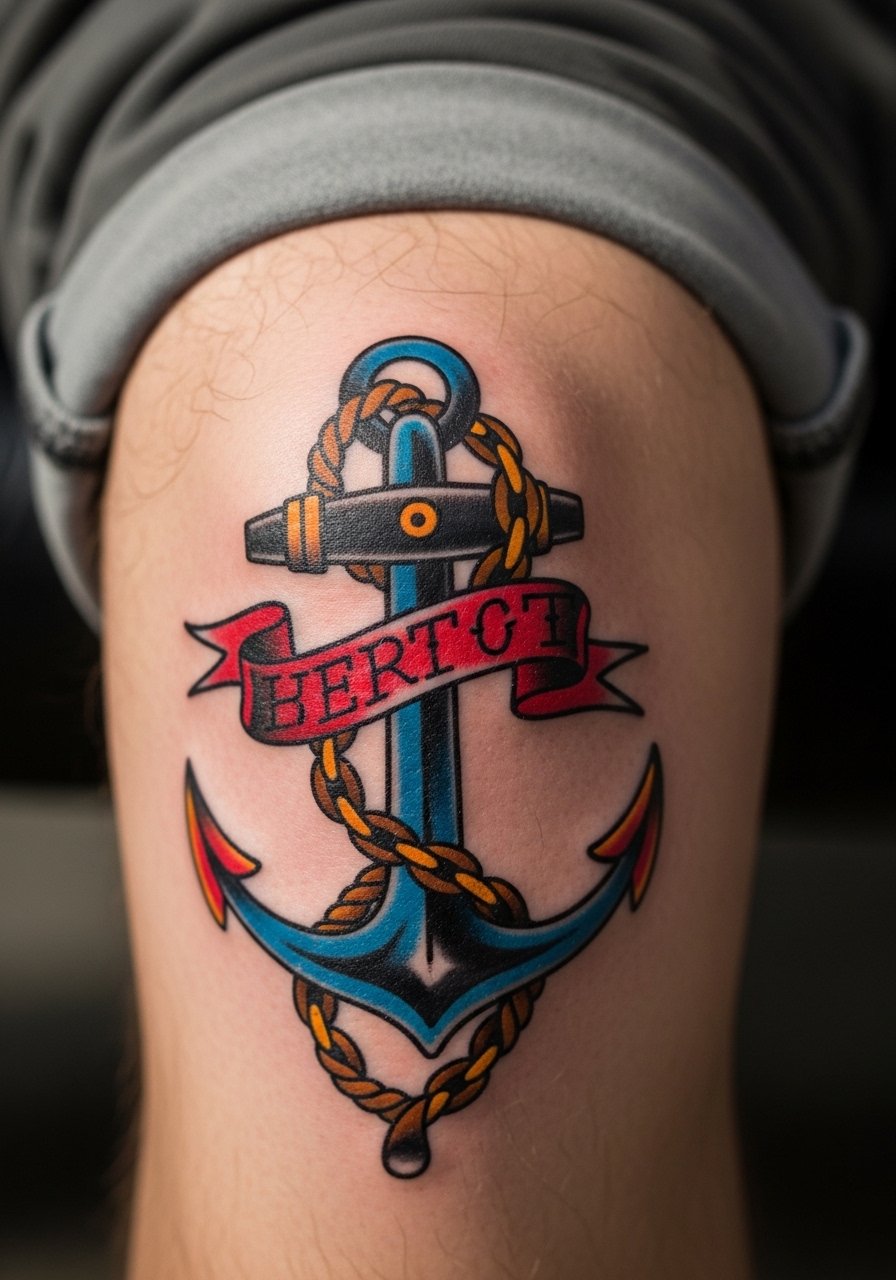
Traditional designs use heavy outlines and saturation that age predictably on joints. Expect sharper pain during the outlines near the kneecap and a more comfortable fill session. A common mistake is asking for tiny details inside the banner text that later become unreadable. Opt for a wider banner and simple, heavier lettering. For summer wear choose midi skirt side slit or shorts that show the banner when you move.
11. Minimalist Arrow Piercing the Cap
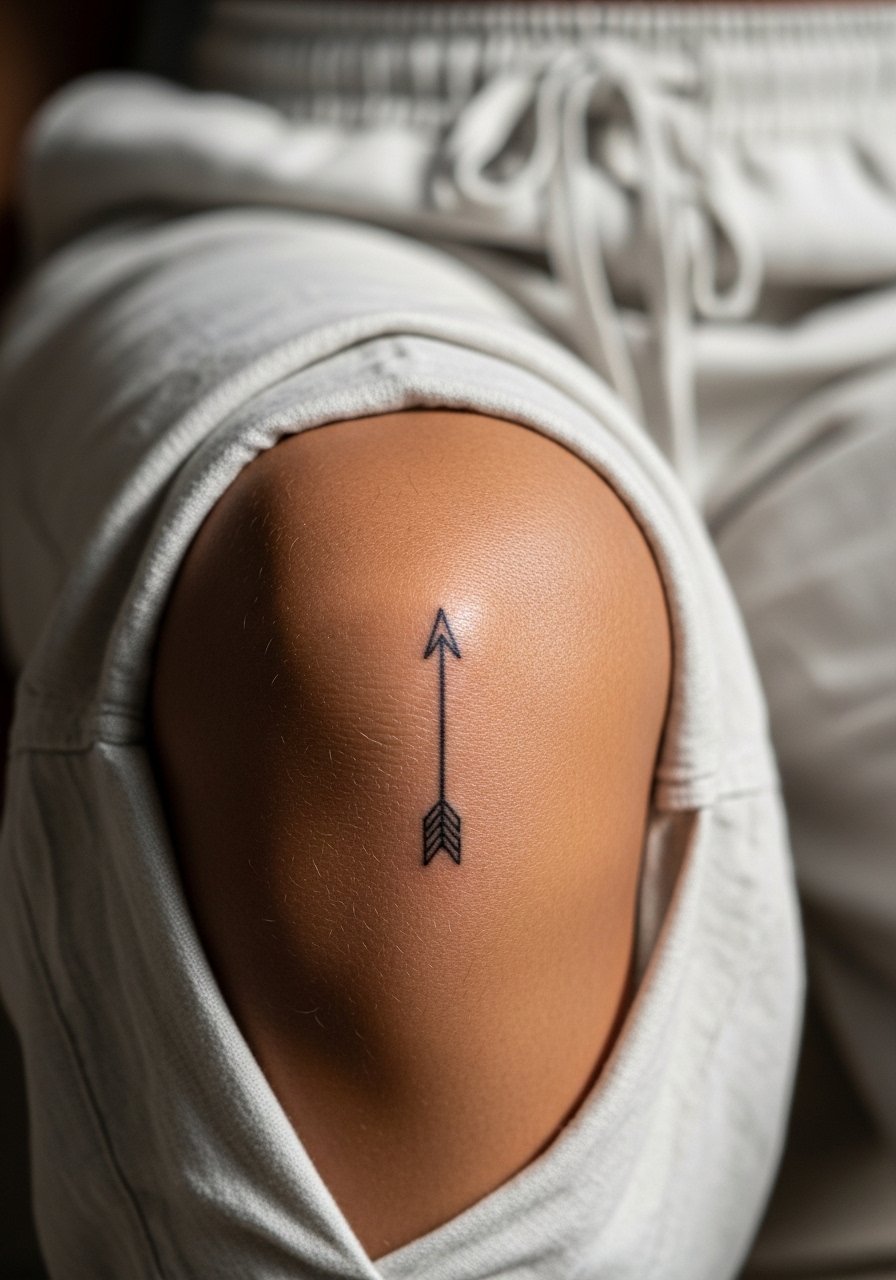
Simple arrow designs are great first knee pieces and usually finish in a short session. Pain is sharp at the joint for the first pass and fades as the needle moves into surrounding tissue. The main issue is too-fine single lines that blur on flex points. Ask your artist for a slightly thicker line or two parallel hairlines for longevity. This design suits a low-commitment aesthetic and looks tidy with loose drawstring linen pant styling.
12. Fine Line Wave Pattern Knee Wrap
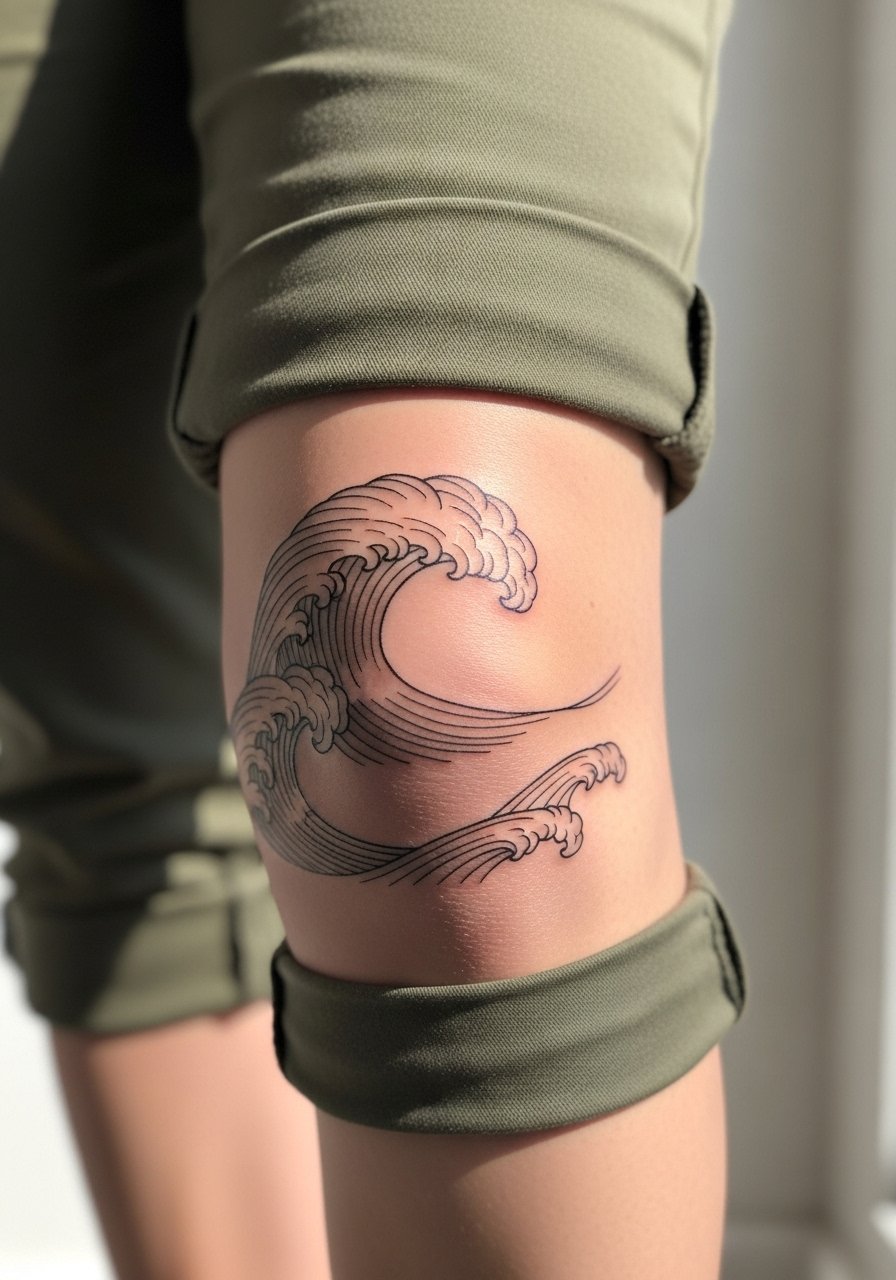
Wave wraps exploit flexion so the design seems to move as you bend. Tell your artist you want a 4 inch width and clear spacing between wave crests so motion stays readable at 6 months and beyond. Fine line is trending for this look, but there is debate around longevity. One camp accepts subtle softening as part of the aesthetic. The other camp prefers bolder strokes to prevent early merge. Pick a middle ground and book a touch-up at one year. For show-off looks try rolled cuff pants that keep the pattern visible.
13. Celestial Phases Encircling the Cap
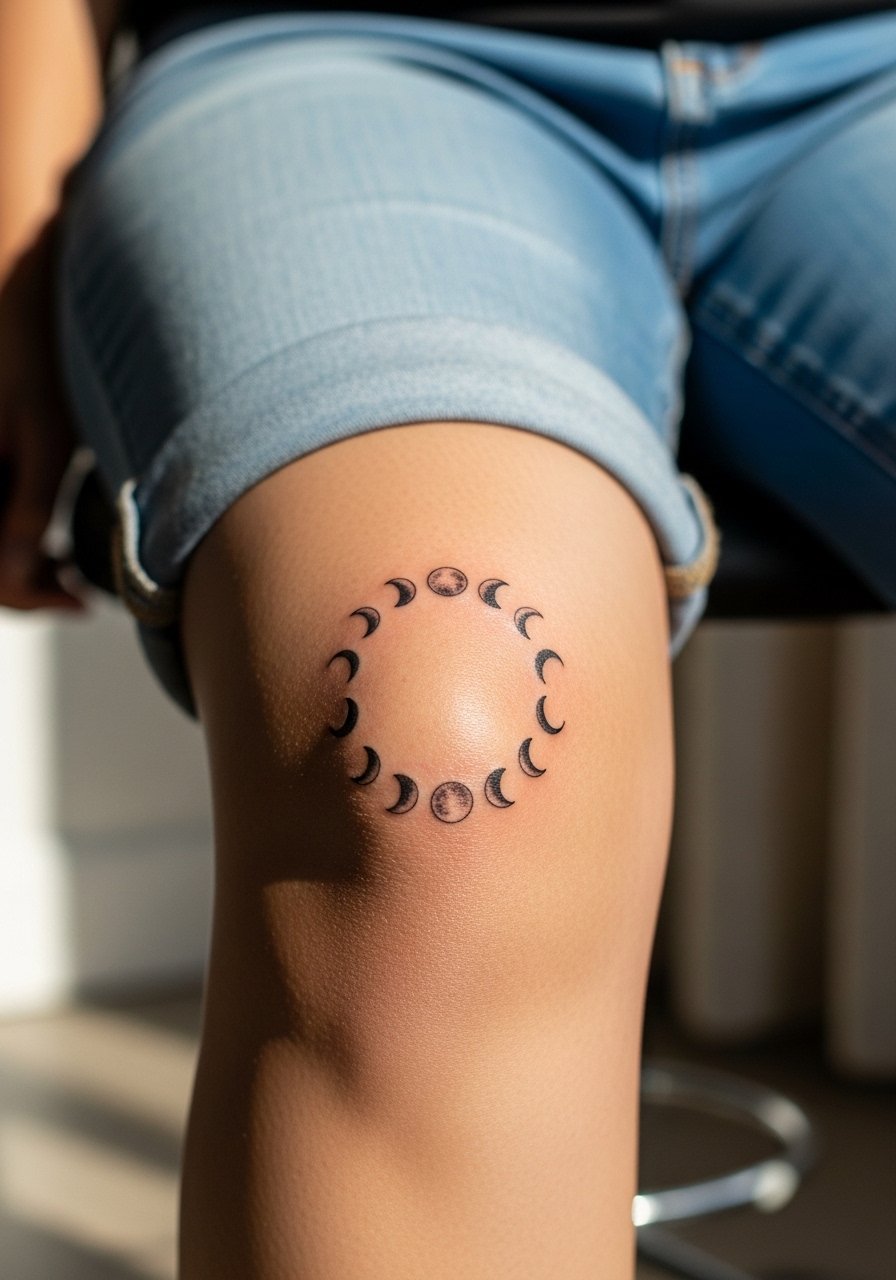
A ring of moon phases works well as a thin, readable wrap. Pain is manageable, but the tiny crescents can merge if placed too close together. Avoid dense packing and ask for uniform spacing so each phase ages separately. Expect a touch-up in the two to three year window for fine lines. This design looks deliberate with simple shorts or cropped pants during the session.
14. Wave Illusion That Flexes With Motion
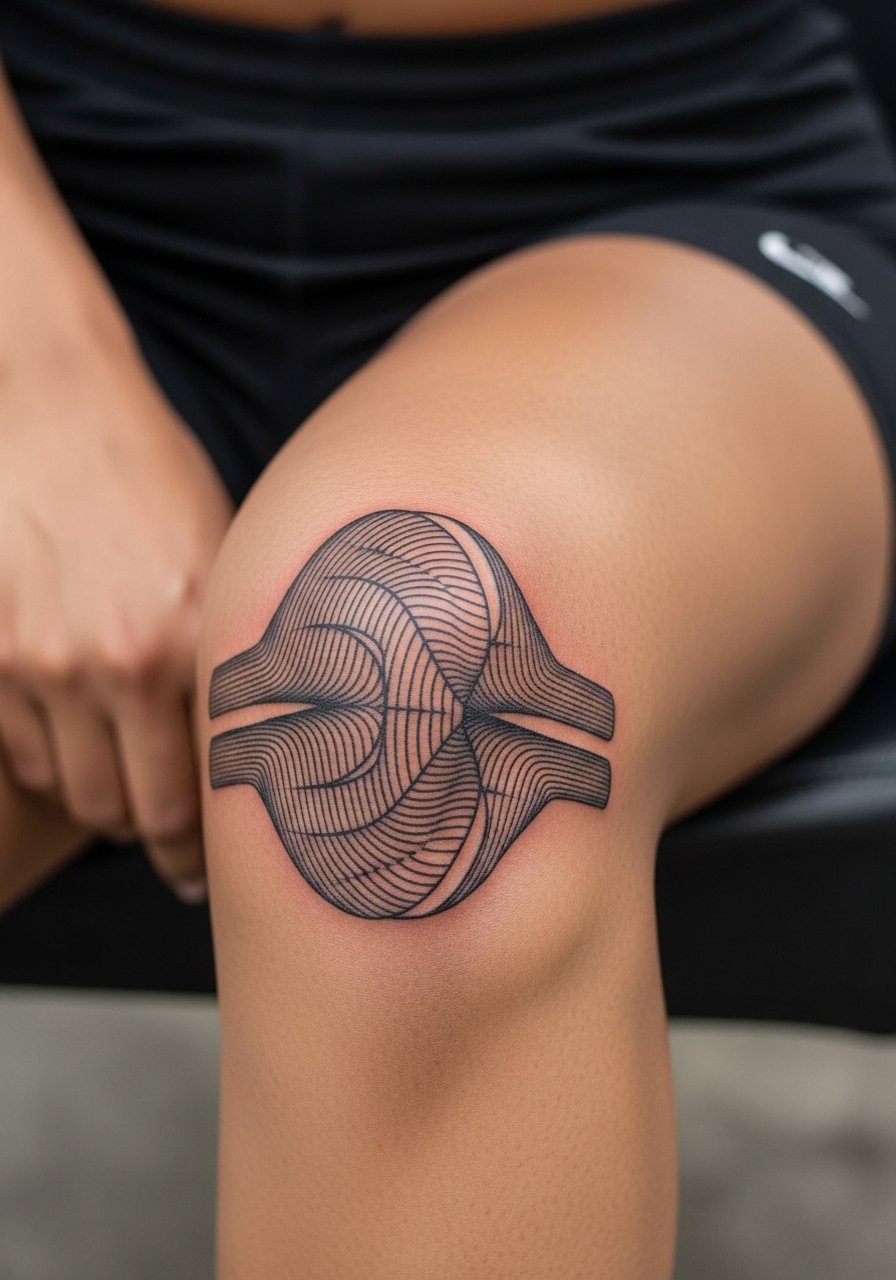
This is a fresher take on wave wraps that uses spacing to create the illusion of movement. Consultation note, have the artist sketch the waves on the knee and test with flexing so the illusion holds in real motion. The session is detail-heavy and can be painful where lines cross the bone. The mistake is too tight a repeat pattern which loses the optical effect. For show-off pairing wear high waist athletic shorts that let the illusion read cleanly.
15. Koi Curve That Tucks Under the Cap
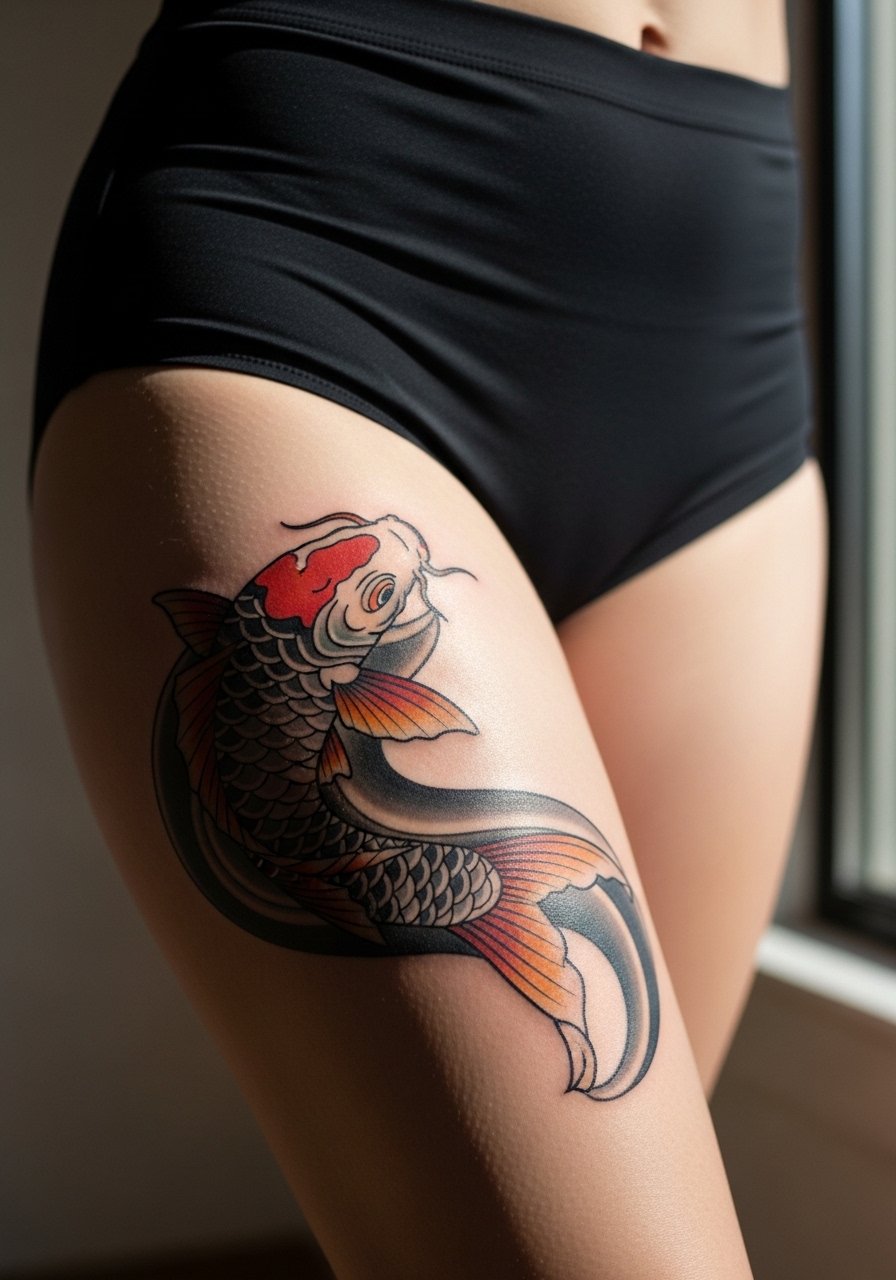
A koi wrapping the knee plays with vertical movement and looks dynamic when you walk. Expect longer sessions for color fills and detailed scales. The common mistake is trying to compress too much fish detail into a small arc which becomes muddled as the skin moves. Ask for larger scale shapes and bold outlines. Healing needs a little more attention because the design crosses both thigh and kneecap tissue.
16. Tiny Portrait Bust Near the Edge
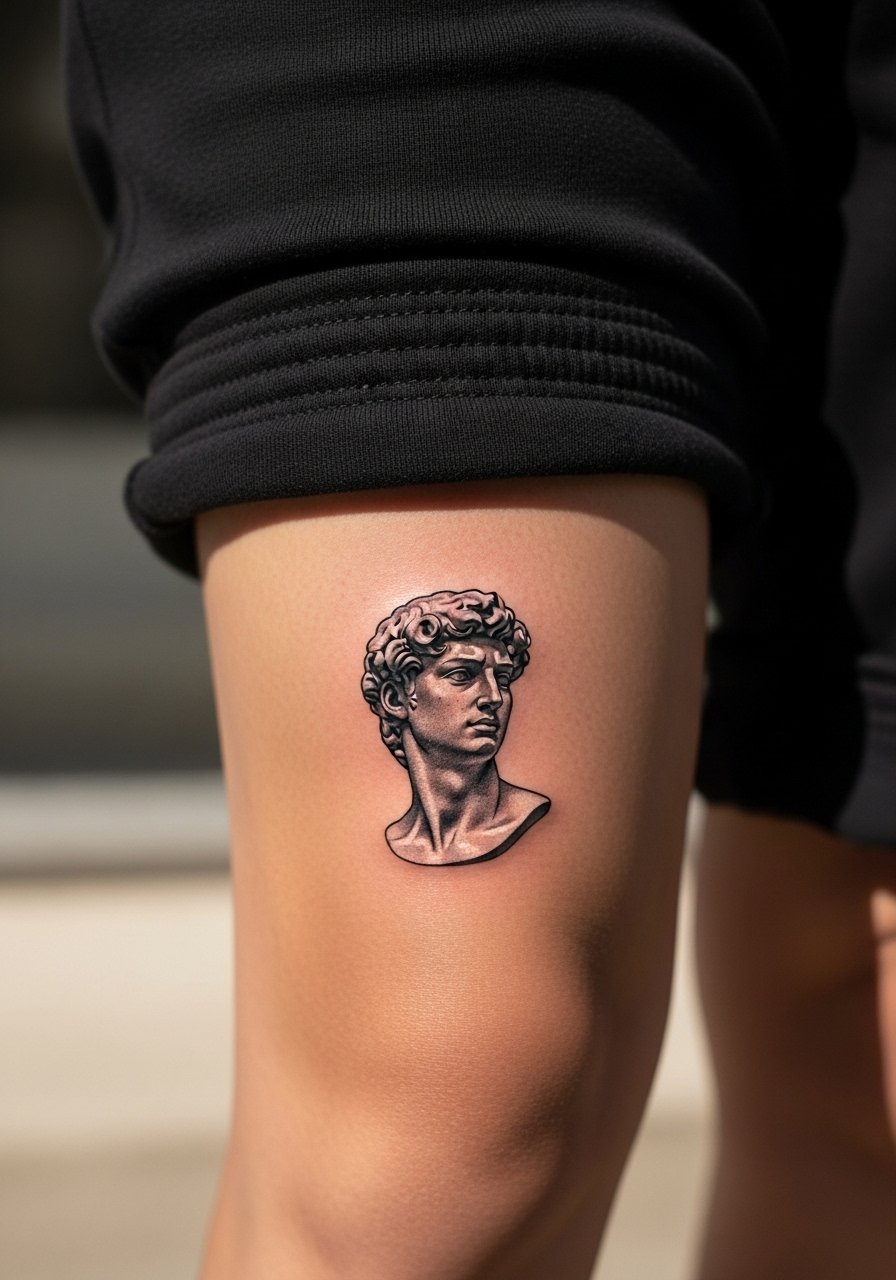
Portraits on the knee require expert micro-realism work and a candid discussion on how facial detail will soften over time. The first session is precise and painful at the bone edge. A common error is requesting extremely small facial features which blur into gray patches. If you want a portrait here, increase size slightly and schedule a follow-up for contrast refresh. For comfort choose elastic waist shorts the day of.
17. Lightning Bolt Strike Through the Cap
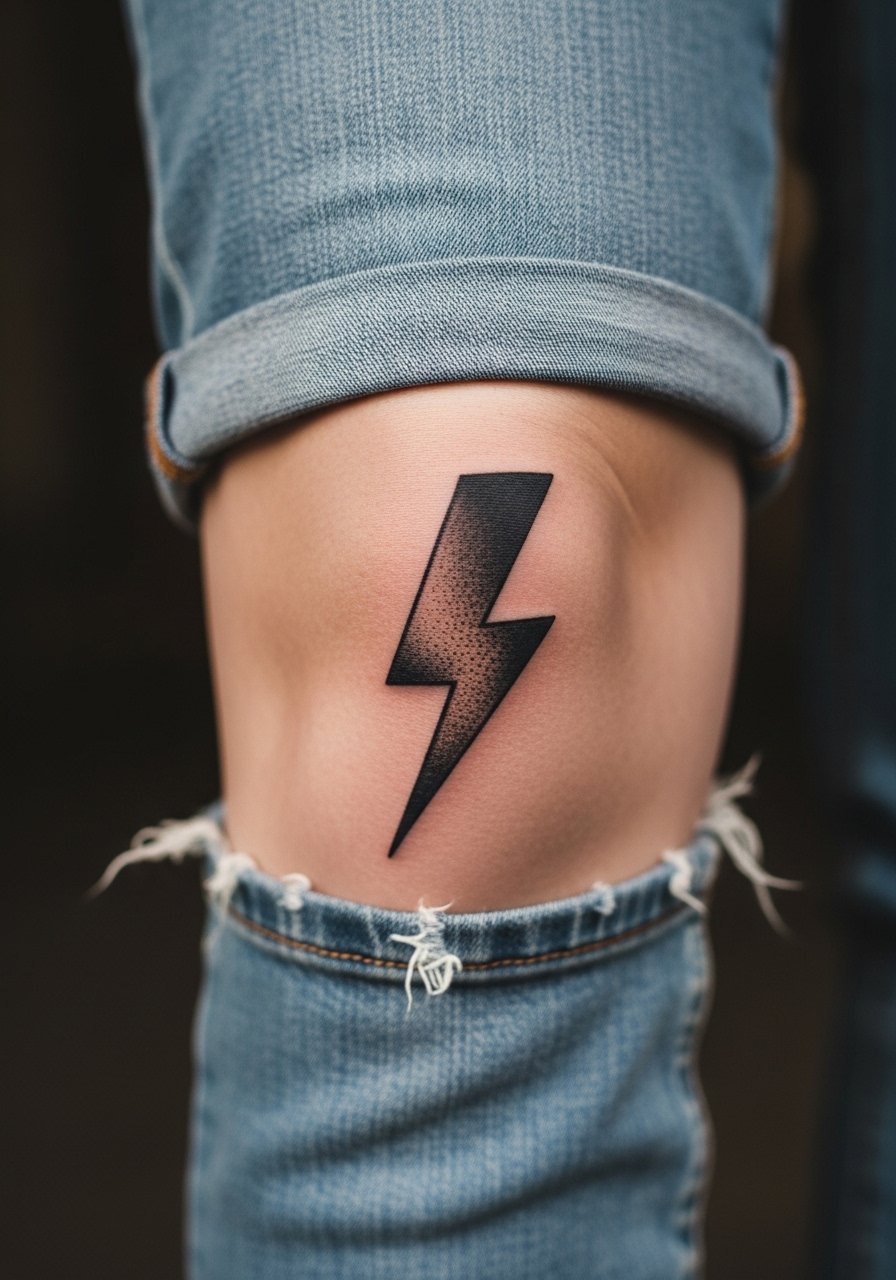
A simple graphic bolt is quick and visually punchy. Expect a sharp stinging first pass over the ridge of the kneecap then softer fills. The main error is asking for too many internal textures inside the bolt. Keep it clean so the silhouette remains strong after movement and aging. This is a low-commitment option for someone testing kneecap pain thresholds.
18. Paw Print Stencil on Lower Cap
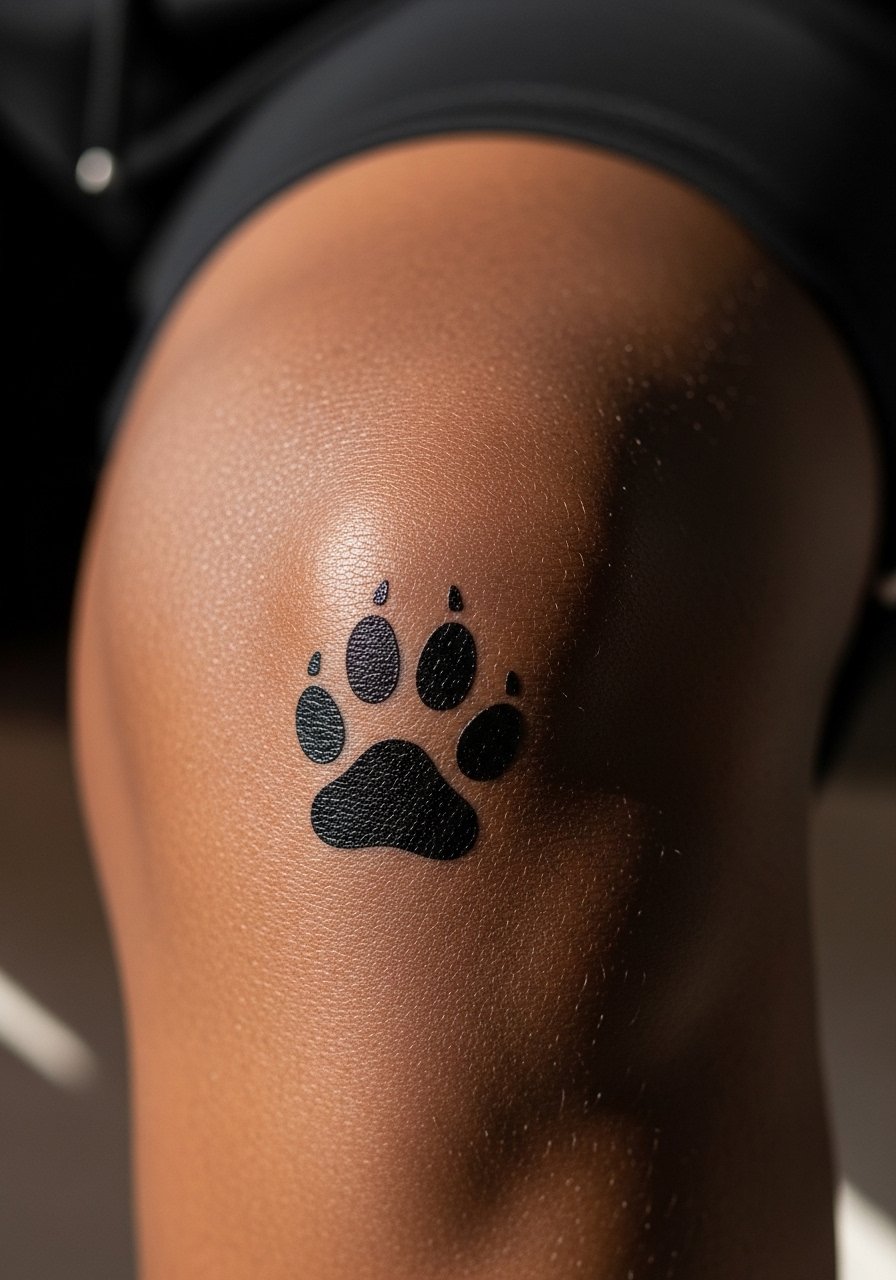
Small commemorative paw prints are straightforward and heal predictably if placed off the highest bone point. Expect a quick session under an hour and concentrated sensitivity on the bone. A common mistake is getting multiple tiny prints too close together, which blend. Leave breathing room so each pad keeps shape. For showing it off during recovery wear elastic waist shorts so nothing rubs.
19. Minimalist Smiley or Tiny Icon
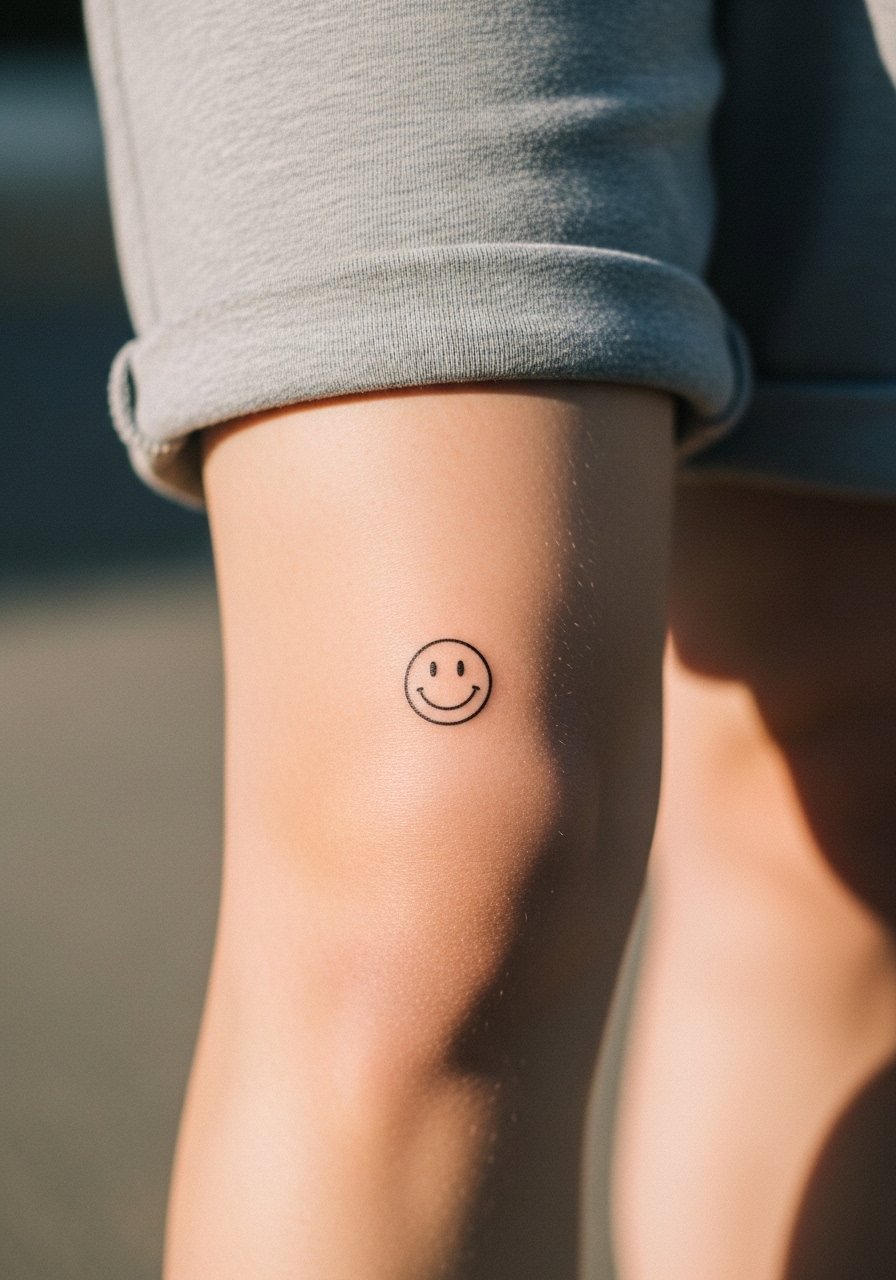
Small icons are beginner-friendly but are vulnerable to blur on joints. The first year often tells the story. Ask your artist for a slightly thicker outline than the reference so the icon keeps its face. The session is short and painful in the usual kneecap spot. Plan on a touch-up if you want the icon to stay readable long term.
20. Zodiac Glyph Around the Cap
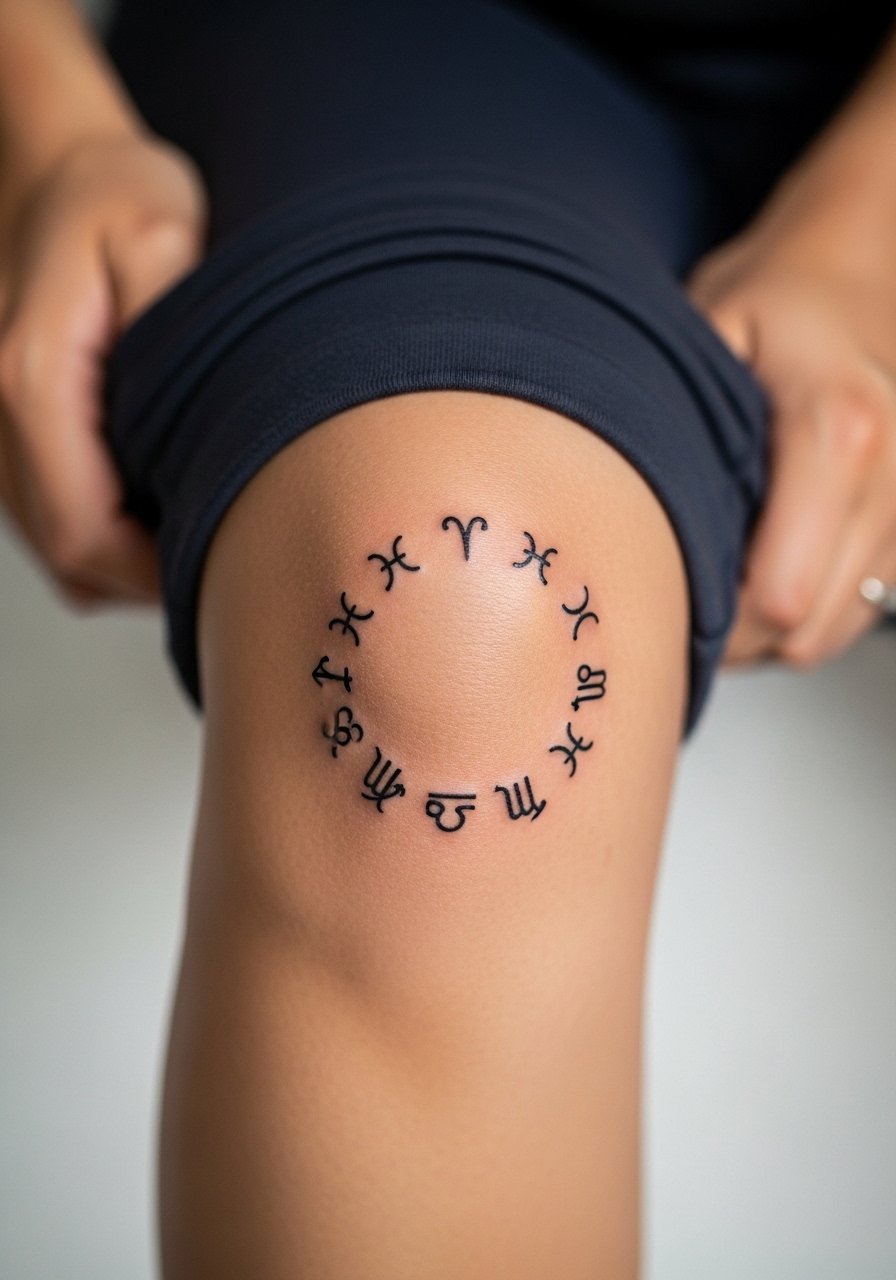
Zodiac rings work as thin symbolic wraps that are easy to place. The trick is spacing each glyph so they do not blur into one string. Tell your artist the exact glyph style and request even negative space between symbols. Pain is similar to other fine line wraps. This look reads well with cutout leggings women when you want it visible in movement.
21. Baroque Ornamental Frame on Cap
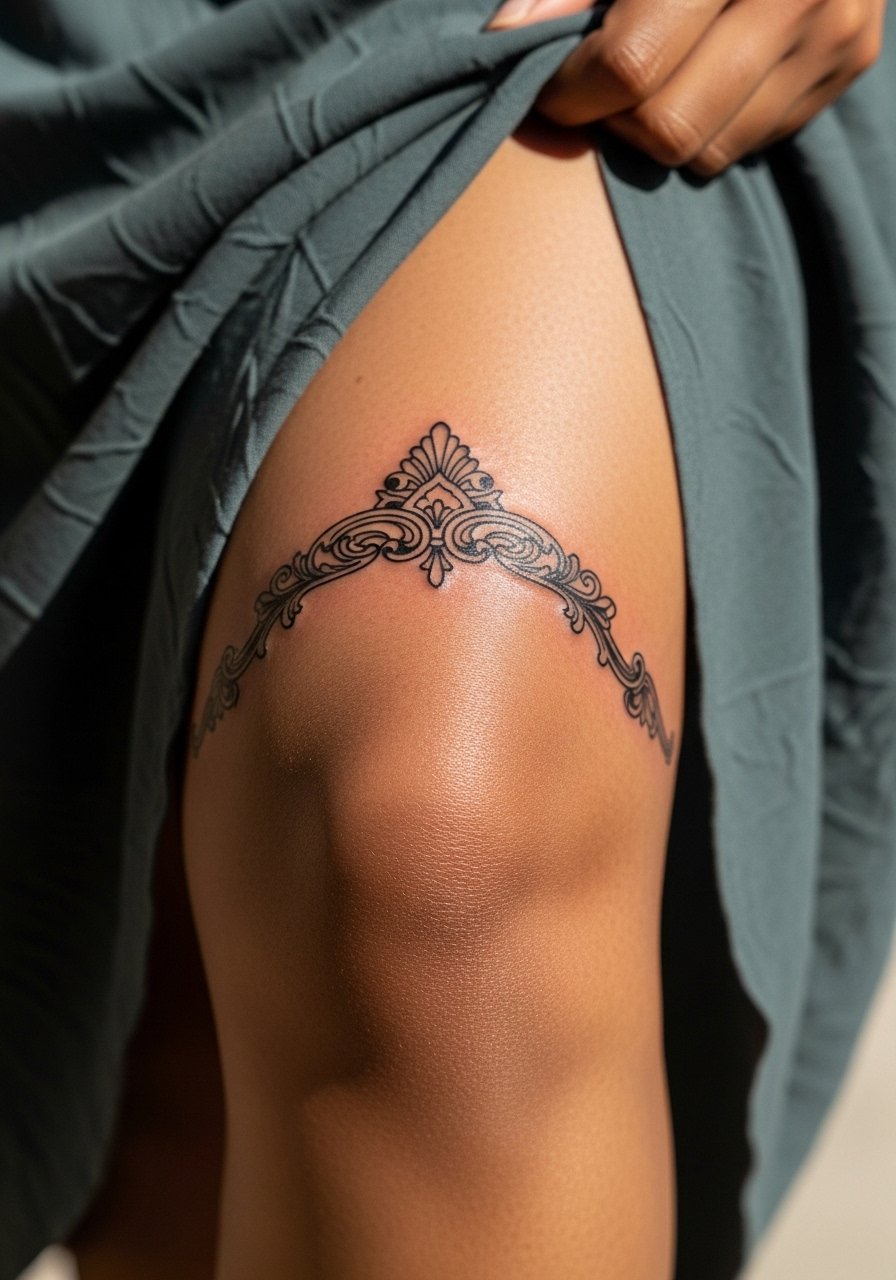
An ornamental frame can elevate a small center piece or hold negative space for a later addition. Expect a longer outline pass and delicate shading that can soften with movement. A common error is over-detailing inner filigree in a small area. Keep the frame slightly simplified so the silhouette remains legible as skin moves.
22. Anatomical Heart Placed Off-Center
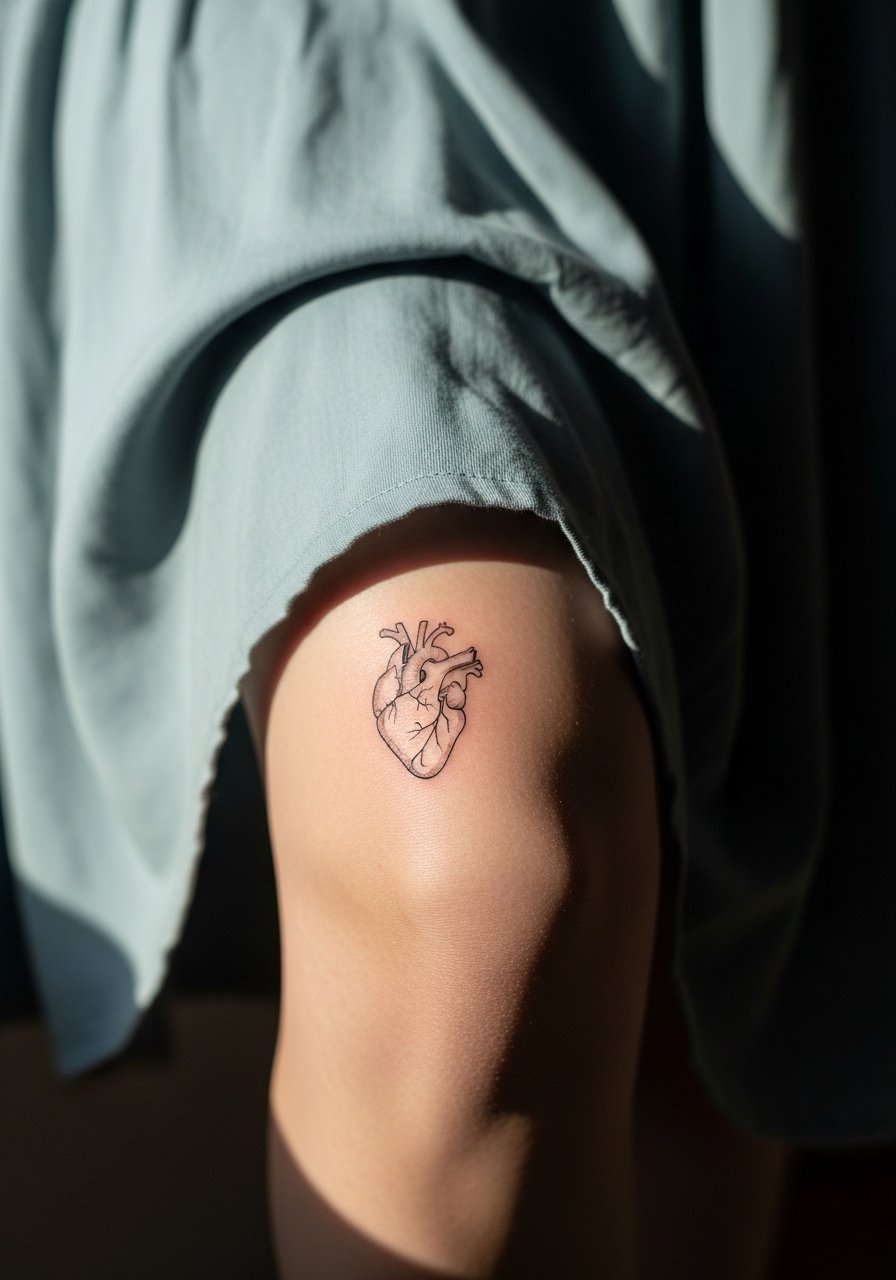
An anatomical heart on the knee is a slightly edgier choice that reads well when off-center. During consultation make sure the main contrast sits away from the harshest bone point. The session can be uncomfortable during stipple shading. A real mistake is pushing for extreme micro detail that loses definition on bend zones. Pair with loose flowy skirt women to show it off seasonally.
23. Small Dagger Piercing the Cap Edge
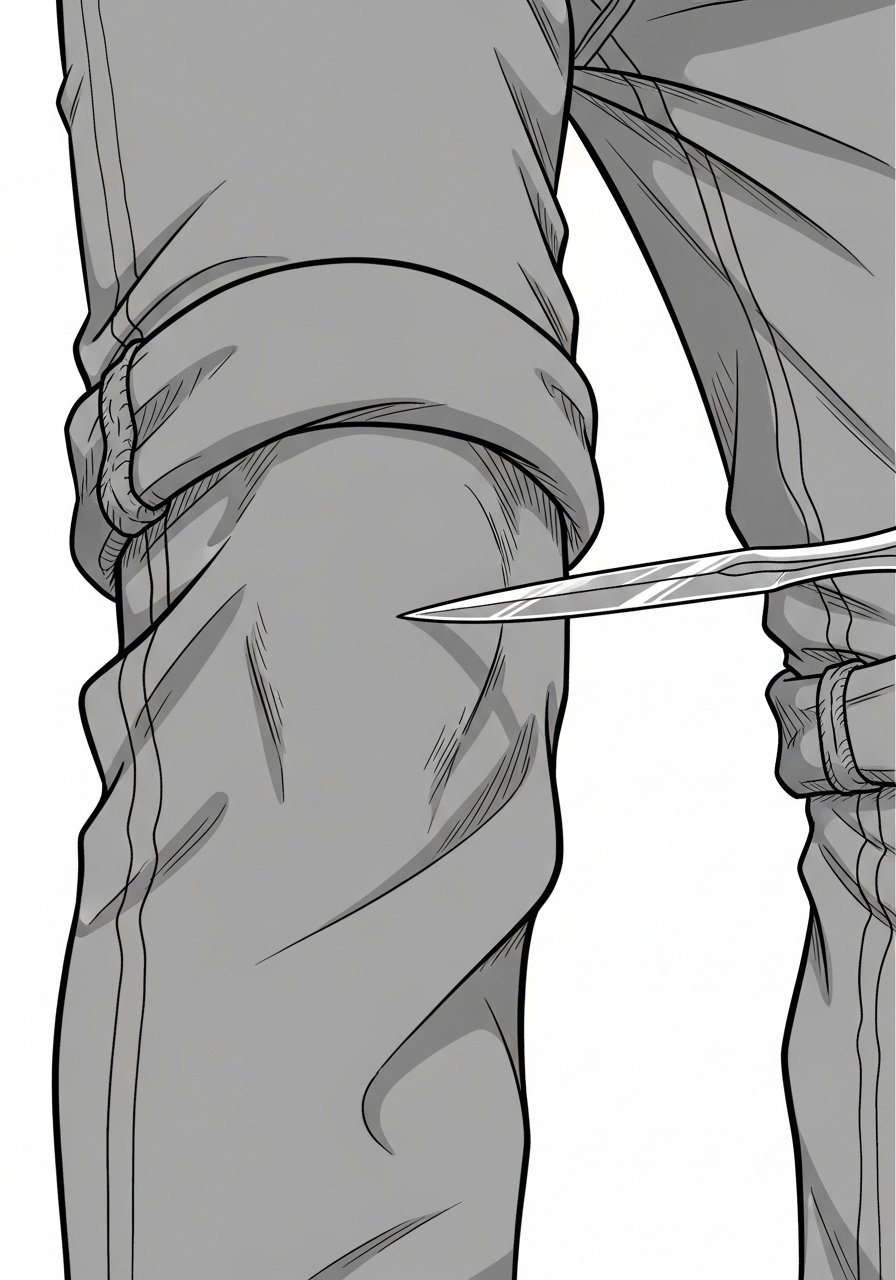
Daggers are classic and age well if outlines are solid. The main pain comes from tip-to-tip passes across the bone. Avoid micro-detailing on the handle if the scale is small. Keep the silhouette clean and expect a touch-up after one to two years.
24. Tribal Band Following the Knee Crease
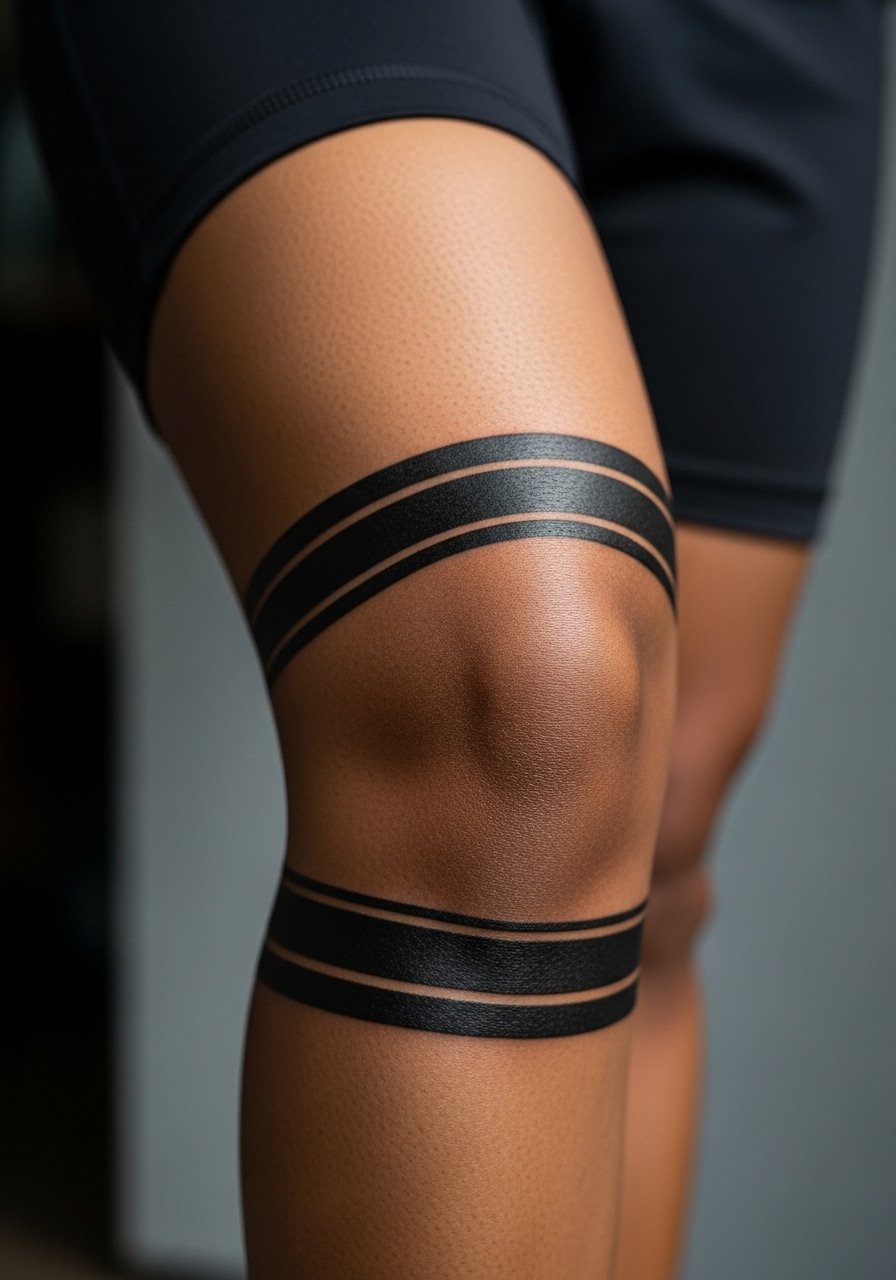
Tribal bands around the knee take advantage of natural creases and can frame motion. Ask the artist to test the stencil with a bend so the pattern reads when you walk. The session is painful during outlines and requires heavy saturation for longevity. Avoid ultra-fine motifs in the band since those blur on flex zones. For showing it off wear high waist athletic shorts that keep the band visible.
25. Barcode or Minimal Line Block
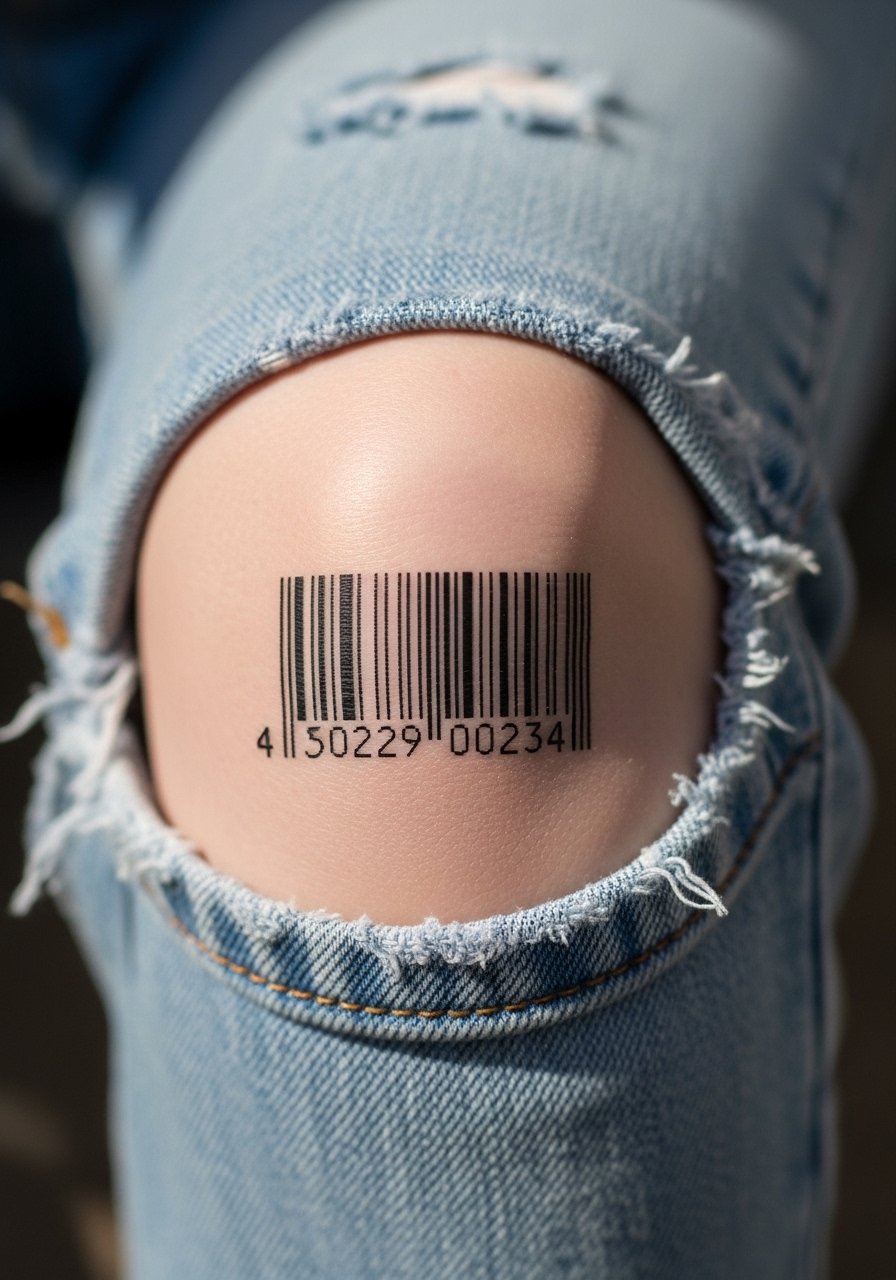
Graphic barcodes are striking when scaled correctly. The risk is mechanical blur where thin bars merge over time. Ask for slightly wider bars and even spacing to avoid an undifferentiated gray band as it ages. The session is short but sharp when lines cross the bone.
26. Sunburst or Radiant Lines from the Cap
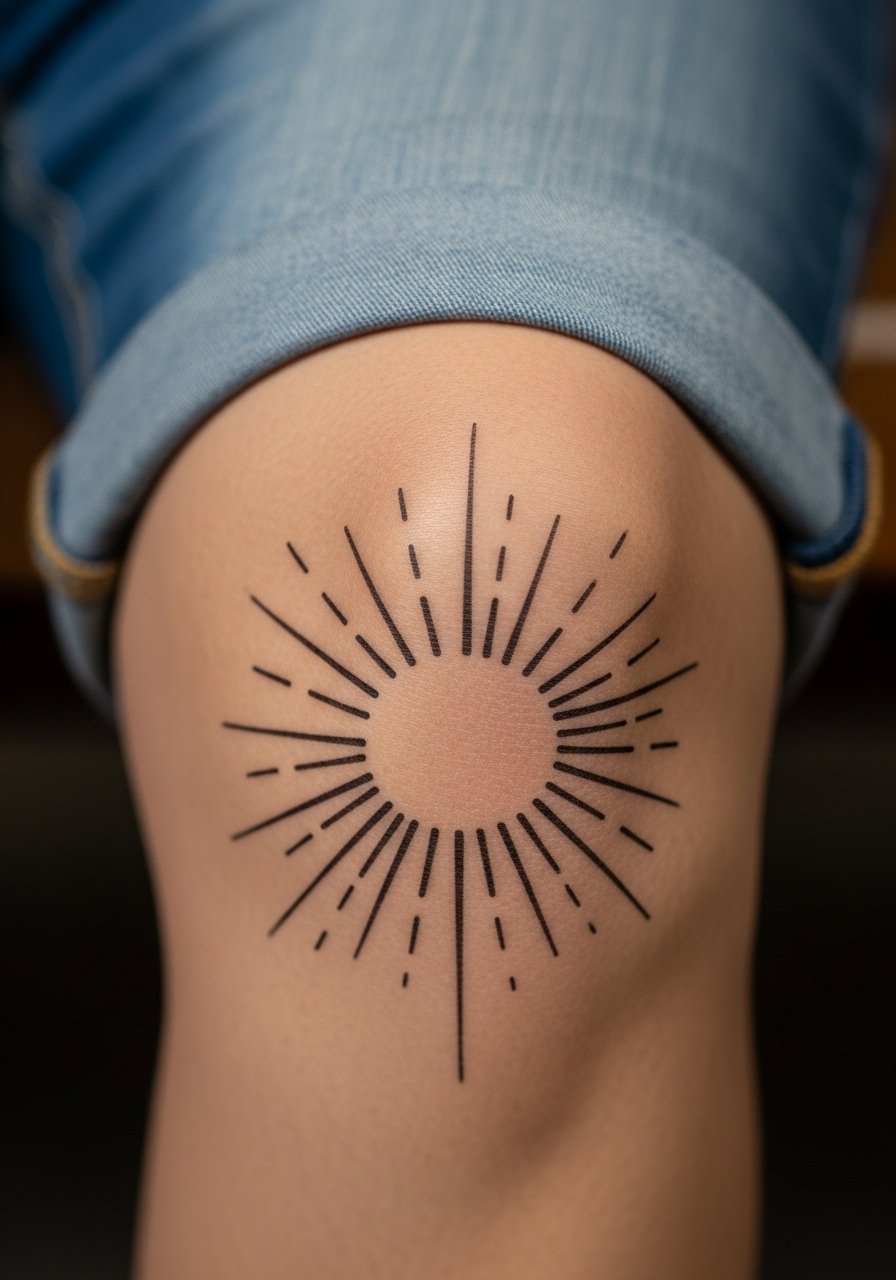
Radial sunburst designs use the knee as a focal point and read well in movement. The key is spacing between rays so they do not merge when the knee bends. Expect the usual kneecap pain and plan a touch-up in the second year for fine rays. Keep the rays slightly thicker near the center for longevity.
27. Lace Thatch That Frames the Kneecap
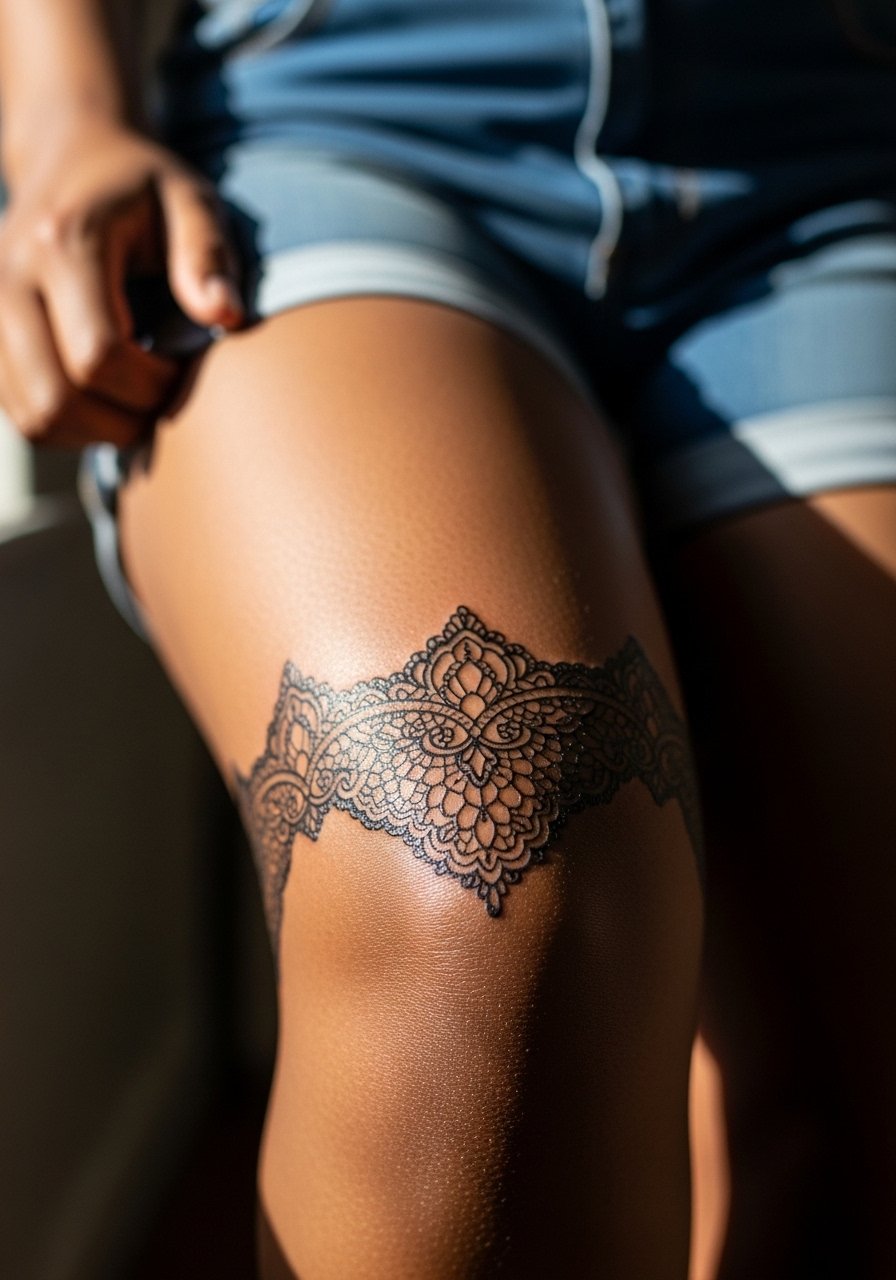
Lace wraps look intricate but are vulnerable to compression blur on joint tissue. In consultation ask for open negative spaces within the lace so each loop reads individually after a year. The session is fiddly and can take longer than expected. Avoid requesting ultra-fine internal loops when the design sits directly over the bone. For appointment wear high waist athletic shorts so the artist can work without fabric interference.
Frequently Asked Questions
Q: How much does a kneecap tattoo usually cost?
A: Expect a wide range depending on size, color, and session count. Small minimalist knee pieces often start around 100 to 300 while full wraps with color can run 400 to 900. Prices rise with specialist skill and if the artist charges by the hour.
Q: How bad does a knee cap tattoo hurt and can numbing help?
A: Kneecap work is generally near the top of most pain charts because of thin tissue over bone. Topical numbing creams can blunt the first sharp passes when used under an artist's guidance but may change how the skin takes ink. Discuss pros and cons with your artist before applying anything.
Q: Will fine line designs blur faster on the knee than bold blackwork?
A: Yes, there is a split in opinion. One group accepts subtle softening as part of the look and prefers ultra-fine detail. The other group recommends heavier line weight or blackwork for joints to keep definition longer. Your artist's portfolio of healed knee work will show which approach they trust.
Q: What aftercare is best for kneecap tattoos in hot weather or if you sweat a lot?
A: Loose breathable clothing for the first week helps reduce trapped moisture. Air the area a couple times daily and follow your artist's guidance on thin layers of ointment and gentle cleansing. If you sweat heavily consider planning sessions during a cooler season so the first week avoids constant dampness.
Q: How often do knee tattoos need touch-ups?
A: Touch-up timelines vary by style and placement. Fine line pieces commonly need a refresh at 1 to 3 years. Solid blackwork and neo-traditional colors often settle for longer but may still benefit from a touch-up at year two or three. Expect to budget for a follow-up when you plan a knee piece.
Q: How do I find an artist who actually knows how to tattoo knees?
A: Search tags like #KneeTattoo and #KneecapTattoo for healed photos and look for motion shots that show the knee bent. Tattoo forums and local convention guest lists are good places to spot specialists. Ask to see healed, not just fresh, knee work during consultations and confirm how they handle touch-ups.
