
Fine line angel number tattoos are everywhere on feeds right now, and the truth is the trend often looks best when scaled and placed with aging in mind. Small digits can read crisp for years when the spacing, line weight, and placement match your skin and lifestyle. Below are 27 minimal-line takes on angel numbers that balance current style with real-world wear, plus what to ask your artist in the chair.
1. Tiny '111' on the Inner Wrist
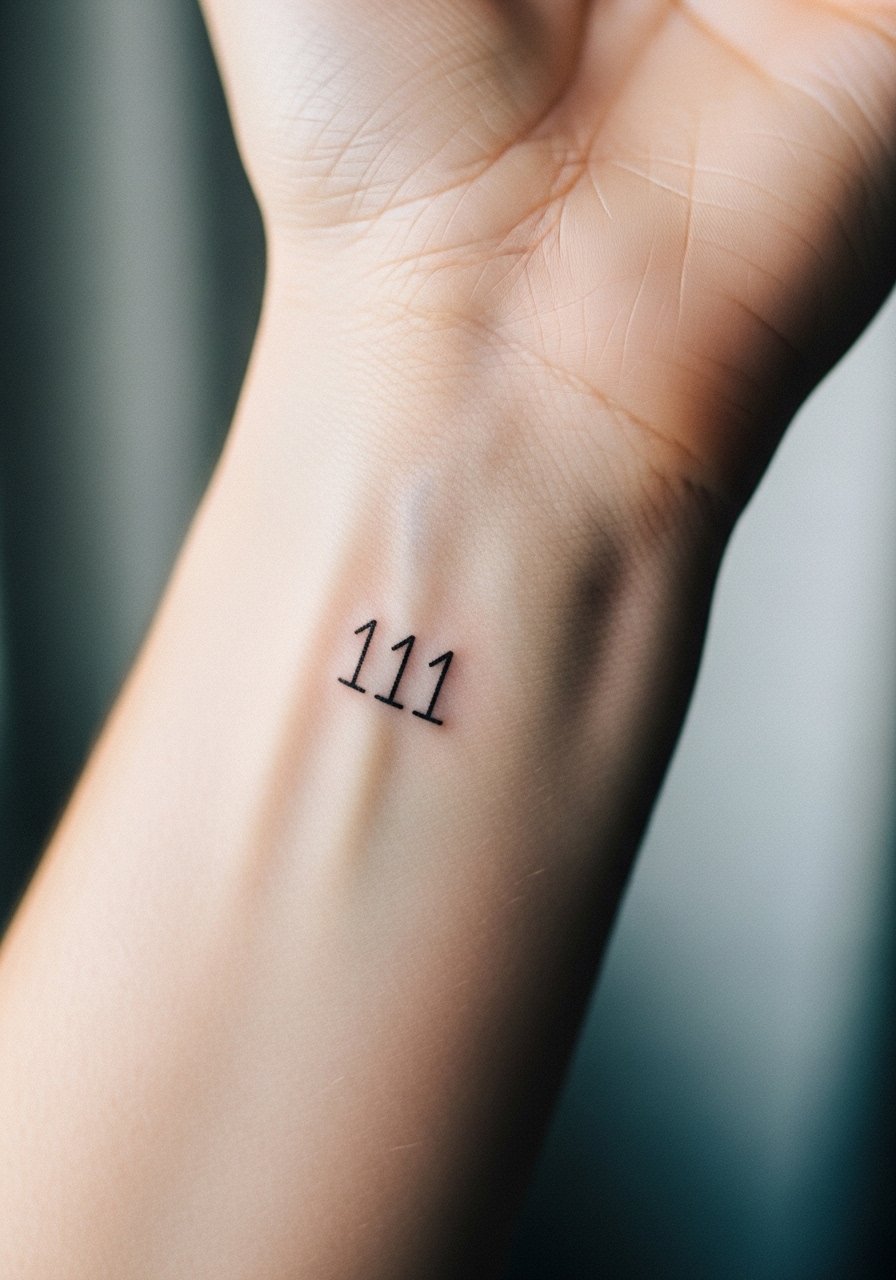
I’ve seen the inner wrist version last clean when artists use slightly heavier linework than clients expect. Fair warning, the wrist moves a lot so tiny digits with ultra-fine weight can blur faster. Tell your artist you want the line weight bumped just enough to read at one year, and ask about spacing between digits so they do not merge. Pain is low to moderate and sessions run 15 to 30 minutes. A common mistake is asking for micro type that reads great in photos but needs touch-up by year two. Pair this with a thin bracelet like a thin chain bracelet to frame the wrist without hiding the numbers.
2. Single-Line '222' Along the Side of a Finger
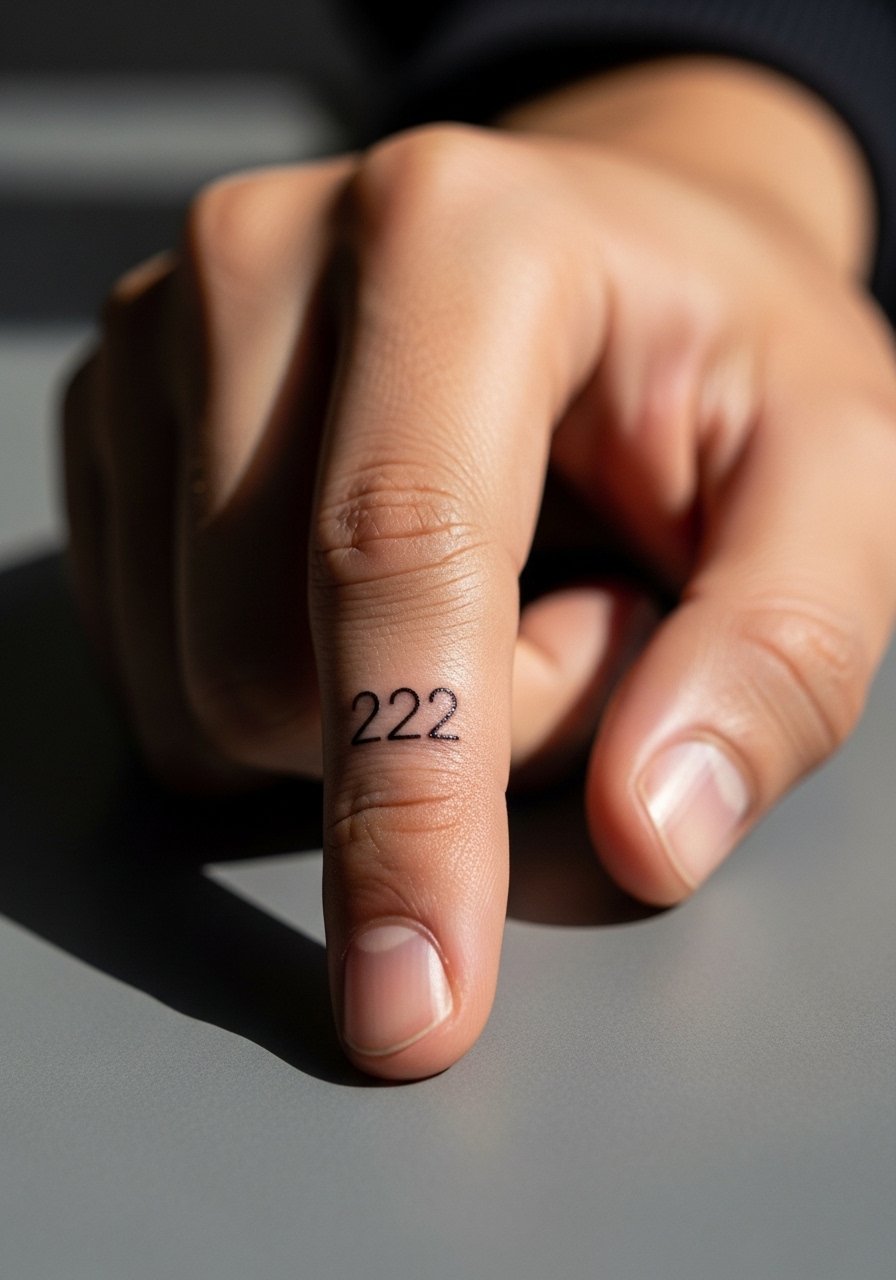
Finger placements are charming but high-maintenance. Expect faster fading from hand washing and friction, and plan for touch-ups around year one or two. In the consultation, ask the artist for slightly staggered spacing so the digits breathe and avoid dense printing. The session itself feels like a quick sting and then a shallow vibration, usually under 20 minutes. Many people request the exact same weight they saw on a feed and then regret the blurring. For showing off, pair a slim ring or a minimal signet ring that complements the digits without crowding the knuckle. Hand tattoos still affect some hiring decisions, so consider career context before committing.
3. Delicate '333' Under the Collarbone
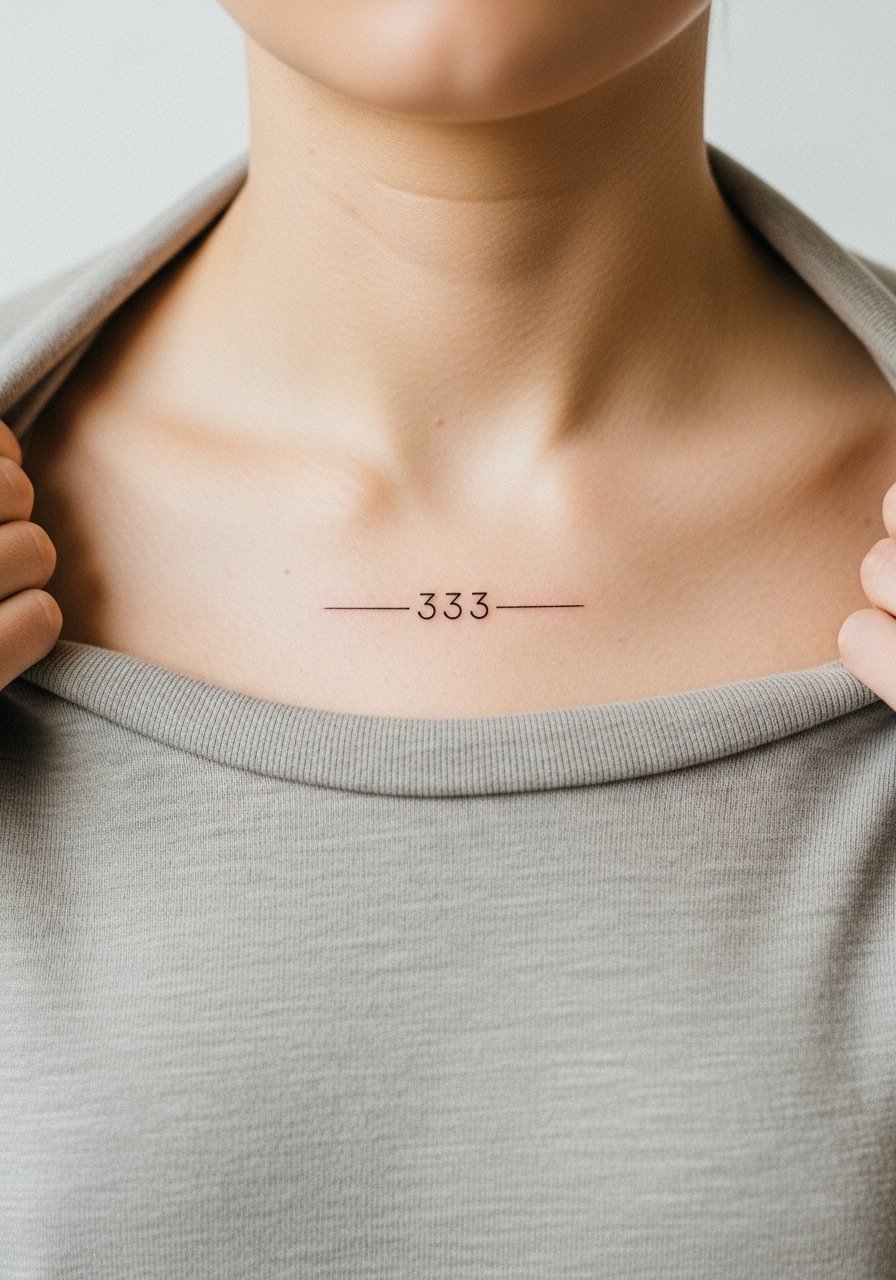
Under-collarbone placements read elegant because the area naturally frames the numbers. Pain is mild to moderate. Tell your artist you want the digits horizontal and centered so a necklace sits above without overlapping the ink. The mistake I see is placing the numbers too close to the bone, which can distort as the skin settles. Over five years the ink usually softens but stays legible if linework had modest saturation. For evenings out, this spot pairs well with an open-neck top or a thin chain pendant necklace that sits above the digits.
4. Micro '444' Behind the Ear, Below the Hairline
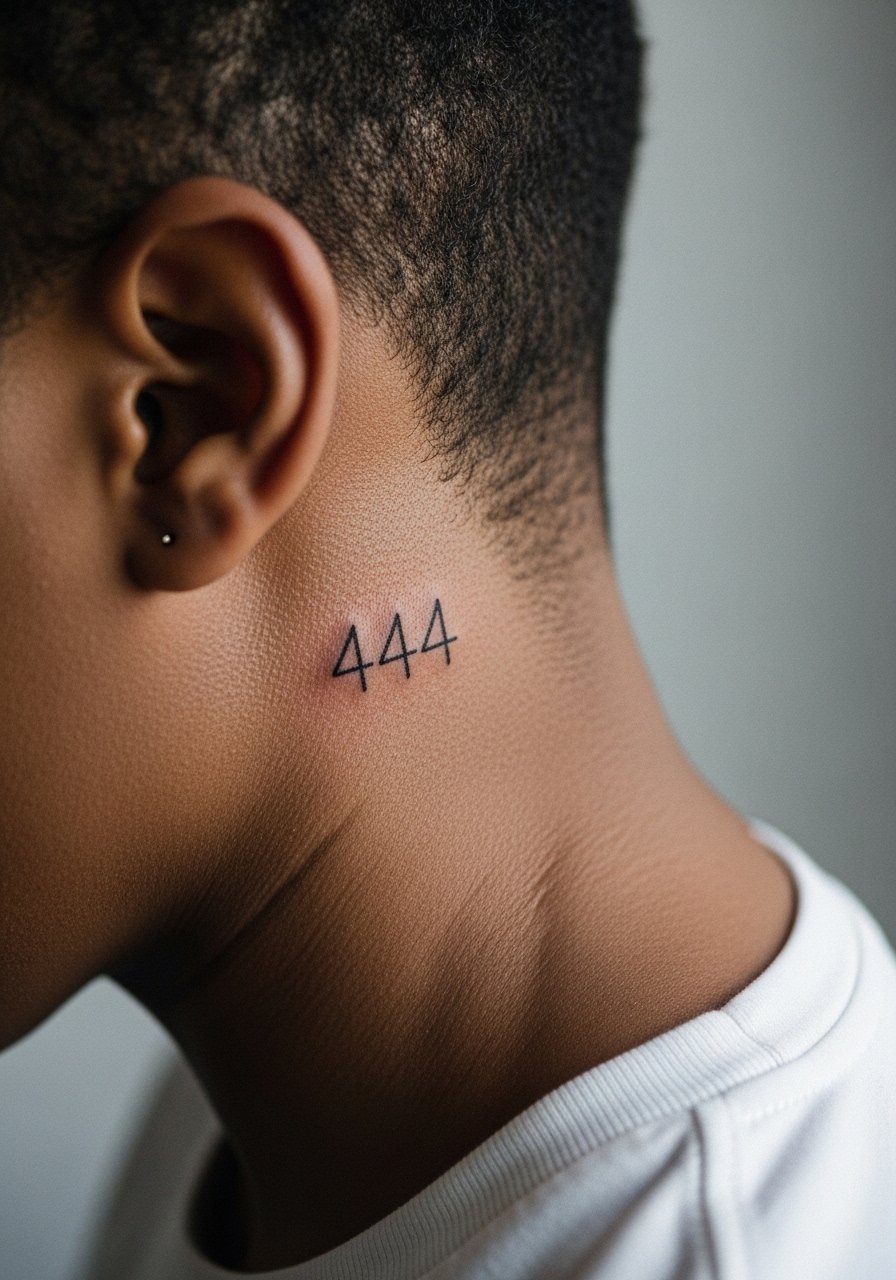
Behind-the-ear pieces hide well but need precise placement because the skin is thin. Artists debate fine line here. One camp says the area shifts and blurs; the other camp argues careful needle depth and touch-ups keep clarity. Ask where your artist stands. Sessions are short and feel sharp due to bone proximity. The common mistake is asking for hairline-thin script that cannot withstand sun and shampoo friction. If you plan to show it, short haircuts or updos reveal it, while scarves hide it; bring a small hair clip for the appointment so the area stays exposed.
5. Minimal '555' Along the Inner Forearm
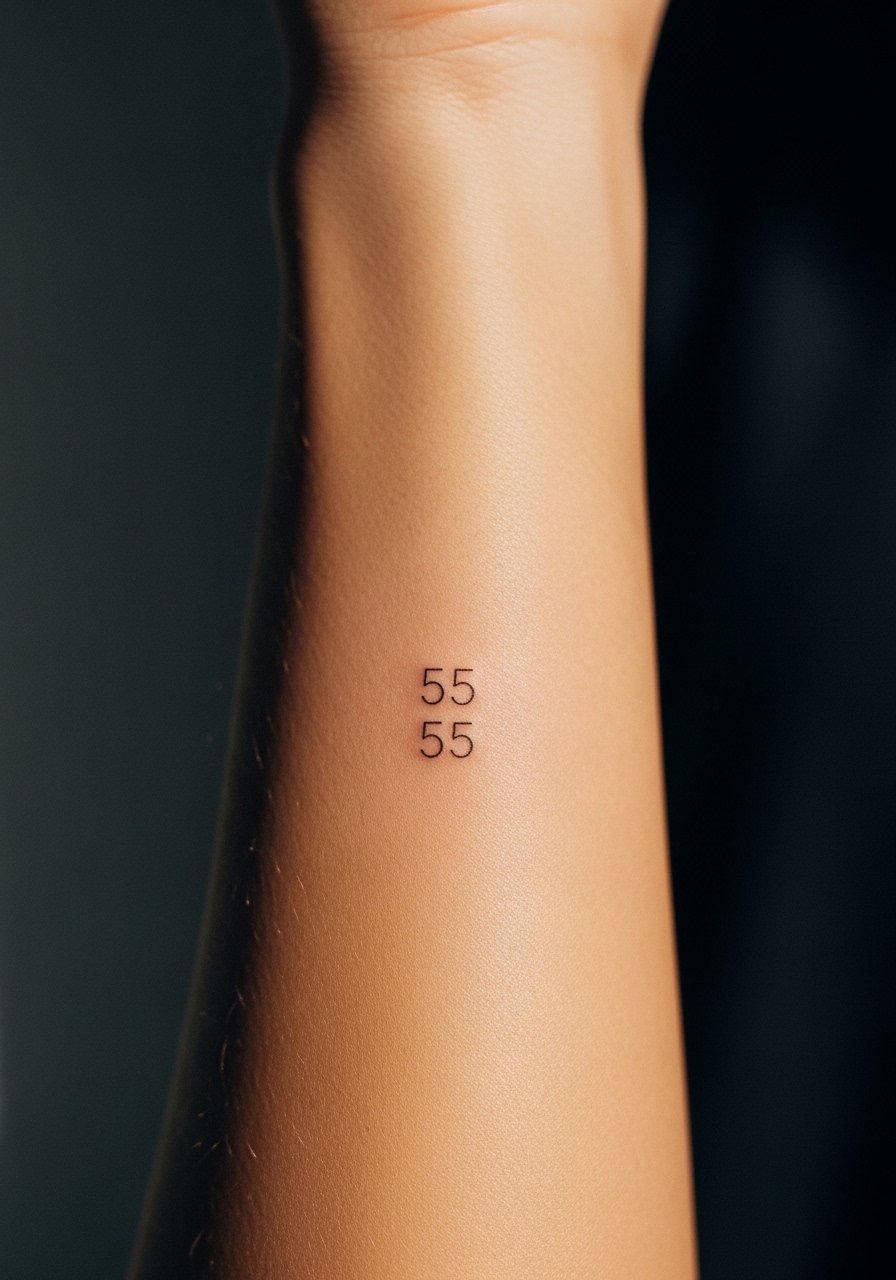
The inner forearm is one of the most forgiving places for minimal linework. Pain is low and sessions rarely pass an hour. For longevity ask for slightly heavier single-pass linework and steady spacing between numbers. A mistake is compressing digits into a tiny vertical column that becomes unreadable after a few years. At six months the lines look sharp; at two years the edges soften but the numbers remain distinct. For casual visibility, roll up sleeves or use a loose button-down shirt so the piece is on display without glare.
6. Tiny Roman Numeral 'VII' on the Side Rib
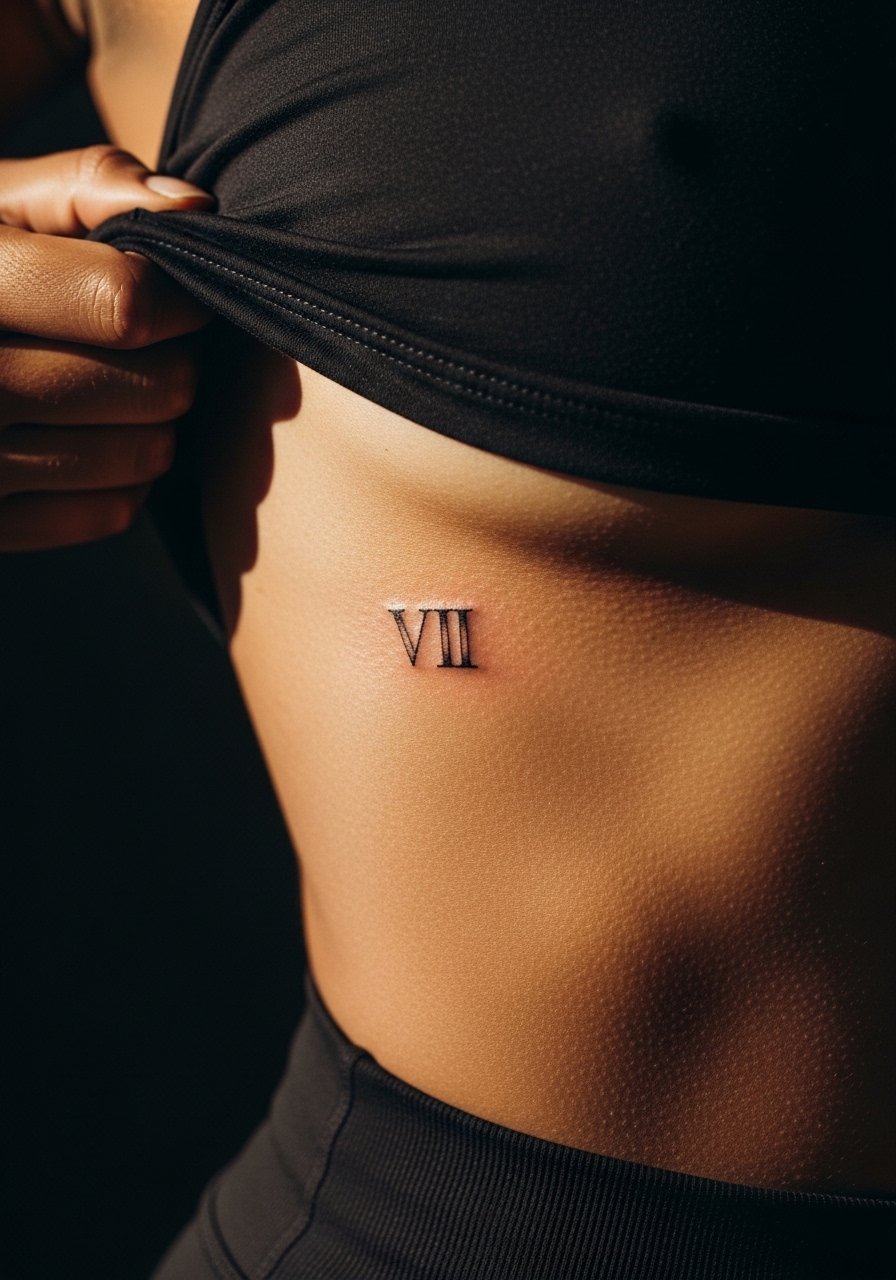
Ribcage is a high-pain zone and a common place for intimate angel numbers. Expect longer sessions and the need to lie still. Artists split on fine line ribs. One group says breathe and stretching blur delicate lines within two years. The other group says proper depth and slight spacing keeps the lines. State your preference and ask about their rib experience. Common mistakes include requesting ultra-thin type on a stretch-prone area. Healing here can be slower because clothing rubs the zone, so wear breathable fabrics to your appointment.
Studio Day Picks
The rib and inner-forearm pieces above need different prep and first-week care. These items make the session and early healing window more comfortable for the placements shown in ideas 1 through 6.
-
Stencil transfer paper kit. Lets you preview the line placement before the needle hits skin, helpful for getting spacing right on wrists and forearms.
-
Thin topical numbing cream. Applied per product instructions before a rib or sternum session to ease the sharper sections without heavily numbing the whole limb.
-
Roll of thin protective film. Useful for finger and wrist pieces that face constant friction, keeps the area cleaner during the first few days.
-
Fragrance free gentle body wash. Gentle cleansing helps fine line work heal without irritation around delicate digits and forearms.
-
Aquaphor healing ointment. A thin layer protects the skin in the immediate days after inking and works well on small, fine-line pieces.
7. Split '1010' Across Both Wrists
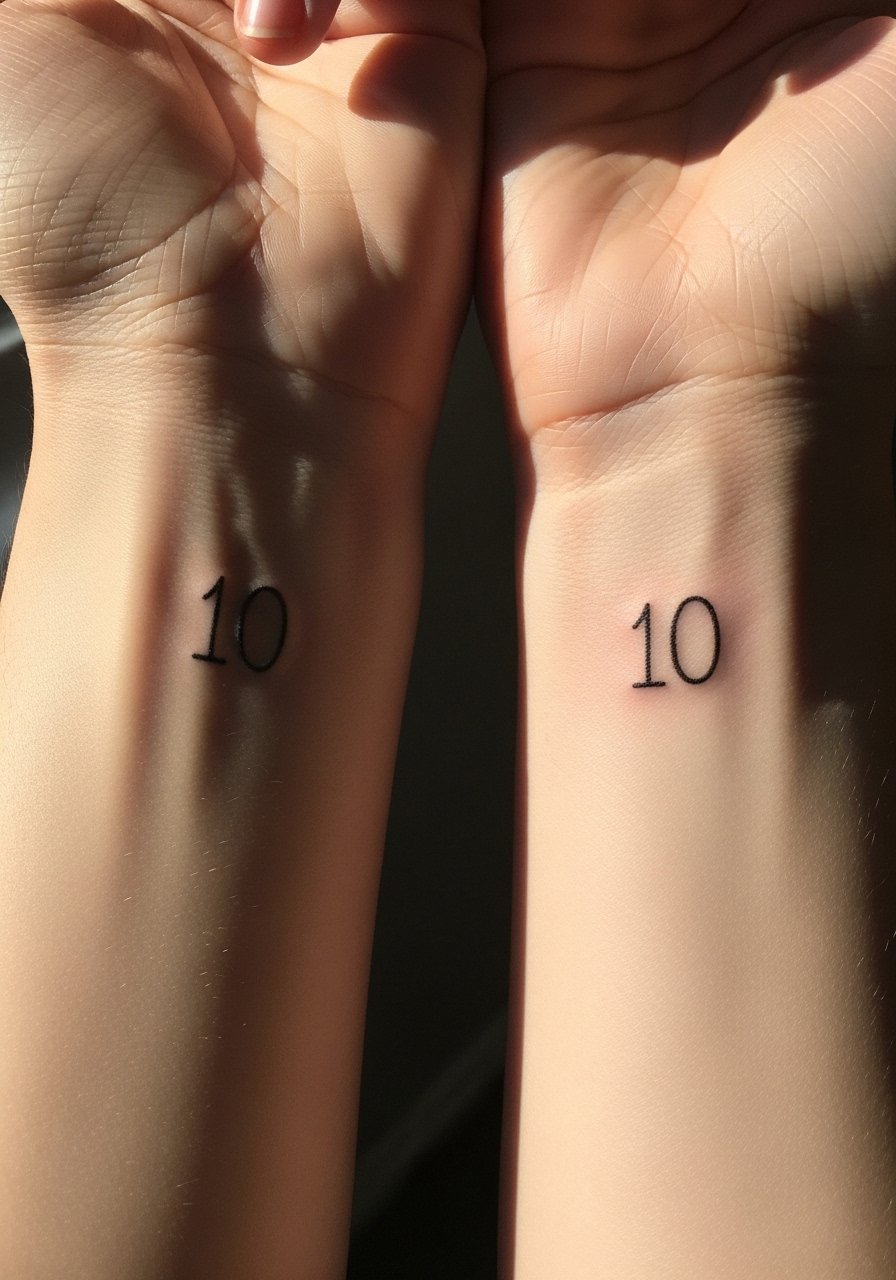
Matching numbers across both wrists make a quiet statement and balance well visually. The risk with symmetrical wrist work is uneven placement. Tell your artist you want the digits mirrored and bring a photo of both wrists in the stencil phase so they check symmetry. Blurring here comes from daily washing and watches rubbing the area. Sessions are short and tolerable. A common mistake is trusting the mirror without a helper to confirm line alignment. For wearing post-heal, a simple minimal leather strap watch sits next to the digits without competing visually.
8. Tiny '777' at the Base of the Thumb

Thumb-base tattoos are highly visible and brush against objects constantly. Expect faster lightening and an early touch-up. Tell your artist you value longevity over extreme fineness. The session is brief but the area can be sore for a few days. A common misstep is choosing ultra-fine type that fades into a gray smudge after heavy use. For styling, a simple slim leather bracelet worn on the opposite wrist helps balance the visual weight.
9. Stacked '888' on the Outer Calf
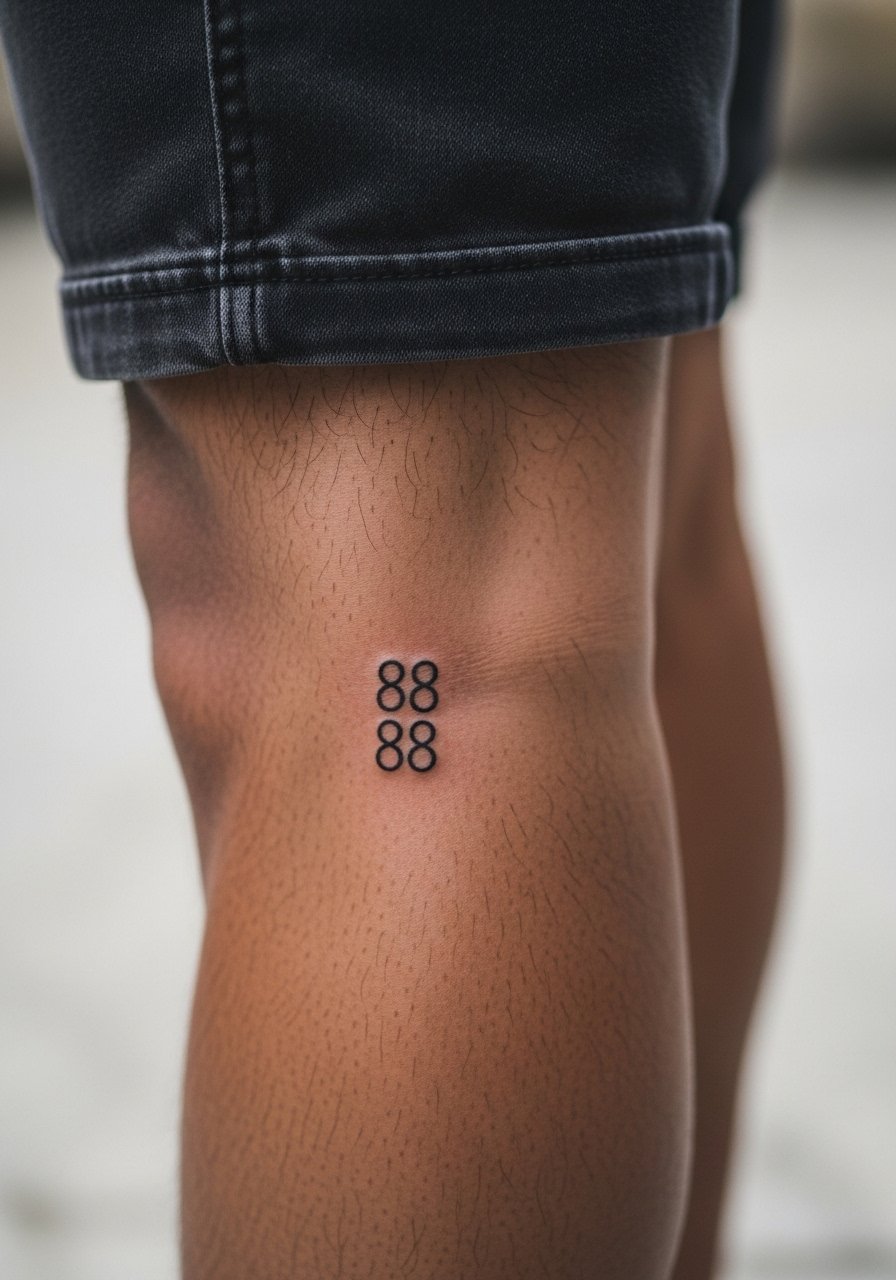
Calf placements are forgiving for linework and tend to maintain crispness longer than hands. Sessions are moderate depending on detail and usually under an hour. Ask your artist to size the digits so they read from a short distance, especially if you plan to show them in summer. A frequent mistake is scaling the digits too small, which reduces long-term legibility. The area handles touch-ups well and rarely suffers blowout. For summer shows, roll-up shorts or a mid-length swim trunk highlight the placement cleanly.
10. Single-Line '999' on the Nape of the Neck
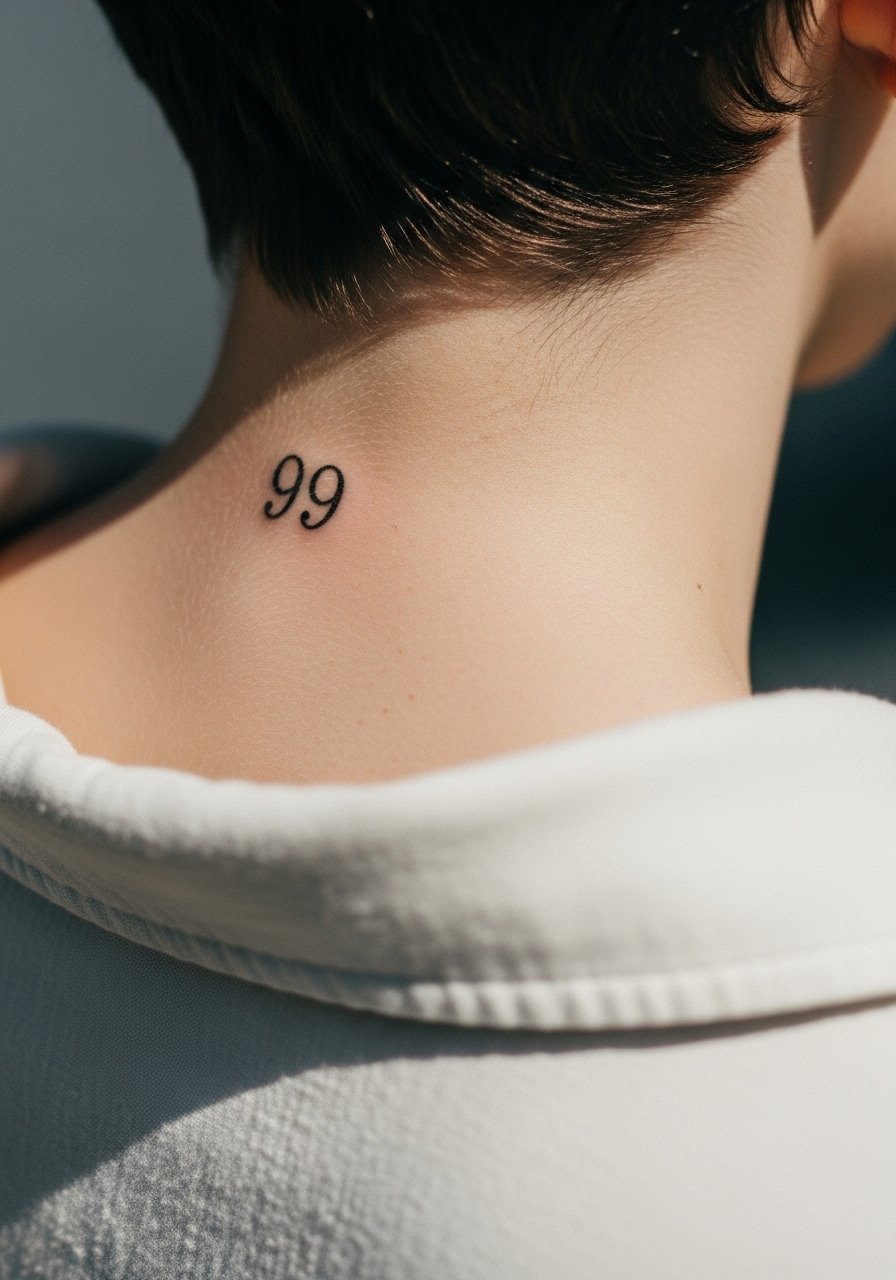
The nape is discreet and reveals nicely with certain hair styles. Pain is low to moderate. For placement accuracy, ask the artist to mark the knot point of your neck for consistent centering. The mistake I see is placing the digits too low so shirts rub constantly. Over time the area sees less sun than forearms, so fading can be slower. Plan to wear hair up or high collars if you prefer it hidden. A delicate short necklace can sit above the digits if you want occasional reveal.
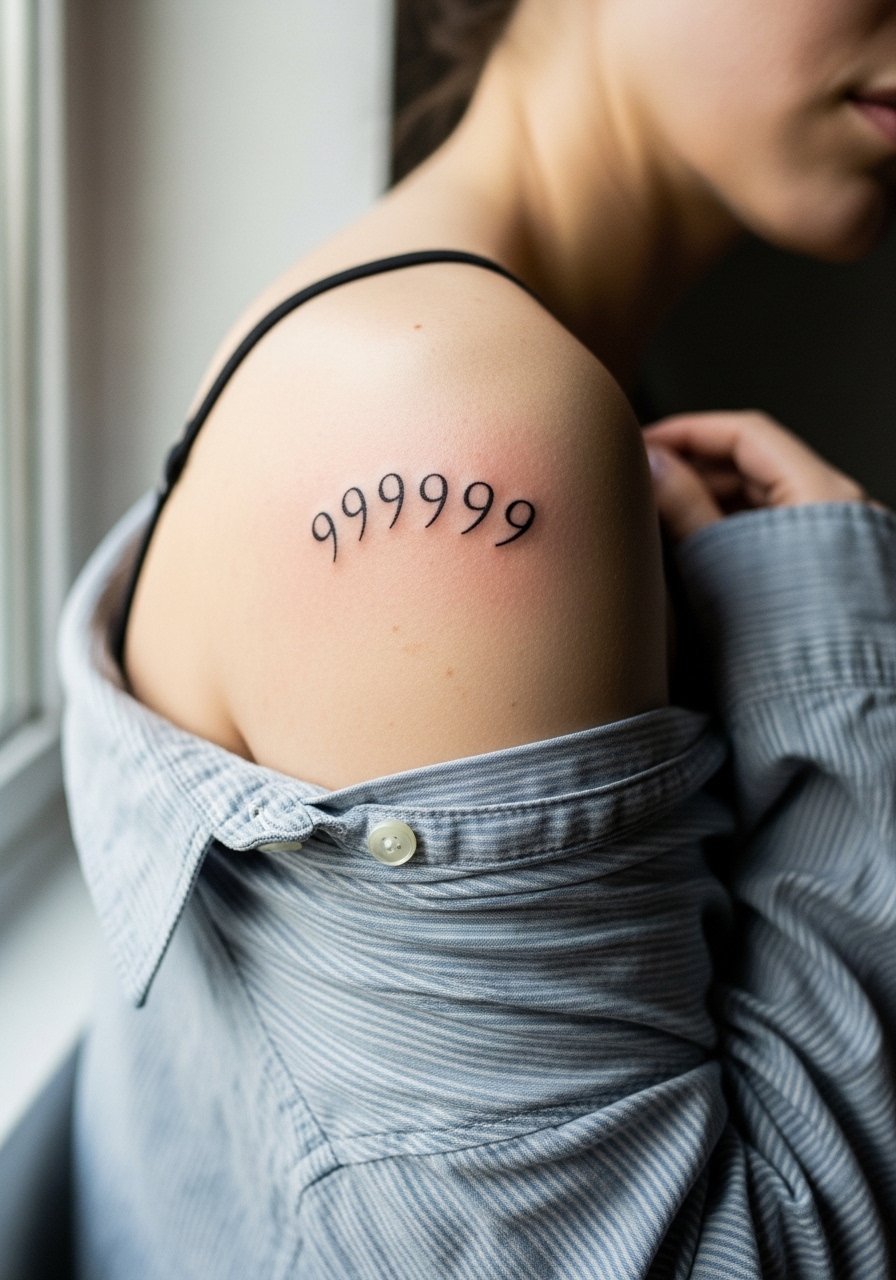
11. Tiny '000' Along the Collar of the Shoulder

Shoulder placements age well because the skin is thicker and experiences less daily friction. Sessions are easy and often quick. Tell the artist how close to the shoulder seam you want it so clothing does not rub during healing. A common error is choosing digits too close to sleeve seams, which leads to irritation. For showing off, a loose tank top frames the shoulder without hiding the minimal numbers.
12. Horizontal '123' Just Above the Hip
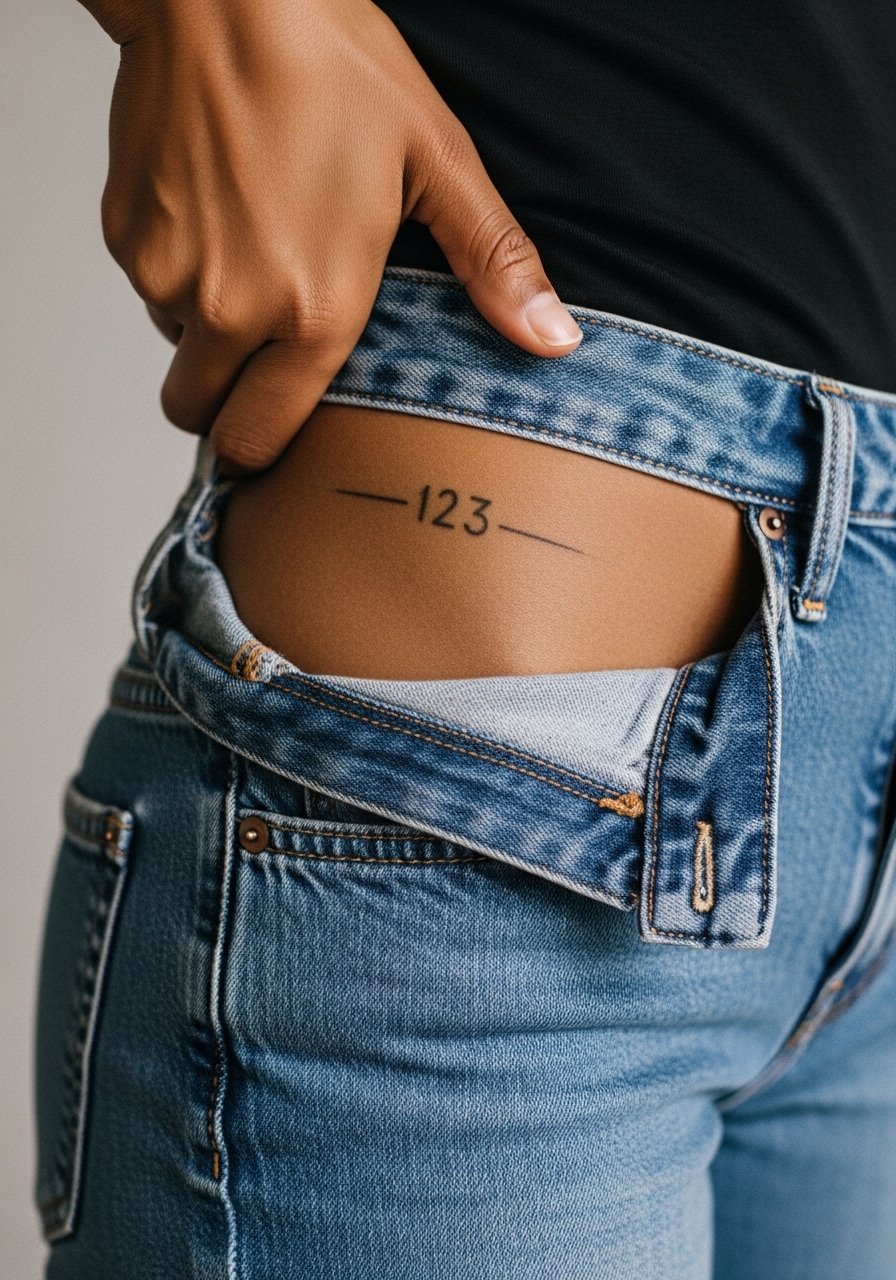
Hip tattoos can be intimate and sit under swimwear lines, so placement determines when you show them. Pain varies with body composition and session length is short. Ask for a test stencil while standing so it aligns with your hip curve. The mistake is centering while lying down, which can shift the visual when you stand. For swim season the numbers peek from certain bikinis, and high-waisted styles can be chosen to reveal or conceal as you like.
13. Fine '4444' on the Side of the Ankle
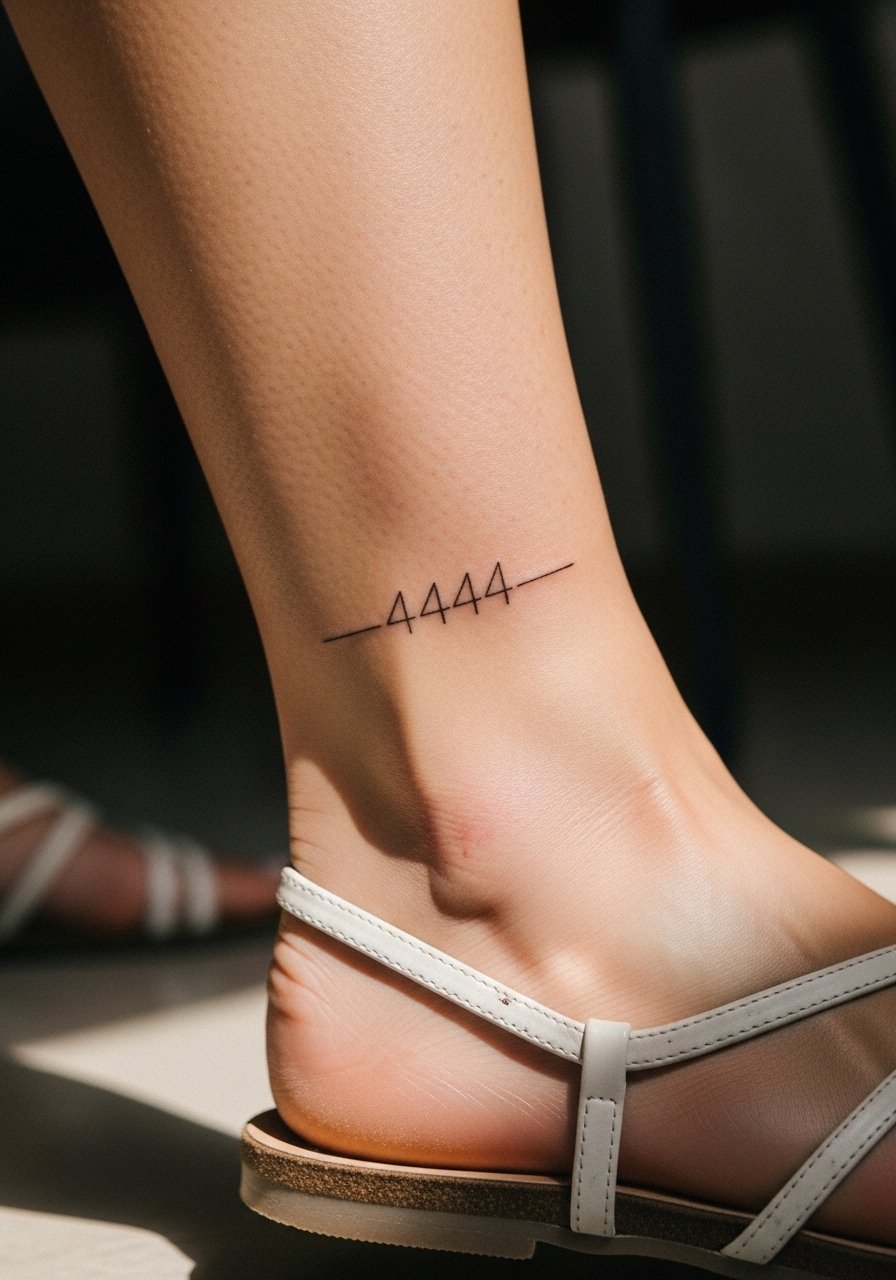
Ankle placements are visible but face friction from socks and shoes during the first weeks. Expect a brief session and mild soreness. For longevity, request the artist avoid the very edge of the bone where ink can blur. A frequent mistake is placing digits too low toward the foot, which increases wear. For footwear pairing, sandals or rolled jeans work best. A delicate anklet chain sits below the digits and draws attention without covering the ink.
14. Stenciled '1212' Along the Spine
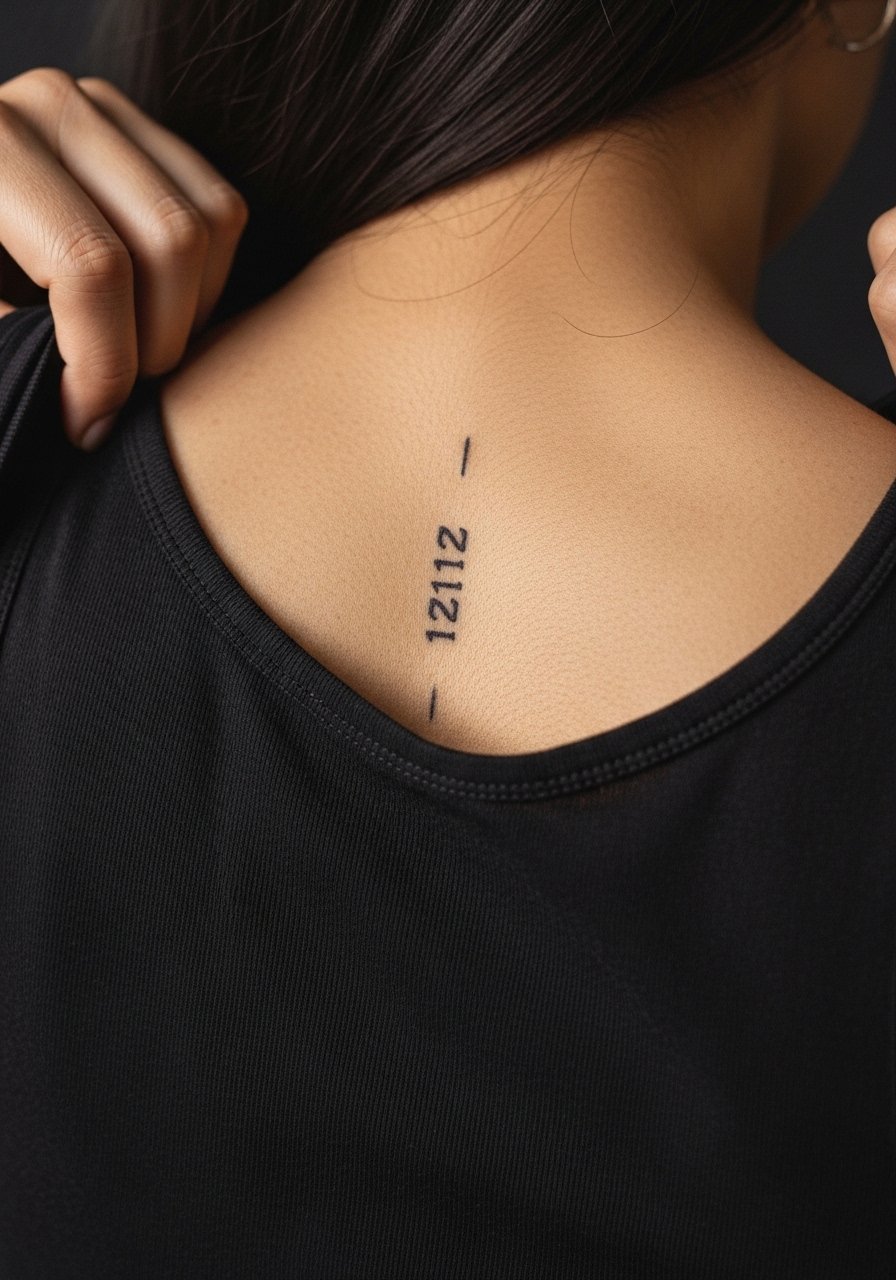
Spine tattoos can be dramatic even when minimal. Pain is higher near the vertebrae and sessions may be split. Tell your artist whether you want the line to follow the spine curve or sit offset for visibility. The common mistake is compressing numbers into a small vertical column that blurs with movement. Healing can be slower since clothing may brush the zone. For evenings, open-back tops and halter styles reveal the vertical sequence, which is why many pick this placement.
15. Tiny '1313' on the Outer Hand
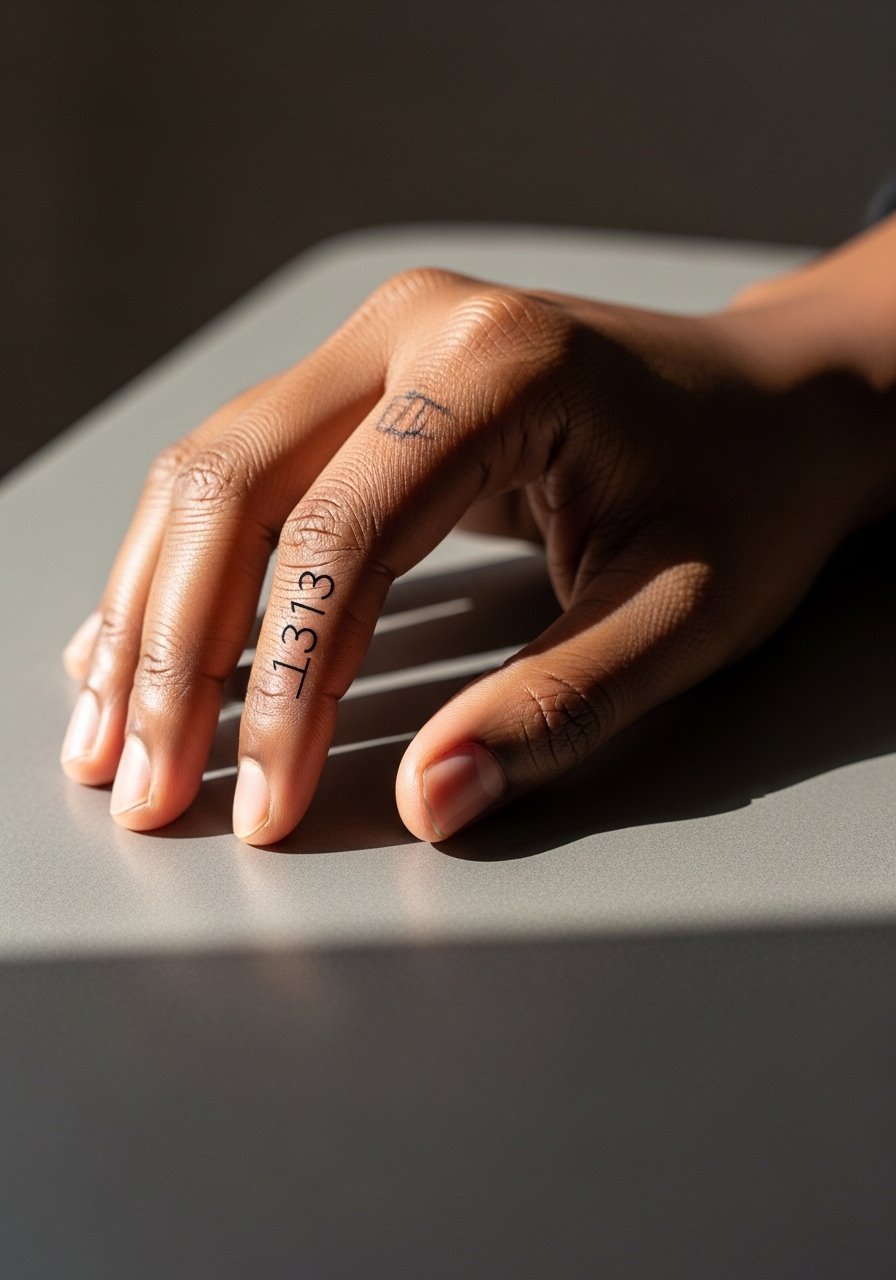
Outer hand work is high-visibility and high-wear. Expect quick fading and frequent touch-ups. When consulting, ask the artist about ink depth for hands; some prefer slightly deeper passes to retain definition. A clear mistake is insisting on ultra-fine digits that will be rubbed by daily activity. In practical terms, avoid placing numbers where rings or tools create constant friction. If you want to show it off without overexposure, wear short-sleeve shirts and a delicate bracelet on the other wrist.
16. Minimal '202' Centered on the Sternum
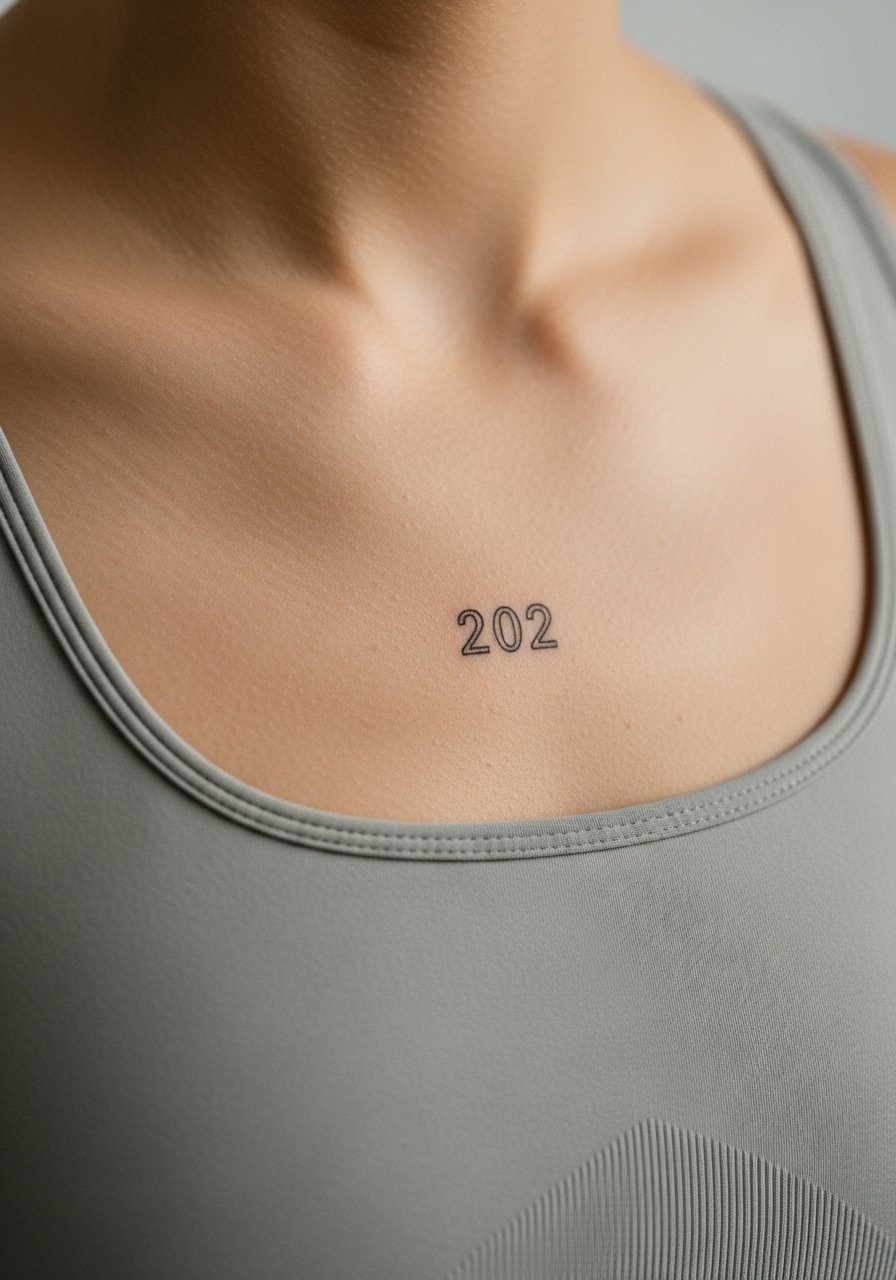
Sternum tattoos have a stronger pain profile and need an artist comfortable with that zone. One camp says fine line here loses definition quickly because of movement and sweat. The other camp argues careful spacing and modest saturation keep the design readable. Ask the artist which approach they use. Common mistakes include undersized digits that distort with breathing. For the appointment wear a strapless or fitted sports bra that gives access while keeping intimacy respectful.
17. Minimal '808' Curved Around the Wrist Cuff
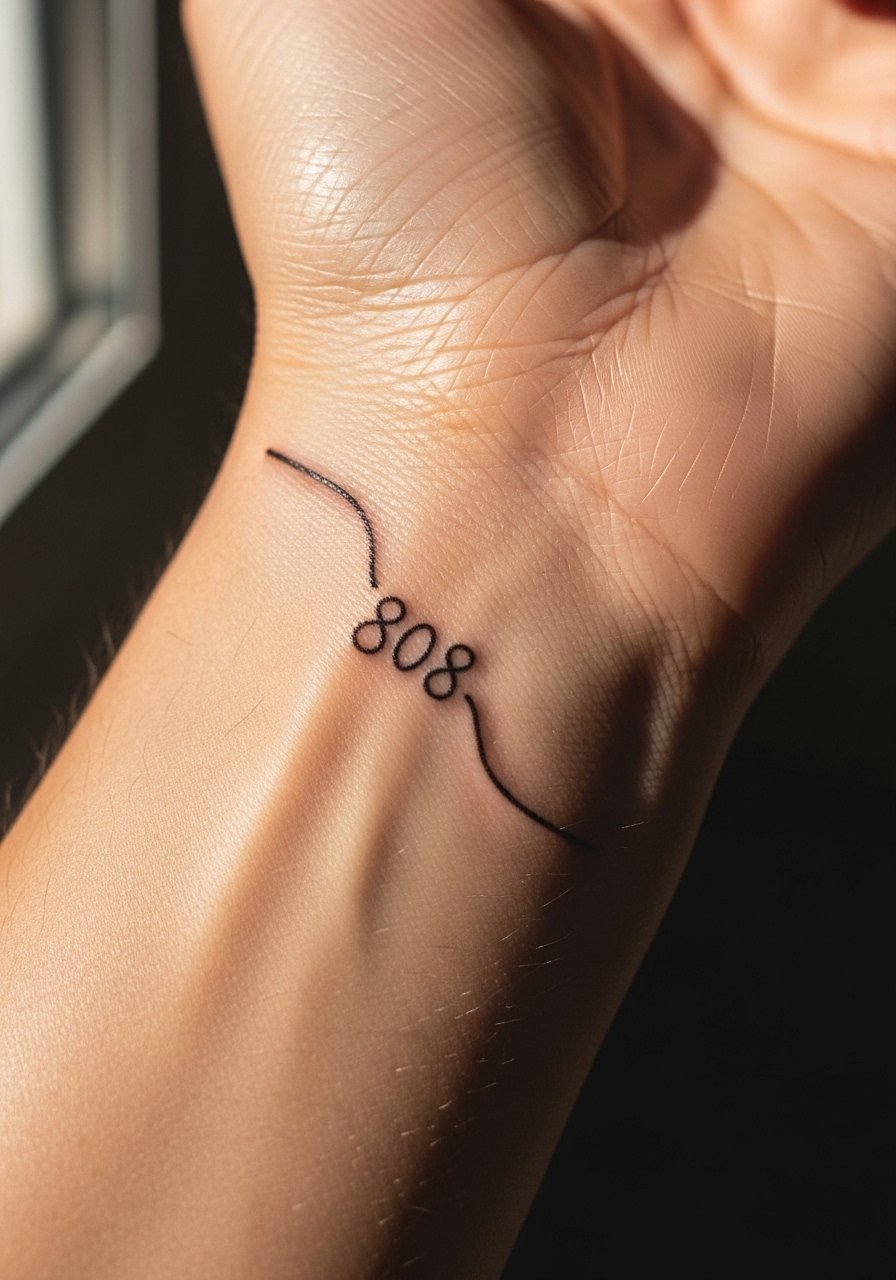
A cuff-style number sits nicely where a bracelet would and ages similarly to wrist pieces. Sessions are short and the pain is manageable. Tell your artist you want the digits to curve with the wrist, not sit flat, so they read when your hand is relaxed. The common error is over-curving which distorts the numeric proportion. For showing it off, a rolled sleeve and a simple cuff bracelet keep the area visible. Consider a slim cuff bracelet to pair with the ink.
18. Subtle '707' Nested Behind the Knee
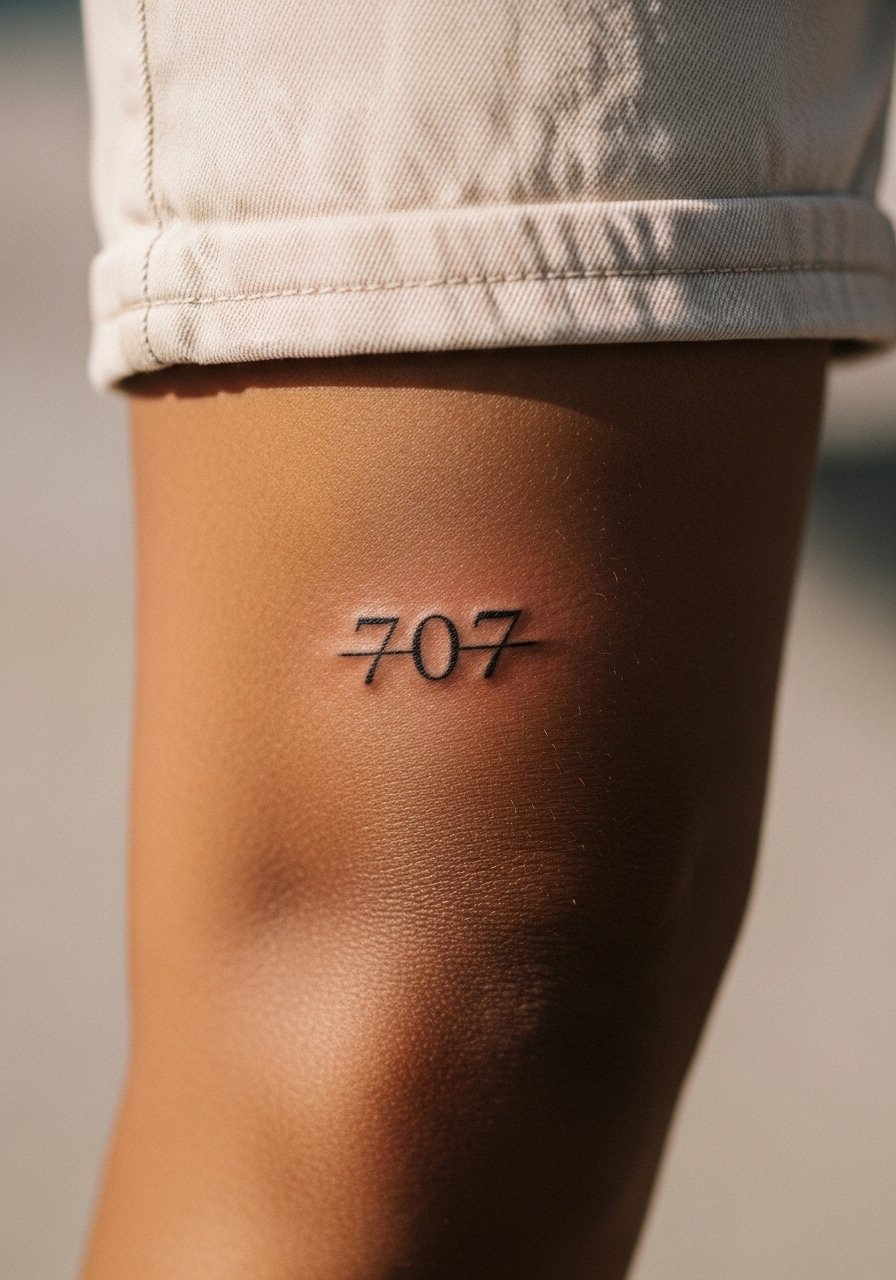
Behind-knee placements are quirky and often hidden unless you sit or bend. Pain is moderate and sessions can be awkward due to leg positioning. Ask your artist to check the stencil while you stand and bend so the digits do not warp in motion. A mistake is picking ultra-thin lines that lose clarity where the skin folds. For seasonal reveal, shorts or dresses expose the area; otherwise it stays private.
19. Horizontal '303' Along the Top of the Foot
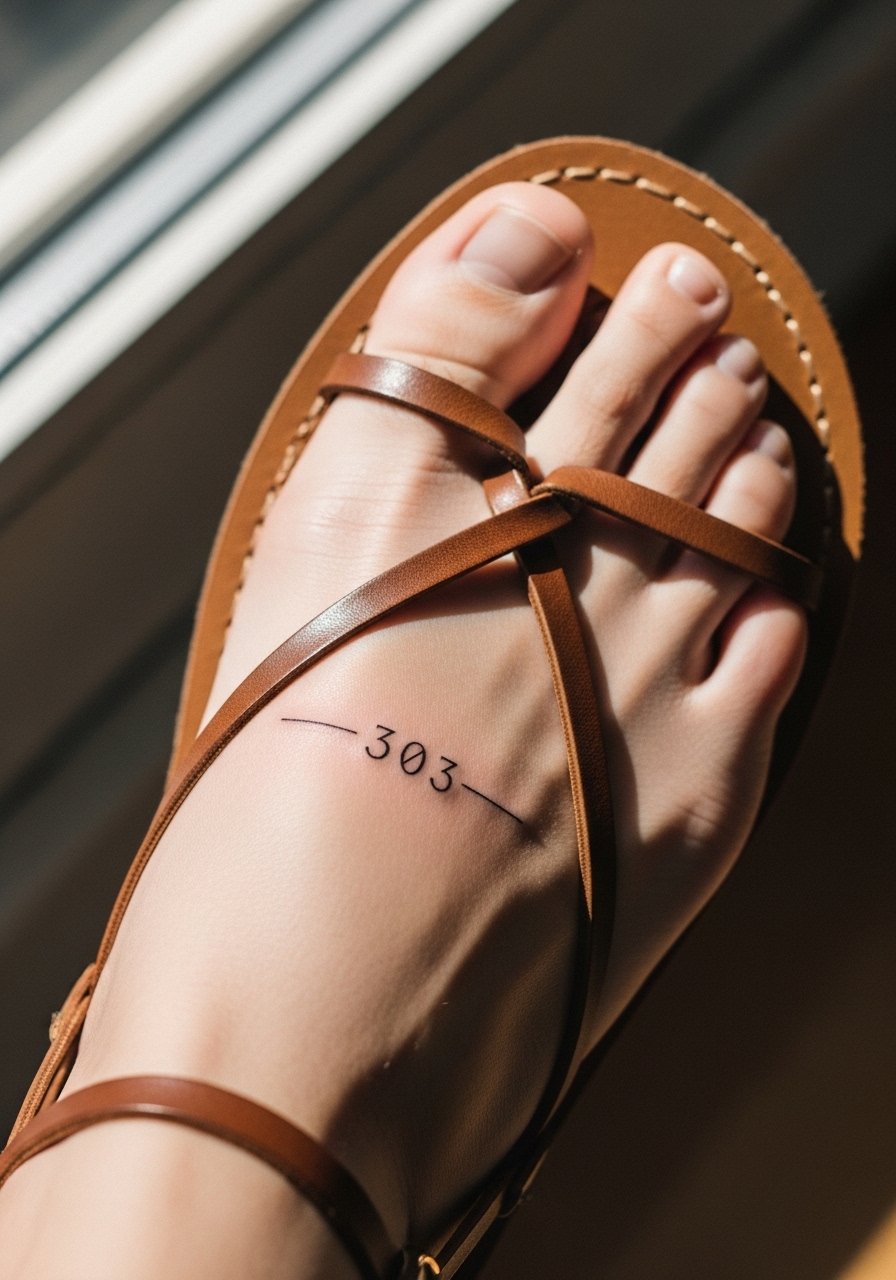
Foot tattoos face strong wear from shoes and environmental exposure so expect faster fading. Sessions are brief but the area can be tender for several days. Tell the artist you want modest saturation to prevent patchy fading. A common mistake is choosing extremely fine digits that break into blotches from shoe friction. Sandals and open shoes display foot numbers nicely, and a simple flat sandal keeps the top of the foot visible without rubbing the ink.
20. Slim '606' on the Inner Bicep
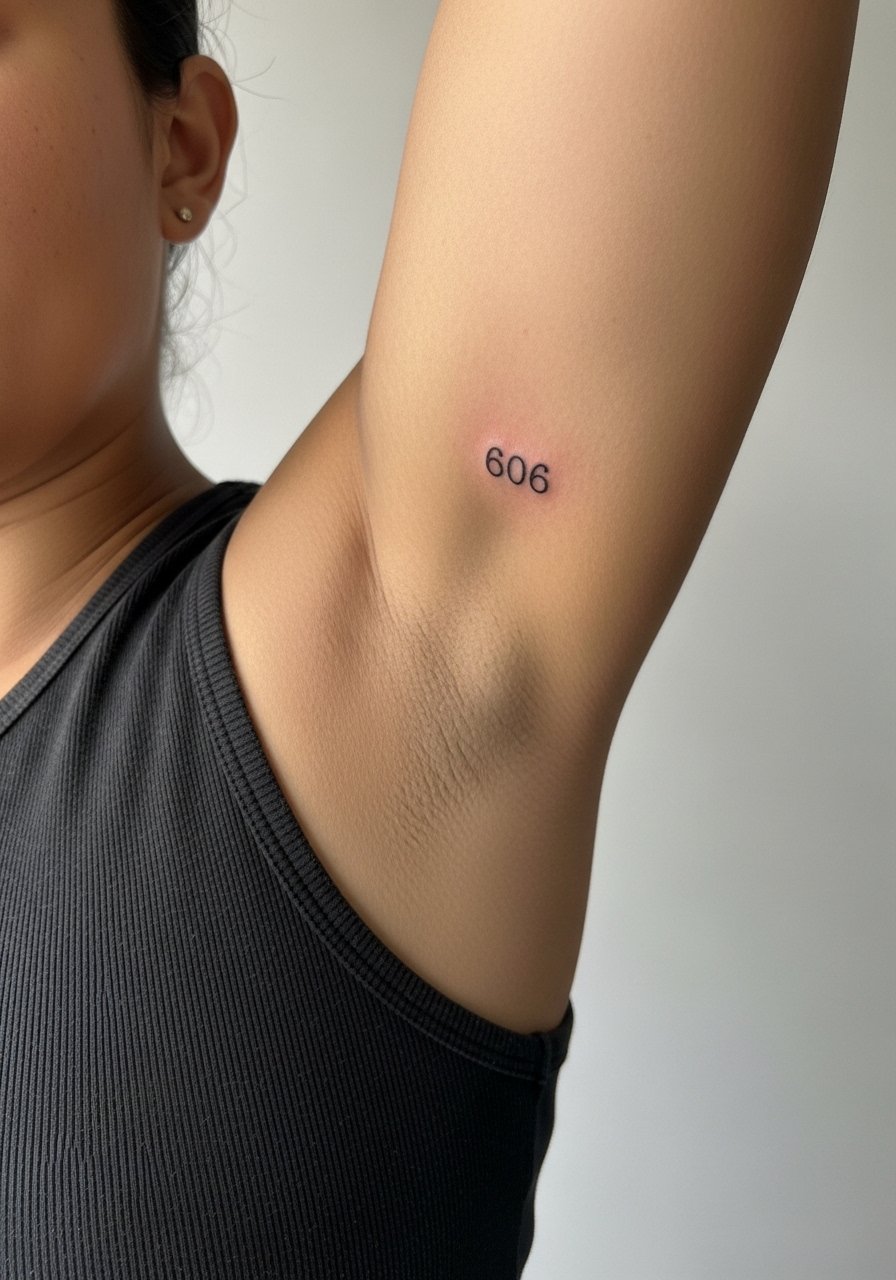
Inner bicep placements hide well and usually maintain crisp lines because the area sees less sun. Sessions are moderate in discomfort and can take longer if the digits are tiny. Tell your artist you want enough space between numbers to avoid merging as muscles change. A common mistake is picking too-small digits that lose proportion when the arm flexes. For appointment wear a loose tank so the artist has full access. Post-heal, short-sleeve shirts or rolled sleeves reveal the piece easily.
21. Minimal '212' Above the Knee on the Outer Thigh
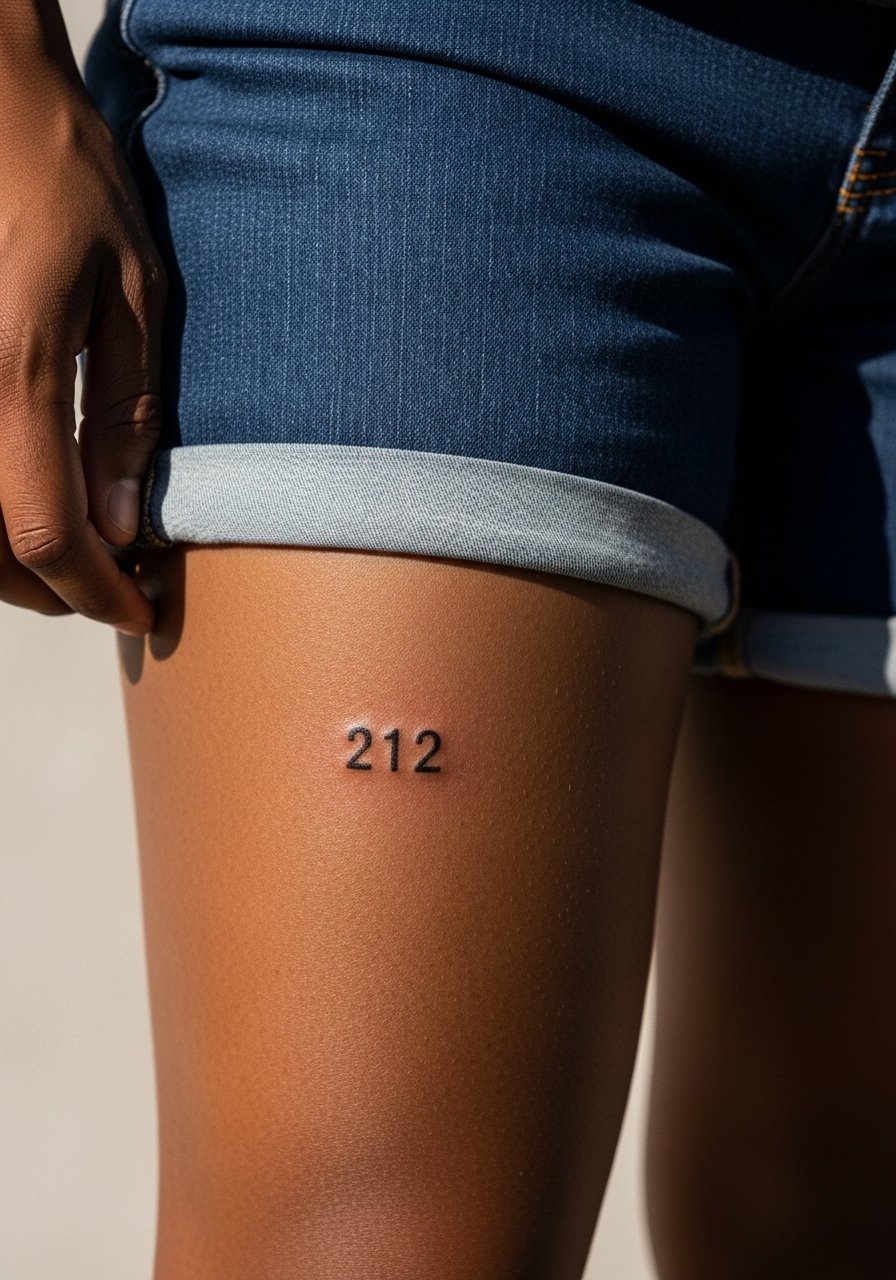
Upper thigh placements are roomy and forgiving, which helps minimal line designs hold. Sessions can be longer depending on size but are generally tolerable. Ask the artist about how the digits will sit when you stand and sit so the line does not warp with movement. A common error is centering while lying down, which shifts the visual when upright. For the session wear loose shorts you can pull slightly aside so the artist has clear access while still feeling comfortable.
22. Tiny '424' Next to the Belly Button
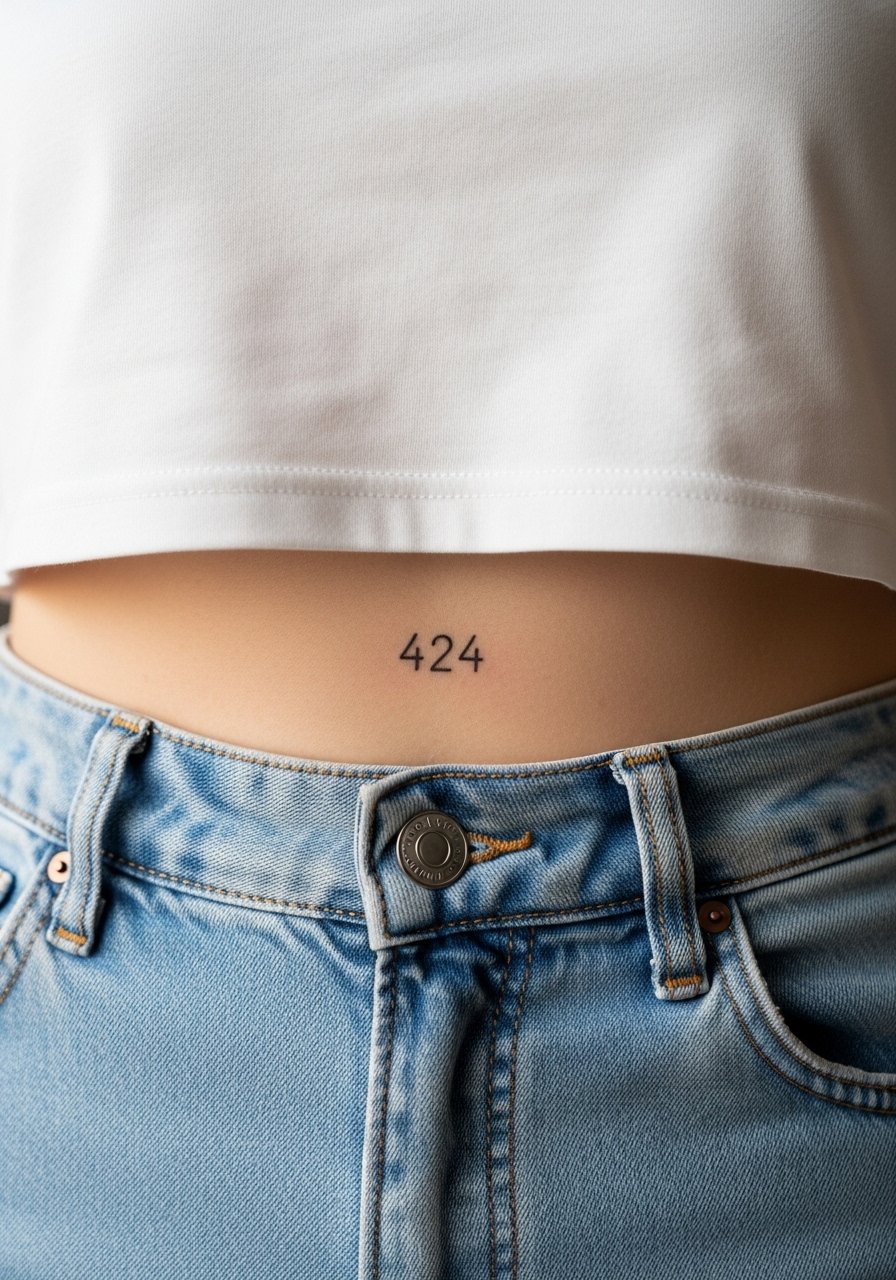
Abdomen placements vary with body changes so size and spacing matter. Pain ranges moderate depending on tissue. Tell the artist where you want the digits relative to clothing lines so they do not sit under tight waistbands. The typical mistake is placing numbers where belts or waistbands will rub during healing. If you plan to wear crop tops, pick pieces centered so the design shows with high-waisted styles.
23. Minimal '515' Along the Top of the Shoulder Blade
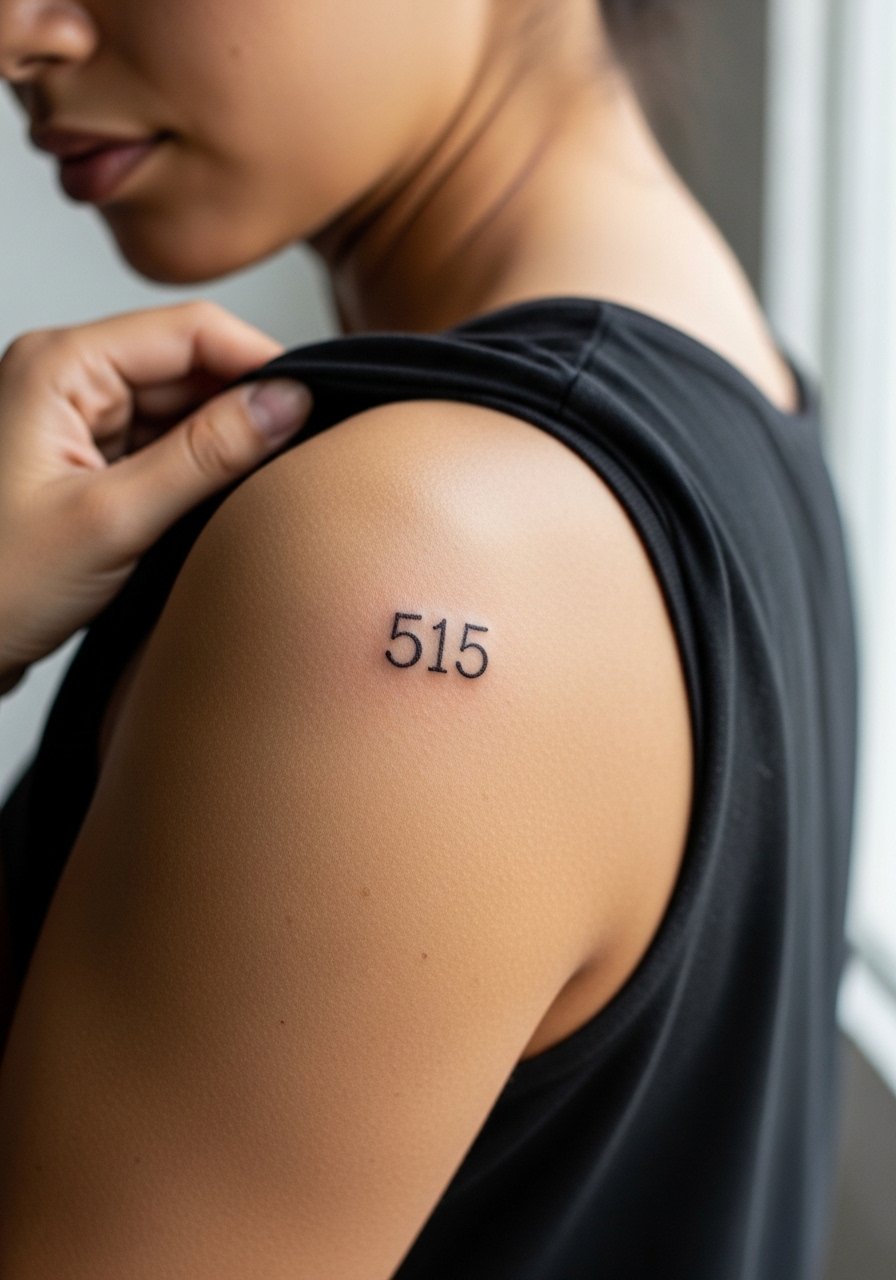
Shoulder blade work keeps numbers private but reveal nicely with open-back tops. Pain is low to moderate and sessions are straightforward. In consults, ask the artist to check the stencil while you sit so placement reads correctly when you move. A common misstep is placing the digits too near the spine where clothing can rub. For showing off, an open-back dress or halter reveals the piece; a strappy dress pairs well for evenings.
24. Linear '1414' Along the Side of the Foot Near the Arch
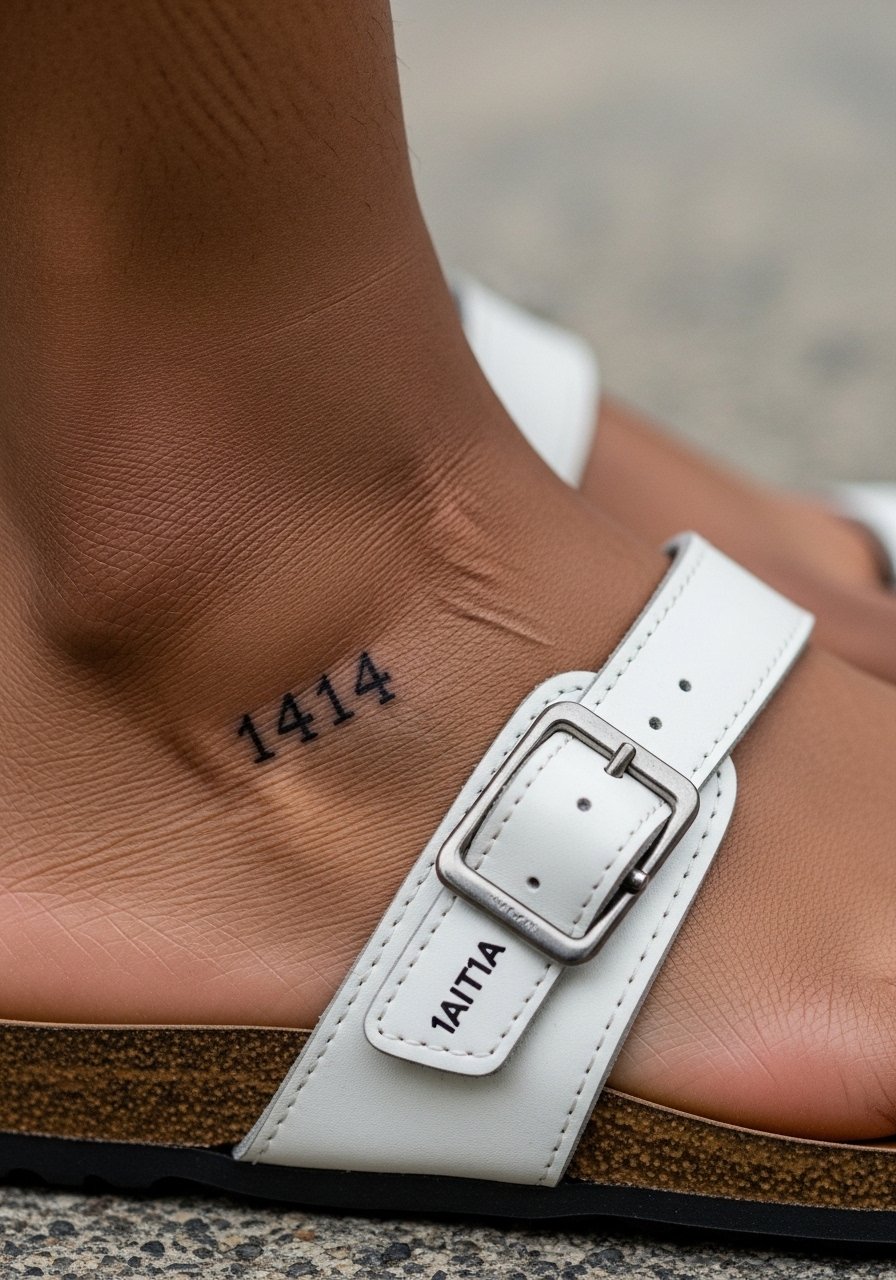
Side-of-foot placements are subtle and often hidden. They weather quickly from shoes and walking, so expect touch-up sooner than forearm work. Sessions are short but can be tender. Ask for slightly bolder single-pass lines to improve retention. The mistake is choosing micro type that disappears under daily wear. For beach or summer looks, sandals display the arch gently without friction.
25. Minimal '9999' Arcing Over the Shoulder Cap
Top-of-shoulder placements look good with summer clothing and maintain clarity because of thicker skin. Sessions are low to moderate in pain. Tell the artist you want a gentle arc that follows shoulder shape for better longevity. A mistake is forcing a straight line on a curved anatomy which flattens when the arm moves. For showing, a loose button-down shirt pulled off one shoulder reveals the arc without overexposure.
26. Tiny '1717' Inside the Elbow Crease
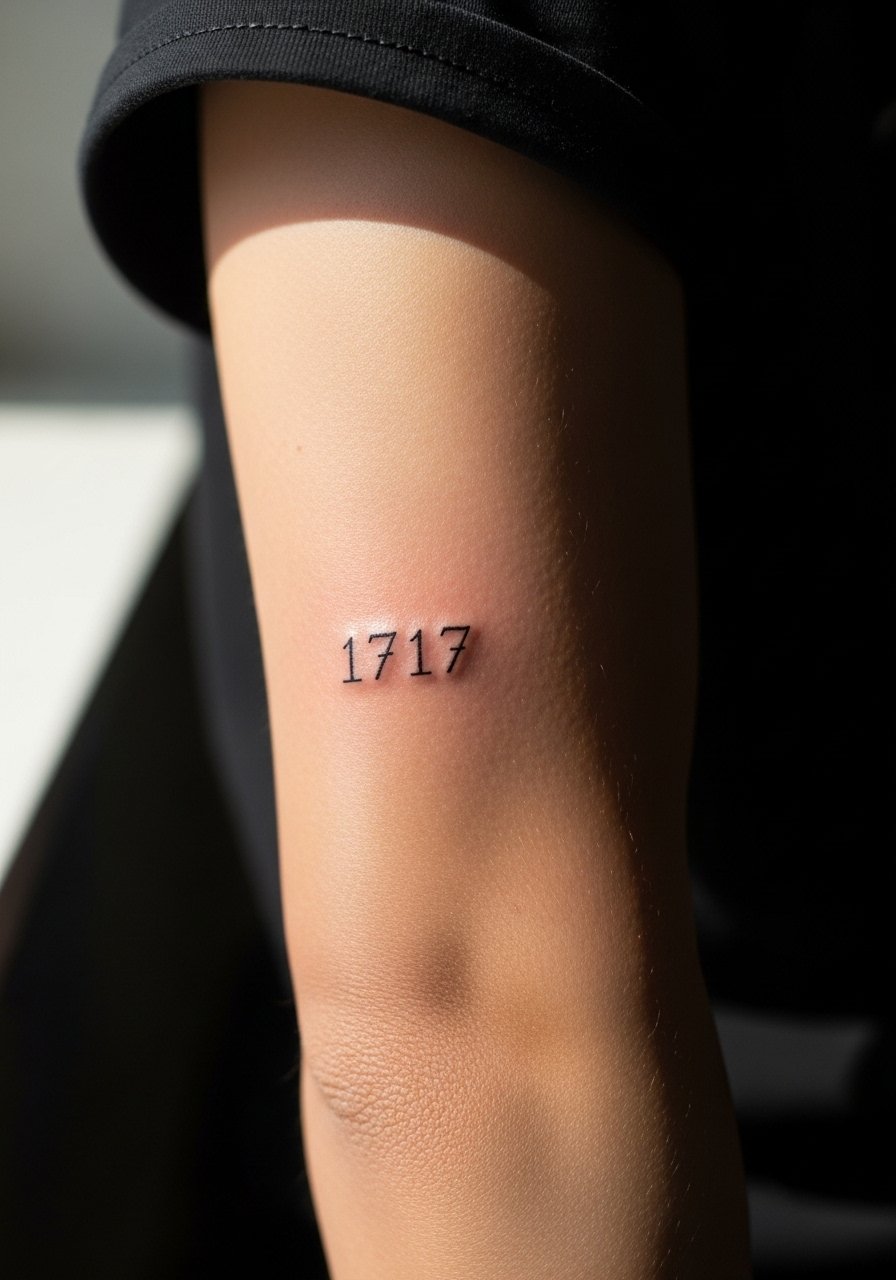
Inside the elbow is a mobile area that can cause early softening. Pain is moderate and the session can be fidgety because the skin folds. Ask your artist for a slightly thicker line and test the stencil while bending to check how digits read in motion. The common mistake is choosing ultra-thin digits that break when the arm flexes. For the appointment wear a short sleeve you can roll up easily so the artist can access the crease.
27. Minimal '2020' Under the Clavicle Ridge

Under-clavicle placements sit in a flattering spot that pairs well with necklaces. Pain is mild to moderate and sessions are quick. For positioning, ask the artist to mark the clavicle landmarks so digits sit symmetrical with your bone structure. A typical mistake is placing the numbers too low into the chest where shirts rub. For evening looks a thin crew or wide-neck top can frame the design and a thin chain pendant sits above without interference.
Frequently Asked Questions
Q: How long do minimal line angel number tattoos usually stay crisp on hands and fingers?
A: Hands and fingers see the most daily wear, so expect visible softening by year one to two. Plan for a touch-up in that window and ask your artist about slightly bolder line weight at the start to improve retention. Ongoing sun protection and reducing abrasive contact help too.
Q: Will a minimal line number on the ribcage need more touch-ups than one on the forearm?
A: Often yes, because ribs have more skin movement and sweat during activity. Some artists will do better on ribs than others. There are two camps on this: one says fine line ribs blur quickly, the other says careful depth and spacing keep the design stable. Discuss their rib experience and realistic touch-up timelines before booking.
Q: What should I wear to the studio for a sternum or ribcage appointment?
A: Wear something easy to move and adjust that keeps you comfortable and modest. A fitted sports bra or zip-up hoodie that you can pull aside works well for sternum and ribs. If you want a specific option, a fitted sports bra is practical for access without exposing more skin than necessary.
Q: Are Roman numerals better than standard digits for fine line longevity?
A: Roman numerals can read bold while staying minimal if the strokes are spaced correctly. They concentrate ink in shorter strokes which sometimes holds better than several tiny digits. The trade-off is legibility at a distance. Ask your artist to mock both styles in stencil form so you can compare.
Q: How do I find an artist experienced with fine line numbers without naming names?
A: Search local portfolios on social feeds and local shop directories, and look for healed photos of similar placements. Use community forums and city-based subreddits to see real reports from clients. During consults, ask to see healed work at 6 to 12 months so you can judge how their fine line heals over time.
