
Fine line florals look effortless on photos, but they ask for planning when you book the chair. The freshest pieces catch attention for a week, and then reality sets in. Placement, line spacing, and how you wear the area determine whether the design still reads clean at year three. Below are 21 minimal floral ideas, with what to ask for in consults and how to keep each one looking its best.
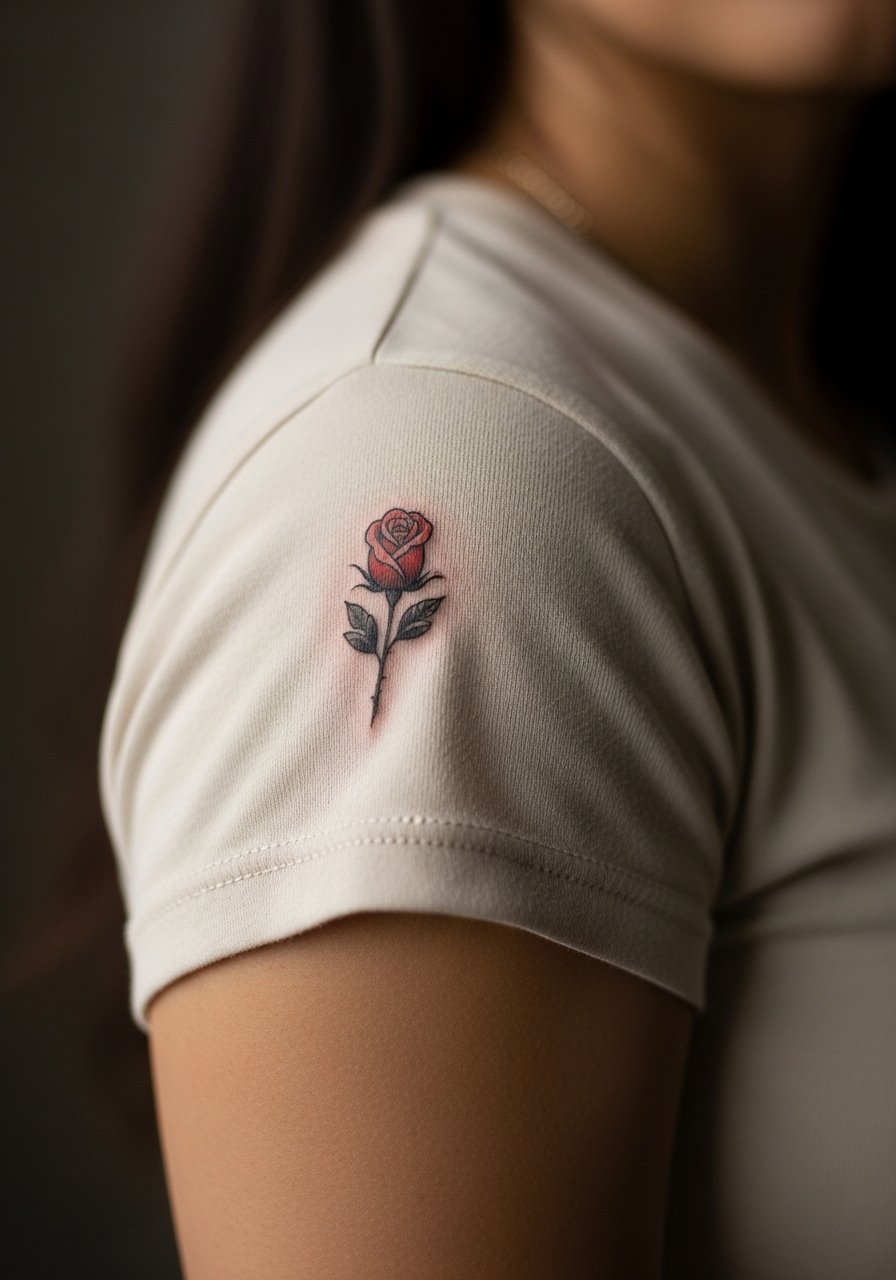
1. Fine Line Rose on the Inner Forearm
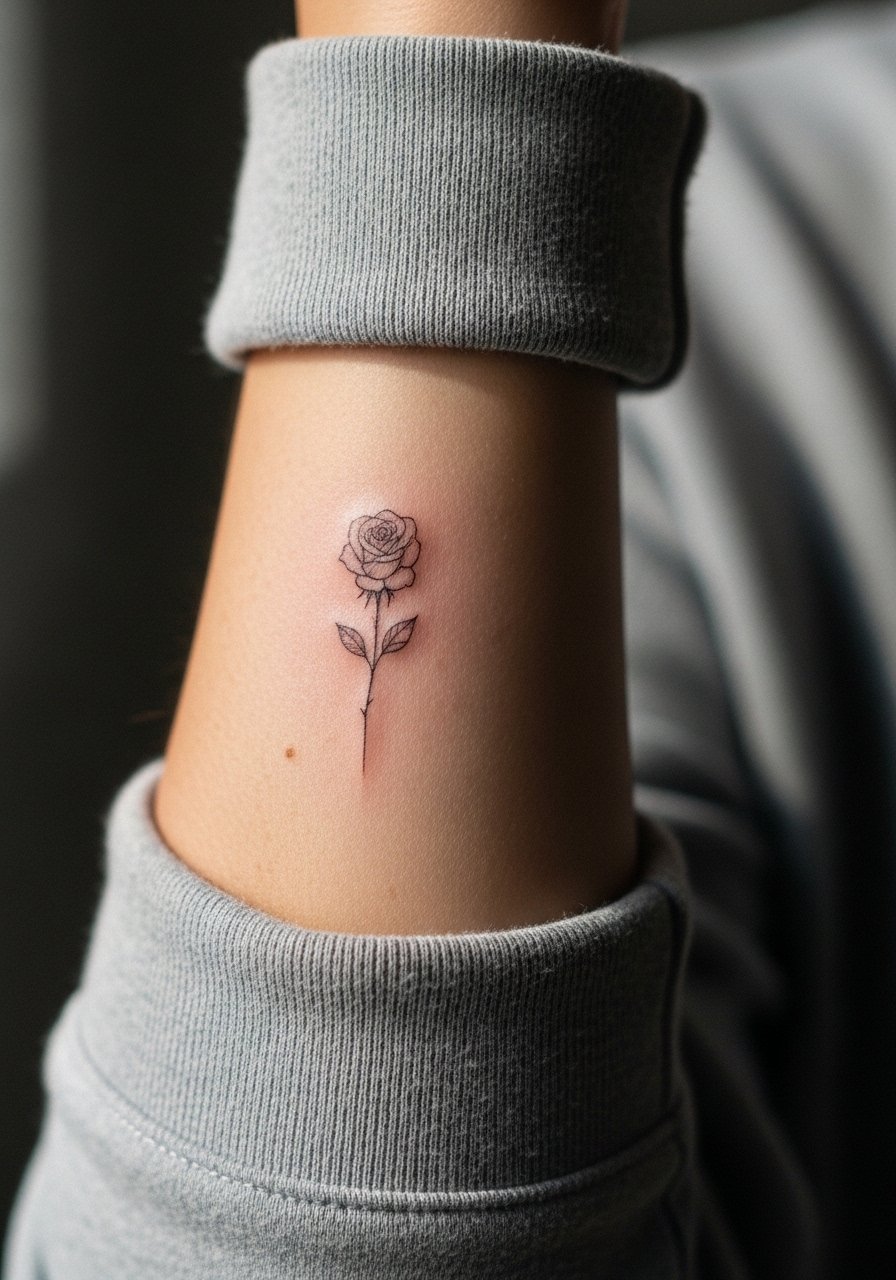
I’ve seen this placement hold detail the longest because the forearm gets moderate sun and less friction than hands. Expect a one to two hour session, and fair warning the inner forearm rates about a four on common pain scales. Ask your artist to keep the petals open rather than packing tiny areas with dots. Small filled petals tend to blur faster. A common mistake is requesting a micro rose that is too small for the stem and leaves. For showing it off, roll sleeves up and pair with a loose button-down shirt or a simple bracelet to frame the piece without crowding the linework.
2. Single Stem Daisy on the Wrist

The wrist loves delicate stems but pays for visibility with touch-ups sooner. Session time is short, around 30 to 45 minutes, but pain is higher due to thin skin and bone proximity. Ask for slightly bolder main stems and thinner petal lines so the petals keep definition as they soften. People often ask for ultra-thin petal outlines and then report blurring after two years. This design is great with stacked thin bracelets or a minimalist watch that leaves space between metal and ink. Expect a possible touch-up at year three depending on sun exposure and washing habits.
3. Tiny Wildflower on the Ankle
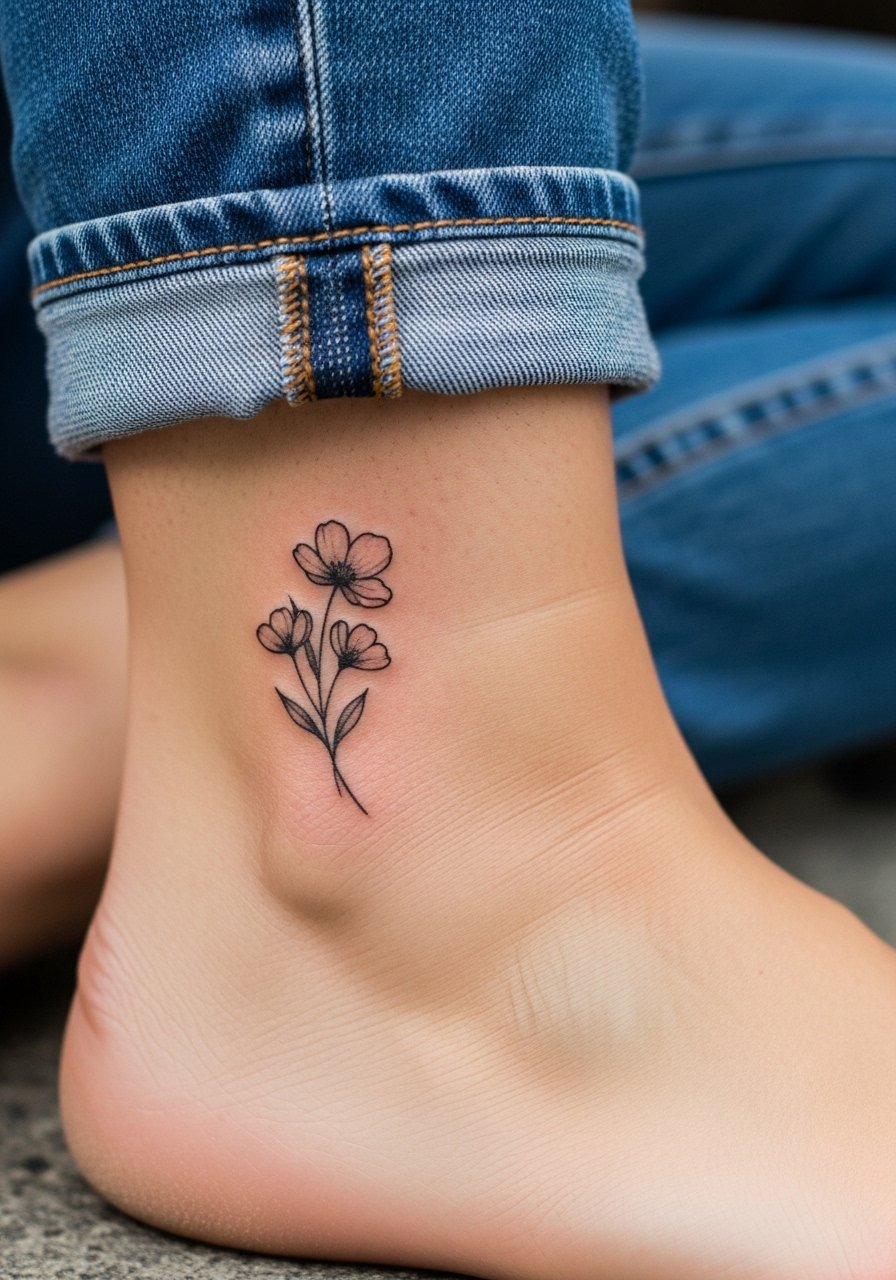
Ankle pieces are forgiving visually when they are slightly larger than micro scale. The session runs 30 to 60 minutes and the area rates about a three to four for pain. The biggest mistake is going too tiny where shoe straps and socks abrade the fresh ink. Ask your artist for a compact composition with a clear margin around the stem so the tiny leaves do not merge. For showing it off in warm months, pair with simple sandals or cropped trousers. Plan for a touch-up around year two for any ankle work that sees heavy friction.
4. Micro Lotus Behind the Ear
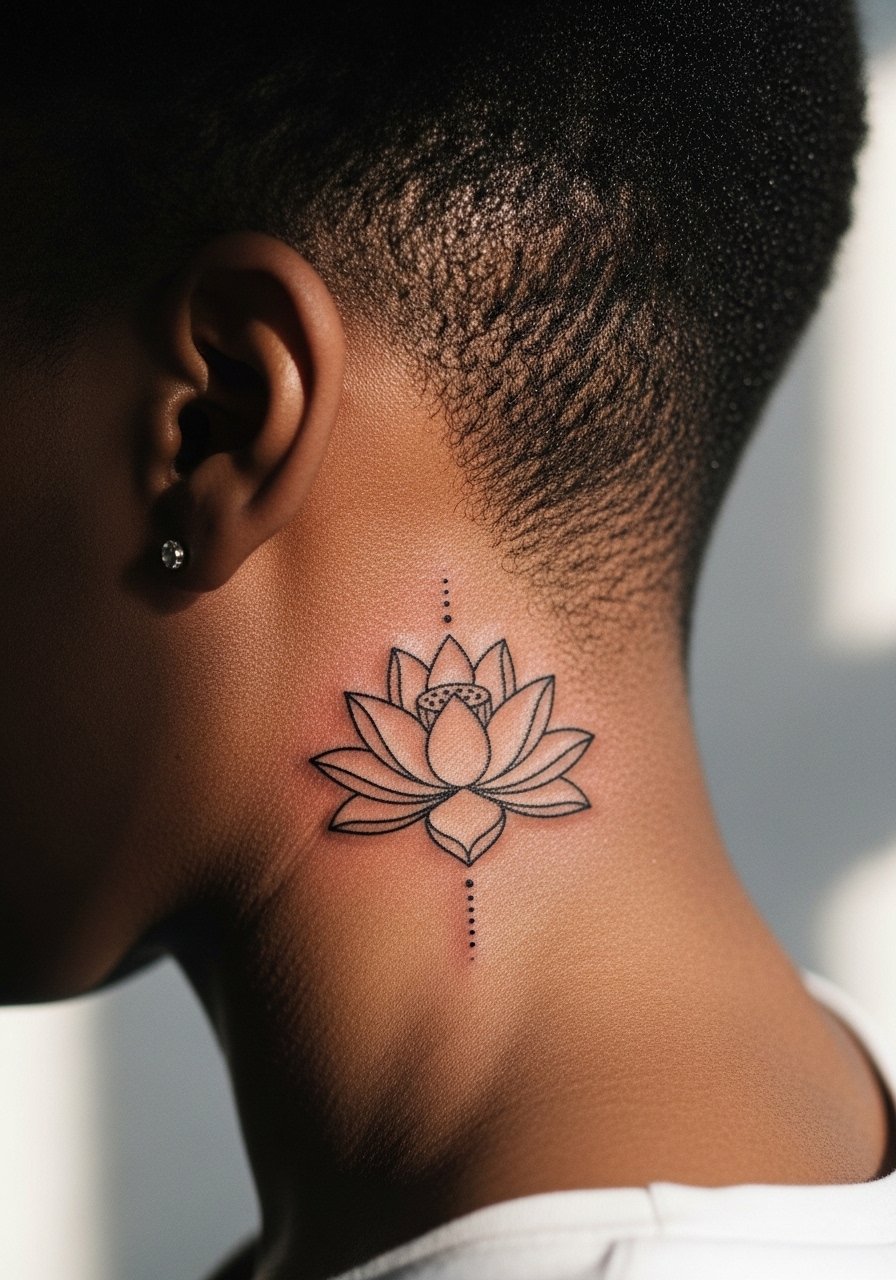
Behind-ear pieces are tiny and intimate, and the session is brief. Expect a sharp sting but short duration. Artists split on whether fine line holds here because the thin skin and constant movement can blur lines faster. One camp says the area softens too quickly. The other camp argues careful needle depth and spacing keeps it crisp. Ask the artist where they stand and get examples of their healed behind-ear work. For showing the piece, pin hair up with a claw hair clip so the tattoo peeks out without being hidden. Keep expectations realistic about touch-ups.
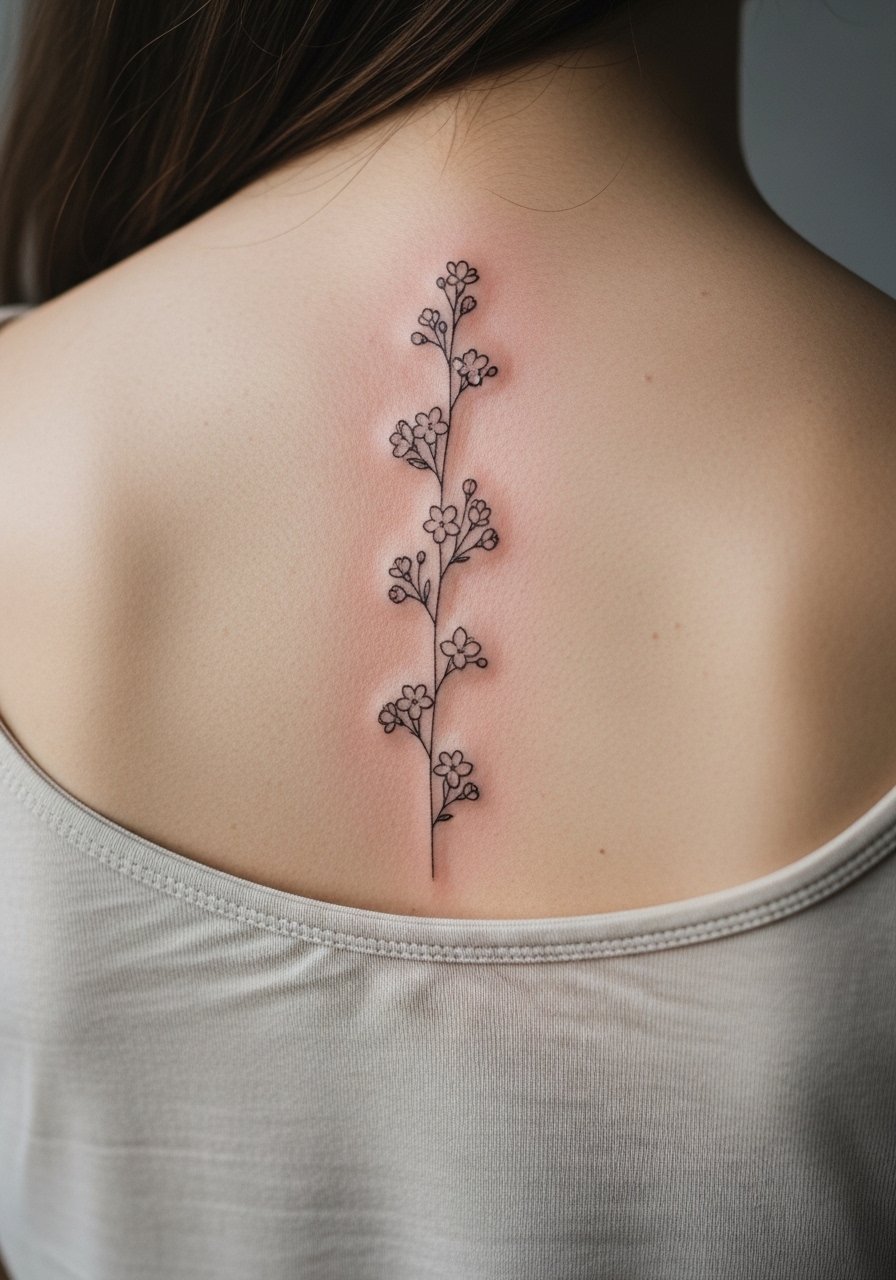
5. Botanical Sprig Along the Collarbone

Collarbone work photographs beautifully because the bone provides a clean plane, but the thin skin makes this a pain spot, usually five to seven on common scales. Sessions range from 45 minutes to 90 minutes. A common error is asking for densely packed stipple shading right against the bone. That density tends to soften into blotches. Tell your artist you want spaced stems and subtle dot work only in open areas. For outfits, an open-back midi dress or wide-neck tops frame the sprig without covering it. Expect a touch-up conversation at the consult.
6. Single Lily on the Ribcage
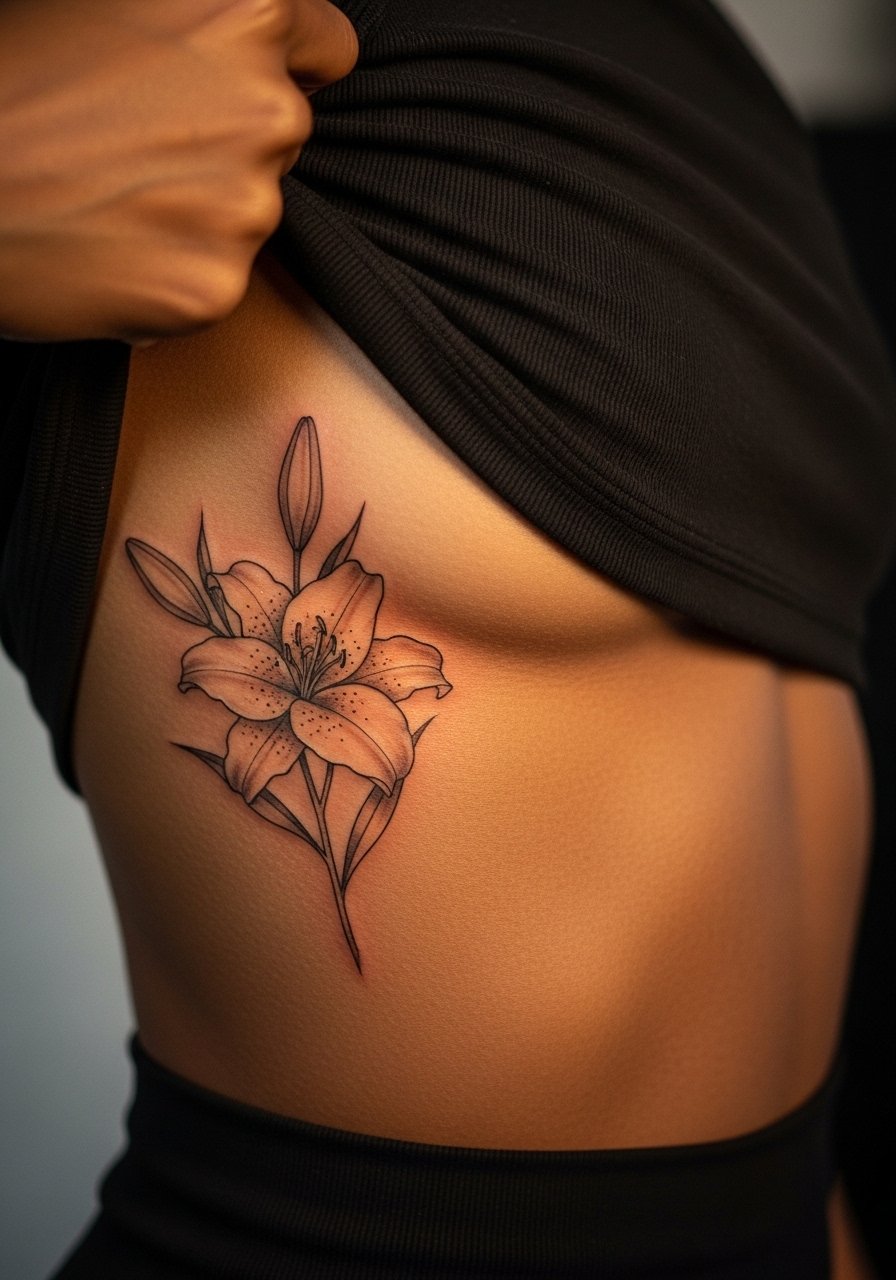
Fair warning, the ribcage rates high on pain scales, often seven to nine, and sessions can run one to three hours depending on size. Artists are divided about fine line on ribs. One camp says skin stretch and movement blur thin work within two years. The other camp maintains that with proper depth and spacing, fine line settles well on ribs. Ask the artist to show healed ribcage examples. Wear a fitted sports bra to the session so you can expose only the area needed. Plan for a realistic touch-up timeline at year two to three.
Studio Day Picks
The ribcage, collarbone, and inner forearm pieces above need different prep and first-week supplies, so a short kit makes the session and healing smoother.
-
Stencil transfer paper kit. Lets you preview line placement on skin before committing, which is helpful for asymmetrical collarbone designs.
-
Topical numbing cream. Applied 30 to 45 minutes before can reduce discomfort for rib and collarbone sessions.
-
Thin protective film roll. Useful for ankle and wrist pieces that face constant friction from clothing and daily tasks.
-
Fragrance-free body wash. Gentle cleansing for the first week protects delicate linework on forearms and ankles.
-
Aquaphor healing ointment. Thin layers in the initial days lock in moisture for fine line pieces without over-saturating the channel.
7. Petite Bouquet on the Shoulder Blade
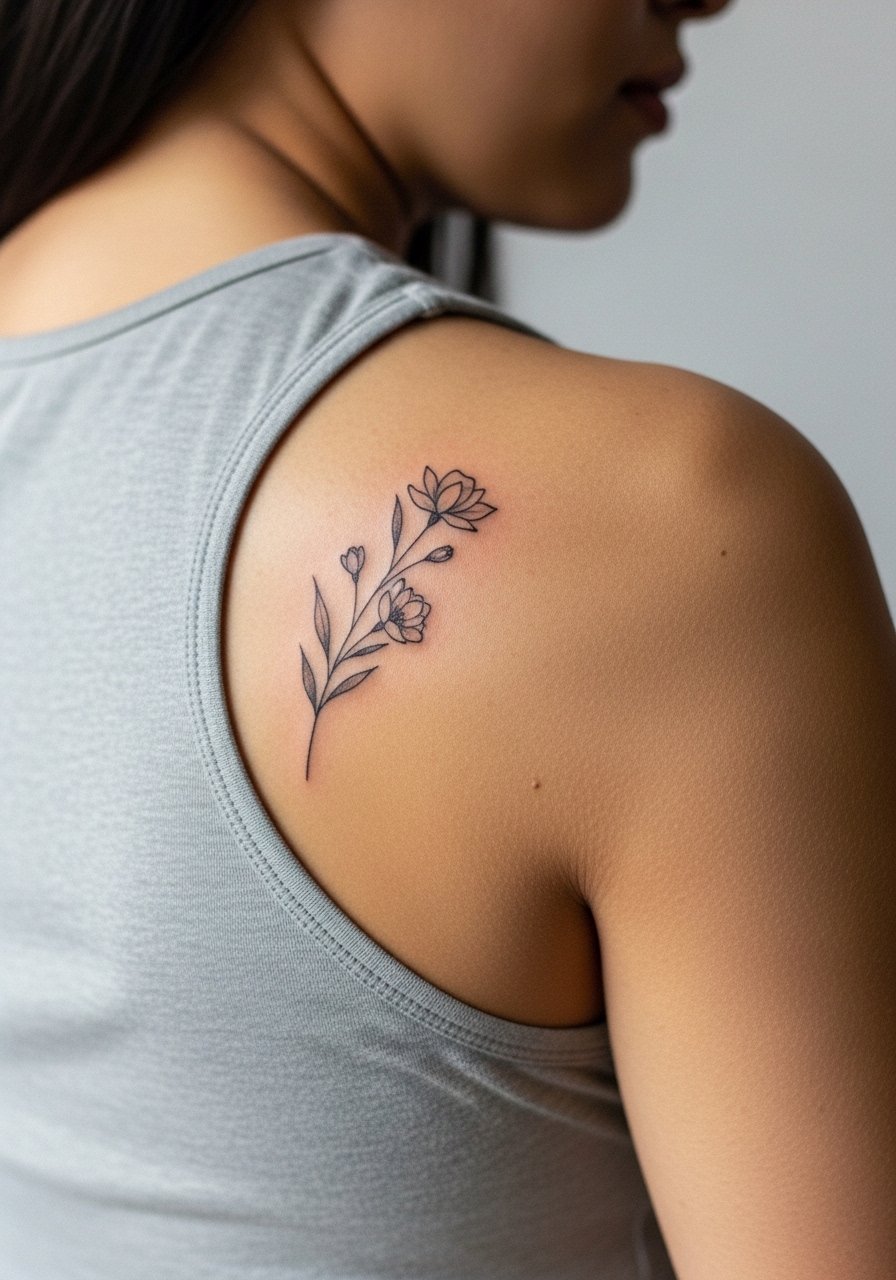
Shoulder blade pieces are forgiving because the skin is stable and sun exposure varies. Sessions typically sit at 45 to 90 minutes and pain is moderate. The common mistake is compressing multiple blooms into a micro space. That visually reads muddled after healing. Tell your artist you want defined negative space between flowers and let stems breathe. For showing the piece, wear a tank top with open back or a strap that slips aside easily. Expect this area to keep crispness longer than hands or ribs.
8. Petite Garland Around the Ankle

A garland around the ankle looks delicate in photos and holds best when lines have spacing that counters sock and shoe abrasion. Sessions are short, about 30 to 60 minutes, with mild pain. A frequent error is wrapping the design too tightly so the ends sit under strap lines. Request that the artist place the focal bloom where shoes do not rub. For care and showing, choose low-cut shoes and cropped pants so the tattoo gets air without constant pressure. Touch-ups are common by year two after heavy wear seasons.
9. Micro Bouquet on the Inner Wrist
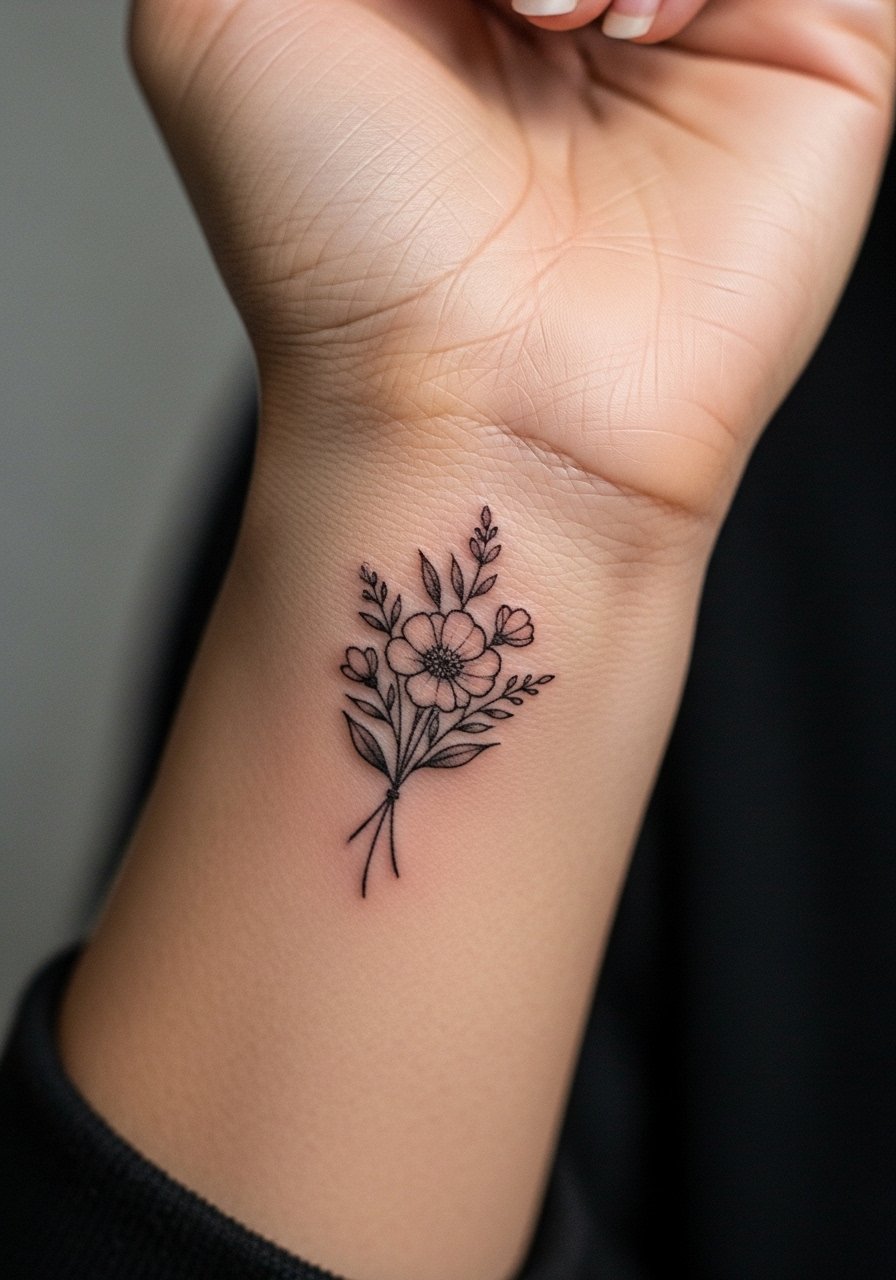
Inner wrist work is front-facing and often photographed. It is sensitive and rates around five for pain. Expect a session under an hour. The aging risk is twofold. First, constant washing and rubbing from watches causes faster fading. Second, overly tiny petal detail blurs. Ask for slightly bolder stems and keep dot shading sparse. For showing it off, a thin chain bracelet or a slim pendant pairs without crowding the lines. Plan on gentle sun protection when exposed.
10. Single Blossom on the Side of the Thumb
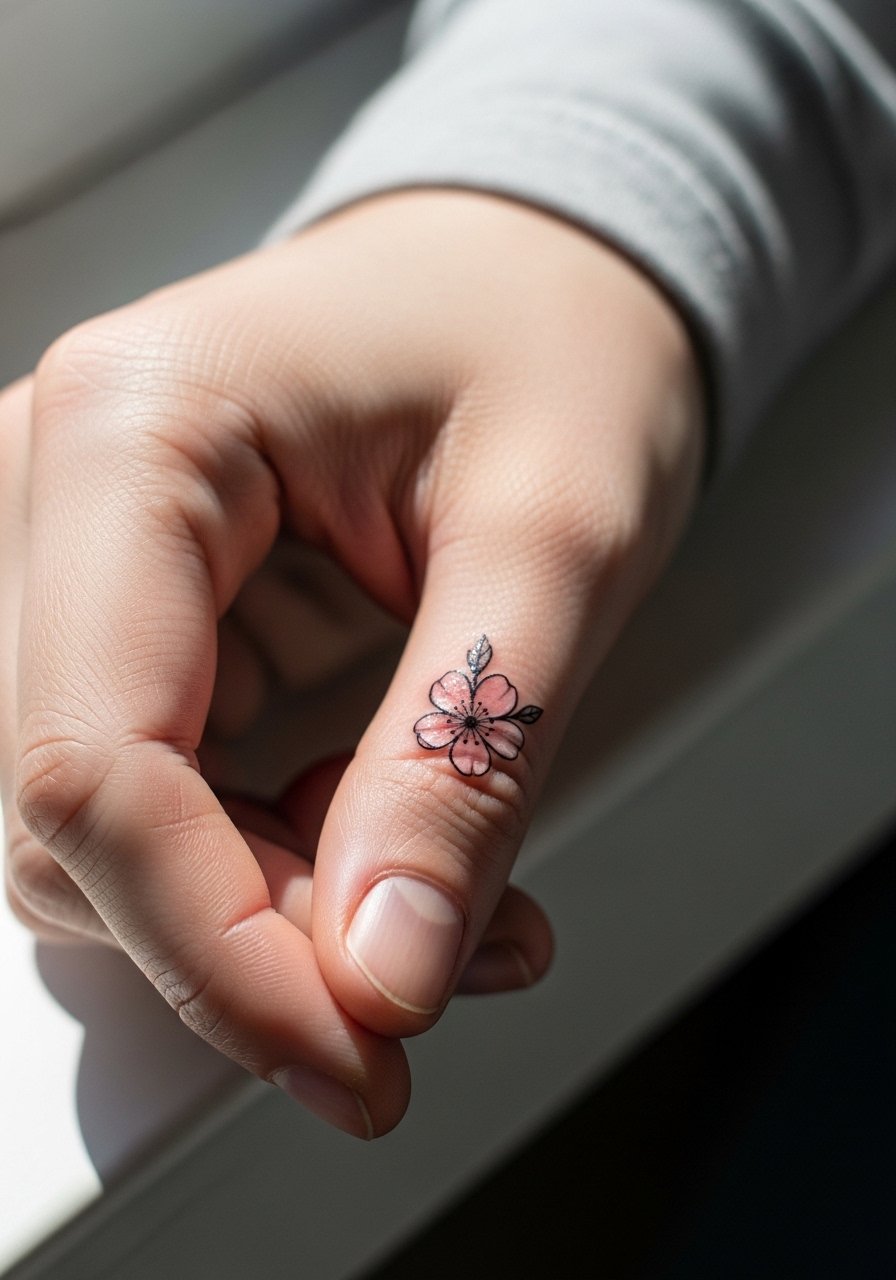
Finger and thumb placements are high risk for early blur and require honest expectations. The tissue moves a lot and washing frequency is high. Pain is sharp for a brief session, often under 30 minutes. Some artists advise against fine line here, and some accept the challenge. Name both camps during consults and ask about expected touch-up frequency. This placement can affect certain work environments, so think about career impact. Keep the design very simple and accept likely yearly touch-ups for crispness.
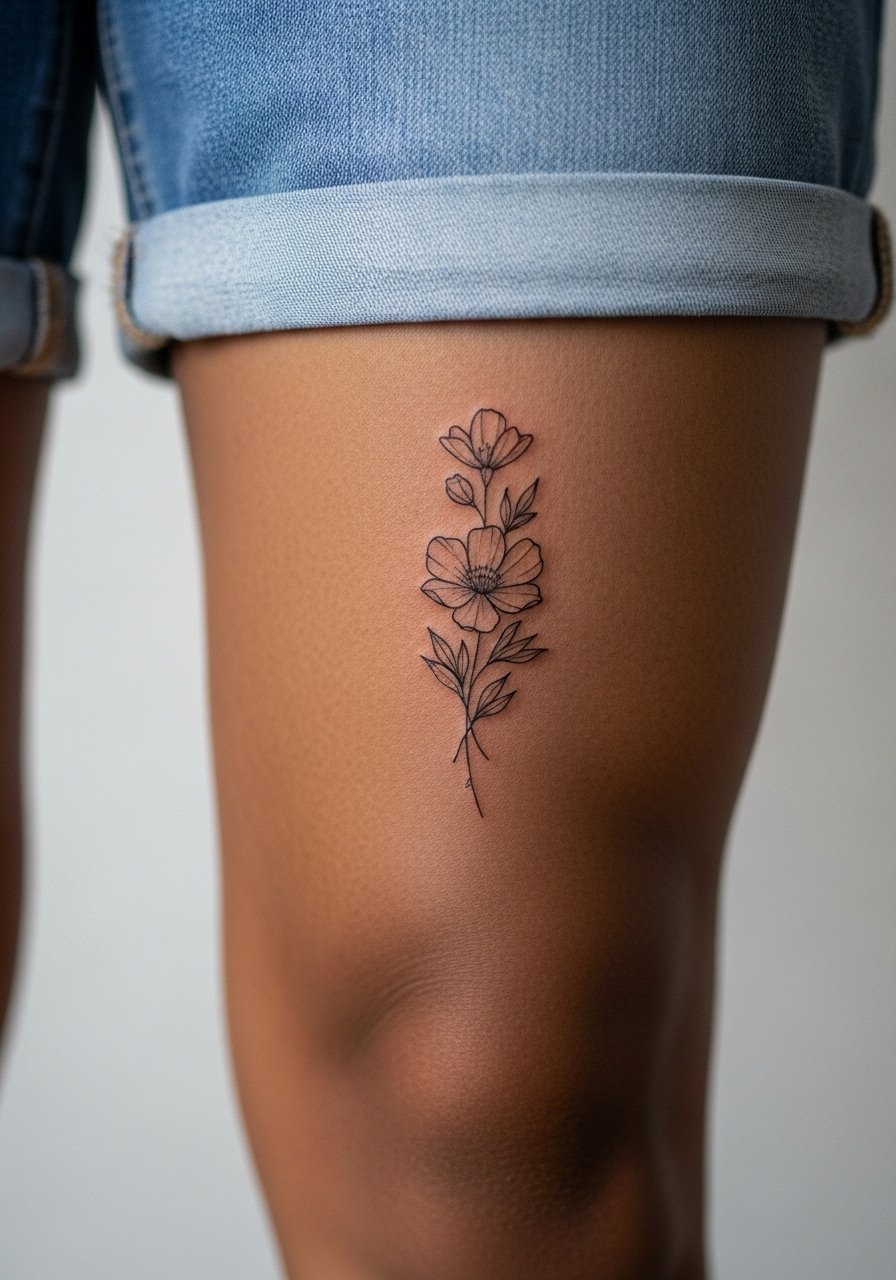
11. Single Peony on the Upper Thigh
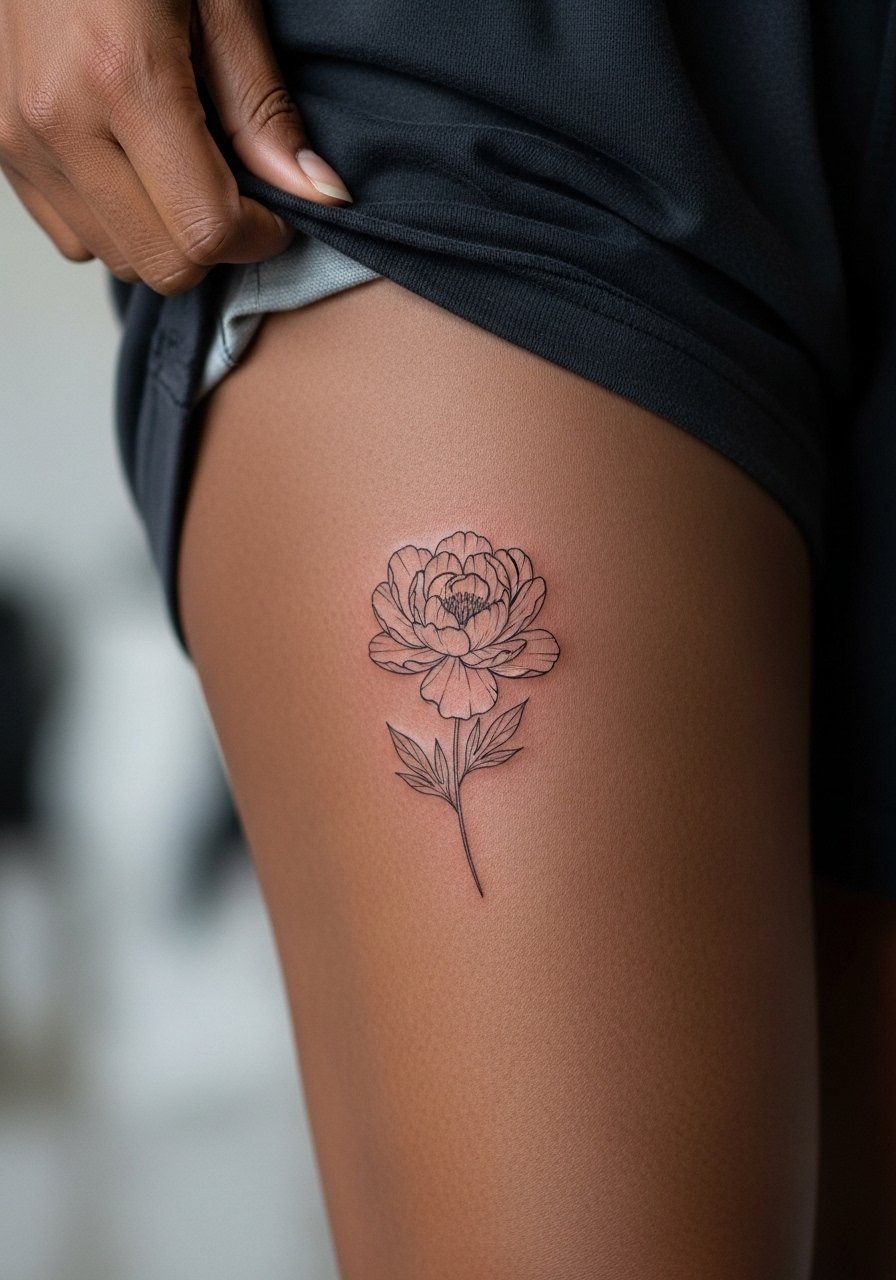
Thigh tattoos age well because they are shielded from sun and abrasion. Sessions vary from one to three hours depending on size and usually rate a four to six for pain. Common mistakes include packing dense stipple shading too close to the bloom edges. For longevity, ask for open petal contours and light stippling only where you want soft texture. For the session, wear loose drawstring linen pants so the artist can roll the leg without pressure. Expect this placement to stay readable for many years with minimal touch-ups.
12. Tiny Stem on the Back of the Neck
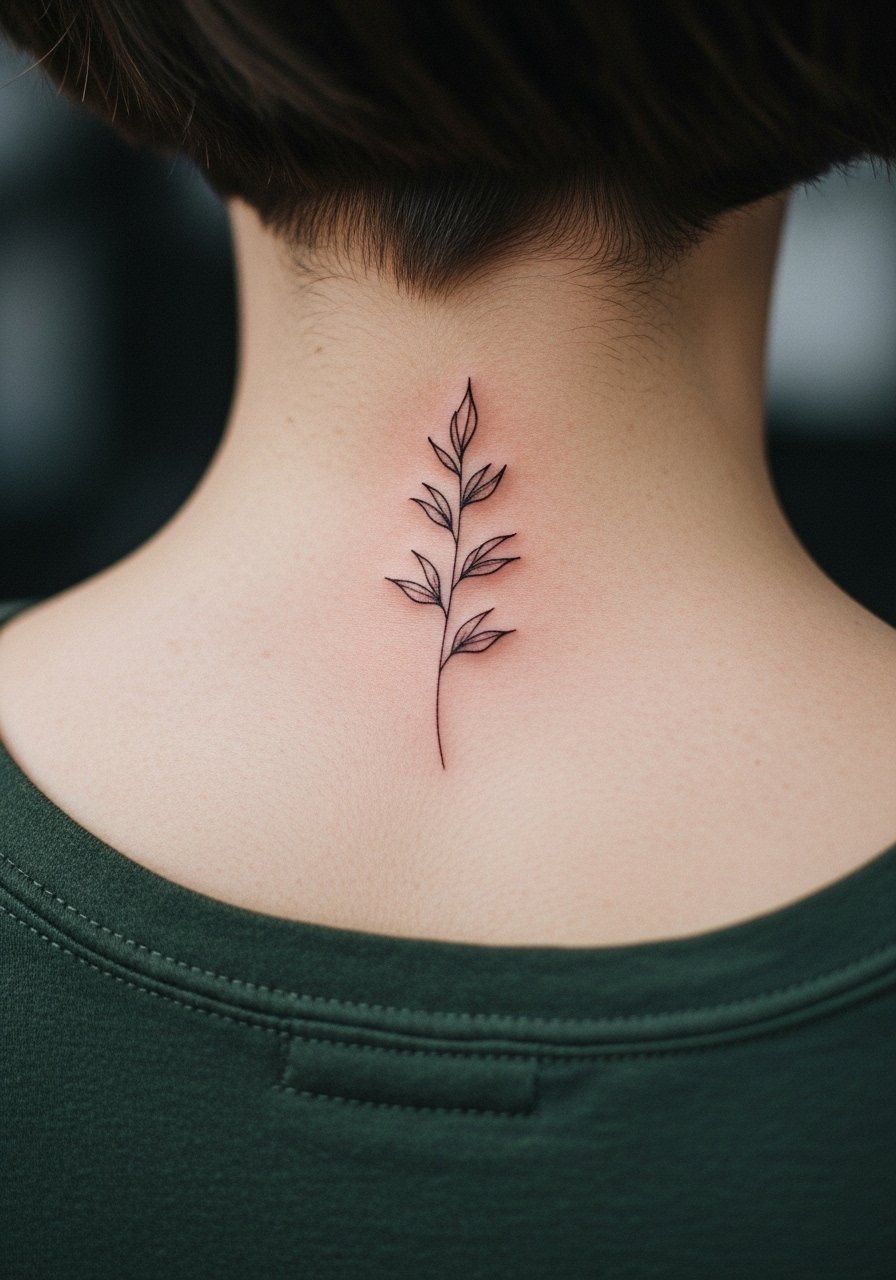
The back of the neck is visible with short hair or updos, and the skin there is thin but stable. Sessions are short and pain varies by sensitivity. A frequent mistake is asking for extremely small script or petal clusters that do not hold. Request clear spacing and slightly heavier main stems. For showing it off, a wide-neck shirt or a pulled collar works well while keeping the look intentional. Be mindful of workplace dress codes if the piece is often exposed.
13. Mini Wildflower on the Lower Back

Lower back skin provides a flat canvas and comparable longevity to shoulders. Sessions take 45 to 90 minutes depending on composition. The common error is too much dense dot work that sinks into the texture of the area. Ask for defined stems and negative space around each bloom. For showing it off, pair with high-waisted bottoms and a cropped top to reveal the strip without exposing more than intended. Expect minimal touch-ups compared with finger or ribcage placements.
14. Climbing Vine on the Outer Bicep
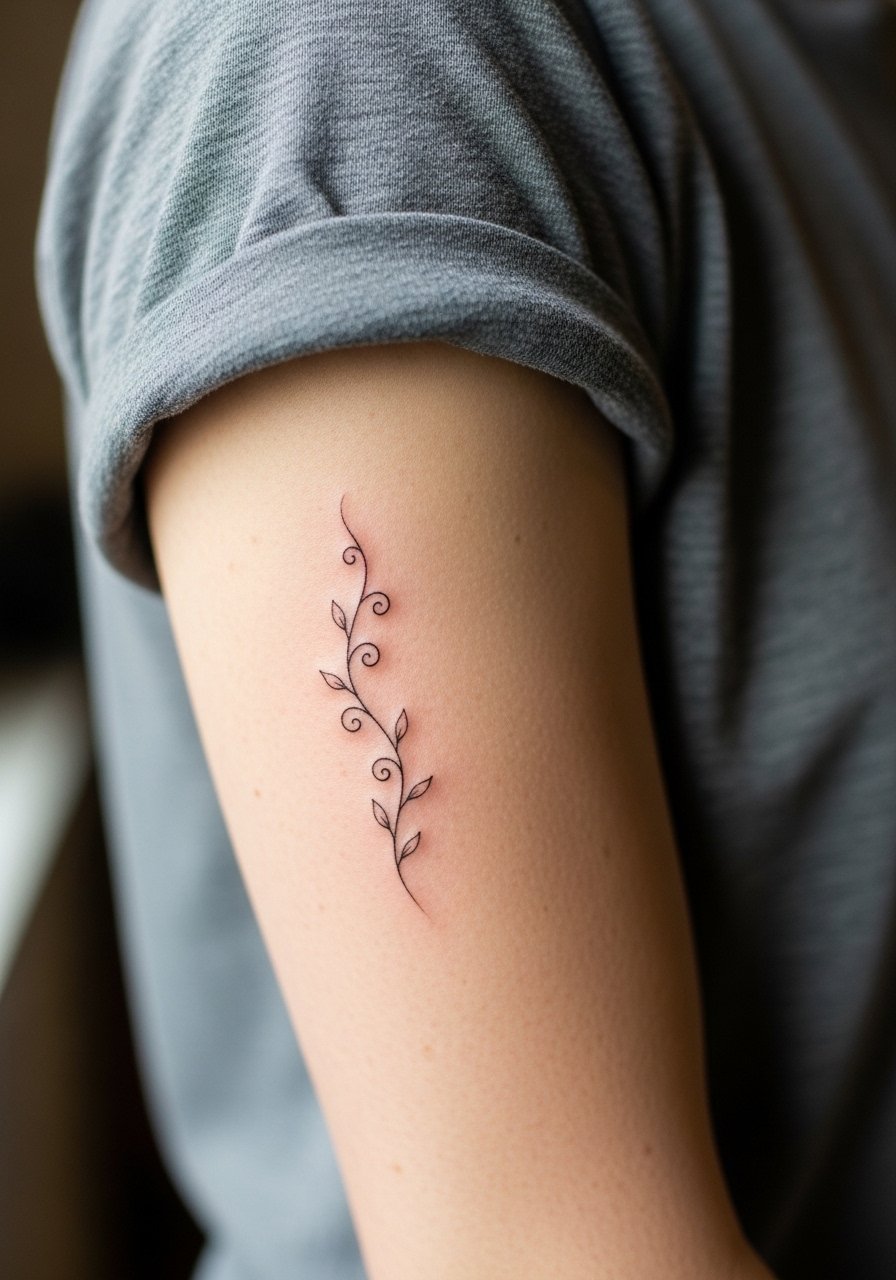
Outer bicep is a reliable place for clean linework because the skin is robust and sun exposure is moderate. Sessions typically run 45 to 75 minutes with a pain rating of three to five. A typical mistake is curving the vine too tightly so it looks disproportionate when arms are at rest. Tell the artist you want the vine to follow muscle lines and leave small gaps between leaves. For casual wear, rolled sleeves or a short sleeve linen shirt frame the vine without crowding it. Expect solid longevity with occasional touch-ups.
15. Delicate Bloom Behind the Knee
Behind-knee placement moves a lot and sits where sweat and friction increase healing complexity. Sessions are sometimes interrupted because the area is awkward to tattoo. Pain varies but is often moderate. Artists caution that micro detail here can migrate because of frequent bending. Ask for simplified petals and spaced stems. For the session wear, bring shorts you can shift easily and that do not rub the fresh tattoo afterward. Touch-ups are likely if the piece is very small and detailed.
16. Minimal Sunflower on the Calf

Calf pieces are sturdy and photograph well. Sessions are typically 45 to 90 minutes and pain sits around three to five. The slip is asking for extremely tiny inner petal dots that merge over time. Request bold primary outlines and airy interior detail. For showing it off, pair with midi skirts or a flowy midi skirt so the design appears when you move. This area tends to hold clarity longer than hands and wrists.
17. Little Rosebud Near the Sleeve Line
Placement at the sleeve line is playful but risks regular fabric abrasion. Sessions are short and pain moderate. A common mistake is placing the focal blossom directly under a tight seam where constant friction fades the lines. Ask your artist to set the bloom slightly above the seam so it reads clean. For casual outfits, short sleeves and a loose t-shirt keep attention on the bud without rubbing. Expect the piece to need a touch-up if you frequently wear backpacks or tight straps.
18. Tiny Leaf on the Finger Knuckle

Knuckle tattoos age fastest because of constant bending and washing. Sessions are very short but the ink often fades to broken lines. Artists disagree on whether knuckle linework is worth it for fine styles. One view says these areas need bold, simple marks. The other view accepts frequent touch-ups as part of the choice. If you proceed, pick a very simple leaf and plan for annual touch-ups. Avoid small fonts or thin stippling here because the channels close quickly.
19. Petite Spray Along the Spine
Spine pieces can be dramatic while staying minimal when the artist respects spacing. Sessions vary from 45 minutes to two hours and pain is personal, often higher near the vertebrae. A mistake is packing blooms too close to the spine where natural curvature distorts the composition. Ask for a gentle vertical rhythm and slightly larger negative space between elements. For showing, open-back tops pair well while keeping exposure controlled. Touch-ups are typically less frequent than on hands.
20. Crescent Floral on the Hip

Hip tattoos sit where clothing seams and waistbands meet, so placement matters more than scale. Sessions usually last 45 to 90 minutes and the pain level ranges from four to six. A common error is centering the crescent under a tight waistband. Ask the artist to position the focal bloom where it will not be under constant pressure from clothing. For the session, wear high-waisted bottoms you can shift easily. This area tends to hold well if protected from daily friction and sun.
21. Minimal Sprig Over the Sternum
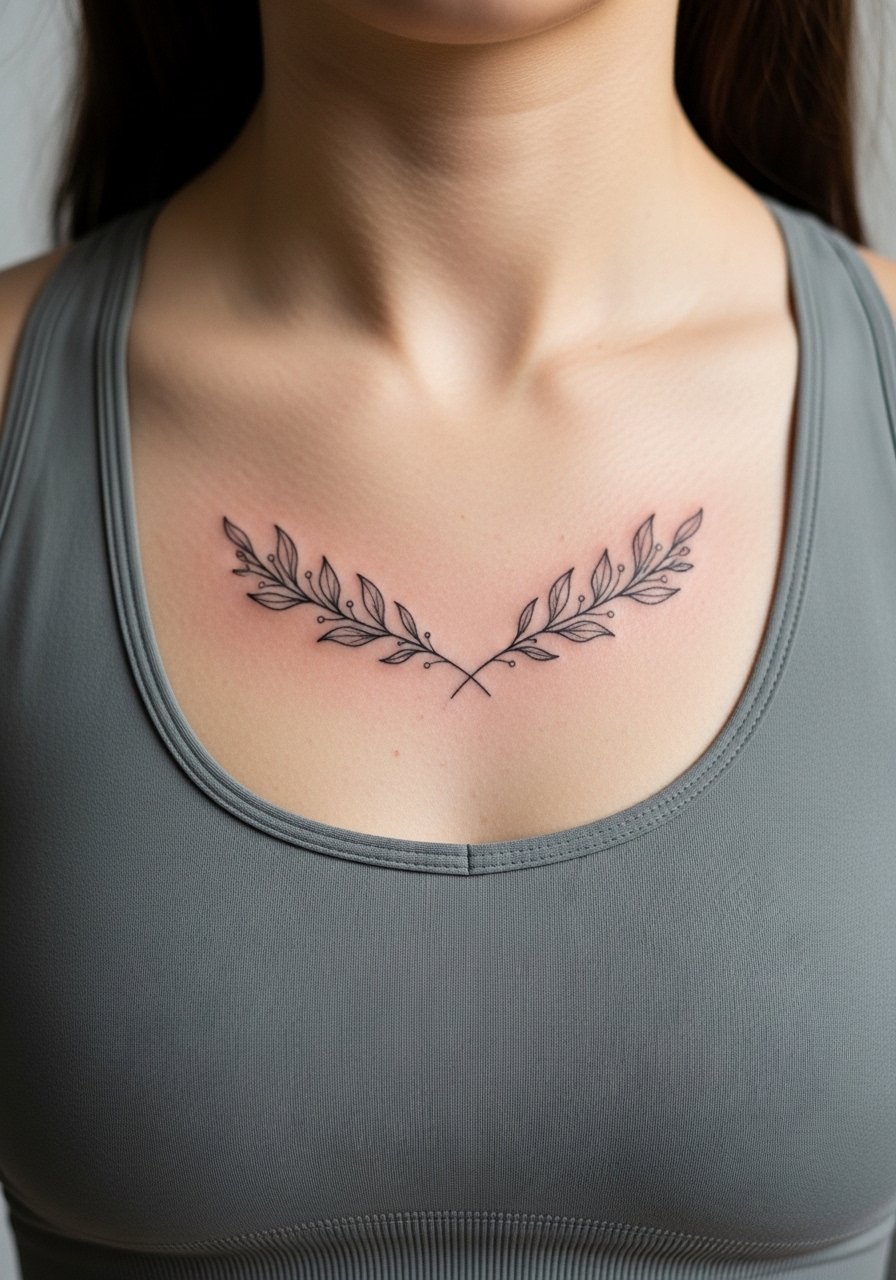
Sternum pieces are intimate and can be sensitive. Pain ranges higher near bone and sessions vary by design. A typical mistake is pushing for dense stippling across the sternum which can heal into muddy texture. Ask for open stems and sparse dot work that accents rather than fills. For the session wear, a strapless or fitted sports bra helps the artist access the area without full exposure. Expect a touch-up conversation during the consult because movement and clothing can affect initial settling.
Frequently Asked Questions
Q: How likely is a fine line floral to need a touch-up compared with a traditional bold rose?
A: From what I have seen, fine line florals tend to require touch-ups sooner because thin strokes blur faster than saturated blackwork. The difference depends on placement and sun exposure. Hands, fingers, and ribs usually need touch-ups sooner than thighs or shoulders.
Q: Can I get a minimal floral on my ribs and expect it to look the same after two years?
A: Artists are split on this. One group says ribs soften fine line quickly due to stretching. The other group says proper depth and spacing prevent early blur. Ask to see healed rib examples from your artist and plan for a possible touch-up at year two.
Q: What should I wear to a shoulder blade or upper back session?
A: Wear a loose button-down shirt or a tank top you can pull aside. That way the artist gets clear access and you leave the studio without awkward fabric rubbing the fresh work.
Q: Are finger and knuckle florals worth it if I want low maintenance?
A: Not usually. Fingers and knuckles demand frequent touch-ups and the lines can break down faster than other spots. If low maintenance is a priority, choose the ankle, thigh, or shoulder blade instead.
Q: How should I talk to my artist to avoid a design that blurs early?
A: Be specific about spacing and line weight. Ask them to show healed photos at similar sizes and placements. Say you want slightly bolder main stems and sparse dot work rather than dense stippling in tight spaces.
Q: Do certain clothing styles help preserve fine line tattoos long term?
A: Yes. Minimizing friction from tight seams and avoiding constant rubbing from straps helps. Lightweight, breathable fabrics and open necklines reduce abrasion and sun exposure on the design.
