
The bold, curved line and the soft fill that defines neo traditional work often outlives trendier treatments, and stars are one of those elements that benefit from that approach. Pick a version that balances contrast, spacing, and color saturation and you get a small symbol that still reads clearly years later. Below are 21 star-forward neo traditional ideas, with what to ask for in consults, how they age, and how to show them off.
1. Constellation Cluster on Inner Forearm

I recommend this when you want a readable piece that can run along the forearm without becoming mud. Tell your artist to use slightly heavier linework on primary stars and lighter dot work for connecting lines. Common mistakes include packing too many tiny stars close together, which leads to blurring after a few years. At six months the contrast will be high, at two years the tiny connectors soften, and by five years the cluster still reads if the main stars were bold enough. Pain is low on the inner forearm and a single session usually runs 45 to 90 minutes. Pair this with rolled sleeves and a loose button-down shirt to show it off.
2. Nautical Star with Rope on Upper Arm

This one reads well at a distance, which is why classic saturation is the safer route. In consultation, ask for clean negative space around the central star so the rope and color do not compete. A common version that ages poorly uses thin outlines and heavy shading too close to the center, which fills in over time. Expect a 90 to 150 minute session with medium pain. The upper arm has low blowout risk compared with hands and ribs. For evenings out, a rolled sleeve linen shirt frames the star without hiding the rope detail.
3. Shooting Star and Banner on the Chest

Chest pieces can be showy, so plan the banner text clearly. Specify exact lettering during the consult and give the artist the phrase in the font you want. Artists split on how much filler shading the chest can take. One camp favors bold outlines and limited filler to preserve clarity. The other camp favors layered shading for depth. Name both approaches and ask which your chosen artist prefers. Session time is usually 90 to 180 minutes and pain is moderate. For showing this off, try an open-back midi dress or a wide-neck top.
4. Crescent Moon with Starry Filigree on Sternum

Sternum pieces need a steady hand and careful spacing because the skin there can stretch and move. Ask the artist to place the densest details slightly off the tight center so the main shapes remain readable. A frequent mistake is over-detailing in the center which blurs within a couple of years. Pain is higher here and sessions can be broken into two visits. For the appointment, wear a fitted sports bra so access is clean. For nights out, a thin chain pendant necklace sits just above the design without crowding the composition.
5. Star Compass on the Upper Back

This placement is great for a larger symbol that keeps its graphic edge. Ask for stronger outer lines on the compass points, and for inner shading to use stipple rather than heavy fill to avoid early softening. A common error is making the compass too small for the back, which loses its impact. Sessions are longer, often two to three hours, and pain is moderate. For the studio day, wear a button-down you can pull aside. When showing off the piece, open-back tops work well.
6. Floral Star Medallion on Thigh

Thigh skin handles saturation well, so this is a good place for layered color and stipple shading. Tell your artist to keep the brightest highlights on the petals and slightly darker saturation on the outer points so the star stays central visually. The inner-thigh variant needs special care during consultation because it can rub during daily life. Expect 90 to 180 minutes and moderate pain. For the session, wear loose shorts or a loose drawstring linen pant so the area is easy to access and comfortable afterward.
Studio Day Picks
These small items smooth the sessions for the shoulder, arm, chest, and thigh pieces above and help manage the first 48 hours after a long stencil sits.
-
Stencil transfer paper kit. Lets you preview placement on skin so the constellation and medallion pieces from above read where you expect them to.
-
Topical numbing cream. Applied per instructions before sessions that hit the sternum or inner thigh to ease the pain peaks without altering linework.
-
Thin protective film roll. Useful for thigh and chest work where fabric friction is a concern during the first week.
-
Fragrance-free gentle body wash. Cleans healing areas without stripping saturated color, important for bold neo traditional fills on the upper arm.
-
Aquaphor healing ointment. Thin layers in the first days help protect delicate linework until flaking finishes, especially on chest and arm pieces.
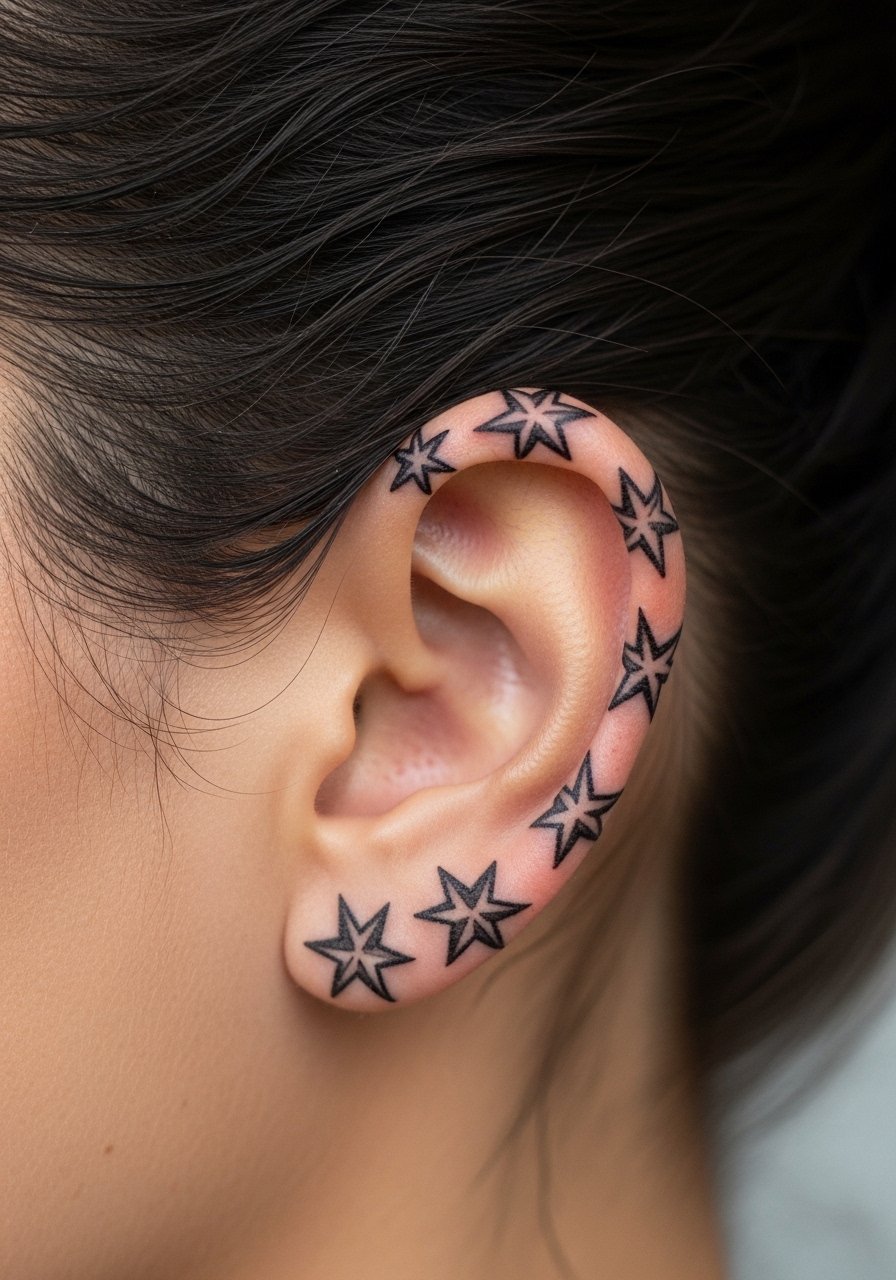
7. Minimal Star Trio Behind the Ear

Behind-the-ear placements need precision and planning because the area is small and moves with hair and clothing. Ask for the trio to vary in size so the negative space reads as intention rather than crowding. The main risk is the tiny stars blurring when the outlines are too thin. Expect a brief session of 20 to 40 minutes and higher sensitivity. This zone also raises hiring considerations in some industries, so think about that before committing. Because of the placement, wear hair up for the session and plan to show it off with a neat bun or a tucked collar.
8. Geometric Star Mandala on the Calf
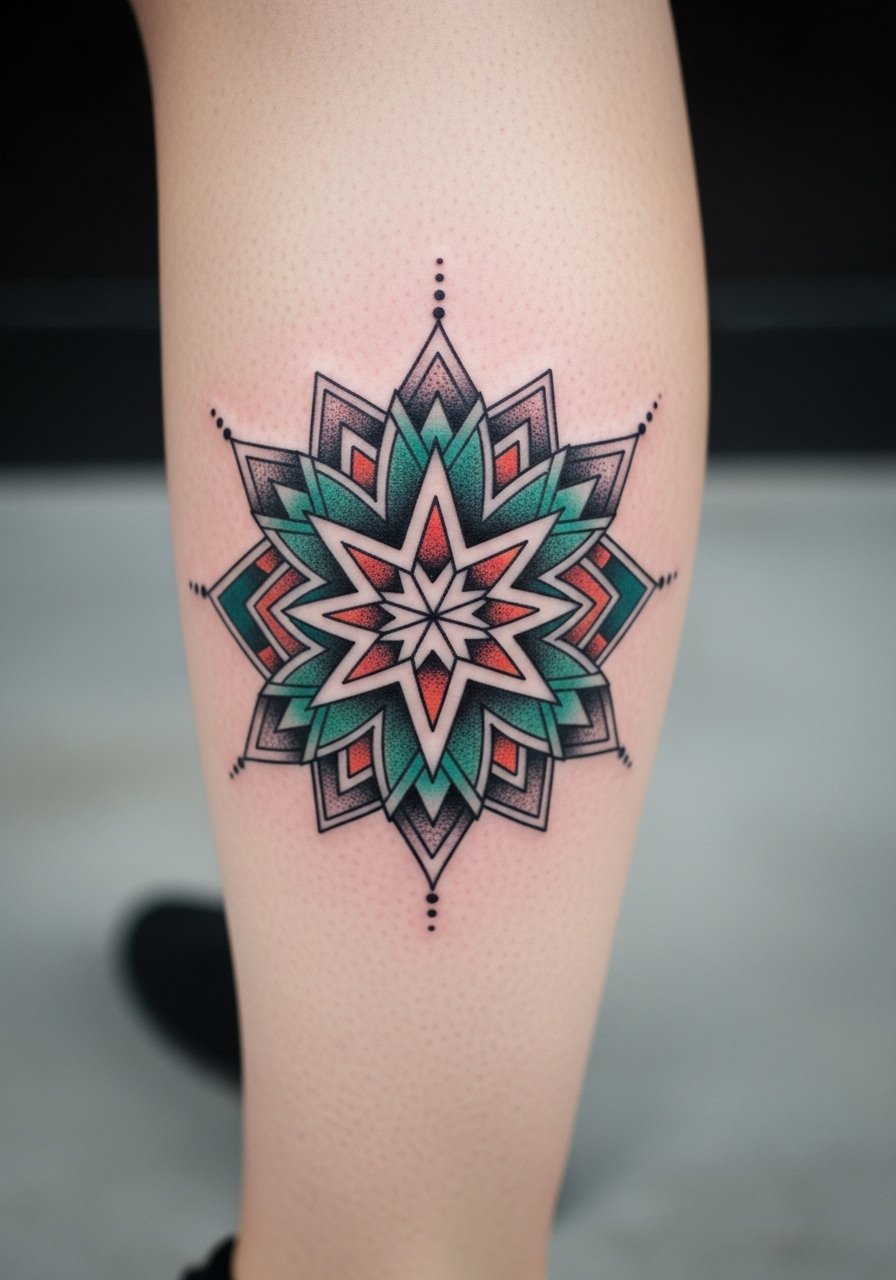
Calf skin holds detail well, which lets artists combine geometric star points with floral mandala elements. In consults, request spacing between dense mandala lines to preserve clarity at two to five years. The mistake I see most is cramming too many thin spokes into one radius. Sessions run 90 to 150 minutes and pain is moderate. For footwear and styling, rolled jeans or a jeans rolled up ankle boot look great without covering the piece.
9. Tiny Star Accent on Finger Joint

Finger tattoos age differently because of constant washing and friction. Ask for slightly bolder dots and a thicker outline than you think you need, and accept touch-ups as part of the plan. One camp argues finger work is a fast-fading aesthetic choice and that constant touch-ups are fine. Another camp warns that the skin there rarely holds micro detail and recommends larger designs. Name both camps to your artist and pick the approach you prefer. Sessions are short and the pain is high. For showing this off, stacked dainty rings and a minimalist gold watch complement the tiny star without competing.
10. Star and Dagger on the Forearm
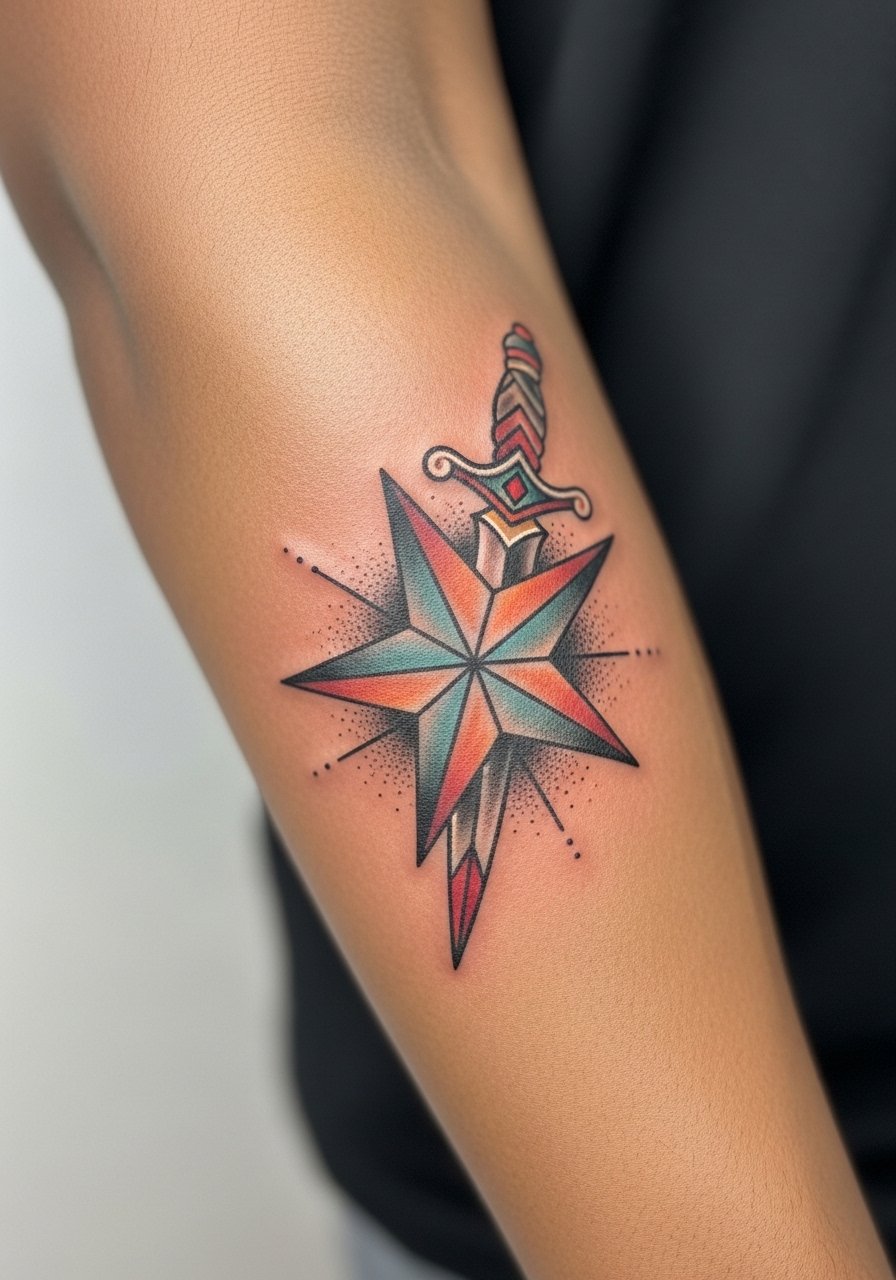
This pairing works when you want a narrative edge. Ask the artist to keep the star slightly larger than the dagger hilt so the symbol remains the focal point as it ages. A common mistake is placing heavy shading too close to the star, which reduces contrast over time. Expect 60 to 120 minutes and moderate pain. Forearm placements have low blowout risk if the needle depth stays consistent. For casual wear, a rolled sleeve linen shirt or short sleeves show it off cleanly.
11. Star Cluster Collarbone Accent
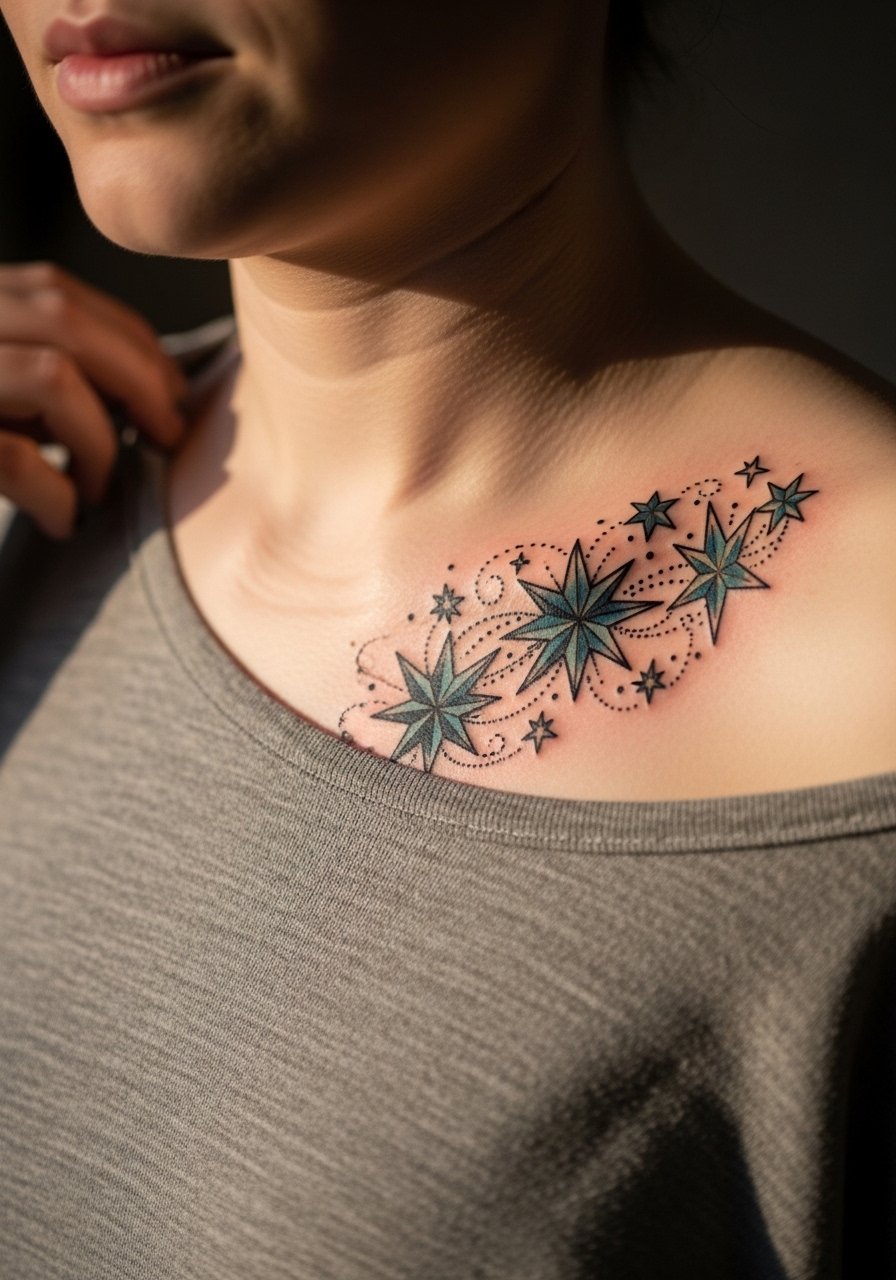
Collarbones are visually striking but the skin there is thin. Ask the artist to keep primary stars slightly raised in contrast and to avoid heavy filler shading along the bone. Some artists say collarbone pieces need bold outlines to last. Others prefer delicate weight for a softer look. Ask the artist which they recommend. Pain can be higher and sessions tend to be shorter and more precise. For evening styling, an open-back midi dress or a wide-neck top accents the cluster.
12. Lunar Phase Row with Central Star on Ribcage

Ribcage work divides opinion sharply. One camp says thin line work on ribs blurs quickly because of skin stretch. The other camp argues that if you space elements and use slightly heavier linework, they settle well. Name both camps in your consult. The ribcage is painful and sessions are often split. The piece looks crisp at six months if the artist used proper depth, but thin connectors may cloud by year three. For the session, wear a cropped top you can lift. For evenings, a high-waisted skirt and a crop top frames the piece without covering it.
13. Shooting Star Trail Down the Spine

Spine placements create a strong vertical read. Tell your artist to anchor the brightest point at the top and fade the trail slightly as it descends to keep the eye moving. A mistake is packing dots too close together on lower spine sections where movement is greater. Sessions vary by length but expect two sessions for longer trails. Pain is higher along the spine. For showing, try an open-back top or halter that leaves the trail visible.
14. Compass Rose with Starburst on Shoulder Blade

Shoulder blade skin takes saturation and keeps separation between elements, which makes it a strong spot for neo traditional layering. During consults ask for slightly heavier outer rings on the compass to maintain a clear silhouette. A common mistake is making the inner ornaments too dense, which fills in over time. Sessions are moderate length and pain is low to medium. Pair this with a loose button-down shirt worn off one shoulder when you want to show it.
15. Star-In-Moon Mandala on the Hip

Hip placements allow for larger mandala shapes and layered color. Tell your artist to protect the central star with a ring of negative space so the main motif keeps definition as the outer details age. A common error is compressing too much detail toward the center. Pain is moderate and sessions can be long. For the studio, wear high-waisted bottoms that are easy to shift. For beach days, a swimsuit bottom that sits slightly below the line will show the art without overexposure.
16. Tiny Constellation Anklet

Ankle tattoos rub against socks and shoes often, so the trick is to ask for slightly heavier dots and a clear spacing plan. Small fine lines here can fade quickly if not saturated. Expect low to moderate pain and a session under an hour. For styling, rolled pants, sandals, or a short skirt keep the anklet visible. A simple ankle bracelet complements the tattoo without crowding it.
17. Star and Phoenix Shoulder Sleeve Accent

Shoulder sleeves allow you to mix motifs without losing the star as a focal point. Tell the artist to scale the star larger than adjacent feather clusters and to use stipple shading to separate layers. A typical mistake is letting background shading swallow the star. Sessions will be multiple and pain is medium. For the studio, wear a loose tank top. When dressing, an off-shoulder top highlights the motif.
18. Celestial Hourglass with Guiding Star on the Rib Side

Combining symbolism with a star is powerful, but the rib side moves a lot. Ask the artist to anchor the hourglass with bold outer lines and to keep the star in a slightly negative space halo. Artists differ on whether dense shading belongs on ribs. One camp says avoid it due to stretch and healing. The other says careful layering is fine. Ask which they follow. Sessions are painful and often split. For the appointment, pick a top that lifts easily and does not press on the area afterward.
19. Shooting Star Wrist Band

Wrist bands are very visible and face a lot of washing and sun exposure. Request slightly bolder outlines and soft negative space between repeated motifs to keep the band legible over time. A frequent mistake is making the band too fine and expecting it to survive without touch-ups. Sessions are short and the pain is moderate. For showing off, stack with a thin chain bracelet rather than thick cuffs which hide the work.
20. Star-Studded Ear Cuff Tattoo Alternative
Ear and helix placements require careful line weight because cartilage heals differently. Tell your artist you want primary stars to be slightly larger and spaced apart. The mistake I see is trying to cram micro stars into a tiny area which produces early blurring. Sessions are short but sensitivity is high. For showing off, tuck hair behind one ear or use a half-up style to make the cluster visible without being obvious every day.
21. Retro Telescope with Guiding Star on the Thigh Inner Side

Inner-thigh placements are intimate and prone to friction from clothing. In consults ask for the star and telescope to be offset slightly to avoid high-motion zones. The main mistake is placing dense filler where fabric will rub, which accelerates fading. Sessions can be longer and pain varies. For the appointment, wear loose shorts or a wrap skirt. For privacy and comfort afterward, choose loosely fitted bottoms that reduce rubbing.
Frequently Asked Questions
Q: Will neo traditional stars fade faster than traditional stars on the hand and fingers?
A: From what I have seen, areas with more washing and friction like hands and fingers fade faster regardless of style, so neo traditional pieces with heavier saturation still need touch-ups sooner than upper-arm or back work. Ask your artist about reinforcing outlines and plan on a possible touch-up within two to four years for finger pieces.
Q: Can I get a fine line star mandala on my ribs and expect it to stay crisp?
A: Ribs are a tricky spot. Some artists say fine line there blurs within a couple of years because of skin movement. Others say spacing and slightly bolder line weight will keep the mandala readable. It depends on your skin and the artist technique, so bring reference images and ask which camp your artist follows.
Q: What should I wear to a shoulder or upper-back session so the artist has clean access?
A: A loose tank top or a button-down you can pull aside works best. For upper-back sessions, a tank top pulled down slightly or a button shirt gives access without exposing more skin than necessary. I often recommend something you can easily remove and put back on without rubbing the fresh area.
Q: Are there styling tips to make a forearm star and dagger combination look less busy with casual outfits?
A: Yes. Keep accessories minimal so the tattoo reads as part of the outfit. A minimalist gold watch or a single leather bracelet frames the forearm without competing with the tattoo.
Q: How often should I plan touch-ups for neo traditional color stars on thighs and upper arms?
A: Expect color refreshes less often on thighs and upper arms than on hands or feet. From observation, many people need a touch-up at year three to five depending on sun exposure and skin type. Keep sunscreen on exposed pieces to extend intervals between touch-ups.
