
Sitting in the chair with the stencil pressed to the skin behind the ear is when most people realize how small choices matter. The visibility, the hairline, and the line weight decide whether the piece reads sharp or disappears into shadow after a year. These 21 classic old school ideas show how to plan the design, what to tell your artist, and how to wear the look so the work actually lasts.
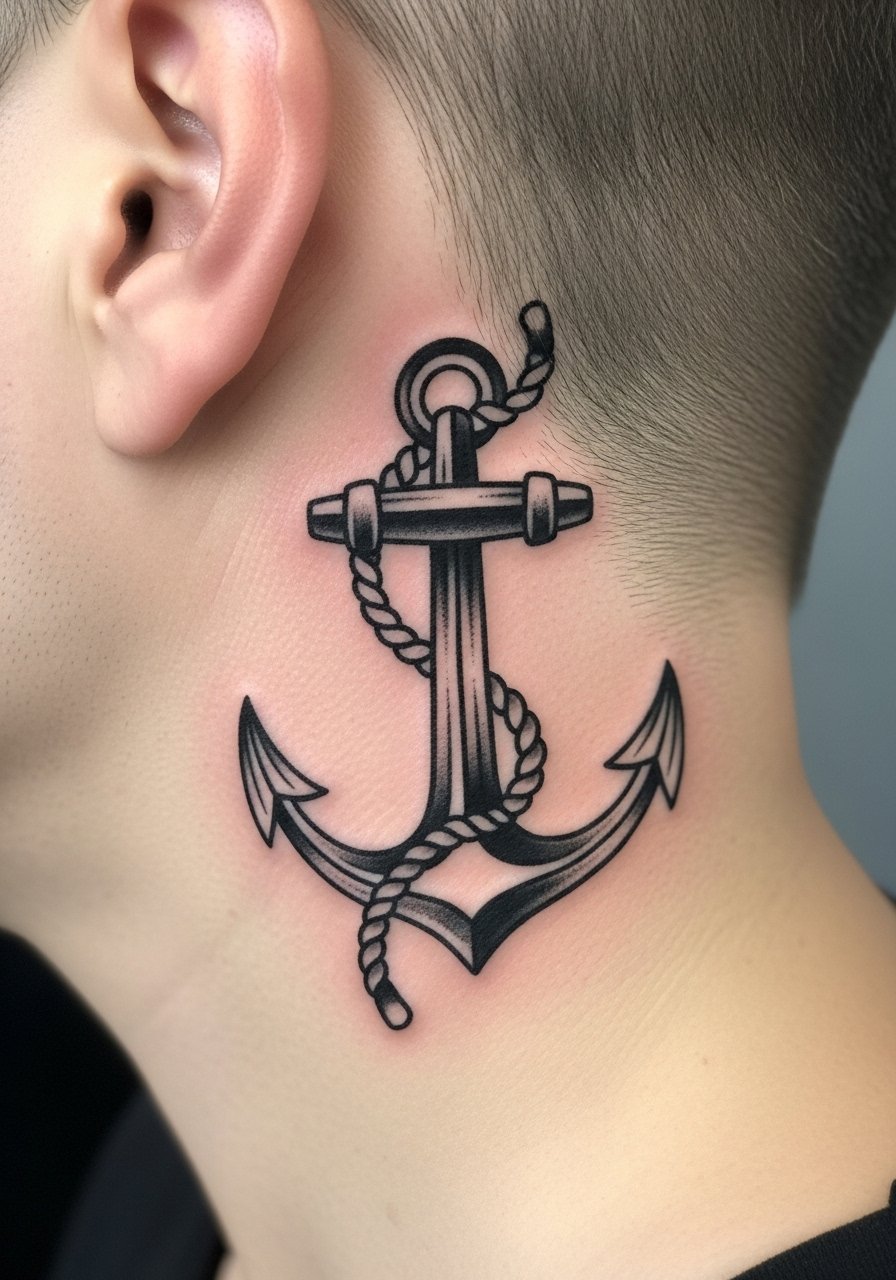
1. Mini Anchor with Rope Curve Behind the Ear
An old school anchor reduced to a compact silhouette works well in the small curve behind the ear. Ask for bold outer linework and a lightly shaded inner field so the anchor keeps contrast as it heals. Fair warning, the skin there is thin so pain registers as a 5 to 6 on most scales, but a thirty to forty minute session usually covers it. A common mistake is asking for tiny interior detail that the placement cannot hold. For consultation say you want bold line weight and simple negative space. For showing it off, a clean cropped haircut or a crew neck tee keeps attention on the silhouette. Image below shows the finished scale and placement.
2. Tiny Traditional Rose Bud Behind the Ear
A compact rose bud with heavy outline and saturated red fills reads classic and ages better than micro petals. Tell your artist to keep the petals chunky and to avoid tiny stipple inside the bloom. The session is brief, around twenty to thirty minutes, but expect some tenderness when sleeping on that side for the first few nights. The usual aging mistake is too many small shaded petals that merge into a blot after sun exposure. This version holds because saturation is prioritized over micro detail. For showing it off, pair with a short back and sides haircut or a bandana headband so the floral sits visible above the ear. Image shows the placement and healed saturation.

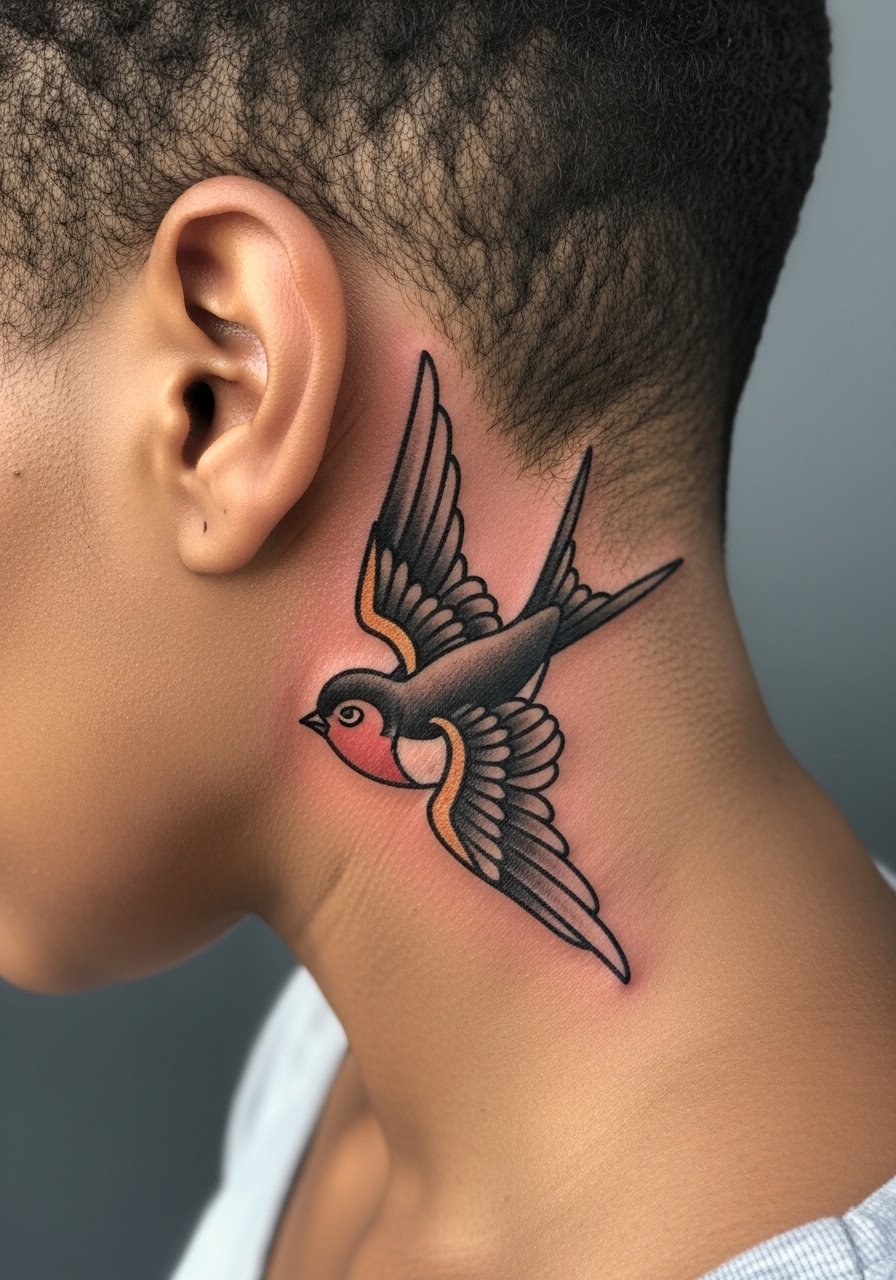
3. Old School Swallow with Motion Line Behind the Ear
The swallow is a staple in traditional work and behind the ear it becomes a kinetic accent rather than a centerpiece. In consultation mention you want the wings to read as motion, with open negative space between feathers. Expect a short session under forty minutes and low blowout risk if linework is bold. A common version that ages poorly stacks too many internal feather lines. Instead ask for simplified feather blocks so the wings still read at year two. For session wear, tie hair up and bring a loose shirt. If you want the barber to make the piece visible, search shop directories or hashtag feeds to find artists who photograph near-hairline work. Image below shows composition and negative space.
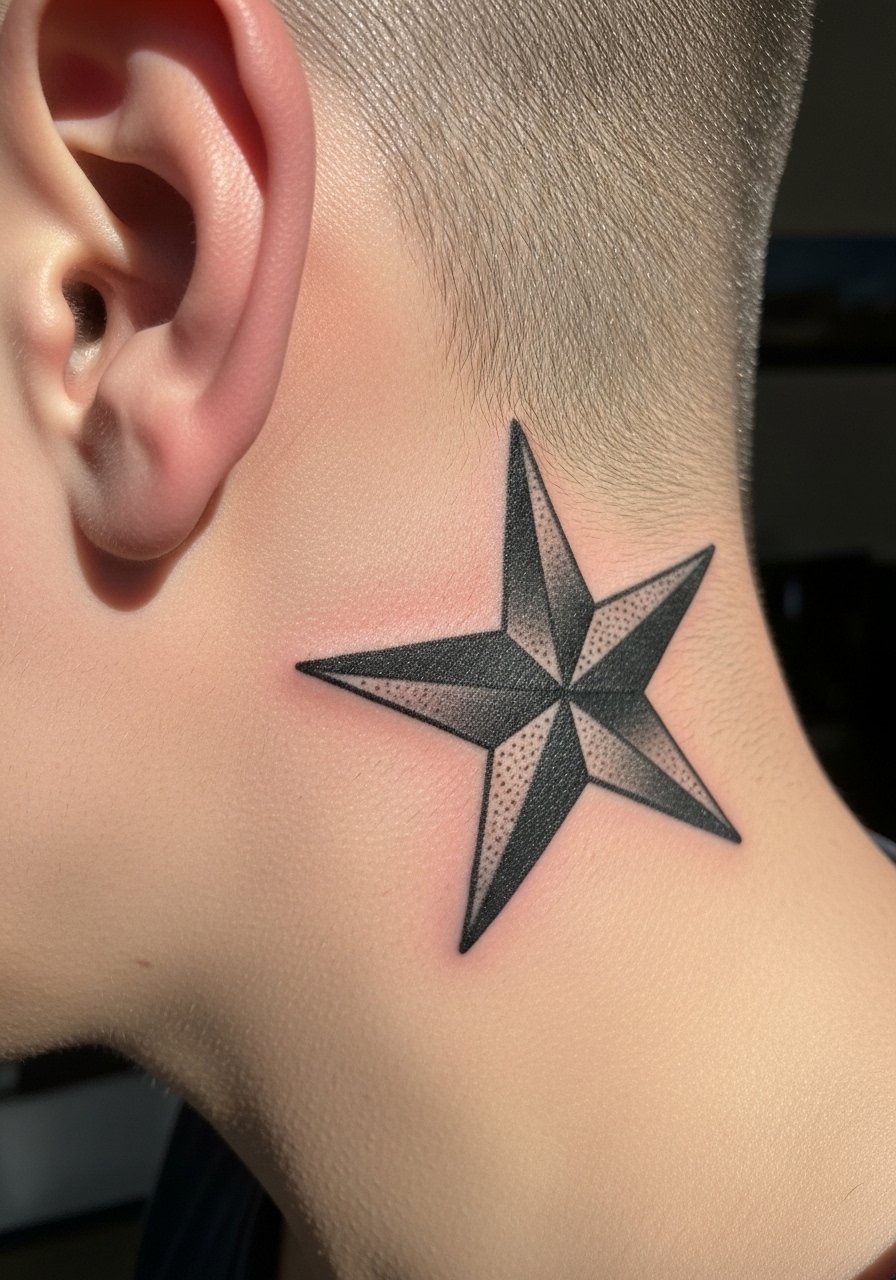
4. Nautical Star with Bold Black Fill Behind the Ear
A nautical star with thick black arms contrasts well against skin behind the ear and reads from a short distance. For longevity ask for crisp linework and deep saturation in the black fields so the contrast remains as the skin ages. Pain levels are moderate and session time is short. The frequent error is asking for thin lines between star arms which blur over time. For after-session comfort wear a loose button-down shirt you can pull aside easily. When scouting artists use local shop listings and convention rosters to find people who post healed photos of hairline placements. Image shows the bold fill and healed edge integrity.
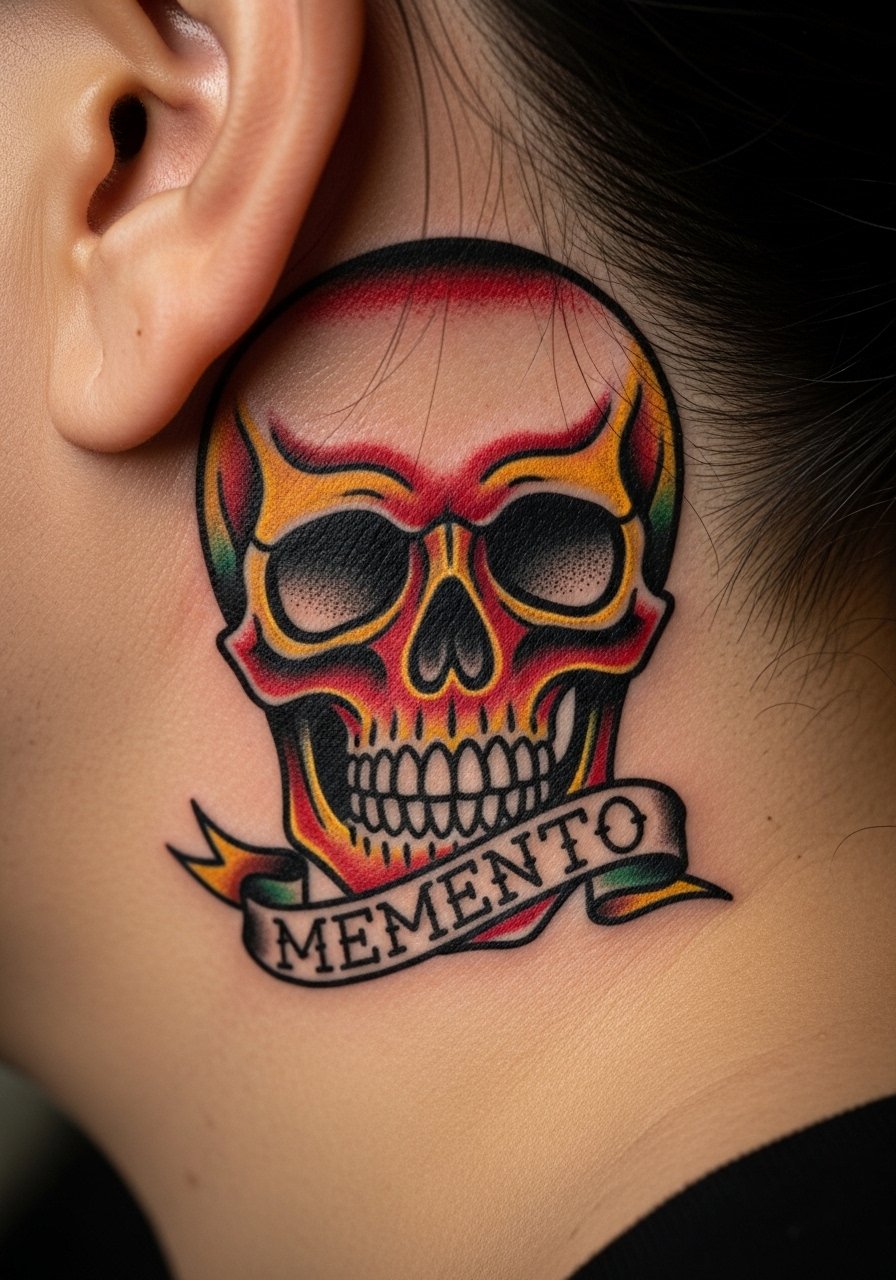
5. Micro Skull with Banner Behind the Ear
A small skull with a short banner for initials or a year works as a classic accent. Tell the artist you want the banner wide enough to hold two or three characters without compressing the lettering. Small script is a common mistake here. Expect a thirty minute session and localized soreness during headwear use. One important note is the lettering should be bold and simple so it reads past the one-year mark. For showing the piece off, short hair and a thin chain pendant draw the eye toward the neck and ear area. Image prompt captures scale and the readable banner.
6. Tiny Ship Wheel with Dot Work Behind the Ear
The ship wheel in simplified form pairs well with dot accents placed around it for a nautically themed hit. Ask for thick spokes and sparse dot work so the dots do not merge into blotches as the piece ages. The session is quick and most people describe a sharp stinging then a dull throb after. A mistake is overdoing the dot field; keep the dots spaced. For the appointment wear a shirt with an open collar that lets you tilt your head without tugging. For showing off the work, a cropped hairstyle or a crew cut styling paste keeps the area visible. When you look for an artist, use local directories and hashtag searches to find healed photos of behind-ear flash.

Pre-Session Essentials
The behind-ear pieces above are small and close to the hairline, so a couple of items smooth the session and the first week.
-
Stencil transfer paper kit. Lets you confirm size and orientation on the skin before the needle touches the area.
-
Topical numbing cream. Applied per directions eases the short sharp sting behind the ear without altering linework when used correctly.
-
Silicone scar film strips. Thin strips can protect the immediate area from friction under collars and straps during early healing.
-
Hypoallergenic adhesive patches. Useful for covering tiny pieces if hair or clothing rubs the spot in the first days.
-
Aquaphor healing ointment. A thin layer in the initial phase keeps the tiny lines from drying into flakes while the skin closes.
7. Classic Dagger Tip Tucked Behind the Ear
A dagger tip angled toward the jawline reads intentional even at a small scale. During consultation ask that the blade silhouette be simplified and the hilt kept compact. A typical session runs about thirty minutes and the pain is short but sharp. The mistake people make is packing too many hilt details into the small space. That leads to muddiness after healing. If you want it visible with facial hair, keep a neat beard line and try a beard trimmer to define the jaw, which frames the dagger. For artist discovery use studio directories and healed-photo galleries to confirm their work on hairline placements. Image shows blade direction and clean silhouette.

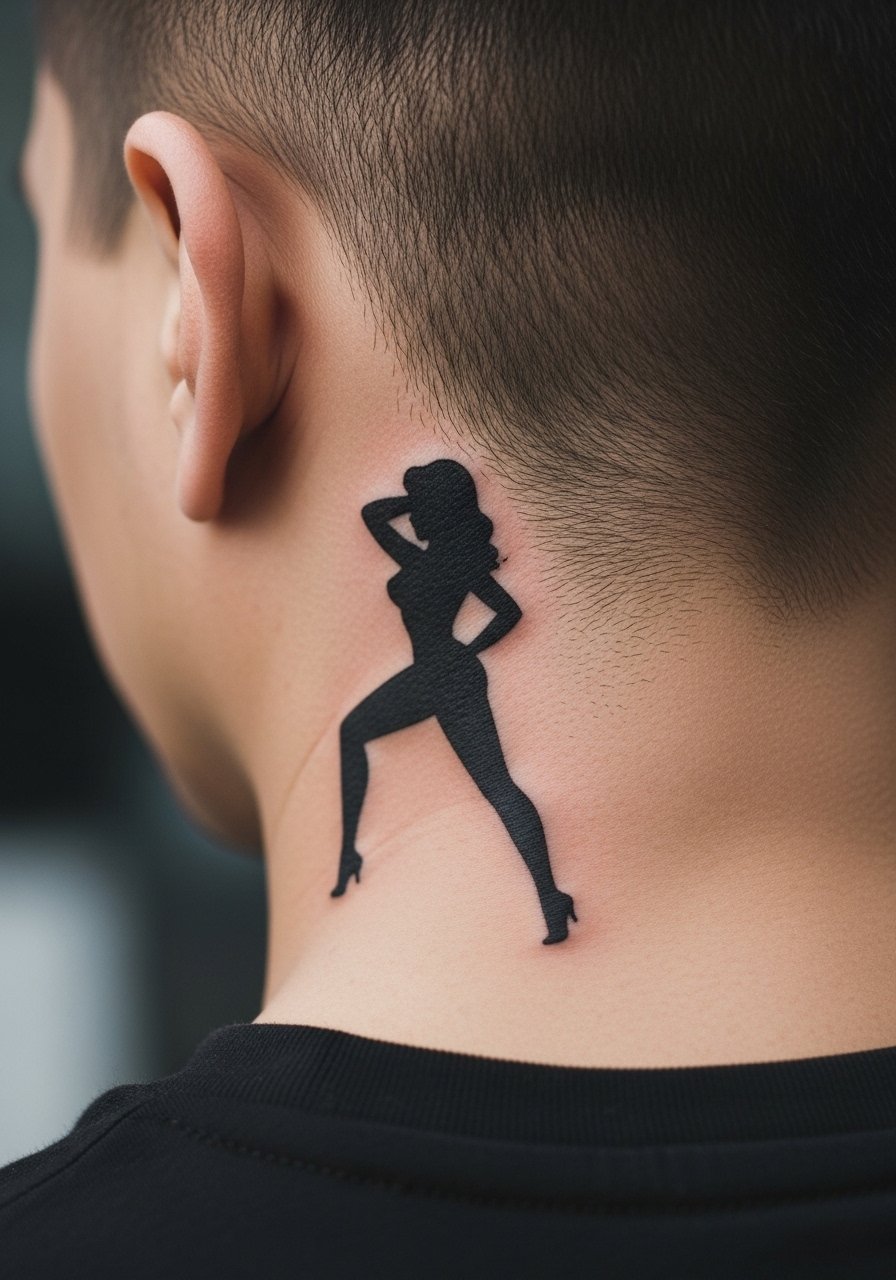
8. Tiny Pin-Up Silhouette Behind the Ear
A pin-up silhouette reduced to a clean black shape becomes a retro nod when placed behind the ear. Specify that you want the figure as a silhouette with no interior shading so it keeps shape as it ages. The session is brief and may tingle more near the skull. A common error is trying to keep facial features at this size. Ask the artist for a single filled shape instead. To show it off, slicked-back hair or a low fade helps, and a matte pomade keeps the styling consistent. When booking, check portfolios for healed silhouettes near the hairline. Image below captures the silhouette scale.
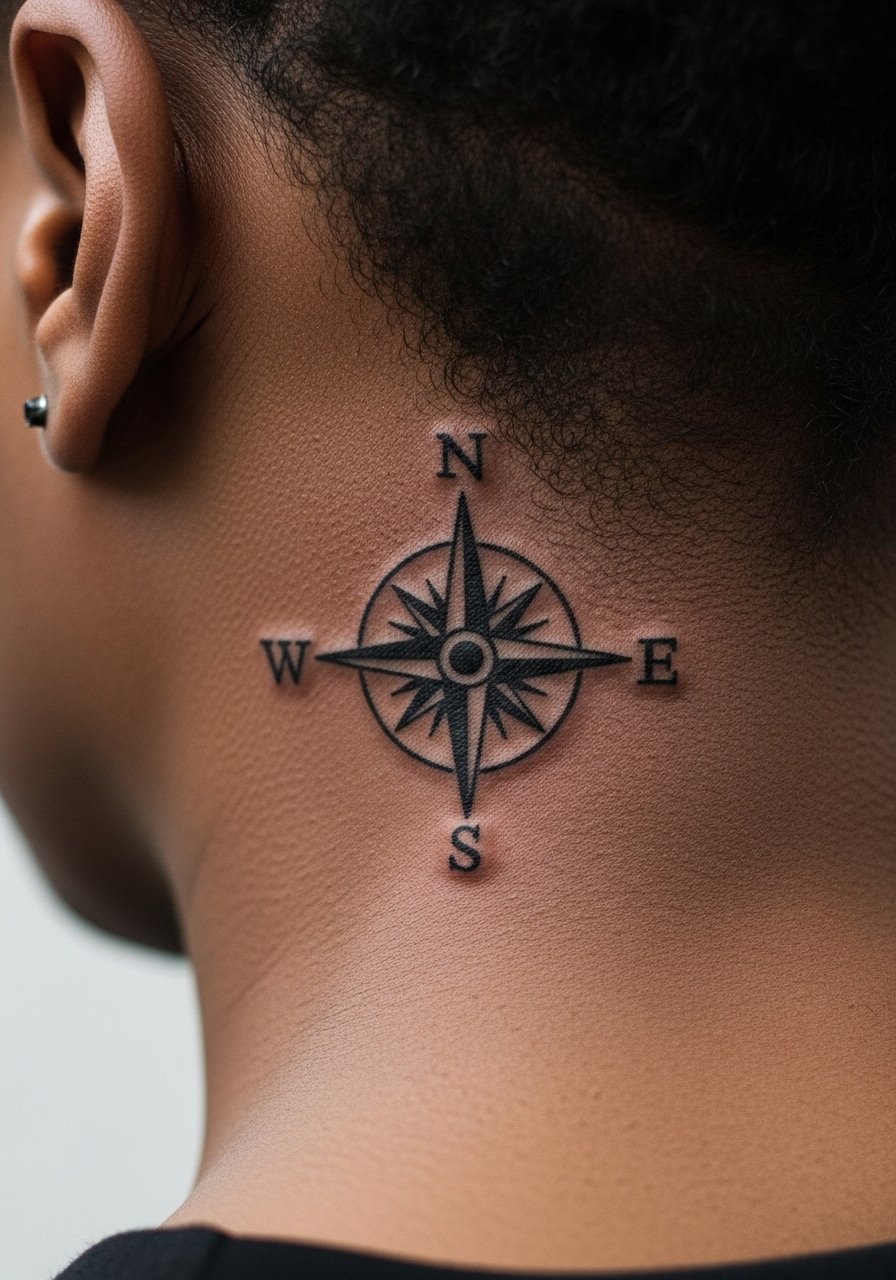
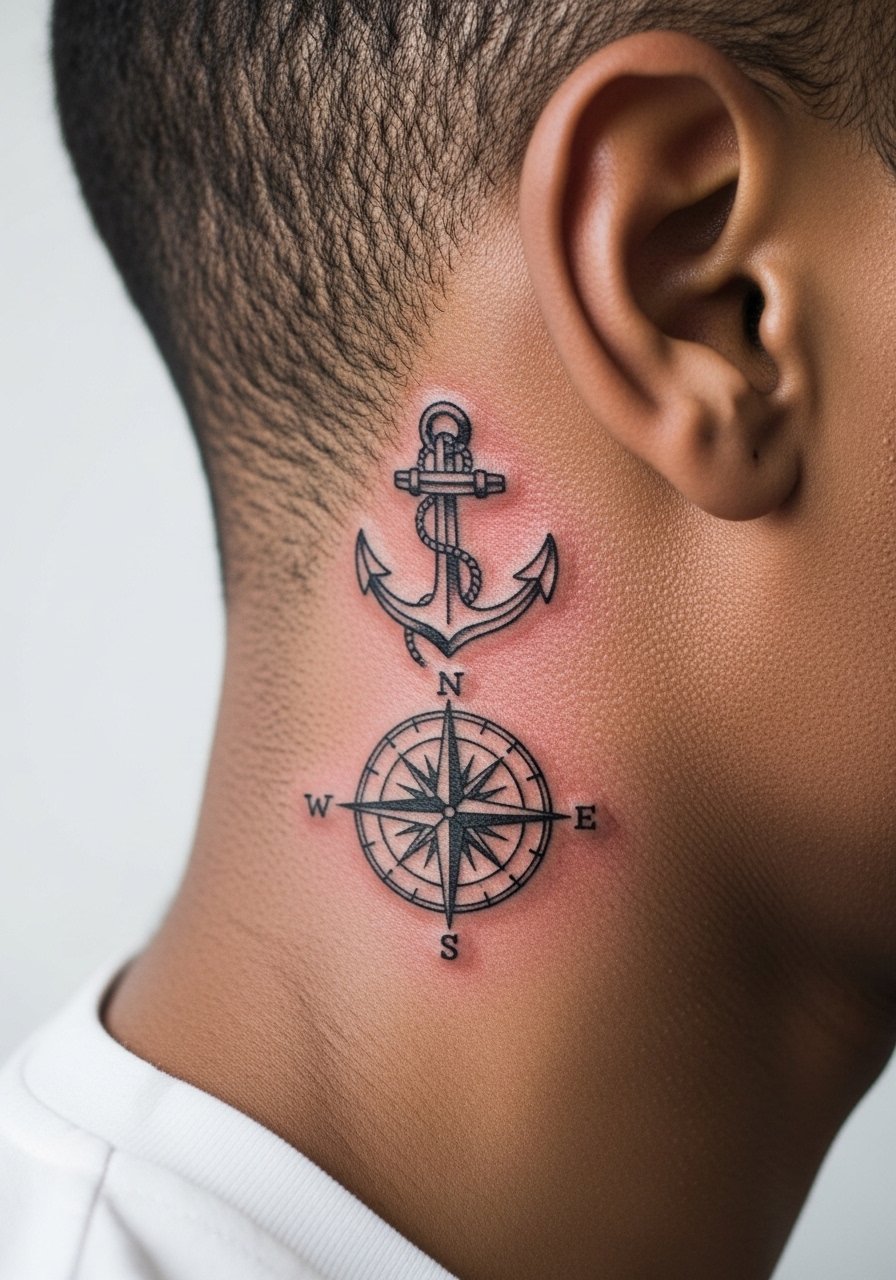
9. Tiny Traditional Compass Rose Behind the Ear
A compact compass rose gives a small directional accent and suits a variety of orientations behind the ear. Tell your artist you want the cardinal points simplified and the central dot emphasized so the piece keeps a focal point. Expect a thirty to forty minute session and moderate soreness. A typical mistake is adding tiny arrow tails that blur. For longevity favor fewer directional spikes and stronger central saturation. For the session wear your hair up and bring a small travel mirror so you can check placement before the stencil stays. Use directory searches and convention pages to find artists experienced with small neck placements. Image shows compass geometry and focal dot.
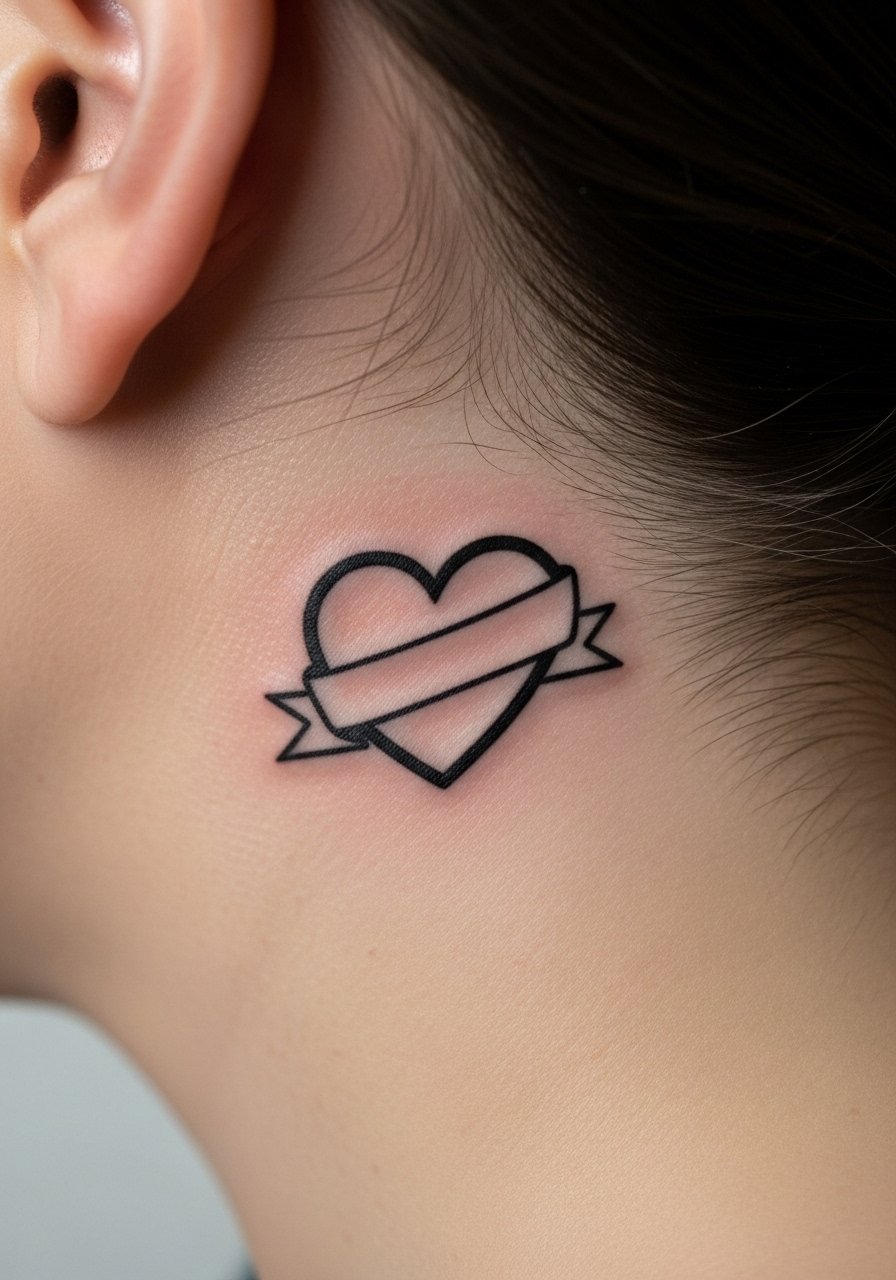
10. Tiny Heart with Banner Behind the Ear
A micro heart with a narrow banner is a simple old school touch that doubles as discreet personalization. Be clear in consultation that the banner must be at least three or four millimeters tall to hold two or three characters legibly. The session is quick and cleanup is minimal. Mistakes arise when people request cursive micro lettering that the placement cannot sustain. For showing the small banner, a trimmed neckline or a short haircut works best, and a thin chain pendant can balance the area visually. When searching for an artist, rely on healed-photo galleries and local shop references. Image shows compact heart and readable banner.
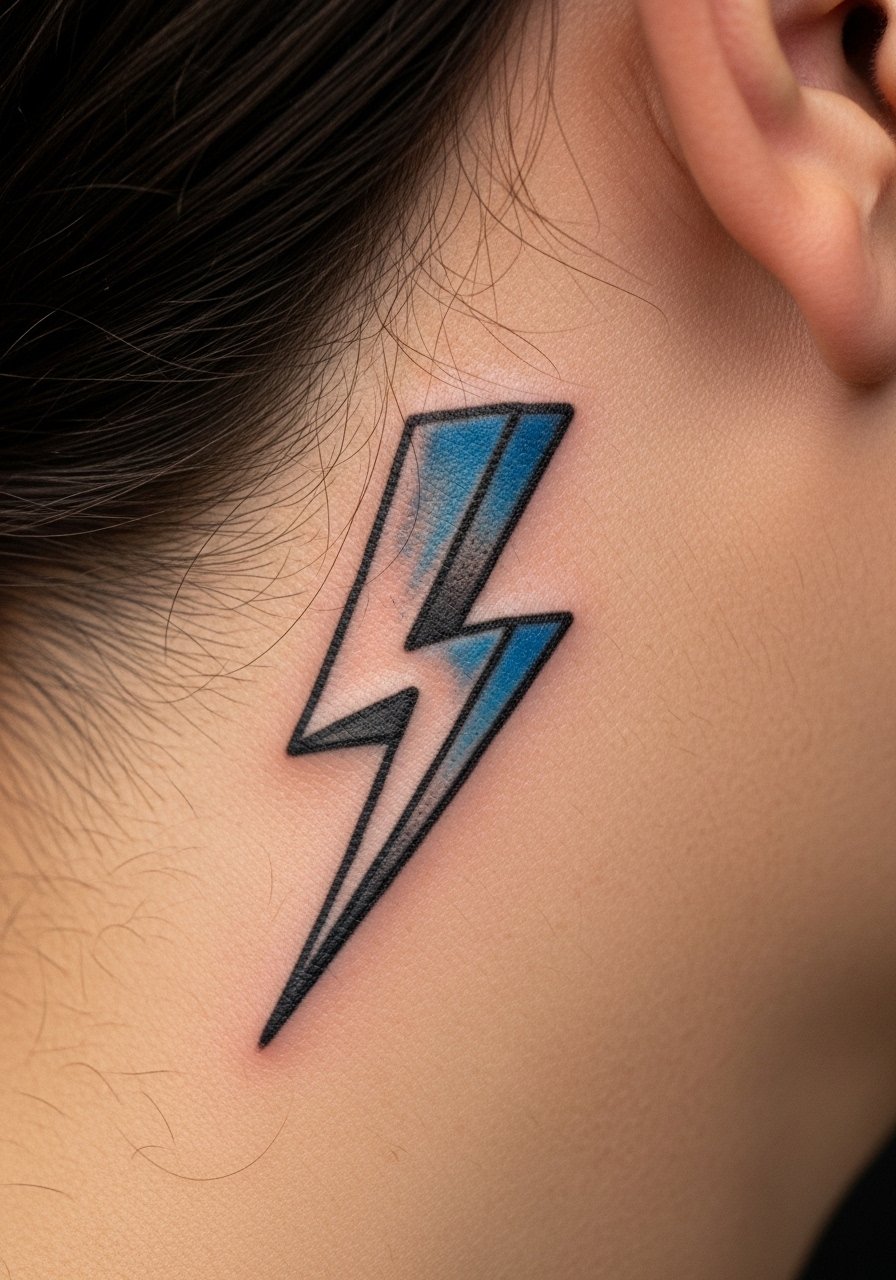
11. Traditional Lightning Bolt Behind the Ear
A compact lightning bolt is a high-contrast, low-risk choice for the hairline area. Tell your artist to keep the bolt thick and angular so it resists softening as the skin ages. Sessions are short and discomfort is brief. A frequent error is asking for thin interior line detail that fills in over time. This piece also works well when paired with a colored accent, like a blue wash around the bolt, but keep the color sparing. For the appointment wear a shirt with a wide collar and tie your hair back. To find an artist, use hashtag feeds and studio directories to compare healed lightning bolt work. Image shows the bolt weight and healed edge.
12. Tiny Anchor Chain Loop Behind the Ear
A single looped anchor chain with a tiny ring reads like a nod to maritime tradition in a minimal package. Ask for crisp ring definition and minimal chain links so the element stays legible. The area is sensitive and the session is short. The common mistake is packing many tiny links which flatten into an indistinct band. For showing the loop, a cropped haircut or a short sidecut makes the chain more visible. Try a mens+hair+clippers search if you plan to maintain a tight fade. When booking, look for artists who post healed hairline jewelry pieces. Image demonstrates ring clarity and spacing.

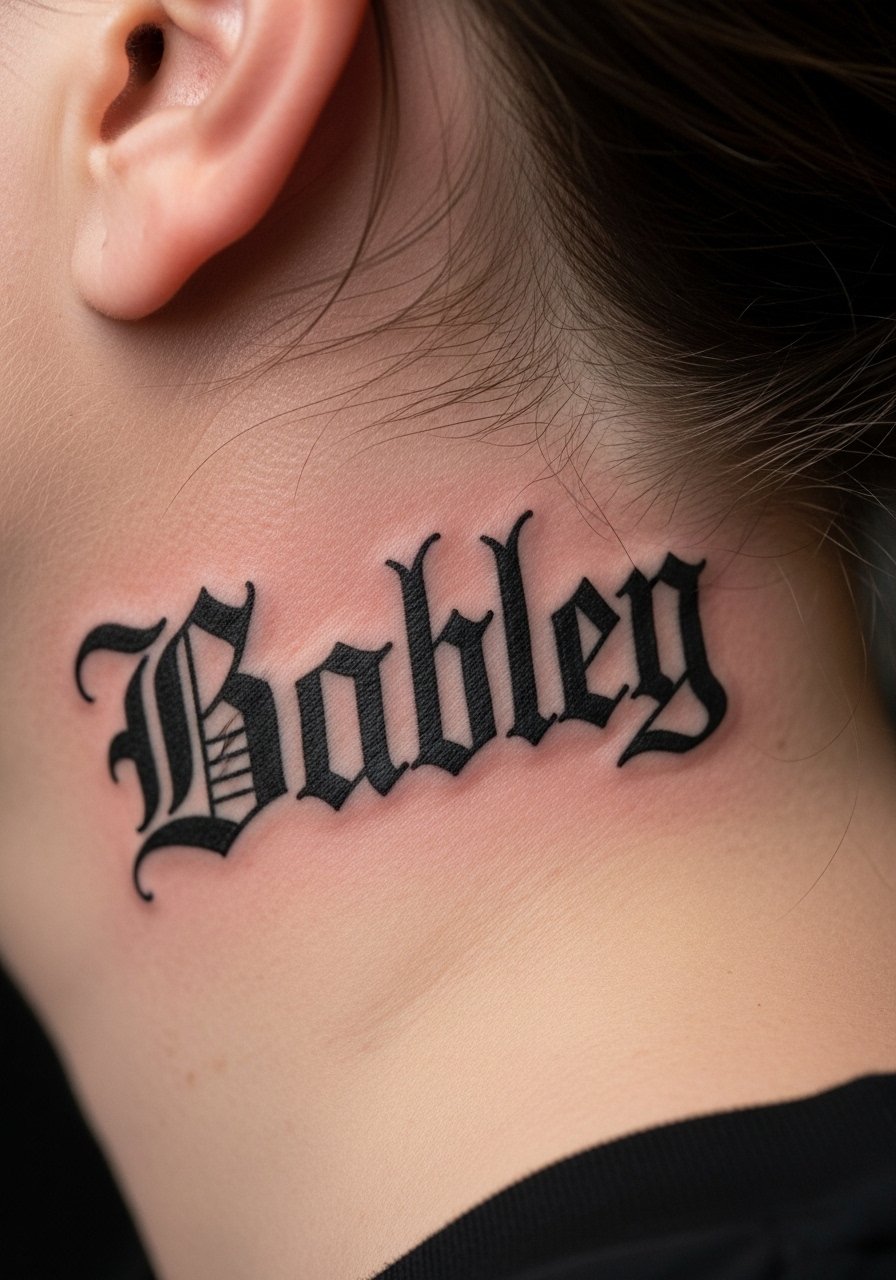
13. Tiny Traditional Script Word Behind the Ear
A single word in bold script can be very effective behind the ear if the letterforms are chunky. Tell your artist which font family you prefer and request a mock stencil scaled to the skin. The usual pitfall is asking for thin cursive that becomes unreadable within a year. Plan for a small touch-up window at year two if you want the lettering to stay crisp. This placement is visible and may carry social considerations for some workplaces, so factor that in. For finding lettering specialists, use type-focused portfolios and directory filters rather than relying on a single social post. Image shows readable letterforms and healed edges.
14. Tiny Old School Rose Stem with Leaf Behind the Ear
A stem and single leaf is a minimalist floral nod with old school shading. Ask for thicker stem linework and a single filled leaf so it keeps shape when the skin smooths. Sessions are under an hour and the spot can feel tender. The mistake is over-shading the leaf with fine gradients which soften into a blob. For showing this, a bandana headband or low fade reveals the stem cleanly. When you search for artists, filter portfolios for healed small floral work near the hairline. Image shows stem placement and leaf block shading.

15. Tiny Anchor and Compass Combo Behind the Ear
Pairing two micro icons like an anchor and a compass can tell a short visual story when spaced correctly. During consultation ask for separation so each icon has room to breathe. The session may run closer to an hour depending on spacing. The frequent error is cramming multiple symbols into a postage-stamp area. For longevity assign each symbol clear negative space around it. This placement is sensitive to hair rubbing, so avoid tight collars in the first week. For artist discovery search healed combo pieces in studio galleries and convention pages. Image demonstrates balanced spacing and healed integrity.
16. Tiny Traditional Rose with Anchor Stem Behind the Ear
A rose whose stem morphs into an anchor blends two classics into a single compact symbol. Ask for a bold rose head and a simplified anchor base so the transition reads cleanly. Session time is moderate and pain is localized. The common mistake is too much filigree where the stem and anchor meet. For showing off this hybrid, a short haircut or a trimmed neckline helps, and a thin chain pendant balances the visual weight. When choosing an artist, look for healed hybrid pieces in portfolio galleries. Image shows the hybrid junction and healed contrast.

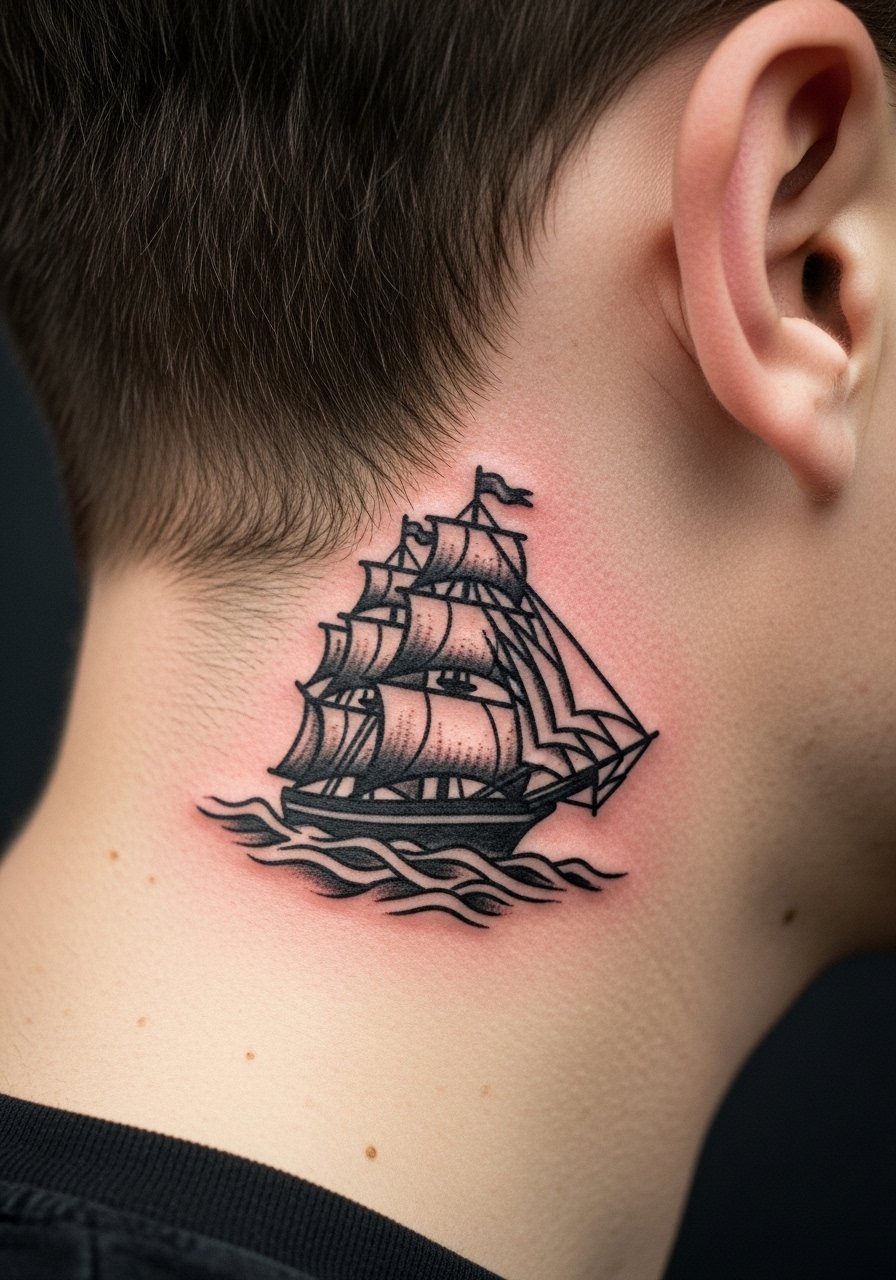
17. Tiny Traditional Ship with Wave Accent Behind the Ear
A micro ship silhouette with a single wave accent gives maritime flair without large scale. Request that the ship be a silhouette with bold mast lines and the wave as a simple curved form so both hold up. The session runs short and the area may ache for a few days. One mistake is overdoing sails and ropes at this scale. For picking an artist, use convention rosters and local studio listings to find people who show healed micro maritime work. This placement is visible, so consider your daily hairstyle if visibility matters. Image shows ship silhouette and wave accent.
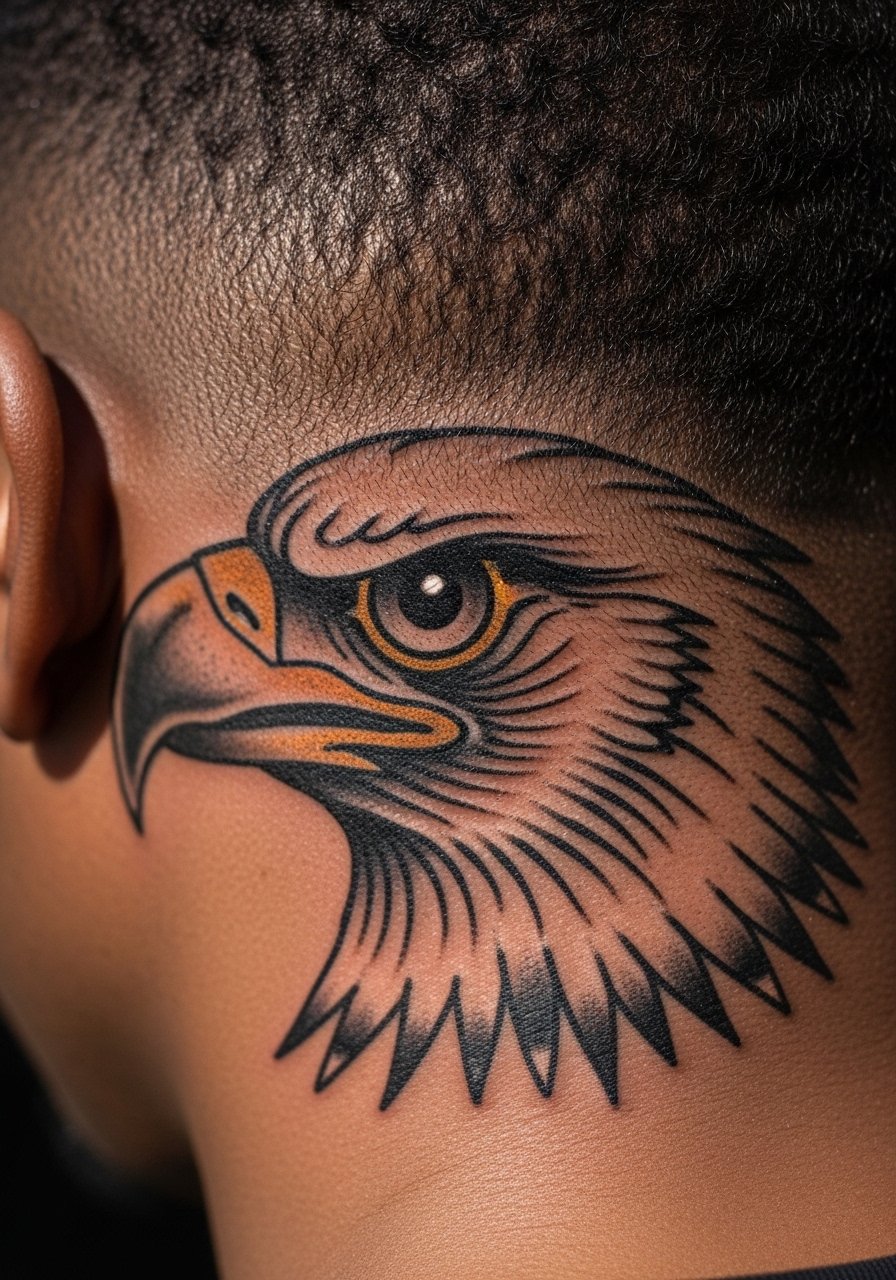
18. Tiny Old School Eagle Head Behind the Ear
An eagle head reduced to its profile works well as a strong little emblem. Ask for simplified beak and eye block with bold linework to keep the expression legible. Sessions are typically under an hour and the pain is short. A common mistake is attempting feather detail that the small area cannot hold. For showing the eagle, a short haircut and a matte pomade keep the hairline clean. When hunting for artists, check healed-theme portfolios and local directory tags. Image captures the profile and bold features.
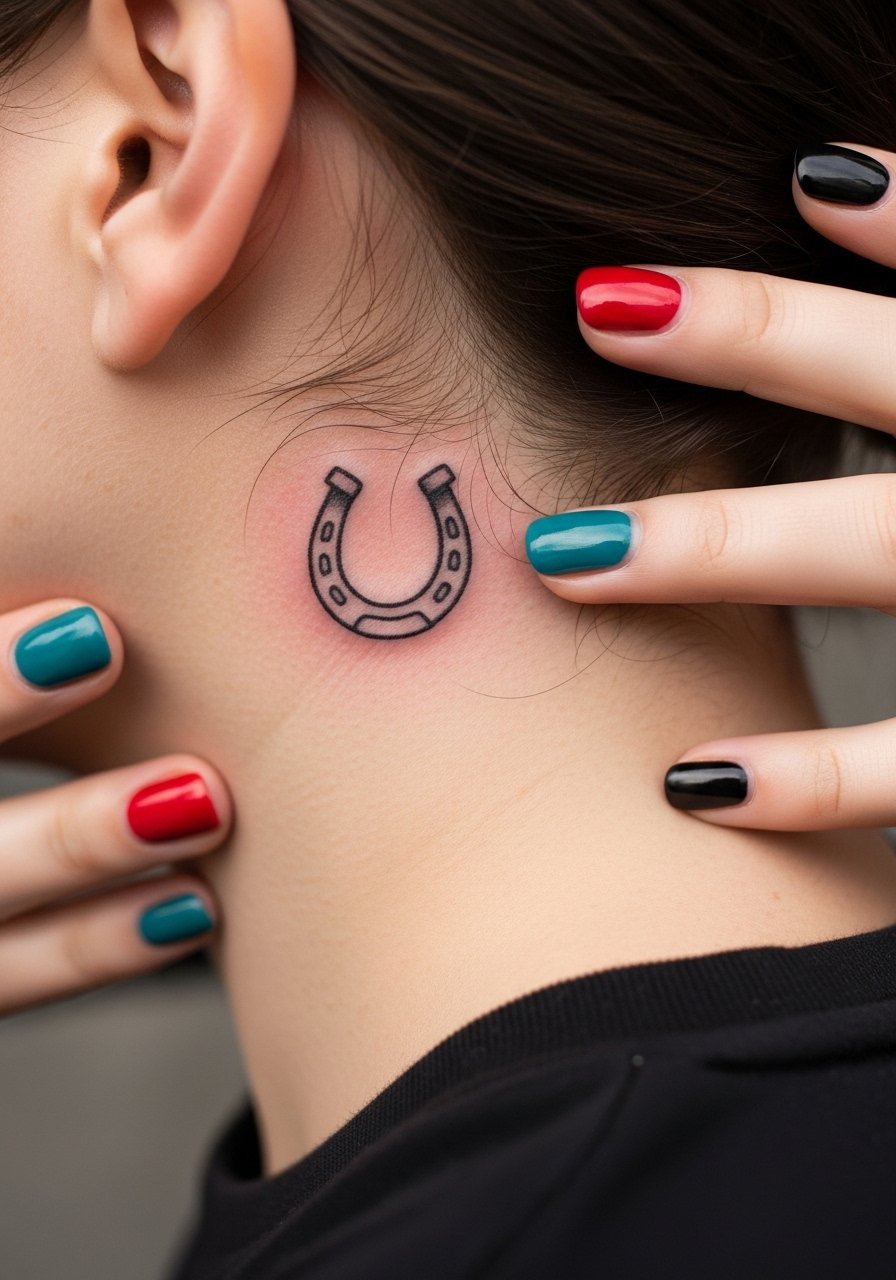
19. Tiny Traditional Horseshoe Behind the Ear
A small horseshoe with a couple of bold nail dots is a quick classic choice. Ask for the horseshoe to be solid with clear spacing for the nail dots so they do not blend as the skin settles. The go-to mistake is tiny dot clusters that blur. Sessions are brief and many people skip pain management. If visibility is intentional, keep a short haircut and pair with a thin chain pendant to draw the eye. Use studio galleries and hashtag searches to confirm healed clarity on hairline pieces. Image shows horseshoe shape and dot spacing.
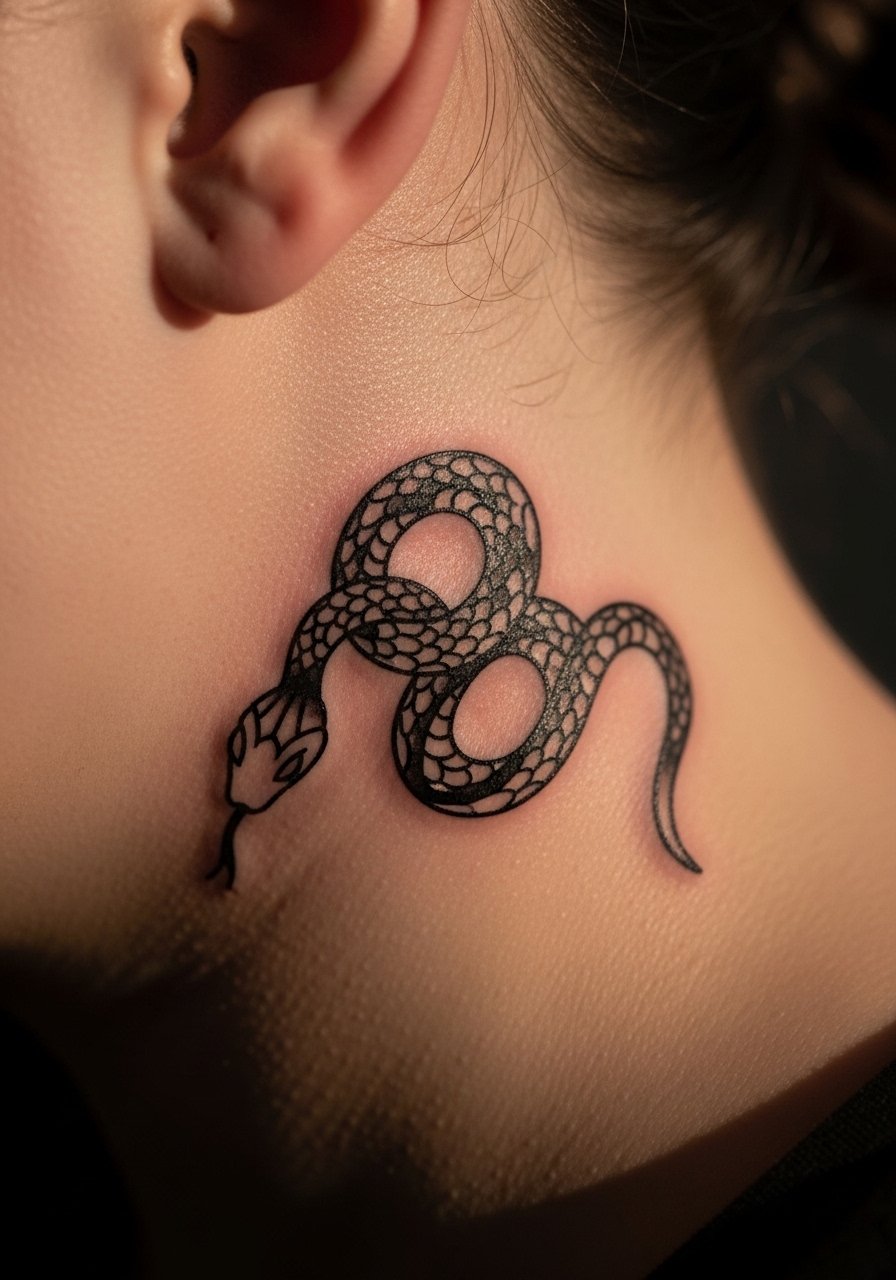
20. Tiny Traditional Snake Loop Behind the Ear
A small looping snake that hugs the hairline can be bold without being busy. Tell the artist you want thick contour lines and minimal internal scales so the shape reads as it heals. The session may last forty minutes and the area can feel sore for a couple of days. The common error is too many tiny scales or shaded gradients. For showing this piece off, keep the sides short and use a matte pomade to push hair back. When searching for an artist, look for healed work of sinuous micro shapes in local portfolios. Image shows the snake loop and bold outline.
21. Tiny Classic Scripted Initials Behind the Ear
Initials in bold block or slab script are the simplest old school token and they work behind the ear when letterforms are compact. Insist on bold letterforms and request a test stencil so you can see the scale against the hairline. The session is very quick and discomfort is minimal. The primary mistake is choosing thin serif scripts that lose their serifs after healing. This placement is highly visible in shorter hairstyles so think about career implications if you need concealment. For artist discovery use local studio searches and community forums to confirm healed examples of micro lettering. Image shows readable bold initials and healed edge integrity.
Frequently Asked Questions
Q: Will old school pieces behind the ear fade faster than on my forearm?
A: Smaller pieces near the hairline can lose crispness sooner because the skin is thin and the area sees friction from collars and hair. From what I've seen, prioritizing thicker linework and stronger saturation helps a behind-ear icon last longer than a finely detailed small piece would. Plan for a possible touch-up around year two if you want persistent sharpness.
Q: How painful is getting a tattoo behind the ear compared with other neck placements?
A: Pain is usually sharper and more localized behind the ear because the skin sits close to bone and nerves. Most people rate it higher than the outer forearm and lower than the ribcage. Expect tingling while the needle runs and tenderness for a few days. Numbing cream can help if your pain threshold is low, but discuss it with the artist before the session.
Q: Are there controversy points about doing fine line old school work behind the ear?
A: Yes, artists split into two camps on fine line near the hairline. One camp says the thin skin and movement blur fine lines within a couple of years. The other camp believes that with correct depth and spacing fine line holds up even on hairline skin. The practical approach is to ask your artist which side they practice and to see healed photos from similar placements before booking.
Q: What should I wear to the appointment for a behind-ear piece?
A: Wear a top with an easy neckline so you can tilt your head without tugging at clothing, for example a loose button-down or a wide-neck tee. If you want the piece visible immediately, bring a hair tie and consider a short cut or slick-back style. A loose button-down shirt is usually the simplest solution for access.
Q: How do I find artists who specialize in small hairline or behind-ear work?
A: Use local studio directories, convention rosters, and hashtag searches to find healed photos. Focus on portfolios that show healed results rather than only fresh photos. Community forums and local shop galleries are also helpful. I have seen consistent results from artists who post multiple healed hairline pieces in their portfolios.
Q: Can I get multiple small old school icons behind both ears and have them age consistently?
A: You can, but consistency depends on line weight and aftercare. Keep each icon bold with simple shapes and plan similar spacing. Hair and collar friction can differ side to side, so expect slightly different wear. If matching precisely matters, discuss symmetry and healing plans with your artist and factor in a synchronized touch-up if needed.
