
The tattoos that still read clean after a decade are rarely the flashiest things you see on Instagram, and that common surprise shapes how I pick old school pieces for men. Faded panthers, color that pools on darker skin, and the surprise pain of a wrist stencil are all real headaches. Read these sketches with placement, aging, and session wear in mind so your first consult starts sharp.
1. Classic Anchor with Rope on Outer Forearm
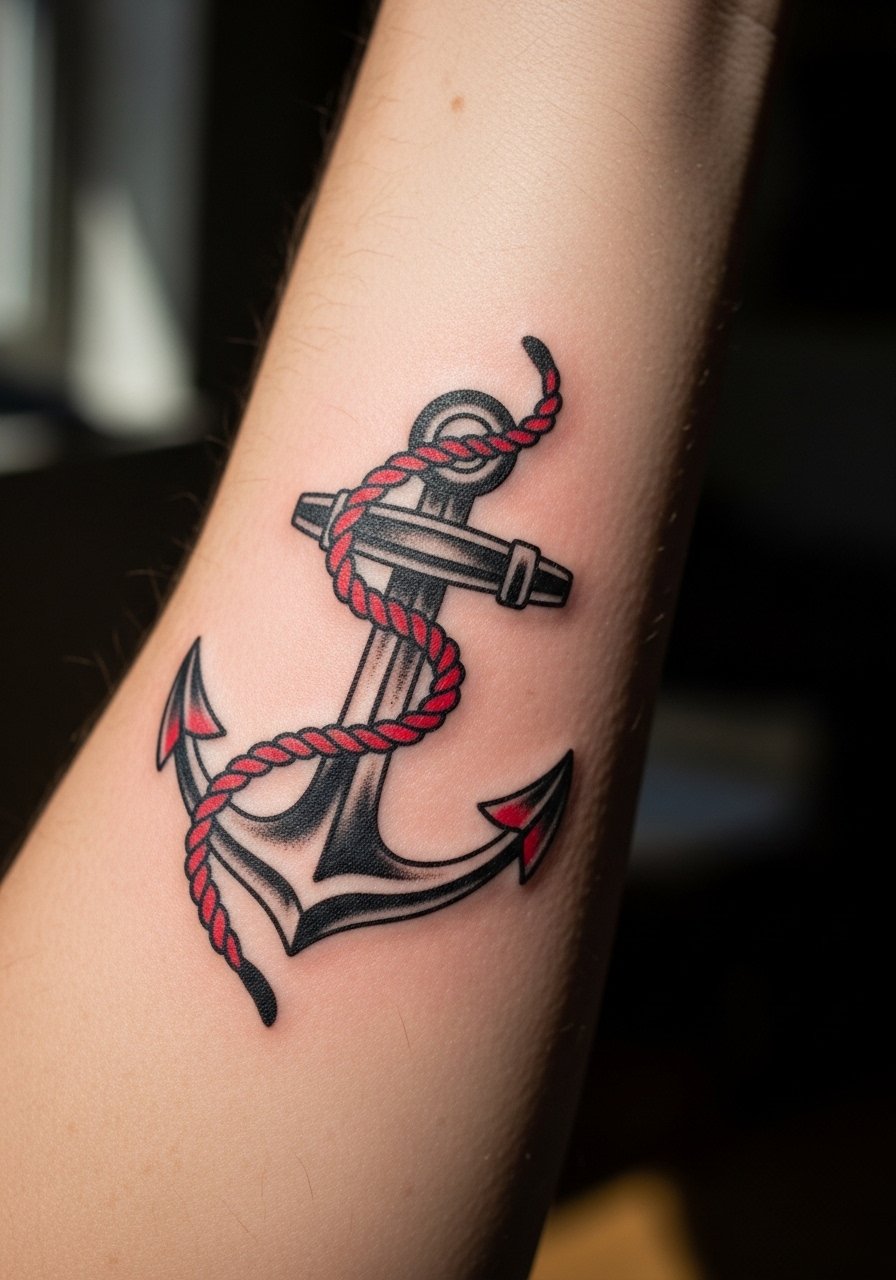
An anchor reads like old school shorthand for steadiness, and the outer forearm is the best place to show the rope wrapping without crowding. I recommend asking your artist for thicker black outlines and slightly larger negative spaces inside the rope so the knot keeps its shape as the years pass. The common mistake is requesting a tiny anchor that turns into a blob by year five. Expect a single session for a 4–6 inch piece and a touch-up around year five if you work outdoors. For showing it off, try a fitted navy crewneck tee men with sleeves rolled to expose the piece on casual days, and wear a loose short-sleeve button-up to the session for easy access.
2. Panther Head in Profile on Bicep
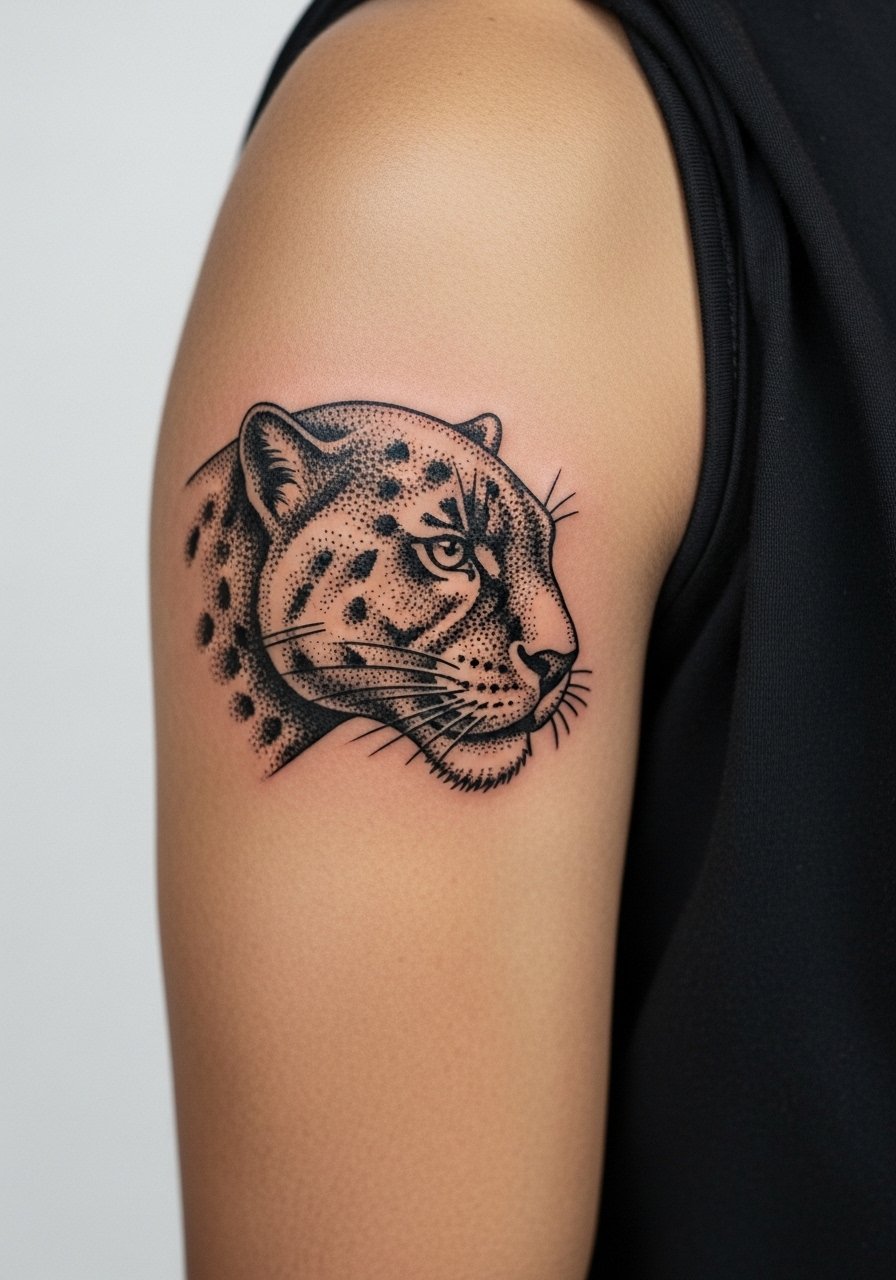
Panthers are the cover-up workhorse because dense saturation and dark fills mask older ink without needing extreme rework. Tell your artist you want contrast between matte black fills and a few small red accents so the face reads from a distance. A common aging issue is trying to keep delicate whisker lines; avoid that. The session will feel like standard upper-arm work, tolerable for most guys. A realistic touch-up timeline is two sessions up front and then another check at year five. For sessions and photos, a white sleeveless tank men makes the bicep read cleaner when you want to show progress.
3. Coiled Snake Ready to Strike on Calf
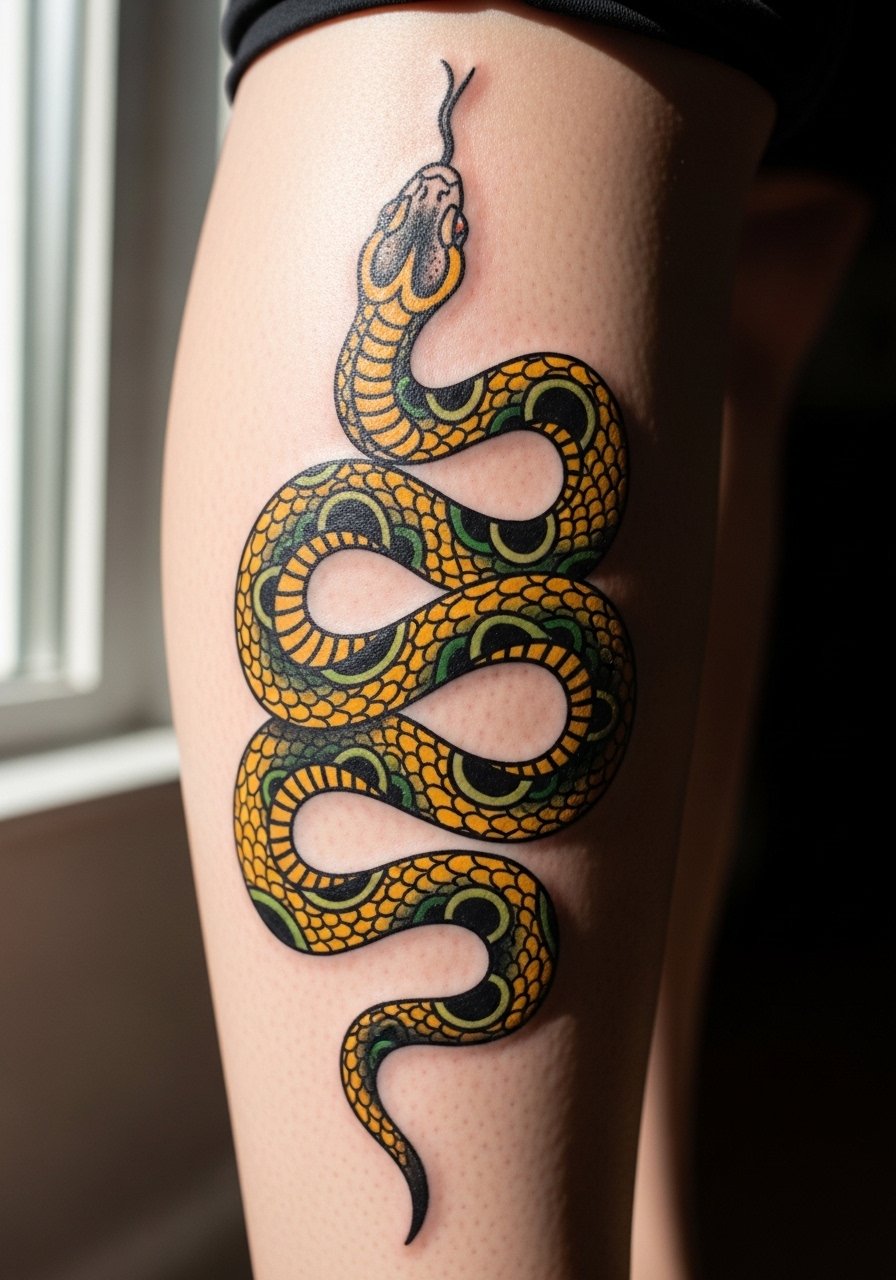
A calf gives the snake room to coil and flex with the leg, which helps the motion read correctly when you walk. Ask for a thicker outer outline and scales hinted with dot work rather than micro lines that blur against leg hair. Calf sessions usually take two hours for a 6–10 inch piece and are kinder than ribs for pain. Over time the fills settle into a matte look, so expect a color refresh at year five if you wear shorts a lot. For showing it off, roll up slim-fit chinos or wear sandals and jeans rolled to mid-calf to frame the work with intention. Try slim fit chinos men for summer outfits.
4. Swallow in Flight with Banner on Chest
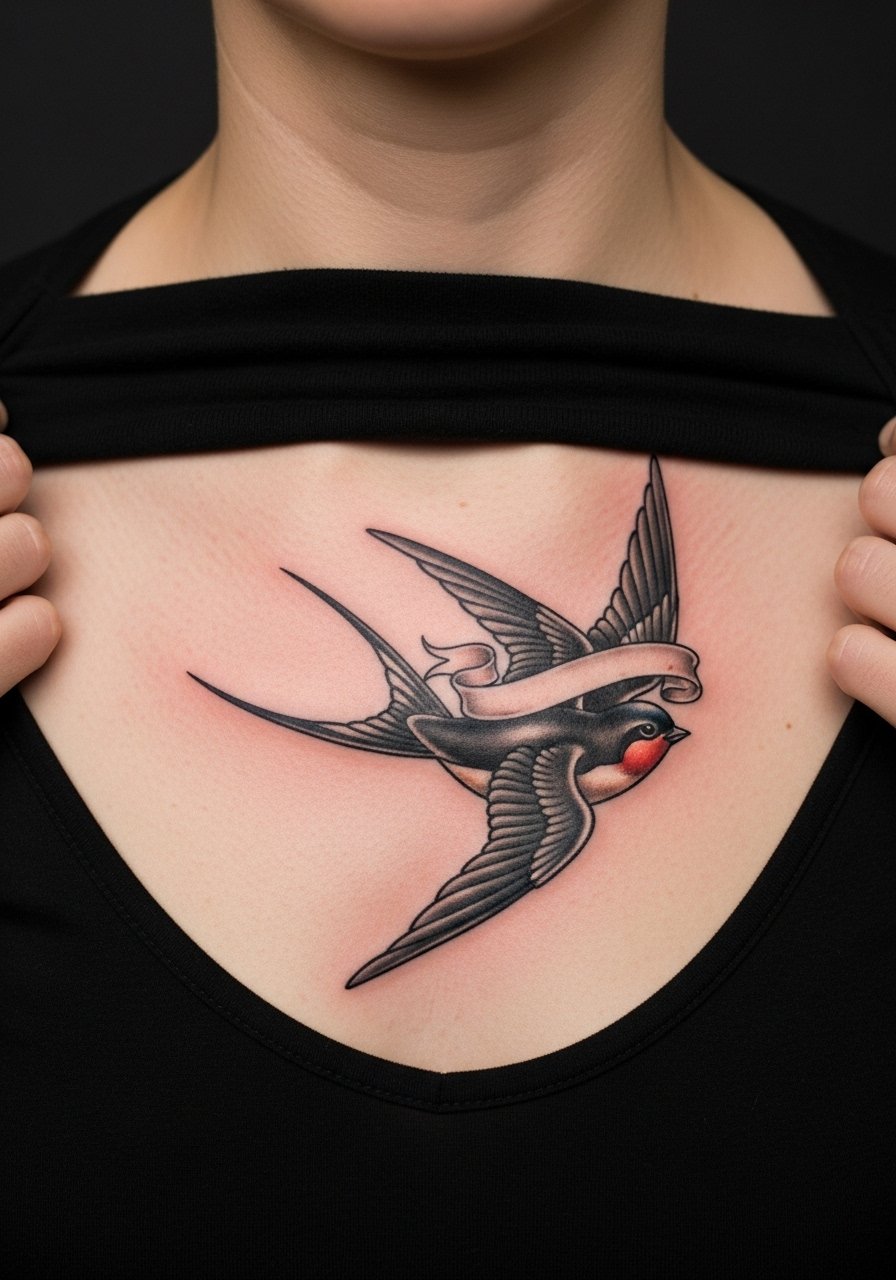
Swallows are classic markers for safe return and loyalty, and the upper chest gives the wings a broad canvas. When you consult, bring a clear idea of banner text and ask the artist for a slightly thicker banner ribbon so the letters keep legibility as the skin ages. Tiny script inside a narrow ribbon is the usual regret. A 4–7 inch chest swallow often finishes in one to two sessions depending on color. The chest can shift with weight gain, so expect minor stretching if your torso changes. For appointments, wear a loose tank or an open button-down you can pull aside without irritating the area.
5. Pin-Up Girl with Heart on Shoulder
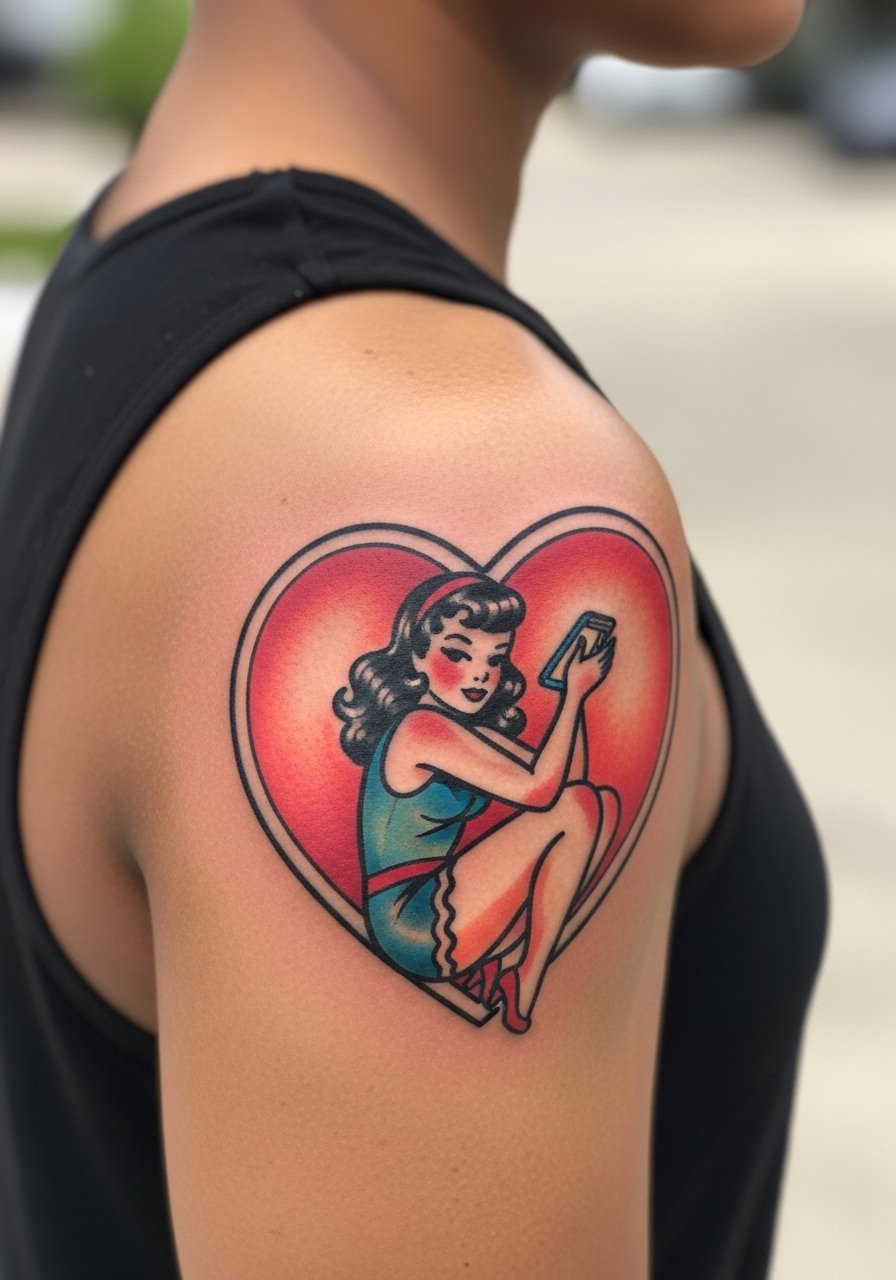
Pin-up pieces keep their vintage energy when scaled correctly for the shoulder cap. Ask your artist for slightly simplified facial detail so the expression holds after healing. The shoulder accepts color well, and because it is fleshy you can expect the lines to settle nicely into the skin. Sessions run one to two sittings depending on fill. A common mistake is asking for ultra-realistic facial shading that muddles into one tone on the shoulder. For show-off outfits, an off shoulder henley in olive exposes the cap without feeling contrived, and wear a sleeveless top to the session for clear access.
6. Skull with Crossed Knives on Forearm
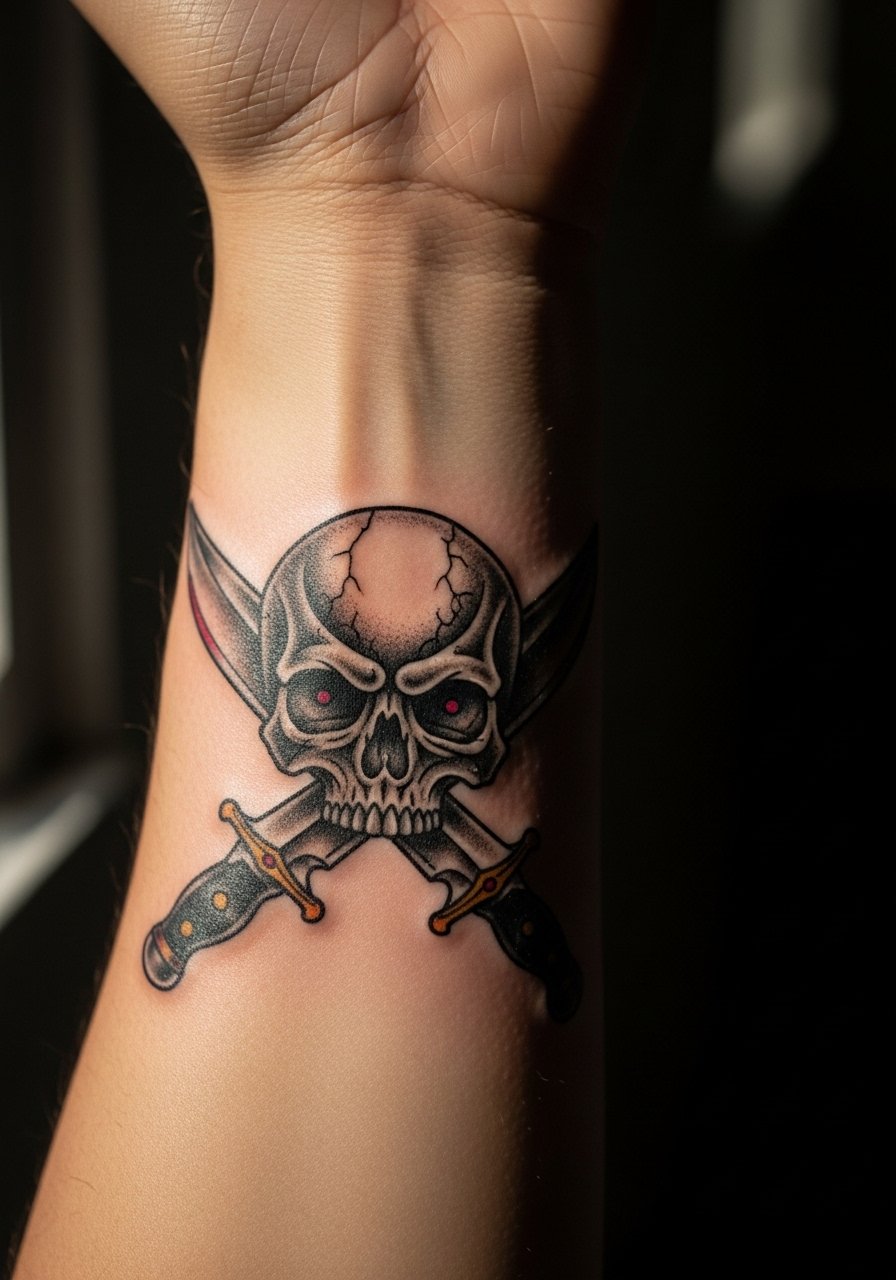
Forearm skulls land hard visually but they also live in a high-friction spot that sees soap, sleeves, and sun. Ask for thicker contour linework and reduced tiny stippling near the edges, because those details are the first to soften. Expect a one to two hour session for a 5–7 inch piece and a likely touch-up at year four if you work outdoors. The inner forearm is lower blowout risk than the wrist but more exposed. A frequent error is picking ultra-fine shading that fans out over time. Keep this piece visible in day-to-day outfits, but protect it from constant sun to preserve saturation.
Studio Day Picks
The anchor, panther, calf snake, chest swallow, shoulder pin-up, and forearm skull above have different session needs. These five picks smooth the session for those placements and protect fine black work during the first week.
-
Stencil transfer paper kit. Lets you preview line placement on skin, which is especially useful for the anchor and banner type pieces above so proportions read right before needles start.
-
Topical numbing cream. Applied as directed before the session can ease wrist and rib discomfort so you sit longer with less flinching.
-
Thin protective film roll. Helps guard forearm and wrist pieces from friction during the first few days when clothing and washing would otherwise rub the linework.
-
Fragrance-free body wash. A gentle wash keeps fresh ink clean without stripping oils that help satin the black outlines, important for chest and shoulder work.
-
Aquaphor healing ointment. A thin layer in the immediate post-session window locks moisture for black-heavy pieces while still allowing the skin to breathe.
7. Shellback Turtle on Thigh
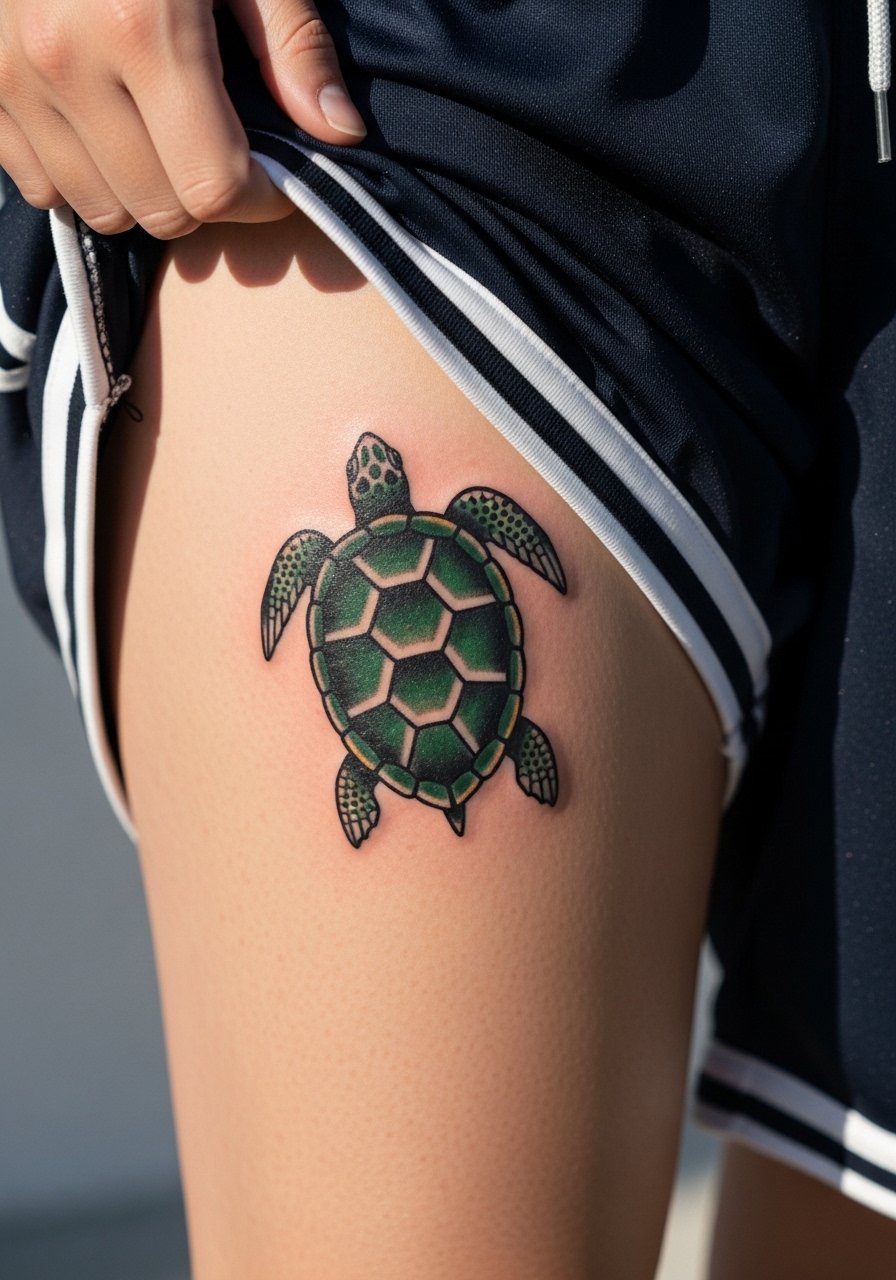
Shellback turtles are sea veteran badges and they sit nicely on a thigh because you get scale without distortion. Tell the artist you want a dense shell pattern with heavier black outlines and slightly muted greens so color stays readable on day-to-day skin contact. The thigh tolerates longer sessions, so expect two sittings for a 7–10 inch composition. The biggest mistake is compressing the shell pattern too tightly, which blurs as the skin flexes. For session wear, bring loose basketball shorts so the artist can roll the leg without pressure and you can move comfortably after.
8. Eagle with Banner on Upper Arm
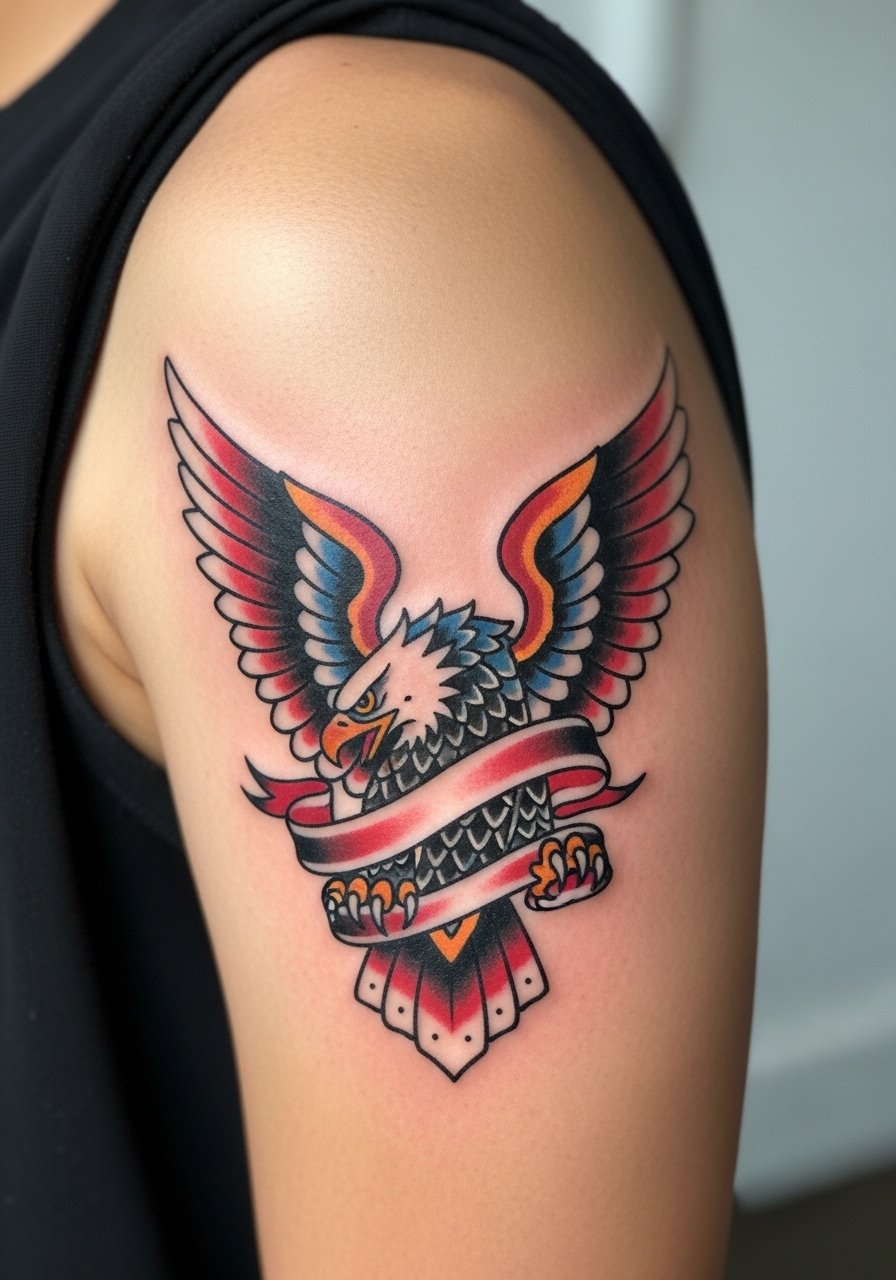
Eagles read patriotic and dense shading keeps the bird legible from a distance. When you sit down for consult, specify how you want the banner to curve around the wing and insist on thick outer contours. The upper arm is forgiving for saturation, and two to three sessions are common for a 6–8 inch layout. A typical error is putting too much tiny feather detail that fades into muddiness within a few years. If you plan full sleeves later, map the eagle so it can slot into larger work without being overpowered.
9. Ship at Full Mast on Back
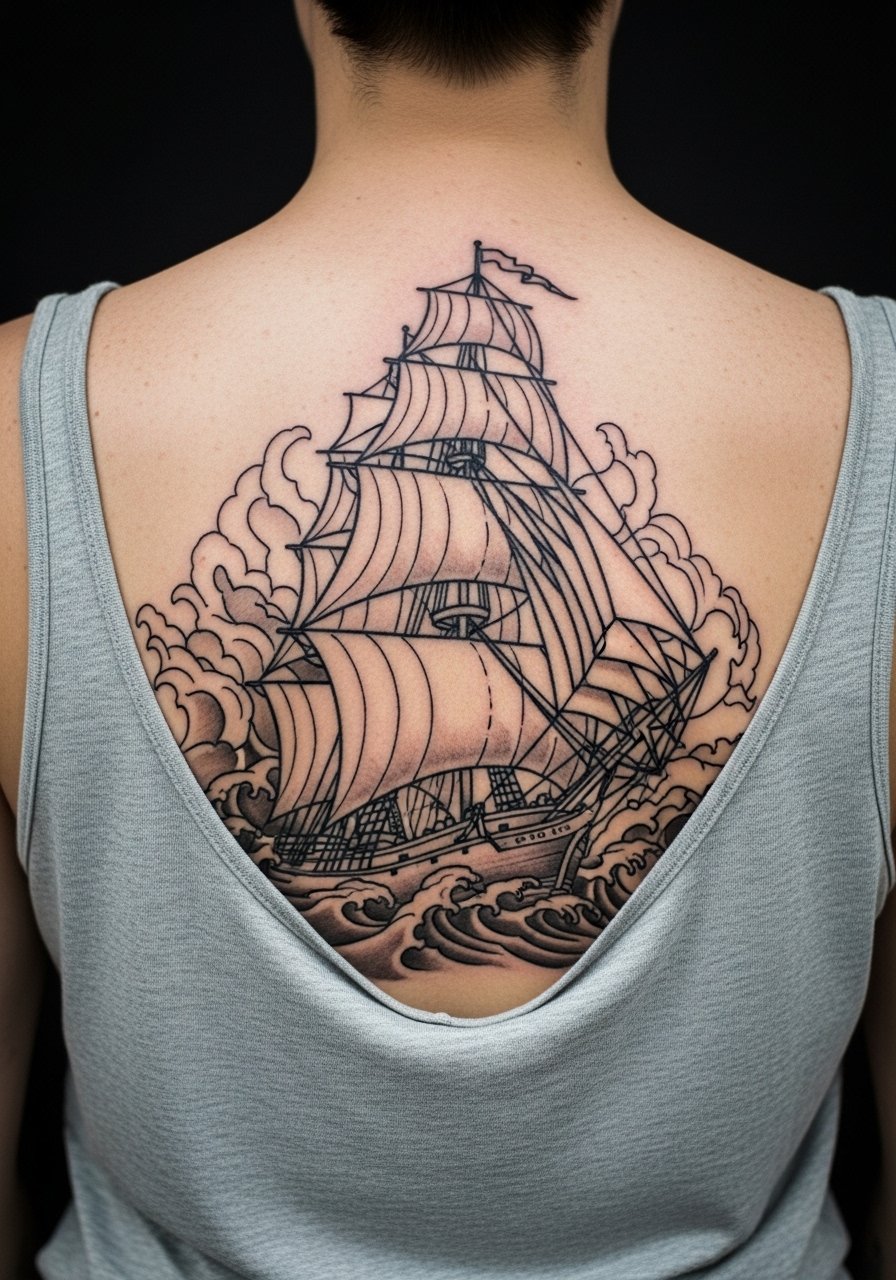
Large back canvases make ships sing, and a full-mast composition needs breathing room around the sails so the rigging does not become a blur. Tell the artist you want staggered sessions and a clear plan for how the waves wrap toward the shoulder blades. Multi-session work helps thin layers of saturation land evenly across the expanse. Expect three to four sittings and a touch-up check after the piece fully heals. The most common mistake is cramming too many tiny elements into the hull. For session logistics, a loose tank top gives the artist easy access while you stay covered.
10. Heart with Mom Banner on Bicep
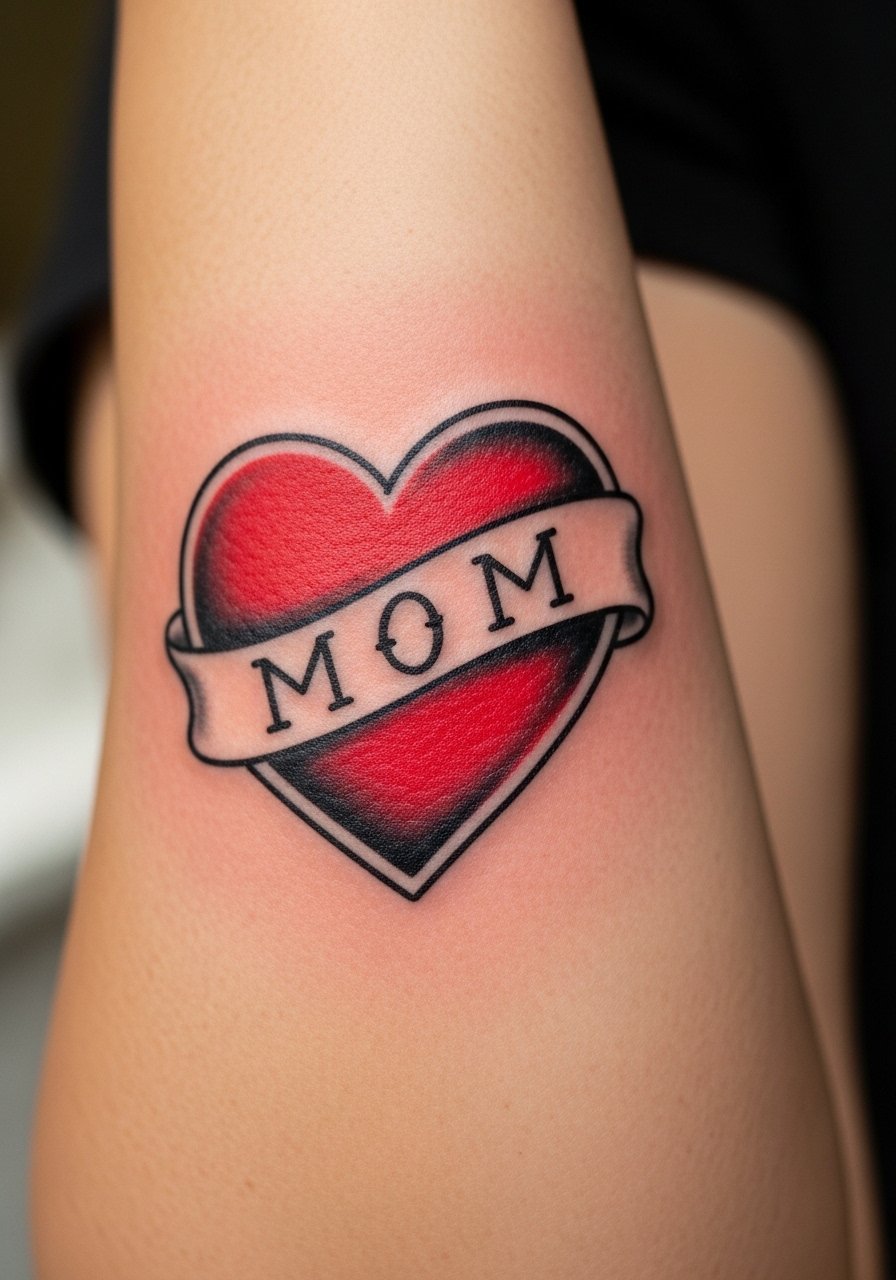
A heart and banner lives as a sentimental old school motif and the inner bicep keeps the ribbon readable. Ask for a wider ribbon and block lettering so "MOM" holds up when the skin softens. The inner bicep is sensitive but not brutal, and one session often finishes a medium 5–7 inch design. A mistake I see is choosing narrow serif script that breaks into the fill; block letters avoid that. This placement changes more with muscle gain, so factor in future body changes before pinning the size.
11. Lion Head Roaring on Chest

A chest lion carries magnitude if it is set off-center and sized to the pectoral. Ask for heavy mane saturation and simplified teeth highlights so the face keeps clarity. A two-session plan usually covers linework and color. Watch out for over-ambitious micro-shading inside the mane; that is the part that softens first. If you plan shirts that may reveal the chest, an open button-down over a plain tee helps the piece read without feeling like a costume.
12. Dagger Through Rose on Wrist
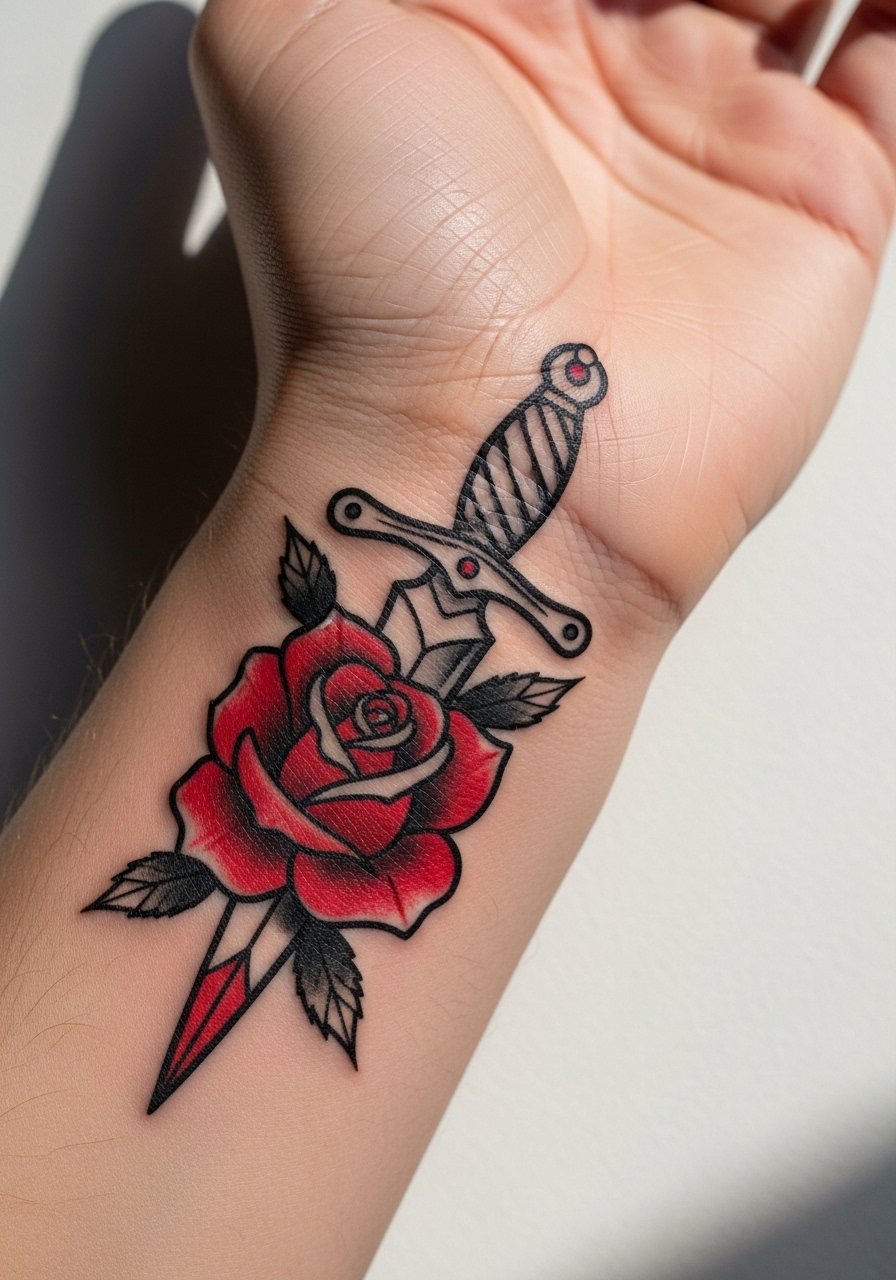
Wrist tattoos are compact and noisy. For a dagger and rose, ask for clean, thick contour lines and reduce tiny scrollwork that will bleed into the veins of the hand. The wrist is bony and will feel sharp during the session, so expect more discomfort than a fleshy arm. There is a persistent split among artists about fine line on wrists. One camp argues the constant motion and thin skin blur lines within two years. The other camp says proper needle depth and spacing can keep clean contours for much longer. Ask your artist where they stand and check healed photos on similar skin tones. For showing off, a narrow leather cuff bracelet frames the wrist without covering the artwork.
13. Nautical Star on Shoulder Cap
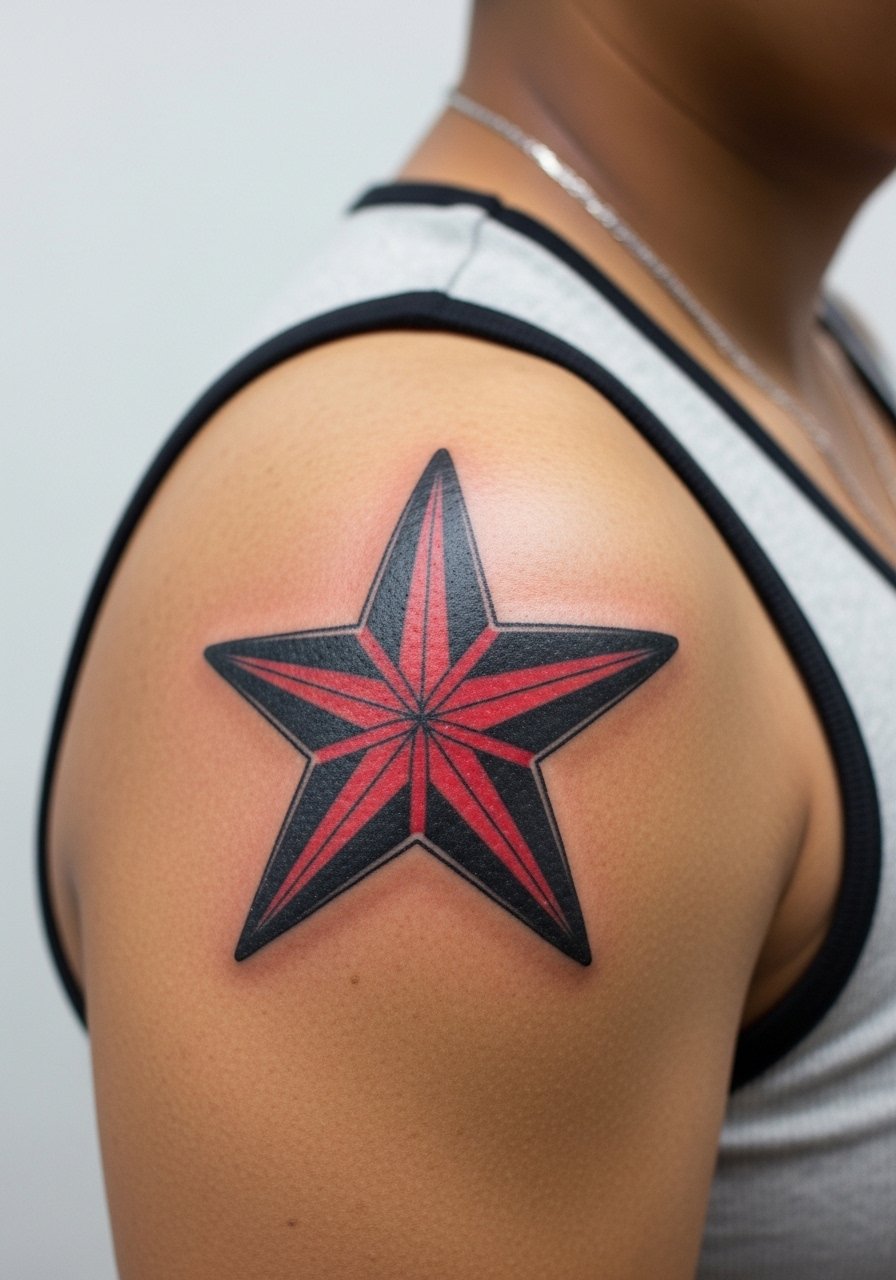
A nautical star is a compact emblem that holds up because of its simple geometry. Keep the star at least three inches across on the shoulder so the points remain crisp. Small stars under two inches often lose their point definition with years of sun exposure. Sessions are quick and tolerable. The shoulder cap handles saturation well, but if you plan to integrate it into an arm sleeve, discuss spacing so neighboring pieces do not crowd the star later.
14. Compass on Inner Forearm
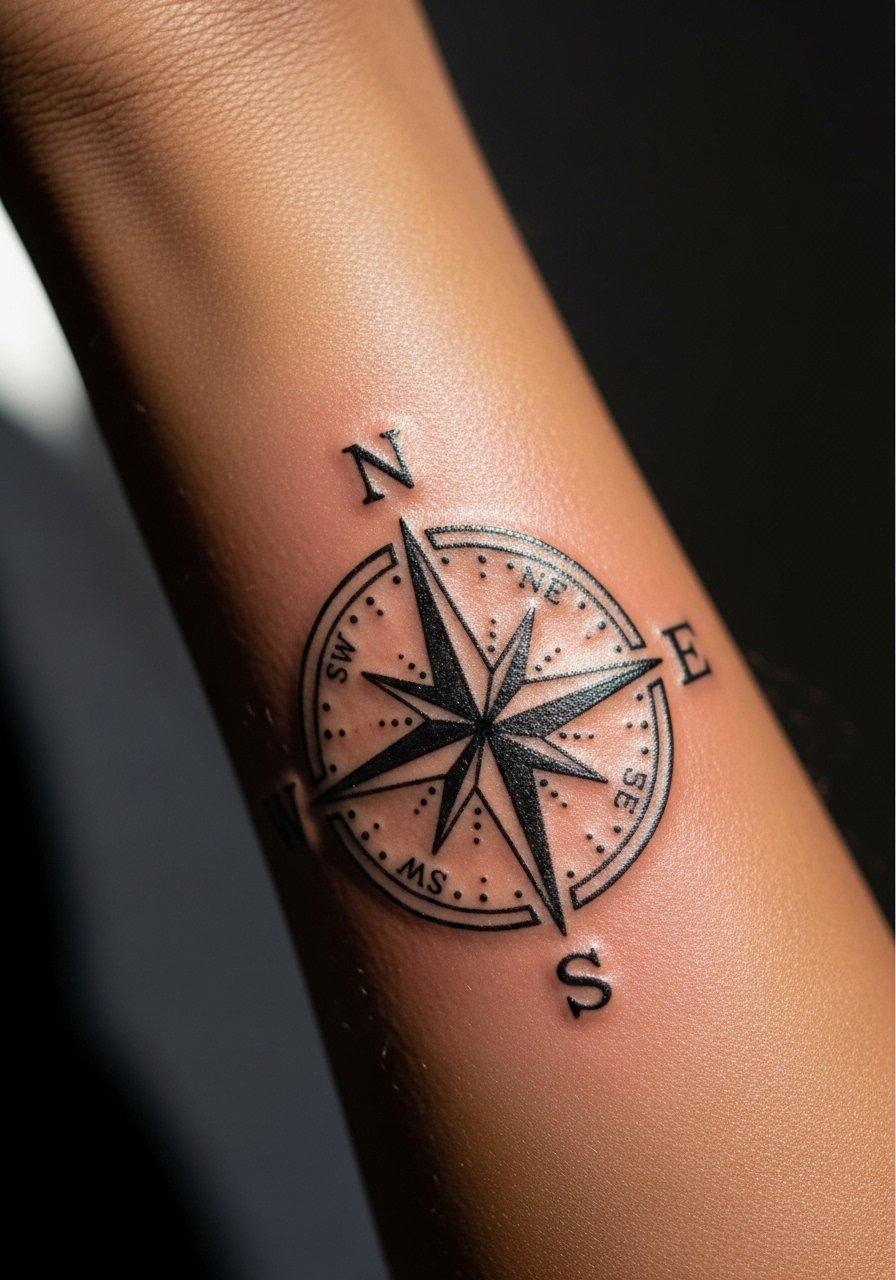
A compass reads classic on the inner forearm because the straight elements align with the limb. Ask your artist for slightly oversized directional points and a thicker outer ring so the geometry keeps contrast as the skin ages. A common mistake is making the needles too thin. Expect one to two hours for a medium compass. This placement often triggers the Saniderm versus dry healing debate. One group prefers dry healing believing it builds natural scab resilience under thick black lines. The other group favors protective film like Saniderm for color retention and fewer scabs. Discuss the pros and cons with the artist and pick the aftercare approach you can commit to for the first week.
15. Rose and Banner on Outer Forearm
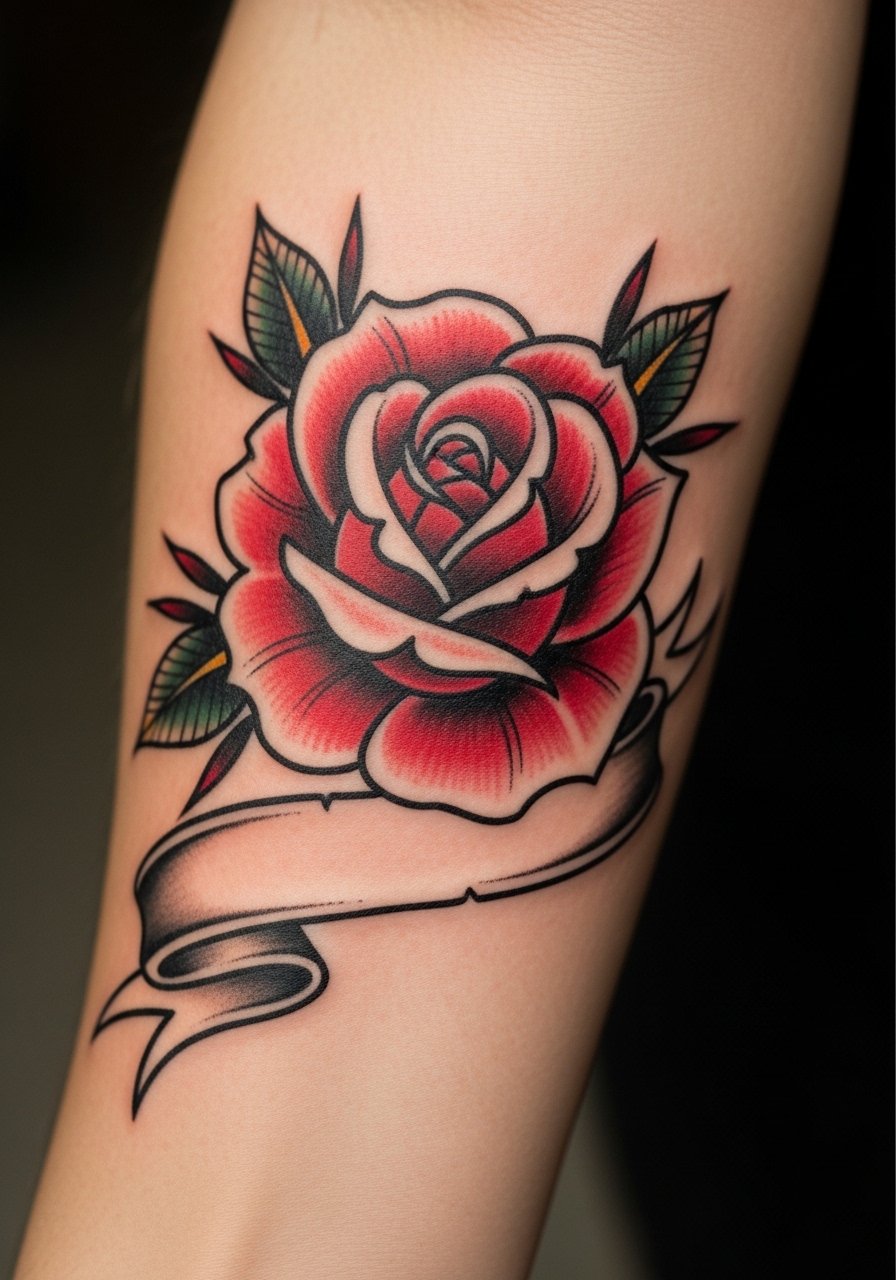
Roses pair with banners to say a lot in a small package, and the outer forearm keeps the stem and scroll readable. Ask for open petal negative spaces and fewer tiny veins so the flower does not darken into a single mass. A frequent mistake is over-detailing the petals. One session typically finishes a 4–6 inch rose and you should expect a touch-up to restore brightness if you swim or sunbathe often. For placement planning, consider how arm hair and sleeve cuffs will sit against the stem.
16. Tiny Anchor Wrap Around Wrist
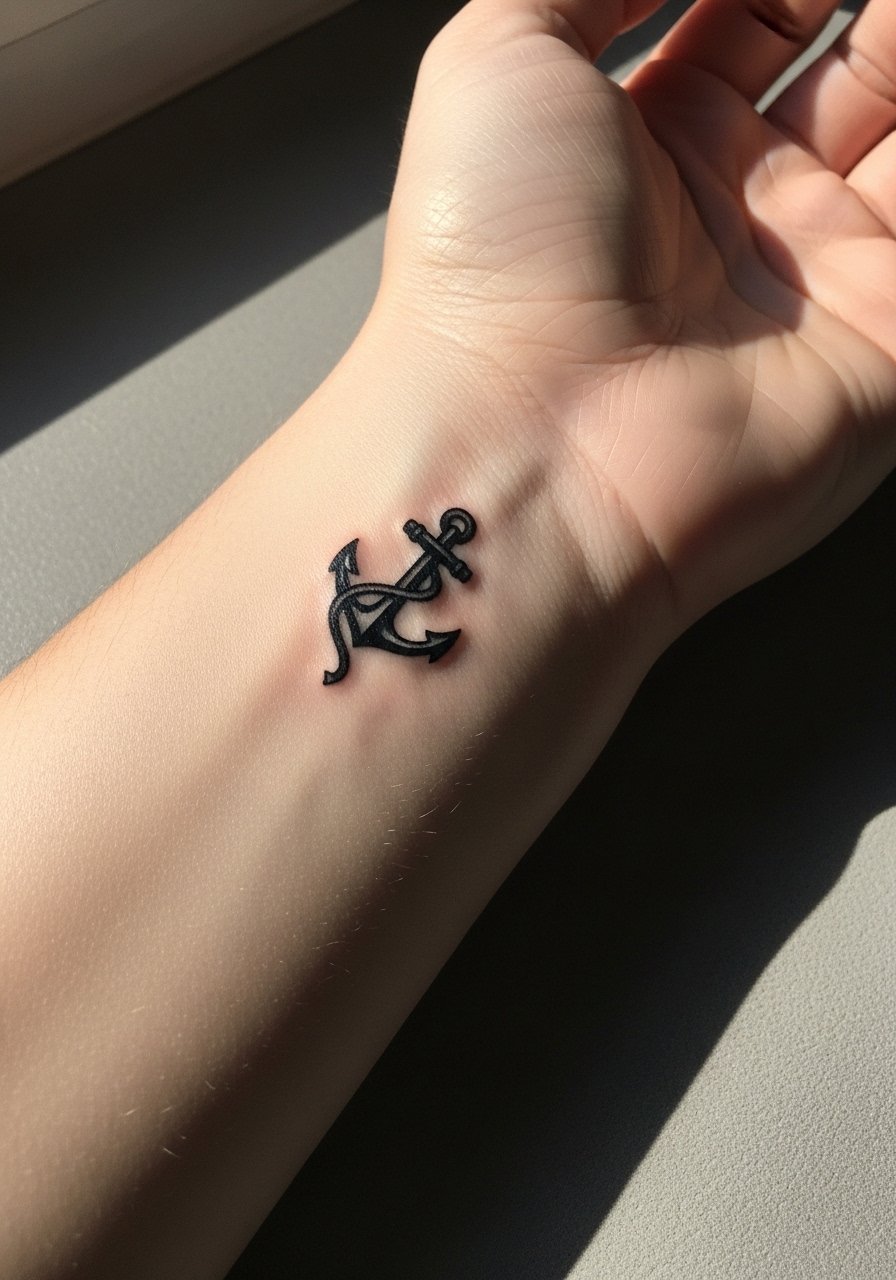
Mini anchors are low-commitment old school nods that still require thinking about scale. Make the anchor large enough to keep separation between the shank and the crossbar, otherwise the loops blur into one shape. The wrist is high-motion and sees frequent washing, so expect a tighter touch-up window at year two to three for small pieces. The session is quick but sharp. Avoid requesting micro-shading in tiny anchors because it vanishes or pools.
17. Gypsy Head on Upper Arm
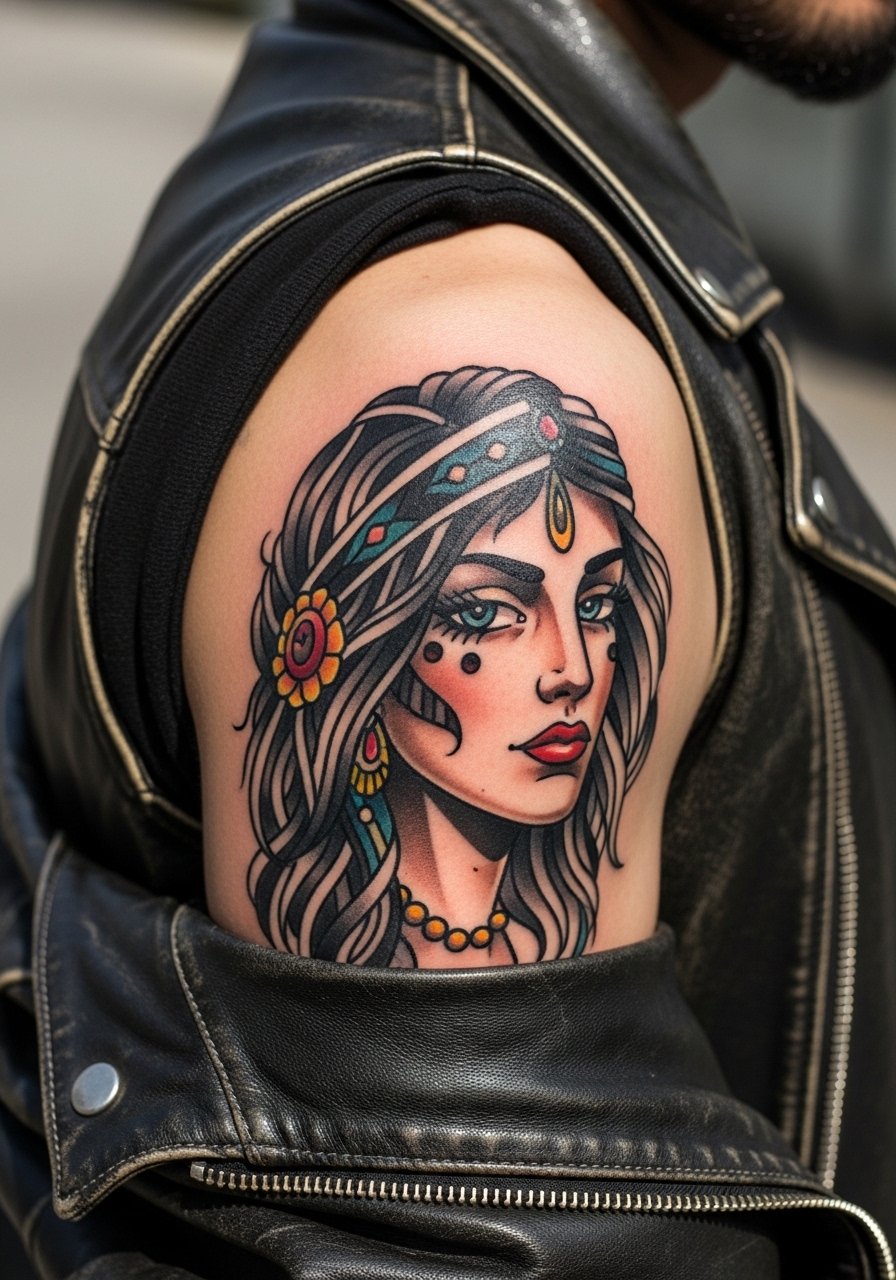
Gypsy heads and lady portraits need simplified facial planes for longevity. Tell the artist to reduce ultra-fine facial lines and lean into strong contrast between hair, skin tone, and scarf. The upper arm is forgiving for color and can take two sessions for a 6–8 inch portrait. Many guys pair this with a vintage leather jacket for a rugged look that complements the portrait instead of competing with it. If you plan more portraits, set a consistent line weight so the collection reads cohesive.
Frequently Asked Questions
Q: Why do old school panthers and dark fills go blurry on some forearms after a decade?
A: In my experience the issue often comes down to initial line weight and placement. Thin outlines combined with lots of sun exposure let the black migrate under the skin. Choosing thicker black outlines and placing dense fills on the outer forearm rather than directly over scar tissue helps a lot. Expect touch-ups every five to ten years depending on work exposure.
Q: Do bright reds and yellows fade faster on darker skin tones, and what should I ask my artist?
A: From what I've seen, saturated red and yellow can behave differently across skin tones because contrast works differently visually. Ask your artist to start with a strong black base around color fields and to test a small spot if you are unsure. Many artists recommend slightly muted color choices and denser saturation for longer visibility on medium and dark skin.
Q: How should I dress for a shoulder or chest session to make the artist's life easier?
A: Wear a loose tank or an open button-down you can pull aside without rubbing the fresh ink. For shoulders, an off-shoulder henley or sleeveless top gives access and keeps you covered. If you want a direct match, search for a loose tank top men to slide on and off the chair without disturbing the stencil.
Q: Will fine line banners and script hold up on the wrist or should I pick block lettering?
A: Wrist skin moves a lot and sees constant washing, so fine script is at higher risk of softening. Block lettering or slightly wider letterforms keep readability for longer. Ask your artist for examples of healed wrists with similar sizing before you commit.
Q: How do cover-ups with panthers or eagles work compared with laser removal?
A: Panthers and other dense, dark motifs are cost-effective cover-up choices because they mask older lines with saturation in one or two sessions. Laser removes ink gradually and can be more expensive and time-consuming. If your old ink is very dark, talk through both paths with the artist so you pick the route that fits your timeline and budget.
