
Fine line angel imagery is everywhere online, but what holds up on skin is a different matter. Fine detail, placement, and how you prepare for the session determine if a biblically accurate angel reads as majestic or as a blurred mess in a few years. Expect trade-offs in pain at certain spots, different fading patterns, and social visibility concerns. Below are realistic takes and wardrobe tips to make the design age as intended.
1. Seraphim Six-Winged Chest Piece
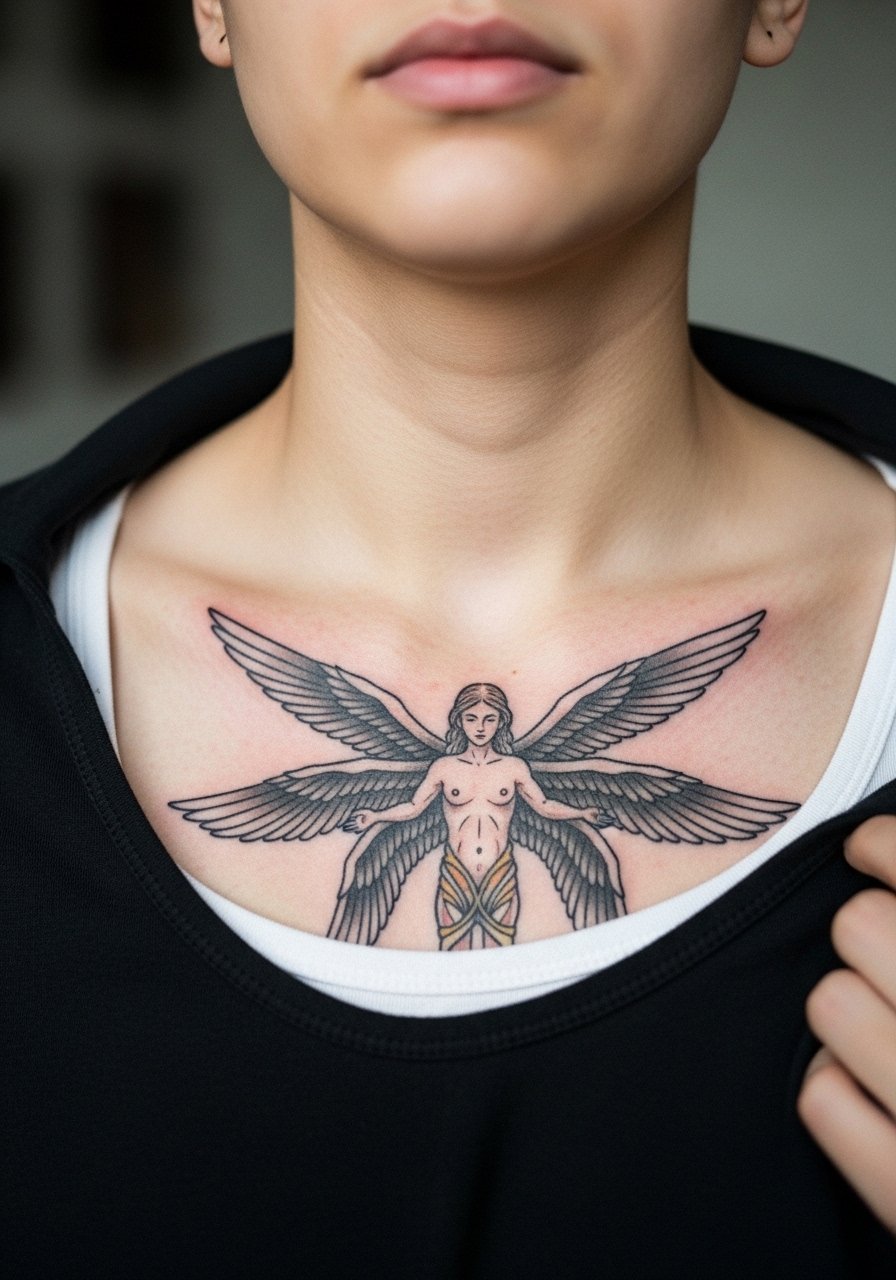
A realistic six-wing seraphim on the upper chest reads cinematic and dense without being cluttered when the wings are laid out to follow muscle contours. Fair warning, the chest can be a high sensitivity zone and sessions feel patchy because of rib movement. Tell your artist you want staggered spacing between feather rows and stipple shading for depth rather than tight parallel lines that merge. A common mistake is shrinking the wings to fit into a small collarbone gap, which causes heavy saturation that blurs. For showing it off, pair with a wide-neck blouse that frames the collarbone and keeps attention on the ink.
2. Eyed Cherubim Upper Arm Micro-Realism
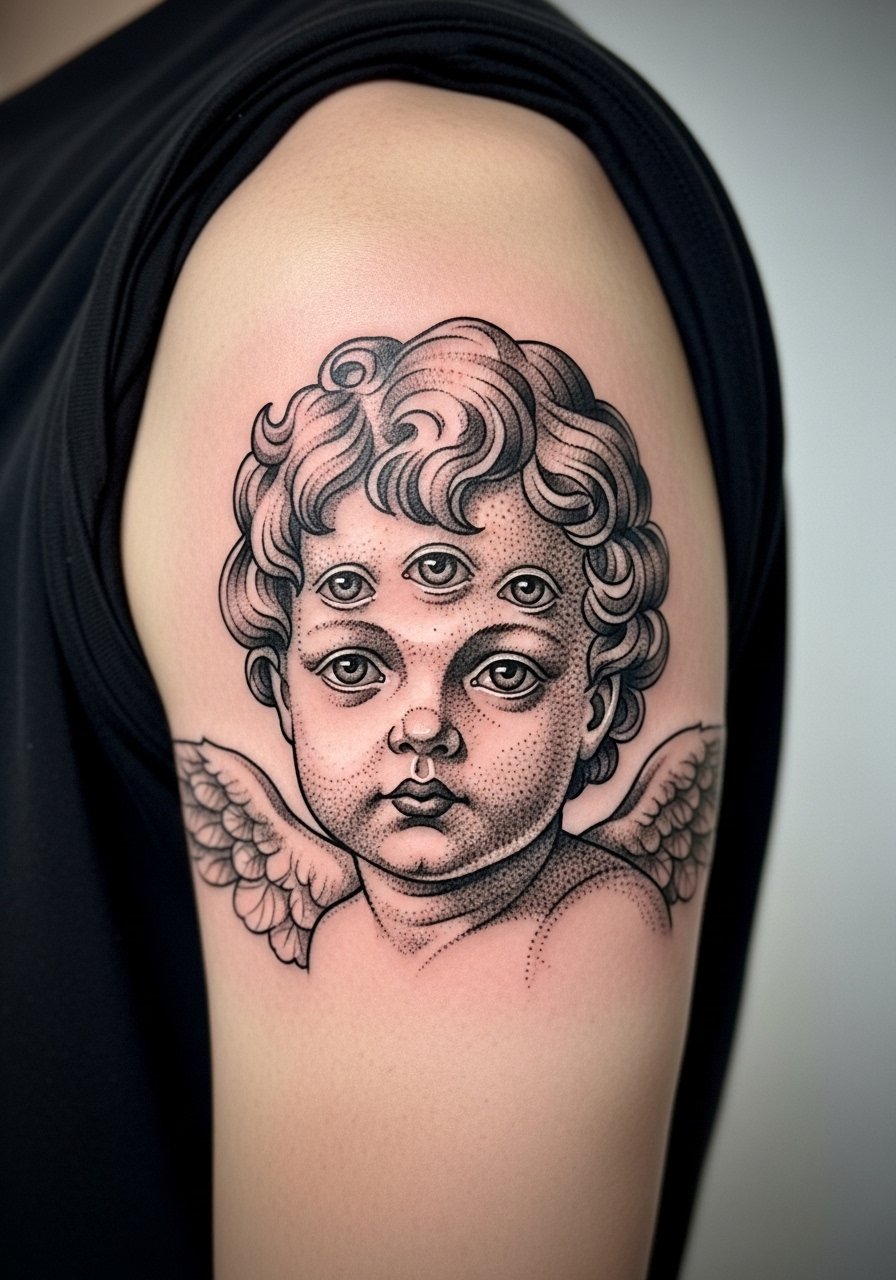
An eyed cherubim draws from scriptural descriptions while staying wearable as an upper arm piece. The outer upper arm tolerates longer sessions and holds detail well because the skin is thicker. In consultation, specify micro-realism with dot work for the eyes and light stipple shading rather than saturated blocks. Expect a 2 to 4 hour session depending on scale and ask about a three-month touch-up for the tiny pupils. Avoid the common version where artists pack too much black into the eye sockets, which creates a muddy look as it heals. For session comfort, wear a loose button-down shirt so the artist can roll the sleeve without pulling at the arm.
3. Thrones Geometric Back Panel

A throne-themed panel uses rigid geometry to interpret angelic authority. Back panels let you scale up complexity without worrying about blowout from tight lines. The trade-off is longer sessions and more sitting in one position. Tell your artist you want negative space to preserve breathing room between geometric elements and avoid tiny interlocking triangles that age into blur. Many people expect instant clarity across a large area and forget the endurance of touch-ups. For showing off on warm days, an open-back dress frames the panel without covering the central geometry.
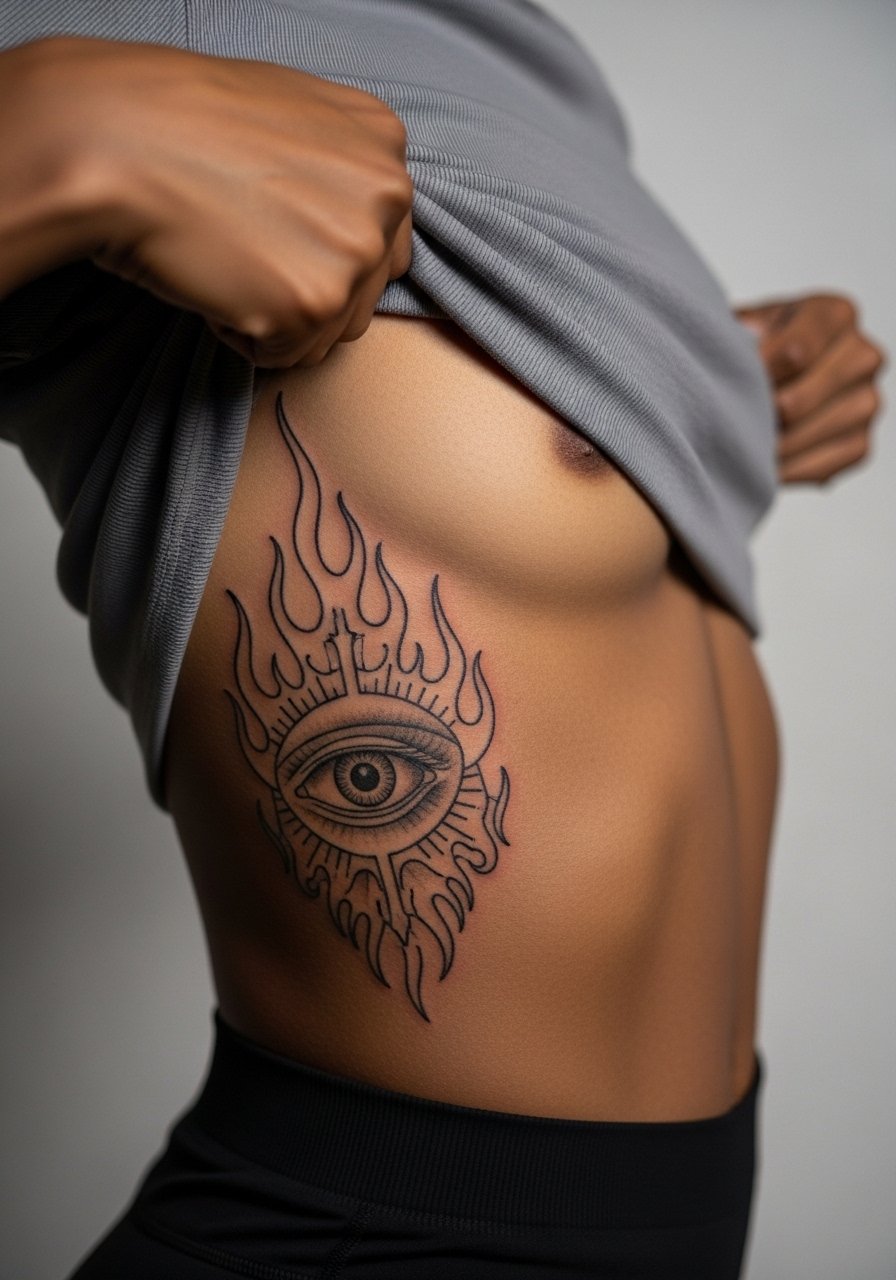
4. Sternum Seraph Face Close-Up

A close-up face on the sternum can be intensely detailed and intimate. Sternum work splits artists into two camps. One camp says the area stretches with breathing and tears detail within a couple of years. The other camp says with the right depth and slightly larger line weight it settles fine. Ask the artist which approach they use and if they recommend spacing up every small facial feature. Sessions feel more uncomfortable here because breathing moves the canvas. A frequent mistake is packing tiny facial details that look cramped once healed. Because the area is intimate, consider discrete variations that hint at the scriptural description rather than a literal micro-portrait.
5. Angel Holding a Sword Forearm Piece
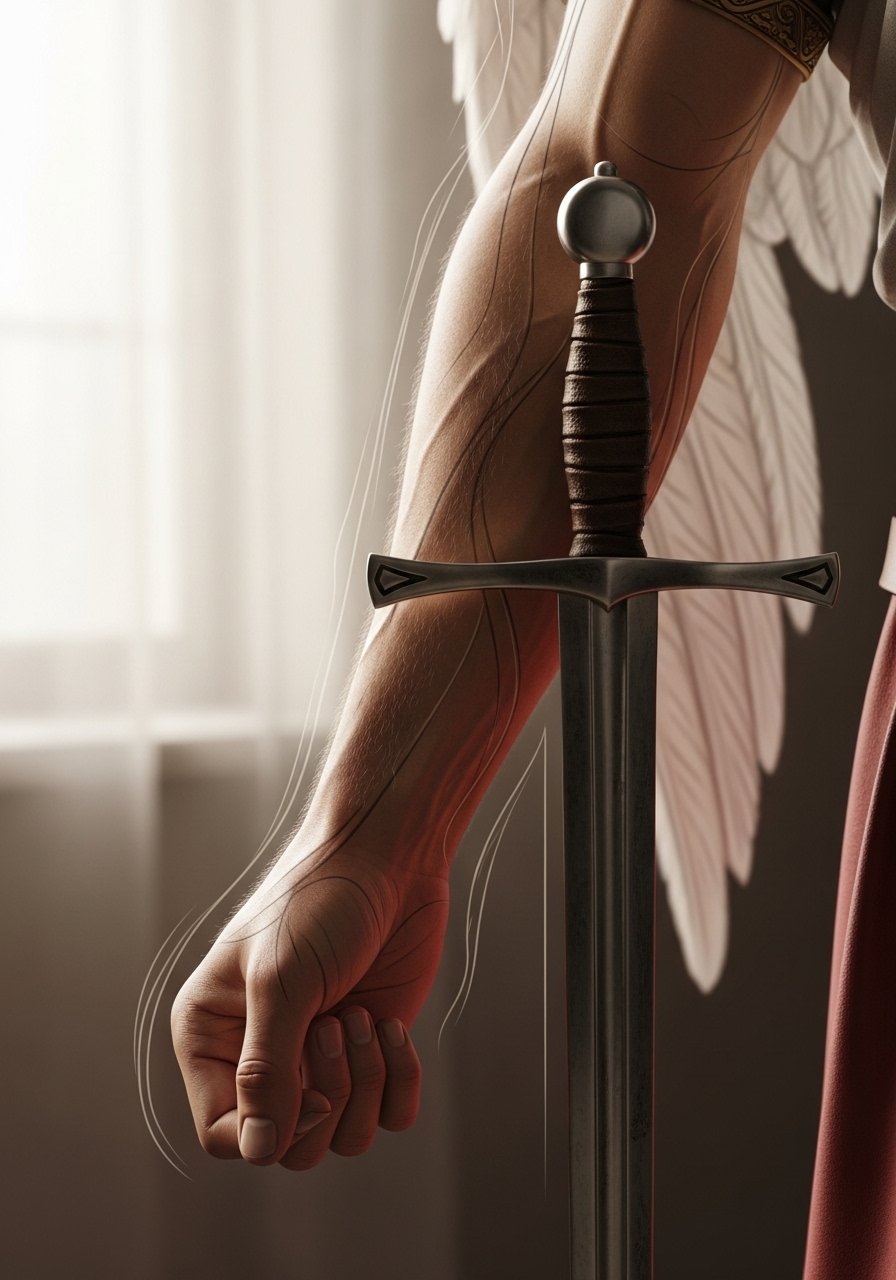
An outer forearm sword angel reads well at arm length and photographs clean. The forearm is forgiving for fine work but it sees a lot of sun. Tell your artist you plan for a midweight line rather than fragile hairlines so the sword hilt keeps definition over time. Expect moderate pain and a session that runs one to three hours depending on shading. A common mistake is letting the blade be the only vertical element which makes the composition feel rigid. Give the artist reference showing the arm in motion so the wing placement flows when you bend the elbow. To highlight the piece casually, a rolled sleeve or a racerback tank keeps the forearm visible without shouting.
6. Paired Watchers on Shoulder Blades

Mirrored watchers across the shoulder blades use symmetry to give a biblically accurate feel without crowding. Shoulder blades tolerate detail and the skin there does not move as much as the sternum. The session can be broken across two appointments if you want perfect symmetry. A frequent error is forcing identical stencils instead of letting the artist hand-adjust each side to muscle asymmetry. For long-term preservation, avoid overly tight linework near the spine where blowout risk rises. For pre-session ease and access, wear a loose tank top you can lift without removing.
Studio Day Picks
The chest and forearm pieces above need different prep from the sternum and shoulder sessions. A few compact items smooth the day and the first week.
-
Stencil transfer paper kit. Lets you test placement on the skin before the needle goes down, which is crucial for the chest and forearm alignments in the ideas above.
-
Thin protective film roll. Useful for covering a healed small forearm piece overnight to reduce friction from clothing.
-
Breathable compression wrap. Helps with swelling after longer back and chest sessions where movement can aggravate soreness.
-
Fragrance-free gentle body wash. Cleans the area without stripping pigments, helpful for large areas like the back panel.
-
Aquaphor healing ointment. A thin layer supports early healing for fine line work without blocking tiny needle channels.
7. Minimalist Angel Outline on Inner Wrist

A minimalist outline on the inner wrist reads delicate and personal. The wrist is a high-motion area and sees daily washing, which affects longevity. For a biblically accurate feel, scale the wings so they do not compress into the wrist crease. Ask your artist for slightly heavier primary lines around the wing base and lighter interior strokes for texture. A common mistake is placing the angel too near the tendon where blowout risk rises. Session time is short but expect a touch-up around year two. Pair with a thin chain pendant necklace that sits above the wrist without overlapping the design.
8. Scripted Angel Name Along Collarbone
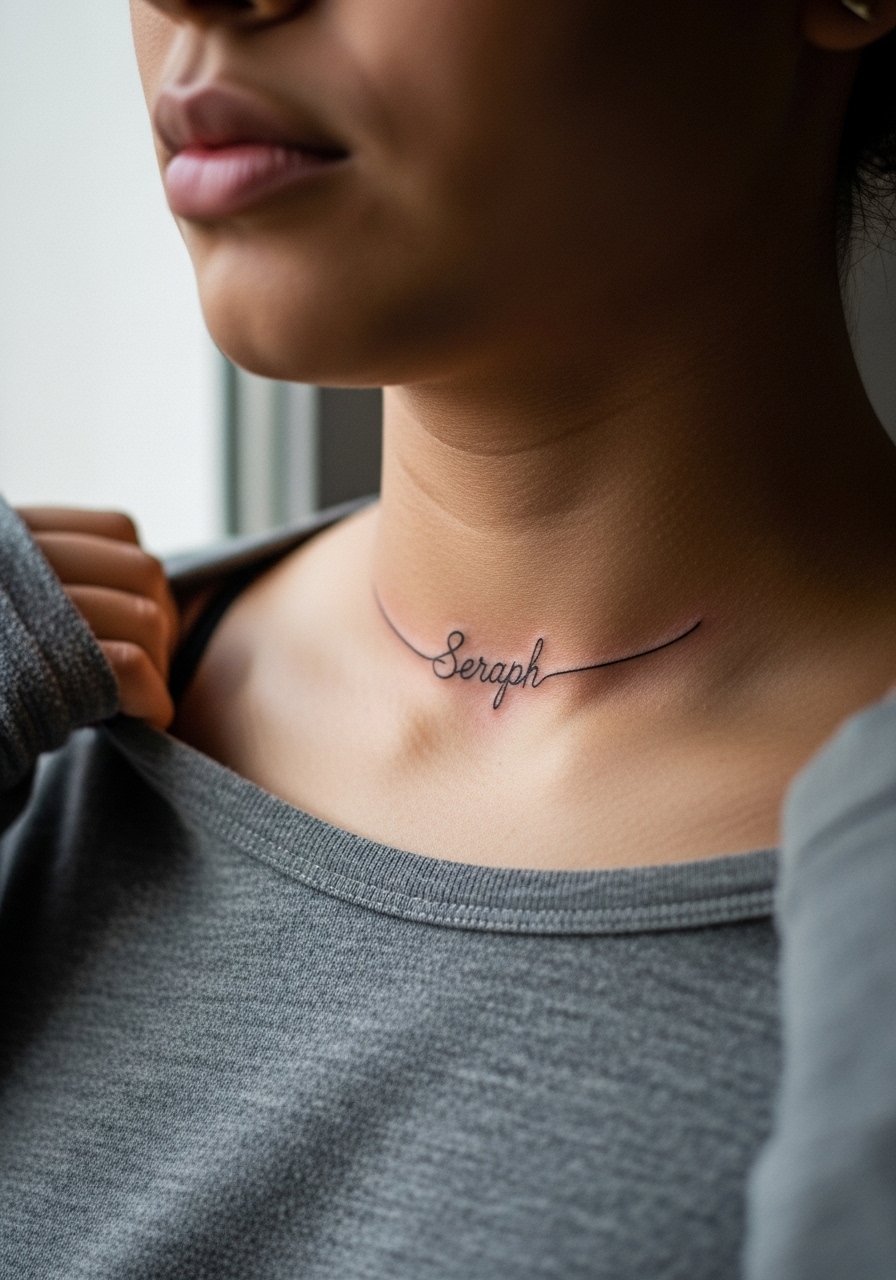
Textual takes that pair an angelic name with a small wing motif along the collarbone read as personal and wearable. The collarbone area can be unforgiving for tiny serif lettering. Tell your artist the exact font weight and letter spacing you want and request a stencil check at life size. The mistake I see often is shrinking script to fit a gap, which loses legibility when the skin stretches. Expect a quick session and a potential touch-up if letters settle unevenly. For evenings out, an open-back top or a wide-neck shirt frames the area cleanly.
9. Ribcage Seraphim Flame and Eye
Ribcage placements are dramatic but painful and sensitive to breathing. Fine line interpretations here split artists into two camps. One group says the skin's movement causes lines to blur within two years. The other group maintains that with strategic spacing and slightly bolder line weight it holds. Be explicit in consultation about whether you prefer extra spacing or crisp micro lines. Sessions feel intense and often require breaks. A common misstep is packing too much micro detail into a curved rib area which later becomes indistinct. For the appointment, wear a cropped athletic top so the artist can access the side without excess tugging.
10. Fallen Angel Motif on Thigh
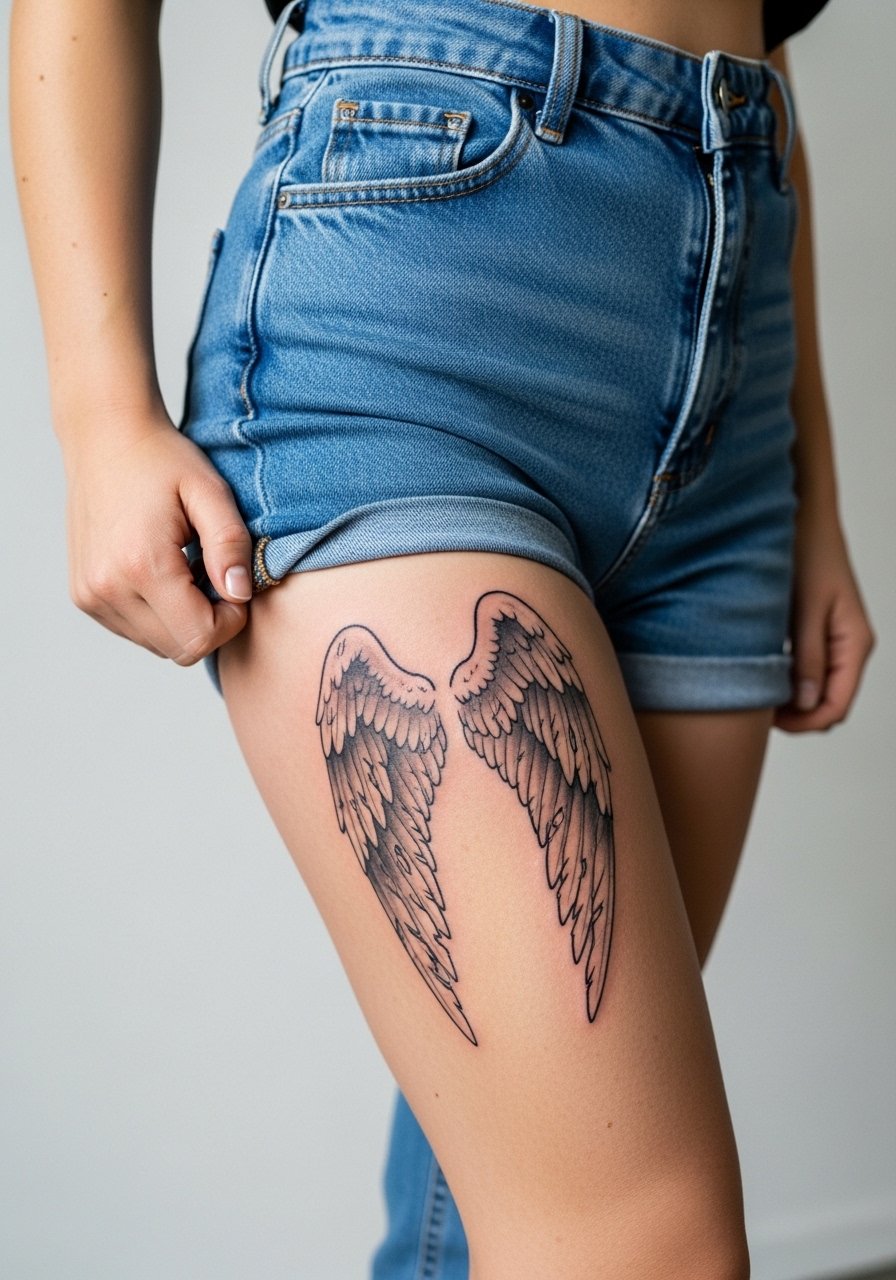
The outer thigh is forgiving and excellent for larger narrative pieces like a fallen angel scene. It lets you include facial detail and tonal gradation without blowout. Sessions can be longer and you will want comfortable seating. A typical mistake is choosing very fine hairlines for heavy shadow areas, which lose contrast as they heal. For longevity ask for layered shading that reads at a distance and keeps delicate edgework. For the session wear high-waisted shorts you can shift to expose the outer thigh without full undressing.
11. Conductor Sleeve with Cloud Bands
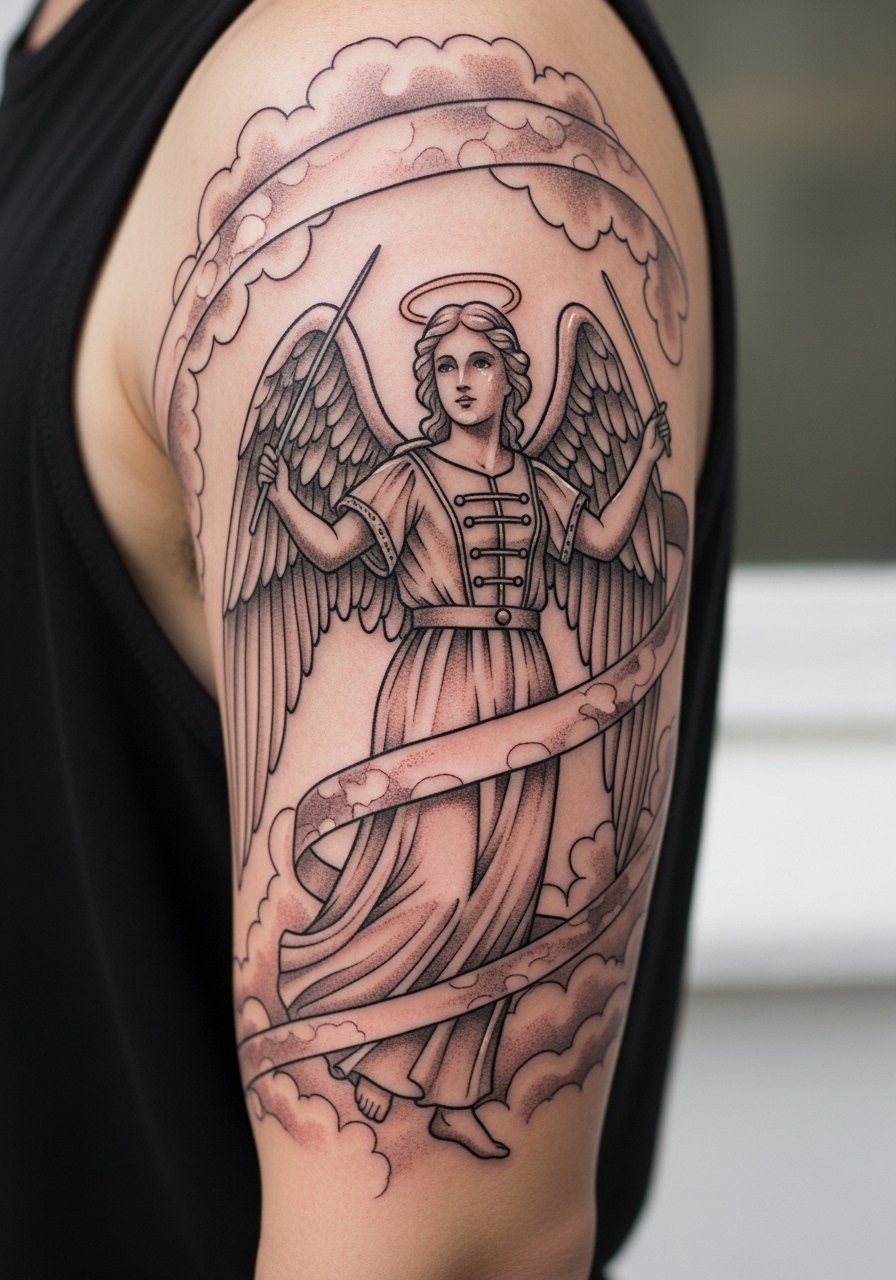
A half-sleeve that uses cloud bands and an angelic conductor gives motion to the arm when you bend it. Sleeves need a rhythm of negative space and saturated knots so the overall composition ages cohesively. Tell your artist you want breathability between cloud clusters and lighter stippling at the edges to prevent the sleeve from becoming a single dark mass. Expect multiple sessions over months and a likely comprehensive touch-up once the whole sleeve has settled. A common error is stacking dense motifs without transitional shading, which ages into visual mud. Show-off pairing includes rolled sleeves or a short-sleeve linen shirt to expose the upper arm.
12. Feather Trail Along the Spine
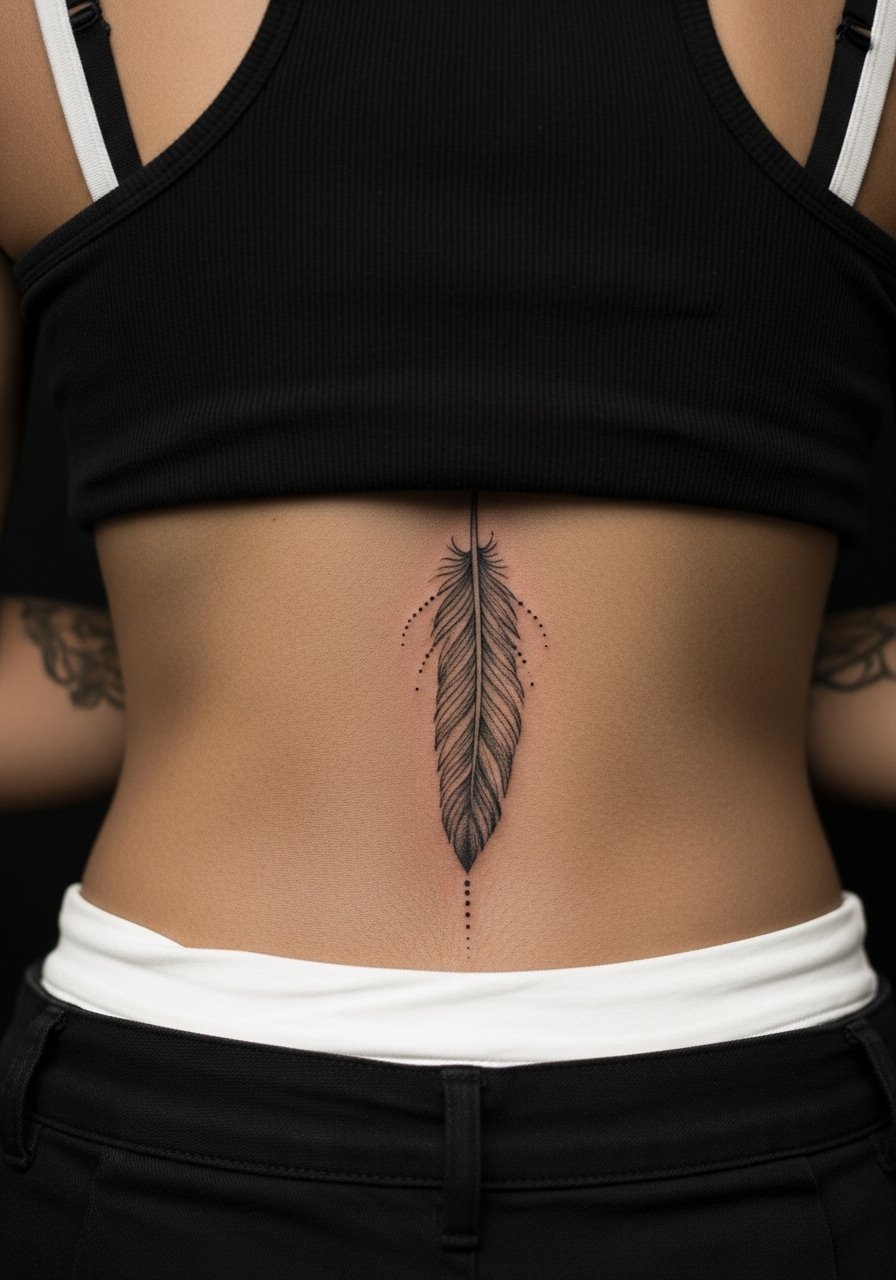
A vertical feather trail down the spine looks elegant and follows the natural line of the body. Spine work requires an artist experienced with motion and curvature to avoid lines that kink as you move. Sessions can be uncomfortable because of proximity to bone. The main mistake is using hairline strokes for long vertical elements which can blur into faint lines over time. Ask for slightly stronger anchor lines and subtle dot work for texture. For showing the spine work in summer, an open-back dress makes the trail visible without fuss.
13. Kabbalistic Angel Sigils on Ankle
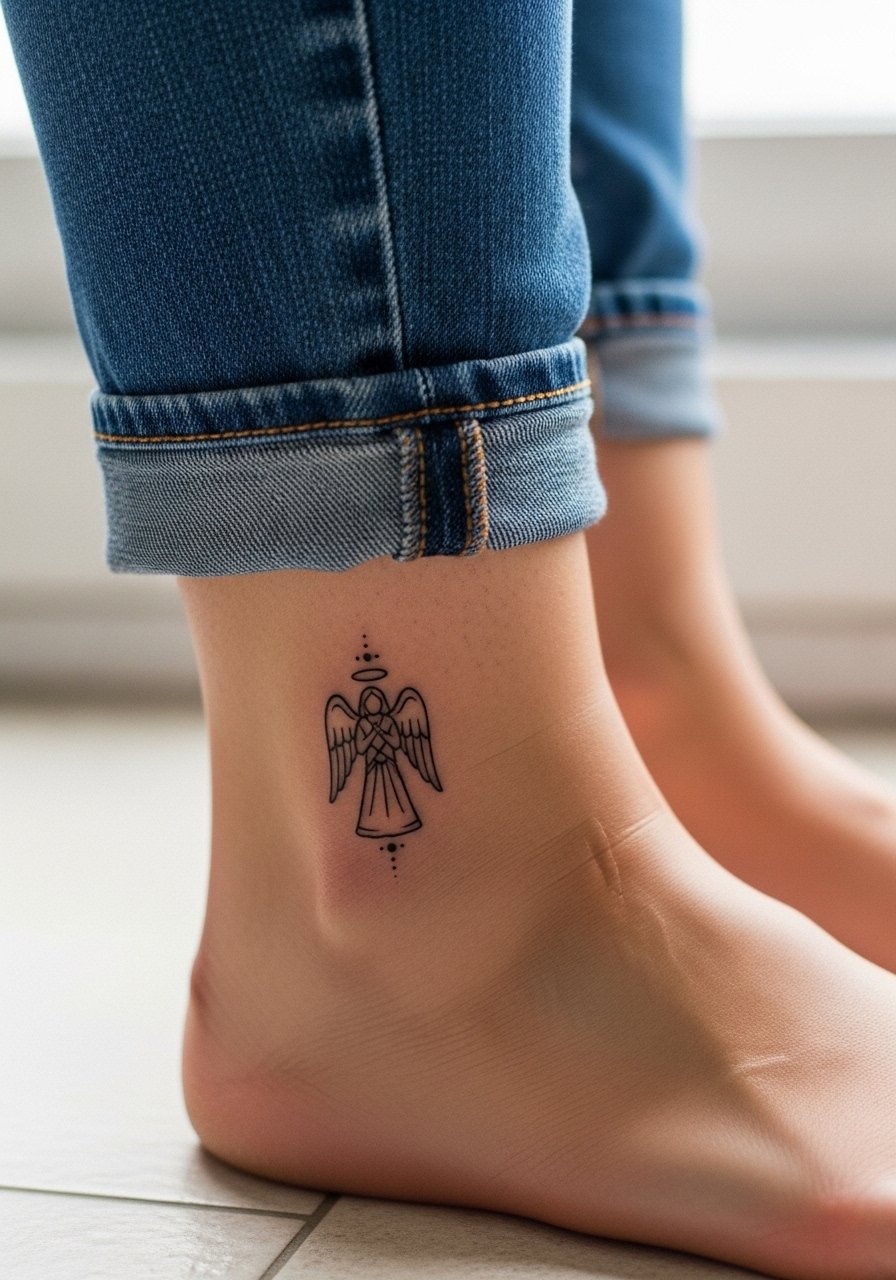
Sigils and angelic script at the ankle are discreet and can be striking when scaled correctly. Ankles see constant friction from socks and shoes which affects healing. Tell your artist you want slightly bolder outer lines and delicate interior dots to preserve the sigil's shape. A common mistake is making the lines too thin and too close together, which causes merging with movement. Plan for a protective film period during the first week and avoid tight shoes while it heals. For casual display, sandals or rolled cuffs work well with the placement.
14. Madonna-Style Angel Micro Portrait on Calf
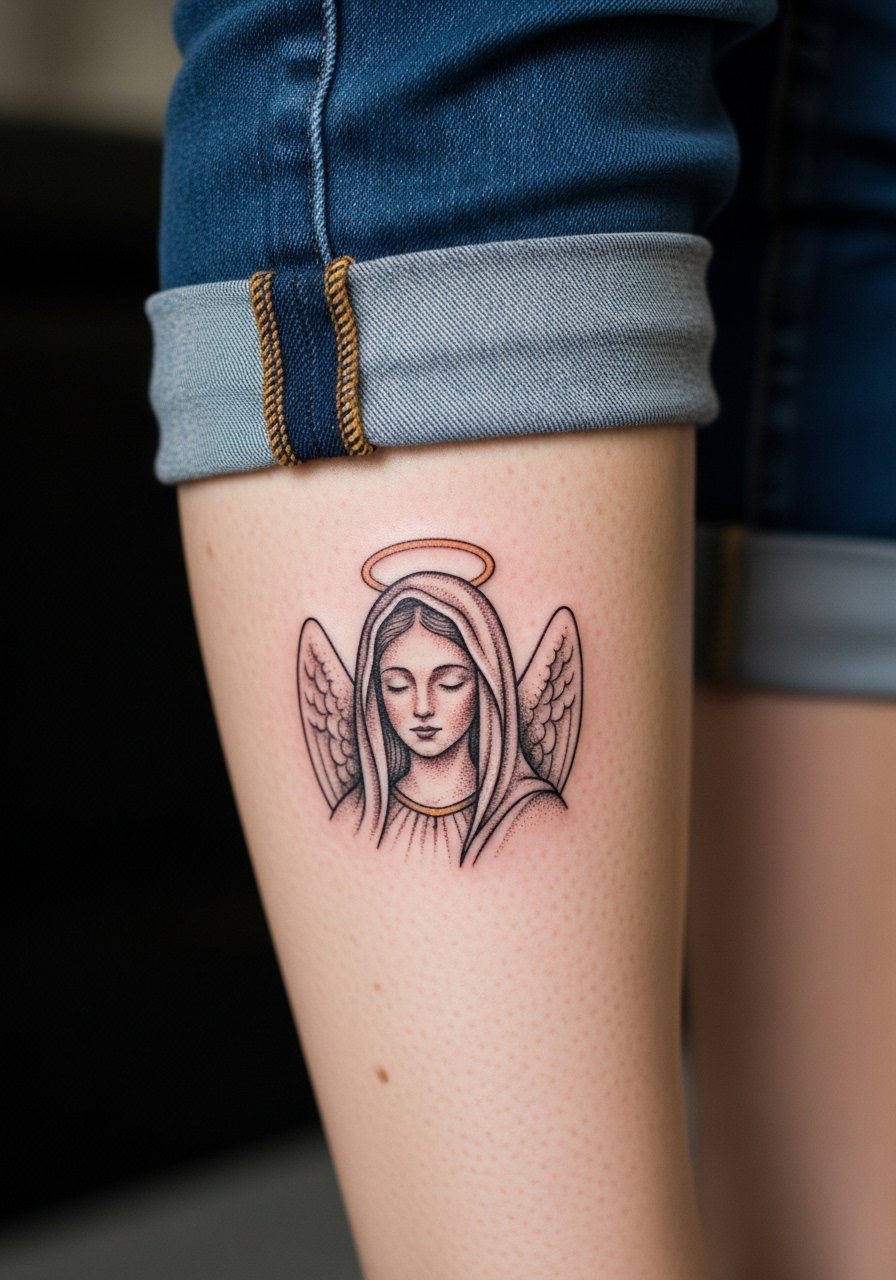
A micro portrait on the calf lets you pair religious iconography with quiet visibility. The calf holds saturated ink well because of thicker skin and less constant friction. Tell the artist you want a focus on soft stipple shading for skin tones and avoid heavy black blocking in the background. The mistake I see often is pushing contrast too far for a small portrait which reads harsh from a short distance. Sessions are moderate in pain and many choose a single two-hour block. Pair with cropped pants or a midi skirt and a mid-calf boot to reveal the artwork during cooler months.
15. Ophanim Wheel on the Shoulder Cap
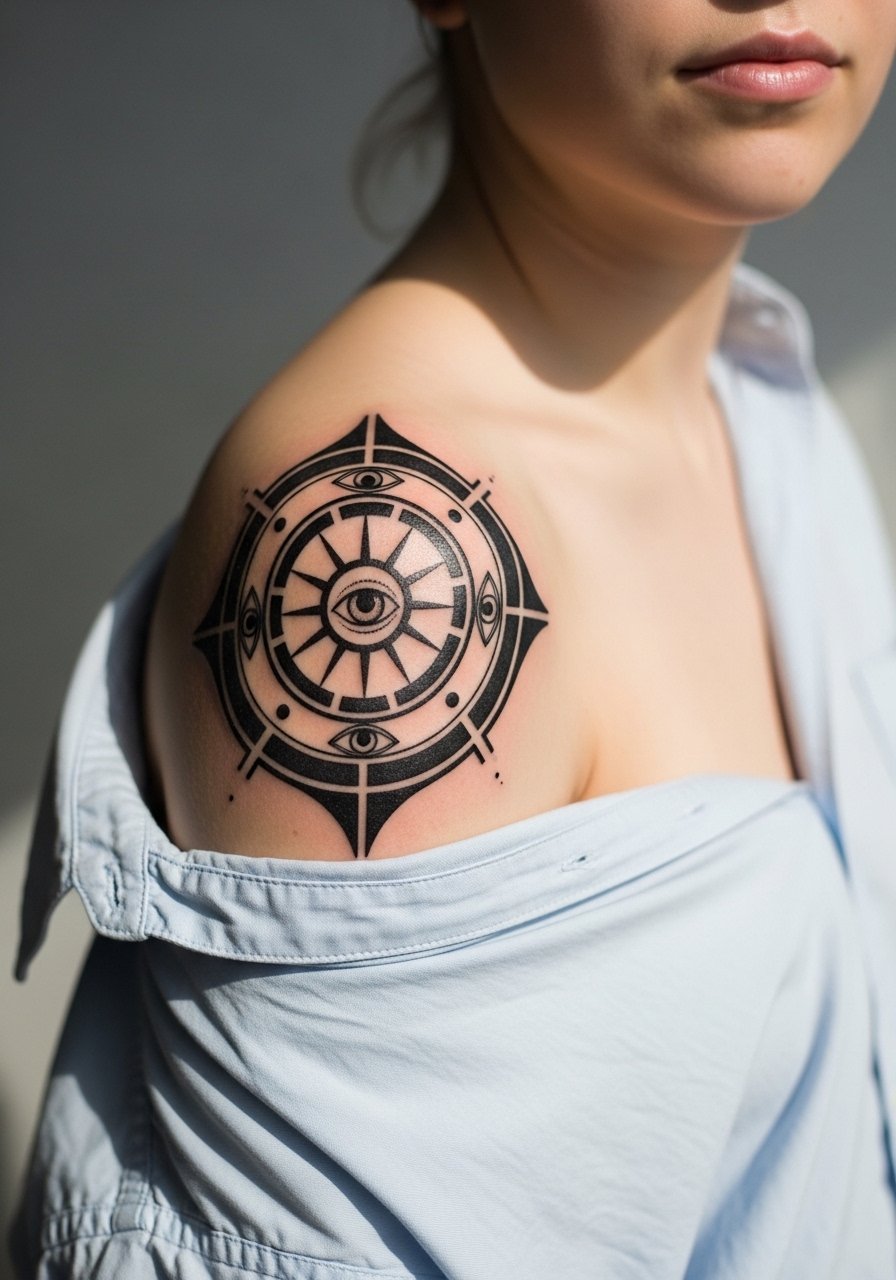
An ophanim wheel centered on the shoulder cap creates a compact, powerful symbol with strong graphic impact. Shoulder cap skin tolerates bold blackwork and maintains saturation well over time. The main mistake is crowding the spokes with too many tiny eyes which reduces clarity. Ask for clear radius gaps between spokes and a mix of solid saturation with stipple highlights to retain texture. Sessions are shorter than a sleeve and pain is moderate. For showing it off, wear a loose button-down shirt with one shoulder pulled down for a casual reveal.
16. Abstract Mandorla with Angelic Eyes on Upper Arm
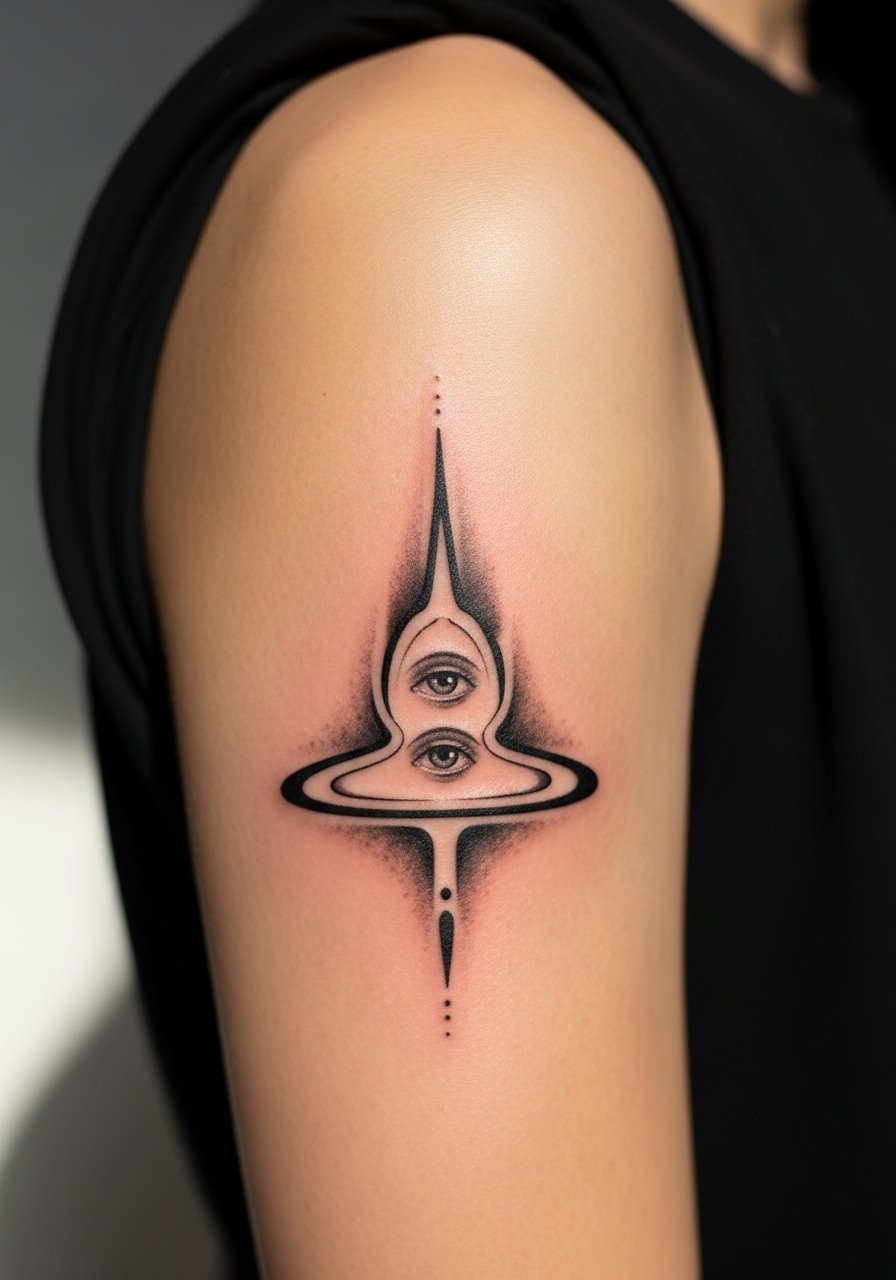
A mandorla-shaped field with eyes inside reads symbolic and modern while nodding to biblical descriptions. Upper arm placement helps this style keep its graphic crispness and controls blowout. The mistake people make is over-detailing the interior eyes which need breathing room. Ask your artist for a strong outline and soft internal shading to keep the mandorla readable at a distance. Sessions are moderate and touch-ups are rare if the composition allows negative space. For casual wear an oversized tee with rolled sleeves shows the upper arm without crowding the motif.
17. Angelic Wing Finger Tattoo
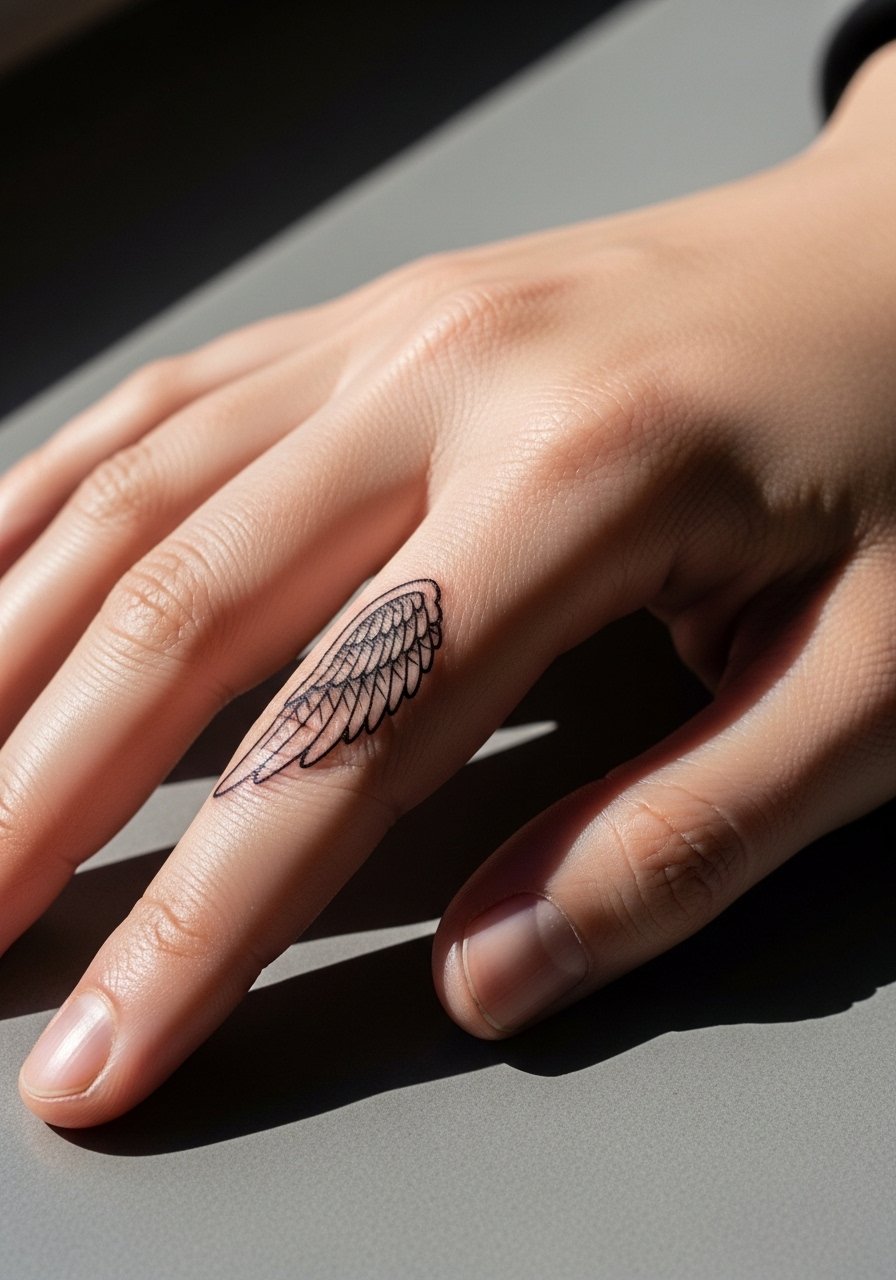
Finger tattoos read intimate but are high maintenance because of constant washing and friction. A small wing fragment or feather along the finger edge can look biblically accurate while avoiding full-digit saturation which fades quickly. Tell your artist you want slightly thicker anchor lines and minimal interior cross-hatching to reduce blowout risk. Expect touch-ups at year one or sooner. A common mistake is placing dense shading on the finger pad where ink disperses fastest. Hand placements still affect some work situations, so weigh visibility against career needs.
Frequently Asked Questions
Q: How literal should a biblically accurate angel be if I want the tattoo to age well?
A: Literal multi-winged and multi-eyed compositions can be beautiful but they demand spacing and slightly heavier anchor lines to survive five years of wear. If you want a long-term realistic look, ask your artist to prioritize negative space and stipple shading so the features do not merge.
Q: Which placements are least likely to need touch-ups for fine detail angels?
A: Upper arm, calf, and shoulder cap tend to keep detail and saturation best because of thicker skin and lower friction. Ribs, fingers, and wrists need more touch-ups due to movement and washing. Plan accordingly when choosing where to place intricate eyes and tiny feathers.
Q: Are there cultural or religious considerations for biblically accurate angel imagery?
A: Yes, some people prefer to follow scriptural descriptions closely while others favor symbolic or abstract interpretations. One camp emphasizes literal attributes to honor the original texts. The other camp argues for stylized or simplified forms out of respect for diverse beliefs. If the design draws from a particular tradition, say you want a thoughtful variation rather than a direct replica during the consultation.
Q: How should I dress for a sternum or ribcage session without exposing too much?
A: Wear a fitted sports bra or a cropped athletic top that you can lift slightly to reveal only the tattoo zone. That keeps you comfortable and gives the artist access without full undressing. A sports bra with a snug band works well for sternum access.
Q: Can I get a large back panel done in one visit or should I split it?
A: Large back work is best split into multiple sessions for symmetry checks and pigment stability. Breaking it up also reduces fatigue and helps you maintain consistent aftercare between appointments. Ask your artist to map the panel in stages so each session complements the last.
